Standard First Aid - na · PDF fileStandard First Aid . ... start CPR, beginning with...
25
Standard First Aid
Transcript of Standard First Aid - na · PDF fileStandard First Aid . ... start CPR, beginning with...

Standard First Aid

Welcome!
We’re so excited that you’ve chosen us to be your learning partner in Standard
First Aid. We strive to provide the best online learning experiences anywhere on
the Web, and we’re certain you’ll find the information within this course of great
value to you in your work and life.
In order to pass the course, you will need to complete the online examination. To
be certain you pass on the first attempt, please read through the course at your
leisure to be sure you understand the information contained within.
Topics included in this course are as follows:
• Scene Safety
• Universal Precautions
• Patient Assessment
• Control of Bleeding
• Shock
• Musculoskeletal Injuries
• Burns
• Chest Pain
• Respiratory Emergencies
• Stroke
• Seizures
• Diabetic Emergencies
• Poisoning
• Hyperthermia (Heat Exposure)
• Hypothermia
• Frostbite
• Foreign Bodies
• Traumatic Tooth Loss
• Bites and Stings
• Anaphylaxis
• Minor Cuts and Puncture Wounds
Let’s get started!

Scene Safety
Imagine that you’re driving along in your car, and to your horror you observe the car in front of
you lose control, drive into a deep ditch at the side of the road and flip twice, landing on it’s
side. You have taken CPR and First Aid and you’re prepared to help. What should you do first?
Scenes like these happen every day. That’s why we take these courses- so that we can help at
the right time in the right way. Before you attend to any victim, there is one important step you
must take: you must ensure that the scene is safe.
Why? Scene safety is important because the last thing you would want to do in such a situation
is to become a victim yourself- that would be of no help to anyone. There are several things
that you should look for when determining in the scene is safe for you to enter. Look for:
• Flames or smoke
• Traffic (especially on the highway)
• Risk of an explosion
• Chemical spills/fumes
• Downed electrical wires
• Potential collapse of a building or structure
• Animals (frightened animals may bite if you attempt to render assistance to their owner)
• Potential for violence towards yourself or others
• Other dangers
Only when you have ensured that you will be safe should you provide first aid to a victim.
Universal Precautions
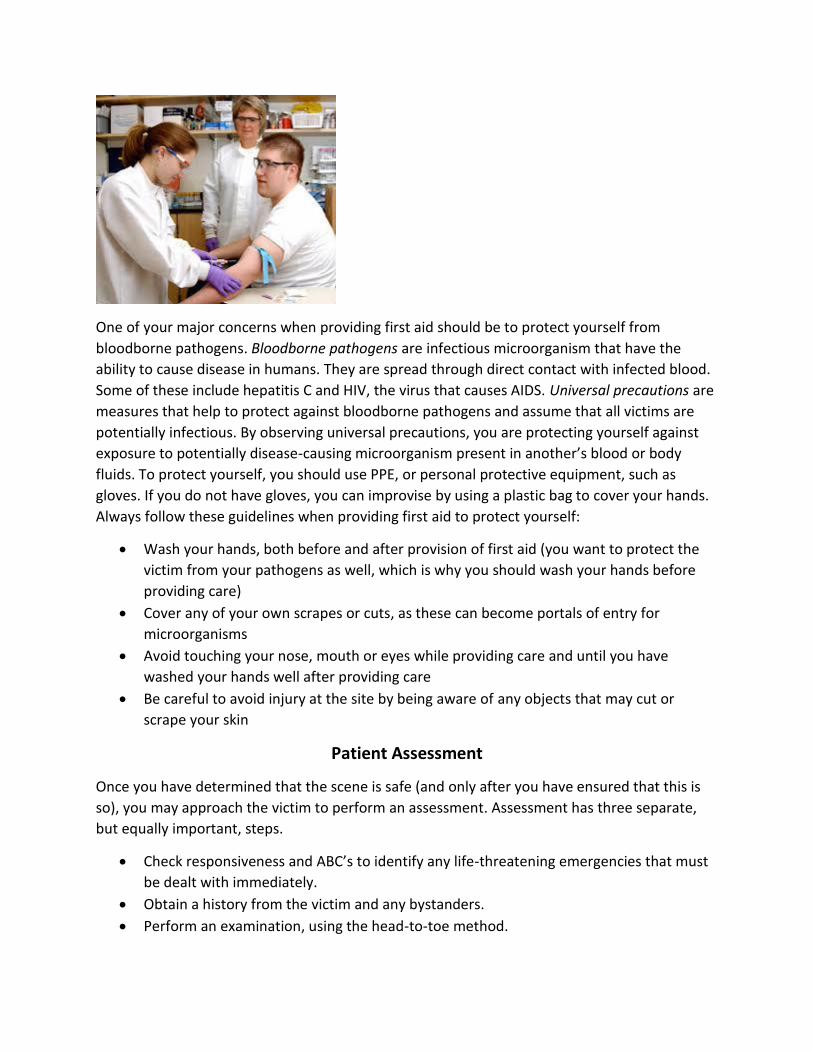
One of your major concerns when providing first aid should be to protect yourself from
bloodborne pathogens. Bloodborne pathogens are infectious microorganism that have the
ability to cause disease in humans. They are spread through direct contact with infected blood.
Some of these include hepatitis C and HIV, the virus that causes AIDS. Universal precautions are
measures that help to protect against bloodborne pathogens and assume that all victims are
potentially infectious. By observing universal precautions, you are protecting yourself against
exposure to potentially disease-causing microorganism present in another’s blood or body
fluids. To protect yourself, you should use PPE, or personal protective equipment, such as
gloves. If you do not have gloves, you can improvise by using a plastic bag to cover your hands.
Always follow these guidelines when providing first aid to protect yourself:
• Wash your hands, both before and after provision of first aid (you want to protect the
victim from your pathogens as well, which is why you should wash your hands before
providing care)
• Cover any of your own scrapes or cuts, as these can become portals of entry for
microorganisms
• Avoid touching your nose, mouth or eyes while providing care and until you have
washed your hands well after providing care
• Be careful to avoid injury at the site by being aware of any objects that may cut or
scrape your skin
Patient Assessment
Once you have determined that the scene is safe (and only after you have ensured that this is
so), you may approach the victim to perform an assessment. Assessment has three separate,
but equally important, steps.
• Check responsiveness and ABC’s to identify any life-threatening emergencies that must
be dealt with immediately.
• Obtain a history from the victim and any bystanders.
• Perform an examination, using the head-to-toe method.

Check responsiveness and ABCs
To check responsiveness, talk to the victim to see if they respond. Shake their shoulders and
yell “Are you okay?”. If they do not respond, this means they are likely unconscious and you
must move quickly to assess airway, breathing and circulation.
Next, assess for breathing. Look for normal, absent or abnormal breathing (such as gasping). If
responsiveness and breathing are absent or abnormal, call for help. If someone is around, ask
them to activate the emergency response system (call 9-1-1) and get an AED (automated
external defibrillator). If you are alone and no one responds to your call for help, use your cell
phone to call 9-1-1. Quickly leave to obtain an AED if you know where one is located.
Check the victim’s pulse. If the victim is an adult, check for a pulse using the carotid artery. Use
2 or 3 fingers to locate the trachea (the windpipe), then slide these 2 fingers into the groove
located between the trachea and the muscles on the side of the victim’s neck. Try to feel a
pulse for 5, but not more than 10, seconds. If you cannot feel a pulse, or you’re not sure that
you can feel a pulse, start CPR, beginning with compressions. If the victim is a child, you can
also use the carotid artery to find a pulse, or you may also use the femoral artery. Place 2
fingers in the inner thigh, halfway between the victim’s hipbone and pubic bone and just below
the crease where the victim’s leg meets the abdomen. If the victim is an infant, use the brachial
artery in the upper arm. Place 2 or 3 fingers on the inside of the infant’s arm between the
elbow and shoulder. In child and infant victim’s if there is no pulse, you are not sure if there is a
pulse OR if the pulse is less than 60 beats per minute with signs of poor perfusion (pale color or
bluish discoloration around the mouth or at the nailbeds), start CPR beginning with
compressions.
When performing CPR, remember the following:
• Push HARD and FAST, 100 to 120 compressions/minute for victims of all ages
• Allow the chest to fully recoil after each compression (return to its normal position)
• Press down on the chest at least 2 inches for an adult victim; for children and infants,
compress the chest to 1/3 the depth of the chest, or approximately 2 inches for most
children and 1 ½ inches for infants less than 1 year of age. Use 2 hands to compress the
chest of adults, 1 or 2 hands to compress the chests of children (depending on size) and
2 fingers to compress the chests of infants. When 2 rescuers are present with an infant
victim, the chest is compressed using the 2 thumbs of the rescuer, while the fingers
encircle the chest and provide support to the back.
• When providing breaths, use a barrier device (such as a pocket face mask) if available to
prevent inhalation of expired air or other matter. If you choose to provide mouth-to-
mouth breaths, use a head tilt-chin lift to open the airway and hold the airway open
with your hand. With the hand you use on the forehead to hold the airway open, pinch
the victim’s nostrils shut. Place your mouth over the victim’s mouth to create a tight
seal. Take a normal breath and breathe through your mouth into the victim’s mouth.
Deliver each breath over 1 second and watch for chest rise. If the chest does not rise, try
the head tilt-chin lift again and attempt another breath. If you cannot ventilate the
victim, return immediately to chest compressions. For small children and infants, cover
their mouth AND nose with your mouth. Deliver each breath over 1 second and watch
for chest rise.
• Hands-only CPR can be provided when a barrier device is not available- provide
continuous chest compressions at a rate of 100 to 120 compressions per minute.
• Compression-ventilation ratios for adults (1 and 2 rescuers) is 30 compressions to 2
breaths; for children and infants, the compressions to ventilation ratio is 30:2 when 1
rescuer is present, and changes to 15: 2 when a second rescuer is available.
• Avoid excessive ventilation- this may lead to gastric inflation (air in the stomach), which
may cause the victim to vomit. When an unconscious victim vomits, vomited material
may travel down the airway into the patient’s lungs, which may cause what is known as
aspiration pneumonia.
• Use an AED (automated external defibrillator as soon as it is available. Follow the steps
as the AED guides you. Remember, the first and most important step when using an AED
is to turn the machine ON- the AED will guide you through the next steps.
Note: This course is not designed to teach you to perform CPR. If you have not learned to
perform CPR, we offer CPR with AED here. {hyperlink to the appropriate course}. We have
added this material as a quick review. We recommend you take the full CPR/AED course if you
have not already done so.
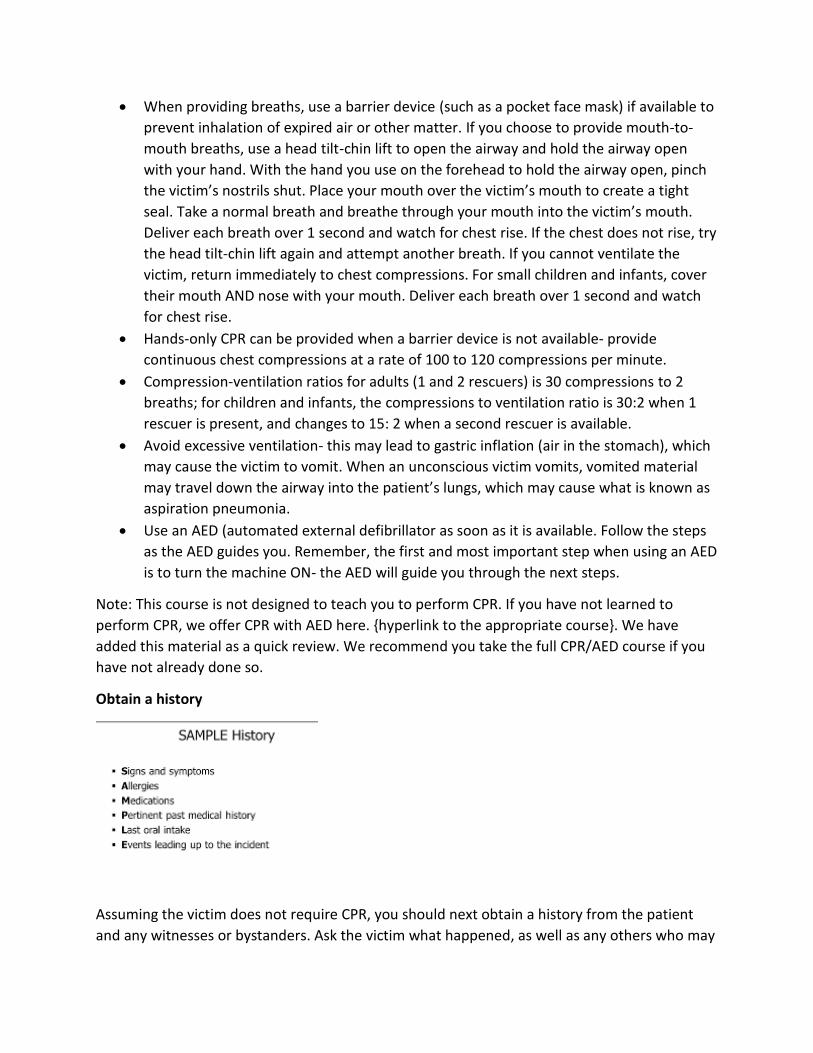
Obtain a history
Assuming the victim does not require CPR, you should next obtain a history from the patient
and any witnesses or bystanders. Ask the victim what happened, as well as any others who may

be able to provide important information that may determine what you do next. This
information may also be important to emergency responders one they arrive on the scene. An
easy way to obtain a thorough history is to use the mnemonic SAMPLE:
S- signs and symptoms- ask the victim how he/she feels. What can you notice when you look at
the victim? For example, the victim may tell you that their right leg hurts- this is a symptom.
You notice that the patient is holding their leg and grimacing in apparent pain- this is a sign.
A-allergy- ask the patient if they have any allergies to anything. If family members or loved ones
are present, they may be able to provide you with this information on the patient’s behalf.
M-medications- ask the patient if they take any medications. This should include over-the-
counter medications, vitamins and supplements, as these can sometimes have unwanted side
effects, such as excessive bleeding for example.
P-previous problems- ask if the patient has ever experienced a similar event. Also ask if they
have any major health problems, such as heart disease, diabetes or bleeding disorders.
L-last meal taken- ask the patient when the last time was that the patient ate or drank anything.
E-event- ask for a summary of the present event. What exactly happened?
Perform an examination
Once you have obtained the victim’s history, you should move on to performing a head-to-toe
examination, starting at the head and working your way down to wards the feet. You should
look for:
• Bruises
• Cuts/lacerations
• Bumps/lumps
• Sources of bleeding
• Obvious deformities of the arms and legs
• Painful areas
Note: If the patient is conscious, you should ask for permission (consent) before examining the
victim. If the victim is unconscious, there are Good Samaritan laws that protect you legally,
providing you are following the standard of care (providing care as you have learned or have
been trained).
Take a close look at the victim. Assess the victim’s breathing. Are they breathing very shallowly
or quickly? Do they have pain when they breathe? Is their breathing too slow? Also assess their
color (pale, bluish discoloration or flushing) and skin temperature. Is the skin warm and dry, or
cool and clammy? This may provide important information.

During your examination, you should immediately call 9-1-1 for help if you find any life-
threatening signs or symptoms:
• Chest pain or pressure
• Altered level of consciousness
• Uncontrolled bleeding
• Serious broken bones
• Difficulty breathing
• Seizures
• Signs of shock (pale, clammy and cool skin)
Note: You should not try to move the victim unless absolutely necessary, as moving the victim
could cause further injury. You may need to move the victim if the scene is not safe for you and
the victim (there is fire or smoke nearby, or you fear an explosion may occur). Otherwise, you
should leave the victim in the same position they were in. Remember, scene safety is of utmost
importance- although you may want to, you should not put your own life at risk unnecessarily-
doing so may create another victim- YOU.
Control of Bleeding
Although most bleeding episodes are not life-threatening, severe bleeding can result in death if
not stopped. As a first aid responder, protect yourself from bloodborne pathogens by wearing
gloves if they are available- a plastic bag over your hand can be used if you don’t have any
gloves.
Try to identify the source of the bleeding. If blood is spurting, it is likely that an artery has been
cut. Apply direct pressure to stop the bleeding. If the wound is in the victim's belly and organs
are visible, do NOT try to put the organs back into the abdomen; simply cover the wound with a
clean dressing, apply pressure as needed to control the bleeding and get the victim to medical
care.
For other bleeding wounds, do the following:
1. Encourage the victim to lie down; if the victim is dizzy, raise the victim’s feet above
his/her head.
2. Do NOT remove any object that is deeply embedded in the wound.
3. If the source of blood is an extremity, raise the affected arm or leg above the level of the
victim’s heart. Apply pressure directly to the wound using a clean cloth or clean/sterile
bandage. Hold pressure for ten minutes; do NOT peek to see if bleeding has stopped.
4. Apply a pressure bandage. If you note that there is blood coming through the pressure
bandage, do not remove it- simply reinforce the bandage if you notice bleeding around
the original bandage.
5. Continue to apply pressure to the wound.
6. If the victim becomes drowsy, extremely anxious, thirsty, or if his skin becomes very
cool and/or clammy, you should suspect shock. If the victim is anxious, try to keep them
calm and still. Raise the victim’s legs above the level of their heart.
7. Get the victim to emergency care as soon as possible.
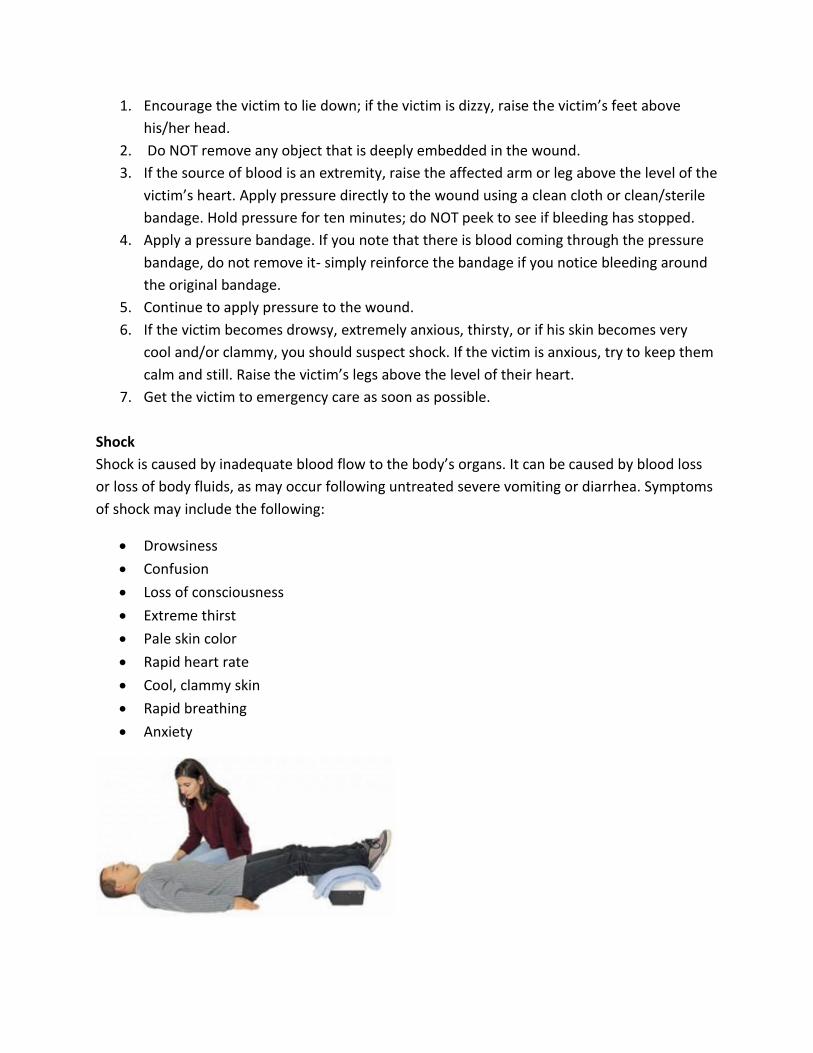
Shock
Shock is caused by inadequate blood flow to the body’s organs. It can be caused by blood loss
or loss of body fluids, as may occur following untreated severe vomiting or diarrhea. Symptoms
of shock may include the following:
• Drowsiness
• Confusion
• Loss of consciousness
• Extreme thirst
• Pale skin color
• Rapid heart rate
• Cool, clammy skin
• Rapid breathing
• Anxiety

Victims in shock must receive emergency care as soon as possible to prevent death. Call 9-1-1.
While waiting for emergency services:
2. Elevate the victim’s legs above the level of their heart, approximately 8 to 12 inches.
This will promote blood flow to the heart.
3. Cover the victim with a blanket to keep them warm.
4. Keep the victim calm and still.
Musculoskeletal Injuries
Sprains, strains, fractures and dislocations are almost always caused by trauma. Any of these injuries
may cause deformity, swelling, and severe pain. All of these injuries should be evaluated by a medical
professional; however, there are some steps that should be taken in providing first aid. These steps may
prevent further injury and disability:
• Call 9-1-1 if the injury is a result of major trauma.
• Assume the victim has a neck injury in any case of major trauma and avoid moving the victim
until help arrives. Do not allow the victim to move his/her neck.
• Stabilize the affected body part only if doing so does not cause additional pain; do not try to
force a deformed joint back into place as this may cause further damage.
• Many victims of musculoskeletal injury will assume a position of comfort- allow them to do so if
this decreases their pain.
• Remember the acronym RICE when treating injured extremities (arms and legs, feet and hands):
o Rest any injured joint
o Apply a cold pack or Ice if available to reduce swelling and control pain
o Apply Compression (an elastic bandage) for any sprains or strains
o Elevate the injured body part above the heart to reduce swelling
• Do not give the victim anything by mouth until seen by a medical professional; the exception to
this rule is if medical care is not available within a couple of hours, an over-the-counter pain
reliever may help manage pain.
• Control bleeding if present (see section on Control of Bleeding)
•
help.
If the victim shows signs of shock (see section on Shock), have the victim lie down and wait for
1. Ensure the victim is lying down.

Burns
Many burns are minor and can be treated with first aid; others burns are more serious and require
medical attention. The severity of a burn can depend on many factors, including:
• The age of the victim- burns can be more severe in babies, young children and the elderly
• The size of the burn- how much of the body is affected, often described as a percentage, which
may be an indicator of survivability
• The depth of the burn- how deeply the burn extends down into the subcutaneous tissue
• The location of the burn- burns located on the hands, face, groin/genitals, neck, hands and feet
can have severe functional and cosmetic consequences
• The presence of other injuries- burns combined with other severe injuries may affect outcome
and survivability
It is important to be able to recognize the type of burn in order to provide the correct care.
Type of Burn Appearance & Sensation
Complications First Aid Treatment
First Degree Redness; Dry skin; Painful
Infection First degree- cool the burn with cool running water for 10-20 minutes, or apply a cool wet compress. Remove rings from burned fingers as the area may swell. Apply lotion or aloe vera gel for comfort. May take an over-the-counter pain reliever if needed. Sunburns are an example of first-degree burn.
Second Degree (Partial Thickness)
Red with blisters; Moist; Painful
Infection and cellulitis; scarring and contractures; may require debridement
Treat as for a first degree burn unless the burned area is large. Seek medical help for larger burns, especially those on the hands, face, neck, groin or feet. Leave large blisters intact- do NOT

puncture. If small blisters rupture (smaller than your fingernail) cleanse the area with mild soap and water and apply antibiotic ointment and a non-stick dressing. Seek medical care for signs of infection (increased pain, redness, swelling, oozing from the wound)
Third Degree (Full Thickness)
Stiff; dry; leathery; white or brown color; Painless
Scarring and contractures; May require debridement or amputation; large third degree burns may result in death
Call 9-1-1. If it is safe to do so, remove the victim from further contact with heat and/or smoke. Do not remove clothing that has adhered to the skin. Remove belts, jewelry or other restrictive items from the victim as the burned areas will swell very quickly. Do not immerse very large burns in cool water as this may lead to excessive loss of body heat. Elevate burned areas if possible. Cover burned areas with a clean cloth or a sheet. Monitor breathing and circulation and perform CPR if it becomes necessary.
Fourth Degree Black; charred; Painless Possible gangrene; Usually leads to loss of function and sometimes death
As for a full thickness burn
Smoke inhalation may be as deadly as severe burns. If a burn victim has soot around or in their mouth or
nose, this indicates that the airway may be affected and breathing may become a problem. If you
suspect smoke inhalation, call 9-1-1.
Chest Pain
There are many causes of chest pain, some minor and some very serious. Without a medical workup, it
is often impossible to tell whether chest pain is life threatening. For this reason, if you or a companion
experiences chest pain that lasts more than a few minutes, it is critical that chest pain be evaluated by
medical professionals. Symptoms that should raise your suspicion of heart attack include:
• Chest pain that gets worse when you are active but decreases with rest
• Pressure or squeezing pain in the middle of your chest
• Pain that spreads to your shoulder, arm, neck or back
• Pain accompanied by dizziness, weakness, shortness of breath, nausea or vomiting.
• Pale, clammy skin (diaphoresis or sweating)

Any of these symptoms may indicate angina, pulmonary embolism (a blood clot that moves to the lung),
aortic dissection or a myocardial infarction (heart attack). If you or someone you are with experiences
any of these symptoms:
1. Call immediately for help (call 9-1-1). If you cannot call for help, get to medical treatment as
soon as possible.
2. If you have a well-stocked first aid kit, have the victim chew an adult aspirin or 2 baby aspirins
(unless allergic). This can help reduce blood clotting which is a cause of heart attack.
4. If the victim becomes unresponsive, activate the emergency response system and begin CPR if
indicated.
Chest pain may not be life-threatening. For example, pneumonia and costochondritis (pain in the
cartilage connecting your ribs to your sternum) are common causes of chest pain. Strained chest
muscles, gastric reflux, gallbladder disease, and even anxiety can cause chest pain. These syndromes
and diseases may cause chest pain; however, any chest pain should be diagnosed by medical personnel
to rule out one of the deadly conditions.
Respiratory Emergencies
Respiratory conditions are common in the population in every age group. For this reason, it’s important
to know what to do to assist someone experiencing difficulty breathing. Respiratory problems are
almost always an emergency, and medical assistance will be required in almost all cases. Common
causes of respiratory distress include:
• Asthma
• Emphysema
• COPD (chronic obstructive pulmonary disease, common in the elderly population)
• Respiratory infections (such as pneumonia, croup, whooping cough)
• Pneumothorax (collapsed lung, usually from trauma)
• Heart failure or severe heart disease
• Fluid around the heart or lungs (pericardial or pleural effusion)
• Anaphylaxis (life-threatening allergic reaction)
• Pulmonary thrombosis (blood clot in the lung)
• Injury to the chest, lungs or neck
Difficulty breathing may present as difficulty taking a deep breath, being short of breath or experiencing
‘air hunger’, the sensation of not being able to get enough air. There may also be pain with breathing in
certain conditions, especially if the victim has been involved in a trauma.
Signs and symptoms of respiratory distress are often quite obvious, and may include:
• Rapid breathing
• Inability to breathe properly unless sitting upright
• Anxiety
• Altered level of consciousness (drowsiness, confusion or unconsciousness)
• Cough
3. Have the victim lie or sit comfortably until help arrives, and keep the victim calm

• Dizziness
• Pain with breathing
• Grunting, high-pitched whistling (stridor) or wheezing when breathing
• Bluish discoloration to the lips, nailbeds or fingers
• Rapid heart rate
• Diaphoresis (sweating)
• Difficulty speaking more than a couple of words at a time
• Gasping for breath
• Fever (if the cause is infectious)
• Hemoptysis (coughing up blood)
• Rash or hives (if the victim is suffering an anaphylactic reaction)
As can be seen, respiratory emergencies can present in numerous ways. If you are administering first aid
to someone experiencing a respiratory emergency, you should:
1. Call 9-1-1.
2. Loosen tight clothing that may be restricting the victim’s breathing.
3. Assist the victim to use any inhalers, oxygen or other medical devices.
4. Bandage any open wounds of the neck or chest if necessary. If the victim has a ‘sucking’ chest
wound (a chest wound that allows air to enter the chest cavity with each breath), apply plastic
wrap or a plastic bag to the wound, sealing it in place EXCEPT for one side to allow air to escape.
This will prevent air from entering the chest, but will also allow any trapped air to escape.
5. Do not give the person food or drink.
6. Do not put a pillow under the victim’s head (this may close off the victim’s airway).
7. Do not move the person if they have been injured (in case of spinal cord injury).
8. Continue to monitor the victim’s breathing and heart rate. Should the victim stop breathing or
lose their pulse, perform rescue breathing or CPR until help arrives.
Do not be falsely reassured if a victim with noisy breathing (wheezing, gurgles or high-pitched whistling)
suddenly has quiet breathing- this may indicate that the victim is no longer moving air into the lungs and
may mean that the victim is close to respiratory collapse.
Stroke
A stroke is a true medical emergency. There is a saying in medicine, “Time is Brain”, which means that
the longer a person waits to receive medical care after a stroke, the greater the chances of serious
neurological damage or death. The brain requires oxygen and nutrients to function and cannot last long
without these- brain cells begin to die within minutes when deprived of oxygen.
It is important that everyone is familiar with the signs of stroke:
• Weakness or numbness on one side of the body or face
• Facial drooping (one side of the mouth will appear to be lower than the other, smile will be
crooked)
• Changes in vision (blurred vision, loss of vision or dimness)
• Difficulty speaking or difficulty “finding” words/slurred speech
• Altered gait/difficulty walking

• Severe headache (not always present)
• Dizziness or weakness
A victim of stroke may be found unconscious if the stoke is severe.
A stroke occurs for one of two reasons: a blood clot blocks blood flow to a portion of the brain (called
ischemic stroke), or there is bleeding into the brain (called hemorrhagic stroke). The most important
thing to note with either type of stroke is when symptoms first appeared (when the victim was last
known to ne normal). This is because certain treatments for stroke are time-dependent.
If you suspect stroke:
• Call 9-1-1. This is your priority action. Be sure you tell dispatch that you suspect stroke, as this
will start important preparations at the hospital.
• Keep the victim calm.
• Try to determine when the victim was last normal, or without symptoms.
• Do NOT give food or water. Some strokes may affect swallowing.
• Do NOT give aspirin. Although most strokes are ischemic in nature, some are hemorrhagic, and
giving aspirin in these cases would worsen bleeding and could cause death.
• If the victim is unconscious, monitor breathing and pulse and be prepared to perform CPR if it
should become necessary.
Seizures
Seizures (convulsions) are not uncommon and can be quite frightening to witness if you have never seen
one before. Seizures are not a disease in and of themselves, but rather are a symptom of any number of
disorders that affect the brain, including epilepsy. Seizures do not cause permanent brain damage. A
seizure is a sudden surge of electrical activity in the brain which affects the way a person moves and
acts. Some seizures are severe, while others are barely noticeable unless you know what you are looking
for. You will not need to provide first aid unless the seizure is a grand mal seizure, in which the person
loses consciousness, falls to the ground and experiences jerking and stiffening of the muscles. These are
also called generalized seizures, or tonic-clonic seizures. These types of seizures usually last 1 to 3
minutes and subside on their own without treatment. Seizures that last longer than 5 minutes require
medical care and monitoring.
If you are assisting a victim who is suffering a seizure:
1. Loosen and tight or restrictive clothing that may hamper breathing.

2. Do NOT try to restrain the victim or hold them down- this may result in injury to the victim.
3. Do NOT try to put anything in the victim’s mouth to prevent them biting their tongue- the victim
may choke on the object or injure their mouth.
4. Remove any dangerous objects/furniture from the victim’s space that could cause injury
5. If there are panicked bystanders, ask them to move back and give the victim some space.
Reassure them that the seizure will pass and there is no reason to panic.
6. Once the victim has stopped seizing, they may be confused and disoriented for a period of time.
Provide reassurance. If the victim is semiconscious or unconscious, place the victim on his/her
side to prevent choking on any secretions from the mouth, particularly if the victim bit their
tongue and it is bleeding.
7. Monitor breathing and pulse until help arrives.
8. Call 9-1-1. Many seizure patients will not require transport to a hospital if the seizure is their
“usual” pattern of seizure, but it is a wise idea to allow medical personnel to make that decision.
Children will sometimes experience what is known as febrile seizures when they have a high fever-
treatment is the same as for an adult victim. Controlling fever will often prevent these types of seizures.
Most children outgrown these types of seizures as their brain develops.
Diabetic Emergencies
Millions of people around the world suffer from diabetes, and diabetic emergencies are common. In
type 1 diabetes, the body produces no insulin, and the individual must use artificial insulin to survive. In
type 2 diabetes, the individual’s pancreas produces insulin, but the person’s body is unable to utilize it
properly. Our cells require a constant supply of sugar to survive, particularly the brain. Too much sugar
in the blood (hyperglycemia) and too little sugar (hypoglycemia) have different symptoms, and it is
important to be able to recognize the difference between the two.
Signs and symptoms of hyperglycemia include:
• Fatigue (tiredness)
• Thirst
• Warm, dry skin
• Sweet or fruity breath
• Rapid heart rate and breathing
• Drowsiness
• Loss of consciousness (diabetic coma)
Signs and symptoms of hypoglycemia include:
• Weakness/faintness
• Hunger
• Shakiness/trembling
• Sweating
• Cold, clammy skin
• Combativeness, confusion or irrational behaviour
• Rapid heart rate
• Loss of consciousness (severe)

To treat hyperglycemia:
1. Call 9-1-1. If you know or suspect the victim is a diabetic, tell dispatch.
2. Monitor breathing and pulse and prepare to act if the person becomes unconscious.
To treat hypoglycemia:
2. If they have their own source of sugar (i.e. glucose gel) have them take it; if they do not, give
them food or drink containing sugar, such as soda, juice with sugar in it or candy.
3. If they show signs of improving, ask them to check their blood glucose (if they have a testing kit).
4. Give them more sugar if necessary.
5. If they do not improve quickly call 9-1-1. Look for other causes.
6. Continue to monitor breathing and pulse and prepare to act if the person becomes unconscious.
Poisoning
Poisoning can occur with almost any substance, even with medications prescribed by a healthcare
provider. In fact, intentional and unintentional overdoses of medicines are much more common than
poisonings by other substances. You should know the number of your regional poison control center or
the United States National Poison Center at 800-222-1222 and call them before providing first aid to
anyone suspected of having any kind of poisoning. When you call, have some general information about
the victim readily available. In addition, if you know the medicine, product or plant the victim ingested,
this will be invaluable to the expert on the phone.
1. Have the victim sit or lie down.

Be aware that the symptoms of poisoning can be the same as many other diseases and conditions;
however, there are certain signs to look for if you suspect poisoning. If you notice any of these, call for
medical assistance BEFORE calling poison control:
• Altered level of consciousness (may be sleepy or hyperactive)
• Altered respiratory pattern (breathing very slowly or too quickly)
• Slurred speech
• Nausea and/or vomiting
• Chemical smell on the victim’s breath
• Burns on or around the lips or in the mouth
• Seizures
• Empty pill bottles in the area
• Spilled chemical bottles
While you are waiting for medical assistance, be sure you and the victim are both safe. Move to fresh
air if you suspect the victim has been breathing lethal fumes, as in carbon monoxide poisoning. Look
into the victim’s mouth and, with a gloved hand, remove anything you can easily reach. If the poison
spilled on the victim, remove any contaminated clothing and begin to flush the area with water until
help arrives, but only if you have proper protective wear, such as gloves. Do NOT make the victim vomit
unless advised to do so. Monitor the victim and start CPR if that becomes necessary.
If you reach the poison control center, follow any instructions given by them. If the victim is taken to
hospital, take or send any pills, bottles or plants.
Hyperthermia (Heat Exposure)
Heat related injuries include heat cramps, heat exhaustion and heat stroke. Heat stroke is the most
severe of these injuries and typically happens when the victim has been performing heavy work or
engaging in sports in a very hot environment. The victim usually has been sweating heavily and not
replenishing fluids lost to sweating. In addition, some medications and alcohol use may predispose an
individual to heat stroke. The main symptoms of heat stroke include:
• Faintness/dizziness
• Headache
• Nausea/vomiting
• Hot, dry skin or cool, clammy skin
• Rapid and weak pulse
• Weakness
• Altered level of unconsciousness (may lose consciousness)
Untreated heat exhaustion or heat stroke can cause death. Act quickly if you suspect either condition. If
you suspect a person has hyperthermia, there are several things you can do to help the victim:
1. Call 9-1-1
2. Move the person to a cooler environment, out of the sun and into a shady or air-conditioned
space.

4. Remove restrictive or tight clothing.
5. Begin to actively cool the victim by fanning the person and applying cool compresses to the
armpits, neck and groin areas.
6. If the victim is awake enough to drink and is not vomiting, try giving cool liquids to drink. Do
NOT give the person alcohol or beverages containing caffeine. Move the person out of the sun
and into a shady or air-conditioned space.
7. If the victim loses consciousness, monitor airway, breathing and circulation and prepare to
perform CPR if necessary.
Hypothermia
Hypothermia is caused by prolonged exposure to the cold (cold weather or cold water).
• Shivering and loss of coordination
• Slurred speech, apathy, confusion
• Extremely slow breathing
• Loss of consciousness (severe hypothermia)
If you suspect someone has hypothermia, there are several things you can do to help the victim:
1. Call 9-1-1
2. Move the person to a warmer environment.
3. Remove any wet clothing and cover the victim with a dry blanket (or dress in dry clothing for
mild cases).
4. Begin to actively warm the victim by applying hot water bottles or chemical hot packs (wrapped
in towels or blankets to prevent burns) to the chest and abdominal areas (core areas). Do not
worry about warming the arms and legs; warm the blood at the center (core) of the body and
allow that warm blood to warm the extremities.
5. Do NOT immerse the victim in hot water- warming the victim too quickly may cause lethal heart
rhythms
6. Do NOT use a heating pad or heating lamp.
7. If the victim is awake enough to drink and is not vomiting, try giving warm liquids to drink. Do
NOT give the person alcohol or caffeinated beverages.
8. If the victim is unconscious, monitor breathing and pulse and prepare to perform CPR if
necessary.
Frostbite
Frostbite is caused by exposure to cold temperatures for prolonged periods, which causes damage to
the skin and underlying tissues.
Symptoms of frostbite may include:
• Pins and needles sensation, followed by numbness
• Pale and hard skin
• Aching, throbbing or lack of sensation in the affected area
• Red and very painful skin/tissue as unthawing occurs
3. Lie the victim down and elevate their legs and feet.

• Blisters and blackened, dead tissue (severe frostbite)
Areas with poorer circulation are most prone to frostbite, such as the nose, ears, hands and feet. When
frostbite extends to the blood vessels and damages them, the affected area may not recover and
amputation is often necessary.
To treat frostbite:
1. Look for signs and symptoms of hypothermia and treat first (see section on Hypothermia
above). Call 9-1-1 immediately if frostbite is severe or if there are signs and symptoms of
hypothermia.
2. Bring the victim into a warm, dry place.
3. Remove tight jewellery if fingers are affected, or socks and boots if feet are affected. Remove
any wet clothing to prevent further cooling.
4. If medical assistance is close by: wrap the affected area with dry gauze, separating fingers and
toes.
5. If medical assistance is not close by, you will need to rewarm the affected areas.
6. Soak affected areas in warm water for 20 to 30 minutes (do NOT use hot water). Keep changing
the water as it cools. If the victim’s face is affected, apply warm compresses one after another.
Pain, color changes and changes in sensation will occur as the tissue warms. Warming is
complete when the affected tissue is soft again and full feeling returns.
7. Once fingers and toes have thawed, wrap them in dry gauze, being careful to separate the digits.
8. Move the injured tissue as little as possible.
9. If the frostbite is severe and affects more than one area, give warm fluids (NOT alcohol) to warm
the victim and replenish fluids.
10. Do NOT break any blisters that form
11. Do NOT rewarm if there is a risk of refreezing- wait until you can get medical assistance)
12. Do NOT use direct heat to thaw damaged tissue (i.e. hair dryer, heating pad)
13. Do NOT massage the affected area
Foreign Bodies

A foreign object in any part of the body can cause pain, infection, and other problems. Most commonly,
foreign bodies are found in the ear, eye, nose or skin.
Ear Foreign bodies in the ear can lead to hearing loss, pain, and infection. The important thing to
remember is to NEVER stick anything in the ear in an attempt to remove an object. Doing so may push
the foreign body deeper into the ear and may result in damage to the ear. If you can see the object and
grab it with a pair of tweezers, remove it. Use gravity by having the person tilt their head toward the ear
with the foreign body.
Many times, an insect will crawl into an ear seeking the warmth and confined space. If you know that an
insect is in the ear, you may be able to remove it by warming some baby oil and pouring it into the ear.
The oil will serve to drown the insect and may allow the insect to float out of the ear. Do NOT use this
method if there is any drainage from the ear that might indicate a ruptured eardrum. You should not
use this method in any child who has tubes in his ears for recurrent ear infections.
Whether or not these methods are successful in removing the foreign body from the ear, a licensed
practitioner should check the affected ear as soon as possible.
Eye Foreign bodies in the eye can lead to vision loss, pain and infection. Be sure your hands are clean before
you start working with the eyes. Many times, it may be possible to remove the foreign object by
flushing the eye with saline solution or clean water while holding your eyelid open.
If the object is embedded in the eyeball, do NOT remove it. Instead, cover the eye loosely with a gauze
pad and get immediate medical attention. An object deeply embedded in the eyeball must be removed
surgically to prevent further damage to the eye.
If you flush a foreign body from the eye but the victim continues to have pain or redness, or if the victim
cannot see normally, medical attention is immediately required.
Nose Foreign bodies in the nose can lead to pain and infection. The important thing to remember is to NEVER
stick anything in the nose in an attempt to remove an object. Doing so may push the foreign body
deeper into the nose and may result in damage to the structures of the nose. If you can see the object
and grab it with a pair of tweezers, remove it.
Instruct the victim to breathe through his mouth until the foreign body is removed. Breathing through
his nose may cause the object to enter the victim's windpipe or lungs. Instead, have him blow his nose
gently in an attempt to remove the object. If the object is not removed using these methods, seek
medical help for professional removal.
Skin Foreign bodies in the skin can lead to infection and pain. Before attempting to remove an object from
the skin, make sure your hands are clean. If the object in the skin is wood, do NOT soak the extremity.
Getting the wood wet will cause it to swell and fragment, making the removal more difficult. If enough
of the foreign body is above the skin, you may be able to grasp it with tweezers and pull it out. After

removal, gently squeeze the area around the wound to encourage bleeding to wash out any fragments
that might be left behind. Apply some antibiotic ointment and cover the area if it is likely to get dirty.
Be sure to consult with your healthcare provider to determine if you should receive a tetanus shot.
Occasionally, the foreign body will be completely under the top layer of skin. If you feel comfortable
using a sharp needle to remove the object, you must first clean the needle as well as possible using
rubbing alcohol or soap and water. If you can see the point of entry for the object, use the needle to lift
the skin above the object and move the point of the needle to lift the tip of the foreign body out above
the level of the skin. Use the tweezers to grasp the object and pull it out. Cleanse the wound
thoroughly, apply a topical antibiotic ointment, and cover the wound if it is likely to get dirty. Again, be
sure to check on the status of your tetanus immunization.
Traumatic Tooth Loss
Losing a tooth due to trauma does not always mean that a tooth is lost forever. If a tooth is lost due to
trauma you should:
1. Avoid touching the roots of the tooth- handle it by the crown only.
2. Avoid rubbing the tooth in an effort to clean it of debris.
3. If debris is present, gently swish the tooth around for less than 10 seconds in a bowl of
lukewarm water-do NOT rinse the tooth under running water.
4. Attempt to place the tooth back in its socket. Bite down gently on a piece of gauze or moistened
paper towel if it will not go all the way in.
5. If the tooth will not go back into the socket, place it in some milk or a mild saltwater solution.
6. See a dentist as soon as possible- the sooner a dentist is consulted, the better the chance of
successful reimplantation.
Bites and Stings
Animal bites can be dangerous for several reasons. Animal bites can be deep and there is a high risk of
infection.
1. If the bite is minor, clean the wound thoroughly with soap and water and apply a thin layer of
antibiotic cream. Cover with a bandage.
2. For deeper wounds, apply pressure to stop any bleeding and seek medical attention. If medical
help is not readily available, stop any bleeding, clean the wound well and apply a clean dressing
until medical attention is available.
Any time the skin is broken, there is risk of infection. Signs of infection (redness, swelling, pain that is
getting worse instead of better, warmth, red streaks moving out from the wound) require medical help
immediately. A tetanus shot is required if tetanus is not up to date.
If there is a chance that the animal carried rabies, it is critical that medical help be sought immediately.
If possible, cage the animal that bit the victim, but do not risk a second bite to yourself. Remember that
unimmunized domesticated animals can also carry rabies. In many areas of the US, a large proportion of

the populations of bats and skunks are rabid. Any wild animal that is acting unusually (i.e. it lets you get
close to it) may be ill with rabies.
Human Bites The human mouth is very dirty -- and human bites can be worse than animal bites. For human bites, it is
important to clean the wound very well with soap and water. Apply a thin layer of antibiotic cream and
a clean bandage. Watch for signs and symptoms of infection and seek medical care if any develop.
If the wound is very deep, get health care as soon as possible. Again, if you have not had a tetanus shot
in the last ten years, seek medical care to get one as soon as possible after the wound.
Insect Bites or Stings Insect bites and stings can be a problem not only due to localized pain and swelling, but also because of
the generalized systemic reactions that can occur. If a victim has been bit or stung:
1. Move to an area where the victim is safe from additional bites or stings.
2. Remove the stinger if it is still stuck in the skin. Do this by scraping a fingernail or other object,
such as a credit card, across the skin; avoid trying to pluck the stinger out with your fingers as
this may release more venom into the skin.
3. Cleanse the area with soap and water.
4. Apply an ice pack or cold cloth to help reduce swelling and pain.
5. Ibuprofen or acetaminophen may relieve the pain caused by inflammation. A topical
antihistamine may help relieve pain and swelling. Calamine or Caladryl lotion may help with
itching. A paste created from water and meat tenderizer or baking soda may also help reduce
swelling and itching.
Snake Bite Most snakes will avoid you if possible and will bite only when threatened or surprised. If you come
across a snake, back away slowly and leave the snake alone.
If you or someone around you are bit by a snake:
1. Call 9-1-1.
2. Remain calm and try to remember what the snake looks like (color, markings, shape of pupils).
3. Do NOT try to catch the snake (and never bring a live snake to the hospital).

4. Immobilize the affected area with a splint.
5. Keep the area affected by the bite lower than the heart.
6. Keep the victim as quiet as possible to keep the venom from spreading.
7. If possible, clean the wound gently. Do not flush it with water.
8. Do NOT cut the wound or try to suck the venom from the bite. Do NOT apply ice or a
tourniquet.
9. Remove any jewelry or other items that might constrict the area if swelling occurs.
Anaphylaxis
Some people are highly allergic to certain insect bites or stings. Certain foods, such as peanuts, can also
cause a severe and life-threatening allergic reaction.
Anaphylaxis is a severe allergic reaction that can rapidly cause death if not immediately treated.
Anaphylaxis causes a dangerous drop in blood pressure leading to shock. It can also cause swelling of the
airway leading to inability to breathe. Symptoms may occur within minutes of exposure to the allergen.
Symptoms and signs may include:
• Shortness of breath
• Swelling of lips, eyes, mouth or throat
• Dizziness or faintness
• Wheezing or difficulty breathing
• Rapid heart rate
• Nausea/vomiting or diarrhea
• Hives or rash
• Flushed or pale skin
• Loss of consciousness
If you are with someone experiencing an anaphylactic reaction:
• Call 9-1-1 immediately.
• Check to see if he/she is carrying an EpiPen. If the victim is able, have them inject themselves; if
they are unable, assist them to use the EpiPen. EpiPen use is simple: Remember “blue to the
sky, orange to the thigh”. Hold the pen firmly with the orange side pointing down. Remove the
blue cap by pulling straight up- do not bend or twist. Push the orange tip firmly into the mid-
outer thigh. You will hear a click- hold firmly in place for several seconds.
•
• Monitor the patient closely. If the patient stops breathing or loses their pulse, start CPR and
continue until help arrives.
Lie the victim down with the legs and feet elevated, loosen tight clothing and keep them warm.

The medication contained in EpiPens is potent but wears off quickly. Even if the victim feels better after
receiving the injection of epinephrine, they must go to the hospital in case symptoms return.
Minor Cuts and Puncture Wounds
Cuts and puncture wounds are common injuries. First aid for these injuries includes:
• Control bleeding by application of pressure to the area (see the section on Bleeding).
• Elevate the injury.
• Apply a cold pack to reduce swelling and pain.
• Clean the wound thoroughly with soap and water and apply a topical antibiotic cream.
• Cover the wound with a Band-Aid or clean bandage.
• Change the dressing if it becomes soiled.
• If the wound is deep or large, seek medical care to determine if stitches are required. This must
be done within the first few hours after injury.
• A tetanus shot may be necessary if you have not had one in the last ten years- check with your
physician. • Watch for signs of infection (redness, swelling, drainage, or pain that is getting worse instead of
better) and get treatment if you think the wound is getting infected.