SRU8015 IFU Bundel1v4 - Philips · PDF file4 Your Philips Prestigo SRU8015 1 Your Philips...
112
SRU8015 www.philips.com/urc EN Instructions for Use 3 FR Mode d’emploi 19 DE Bedienungsanleitung 37 ES Instrucciones de manejo 55 IT Istruzioni per l’uso 73 NL Gebruiksaanwijzing 89 SRU8015_IFU_Bundel1v4.qxd 16-05-2007 17:01 Pagina 1
-
Upload
truongthuy -
Category
Documents
-
view
250 -
download
5
Transcript of SRU8015 IFU Bundel1v4 - Philips · PDF file4 Your Philips Prestigo SRU8015 1 Your Philips...
SRU8015
www.philips.com/urc
EN Instructions for Use 3
FR Mode d’emploi 19
DE Bedienungsanleitung 37
ES Instrucciones de manejo 55
IT Istruzioni per l’uso 73
NL Gebruiksaanwijzing 89
SRU8015_IFU_Bundel1v4.qxd 16-05-2007 17:01 Pagina 1
2
A E
123
4
5
B
C
D F
SRU8015_IFU_Bundel1v4.qxd 16-05-2007 17:01 Pagina 2

3Contents
ENG
LISHContents
1 Your Philips Prestigo SRU8015 41.1 What’s in the Box 41.2 Overview SRU8015 41.3 Overview Main Menu 5
2 Getting Started 52.1 Prepare 52.2 Install 6
3 Using Your SRU8015 73.1 Selecting a Device or an Activity 83.2 Selecting a Favorite 83.3 Selecting More Functions 8
4 Getting the Most out of Your SRU8015 94.1 Devices 104.2 Activities 124.3 Favorites 134.4 More Functions 144.5 System Settings 154.6 Language 16
5 Frequently Asked Questions 17
6 Need help? 18
Only for US - FCC Compliancy 106
Only for Europe - WEEE Regulation 108
SRU8015_IFU_Bundel1v4.qxd 16-05-2007 17:01 Pagina 3
4 Your Philips Prestigo SRU8015
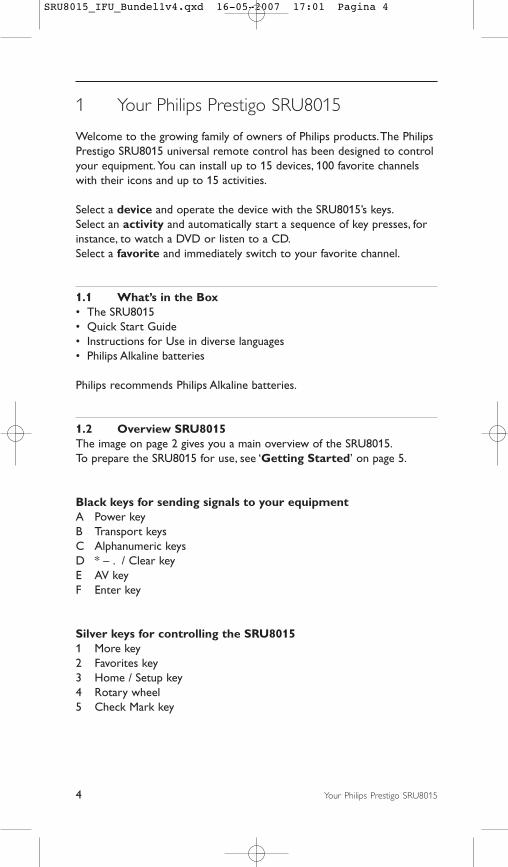
1 Your Philips Prestigo SRU8015
Welcome to the growing family of owners of Philips products. The PhilipsPrestigo SRU8015 universal remote control has been designed to controlyour equipment. You can install up to 15 devices, 100 favorite channelswith their icons and up to 15 activities.
Select a device and operate the device with the SRU8015’s keys.Select an activity and automatically start a sequence of key presses, forinstance, to watch a DVD or listen to a CD.Select a favorite and immediately switch to your favorite channel.
1.1 What’s in the Box• The SRU8015• Quick Start Guide• Instructions for Use in diverse languages • Philips Alkaline batteries
Philips recommends Philips Alkaline batteries.
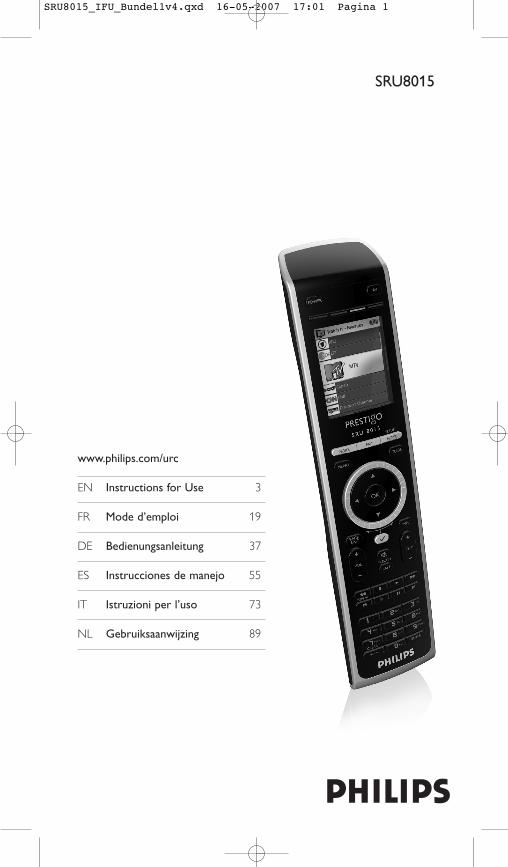
1.2 Overview SRU8015The image on page 2 gives you a main overview of the SRU8015.To prepare the SRU8015 for use, see ‘Getting Started’ on page 5.
Black keys for sending signals to your equipmentA Power keyB Transport keysC Alphanumeric keysD * – . / Clear keyE AV keyF Enter key
Silver keys for controlling the SRU80151 More key2 Favorites key3 Home / Setup key4 Rotary wheel5 Check Mark key
SRU8015_IFU_Bundel1v4.qxd 16-05-2007 17:01 Pagina 4
5Your Philips Prestigo SRU8015
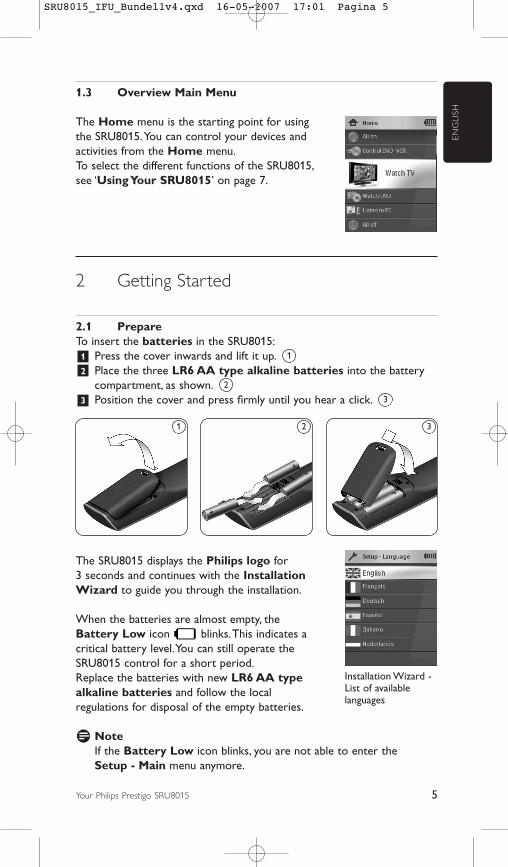
1.3 Overview Main Menu
The Home menu is the starting point for usingthe SRU8015.You can control your devices andactivities from the Home menu.To select the different functions of the SRU8015,see ‘Using Your SRU8015’ on page 7.
2 Getting Started
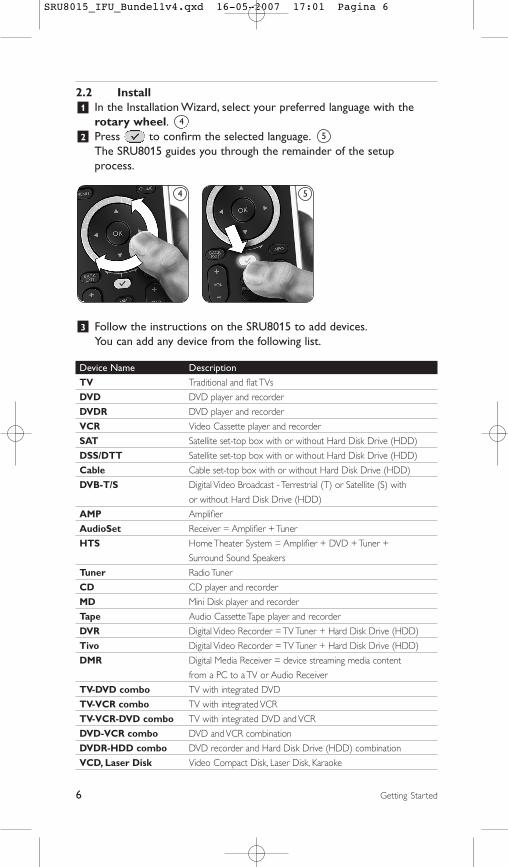
2.1 PrepareTo insert the batteries in the SRU8015:1 Press the cover inwards and lift it up. 2 Place the three LR6 AA type alkaline batteries into the battery
compartment, as shown. 3 Position the cover and press firmly until you hear a click.
The SRU8015 displays the Philips logo for 3 seconds and continues with the InstallationWizard to guide you through the installation.
When the batteries are almost empty, theBattery Low icon blinks. This indicates acritical battery level. You can still operate theSRU8015 control for a short period.Replace the batteries with new LR6 AA typealkaline batteries and follow the localregulations for disposal of the empty batteries.
D NoteIf the Battery Low icon blinks, you are not able to enter the Setup - Main menu anymore.
3
2
1
ENG
LISH
1 2 3
Installation Wizard -List of availablelanguages
SRU8015_IFU_Bundel1v4.qxd 16-05-2007 17:01 Pagina 5
6 Getting Started
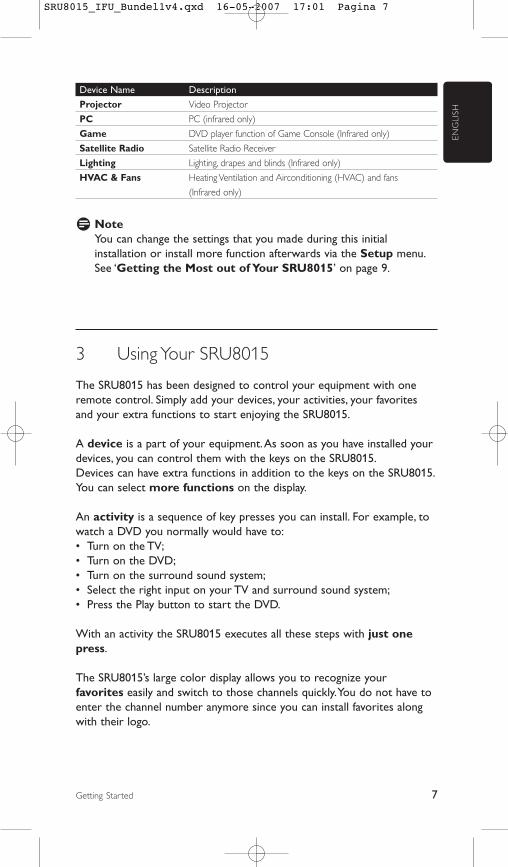
2.2 Install1 In the Installation Wizard, select your preferred language with the
rotary wheel. 2 Press to confirm the selected language.
The SRU8015 guides you through the remainder of the setupprocess.
3 Follow the instructions on the SRU8015 to add devices. You can add any device from the following list.
Device Name Description
TV Traditional and flat TVs
DVD DVD player and recorder
DVDR DVD player and recorder
VCR Video Cassette player and recorder
SAT Satellite set-top box with or without Hard Disk Drive (HDD)
DSS/DTT Satellite set-top box with or without Hard Disk Drive (HDD)
Cable Cable set-top box with or without Hard Disk Drive (HDD)
DVB-T/S Digital Video Broadcast - Terrestrial (T) or Satellite (S) with
or without Hard Disk Drive (HDD)
AMP Amplifier
AudioSet Receiver = Amplifier + Tuner
HTS Home Theater System = Amplifier + DVD + Tuner +
Surround Sound Speakers
Tuner Radio Tuner
CD CD player and recorder
MD Mini Disk player and recorder
Tape Audio Cassette Tape player and recorder
DVR Digital Video Recorder = TV Tuner + Hard Disk Drive (HDD)
Tivo Digital Video Recorder = TV Tuner + Hard Disk Drive (HDD)
DMR Digital Media Receiver = device streaming media content
from a PC to a TV or Audio Receiver
TV-DVD combo TV with integrated DVD
TV-VCR combo TV with integrated VCR
TV-VCR-DVD combo TV with integrated DVD and VCR
DVD-VCR combo DVD and VCR combination
DVDR-HDD combo DVD recorder and Hard Disk Drive (HDD) combination
VCD, Laser Disk Video Compact Disk, Laser Disk, Karaoke
4 5
5
4
SRU8015_IFU_Bundel1v4.qxd 16-05-2007 17:01 Pagina 6
7Getting Started
Device Name Description
Projector Video Projector
PC PC (infrared only)
Game DVD player function of Game Console (Infrared only)
Satellite Radio Satellite Radio Receiver
Lighting Lighting, drapes and blinds (Infrared only)
HVAC & Fans Heating Ventilation and Airconditioning (HVAC) and fans
(Infrared only)
D NoteYou can change the settings that you made during this initialinstallation or install more function afterwards via the Setup menu.See ‘Getting the Most out of Your SRU8015’ on page 9.
3 Using Your SRU8015
The SRU8015 has been designed to control your equipment with oneremote control. Simply add your devices, your activities, your favoritesand your extra functions to start enjoying the SRU8015.
A device is a part of your equipment. As soon as you have installed yourdevices, you can control them with the keys on the SRU8015.Devices can have extra functions in addition to the keys on the SRU8015.You can select more functions on the display.
An activity is a sequence of key presses you can install. For example, towatch a DVD you normally would have to:• Turn on the TV;• Turn on the DVD;• Turn on the surround sound system;• Select the right input on your TV and surround sound system;• Press the Play button to start the DVD.
With an activity the SRU8015 executes all these steps with just onepress.
The SRU8015’s large color display allows you to recognize yourfavorites easily and switch to those channels quickly. You do not have toenter the channel number anymore since you can install favorites alongwith their logo.
ENG
LISH
SRU8015_IFU_Bundel1v4.qxd 16-05-2007 17:01 Pagina 7

8 Using Your SRU8015
3.1 Selecting a Device or an Activity To select your installed devices and activities:1 Press . 2 Select a device or an activity with the
rotary wheel. The SRU8015 is set to operate the selected device. You can now control that device with the black keys on the SRU8015.-or-Select an activity with the rotary wheel and press to start the activity.The SRU8015 sends out a sequence of key presses for the selected activity. The SRU8015 is set to operate the device you selected for this activity.
To setup your devices, see ‘Add a Device’ on page 10. To setup your activities, see ‘Add an Activity’ on page 12.
3.2 Selecting a Favorite To select your installed favorites:1 Press .2 Select a favorite with the rotary wheel and
press to confirm your choice.The SRU8015 sends out a signal and switches to the selected channel.
To setup your favorites, see ‘Add a Favorite’ on page 13.
3.3 Selecting More FunctionsDevices can have extra functions in addition to the keys on the SRU8015.To select more installed functions:1 Press .2 Select a function with the rotary wheel
and press to confirm your choice.The SRU8015 sends out the signal for the selected function.
To setup more functions for your devices, see ‘Add a Function’ on page 14.
List of installedfunctions
List of installedfavorites
List of installeddevices and activities
SRU8015_IFU_Bundel1v4.qxd 16-05-2007 17:01 Pagina 8
9Getting the Most out of Your SRU8015
4 Getting the Most out of Your SRU8015
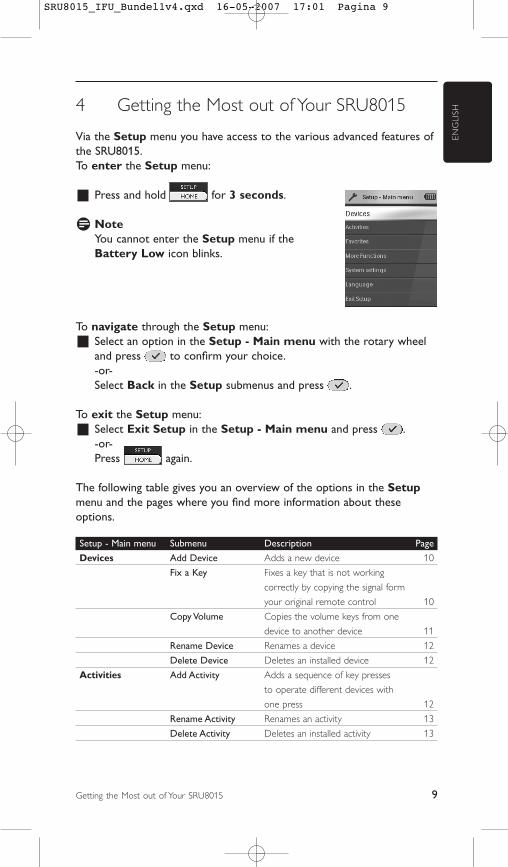
Via the Setup menu you have access to the various advanced features ofthe SRU8015. To enter the Setup menu:
Press and hold for 3 seconds.
D NoteYou cannot enter the Setup menu if the Battery Low icon blinks.
To navigate through the Setup menu:Select an option in the Setup - Main menu with the rotary wheeland press to confirm your choice.-or-Select Back in the Setup submenus and press .
To exit the Setup menu:Select Exit Setup in the Setup - Main menu and press .-or-Press again.
The following table gives you an overview of the options in the Setupmenu and the pages where you find more information about theseoptions.
Setup - Main menu Submenu Description Page
Devices Add Device Adds a new device 10
Fix a Key Fixes a key that is not working
correctly by copying the signal form
your original remote control 10
Copy Volume Copies the volume keys from one
device to another device 11
Rename Device Renames a device 12
Delete Device Deletes an installed device 12
Activities Add Activity Adds a sequence of key presses
to operate different devices with
one press 12
Rename Activity Renames an activity 13
Delete Activity Deletes an installed activity 13
ENG
LISH
SRU8015_IFU_Bundel1v4.qxd 16-05-2007 17:01 Pagina 9
10 Getting the Most out of Your SRU8015
Setup - Main menu Submenu Description Page
Favorites Add Favorite Adds a new favorite 13
Rename Favorite Renames a favorite 14
Delete Favorite Deletes a favorite 14
More Functions Add Function Adds an extra function by learning it
from your original remote control 14
Rename Function Renames a function 14
Delete Function Deletes an installed function 15
System Settings Display Brightness Changes the brightness of the display 15
Backlight Time-Out Changes the time-out of the backlight
on the SRU8015 15
Key Backlight Turns the key backlight on or off 15
Full Reset Deletes all your personal settings
on SRU8015 16
Language Changes the language of the
instructions on the SRU8015 16
Exit Setup Leaves the Setup menu 9
4.1 Devices
4.1.1 Add a Device To operate your specific devices with the SRU8015, you have to add thosedevices. You can add up to 15 devices. For a list of devices, see page 6.
D NoteYou can add a device more than once. A second TV will automaticallybe named TV2. You can enter a different name if your wish to. See‘Rename a Device’ on page 12.
1 Go to Setup - Devices, select Add Device and press .2 Select the device you want to add.3 Follow the instructions on the SRU8015.
The selected device is installed and added to the SRU8015.
You can now operate your device with the SRU8015:Press , select the device with the rotary wheel and press .
4.1.2 Fix a KeyIf a key or extra function is not working properly with your device, youcan copy that key’s signal from your original remote to the SRU8015.
B WarningWhen you use the ‘Fix a Key’ option, new data overwrites the datathat is currently stored for that key.
SRU8015_IFU_Bundel1v4.qxd 16-05-2007 17:01 Pagina 10
11Getting the Most out of Your SRU8015
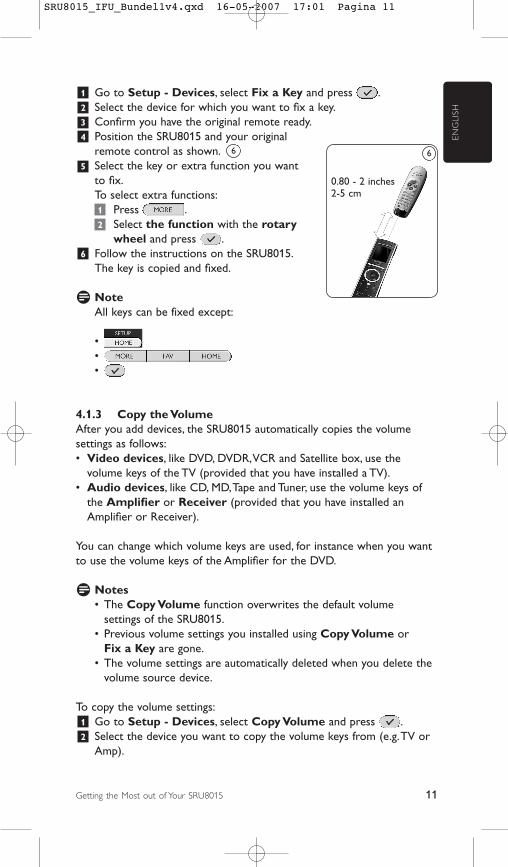
1 Go to Setup - Devices, select Fix a Key and press .2 Select the device for which you want to fix a key.3 Confirm you have the original remote ready.4 Position the SRU8015 and your original
remote control as shown. 5 Select the key or extra function you want
to fix.To select extra functions:1 Press .2 Select the function with the rotary
wheel and press . 6 Follow the instructions on the SRU8015.
The key is copied and fixed.
D NoteAll keys can be fixed except:
•••
4.1.3 Copy the VolumeAfter you add devices, the SRU8015 automatically copies the volumesettings as follows:• Video devices, like DVD, DVDR, VCR and Satellite box, use the
volume keys of the TV (provided that you have installed a TV).• Audio devices, like CD, MD, Tape and Tuner, use the volume keys of
the Amplifier or Receiver (provided that you have installed anAmplifier or Receiver).
You can change which volume keys are used, for instance when you wantto use the volume keys of the Amplifier for the DVD.
D Notes• The Copy Volume function overwrites the default volume
settings of the SRU8015.• Previous volume settings you installed using Copy Volume or
Fix a Key are gone.• The volume settings are automatically deleted when you delete the
volume source device.
To copy the volume settings:1 Go to Setup - Devices, select Copy Volume and press .2 Select the device you want to copy the volume keys from (e.g. TV or
Amp).
6
ENG
LISH
6
0.80 - 2 inches2-5 cm
SRU8015_IFU_Bundel1v4.qxd 16-05-2007 17:01 Pagina 11
12 Getting the Most out of Your SRU8015
3 Select the device you want to copy the volume keys to (e.g. DVD orSAT box).
4 Confirm you want to copy the volume keys from one device to theother.The volume keys are copied.
4.1.4 Rename a DeviceTo rename a device:1 Go to Setup - Devices, select Rename Device and press .2 Enter the new label with the alphanumeric keys.
D NoteYou can delete characters with the Clear key and the left cursor.
3 Confirm the new label.The device is renamed.
4.1.5 Delete a DeviceTo delete a device:1 Go to Setup - Devices, select Delete Device and press .2 Select the device you want to delete.3 Confirm you want to delete the device.
The device is deleted.
D NoteKeys of the deleted device that are used elsewhere, e.g. in an activityor the volume keys you copied, will be deleted as well.Check the activities you installed and reinstall them if necessary. See ‘Add an Activity’ on page 12.Check the volume keys for your devices and reinstall them ifnecessary. See ‘Copy the Volume’ on page 11.
4.2 Activities
4.2.1 Add an ActivityYou can add activities to the SRU8015. An activity consists of several keypresses that the SRU8015 sends out with just one press.By default the SRU8015 inserts a delay of 600ms between every keypress to make sure your devices are responding correctly to the IRsignals. You can overwrite this default delay.• If one of your devices needs a longer delay before receiving the next
IR signal, you can insert a delay of 1, 3, 5 or 15 seconds.• If an activity needs a long key press, e.g. turn up the volume, you can
select the option hold last key.
SRU8015_IFU_Bundel1v4.qxd 16-05-2007 17:01 Pagina 12
13Getting the Most out of Your SRU8015
To add an activity:1 Go to Setup - Activities, select Add an Activity and press .2 Select the label you want to use for the activity.
-or-Select Not in List to create a new label.
3 Follow the instructions on the SRU8015. • Select a device with the rotary wheel, press and press a key
to add it to the activity.• Select 1, 3, 5 or 15 seconds delay with the rotary wheel and
press .-or- Select Hold Last Key with the rotary wheel and press .
4 Repeat step 3 to create another activity.The activity is added to the SRU8015.
You can now run the activity with the SRU8015: Press , select the activity with the rotary wheel and press .
4.2.2 Rename an ActivityTo rename an activity:1 Go to Setup - Activities, select Rename Activity and press .2 Enter the text for the new label with the alphanumeric keys.
D NoteYou can delete characters with the Clear key and the left cursor.
3 Confirm the new label.The activity is renamed.
4.2.3 Delete an ActivityTo delete an activity:1 Go to Setup - Activities, select Delete Activity and press .2 Select the activity you want to delete.3 Confirm you want to delete the activity.
The activity is deleted.
4.3 Favorites
4.3.1 Add a FavoriteTo add a favorite channel:1 Go to Setup - Favorites, select Add Favorite and press .2 Select the favorite channel you want to add.3 Follow the instructions on the SRU8015.
The selected channel is installed and added to the SRU8015.
ENG
LISH
SRU8015_IFU_Bundel1v4.qxd 16-05-2007 17:01 Pagina 13
14 Getting the Most out of Your SRU8015
You can now switch to your favorite channels with the SRU8015:Press , select the favorite channel with the rotary wheel and press .
4.3.2 Rename a FavoriteTo rename a favorite channel: 1 Go to Setup - Favorites, select Rename Favorite and press .2 Enter the text for the new label with the alphanumeric keys.
D NoteYou can delete characters with the Clear key and the left cursor.
3 Confirm the new label.The favorite is renamed.
4.3.3 Delete a FavoriteTo delete a favorite channel:1 Go to Setup - Favorites, select Delete Favorite and press .2 Select the favorite channel you want to delete.3 Confirm you want to delete the favorite channel.
The favorite channel is deleted.
4.4 More Functions
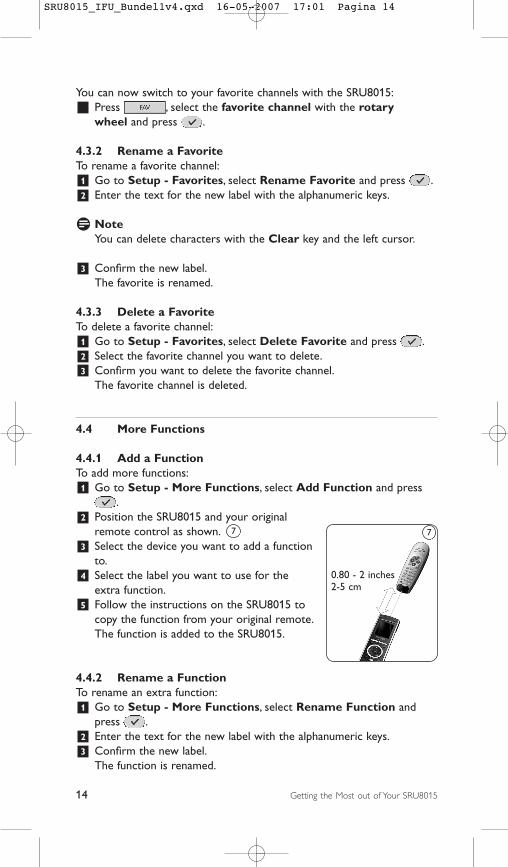
4.4.1 Add a FunctionTo add more functions:1 Go to Setup - More Functions, select Add Function and press
.2 Position the SRU8015 and your original
remote control as shown. 3 Select the device you want to add a function
to.4 Select the label you want to use for the
extra function.5 Follow the instructions on the SRU8015 to
copy the function from your original remote.The function is added to the SRU8015.
4.4.2 Rename a Function To rename an extra function: 1 Go to Setup - More Functions, select Rename Function and
press .2 Enter the text for the new label with the alphanumeric keys.3 Confirm the new label.
The function is renamed.
7 7
0.80 - 2 inches2-5 cm
SRU8015_IFU_Bundel1v4.qxd 16-05-2007 17:01 Pagina 14

15Getting the Most out of Your SRU8015
4.4.3 Delete a FunctionTo delete an extra function: 1 Go to Setup - More Functions, select Delete Function and
press .2 Select the device from which you want to delete a function. 3 Select the function you want to delete.4 Confirm you want to delete the function.
The function is deleted.
4.5 System Settings
4.5.1 Display BrightnessTo change the brightness of your display:1 Go to Setup - System Settings, select Display Brightness and
press .2 Select your preferred brightness with the rotary wheel:
20%, 40%, 60%, 80%, 100%.
D NoteA preview of the selected brightness is shown as you turn the rotarywheel.
3 Confirm the new brightness setting.The brightness of the display is changed.
4.5.2 Backlight Time-OutWhen you use the SRU8015, the backlight turns on. After 5 seconds itturns off again.To change this time out: 1 Go to Setup - System Settings, select Backlight Time-Out and
press .2 Select the preferred backlight time-out with the rotary wheel:
3 seconds, 5 seconds, 10 seconds, 20 seconds.3 Confirm the new time-out setting.
The backlight time-out is changed.
D NoteThe backlight time-out has an impact on the lifetime of the batteries,the longer the backlight stays on, the faster the batteries drain.
4.5.3 Key BacklightTo turn on and off the key backlight:1 Go to Setup - System Settings, select Key Backlight and
press .2 Select On or Off with the rotary wheel.
ENG
LISH
SRU8015_IFU_Bundel1v4.qxd 16-05-2007 17:01 Pagina 15
16 Getting the Most out of Your SRU8015
3 Confirm the new key backlight setting.The key backlight is turned on or off.
4.5.4 Full ResetWhen resetting the SRU8015 completely, all installed devices, activities,favorites and other settings are deleted. After the reset, the SRU8015needs to be installed again. To reset the SRU8015:1 Go to Setup - System Settings, select Full Reset and press .2 Select Yes with the rotary wheel and press .3 Press to reconfirm.
The SRU8015 deletes all settings and restarts with the InstallationWizard. This can take up to one minute.
4.6 Language To change the language of the SRU8015:1 Go to Setup - Language and press .2 Select the preferred language with the rotary wheel:
English, Français, Deutsch, Español, Italiano, Nederlands.3 Confirm the new language.
The language used in the Setup - Main menu is changed.
SRU8015_IFU_Bundel1v4.qxd 16-05-2007 17:01 Pagina 16
17Frequently Asked Questions
5 Frequently Asked Questions
Keys
Why are one or more keys not working with my device?Not all functions are available in the database of the SRU8015 or thecode behind the key is defect.You can fix a key by copying the signal from your original remote. See ‘Fix a Key’ on page 10.
How can I add extra functions to the SRU8015?See ‘Add a Function’ on page 14.
Brand
Why can I not find the brand of my device in the SRU8015?Not all brands are available in the database of the SRU8015. When yourbrand is not in the list:• You can copy the keys from your original remote. See ‘Fix a Key’ on
page 11.-Or-
• You can select Not in list to perform a full database search.The SRU8015 tests all available codes. This can take up to 25 minutes.
Volume
Why are the volume keys not working properly?After adding devices, the SRU8015 automatically copies the volume keysand Mute key, as follows:• Video devices, like DVD, DVDR, VCR and Satellite box, use the
volume keys of the TV.• Audio devices, like CD, DMR and Tuner, use the volume keys of the
Amplifier or Receiver.
If you did not install the source device (TV, Amplifier or Receiver), thevolume keys and the Mute key will not work. To define the volume keys:• You can install the source device on the SRU8015. See ‘Add a Device’
on page 10.-Or-
• You can copy the volume keys of another source device. See ‘Copythe Volume’ on page 11.
ENG
LISH
SRU8015_IFU_Bundel1v4.qxd 16-05-2007 17:01 Pagina 17
18 Frequently Asked Questions
Batteries
Why can I not enter the Setup menu?When the battery level is too low, you cannot enter the Setup menu.Replace the batteries with new alkaline batteries.
Why does the SRU8015 not wake up anymore?The battery level is too low. Replace the batteries with new alkalinebatteries.
Do I loose my data when I replace the batteries?No. Your data will be saved.
Can I use rechargeable batteries with my SRU8015? Yes you certainly can. However, bear in mind that rechargeable batteriestend to drain faster than alkaline batteries.
6 Need help?
First of all, read this Instruction for Use carefully.
When you have additional questions about the usage or setup of theSRU8015, see www.philips.com/URC.
For contact details, see www.philips.com/support.
For warranty information, see www.philips.com/guarantee.
Make sure the SRU8015 is at hand when you call our helpline so that ouroperators can help you determine whether it is working properly. The model number of your Philips universal remote control is SRU8015.
Date of purchase: . . . . /. . . . /. . . . . . . . (day/month/year)
SRU8015_IFU_Bundel1v4.qxd 16-05-2007 17:01 Pagina 18
19Table des matières
FRA
NÇ
AIS
Table des matières
1 Votre télécommande Philips Prestigo SRU8015 201.1 Contenu 201.2 Vue d’ensemble de la SRU8015 201.3 Aperçu du Menu Principal 21
2 Première approche 212.1 Préparation 212.2 Installation 22
3 Utilisation de la SRU8015 233.1 Sélection d’un appareil ou d’une activité 243.2 Sélection d’un favori 243.3 Sélection des Fonctions+ 24
4 Utilisation optimale de la SRU8015 254.1 Appareils 264.2 Activités 294.3 Favoris 304.4 Fonctions+ 314.5 Réglages Système 324.6 Langue 33
5 Questions fréquemment posées 34
6 Besoin d’aide ? 36
Only for US - FCC Compliancy 106
Only for Europe - WEEE Regulation 108
SRU8015_IFU_Bundel1v4.qxd 16-05-2007 17:01 Pagina 19
20 Votre télécommande Philips Prestigo SRU8015
1 Votre télécommande Philips Prestigo SRU8015
Bienvenue dans la famille toujours plus nombreuse des possesseurs deproduits Philips. La télécommande universelle Philips Prestigo SRU8015 aété conçue pour contrôler votre équipement. Vous pouvez installerjusqu’à 15 appareils, 100 chaînes favorites avec leurs icônes et 15 activités.
Sélectionnez un appareil et faites-le fonctionner avec les touches de laSRU8015. Sélectionnez une activité et démarrez automatiquement une séquencede pressions de touches pour, par exemple, regarder un DVD ou écouterun CD. Sélectionnez un favori et passez immédiatement sur votre chaînepréférée.
1.1 Contenu• La télécommande SRU8015• Le guide de démarrage rapide• Les instructions d’utilisation en plusieurs langues• Des piles alcalines Philips.
Philips recommande l’utilisation de piles alcalines Philips.
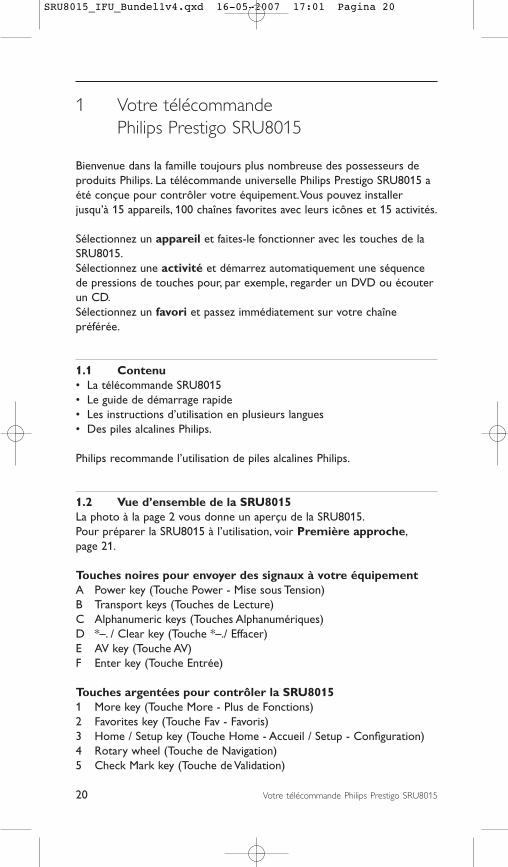
1.2 Vue d’ensemble de la SRU8015La photo à la page 2 vous donne un aperçu de la SRU8015.Pour préparer la SRU8015 à l’utilisation, voir Première approche, page 21.
Touches noires pour envoyer des signaux à votre équipementA Power key (Touche Power - Mise sous Tension)B Transport keys (Touches de Lecture)C Alphanumeric keys (Touches Alphanumériques)D *–. / Clear key (Touche *–./ Effacer)E AV key (Touche AV)F Enter key (Touche Entrée)
Touches argentées pour contrôler la SRU80151 More key (Touche More - Plus de Fonctions)2 Favorites key (Touche Fav - Favoris)3 Home / Setup key (Touche Home - Accueil / Setup - Configuration)4 Rotary wheel (Touche de Navigation)5 Check Mark key (Touche de Validation)
SRU8015_IFU_Bundel1v4.qxd 16-05-2007 17:01 Pagina 20
21Votre télécommande Philips Prestigo SRU8015
FRA
NÇ
AIS
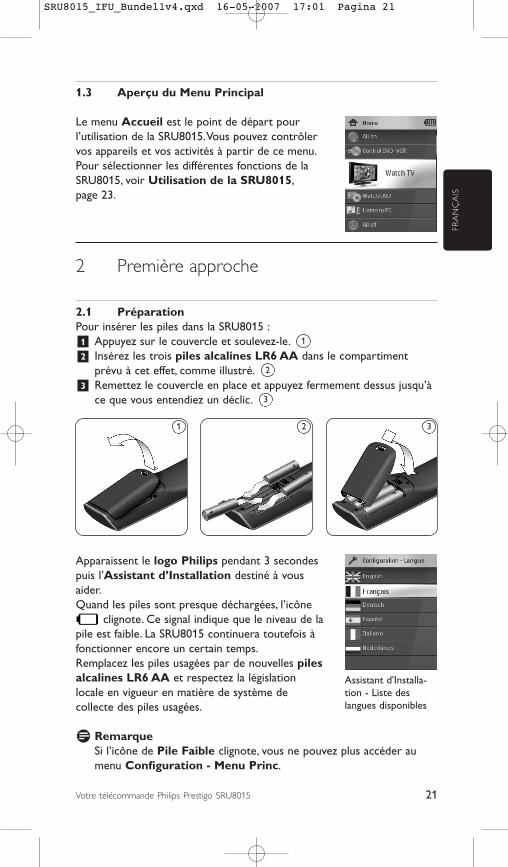
1.3 Aperçu du Menu Principal
Le menu Accueil est le point de départ pourl’utilisation de la SRU8015. Vous pouvez contrôlervos appareils et vos activités à partir de ce menu.Pour sélectionner les différentes fonctions de laSRU8015, voir Utilisation de la SRU8015, page 23.
2 Première approche
2.1 PréparationPour insérer les piles dans la SRU8015 :1 Appuyez sur le couvercle et soulevez-le.2 Insérez les trois piles alcalines LR6 AA dans le compartiment
prévu à cet effet, comme illustré.3 Remettez le couvercle en place et appuyez fermement dessus jusqu’à
ce que vous entendiez un déclic.
Apparaissent le logo Philips pendant 3 secondespuis l’Assistant d’Installation destiné à vousaider.Quand les piles sont presque déchargées, l’icône
clignote. Ce signal indique que le niveau de lapile est faible. La SRU8015 continuera toutefois àfonctionner encore un certain temps. Remplacez les piles usagées par de nouvelles pilesalcalines LR6 AA et respectez la législationlocale en vigueur en matière de système decollecte des piles usagées.
D RemarqueSi l’icône de Pile Faible clignote, vous ne pouvez plus accéder aumenu Configuration - Menu Princ.
3
2
1
1 2 3
Assistant d'Installa -tion - Liste deslangues disponibles
SRU8015_IFU_Bundel1v4.qxd 16-05-2007 17:01 Pagina 21
22 Première approche
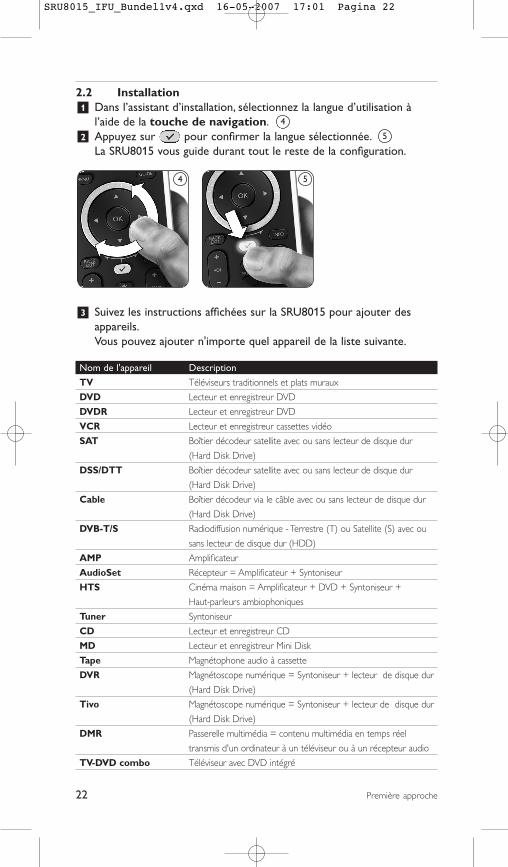
2.2 Installation1 Dans l’assistant d’installation, sélectionnez la langue d’utilisation à
l’aide de la touche de navigation.2 Appuyez sur pour confirmer la langue sélectionnée.
La SRU8015 vous guide durant tout le reste de la configuration.
3 Suivez les instructions affichées sur la SRU8015 pour ajouter desappareils. Vous pouvez ajouter n'importe quel appareil de la liste suivante.
Nom de l'appareil Description
TV Téléviseurs traditionnels et plats muraux
DVD Lecteur et enregistreur DVD
DVDR Lecteur et enregistreur DVD
VCR Lecteur et enregistreur cassettes vidéo
SAT Boîtier décodeur satellite avec ou sans lecteur de disque dur
(Hard Disk Drive)
DSS/DTT Boîtier décodeur satellite avec ou sans lecteur de disque dur
(Hard Disk Drive)
Cable Boîtier décodeur via le câble avec ou sans lecteur de disque dur
(Hard Disk Drive)
DVB-T/S Radiodiffusion numérique - Terrestre (T) ou Satellite (S) avec ou
sans lecteur de disque dur (HDD)
AMP Amplificateur
AudioSet Récepteur = Amplificateur + Syntoniseur
HTS Cinéma maison = Amplificateur + DVD + Syntoniseur +
Haut-parleurs ambiophoniques
Tuner Syntoniseur
CD Lecteur et enregistreur CD
MD Lecteur et enregistreur Mini Disk
Tape Magnétophone audio à cassette
DVR Magnétoscope numérique = Syntoniseur + lecteur de disque dur
(Hard Disk Drive)
Tivo Magnétoscope numérique = Syntoniseur + lecteur de disque dur
(Hard Disk Drive)
DMR Passerelle multimédia = contenu multimédia en temps réel
transmis d'un ordinateur à un téléviseur ou à un récepteur audio
TV-DVD combo Téléviseur avec DVD intégré
5
4 5
4
SRU8015_IFU_Bundel1v4.qxd 16-05-2007 17:01 Pagina 22
23Première approche
FRA
NÇ
AIS
Nom de l'appareil Description
TV-VCR combo Téléviseur avec VCR intégré
TV-VCR-DVD combo Téléviseur avec DVD et VCR intégrés
DVD-VCR combo Combinaison DVD et VCR
DVDR-HDD combo Combinaison enregistreur DVD et lecteur de disque dur
(Hard Disk Drive)
VCD, Laser Disk Disque compact vidéo, Disque optique, Karaoké
Projector Vidéoprojecteur
PC PC (uniquement infrarouge)
Game Fonction lecteur DVD d'une console de jeu
(uniquement infrarouge)
Satellite Radio Récepteur radio satellite
Lighting Éclairage, rideaux/stores (uniquement infrarouge)
HVAC & Fans Système de chauffage, de ventilation et de climatisation
(Heating Ventilation and Airconditioning) et ventilateurs
(uniquement infrarouge)
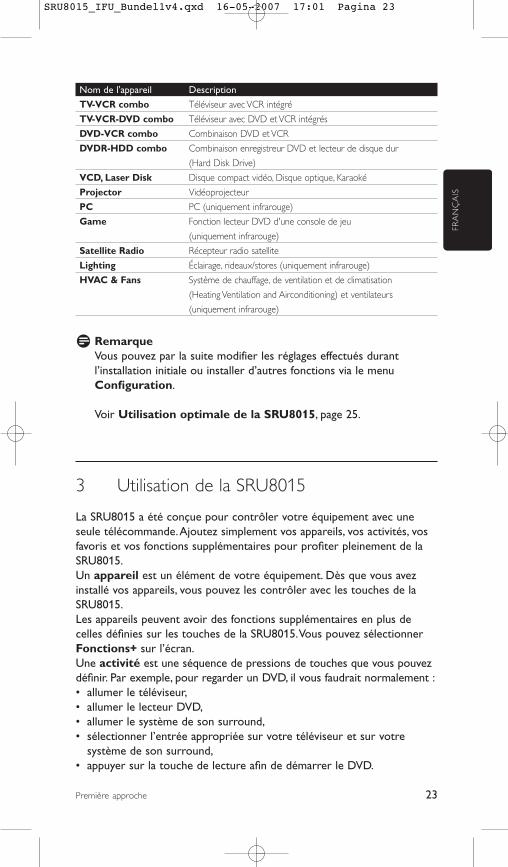
D RemarqueVous pouvez par la suite modifier les réglages effectués durantl’installation initiale ou installer d’autres fonctions via le menuConfiguration.
Voir Utilisation optimale de la SRU8015, page 25.
3 Utilisation de la SRU8015
La SRU8015 a été conçue pour contrôler votre équipement avec uneseule télécommande. Ajoutez simplement vos appareils, vos activités, vosfavoris et vos fonctions supplémentaires pour profiter pleinement de laSRU8015.Un appareil est un élément de votre équipement. Dès que vous avezinstallé vos appareils, vous pouvez les contrôler avec les touches de laSRU8015.Les appareils peuvent avoir des fonctions supplémentaires en plus decelles définies sur les touches de la SRU8015. Vous pouvez sélectionnerFonctions+ sur l’écran.Une activité est une séquence de pressions de touches que vous pouvezdéfinir. Par exemple, pour regarder un DVD, il vous faudrait normalement :• allumer le téléviseur,• allumer le lecteur DVD,• allumer le système de son surround,• sélectionner l’entrée appropriée sur votre téléviseur et sur votre
système de son surround,• appuyer sur la touche de lecture afin de démarrer le DVD.
SRU8015_IFU_Bundel1v4.qxd 16-05-2007 17:01 Pagina 23
24 Utilisation de la SRU8015
Grâce à une activité, la SRU8015 exécute toutes ces étapes en une seulepression sur une seule touche.L’écran large en couleurs de la SRU8015 vous permet de reconnaître vosfavoris facilement et de passer sur ces chaînes rapidement. Il n’est plusnécessaire que vous tapiez les numéros de chaînes puisque vous pouvezles enregistrer en favoris avec leur logo.
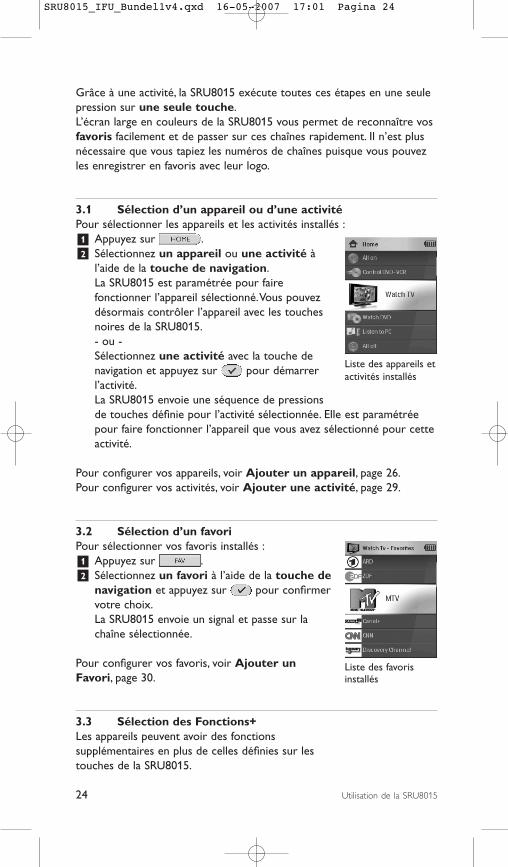
3.1 Sélection d’un appareil ou d’une activitéPour sélectionner les appareils et les activités installés :1 Appuyez sur . 2 Sélectionnez un appareil ou une activité à
l’aide de la touche de navigation.La SRU8015 est paramétrée pour faire fonctionner l’appareil sélectionné. Vous pouvez désormais contrôler l’appareil avec les touches noires de la SRU8015.- ou -Sélectionnez une activité avec la touche de navigation et appuyez sur pour démarrer l’activité.La SRU8015 envoie une séquence de pressions de touches définie pour l’activité sélectionnée. Elle est paramétréepour faire fonctionner l’appareil que vous avez sélectionné pour cetteactivité.
Pour configurer vos appareils, voir Ajouter un appareil, page 26. Pour configurer vos activités, voir Ajouter une activité, page 29.
3.2 Sélection d’un favori Pour sélectionner vos favoris installés :1 Appuyez sur .2 Sélectionnez un favori à l’aide de la touche de
navigation et appuyez sur pour confirmer votre choix.La SRU8015 envoie un signal et passe sur la chaîne sélectionnée.
Pour configurer vos favoris, voir Ajouter un Favori, page 30.
3.3 Sélection des Fonctions+Les appareils peuvent avoir des fonctions supplémentaires en plus de celles définies sur les touches de la SRU8015.
Liste des favorisinstallés
Liste des appareils etactivités installés
SRU8015_IFU_Bundel1v4.qxd 16-05-2007 17:01 Pagina 24
25Utilisation de la SRU8015
FRA
NÇ
AIS
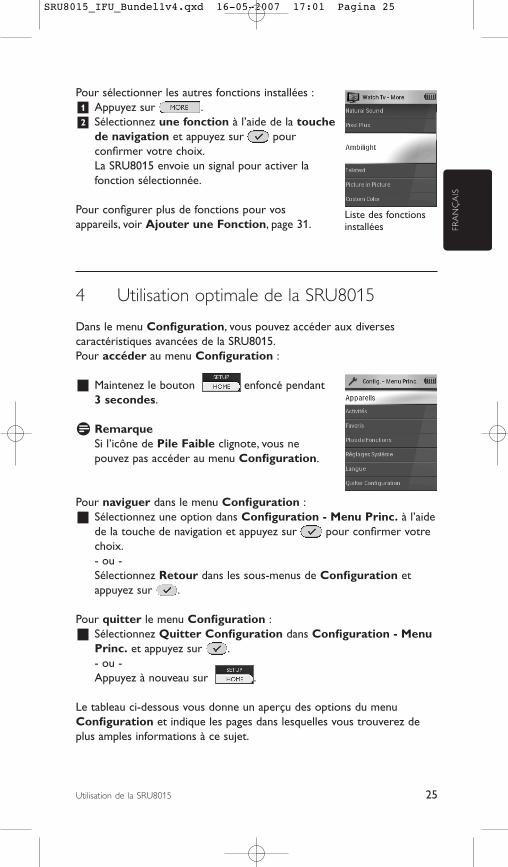
Pour sélectionner les autres fonctions installées :1 Appuyez sur .2 Sélectionnez une fonction à l’aide de la touche
de navigation et appuyez sur pour confirmer votre choix.La SRU8015 envoie un signal pour activer la fonction sélectionnée.
Pour configurer plus de fonctions pour vos appareils, voir Ajouter une Fonction, page 31.
4 Utilisation optimale de la SRU8015
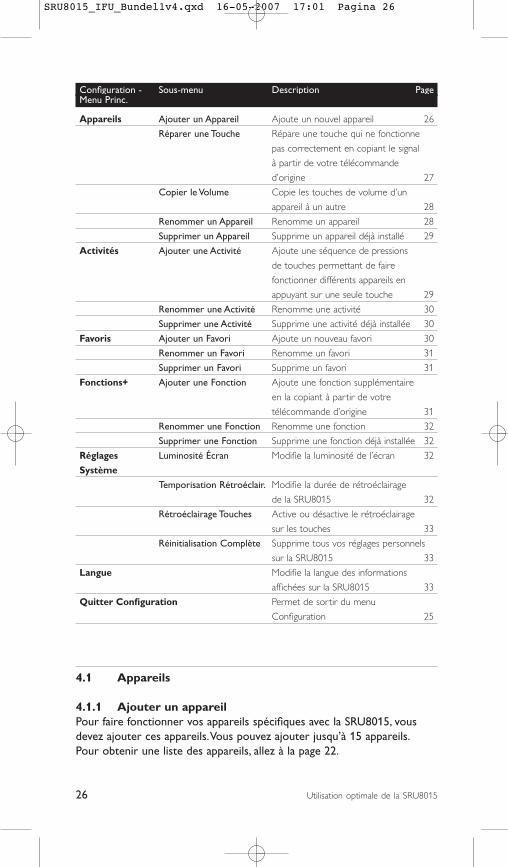
Dans le menu Configuration, vous pouvez accéder aux diversescaractéristiques avancées de la SRU8015.Pour accéder au menu Configuration :
Maintenez le bouton enfoncé pendant 3 secondes.
D RemarqueSi l’icône de Pile Faible clignote, vous ne pouvez pas accéder au menu Configuration.
Pour naviguer dans le menu Configuration :Sélectionnez une option dans Configuration - Menu Princ. à l’aidede la touche de navigation et appuyez sur pour confirmer votrechoix.- ou -Sélectionnez Retour dans les sous-menus de Configuration etappuyez sur .
Pour quitter le menu Configuration :Sélectionnez Quitter Configuration dans Configuration - MenuPrinc. et appuyez sur .- ou -Appuyez à nouveau sur .
Le tableau ci-dessous vous donne un aperçu des options du menuConfiguration et indique les pages dans lesquelles vous trouverez deplus amples informations à ce sujet.
Liste des fonctionsinstallées
SRU8015_IFU_Bundel1v4.qxd 16-05-2007 17:01 Pagina 25
26 Utilisation optimale de la SRU8015
Configuration - Sous-menu Description PageMenu Princ.
Appareils Ajouter un Appareil Ajoute un nouvel appareil 26
Réparer une Touche Répare une touche qui ne fonctionne
pas correctement en copiant le signal
à partir de votre télécommande
d’origine 27
Copier le Volume Copie les touches de volume d’un
appareil à un autre 28
Renommer un Appareil Renomme un appareil 28
Supprimer un Appareil Supprime un appareil déjà installé 29
Activités Ajouter une Activité Ajoute une séquence de pressions
de touches permettant de faire
fonctionner différents appareils en
appuyant sur une seule touche 29
Renommer une Activité Renomme une activité 30
Supprimer une Activité Supprime une activité déjà installée 30
Favoris Ajouter un Favori Ajoute un nouveau favori 30
Renommer un Favori Renomme un favori 31
Supprimer un Favori Supprime un favori 31
Fonctions+ Ajouter une Fonction Ajoute une fonction supplémentaire
en la copiant à partir de votre
télécommande d’origine 31
Renommer une Fonction Renomme une fonction 32
Supprimer une Fonction Supprime une fonction déjà installée 32
Réglages Luminosité Écran Modifie la luminosité de l’écran 32
Système
Temporisation Rétroéclair. Modifie la durée de rétroéclairage
de la SRU8015 32
Rétroéclairage Touches Active ou désactive le rétroéclairage
sur les touches 33
Réinitialisation Complète Supprime tous vos réglages personnels
sur la SRU8015 33
Langue Modifie la langue des informations
affichées sur la SRU8015 33
Quitter Configuration Permet de sortir du menu
Configuration 25
4.1 Appareils
4.1.1 Ajouter un appareil Pour faire fonctionner vos appareils spécifiques avec la SRU8015, vousdevez ajouter ces appareils. Vous pouvez ajouter jusqu’à 15 appareils. Pour obtenir une liste des appareils, allez à la page 22.
SRU8015_IFU_Bundel1v4.qxd 16-05-2007 17:01 Pagina 26
27Utilisation optimale de la SRU8015
FRA
NÇ
AIS
D RemarqueVous pouvez ajouter un même appareil deux fois. Si un deuxièmetéléviseur est installé, il sera automatiquement nommé TV2. Vouspouvez cependant le nommer différemment si vous le souhaitez. Voir Renommer un appareil, page 28.
1 Allez dans Configuration - Appareils, sélectionnez Ajouter unAppareil et appuyez sur .
2 Sélectionnez l’appareil que vous souhaitez ajouter.3 Suivez les instructions affichées sur la SRU8015.
L’appareil sélectionné est installé puis ajouté à la SRU8015.
Vous pouvez désormais faire fonctionner votre appareil avec la SRU8015 :Appuyez sur , sélectionnez l’appareil à l’aide de la touchede navigation et appuyez sur .
4.1.2 Réparer une toucheSi une touche ou une fonction supplémentaire ne fonctionne pascorrectement, vous pouvez copier le signal de cette touche vers laSRU8015 à partir de votre télécommande d’origine.
B AvertissementLorsque vous utilisez l’option Réparer une Touche, les nouvellesdonnées remplacent celles qui étaient enregistrées auparavant pourcette touche.
1 Allez dans Configuration - Appareils, sélectionnez Réparer uneTouche et appuyez sur .
2 Sélectionnez l’appareil pour lequel vous souhaitez réparer unetouche.
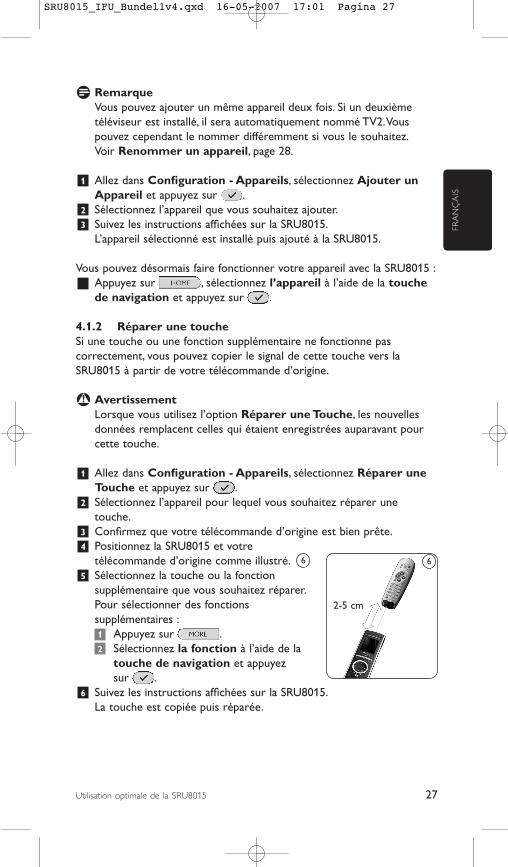
3 Confirmez que votre télécommande d’origine est bien prête.4 Positionnez la SRU8015 et votre
télécommande d’origine comme illustré. 5 Sélectionnez la touche ou la fonction
supplémentaire que vous souhaitez réparer.Pour sélectionner des fonctions supplémentaires :1 Appuyez sur .2 Sélectionnez la fonction à l’aide de la
touche de navigation et appuyez sur .
6 Suivez les instructions affichées sur la SRU8015.La touche est copiée puis réparée.
6 6
2-5 cm
SRU8015_IFU_Bundel1v4.qxd 16-05-2007 17:01 Pagina 27

28 Utilisation optimale de la SRU8015
D RemarqueToutes les touches peuvent être réparées sauf la suivante :
•••
4.1.3 Copier le volumeAprès avoir ajouté vos appareils, la SRU8015 copie automatiquement lesréglages de volume comme suit :• Le réglage du volume sur les appareils vidéo comme les lecteurs
DVD, les lecteurs DVD-R, les magnétoscopes et les boîtiers satellites sefait à partir des touches de volume du téléviseur (si vous avez installéun téléviseur).
• Le réglage du volume des appareils audio comme les CD, les MD, lescassettes et les tuners se fait à l’aide des touches de l’amplificateurou du tuner (si vous avez installé un amplificateur ou un tuner).
Vous pouvez modifier les touches de volume utilisées, par exemplelorsque vous voulez utiliser celles de l’amplificateur pour le lecteur DVD.
D Remarques• La fonction Copier le Volume remplace les réglages de volume
par défaut de la SRU8015. • Les réglages de volume définis auparavant en utilisant Copier le
volume ou Réparer une Touche sont effacés.• Les réglages de volume sont supprimés automatiquement lorsque
vous supprimez l’appareil source de volume.
Pour copier les réglages de volume :1 Allez dans Configuration - Appareils, sélectionnez Copier le
Volume et appuyez sur .2 Sélectionnez l’appareil dont vous souhaitez copier les touches de
volume (par exemple le téléviseur ou l’amplificateur).3 Sélectionnez l’appareil vers lequel vous souhaitez copier les touches
de volume (par exemple le lecteur DVD ou le boîtier satellite).4 Confirmez que vous souhaitez copier les touches de volume d’un
appareil vers l’autre.Les touches de volume sont copiées.
4.1.4 Renommer un appareilPour renommer un appareil :1 Allez dans Configuration - Appareils, sélectionnez Renommer
un Appareil et appuyez sur .2 Saisissez le nouveau sigle à l’aide des touches alphanumériques.
SRU8015_IFU_Bundel1v4.qxd 16-05-2007 17:01 Pagina 28
29Utilisation optimale de la SRU8015
FRA
NÇ
AIS
D RemarqueVous pouvez supprimer des caractères avec la touche Clear et lecurseur gauche.
3 Confirmez le nouveau sigle.L’appareil est renommé.
4.1.5 Supprimer un appareilPour supprimer un appareil :1 Allez dans Configuration - Appareils, sélectionnez Supprimer un
Appareil et appuyez sur .2 Sélectionnez l’appareil que vous souhaitez supprimer.3 Confirmez que vous souhaitez supprimer cet appareil.
L’appareil est supprimé.
D RemarqueLes touches de l’appareil sélectionné qui sont utilisées ailleurs, parexemple dans une activité, ou les touches de volume que vous avezcopiées seront supprimées également.Vérifiez les activités que vous avez installées et réinstallez-les sinécessaire. Voir Ajouter une activité, page 29. Vérifiez les touches de volume pour vos appareils et réinstallez-les sinécessaire. Voir Copier le volume, page 28.
4.2 Activités
4.2.1 Ajouter une activitéVous pouvez ajouter des activités sur la SRU8015. Une activité est unesuccession de pressions de touches transmise par la SRU8015 à l’aided’une seule touche.Par défaut, la SRU8015 inclut un délai de 600 ms entre chaque pressionde touche pour s’assurer que vos appareils répondent correctement auxsignaux infrarouges. Vous pouvez modifier ce délai par défaut.• Si l’un de vos appareils a besoin d’un délai plus long avant de recevoir
le signal infrarouge suivant, vous pouvez définir un délai de 1, 3, 5 ou15 secondes.
• Si une activité nécessite une pression prolongée, par exemple pourmonter le son, vous pouvez sélectionner l’option Maintenir DernièreTouche.
Pour ajouter une activité :1 Allez dans Configuration - Activités, sélectionnez Ajouter une
Activité et appuyez sur .2 Sélectionnez le sigle que vous souhaitez utiliser pour cette activité.
- ou -Sélectionnez l’option Autre pour créer un nouveau sigle.
SRU8015_IFU_Bundel1v4.qxd 16-05-2007 17:01 Pagina 29
30 Utilisation optimale de la SRU8015
3 Suivez les instructions affichées sur la SRU8015.• Sélectionnez un appareil à l’aide de la touche de navigation,
appuyez sur puis appuyez sur une touche pour l’ajouter àl’activité.
• Sélectionnez un délai de 1, 3, 5 ou 15 secondes à l’aide de latouche de navigation et appuyez sur .
- ou -Sélectionnez Maintenir Dernière Touche à l’aide de la touche denavigation puis appuyez sur .
4 Recommencez l’étape 3 pour créer une nouvelle activité.L’activité est ajoutée à la SRU8015.
Vous pouvez désormais utiliser l’activité avec la SRU8015.Appuyez sur , sélectionnez l’activité à l’aide de la touche denavigation et appuyez sur .
4.2.2 Renommer une activitéPour renommer une activité :1 Allez dans Configuration - Activités, sélectionnez Renommer
une Activité et appuyez sur .2 Saisissez le texte du nouveau sigle à l’aide des touches
alphanumériques.
D RemarqueVous pouvez supprimer des caractères avec la touche Clear et lecurseur gauche.
3 Confirmez le nouveau sigle.L’activité est renommée.
4.2.3 Supprimer une activitéPour supprimer une activité :1 Allez dans Configuration - Activités, sélectionnez Supprimer
une Activité et appuyez sur .2 Sélectionnez l’activité que vous souhaitez supprimer.3 Confirmez que vous souhaitez supprimer l’activité.
L’activité est supprimée.
4.3 Favoris
4.3.1 Ajouter un favoriPour ajouter un favori :1 Allez dans Configuration - Favoris, sélectionnez Ajouter un
Favori et appuyez sur .2 Sélectionnez la chaîne que vous souhaitez ajouter.
SRU8015_IFU_Bundel1v4.qxd 16-05-2007 17:01 Pagina 30

31Utilisation optimale de la SRU8015
FRA
NÇ
AIS
3 Suivez les instructions affichées sur la SRU8015.La chaîne sélectionnée est installée et ajoutée à la SRU8015.
Vous pouvez désormais passer sur vos chaînes préférentielles avec laSRU8015.
Appuyez sur , sélectionnez la chaîne préférentielle à l’aidede la touche de navigation et appuyez sur .
4.3.2 Renommer un favoriPour renommer un favori : 1 Allez dans Configuration - Favoris, sélectionnez Renommer un
Favori et appuyez sur .2 Saisissez le texte du nouveau sigle à l’aide des touches
alphanumériques.
D RemarqueVous pouvez supprimer des caractères avec la touche Clear et lecurseur gauche.
3 Confirmez le nouveau sigle.Le favori est renommé.
4.3.3 Supprimer un favoriPour supprimer une chaîne :1 Allez dans Configuration - Favoris, sélectionnez Supprimer un
Favori et appuyez sur .2 Sélectionnez la chaîne que vous souhaitez supprimer.3 Confirmez que vous souhaitez supprimer la chaîne.
La chaîne est supprimée.
4.4 Fonctions+
4.4.1 Ajouter une fonctionPour ajouter d’autres fonctions :1 Allez dans Configuration - Fonctions+, sélectionnez Ajouter une
Fonction et appuyez sur .2 Positionnez la SRU8015 et votre
télécommande d’origine comme illustré. 3 Sélectionnez l’appareil pour lequel vous
souhaitez ajouter une fonction.4 Sélectionnez le sigle que vous souhaitez
utiliser pour cette fonction supplémentaire.5 Suivez les instructions affichées sur votre
SRU8015 pour copier la fonction à partir de votre télécommande d’origine.La fonction est ajoutée à la SRU8015.
7 7
2-5 cm
SRU8015_IFU_Bundel1v4.qxd 16-05-2007 17:01 Pagina 31
32 Utilisation optimale de la SRU8015
4.4.2 Renommer une fonction Pour renommer une fonction supplémentaire :1 Allez dans Configuration - Fonctions+, sélectionnez Renommer
une Fonction et appuyez sur .2 Saisissez le texte du nouveau sigle à l’aide des touches
alphanumériques.3 Confirmez le nouveau sigle.
La fonction est renommée.
4.4.3 Supprimer une fonctionPour supprimer une fonction :1 Allez dans Configuration - Fonctions+, sélectionnez Supprimer
une Fonction et appuyez sur .2 Sélectionnez l’appareil pour lequel vous souhaitez supprimer une
fonction.3 Sélectionnez la fonction que vous souhaitez supprimer.4 Confirmez que vous souhaitez supprimer la fonction.
La fonction est supprimée.
4.5 Réglages Système
4.5.1 Luminosité écranPour modifier la luminosité de l’écran :1 Allez dans Configuration - Réglages Système, sélectionnez
Luminosité Écran et appuyez sur .2 Sélectionnez la luminosité souhaitée à l’aide de la touche de
navigation : 20%, 40%, 60%, 80%, 100%.
D RemarqueUn aperçu de la luminosité sélectionnée est visible à mesure que voustournez la touche de navigation.
3 Confirmez le nouveau réglage de luminosité.La luminosité de l’écran est modifiée.
4.5.2 Temporisation rétroéclairageQuand vous utilisez la SRU8015, l’écran rétroéclairé s’allume. Il s’éteint ànouveau après 5 secondes.
Pour modifier cette temporisation :1 Allez dans Configuration - Réglages Systèmes, sélectionnez
Temporisation Rétroéclair. et appuyez sur .2 Sélectionnez la temporisation de rétroéclairage souhaitée à l’aide de
la touche de navigation : 3 secondes, 5 secondes, 10 secondes, 20secondes.
SRU8015_IFU_Bundel1v4.qxd 16-05-2007 17:01 Pagina 32
33Utilisation optimale de la SRU8015
FRA
NÇ
AIS
3 Confirmez le nouveau réglage de la temporisation.La temporisation du rétroéclairage est modifiée.
D RemarqueLa temporisation du rétroéclairage a un impact sur la durée de viedes piles : plus le rétroéclairage reste activé longtemps, plus les piless’usent rapidement.
4.5.3 Rétroéclairage touchesPour activer ou désactiver le rétroéclairage des touches :1 Allez dans Configuration - Réglages Système, sélectionnez
Rétroéclairage Touches et appuyez sur .2 Sélectionnez Actif ou Inactif à l’aide de la touche de navigation.3 Confirmez le nouveau réglage du rétroéclairage des touches.
Le rétroéclairage des touches est activé ou désactivé.
4.5.4 Réinitialisation complèteLorsque vous réinitialisez complètement la SRU8015, tous les appareils,activités, favoris et autres réglages enregistrés sont supprimés. Après laréinitialisation, la SRU8015 doit être réinstallée.Pour réinitialiser la SRU8015 :1 Allez dans Configuration - Réglages Système, sélectionnez
Réinitialisation Complète et appuyez sur .2 Sélectionnez Oui à l’aide de la touche de navigation et appuyez
sur .3 Appuyez sur pour confirmer à nouveau.
La SRU8015 supprime tous les réglages et redémarre par l’assistantd’installation. Cette opération peut prendre jusqu’à une minute.
4.6 LanguePour modifier la langue de la SRU8015 :1 Allez dans Configuration - Langue et appuyez sur .2 Sélectionnez la langue d’utilisation à l’aide de la touche de
navigation : English, Français, Deutsch, Español, Italiano, Nederlands3 Confirmez la nouvelle langue.
La langue utilisée dans Configuration - Menu Princ. est modifiée.
SRU8015_IFU_Bundel1v4.qxd 16-05-2007 17:01 Pagina 33
34 Questions fréquemment posées
5 Questions fréquemment posées
Touches
Pourquoi une ou plusieurs touches ne fonctionnent-elles pas surmon appareil ?Toutes les fonctions ne sont pas forcément disponibles dans la base dedonnées de la SRU8015 ou le code défini pour la touche est défectueux.Vous pouvez réparer une touche en copiant le signal à partir de votretélécommande d’origine. Voir Réparer une Touche, page 27.
Comment puis-je ajouter des fonctions supplémentaires à laSRU8015 ?Voir Ajouter une fonction, page 31.
Marque
Pourquoi la marque de mon appareil n’apparaît-elle pas dans laSRU8015 ?Toutes les marques ne sont pas forcément disponibles dans la base dedonnées de la SRU8015. Si votre marque ne figure pas dans la liste :• Vous pouvez copier les touches à partir de votre télécommande
d’origine. Voir Réparer une Touche, page 27.- ou -
• Vous pouvez sélectionner Autre pour effectuer une recherchecomplète dans la base de données. La SRU8015 teste tous les codes disponibles. Cette opération peutprendre jusqu’à 25 minutes.
Volume
Pourquoi les touches de volume ne fonctionnent-elles pascorrectement ?Après l’ajout d’appareils, la SRU8015 copie automatiquement les touchesde volume et la touche Silence comme suit :• Les appareils vidéo, comme les lecteurs DVD, les lecteurs DVD-R, les
magnétoscopes et les boîtiers satellites utilisent les touches de volumedu téléviseur.
• Les appareils audio, comme les CD, les DMR et les tuners utilisentles touches de volume de l’amplificateur ou du tuner.
SRU8015_IFU_Bundel1v4.qxd 16-05-2007 17:01 Pagina 34
35Questions fréquemment posées
Si vous n’avez pas installé l’appareil source (téléviseur, amplificateur outuner), les touches de volume et la touche Silence ne fonctionnerontpas. Pour définir les touches de volume :• Vous pouvez installer l’appareil source sur la SRU8015. Voir Ajouter
un appareil, page 26.- ou -
• Vous pouvez copier les touches de volume d’un autre appareil source.Voir Copier le volume, page 28.
Piles
Pourquoi ne puis-je pas accéder au menu Configuration ?Quand le niveau de la pile est trop faible, vous ne pouvez pas accéder aumenu Configuration. Remplacez les piles usagées par des piles alcalinesneuves.
Pourquoi la SRU8015 ne veut-elle plus s’activer ?Le niveau des piles est trop faible. Remplacez les piles usagées par despiles alcalines neuves.
Les données sont-elles perdues quand je remplace les piles ?Non. Vos données seront enregistrées.
Puis-je utiliser des piles rechargeables avec ma SRU8015 ?Bien sûr ! Cependant, n’oubliez pas que les piles rechargeables onttendance à se décharger plus vite que les piles alcalines.
FRA
NÇ
AIS
SRU8015_IFU_Bundel1v4.qxd 16-05-2007 17:01 Pagina 35
36 Besoin d’aide ?
6 Besoin d’aide ?
Tout d’abord, lisez attentivement les instructions d’utilisation.
Pour toute autre question concernant l’utilisation ou la configuration dela SRU8015, consultez le site www.philips.com/URC.
Pour les coordonnées, consultez le site www.philips.com/support.
Pour obtenir des informations sur la garantie, consultez le sitewww.philips.com/guarantee.
Lorsque vous contactez le service d’assistance par téléphone, assurez-vous d’avoir la télécommande à portée de main de sorte que nosopérateurs puissent vous aider à déterminer si elle fonctionnecorrectement.
Le numéro de modèle de votre télécommande universelle Philips estSRU8015.
Date d’achat : . . . . . /. . . . . /. . . . . . . (jour/mois/année)
SRU8015_IFU_Bundel1v4.qxd 16-05-2007 17:01 Pagina 36
37Inhalt
DEU
TSC
H
Inhalt
1 Ihre Philips Prestigo SRU8015 381.1 Was ist in der Verpackung 381.2 Übersicht SRU8015 381.3 Übersicht Hauptmenü 39
2 Erste Schritte 392.1 Vorbereiten 392.2 Installieren 40
3 Ihre SRU8015 benutzen 413.1 Ein Gerät oder eine Aktivität auswählen 423.2 Einen Favoriten auswählen 423.3 Weitere Funktionen auswählen 43
4 Fortgeschrittene Bedienung mit Ihrer SRU8015 434.1 Geräte 444.2 Aktivitäten 474.3 Favoriten 484.4 Weitere Funktionen 494.5 Systemeinstellungen 504.6 Sprache 51
5 Häufige Fragen (FAQ) 52
6 Brauchen Sie Hilfe? 54
Only for US - FCC Compliancy 106
Only for Europe - WEEE Regulation 108
SRU8015_IFU_Bundel1v4.qxd 16-05-2007 17:01 Pagina 37
38 Ihre Philips Prestigo SRU8015
1 Ihre Philips Prestigo SRU8015
Herzlich Willkommen in der stetig wachsenden Familie der Besitzer vonPhilips-Produkten. Mit der Philips Prestigo SRU8015 Universal-Fernbedienung können Sie Ihre Geräte bequem bedienen. Sie können biszu 15 Geräte, 100 Kanäle als Favoriten mit Symbolen und bis zu 15Aktivitäten installieren.
Wählen Sie ein Gerät aus und bedienen Sie es mit den Tasten derSRU8015. Mit der Auswahl einer Aktivität starten Sie automatisch eine Folge vonTastenbefehlen, um z. B. eine DVD anzuschauen oder Musik von einer CDzu hören. Wenn Sie einen Favoriten wählen, schalten Sie sofort zu Ihrembevorzugten Kanal.
1.1 Was ist in der Verpackung• Die SRU8015• Quick Start Guide• Bedienungsanleitungen in mehreren Sprachen • Philips Alkalibatterien
Philips empfiehlt Original Philips Alkalibatterien.
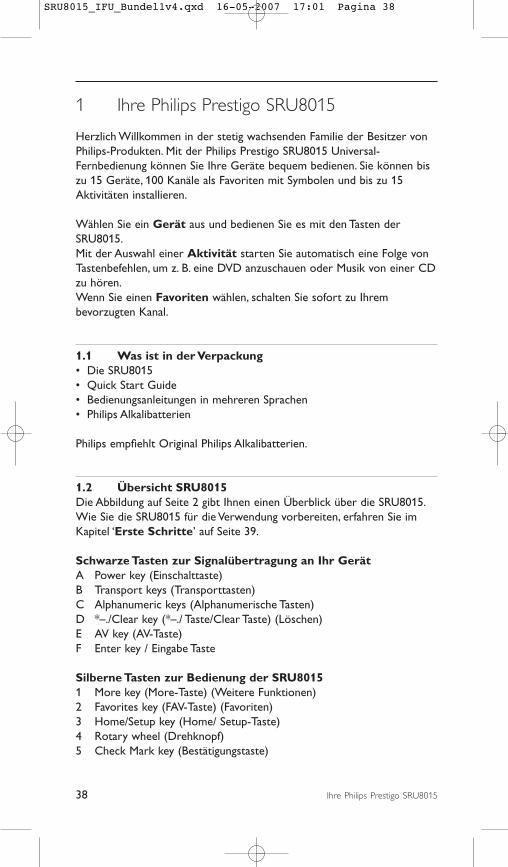
1.2 Übersicht SRU8015Die Abbildung auf Seite 2 gibt Ihnen einen Überblick über die SRU8015.Wie Sie die SRU8015 für die Verwendung vorbereiten, erfahren Sie imKapitel ‘Erste Schritte’ auf Seite 39.
Schwarze Tasten zur Signalübertragung an Ihr GerätA Power key (Einschalttaste)B Transport keys (Transporttasten)C Alphanumeric keys (Alphanumerische Tasten)D *–./Clear key (*–./ Taste/Clear Taste) (Löschen) E AV key (AV-Taste)F Enter key / Eingabe Taste
Silberne Tasten zur Bedienung der SRU80151 More key (More-Taste) (Weitere Funktionen)2 Favorites key (FAV-Taste) (Favoriten)3 Home/Setup key (Home/ Setup-Taste)4 Rotary wheel (Drehknopf)5 Check Mark key (Bestätigungstaste)
SRU8015_IFU_Bundel1v4.qxd 16-05-2007 17:01 Pagina 38
39Ihre Philips Prestigo SRU8015
DEU
TSC
H
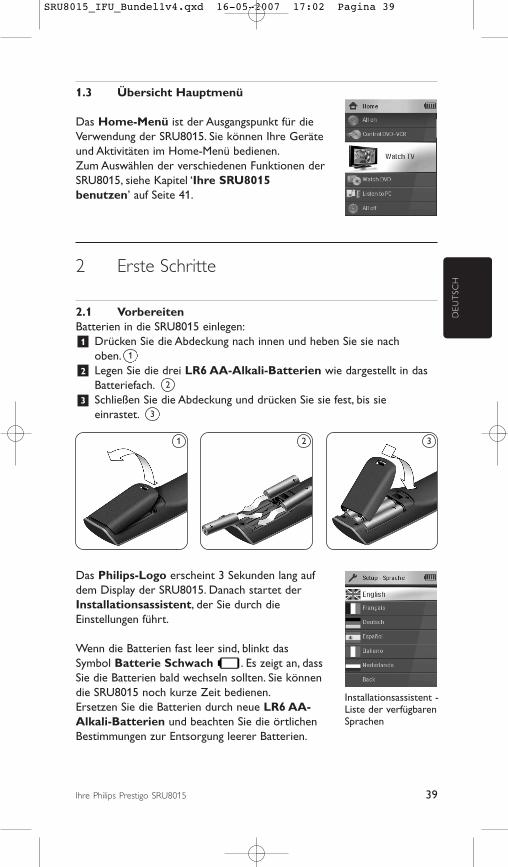
1.3 Übersicht Hauptmenü
Das Home-Menü ist der Ausgangspunkt für dieVerwendung der SRU8015. Sie können Ihre Geräteund Aktivitäten im Home-Menü bedienen.Zum Auswählen der verschiedenen Funktionen derSRU8015, siehe Kapitel ‘Ihre SRU8015benutzen’ auf Seite 41.
2 Erste Schritte
2.1 VorbereitenBatterien in die SRU8015 einlegen:1 Drücken Sie die Abdeckung nach innen und heben Sie sie nach
oben. 2 Legen Sie die drei LR6 AA-Alkali-Batterien wie dargestellt in das
Batteriefach. 3 Schließen Sie die Abdeckung und drücken Sie sie fest, bis sie
einrastet.
Das Philips-Logo erscheint 3 Sekunden lang aufdem Display der SRU8015. Danach startet derInstallationsassistent, der Sie durch dieEinstellungen führt.
Wenn die Batterien fast leer sind, blinkt dasSymbol Batterie Schwach . Es zeigt an, dassSie die Batterien bald wechseln sollten. Sie könnendie SRU8015 noch kurze Zeit bedienen. Ersetzen Sie die Batterien durch neue LR6 AA-Alkali-Batterien und beachten Sie die örtlichenBestimmungen zur Entsorgung leerer Batterien.
3
2
1
1 2 3
Installationsassistent -Liste der verfügbarenSprachen
SRU8015_IFU_Bundel1v4.qxd 16-05-2007 17:02 Pagina 39
40 Erste Schritte
D HinweisWenn das Symbol Batterie Schwach blinkt, können Sie das Setup -Hauptmenü nicht mehr aufrufen.
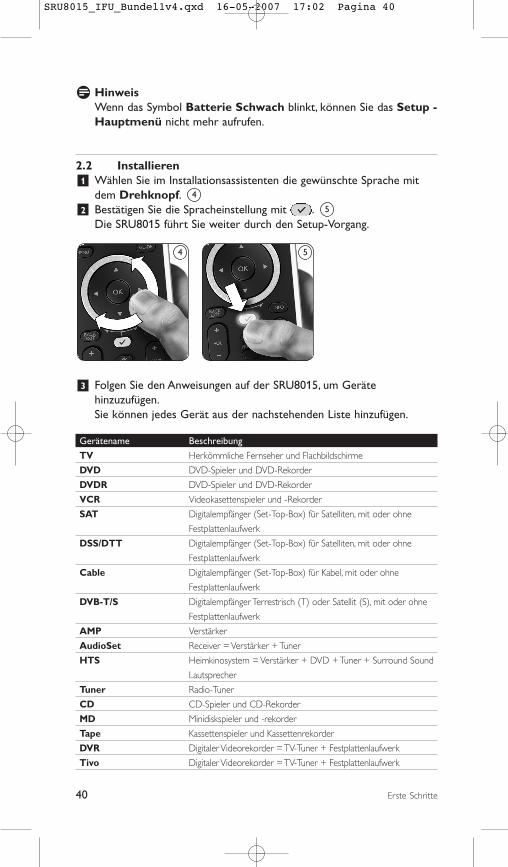
2.2 Installieren1 Wählen Sie im Installationsassistenten die gewünschte Sprache mit
dem Drehknopf. 2 Bestätigen Sie die Spracheinstellung mit .
Die SRU8015 führt Sie weiter durch den Setup-Vorgang.
3 Folgen Sie den Anweisungen auf der SRU8015, um Gerätehinzuzufügen. Sie können jedes Gerät aus der nachstehenden Liste hinzufügen.
Gerätename Beschreibung
TV Herkömmliche Fernseher und Flachbildschirme
DVD DVD-Spieler und DVD-Rekorder
DVDR DVD-Spieler und DVD-Rekorder
VCR Videokasettenspieler und -Rekorder
SAT Digitalempfänger (Set-Top-Box) für Satelliten, mit oder ohne
Festplattenlaufwerk
DSS/DTT Digitalempfänger (Set-Top-Box) für Satelliten, mit oder ohne
Festplattenlaufwerk
Cable Digitalempfänger (Set-Top-Box) für Kabel, mit oder ohne
Festplattenlaufwerk
DVB-T/S Digitalempfänger Terrestrisch (T) oder Satellit (S), mit oder ohne
Festplattenlaufwerk
AMP Verstärker
AudioSet Receiver = Verstärker + Tuner
HTS Heimkinosystem = Verstärker + DVD + Tuner + Surround Sound
Lautsprecher
Tuner Radio-Tuner
CD CD-Spieler und CD-Rekorder
MD Minidiskspieler und -rekorder
Tape Kassettenspieler und Kassettenrekorder
DVR Digitaler Videorekorder = TV-Tuner + Festplattenlaufwerk
Tivo Digitaler Videorekorder = TV-Tuner + Festplattenlaufwerk
5
4
4 5
SRU8015_IFU_Bundel1v4.qxd 16-05-2007 17:02 Pagina 40
41Erste Schritte
DEU
TSC
H
Gerätename Beschreibung
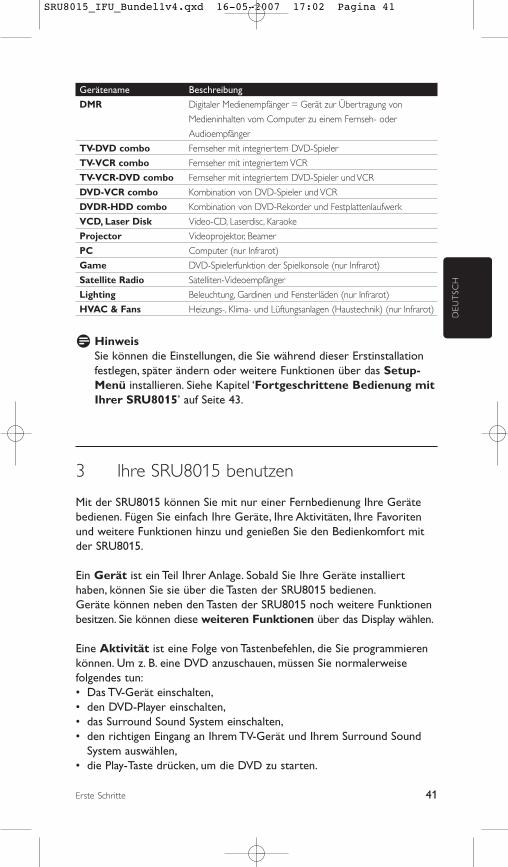
DMR Digitaler Medienempfänger = Gerät zur Übertragung von
Medieninhalten vom Computer zu einem Fernseh- oder
Audioempfänger
TV-DVD combo Fernseher mit integriertem DVD-Spieler
TV-VCR combo Fernseher mit integriertem VCR
TV-VCR-DVD combo Fernseher mit integriertem DVD-Spieler und VCR
DVD-VCR combo Kombination von DVD-Spieler und VCR
DVDR-HDD combo Kombination von DVD-Rekorder und Festplattenlaufwerk
VCD, Laser Disk Video-CD, Laserdisc, Karaoke
Projector Videoprojektor, Beamer
PC Computer (nur Infrarot)
Game DVD-Spielerfunktion der Spielkonsole (nur Infrarot)
Satellite Radio Satelliten-Videoempfänger
Lighting Beleuchtung, Gardinen und Fensterläden (nur Infrarot)
HVAC & Fans Heizungs-, Klima- und Lüftungsanlagen (Haustechnik) (nur Infrarot)
D HinweisSie können die Einstellungen, die Sie während dieser Erstinstallationfestlegen, später ändern oder weitere Funktionen über das Setup-Menü installieren. Siehe Kapitel ‘Fortgeschrittene Bedienung mitIhrer SRU8015’ auf Seite 43.
3 Ihre SRU8015 benutzen
Mit der SRU8015 können Sie mit nur einer Fernbedienung Ihre Gerätebedienen. Fügen Sie einfach Ihre Geräte, Ihre Aktivitäten, Ihre Favoritenund weitere Funktionen hinzu und genießen Sie den Bedienkomfort mitder SRU8015.
Ein Gerät ist ein Teil Ihrer Anlage. Sobald Sie Ihre Geräte installierthaben, können Sie sie über die Tasten der SRU8015 bedienen.Geräte können neben den Tasten der SRU8015 noch weitere Funktionenbesitzen. Sie können diese weiteren Funktionen über das Display wählen.
Eine Aktivität ist eine Folge von Tastenbefehlen, die Sie programmierenkönnen. Um z. B. eine DVD anzuschauen, müssen Sie normalerweisefolgendes tun:• Das TV-Gerät einschalten,• den DVD-Player einschalten,• das Surround Sound System einschalten,• den richtigen Eingang an Ihrem TV-Gerät und Ihrem Surround Sound
System auswählen,• die Play-Taste drücken, um die DVD zu starten.
SRU8015_IFU_Bundel1v4.qxd 16-05-2007 17:02 Pagina 41
42 Ihre SRU8015 benutzen
Mit einer Aktivität führt die SRU8015 all diese Schritte mit nur einemTastendruck aus.
Auf dem großen Farbdisplay der SRU8015 sind Ihre Favoriten leicht zuerkennen und Sie können schnell zu diesen Kanälen umschalten. Siemüssen keine Kanal-Nummer mehr eingeben, denn Sie können IhreFavoriten mit ihrem Logo speichern.
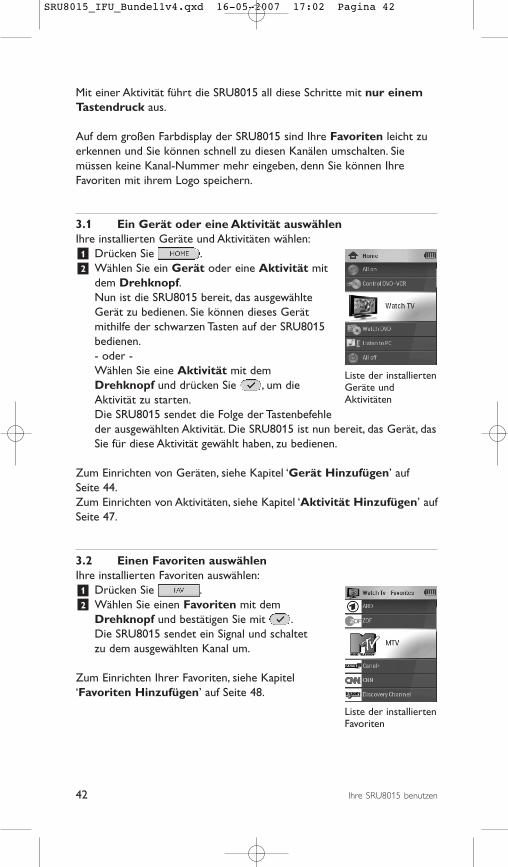
3.1 Ein Gerät oder eine Aktivität auswählen Ihre installierten Geräte und Aktivitäten wählen:1 Drücken Sie .2 Wählen Sie ein Gerät oder eine Aktivität mit
dem Drehknopf. Nun ist die SRU8015 bereit, das ausgewählte Gerät zu bedienen. Sie können dieses Gerät mithilfe der schwarzen Tasten auf der SRU8015 bedienen.- oder - Wählen Sie eine Aktivität mit dem Drehknopf und drücken Sie , um die Aktivität zu starten.Die SRU8015 sendet die Folge der Tastenbefehle der ausgewählten Aktivität. Die SRU8015 ist nun bereit, das Gerät, dasSie für diese Aktivität gewählt haben, zu bedienen.
Zum Einrichten von Geräten, siehe Kapitel ‘Gerät Hinzufügen’ auf Seite 44. Zum Einrichten von Aktivitäten, siehe Kapitel ‘Aktivität Hinzufügen’ aufSeite 47.
3.2 Einen Favoriten auswählen Ihre installierten Favoriten auswählen:1 Drücken Sie .2 Wählen Sie einen Favoriten mit dem
Drehknopf und bestätigen Sie mit .Die SRU8015 sendet ein Signal und schaltet zu dem ausgewählten Kanal um.
Zum Einrichten Ihrer Favoriten, siehe Kapitel ‘Favoriten Hinzufügen’ auf Seite 48.
Liste der installiertenFavoriten
Liste der installiertenGeräte undAktivitäten
SRU8015_IFU_Bundel1v4.qxd 16-05-2007 17:02 Pagina 42
43Ihre SRU8015 benutzen
DEU
TSC
H
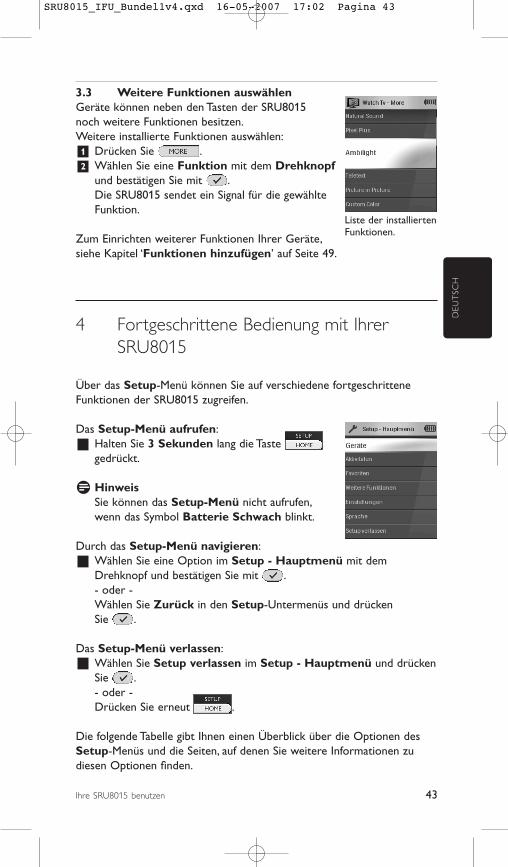
3.3 Weitere Funktionen auswählenGeräte können neben den Tasten der SRU8015 noch weitere Funktionen besitzen.Weitere installierte Funktionen auswählen:1 Drücken Sie .2 Wählen Sie eine Funktion mit dem Drehknopf
und bestätigen Sie mit .Die SRU8015 sendet ein Signal für die gewählte Funktion.
Zum Einrichten weiterer Funktionen Ihrer Geräte, siehe Kapitel ‘Funktionen hinzufügen’ auf Seite 49.
4 Fortgeschrittene Bedienung mit IhrerSRU8015
Über das Setup-Menü können Sie auf verschiedene fortgeschritteneFunktionen der SRU8015 zugreifen.
Das Setup-Menü aufrufen:Halten Sie 3 Sekunden lang die Taste gedrückt.
D HinweisSie können das Setup-Menü nicht aufrufen, wenn das Symbol Batterie Schwach blinkt.
Durch das Setup-Menü navigieren:Wählen Sie eine Option im Setup - Hauptmenü mit demDrehknopf und bestätigen Sie mit .- oder - Wählen Sie Zurück in den Setup-Untermenüs und drücken Sie .
Das Setup-Menü verlassen:Wählen Sie Setup verlassen im Setup - Hauptmenü und drücken Sie .- oder - Drücken Sie erneut .
Die folgende Tabelle gibt Ihnen einen Überblick über die Optionen desSetup-Menüs und die Seiten, auf denen Sie weitere Informationen zudiesen Optionen finden.
Liste der installiertenFunktionen.
SRU8015_IFU_Bundel1v4.qxd 16-05-2007 17:02 Pagina 43
44 Fortgeschrittene Bedienung mit Ihrer SRU8015
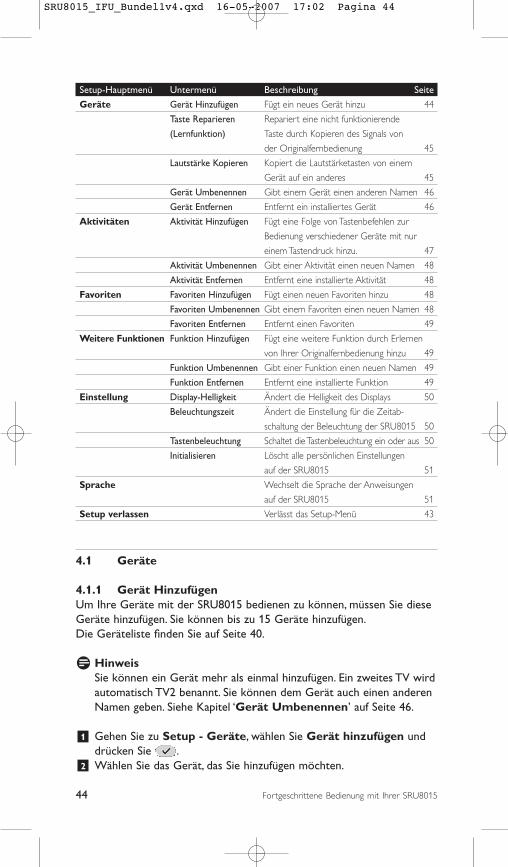
Setup-Hauptmenü Untermenü Beschreibung Seite
Geräte Gerät Hinzufügen Fügt ein neues Gerät hinzu 44
Taste Reparieren Repariert eine nicht funktionierende
(Lernfunktion) Taste durch Kopieren des Signals von
der Originalfernbedienung 45
Lautstärke Kopieren Kopiert die Lautstärketasten von einem
Gerät auf ein anderes 45
Gerät Umbenennen Gibt einem Gerät einen anderen Namen 46
Gerät Entfernen Entfernt ein installiertes Gerät 46
Aktivitäten Aktivität Hinzufügen Fügt eine Folge von Tastenbefehlen zur
Bedienung verschiedener Geräte mit nur
einem Tastendruck hinzu. 47
Aktivität Umbenennen Gibt einer Aktivität einen neuen Namen 48
Aktivität Entfernen Entfernt eine installierte Aktivität 48
Favoriten Favoriten Hinzufügen Fügt einen neuen Favoriten hinzu 48
Favoriten Umbenennen Gibt einem Favoriten einen neuen Namen 48
Favoriten Entfernen Entfernt einen Favoriten 49
Weitere Funktionen Funktion Hinzufügen Fügt eine weitere Funktion durch Erlernen
von Ihrer Originalfernbedienung hinzu 49
Funktion Umbenennen Gibt einer Funktion einen neuen Namen 49
Funktion Entfernen Entfernt eine installierte Funktion 49
Einstellung Display-Helligkeit Ändert die Helligkeit des Displays 50
Beleuchtungszeit Ändert die Einstellung für die Zeitab-
schaltung der Beleuchtung der SRU8015 50
Tastenbeleuchtung Schaltet die Tastenbeleuchtung ein oder aus 50
Initialisieren Löscht alle persönlichen Einstellungen
auf der SRU8015 51
Sprache Wechselt die Sprache der Anweisungen
auf der SRU8015 51
Setup verlassen Verlässt das Setup-Menü 43
4.1 Geräte
4.1.1 Gerät Hinzufügen Um Ihre Geräte mit der SRU8015 bedienen zu können, müssen Sie dieseGeräte hinzufügen. Sie können bis zu 15 Geräte hinzufügen. Die Geräteliste finden Sie auf Seite 40.
D HinweisSie können ein Gerät mehr als einmal hinzufügen. Ein zweites TV wirdautomatisch TV2 benannt. Sie können dem Gerät auch einen anderenNamen geben. Siehe Kapitel ‘Gerät Umbenennen’ auf Seite 46.
1 Gehen Sie zu Setup - Geräte, wählen Sie Gerät hinzufügen unddrücken Sie .
2 Wählen Sie das Gerät, das Sie hinzufügen möchten.
SRU8015_IFU_Bundel1v4.qxd 16-05-2007 17:02 Pagina 44
45Fortgeschrittene Bedienung mit Ihrer SRU8015
DEU
TSC
H
3 Folgen Sie den Anweisungen auf der SRU8015.Das ausgewählte Gerät wird installiert und der SRU8015 hinzugefügt.
Sie können das Gerät nun mit der SRU8015 bedienen:Drücken Sie , wählen Sie das Gerät mit dem Drehknopfaus und drücken Sie .
4.1.2 Taste reparieren (Lernfunktion)Wenn eine Taste oder eine weitere Funktion nicht richtig funktioniert,können Sie das Signal dieser Taste von der Originalfernbedienung auf dieSRU8015 kopieren.
B AchtungWenn Sie die Option ‘Taste reparieren’ benutzen, werden die fürdiese Taste gespeicherten Daten mit den neuen Daten überschrieben.
1 Gehen Sie zu Setup - Geräte, wählen Sie Taste reparieren unddrücken Sie .
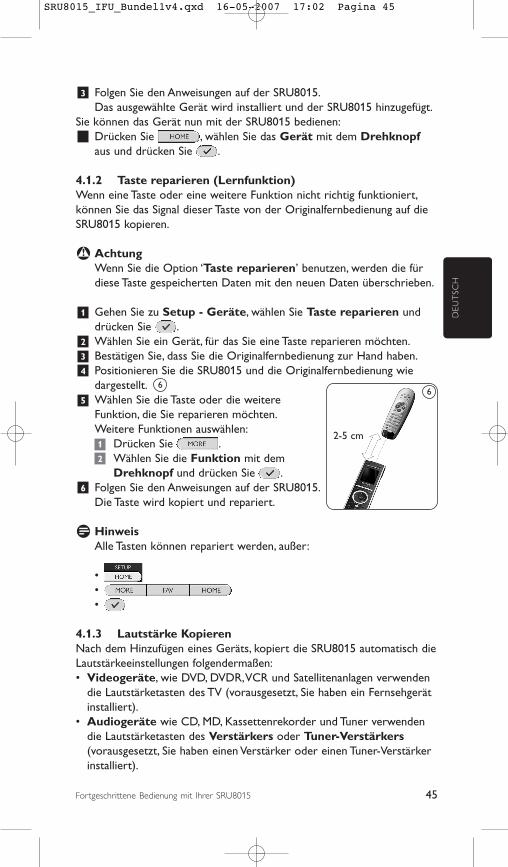
2 Wählen Sie ein Gerät, für das Sie eine Taste reparieren möchten.3 Bestätigen Sie, dass Sie die Originalfernbedienung zur Hand haben.4 Positionieren Sie die SRU8015 und die Originalfernbedienung wie
dargestellt. 5 Wählen Sie die Taste oder die weitere
Funktion, die Sie reparieren möchten.Weitere Funktionen auswählen:1 Drücken Sie . 2 Wählen Sie die Funktion mit dem
Drehknopf und drücken Sie . 6 Folgen Sie den Anweisungen auf der SRU8015.
Die Taste wird kopiert und repariert.
D HinweisAlle Tasten können repariert werden, außer:
•••
4.1.3 Lautstärke KopierenNach dem Hinzufügen eines Geräts, kopiert die SRU8015 automatisch dieLautstärkeeinstellungen folgendermaßen:• Videogeräte, wie DVD, DVDR, VCR und Satellitenanlagen verwenden
die Lautstärketasten des TV (vorausgesetzt, Sie haben ein Fernsehgerätinstalliert).
• Audiogeräte wie CD, MD, Kassettenrekorder und Tuner verwendendie Lautstärketasten des Verstärkers oder Tuner-Verstärkers(vorausgesetzt, Sie haben einen Verstärker oder einen Tuner-Verstärkerinstalliert).
66
2-5 cm
SRU8015_IFU_Bundel1v4.qxd 16-05-2007 17:02 Pagina 45
46 Fortgeschrittene Bedienung mit Ihrer SRU8015
Sie können bestimmen, welche Lautstärketasten verwendet werdensollen, z. B. wenn Sie die Lautstärketasten des Verstärkers für Ihren DVD-Player benutzen möchten.
D Hinweis• Die Funktion Lautstärke Kopieren überschreibt die
Voreinstellungen auf der SRU8015. • Frühere Lautstärkeeinstellungen, die Sie über Lautstärke
Kopieren oder Taste Reparieren gespeichert haben, gehenverloren.
• Die Lautstärkeeinstellungen werden automatisch gelöscht, wenn Siedas Quellgerät für die Lautstärke entfernen.
Lautstärkeeinstellungen kopieren:1 Gehen Sie zu Setup - Geräte, wählen Sie Lautstärke Kopieren
und drücken Sie .2 Wählen Sie das Gerät, von dem Sie die Lautstärketasten kopieren
möchten (z. B. TV oder Verstärker)3 Wählen Sie das Gerät, auf das Sie die Lautstärketasten kopieren
möchten (z. B. DVD oder SAT).4 Bestätigen Sie, dass Sie die Lautstärketasten von dem einen auf das
andere Gerät kopieren möchten.Die Lautstärketasten werden kopiert.
4.1.4 Gerät UmbenennenGerät umbenennen:1 Gehen Sie zu Setup - Geräte, wählen Sie Gerät Umbenennen
und drücken Sie .2 Geben Sie die neue Bezeichnung mit den alphanumerischen Tasten
ein.
D HinweisSie können Zeichen löschen, indem Sie die Taste Clear drücken undden Cursor nach links bewegen.
3 Bestätigen Sie den neuen Namen.Das Gerät wird umbenannt.
4.1.5 Gerät EntfernenGerät entfernen:1 Gehen Sie zu Setup - Geräte, wählen Sie Gerät Entfernen und
drücken Sie .2 Wählen Sie das Gerät, das Sie entfernen möchten.3 Bestätigen Sie, dass Sie das Gerät entfernen möchten.
Das Gerät wird entfernt.
SRU8015_IFU_Bundel1v4.qxd 16-05-2007 17:02 Pagina 46
47Fortgeschrittene Bedienung mit Ihrer SRU8015
DEU
TSC
H
D HinweisDie Tasten eines entfernten Geräts, die anderswo verwendet werden,z. B. in einer Aktivität oder die kopierten Lautstärketasten, werdenebenfalls gelöscht.Prüfen Sie Ihre installierten Aktivitäten und programmieren Sie siewenn nötig neu. Siehe Kapitel ‘Aktivität Hinzufügen’ auf Seite 47. Prüfen Sie die Lautstärketasten Ihrer Geräte und programmieren Siesie wenn nötig neu. Siehe Kapitel ‘Lautstärke Kopieren’ auf Seite 45.
4.2 Aktivitäten
4.2.1 Aktivität HinzufügenSie können Ihrer SRU8015 Aktivitäten hinzufügen. Eine Aktivität bestehtaus mehreren Tastenbefehlen, welche die SRU8015 mit nur einemTastendruck aussendet.Die SRU8015 fügt standardmäßig eine Zeitverzögerung von 600 mszwischen den einzelnen Tastenbefehlen ein, um sicherzustellen, dass IhreGeräte richtig auf die IR-Signale reagieren. Sie können dieseStandardeinstellung überschreiben.• Wenn eines Ihrer Geräte eine längere Zeitverzögerung benötigt,
bevor es das nächste IR-Signal empfangen kann, können Sie eineZeitverzögerung von 1, 3, 5 oder 15 Sekunden einfügen.
• Wenn eine Aktivität einen längeren Tastendruck benötigt, z. B. um dieLautstärke zu verändern, dann können Sie die Option Letzte TasteHalten wählen.
Eine Aktivität hinzufügen:1 Gehen Sie zu Setup - Aktivitäten, wählen Sie Aktivität
Hinzufügen und drücken Sie .2 Wählen Sie einen Namen für die Aktivität.
- oder - Wählen Sie Nicht in der Liste, um einen neuen Namen zu erstellen.
3 Folgen Sie den Anweisungen auf der SRU8015.• Wählen Sie ein Gerät mit dem Drehknopf, drücken Sie und
drücken Sie eine Taste, die Sie der Aktivität hinzufügen möchten.• Wählen Sie 1, 3, 5 oder 15 Sekunden Zeitverzögerung mit dem
Drehknopf und drücken Sie .- oder -Wählen Sie Letzte Taste Halten mit dem Drehknopf und drückenSie .
4 Wiederholen Sie Schritt 3, um eine weitere Aktivität zu erstellen.Die Aktivität wird der SRU8015 hinzugefügt.
Sie können die Aktivität nun mit der SRU8015 ausführen:Drücken Sie , wählen Sie die Aktivität mit dem Drehknopfund drücken Sie .
SRU8015_IFU_Bundel1v4.qxd 16-05-2007 17:02 Pagina 47
48 Fortgeschrittene Bedienung mit Ihrer SRU8015
4.2.2 Aktivität UmbenennenEine Aktivität umbenennen:1 Gehen Sie zu Setup - Aktivitäten, wählen Sie Aktivität
Umbenennen und drücken Sie .2 Geben Sie den Text für die neue Bezeichnung mit den
alphanumerischen Tasten ein.
D HinweisSie können Zeichen löschen, indem Sie die Taste Clear drücken undden Cursor nach links bewegen.
3 Bestätigen Sie den neuen Namen.Die Aktivität wird umbenannt.
4.2.3 Aktivität EntfernenEine Aktivität entfernen:1 Gehen Sie zu Setup - Aktivitäten, wählen Sie Aktivität Entfernen
und drücken Sie .2 Wählen Sie die Aktivität, die Sie entfernen möchten.3 Bestätigen Sie, dass Sie die Aktivität entfernen möchten.
Die Aktivität wird entfernt.
4.3 Favoriten
4.3.1 Favoriten HinzufügenEinen Favoriten hinzufügen:1 Gehen Sie zu Setup - Favoriten, wählen Sie Favoriten
Hinzufügen und drücken Sie .2 Wählen Sie den Kanal, den Sie als Favoriten hinzufügen möchten.3 Folgen Sie den Anweisungen auf der SRU8015.
Der ausgewählte Kanal wird installiert und der SRU8015 hinzugefügt.
Sie können nun mit der SRU8015 auf diesen Kanal umschalten:Drücken Sie , wählen Sie den Kanal mit dem Drehknopfund drücken Sie .
4.3.2 Favoriten UmbenennenEinen Favoriten umbenennen:1 Gehen Sie zu Setup - Favoriten, wählen Sie Favoriten
Umbenennen und drücken Sie .2 Geben Sie den Text für die neue Bezeichnung mit den
alphanumerischen Tasten ein.
D HinweisSie können Zeichen löschen, indem Sie die Taste Clear drücken undden Cursor nach links bewegen.
SRU8015_IFU_Bundel1v4.qxd 16-05-2007 17:02 Pagina 48
49Fortgeschrittene Bedienung mit Ihrer SRU8015
DEU
TSC
H
3 Bestätigen Sie den neuen Namen.Der Favorit wird umbenannt.
4.3.3 Favoriten EntfernenEinen Favoriten entfernen:1 Gehen Sie zu Setup - Favoriten, wählen Sie Favoriten Entfernen
und drücken Sie .2 Wählen Sie den Favoriten, den Sie entfernen möchten.3 Bestätigen Sie, dass Sie den Favoriten entfernen möchten.
Der Favorit wird entfernt.
4.4 Weitere Funktionen
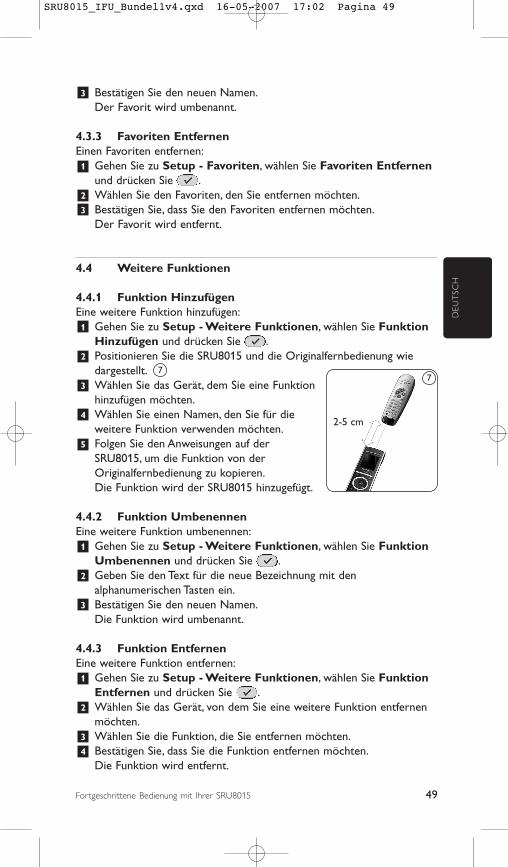
4.4.1 Funktion HinzufügenEine weitere Funktion hinzufügen:1 Gehen Sie zu Setup - Weitere Funktionen, wählen Sie Funktion
Hinzufügen und drücken Sie .2 Positionieren Sie die SRU8015 und die Originalfernbedienung wie
dargestellt. 3 Wählen Sie das Gerät, dem Sie eine Funktion
hinzufügen möchten.4 Wählen Sie einen Namen, den Sie für die
weitere Funktion verwenden möchten.5 Folgen Sie den Anweisungen auf der
SRU8015, um die Funktion von der Originalfernbedienung zu kopieren.Die Funktion wird der SRU8015 hinzugefügt.
4.4.2 Funktion Umbenennen Eine weitere Funktion umbenennen:1 Gehen Sie zu Setup - Weitere Funktionen, wählen Sie Funktion
Umbenennen und drücken Sie .2 Geben Sie den Text für die neue Bezeichnung mit den
alphanumerischen Tasten ein.3 Bestätigen Sie den neuen Namen.
Die Funktion wird umbenannt.
4.4.3 Funktion EntfernenEine weitere Funktion entfernen:1 Gehen Sie zu Setup - Weitere Funktionen, wählen Sie Funktion
Entfernen und drücken Sie .2 Wählen Sie das Gerät, von dem Sie eine weitere Funktion entfernen
möchten. 3 Wählen Sie die Funktion, die Sie entfernen möchten.4 Bestätigen Sie, dass Sie die Funktion entfernen möchten.
Die Funktion wird entfernt.
77
2-5 cm
SRU8015_IFU_Bundel1v4.qxd 16-05-2007 17:02 Pagina 49
50 Fortgeschrittene Bedienung mit Ihrer SRU8015
4.5 Systemeinstellungen
4.5.1 Display-HelligkeitDie Helligkeit Ihres Displays ändern:1 Gehen Sie zu Setup - Einstellungen, wählen Sie Display-
Helligkeit und drücken Sie .2 Stellen Sie die gewünschte Helligkeit mit dem Drehknopf ein:
20 %, 40 %, 60 %, 80 %, 100 %.
D HinweisBeim Drehen des Drehknopfes wird die eingestellte Helligkeitangezeigt.
3 Bestätigen Sie die neue Einstellung der Helligkeit.Die Helligkeit des Displays wird geändert.
4.5.2 BeleuchtungszeitWenn Sie die SRU8015 benutzen, schaltet sich die Beleuchtung ein. Nach 5 Sekunden schaltet sie sich wieder aus.Die Zeitabschaltung ändern:1 Gehen Sie zu Setup - Einstellungen, wählen Sie Beleuchtungszeit
und drücken Sie . 2 Wählen Sie die gewünschte Beleuchtungszeit mit dem Drehknopf:
3 Sekunden, 5 Sekunden, 10 Sekunden, 20 Sekunden.3 Bestätigen Sie die neue Einstellung der Zeitabschaltung.
Die Beleuchtungszeit wird geändert.
D HinweisDie Beleuchtungszeit beeinflusst die Lebensdauer der Batterien. Jelänger die Beleuchtung eingeschaltet ist, desto schneller werden dieBatterien entladen.
4.5.3 TastenbeleuchtungDie Tastenbeleuchtung ein- und ausschalten:1 Gehen Sie zu Setup - Einstellungen, wählen Sie
Tastenbeleuchtung und drücken Sie .2 Wählen Sie Ein oder Aus mit dem Drehknopf.3 Bestätigen Sie die neue Einstellung der Tastenbeleuchtung.
Die Tastenbeleuchtung wird ein- oder ausgeschaltet.
SRU8015_IFU_Bundel1v4.qxd 16-05-2007 17:02 Pagina 50
51Fortgeschrittene Bedienung mit Ihrer SRU8015
DEU
TSC
H
4.5.4 InitialisierenWenn Sie die SRU8015 initialisieren, werden alle Geräte, Aktivitäten,Favoriten und andere Einstellungen gelöscht. Nach der Initialisierung mussdie SRU8015 neu installiert werden.Die SRU8015 initialisieren:1 Gehen Sie zu Setup - Einstellungen, wählen Sie Initialisieren und
drücken Sie .2 Wählen Sie Ja mit dem Drehknopf und drücken Sie .3 Bestätigen Sie noch einmal mit .
Die SRU8015 löscht alle Einstellungen und startet denInstallationsassistenten. Dies kann bis zu einer Minute dauern.
4.6 Sprache Die Spracheinstellung der SRU8015 ändern:1 Gehen Sie zu Setup - Sprache und drücken Sie .2 Wählen Sie die gewünschte Sprache mit dem Drehknopf:
English, Français, Deutsch, Español, Italiano, Nederlands.3 Bestätigen Sie die neue Spracheinstellung.
Die im Setup - Hauptmenü verwendete Spracheinstellung wirdgeändert.
SRU8015_IFU_Bundel1v4.qxd 16-05-2007 17:02 Pagina 51
52 Häufige Fragen (FAQ)
5 Häufige Fragen (FAQ)
Tasten
Warum funktionieren eine oder mehrere Tasten an meinemGerät nicht?Nicht alle Funktionen sind in der Datenbank der SRU8015 verfügbar oderder Tastencode ist defekt.Sie können eine Taste reparieren, indem Sie das Signal von derOriginalfernbedienung lernen. Siehe Kapitel ‘Taste reparieren’ auf Seite 45.
Wie kann ich eine weitere Funktion zur SRU8015 hinzufügen?Siehe Kapitel ‘Funktion Hinzufügen’ auf Seite 49.
Marke
Warum kann ich die Marke meines Geräts nicht in der SRU8015finden?Es sind nicht alle Marken in der Datenbank der SRU8015 enthalten. Wenn Ihre Marke nicht in der Liste ist:• Sie können die Tasten von der Originalfernbedienung kopieren.
Siehe Kapitel ‘Taste reparieren’ auf Seite 45.- oder -
• Sie können Nicht in der Liste wählen und eine Datenbanksuchedurchführen.
Die SRU8015 prüft dann alle verfügbaren Codes. Dies kann bis zu 25 Minuten dauern.
Lautstärke
Warum funktionieren die Lautstärketasten nicht richtig?Nach dem Hinzufügen eines Geräts kopiert die SRU8015 automatisch dieLautstärketasten und die Stummschalttaste folgendermaßen:• Videogeräte wie DVD, DVD-R, VCR und Satellitenanlage verwenden
die Lautstärketasten des TV.• Audiogeräte wie CD, DMR und Tuner verwenden die
Lautstärketasten des Verstärkers oder Tuner-Verstärkers.
SRU8015_IFU_Bundel1v4.qxd 16-05-2007 17:02 Pagina 52
53Häufige Fragen (FAQ)
DEU
TSC
H
Wenn Sie die Quellgeräte (TV, Verstärker oder Tuner-Verstärker) nichtinstalliert haben, funktionieren die Lautstärketasten und dieStummschalttaste nicht. Die Lautstärketasten definieren:• Sie können das Quellgerät auf der SRU8015 installieren. Siehe Kapitel
‘Gerät Hinzufügen’ auf Seite 44.- oder -
• Sie können die Lautstärketasten eines anderen Quellgeräts kopieren.Siehe Kapitel ‘Lautstärke Kopieren’ auf Seite 45.
Batterien
Warum kann ich das Setup-Menü nicht aufrufen?Wenn die Batterien zu schwach sind, können Sie das Setup-Menü nichtaufrufen. Ersetzen Sie die Batterien mit neuen Alkalibatterien.
Warum schaltet sich die SRU8015 nicht mehr ein?Die Batterien sind zu schwach. Ersetzen Sie die Batterien mit neuenAlkalibatterien.
Gehen meine Daten verloren, wenn ich die Batterienaustausche?Nein. Ihre Daten sind gesichert.
Kann ich wiederaufladbare Batterien in der SRU8015 benutzen?Ja, das können Sie. Denken Sie jedoch daran, dass wiederaufladbareBatterien sich oft schneller entladen als Alkalibatterien.
SRU8015_IFU_Bundel1v4.qxd 16-05-2007 17:02 Pagina 53
54 Brauchen Sie Hilfe?
6 Brauchen Sie Hilfe?
Lesen Sie bitte diese Bedienungsanleitung sorgfältig durch.
Wenn Sie weitere Fragen zur Bedienung oder Einrichtung der SRU8015haben, gehen Sie bitte zu www.philips.com/URC.
Kontaktdetails finden Sie unter www.philips.com/support.
Informationen zur Garantie finden Sie unter www.philips.com/guarantee.
Wenn Sie unsere Hotline anrufen, halten Sie das Gerät bereit. So könnenIhnen unsere Servicemitarbeiter dabei helfen, zu entscheiden, ob dieFernbedienung korrekt funktioniert.
Die Modellnummer der Philips Universalfernbedienung ist SRU8015.
Kaufdatum: . . . . . . /. . . . . . /. . . . . . (Tag/Monat/Jahr)
SRU8015_IFU_Bundel1v4.qxd 16-05-2007 17:02 Pagina 54
55Índice
ESPA
ÑO
L
Índice
1 Acerca de su Philips Prestigo SRU8015 561.1 Contenido del paquete 561.2 Descripción general del SRU8015 561.3 Descripción general del menú principal 57
2 Primeros pasos 572.1 Preparación del equipo 572.2 Instalación 58
3 Uso del SRU8015 593.1 Selección de un dispositivo o de una actividad 603.2 Selección de un favorito 603.3 Selección de funciones adicionales 61
4 Cómo sacarle el máximo partido a su SRU8015 614.1 Dispositivos 624.2 Actividades 654.3 Favoritos 664.4 Funciones adicionales 674.5 Configuración del sistema 684.6 Idioma 69
5 Preguntas frecuentes 70
6 ¿Necesita ayuda? 72
Only for US - FCC Compliancy 106
Only for Europe - WEEE Regulation 108
SRU8015_IFU_Bundel1v4.qxd 16-05-2007 17:02 Pagina 55
56 Acerca de su Philips Prestigo SRU8015
1 Acerca de su Philips Prestigo SRU8015
Bienvenido a la creciente familia de propietarios de productos de Philips.El mando a distancia universal Philips Prestigo SRU8015 ha sido diseñadopara permitirle controlar sus equipos. Podrá instalar hasta 15 dispositivos,definir 100 canales favoritos con sus iconos y hasta 15 actividades.
Seleccione un dispositivo y seleccione una función del dispositivomediante las teclas del SRU8015. Seleccione una actividad y automáticamente se iniciará una secuencia depulsaciones de teclas, por ejemplo, para comenzar a ver un DVD o areproducir un CD. Seleccione un favorito para cambiar inmediatamente a su canal favorito.
1.1 Contenido del paquete• El SRU8015• Guía de inicio rápido• Instrucciones de uso en distintos idiomas• Pilas alcalinas de la marca Philips
Philips recomienda usar pilas alcalinas de la marca Philips.
1.2 Descripción general del SRU8015La imagen en la página 2 le ofrece una descripción general del SRU8015.Para preparar el SRU8015 para su uso, ‘Primeros pasos’ en la página 57.
Teclas negras para transmitir señales a sus equiposA Power key (Tecla de Encendido/Power)B Transport keys (Teclas de Transporte)C Alphanumeric keys (Teclas Alfanuméricas)D * – . / Clear key (Tecla * – . / Borrar/Clear)E AV key (Tecla AV)F Enter key (Tecla Enter)
Teclas plateadas para controlar el SRU80151 More key (Tecla Más/More)2 Favorites key (Tecla Favoritos)3 Home / Setup key (Tecla Inicio/Home / Tecla de Configuración/Setup)4 Rotary wheel (Rueda Giratoria)5 Check Mark key (Tecla Marca de Comprobación)
SRU8015_IFU_Bundel1v4.qxd 16-05-2007 17:02 Pagina 56
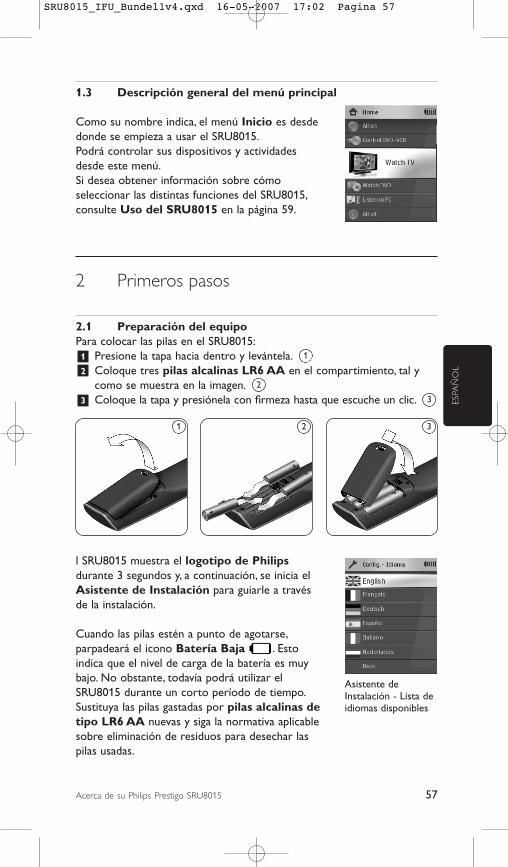
57Acerca de su Philips Prestigo SRU8015
ESPA
ÑO
L
1.3 Descripción general del menú principal
Como su nombre indica, el menú Inicio es desde donde se empieza a usar el SRU8015. Podrá controlar sus dispositivos y actividadesdesde este menú.Si desea obtener información sobre cómoseleccionar las distintas funciones del SRU8015,consulte Uso del SRU8015 en la página 59.
2 Primeros pasos
2.1 Preparación del equipoPara colocar las pilas en el SRU8015:1 Presione la tapa hacia dentro y levántela. 2 Coloque tres pilas alcalinas LR6 AA en el compartimiento, tal y
como se muestra en la imagen. 3 Coloque la tapa y presiónela con firmeza hasta que escuche un clic.
l SRU8015 muestra el logotipo de Philipsdurante 3 segundos y, a continuación, se inicia elAsistente de Instalación para guiarle a travésde la instalación.
Cuando las pilas estén a punto de agotarse,parpadeará el icono Batería Baja . Estoindica que el nivel de carga de la batería es muybajo. No obstante, todavía podrá utilizar elSRU8015 durante un corto período de tiempo. Sustituya las pilas gastadas por pilas alcalinas detipo LR6 AA nuevas y siga la normativa aplicablesobre eliminación de residuos para desechar laspilas usadas.
3
2
1
1 2 3
Asistente deInstalación - Lista deidiomas disponibles
SRU8015_IFU_Bundel1v4.qxd 16-05-2007 17:02 Pagina 57
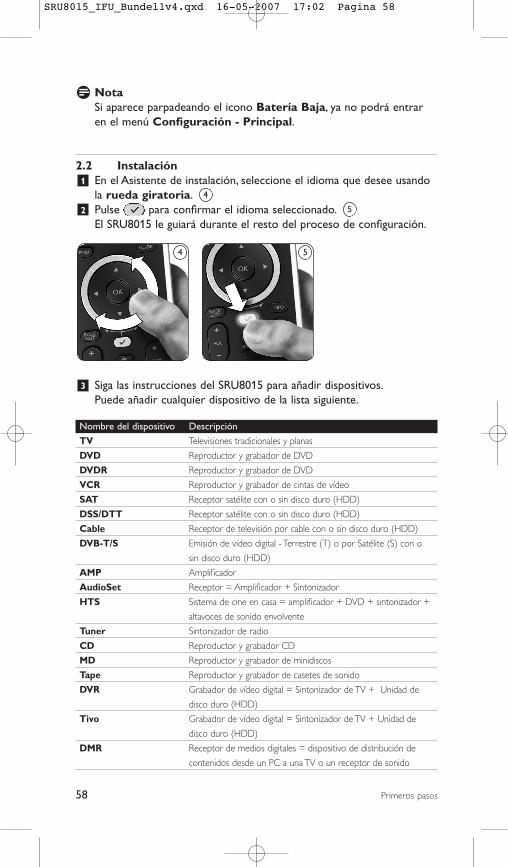
58 Primeros pasos
D NotaSi aparece parpadeando el icono Batería Baja, ya no podrá entraren el menú Configuración - Principal.
2.2 Instalación1 En el Asistente de instalación, seleccione el idioma que desee usando
la rueda giratoria. 2 Pulse para confirmar el idioma seleccionado.
El SRU8015 le guiará durante el resto del proceso de configuración.
3 Siga las instrucciones del SRU8015 para añadir dispositivos.Puede añadir cualquier dispositivo de la lista siguiente.
Nombre del dispositivo Descripción
TV Televisiones tradicionales y planas
DVD Reproductor y grabador de DVD
DVDR Reproductor y grabador de DVD
VCR Reproductor y grabador de cintas de vídeo
SAT Receptor satélite con o sin disco duro (HDD)
DSS/DTT Receptor satélite con o sin disco duro (HDD)
Cable Receptor de televisión por cable con o sin disco duro (HDD)
DVB-T/S Emisión de vídeo digital - Terrestre (T) o por Satélite (S) con o
sin disco duro (HDD)
AMP Amplificador
AudioSet Receptor = Amplificador + Sintonizador
HTS Sistema de cine en casa = amplificador + DVD + sintonizador +
altavoces de sonido envolvente
Tuner Sintonizador de radio
CD Reproductor y grabador CD
MD Reproductor y grabador de minidiscos
Tape Reproductor y grabador de casetes de sonido
DVR Grabador de vídeo digital = Sintonizador de TV + Unidad de
disco duro (HDD)
Tivo Grabador de vídeo digital = Sintonizador de TV + Unidad de
disco duro (HDD)
DMR Receptor de medios digitales = dispositivo de distribución de
contenidos desde un PC a una TV o un receptor de sonido
5
4
4 5
SRU8015_IFU_Bundel1v4.qxd 16-05-2007 17:02 Pagina 58
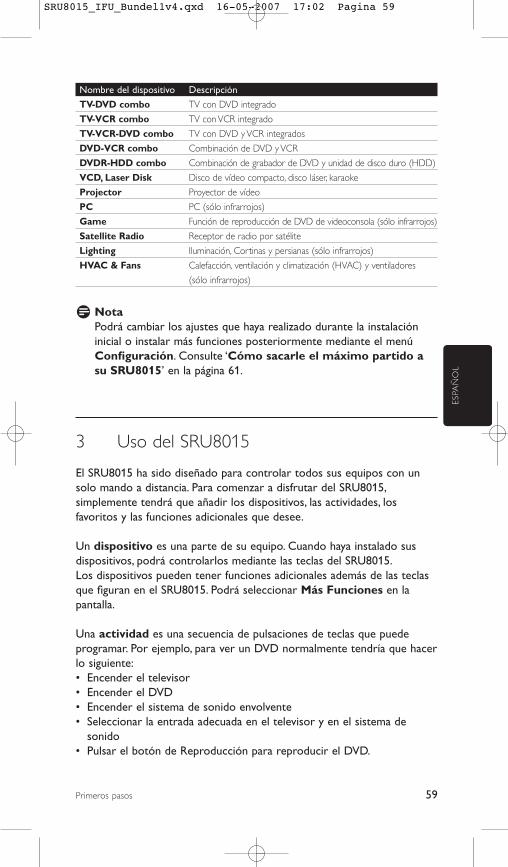
59Primeros pasos
ESPA
ÑO
L
Nombre del dispositivo Descripción
TV-DVD combo TV con DVD integrado
TV-VCR combo TV con VCR integrado
TV-VCR-DVD combo TV con DVD y VCR integrados
DVD-VCR combo Combinación de DVD y VCR
DVDR-HDD combo Combinación de grabador de DVD y unidad de disco duro (HDD)
VCD, Laser Disk Disco de vídeo compacto, disco láser, karaoke
Projector Proyector de vídeo
PC PC (sólo infrarrojos)
Game Función de reproducción de DVD de videoconsola (sólo infrarrojos)
Satellite Radio Receptor de radio por satélite
Lighting Iluminación, Cortinas y persianas (sólo infrarrojos)
HVAC & Fans Calefacción, ventilación y climatización (HVAC) y ventiladores
(sólo infrarrojos)
D NotaPodrá cambiar los ajustes que haya realizado durante la instalacióninicial o instalar más funciones posteriormente mediante el menúConfiguración. Consulte ‘Cómo sacarle el máximo partido asu SRU8015’ en la página 61.
3 Uso del SRU8015
El SRU8015 ha sido diseñado para controlar todos sus equipos con unsolo mando a distancia. Para comenzar a disfrutar del SRU8015,simplemente tendrá que añadir los dispositivos, las actividades, losfavoritos y las funciones adicionales que desee.
Un dispositivo es una parte de su equipo. Cuando haya instalado susdispositivos, podrá controlarlos mediante las teclas del SRU8015.Los dispositivos pueden tener funciones adicionales además de las teclasque figuran en el SRU8015. Podrá seleccionar Más Funciones en lapantalla.
Una actividad es una secuencia de pulsaciones de teclas que puedeprogramar. Por ejemplo, para ver un DVD normalmente tendría que hacerlo siguiente:• Encender el televisor• Encender el DVD• Encender el sistema de sonido envolvente• Seleccionar la entrada adecuada en el televisor y en el sistema de
sonido• Pulsar el botón de Reproducción para reproducir el DVD.
SRU8015_IFU_Bundel1v4.qxd 16-05-2007 17:02 Pagina 59
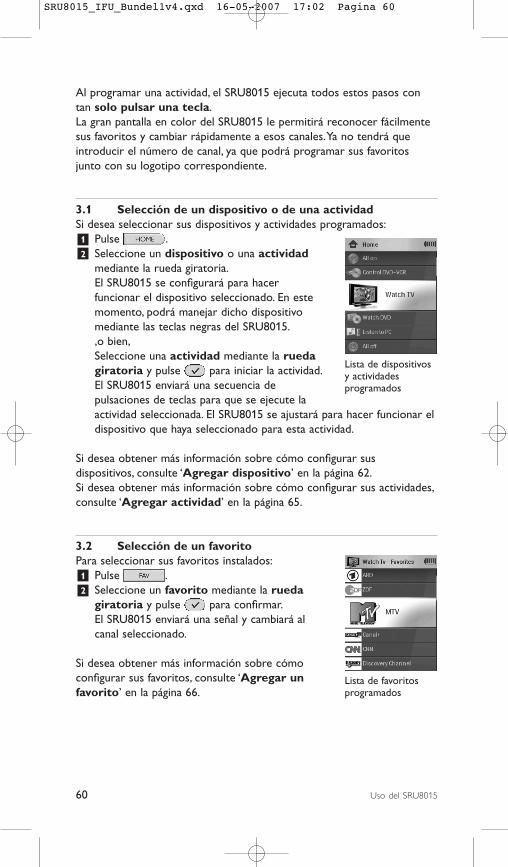
60 Uso del SRU8015
Al programar una actividad, el SRU8015 ejecuta todos estos pasos contan solo pulsar una tecla.La gran pantalla en color del SRU8015 le permitirá reconocer fácilmentesus favoritos y cambiar rápidamente a esos canales. Ya no tendrá queintroducir el número de canal, ya que podrá programar sus favoritosjunto con su logotipo correspondiente.
3.1 Selección de un dispositivo o de una actividadSi desea seleccionar sus dispositivos y actividades programados:1 Pulse .2 Seleccione un dispositivo o una actividad
mediante la rueda giratoria.El SRU8015 se configurará para hacer funcionar el dispositivo seleccionado. En este momento, podrá manejar dicho dispositivo mediante las teclas negras del SRU8015.,o bien,Seleccione una actividad mediante la rueda giratoria y pulse para iniciar la actividad.El SRU8015 enviará una secuencia de pulsaciones de teclas para que se ejecute la actividad seleccionada. El SRU8015 se ajustará para hacer funcionar eldispositivo que haya seleccionado para esta actividad.
Si desea obtener más información sobre cómo configurar susdispositivos, consulte ‘Agregar dispositivo’ en la página 62. Si desea obtener más información sobre cómo configurar sus actividades,consulte ‘Agregar actividad’ en la página 65.
3.2 Selección de un favoritoPara seleccionar sus favoritos instalados:1 Pulse .2 Seleccione un favorito mediante la rueda
giratoria y pulse para confirmar.El SRU8015 enviará una señal y cambiará al canal seleccionado.
Si desea obtener más información sobre cómo configurar sus favoritos, consulte ‘Agregar un favorito’ en la página 66.
Lista de favoritosprogramados
Lista de dispositivosy actividadesprogramados
SRU8015_IFU_Bundel1v4.qxd 16-05-2007 17:02 Pagina 60
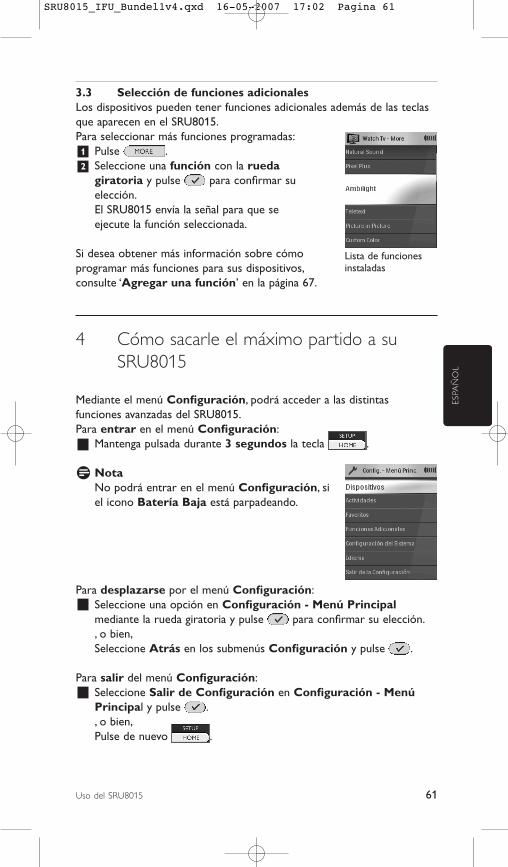
61Uso del SRU8015
ESPA
ÑO
L
3.3 Selección de funciones adicionalesLos dispositivos pueden tener funciones adicionales además de las teclasque aparecen en el SRU8015.Para seleccionar más funciones programadas:1 Pulse .2 Seleccione una función con la rueda
giratoria y pulse para confirmar su elección.El SRU8015 envía la señal para que se ejecute la función seleccionada.
Si desea obtener más información sobre cómo programar más funciones para sus dispositivos, consulte ‘Agregar una función’ en la página 67.
4 Cómo sacarle el máximo partido a suSRU8015
Mediante el menú Configuración, podrá acceder a las distintasfunciones avanzadas del SRU8015.Para entrar en el menú Configuración:
Mantenga pulsada durante 3 segundos la tecla .
D NotaNo podrá entrar en el menú Configuración, si el icono Batería Baja está parpadeando.
Para desplazarse por el menú Configuración:Seleccione una opción en Configuración - Menú Principalmediante la rueda giratoria y pulse para confirmar su elección., o bien,Seleccione Atrás en los submenús Configuración y pulse .
Para salir del menú Configuración:Seleccione Salir de Configuración en Configuración - MenúPrincipal y pulse ., o bien,Pulse de nuevo .
Lista de funcionesinstaladas
SRU8015_IFU_Bundel1v4.qxd 16-05-2007 17:02 Pagina 61
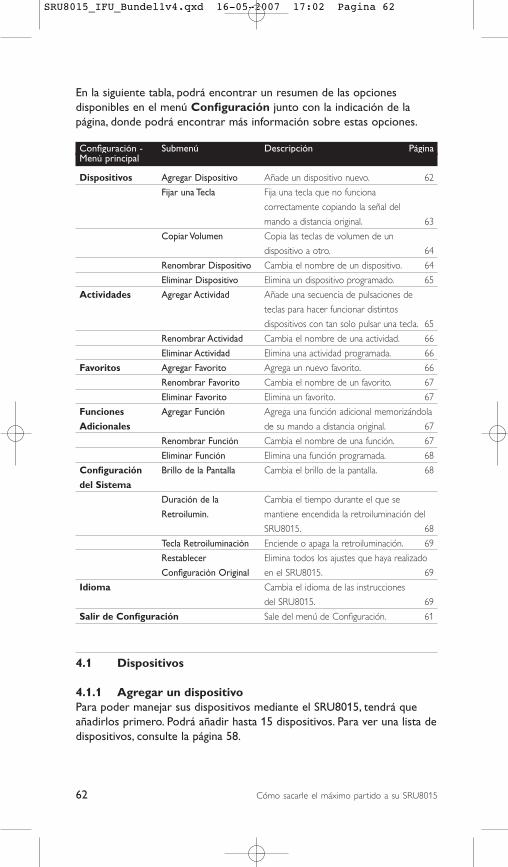
62 Cómo sacarle el máximo partido a su SRU8015
En la siguiente tabla, podrá encontrar un resumen de las opcionesdisponibles en el menú Configuración junto con la indicación de lapágina, donde podrá encontrar más información sobre estas opciones.
Configuración - Submenú Descripción PáginaMenú principal
Dispositivos Agregar Dispositivo Añade un dispositivo nuevo. 62
Fijar una Tecla Fija una tecla que no funciona
correctamente copiando la señal del
mando a distancia original. 63
Copiar Volumen Copia las teclas de volumen de un
dispositivo a otro. 64
Renombrar Dispositivo Cambia el nombre de un dispositivo. 64
Eliminar Dispositivo Elimina un dispositivo programado. 65
Actividades Agregar Actividad Añade una secuencia de pulsaciones de
teclas para hacer funcionar distintos
dispositivos con tan solo pulsar una tecla. 65
Renombrar Actividad Cambia el nombre de una actividad. 66
Eliminar Actividad Elimina una actividad programada. 66
Favoritos Agregar Favorito Agrega un nuevo favorito. 66
Renombrar Favorito Cambia el nombre de un favorito. 67
Eliminar Favorito Elimina un favorito. 67
Funciones Agregar Función Agrega una función adicional memorizándola
Adicionales de su mando a distancia original. 67
Renombrar Función Cambia el nombre de una función. 67
Eliminar Función Elimina una función programada. 68
Configuración Brillo de la Pantalla Cambia el brillo de la pantalla. 68
del Sistema
Duración de la Cambia el tiempo durante el que se
Retroilumin. mantiene encendida la retroiluminación del
SRU8015. 68
Tecla Retroiluminación Enciende o apaga la retroiluminación. 69
Restablecer Elimina todos los ajustes que haya realizado
Configuración Original en el SRU8015. 69
Idioma Cambia el idioma de las instrucciones
del SRU8015. 69
Salir de Configuración Sale del menú de Configuración. 61
4.1 Dispositivos
4.1.1 Agregar un dispositivoPara poder manejar sus dispositivos mediante el SRU8015, tendrá queañadirlos primero. Podrá añadir hasta 15 dispositivos. Para ver una lista dedispositivos, consulte la página 58.
SRU8015_IFU_Bundel1v4.qxd 16-05-2007 17:02 Pagina 62
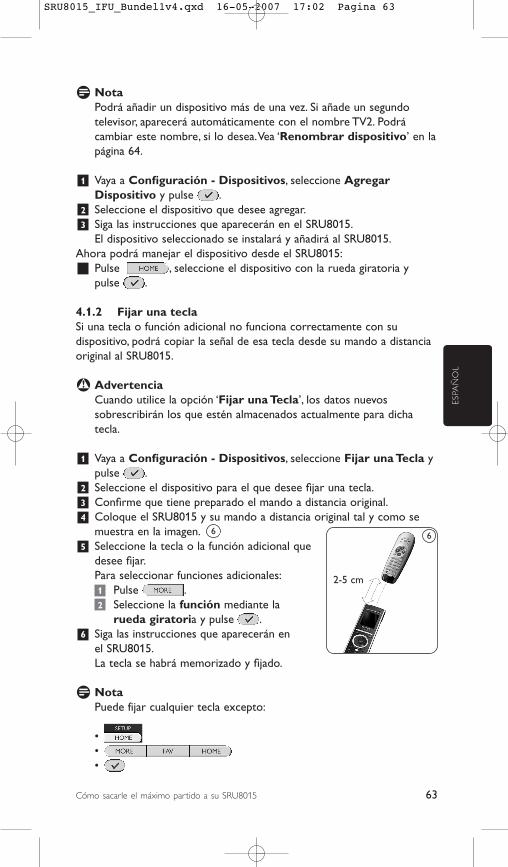
63Cómo sacarle el máximo partido a su SRU8015
ESPA
ÑO
L
D NotaPodrá añadir un dispositivo más de una vez. Si añade un segundotelevisor, aparecerá automáticamente con el nombre TV2. Podrácambiar este nombre, si lo desea. Vea ‘Renombrar dispositivo’ en lapágina 64.
1 Vaya a Configuración - Dispositivos, seleccione AgregarDispositivo y pulse .
2 Seleccione el dispositivo que desee agregar.3 Siga las instrucciones que aparecerán en el SRU8015.
El dispositivo seleccionado se instalará y añadirá al SRU8015.Ahora podrá manejar el dispositivo desde el SRU8015:
Pulse , seleccione el dispositivo con la rueda giratoria y pulse .
4.1.2 Fijar una teclaSi una tecla o función adicional no funciona correctamente con sudispositivo, podrá copiar la señal de esa tecla desde su mando a distanciaoriginal al SRU8015.
B AdvertenciaCuando utilice la opción ‘Fijar una Tecla’, los datos nuevossobrescribirán los que estén almacenados actualmente para dichatecla.
1 Vaya a Configuración - Dispositivos, seleccione Fijar una Tecla ypulse .
2 Seleccione el dispositivo para el que desee fijar una tecla.3 Confirme que tiene preparado el mando a distancia original.4 Coloque el SRU8015 y su mando a distancia original tal y como se
muestra en la imagen. 5 Seleccione la tecla o la función adicional que
desee fijar.Para seleccionar funciones adicionales:1 Pulse .2 Seleccione la función mediante la
rueda giratoria y pulse .6 Siga las instrucciones que aparecerán en
el SRU8015.La tecla se habrá memorizado y fijado.
D NotaPuede fijar cualquier tecla excepto:
•••
6 6
2-5 cm
SRU8015_IFU_Bundel1v4.qxd 16-05-2007 17:02 Pagina 63
64 Cómo sacarle el máximo partido a su SRU8015
4.1.3 Copiar el volumenUna vez que haya añadido dispositivos, el SRU8015 copiaráautomáticamente los ajustes de volumen de la siguiente manera:• Para los dispositivos de vídeo como DVD, DVD-R, VCR y
sintonizadores de satélite, utilice las teclas de volumen del televisor(siempre y cuando haya instalado uno).
• Para los dispositivos de audio como CD, MD, casetes y radios, utilicelas teclas de volumen del Amplificador o del Receptor (siempre ycuando haya instalado un amplificador o un receptor).
Podrá definir las teclas de volumen que desee utilizar, por ejemplo, sidesea utilizar las teclas de volumen del amplificador para el DVD.
D Notas• La función Copiar Volumen sobrescribe los ajustes de volumen
predeterminados del SRU8015. • Los ajustes de volumen que haya definido previamente mediante las
funciones Copiar Volumen o Fijar una Tecla se perderán.• Los ajustes de volumen se borrarán automáticamente, cuando
elimine el dispositivo de origen de este ajuste.
Para copiar los ajustes de volumen:1 Vaya a Configuración - Dispositivos, seleccione Copiar Volumen
y pulse .2 Seleccione el dispositivo desde el que desee copiar las teclas de
volumen (por ejemplo, un TV o amplificador).3 Seleccione el dispositivo al que desee copiar las teclas de volumen
(por ejemplo, un DVD o un sintonizador de satélite).4 Confirme que desea copiar las teclas de volumen de un dispositivo a
otro.Se copiarán las teclas de volumen.
4.1.4 Renombrar un dispositivoPara renombrar un dispositivo:1 Vaya a Configuración - Dispositivos, seleccione Renombrar
Dispositivo y pulse .2 Introduzca la nueva etiqueta mediante las teclas alfanuméricas.
D NotaPodrá borrar caracteres mediante la tecla Clear o con el cursorizquierdo.
3 Confirme la nueva etiqueta.Con ello se habrá cambiado el nombre del dispositivo.
SRU8015_IFU_Bundel1v4.qxd 16-05-2007 17:02 Pagina 64
65Cómo sacarle el máximo partido a su SRU8015
ESPA
ÑO
L
4.1.5 Eliminar un dispositivoPara eliminar un dispositivo:1 Vaya a Configuración - Dispositivos, seleccione Eliminar
Dispositivo y pulse .2 Seleccione el dispositivo que desee eliminar.3 Confirme que desea eliminar el dispositivo.
Se eliminará el dispositivo.
D NotaLas teclas del dispositivo eliminado que se utilicen en otro lugar, porejemplo, en una actividad, o las teclas de volumen copiadas, tambiénse eliminarán.Compruebe las actividades que tenía programadas y vuelva a progra -marlas, si es necesario. Vea ‘Agregar una actividad’ en la página 65. Compruebe las teclas de volumen de sus dispositivos y vuelva aprogramarlas, si es necesario. Vea ‘Copiar el volumen’ en la página 64.
4.2 Actividades
4.2.1 Agregar una actividadPodrá programar actividades nuevas en el SRU8015. Una actividadconsiste en una función que requiere varias pulsaciones de teclas y que elSRU8015 ejecuta con tan solo pulsar una tecla.Por defecto, el SRU8015 introduce una demora de 600 ms entre cadapulsación para asegurarse de que sus dispositivos respondancorrectamente a las señales transmitidas por IR. Podrá sobrescribir estademora predefinida.• En caso de que uno de sus dispositivos necesite una demora mayor
antes de recibir la siguiente señal por IR, podrá introducir una demorade 1, 3, 5 ó 15 segundos.
• Si una actividad requiere pulsaciones largas, por ejemplo, para subir elvolumen, podrá seleccionar la opción Mantener la Ultima Tecla.
Para agregar una actividad:1 Vaya a Configurar - Actividades, seleccione Agregar una
Actividad y pulse .2 Seleccione la etiqueta que desee utilizar para la actividad.
, o bien,Seleccione Otros para crear una etiqueta nueva.
3 Siga las instrucciones que aparecerán en el SRU8015.• Seleccione un dispositivo mediante la rueda giratoria, pulse
y pulse una tecla para añadirla a la actividad.• Seleccione una demora de 1, 3, 5 ó 15 segundos con la rueda
giratoria y pulse ., o bien,
SRU8015_IFU_Bundel1v4.qxd 16-05-2007 17:02 Pagina 65
66 Cómo sacarle el máximo partido a su SRU8015
Seleccione Mantener la Ultima Tecla con la rueda giratoria y pulse .
4 Repita el tercer paso, si desea crear otra actividad.Se añadirá la actividad al SRU8015.
Desde este momento, podrá ejecutar la actividad desde el SRU8015:Pulse , seleccione la actividad con la rueda giratoria y pulse .
4.2.2 Renombrar una actividadPara renombrar una actividad:1 Vaya a Configuración - Actividades, seleccione Renombrar
Actividad y pulse .2 Introduzca el texto para la nueva etiqueta mediante las teclas
alfanuméricas.
D NotaPodrá eliminar caracteres mediante la tecla Clear y el cursorizquierdo.
3 Confirme la nueva etiqueta.Se cambiará el nombre de la actividad.
4.2.3 Eliminar una actividadPara eliminar una actividad:1 Vaya a Configuración - Actividades, seleccione Eliminar
Actividad y pulse .2 Seleccione la actividad que desee eliminar.3 Confirme que desea eliminar la actividad.
Se eliminará la actividad.
4.3 Favoritos
4.3.1 Agregar un favoritoPara agregar un canal favorito:1 Vaya a Configuración - Favoritos, seleccione Agregar Favorito y
pulse .2 Seleccione el canal favorito que desee agregar.3 Siga las instrucciones que aparecerán en el SRU8015.
El canal seleccionado se instalará y se añadirá al SRU8015.
Ahora podrá cambiar a sus canales favoritos desde el SRU8015:Pulse , seleccione el canal favorito mediante la ruedagiratoria y pulse .
SRU8015_IFU_Bundel1v4.qxd 16-05-2007 17:02 Pagina 66
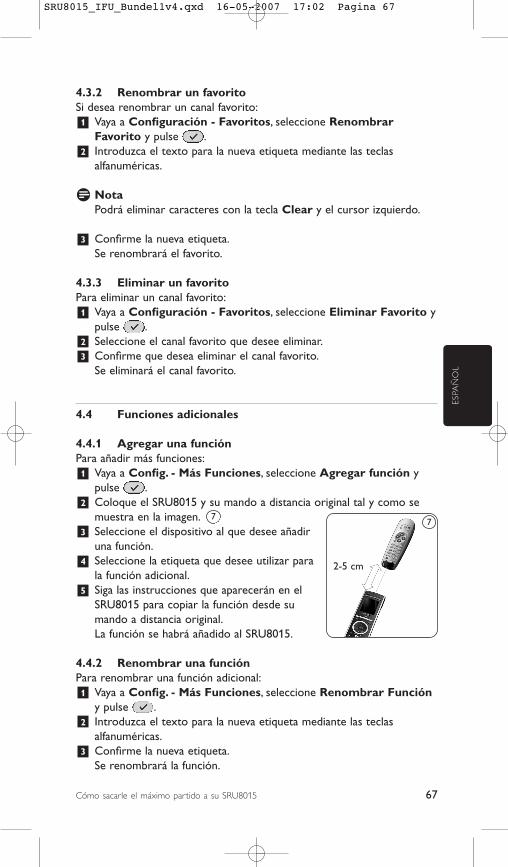
67Cómo sacarle el máximo partido a su SRU8015
ESPA
ÑO
L
4.3.2 Renombrar un favoritoSi desea renombrar un canal favorito:1 Vaya a Configuración - Favoritos, seleccione Renombrar
Favorito y pulse .2 Introduzca el texto para la nueva etiqueta mediante las teclas
alfanuméricas.
D NotaPodrá eliminar caracteres con la tecla Clear y el cursor izquierdo.
3 Confirme la nueva etiqueta.Se renombrará el favorito.
4.3.3 Eliminar un favoritoPara eliminar un canal favorito:1 Vaya a Configuración - Favoritos, seleccione Eliminar Favorito y
pulse .2 Seleccione el canal favorito que desee eliminar.3 Confirme que desea eliminar el canal favorito.
Se eliminará el canal favorito.
4.4 Funciones adicionales
4.4.1 Agregar una funciónPara añadir más funciones:1 Vaya a Config. - Más Funciones, seleccione Agregar función y
pulse .2 Coloque el SRU8015 y su mando a distancia original tal y como se
muestra en la imagen. 3 Seleccione el dispositivo al que desee añadir
una función.4 Seleccione la etiqueta que desee utilizar para
la función adicional.5 Siga las instrucciones que aparecerán en el
SRU8015 para copiar la función desde su mando a distancia original.La función se habrá añadido al SRU8015.
4.4.2 Renombrar una funciónPara renombrar una función adicional:1 Vaya a Config. - Más Funciones, seleccione Renombrar Función
y pulse .2 Introduzca el texto para la nueva etiqueta mediante las teclas
alfanuméricas.3 Confirme la nueva etiqueta.
Se renombrará la función.
77
2-5 cm
SRU8015_IFU_Bundel1v4.qxd 16-05-2007 17:02 Pagina 67
68 Cómo sacarle el máximo partido a su SRU8015
4.4.3 Eliminar una funciónPara eliminar una función adicional:1 Vaya a Config. - Más Funciones, seleccione Eliminar Función y
pulse .2 Seleccione el dispositivo del que desee eliminar una función.3 Seleccione la función que desee eliminar.4 Confirme que desea eliminar la función.
Se eliminará la función.
4.5 Configuración del sistema
4.5.1 Brillo de la pantallaPara cambiar el brillo de su pantalla:1 Vaya a Config. - Config. del Sist., seleccione Brillo de la Pantalla
y pulse .2 Seleccione el brillo que desee mediante la rueda giratoria:
20 %, 40 %, 60 %, 80 %, 100 %.
D NotaSegún vaya girando la rueda, irá obteniendo una vista previa del brilloseleccionado.
3 Confirme el nuevo ajuste del brillo.Se cambiará el brillo de la pantalla.
4.5.2 Duración de la retroiluminaciónCada vez que utilice el SRU8015, se encenderá la retroiluminación. Al cabo de cinco segundos se volverá a apagar.Para cambiar este ajuste de tiempo:1 Vaya a Config. - Config. del Sist., seleccione Duración de la
Retroilumin. y pulse .2 Seleccione el tiempo de duración de la retroiluminación que desee
con la rueda giratoria:3 segundos, 5 segundos, 10 segundos, 20 segundos.
3 Confirme el nuevo ajuste de duración.Se cambiará la duración de la retroiluminación.
D NotaLa duración de la retroiluminación influye sobre la vida útil de laspilas: cuanto más tiempo se mantenga encendida, más rápidamente seagotarán las pilas.
SRU8015_IFU_Bundel1v4.qxd 16-05-2007 17:02 Pagina 68
69Cómo sacarle el máximo partido a su SRU8015
ESPA
ÑO
L
4.5.3 Tecla RetroiluminaciónPara encender y apagar la retroiluminación:1 Vaya a Config. - Config. del Sist., seleccione Tecla
Retroiluminación y pulse .2 Seleccione Activado u Desactivado mediante la rueda giratoria.3 Confirme el nuevo ajuste de la tecla Retroiluminación.
Se activará o desactivará la tecla Retroiluminación.
4.5.4 Restablecer configuración originalCuando restablezca completamente la configuración original delSRU8015, se borrarán los dispositivos, las actividades, los favoritos ycualquier otro ajuste que haya realizado. Tras el restablecimiento deberávolver a programar el SRU8015.Para restablecer el SRU8015:1 Vaya a Config. - Config. del Sist., seleccione Restablecer
Configuración Original y pulse .2 Seleccione Sí con la rueda giratoria y pulse .3 Pulse para volver a confirmar.
El SRU8015 borrará todos los ajustes y volverá a mostrar el Asistentede instalación. Esta operación puede tardar hasta un minuto.
4.6 IdiomaPara cambiar el idioma del SRU8015:1 Vaya a Configuración - Idioma y pulse .2 Seleccione el idioma que desee con la rueda giratoria:
English, Français, Deutsch, Español, Italiano, Nederlands.3 Confirme el nuevo idioma.
Cambiará el idioma utilizado en Configuración - Menú Principal.
SRU8015_IFU_Bundel1v4.qxd 16-05-2007 17:02 Pagina 69
70 Preguntas frecuentes
5 Preguntas frecuentes
Teclas
¿Por qué no funcionan una o más teclas en mi dispositivo?No todas las funciones están disponibles en la base de datos del SRU8015o el código que utiliza la tecla es incorrecto.Podrá fijar una tecla copiando la señal de su mando a distancia original.Vea ‘Fijar una tecla’ en la página 63.
¿Cómo puedo añadir funciones adicionales al SRU8015?Vea ‘Agregar una función’ en la página 67.
Marca
¿Por qué no puedo encontrar la marca de mi dispositivo en elSRU8015?No todas las marcas están incluidas en la base de datos del SRU8015. Si su marca no está en la lista:• Puede copiar las teclas desde su mando a distancia original. Vea ‘Fijar
una tecla’ en la página 63., o bien,
• Podrá Otros para realizar una búsqueda en toda la base de datos. El SRU8015 comprobará todos los códigos disponibles. Esta operaciónpuede tardar hasta 25 minutos.
Volumen
¿Por qué no funcionan correctamente las teclas de volumen?Una vez que haya añadido dispositivos, el SRU8015 copiaráautomáticamente las teclas de volumen y la tecla Mute (Silencio) de lasiguiente manera:• Para los dispositivos de vídeo como DVD, DVD-R, VCR y
sintonizadores de satélite, utilice las teclas de volumen del televisor.• Para dispositivos de audio como CD, DMR y radios, utilice las teclas
de volumen del Amplificador o del Receptor.
Si no ha instalado el dispositivo de origen (TV, amplificador oreceptor), las teclas de volumen y la tecla Mute (Silencio) no funcionarán.Para configurar las teclas de volumen:
SRU8015_IFU_Bundel1v4.qxd 16-05-2007 17:02 Pagina 70
71Preguntas frecuentes
ESPA
ÑO
L
• Puede programar el dispositivo de origen en el SRU8015. Vea ‘Agregarun dispositivo’ en la página 62., o bien,
• Podrá copiar las teclas de volumen desde otro dispositivo de origen.Vea ‘Copiar el volumen’ en la página 64.
Pilas
¿Por qué no puedo entrar en el menú Configuración?Cuando el nivel de carga de las pilas sea demasiado bajo, no podrá entraren el menú Configuración. Sustituya las pilas por unas pilas alcalinasnuevas.
¿Por qué no responde el SRU8015?El nivel de carga de las pilas es demasiado bajo. Sustituya las pilas porunas pilas alcalinas nuevas.
¿Pierdo los datos al sustituir las pilas?No. Sus datos quedarán guardados.
¿Puedo utilizar pilas recargables en el SRU8015?Sí. No obstante, tenga en cuenta que las pilas recargables tienden agastarse antes que las pilas alcalinas.
SRU8015_IFU_Bundel1v4.qxd 16-05-2007 17:02 Pagina 71
72 ¿Necesita ayuda?
6 ¿Necesita ayuda?
En primer lugar, lea atentamente las instrucciones de uso.
Si tiene alguna pregunta adicional sobre el uso o la configuración delSRU8015, consulte el sitio web www.philips.com/URC.
Puede consultar los datos de contacto en www.philips.com/support.
Si desea obtener información acerca de la garantía, consulte el sitio webwww.philips.com/guarantee.
Asegúrese de tener a mano el SRU8015, cuando llame al servicio deasistencia técnica, para que nuestros operadores puedan ayudarle adeterminar si funciona correctamente.El número de modelo de su mando a distancia universal de Philips esSRU8015.
Fecha de compra: . . . . . . / . . . . . . / . . . . . . (día/mes/año)
SRU8015_IFU_Bundel1v4.qxd 16-05-2007 17:02 Pagina 72
73Indice
ITA
LIA
NO
Indice
1 Il vostro Prestigo SRU8015 di Philips 741.1 Contenuto del pacchetto 741.2 Panoramica dell’SRU8015 741.3 Panoramica del Menu Principale 75
2 Inizio 752.1 Preparazione 752.2 Installazione 76
3 Come utilizzare l’SRU8015 773.1 Selezionare un Dispositivo o un’Attività 783.2 Selezione di un Preferito 783.3 Selezione di Più Funzioni 78
4 Come sfruttare al massimo l’SRU8015 794.1 Dispositivi 804.2 Attività 834.3 Preferiti 844.4 Più funzioni 854.5 Imposta sistema 854.6 Lingua 86
5 Domande frequenti 87
6 Bisogno di aiuto? 88
Only for US - FCC Compliancy 106
Only for Europe - WEEE Regulation 108
SRU8015_IFU_Bundel1v4.qxd 16-05-2007 17:02 Pagina 73
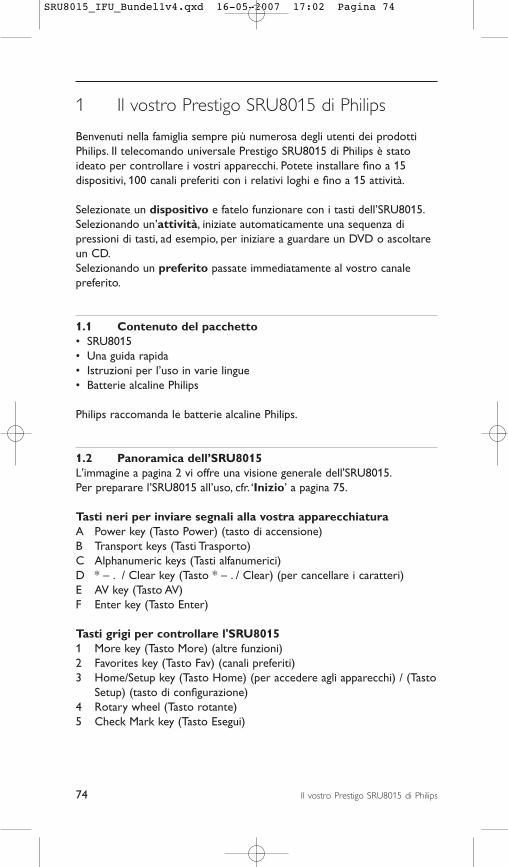
74 Il vostro Prestigo SRU8015 di Philips
1 Il vostro Prestigo SRU8015 di Philips
Benvenuti nella famiglia sempre più numerosa degli utenti dei prodottiPhilips. Il telecomando universale Prestigo SRU8015 di Philips è statoideato per controllare i vostri apparecchi. Potete installare fino a 15dispositivi, 100 canali preferiti con i relativi loghi e fino a 15 attività.
Selezionate un dispositivo e fatelo funzionare con i tasti dell’SRU8015. Selezionando un’attività, iniziate automaticamente una sequenza dipressioni di tasti, ad esempio, per iniziare a guardare un DVD o ascoltareun CD. Selezionando un preferito passate immediatamente al vostro canalepreferito.
1.1 Contenuto del pacchetto• SRU8015• Una guida rapida• Istruzioni per l’uso in varie lingue• Batterie alcaline Philips
Philips raccomanda le batterie alcaline Philips.
1.2 Panoramica dell’SRU8015L'immagine a pagina 2 vi offre una visione generale dell'SRU8015.Per preparare l’SRU8015 all’uso, cfr. ‘Inizio’ a pagina 75.
Tasti neri per inviare segnali alla vostra apparecchiaturaA Power key (Tasto Power) (tasto di accensione)B Transport keys (Tasti Trasporto)C Alphanumeric keys (Tasti alfanumerici)D * – . / Clear key (Tasto * – . / Clear) (per cancellare i caratteri)E AV key (Tasto AV)F Enter key (Tasto Enter)
Tasti grigi per controllare l'SRU80151 More key (Tasto More) (altre funzioni)2 Favorites key (Tasto Fav) (canali preferiti)3 Home/Setup key (Tasto Home) (per accedere agli apparecchi) / (Tasto
Setup) (tasto di configurazione)4 Rotary wheel (Tasto rotante)5 Check Mark key (Tasto Esegui)
SRU8015_IFU_Bundel1v4.qxd 16-05-2007 17:02 Pagina 74
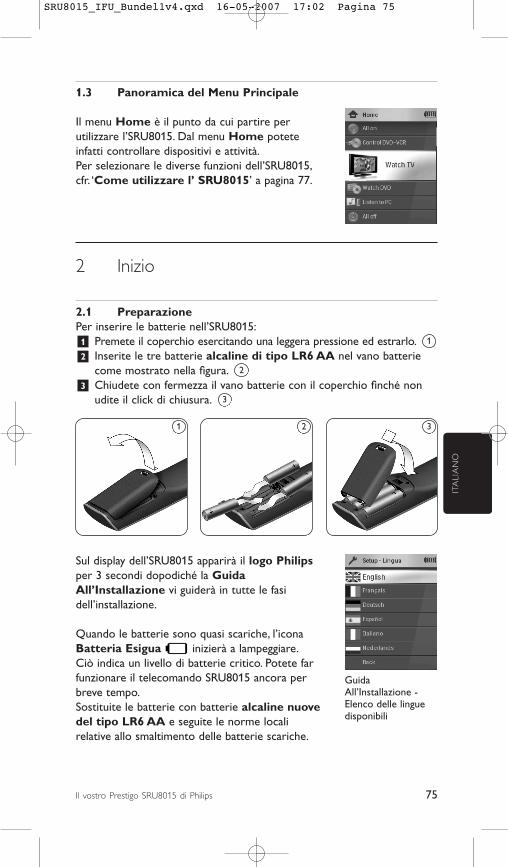
75Il vostro Prestigo SRU8015 di Philips
ITA
LIA
NO
1.3 Panoramica del Menu Principale
Il menu Home è il punto da cui partire perutilizzare l’SRU8015. Dal menu Home poteteinfatti controllare dispositivi e attività.Per selezionare le diverse funzioni dell’SRU8015,cfr. ‘Come utilizzare l’ SRU8015’ a pagina 77.
2 Inizio
2.1 PreparazionePer inserire le batterie nell’SRU8015:1 Premete il coperchio esercitando una leggera pressione ed estrarlo. 2 Inserite le tre batterie alcaline di tipo LR6 AA nel vano batterie
come mostrato nella figura. 3 Chiudete con fermezza il vano batterie con il coperchio finché non
udite il click di chiusura.
Sul display dell’SRU8015 apparirà il logo Philipsper 3 secondi dopodiché la GuidaAll’Installazione vi guiderà in tutte le fasidell’installazione.
Quando le batterie sono quasi scariche, l’iconaBatteria Esigua inizierà a lampeggiare. Ciò indica un livello di batterie critico. Potete farfunzionare il telecomando SRU8015 ancora perbreve tempo. Sostituite le batterie con batterie alcaline nuovedel tipo LR6 AA e seguite le norme localirelative allo smaltimento delle batterie scariche.
3
2
1
1 2 3
GuidaAll’Installazione -Elenco delle linguedisponibili
SRU8015_IFU_Bundel1v4.qxd 16-05-2007 17:02 Pagina 75
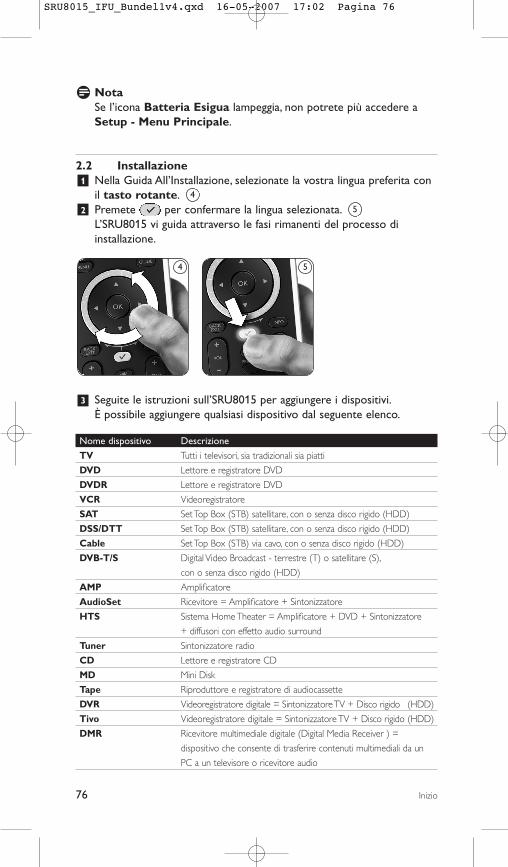
76 Inizio
D NotaSe l’icona Batteria Esigua lampeggia, non potrete più accedere aSetup - Menu Principale.
2.2 Installazione1 Nella Guida All’Installazione, selezionate la vostra lingua preferita con
il tasto rotante. 2 Premete per confermare la lingua selezionata.
L’SRU8015 vi guida attraverso le fasi rimanenti del processo diinstallazione.
3 Seguite le istruzioni sull’SRU8015 per aggiungere i dispositivi.È possibile aggiungere qualsiasi dispositivo dal seguente elenco.
Nome dispositivo Descrizione
TV Tutti i televisori, sia tradizionali sia piatti
DVD Lettore e registratore DVD
DVDR Lettore e registratore DVD
VCR Videoregistratore
SAT Set Top Box (STB) satellitare, con o senza disco rigido (HDD)
DSS/DTT Set Top Box (STB) satellitare, con o senza disco rigido (HDD)
Cable Set Top Box (STB) via cavo, con o senza disco rigido (HDD)
DVB-T/S Digital Video Broadcast - terrestre (T) o satellitare (S),
con o senza disco rigido (HDD)
AMP Amplificatore
AudioSet Ricevitore = Amplificatore + Sintonizzatore
HTS Sistema Home Theater = Amplificatore + DVD + Sintonizzatore
+ diffusori con effetto audio surround
Tuner Sintonizzatore radio
CD Lettore e registratore CD
MD Mini Disk
Tape Riproduttore e registratore di audiocassette
DVR Videoregistratore digitale = Sintonizzatore TV + Disco rigido (HDD)
Tivo Videoregistratore digitale = Sintonizzatore TV + Disco rigido (HDD)
DMR Ricevitore multimediale digitale (Digital Media Receiver ) =
dispositivo che consente di trasferire contenuti multimediali da un
PC a un televisore o ricevitore audio
5
4
4 5
SRU8015_IFU_Bundel1v4.qxd 16-05-2007 17:02 Pagina 76
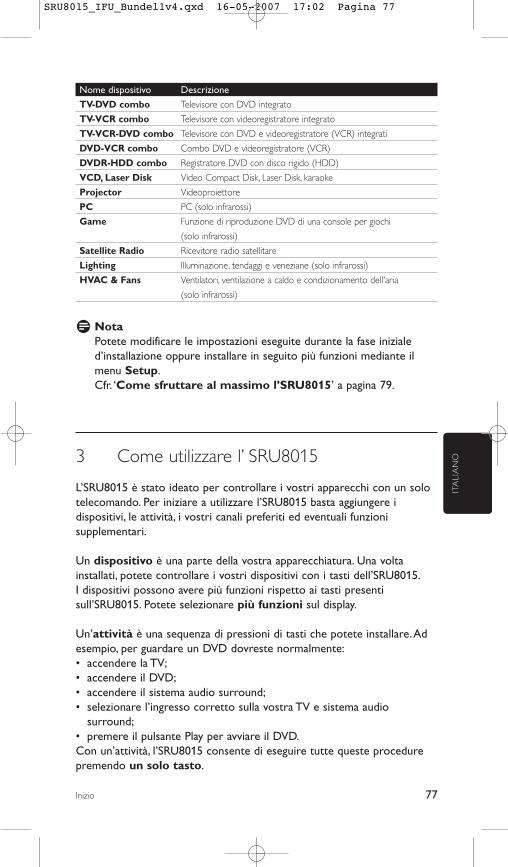
77Inizio
ITA
LIA
NO
Nome dispositivo Descrizione
TV-DVD combo Televisore con DVD integrato
TV-VCR combo Televisore con videoregistratore integrato
TV-VCR-DVD combo Televisore con DVD e videoregistratore (VCR) integrati
DVD-VCR combo Combo DVD e videoregistratore (VCR)
DVDR-HDD combo Registratore DVD con disco rigido (HDD)
VCD, Laser Disk Video Compact Disk, Laser Disk, karaoke
Projector Videoproiettore
PC PC (solo infrarossi)
Game Funzione di riproduzione DVD di una console per giochi
(solo infrarossi)
Satellite Radio Ricevitore radio satellitare
Lighting Illuminazione, tendaggi e veneziane (solo infrarossi)
HVAC & Fans Ventilatori, ventilazione a caldo e condizionamento dell'aria
(solo infrarossi)
D NotaPotete modificare le impostazioni eseguite durante la fase inizialed’installazione oppure installare in seguito più funzioni mediante ilmenu Setup. Cfr. ‘Come sfruttare al massimo l’SRU8015’ a pagina 79.
3 Come utilizzare l’ SRU8015
L’SRU8015 è stato ideato per controllare i vostri apparecchi con un solotelecomando. Per iniziare a utilizzare l’SRU8015 basta aggiungere idispositivi, le attività, i vostri canali preferiti ed eventuali funzionisupplementari.
Un dispositivo è una parte della vostra apparecchiatura. Una voltainstallati, potete controllare i vostri dispositivi con i tasti dell’SRU8015.I dispositivi possono avere più funzioni rispetto ai tasti presentisull’SRU8015. Potete selezionare più funzioni sul display.
Un’attività è una sequenza di pressioni di tasti che potete installare. Adesempio, per guardare un DVD dovreste normalmente:• accendere la TV;• accendere il DVD;• accendere il sistema audio surround;• selezionare l’ingresso corretto sulla vostra TV e sistema audio
surround;• premere il pulsante Play per avviare il DVD.Con un’attività, l’SRU8015 consente di eseguire tutte queste procedurepremendo un solo tasto.
SRU8015_IFU_Bundel1v4.qxd 16-05-2007 17:02 Pagina 77
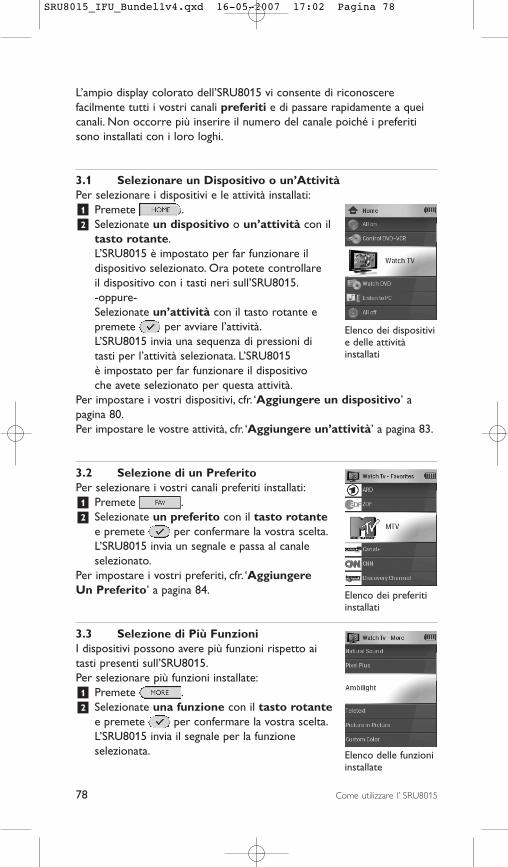
78 Come utilizzare l’ SRU8015
L’ampio display colorato dell’SRU8015 vi consente di riconoscerefacilmente tutti i vostri canali preferiti e di passare rapidamente a queicanali. Non occorre più inserire il numero del canale poiché i preferitisono installati con i loro loghi.
3.1 Selezionare un Dispositivo o un’AttivitàPer selezionare i dispositivi e le attività installati:1 Premete . 2 Selezionate un dispositivo o un’attività con il
tasto rotante.L’SRU8015 è impostato per far funzionare il dispositivo selezionato. Ora potete controllare il dispositivo con i tasti neri sull’SRU8015.-oppure-Selezionate un’attività con il tasto rotante e premete per avviare l’attività.L’SRU8015 invia una sequenza di pressioni di tasti per l’attività selezionata. L’SRU8015 è impostato per far funzionare il dispositivo che avete selezionato per questa attività.
Per impostare i vostri dispositivi, cfr. ‘Aggiungere un dispositivo’ apagina 80. Per impostare le vostre attività, cfr. ‘Aggiungere un’attività’ a pagina 83.
3.2 Selezione di un PreferitoPer selezionare i vostri canali preferiti installati:1 Premete .2 Selezionate un preferito con il tasto rotante
e premete per confermare la vostra scelta.L’SRU8015 invia un segnale e passa al canale selezionato.
Per impostare i vostri preferiti, cfr. ‘Aggiungere Un Preferito’ a pagina 84.
3.3 Selezione di Più FunzioniI dispositivi possono avere più funzioni rispetto ai tasti presenti sull’SRU8015.Per selezionare più funzioni installate:1 Premete .2 Selezionate una funzione con il tasto rotante
e premete per confermare la vostra scelta.L’SRU8015 invia il segnale per la funzione selezionata. Elenco delle funzioni
installate
Elenco dei preferitiinstallati
Elenco dei dispositivie delle attivitàinstallati
SRU8015_IFU_Bundel1v4.qxd 16-05-2007 17:02 Pagina 78
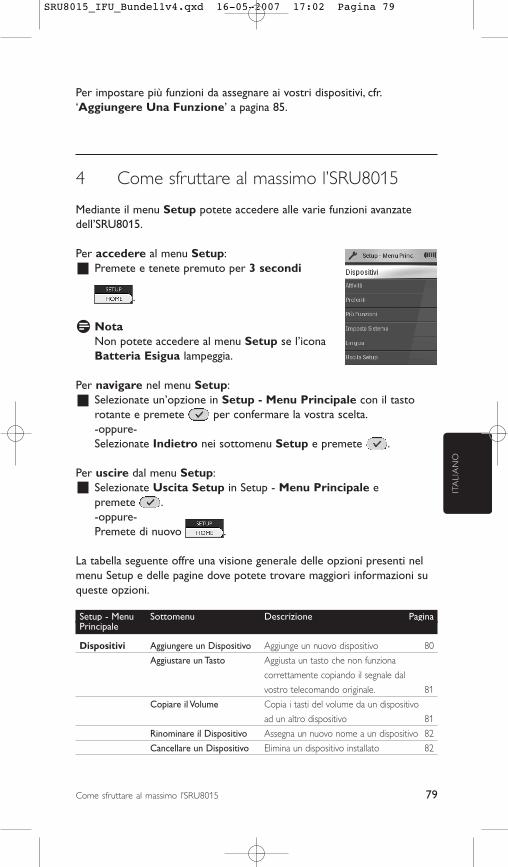
79Come sfruttare al massimo l’SRU8015
ITA
LIA
NO
Per impostare più funzioni da assegnare ai vostri dispositivi, cfr.‘Aggiungere Una Funzione’ a pagina 85.
4 Come sfruttare al massimo l’SRU8015
Mediante il menu Setup potete accedere alle varie funzioni avanzatedell’SRU8015.
Per accedere al menu Setup:Premete e tenete premuto per 3 secondi
.
D NotaNon potete accedere al menu Setup se l’icona Batteria Esigua lampeggia.
Per navigare nel menu Setup:Selezionate un’opzione in Setup - Menu Principale con il tastorotante e premete per confermare la vostra scelta.-oppure-Selezionate Indietro nei sottomenu Setup e premete .
Per uscire dal menu Setup:Selezionate Uscita Setup in Setup - Menu Principale e premete .-oppure-Premete di nuovo .
La tabella seguente offre una visione generale delle opzioni presenti nelmenu Setup e delle pagine dove potete trovare maggiori informazioni suqueste opzioni.
Setup - Menu Sottomenu Descrizione PaginaPrincipale
Dispositivi Aggiungere un Dispositivo Aggiunge un nuovo dispositivo 80
Aggiustare un Tasto Aggiusta un tasto che non funziona
correttamente copiando il segnale dal
vostro telecomando originale. 81
Copiare il Volume Copia i tasti del volume da un dispositivo
ad un altro dispositivo 81
Rinominare il Dispositivo Assegna un nuovo nome a un dispositivo 82
Cancellare un Dispositivo Elimina un dispositivo installato 82
SRU8015_IFU_Bundel1v4.qxd 16-05-2007 17:02 Pagina 79
80 Come sfruttare al massimo l’SRU8015
Setup - Menu Sottomenu Descrizione PaginaPrincipale
Attività Aggiungere un’Attività Aggiunge una sequenza di pressioni di
tasti per far funzionare diversi dispositivi
premendo un solo tasto. 83
Rinominare un’Attività Assegna un nuovo nome a un’attività 83
Cancellare un’Attività Elimina un’attività installata 84
Preferiti Aggiungere un Preferito Aggiunge un nuovo preferito 84
Rinominare un Preferito Assegna un nuovo nome a un preferito 84
Cancellare un Preferito Elimina un preferito 84
Più Funzioni Aggiungere una Funzione Aggiunge una funzione supplementare
copiandola dal vostro telecomando
originale 85
Rinominare una Funzione Assegna un nuovo nome a una funzione 85
Cancellare una Funzione Elimina una funzione installata 85
Imposta Luminosità del Display Cambia la luminosità del display 85
Sistema
Time-Out Retroillumin. Modifica il time-out della retroilluminazione
sull’SRU8015 86
Retroilluminazione Tasto Accende o spegne la retroilluminazione
del tasto 86
Ripristino Completo Elimina tutte le vostre impostazioni
sull’SRU8015 86
Lingua Cambia la lingua delle istruzioni
sull’SRU8015 86
Uscita Setup Abbandona il menu Setup 79
4.1 Dispositivi
4.1.1 Aggiungere un dispositivo Per far funzionare i vostri dispositivi specifici con l’SRU8015, è necessarioaggiungerli. Potete aggiungere fino a 15 dispositivi. Per l’elenco deidispositivi, consultare la pagina 76.
D NotaPotete aggiungere un dispositivo più di una volta. Una seconda TVsarà automaticamente chiamata TV2. Potete inserire un nome diversose lo desiderate. Cfr. ‘Rinominare un dispositivo’ a pagina 82.
1 Andate su Setup - Dispositivi, selezionate Aggiungere UnDispositivo e premete .
2 Selezionate il dispositivo che desiderate aggiungere.3 Seguire le istruzioni che compaiono sull’SRU8015.
Il dispositivo selezionato è stato installato e aggiunto all’SRU8015.
SRU8015_IFU_Bundel1v4.qxd 16-05-2007 17:02 Pagina 80
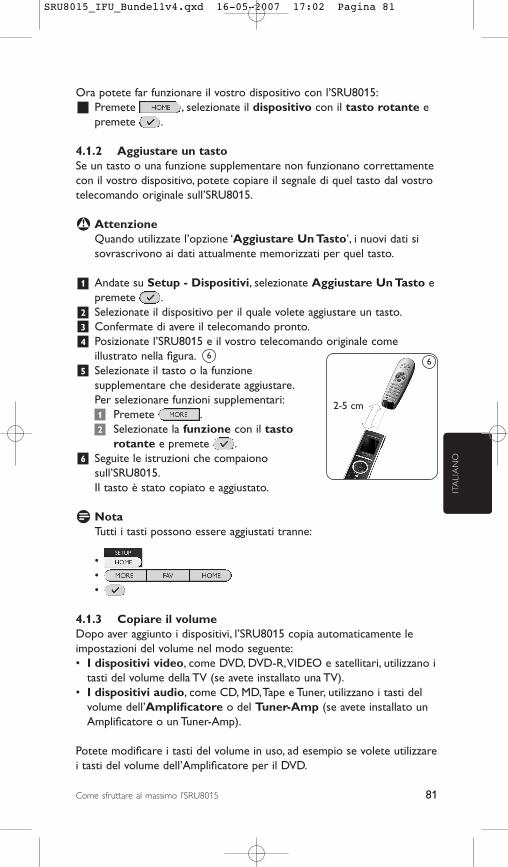
81Come sfruttare al massimo l’SRU8015
ITA
LIA
NO
Ora potete far funzionare il vostro dispositivo con l’SRU8015:Premete , selezionate il dispositivo con il tasto rotante epremete .
4.1.2 Aggiustare un tastoSe un tasto o una funzione supplementare non funzionano correttamentecon il vostro dispositivo, potete copiare il segnale di quel tasto dal vostrotelecomando originale sull’SRU8015.
B AttenzioneQuando utilizzate l’opzione ‘Aggiustare Un Tasto’, i nuovi dati sisovrascrivono ai dati attualmente memorizzati per quel tasto.
1 Andate su Setup - Dispositivi, selezionate Aggiustare Un Tasto epremete .
2 Selezionate il dispositivo per il quale volete aggiustare un tasto.3 Confermate di avere il telecomando pronto.4 Posizionate l’SRU8015 e il vostro telecomando originale come
illustrato nella figura. 5 Selezionate il tasto o la funzione
supplementare che desiderate aggiustare.Per selezionare funzioni supplementari:1 Premete .2 Selezionate la funzione con il tasto
rotante e premete . 6 Seguite le istruzioni che compaiono
sull’SRU8015.Il tasto è stato copiato e aggiustato.
D NotaTutti i tasti possono essere aggiustati tranne:
•••
4.1.3 Copiare il volumeDopo aver aggiunto i dispositivi, l’SRU8015 copia automaticamente leimpostazioni del volume nel modo seguente:• I dispositivi video, come DVD, DVD-R, VIDEO e satellitari, utilizzano i
tasti del volume della TV (se avete installato una TV).• I dispositivi audio, come CD, MD, Tape e Tuner, utilizzano i tasti del
volume dell’Amplificatore o del Tuner-Amp (se avete installato unAmplificatore o un Tuner-Amp).
Potete modificare i tasti del volume in uso, ad esempio se volete utilizzarei tasti del volume dell’Amplificatore per il DVD.
66
2-5 cm
SRU8015_IFU_Bundel1v4.qxd 16-05-2007 17:02 Pagina 81
82 Come sfruttare al massimo l’SRU8015
D Nota• La funzione Copiare Il Volume sovrascrive le impostazioni del
volume predefiniti dell’SRU8015. • Le precedenti impostazioni del volume che avete installato
utilizzando Copiare Il Volume o Aggiustare Un Tasto vengonoeliminate.
• Le impostazioni del volume vengono automaticamente cancellatequando cancellate il volume del dispositivo originale.
Per copiare le impostazioni del volume:1 Andate su Setup - Dispositivi, selezionate Copiare Il Volume e
premete .2 Selezionate il dispositivo da cui desiderate copiare i tasti del volume
(ad es., TV o Amplificatore).3 Selezionate il dispositivo verso cui desiderate copiare i tasti del
volume (ad es., DVD o SAT).4 Confermate di voler copiare i tasti del volume da un dispositivo ad un
altro. I tasti del volume sono stati copiati.
4.1.4 Rinominare un dispositivoPer rinominare un dispositivo:1 Andate su Setup - Dispositivi, selezionate Rinominare Un
Dispositivo e premete .2 Inserite il nuovo nome utilizzando i tasti alfanumerici.
D NotaPotete cancellare i caratteri con il tasto Clear e il cursore a sinistra.
3 Confermate il nuovo nome.Il dispositivo è stato rinominato.
4.1.5 Cancellare un dispositivoPer cancellare un dispositivo:1 Andate su Setup - Dispositivi, selezionate Cancellare Un
Dispositivo e premete .2 Selezionate il dispositivo che desiderate cancellare.3 Confermate di voler cancellare il dispositivo.
Il dispositivo è stato cancellato.
D NotaI tasti del dispositivo cancellato utilizzati per altre funzioni, ad es. inun’attività o i tasti del volume che avete copiato, saranno ugualmentecancellati.Controllate le attività che avete installato e installarle nuovamente senecessario. Cfr. ‘Aggiungere un’attività’ a pagina 83. Controllate i tasti del volume dei vostri dispositivi e installarlinuovamente se necessario. Cfr. ‘Copiare Il Volume’ a pagina 81.
SRU8015_IFU_Bundel1v4.qxd 16-05-2007 17:02 Pagina 82
83Come sfruttare al massimo l’SRU8015
ITA
LIA
NO
4.2 Attività
4.2.1 Aggiungere un’attivitàÈ possibile aggiungere le attività all’SRU8015. Un’attività consiste di variepressioni di tasti che l’SRU8015 invia premendo un solo tasto.L’SRU8015 osserva un tempo predefinito di 600ms tra ogni pressionedi tasto per garantire che i vostri dispositivi rispondano correttamente aisegnali IR. Potete riscrivere questo tempo predefinito.• Se uno dei vostri dispositivi necessita di tempi più lunghi prima di
ricevere il segnale IR successivo, potete inserire un tempo di 1, 3, 5 o15 secondi.
• Se un’attività necessita di una lunga pressione del tasto, ad esempio peralzare il volume, potete selezionare l’opzione Tenere PremutoL’Ultimo Tasto.
Per aggiungere un’attività:1 Andate su Setup - Attività, selezionate Aggiungere Un’Attività e
premete .2 Selezionate il nome che volete utilizzare per l’attività.
-oppure-Selezionate Non Presente Nell’Elenco per creare un nuovo nome.
3 Seguire le istruzioni sull’SRU8015. • Selezionate un dispositivo con il tasto rotante, premete e
premete un tasto per aggiungerlo all’attività.• Selezionate un tempo di 1, 3, 5 o 15 secondi con il tasto rotante e
premete .-oppure-Selezionate Tenere Premuto L’Ultimo Tasto con il tasto rotante epremete .
4 Ripetete il punto 3 per creare un’altra attività.L’attività è stata aggiunta all’SRU8015.
Ora potete eseguire l’attività con l’SRU8015. Premete , selezionate l’attività con il tasto rotante e premete
.
4.2.2 Rinominare un’attivitàPer rinominare un’attività:1 Andate su Setup - Attività, selezionate Rinominare Un’Attività e
premete .2 Inserire il testo per il nuovo nome con i tasti alfanumerici.
D NotaPotete cancellare i caratteri con il tasto Clear e il cursore a sinistra.
3 Confermate il nuovo nome.L’attività è stata rinominata.
SRU8015_IFU_Bundel1v4.qxd 16-05-2007 17:02 Pagina 83
84 Come sfruttare al massimo l’SRU8015
4.2.3 Cancellare un’attivitàPer cancellare un’attività:1 Andate su Setup - Attività, selezionate Cancellare Un’Attività e
premete .2 Selezionate l’attività che volete cancellare.3 Confermate di voler cancellare l’attività.
L’attività è stata cancellata.
4.3 Preferiti
4.3.1 Aggiungere un preferitoPer aggiungere un canale preferito:1 Andate su Setup - Preferiti, selezionate Aggiungere Un
Preferito e premete .2 Selezionate un canale preferito che desiderate aggiungere.3 Seguite le istruzioni che compaiono sull’SRU8015.
Il canale selezionato è stato installato e aggiunto all’SRU8015.
Ora potete passare ai vostri canali preferiti usando l’SRU8015:Premete , selezionate il canale preferito con il tastorotante e premete .
4.3.2 Rinominare un preferitoPer rinominare un preferito:1 Andate su Setup - Preferiti, selezionate Rinominare Un
Preferito e premete .2 Inserire il testo per il nuovo nome con i tasti alfanumerici.
D NotaPotete cancellare i caratteri con il tasto Clear e il cursore a sinistra.
3 Confermate il nuovo nome.Il preferito è stato rinominato.
4.3.3 Cancellare un preferitoPer cancellare un canale preferito:1 Andate su Setup - Preferiti, selezionate Cancellare Un Preferito
e premete .2 Selezionate il canale preferito che desiderate cancellare.3 Confermate di voler cancellare il canale preferito.
Il canale preferito è stato cancellato.
SRU8015_IFU_Bundel1v4.qxd 16-05-2007 17:02 Pagina 84
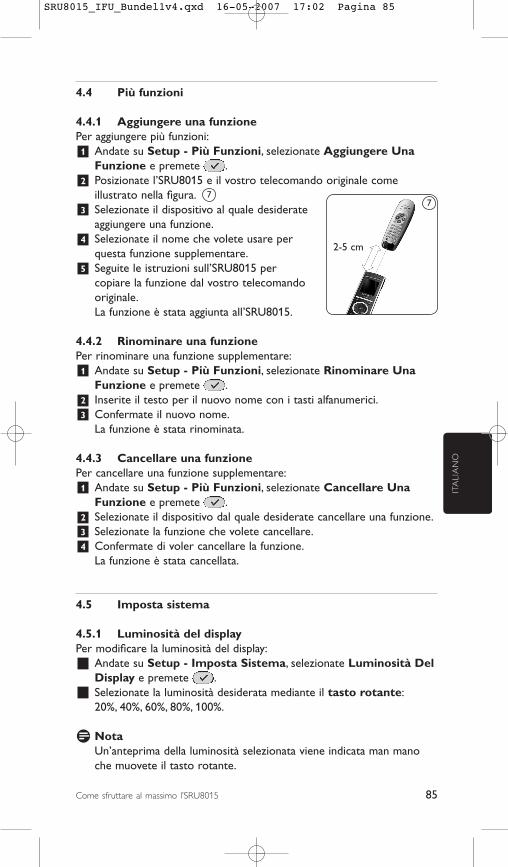
85Come sfruttare al massimo l’SRU8015
ITA
LIA
NO
4.4 Più funzioni
4.4.1 Aggiungere una funzionePer aggiungere più funzioni:1 Andate su Setup - Più Funzioni, selezionate Aggiungere Una
Funzione e premete .2 Posizionate l’SRU8015 e il vostro telecomando originale come
illustrato nella figura. 3 Selezionate il dispositivo al quale desiderate
aggiungere una funzione.4 Selezionate il nome che volete usare per
questa funzione supplementare.5 Seguite le istruzioni sull’SRU8015 per
copiare la funzione dal vostro telecomando originale.La funzione è stata aggiunta all’SRU8015.
4.4.2 Rinominare una funzione Per rinominare una funzione supplementare:1 Andate su Setup - Più Funzioni, selezionate Rinominare Una
Funzione e premete .2 Inserite il testo per il nuovo nome con i tasti alfanumerici.3 Confermate il nuovo nome.
La funzione è stata rinominata.
4.4.3 Cancellare una funzionePer cancellare una funzione supplementare:1 Andate su Setup - Più Funzioni, selezionate Cancellare Una
Funzione e premete .2 Selezionate il dispositivo dal quale desiderate cancellare una funzione.3 Selezionate la funzione che volete cancellare.4 Confermate di voler cancellare la funzione.
La funzione è stata cancellata.
4.5 Imposta sistema
4.5.1 Luminosità del displayPer modificare la luminosità del display:1 Andate su Setup - Imposta Sistema, selezionate Luminosità Del
Display e premete .2 Selezionate la luminosità desiderata mediante il tasto rotante:
20%, 40%, 60%, 80%, 100%.
D NotaUn’anteprima della luminosità selezionata viene indicata man manoche muovete il tasto rotante.
77
2-5 cm
SRU8015_IFU_Bundel1v4.qxd 16-05-2007 17:02 Pagina 85
86 Come sfruttare al massimo l’SRU8015
3 Confermate la nuova impostazione della luminosità.La luminosità del display è stata modificata.
4.5.2 Time-Out retroilluminazioneQuando utilizzate l’SRU8015, la retroilluminazione si accende. Dopo 5 secondi si spegne di nuovo.Per modificare questo tempo:1 Andate su Setup - Imposta Sistema, selezionate Time-Out
Retroillumin. e premete .2 Selezionate il vostro time-out della retroilluminazione mediante
il tasto rotante: 3 secondi, 5 secondi, 10 secondi, 20 secondi.3 Confermate la nuova impostazione del time-out.
Il time-out della retroilluminazione è stato modificato.
D NotaIl time-out della retroilluminazione influisce sulla durata delle batterie:quanto più la retroilluminazione rimane accesa, tanto più rapidamentesi esauriranno le batterie.
4.5.3 Retroilluminazione tastoPer accendere e spegnere la retroilluminazione del tasto:1 Andate su Setup - Imposta Sistema, selezionate
Retroilluminazione Tasto e premete .2 Selezionate On o Off usando il tasto rotante.3 Confermate la nuova impostazione della retroilluminazione del tasto.
La retroilluminazione del tasto è accesa o spenta.
4.5.4 Ripristino completoAl ripristino completo dell’SRU8015, i dispositivi, le attività, i preferiti e lealtre impostazioni sono tutti cancellati. Dopo il ripristino, è necessarioinstallare nuovamente l’SRU8015.Per ripristinare l’SRU8015:1 Andate su Setup - Imposta Sistema, selezionate Ripristino
Completo e premete .2 Selezionate Sì con il tasto rotante e premete .3 Premete per confermare.
L’SRU8015 cancella tutte le impostazioni e riavvia la GuidaAll’Installazione. Questa operazione può durare fino a un minuto.
4.6 Lingua Per cambiare la lingua dell’SRU8015:1 Andate su Setup - Lingua e premete .2 Selezionate la lingua preferita mediante il tasto rotante:
English, Français, Deutsch, Español, Italiano, Nederlands.3 Confermate la nuova lingua.
La lingua usata nel Setup - Menu Principale è stata modificata.
SRU8015_IFU_Bundel1v4.qxd 16-05-2007 17:02 Pagina 86
87Domande frequenti
ITA
LIA
NO
5 Domande frequenti
Tasti
Perché uno o più tasti non funzionano con il mio dispositivo?Non tutte le funzioni sono disponibili nel database dell’SRU8015 oppure ilcodice del tasto è difettoso.Potete aggiustare un tasto copiando il segnale dal vostro telecomandooriginale. Cfr. ‘Aggiustare Un Tasto’ a pagina 81.
Come posso aggiungere funzioni supplementari all’SRU8015?Cfr. ‘Aggiungere una funzione’ a pagina 85.
Marca
Perché non riesco a trovare la marca del mio dispositivonell’SRU8015?Non tutte le marche sono disponibili nel database dell’SRU8015. Se lavostra marca non è presente nell’elenco:• Potete copiare i tasti dal vostro telecomando originale. Cfr. ‘Aggiustare
Un Tasto’ a pagina 81.-oppure-
• Potete selezionare Non Presente Nell’Elenco per eseguire una ricercacompleta nel database. L’SRU8015 prova tutti i codici disponibili. Questa operazione puòdurare fino a 25 minuti.
Volume
Perché i tasti del volume non funzionano correttamente?Dopo aver aggiunto i dispositivi, l’SRU8015 copia automaticamente iltasto del volume e il tasto del silenziatore, nella maniera seguente:• I dispositivi video, come DVD, DVDR, VCR e Satellitari, utilizzano i
tasti del volume della TV.• I dispositivi audio, come CD, DMR e Tuner, utilizzano i tasti del
volume dell’Amplificatore o del Tuner-Amp.
Se non avete installato il dispositivo originale, (TV, Amplificatore oTuner-Amp), i tasti del volume e del silenziatore non funzioneranno. Perdefinire i tasti del volume:• Potete installare il dispositivo originale sull’SRU8015. Cfr. ‘Aggiungere
Un Dispositivo’ a pagina 80.-oppure-
SRU8015_IFU_Bundel1v4.qxd 16-05-2007 17:02 Pagina 87
88 Domande frequenti
• Potete copiare i tasti del volume di un altro dispositivo originale. Cfr.‘Copiare Il Volume’ a pagina 81.
Batterie
Perché non posso accedere al menu Setup?Quando il livello delle batterie è troppo basso, non è possibile accedere almenu Setup. Sostituire le batterie con le nuove batterie alcaline.
Perché l’SRU8015 non si attiva più?Il livello della batteria è troppo basso. Sostituire le batterie con le nuovebatterie alcaline.
Perdo i miei dati se sostituisco le batterie?No. I vostri dati saranno salvati.
Posso utilizzare batterie ricaricabili con il mio SRU8015? Sì, certamente. Tuttavia, ricordatevi che le batterie ricaricabili tendono ascaricarsi più rapidamente delle batterie alcaline.
6 Bisogno di aiuto?
Prima di tutto, leggete attentamente le presenti Istruzioni per l’Uso.
Se avete altre domande sull’uso o sull’installazione dell’SRU8015, visitate ilsito www.philips.com/URC.
Per i dettagli sui contatti, visitate il sito www.philips.com/support.
Per informazioni riguardanti la garanzia visitate il sitowww.philips.com/guarantee.
Se contattate la nostra helpline, tenete l’SRU8015 a portata di mano inmodo che i nostri operatori possano aiutarvi a stabilire se il vostrotelecomando sta funzionando correttamente.Il numero del modello del vostro telecomando universale Philips èSRU8015.
Data di acquisto: . . . . . /. . . . . /. . . . . (giorno/mese/anno)
SRU8015_IFU_Bundel1v4.qxd 16-05-2007 17:02 Pagina 88
89Inhoudsopgave
NED
ERLA
ND
S
Inhoudsopgave
1 Jouw Philips Prestigo SRU8015 901.1 Wat zit er in de verpakking? 901.2 Overzicht van de SRU8015 901.3 Overzicht Hoofdmenu 91
2 Aan de slag 912.1 Voorbereiding 912.2 Installeren 92
3 Je SRU8015 gebruiken 933.1 Een apparaat of activiteit kiezen 943.2 Een favoriet selecteren 943.3 Extra functies selecteren 94
4 Haal het meeste uit je SRU8015 954.1 Apparaten 964.2 Activiteiten 994.3 Favorieten 1004.4 Extra functies 1014.5 Systeeminstellingen 1014.6 Taal 103
5 Vaak gestelde vragen 103
6 Hulp nodig? 105
Only for US - FCC Compliancy 106
Only for Europe - WEEE Regulation 108
SRU8015_IFU_Bundel1v4.qxd 16-05-2007 17:02 Pagina 89
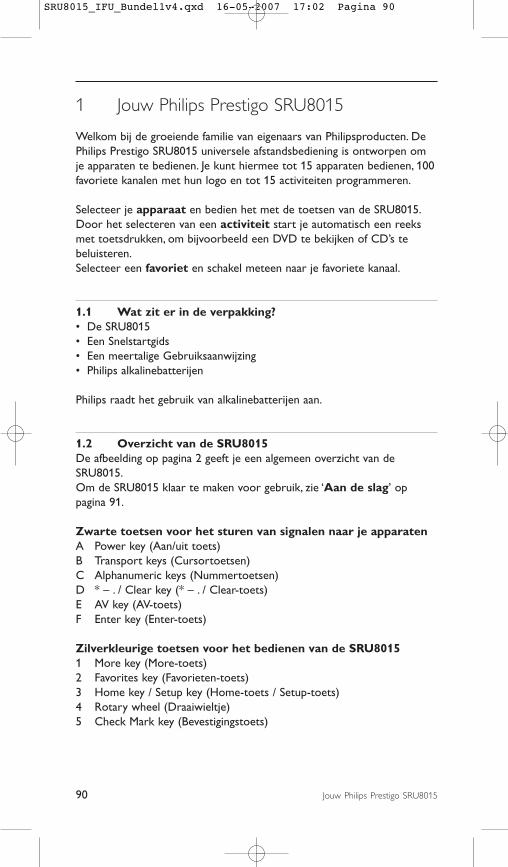
90 Jouw Philips Prestigo SRU8015
1 Jouw Philips Prestigo SRU8015
Welkom bij de groeiende familie van eigenaars van Philipsproducten. DePhilips Prestigo SRU8015 universele afstandsbediening is ontworpen omje apparaten te bedienen. Je kunt hiermee tot 15 apparaten bedienen, 100favoriete kanalen met hun logo en tot 15 activiteiten programmeren.
Selecteer je apparaat en bedien het met de toetsen van de SRU8015. Door het selecteren van een activiteit start je automatisch een reeksmet toetsdrukken, om bijvoorbeeld een DVD te bekijken of CD’s tebeluisteren. Selecteer een favoriet en schakel meteen naar je favoriete kanaal.
1.1 Wat zit er in de verpakking?• De SRU8015• Een Snelstartgids• Een meertalige Gebruiksaanwijzing• Philips alkalinebatterijen
Philips raadt het gebruik van alkalinebatterijen aan.
1.2 Overzicht van de SRU8015De afbeelding op pagina 2 geeft je een algemeen overzicht van deSRU8015.Om de SRU8015 klaar te maken voor gebruik, zie ‘Aan de slag’ oppagina 91.
Zwarte toetsen voor het sturen van signalen naar je apparatenA Power key (Aan/uit toets)B Transport keys (Cursortoetsen)C Alphanumeric keys (Nummertoetsen)D * – . / Clear key (* – . / Clear-toets)E AV key (AV-toets)F Enter key (Enter-toets)
Zilverkleurige toetsen voor het bedienen van de SRU80151 More key (More-toets)2 Favorites key (Favorieten-toets)3 Home key / Setup key (Home-toets / Setup-toets)4 Rotary wheel (Draaiwieltje)5 Check Mark key (Bevestigingstoets)
SRU8015_IFU_Bundel1v4.qxd 16-05-2007 17:02 Pagina 90
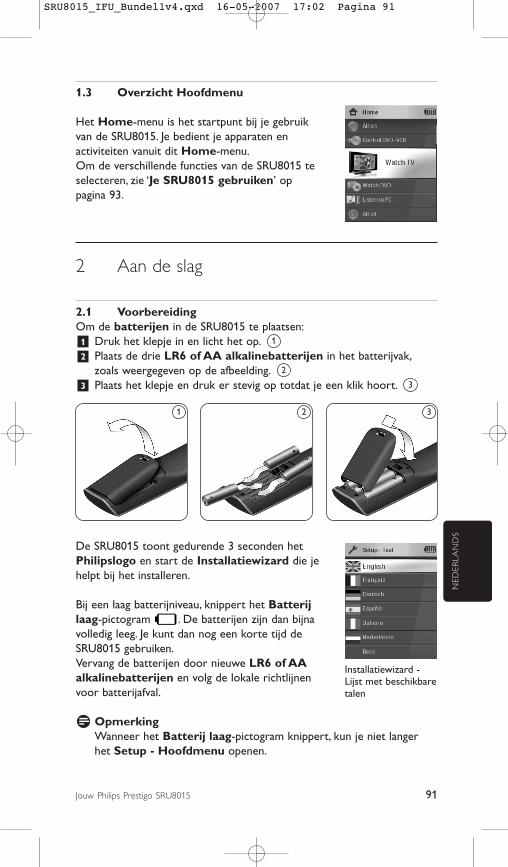
91Jouw Philips Prestigo SRU8015
NED
ERLA
ND
S
1.3 Overzicht Hoofdmenu
Het Home-menu is het startpunt bij je gebruikvan de SRU8015. Je bedient je apparaten enactiviteiten vanuit dit Home-menu.Om de verschillende functies van de SRU8015 teselecteren, zie ‘Je SRU8015 gebruiken’ op pagina 93.
2 Aan de slag
2.1 VoorbereidingOm de batterijen in de SRU8015 te plaatsen:1 Druk het klepje in en licht het op. 2 Plaats de drie LR6 of AA alkalinebatterijen in het batterijvak,
zoals weergegeven op de afbeelding. 3 Plaats het klepje en druk er stevig op totdat je een klik hoort.
De SRU8015 toont gedurende 3 seconden hetPhilipslogo en start de Installatiewizard die jehelpt bij het installeren.
Bij een laag batterijniveau, knippert het Batterijlaag-pictogram . De batterijen zijn dan bijnavolledig leeg. Je kunt dan nog een korte tijd deSRU8015 gebruiken. Vervang de batterijen door nieuwe LR6 of AAalkalinebatterijen en volg de lokale richtlijnenvoor batterijafval.
D OpmerkingWanneer het Batterij laag-pictogram knippert, kun je niet langerhet Setup - Hoofdmenu openen.
3
2
1
1 2 3
Installatiewizard -Lijst met beschikbaretalen
SRU8015_IFU_Bundel1v4.qxd 16-05-2007 17:02 Pagina 91
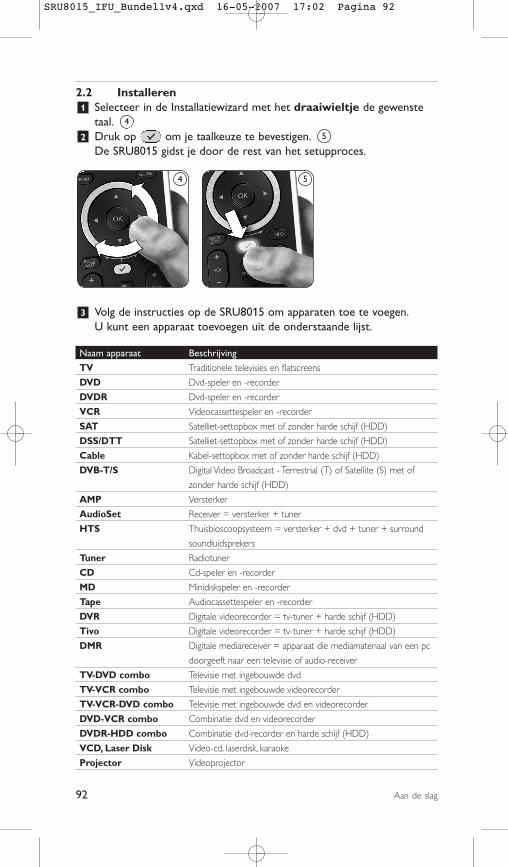
92 Aan de slag
2.2 Installeren1 Selecteer in de Installatiewizard met het draaiwieltje de gewenste
taal. 2 Druk op om je taalkeuze te bevestigen.
De SRU8015 gidst je door de rest van het setupproces.
3 Volg de instructies op de SRU8015 om apparaten toe te voegen.U kunt een apparaat toevoegen uit de onderstaande lijst.
Naam apparaat Beschrijving
TV Traditionele televisies en flatscreens
DVD Dvd-speler en -recorder
DVDR Dvd-speler en -recorder
VCR Videocassettespeler en -recorder
SAT Satelliet-settopbox met of zonder harde schijf (HDD)
DSS/DTT Satelliet-settopbox met of zonder harde schijf (HDD)
Cable Kabel-settopbox met of zonder harde schijf (HDD)
DVB-T/S Digital Video Broadcast - Terrestrial (T) of Satellite (S) met of
zonder harde schijf (HDD)
AMP Versterker
AudioSet Receiver = versterker + tuner
HTS Thuisbioscoopsysteem = versterker + dvd + tuner + surround
soundluidsprekers
Tuner Radiotuner
CD Cd-speler en -recorder
MD Minidiskspeler en -recorder
Tape Audiocassettespeler en -recorder
DVR Digitale videorecorder = tv-tuner + harde schijf (HDD)
Tivo Digitale videorecorder = tv-tuner + harde schijf (HDD)
DMR Digitale mediareceiver = apparaat die mediamateriaal van een pc
doorgeeft naar een televisie of audio-receiver
TV-DVD combo Televisie met ingebouwde dvd
TV-VCR combo Televisie met ingebouwde videorecorder
TV-VCR-DVD combo Televisie met ingebouwde dvd en videorecorder
DVD-VCR combo Combinatie dvd en videorecorder
DVDR-HDD combo Combinatie dvd-recorder en harde schijf (HDD)
VCD, Laser Disk Video-cd, laserdisk, karaoke
Projector Videoprojector
4
5
4 5
SRU8015_IFU_Bundel1v4.qxd 16-05-2007 17:02 Pagina 92
93Aan de slag
NED
ERLA
ND
S
Naam apparaat Beschrijving
PC Pc (alleen infrarood)
Game Dvd-spelerfunctie van spelconsole (alleen infrarood)
Satellite Radio Satellietradio-ontvanger
Lighting Verlichting, gordijnen en jaloezieën (alleen infrarood)
HVAC & Fans Verwarming, ventilatie en airconditioning (HVAC) en ventilatoren
(alleen infrarood)
D OpmerkingJe kunt de instellingen van je eerste installatie wijzigen of later extrafuncties installeren via het Setup-menu. Zie ‘Haal het meeste uit je SRU8015’ op pagina 95.
3 Je SRU8015 gebruiken
Met de SRU8015 kun je al je apparaten bedienen met slechts éénafstandsbediening. In een handomdraai voeg je in de SRU8015 apparaten,activiteiten, favorieten en extra functies toe.
Een apparaat is een deel van je installatie. Zodra je je apparaten hebtgeïnstalleerd, kun je ze allemaal bedienen met de toetsen op de SRU8015.Naast de toetsen kun je met de SRU8015 ook extra functiesprogrammeren. Selecteer extra functies op de display.
Een activiteit is een reeks toetsdrukken die je kunt programmeren.Bijvoorbeeld, om een DVD te bekijken moet je meestal:• de TV inschakelen;• de DVD inschakelen;• het surround sound-systeem inschakelen;• de juiste ingang op je TV en het surround sound-systeem selecteren;• op de Play-toets drukken om de DVD te starten.
Met een activiteit in de SRU8015 kun je al deze handelingen uitvoerenmet slechts één druk op de knop.
Op de grote kleurendisplay van de SRU8015 herken je vlot jeFavorieten en kun je snel naar een ander kanaal schakelen. Je kunt jefavoriete zenders installeren met hun logo en je hoeft niet langer hetkanaalnummer in te drukken.
SRU8015_IFU_Bundel1v4.qxd 16-05-2007 17:02 Pagina 93
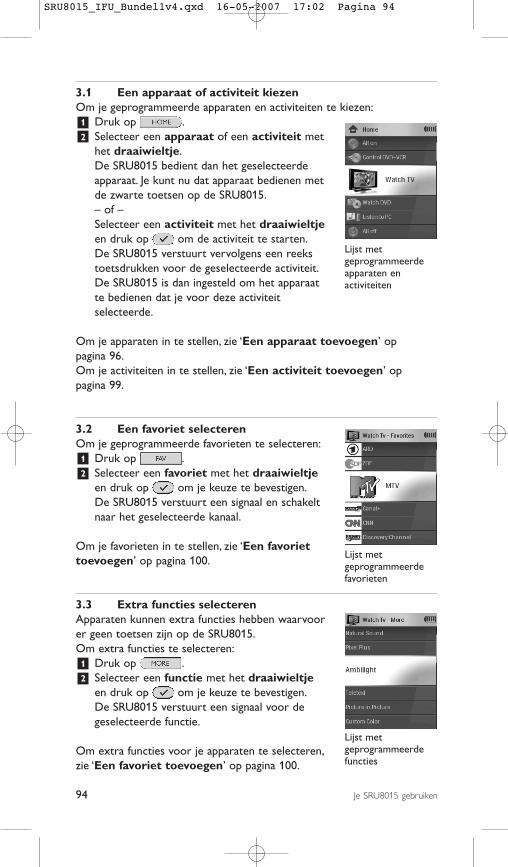
94 Je SRU8015 gebruiken
Lijst metgeprogrammeerdefuncties
3.1 Een apparaat of activiteit kiezenOm je geprogrammeerde apparaten en activiteiten te kiezen:1 Druk op . 2 Selecteer een apparaat of een activiteit met
het draaiwieltje.De SRU8015 bedient dan het geselecteerde apparaat. Je kunt nu dat apparaat bedienen met de zwarte toetsen op de SRU8015.– of –Selecteer een activiteit met het draaiwieltjeen druk op om de activiteit te starten.De SRU8015 verstuurt vervolgens een reeks toetsdrukken voor de geselecteerde activiteit. De SRU8015 is dan ingesteld om het apparaat te bedienen dat je voor deze activiteit selecteerde.
Om je apparaten in te stellen, zie ‘Een apparaat toevoegen’ op pagina 96. Om je activiteiten in te stellen, zie ‘Een activiteit toevoegen’ op pagina 99.
3.2 Een favoriet selecterenOm je geprogrammeerde favorieten te selecteren:1 Druk op .2 Selecteer een favoriet met het draaiwieltje
en druk op om je keuze te bevestigen.De SRU8015 verstuurt een signaal en schakelt naar het geselecteerde kanaal.
Om je favorieten in te stellen, zie ‘Een favoriet toevoegen’ op pagina 100.
3.3 Extra functies selecterenApparaten kunnen extra functies hebben waarvoor er geen toetsen zijn op de SRU8015.Om extra functies te selecteren:1 Druk op .2 Selecteer een functie met het draaiwieltje
en druk op om je keuze te bevestigen.De SRU8015 verstuurt een signaal voor de geselecteerde functie.
Om extra functies voor je apparaten te selecteren, zie ‘Een favoriet toevoegen’ op pagina 100.
Lijst metgeprogrammeerdefavorieten
Lijst metgeprogrammeerdeapparaten enactiviteiten
SRU8015_IFU_Bundel1v4.qxd 16-05-2007 17:02 Pagina 94

95Haal het meeste uit je SRU8015
NED
ERLA
ND
S
4 Haal het meeste uit je SRU8015
Via het Setup-menu heb je toegang tot de diverse geavanceerde functiesvan de SRU8015.Om het Setup-menu te openen:
Hou de toets gedurende 3 secondeningedrukt.
D OpmerkingJe kunt het Setup-menu niet openen wanneer het Batterij Laag-pictogram knippert.
Om te navigeren in het Setup-menu:Selecteer met het draaiwieltje een optie in het Setup - Hoofdmenuen druk op om je keuze te bevestigen.– of –Selecteer Terug in de Setup-submenus en druk op .
Om het Setup-menu te verlaten:Selecteer Setup Afsluiten in het Setup - Hoofdmenu en druk op .– of –Druk opnieuw op .
Onderstaande tabel geeft je een overzicht van de opties in het Setup-menu en de pagina’s waar je meer informatie over deze opties vindt.
Setup-Hoofdmenu Submenu Beschrijving Pagina
Apparaten Apparaat Toevoegen Voegt een apparaat toe. 96
Toets Repareren Repareert een toets die niet correct
werkt door het signaal van je originele
afstandsbediening te kopiëren. 96
Volumetoetsen Kopiëren Kopieert de volumetoetsen van het ene
apparaat naar het andere. 97
Apparaat Hernoemen Geeft een nieuwe naam aan een apparaat. 98
Apparaat Verwijderen Verwijdert een geprogrammeerd apparaat. 98
Activiteiten Activiteit Toevoegen Voegt een reeks toetsdrukken toe om
verschillende apparaten met één toetsdruk
te bedienen. 99
Activiteit Hernoemen Geeft een nieuwe naam aan een activiteit. 99
Activiteit Verwijderen Verwijdert een geprogrammeerde activiteit. 100
SRU8015_IFU_Bundel1v4.qxd 16-05-2007 17:02 Pagina 95
96 Haal het meeste uit je SRU8015
Setup-Hoofdmenu Submenu Beschrijving Pagina
Favorieten Favoriet Toevoegen Voegt een nieuwe favoriet toe. 100
Favoriet Hernoemen Geeft een nieuwe naam aan een favoriet. 100
Favoriet Verwijderen Verwijdert een favoriet. 100
Extra Functies Functie Toevoegen Voegt een extra functie toe die de SRU8015
leert van je originele afstandsbediening. 101
Functie Hernoemen Geeft een nieuwe naam aan een functie. 101
Functie Verwijderen Verwijdert een geprogrammeerde functie. 101
Systeem- Displayhelderheid Past de helderheid van de display aan. 101
instellingen
Tijdsint. Oplichten Wijzigt de duur van het oplichten
van de SRU8015. 102
Toetsverlichting Schakelt de toetsverlichting aan of uit. 102
Alles Wissen Wist al je persoonlijke instellingen op de
SRU8015. 102
Taal Wijzigt de taal van de instructies op de
SRU8015. 103
Setup Afsluiten Sluit het Setup-menu af. 95
4.1 Apparaten
4.1.1 Een apparaat toevoegenOm je apparaten met de SRU8015 te kunnen bedienen, moet je ze eersttoevoegen. Je kunt tot 15 apparaten programmeren. De lijst met apparaten vind je op pagina 92.
D OpmerkingJe kunt een apparaat ook meerdere keren toevoegen. Een tweede TVwordt automatisch TV2 genoemd. Je kunt ook een ander naamingeven. Zie ‘Een apparaat hernoemen’ op pagina 98.
1 Ga naar Setup - Apparaten, selecteer Apparaat Toevoegen endruk op .
2 Selecteer het apparaat dat je wilt toevoegen.3 Volg de aanwijzingen op de SRU8015.
Het geselecteerde apparaat is geprogrammeerd en toegevoegd aan deSRU8015.
Je kunt nu je apparaat bedienen met de SRU8015:Druk op , selecteer het apparaat met het draaiwieltje endruk op .
4.1.2 Een toets reparerenWanneer een toets of extra functie niet correct werkt met jouwapparaat, kun je een kopie van het toetsignaal van je origineleafstandsbediening naar de SRU8015 kopiëren.
SRU8015_IFU_Bundel1v4.qxd 16-05-2007 17:02 Pagina 96
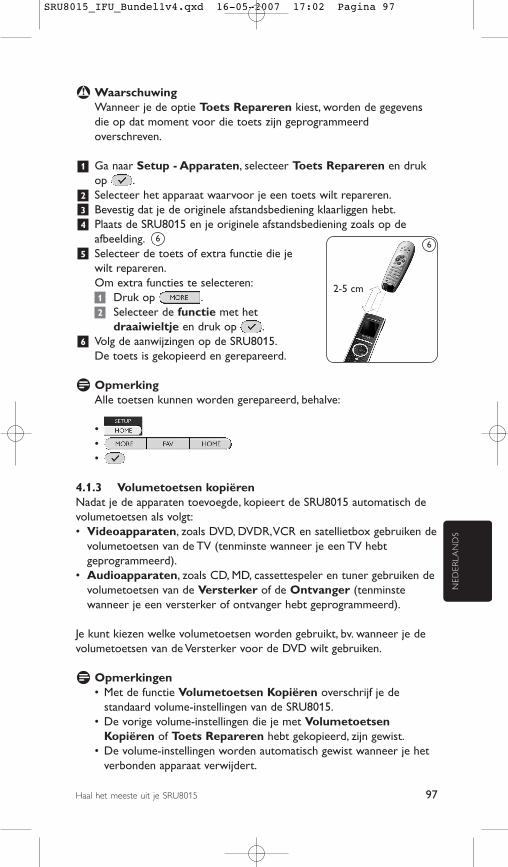
97Haal het meeste uit je SRU8015
NED
ERLA
ND
S
B WaarschuwingWanneer je de optie Toets Repareren kiest, worden de gegevensdie op dat moment voor die toets zijn geprogrammeerdoverschreven.
1 Ga naar Setup - Apparaten, selecteer Toets Repareren en drukop .
2 Selecteer het apparaat waarvoor je een toets wilt repareren.3 Bevestig dat je de originele afstandsbediening klaarliggen hebt.4 Plaats de SRU8015 en je originele afstandsbediening zoals op de
afbeelding. 5 Selecteer de toets of extra functie die je
wilt repareren.Om extra functies te selecteren:1 Druk op .2 Selecteer de functie met het
draaiwieltje en druk op .6 Volg de aanwijzingen op de SRU8015.
De toets is gekopieerd en gerepareerd.
D OpmerkingAlle toetsen kunnen worden gerepareerd, behalve:
•••
4.1.3 Volumetoetsen kopiërenNadat je de apparaten toevoegde, kopieert de SRU8015 automatisch devolumetoetsen als volgt:• Videoapparaten, zoals DVD, DVDR, VCR en satellietbox gebruiken de
volumetoetsen van de TV (tenminste wanneer je een TV hebtgeprogrammeerd).
• Audioapparaten, zoals CD, MD, cassettespeler en tuner gebruiken devolumetoetsen van de Versterker of de Ontvanger (tenminstewanneer je een versterker of ontvanger hebt geprogrammeerd).
Je kunt kiezen welke volumetoetsen worden gebruikt, bv. wanneer je devolumetoetsen van de Versterker voor de DVD wilt gebruiken.
D Opmerkingen• Met de functie Volumetoetsen Kopiëren overschrijf je de
standaard volume-instellingen van de SRU8015. • De vorige volume-instellingen die je met Volumetoetsen
Kopiëren of Toets Repareren hebt gekopieerd, zijn gewist.• De volume-instellingen worden automatisch gewist wanneer je het
verbonden apparaat verwijdert.
66
2-5 cm
SRU8015_IFU_Bundel1v4.qxd 16-05-2007 17:02 Pagina 97
98 Haal het meeste uit je SRU8015
Om de volume-instellingen te kopiëren:1 Ga naar Setup - Apparaten, selecteer Volumetoetsen Kopiëren
en druk op .2 Selecteer het apparaat waarvan je de volumetoetsen wilt kopiëren
(bv. TV of Versterker).3 Selecteer het apparaat waarnaar je de volumetoetsen wilt kopiëren
(bv. DVD of satellietbox).4 Bevestig dat je de volumetoetsen wilt kopiëren van het ene apparaat
naar het andere.De volumetoetsen zijn gekopieerd.
4.1.4 Een apparaat hernoemenOm een apparaat te hernoemen:1 Ga naar Setup - Apparaten, selecteer Apparaat Hernoemen en
druk op .2 Voer de nieuwe naam in met de nummertoetsen.
D OpmerkingJe kunt tekens wissen met de Clear-toets en de linkse cursortoets.
3 Bevestig de nieuwe naam.Het apparaat is hernoemd.
4.1.5 Een apparaat verwijderenOm een apparaat te verwijderen:1 Ga naar Setup - Apparaten, selecteer Apparaat Verwijderen en
druk op .2 Selecteer het apparaat dat je wilt verwijderen.3 Bevestig dat je dit apparaat wilt verwijderen.
Het apparaat is verwijderd.
D OpmerkingOok de toetsen van het verwijderde apparaat die elders wordengebruikt, bv. in een activiteit of de door jou gekopieerdevolumetoetsen, worden verwijderd.Controleer de activiteiten die je programmeerde en programmeer zeindien nodig opnieuw. Zie ‘Een activiteit toevoegen’ op pagina 99. Controleer de volumetoetsen van je apparaten en programmeer zeindien nodig opnieuw. Zie ‘Volumetoetsen kopiëren’ op pagina 97.
SRU8015_IFU_Bundel1v4.qxd 16-05-2007 17:02 Pagina 98
99Haal het meeste uit je SRU8015
NED
ERLA
ND
S
4.2 Activiteiten
4.2.1 Een activiteit toevoegenJe kunt activiteiten toevoegen aan je SRU8015. Een activiteit bestaat uitverschillende toetsdrukken die je SRU8015 in slechts één toetsdrukdoorstuurt.Opdat alle apparaten correct reageren op de IR-signalen, voegt deSRU8015 standaard een vertraging van 600 ms in tussen elketoetsdruk. Je kunt deze standaard vertraging wijzigen.• Indien een van je apparaten een langere vertraging vereist voor de
ontvangst van het volgende IR-signaal, kun je een vertraging van 1, 3, 5of 15 seconden instellen.
• Wanneer een toets vereist dat je er langer moet op drukken, bv. devolumetoetsen, kun je de optie Laatste Toets Vasthoudenselecteren.
Om een activiteit toe te voegen:1 Ga naar Setup - Activiteiten, selecteer Activiteit Toevoegen en
druk op .2 Selecteer de naam die je voor de activiteit wilt gebruiken.
– of –Selecteer Niet in de Lijst om een nieuwe naam aan te maken.
3 Volg de aanwijzingen op de SRU8015.• Selecteer een apparaat met het draaiwieltje, druk op en
druk op een toets om het aan de activiteit toe te voegen.• Selecteer 1, 3, 5 of 15 seconden vertraging met het draaiwieltje
en druk op .– of –Selecteer Laatste Toets Vasthouden met het draaiwieltje en drukop .
4 Herhaal stap 3 om een andere activiteit te programmeren.De activiteit is toegevoegd aan de SRU8015.
Je kunt nu de activiteit starten met de SRU8015: Druk op , selecteer de activiteit met het draaiwieltje en drukop .
4.2.2 Een activiteit hernoemenOm een activiteit te hernoemen:1 Ga naar Setup - Activiteiten, selecteer Activiteit Hernoemen en
druk op .2 Voer de tekst in voor het nieuwe label met de nummertoetsen.
D OpmerkingJe kunt tekens wissen met de Clear-toets en de linkse cursortoets.
SRU8015_IFU_Bundel1v4.qxd 16-05-2007 17:02 Pagina 99
100 Haal het meeste uit je SRU8015
3 Bevestig de nieuwe naam.De activiteit is hernoemd.
4.2.3 Een activiteit verwijderenOm een activiteit te verwijderen:1 Ga naar Setup - Activiteiten, selecteer Activiteit Verwijderen en
druk op .2 Selecteer de activiteit die je wilt verwijderen.3 Bevestig dat je de activiteit wilt verwijderen.
De activiteit is nu verwijderd.
4.3 Favorieten
4.3.1 Een favoriet toevoegenOm een favoriet kanaal toe te voegen:1 Ga naar Setup - Favorieten, selecteer Favoriet Toevoegen en
druk op .2 Selecteer het favoriete kanaal dat je wilt toevoegen.3 Volg de aanwijzingen op de SRU8015.
Het geselecteerde kanaal is nu geprogrammeerd en toegevoegd aande SRU8015.
Je kunt nu vlot met de SRU8015 schakelen naar je favoriete kanalen:Druk op , selecteer het favoriete kanaal met hetdraaiwieltje en druk op .
4.3.2 Een favoriet hernoemenOm een favoriet kanaal te hernoemen:1 Ga naar Setup - Favorieten, selecteer Favoriet Hernoemen en
druk op .2 Voer de tekst in voor de nieuwe naam met de nummertoetsen.
D OpmerkingJe kunt tekens wissen met de Clear-toets en de linkse cursortoets.
3 Bevestig de nieuwe naam.Het favoriete kanaal is nu hernoemd.
4.3.3 Een favoriet verwijderenOm een favoriet kanaal te verwijderen:1 Ga naar Setup - Favorieten, selecteer Favoriet Verwijderen en
druk op .2 Selecteer het favoriete kanaal dat je wilt verwijderen.3 Bevestig dat je het favoriete kanaal wilt verwijderen.
Het favoriete kanaal is nu verwijderd.
SRU8015_IFU_Bundel1v4.qxd 16-05-2007 17:02 Pagina 100
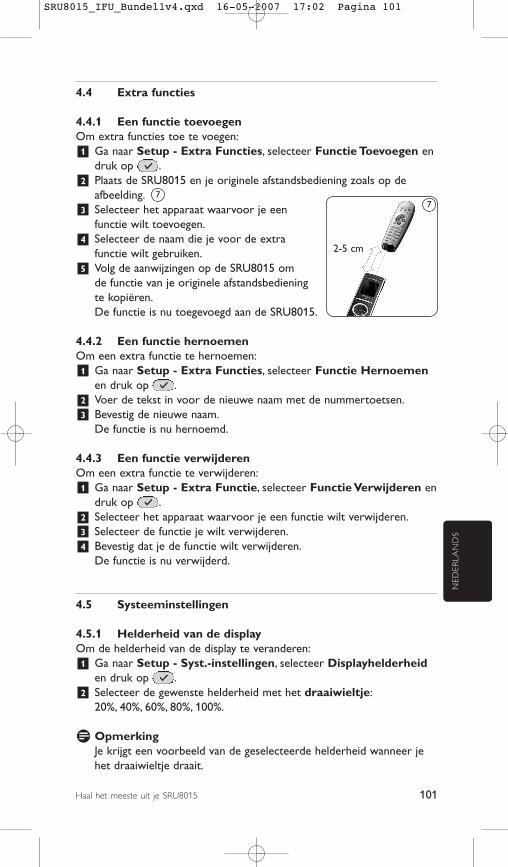
101Haal het meeste uit je SRU8015
NED
ERLA
ND
S
4.4 Extra functies
4.4.1 Een functie toevoegenOm extra functies toe te voegen:1 Ga naar Setup - Extra Functies, selecteer Functie Toevoegen en
druk op .2 Plaats de SRU8015 en je originele afstandsbediening zoals op de
afbeelding. 3 Selecteer het apparaat waarvoor je een
functie wilt toevoegen.4 Selecteer de naam die je voor de extra
functie wilt gebruiken.5 Volg de aanwijzingen op de SRU8015 om
de functie van je originele afstandsbediening te kopiëren.De functie is nu toegevoegd aan de SRU8015.
4.4.2 Een functie hernoemen Om een extra functie te hernoemen:1 Ga naar Setup - Extra Functies, selecteer Functie Hernoemen
en druk op .2 Voer de tekst in voor de nieuwe naam met de nummertoetsen.3 Bevestig de nieuwe naam.
De functie is nu hernoemd.
4.4.3 Een functie verwijderenOm een extra functie te verwijderen:1 Ga naar Setup - Extra Functie, selecteer Functie Verwijderen en
druk op .2 Selecteer het apparaat waarvoor je een functie wilt verwijderen.3 Selecteer de functie je wilt verwijderen.4 Bevestig dat je de functie wilt verwijderen.
De functie is nu verwijderd.
4.5 Systeeminstellingen
4.5.1 Helderheid van de displayOm de helderheid van de display te veranderen:1 Ga naar Setup - Syst.-instellingen, selecteer Displayhelderheid
en druk op .2 Selecteer de gewenste helderheid met het draaiwieltje:
20%, 40%, 60%, 80%, 100%.
D OpmerkingJe krijgt een voorbeeld van de geselecteerde helderheid wanneer jehet draaiwieltje draait.
77
2-5 cm
SRU8015_IFU_Bundel1v4.qxd 16-05-2007 17:02 Pagina 101
102 Haal het meeste uit je SRU8015
3 Bevestig de nieuwe instelling voor de helderheid.De displayhelderheid is nu gewijzigd.
4.5.2 Tijdsinterval voor het oplichtenTijdens het gebruik licht de SRU8015 op. Na 5 seconden schakelt diezichzelf uit. Om dit tijdsinterval te wijzigen:1 Ga naar Setup - Syst.-instellingen, selecteer Tijdsint. Oplichten
en druk op .2 Selecteer de gewenste duur van het oplichten met het draaiwieltje:
3 seconden, 5 seconden, 10 seconden, 20 seconden.3 Bevestig de nieuwe instelling voor het tijdsinterval.
Het tijdsinterval voor het oplichten is nu gewijzigd.
D OpmerkingDe duur van het oplichten heeft een impact op de levensduur van debatterijen: hoe langer de SRU8015 oplicht, hoe meer energie debatterijen verbruiken.
4.5.3 ToetsverlichtingOm de toetsverlichting aan en uit te zetten:1 Ga naar Setup - Syst.-instellingen, selecteer Toetsverlichting en
druk op .2 Selecteer Aan of Uit met het draaiwieltje. 3 Bevestig de nieuwe instelling voor de toetsverlichting.
De toetsverlichting is nu aan of uit.
4.5.4 Alles wissenWanneer je de optie Alles Wissen van de SRU8015 selecteert, wordenalle geprogrammeerde apparaten, activiteiten, favorieten en andereinstellingen gewist. Nadat je alles hebt gewist, moet je de SRU8015opnieuw programmeren.Om alles op de SRU8015 te wissen:1 Ga naar Setup - Syst.-instellingen, selecteer Alles Wissen en
druk op .2 Selecteer Ja met het draaiwieltje en druk op .3 Druk op om te herbevestigen.
De SRU8015 wist nu alle instellingen en start opnieuw op met deInstallatiewizard. Dit kan een minuut duren.
SRU8015_IFU_Bundel1v4.qxd 16-05-2007 17:02 Pagina 102
103Haal het meeste uit je SRU8015
NED
ERLA
ND
S
4.6 Taal Om de taal van de SRU8015 te wijzigen:1 Ga naar Setup - Taal en druk op .2 Selecteer de taal die je wenst met het draaiwieltje:
English, Français, Deutsch, Español, Italiano, Nederlands.3 Bevestig je taalkeuze.
De taal van het Setup - Hoofdmenu is nu gewijzigd.
5 Vaak gestelde vragen
Toetsen
Waarom werken een of meerdere toetsen niet met mijnapparaat?Niet alle functies zijn beschikbaar in de databank van de SRU8015, of decode achter de toets is defect.Je kunt een toets repareren door het signaal te kopiëren van je origineleafstandsbediening. Zie ‘Een toets repareren’ op pagina 97.
Hoe kan ik extra functies toevoegen in de SRU8015?Zie ‘Een functie toevoegen’ op pagina 101.
Merk
Waarom vind ik het merk van mijn apparaat niet in deSRU8015?De databank van de SRU8015 bevat niet alle merken. Wanneer je merkniet in de lijst staat:• Je kunt de toetsen van je originele afstandsbediening kopiëren.
Zie ‘Een toets repareren’ op pagina 96.– of –
• Je kunt Niet in de Lijst selecteren om een grondige zoekopdrachtin de databank uit te voeren.
De SRU8015 test dan alle beschikbare codes. Dit kan 25 minuten duren.
SRU8015_IFU_Bundel1v4.qxd 16-05-2007 17:02 Pagina 103
104 Vaak gestelde vragen
Volume
Waarom werken de volumetoetsen niet correct?Nadat je de apparaten toevoegde, kopieert de SRU8015 automatisch devolumetoetsen en Mute-toets als volgt:• Videoapparaten, zoals DVD, DVDR, VCR en satellietbox gebruiken de
volumetoetsen van de TV.• Audioapparaten, zoals CD, DMR en tuner gebruiken de
volumetoetsen van de Versterker of de Ontvanger.
Wanneer je het bronapparaat (TV, Versterker of Ontvanger) nietprogrammeerde, zullen de volumetoetsen en Mute-toets niet werken.Om de volumetoetsen in te stellen:• Je kunt het bronapparaat in de SRU8015 programmeren.
Zie ‘Een apparaat toevoegen’ op pagina 96.– of –
• Je kunt de volumetoetsen van een ander bronapparaat kopiëren. Zie ‘Volumetoetsen kopiëren’ op pagina 96.
Batterijen
Waarom kan ik het Setup-menu niet openen?Wanneer het batterijniveau te laag is, kun je het Setup-menu nietopenen. Vervang de batterijen door nieuwe alkalinebatterijen.
Waarom start de SRU8015 niet meer op?Het batterijniveau is te laag. Vervang de batterijen door nieuwealkalinebatterijen.
Verlies ik mijn gegevens wanneer ik de batterijen vervang?Neen, je gegevens blijven bewaard.
Kan ik oplaadbare batterijen gebruiken in mijn SRU8015?Ja. Hou er echter rekening mee dat oplaadbare batterijen snellerleeglopen dan alkalinebatterijen.
SRU8015_IFU_Bundel1v4.qxd 16-05-2007 17:02 Pagina 104
105Hulp nodig?
NED
ERLA
ND
S
6 Hulp nodig?
Lees aandachtig deze Gebruiksaanwijzing voor je met ons contactopneemt.
Voor bijkomende vragen over het gebruik of de programmering van deSRU8015, zie www.philips.com/URC.
Voor contactgegevens, zie www.philips.com/support.
Voor informatie over de garantie, zie www.philips.com/guarantee.
Let erop dat je je SRU8015 bij de hand hebt wanneer je onze hulplijncontacteert, zodat onze medewerkers je kunnen helpen na te gaan of jeafstandsbediening correct werkt.Het modelnummer van je Philips universele afstandsbediening is SRU8015.
De aankoopdatum: . . . . . . /. . . . . /. . . . . (dag/maand/jaar)
SRU8015_IFU_Bundel1v4.qxd 16-05-2007 17:02 Pagina 105
106 FCC Compliancy
Only for US - FCC Compliancy
This device complies with Part 15 of the FCC Rules. Operation is subjectto the following two conditions:• This device should not cause harmful interference.• This device must accept any interference received, including
interference that may cause undesired operation.
This equipment has been tested and found to comply with the limits for aClass B digital device, pursuant to part 15 of the FCC rule and ICES 003in Canada.
These limits are designed to provide reasonable protection againstharmful interference in residential installations. This equipment generates,uses, and can radiate radio frequency energy and, if not installed and usedin accordance with the instructions, may cause harmful interference toradio communications.
However, there is no guarantee that interference will not occur in aparticular installation. If the equipment does cause harmful interference toradio or television reception, which can be determined by turning theeequipment off and on, the user is encouraged to try to correct theinterference by using one or more of the following measures:• Reorient or relocate the receiving antenna.• Increase the separation between the equipment and receiver.• Connect the equipment into to an outlet on a different circuit from the
receiver.• Consult the dealer or an experienced radio/TV technician for help.
C CAUTION:User changes or modifications not expressly approved by the partyresponsible for compliance may void the user’s authority to operatethe equipment.
SRU8015_IFU_Bundel1v4.qxd 16-05-2007 17:02 Pagina 106
107WEEE Regulation
Limited one year warranty
Warranty coverage begins the day you buy your product. For one yearthereafter, a defective or inoperative product can be returned to theplace of purchase and it will be replaced with a new or comparableproduct at no charge to you. You must have proof of purchase toexchange the product.
This warranty does not extend to the product if damaged or rendereddefective because of misuse, accident, unauthorized repair, modification orother cause not within the control of Philips Consumer Electronics.
Replacement as provided under this warranty is the exclusive remedy forthe consumer. Philips shall not be liable for any incidental orconsequential damages for breach of any express or implied warranty onthis product.
Except to the extent prohibited by applicable law, any implied warranty ofmerchantability for fitness for a particular purpose on this products islimited in duration to the duration of this warranty. This warranty gives you specific legal rights. You may have other rightswhich vary from state/province to state/province.
Product specifications may change without prior notice.
SRU8015_IFU_Bundel1v4.qxd 16-05-2007 17:02 Pagina 107
108 WEEE Regulation
Only for Europe - WEEE Regulation
Dutch Verwijdering van uw oude productUw product is vervaardigd van kwalitatief hoogwaardige materialen enonderdelen, welke gerecycled en opnieuw gebruikt kunnen worden. Als u op uw product een doorstreepte afvalcontainer op wieltjes ziet, betekentdit dat het product valt onder de EU-richtlijn 2002/96/EC.Win inlichtingen in over de manier waarop elektrische en elektronischeproducten in uw regio gescheiden worden ingezameld.Neem bij de verwijdering van oude producten de lokale wetgeving in acht enplaats deze producten niet bij het gewone huishoudelijke afval. Als u oudeproducten correct verwijdert voorkomt u negatieve gevolgen voor het milieu ende volksgezondheid.
English Disposal of your old productYour product is designed and manufactured with high quality materialsand components, which can be recycled and reused. When this crossed-out wheeled bin symbol is attached to a product it meansthe product is covered by the European Directive 2002/96/EC.Please inform yourself about the local separate collection system for electricaland electronic products.Please act according to your local rules and do not dispose of your old productswith your normal household waste. The correct disposal of your old product willhelp prevent potential negative consequences for the environment and humanhealth.
Finnish Vanhan tuotteen hävittäminenTuotteesi on suunniteltu ja valmistettu laadukkaista materiaaleista jakomponenteista, jotka voidaan kierrättää ja käyttää uudelleen. Tuotteeseen kiinnitetty yliviivatun roskakorin kuva tarkoittaa, että tuote kuuluuEuroopan parlamentin ja neuvoston direktiivin 2002/96/EC soveltamisalaan.Ota selvää sähkölaitteille ja elektronisille laitteille tarkoitetustakierrätysjärjestelmästä alueellasi.Noudata paikallisia sääntöjä äläkä hävitä vanhoja tuotteita tavallisen talousjätteenmukana. Vanhojen tuotteiden hävittäminen oikealla tavalla auttaa vähentämäänympäristölle ja ihmisille mahdollisesti koituvia haittavaikutuksia
French Mise au rebut des produits en fin de vieCe produit a été conçu et fabriqué avec des matériaux et composantsrecyclables de haute qualité. Le symbole d'une poubelle barrée apposé sur un produit signifie que ce dernierrépond aux exigences de la directive européenne 2002/96/EC.Informez-vous auprès des instances locales sur le système de collecte desproduits électriques et électroniques en fin de vie.Conformez-vous à la législation en vigueur et ne jetez pas vos produits avec lesdéchets ménagers. Seule une mise au rebut adéquate des produits peutempêcher la contamination de l'environnement et ses effets nocifs sur la santé.
German Entsorgung Ihres alten GerätsIhr Gerät wurde unter Verwendung hochwertiger Materialien und Komponentenentwickelt und hergestellt, die recycelt und wieder verwendet werden können. Befindet sich dieses Symbol (durchgestrichene Abfalltonne auf Rädern) auf demGerät, bedeutet dies, dass für dieses Gerät die Europäischen Richtlinie2002/96/EG gilt.Informieren Sie sich über die geltenden Bestimmungen zur getrennten Sammlungvon Elektro- und Elektronik-Altgeräten in Ihrem Land.Richten Sie sich bitte nach den geltenden Bestimmungen in Ihrem Land, undentsorgen Sie Altgeräte nicht über Ihren Haushaltsabfall. Durch die korrekteEntsorgung Ihrer Altgeräte werden Umwelt und Menschen vor möglichennegativen Folgen geschützt.
SRU8015_IFU_Bundel1v4.qxd 16-05-2007 17:02 Pagina 108
109
Italian Smaltimento di vecchi prodottiIl prodotto è stato progettato e assemblato con materiali e componenti di altaqualità che possono essere riciclati e riutilizzati. Se su un prodotto si trova il simbolo di un bidone con ruote, ricoperto da unaX, vuol dire che il prodotto soddisfa i requisiti della Direttiva comunitaria2002/96/CE.Informarsi sulle modalità di raccolta, dei prodotti elettrici ed elettronici, in vigorenella zona in cui si desidera disfarsi del prodotto.Attenersi alle normative locali per lo smaltimento dei rifiuti e non gettare ivecchi prodotti nei normali rifiuti domestici. Uno smaltimento adeguato deiprodotti aiuta a prevenire l'inquinamento ambientale e possibili danni alla salute.
Norwegian Avhending av gamle produkterProduktet er utformet og produsert i materialer og komponenter av høykvalitet, som kan resirkuleres og brukes på nytt. Når denne søppelbøtten med kryss på følger med et produkt, betyr det atproduktet dekkes av det europeiske direktivet 2002/96/EU.Finn ut hvor du kan levere inn elektriske og elektroniske produkter tilgjenvinning i ditt lokalmiljø.Overhold lokale regler, og ikke kast gamle produkter sammen medhusholdningsavfallet. Riktig avhending av de gamle produktene dine vil hjelpe tilmed å forhindre potensielle negative konsekvenser for miljøet og menneskershelse.
Portuguese Eliminação do seu antigo produtoO seu produto foi desenhado e fabricado com matérias-primas e componentesde alta qualidade, que podem ser reciclados e reutilizados. Quando este símbolo, com um latão traçado, está afixado a um produto significaque o produto é abrangido pela Directiva Europeia 2002/96/EC.Informe-se acerca do sistema de recolha selectiva local para produtos eléctricose electrónicos.Aja de acordo com os regulamentos locais e não descarte os seus antigosprodutos com o lixo doméstico comum. A correcta eliminação do seu antigoproduto ajuda a evitar potenciais consequências negativas para o meio ambientee para a saúde pública.
Spanish Desecho del producto antiguoEl producto se ha diseñado y fabricado con materiales y componentes de altacalidad, que se pueden reciclar y volver a utilizar. Cuando este símbolo de contenedor de ruedas tachado se muestra en unproducto indica que éste cumple la directiva europea 2002/96/EC.Obtenga información sobre la recogida selectiva local de productos eléctricos yelectrónicos.Cumpla con la normativa local y no deseche los productos antiguos con losdesechos domésticos. El desecho correcto del producto antiguo ayudará a evitarconsecuencias negativas para el medioambiente y la salud humana.
Swedish Kassering av din gamla produktProdukten är utvecklad och tillverkad av högkvalitativa material ochkomponenter som kan både återvinnas och återanvändas. När den här symbolen med en överkryssad papperskorg visas på produkteninnebär det att produkten omfattas av det europeiska direktivet 2002/96/EG.Ta reda på var du kan hitta närmaste återvinningsstation för elektriska ochelektroniska produkter.Följ de lokala reglerna och släng inte dina gamla produkter i det vanligahushållsavfallet. Genom att kassera dina gamla produkter på rätt sätt kan du bidratill att minska eventuella negativa effekter på miljö och hälsa.
SRU8015_IFU_Bundel1v4.qxd 16-05-2007 17:02 Pagina 109

110
Turkish Eski ürününüzün atılmasıÜrününüz, geri dönüşüme tabi tutulabilen ve yeniden kullanılabilen,yüksek kalitede malzeme ve parçalardan tasarlanmış ve üretilmiştir. Birürüne, çarpı işaretli tekerlekli çöp arabası işaretli etiket yapıştırılması,söz konusu ürünün 2002/96/EC sayılı Avrupa Yönergesi kapsamınaalınması anlamına gelir. Lütfen, elektrikli ve elektronik ürünlerintoplanması ile ilgili bulunduğunuz yerdeki sistem hakkında bilgi edinin.Lütfen, yerel kurallara uygun hareket edin ve eskiyen ürünlerinizi,normal evsel atıklarınızla birlikte atmayın. Eskiyen ürününüzün atıkişlemlerinin doğru biçimde gerçekleştirilmesi, çevre ve insan sağlığıüzerinde olumsuz etkilere yol açılmasını önlemeye yardımcı olacaktır.
SRU8015_IFU_Bundel1v4.qxd 16-05-2007 17:02 Pagina 110
111
. . . . . . . . . . . . . . . . . . . . . . . . . . . . . . . . . . . . . . . . . . . . . . . . . . . . . .
. . . . . . . . . . . . . . . . . . . . . . . . . . . . . . . . . . . . . . . . . . . . . . . . . . . . . .
. . . . . . . . . . . . . . . . . . . . . . . . . . . . . . . . . . . . . . . . . . . . . . . . . . . . . .
. . . . . . . . . . . . . . . . . . . . . . . . . . . . . . . . . . . . . . . . . . . . . . . . . . . . . .
. . . . . . . . . . . . . . . . . . . . . . . . . . . . . . . . . . . . . . . . . . . . . . . . . . . . . .
. . . . . . . . . . . . . . . . . . . . . . . . . . . . . . . . . . . . . . . . . . . . . . . . . . . . . .
. . . . . . . . . . . . . . . . . . . . . . . . . . . . . . . . . . . . . . . . . . . . . . . . . . . . . .
. . . . . . . . . . . . . . . . . . . . . . . . . . . . . . . . . . . . . . . . . . . . . . . . . . . . . .
. . . . . . . . . . . . . . . . . . . . . . . . . . . . . . . . . . . . . . . . . . . . . . . . . . . . . .
. . . . . . . . . . . . . . . . . . . . . . . . . . . . . . . . . . . . . . . . . . . . . . . . . . . . . .
. . . . . . . . . . . . . . . . . . . . . . . . . . . . . . . . . . . . . . . . . . . . . . . . . . . . . .
. . . . . . . . . . . . . . . . . . . . . . . . . . . . . . . . . . . . . . . . . . . . . . . . . . . . . .
. . . . . . . . . . . . . . . . . . . . . . . . . . . . . . . . . . . . . . . . . . . . . . . . . . . . . .
. . . . . . . . . . . . . . . . . . . . . . . . . . . . . . . . . . . . . . . . . . . . . . . . . . . . . .
. . . . . . . . . . . . . . . . . . . . . . . . . . . . . . . . . . . . . . . . . . . . . . . . . . . . . .
. . . . . . . . . . . . . . . . . . . . . . . . . . . . . . . . . . . . . . . . . . . . . . . . . . . . . .
. . . . . . . . . . . . . . . . . . . . . . . . . . . . . . . . . . . . . . . . . . . . . . . . . . . . . .
. . . . . . . . . . . . . . . . . . . . . . . . . . . . . . . . . . . . . . . . . . . . . . . . . . . . . .
. . . . . . . . . . . . . . . . . . . . . . . . . . . . . . . . . . . . . . . . . . . . . . . . . . . . . .
. . . . . . . . . . . . . . . . . . . . . . . . . . . . . . . . . . . . . . . . . . . . . . . . . . . . . .
. . . . . . . . . . . . . . . . . . . . . . . . . . . . . . . . . . . . . . . . . . . . . . . . . . . . . .
. . . . . . . . . . . . . . . . . . . . . . . . . . . . . . . . . . . . . . . . . . . . . . . . . . . . . .
. . . . . . . . . . . . . . . . . . . . . . . . . . . . . . . . . . . . . . . . . . . . . . . . . . . . . .
. . . . . . . . . . . . . . . . . . . . . . . . . . . . . . . . . . . . . . . . . . . . . . . . . . . . .
SRU8015_IFU_Bundel1v4.qxd 16-05-2007 17:02 Pagina 111
© Copyright 2007 Royal Philips Electronics,
Interleuvenlaan 74-76, 3001 Leuven (Belgium)
3104 205 3448.1
SRU8015_IFU_Bundel1v4.qxd 16-05-2007 17:02 Pagina 112