
Spikes-Spider Hub Installation · Spikes-Spider Hub Installation The instructions that are provided...
10
Spikes-Spider Hub Installation The instructions that are provided with the Spikes Spiders are pretty good. I've created this page for two reasons: to show those that are thinking of buying a set exactly what it looks like to install them, and to show Saturn Vue owners exactly which pieces are used for the installation since the provided instructions are more generic in nature. These instructions are for installing the Spikes-Spider wheel hubs on '06 and '07 FWD Vues with 17 inch wheels and the OEM Bridgestone Duellers (235/65/17). The installation takes about 20 miutes: 1. Ensure that you have the right size Sport chains and Adapter Kit.
Transcript of Spikes-Spider Hub Installation · Spikes-Spider Hub Installation The instructions that are provided...

Spikes-Spider Hub Installation The instructions that are provided with the Spikes Spiders are pretty good. I've created this page for two reasons: to show those that are thinking of buying a set exactly what it looks like to install them, and to show Saturn Vue owners exactly which pieces are used for the installation since the provided instructions are more generic in nature. These instructions are for installing the Spikes-Spider wheel hubs on '06 and '07 FWD Vues with 17 inch wheels and the OEM Bridgestone Duellers (235/65/17). The installation takes about 20 miutes: 1. Ensure that you have the right size Sport chains and Adapter Kit.

2. Remove the center hub cover from the two front wheels: Turn the plastic nuts on the hub cover counter clockwise. You can use a socket or the jack handle wrench that comes with the vehicle. I chose to use a socket and was pleasantly surprised to see that I can finger loosen the plastic nuts without using a wrench. The plastic nuts do not separate from the hub, you simply need to turn them about 3 or four turns counter clockwise.
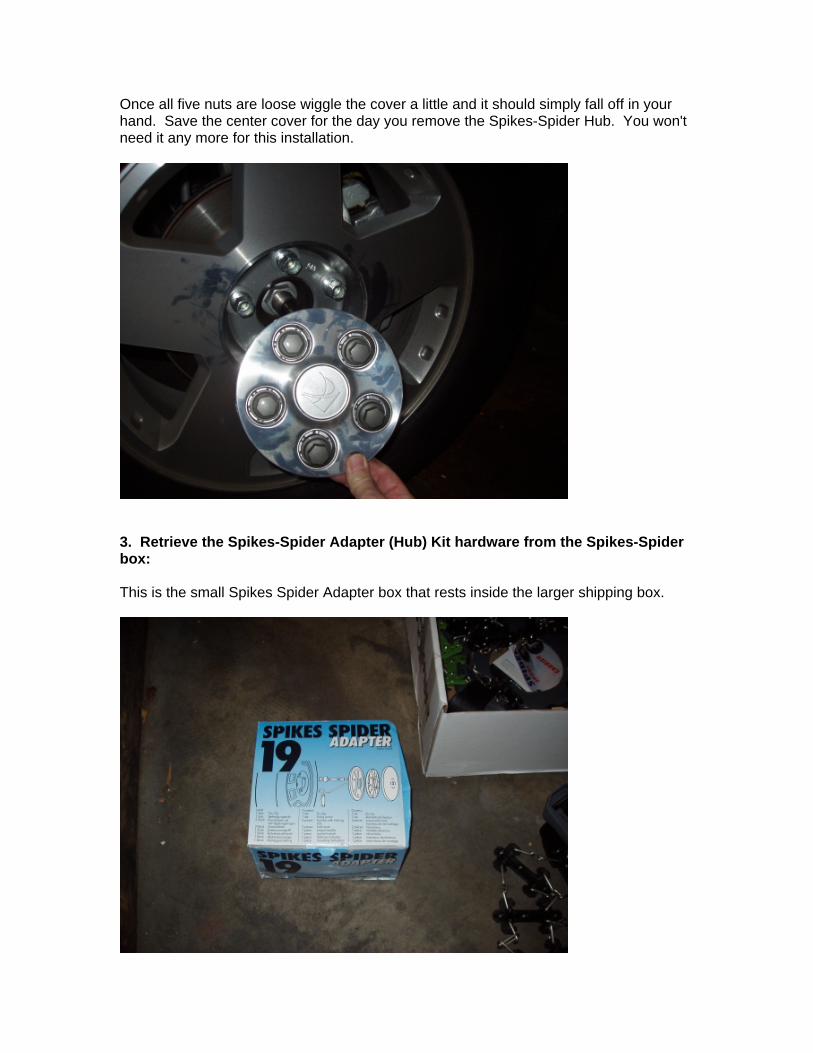
Once all five nuts are loose wiggle the cover a little and it should simply fall off in your hand. Save the center cover for the day you remove the Spikes-Spider Hub. You won't need it any more for this installation.
3. Retrieve the Spikes-Spider Adapter (Hub) Kit hardware from the Spikes-Spider box: This is the small Spikes Spider Adapter box that rests inside the larger shipping box.
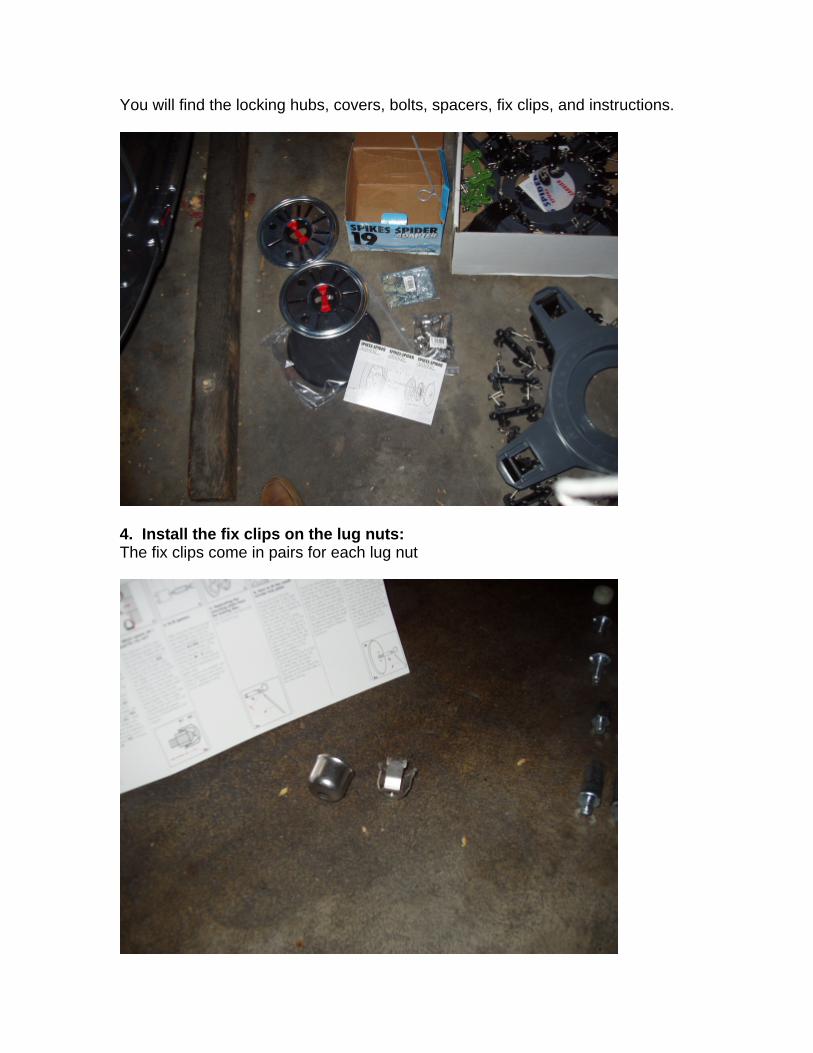
You will find the locking hubs, covers, bolts, spacers, fix clips, and instructions.
4. Install the fix clips on the lug nuts: The fix clips come in pairs for each lug nut
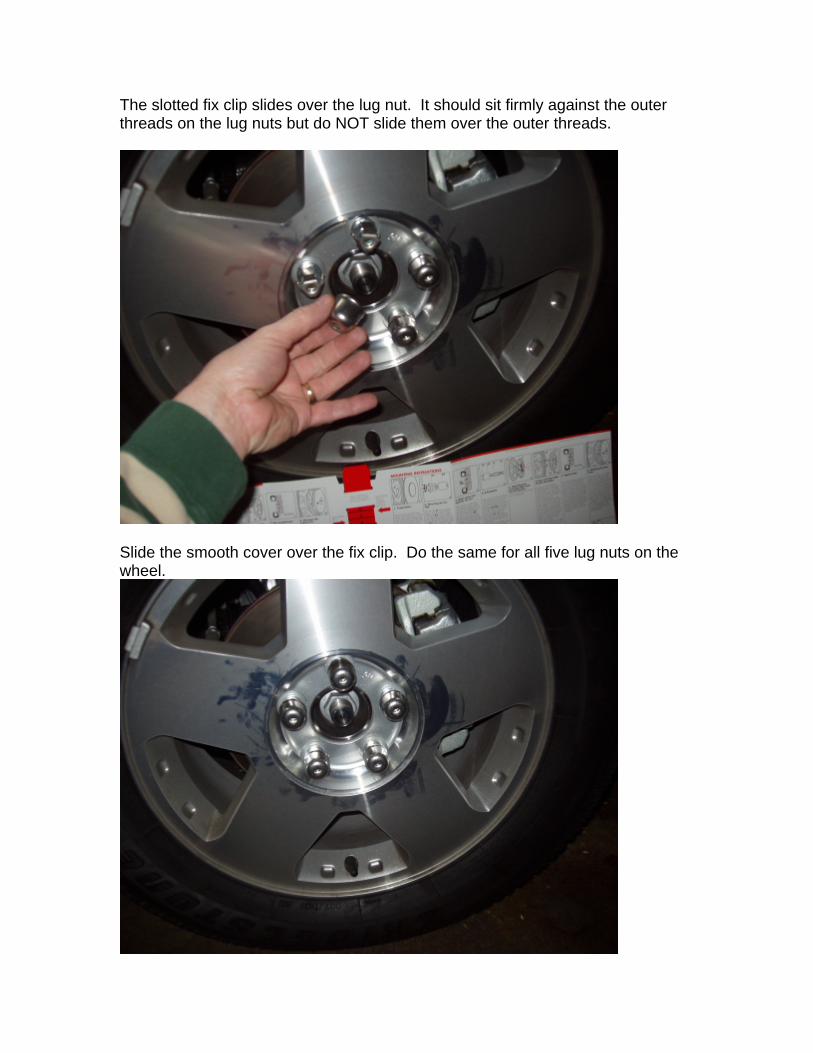
The slotted fix clip slides over the lug nut. It should sit firmly against the outer threads on the lug nuts but do NOT slide them over the outer threads.
Slide the smooth cover over the fix clip. Do the same for all five lug nuts on the wheel.
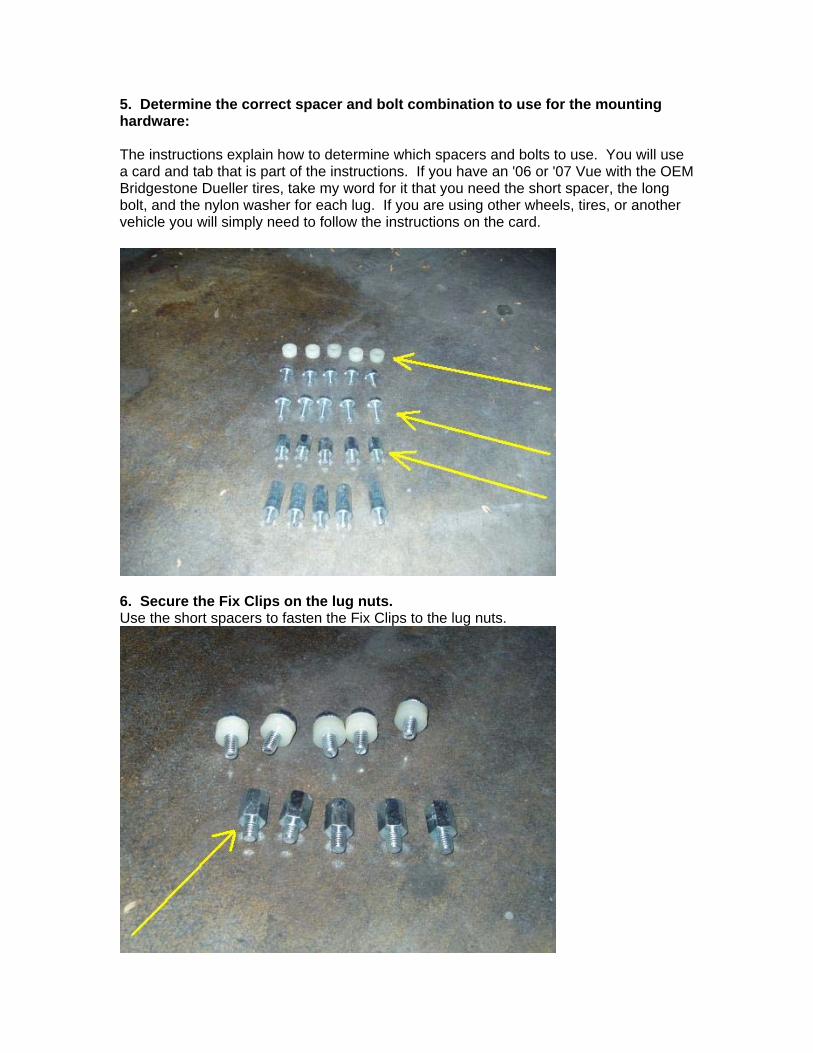
5. Determine the correct spacer and bolt combination to use for the mounting hardware: The instructions explain how to determine which spacers and bolts to use. You will use a card and tab that is part of the instructions. If you have an '06 or '07 Vue with the OEM Bridgestone Dueller tires, take my word for it that you need the short spacer, the long bolt, and the nylon washer for each lug. If you are using other wheels, tires, or another vehicle you will simply need to follow the instructions on the card.
6. Secure the Fix Clips on the lug nuts. Use the short spacers to fasten the Fix Clips to the lug nuts.
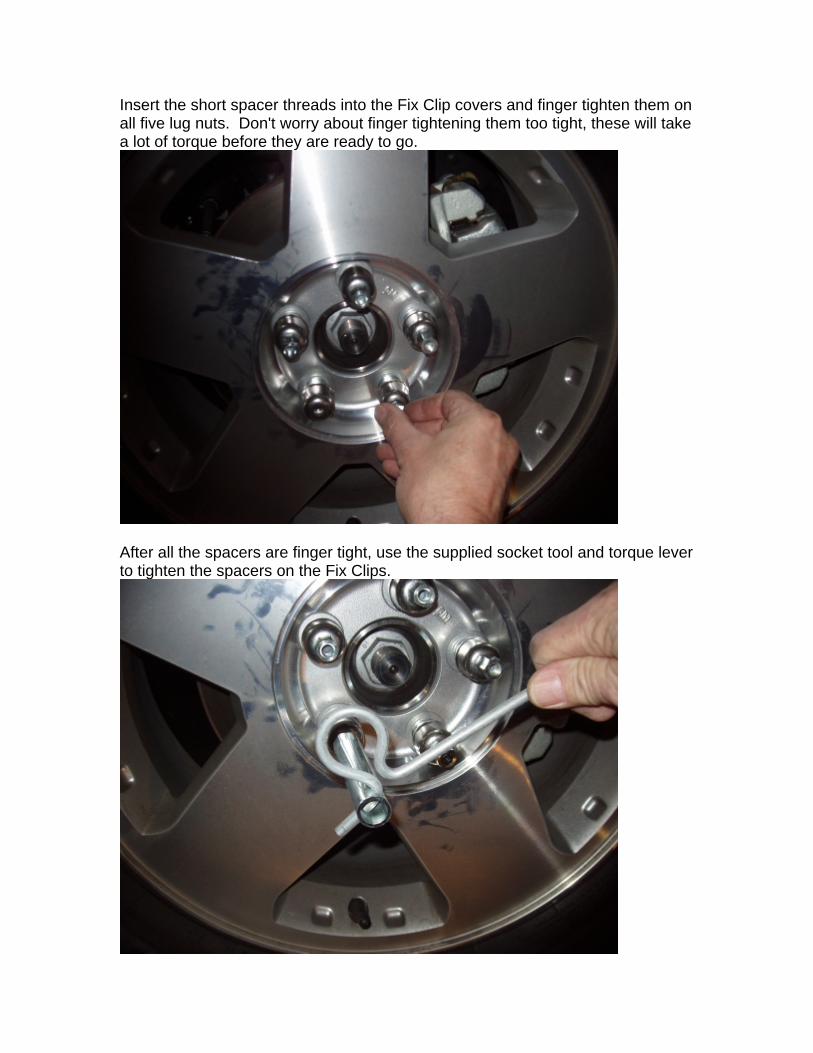
Insert the short spacer threads into the Fix Clip covers and finger tighten them on all five lug nuts. Don't worry about finger tightening them too tight, these will take a lot of torque before they are ready to go.
After all the spacers are finger tight, use the supplied socket tool and torque lever to tighten the spacers on the Fix Clips.
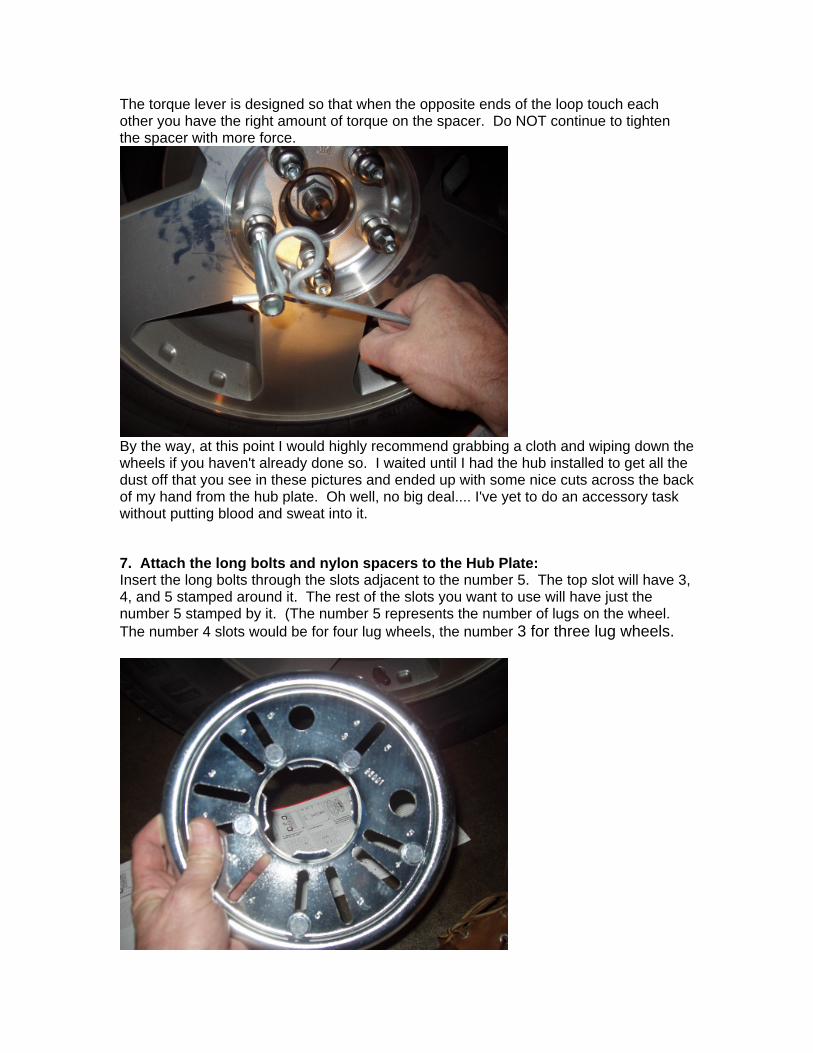
The torque lever is designed so that when the opposite ends of the loop touch each other you have the right amount of torque on the spacer. Do NOT continue to tighten the spacer with more force.
By the way, at this point I would highly recommend grabbing a cloth and wiping down the wheels if you haven't already done so. I waited until I had the hub installed to get all the dust off that you see in these pictures and ended up with some nice cuts across the back of my hand from the hub plate. Oh well, no big deal.... I've yet to do an accessory task without putting blood and sweat into it.
7. Attach the long bolts and nylon spacers to the Hub Plate: Insert the long bolts through the slots adjacent to the number 5. The top slot will have 3, 4, and 5 stamped around it. The rest of the slots you want to use will have just the number 5 stamped by it. (The number 5 represents the number of lugs on the wheel. The number 4 slots would be for four lug wheels, the number 3 for three lug wheels.

Slide the nylon spacers onto the threaded part of the bolt that is sticking out the back side of the plate. This will hold the bolts on the plate for the next step.
8. Attach the hub plate to the spacers on the Fix Clips: Starting at the top with the 3, 4, 5 slot, screw the bolt into the topmost spacer. Only screw it in enough for it to stay in place. The looser you leave it the easier it will be to get the rest of the bolts started. Once all 5 bolts are started, tighten them all down with the same supplied socket and torque lever tool.
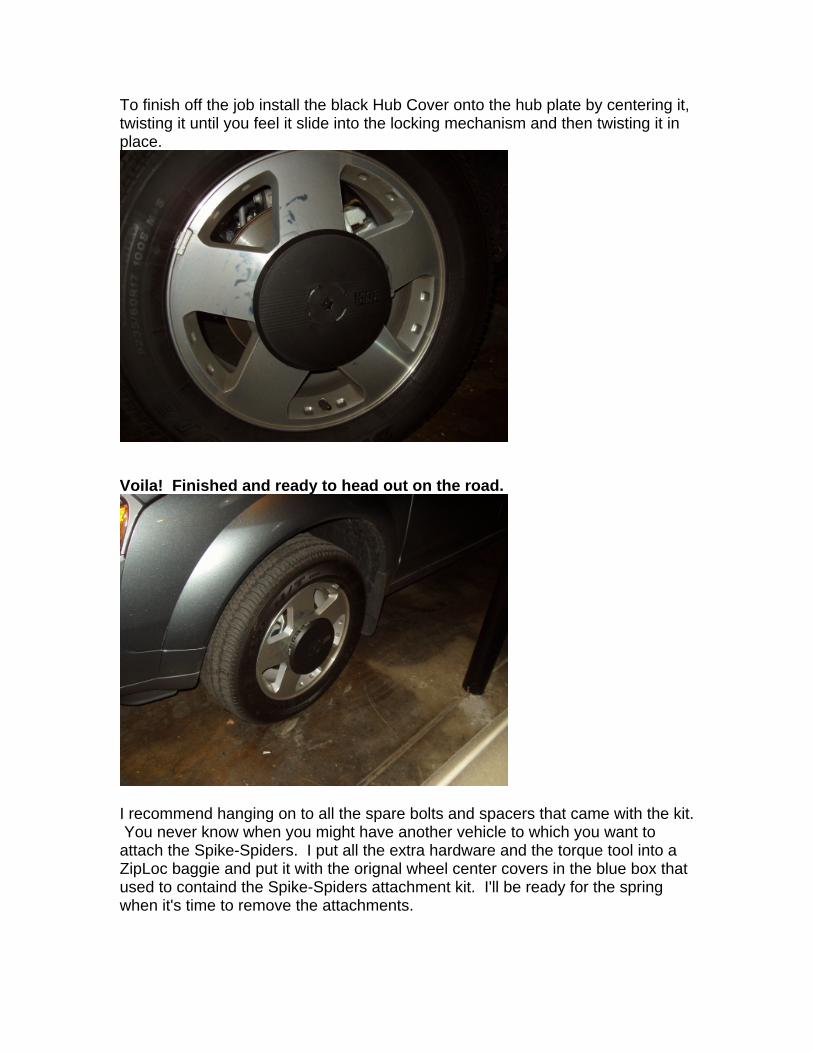
To finish off the job install the black Hub Cover onto the hub plate by centering it, twisting it until you feel it slide into the locking mechanism and then twisting it in place.
Voila! Finished and ready to head out on the road.
I recommend hanging on to all the spare bolts and spacers that came with the kit. You never know when you might have another vehicle to which you want to attach the Spike-Spiders. I put all the extra hardware and the torque tool into a ZipLoc baggie and put it with the orignal wheel center covers in the blue box that used to containd the Spike-Spiders attachment kit. I'll be ready for the spring when it's time to remove the attachments.


![76004 Spider-Man: Spider-Cycle Chase [Marvel]](https://static.fdocuments.net/doc/165x107/577cc35c1a28aba71195cd3a/76004-spider-man-spider-cycle-chase-marvel.jpg)


