Spectra WaveWriter™ System Implantable Pulse Generator · REF 82-1515 (36 cm); REF 82-1516 (55...
16
CAUTION: Federal law restricts this device to sale, distribution and use by or on the order of a physician. 91171765-02 Content ID: 92162496 REV A Spectra WaveWriter™ System Implantable Pulse Generator Directions for Use
Transcript of Spectra WaveWriter™ System Implantable Pulse Generator · REF 82-1515 (36 cm); REF 82-1516 (55...

CAUTION: Federal law restricts this device to sale, distribution and use by or on the order of a physician.
91171765-02 Content ID: 92162496 REV A
Spectra WaveWriter™ System Implantable Pulse Generator
Directions for Use
Implantable Pulse Generator
Implantable Pulse Generator 91171765-02 i of iii
GuaranteesBoston Scientific Corporation reserves the right to modify, without prior notice, information relating to its products in order to improve their reliability or operating capacity.Drawings are for illustration purposes only.
TrademarksAll trademarks are the property of their respective holders.Industry Canada Equipment Certification NumberIC: 9773A-SC1132
Additional InformationFor Indications and related information, see the Indications DFU. For contraindications, warnings, precautions, adverse events summary, physician instructions, sterilization, component disposal, and contact information for Boston Scientific, refer to the Information for Prescribers DFU for your spinal cord stimulator system. For other device-specific instructions not included in this manual, labeling symbols, and warranty information, refer to the appropriate DFU as listed on your Reference Guide.
For information regarding the Patient Identification Card, FCC rules and for clinical studies supporting the clinical use of the neurostimulation system, refer to the Information for Prescribers manual.
Product Model Number
Model DescriptionSC-1160 Implantable Pulse Generator
Registration InformationIn accordance with international practice and regulatory legislation in some countries, a registration form is packed with each Boston Scientific neurostimulator. The purpose of this form is to maintain traceability of all products and to secure warranty rights. It also allows the institution involved in the evaluation or replacement of a specific device to gain quick access to pertinent data from the manufacturer.
Fill out the registration form included in the package contents. Return one copy to Boston Scientific, keep one copy for patient records, provide one copy to the patient, and one copy to the physician.Boston Scientific Neuromodulation Corporation 25155 Rye Canyon Loop Valencia, California 91355, USA Attention: Customer Service Department

Implantable Pulse Generator 91171765-02 ii of iii
Table of ContentsDescription ..................................................................................................................1
Compatible Leads ....................................................................................................1IPG Kit .....................................................................................................................1
Max Current Amplitude per Electrode vs Impedance .............................................2Max Amplitude Based on Frequency and Pulse Width ...........................................3Materials ......................................................................................................................4Radiopaque Identification Tag ..................................................................................4Instructions for Use ....................................................................................................5
IPG Handling and Storage .......................................................................................5Pre-Op Instructions ..................................................................................................5IPG Implantation ......................................................................................................5Tunneling the Lead or Lead Extension ....................................................................5Connecting the Lead, Extension, Splitter, or Connector to the IPG .........................7IPG Explant or Replacement ...................................................................................9
Rechargeable Stimulator System .............................................................................9Charging Steps .........................................................................................................10IPG Battery Status .................................................................................................... 11

Implantable Pulse Generator
Implantable Pulse Generator 91171765-02 iii of iii
This page intentionally left blank
Description
Implantable Pulse Generator 91171765-02 1 of 11
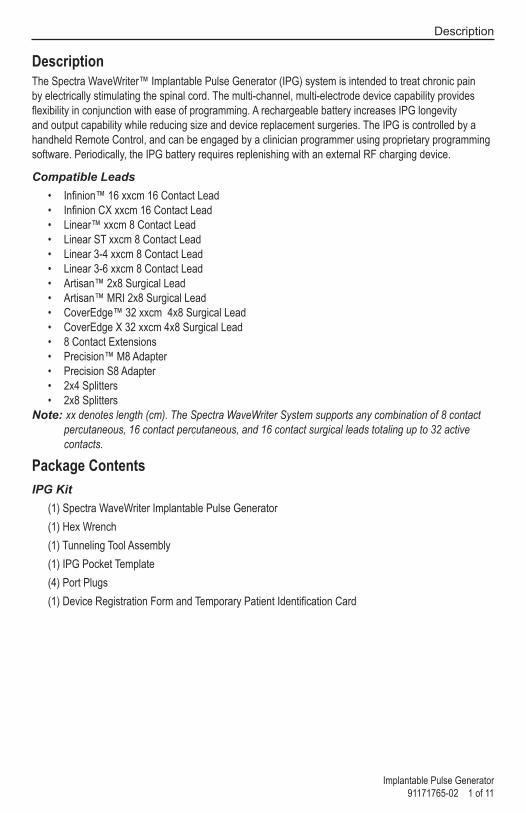
DescriptionThe Spectra WaveWriter™ Implantable Pulse Generator (IPG) system is intended to treat chronic pain by electrically stimulating the spinal cord. The multi-channel, multi-electrode device capability provides flexibility in conjunction with ease of programming. A rechargeable battery increases IPG longevity and output capability while reducing size and device replacement surgeries. The IPG is controlled by a handheld Remote Control, and can be engaged by a clinician programmer using proprietary programming software. Periodically, the IPG battery requires replenishing with an external RF charging device.
Compatible Leads• Infinion™ 16 xxcm 16 Contact Lead• Infinion CX xxcm 16 Contact Lead• Linear™ xxcm 8 Contact Lead• Linear ST xxcm 8 Contact Lead• Linear 3-4 xxcm 8 Contact Lead• Linear 3-6 xxcm 8 Contact Lead• Artisan™ 2x8 Surgical Lead• Artisan™ MRI 2x8 Surgical Lead• CoverEdge™ 32 xxcm 4x8 Surgical Lead• CoverEdge X 32 xxcm 4x8 Surgical Lead• 8 Contact Extensions• Precision™ M8 Adapter• Precision S8 Adapter• 2x4 Splitters• 2x8 Splitters
Note: xx denotes length (cm). The Spectra WaveWriter System supports any combination of 8 contact percutaneous, 16 contact percutaneous, and 16 contact surgical leads totaling up to 32 active contacts.
Package ContentsIPG Kit
(1) Spectra WaveWriter Implantable Pulse Generator(1) Hex Wrench(1) Tunneling Tool Assembly(1) IPG Pocket Template(4) Port Plugs(1) Device Registration Form and Temporary Patient Identification Card

Implantable Pulse Generator
Implantable Pulse Generator 91171765-02 2 of 11
Max Current Amplitude per Electrode vs Impedance(for all leads other than the 4x8 Surgical Lead)
0.00
5.10
10.20
15.30
20.40
25.50
300 400 500 600 700 800 900 1000 1100 1200
Curr
ent (
mA)
Impedance (Ω)
Maximum Amplitude Based on Impedance and Pulse Width
PW = 20 us
PW = 100 us
PW = 200 us
PW = 300 us
PW = 400 us
PW = 600 us
PW = 800 us
PW = 1000 us
Programmable up to 25.5 mA
Programmable up to 21.1 mA
Programmable up to 15.8 mA
Programmable up to 12.7 mA
20 µsec
100 µsec
200 µsec
300 µsec
400 µsec
600 µsec
800 µsec
1000 µsec
Pulse Width:
Max Current Amplitude per Electrode vs Impedance(4x8 Surgical Lead)

Max Amplitude Based on Frequency and Pulse Width
Implantable Pulse Generator 91171765-02 3 of 11
Max Amplitude Based on Frequency and Pulse Width(for all leads other than the 4x8 Surgical Lead)
0.00
5.10
10.20
15.30
20.40
25.50
0 200 400 600 800 1000 1200
Curr
ent (
mA)
Frequency (Hz)
Maximum Amplitude Based on Frequency and Pulse Width
PW = 20 us
PW = 100 us
PW = 200 us
PW = 300 us
PW = 400 us
PW = 600 us
PW = 800 us
PW = 1000 us
Pulse Width:
20 µsec
100 µsec
200 µsec
300 µsec
400 µsec
600 µsec
800 µsec
1000 µsec
Max Amplitude Based on Frequency and Pulse Width(4x8 Surgical Lead)

Implantable Pulse Generator
Implantable Pulse Generator 91171765-02 4 of 11
Specifications and Technical DataParameter Range DefaultAreas (Channels) 4 —Amplitude 0 – 25.5 mA 0 mARate 2 – 1200 pps 40 ppsWidth 20 – 1000 μseca 210 μsecCycle 0 sec – 90 min, OFF OFFRamp 1 – 10 secs 3 secsb
Contacts 1 – 32, case: +100% to -100%, OFF
1 – 32, case: OFF
MicroBurst 0 to 1 second range OFF
a. Amplitude × Width ≤ 12.7 µC for all leads other than the 4x8 Surgical Lead; Amplitude × Width ≤ 9.1 μC for the 4x8 Surgical Leads.
b. Ramp is OFF by default when an Area is programmed with MicroBurst settings and cannot be turned on.
MaterialsCase TitaniumHeader EpoxyStrain Relief SiliconeSize/Volume 55.0 mm x 46.0 mm x 10.8 mm / 21.2 cm3 (including header)
Radiopaque Identification TagThe IPG contains a radiopaque identification tag “BSC IPG”. The identification tag is visible using standard x-ray procedures.

Instructions for Use
Implantable Pulse Generator 91171765-02 5 of 11
Instructions for UseIPG Handling and Storage
• Handle the IPG and all components with care.• Keep sharp instruments away from the components.• Do not use the IPG if it has been dropped on a hard surface.• Do not incinerate an IPG. Improper disposal of the device could result in an explosion. Devices
should be explanted in the case of cremation, and returned to Boston Scientific Neuromodulation. An explant kit is available.
• Store the IPG between 0 °C and 45 °C ( 32°F and 113 °F). Devices should always be kept in temperature regulated areas within the acceptable temperature range. IPG damage can occur at temperatures outside of this range.
Pre-Op Instructions1. Ensure that the IPG is fully charged prior to the permanent implant procedure. The approximate
location of the IPG is marked on the IPG kit. Turn on the Charger and place it over the IPG to begin charging. Refer to “Charging Steps” on page 10 for additional instructions.
2. Check that the sterile package is intact. (See “Sterilization” in the Information for Prescribers manual.)3. If intra-operative stimulation testing is desired, ensure that a Trial Stimulator is available for use. Be
sure that stimulation is off (the indicator light is not blinking) before opening the Trial Stimulator’s battery compartment. Refer to the Clinician Trial Manual for additional instructions.
IPG Implantation1. Ensure that the area surrounding the lead entry site is incised to a dimension that will accommodate
the tunneling tool.2. Check that the lead is securely anchored.3. Select and mark the intended IPG site, using the IPG template, and create an incision for the IPG
pocket.4. Create a subcutaneous pocket no larger than the IPG outline at a depth of up to 2.0 cm from the
surface. Implant charging could become ineffective at depths shallower than 0.5 cm or greater than 2.0 cm.
5. Tunnel the lead(s) to the IPG site.Note: Using the IPG template will help guide the correct pocket sizing. It is important to keep the pocket
small to reduce the chances of patient manipulation and IPG flipping. Select an IPG site several inches away from the previously externalized trial lead site to reduce risk of infection.
Tunneling the Lead or Lead ExtensionNote: if using an Infinion™ CX Lead(s), it is recommended to use the Long Tunneling Tool (35cm).If using a 4x8 Surgical Lead, it is recommended to use the Long Tunneling Tool (35cm).

Implantable Pulse Generator
Implantable Pulse Generator 91171765-02 6 of 11
1. If not already assembled, attach the tunneling tool handle to the shaft by turning the locking mechanism clockwise.
Tool Handle
Locking Mechanism
Shaft
2. Mark the desired route of the tunnel.
3. Administer the appropriate local anesthetic along the tunneling path.4. OPTIONAL. If necessary, bend the tool shaft to conform to the patient’s body.5. Make a small incision at the desired exit site.6. Create a subcutaneous tunnel between the lead(s) incision and the IPG pocket site until the straw is
visible and accessible at the exit point.
7. Unscrew and remove the tunneling tool handle.

Instructions for Use
Implantable Pulse Generator 91171765-02 7 of 11
8. Grasp the tip of the tool with one hand while holding the straw in place with the other hand. Pull the tunneling tool shaft out through the straw.
9. Push the lead or extension through the straw, then withdraw the straw.10. Pull the proximal end(s) out of the exit point. 11. Wipe the proximal end(s) clean.
CAUTION: Do not tunnel the splitter.
Note: If using the 2x8 Splitter and performing a permanent trial, the splitter tails may be tunneled to the exit site.
Note: The following Codman Disposable Catheter Passers may be used in place of the Boston Scientific tunneling tool for the 2x8 Surgical Lead, Linear™ 8 Contact Leads and Infinion 16 Lead only:REF 82-1515 (36 cm); REF 82-1516 (55 cm); REF 82-1517 (65 cm)
Note: When using a Codman Disposable Catheter Passer, tunnel from the midline incision to the IPG pocket using the standard technique.
Connecting the Lead, Extension, Splitter, or Connector to the IPGIPG ports are labeled as follows:

Implantable Pulse Generator
Implantable Pulse Generator 91171765-02 8 of 11
For convenience, connect leads or splitter tails to the IPG ports corresponding to their locations, superior versus inferior or left versus right lead placements. For example:
• Superior leads to upper IPG ports A or B. Inferior leads to IPG ports C or D.• For the Infinion16, connect the splitter tail with laser etched bands (contacts 1-8 of the Infinion 16
lead) to the left ports A or C and the unmarked splitter tail (contacts 9-16 of the Infinion 16 lead) to the right ports B or D.
• For the Infinion CX Lead, connect the tail with the single marker band (contacts 1-8 of the Infinion CX Lead) to the ports A or C and the tail with two marker bands (contacts 9-16 of the Infinion CX Lead) to the right ports B or D.
• For the Artisan 2x8 surgical lead, connect the left side to the left ports A or C. Connect the right side (the laser-etched tail), contacts 9-16, to the right ports B or D.
• For the 4x8 Surgical Lead, connect the lead tail as follows: - Lead tail with one marker band (contacts 1-8) to port A. - Lead tail with two marker bands (contacts 9-16) to port B. - Lead tail with three marker bands (contacts 17-24) to port C. - Lead tail with four marker bands (contacts 25-32) to port D.
Example: 4x8 Surgical Lead (electrodes faced down)
4321
8765
1 Contacts 1-8 5 Connects to port A2 Contacts 9-16 6 Connects to port B3 Contacts 17-24 7 Connects to port C4 Contacts 25-32 8 Connects to port D
1. Fully insert the lead(s), extension(s), splitter(s), and/or connector(s) into the IPG port(s), being careful not to stress or bend the proximal end of the lead. When the lead is properly inserted, the lead will stop and the retention ring will be located under the set screw.
2. Fully insert a port plug into unused IPG ports.Note: If you experience difficulty when inserting the lead, lead extension, splitter, connector, or port plug,
use the hex wrench to loosen (counterclockwise) the set screw and/or gently rotate the lead to help advance the proximal end.
Note: To confirm good connections, check impedances before tightening the set screw. The IPG must be in contact with the subcutaneous pocket in order to receive accurate impedance measurements.

Rechargeable Stimulator System
Implantable Pulse Generator 91171765-02 9 of 11
3. Pass the hex wrench through the hole in the septum located on the front or back of the IPG header and tighten each set screw until the hex wrench “clicks,” indicating lock.
CAUTION: Ensure that the lead is fully inserted before tightening the set screw to prevent lead damage
Note: If a port plug is used, it is still necessary to tighten the set screw on the port plug as described above.
Note: The hex wrench is torque-limited and cannot be over-tightened.4. Place the IPG in the subcutaneous pocket with logo marking facing up towards the skin.5. Coil excess lead, extension, splitter, or connector under the IPG. 6. If desired, secure the IPG in the pocket by suturing through the holes in the IPG header.
CAUTION: Do not suture through the leads or splitter.
7. Close and dress the wound(s).
IPG Explant or Replacement1. Turn off the IPG.2. Surgically open the IPG pocket and withdraw the device. Please try to preserve the integrity of all
components so that complete device assessment can be performed.3. Loosen the connector set screws to release and remove the leads, extensions, or splitters.4. For replacement, connect the new IPG following the instructions for “Connecting the Lead, Extension,
Splitter, or Connector to the IPG” on page 7. Or, to terminate therapy, surgically remove the implanted lead system.
5. Notify Boston Scientific to document the reason for explant or replacement and to arrange for return of IPG and components.
Rechargeable Stimulator SystemThe Spectra WaveWriter Stimulator is rechargeable. Boston Scientific recommends any recharge routine that fits the patient’s schedule and lifestyle while maintaining sufficient charge to maintain stimulation.Developing a patient’s recharge routine involves finding the right balance among the following:
• How much power is required for the patient to experience effective therapy.• How often the patient wants to recharge.• How long the patient wants to recharge.• How the patient would like to manage their personal schedule.

Implantable Pulse Generator
Implantable Pulse Generator 91171765-02 10 of 11
The Clinician Programmer will estimate charging time based on 24 hours per day of stimulation at the programmed settings. To charge fully, wait until the Charger emits an end of charge beep signal or the Remote Control display indicates that the battery is charged. Refer to the Patient’s Charger Handbook and the Physician’s Remote Control Directions for Use for additional information. The recharging process is simple, but important.
Charging StepsWARNINGS:
• Patient should not charge while sleeping. This may result in a burn.• While charging, the Charger may become warm. It should be handled with care.• Failure to use the Charger with either the Charger Belt or an adhesive patch, as shown, may result
in a burn. If pain or discomfort is felt, cease charging and contact Boston Scientific.The Charger Base Station should be plugged in and the Charger placed in the Base Station when not in use. When the indicator light is green, the Charger is fully charged. When the indicator is amber, the Charger is partially charged, but is still able to deliver a charge to the Stimulator.1. When the indicator light is green, remove the Charger from the Base Station. The indicator light will
then turn off.2. Press the power button. The indicator light will come on again, and the Charger will begin beeping as it
searches for the Stimulator.3. Place the Charger over the Stimulator. When the Charger is aligned with the Stimulator, the beeping
will stop.• Centering the Charger over the Stimulator will ensure the shortest charging time.• Many patients are able to feel the implanted Stimulator and can place the Charger directly on
top of it.• Alternatively, centering the Charger within the alignment area (i.e., the area where the Charger
does not beep) will also ensure that the Charger is aligned.4. Secure the Charger over the Stimulator by using either an adhesive patch or the Charger Belt.
• Adhesive Patch: Remove the clear liner from the patch. Apply the white side with the blue stripe to the back of the Charger. Then remove the beige liner from the patch. Secure the Charger over the Stimulator by pressing the adhesive to the skin over the Stimulator.
• Charger Belt: Place the Charger into the pocket on the Charger Belt so that the Power button is visible through the mesh fabric. Secure the Charger over the Stimulator by adjusting the Charger Belt.
Note: If you accidentally locate the patch in the wrong place, or if the Charger Belt moves out of alignment, the Charger will start beeping again. Use a new adhesive patch or readjust the belt to place the Charger back into position.

IPG Battery Status
Implantable Pulse Generator 91171765-02 11 of 11
5. When the Charger emits a series of double beeps, the Stimulator is fully charged. Turn off the Charger, remove the Charger Belt or adhesive patch, and return the Charger to the Base Station. Do not confuse the end of charge signal (a series of double beeps) with the continuous beeps that indicate that the Charger is searching for the Stimulator.
Note: • The end of a charge signal is a distinct double beep, and the alignment indicator is a steady continuous signal.
• The Remote Control will not be able to communicate with the IPG when charging.Refer to “IPG Battery Life” in your Information for Prescribers manual for information on Stimulator battery life.
IPG Battery StatusThe patient Remote Control displays the Stimulator battery status when communicating with the Stimulator. Refer to the Clinician’s Remote Control Directions for Use for additional information. When the Remote Control indicates a low battery the Stimulator should be recharged as soon as possible. Failure to recharge may lead to loss of stimulation in less than 24 hours. After stimulation stops, communication with the Stimulator will also cease. Until a sufficient level of charge has been attained, the Stimulator may not communicate with the Remote Control.

© 2017 Boston Scientific Corporation or its affiliates. All rights reserved.
91171765-02 2017-08
Legal Manufacturer
Boston Scientific Neuromodulation Corporation 25155 Rye Canyon Loop Valencia, CA 91355 USA (866) 789-5899 in US and Canada (661) 949-4000, (661) 949-4022 Fax (866) 789-6364 TTY www.bostonscientific.com Email: [email protected]
AUS Australian Sponsor Address
Boston Scientific (Australia) Pty LtdPO Box 332BOTANYNSW 1455AustraliaFree Phone 1800 676 133Free Fax 1800 836 666
EU Authorised Representative
Boston Scientific Limited Ballybrit Business Park Galway, IrelandT: +33 (0) 1 39 30 97 00 F: +33 (0) 1 39 30 97 99