SolidWorks Motion and Finite Element Analysis (FEA) Simulation

SolidWorks Motion Study
Tutorial
By: Mohamed Hakeem Mohamed Nizar
Mechanical Engineering Student- May 2015 South Dakota School of Mines & Technology
August 2013

SolidWorks Motion Study by: Mohamed Hakeem Mohamed Nizar Page 1
Getting Started This tutorial is for you to understand the basics of SolidWorks Motion Analysis and use it to
simulate and get the results for problems.
SolidWorks Motion Analysis allows you to study two major types of problems relating to the
motion of solid bodies.
1. Kinematics: Study of the motion of a rigid body without considering the forces that
result in the motion of the body.
2. Dynamics: Study of the motion of a rigid body as a result of the applied external forces
on the body.
SolidWorks Motion Analysis allows you to
answer the following questions:
1. Will the assembled components of your
design move as you intended?
2. Will the assembled components of your
design collide when it’s in motion?
4. What are the magnitudes of the forces
between two parts in contact with one
another?
5. What is the path of the solid body?
6. What is the velocity, acceleration, angle, or
reaction force at an instant?
In order to do motion analysis you need to
add motion analysis plugin to your assembly
file.
Tools Add-Ins Select SolidWorks Motion.
Note: Most of the details in this page are extracted from ‘SolidWorks Motion,’ 21 July 2011, by
Professor Erik Spjut, Engineering Clinic Director, HMC.
http://www.hmc.edu/files/engineering/clinic/Solidworks_motion_final.pdf

SolidWorks Motion Study by: Mohamed Hakeem Mohamed Nizar Page 2
Introduction to Motion Analysis
Motion Analysis can be found only in assembly files. It has several features related to the
motion of an assembly file. Figure below shows a screen shot of a simple pin connection
assembly file.
Features of Motion Study
Motion Study Tab – This tab allows us to analyze the motion study of the assembly file.
Motion Manager Tree – This contains all the parts, sub-assemblies, mates, and the
simulation elements.
Calculate – This button allows calculating the motions of the assembly and helps to
update after changes made.
Play – This button allows us to play the animation to see how it works after calculating
the motion.
Playback Speed – This helps to reduce or increase the speed of the animation.
Save Animation – This button helps to save the animation as a video.

SolidWorks Motion Study by: Mohamed Hakeem Mohamed Nizar Page 3
Motor – This allows simulating a motor or giving a torque to the animation such as at
pin connections.
Spring – This allows simulating a spring in motion where you can edit the spring
constant and length.
Force – This allows simulating forces on any part of an object.
Contact – This allows stopping the interference between solid objects and adjusting the
friction between objects when it is in motion.
Gravity – This allows simulating the effect of gravity on solid objects.
Results & Plots – This allows getting the results and plots for displacement, velocity,
force, angles, etc.
Zoom Time Scale – This allows zooming in/out the timeline.
Key Point – This point decides where the motion has to be stopped.
Time line – This shows the moving time frame.
Introduction to Mates
Mates are crucial for motion analysis. There are some typical mates such as coincident,
concentric, parallel, tangent, and so on that we use to assemble and put the parts together.
This section should be a review of material covered in ME-110.
The following screen shots of an assembly file shows some of the typical mates.
1. Before mates are applied to the assembly

SolidWorks Motion Study by: Mohamed Hakeem Mohamed Nizar Page 4
2. Select the cylindrical face of the bar and pin holder and it will mate it to concentric by
default.
3. Select the face of the rod and the inner face of the pin holder (Right click on the surface
of the pin holder and then click select other to select the inner face) and it will mate it to
coincident by default.

SolidWorks Motion Study by: Mohamed Hakeem Mohamed Nizar Page 5
4. Select the cylindrical face of the pin and pin holder and it will mate it to concentric by
default.
5. Select the circular face of the pin and the face the pin holder as shown in the figure
which will select the coincident mate by default.
The above example gives a demonstration of basic assembly and mates. You can download the
part and assembly files from the website under class materials. Create a new assembly file and
practice to understand it well.

SolidWorks Motion Study by: Mohamed Hakeem Mohamed Nizar Page 6
Lesson 1
This lesson will help you to get familiar with forces acting on a body. You can download the part
and assembly files from the website under class materials.
Open the assembly file.
Click the mate option in assembly features Select the top surface of the floor and the
bottom surface of the cube which will go for the mate coincident by default Click the
check mark to add another mate.

SolidWorks Motion Study by: Mohamed Hakeem Mohamed Nizar Page 7
Dealing with friction and mates
Note: The typical way to attach an object to the floor or to another object is by adding a
coincident mate in between those two faces so they will be touching together at the
selected surfaces. This would change if we need to add friction into our motion analysis.
When you need to add friction, first replace the coincident mate with a parallel mate
without changing anything else. Then add friction via Solid Body Contact.
Click the side edge of the cube and the edge of the floor as shown below It would
select the concentric mate by default, but go and select the distance mate as shown and
specify a distance between those two line. This mate causes the box move along a
straight path.
To change the mass properties go to tools Mass properties. You can change the mass
(make it 5 kg) and the location of center of mass.
Gravity needs to be added in order to simulate the effect of weight. Choose the
direction of gravity as you want it to be.

SolidWorks Motion Study by: Mohamed Hakeem Mohamed Nizar Page 8
Add force to the object. You can choose the face where the force is acting and then can
change the direction as shown below. Then you can change the magnitude of the force
(make it 10 N).

SolidWorks Motion Study by: Mohamed Hakeem Mohamed Nizar Page 9
Calculate the motion.
Now you can play it and see how it behaves when a force is applied. You can drag the
key point until when it reaches the end of the floor.

SolidWorks Motion Study by: Mohamed Hakeem Mohamed Nizar Page 10
Advanced Lesson 1
You can get the results in a plot as shown below. Results and Plots Select category
Select sub-category Select result component. Then select the face which you want to
get the results of. This would give the plot of the result versus time or else you select
new results and change results instead of time. You can see the plot by expanding the
results in the motion manager tree right click the plot you want to see Show plot.
To see the data points in excel, right click on the plot and the click Export CSV.
Velocity vs Time plot ( without friction)

SolidWorks Motion Study by: Mohamed Hakeem Mohamed Nizar Page 11
Acceleration vs Time plot ( without friction )
Add contact to use the friction features. Unselect the material option to edit the static
and kinetic friction coefficients. If you want to choose the materials SolidWorks will set
the friction values to match the materials. When working with friction, coincident mate
should be either suppress or deleted from the motion analysis. Do not specify mass
when working with friction. You can change the mass by creating a materian changing
the density of it as shown in “Tips and Tricks” section.
SolidWorks Motion Study by: Mohamed Hakeem Mohamed Nizar Page 12
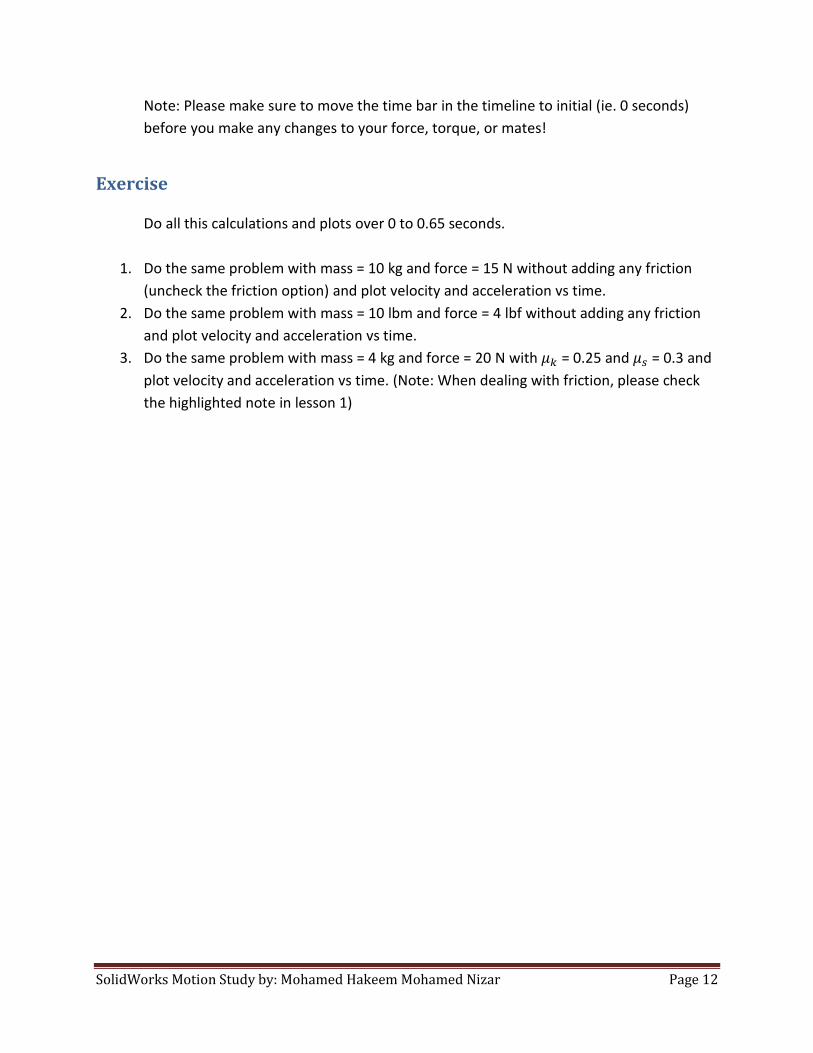
Note: Please make sure to move the time bar in the timeline to initial (ie. 0 seconds)
before you make any changes to your force, torque, or mates!
Exercise
Do all this calculations and plots over 0 to 0.65 seconds.
1. Do the same problem with mass = 10 kg and force = 15 N without adding any friction
(uncheck the friction option) and plot velocity and acceleration vs time.
2. Do the same problem with mass = 10 lbm and force = 4 lbf without adding any friction
and plot velocity and acceleration vs time.
3. Do the same problem with mass = 4 kg and force = 20 N with 𝜇𝑘 = 0.25 and 𝜇𝑠 = 0.3 and
plot velocity and acceleration vs time. (Note: When dealing with friction, please check
the highlighted note in lesson 1)

SolidWorks Motion Study by: Mohamed Hakeem Mohamed Nizar Page 13
Lesson 2
This lesson will help you to get familiar with simulation of a spring. You can download the part
and assembly files from the website under class materials.
Open the assembly file Do the similar mates as in the lesson 1
Click the motion analysis option as shown.

SolidWorks Motion Study by: Mohamed Hakeem Mohamed Nizar Page 14
Add a spring to it by selecting the face of the box and the face of base as shown. Then
you can change the spring stiffness and unstretched length of it as shown.
You can change the display of the spring such as diameter, thickness, and number of
cycles. This part will not affect any mechanical properties of the spring.
Now you can change the initial length of the spring by adding a mate to it. As shown
here, add a distance mate in between the two faces. Here I enter the initial length
longer than the unstretched length to give an oscillation. Make sure to suppress (Right
click on the mate and then select suppress) or delete the mate from the motion study
before you calculate motion or else the box will not move.

SolidWorks Motion Study by: Mohamed Hakeem Mohamed Nizar Page 15
Assign mass (10kg) and Calculate motion.
In addition you can add friction as shown in lesson 1 and then plot the results of desired
parameters, but you need to consider the fact that you can’t assign mass and you have
to create a new material as shown in “Tips and Tricks” section.
Velocity vs Time plot

SolidWorks Motion Study by: Mohamed Hakeem Mohamed Nizar Page 16
Acceleration vs Time plot
Note: The spring won’t be on display unless you click the spring on the motion manager tree
while it is playing.
Exercise
1. Do the same problem with mass = 5 kg and plot velocity and acceleration vs time.
2. Do the same problem (mass = 10 kg) with spring constant = 200 N/m.
3. Do the same problem (mass = 10 kg) with initial length = 0.4m keeping the unstretched
length the same.
4. Do the same problem while setting the unstretched and initial lengths equal to 0.5m
and applying a 5 N force in the positive x direction.

SolidWorks Motion Study by: Mohamed Hakeem Mohamed Nizar Page 17
Lesson 3
This lesson will allow you to get familiar with motors. You can download the part and assembly
files from the website under class materials.
The first few mates are exactly the same as shown in “Introduction to Mates” at the
beginning. The images show the completed assembly.
After assembling the pin holder with the two bars, insert component Insert Slide part
file. Then in mates, click the faces as shown which would select the coincident mate by
default.

SolidWorks Motion Study by: Mohamed Hakeem Mohamed Nizar Page 18
Click the faces as shown which would select the coincident mate by default, but change
it to parallel mate as shown.

SolidWorks Motion Study by: Mohamed Hakeem Mohamed Nizar Page 19
Insert the component sliding box. Then click the cylindrical faces as shown which would
select the concentric mate by default.
Select the faces as shown which would select the coincident mate by default.

SolidWorks Motion Study by: Mohamed Hakeem Mohamed Nizar Page 20
Now select the circular face of the pin on the sliding bar and the front face of the bar as shown
which would select the coincident mate by default.
Right click anywhere on the part Slide and select fix to make that part fixed.
SolidWorks Motion Study by: Mohamed Hakeem Mohamed Nizar Page 21
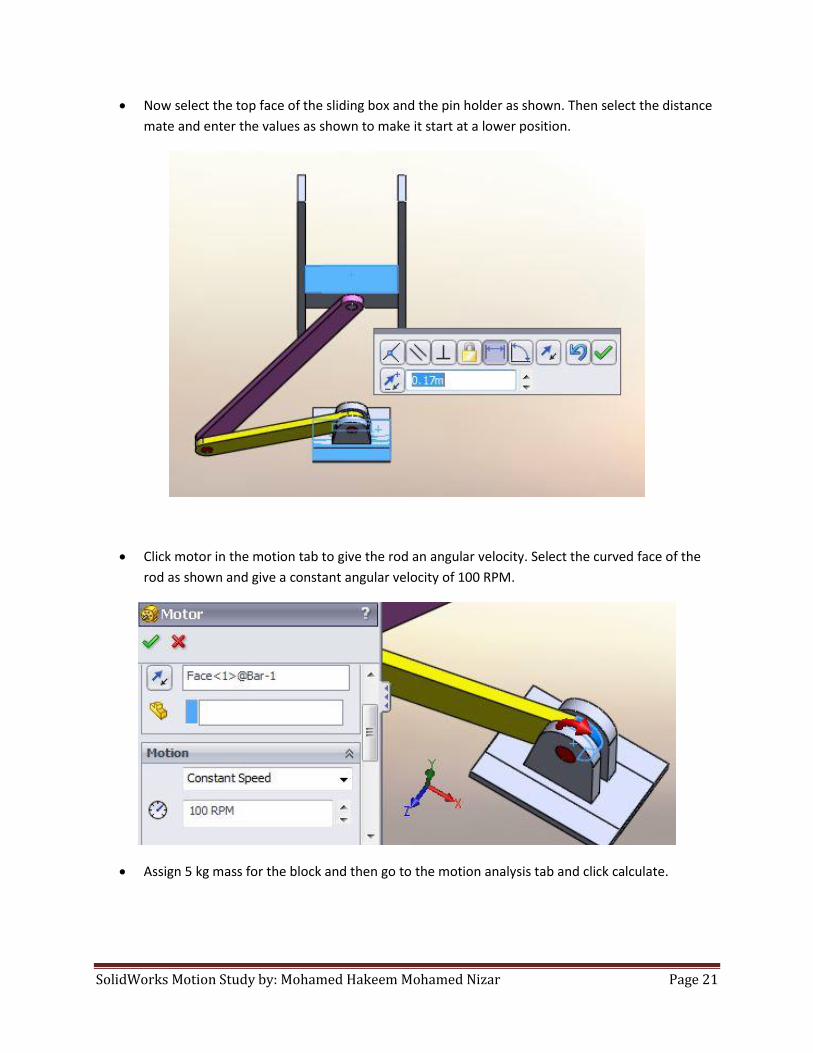
Now select the top face of the sliding box and the pin holder as shown. Then select the distance
mate and enter the values as shown to make it start at a lower position.
Click motor in the motion tab to give the rod an angular velocity. Select the curved face of the
rod as shown and give a constant angular velocity of 100 RPM.
Assign 5 kg mass for the block and then go to the motion analysis tab and click calculate.

SolidWorks Motion Study by: Mohamed Hakeem Mohamed Nizar Page 22
Angular Velocity vs Time plot.
Angular Acceleration vs Time plot.

SolidWorks Motion Study by: Mohamed Hakeem Mohamed Nizar Page 23
Displacement of the Sliding Box vs Angle of the rod plot.
Exercise
1. Do the same problem with a 10kg mass box and show all three plots.
2. Do the same problem with the same mass but 150 RPM constant speed and show all three plots.
3. Do the same problem with 5 rad/s constant angular velocity and show all three plots.

SolidWorks Motion Study by: Mohamed Hakeem Mohamed Nizar Page 24
Lesson 4
This lesson will allow you to get familiar with a simple impact situation. You can download the
part and assembly files from the website under class materials.
Make the assembly file and make sure the ball is above where the floor is by selecting the
different views to make sure of its position. Then create a distance mate between the ball and
the floor as shown (1m) in the model tab.
Add solid body contact between the ball and the floor. Check the restitution coefficient (0.5)
option.

SolidWorks Motion Study by: Mohamed Hakeem Mohamed Nizar Page 25
The default simulation setting sare often not accurate enough to capture impact events. There
are two ways you can change the defaults. You can use either check the “Use Precise Contact”
option or increase the frames per second. The preferred solution is Use Precise Contact.
Calculate the motion and plot the results of the displacement of the ball vs time.

SolidWorks Motion Study by: Mohamed Hakeem Mohamed Nizar Page 26
Linear velocity vs Time plot
Linear Displacement vs Linear Velocity Plot

SolidWorks Motion Study by: Mohamed Hakeem Mohamed Nizar Page 27
Exercise
1. Do the same problem with a restitution coefficient of 0.6 and plot the displacement of the ball
vs time, the results of linear velocity vs time, and the results of linear displacement vs linear
velocity.

SolidWorks Motion Study by: Mohamed Hakeem Mohamed Nizar Page 28
Tips and Tricks
To change units, click options as shown.
Then you can change units as you need as shown below.

SolidWorks Motion Study by: Mohamed Hakeem Mohamed Nizar Page 29
To change the material, drag and drop the appearance on the part you want to change the
material of.
Click the icon as shown to change the Motion Study properties

SolidWorks Motion Study by: Mohamed Hakeem Mohamed Nizar Page 30
You can make the motion smoother by increasing the frames per second. You can make the
accuracy higher and change the solver by clicking ‘Advance Options’ (Integrator type) to make
your simulation work.
Fix and float : Fixed parts are incapable of moving, while moving parts must be floating. First
import the part file that needs to be fixed so by default it will be fixed. The parts you import
after that would be in float mode so you can freely move them around; use right-click Fix to
make it fixed as shown.

SolidWorks Motion Study by: Mohamed Hakeem Mohamed Nizar Page 31
SolidWorks acts unusually sometimes when you try to change the mass manually, particularly in
problems with impact and friction involved. In these cases the preferable way to change mass is
to create a new material and change the density according to the volume to obtain the desired
mass.
Mass will be assigned by default as soon as the object is created. To access mass properties go
to tools Mass properties and you will see something similar to the one showed in
image bellow. To edit mass properties click on “Override Mass Properties”.

SolidWorks Motion Study by: Mohamed Hakeem Mohamed Nizar Page 32
Mass, center of mass, and moments of inertia can be changed by accessing Override Mass
Properties as shown below.

SolidWorks Motion Study by: Mohamed Hakeem Mohamed Nizar Page 33
This is the appearance in SolidWorks 2012 version. In this check “Assign mass properties” to
change mass.
If you see strange behavior with friction or impacts, you need to create a material to change the
mass instead of selecting the “Override Mass Properties” or “Assign mass properties”. The
steps are shown below with the help of pictures.
First right click on the material Edit material. Then the following
tab will appear. Right click anywhere on the left side select New Library.
Then name your library and save it (For this example I have named it as ‘My_materials’). Then
right click the library you created select New Category (I named it as Mat1).

SolidWorks Motion Study by: Mohamed Hakeem Mohamed Nizar Page 34
Then right click on the category you have crated and select ‘New Material’. Name it and click the
Properties tab as shown.
Now you can change the properties of the material shown in the ‘Value’ column; double click to
edit. You will probably only change the density to get the desired mass and click ‘Apply’. You
can also change the units by clicking the drop-down arrow.

SolidWorks Motion Study by: Mohamed Hakeem Mohamed Nizar Page 35
Time Frame and Key Points
The above figure shows some typical errors in key frames when dealing with motion analysis. As
you can see, key points 1, 2 and 4, 5 are discontinuous. This means the action is not active in the
region, for instance the force is not acting from point 1 to 2.
Key points 2 and 3 imply that the force is active. Meanwhile notice that there is a key point 6 in
between 2 and 3; this means there is a change in force at key point 6.
To solve these problems make sure all your key frames start at the beginning of the timeline
unless you want the force or other action to be taken after some time. There should be no key
frame after the initial one as shown in 7, not even at the end unless you want any specific
changes in between or you need to stop the action at certain times without going till the end.
The timeline would be highlighted after calculating the motion if the key frame is active as
shown below. If the force is not on, right click the force and click on to make the force active and
recalculate.

SolidWorks Motion Study by: Mohamed Hakeem Mohamed Nizar Page 36