Software Tools for the Analysis of the Photocathode ...
15
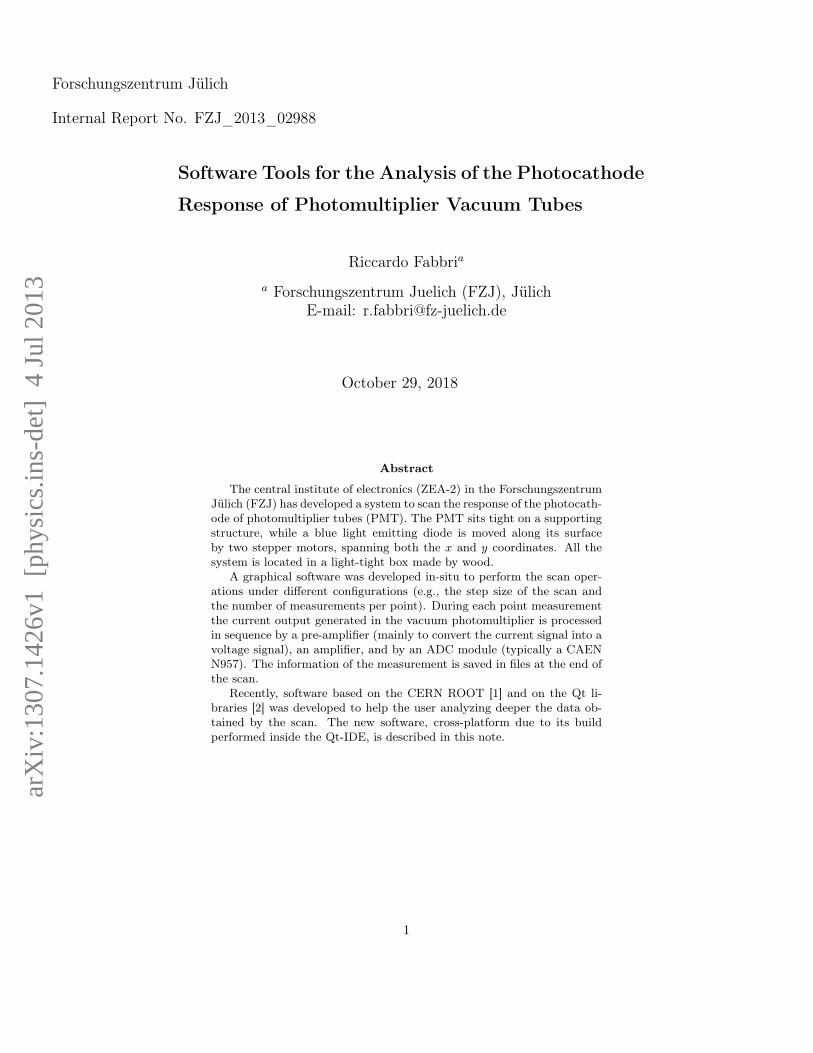
Software Tools for the Analysis of the Photocathode Response of Photomultiplier Vacuum Tubes Riccardo Fabbri a a Forschungszentrum Juelich (FZJ), Jülich E-mail: [email protected] October 29, 2018 Abstract The central institute of electronics (ZEA-2) in the Forschungszentrum Jülich (FZJ) has developed a system to scan the response of the photocath- ode of photomultiplier tubes (PMT). The PMT sits tight on a supporting structure, while a blue light emitting diode is moved along its surface by two stepper motors, spanning both the x and y coordinates. All the system is located in a light-tight box made by wood. A graphical software was developed in-situ to perform the scan oper- ations under different configurations (e.g., the step size of the scan and the number of measurements per point). During each point measurement the current output generated in the vacuum photomultiplier is processed in sequence by a pre-amplifier (mainly to convert the current signal into a voltage signal), an amplifier, and by an ADC module (typically a CAEN N957). The information of the measurement is saved in files at the end of the scan. Recently, software based on the CERN ROOT [1] and on the Qt li- braries [2] was developed to help the user analyzing deeper the data ob- tained by the scan. The new software, cross-platform due to its build performed inside the Qt-IDE, is described in this note. Forschungszentrum Jülich Internal Report No. FZJ_2013_02988 1 arXiv:1307.1426v1 [physics.ins-det] 4 Jul 2013
Transcript of Software Tools for the Analysis of the Photocathode ...
Software Tools for the Analysis of the Photocathode
Response of Photomultiplier Vacuum Tubes
Riccardo Fabbria
a Forschungszentrum Juelich (FZJ), JülichE-mail: [email protected]
October 29, 2018
Abstract
The central institute of electronics (ZEA-2) in the ForschungszentrumJülich (FZJ) has developed a system to scan the response of the photocath-ode of photomultiplier tubes (PMT). The PMT sits tight on a supportingstructure, while a blue light emitting diode is moved along its surfaceby two stepper motors, spanning both the x and y coordinates. All thesystem is located in a light-tight box made by wood.
A graphical software was developed in-situ to perform the scan oper-ations under different configurations (e.g., the step size of the scan andthe number of measurements per point). During each point measurementthe current output generated in the vacuum photomultiplier is processedin sequence by a pre-amplifier (mainly to convert the current signal into avoltage signal), an amplifier, and by an ADC module (typically a CAENN957). The information of the measurement is saved in files at the end ofthe scan.
Recently, software based on the CERN ROOT [1] and on the Qt li-braries [2] was developed to help the user analyzing deeper the data ob-tained by the scan. The new software, cross-platform due to its buildperformed inside the Qt-IDE, is described in this note.
Forschungszentrum Jülich
Internal Report No. FZJ_2013_02988
1
arX
iv:1
307.
1426
v1 [
phys
ics.
ins-
det]
4 J
ul 2
013

Contents1 Introduction 3
2 The Photocathode Scan Facility at ZEA-2 3
3 PMT Photocathode Scan:Analysis of a single Scan Measurement 4
4 PMT Scan Systematics:Stability of the Experimental Apparatus 9
5 Conclusions and Outlook 15
2

1 IntroductionThis note describes how to use the programs designed to analyze the result ofthe scan of a PMT photocathode (or of a series of scans), which I developed forthe Neutron and Gamma Detector Group (Arbeit Gruppe Neutron und GammaDetektoren) at ZEA-2 in FZJ.
2 The Photocathode Scan Facility at ZEA-2In the institute of electronics ZEA-2 at FZJ since many years a facility to analyzethe performance of PMTs is present and available to external users upon request.In principle, photomultipliers of every size can be accommodated on the scantable inside the light-tight box, Fig. 1. The workshop of the institute can buildthe suitable support to keep sitting fest any PMT photocathode in front of themoving LED.
The scan is performed remotely by the program DetScan (designed andwritten by Uwe Clemens, ZEA-2 at FZJ), which drives the stepper motors,and takes care to show either online or offline the intensity (in ADC units)of the measurement in the scanned area of the photocathode, and to save the
photocathode
Photomultiplier
Vacuum
x
driven remotely by software
in x and y the LED source
Stepper motor to move
y
PMT HV
Panel for
Panel for
PMT Signal
BL
AC
K−
BO
X:
Lig
ht−
tig
ht
1m
cu
bic
bo
x
Agilent
Pulse Generator
Figure 1: Schematic of the facility available to scan the response of the photo-cathode surface of PMTs.
3

measurement data in files on disk. These files can be analyzed by the programswhich I recently developed to investigate additional aspects of the photocathoderesponse in a photomultiplier.
The pulse generator is typically set to generate a voltage pulse such to mea-sure enough signal in all the investigated area, without saturating the photo-multiplier. The current signal from the PMT is converted into a voltage signalby a pre-amplifier located inside the box, and can be eventually readout via afront panel provided with LEMO connectors with 50 Ohm impedance. The sig-nal is additionally amplified and shaped by the ORTEC amplifier 571, and thensent to the CAEN ADC module N975. The date acquisition can run in automode continuously sampling the incoming signals (above a user-defined low-levelthreshold), and shipping the their peaking amplitude to the DetScan program.Or, a gate, synchronized with the pulse to the LED, can be set to the ADCmodule. In this latter case the measurement of the pedestal (to be subtractedfrom the data) is needed, because in some outer regions of the photocathodesurface the efficiency of the photo-electron emission could be low enough to havestatistically no signal at the device output.
It is clear that increasing the high voltage of the PMT can avoid this problem;on the other side, the region with more efficiency (also referred as gain, i.e., asthe number of photo-electrons eventually produced per impinging photon) mightgenerate a large signal to saturate the ADC module.
3 PMT Photocathode Scan:Analysis of a single Scan Measurement
The PMT_PhotoCathodeScan program (written in C/C++ and based on theCERN ROOT libraries), shown in Fig. 2, processes the data generated duringthe scan of a PMT photo-cathode by the DetScan program.
To start a measurement the user should select the input data via the buttonBrowse FileSystem in the bottom left side of the canvas; the selection allowsonly to choose one of the *.csv files generated by the DetScan, which saves inthese files (in a 128x128 mask) the mean amplitude measured in each scan step.If an error in finding the input file is found, then that error will be prompted ina pop-up window. Instead, if no error appears (e.g. the selected file does exist)the button Start will get activated and the data can be analyzed by pressing it.
Note that to access all the information relative to that measurement all thecorresponding files dumped by the DetScan program should be present in thesame directory, as (among the other ones):
4

Variable retrieved?_Info.txt Start and stop time of the measurement?_TempIn.txt Temperature (Celsius degree) internal to the
scan box measured during each scan step?_TempOut.txt Temperature (Celsius degree) in the laboratory
measured during each scan step?_PedSpk.txt Histogram of the pedestal measurement?_<date:YYYYMMDD>_<time:HHMM>.ph Timestamp of the measurement
After selecting the data file to process the user has the option to whethersubtract the pedestal calculated by the DetScan (in the future it could be calcu-lated directly from its saved spectrum) and to select a lower-level ADC cut. Byclicking on the button Start the analysis is performed with the selected options.In case a different set of options is needed, then the analysis should be restarted.
The plots showed in the tabs can be saved in external files. This possibilityis displayed in the menu option File. The default graphic format is png but it
Figure 2: Screenshot at start-up of the GUI to analyze the data provided bythe DetScan program. The program is started along with LOG file canvas atits side.
5

can be changed via the menu option Options/Config Format for Pictures. Inthe same menu item Options one can choose whether to show the legends in theplots, and to show the LOG file. At the end of the menu bar the option Helpgives the possibility to see the version history of the program and the referenceto its author.
The program allows to show several data property in a 2D and 3D visualiza-tion with different plotting options, as displayed in the radio-buttons widgetsin the top side of the tabs. In this case there is no need to restart the analysis,but it is sufficient to redraw the histogram with the button ReDraw Histo. Theavailable options are taken by the ROOT library. For clarification of the wayall the ROOT objects used in this program behave please refer to the ROOTdocumentation [1].
The Tab 2D Histo shows the x-y gain response of the photo-cathode surface.For every point scanned by the blue-light LED of the scanning system the meanamplitude (as calculated by the DetScan) is shown (eventually with the pedestalsubtraction in case this option was required). It is clear, that using the functionsof the ROOT classes, specific slides of the surface can be investigated directlyfrom the 2-dimensional histogram of the photocathode response. An exampleof this measurement is shown in Fig. 3 using the multi-anode 8x8 photomulti-plier H8500 from Hamamatsu [3]. Clearly visible is the large non-homogeneous
Figure 3: Intensity response of the photocathode surface for the H8500 PMT.
6

response on the scanned surface. This is a typical behavior observed in PMTs.The Tab 1D Histo shows the one-dimensional histogram which contains the
amplitudes for all x and y bins.The Tab Relative Deviation shows the entries of the relative deviation with
respect to the measured maximum amplitude. Note that, by construction, therelative deviation can vary between null and unity.
The Tab Integrated Counts shows the integrated sum of entries (pixels) withrespect to the relative deviation. As an example, this histogram can tell theuser what is the fraction of pixels within a relative deviation of value D. It isclear that considering that D can range between 0 and 1, then the fractionalintegral can be at most unity, as shown in Fig. 4 obtained again using the H8500photomultiplier. Please note that here the term pixel is interpreted not as areal physical pixel in the photocathode surface (as for example in multi-anodePMTs), but as the investigated region during one scan-step.
Figure 4: Integration of the relative deviation with respect to the maximumamplitude measured in a scanned bin for the H8500 PMT.
In this specific example, within a specific PMT and experimental setup, itappears that 80% of the scanned points have a response lower at least than 30%of the measured maximum.
The Tab Pixel Structure, upper panel of Fig. 5, is very useful to comparethe response of different area (of equal size) of the photocathode surface.
The scrollbars in x and y allow to select the area of interest, which can bethen divided in sub-pads using the corresponding Number of Pixels in X (Y)entry widgets. When the selection is done, then clicking on the button "Analyse
7

Figure 5: Top panel: The response of the H8500 multi-anode photomultiplierwith a plexi-glass mask on its surface (which results in the observed circularshapes) shows the strong non-homogeneous response of the device. Bottompanel: The scrollbars select the area to be divided in several pixels whose in-tensity is shown in the corresponding histogram.
8

Sub-structures" pops up a new canvas displaying all the selected pads; each padshows a one-dimensional histogram containing the amplitude value of all scannedpoints in the corresponding region, bottom panel of Fig. 5.
The variation of the mean value of the displayed histograms shows the gainmismatch in different area of the photocathode surface. In case of a multi-anodePMT, as the H8500, this tool can quantify within few percent of systematicaluncertainty the gain mismatch between the independent amplifying channels(properly selecting the area under investigation, and the number of equal-sizepixels in x and y), thus allowing for its correction by introducing, e.g., adequateresistors in the channels with higher gain.
Moving downward the scrollbar the two buttons Hide Canvas and DumpResults at the bottom of the canvas become visible. They allow, respectively,to iconize the frame, and to dump the results into an ascii file whose path isdumped in the LOG panel. The result file can be eventually used for an offlineanalysis on the gain-matching. To perform this analysis it is crucial to correctlyselect the area to investigate by setting the area borders as close as possible tothe transition regions between the physical pixels.
4 PMT Scan Systematics:Stability of the Experimental Apparatus
The stability of the scan measurement is a crucial aspect to monitor, in order toreliably provide the results of a photocathode scan. On this regard, a GUI wasdeveloped to analyze a set of measurements performed in the same hardwareconfiguration. This allows to monitor how stable is the measurement (e.g., themean intensity of the PMT), and in case of any observed instability, to possiblyspot a dependence of the measurement on some variables of the system. Pleasenote that the measurements to compare should be performed while keepingthe system as much as possible untouched, to avoid introducing a bias in themeasurement.
The program PMT_SYSTEMATICS is a GUI with a layout similar to thePMT_PhotoCathodeScan program, above described, and at startup shows upas in Fig. 6, with an additional small canvas dedicated to monitor the LOGactivities. To help the user in easily distinguish the two analysis programs (whenboth are running), a different color (violet) was chosen for the GUI dedicatedto systematic studies.
To start the analysis the user should select the input data list via the buttonSelect Input Data List in the bottom left side of the canvas; the selection allowsonly to choose one *.list file, which contains a list of the *.cvs files generated bythe DetScan program. This list should be prepared in advance by the analyzer,and should contain in each line the correct path of a *.cvs file. That location(directory) should also contain all the files generated by the DetScan needed,as for PMT_PhotoCathodeScan program, to retrieve all necessary informationfor the analysis.
9

Figure 6: Startup of the PMT_SYSTEMATICS GUI, along with its LOG panel.
If an error in finding the list file or one of the files in the list is encountered,then that error will be dumped in the LOG panel. Instead, if no error appearsthe button Start will get activated and the data can be analyzed by pressing it.
Also here, after selecting the data file to process the user has the optionwhether to subtract the pedestal calculated by the DetScan (in the future itcould be calculated directly from its spectrum) and to select a lower-level ADCcut. The analysis is performed with the selected options. In case, a different setof options is needed, then the analysis should be restarted.
The plots showed in the tabs can be saved in external files. This possibilityis displayed in the menu option File. The default graphic format is png but itcan be changed via the menu option Options/Config Format for Pictures. Inthe same menu item Options one can choose to show the legends in the plots,and to show the LOG file. At the end of the menu bar the option Help givesthe possibility to see the version history of the program and the reference to its
10

Figure 7: Behavior of the mean values of the temperature measured insideand outside the scan box during the series of photocathode scans. for theHamamatsu R580 (serial number CE3049).
author.The Tab (<ADC> vs Time) shows the mean amplitude of a scan for the
series of measurements inserted in the selected list. The program allows tochange the visualization using different plotting options, as displayed in theradio-buttons widgets in the top side of the tabs. In this case there is no needto restart the analysis, but it is sufficient to redraw the histogram with thebutton ReDraw Histo. An example of a series of measurements covering oneentire day (on March 2013) is shown in Fig. 7.
The measurements presented here and in the following were performed with
11

Figure 8: One-dimensional distribution of the mean values of the intensity mea-sured during the series of the photocathode scans.
the photomultiplier Hamamatsu R580 (serial number CE3049). A small trendduring the investigated day of approximately 4% is visible, although in most ofthe measurements the system appears quite stable. The statistical uncertaintyof the mean is calculated out of each one-dimensional histogram containing themeasured intensity for all scan-points as RMS/
√(Npoints of scan − 1).
The Tab 1D Histo shows the distribution of all mean values shown in theTab (<ADC> vs Time). For the above mentioned series of measurements theone-dimensional histogram is presented in Fig. 8.
The Tab <T> vs Time shows the mean temperature for the same photo-cathode scans. The temperature is measured inside the scan light-tight box,
12

Figure 9: Behavior of the mean values of the temperature measured inside andoutside the scan box during the series of photocathode scans.
and in the room containing the scanning device. The room is typically kept at arelatively stable temperature by a cooling system. For every scan, during eachstep of the LED on the photocathode surface the temperature is measured, andthe statistical mean of all these measurements characterizes here the presentedmean value.
For the considered series of measurements the behavior of the "inner" and"outer" temperature is shown in Fig. 9. A small change of the temperature, inthe order of fraction of one degree Celsius, is observed. This tiny change canhardly be considered the source of the observed relative 4% maximum deviationfound in the response means.
13

Figure 10: Distribution of the mean values of the pedestal measured during theseries of photocathode scans.
At the beginning of each photocathode scan the LED is moved by the steppermotors far away from the PMT front-surface. This way, the pedestal of thesystem is obtained, measuring the signal in the PMT, and can be thus subtractedto the raw data in the offline analysis. Due to the system noise the distributionof the pedestal values (typically 1000 LED pulses are sent) is not a delta functionbut should typically follow a Gaussian distribution, and a mean value is thuscalculated,
The Tab <Ped> vs Time shows the behavior the mean pedestal during themeasurements. For the series of measurements here considered as example,Fig. 10 shows a very good stability of the pedestal.
14

5 Conclusions and OutlookWe have presented in this note new software tools for the analysis of the pho-tocathode response of vacuum photomultipliers (using the data accumulated bythe DetScan program already available at ZEA-2). These programs performsa deeper investigation of the PMT data quantifying the level of homogene-ity response, with and without the application of a lower level cut and of thepedestal subtraction (when the pedestal has been measured). In addition, incase of multi-anode PMTs the gain mismatch of the individual channels can beinvestigated, allowing to bring the non-homogeneity within few percents,
This code was already used to investigate the relative gain of several Hama-matsu vacuum photomultipliers R580 during the commissioning of the JUDIDTelectronics for an Anger Camera prototype [4].
The program to monitor the stability of the measurement showed a system-atical uncertainty of some percents, whose source has not been spotted yet. Theblue-light LED system could be a possible source of the observed "long-term"instability.
In principle, the long-term behavior of additional variables, e.g., the systemnoise, and two-dimensional correlation plots could be added in dedicated tabs,enlarging the control of the measuring system.
A natural extention of this software suite (not possible here due to timeconstraints) would be the inclusion of an extra GUI dedicated to compare themeasurements of different PMTs to investigate the relative gain.
Acknowledgments
The author gratefully acknowledges U. Clemens, R. Engels andC. Wesolek for their valuable technical contribution and suggestionsto the work here presented.
References[1] R. Brun and F. Rademakers,
ROOT - An Object Oriented Data Analysis Framework,Nucl. Inst. & Meth. in Phys. Res. A 389 (1997) 81-86.See also http://root.cern.ch/.
[2] Qt Project,www.qt-project.org.
[3] Hamamatsu Photonics K.K.,www.hamamatsu.com.
[4] R. Fabbri et al.,Characterization of the JUDIDT Readout Electronics for Neutron Detec-tion,arXiv:1304.6695; FZJ_2013_02194.
15