Simple Vehicle Maintenance
60
Simple Vehicle Simple Vehicle Maintenance Maintenance By By Dale O. Ritzel Dale O. Ritzel Director Emeritus, Safety Center Director Emeritus, Safety Center Southern Illinois University Southern Illinois University Carbondale, IL 62901 Carbondale, IL 62901 - - 6731 6731
Transcript of Simple Vehicle Maintenance

Simple Vehicle Simple Vehicle MaintenanceMaintenance
ByByDale O. RitzelDale O. Ritzel
Director Emeritus, Safety CenterDirector Emeritus, Safety CenterSouthern Illinois UniversitySouthern Illinois UniversityCarbondale, IL 62901Carbondale, IL 62901--67316731

How to Check your OilHow to Check your OilYou don't have to feel like a You don't have to feel like a dipstick when you go to check dipstick when you go to check your oil; here's how to do it like your oil; here's how to do it like a pro. a pro. Check the oil when the engine Check the oil when the engine is warm. Oil expands when it's is warm. Oil expands when it's hot and contracts when it's hot and contracts when it's cold; different temperatures will cold; different temperatures will give you different readings. give you different readings. Park the car on a level surface. Park the car on a level surface. Turn off the engine. Turn off the engine. Pull the hood release lever Pull the hood release lever under the dashboard. under the dashboard. Walk around the front of the Walk around the front of the car, reach under the hood, find car, reach under the hood, find the latch and squeeze it. As you the latch and squeeze it. As you squeeze the latch, open the squeeze the latch, open the hood.
1.
hood.

How to Check your OilHow to Check your OilFind the dipstick, a long Find the dipstick, a long piece of metal sticking out of piece of metal sticking out of the engine with a loop at one the engine with a loop at one end, usually located near the end, usually located near the spark plugs. spark plugs. Pull on the loop and draw Pull on the loop and draw the dipstick all the way out. the dipstick all the way out. Wipe the oil off the dipstick Wipe the oil off the dipstick with a paper towel or shop with a paper towel or shop rag. rag. Replace the clean dipstick, Replace the clean dipstick, making sure to push it all the making sure to push it all the way in, then pull it back out way in, then pull it back out and hold it horizontally in and hold it horizontally in front of you. front of you.

How to Check your OilHow to Check your OilLook at the pointy end of the Look at the pointy end of the dipstick. If the oil on the dipstick. If the oil on the dipstick is below the line dipstick is below the line marked "full," add a small marked "full," add a small amount of oil (less than a amount of oil (less than a quarter of a quart) with a funnel. quarter of a quart) with a funnel. Many dipsticks simply have two Many dipsticks simply have two lines with a cross hatch design lines with a cross hatch design in between. The oil level should in between. The oil level should be halfway between these two be halfway between these two lines. lines. Add the oil by unscrewing the Add the oil by unscrewing the oil filler cap, which is about 3 oil filler cap, which is about 3 inches in diameter and located inches in diameter and located on the very top of the engine. on the very top of the engine. Check the oil level with the Check the oil level with the dipstick after adding oil. Add dipstick after adding oil. Add more if necessary. It's easier to more if necessary. It's easier to add more oil but fairly difficult add more oil but fairly difficult to remove oil if you add too to remove oil if you add too much. much. Put the oil filler cap back on and Put the oil filler cap back on and secure it tightly. secure it tightly.

How to Check your OilHow to Check your OilTips:Tips:–– Your owner's manual will tell you what type of Your owner's manual will tell you what type of
motor oil your engine requires. motor oil your engine requires. –– If you're in a pinch or you only need to add a little, If you're in a pinch or you only need to add a little,
it's OK to mix types it's OK to mix types -- for example, 10wfor example, 10w--40 with 40 with 10w10w--30. 30.
–– Always keep two quarts of oil in your car. Always keep two quarts of oil in your car. –– The oil lubricating system is a closed system: The The oil lubricating system is a closed system: The
oil does not get used up or go anywhere. If it's oil does not get used up or go anywhere. If it's consistently low, there may be an oil leak. consistently low, there may be an oil leak.
–– Leaks always get worse, and losing all the engine Leaks always get worse, and losing all the engine oil will require expensive repairs and/or replacing oil will require expensive repairs and/or replacing the engine. the engine.

How to Change your Motor OilHow to Change your Motor Oil
Plan to change your motor oil every Plan to change your motor oil every 3,000 miles or every 3 months. 3,000 miles or every 3 months. However, you may want to do it more However, you may want to do it more often if you've been driving in very hot often if you've been driving in very hot and/or dusty conditions. and/or dusty conditions.

How to Change your Motor OilHow to Change your Motor OilGetting Ready Steps: Getting Ready Steps: –– Gather necessary tools and materials. If you plan to change Gather necessary tools and materials. If you plan to change
your oil regularly, consider investing in jack stands, a your oil regularly, consider investing in jack stands, a socket set and an oil drain pan. socket set and an oil drain pan.
–– Run the car's engine for 10 minutes before you drain the oil. Run the car's engine for 10 minutes before you drain the oil. Warm oil drains faster than cold oil.Warm oil drains faster than cold oil.
–– Park the car on a level surface, engage the parking brake Park the car on a level surface, engage the parking brake and turn off the engine. If your car has a low clearance, raise and turn off the engine. If your car has a low clearance, raise it by driving it onto a ramp or by jacking it up and it by driving it onto a ramp or by jacking it up and supporting it securely. supporting it securely.
–– Open the hood and place the new oil and funnel on top of Open the hood and place the new oil and funnel on top of the engine to ensure that you won't forget to add oil the engine to ensure that you won't forget to add oil afterwards (an expensive mistake that many doafterwards (an expensive mistake that many do--itit--yourselfers make!). yourselfers make!).

How to Change your Motor OilHow to Change your Motor Oil–– Tips: Tips:
Consult your owner's manual or an automotive Consult your owner's manual or an automotive parts specialist to find out the weight of oil and parts specialist to find out the weight of oil and type of oil filter your car needs. You'll need the type of oil filter your car needs. You'll need the year, make, model and mileage of your car if year, make, model and mileage of your car if you go to an auto parts store.you go to an auto parts store.
–– Warnings: Warnings: Make sure the car is securely supported before Make sure the car is securely supported before you crawl underneath. You will need two jack you crawl underneath. You will need two jack stands to support the front of your car after stands to support the front of your car after jacking it up. Never get under a car that is jacking it up. Never get under a car that is supported only by a jack! A pair of jack stands supported only by a jack! A pair of jack stands costs less than $20. costs less than $20.
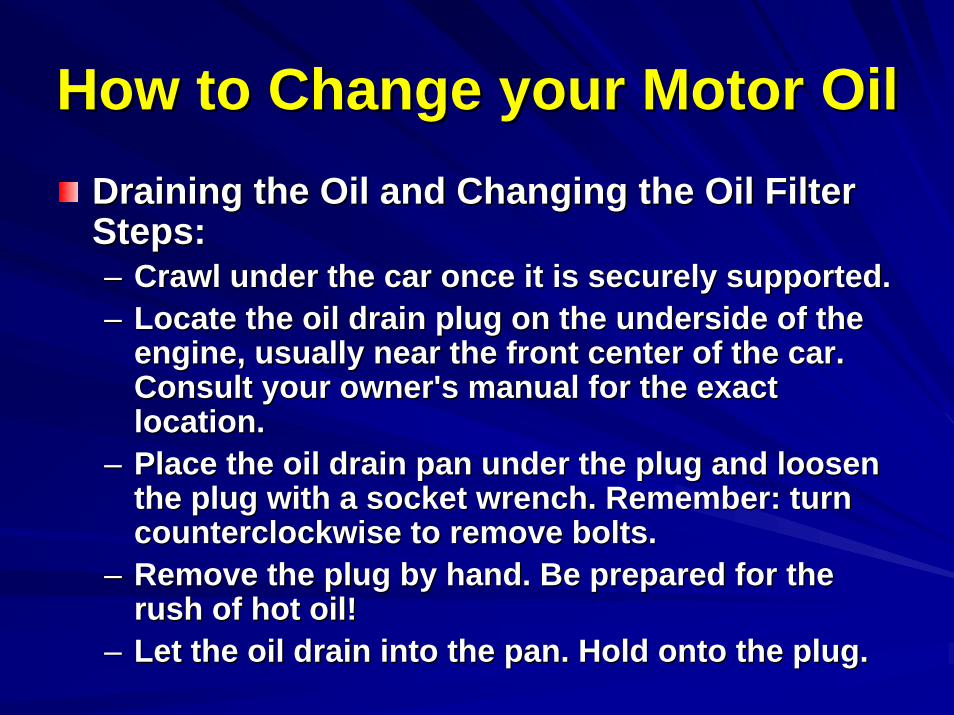
How to Change your Motor OilHow to Change your Motor OilDraining the Oil and Changing the Oil Filter Draining the Oil and Changing the Oil Filter Steps: Steps: –– Crawl under the car once it is securely supported. Crawl under the car once it is securely supported. –– Locate the oil drain plug on the underside of the Locate the oil drain plug on the underside of the
engine, usually near the front center of the car. engine, usually near the front center of the car. Consult your owner's manual for the exact Consult your owner's manual for the exact location. location.
–– Place the oil drain pan under the plug and loosen Place the oil drain pan under the plug and loosen the plug with a socket wrench. Remember: turn the plug with a socket wrench. Remember: turn counterclockwise to remove bolts. counterclockwise to remove bolts.
–– Remove the plug by hand. Be prepared for the Remove the plug by hand. Be prepared for the rush of hot oil! rush of hot oil!
–– Let the oil drain into the pan. Hold onto the plug. Let the oil drain into the pan. Hold onto the plug.
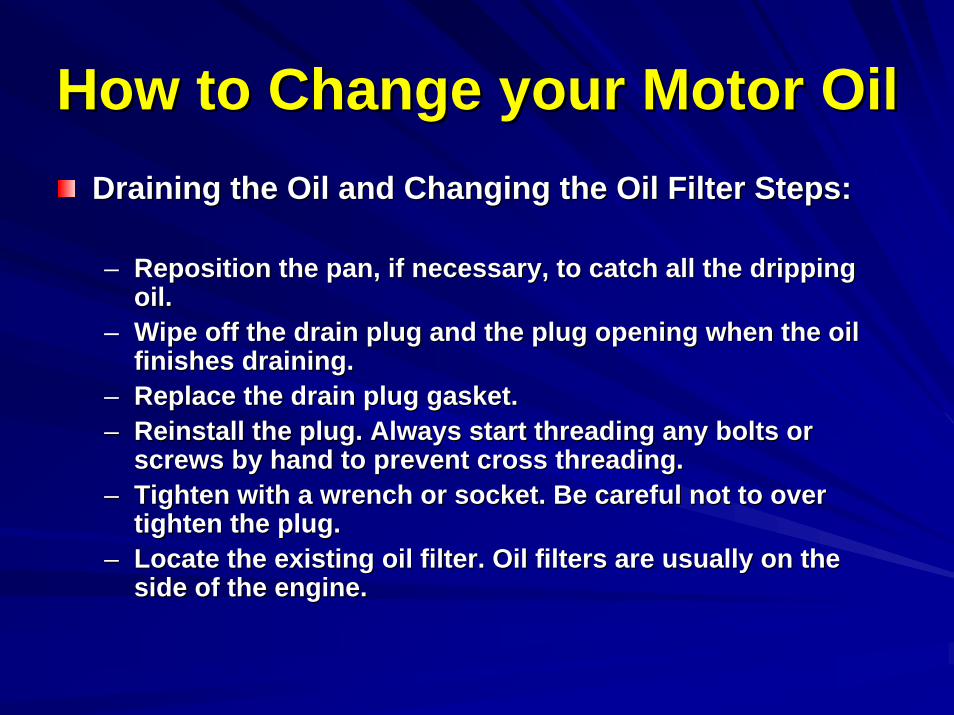
How to Change your Motor OilHow to Change your Motor OilDraining the Oil and Changing the Oil Filter Steps: Draining the Oil and Changing the Oil Filter Steps:
–– Reposition the pan, if necessary, to catch all the dripping Reposition the pan, if necessary, to catch all the dripping oil. oil.
–– Wipe off the drain plug and the plug opening when the oil Wipe off the drain plug and the plug opening when the oil finishes draining. finishes draining.
–– Replace the drain plug gasket. Replace the drain plug gasket. –– Reinstall the plug. Always start threading any bolts or Reinstall the plug. Always start threading any bolts or
screws by hand to prevent cross threading. screws by hand to prevent cross threading. –– Tighten with a wrench or socket. Be careful not to over Tighten with a wrench or socket. Be careful not to over
tighten the plug. tighten the plug. –– Locate the existing oil filter. Oil filters are usually on the Locate the existing oil filter. Oil filters are usually on the
side of the engine. side of the engine.

How to Change your Motor OilHow to Change your Motor OilDraining the Oil and Changing the Oil Filter Steps: Draining the Oil and Changing the Oil Filter Steps:
–– Position the oil pan underneath the filter to catch any Position the oil pan underneath the filter to catch any remaining oil. remaining oil.
–– Use an adjustable oil filter wrench to unscrew the old oil Use an adjustable oil filter wrench to unscrew the old oil filter. filter.
–– Use a rag to wipe the area where the filter mounts to the Use a rag to wipe the area where the filter mounts to the engine. Make sure the rubber seal of the old filter is not engine. Make sure the rubber seal of the old filter is not stuck to the engine. stuck to the engine.
–– Use some new oil to lightly coat the rubber Use some new oil to lightly coat the rubber seal of the new filter. seal of the new filter.
–– Screw the new filter into place by hand. It's usually not Screw the new filter into place by hand. It's usually not necessary to tighten the oil filter with the oil filter wrench, necessary to tighten the oil filter with the oil filter wrench, but have it at the ready if you're grip's not strong (or large) but have it at the ready if you're grip's not strong (or large) enough. enough.

How to Change your Motor OilHow to Change your Motor Oil–– Tips: Tips:
Wear gloves to remove the plug if it's hot. Wear gloves to remove the plug if it's hot. It's always best to replace the oil drain plug It's always best to replace the oil drain plug gasket. gasket. Use the right size wrench or socket. Use the right size wrench or socket. Don't use an adjustable wrench: you can strip Don't use an adjustable wrench: you can strip the bolt. the bolt.
–– Warnings: Warnings: Handle hot automotive oil with extreme care. Handle hot automotive oil with extreme care. Be careful when removing the old oil filter. It's Be careful when removing the old oil filter. It's full of oil. full of oil.

How to Change your Motor OilHow to Change your Motor OilInstalling New Oil and Cleaning Up Steps:Installing New Oil and Cleaning Up Steps:–– Locate the oil filler cap on top of the engine. Locate the oil filler cap on top of the engine.
Remove it. Remove it. –– Place the funnel in the opening and pour in the Place the funnel in the opening and pour in the
new oil. Typically, you will use 4 to 5 quarts of oil. new oil. Typically, you will use 4 to 5 quarts of oil. Check your manual for the correct oil capacity. Check your manual for the correct oil capacity.
–– Replace the cap when you're finished. Replace the cap when you're finished. –– Run the engine for a minute, then check the Run the engine for a minute, then check the
dipstick. Add more oil if necessary. dipstick. Add more oil if necessary.

How to Change your Motor OilHow to Change your Motor OilInstalling New Oil and Cleaning Up Steps:Installing New Oil and Cleaning Up Steps:–– Check the area around the oil drain plug and the Check the area around the oil drain plug and the
filter for oil leaks. Tighten the plug or oil filter if filter for oil leaks. Tighten the plug or oil filter if you find leakage. you find leakage.
–– Use rags and newspapers to wipe away excess Use rags and newspapers to wipe away excess oil. oil.
–– Pour the used oil into a plastic container after the Pour the used oil into a plastic container after the used oil cools. used oil cools.
–– Dispose the used oil properly: either bring it to a Dispose the used oil properly: either bring it to a recycling center or an auto repair shop that can recycling center or an auto repair shop that can recycle it for you. Don't pour it down the sewer! recycle it for you. Don't pour it down the sewer!

How to Change your Motor OilHow to Change your Motor OilTips: Tips: –– Record the date and mileage after you change the Record the date and mileage after you change the
oil so you will know when your car is due for oil so you will know when your car is due for another oil change. another oil change.
–– It helps to put a small sticker on your windshield It helps to put a small sticker on your windshield to remind you. to remind you.
Warnings: Warnings: –– Handle hot motor oil with extreme caution. Handle hot motor oil with extreme caution. –– Only dispose of used motor oil and filters at Only dispose of used motor oil and filters at
authorized locations. authorized locations.

How to Check Brake FluidHow to Check Brake Fluid
Check the brake fluid when you check Check the brake fluid when you check all the other fluids. It's easy to do and all the other fluids. It's easy to do and only takes a minute. only takes a minute.

How to Check Brake FluidHow to Check Brake FluidSteps: Steps: –– Find the brake master cylinder. Find the brake master cylinder.
This is usually located under the This is usually located under the hood on the driver's side of the hood on the driver's side of the car, toward the back of the engine car, toward the back of the engine compartment. Imagine where compartment. Imagine where your brake pedal would end up if your brake pedal would end up if it went all the way through to the it went all the way through to the engine. The brake master engine. The brake master cylinder is a small (about 6 by 2 cylinder is a small (about 6 by 2 inches), rectangular piece of inches), rectangular piece of metal with a plastic reservoir and metal with a plastic reservoir and a rubber cap on top, and small a rubber cap on top, and small metal tubes leading from it. metal tubes leading from it.
–– Check your manual if you aren't Check your manual if you aren't sure that you've found the master sure that you've found the master cylinder. The rubber cap will cylinder. The rubber cap will usually read 'Use only DOT 3 or 4 usually read 'Use only DOT 3 or 4 brake fluid from a sealed brake fluid from a sealed container.' container.'

How to Check Brake FluidHow to Check Brake Fluid–– Note that on most newerNote that on most newer--model cars model cars
the reservoir is translucent and you the reservoir is translucent and you can see the fluid level without can see the fluid level without removing the cap. There will be a removing the cap. There will be a 'Full' line'Full' line‘‘ the brake fluid should be at the brake fluid should be at this line.this line.
–– In older cars (preIn older cars (pre--1980) the brake 1980) the brake master cylinder reservoir may be master cylinder reservoir may be made entirely of metal so that you made entirely of metal so that you must take the top off to check the must take the top off to check the fluid level. The top is held on by a fluid level. The top is held on by a metal clamp. Use a screwdriver to metal clamp. Use a screwdriver to pop off the clamp and lift the lid. pop off the clamp and lift the lid.
–– Add brake fluid to the Full line. Use Add brake fluid to the Full line. Use the correct brake fluid for your car: the correct brake fluid for your car: Check the rubber cap and your Check the rubber cap and your owner's manual to find out what owner's manual to find out what grade of brake fluid your car grade of brake fluid your car requires. Most cars use DOT requires. Most cars use DOT (Department of Transportation) 3 or (Department of Transportation) 3 or 4. If the reservoir has two parts, fill 4. If the reservoir has two parts, fill both halves.both halves.

How to Check Brake FluidHow to Check Brake FluidTips: Tips: –– If the brake master cylinder is empty, the brake pedal will go If the brake master cylinder is empty, the brake pedal will go
to the floor. to the floor. –– If this is the case, you will have to bleed the brakes in If this is the case, you will have to bleed the brakes in
addition to adding fluid: Time to see your mechanic, who addition to adding fluid: Time to see your mechanic, who will flush and refill the braking system. will flush and refill the braking system.
Warnings: Warnings: –– Brake fluid is very toxic. Keep it away from hands and eyes, Brake fluid is very toxic. Keep it away from hands and eyes,
and avoid spilling it on the ground. and avoid spilling it on the ground. –– Dispose of empty containers carefully. Dispose of empty containers carefully. –– Be especially careful not to spill brake fluid on your car's Be especially careful not to spill brake fluid on your car's
paint. paint. –– Wash your hands well after handling brake fluid. Wash your hands well after handling brake fluid. –– Don't drive a car that has run out of brake fluid until Don't drive a car that has run out of brake fluid until
bleeding the brakes. bleeding the brakes.

How to Check How to Check Power Steering FluidPower Steering Fluid
Checking power steering fluid on most Checking power steering fluid on most cars is easy, though not all cars have it: cars is easy, though not all cars have it: if you can parallel park with one hand if you can parallel park with one hand and eat an ice cream cone with the and eat an ice cream cone with the other, then you have power steering. other, then you have power steering.

How to Check How to Check Power Steering FluidPower Steering Fluid
Steps: Steps: –– Find the hood release, usually Find the hood release, usually
located beneath the dash. Pull. located beneath the dash. Pull. –– Walk around the front of the car. Walk around the front of the car.
Find the hood latch. The hood Find the hood latch. The hood latch is usually located at the latch is usually located at the front edge of the hood. Depress front edge of the hood. Depress the latch. While depressing the the latch. While depressing the latch, lift and open the hood. latch, lift and open the hood.
–– Locate the belts. The power Locate the belts. The power steering pump is driven by a steering pump is driven by a pulley and a belt and has a clear pulley and a belt and has a clear plastic or metal (usually round) plastic or metal (usually round) reservoir on top if it. The power reservoir on top if it. The power steering cap will often say steering cap will often say "power steering." "power steering."

How to Check How to Check Power Steering FluidPower Steering Fluid
–– Check the fluid level either by Check the fluid level either by looking at the side of the looking at the side of the reservoir (if you have the clear reservoir (if you have the clear plastic type) or by unscrewing the plastic type) or by unscrewing the cap (for the metal type). Some cap (for the metal type). Some reservoirs may have a small reservoirs may have a small dipstick attached to the cap. dipstick attached to the cap. Typically, you have a choice Typically, you have a choice between checking the fluid warm between checking the fluid warm or cold, and there will be or cold, and there will be corresponding "Hot" and "Cold" corresponding "Hot" and "Cold" levels. levels.
–– Add fluid if necessary. Use only Add fluid if necessary. Use only the proper type of power steering the proper type of power steering fluid for your car. Check the fluid for your car. Check the owner's manual and the bottle. owner's manual and the bottle. Some cars require power steering Some cars require power steering fluid specifically for your make of fluid specifically for your make of car. car.

How to Check How to Check Power Steering FluidPower Steering Fluid
Tips: Tips: –– Check the fluid level and the power steering belt if you hear a Check the fluid level and the power steering belt if you hear a
squeal when you turn the wheel all the way to one side. squeal when you turn the wheel all the way to one side. –– Take the car into a mechanic if the steering is stiff. Take the car into a mechanic if the steering is stiff. –– Keep in mind that although drifting or shuddering may signal Keep in mind that although drifting or shuddering may signal
problems with the steering system, these symptoms may also problems with the steering system, these symptoms may also relate to the car's tires, suspension, brakes or other frontrelate to the car's tires, suspension, brakes or other front--end end problems. problems.
Warnings: Warnings: –– Power steering fluid does not get "used up" Power steering fluid does not get "used up" -- other than a leak, other than a leak,
there's no reason that the fluid should be low. there's no reason that the fluid should be low. –– Fill the reservoir to the proper level and check frequently if yFill the reservoir to the proper level and check frequently if you ou
find it low. find it low. –– If it continues to be low, check for leaks and go see your If it continues to be low, check for leaks and go see your
mechanic. mechanic. –– An empty power steering pump can be damaged very quickly and An empty power steering pump can be damaged very quickly and
is costly to replace. is costly to replace.

How to Check Automatic How to Check Automatic Transmission FluidTransmission Fluid
Check your car's automatic Check your car's automatic transmission fluid (ATF) every month transmission fluid (ATF) every month and whenever the transmission isn't and whenever the transmission isn't shifting smoothly. shifting smoothly.

How to Check Automatic How to Check Automatic Transmission FluidTransmission Fluid
Steps: Steps: –– Park your car on level ground and start the Park your car on level ground and start the
engine, leaving the gear in neutral or park. Wait engine, leaving the gear in neutral or park. Wait for the engine to warm up. Unless your owner's for the engine to warm up. Unless your owner's manual directs otherwise, allow the engine to manual directs otherwise, allow the engine to continue running throughout this procedure. continue running throughout this procedure.
–– Find the ATF dipstick, located at the back of the Find the ATF dipstick, located at the back of the engine. The ATF dipstick is often shorter than the engine. The ATF dipstick is often shorter than the engine oil dipstick but otherwise looks similar. If engine oil dipstick but otherwise looks similar. If you're lucky, it will be labeled. you're lucky, it will be labeled.
–– Pull on the dipstick and completely remove it. It Pull on the dipstick and completely remove it. It may be very long. may be very long.
–– Wipe the dipstick with a rag, replace it in the Wipe the dipstick with a rag, replace it in the engine, push it all the way in and remove it again. engine, push it all the way in and remove it again.

How to Check Automatic How to Check Automatic Transmission FluidTransmission Fluid
–– Look at the dipstick's tip. Observe whether there Look at the dipstick's tip. Observe whether there are two different full markings: one for cold are two different full markings: one for cold readings and one for warm readings. If so, read readings and one for warm readings. If so, read the one for 'Warm.' If the ATF does not come up to the one for 'Warm.' If the ATF does not come up to the line marked 'Full,' add ATF. the line marked 'Full,' add ATF.
–– Add ATF (see Tips) into the hole that the dipstick Add ATF (see Tips) into the hole that the dipstick came out of (yes, that little tiny hole). Use a funnel came out of (yes, that little tiny hole). Use a funnel with a long, narrow neck. Add only a little at a with a long, narrow neck. Add only a little at a time, and check the level with the dipstick after time, and check the level with the dipstick after each time. It's easy to add ATF but fairly difficult each time. It's easy to add ATF but fairly difficult to take it out if you add too much. to take it out if you add too much.
–– Put the dipstick all the way back in when you are Put the dipstick all the way back in when you are done. done.

How to Check Automatic How to Check Automatic Transmission FluidTransmission Fluid
Tips: Tips: –– There are two types of ATF: There are two types of ATF: DexronDexron (also called (also called MercronMercron) and Type ) and Type
F; your owner's manual should list the type to use. F; your owner's manual should list the type to use. –– With some cars the engine should not be running while you check With some cars the engine should not be running while you check
the fluid, so be sure to consult your owner's manual. the fluid, so be sure to consult your owner's manual. Warnings: Warnings: –– ATF doesn't get used up, so if it's low, that indicates a leak. ATF doesn't get used up, so if it's low, that indicates a leak. –– Don't ignore leaks or drive around with low ATF, it can lead to Don't ignore leaks or drive around with low ATF, it can lead to
expensive transmission repairs. expensive transmission repairs. Tips from Users: Tips from Users: –– Siphoning overfilled transmission Siphoning overfilled transmission
"Important warning! Do not overfill! Filling above the full line"Important warning! Do not overfill! Filling above the full linecauses the fluid to foam. Also, excessive pressure buildup may causes the fluid to foam. Also, excessive pressure buildup may damage the transmission. If you overfilled, get a thin hose and damage the transmission. If you overfilled, get a thin hose and the the gun from a squirt gun from a squirt bottle. Insert it in and siphon excess fluid out." bottle. Insert it in and siphon excess fluid out."
–– We used an aquarium air hose and a squirt bottle top, and it We used an aquarium air hose and a squirt bottle top, and it worked like a charm! worked like a charm!

How to Check and Add CoolantHow to Check and Add Coolant
Coolant doesn't get used up during a car's Coolant doesn't get used up during a car's normal operation. normal operation. If the coolant level is consistently low, your If the coolant level is consistently low, your car has a coolant leak. Your mechanic can car has a coolant leak. Your mechanic can pressurepressure--check the cooling system to find check the cooling system to find any leaks. any leaks. A small hole in a radiator hose or a loose A small hole in a radiator hose or a loose clamp could end up costing hundreds or clamp could end up costing hundreds or even thousands of dollars if the coolant even thousands of dollars if the coolant leaks out and the engine overheats. leaks out and the engine overheats.

How to Check and Add CoolantHow to Check and Add CoolantSteps: Steps: –– Find the coolant reservoir. Follow Find the coolant reservoir. Follow
the hose that comes from the top of the hose that comes from the top of the radiator capthe radiator cap----it will lead to the it will lead to the coolant reservoir. It is usually a coolant reservoir. It is usually a clear plastic tank with full and low clear plastic tank with full and low indicators on the outside (see indicators on the outside (see illustration). illustration).
–– Open the cap and add coolant to the Open the cap and add coolant to the coolant reservoir, using a funnel to coolant reservoir, using a funnel to avoid spilling. Coolant is a mixture avoid spilling. Coolant is a mixture of half antifreeze and half water. In a of half antifreeze and half water. In a pinch it is OK to add only water or pinch it is OK to add only water or only antifreeze. (On some cars, it is only antifreeze. (On some cars, it is difficult to see the full line on the difficult to see the full line on the coolant reservoir. Bounce the car coolant reservoir. Bounce the car up and down while looking to see up and down while looking to see how full the reservoir is.) how full the reservoir is.)

How to Check and Add CoolantHow to Check and Add Coolant–– Put the cap back on the Put the cap back on the
coolant reservoir. coolant reservoir. –– Add coolant to the Add coolant to the
radiator as well if the radiator as well if the reservoir was completely reservoir was completely empty. Make sure the empty. Make sure the engine is completely cool engine is completely cool before opening the before opening the radiator cap. radiator cap.
–– Some older cars don't Some older cars don't have a coolant reservoir; have a coolant reservoir; in that case, add the in that case, add the coolant directly to the coolant directly to the radiator.radiator.

How to Check and Add CoolantHow to Check and Add Coolant
Overall Warnings: Overall Warnings: –– Never open a radiator cap on a hot engine. Never open a radiator cap on a hot engine.
The radiator is pressurized and the coolant The radiator is pressurized and the coolant could spurt out and scald you. could spurt out and scald you.
–– Some German cars have pressurized Some German cars have pressurized coolant reservoirs. Wait for the engine to coolant reservoirs. Wait for the engine to cool down before opening the cap to add cool down before opening the cap to add coolant. coolant.
–– Do not leave coolant out where children or Do not leave coolant out where children or pets can get to it. It has a sweet smell but pets can get to it. It has a sweet smell but is very toxic. is very toxic.

Cleaning a Car BatteryCleaning a Car Battery
What You Need What You Need –– Baking Soda and Stiff Brush Baking Soda and Stiff Brush –– Rubber Gloves Rubber Gloves –– Wrench to Fit Cable Clamp Wrench to Fit Cable Clamp –– Wrench to Remove Battery Wrench to Remove Battery –– Waterproof Grease Waterproof Grease

Cleaning a Car BatteryCleaning a Car BatteryAfter loosening the cable After loosening the cable clamps and battery holder, clamps and battery holder, remove the battery from remove the battery from vehicle.vehicle.Begin by cleaning the entire Begin by cleaning the entire battery top of dirt and battery top of dirt and oxidation using baking soda oxidation using baking soda and water.and water.While battery is out, clean While battery is out, clean the cable clamps until shiny the cable clamps until shiny with #535 brass brush.with #535 brass brush.ReRe--install battery in vehicle. install battery in vehicle. ReRe--attach clamps and cover attach clamps and cover the connection with grease.the connection with grease.

How to Check BeltsHow to Check Belts
A broken belt is painful to the wallet; A broken belt is painful to the wallet; get in the habit of scoping yours out get in the habit of scoping yours out from time to time, and have all the belts from time to time, and have all the belts changed at 60,000 miles. There should changed at 60,000 miles. There should be no extra labor charge if you ask your be no extra labor charge if you ask your mechanic to change them when the mechanic to change them when the timing belt is replaced at 60,000 miles. timing belt is replaced at 60,000 miles.

How to Check BeltsHow to Check BeltsSteps: Steps: –– Turn off the engine. Turn off the engine. –– Pull the hood release lever Pull the hood release lever
under the dashboard. under the dashboard. –– Walk around to the front of the Walk around to the front of the
car, reach under the hood, car, reach under the hood, find the latch and squeeze it. find the latch and squeeze it. As you squeeze the latch, As you squeeze the latch, open the hood. open the hood.
–– Find the belts located on the Find the belts located on the very front of the engine. On a very front of the engine. On a frontfront--wheelwheel--drive car, the front drive car, the front of the engine is usually of the engine is usually adjacent to the fender; on a adjacent to the fender; on a rearrear--wheelwheel--drive car, the front drive car, the front of the engine is adjacent to the of the engine is adjacent to the radiator and the front bumper. radiator and the front bumper.

How to Check BeltsHow to Check Belts–– Note that there will be two or Note that there will be two or
more belts, depending on the more belts, depending on the car. Belts are used to operate car. Belts are used to operate the fan, water pump, alternator, the fan, water pump, alternator, air conditioner, power steering air conditioner, power steering pump and smog pump. Press pump and smog pump. Press lightly with your thumb on each lightly with your thumb on each belt at the belt's longest part belt at the belt's longest part between pulleys. between pulleys.
–– Check the appropriate tension Check the appropriate tension for your belts in your car's for your belts in your car's manual. Belts should not have manual. Belts should not have more than 1 inch of "give" in more than 1 inch of "give" in either direction. Observe the either direction. Observe the belt as you press on it. If it's belt as you press on it. If it's cracked or can be easily cracked or can be easily pushed more than 1 inch, it pushed more than 1 inch, it most likely needs to be most likely needs to be replaced. replaced.

How to Check BeltsHow to Check BeltsTips: Tips: –– Let the engine cool before checking the Let the engine cool before checking the
belts, and be careful around hot engine belts, and be careful around hot engine parts. parts.
–– Some belts run more smoothly after being Some belts run more smoothly after being sprayed with "belt dressing." sprayed with "belt dressing."
–– If your belts make a horrible shrieking If your belts make a horrible shrieking sound when you press on the gas pedal, sound when you press on the gas pedal, they are too loose, and probably need to they are too loose, and probably need to be tightened or replaced. be tightened or replaced.

How to Check BeltsHow to Check BeltsTips from Users: Tips from Users: –– Some cars have electric fans that come on after Some cars have electric fans that come on after
the engine has stopped, even when the key is not the engine has stopped, even when the key is not in the ignition! Keep your hands clear of the in the ignition! Keep your hands clear of the blades or disconnect the negative battery cable. blades or disconnect the negative battery cable.
–– An increasing number of new vehicles are An increasing number of new vehicles are equipped with one belt which runs all the equipped with one belt which runs all the accessories' pulleys and has a spring loaded self accessories' pulleys and has a spring loaded self adjuster. They don't need adjusting for the life of adjuster. They don't need adjusting for the life of the belt. These belts sometimes have grooves the belt. These belts sometimes have grooves running across the inside face of the belt so it will running across the inside face of the belt so it will flex better and create less noise. These grooves flex better and create less noise. These grooves can easily be mistaken for wear cracks so be sure can easily be mistaken for wear cracks so be sure the belt NEEDS to be replaced. the belt NEEDS to be replaced.

How to Check Radiator HosesHow to Check Radiator Hoses
Old radiator hoses or loose clamps can Old radiator hoses or loose clamps can cause a coolant leak, which will lead to cause a coolant leak, which will lead to overheating and expensive repairs. overheating and expensive repairs. Check hoses periodically and replace Check hoses periodically and replace them if they're aged or leaking. them if they're aged or leaking.
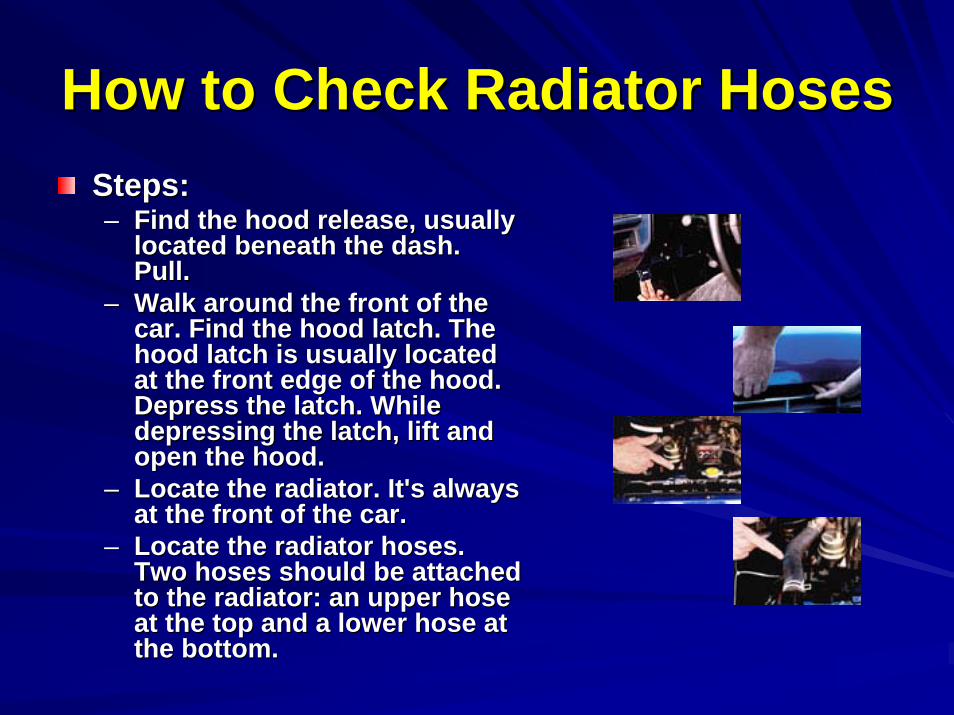
How to Check Radiator HosesHow to Check Radiator HosesSteps: Steps: –– Find the hood release, usually Find the hood release, usually
located beneath the dash. located beneath the dash. Pull. Pull.
–– Walk around the front of the Walk around the front of the car. Find the hood latch. The car. Find the hood latch. The hood latch is usually located hood latch is usually located at the front edge of the hood. at the front edge of the hood. Depress the latch. While Depress the latch. While depressing the latch, lift and depressing the latch, lift and open the hood. open the hood.
–– Locate the radiator. It's always Locate the radiator. It's always at the front of the car. at the front of the car.
–– Locate the radiator hoses. Locate the radiator hoses. Two hoses should be attached Two hoses should be attached to the radiator: an upper hose to the radiator: an upper hose at the top and a lower hose at at the top and a lower hose at the bottom. the bottom.

How to Check Radiator HosesHow to Check Radiator Hoses–– With the engine cold, squeeze With the engine cold, squeeze
each hose. If the hose feels each hose. If the hose feels "crunchy" or brittle, it's old and "crunchy" or brittle, it's old and needs replacing. needs replacing.
–– Check the clamps at either end Check the clamps at either end of both hoses. If the hose is of both hoses. If the hose is damp or wet at the clamp, damp or wet at the clamp, tighten or replace the clamp. The tighten or replace the clamp. The clamps should be tight enough clamps should be tight enough that the hose cannot be turned that the hose cannot be turned or moved. or moved.
–– Check the hose for cracks, tears, Check the hose for cracks, tears, or frayed ends. If you find any, or frayed ends. If you find any, replace the hose. replace the hose.
–– Close the hood. Close the hood.

How to Jump Start a CarHow to Jump Start a Car
Knowing how to jumpKnowing how to jump--start a car with a dead start a car with a dead battery can keep an inconvenience from battery can keep an inconvenience from becoming a crisis. If you are unsure about becoming a crisis. If you are unsure about how to use jumper cables, ask for help. how to use jumper cables, ask for help.

How to Jump Start a CarHow to Jump Start a CarSteps: Steps: –– Read your owner's manual, as Read your owner's manual, as
it will describe any it will describe any peculiarities involved in jumppeculiarities involved in jump--starting your vehicle. starting your vehicle.
–– Pull a car with a charged Pull a car with a charged battery next to the car with the battery next to the car with the dead battery, situating the two dead battery, situating the two batteries as close together as batteries as close together as you can without allowing the you can without allowing the two cars to touch. two cars to touch.
–– Turn off both engines, pull out Turn off both engines, pull out the keys, put both cars in park the keys, put both cars in park (or in first gear if they have (or in first gear if they have stick shifts), engage the stick shifts), engage the emergency brakes and open emergency brakes and open the hoods. the hoods.

How to Jump Start a CarHow to Jump Start a Car–– Attach a redAttach a red--handled/positive handled/positive
jumper cable clamp to the positive jumper cable clamp to the positive terminal (the one with the plus sign) terminal (the one with the plus sign) of the charged battery. of the charged battery.
–– Connect the other redConnect the other red--handled handled clamp to the positive terminal of the clamp to the positive terminal of the dead battery. dead battery.
–– Attach the neighboring Attach the neighboring black/negative cable to the car with black/negative cable to the car with the dead battery. Clamp it the dead battery. Clamp it somewhere where the current can somewhere where the current can ground out, such as a bolt or ground out, such as a bolt or bracket on the engine. You can also bracket on the engine. You can also attach it to any metal, unpainted attach it to any metal, unpainted part of the vehicle's frame. part of the vehicle's frame.
–– Ground the other black/negative Ground the other black/negative cable on the charging car, as cable on the charging car, as described in the previous step. Be described in the previous step. Be careful, as a small spark may be careful, as a small spark may be produced. produced.

How to Jump Start a CarHow to Jump Start a Car–– Attempt to start the car that has the Attempt to start the car that has the
dead battery. dead battery. –– ReRe--adjust the red/positive clamp on adjust the red/positive clamp on
the dead car if there is no the dead car if there is no response; try response; try reclampingreclamping it to the it to the terminal or turning it for a better terminal or turning it for a better connection. Keep trying to start the connection. Keep trying to start the dead car. dead car.
–– Once the dead car is running, Once the dead car is running, remove the clamps one at a time in remove the clamps one at a time in reverse order. reverse order.
–– Allow the jumpAllow the jump--started car to run started car to run for half an hour in order to charge for half an hour in order to charge the battery. It will charge whether the battery. It will charge whether driving or idling.driving or idling.

How to Jump Start a CarHow to Jump Start a CarTips: Tips: –– Always check your owners manual before jumpAlways check your owners manual before jump--
starting a car. starting a car. –– Some new cars have special 'jumpSome new cars have special 'jump--start lugs' start lugs'
where jumper cables are attached rather than to where jumper cables are attached rather than to the battery cables. These allow the potentially the battery cables. These allow the potentially damaging surge of current to bypass the damaging surge of current to bypass the electrical system (and all those fancy, new electrical system (and all those fancy, new onboard computers). onboard computers).
–– If the dead car won't respond, there might be a If the dead car won't respond, there might be a problem in another part of the ignition system. problem in another part of the ignition system.
–– Consult a mechanic. Consult a mechanic. –– After you jumpAfter you jump--start a dead car, run the engine for start a dead car, run the engine for
half an hour to charge the battery. half an hour to charge the battery.

How to Jump Start a CarHow to Jump Start a CarWarnings: Warnings: –– Avoid starting or running the charged car while jumpAvoid starting or running the charged car while jump--
starting the dead one. This is a common mistake in jumpstarting the dead one. This is a common mistake in jump--starting cars. This can release a power surge into the starting cars. This can release a power surge into the charging car and blow a fuse, damage the alternator, or charging car and blow a fuse, damage the alternator, or harm other areas of the electrical system. harm other areas of the electrical system.
–– Many early British cars, such as Jaguars and Many early British cars, such as Jaguars and MGsMGs, use a , use a positive ground instead of the popular negative ground. positive ground instead of the popular negative ground.
–– Consult a mechanic if you're in doubt about how to jumpConsult a mechanic if you're in doubt about how to jump--start your particular car. start your particular car.
–– The voltage from a car battery is dangerous whether the The voltage from a car battery is dangerous whether the engine is running or not. Do not touch the metal ends of the engine is running or not. Do not touch the metal ends of the jumper cables with your hands, nor touch them to each jumper cables with your hands, nor touch them to each other. other.
–– Never grasp both battery terminals at the same time. Never grasp both battery terminals at the same time.

How to Jump Start a CarHow to Jump Start a Car
Tips from Users: Tips from Users: –– Never use a lighter or match while Never use a lighter or match while
handling jumper cables! There are handling jumper cables! There are explosive gases released by the battery. explosive gases released by the battery.
–– Make sure your clamps aren't on Make sure your clamps aren't on backward. Otherwise, when you hit the backward. Otherwise, when you hit the ignition, the reverse voltage will fry the ignition, the reverse voltage will fry the diodes in your alternator, and you'll be out diodes in your alternator, and you'll be out about $100.about $100.

How to Maintain and Extend the How to Maintain and Extend the Life of your CarLife of your Car’’s Tiress Tires
Driving with worn tires increases the Driving with worn tires increases the chance of getting a flat tire or a chance of getting a flat tire or a dangerous blowout. Good tire dangerous blowout. Good tire maintenance will extend the life of your maintenance will extend the life of your tires, which will save you money. tires, which will save you money. Follow these steps to extend the life of Follow these steps to extend the life of your tires. your tires.

How to Maintain and Extend the How to Maintain and Extend the Life of your CarLife of your Car’’s Tiress Tires
Steps: Steps: –– Check the tire pressure on all four tires at least once a month.Check the tire pressure on all four tires at least once a month.
Don't over inflate. The recommended tire pressure is stamped on Don't over inflate. The recommended tire pressure is stamped on the side of the tire as well as on a sticker on the driver's sidthe side of the tire as well as on a sticker on the driver's side door e door jamb jamb -- 32 pounds per square inch (PSI) is a good rule of thumb. 32 pounds per square inch (PSI) is a good rule of thumb.
–– Have your car aligned if you notice that it drifts in one directHave your car aligned if you notice that it drifts in one direction ion when driving on a straight road. when driving on a straight road.
–– Get an alignment after any accident, even a small fender bender.Get an alignment after any accident, even a small fender bender.–– Have the wheels balanced if you notice a consistent vibration orHave the wheels balanced if you notice a consistent vibration or
shimmy at certain speeds. For example, a vibration in the steerishimmy at certain speeds. For example, a vibration in the steering ng wheel that occurs only at 60 mph and goes away if you drive fastwheel that occurs only at 60 mph and goes away if you drive faster er or slower indicates that the wheels need balancing. or slower indicates that the wheels need balancing.
–– Understand that bad shock absorbers or struts will cause the tirUnderstand that bad shock absorbers or struts will cause the tires es to wear unevenly. to wear unevenly.
Tips: Tips: –– Most people need to purchase new tires every four or five years,Most people need to purchase new tires every four or five years,
depending on their driving habits. depending on their driving habits. –– If you are unsure whether you need new tires, ask for an opinionIf you are unsure whether you need new tires, ask for an opinion at at
a repair shop that does not sell tires! a repair shop that does not sell tires!

How to Interpret Tire WearHow to Interpret Tire Wear
Tire wear can tell you what's going on Tire wear can tell you what's going on with your car's steering, suspension with your car's steering, suspension and tire pressure. Regular checks can and tire pressure. Regular checks can also help you prevent flat tires or a also help you prevent flat tires or a dangerous blowout. dangerous blowout.

How to Interpret Tire WearHow to Interpret Tire WearSteps: Steps: –– Check your tires outdoors where the lighting is good. Check your tires outdoors where the lighting is good.
Visually inspect all four tires. Visually inspect all four tires. –– Remember that under normal driving conditions, all four Remember that under normal driving conditions, all four
tires should wear evenly. tires should wear evenly. –– Check for even tread wear by using a treadCheck for even tread wear by using a tread--depth gauge, depth gauge,
which costs less than $20. The depth of the tread (the which costs less than $20. The depth of the tread (the grooves in the tire) should be even on all parts of the tire. grooves in the tire) should be even on all parts of the tire. Another way to check for tire wear (although not as Another way to check for tire wear (although not as accurate) is to stick a penny into the grooves, with Lincoln's accurate) is to stick a penny into the grooves, with Lincoln's head pointing into the tire. If you can see the top of his head pointing into the tire. If you can see the top of his head, it's time to buy new tires. head, it's time to buy new tires.
–– Let some air out of your tires if there is wear down the Let some air out of your tires if there is wear down the middle and not on the sides. It means there's too much air middle and not on the sides. It means there's too much air in them. in them.

How to Interpret Tire WearHow to Interpret Tire Wear–– Add air to tires with wear on both the inside and outside Add air to tires with wear on both the inside and outside
edges, which means there's not enough air in them. edges, which means there's not enough air in them. –– Bring your car to an alignment shop for a frontBring your car to an alignment shop for a front--end or fourend or four--
wheel alignment if your tires are worn on one side or the wheel alignment if your tires are worn on one side or the other. other.
–– Run your hand lightly over the tread surface of each tire. If Run your hand lightly over the tread surface of each tire. If the treads feel bumpy or scalloped, even if the tread is still the treads feel bumpy or scalloped, even if the tread is still deep, you may need new shock absorbers or struts. (Some deep, you may need new shock absorbers or struts. (Some cars have shocks, some have struts and some have a cars have shocks, some have struts and some have a combination struts in front, shocks in back.) combination struts in front, shocks in back.)
–– Check the tire pressure in all four tires and the spare tire at Check the tire pressure in all four tires and the spare tire at least once a month. The recommended tire pressure is least once a month. The recommended tire pressure is listed in your vehicle's manual, stamped on the side of the listed in your vehicle's manual, stamped on the side of the tire, and often printed on a sticker on the driver'stire, and often printed on a sticker on the driver's--side side doorjamb. When in doubt, 32 pounds per square inch (psi) doorjamb. When in doubt, 32 pounds per square inch (psi) is a good average until other sources can be consulted. is a good average until other sources can be consulted.

How to Interpret Tire WearHow to Interpret Tire WearTips: Tips: –– On average, tires need to be replaced every 40,000 miles, On average, tires need to be replaced every 40,000 miles,
but the exact mileage depends on the type of tire and car but the exact mileage depends on the type of tire and car and what kind of driving you do. and what kind of driving you do.
–– Have an automotive professional examine your tires if Have an automotive professional examine your tires if you're not sure they need replacing. For an unbiased you're not sure they need replacing. For an unbiased opinion, consider getting this done at a shop that does not opinion, consider getting this done at a shop that does not sell tires. sell tires.
–– Get a frontGet a front--end or fourend or four--wheel alignment if you are in an wheel alignment if you are in an accident, even just a fender bender. If anything is out of accident, even just a fender bender. If anything is out of alignment, it will affect your tires' wear. alignment, it will affect your tires' wear.
Warnings: Driving on tires that are bald or badly Warnings: Driving on tires that are bald or badly worn greatly increases your chance of getting a flat worn greatly increases your chance of getting a flat or a blowout and is especially dangerous when the or a blowout and is especially dangerous when the roads are wet or slick. Don't put off buying new tires roads are wet or slick. Don't put off buying new tires when you need them, your safety is at stake! when you need them, your safety is at stake!

How to Interpret Tire WearHow to Interpret Tire WearTips from Users: Tips from Users: –– If you live in a climate where you get any snow, I If you live in a climate where you get any snow, I
suggest that you buy four winter tires. Not only suggest that you buy four winter tires. Not only will snow tires give you the greatest traction in will snow tires give you the greatest traction in snow and ice, but they will also help you to snow and ice, but they will also help you to prolong the life of your "All Season" tires. The prolong the life of your "All Season" tires. The reason is that you will always be rotating between reason is that you will always be rotating between your winter tires and your "All Season" tires. your winter tires and your "All Season" tires.
–– Correct tire size can be critical in vehicles with an Correct tire size can be critical in vehicles with an ABS (antilock brake system)! Mixing tire sizes can ABS (antilock brake system)! Mixing tire sizes can make an ABS activate prematurely. make an ABS activate prematurely.

How to Replace an Electrical How to Replace an Electrical Fuse in A CarFuse in A Car
Fuses protect all the electrical devices in Fuses protect all the electrical devices in your car: In case of a power surge, a fuse will your car: In case of a power surge, a fuse will "blow" so that the extra electricity doesn't "blow" so that the extra electricity doesn't reach the device. Replacing a fuse is easy, reach the device. Replacing a fuse is easy, and you'll feel good diagnosing and fixing and you'll feel good diagnosing and fixing something yourself. something yourself.

How to Replace an Electrical How to Replace an Electrical Fuse in A CarFuse in A Car
Steps: Steps: –– Turn off the car before beginning Turn off the car before beginning
work. work. –– Look under your car's dashboard, Look under your car's dashboard,
just below the driver's left knee. just below the driver's left knee. –– Find the fuse box. It's usually a Find the fuse box. It's usually a
small square or rectangular plastic small square or rectangular plastic box. There will be a cover that pops box. There will be a cover that pops open, with perhaps a tab keeping it open, with perhaps a tab keeping it closed. It can be opened without closed. It can be opened without any tools. Many cars have a second any tools. Many cars have a second fuse box inside the engine fuse box inside the engine compartment. If the fuse you're compartment. If the fuse you're looking to replace isn't in the fuse looking to replace isn't in the fuse box inside the car, check for a box inside the car, check for a second fuse box. second fuse box.

How to Replace an Electrical How to Replace an Electrical Fuse in A CarFuse in A Car
–– Remove the cover from the fuse Remove the cover from the fuse box. The cover should contain a box. The cover should contain a chart telling what each fuse chart telling what each fuse controls, or there may be a clear controls, or there may be a clear plastic cover over the fuses that plastic cover over the fuses that gives this information. gives this information.
–– Find the blown fuse. It will look like Find the blown fuse. It will look like the filament in a burnedthe filament in a burned--out out lightbulblightbulb -- the metal strip will be the metal strip will be broken and the fuse may look a little broken and the fuse may look a little blackened. blackened.
–– Grasp the burnedGrasp the burned--out fuse on either out fuse on either side with your thumb and side with your thumb and forefinger, and pop it out with a forefinger, and pop it out with a small pinching motion. Most cars small pinching motion. Most cars have a small, plastic "fuse remover" have a small, plastic "fuse remover" in one of the slots. If it hasn't in one of the slots. If it hasn't already been lost, you can use this already been lost, you can use this to remove the fuse, or even a small to remove the fuse, or even a small screwdriver if you can't get it out screwdriver if you can't get it out with your fingers. with your fingers.

How to Replace an Electrical How to Replace an Electrical Fuse in A CarFuse in A Car
–– Take the fuse to a hardware or Take the fuse to a hardware or auto parts store. Get an identical auto parts store. Get an identical replacement. replacement.
–– Replace the fuse by seating it in Replace the fuse by seating it in the slot from which you the slot from which you removed the burnedremoved the burned--out one out one and pressing firmly with your and pressing firmly with your thumb. It should snap into thumb. It should snap into place. place.
–– Start the car and test the feature Start the car and test the feature that had burned out that had burned out -- the the headlights, the fan or the headlights, the fan or the interior lights, for example. interior lights, for example.
–– Replace the fuse box cover. Replace the fuse box cover.

How to Replace an Electrical How to Replace an Electrical Fuse in A CarFuse in A Car
Tips: Tips: –– Many cars have a few slots for extra fuses Many cars have a few slots for extra fuses -- just be sure to use the just be sure to use the
right amperage (there will be a little number in the fuse indicaright amperage (there will be a little number in the fuse indicating ting amps). amps).
–– There are three types of fuses: cylindrical glass fuses with metThere are three types of fuses: cylindrical glass fuses with metal al ends; square plastic fuses with two metal prongs; and cylindricaends; square plastic fuses with two metal prongs; and cylindrical l plastic fuses with no covering over the filament. All of the fusplastic fuses with no covering over the filament. All of the fuses in es in your car will use one of these three types. your car will use one of these three types.
–– Once you know which type your car uses, it's not a bad idea to bOnce you know which type your car uses, it's not a bad idea to buy uy a box of assorted fuses, of various amperages, to keep in the gla box of assorted fuses, of various amperages, to keep in the glove ove box. box.
–– If you replace the fuse and it keeps blowing, there may be an If you replace the fuse and it keeps blowing, there may be an electrical short somewhere. Make an appointment to see your electrical short somewhere. Make an appointment to see your mechanic. mechanic.
Warnings: Warnings: –– Don't replace burnedDon't replace burned--out fuses with new fuses of different ratings out fuses with new fuses of different ratings
(that is, don't use a 15(that is, don't use a 15--amp fuse to replace a 10amp fuse to replace a 10--amp fuse). amp fuse). –– On older cars, fuses may crack when removed. Be careful not to On older cars, fuses may crack when removed. Be careful not to
cut yourself on old fuses. cut yourself on old fuses.