Shuttles, Heddles, Warping, and Weaving on the PVC Inkle Loom · Shuttles, Heddles, Warping, and...
8
Shuttles, Heddles, Warping, and Weaving on the PVC Inkle Loom Warp – The vertical threads in a woven object. Weft – The horizontal threads in a woven object. Shuttles The pattern given here is a belt shuttle. Its purpose is two-fold: 1. To hold the weft yarn and 2. To use the sharpened edge to “beat down” the rows of yarn to a snug, consistent width. The wider edge is sanded or filed to about a 1/16 of an inch (1mm) thick. Shuttles can be any length and made from many materials. Wood, obviously is a good choice, but if you don’t have access to wood working tools like a scroll saw and sanders, you can use other materials like Lucite, balsa wood or cardboard. If using a soft material like balsa wood or cardboard, you need to cover the edge of the shuttle with duct tape so the shuttle lasts longer. It would also be recommended to cover the edge with duct tape if using Lucite or a material that might have a sharp edge and cut the warp threads.
Transcript of Shuttles, Heddles, Warping, and Weaving on the PVC Inkle Loom · Shuttles, Heddles, Warping, and...

Shuttles, Heddles, Warping, and Weaving
on the PVC Inkle Loom
Warp – The vertical threads in a woven object.
Weft – The horizontal threads in a woven object.
Shuttles
The pattern given here is a belt shuttle. Its purpose is two-fold: 1. To hold the weft yarn
and 2. To use the sharpened edge to “beat down” the rows of yarn to a snug,
consistent width. The wider edge is sanded or filed to about a 1/16 of an inch (1mm)
thick. Shuttles can be any length and made from many materials.
Wood, obviously is a good choice, but if you don’t have access to wood working tools
like a scroll saw and sanders, you can use other materials like Lucite, balsa wood or
cardboard.
If using a soft material like balsa wood or cardboard, you need to cover the edge of
the shuttle with duct tape so the shuttle lasts longer. It would also be recommended to
cover the edge with duct tape if using Lucite or a material that might have a sharp
edge and cut the warp threads.
Heddles
Heddles are loops of thread or yarn usually made from cotton or some non sticky,
sturdy thread or yarn that won’t stretch.
The heddles loop over every other warp thread so they are held in place, while the
other warp threads can be raised above or below creating the two sheds necessary
for weaving.
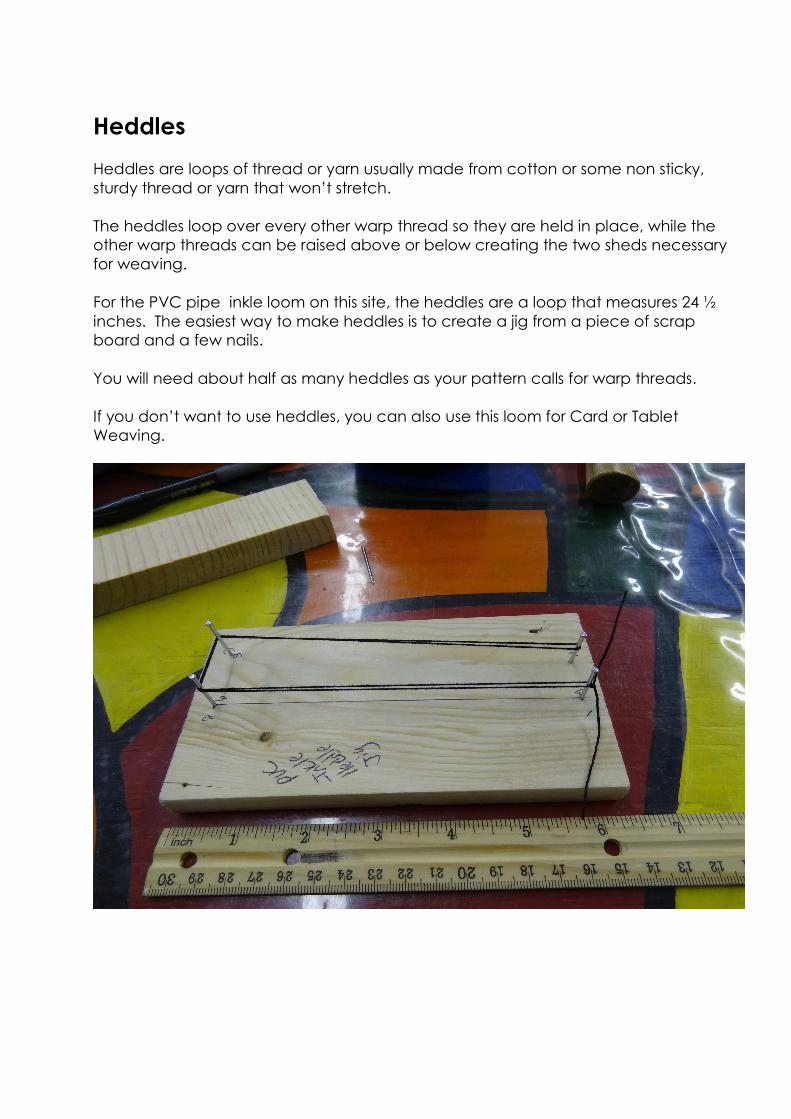
For the PVC pipe inkle loom on this site, the heddles are a loop that measures 24 ½
inches. The easiest way to make heddles is to create a jig from a piece of scrap
board and a few nails.
You will need about half as many heddles as your pattern calls for warp threads.
If you don’t want to use heddles, you can also use this loom for Card or Tablet
Weaving.
Warping
I start my students with Red Heart or an equivalent acrylic worsted weight yarn. I do
not recommend starting with more expensive yarns or wools or crochet-type thread.
Specialty and narrow-gauge yarns have their own issues, start with yarn you are
comfortable and used to working with.
Some of the following will only make sense after you have begun the warping process.
You will have to gain some experience doing this process before you find the method
and processes that work best for you.
Warping is the process of putting the warp (vertical) threads on the loom.
I always try to start and end with a heddle on the first and last warp threads, but most
patterns have you ending without a heddle. Often, I just leave the last thread off on
the pattern. This is just a personal preference, it’s not required but for beginners just
getting started, it’s easy to miss that last thread on the edge when it’s moving up and
down with the changing of the sheds and when the first and last warp threads are
held in place with heddles, it’s easier to catch them in each pass of the shuttle.
I lay the loom on its side with the open end of the heddle and tension bars pointing
up. Starting at the front most bar, follow the diagrams below trying to keep about the
same tension on each thread as you continuously wrap the threads around the loom
bars. Change colors by tying the new color thread to the old thread at the front bar
and end by tying the last thread to one of the previous threads at the front bar.
Be careful and do not wrap any of the threads completely around any of the bars.
Also be careful to wrap the warp threads the same direction around each of the bars.
If this happens, you will not be able to shift the warp forward on the loom.
When warping the PVC Inkle Loom on this site, you do not have to pass the
thread/yarn ball between the middle and bottom bars on the rear castle. Simple
reach through with your hand and pull a string off the ball and pull it around the
tension dowel.
To place a heddle on a warp thread, loop the heddle around the heddle bar on the
loom. Then, lay the heddle over the thread it will hold from back to front and loop the
other end of the heddle around the heddle bar. So the heddle will be folded in half
around the thread.


Weaving
To create the “up” shed, reach behind the heddles and raise the lower threads so
they are now on top in the area in front of the heddles. Pass the shuttle through the
shed from right to left.
To create the “down” shed, reach behind the heddles and push down on the same
threads that you raised in the up shed and the other set of threads will come to the
surface in the area in front of the heddles. Pass the shuttle through this shed from left to
right.
Continue changing sheds and passing the shuttle. Remember to pause the shuttle
when it is centered over the threads and pull it down to beat (or squeeze) the
weaving so each weft thread is snug against the other before it.
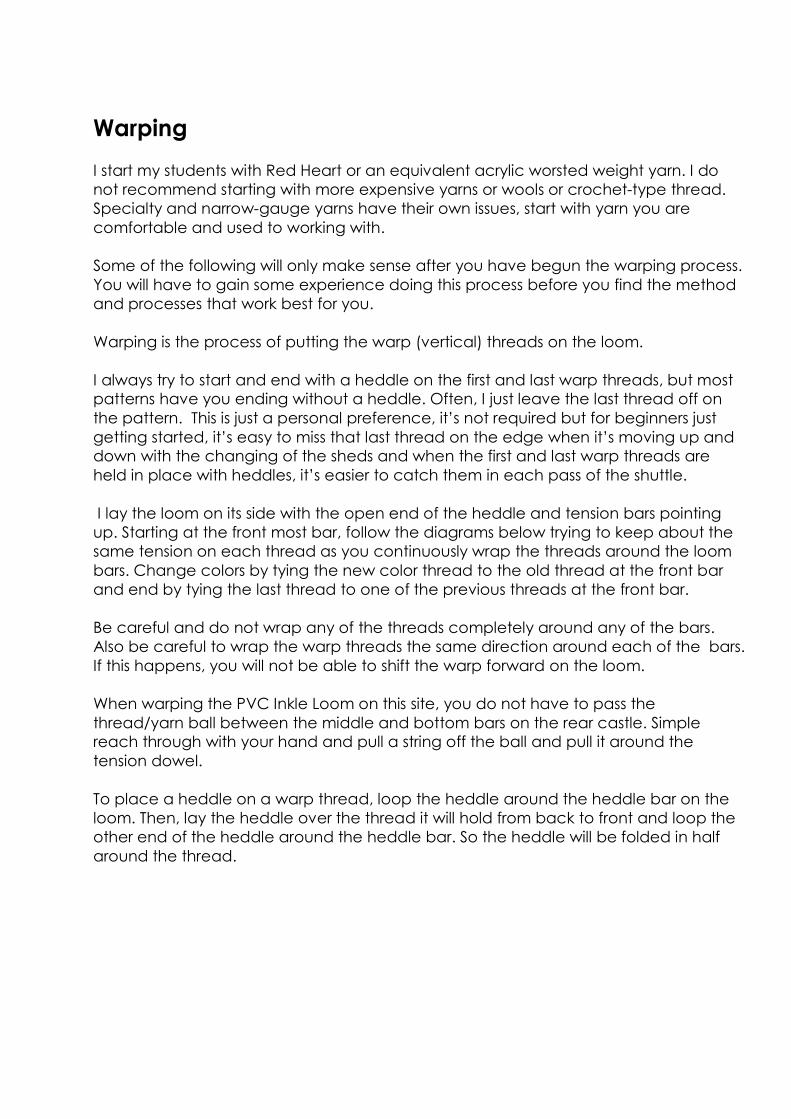
Try to keep your selvages (edges) smooth by keeping the weft thread from the shuttle
snug at the edges but not too tight or too loose. After you have woven a bit try leaving
a loop at the selvage and pull it snug after you have changed sheds and passed the
shuttle back to the middle of the warp right before you beat the warp again. This will
make keeping the selvages smooth easier.
Here are three pictures of the warped loom:


Good luck!
P Girard March 2014 text and photos.