
Filling and secondary packaging machineries from multi pack machinery company

Page Secondary Education Pack © Chillistick Ltd— www.chillistick.com— 0203 4329412
At Chillistick we are passionate about dry
ice! It is a great material to demonstrate
scientific principles for students of all ages.
It is also brilliant as a means of adding
pizazz to open days and assemblies. This
booklet is our attempt to provide a one
stop shop for all things dry ice.
Contents
Secondary Education Pack
Notes On The Use Of This Booklet……………….4
Introducing Dry Ice …………………………………....6
Uses Of Dry Ice …………………………………..7
The Experiments…………………………….…..…6-57
Safety Information ……………………………….….57
Re-Order Dry Ice And Hardware ……………...58

Page 2 Secondary Education Pack © Chillistick Ltd— www.chillistick.com— 0203 4329412
© Chillistick Ltd
All rights reserved
2017
Author: Chillistick Ltd
Version 0102

Page 3 Secondary Education Pack © Chillistick Ltd— www.chillistick.com— 0203 4329412
Table Of Contents
Notes On The Use Of This Booklet.................................................................... 4
Introducing Dry Ice And Carbon Dioxide .......................................................... 6
Uses Of Dry Ice ................................................................................................. 7
The Experiments ...............................................................................................
Floating Bubbles ........................................................................................ 8
Self-Inflating Balloon ................................................................................. 9
The Hovercraft .......................................................................................... 11
The Safe Explosion .................................................................................... 13
Crystal Growth .......................................................................................... 14
Screaming Metal ....................................................................................... 16
Making Fog 1 ............................................................................................. 18
Pouring Carbon Dioxide And Fire Extinguishers ........................................ 21
Making Fog 2 Spooky Scene—Big Fog Effect ............................................ 23
The Rocket ................................................................................................ 25
Make A Comet .......................................................................................... 30
Bubble Monsters ....................................................................................... 31
Climb The pH Scale .................................................................................... 33
Smoking Vortex Rings ............................................................................... 34
Freezing Solution....................................................................................... 37
The Cloud Chamber................................................................................... 41
Fizzy Fruit .................................................................................................. 42
The Blackcurrant Cloud And Smoking Drinks ............................................ 43
Making Sorbet ........................................................................................... 47
The Volcano - Magnesium & Dry Ice ......................................................... 49
Measuring The Molar Volume of CO2 ....................................................... 52
Safety Information ............................................................................................ 57
Material Safety Data Sheet For Dry Ice ..................................................... 57
Draft Hazard Assessment .......................................................................... 56
Re-Order Dry Ice And Hardware ....................................................................... 57

Page 4 Secondary Education Pack © Chillistick Ltd— www.chillistick.com— 0203 4329412
At Chillistick we are passionate about dry ice! It is a great material to demonstrate
scientific principles for students of all ages. It is also brilliant as a means of adding
pizazz to open days and assemblies. This booklet is our attempt to provide a one
stop shop for all things dry ice. Alas, it is not perfect… if you see new ways of using
dry ice in schools and would like to add to this document (and receive
acknowledgement) or if you have spotted errors please let us know by sending a
note to us at: [email protected]
We would also love to get feedback, photos and well, anything… thanks and have
safe dry ice fun!
Chillistick gratefully acknowledges help from:
Faye James Evergreen Jennifer Hughes, Lindsay Turner and her students at
Farnborough Hill School, Science staff at Charterhouse School for help with the
Magnesium Volcano experiment, staff and students from St Hilary’s School,
Godalming, Grey House School, Hartley Witney and Yateley School, Yateley.
Dr Cristina Lazeroni, University of Birmingham and the Institute of Physics for
promoting the use of cloud chambers in schools.
Notes on the use of this booklet
Each experiment is given with estimated times, equipment, objectives and
discussion points. Most of the equipment required is available in the Chilly Science
Pack Education Pack. Please follow all safety guidelines and complete a Hazard
Assessment; in the Safety Information section is a sample hazard assessment and a
databank to help you use this product safely.
Each experiment can be performed separately, to make sure nothing is missed out
we have repeated discussions on sublimation and safety. Depending on the age of
the students you may wish to let them carry out these experiments in small groups.
Most of the practical work has relevance to students of all ages; teachers will know
how much detail to delve into, most of the experiments can be carried out within
one or two lessons and the experiments generally flow together as we have tried to
show in the text.
Lightweight gloves providing short term (up to 10 seconds) insulation
without compromising dexterity. Intended for picking up individual
pieces of dry ice, and putting into vortex generators, for example. Not
intended for scooping large amounts or for holding for more than 10
seconds. These gloves also make an effective demonstration of gas
evolving from the dry ice in the self-inflating balloon experiment.
Page 5 Secondary Education Pack © Chillistick Ltd— www.chillistick.com— 0203 4329412
The Chilly Science Pack contains:
• 1 x vortex ring generators
• 1 x safe explosion canister
• 1 x Jug/launcher
• Water Rocket Bottle
• 1 x polycarbonate scoop
• 1 x ice cage
• 5 x chillisticks
• 1 x bubble mixture
• 1 x 10 Litre container
• 5 x sets of lightweight blue gloves
• Instructions
You will also need to order a dry ice pack directly from Chillistick Ltd on 0203
4329412 or go to dryice.education. Sizes available are from 5kg to 30kg depending
on what you require – give us a ring to discuss. We accept Purchase Order numbers
from schools.
Please note that the dry ice will only last for a few days and so it is important to
ensure that delivery is made on the best day for your schedule. Deliveries can be
made by courier to arrive Tuesday to Friday and we can also offer AM and pre
10AM deliveries for a supplement, please go to dryice.education to get the latest
information.
To get the most out of the pack we recommend that the dry ice is shared across a
number of classes and age groups and so this will require some co-ordination within
the school.
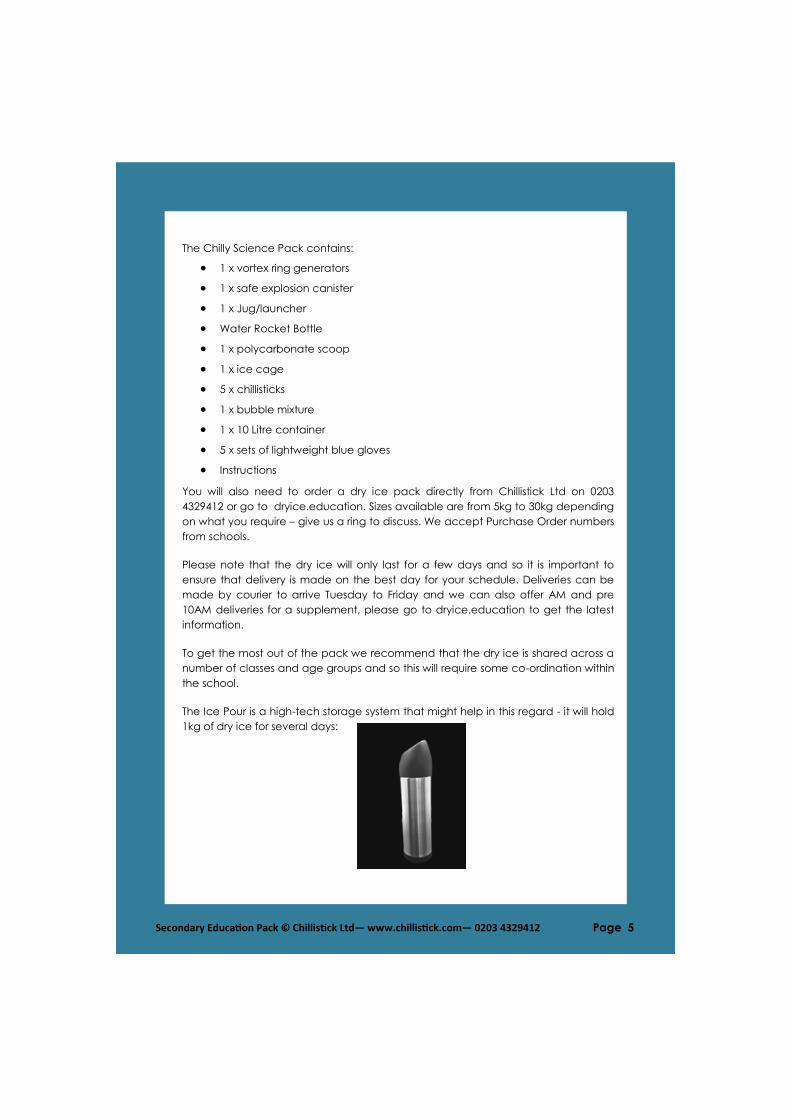
The Ice Pour is a high-tech storage system that might help in this regard - it will hold
1kg of dry ice for several days:

Page 6 Secondary Education Pack © Chillistick Ltd— www.chillistick.com— 0203 4329412
Introducing dry ice and carbon dioxide
Dry ice is the solid form of carbon dioxide (CO2). At atmospheric pressure it exists as
a solid at -79ºC. Dry changes from a solid to a gas without passing through a liquid
phase, this phenomenon is called sublimation.
The lack of liquid phase (at atmospheric pressure) combined with the cold
temperature are why it is called ‘dry’ ice - it has nothing in common with ordinary
‘water’ ice.
Dry ice is made from carbon dioxide gas, which is pressurised and refrigerated until
it becomes a liquid. This liquid is pumped into a machine called a ‘pelletiser’ where
the pressure is rapidly reduced to atmospheric pressure. When this occurs some
liquid carbon dioxide vaporises and the remaining liquid freezes into carbon dioxide
‘snow’.
This snow-like solid carbon dioxide is compressed into solid pellets, slices and blocks
of dry ice. This diagram shows the phases of CO2 with temperature and pressure:
Of interest to us is what happens at atmospheric pressure and this shows that CO2
only exists as solid or a gas. Dry ice sublimes to CO2 gas and the heat of sublimation
required for this phase change is how the remaining dry ice maintains its
temperature of -79ºC. Of note is the triple point, where CO2 exists in all three
phases at -56ºC and a pressure of just over 5 bar.
In the UK all dry ice is made from recycled CO2 which is manufactured as a by-
product of the manufacture of hydrogen from fossil fuels, the overall equation is:
CH4 + 2H2O CO2 + 4 H2
(Incidentally the hydrogen is then used in the Haber process to fix nitrogen for the
fertiliser industry, which helps to feed 1/3rd of the world’s population.)
Carbon dioxide plays a crucial role in the carbon cycle – the process by which
carbon is recycled between the environment and living organisms:
Page 7 Secondary Education Pack © Chillistick Ltd— www.chillistick.com— 0203 4329412
Carbon enters the atmosphere as carbon dioxide from respiration and
combustion.
• Carbon dioxide is absorbed by plants to make carbohydrates and oxygen via
photosynthesis.
• Animals feed on plants containing carbon compounds, most of the carbon
consumed is exhaled as carbon dioxide formed during respiration. The animals
and plants eventually die.
• The dead organisms decompose and the carbon in their bodies is returned to
the atmosphere as carbon dioxide. In some conditions decomposition is
prevented. The plant and animal is then converted to coal, oil and gas - fossil
fuels, which will release carbon dioxide if burned.
CO2 is one of the primary greenhouse gases in the Earth’s atmosphere and scientists
have shown that the increase in CO2 gas in the environment due to the combustion
of fossil fuels is having serious consequences for our environment.
Please note, the dry ice supplied by dryice.education comes from recycled
sources.
Uses of dry ice
The most common use of dry ice is to package items that need to remain cold or
frozen, such as biological samples and perishable goods. It is also used to quickly
freeze items including foods, pharmaceuticals and laboratory biological samples.
Other uses of dry ice are fog machines in theatres, removing warts, freeze branding
animals (which does not hurt the animal or damage the skin), blast cleaning,
keeping food cold on aeroplanes, food processing such as making ice cream and
oh yes, teaching!

Page 8 Secondary Education Pack © Chillistick Ltd— www.chillistick.com— 0203 4329412
Floating Bubbles
Instructions
Place around 100 grams of dry ice in the polycarbonate scoop provided in the pack
(approx. half-full). If you do not have this you can use a ceramic coffee mug or
plastic drinking glass and half fill with ice. Please do not use a glass container unless
you know that it is Pyrex.
Place the cup in the 10 Litre container, or in a sink with the plug in. Wait five minutes
to allow the dry ice to start to sublime to invisible CO2 gas.
Invite several students to blow bubbles into the box using the bubble kit provided in
the pack. Some of the bubbles will float and bob up and down. If you do not have
any bubble mixture you can make your own:
70ml washing up liquid
30ml glycerol
l litre of tap water
If you do not have a convenient sink or box, you can use the dry ice container
itself, as this will always be full of CO2 gas. Don’t forget to replace the lid on the
box after the demonstration to help preserve the ice.
Time
5-10 mins +class discussion
We think this is a good visual experiment for students of all ages to start learning about
dry ice. Levitating soap bubbles leads on to a discussion about dry ice subliming to a
gas and also provides visual confirmation about the relative molecular weight of CO2
and air. It also looks good!
Page 9 Secondary Education Pack © Chillistick Ltd— www.chillistick.com— 0203 4329412
Class Discussion
Why are the bubbles floating?
The atmosphere above the dry ice will be high in CO2 so when bubbles filled with air
at molecular weight 29 comes in contact with CO2 with molecular weight 44 the
bubbles float on the heavier gas.
Where is the CO2 gas coming from?
The heat from the room causes the dry ice to sublime to CO2 gas.
Does the breathe we exhale differ from the ‘average’ air in the room?
When we exhale we breathe out a small amount of CO2 gas and water vapour.
Why do the bubbles bob up and down?
The CO2 gas is a fluid – to test this gently stir the CO2 in the sink or lift and lower the
box and observe how the bubbles respond. This is like a boat on an ocean moving
with the water.
What do the components in the bubble solution do?
The washing-up liquid reduces the surface tension of the bubble by about 1/3 and so
allows the bubble to expand. The glycerol reduces water evaporation from the
bubble surface and so helps prevent the mega bubble from popping too soon.
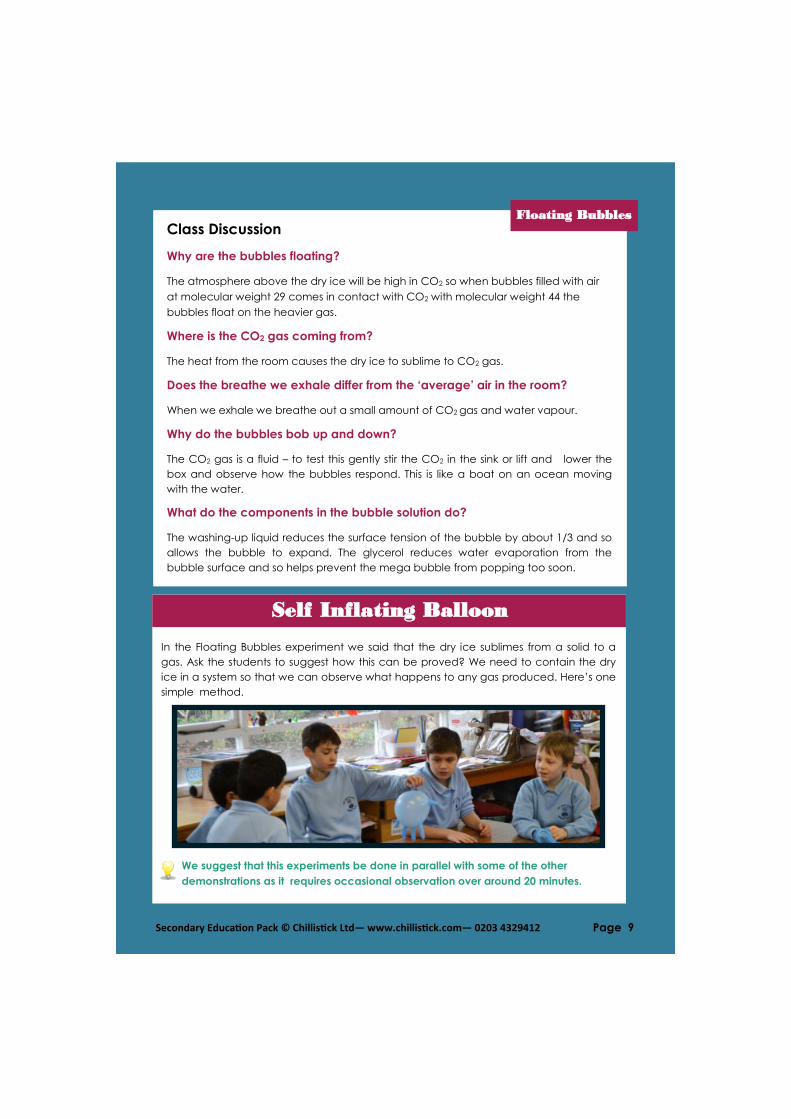
We suggest that this experiments be done in parallel with some of the other
demonstrations as it requires occasional observation over around 20 minutes.
In the Floating Bubbles experiment we said that the dry ice sublimes from a solid to a
gas. Ask the students to suggest how this can be proved? We need to contain the dry
ice in a system so that we can observe what happens to any gas produced. Here’s one
simple method.
Floating Bubbles
Self Inflating Balloon
Page 10 Secondary Education Pack © Chillistick Ltd— www.chillistick.com— 0203 4329412
Time- 10-20 minutes
Self Inflating Balloon
If you use 2 -3 pieces of dry ice there is no danger of the hand balloon bursting –
please be careful not to add more than this!
Meanwhile place a piece or two of dry ice in a saucer and leave on a table in
open view.
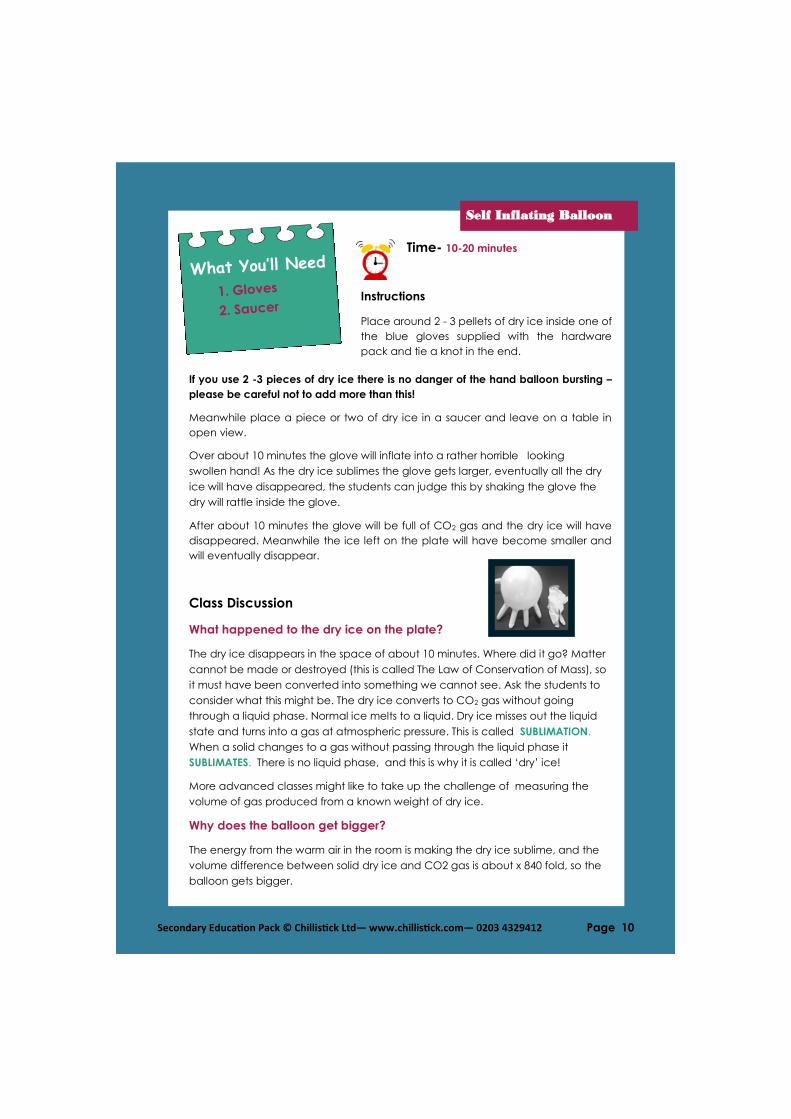
Over about 10 minutes the glove will inflate into a rather horrible looking
swollen hand! As the dry ice sublimes the glove gets larger, eventually all the dry
ice will have disappeared, the students can judge this by shaking the glove the
dry will rattle inside the glove.
After about 10 minutes the glove will be full of CO2 gas and the dry ice will have
disappeared. Meanwhile the ice left on the plate will have become smaller and
will eventually disappear.
Class Discussion
What happened to the dry ice on the plate?
The dry ice disappears in the space of about 10 minutes. Where did it go? Matter
cannot be made or destroyed (this is called The Law of Conservation of Mass), so
it must have been converted into something we cannot see. Ask the students to
consider what this might be. The dry ice converts to CO2 gas without going
through a liquid phase. Normal ice melts to a liquid. Dry ice misses out the liquid
state and turns into a gas at atmospheric pressure. This is called SUBLIMATION.
When a solid changes to a gas without passing through the liquid phase it
SUBLIMATES. There is no liquid phase, and this is why it is called ‘dry’ ice!
More advanced classes might like to take up the challenge of measuring the
volume of gas produced from a known weight of dry ice.
Why does the balloon get bigger?
The energy from the warm air in the room is making the dry ice sublime, and the
volume difference between solid dry ice and CO2 gas is about x 840 fold, so the
balloon gets bigger.
Instructions
Place around 2 - 3 pellets of dry ice inside one of
the blue gloves supplied with the hardware
pack and tie a knot in the end.

Page 11 Secondary Education Pack © Chillistick Ltd— www.chillistick.com— 0203 4329412
How can the inflation of the balloon be increased?
Dry ice will sublimate quite quickly at room temperature, where the difference in
temperature is about 100°c (from -79°c to +20°c). If the temperature difference
increases, for example by placing into a cup of hot water, then the dry ice subli-
mates at a faster rate. Even just breathing on a piece of dry ice will accelerate
the process. To increase the speed of inflation place the balloon in a hot water
bath or under a hot tap. An interesting way to inflate the balloon is to add some
water with the dry ice in the glove, tie a knot and then place it in a microwave
and heat in 10-second spurts. (Dry ice is transparent to microwaves – so you
need the water to transfer energy to the dry ice).
Is the weight of the CO2 gas in the glove different from the weight of the dry ice?
The conservation of mass is a law of science - the weight of the balloon plus the
ice should be exactly the same as the weight of the balloon inflated with CO2
gas. If you have very accurate scales it might be a quick experiment to carry
out. If there is a difference in weight it is likely to be because the balloon
material is gas-permeable!
Would this be a good method of measuring the molar gas volume of CO2?
More advanced classes might like to take up the challenge of measuring the
volume of gas produced from a known weight of dry ice. (See Measuring The
Molar Volume of CO2 experiment).
Using the volume of the balloon to determining molar volume will create errors as
the pressure of the contained gas is above atmospheric pressure to balance the
compression from the stretched balloon material. Also, the balloon material in
this case is permeable to gases and so even as the hand is inflating it is loosing
CO2 through the skin. Ask the students to calculate the volume of gas that they
would expect to be produced from a known weight of dry ice.
This is another way of showing the sublimation of dry ice and how a small film of gas
reduces friction. A piece of dry ice can be shown to almost float across a bench
top, the heat from the surface maintains a small gas cushion, just like a hovercraft.
Please remind students not to pick the ice up and should the ice fall on the floor
leave it there to sublime.
Self Inflating Balloon
The Hovercraft
Time
5 minutes plus class discussion

Page 12 Secondary Education Pack © Chillistick Ltd— www.chillistick.com— 0203 4329412
Instructions
Using a piece of cloth or thick paper towel to protect your hands, rub a piece of
dry ice against a flat table top for about 20 seconds; the pressure will cause the dry
ice to form a flat side against the table. If you now push the flattened piece of ice
it will slide along a smooth table top like a hovercraft.
If age appropriate you can ask students to flick the small piece of ice along the
bench using a ruler or a book so that they can see how easily it moves.
The Hovercraft
Discussion Topics
Why does the ice move so easily?
CO2 gas is subliming from the solid and so provides a small layer of gas between the
table top and the dry ice so greatly reducing friction, like a hovercraft.
How could you make the hovercraft work better/worse?
Change the temperature of the surface, hotter will mean more sublimation and
lower friction. Colder will mean the opposite. You could test this by chilling down
part of the surface using some dry ice, and then launching the hovercraft at this
patch. the cold section should act like brake.
Engineers and scientists are constantly working to reduce friction in machinery of all
types to save on material and energy costs.
Consider devising a method to do this in a
bigger way using pellets. We haven’t
managed this yet, but it would be impressive
to show students how to slide a payload of
books, for example, across a desk! We will
credit any suggestions in our next booklet….!
Your hovercraft photo
here please!

Page 13 Secondary Education Pack © Chillistick Ltd— www.chillistick.com— 0203 4329412
Instructions
Set this experiment on a table at the front of the class and ensure that everyone is at
least 2 metres away. The demonstrator must wear eye protection. The canister used
in the experiment is designed so that when the pressure reaches a certain point the
top will pop off and travel about 1 - 2 metres vertically - it is safe to carry this out in a
laboratory but please do not use any other container unless you know it will release
pressure safely.
Place 3 - 5 dry ice pellets in the polycarbonate scoop supplied in the kit and
immediately firmly push the red plug into the top of the glass. Step back a few
metres and wait … As the dry ice sublimates the pressure from the gas builds up and
the lid pops off. Part of the fun of this demonstration is the uncertainty on the timing,
the looser the lid the quicker it will be released, the more firmly it is pushed on the
longer it takes to pop and the more satisfying the result.
Once the red plug is in position you may find it easier to turn the assembly over and
push down on the base of the scoop to fully insert.
Discussion Topics
Why did the plug ‘blow up?’
The dry ice sublimated from a solid to
a gas and the gas takes up slightly
more than 850 times the volume of the
solid, so the pressure rises eventually
removing the lid. If this experiment
was performed using a screw-on
bottle lid then the pressure would
continue to rise until the bottle
ruptures, which leads to a potentially dangerous explosion - please never do this.
The Safe Explosion
Everyone likes a pop and this is safe way of achieving this in a classroom.
Time
2 minutes

Page 14 Secondary Education Pack © Chillistick Ltd— www.chillistick.com— 0203 4329412
Instructions
If the students are old enough to understand that they must not pick up the ice,
then each student or small groups of students can be given 2 - 3 pellets on a dish or
dark card. The dark background will provide a contrast to enable the students to
see the dry ice clearly. For younger students perform a class demonstration.
Using the gloves provided or a scoop weigh out around 5 grams of dry ice pellets
from the storage box provided into a plastic or Pyrex glass container. (Make sure
the lid is placed back on the dry ice box.) If you don’t have scales then count out 3
- 4 pieces of 9mm dry ice pellets, this will be roughly 5 grams.
Instruct the students not to touch the ice but to observe what they see, tell them to
be careful not to breathe on the dry ice pellets. After 1 minute they should be able
to see a flaky layer starting to grow from the surface of the dry ice - ask them to
consider what this might be (tiny water crystals). If available use a magnifying glass
and they will see these crystals growing over the next few minutes, consider using a
magnifying app on a smart phone to take some photos. After 10 minutes the dry ice
will be covered in a layer of these beautiful crystals. Eventually the dry ice will
completely sublime and then the water crystal will melt leaving a few drops of
water. Here is a very nice video of this: http://goo.gl/ei8jGu
One of the most notable features of dry ice is that at atmospheric pressure it
SUBLIMES from a solid to a gas without passing through the liquid state. At normal
pressure most chemical compounds and elements possess all three states, each
produced at a different temperature.
Science is often about careful observation and this simple experiment is an object
lesson in patience! Areas covered include: Water crystal growth, humidity, concept of
sublimation, observation of phase change.
Crystal Growth
Time - 20minutes

Page 15 Secondary Education Pack © Chillistick Ltd— www.chillistick.com— 0203 4329412
Crystal Growth
Class Discussion
Use microscope with screen viewer if available!
Usually the transition from the solid to the gaseous state requires an intermediate
liquid state. When you heat molecules up they take up more space and move
around faster. We use heating and cooling to change the states of matter.
For example; if we MELT a (solid) water ice cube it turns into liquid water and if we
EVAPORATE the water it turns into a gas - water vapour. To reverse these effects, if
we CONDENSE the water vapour it will turn back to water and if we FREEZE the
water it will turn back to ice.
In a solid the molecules are tightly packed together and can hardly move. A solid
keeps its own shape unless we cut it or shape it ourselves.
Generally anything you can take hold of is a solid. The molecules in a liquid are not
so tightly packed, they can move a little - liquids are ‘runny’ and flow downwards.
They take the shape of the container they are in.
The surface of a liquid stays level. Gas molecules have lots of energy and move
around very quickly in a random fashion. Gases are all around us, spreading into
any empty spaces, most gases are invisible like CO2.
Where did the water come from to produce the water crystals?
Water is all about us in the air, it is measured as humidity, (mass of water per mass or
volume of dry air.) A hot humid day will produce more moisture than a dry cold day
as the humidity will be higher. When this air is cooled, for example by contact with
dry ice, it reaches its ‘dew point’ and this is when the air releases moisture as
condensation. When observing the surface of the dry ice we are seeing the air chill
and release its moisture which almost immediately freezes into delicate cluster of
ice crystals on the surface of the dry ice.
This phenomenon occurs in nature when it is sometimes called ‘hoar frost’. The name
‘hoar’ comes from an Old English adjective for showing signs of old age, and is used
in this context in reference to the frost that makes trees and bushes look like they
have white hair!
Why is it called ‘dry ice’?
To distinguish from ‘water ice’ or ‘wet ice’ ! When dry ice is packed in boxes of
valuable items there is no liquid phase and so there is no residual liquid to risk
spoiling the packed item. There is a very small amount of water condensed from the
surrounding air but this is negligible.
Could the students see the CO2 gas as it sublimed?
CO2 gas is invisible as are most gases. Importantly the components of air (nitrogen,
oxygen and small amounts of other gases) are invisible - which is just as well

Page 16 Secondary Education Pack © Chillistick Ltd— www.chillistick.com— 0203 4329412
otherwise we would have a hard time seeing things! Visible
gases are limited to the halogen family.
Can students think of other materials which sublime?
Water ice does! Items left in the freezer which are not wrapped tightly will look
unpalatable, this is because the water crystals on the surface have started to
sublime from ice to water vapour. This is sometimes referred to as ‘freezer burn’.
Freeze drying is a process which takes advantage of this phenomenon. Food
and other items are quickly frozen and placed in a vacuum that encourages the
sublimation of the ice crystals. With a majority of the water removed flowers, herb
and many foods can be stored for years without deteriorating. You can buy freeze
dried fruit in pouches, these can be re-hydrated into a smoothie and then used to
make a fruit ice cream! – see ‘Making Instant Ice Cream’ chapter.
Chemists use sublimation to purify compounds: typically a solid is heated under
vacuum, under this reduced pressure, the solid volatilises and condenses as a
purified compound on a cooled surface, leaving a non-volatile residue of
impurities behind. Once heating ceases and the vacuum is removed, the purified
compound may be collected from the cooling surface.
Iodine also sublimes on gentle heating.
Dry ice will sublimate quickly at room temperature as measured in the experiment
where the difference in temperature is nearly 100°c (from -79°c to +19°c).
If the experiment was conducted in a hot space the temperature difference
increases and the rate of dry ice sublimation proceeds more quickly.
In this experiment we specified the use of a plastic or Pyrex container. Why is it
necessary to use Pyrex glass or plastic as the container material?
Pyrex glass has a low thermal expansion coefficient and can therefore resist
changes in temperature because it expands to a small extent when heated and
shrinks to a small extent when cooled. Normal glass, also known as soda lime glass,
does not like rapid changes in temperature and will crack easily and should never
be used with dry ice.
Crystal Growth
This is a quick and dramatic demonstration which illustrates how
sound is generated and provides a hint about loudspeaker design.
It’s also a little creepy… well certainly annoying.
Screaming Metal

Page 17 Secondary Education Pack © Chillistick Ltd— www.chillistick.com— 0203 4329412
Screaming Metal
Instructions
There are a number of ways of getting a screaming sound from dry ice. Place a
couple of pieces of dry ice on a paper towel and place on the bench top. Press a
spoon firmly against the ice, you will hear a high-pitched screeching sound. Better
still, if you have a large metal surface hold a piece of dry ice in a pair of tongs and
press against the metal surface for a few seconds. A baking tray works very well.
If you do not have tongs use thick gardening gloves to hold the dry ice, or as a last
resort use several pieces of paper towel folded to provide insulation for your hand
whilst you push the dry ice onto the metal surface. Please note that paper towels
should not normally be used to handle dry ice however in this case you are only
holding the dry ice for a few seconds to create the screaming noise so the paper
towels will provide adequate insulation.
Class Discussion
What is making the noise?
Contact with the relatively hot metal is causing the dry ice to sublime. The escaping
gas pushes against the metal causing it to vibrate like a loud speaker (in this case a
horrible loud speaker!).
What happens when the spoon is placed in hot water and then put against the ice?
If you keep the spoon pressed against the ice the noise will diminish, why is this? (less
sublimation as the spoon surface gets colder.
• Using a large metal object (with a large thermal mass) has the advantage
that the screaming goes on for longer.
Why metal?
Metals are good conductors and so as the metal is chilled by the dry ice, more heat
is being conducted to this cold spot so prolonging the sublimation. You can get the
screaming effect with plastic but it is very short-lived, because plastics are not good
conductors.
Time
2 minutes

Page 18 Secondary Education Pack © Chillistick Ltd— www.chillistick.com— 0203 4329412
Making Fog 1 The class will love this!
Rate of sublimation is dependent on temperature. Why are clouds white?
Instructions
Add a small quantity of dry ice (4-5 pieces of ice, around 10-15g) to the container
and then add around 100ml of cold water (no more than 5°C). You will immediately
see bubbles as the dry ice sublimates and the formation of a very faint cloud of mist
at the surface of the liquid.
Challenge the students to explain what is happening and ask them to speculate on
what would happen with warmer water.
Repeat this experiment using progressively warmer water; we suggest around 20°C
and again at around 50°C. The last demonstration will produce a very impressive
‘cotton wool’ cloud. As the water gets hotter the students should observe that the
amount of fog is increasing. You can repeat the last demonstration with around 50g
of dry ice and 250ml of hot water (scale down a little if your container is smaller).
Ask the students to see if they can make coloured fog. For example by adding
food colouring. If the teacher judges it safe, allow student volunteers to pour the fog
from the jug.
Discussion Topics
What is happening here?
All liquids evaporate to some degree creating a vapour above the surface of the
liquid and the hotter the liquid the more evaporation will occur. The pressure
exerted by a vapour in equilibrium with the liquid phase of the same substance is
called the Vapour Pressure. Consider a kettle of water – you can start to see vapour
coming out of the spout as it heats up the water, the vapour pressure is increasing;
Time - 20 minutes

Page 19 Secondary Education Pack © Chillistick Ltd— www.chillistick.com— 0203 4329412
when the kettle boils the pressure of the water vapour is the same as atmospheric
pressure.
When we add dry ice to water we start to interfere with this system.
The bubbles of CO2 gas leaving the dry ice are very cold, (around -79°C). When the
bubbles hit the surface of the liquid they are still very cold (even though they have
been warmed up slightly in passing through the water) and start to chill the vapour
and air immediately above the liquid surface.
Cold air cannot hold as much water as warm air and so some of the water vapour
condenses into small water droplets that we see as fog. This creates an aerosol of
tiny water droplets that scatter light and look like mist, which is what it is!
This now means that the vapour pressure of water has fallen and so the liquid
immediately starts to evaporate more liquid to vapour to re-establish the correct
vapour pressure. This in turn is condensed and so the cycle continues. In effect by
putting dry ice into a glass of water we have created a pump that moves water in a
liquid to water as tiny droplet in an aerosol – pretty cool!
The hotter the liquid the greater the formation rate of white mist. The white fog is
caused only by the water droplets and not by CO2 gas, which is invisible.
There is a second effect going on here and that is that as the CO2 bubble hits the
surface of the water it is increasing the surface area of the liquid by atomising the
water and this is adding to the vapour and fog formation.
Can you make the fog different colours?
The white colour of the fog is due to the size of the water droplets not the colour of
the liquid. It’s always white (unless you shine coloured light at the fog).
If anyone can make a coloured fog please let us know and we will provide you
with a place of honour on our website!
The white colour of the fog is due to the size of the water droplets not the colour of
the liquid. It’s always white (unless you shine coloured light at the fog). If anyone
can make a coloured fog please let us know and we will provide you with a place
of honour on our website!
This is why clouds are always white: a water droplet inside a cloud is large enough to
scatter light of all colours (different wavelengths). In a cloud there are millions of
water droplets some of which will have frozen and light from the sun will be
scattered many times before passing through the cloud and scattered light of all
wavelengths is white in colour.
Making Fog 1

Page 20 Secondary Education Pack © Chillistick Ltd— www.chillistick.com— 0203 4329412
Making Fog 1
Light travelling through very big clouds is so reduced that the clouds appear darker.
A good clue that rain may be on the way!
How do you know that CO2 gas is invisible?
Our breathe contains CO2 gas and is invisible (but see next question). Also in the
Crystal Growth experiment the students were asked to see if they could observe CO2
gas leaving dry ice.
Most gases are invisible - ask the students if they can think of gases that can be
seen, (this is limited to the halogens and their compounds: chlorine, bromine and iodine).
Would any gas cause the formation of the mist?
Only cold gases! Ask the students to think of an experiment to test this. One answer is
to state what happens when they open a can or bottle of soda drink that has CO2
gas dissolved into the liquid - they will see bubbles coming to the surface but no
mist. This is because CO2 gas in this case is not cold enough. On a cold day you can
see your breath - this is because we breathe out warm humid air and this is chilled
and condensed by the ambient cold air causing the formation of the water aerosol,
which scatters light to provide a white mist.

Page 21 Secondary Education Pack © Chillistick Ltd— www.chillistick.com— 0203 4329412
This is a fun demonstration particularly if someone is celebrating a birthday and a
cake and candle is available – put the candle out without blowing by pouring an
invisible gas over the cake! This introduces the concept of combustion and fire
extinguishers and also shows that CO2 and water vapour are heavier than air.
Instructions
Place 10 - 20g of dry ice in the jug and cover the top of the jug with a cloth or paper
napkins. Prepare this before the class starts so that the dry ice has sublime completely
and filled the jug to the brim. As CO2 gas is invisible the jug will now appear empty.
Timing is important: if you prepare this too early the CO2 gas will diffuse away, and if
you leave it too late there will be residual dry ice pellets spoiling the illusion. Suggest
prepping 10 minutes before the demonstration. Pour the ‘empty’ jug over a lit candle
and extinguish the candles. This is also a nice effect if it is someone’s birthday and you
have a cake available!
Repeat this demonstration this time adding a small quantity of dry ice to the jug and
pour hot tap water over it, approximately in the ratio of 30g of dry ice to 200ml of
water. You will immediately see white ‘smoke’ being produced. Hold the jug and tilt it
a little being careful not to pour any liquid out. The white vapour is an aerosol of tiny
water droplets being carried in a stream of CO2 gas. Observe as the gas flows out of
the jug and sinks to the floor.
For younger students you can fill the ice cage supplied in the science pack with dry
ice and repeat the experiment. The Ice Cage retains the dry ice in a safe enclosure
so that it will not escape. In this way you could give the students a ‘fog shower’ by
pouring the fog over them as you go around the classroom – taking care not to tip
out the water, (the ice cage will keep all the dry ice imprisoned and is an important
safety feature, particularly in this case.) For younger students we have found that this
is very popular.
Pouring CO2 & Fire Extinguishers
Time
10-15 minutes
Try with birthday cake and candles

Page 22 Secondary Education Pack © Chillistick Ltd— www.chillistick.com— 0203 4329412
Pour the CO2 and moisture mix over the flame of a candle and
watch it go out. The flame will be extinguished as the area is starved of oxygen.
Class Discussion
Why is the fog flowing downwards?
The fog is heavier than air. The fog consists of CO2 gas (which we know is invisible) and
water droplets. CO2 gas is 50% heavier than air. (Molecular weight of air is 29;
molecular weight of CO2 is 44.)
Why did the candle go out?
Fuel needs oxygen to burn and a candle is no different. When the CO2 fog pours over
the flame it pushes the air away and so starves the flame of oxygen and hence the
flame is extinguished.
How do candles work?
You may wish to ask the students to think about how a candle works. Candles are
amazing - lighting systems which carry their own fuel! The chemical energy contained
in the wax is melted by the heat of the flame and this liquid fuel travels up the wick by
capillary action until it reaches the flame where it burns locally heating more wax and
so keeping the system going!
Fire Extinguishers
Ask students to carefully examine the fire extinguisher in the classroom. Some fire
extinguishers release CO2 gas which is heavier than air and therefore displaces
oxygen at the base of a fire. CO2 gas is also non-toxic and so does not present a new
hazard to fire fighters. CO2 gas is not always the correct choice for putting out fires,
this is because CO2 gas leaves a fire extinguisher at high velocity and whilst it starves
flames of oxygen it can also push ignited materials such as paper and actually spread
the fire! CO2 is great for dealing with electrical fires as the oxygen is displaced quickly
and the CO2 gas dissipates without causing further damage to electric equipment.
There is a special type of fire involving the metal where CO2 would be a terrible
choice for reasons discussed in the Magnesium and Dry Ice Volcano experiment.
You can identify which agent is stored in a fire extinguisher from the colour: (black)
contain carbon dioxide and are used on flammable chemical or electrical fires. Other
extinguishers contain water (red), cream (foam) or dry powder (blue).
Out of interest CO2 is stored as a liquid in a fire extinguisher. How is this possible with all
this talk of sublimation? It’s all to do with pressure and can be explained by looking at
the CO2 phase diagram in the section ‘Introducing Dry Ice and Carbon Dioxide’ at
the front of this booklet.
Pouring CO2

Page 23 Secondary Education Pack © Chillistick Ltd— www.chillistick.com— 0203 4329412
Safety: as with all experiments the supervisor will prepare appropriate safety
procedures according to School guidelines. In this experiment it is important to
ensure that no students put their hands into the bucket. The demonstration will pro-
duce CO2 gas which in large concentrations is an asphyxiant. Good ventilation
is a must, so windows and doors should be left open. A calculation on the safe re-
lease of CO2 is provided in the discussion.
Instructions
We suggest that you use the demonstrations suggested in the Small Fog Effect
section as a useful warm-up. There is plenty of dry ice in the box for practice
purposes.
To make a BIG fog effect that will get people talking place a towel on a table top
or elevated platform and use the 10 litre plastic container supplied with the Science
Pack.
Place 500 grams of dry ice in the bucket, this is approximately two scoop-fulls from
the polycarbonate scoop supplied in the Science Kit.
(HINT: bulk density of dry ice pellets is about 1, a small ½ pint ceramic coffee mug
with handle makes an ideal dry ice scoop and holds about 250g).
Add 2 litres of boiled water from the kettle that has rested for 3 minutes; if you do not
let the water cool down the fog generated will ‘lift off’ like a cloud. This is a BIG
effect, and the temptation is to stop pouring! The fog effect will spread over 5 – 10
metres and placing it on an elevated surface hopefully everyone will be able to see
the fog flow downwards on to the floor.
Spooky Scene — Big Fog Effects
This is the one you have to do - it creates a wow factor that students from 6 to
18 will love! Ideal for an assembly.
Time
5-10 mins per demonstration
Students at Farnborough Hill

Page 24 Secondary Education Pack © Chillistick Ltd— www.chillistick.com— 0203 4329412
Class Discussion
Is this safe?
We know that the fog contains CO2 gas and tiny water droplets - could this be
dangerous? CO2 gas is heavier than air and therefore displaces air at low levels. In a
low level space without ventilation there would be a risk of suffocating (asphyxia)
due to depleted oxygen, (please see the fire extinguisher experiment). In a
classroom with plenty of ventilation and a small amount of CO2 gas as specified in
this activity this is not a problem. At theatres and venues which use dry ice for fog
effects calculations are performed to confirm that the ice can be used safely. In
certain situations CO2 monitors are installed to warn people if the level becomes
dangerously high.
You might want to ask older students to estimate the safety of using dry ice with this
hazard in mind. Safe working limits are set for all kinds of chemicals provided by the
Health and Safety Executive. Useful safety information for all chemicals can be
found in their Material Safety Data Sheets. The data of interest is the exposure limits
for CO2 gas:
long term exposure limit = 9,150 mg/m3 (8 hours)
short term exposure limit = 27,400 mg/m3 (15 minutes)
Assume with reasonable ventilation that your classroom/laboratory has 10 air
changes per hour, this is usual for a correctly ventilated work space. The
concentration in the room should always be a small fraction of the short-term
exposure limit.
1. Estimate classroom size: Vm3
2. The dry ice will sublime over a period of 5 minutes (ask students to check this
timing as it will vary with water temperature).
3. Calculate concentration: = (dry ice used in mg)/((volume of room m3)x(air
changes per hour).
For a classroom of 70m3 subliming 1kg of dry ice with 10 air changes the
concentration is: 1,428mg/m3.
What does this mean?
If the CO2 gas is immediately well mixed with the rest of the air in the classroom then
it can be argued that the average concentration over 15 minutes is 1,428/3 =
476mg/m3. As the CO2 gas takes time to mix with the air in the classroom the
average figure will be between 476 and 1,428 for a 15-minute time period and as
can be seen this is a small fraction of the safe exposure limit over this period of
Spooky Scene Big Fog Effects

Page 25 Secondary Education Pack © Chillistick Ltd— www.chillistick.com— 0203 4329412
27,400mg/m3. However take care: if the
sublimation occurs within a small container and there is little mixing, because a lid is
added for example, then the local concentration will be much higher. Also the
concentration near the floor will be higher than near the ceiling.
How much CO2 is being produced by people breathing in the room?
On average each of us breathes 1kg of CO2 per day, so an assembly with 50 people
for one hour will produce 2kg of CO2 - more than the weight of dry ice used in the
demonstration.
Please prepare your own safety procedure and hazard assessment. In
particular you should only use the type of plastic bottle described in this
section, they have a nozzle which will relieve at a safe pressure. Under no
circumstances should a bottle with a conventional blanked off screw cap be used
as this will lead to an explosion. If in doubt call us before proceeding and we will
advise on this important safety point: 02034 329412.
Instructions
You can carry out this demonstration in a large sports hall or preferably in an
outside playing area. The bottle rocket is propelled by a small amount of water
being thrust out of the nozzle at pressure created by the sublimation of a small
amount of dry ice to CO2 gas.
The supervisor should wear safety glasses and lightweight gloves. All other
spectators should stand behind the supervisor a distance of at least 4 metres.
Spooky Scene Big Fog Effects
The Rocket
Time
30 minutes
The world of rockets is fascinating, this simple experiment is a taster, if you get hooked
there are many excellent online resources some of which are given in these notes.
Our rockets are good fun to use and improve - they also make a pretty good water
pistol. This experiment illustrates Newton's Third Law in action and the forces acting
on a rocket. Students can observe and record measurements and analyse their
results, then discuss how to improve the flight and test their hypotheses. There is
enough dry ice to perform many dozens of launches.

Page 26 Secondary Education Pack © Chillistick Ltd— www.chillistick.com— 0203 4329412
The Rocket
Here is the general procedure, have everything in place - once dry ice is added to
the bottle it is important to move quickly otherwise you will not create enough
pressure in the rocket.
1. Ensure that you have a playing field or similar to yourselves. Ask the children to
line up 3 – 4 metres behind you. On a flat surface fill the bottle with xx ml of
cold water (about 1/5th full).
2. Wearing safety glasses and using the funnel put 5 good pieces of dry ice in the
top of the bottle. You will see some fog starting to form.
3. Place the plastic bottle plug so that it rests on the top of the bottle and then
place the jug over the bottle. As you push down on the jug you will push the
plug into the bottle. Do this as firmly as you can.
5. Grasping the neck of the bottle turn the jug and bottle over whilst holding the
jug by the handle. Do this so that the rocket is never pointing at anyone.
6. Holding the launcher jug by the handle aim the rocket at an angle of about
45 degrees into the field (and away from the children).
7. The rocket will fly off after about 20 - 60 seconds. The plug will be trapped in
the launcher jug and can be re-used. Most of the water will be caught by the
jug even though it is quite possible that the demonstrator may get a bit wet.
8. Measure how far the rocket went to determine who wins.
9. Consider experiments to investigate air resistance, e.g. would a nose cone
make the rocket go further? Perhaps taping the red lid supplied in the Primary
Science Kit
The pressure will build in the bottle as the hot water helps to sublime the dry ice.
Eventually (after about a minute depending on water temperature, nozzle
condition and quantity of dry ice added) the pressure will be large enough to open
the pop valve from inside and immediately the compressed gas will expel the
water through the nozzle. Most of the water expelled by the rocket bottle will be
caught in the launcher, however a small amount could go anywhere so you will
have a little drying up to perform.
The force of the water and gas leaving the bottle will have an equal and opposite

Page 27 Secondary Education Pack © Chillistick Ltd— www.chillistick.com— 0203 4329412
force on the bottle which will cause it to move forward in the
general direction that it is pointed. If you follow these directions the rocket will expel
the water and will travel a short distance.
The time to launch is variable and will depend on the energy contained in the water
(a combination of temperature and volume) and how much dry ice is added (more
dry ice means a bigger sublimation surface).
Please Note: If you do not add enough hot water or dry ice the pressure may not be
sufficient to open the valve. If the nozzle has not opened and bubbling in the bottle
has stopped (after about 4 minutes) then the demonstrator, whilst wearing gloves
and safety glasses, must firmly grasp the bottle and release pressure by twisting the
cap, this is safe and is much the same as opening a bottle of soda which has been
shaken. You may prefer to do this at the end of class. So secure using a bottle.
WARNING: If you add to much dry ice there is a risk that the water will freeze. This will prevent the nozzle from
opening and may lead to the bottle exploding. For this reason please use only hot tap water and dry ice as
shown in the table. As there is a chance that the rocket nozzle may get damaged, please only use once.
You can repeat this experiment and challenge the students to improve on the
distance and flight of the rocket.
Most students will suggest altering the amount of dry ice and the amount of water.
They could compile their result as follows:
Class Discussion
What is happening?
The energy from the hot water is subliming the dry ice to CO2 gas and so the CO2
molecules are moving much more quickly. The gas takes up a much larger volume
than the solid, so the pressure rises until it is sufficient to force the valve open. By
placing the rocket with the nozzle at the bottom of the pitcher the water is forced
out of the nozzle. The mass flow of the water leaving the bottle causes it to launch
upwards, an example of Newton’s Third Law in action. There are three forces acting
on the rocket:
Gravity: the mass of the bottle and contents times the acceleration of gravity .
Thrust: expelled water and compressed CO2 gas.
Drag: the force of air pushing back against the surfaces of the bottle.
The Rocket
Dry ice Weight Length of all
pellets (cm)
Angle from
horizontal
Distance of
rocket (m)
3
5
10

Page 28 Secondary Education Pack © Chillistick Ltd— www.chillistick.com— 0203 4329412
Would more ice make the rocket go further?
You need the minimum ice necessary to generate enough pressure to defeat the
valve. Any more is just going to add to the weight of the rocket in flight, examination
of the nozzle shows that all dry ice is retained within the bottle - wasted payload as
we rocket scientists call it!
Would making the water hotter help?
The temperature of the water speeds up time to launch, but will not make the bottle
fly further.
How about adding more water?
The mass flow of water creates the thrust to get the rocket moving. Once the
pressure inside the bottle has reached atmospheric pressure any remaining water
will be a dead weight reducing the rocket flight.
Our suggestion is to optimise the distance travelled (our record is 10 metres!), but
please tell us how you get on. It is surprising how little water is needed to get the
rocket to fly.
What about the nozzle?
The stiffer the nozzle valve the larger the pressure in the rocket and the greater the
action caused as the water and compressed gases exhaust. (Please do not try and
make the nozzle harder to open by using glue etc., as this would lead to higher
pressures in the bottle which would become unsafe.)
What about Angle of launch?
This will have a large effect on distance travelled: 45 to 60 degrees to the horizontal
will yield the best results - just make sure that the nozzle is covered with water so that
in the moment when the valve opens all the water is expelled. In our instructions we
suggest holding the jug launcher however building a simple launch platform is a
good idea as you can then get repeatable results.
The rocket is a plastic bottle – how can we make it fly better?
The plastic bottle is a lousy flyer and will be rather erratic, sometimes it will sail 10
metres other times it might not leave the launcher. Improvements to the
aerodynamics would be gratefully received - we would love your ideas! Consider
moving the centre of gravity towards the middle by using a nose cone. Also how
about adding some tail fins to stabilise the flight but consider that this will require a
different launch method. You might also want to experiment with curved tail fins so
that the rocket rotates which might also increase flight stability. Another project to
consider is to add wings to the bottle so that once launched it will glide....
The Rocket

Page 29 Secondary Education Pack © Chillistick Ltd— www.chillistick.com— 0203 4329412
The Rocket
How about a different design?
If the nozzle cap is replaced by a plug such as a wine cork then this provides some
advantages.
The centre of gravity is moved along towards the front of the bottle which will help
with flight stability. If you want to try this out we suggest a 2 litre soda bottle and a
tight fitting cork.
When the cork is pushed out by the pressure all of the contents of the rocket will be
expelled from the bottle including any residual dry ice, also, unlike the previous
design, the weight of the plastic nozzle is removed.
If you decide to try this you will need to launch vertically and will need to do this
outside. The demonstrator will need to prepare a new safety procedure and hazard
assessment - not included in these notes!
At this point you are in the wonderful world of water bottle rocket technology and a
nose cone, fins and recovery system will not be far off! Please send us photo
updates of your success.
How can you measure the height that a rocket will fly if launched vertically?
This is called the rocket’s apogee.
You need to use trigonometry!
Stand a safe distance from the launch area (10
metres) and measure the angle that the rocket
reaches at the top of its flight. The height will be:
Ask the students to consider the effect of wind on this
measurement.
There are many resources online for looking at
water rockets, here a couple of really good ones 1234
1 http://goo.gl/qgI8Fn 2 http://goo.gl/YnYe5v
3 http://goo.gl/Bepjb6 4 http://goo.gl/KzjFiL
Your photo here! Please send in
photos and your experience with
the rocket, we will post on our
website.

Page 30 Secondary Education Pack © Chillistick Ltd— www.chillistick.com— 0203 4329412
Comets come in all shapes and sizes; they are often referred to as "dirty snowballs" as
first described by the renowned US astronomer Fred Whipple. At their core is a nucleus
composed of a mixture of rock, dust, water ice, and frozen gases such as carbon diox-
ide, carbon monoxide, methane, and ammonia.
The dry ice pack provides an opportunity to make a comet – a working model with
gas jets just like those in space!
What You’ll Need
1 litre of water (comets have lots of water)
2 cups of soil (minerals and dust)
Safety Glasses
Thick gloves for holding comet (heavy duty gardening gloves not the lightweight gloves provided with the kit)
Plastic bag
Large food mixing bowl
Polycarbonate Scoop (from the chilly science pack)
Dry Ice 400g-600g (2-3 scoops)
Instructions
Place the plastic bag in the mixing bowl and add the water and soil. Mix thoroughly
to create a muddy slurry. Add the dry ice to the bag using the scoop provided with
the Chilly Science Pack. Add the ice slowly so that you do not get large amounts of
smoke and gas leaving the bag. Wearing thick gloves continue to mix the contents
of the bag and slowly add more dry. After a short time the contents will start to
freeze. Open the plastic bag and tip the solid mass into the mixing bowl. This is what
a comet looks like! There will be dry ice and water ice bonding the other
ingredients together. You may wish to pour some water over the comet so that you
see jets of smoke and gas leaving the comet.
When finished leave the comet in the bowl and allow the dry ice to sublime. You
will eventually have a muddy slurry to dispose of - pour this back where you got the
soil from.
Class Discussion
How big are comets?
Comets come in all sizes, usually they are bigger than the one you made, typically
they are the size of a city! They fly through our solar system all the time.
Make A Comet
Time
20 minutes

Page 31 Secondary Education Pack © Chillistick Ltd— www.chillistick.com— 0203 4329412
How realistic is our comet?
Comets come in all shapes, sizes, some of them are
darker, some of them are lighter, producing more gas,
shooting out jets from different locations, in this sense
the comet made is an accurate model. Comets also
have traces of other materials such as organics,
amino acids and methanol. We did not add them to
the comet made in the classroom as we need to
dispose of the model once it has melted and this is
best done by returning the soil to its source without
contaminating it.
How are comets formed?
Comets are left over from the formation of stars and planets billions of years ago.
Particles of dust and ice agglomerate slowly and over millions of years get bigger
and bigger. When the gravitational attraction from a large passing body, like a star,
becomes strong enough, some large pieces of ice get pulled away from the cloud
and towards the Sun.
As the ice and dust ball approaches the Sun it begins to melt, the melted ice
becomes a gaseous tail that extends away from the source of the heat pushed out
by the Sun's solar wind.
A comet’s motion and path is dictated by the forces of gravity acting on it from all
the planets and stars it passes. When a comet is in our solar system, most of the
gravity affecting the comet's motion is due to the Sun. As a comet gets closer to the
Sun it moves faster and faster, because the closer an object is to the Sun the
stronger the Sun's gravity acts on it. As well as moving faster near the Sun, the
comet's tail will grow in length since more of the ice will be evaporating.
Make a comet
photos courtesy Sam Dimbylow, Yateley School, Hampshire
Here are a couple of fun demonstrations:
use the gas produced from the dry ice to
generate a lot of foam consisting of
bubbles and then make one mega
bubble. Warning: this is a bit messy so
please carry out on an easy-to-clean
surface!
Bubble Monsters
Time
20 minutes

Page 32 Secondary Education Pack © Chillistick Ltd— www.chillistick.com— 0203 4329412
Bubble Monsters
Add ½ scoop of dry ice, (around 100g) to every 1
litre of hot tap water in the 10 litre container. You
will immediately see bubbles as the dry ice
sublimates and the formation of a white cloud.
Immediately add a glug of bubble solution.
The fog will be replaced after a moment or two with a continuous tube of bubble
foam which will quickly overflow the container – this always gets a good reaction!
Invite students to pop some of the bubbles and release the white water vapour/CO2
fog.
Class discussion
What’s happening here?
As the dry ice sublimates in the soapy liquid, the gas becomes trapped in the bubbles
and is released when it’s popped.
Why do bubbles form?
This happens when there is a balance between two competing forces: the force ex-
erted on the inside wall of the bubble and the liquid surface tension which is trying to
squeeze the bubble.
Instructions
Soak the strip of cloth in the bowl of detergent
and then run it around the edge of bowl so
that there is some bubble solution wetting the
entire rim - be careful not to drop any bubble
solution into the bowl. Timing is essential with
this demonstration, so when everything is ready
add a full cup of dry ice (about 200g) to the
bucket and immediately add about 1 litre of
warm/hot tap water. Do not add very hot
water as the fog creation will be too large and
it will be hard to create the mega bubble.
Immediately drag the taught cloth over the top of the bucket making a film of
detergent.
Instructions
Carry this demonstration out in an area where it
is easy to clean up spills. Younger students love
to pop the bubbles made so consider access for
the class.
To make a mega bubble you will need:
White Bucket (which contains the hardware science pack)
Strip Of Cloth (approx. 30 cm in length)
Small Bowl (or saucer)
Bubble Solution
Polycarbonate plastic cup (supplied with science pack)

Page 33 Secondary Education Pack © Chillistick Ltd— www.chillistick.com— 0203 4329412
Class discussion
What do the components in the bubble solution do?
The washing-up liquid reduces the surface tension
of the bubble by about 1/3 and so allows the
bubble to expand. The glycerol reduces water
evaporation from the bubble surface and so helps
prevent the mega bubble from popping too soon.
When the mega bubble burst why did the contents
fall downwards?
The fog contained in the mega bubble is water
vapour and CO2 gas, which are heavier than air.
Time
15-20 minutes
Instructions
Half fill the container with hot water
and add a few drops of universal indicator.
The water will turn green indicating that it is
neutral. Add a small amount of sodium
hydroxide to the liquid and observe a colour change from green to blue/purple.
Add a few pieces of dry ice and watch it bubbling away and changing the
colour - you should observe it going back up the pH scale past green to red
indicating that it is acidic.
This takes a number of goes to get right and we find it easier
using glycerol bubble solution, rather than just washing-up liquid. If you have
problems getting the bubble film to form make sure you are pressing down firmly with
the cloth as you sweep over the top of the bucket. As the dry ice continues to subli-
mate, the bubble film fills and grows, often it bursts at which point the contained
water vapour/ CO2 fog spills out and down onto the table top.
Here’s how it should look, note the bubble mixture cloth we used:
Bubble Monsters
Climb The pH Scale

Page 34 Secondary Education Pack © Chillistick Ltd— www.chillistick.com— 0203 4329412
Climb the pH scale
This demonstration illustrates the phenomenon of the toroidal or vortex ring, which is
formed quite widely in nature but is normally not visible. Students will have seen
people blowing smoke rings from cigars in films. You don’t need to smoke to get this
effect, you just need some dry ice!
Class discussion
What’s happening?
Universal indicator changes colour on contact with acids or alkalis and is a gauge of
a liquids pH. (A measure of the concentration of hydrogen). Sodium hydroxide is a
strong alkali and so the colour changes to blue/purple as the pH of the liquid rises.
Carbon dioxide dissolves slightly in water forming carbonic acid and this will
eventually result in a colour change from alkali through neutral to acidic:
CO2 + H2O H2CO3
What does this tell you about your favourite soda drink?
Why is this important?
CO2 is a major source of ocean acidification, scientists estimate that 30–40% of the
carbon dioxide released by human activity dissolves into the oceans, rivers and lakes
thereby reducing pH levels. This is thought to have negative effects on sea creatures
and coral growth.
Instructions
For this you will need to use the vortex ring
generators supplied in the Chilly Science
Pack.
Smoking Vortex Rings
Time
20 minutes

Page 35 Secondary Education Pack © Chillistick Ltd— www.chillistick.com— 0203 4329412
There are five units in the pack each four of them have one hole and one has two
holes. Take one of the single-hole generators and clip the lid on. When the plastic side
of the container is compressed a stable vortex toroidal structure of air leaves the
exhaust port. You can blow out a candle out on a table and by placing the hole
near to a volunteer’s face they will feel a slight breeze when the side of the generator
is quickly squeezed. It is a truly dull demonstration!
We can use dry ice to visualise what is
happening. Peel the cap off the generator
and add around 100ml of warm/hot tap
water. Replace the lid and wearing the
gloves supplied drop 3 - 5 pieces of dry ice
through the hole in the lid. Smoke consisting of
water droplets and CO2 gas will start to pump
out of the exhaust hole of the generator. You
will notice that the hole is off-centre and the
reason for this is to create a weir inside the
generator where the smoke an accumulate. Hold the generator on its side with the
hole nearest to the top and squeeze the sides of the generator; as you repeat this
you will start to see smoke rings (donuts) appearing. It is interesting to observe how
the smoke ring develops – its gets bigger in diameter and moves more slowly as it
gradually reaches the floor. In the Chilly Science lab we have a dingy tea-room and
the diffuse lighting on offer is perfect for observing these smoke rings.
If age-appropriate you can pass the generators around the class. Students may wish
to experiment to see the best way of observing these rings. Firing them vertically up-
wards may work if the student is in the right position.
You may wish to experiment with some black card or a cardboard box for optimum
viewing.
One interesting exercise is to make two vortex rings collide, if you do this you will see
that they combine to form a bigger ring! One of the generators has two holes
punched in it, and the idea is that it will produce two identical rings simultaneously
traveling along the same path, if the students are patient they will see the rings
coalescing.
You can also make a larger device....! A cardboard box works very well and one was
supplied with the dry ice box. Locate the centre of one long side of the box and cut
a hole of around 9cm in the middle, position the box on a table with the hole pointing
upwards. Tape up all the gaps around the box. Fill the scoop supplied in the Science
Kit with dry ice to a height of around 3cm and then half-fill the beaker with hot tap
water and slide into the box through the hole. As the box fills with fog you will start to
see it coming out of the hole. You can pulse the side of the cardboard box and this
will send larger vortex rings up to the ceiling. For best effect you must let the box refill
between pulses, typically 5 - 10 seconds.
Smoking Vortex Rings

Page 36 Secondary Education Pack © Chillistick Ltd— www.chillistick.com— 0203 4329412
You will have to cut the tape to get the scoop back!
Class discussion
Nature loves vortex rings, most of the time we cannot see them but they are formed
from interactions between fluids and an opening/orifice. They can be formed in the
same fluid as in the class demonstration; they can also be formed with different fluids
such as air in water. Some of the best examples can be seen online: try searching for
dolphins/whales and vortex rings. You will see a dolphin breaking up a large ring into
smaller rings – the reverse of what we did with the two-hole vortex generator.
Volcanoes emit vortex rings consisting of particles of ash. You may occasionally see
smokers making smoke rings – to do this they must shape their mouth (the orifice) and
exhale quickly to create the desired effect, which probably takes years of practice -
crazy habit!
Is this like a normal wave?
Unlike a sea wave, or sound wave whose motion is only apparent, a moving vortex
ring actually carries the spinning fluid along. We know this because we can see the
dry ice smoke moving in the air with our experiment.
Why does the ring stop?
The mist generated by the dry ice will evaporate and disappear, but the vortex ring
also breaks down as friction between air molecules in the ring slows the structure. The
temperature and humidity of the room will also effect the duration of the ring.
Ask the students to consider effect of size of orifice on smoke rings generated. You
may wish to ask them to carry out an experiment where they gradually increase the
size of the hole in the cardboard box from 5 to 15 cm - please let us know what they
find out. If you have access to a workshop you may also wish to alter the size of the
holes in the vortex generators.
Why does the ring stop?
The mist generated by the dry ice will evaporate and disappear, but the vortex ring
also breaks down as friction between air molecules in the ring slows the structure. The
temperature and humidity of the room will also effect the duration of the ring.
Ask the students to consider effect of size of orifice on smoke rings generated. You
may wish to ask them to carry out an experiment where they gradually increase the
size of the hole in the cardboard box from 5 to 15 cm - please let us know what they
find out.
Smoking Vortex Rings

Page 37 Secondary Education Pack © Chillistick Ltd— www.chillistick.com— 0203 4329412
This experiment is a means of observing the effect of cold temperatures on a range of
everyday items. A freezing solution is made for this purpose by adding dry ice to a
pure alcohol. This is strictly a project for older students and the supervisor should have
control of the freezing solution at all times. There will be some residual alcohol on
items dipped into the freezing solution and so under no circumstances should food/
fruit items be consumed after dipping. Care must be taken to ensure that the freezing
solution does not come into contact with skin, as it would result in a cryogenic burn.
When the experiment is finished leave the alcohol uncovered in a safe place
overnight until all the dry ice has sublimed and the alcohol has returned to room
temperature. At this point it can be poured back into the bottle for re-use. Please do
not add dry ice into the alcohol bottle.
Instructions
Use high purity alcohol, if it is diluted with water the freezing point rises and the dry ice
makes a sludge.
Place the Pyrex beaker in an aluminum foil baking tray or similar in a fume cupboard
or other well-ventilated area. The tray will retain liquid in the event of a spill or
breakage. Pour around 200ml of the alcohol into the beaker. Using a scoop carefully
add small amounts of dry ice two to three pieces at a time.
Freezing Solution
Protective gloves (thick leather
gardening gloves are fine, not the
ones provided with the kit which
are intended for handling one or
two pellets.)
Metal tongues for handling cold
objects.
Various items for dipping, (e.g.
piece of lettuce, flowers, slices of
fruit, marshmallows, rubber balls,
red, orange LEDs)
Paper/absorbent towels
Some balloons
What You’ll Need
Large Pyrex beaker preferably 500
to 1000ml, or large steel vacuum
insulated container.
Pure alcohol with a freezing point
below -79C (e.g. isopropyl alcohol
freezing point -89°C) Poison not
for consumption.
Dry ice scoop (ceramic mug with
handle, plastic, Pyrex)
Eye protection
A small hammer
Time 30-40 minutes

Page 38 Secondary Education Pack © Chillistick Ltd— www.chillistick.com— 0203 4329412
The amount of dry ice and alcohol to add will depend on the size of the beaker, the
aim is to half-fill the vessel with the freezing solution.
There will be bubbling as CO2 gas sublimes from its solid state and this may lead to
some foaming as the alcohol gets colder. If you have not used pure alcohol the
mixture will become thicker taking on the appearance of a gel - pure alcohol will
remain in a liquid state.
Continue to slowly and carefully add pieces of dry ice to the alcohol. When the
bubbling subsides you will have dry ice floating in very cold alcohol and if the dry
ice and alcohol are in thermal equilibrium then the alcohol will be at -79°C.
Whilst the freezing solution is cooling a simple demonstration can be performed to
demonstrate the ‘Liedenfrost effect’. We suggest this should only be shown to older
students as the object here is a discussion on safety and younger students may
mistakenly get the impression that it is safe to pick up very cold or hot objects.
Having explained that dry ice is very cold and gloves should always be worn it is in
fact completely safe to hold one small dry ice pellet in your hand for up to 5
seconds. The reason for this is that the warmth from the hand sublimes a small
amount of dry ice creating a thin layer of CO2 gas between your skin and the dry
ice. Gas is a poor conductor of heat and so this thin layer insulates your hand from
the cold dry ice for a short period of time. This is an example of the Liedenfrost
effect.
Another example of the Liedenfrost effect that many will have seen is when a frying
pan is heated until very hot, at which point when a few drops of water are added
they bead and bounce around on the hot surface. The water is cushioned by a
layer of steam which is why it moves around easily, the steam insulates the
remainder of the droplet and so it takes longer to evaporate these droplets than
would be the case if the pan was not so hot!
The reason for performing this demonstration at this point is to contrast dry ice pellets
with the freezing solution; the ‘heat transfer’ to the freezing solution is greater than to
the dry ice as there is no insulating gas barrier, for this reason the freezing solution is
much more dangerous than the dry ice pellets even though both are at the same
temperature.
The Experiment
To start with, partly inflate a balloon and tie it off. Dipping the balloon into the
freezing solution will make the balloon shrink. When the balloon is returned to room
temperature it recovers its original size.
Select a fresh flower or green leaf and using tongues carefully dip the leaf into the
liquid and keep it there for about 20 seconds. Astonishingly the flowers or leaves can
be shattered, broken and snapped apart.
Freezing Solution
Page 39 Secondary Education Pack © Chillistick Ltd— www.chillistick.com— 0203 4329412
Repeat this with a range of materials, such as pieces of lettuce and slices of fruit.
After a period most of these items will become brittle tapping them on a hard sur-
face will cause them to break. If you decide to use a larger item, such as a banana,
then you immersion will have to be for several minutes.
If the students are nearby put the banana skin in a transparent plastic bag to
prevent shards of frozen skin from hitting anyone.
Using tongs place a bouncy ball, squash ball or piece of rubber into the freezing
solution for about 3 - 5 minutes. remove and dry off on the paper towels and then
see what happens when you try and bounce the ball.
It is possible it will brittle enough to snap, it will certainly behave in a different way.
Using tongs dip an illuminated LED into the freezing solution and ask the students to
observe what they see, this works best with the Pyrex beaker! (The LED will get
brighter and the light emitted will move to a higher energy level from red through
orange to green.)
Discussion Topics
In this experiment the alcohol was in thermal equilibrium with dry ice and so the
alcohol was at a temperature of -79° C. The temperature inside a domestic freezer is
around -18°C. In industry the process of freezing very quickly is often referred to as
flash freezing, and is used to stabilise all kinds of goods including foods and
biological samples. The technique was developed by Clarence Birdseye in the US -
no prizes for guessing his interest!
The main reason this technique is used in food and medicine is that water con-
tained within the sample is frozen vey quickly and prevents the formation of large
water crystals. If a sample was frozen slowly then the water in a sample would lead
to the growth of larger ice crystals which will damage cell membranes. This is the
reason why ice cream made with dry ice tastes so good – water crystals in the ice
cream are much smaller than those made from industrial machines and so this tastes
smoother and creamier in the mouth!
Other methods for rapidly chilling products include air blast freezing with a vacuum
and liquid nitrogen; the objective in these cases is the same – to prevent formation
of large water crystals.
Why did the balloon shrink?
When the air in the balloon gets colder the molecules in the air slow down so they
exert less pressure inside of the balloon. Since there’s less pressure inside the balloon
it shrinks until it reaches a new equilibrium with the outside pressure.
Freezing Solution

Page 40 Secondary Education Pack © Chillistick Ltd— www.chillistick.com— 0203 4329412
Sc
ien
tist
s a
re in
tere
ste
d in
fin
din
g o
ut
wh
at
ha
pp
en
s to
th
ing
s w
he
n t
he
y g
et
ve
ry c
old

Page 41 Secondary Education Pack © Chillistick Ltd— www.chillistick.com— 0203 4329412
Why did the flowers/lettuce/fruit slices freeze?
Ask the students why the flowers and other items froze. Flowers, fruit etc. contain a lot
of water, and we know water freezes into ice at around 0°C.
What happened to the rubber ball?
There is no water in the rubber so why did it change properties when it got colder? The
rubber acts very differently when it gets cold. The molecules in the rubber don’t want
to move when they’re cold; they want to stay close together, it is very hard to bend
the rubber when it is cold.
Why did the LED change colour?
As the temperature drops electrical conductivity increases and so more current
passes to the LED which makes the light brighter. Also as temperature falls the
emitted wavelength gets smaller and so there is a shift in colour towards the violet end
of the spectrum.
Other questions for students:
• Why use an alcohol, why not just put items into the dry ice?
• Why use pure alcohol? See temperature at which vodka freezes.
• What is the temperature of the alcohol once the bubbling has subsided?
A Cloud Chamber is a device used to detect ionizing particles and to determine
their trajectories; it does not show the particles themselves, but where they have
been. Dry ice is an essential element in the functioning of a cloud chamber.
A cloud chamber is a sealed chamber that is cooled so that super-saturation of
alcohol or water vapour will occur within it. This means that when an ionizing particle
travels condensation will occur about the nucleus of the ions it produces - these
are called condensation nuclei, as the vapour in the chamber is on the verge of
condensing, much in the same way that water vapour condenses around dust
particles in the atmosphere to form clouds. This condensation trail leaves a fine mist
that we can see which tells us where the particle was/originated from and the path
it has taken from then.
A difference in temperature between the top (heater) and the bottom (dry ice) of a
sealed container full of alcohol produces a supersaturated environment necessary
for the mist (or cloud) to be formed.
Dr. Cristina Lazzeroni from the University of Birmingham runs a cloud chamber loan
scheme and organizes demonstrations. For more information please go here:
http://goo.gl/RFGqWK
Freezing Solution
The Cloud Chamber

Page 42 Secondary Education Pack © Chillistick Ltd— www.chillistick.com— 0203 4329412
The Institute of Physics has been promoting cloud chambers in
schools through its Teacher Network. They can also help with demonstrations through
their CPD programme. This paper shows how to construct a cloud chamber and
includes a very useful video: http://goo.gl/sThDfk. Further refererence:-
http:www.nuffieldfoundation.org/practical-physics/diffusion-cloud-chamber
Cloud Chamber
Instructions
As this experiment takes some time we suggest that it is prepped at least an hour
before the class starts.
Open the pressure cooker and place a plastic or Pyrex saucer filled with about 200
grams of dry ice (equivalent to filling the cup provided in the education kit). The
reason for the saucer is to prevent the base of the cooker from getting too cold.
Above the filled saucer place a piece of polystyrene sheet or cardboard. The
purpose of this layer is to prevent fruit and other items from touching the dry ice and
freezing. On top of the polystyrene place plastic containers holding washed fruit,
and a cup with water and preferably a fruit cordial dissolved into it.
Assemble the pressure cooker using the heaviest weight and leave to one side for at
least 60 minutes. Whilst waiting you may wish to carry out the smoking drink
experiments as this emphasises the need for pressure in creating fizzy drinks.
After at least one hour open the pressure cooker and remove the items. Be careful
not to touch the exterior of the pressure cooker as this will be very cold from the dry
ice and you may see frost on the outside at the base - use garden gloves if you
need to touch the outside of the pressure cooker.
Fizzy Fruit
This experiment is intended to show
that pressure is necessary to make
liquids fizzy. For this you will need an
ancient piece of scientific equipment –
a pressure cooker!
A safe way of achieving a moderate
pressure - it is possible that there is one
in the kitchens...
Time Preparation time 5 mins
Cooking time 1-2 hrs
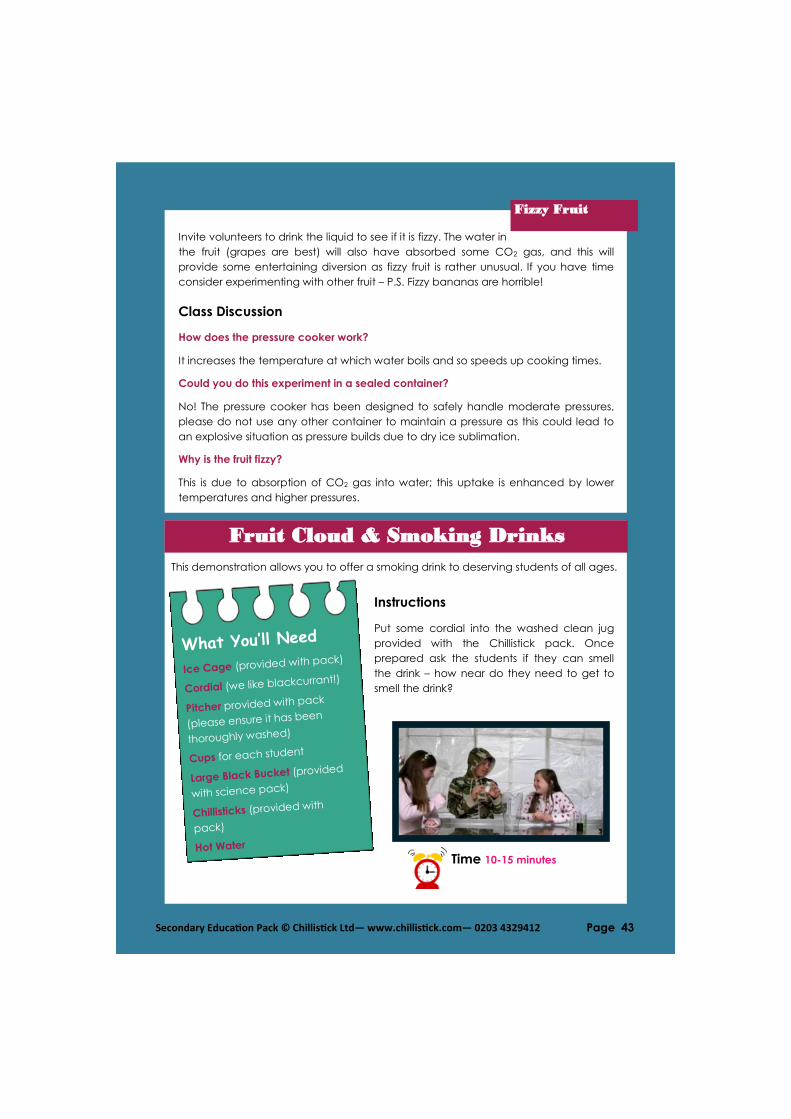
Page 43 Secondary Education Pack © Chillistick Ltd— www.chillistick.com— 0203 4329412
Invite volunteers to drink the liquid to see if it is fizzy. The water in
the fruit (grapes are best) will also have absorbed some CO2 gas, and this will
provide some entertaining diversion as fizzy fruit is rather unusual. If you have time
consider experimenting with other fruit – P.S. Fizzy bananas are horrible!
Class Discussion
How does the pressure cooker work?
It increases the temperature at which water boils and so speeds up cooking times.
Could you do this experiment in a sealed container?
No! The pressure cooker has been designed to safely handle moderate pressures,
please do not use any other container to maintain a pressure as this could lead to
an explosive situation as pressure builds due to dry ice sublimation.
Why is the fruit fizzy?
This is due to absorption of CO2 gas into water; this uptake is enhanced by lower
temperatures and higher pressures.
Fizzy Fruit
This demonstration allows you to offer a smoking drink to deserving students of all ages.
Instructions
Put some cordial into the washed clean jug
provided with the Chillistick pack. Once
prepared ask the students if they can smell
the drink – how near do they need to get to
smell the drink?
Fruit Cloud & Smoking Drinks
Time 10-15 minutes

Page 44 Secondary Education Pack © Chillistick Ltd— www.chillistick.com— 0203 4329412
Load the ice cage as follows:
The Ice Cage is made from very strong polycarbonate. It has our safety valve system
so that you can add dry ice to the cage and then put the cage into any drinking
vessel or container you wish. The liquid will contact the dry ice within the cage giving a
great smoke effect. The ice will not fall out as it is trapped so that this device can be
used for pitchers/jugs of all types. See the photos above.
Before Use
• Wash the Ice Cage – it is dishwasher safe, drain and dry thoroughly.
• Please note that the Ice Cage has a flexible valve at one end, this valve is used
to load dry ice into the Ice Cage, once loaded the dry ice can only leave by
evaporation.
• A loading tube is supplied as part of the kit, see photo above.
Using the Ice Cage
• The Ice cage is filled by pushing the loading tube through the safety valve, see
middle photo above.
• Wearing the gloves provided. Open the box of ice and scoop ice into the
cage via the loading tube.
• When the Ice Cage is half full remove the loading tube and the ice cage is
ready.
Drop the filled ice cage in to the filled pitcher, you will see the characteristic white fog
develop. Your students should also be able to smell the drink as the aroma is being
spread by the fog.
The dry ice is food grade and provided everything is clean there is no reason why the
students shouldn’t be allowed a drink.
When pouring from the pitcher some fog will carry over into the glass. No dry ice will go
into the glass as this is being contained with the ice cage.
For a more spectacular effect (perhaps an assembly) you could create a fruit cloud….
Fill the large white plastic bucket half-full with very hot tap water, or water which has
Fruit Cloud & Smoking Drinks
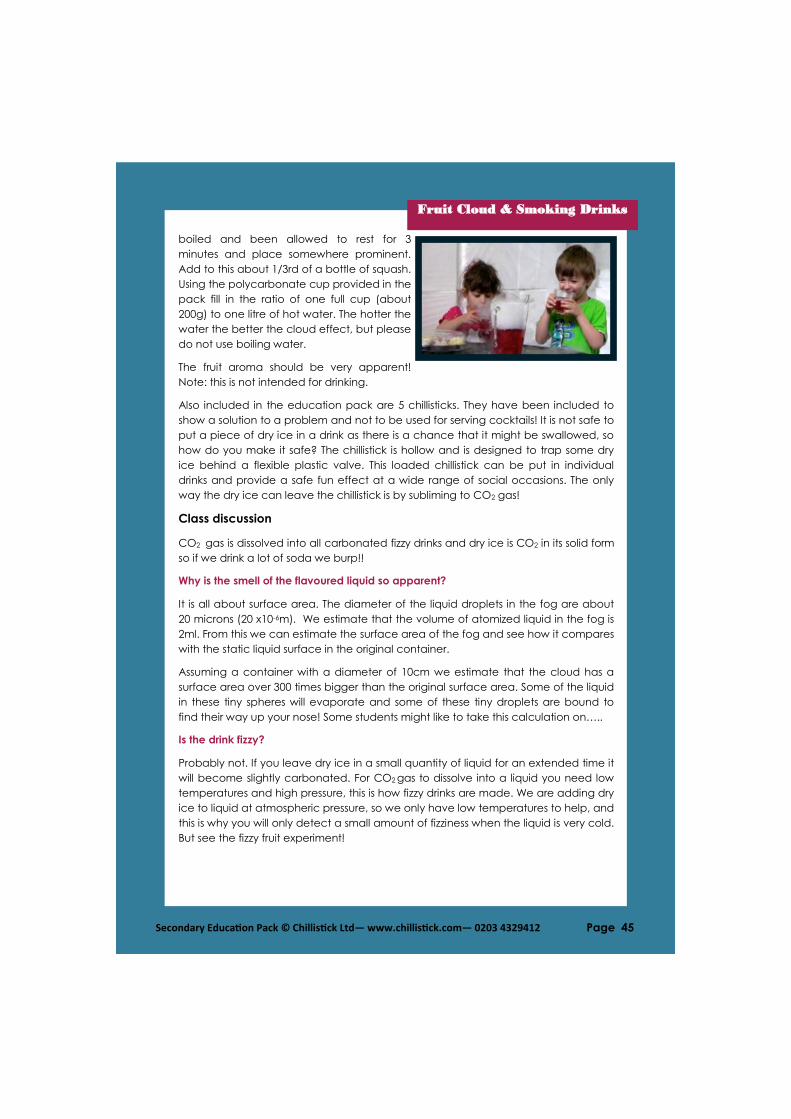
Page 45 Secondary Education Pack © Chillistick Ltd— www.chillistick.com— 0203 4329412
boiled and been allowed to rest for 3
minutes and place somewhere prominent.
Add to this about 1/3rd of a bottle of squash.
Using the polycarbonate cup provided in the
pack fill in the ratio of one full cup (about
200g) to one litre of hot water. The hotter the
water the better the cloud effect, but please
do not use boiling water.
The fruit aroma should be very apparent!
Note: this is not intended for drinking.
Also included in the education pack are 5 chillisticks. They have been included to
show a solution to a problem and not to be used for serving cocktails! It is not safe to
put a piece of dry ice in a drink as there is a chance that it might be swallowed, so
how do you make it safe? The chillistick is hollow and is designed to trap some dry
ice behind a flexible plastic valve. This loaded chillistick can be put in individual
drinks and provide a safe fun effect at a wide range of social occasions. The only
way the dry ice can leave the chillistick is by subliming to CO2 gas!
Class discussion
CO2 gas is dissolved into all carbonated fizzy drinks and dry ice is CO2 in its solid form
so if we drink a lot of soda we burp!!
Why is the smell of the flavoured liquid so apparent?
It is all about surface area. The diameter of the liquid droplets in the fog are about
20 microns (20 x10-6m). We estimate that the volume of atomized liquid in the fog is
2ml. From this we can estimate the surface area of the fog and see how it compares
with the static liquid surface in the original container.
Assuming a container with a diameter of 10cm we estimate that the cloud has a
surface area over 300 times bigger than the original surface area. Some of the liquid
in these tiny spheres will evaporate and some of these tiny droplets are bound to
find their way up your nose! Some students might like to take this calculation on…..
Is the drink fizzy?
Probably not. If you leave dry ice in a small quantity of liquid for an extended time it
will become slightly carbonated. For CO2 gas to dissolve into a liquid you need low
temperatures and high pressure, this is how fizzy drinks are made. We are adding dry
ice to liquid at atmospheric pressure, so we only have low temperatures to help, and
this is why you will only detect a small amount of fizziness when the liquid is very cold.
But see the fizzy fruit experiment!
Fruit Cloud & Smoking Drinks

Page 46 Secondary Education Pack © Chillistick Ltd— www.chillistick.com— 0203 4329412
What happens if we put this in a fizzy drink?
Would you believe it – the drink will go flat! This is because the bubbles from the dry
ice pull CO2 which has been absorbed in the soda out of solution.
The fruit aroma should be very apparent! Note: this is not intended for drinking.
Also included in the education pack are 5 chillisticks. They have been included to
show a solution to a problem and not to be used for serving cocktails! It is not safe to
put a piece of dry ice in a drink as there is a chance that it might be swallowed, so
how do you make it safe? The chillistick is hollow and is designed to trap some dry
ice behind a flexible plastic valve. This loaded chillistick can be put in individual
drinks and provide a safe fun effect at a wide range of social occasions. The only
way the dry ice can leave the chillistick is by subliming to CO2 gas!
Class discussion
CO2 gas is dissolved into all carbonated fizzy drinks and dry ice is CO2 in its solid form
so if we drink a lot of soda we burp!!
Why is the smell of the flavoured liquid so apparent?
It is all about surface area. The diameter of the liquid droplets in the fog are about
20 microns (20 x10-6m). We estimate that the volume of atomized liquid in the fog is
2ml. From this we can estimate the surface area of the fog and see how it compares
with the static liquid surface in the original container.
Assuming a container with a diameter of 10cm we estimate that the cloud has a
surface area over 300 times bigger than the original surface area. Some of the liquid
in these tiny spheres will evaporate and some of these tiny droplets are bound to
find their way up your nose! Some students might like to take this calculation on…..
Is the drink fizzy?
Probably not. If you leave dry ice in a small quantity of liquid for an extended time it
will become slightly carbonated. For CO2 gas to dissolve into a liquid you need low
temperatures and high pressure, this is how fizzy drinks are made. We are adding dry
ice to liquid at atmospheric pressure, so we only have low temperatures to help, and
this is why you will only detect a small amount of fizziness when the liquid is very cold.
But see the fizzy fruit experiment!
What happens if we put this is a fizzy drink?
Would you believe it – the drink will go flat! This is because the bubbles from the dry
ice pull CO2 which has been absorbed in the soda out of solution.
Fruit Cloud & Smoking Drinks

Page 47 Secondary Education Pack © Chillistick Ltd— www.chillistick.com— 0203 4329412
Making Sorbet
The most delicious demonstration we have! This works well as an end-of-term treat or
perhaps for an open day/sports day crowd-pleaser. Hopefully most of the class can
enjoy this non-dairy treat, but please check for fruit/food allergies.
Mrs Zoe Edwards of Wycombe Abbey School made ice-cream for a school event
using pre-mixed Smoothies and dry ice:
Here’s the science:
When the ice cream mixture is chilled water ice crystals start to form and this
continues through the chilling process. When an ice crystal is formed it attracts
surrounding moisture to it and therefore grows in size. The objective is to create lots
of small ice crystals so that the resultant ice cream feels smooth and creamy in your
mouth, rather than fewer larger water ice crystals that will feel gritty and sharp in the
mouth. For this reason it is necessary to chill down the contents as quickly and
evenly as possible. We do not want to risk anyone putting dry ice in their mouths so it
is important to wait at least one hour before consuming. The sorbet must therefore
be stored in a freezer, however if you do this it will turn rock hard and be horrible.
This is where gelatin comes in. The collagen in the gelatin softens the mixture
allowing the sorbet to be spoon cut from the freezer. Food grade dry ice for chilling
down is a good choice as it is very cold and can be mixed into the bulk of the
mixture. Dry ice works best with fruit flavoured ices and sorbets, this is because any
residual CO2 absorbed into the smoothie from the dry ice causes a slight tartness on
‘it went brilliantly! We had run out of 40 litres of smoothie an hour into our 2 hour time
slot - it was so successful that we had a queue forming 10 minutes before we opened
the first carton! The dry ice was perfect. I am hoping to do the same activity next
year as it is such a winner.’
Time 10-15 minutes
Photo Courtesy of The Greyhouse School,
Hampshire

Page 48 Secondary Education Pack © Chillistick Ltd— www.chillistick.com— 0203 4329412
the tongue due to formation of carbonic acid with water which complements fruity
flavours.
When using dry ice in food preparation, you
need to take exactly the same precau-
tions as you would with boiling water, naked
flames, hot pans and baking trays straight out
of the oven. Don’t let it come into direct con-
tact with your skin or you will get a burn.
Instructions
Wear blue gloves provided and eye protection. (In the photo the demonstrator is
not wearing either, idiot.) Weigh out the dry ice pellets and place in the food
processor. Blitz for about 10 seconds which will render the dry ice to powder (the
consistency of icing sugar is ideal). Please examine this powder to satisfy yourself
that there are no large lumps of dry ice remaining. If you do see residual pellets you
will need to blitz again.
• Pour smoothie mixture into a bowl and add the sugar, mix thoroughly to
ensure that the sugar has dissolved.
• Let the gelatin soften in 1/4 cup of the smoothie, then gently heat until it is
dissolved at which point add to the balance of the smoothie. (If you do not
add the gelatin you will end up with a rock hard ice the following day!)
• Add about half the dry ice to the smoothie, sugar and gelatin mix and mix
either using a whisk, or if you prefer mix using the food processor.
• You will see a column of white fog leaving the mixture and you should pick
up the aroma of the smoothie.
• When the smoking has died down remove the bowl and add small amounts
of additional powdered dry ice, continually stir with a wooden spoon or
whisk. You will start to see that the smoothie is becoming a thick liquid and
that the dry ice is causing it to foam and bubble in the bowl. Add more dry
ice bit by bit until you see that the smoothie mix has set like an ice cream.
• Put the sorbet in a freezer for one hour or longer to ensure that all the dry ice
has sublimed before serving.
We find it easier and more fun to use a whisk to combine the dry ice to the
smoothies mixture. If you prefer to use a food mixer a wide diameter food processor
works fine, however an upright liquidiser design does not mix as well and when we
tried with this machine the dry ice fog pumped liquid out of the top and over the
demonstrator.
Some of the carbon dioxide evolved from the dry ice will absorb into the mixture
and will provide a very small amount of fizz – be prepared for applause!
Making Sorbet
photo courtesy of Farnborough Hill School,
Hampshire

Page 49 Secondary Education Pack © Chillistick Ltd— www.chillistick.com— 0203 4329412
An experiment plan with safety assessment; included below is a suggested
procedure however this may not be rigorous enough for your school, so as with all
these demonstrations, please follow best practice allowing for your specific
circumstances.
Good ventilation, as some MgO vapour will be generated consider carrying this out
in a fume cupboard or near to appropriate extractor fan. Please note that if not
contained the fumes could trigger the fire alarm system.
We recommend that you conduct a test run with a colleague prior to presenting to
a class to ensure that sensible safety measures have been taken. In particular
please ensure that students are seated at a safe distance.
Instructions
We suggest that on a large piece of inert fire resistant board you pour a pyramid of
dry ice pellets weighing 3 - 5kg. Wearing gardening gloves create a small hollow
about 1 - 2cm deep, something like a volcano in appearance and place
magnesium ribbon or turnings into the hollow (shown in the diagram opposite).
This is a beautiful demonstration in which magnesium burns in the
absence of air; it is an illustration of the relative position of
magnesium and carbon in the reactivity series.
The Volcano — Magnesium & Dry Ice
What You’ll Need
Magnesium Ribbon or Fillings 5-10g
should be plenty. (The powder will start
to burn more readily than the ribbon.)
A large inert fireboard on which to place the experiment
Thick Gloves (leather garden gloves are fine)
Ignition Source (a Bunsen burner or small
blowtorch work well; please note that an
ignited taper will not be sufficient to start
reaction)
Dry Ice Pellets 3-5 g
Tongs
Eye Protection
This experiment examines the
relative reactivity of magnesium
and carbon. In this experiment
magnesium is oxidised with oxygen
stored in the dry ice:
2Mg + CO2
The result is magnesium oxide,
which is a white powder and
elemental carbon, which is black.
One of the key points is setting up
the experiment so that it will work
with the dry ice pellets.
Time 20 minutes set up,
combustion and examination of residue

Page 50 Secondary Education Pack © Chillistick Ltd— www.chillistick.com— 0203 4329412
The Volcano
The reaction between magnesium and dry ice is exothermic and so energy is
released. The magnesium sitting in the dry ice needs to be ignited to overcome the
excitation energy of the reaction, and for this we recommend a bunsen burner or
blowtorch, * please make sure that you are wearing safety glasses and gloves! * The
magnesium will not ignite as it does in air and may take 2 – 10 seconds to catch.
(Even though the magnesium is not covered at this moment it is trying to burn in an
atmosphere of CO2.) Once ignited use a pair of tongs to push the edges of the
pyramid on to the burning magnesium. The magnesium will react with dry ice
producing a bright flame that will be visible through the pyramid, the flame burns at
about 2000°C.
Ignition has just been accomplished
This photo shows the
covered pyramid
with the reaction in
full swing; please
note the quantity of
fumes being
released.
Class discussion
What is happening?
Magnesium is more reactive than carbon as can be
seen from the following table, which shows the
reactivity order for some metals and also the
position of carbon:

Page 51 Secondary Education Pack © Chillistick Ltd— www.chillistick.com— 0203 4329412
Magnesium will take oxygen from carbon for this reason result-
ing in magnesium oxide and elemental carbon.
Metals such as platinum and gold are very stable and do not oxidise, whereas at the
other extreme potassium will burn on being exposed to air and for this reason is
stored in oil.
CO2 fire extinguishers
In an earlier experiment we mentioned that CO2 is good at putting out some fires as
it removes oxygen. Do you think it would be good at putting out a magnesium fire?
Certainly not based on this experiment! The same applies to other fires involving
metal which are able to steal the oxygen from the CO2 so making the fire much
worse.
Carbon is produced as a by-product – why doesn’t this burn?
Even before the magnesium is covered with dry ice pellets it is sitting in an
atmosphere of CO2. When the carbon is first produced as a by-product of the main
reaction between magnesium and dry ice there is no available oxygen to burn the
carbon.
How much dry ice is used in the reaction?
If 5g of Mg is used then this is 5/24 = 0.21 gmols of magnesium. According the
equation this will consume (0.21/2) gmols of dry ice, which is a weight of (0.21/2) * 44
= 4.62 g of CO2. (m.w. of CO2 = 44, m.w. of Mg = 24)
How much dry ice is lost due to heat?
Heat of reaction is -810kJ/mol. In the case above this will release: 810 * 0.11 = 89.1kJ.
The heat of sublimation of CO2 is the energy required to convert solid dry ice to gas-
eous form at -79° C, this is 571kJ/kg. So if all the heat of reaction is consumed in this
task the maximum conversion is:
89.1/571 = 156g of dry ice.
We know that the actual conversion will be less than this because some of the
energy from the reaction is given off as light and also some of the energy would be
consumed in heating the CO2 produced to some temperature above -79°C.
When the demonstration has been completed and a few minutes have past open
up the volcano with gloves and remove the now cold ball of carbon and
magnesium oxide. Recover the remaining dry ice and put back in the storage box
provided – there are so many other experiments! *Obviously you cannot use this
recycled dry ice for making sorbet or for the drinking demonstrations due to the risk
of contamination.*
The Volcano

Page 52 Secondary Education Pack © Chillistick Ltd— www.chillistick.com— 0203 4329412
In this experiment the students will determine the molar volume (L/gram-mole) of
carbon dioxide at room temperature and pressure by assuming that it behaves like
a perfect gas.
The measured values can be compared to the value for an ideal gas leading to a
discussion about errors in the experiment.
Background Information
In 1810 an Italian scientist called Amedeo Avogadro proposed that at the same
temperature and pressure equal volumes of all gases contain the same number of
molecules. In the years to follow other scientists worked out that at Standard
Temperature and Pressure (which is 1 atmosphere and 273K, (0º Celsius)) one
gram-mole of a perfect gas occupies 22.4 litres and contains 6.02 x 10²³ molecules;
this number is known as Avogadro’s constant in his honour.
For the practical depending on
number of measurements. More
time will be required for the analysis
of results and discussion.
What You’ll Need 200 – 400mL Flask (Erlenmeyer style is ideal)
Cling Film or aluminium foil
Measuring Cylinder (100ml graduated is ideal)
Balance Accurate to 1/100 gram
Dry Ice Pellets 2 – 3cm length (2 grams is plenty for any container up to 500mL)
Gloves (supplied in kit) or tongs
Mole Day is celebrated by some each year in honour of the unit; the date is
derived from Avogadro's number, 6.022×10²³, the day starts at 6:02 a.m. and
ends at 6:02 p.m. on October 23rd!
If you have twenty of
something you call it
a score.
If you have two of
something you call
it a pair.
If you have twelve of
something you call it
a dozen.
If you have
602,000,000,000,000,000,000,000
of something you call it a
mole!
Measuring Molar Volume Of CO2
Time 15-25 minutes

Page 53 Secondary Education Pack © Chillistick Ltd— www.chillistick.com— 0203 4329412
Instructions
During this experiment, a piece of dry ice is placed in a flask and undergoes
sublimation. The carbon dioxide gas so produced will fill the flask and displace the
air that was in the flask, (from previous experiments we know that CO2 gas is heavier
than air). See pouring CO2 and Fire Extinguishers.
Students will need to account for the mass of air in the “empty” flask.
In comparing measured results with the standard for an ideal gas the students will
also need to allow for the temperature adjustment from 0ºC to the conditions in the
laboratory.
Procedure:
1) Weigh the flask, which has been fitted with a piece of cling film or foil. The
purpose of the foil is to reduce loss of CO2 gas from the flask.
2) Place dry ice pellets equivalent to a length of 2cm in the flask.
3) Leave the cover off the flask while the dry ice sublimes.
4) Immediately after the dry ice has disappeared cover the end of the flask
with the same piece of cling film (or foil) and measure the mass using the
analytical balance. Record this value on the data sheet.
5) Fill the flask to the brim with water and carefully wipe off excess water from
the outside of the flask. Measure the volume of water contained in the flask
using a measuring cylinder. Depending on the size of the flask you may
need to empty the measuring cylinder several times. Note the total volume
of water on the data sheet.
6) As an option you can repeat steps 1 through 5 with an additional sample of
dry ice to obtain two measurements.
Molar Volume

Page 54 Secondary Education Pack © Chillistick Ltd— www.chillistick.com— 0203 4329412
Action Experiment
1
Experiment
2
Mass of flask, cover and air (g)
Mass of flask, cover and CO2 (g)
Volume of flask (mL)
Calculate the mass of the air contained in the flask by using the density of air at ambient temperature(0.001225 g/mL) and the volume of the flask
determined in . (g)
()(0.001225)
Determine the mass of CO2 in the flask by adding the difference between the mass of the flasks with and without the CO2 to the mass of the air calculated in
step . (g)
( - ) +
Calculate the gram-moles of CO2 contained as gas in the flask. The molar mass of CO2 is 44 (12 + 2 x 16)
÷ 44
Determine the molar volume of CO2 (the volume occupied by one mole) by dividing the volume of the flask by the moles of CO2 that were contained in the flask. Convert the value of the volume obtained for the flask from mL to liters. (÷1000) to keep units consistent. (L/gram-mole) (÷ 1000) ÷
Average molar volume (L/gram-mole)
Temperature in laboratory (K)
Calculate corrected Ideal molar gas volume. The true value for the molar volume for any ideal gas at stand-ard conditions (1 atmosphere pressure and 0ºC) is 22.4 Litres; use the ideal gas law to adjust based on the temperature in the laboratory. (gram-moles/L)
22.4(/273)
⓫ % error from ideal gas
100(- )/
Measuring Molar Volume Of CO2
Page 55 Secondary Education Pack © Chillistick Ltd— www.chillistick.com— 0203 4329412
Perhaps plot the results % for the whole class. Ask students to see if there are any
trends, for example are results consistently lower or higher than ideal gas results? Was
there a difference between the first and second experiment?
Think of errors in the procedure and other reasons to explain the results.
Some reasons why the molar volume is lower than for an ideal gas:
In step 9 of the experiment the students measured the temperature in the
laboratory. Was this correct or should they have measured the temperature in the
flask? The CO2 gas from the dry ice would be very cold and this means that the
measured ideal molar volume would be higher than it actually was within the flask
therefore making the result appear lower than it is. Also, this temperature is changing
all the time as the flask and contents warm up, perhaps one solution is to cover the
flask carefully and leave to stand for a period until it and the contents have warmed
to ambient.
When the volume of the flask was determined was there residual water left in the
flask for experiment 2? Ask students to look at the results and see if there is a trend to
support this theory.
With reference to the Crystal Growth Experiment do you remember water ice
crystals forming on the surface of the dry ice? This water was condensed from the
air. Did you notice any water ice crystal on the dry ice at the bottom of the flask?
Probably not as the CO2 should have pushed the air away, however if there were
any water crystals formed this would introduce error into the measurement.
Some reasons why the molar volume is greater than for the ideal gas:
When the dry ice was subliming in the flask how do you know all the air was
expelled? CO2 is heavier than air and will expel air as it evolves from the dry ice
however is it possible that there will be back mixing at the opening of the flask?
Is it hard to judge the moment that the dry ice has completely sublimed? As soon as
this happens the pumping of CO2 gas ceases and this will encourage air to diffuse
back into the flask. In the Freezing Solution chapter mention is made of the speed
that molecules travel at ambient conditions – average speed of air molecules is the
speed of a jet engine. You would therefore expect some air to get into the flask.
In the Pouring CO2 and Fire Extinguisher experiment the CO2 gas is seen to act like a
fluid, (which it is!). If the flask filled with CO2 is not handled very gently prior to
weighing it is likely that CO2 gas will be spilled, just as would be the case if it were full
to the brim with water. In this case air would fill the lost volume, making the molar
volume appear higher than it is.
Class Discussion and background
Molar Volume

Page 56 Secondary Education Pack © Chillistick Ltd— www.chillistick.com— 0203 4329412
How do you know you added enough dry ice to the flask?
You need enough dry ice so that on sublimation it generates sufficient CO2 gas to fill
your flask several times over. In this way there is a reasonable chance that the air will
be pushed out by the heavier CO2. Assuming CO2 gas behaves like a perfect gas
then it is possible to estimate the amount of dry ice needed. Carbon dioxide has a
molecular weight of 44 and so 44g of CO2 gas will occupy 22.4 litres at STP if we as-
sume that it follows the Ideal Gas Law:
P1V1/T1 = P2V2/T2
1 x 22.4/273 = 1 x V2/(273 + 20)
44g of CO2 gas occupies 24 litres at 20ºC, typical ambient temperature in a lab.
Mass of dry ice needed for the experiment = (44/24,000)(Volume of you flask in mL)
(2)
You can weigh a piece of dry ice, or estimate its weight based on density. Dry ice
supplied in the kit has a diameter of 9mm and has a density of 1.5g/cm3.
Can you think of another way to measure the volume of the flask?
Hint: Density of water at ambient is 1g/ml.
Is Carbon Dioxide a perfect gas?
We think so! In chemistry terms this means that the gas conforms to the ideal gas law,
which was used in step 10 of the data sheet. The actual molar volume of CO2 at
atmospheric pressure is 22.3L/gram-mole. Some gases deviate from the ideal gas
law particularly at higher pressures.
Molar Volume

Page 57 Secondary Education Pack © Chillistick Ltd— www.chillistick.com— 0203 4329412
ACCIDENTAL RELEASE MEASURES
Personal precautions Evacuate area. Use
protective clothing. Wear self-‐contained
breathing apparatus when entering area
unless atmosphere is proved to be safe.
Ensure adequate air ventilation.
Environmental precautions Try to stop
release. Prevent from entering sewers,
basements and workpits, or any place
where its accumulation can be dangerous
Clean up methods Ventilate area.
HANDLING AND STORAGE
Handling and storage Use only properly
specified equipment which is suitable for
this product. Contact your supplier if in
doubt. Refer to suppliers container
handling instructions. Keep container in a
well ventilated place.
EXPOSURE CONTROLS/PERSONAL PROTECTION
Exposure limit UK: STEL; 15000ppm; LTEL:
5000ppm
Personal protection Ensure adequate
ventilation. Protect eyes, face and skin from
contact with product.
PHYSICAL AND CHEMICAL PROPERTIES
Molecular weight 44
Melting point -‐56.6°C
Boiling point -‐78.5°C (sublimes)
Critical temperature 30°C
Relative density, gas 1.52 (air=1)
Relative density, liquid 1.03 (water=1)
Relative density, solid 1.87 (water=1)
Vapour pressure 20°C 57.3 bar
Solubility mg/l water 2000 mg/l
Appearance/Colour Translucent white solid
Odour No odour warning properties
Other data Gas/vapour heavier than air.
May accumulate in confined spaces,
particularly at or below ground level.
STABILITY AND REACTIVITY
Stability and reactivity Stable at
atmospheric pressure and -‐78°C. At normal
temperatures product sublimes into Carbon
Dioxide gas. Contact with solid can cause
embrittlement of structural materials.
TOXICOLOGICAL INFORMATION
General High concentrations of sublimed
vapour cause rapid circulatory insufficiency.
Symptoms are headache, nausea and
vomiting, which may lead to
unconsciousness.
IDENTIFICATION OF THE SUBSTANCE
PREPARATION AND OF THE COMPANY
Product name Carbon Dioxide (Solid)
Chemical formula CO2
Company identification See footer Emergency phone nos 08433 192919/0845
130 3280
COMPOSITION/INFORMATION ON INGREDIENTS
Substance/Preparation Components/
Impurities Substance contains no other
components or impurities which will
influence the classification of the product
CAS Nr 124-‐38-‐9
EEC Nr 2046969 (from EINECS)
HAZARDS IDENTIFICATION
Hazards identification Refrigerated solidified
gas. Contact with product may cause
cold burns or frostbite. In high
concentrations sublimed vapour may cause
asphyxiation.
FIRST AID MEASURES
Inhalation of sublimed vapour In high
concentrations may cause asphyxiation.
Symptoms may include loss of
mobility/consciousness. Victim may not be
aware of asphyxiation. Low concentrations
of CO2 cause increased respiration and
headache. Remove victim to
uncontaminated area wearing self
contained breathing apparatus. Keep
victim warm and rested. Call a doctor.
Apply artificial respiration if breathing
stopped. Skin/eye contact with Carbon Dioxide
(Solid) Immediately flush eyes thoroughly
with water for at least 15 minutes. In
case of frostbite spray with tepid water for
at least 15 minutes. Apply a sterile
dressing. Obtain medical assistance.
Ingestion Ingestion is not considered a
potential route of exposure.
5 FIRE FIGHTING MEASURES
Specific hazards None
Hazardous combustion products None
Suitable extinguishing media All known
extinguishers can be used.
Specific methods Water on Solid Carbon
Dioxide increases sublimination. Higher risk
of asphyxiation. Special protective equipment for fire
fighters In confined space use self-‐contained breathing apparatus.
Material Safety

Page 58 Secondary Education Pack © Chillistick Ltd— www.chillistick.com— 0203 4329412
School Hazard Assessment
Ac
tiv
ity
H
aza
rd
Ac
tio
n
Ha
rm
Lik
elih
oo
d
Ris
k R
atin
g
Ris
k
Ac
ce
pta
nc
e
Be
fore
Use
Pre
pa
re a
ha
zard
an
d C
OSH
H a
sse
ssm
en
t
an
d a
ny o
the
r d
oc
um
en
tatio
n t
ha
t is
re
-
qu
ire
d b
y la
w a
nd
go
od
pra
ctic
e. Th
ese
no
tes
are
in
ten
de
d a
s a
gu
ida
nc
e, c
on
-
ditio
ns
an
d u
ses
spe
cific
to
yo
ur
v
en
ue
mu
st b
e t
ake
n in
to a
cc
ou
nt
he
re.
De
live
ry o
f
dry
ice
Bro
ke
n c
on
tain
-
er
lea
din
g t
o
po
ten
tia
l risk
of
fro
stb
ite
fro
m
pro
lon
ge
d
co
nta
ct
with
na
ke
d s
kin
On
ly t
rain
ed
sta
ff t
o o
pe
n d
ry ic
e p
ac
ka
ge
.
Dry
ice
pa
cka
ge
s se
nt
to s
ch
oo
ls w
ill b
e
de
live
red
in
po
lyst
yre
ne
bo
xes
with
sa
fety
info
rma
tio
n la
be
ls. If b
ox
is d
am
ag
ed
be
-
yo
nd
use
, i.e
. it is
no
lon
ge
r a
sa
fe c
on
tain
er
the
n d
on
’t u
se p
rod
uc
t a
nd
co
nta
ct
Ch
illis
tic
k f
or
rep
lac
em
en
t.
3
1
1
Ye
s
Sto
rin
g d
ry
ice
Un
co
ntr
olle
d
ac
ce
ss t
o d
ry
ice
co
nta
ine
r
Alw
ays
ke
ep
dry
ice
co
nta
ine
r in
th
e s
am
e
pre
-ag
ree
d lo
ca
tio
n.
En
sure
ac
ce
ss is
limite
d t
o t
rain
ed
sta
ff.
3
1
1
Ye
s
Re
mo
vin
g
dry
ice
fro
m
sto
rag
e
co
nta
ine
r
Fro
stb
ite
fro
m
pro
lon
ge
d e
x-
po
sure
Alw
ays
use
lig
htw
eig
ht
glo
ve
s (s
up
plie
d w
ith
ice
) o
r sc
oo
p -
ne
ve
r to
uc
h d
ry ic
e w
ith
ba
r
ha
nd
s. If
usi
ng
Ic
e P
ou
r d
ec
an
t d
ry ic
e f
rom
po
ly b
ox
usi
ng
ap
pro
pria
tely
siz
ed
sc
oo
p,
av
aila
ble
fro
m C
hill
istic
k L
td
Su
gg
est
ion
s fo
r in
clu
sio
n in
Ris
k A
sse
ssm
en
t fo
r d
ry ic
e
1 =
lo
w
5 =
hig
h

Page 59 Secondary Education Pack © Chillistick Ltd— www.chillistick.com— 0203 4329412
School Hazard Assessment
Su
gg
est
ion
s fo
r in
clu
sio
n in
Ris
k A
sse
ssm
en
t fo
r d
ry ic
e
1 =
lo
w
5 =
hig
h
Ac
tiv
ity
H
aza
rd
Ac
tio
n
Ha
rm
Lik
elih
oo
d
Ris
k
Ra
tin
g
Ris
k
Ac
ce
pta
nc
e
Cre
atin
g
CO
2 g
as
with
sm
oke
eff
ec
ts
Asp
hyxi
atio
n
du
e t
o h
igh
co
nc
en
tra
tio
n
of C
O2
Ch
ec
k v
en
ue
ha
s a
de
qu
ate
wo
rkin
g a
ir
co
nd
itio
nin
g o
r h
as
oth
er
go
od
ve
ntila
tio
n. En
sure
fog
cre
atio
n t
ake
s p
lac
e s
o t
ha
t 1
0kg
of
dry
ice
are
su
blim
ed
ove
r a
pe
rio
d o
f h
alf a
n h
ou
r. S
ho
rt
term
CO
2 g
as
exp
osu
re li
mit is
27,4
00
mg
/m3 (
15
min
ute
s) lo
ng
te
rm e
xp
osu
re li
mit =
9,1
50
mg
/m3 (
8
ho
urs
). In
ca
se o
f d
ou
bt
co
nta
ct
Ch
illis
tic
k b
efo
re
use
.
4
1
1
Ye
s
Ac
cid
en
tal
spill
ag
e o
f
dry
ice
So
me
on
e
pic
ks
up
dry
ice
with
ba
r
ha
nd
s -
risk
of
fro
stb
ite
Ea
ch
less
on
ha
s o
ne
na
me
d p
ers
on
re
spo
nsi
ble
fo
r
dry
ice
, se
e f
orm
at
en
d o
f th
is d
oc
um
en
t. U
se Ic
e
Po
ur
or
sim
ilar
sto
rag
e d
evic
e t
o a
vo
id p
oss
ibili
ty o
f
bre
aks
an
d s
pill
s. P
rovid
e li
gh
twe
igh
t g
love
s fo
r
sta
ff.
3
1
1
Ye
s
Tra
nsp
ort
ing
dry
ice
Ris
k o
f
asp
hyxi
atio
n
Wh
ere
po
ssib
le s
tore
dry
ice
in a
se
pa
rate
co
mp
art
me
nt
iso
late
d f
rom
th
e d
riv
er.
If
this
is n
ot
po
ssib
le a
lwa
ys
sto
re d
ry ic
e in
a w
ell
insu
late
d
bo
x, a
lwa
ys
en
sure
th
at
fre
sh a
ir v
en
ts a
re o
pe
n
an
d t
ha
t th
e w
ind
ow
is a
lso
pa
rtia
lly o
pe
n.
4
1
1
Ye
s
Dis
po
sal
Ge
ne
ral
An
y u
nw
an
ted
dry
ice
will
su
blim
e n
atu
rally
, le
ave
in a
se
cu
re w
ell-
ve
ntila
ted
sp
ac
e.
1
1
1
Ye
s

Page 60 Secondary Education Pack © Chillistick Ltd— www.chillistick.com— 0203 4329412
Re-Order Dry Ice & Hardware
Re-Order Dry Ice And Hardware
There are several ways to re order products. Visit our website at
www.dryice.education, email: [email protected] or contact us on 0203
4329412.
Please note that the dry ice will only last for a few days and so it is important to
ensure that delivery is made on the best day for your schedule. Deliveries can
be made by courier to arrive Tuesday to Friday and we can also offer AM and
pre 10AM deliveries.