Mixed Vegetable Gardening; Gardening Guidebook for United Kingdom

BOOK
3Seasonal Food
& Gardening for
the Early Years
SAMPLE

Introduction: Pleasurable Food
Education and the Early Years p 4
What is Pleasurable Food Education? p 5
The Pleasurable Food Education Philosophy p 5
How to Use This Book p 7
Activities and the Early Years Learning Framework p 8
Getting Started: Cooking Spaces p 10
Seasonal Produce Combinations p 14
Substituting Ingredients p 15
Getting Started: Garden Spaces p 16
Seasonal Planting Guide by Climate Zone p 17
Picture Books with Kitchen Garden Themes p 19
Green Thumbs p 23
Friendships in the Kitchen Garden p 37
W ind and Air p 49
Minimising Waste p 65
Liquids p 79
Pollinators p 89
Index p 105
Table of Contents
SAMPLE

8 SEASONAL FOOD & GARDENING FOR THE EARLY YEARS: BOOK 3 © Stephanie Alexander Kitchen Garden Foundation 2018
Activities and the Early Years Learning Framework
Source: Australian Government Department of Education and Training, www.education.gov.au/early-years-learning-framework-0
Outcome 1: Children have a strong sense of identity
Outcome 2: Children are connected with and contribute to their world
Outcome 3: Children have a strong sense of wellbeing
Outcome 4: Children are confident and involved learners
Outcome 5: Children are effective communicators
This book has been written to support educators working with the practices and principles of the Early Years Learning Framework (EYLF). The following table will help you plan your kitchen and garden activities according to the EYLF Learning Outcomes. Most activities also include inquiry questions for educators to use as a starting point with children.
Outcome 1 Outcome 2 Outcome 3 Outcome 4 Outcome 5
Aphid and Caterpillar Spray, p 85 x xAttracting Pollinators, p 90 x xBeeswax Food Wraps, p 91 x xBeneficial Ladybirds, p 38 x xBuild a Worm Café, p 71 x xEdible-Flower Seed Spheres, p 97 x xGardener’s Hand-Cream, p 98 x xGround Eggshells for the Garden, p 35 x xGrow a Living Cubby-House, p 101 x x xGumboot Strawberry Planters, p 69 x x xHerb Garden Tower, p 27 x xLittle Lettuce Leaves, p 24 x xMake a Barometer, p 51 x x xMake a Birdbath, p 83 x xMake a Bird Scarer, p 74 x xMake a Mini Greenhouse, p 28 x x xMake a Windsock, p 50 x x x
ACTIVITY
SAMPLE

SEASONAL FOOD & GARDENING FOR THE EARLY YEARS: BOOK 3 © Stephanie Alexander Kitchen Garden Foundation 2018 9
Outcome 1 Outcome 2 Outcome 3 Outcome 4 Outcome 5
Make Windchimes, p 57 x xMilk Bottle Harvest Baskets, p 67 x xOrganise a Produce Swap, p 73 x x xOrganise a Working Bee, p 93 x x xPlant Decoys, p 43 x x xPlanting Basil and Tomato, p 44 x x xProtecting the Garden from Wind, p 53 x x xRecycled Plant Labels, p 66 x xSeed Shaker, p 33 x xSeed Spinner, p 61 x xTesting Soil for Planting Blueberries, p 29 x x xThe Garden Shop, p 76 x x xThe Three Sisters, p 39 x x xTin Can Vases, p 77 x xWatering Song, p 81 x x xWill the Wind Blow it?, p 59 x x x
SAMPLE
24 SEASONAL FOOD & GARDENING FOR THE EARLY YEARS: BOOK 3 © Stephanie Alexander Kitchen Garden Foundation 2018
Green Thumbs
EYLF OutcomesOutcome 2: Children are connected with and contribute to their world
Outcome 3: Children have a strong sense of wellbeing
Key Wordsflavour, garden, gardener, grow, ingredient, lettuce, plant, salad greens
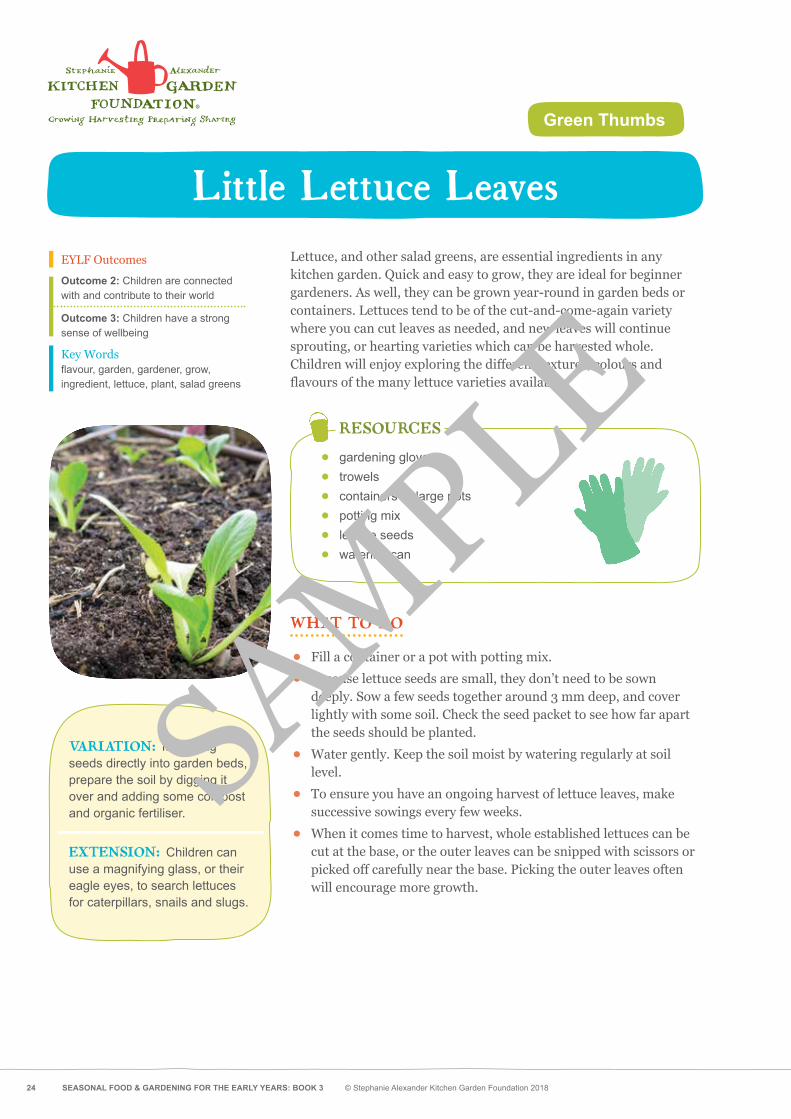
Little Lettuce Leaves
VARIATION: If planting seeds directly into garden beds, prepare the soil by digging it over and adding some compost and organic fertiliser.
EXTENSION: Children can use a magnifying glass, or their eagle eyes, to search lettuces for caterpillars, snails and slugs.
Lettuce, and other salad greens, are essential ingredients in any kitchen garden. Quick and easy to grow, they are ideal for beginner gardeners. As well, they can be grown year-round in garden beds or containers. Lettuces tend to be of the cut-and-come-again variety where you can cut leaves as needed, and new leaves will continue sprouting, or hearting varieties which can be harvested whole. Children will enjoy exploring the different textures, colours and flavours of the many lettuce varieties available.
RESOURCES
• gardening gloves
• trowels
• containers or large pots
• potting mix
• lettuce seeds
• watering can
WHAT TO DO
• Fill a container or a pot with potting mix.
• Because lettuce seeds are small, they don’t need to be sown deeply. Sow a few seeds together around 3 mm deep, and cover lightly with some soil. Check the seed packet to see how far apart the seeds should be planted.
• Water gently. Keep the soil moist by watering regularly at soil level.
• To ensure you have an ongoing harvest of lettuce leaves, make successive sowings every few weeks.
• When it comes time to harvest, whole established lettuces can be cut at the base, or the outer leaves can be snipped with scissors or picked off carefully near the base. Picking the outer leaves often will encourage more growth.
SAMPLE

26 SEASONAL FOOD & GARDENING FOR THE EARLY YEARS: BOOK 3 © Stephanie Alexander Kitchen Garden Foundation 2018
Season: Winter/Spring
Makes: 30 tastes or 6 serves at homeHerb Salad
Fresh from the garden: dill, mint, mixed salad leaves, parsley
This herb salad is a great way for young ones to learn about, touch and smell different herbs.
EQUIPMENT
metric measuring cupsclean tea towelssalad spinnerlarge bowltongsserving platter
INGREDIENTS
2 cups parsley leaves, torn1 cup dill fronds, torn1/3 cup mint leaves, torn6 cups mixed salad leavesHoney Mustard Dressing (see page 100)Toasted Seed Sprinkle (see page 36)
WHAT TO DO
• Prepare all the ingredients based on the instructions in the ingredients list.• Tip all the salad and herb leaves into the large bowl.• Dress with the Honey Mustard Dressing.• Gently turn the leaves with the tongs, to coat them evenly in the dressing.• Serve the salad scattered over with some Toasted Seed Sprinkle.
Green Thumbs
SAMPLE

SEASONAL FOOD & GARDENING FOR THE EARLY YEARS: BOOK 3 © Stephanie Alexander Kitchen Garden Foundation 2018 81
Watering Song
Children can be quite enthusiastic when watering the garden and caring for their plants, but they need to remember to take their time to ensure the roots of the plants get enough water. In this activity, children compose their own short watering song to help them time the watering and make sure the plants are watered deeply enough. Some even say that music has a positive effect on plant growth!
INQUIRY QUESTIONS
> Why do plants need water to grow? > How much water do plants need to grow? > Do all plants need the same amount of water? > Why do you think some plants need less water, and some more?
RESOURCES
• paper
• pencil
• hose or watering can
WHAT TO DO
• Sing a favourite song with the children and write down the lyrics. Explore musical concepts such as volume, tempo, pitch, beat, melody and rhythm. This will be the melody to which you will sing your song when it is finished.
• To start composing the lyrics, go outside and water the garden with the children. Ask children to observe their environment, describe their actions and feelings, and predict what will happen to the plants once they’re watered.
• Record these observations, which will be used in the song lyrics.
• Encourage children to think of rhyming words that can be incorporated into the song. For example, if a line from the song is ‘Slowly tip the watering can’, then ask children to think of a word that rhymes with ‘can’ to use in the next line of the song.
• Once you have finished composing your watering song, go outside and sing it to the plants as you water!
EYLF OutcomesOutcome 2: Children are connected with and contribute to their world
Outcome 3: Children have a strong sense of wellbeing
Outcome 5: Children are effective communicators
Key Wordscaring, deep, music, roots, sing, soil, song, surface, watering
TIP: For inspiration, read garden-themed poems and rhymes together, such as Beatrix Potter’s ‘We have a Little Garden’.
EXTENSION: Draw pictures to illustrate your song, or consider adding instruments, hand gestures or a dance to accompany the lyrics.
LATER: Water soil that has been mulched and soil that is bare, and compare how long it takes them to dry out. Which soil stays moist for longer?
Liquids
SAMPLE

82 SEASONAL FOOD & GARDENING FOR THE EARLY YEARS: BOOK 3 © Stephanie Alexander Kitchen Garden Foundation 2018
Season: All
Makes: 1 x 500 ml jar of picklesQuick Pickles
Fresh from the garden: seasonal vegetables and herbs (see suggestions below)
Note: You can experiment with different types of vinegars, herbs and spices to create flavour combinations that go with your seasonal produce. Suggestions by season:
• Summer/Autumn: Beans, capsicum, cherry tomatoes and cucumbers combined with herbs andspices like bay leaves, chillies, dill and garlic.
• Winter/Spring: Beetroot, carrots, cauliflower, daikon and radishes combined with herbsand spices like cumin seeds, fennel seeds, mustard seeds and thyme.
EQUIPMENT
metric measuring cups and spoons clean tea towelchopping boardcook’s knifeheatproof jugmixing spoon1 x 500 ml sterilised jar with lid*
INGREDIENTS
1 cup white wine vinegar1 cup hot water1 tsp salt¼ cup castor sugar2 cups sliced seasonal vegetablesspices and seasonal herbs, to taste
WHAT TO DO
• Prepare all the ingredients based on the instructions in the ingredients list.• In a heatproof jug, mix together the white wine vinegar, hot water, salt and sugar until the sugar
and salt dissolve.• Put the sliced vegetables into the jar, slipping in any herbs and spices at this point. Leave a 1 cm space
at the top of the jar.• Pour the hot pickling liquid into the jar carefully, filling it to within 1 cm of the top. Make sure all the
vegetables are submerged.• Cool on the bench for an hour to let the vegetables pickle. These quick pickles are now ready to eat
or can be stored in the fridge for up to 2 weeks.
*To sterilise jars and lids, wash them inhot soapy water, then rinse them in hotwater. Place in a stockpot of boiling waterfor at least 10 minutes. Drain jars upsidedown on a clean tea towel and dry themthoroughly in a 150°C oven. Remove thejars from the oven and fill while still hot.
Liquids
SAMPLE