SDL Translation Management System 2011 - SDL - Global Customer
20
SDL Translation Management System 2011 Installation Guide
Transcript of SDL Translation Management System 2011 - SDL - Global Customer
SDL Translation Management System 2011
Installation Guide
SDL TMS 2011 Installation Guide Page 1
Copyright © 2000 – 2015, SDL Group. SDL Group means SDL PLC. and its subsidiaries. All intellectual property rights contained herein are the sole and exclusive rights of SDL Group. All references to SDL or SDL Group shall mean SDL PLC. and/or its subsidiaries details of which can be obtained upon written request. All rights reserved. Unless explicitly stated otherwise, all intellectual property rights including those in copyright in the content of this website and documentation are owned by or controlled for these purposes by SDL Group. Except as otherwise expressly permitted hereunder or in accordance with copyright legislation, the content of this site, and/or the documentation may not be copied, reproduced, republished, downloaded, posted, broadcast or transmitted in any way without the express written permission of SDL. SDL TMS is a registered trademark of SDL Group. All other trademarks are the property of their respective owners. The names of other companies and products mentioned herein may be the trademarks of their respective owners. Unless stated to the contrary, no association with any other company or product is intended or should be inferred. This product may include open source or similar third-party software. Although SDL Group takes all reasonable measures to provide accurate and comprehensive information about the product, this information is provided as-is and all warranties, conditions or other terms concerning the documentation whether express or implied by statute, common law or otherwise (including those relating to satisfactory quality and fitness for purposes) are excluded to the extent permitted by law. To the maximum extent permitted by law, SDL Group shall not be liable in contract, tort (including negligence or breach of statutory duty) or otherwise for any loss, injury, claim liability or damage of any kind or arising out of, or in connection with, the use or performance of the Software Documentation even if such losses and/or damages were foreseen, foreseeable or known, for: (a) loss of, damage to or corruption of data, (b) economic loss, (c) loss of actual or anticipated profits, (d) loss of business revenue, (e) loss of anticipated savings, (f) loss of business, (g) loss of opportunity, (h) loss of goodwill, or (i) any indirect, special, incidental or consequential loss or damage howsoever caused. Information in this documentation, including any URL and other Internet Web site references, is subject to change without notice. Without limiting the rights under copyright, no part of this may be reproduced, stored in or introduced into a retrieval system, or transmitted in any form or by any means (electronic, mechanical, photocopying, recording, or otherwise), or for any purpose, without the express written permission of SDL Group. April 2015
SDL TMS 2011 Installation Guide Page 2
Table of Contents
1 Overview .................................................................................................................................... 3
1.1 About this Guide ................................................................................................................... 3
1.2 Recommended Setup ........................................................................................................... 3
1.3 Software and Hardware Requirements ................................................................................. 3
1.3.1 SDL TMS Server ........................................................................................................................................ 3 1.3.2 Database Server ........................................................................................................................................ 3
1.4 Overview of the SDL TMS Installation Process .................................................................... 4
2 Installation Step 1 – Server Preparation ................................................................................ 5
2.1 About Server Preparation ..................................................................................................... 5
2.2 User Accounts ....................................................................................................................... 5
2.2.1 Local Administrator Accounts ..................................................................................................................... 5 2.2.2 SDL TMS Domain Account ........................................................................................................................ 5
2.3 Prepare the SDL TMS Server ............................................................................................... 5
2.3.1 Install prerequisites components ................................................................................................................ 6
2.4 Prepare the Database server ................................................................................................ 8
2.4.1 Configure SQL Server 2008 / 2012 to Enable Remote Connections using TCP/IP ..................................... 8
3 Installation Step 2 – Install SDL TMS .................................................................................... 10
3.1 About Installing SDL TMS ................................................................................................... 10
3.2 Installation Files .................................................................................................................. 10
3.3 Install SDL TMS 2007 SP1 ................................................................................................. 11
3.3.1 Start the Installation ................................................................................................................................. 11 3.3.2 Installing SDL TMS 2007.......................................................................................................................... 11
3.4 Install latest Service Pack ................................................................................................... 17
3.4.1 Database Deployment Wizard .................................................................................................................. 17
3.5 Verify the Installation........................................................................................................... 18
3.5.1 Log in to SDL TMS ................................................................................................................................... 18
SDL TMS 2011 Installation Guide Page 3
1 Overview
1.1 About this Guide This guide describes how to install SDL Translation Management System (SDL TMS) as of
version 2011. It describes the system requirements for installing SDL TMS and provides
information on how to configure the system before installation, outlining pre-installation steps
and giving step-by-step instructions for installing SDL TMS and its component products.
1.2 Recommended Setup We recommend a two - computer setup, having the SDL TMS core components installed on
one server computer and the database server installed on a separate server computer.
1.3 Software and Hardware Requirements
1.3.1 SDL TMS Server
For the computer on which the SDL TMS server components are installed, the recommended
specifications are as follows:
Processor 4 CPU cores
RAM 8 GB
Hard Disk We recommend dedicating at least 8 GB of space. Most of the
deployments require significantly more space, since this space is used
by the content that is being translated. Typical production environments
have 60+ GB of space allocated for the solution and the data (out of
which the solution is about 1 GB).
Operating
System
Microsoft Windows Server 2008 R2 (Standard Edition or above) /
Microsoft Windows Server 2012 (Standard Edition or above)
1.3.2 Database Server
For the computer on which the database is installed, the recommended specifications are:
Processor 4 CPU cores
RAM 8 GB
Hard Disk RAID 5 Array for SQL Logs & Data.
Size requirements will depend on usage.
Operating
System
Microsoft Windows Server 2008 R2
(Standard Edition or above) /
Microsoft Windows Server 2012
(Standard Edition or above)
Database Server Microsoft SQL Server 2008 / 2012 (Standard Edition or above)
SDL TMS 2011 Installation Guide Page 4
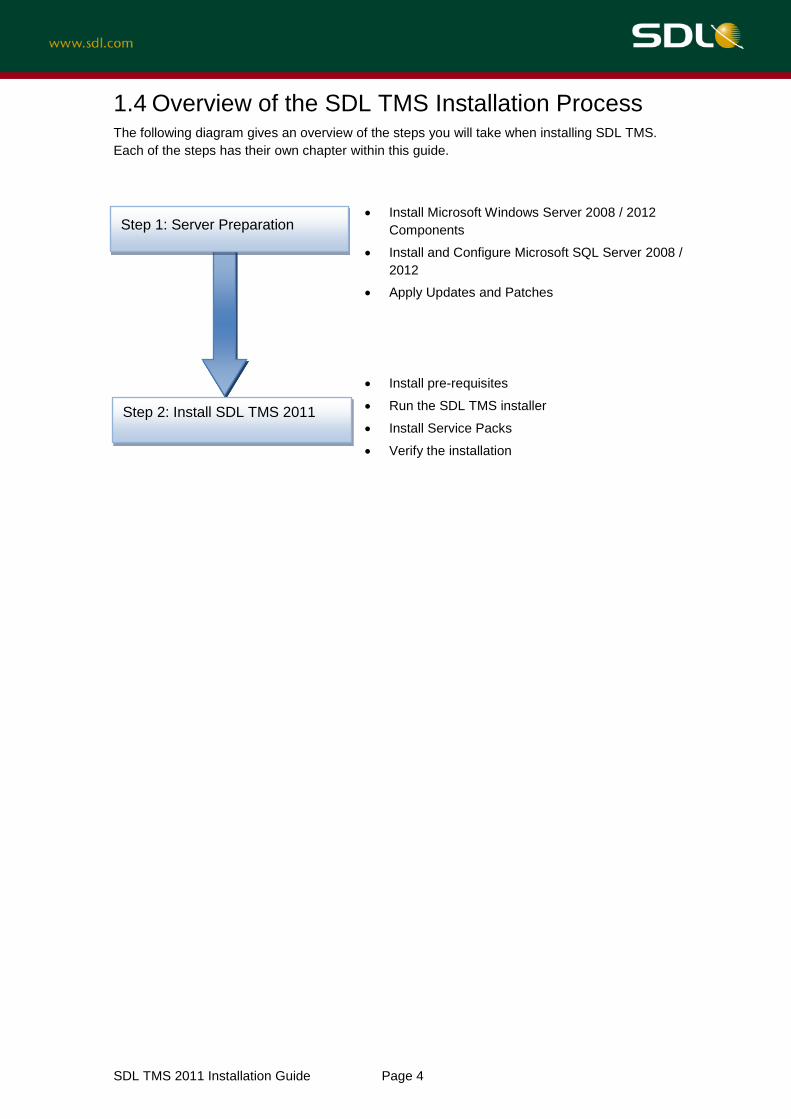
1.4 Overview of the SDL TMS Installation Process The following diagram gives an overview of the steps you will take when installing SDL TMS.
Each of the steps has their own chapter within this guide.
Install Microsoft Windows Server 2008 / 2012
Components
Install and Configure Microsoft SQL Server 2008 /
2012
Apply Updates and Patches
Install pre-requisites
Run the SDL TMS installer
Install Service Packs
Verify the installation
Step 1: Server Preparation
Step 2: Install SDL TMS 2011
SDL TMS 2011 Installation Guide Page 5
2 Installation Step 1 – Server Preparation
2.1 About Server Preparation If you are installing SDL TMS for the first time, prepare both the server computer where you
intend to install SDL TMS and the computer you intend to use as the database server. If you are
not installing SDL TMS for the first time, you can proceed to Installation Step 2 – Install SDL
TMS.
2.2 User Accounts To install and run SDL TMS, the following user accounts are required:
Local administrator account
A domain account (required permissions listed in 2.2.2 SDL TMS Domain Account).
2.2.1 Local Administrator Accounts
Local administrator accounts are required for both the SDL TMS server and the database
server, in order to perform installation and configuration.
In this guide, the local administrator account is referred to as <Local_Admin_User>.
2.2.2 SDL TMS Domain Account
Create or nominate a domain account for SDL TMS to run as. We recommend that this account
does not have password change enforced.
In this guide, the SDL TMS domain account is referred to as <TMS_Domain_User>.
Note: For the installation, this domain account needs administrator rights on the server
computer where you are installing SDL TMS. After installation, you can remove this
account from the local administrator group. Additionally, as part of the installation
routine, the SDL TMS installer adds <TMS_Domain_User> to the IIS_IUSRS local
user group.
2.3 Prepare the SDL TMS Server To prepare the server where SDL TMS Server will be installed, all required prerequisites have
to be installed (see 2.3.1).
Note: For the SDL TMS server, we recommend using a separate partition for all SDL TMS
Application and Data files. This partition must be at least 32 GB in size but,
depending on the scale of your deployment, you may need to increase this size.

SDL TMS 2011 Installation Guide Page 6
2.3.1 Install prerequisites components
In order to have SDL TMS running properly, there is a list of prerequisites which are required to
be installed on the server, as follows:
1. Microsoft .Net Framework 3.5
2. Microsoft .Net Framework 4.5
3. Microsoft Internet Information Server (IIS)
4. Microsoft Message Queue (MSMQ)
5. Microsoft MSXML 4.0 Parser
6. Microsoft System CLR Types for SQL Server 2012
7. Microsoft System CLR Types for SQL Server 2012 x64
8. Microsoft SQL Server 2012 Management Objects
9. Microsoft SQL Server 2012 Management Objects x64
10. Microsoft SQL Server 2012 Native Client x64
11. Microsoft SQL Server Compact 4.0 ENU x64
12. Microsoft Visual C++ 2005 x86 Redistributable
13. Microsoft Visual C++ 2008 x86 Redistributable
14. Microsoft Visual C++ 2010 x86 Redistributable
The installation files you find on FTP (for details, see 3.2 Installation Files) contain SDL TMS
Prerequisites.exe which lets you install all the components from the above list.
SDL TMS 2011 Installation Guide Page 7
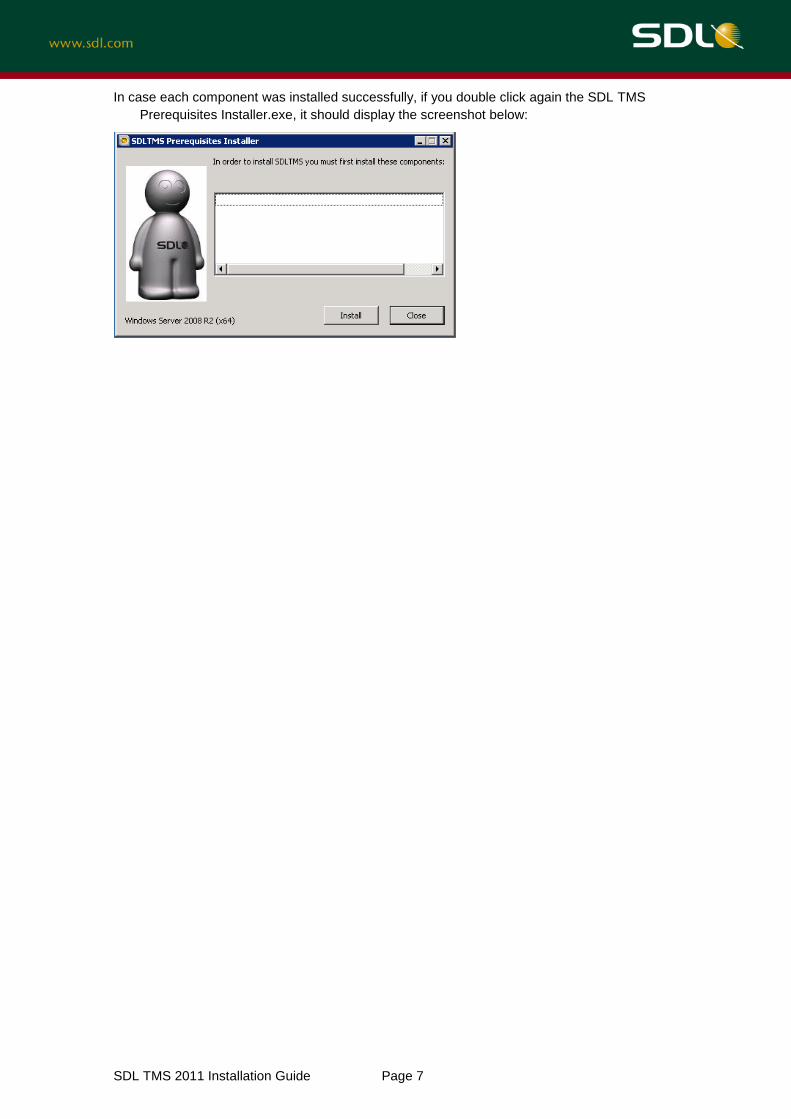
In case each component was installed successfully, if you double click again the SDL TMS
Prerequisites Installer.exe, it should display the screenshot below:
SDL TMS 2011 Installation Guide Page 8
2.4 Prepare the Database server Configure SQL Server 2008/2012 to Enable Remote Connections using TCP/IP. For details,
see 2.4.1.
Allow Extended Stored Procedures (necessary for the SDL TMS 2007 installer to create the
database user).
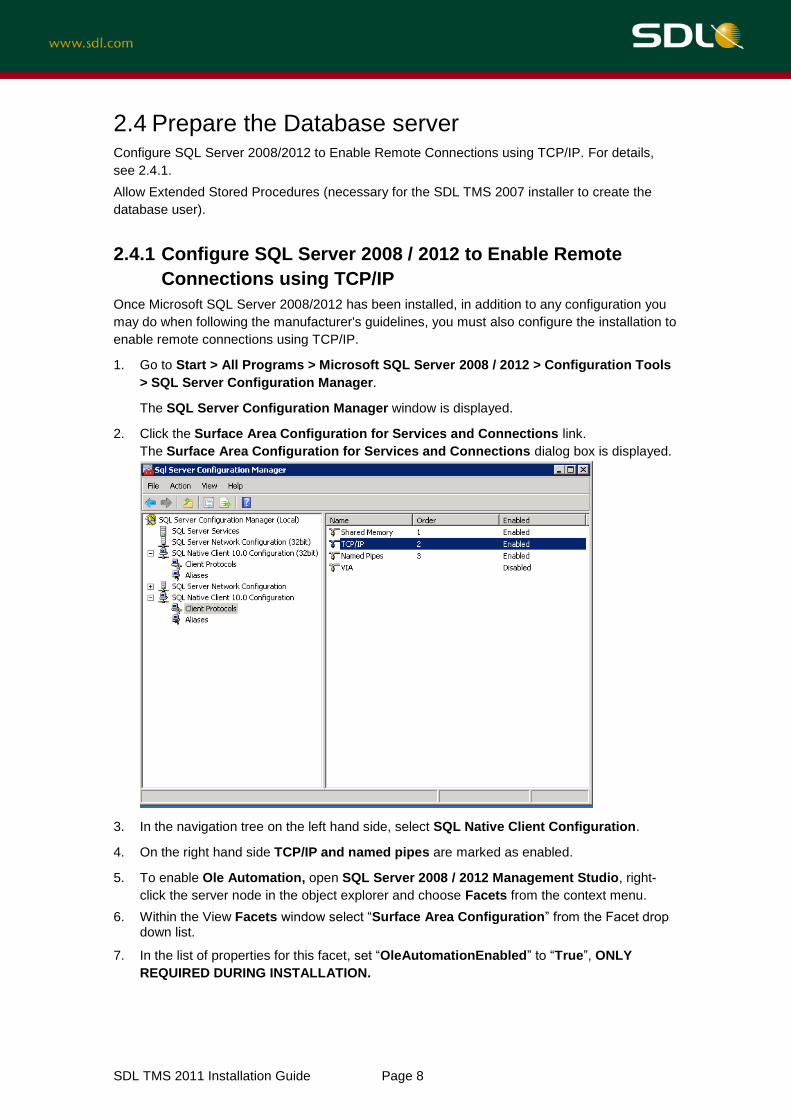
2.4.1 Configure SQL Server 2008 / 2012 to Enable Remote
Connections using TCP/IP
Once Microsoft SQL Server 2008/2012 has been installed, in addition to any configuration you
may do when following the manufacturer's guidelines, you must also configure the installation to
enable remote connections using TCP/IP.
1. Go to Start > All Programs > Microsoft SQL Server 2008 / 2012 > Configuration Tools
> SQL Server Configuration Manager.
The SQL Server Configuration Manager window is displayed.
2. Click the Surface Area Configuration for Services and Connections link.
The Surface Area Configuration for Services and Connections dialog box is displayed.
3. In the navigation tree on the left hand side, select SQL Native Client Configuration.
4. On the right hand side TCP/IP and named pipes are marked as enabled.
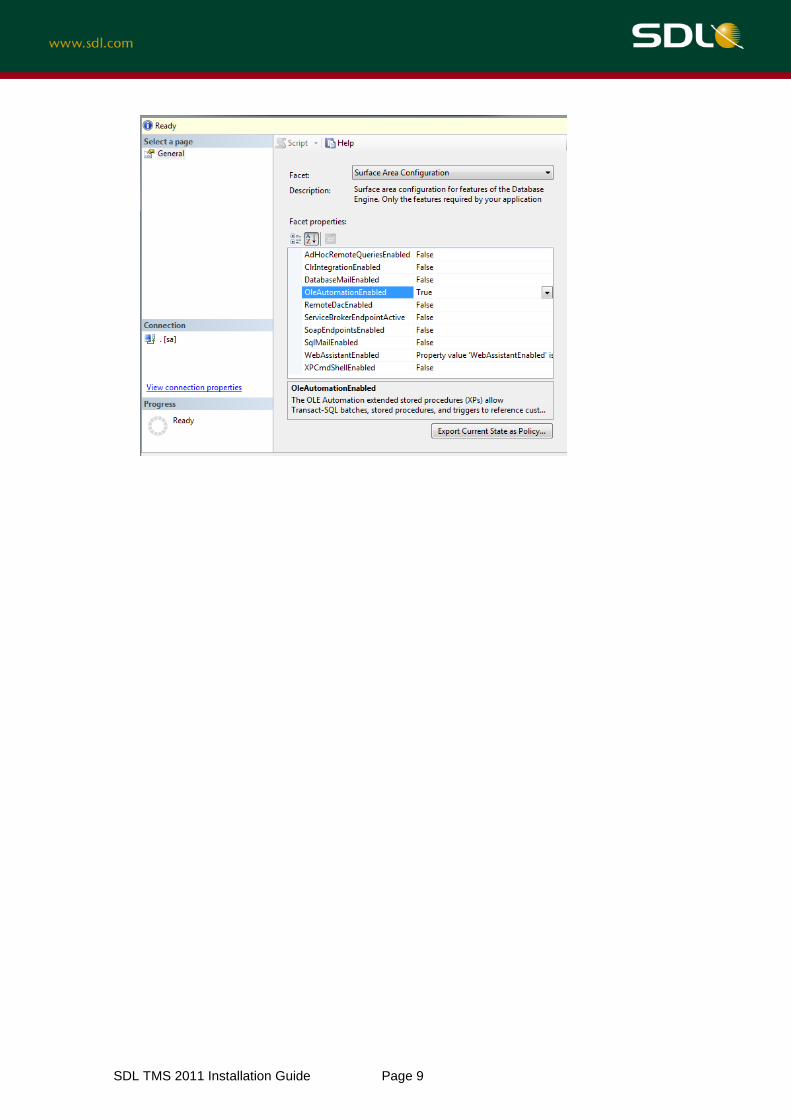
5. To enable Ole Automation, open SQL Server 2008 / 2012 Management Studio, right-
click the server node in the object explorer and choose Facets from the context menu.
6. Within the View Facets window select “Surface Area Configuration” from the Facet drop down list.
7. In the list of properties for this facet, set “OleAutomationEnabled” to “True”, ONLY
REQUIRED DURING INSTALLATION.
SDL TMS 2011 Installation Guide Page 9

SDL TMS 2011 Installation Guide Page 10
3 Installation Step 2 – Install SDL TMS
3.1 About Installing SDL TMS Installing SDL TMS is a cumulative process. First you run the SDL TMS 2007 SP1 installer and
then you apply all of the later updates and service packs to the installation using separate
installers.
Note: The installers will perform the database creation and setup.
When you install SDL TMS, the SDL TMS website is installed as the default website
on your SDL TMS server and any existing websites are overwritten. SDL
recommends that the first time you install SDL TMS, you do so on a clean server.
3.2 Installation Files The SDL TMS installation files are located on
ftp:// sdlpatches:[email protected]/SDL%20TMS/ and the appropriate sub-folder.
There you will find an ISO image which you need to download. This ISO contains the following
files:
- DatabaseDeployment.exe
- SDL TMS 2011 Installation Guide.pdf (this current file)
- Sdl.ContentCollector.msi
- Sdl.Nexus.msi
- Sdl.Sjp.msi
- Sdl.Tms.Passolo.2011.msi
- Sdl.Tms.Passolo.2015.msi
- Sdl.Tms.Sdk.msi
- SDLNexus.jar
- SDLTMS 10.x.x.xxxx.0.exe
- TMS2007SP1 - For Fresh Installs. This folder contains:
o Data1.cab
o ISScript1050.msi
o jre-1_5_0_12-windows-i586-p.exe
o Readme.txt
o SDLTMS2007.lsu
o setup.exe
o setup.isn
o TradosCompatibility1.msi
Note: Any hotfix, patch or service pack released after the publication of this guide will also
need to be installed. You can download these from the SDL TMS FTP site. Login
details for this site can be obtained from your SDL representative.
SDL TMS 2011 Installation Guide Page 11
3.3 Install SDL TMS 2007 SP1 This section describes how to install SDL TMS 2007 SP1. All components are installed on the
same server.
3.3.1 Start the Installation
1. TradosCompatibility1.msi - Trados 2007 Compatibility pack - required for the legacy T2007
filters.
2. ISScript1050.Msi - Installshield scripting - required for the TMS 2007 Installation.
3. jre-1_5_0_12-windows-i586-p.exe - optional – this is required for TMS 2007/2011 Legacy
INX filter
4. setup.exe - TMS 2007 Installation program
5. Login to the SDL TMS server as <Local_Admin_User> and double-click on setup.exe to
launch the SDL TMS installation wizard. The first page to be displayed contains the
destination folder for the installation files.
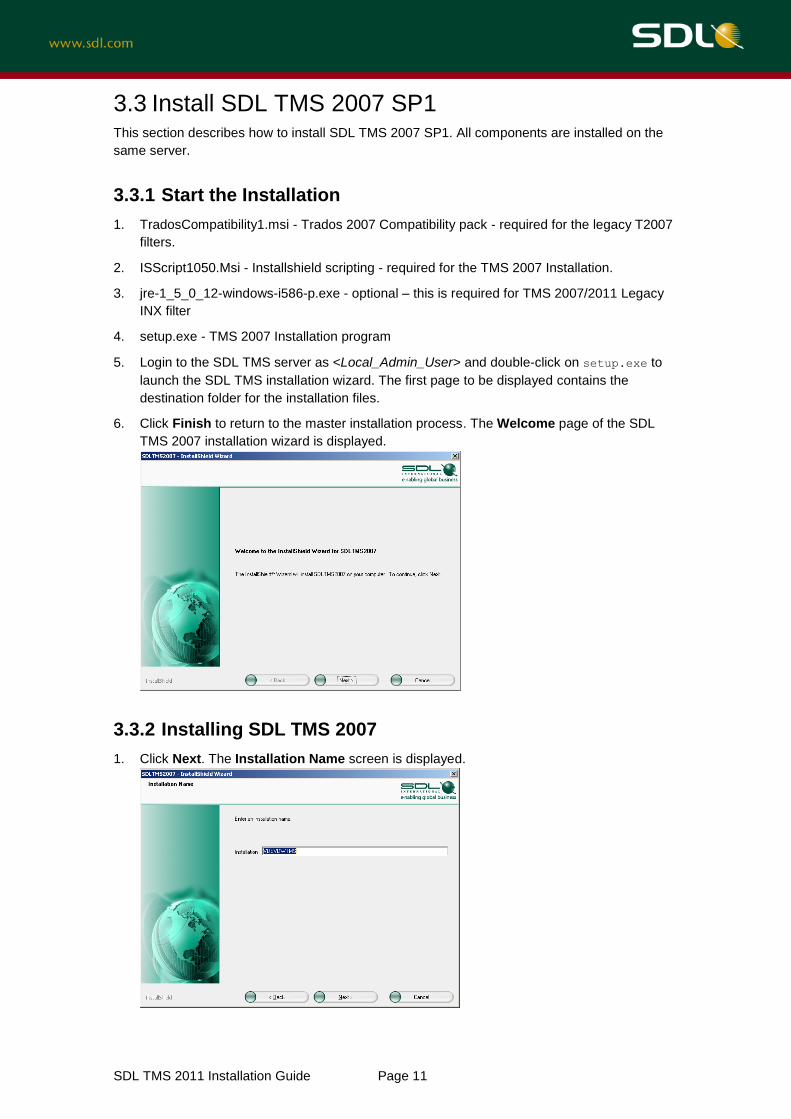
6. Click Finish to return to the master installation process. The Welcome page of the SDL
TMS 2007 installation wizard is displayed.
3.3.2 Installing SDL TMS 2007
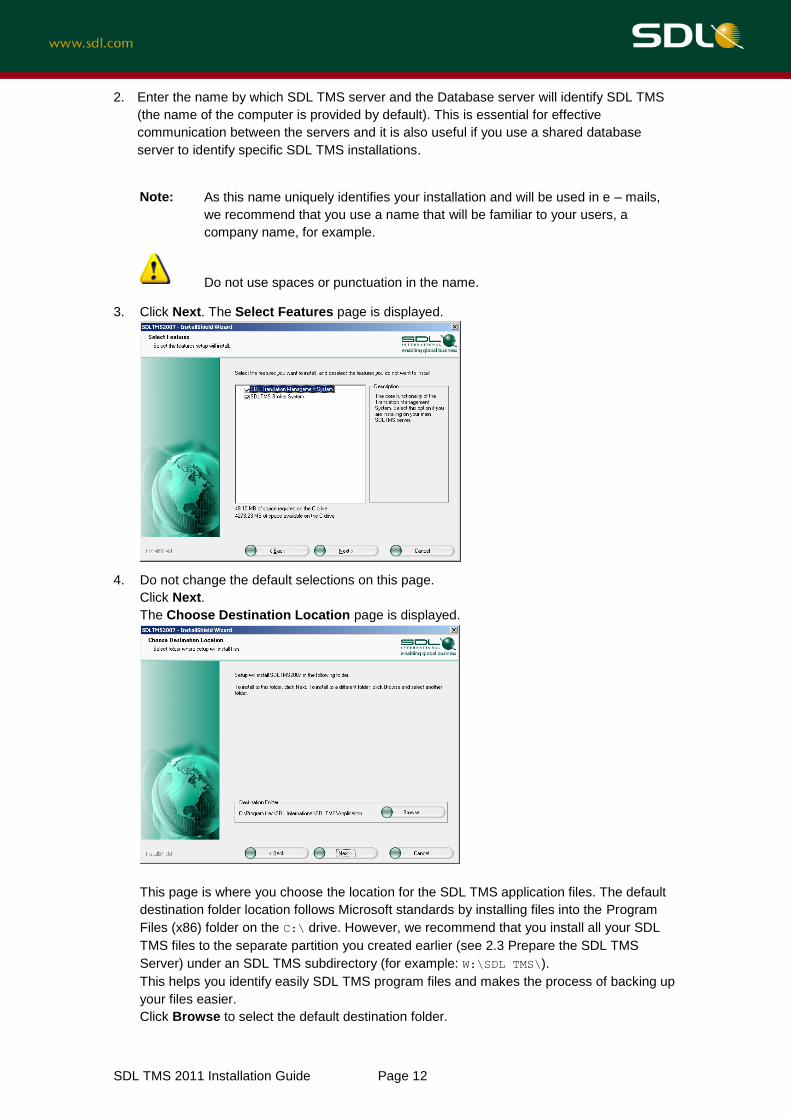
1. Click Next. The Installation Name screen is displayed.
SDL TMS 2011 Installation Guide Page 12
2. Enter the name by which SDL TMS server and the Database server will identify SDL TMS
(the name of the computer is provided by default). This is essential for effective
communication between the servers and it is also useful if you use a shared database
server to identify specific SDL TMS installations.
Note: As this name uniquely identifies your installation and will be used in e – mails,
we recommend that you use a name that will be familiar to your users, a
company name, for example.
Do not use spaces or punctuation in the name.
3. Click Next. The Select Features page is displayed.
4. Do not change the default selections on this page.
Click Next.
The Choose Destination Location page is displayed.
This page is where you choose the location for the SDL TMS application files. The default
destination folder location follows Microsoft standards by installing files into the Program
Files (x86) folder on the C:\ drive. However, we recommend that you install all your SDL
TMS files to the separate partition you created earlier (see 2.3 Prepare the SDL TMS
Server) under an SDL TMS subdirectory (for example: W:\SDL TMS\).
This helps you identify easily SDL TMS program files and makes the process of backing up
your files easier.
Click Browse to select the default destination folder.
SDL TMS 2011 Installation Guide Page 13
Once the installation is complete, do not attempt to move files from this
location, as this will cause SDL TMS to fail. If you need to move the SDL TMS
files, uninstall the application and then reinstall it to the required location.
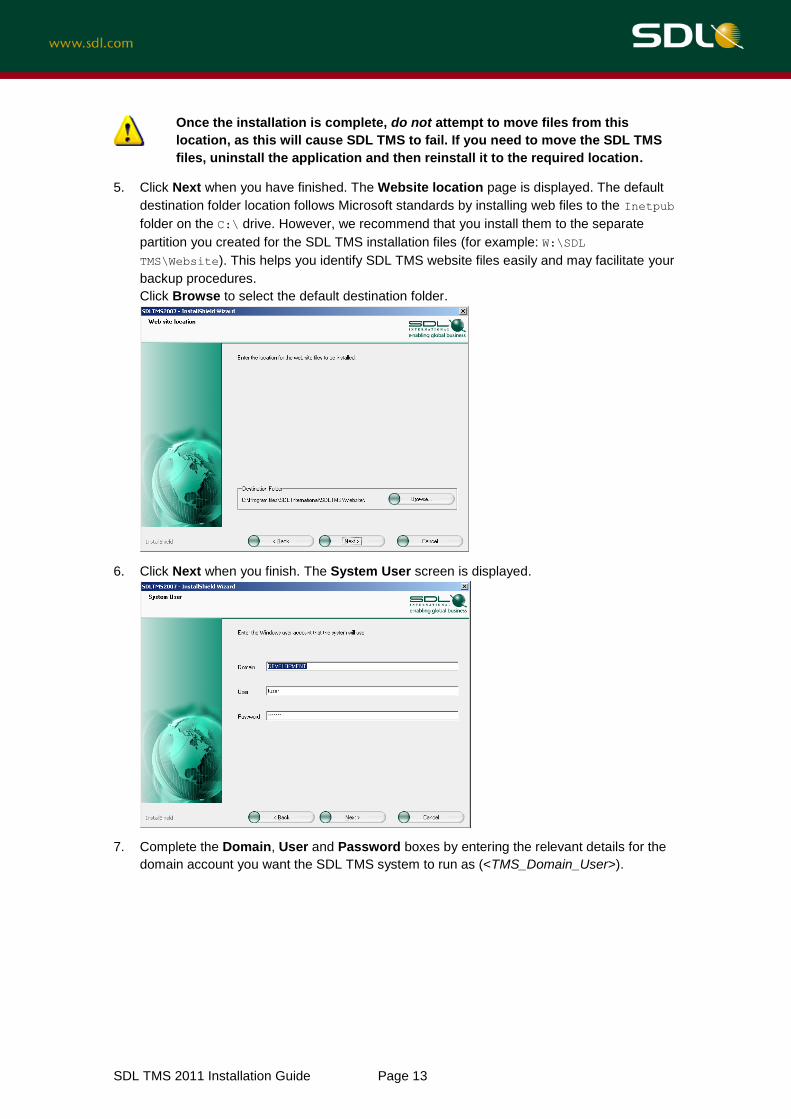
5. Click Next when you have finished. The Website location page is displayed. The default
destination folder location follows Microsoft standards by installing web files to the Inetpub
folder on the C:\ drive. However, we recommend that you install them to the separate
partition you created for the SDL TMS installation files (for example: W:\SDL
TMS\Website). This helps you identify SDL TMS website files easily and may facilitate your
backup procedures.
Click Browse to select the default destination folder.
6. Click Next when you finish. The System User screen is displayed.
7. Complete the Domain, User and Password boxes by entering the relevant details for the
domain account you want the SDL TMS system to run as (<TMS_Domain_User>).
SDL TMS 2011 Installation Guide Page 14
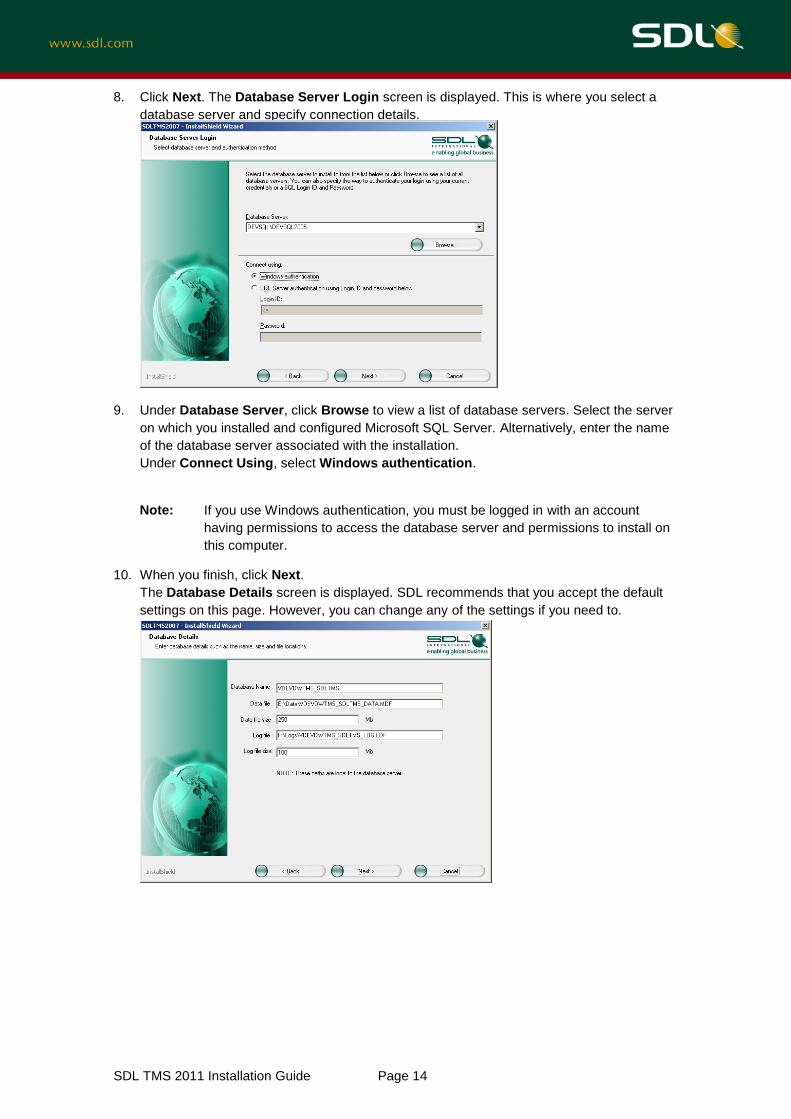
8. Click Next. The Database Server Login screen is displayed. This is where you select a
database server and specify connection details.
9. Under Database Server, click Browse to view a list of database servers. Select the server
on which you installed and configured Microsoft SQL Server. Alternatively, enter the name
of the database server associated with the installation.
Under Connect Using, select Windows authentication.
Note: If you use Windows authentication, you must be logged in with an account
having permissions to access the database server and permissions to install on
this computer.
10. When you finish, click Next.
The Database Details screen is displayed. SDL recommends that you accept the default
settings on this page. However, you can change any of the settings if you need to.
SDL TMS 2011 Installation Guide Page 15
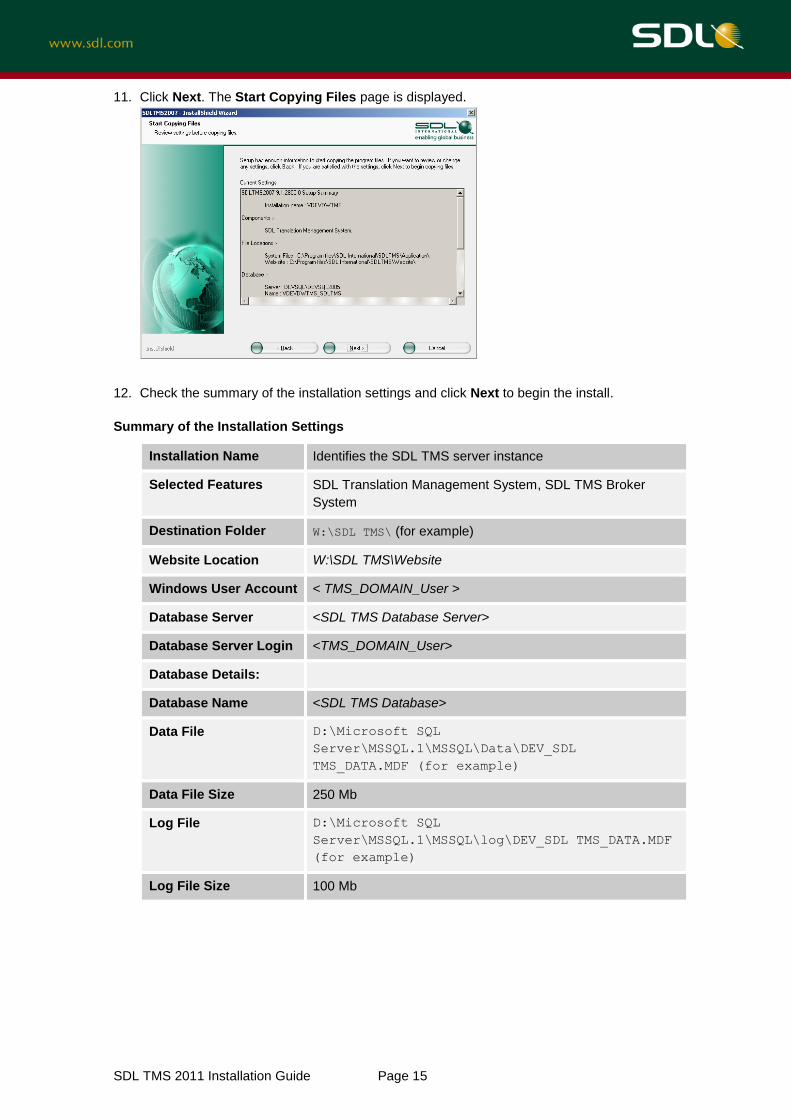
11. Click Next. The Start Copying Files page is displayed.
12. Check the summary of the installation settings and click Next to begin the install.
Summary of the Installation Settings
Installation Name Identifies the SDL TMS server instance
Selected Features SDL Translation Management System, SDL TMS Broker
System
Destination Folder W:\SDL TMS\ (for example)
Website Location W:\SDL TMS\Website
Windows User Account < TMS_DOMAIN_User >
Database Server <SDL TMS Database Server>
Database Server Login <TMS_DOMAIN_User>
Database Details:
Database Name <SDL TMS Database>
Data File D:\Microsoft SQL
Server\MSSQL.1\MSSQL\Data\DEV_SDL
TMS_DATA.MDF (for example)
Data File Size 250 Mb
Log File D:\Microsoft SQL
Server\MSSQL.1\MSSQL\log\DEV_SDL TMS_DATA.MDF
(for example)
Log File Size 100 Mb
SDL TMS 2011 Installation Guide Page 16
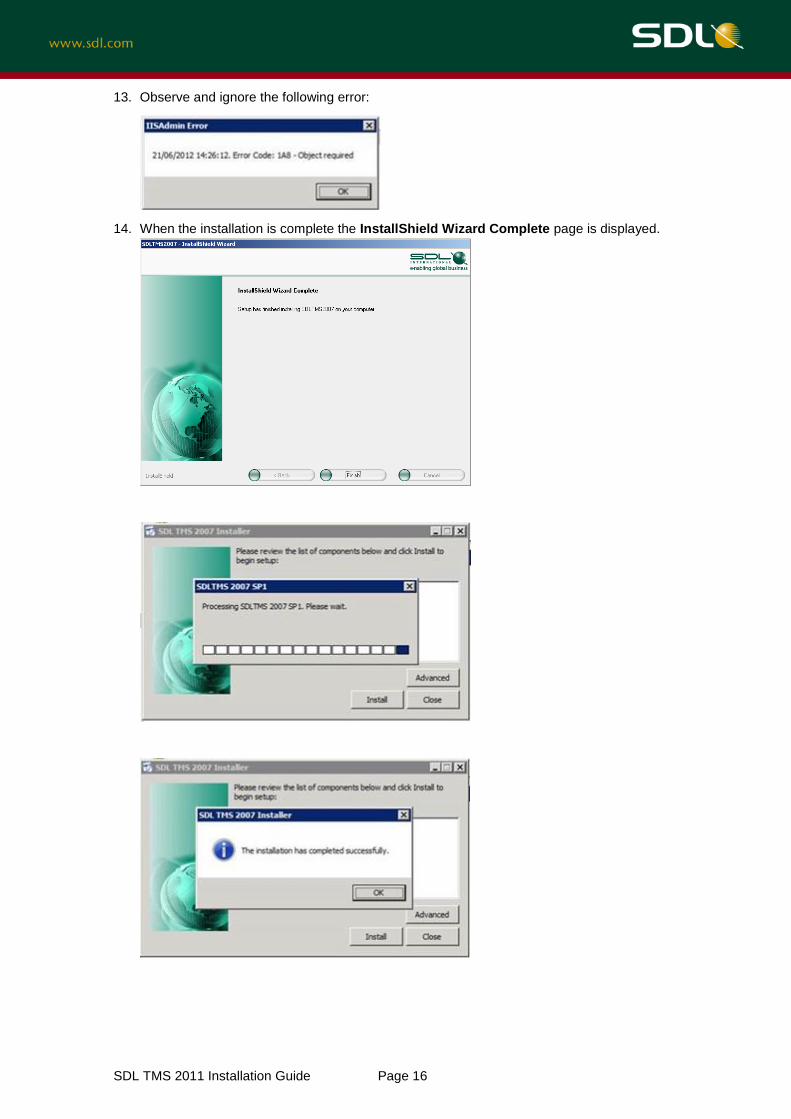
13. Observe and ignore the following error:
14. When the installation is complete the InstallShield Wizard Complete page is displayed.
SDL TMS 2011 Installation Guide Page 17
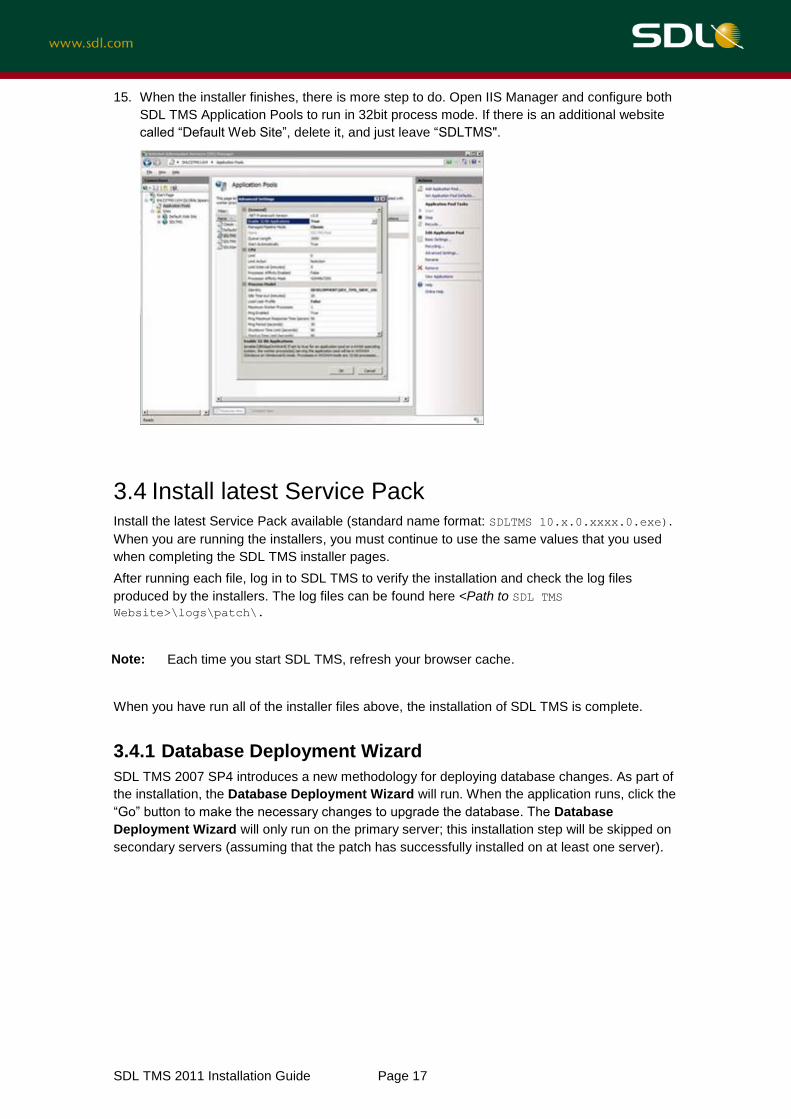
15. When the installer finishes, there is more step to do. Open IIS Manager and configure both
SDL TMS Application Pools to run in 32bit process mode. If there is an additional website
called “Default Web Site”, delete it, and just leave “SDLTMS".
3.4 Install latest Service Pack Install the latest Service Pack available (standard name format: SDLTMS 10.x.0.xxxx.0.exe).
When you are running the installers, you must continue to use the same values that you used
when completing the SDL TMS installer pages.
After running each file, log in to SDL TMS to verify the installation and check the log files
produced by the installers. The log files can be found here <Path to SDL TMS
Website>\logs\patch\.
Note: Each time you start SDL TMS, refresh your browser cache.
When you have run all of the installer files above, the installation of SDL TMS is complete.
3.4.1 Database Deployment Wizard
SDL TMS 2007 SP4 introduces a new methodology for deploying database changes. As part of
the installation, the Database Deployment Wizard will run. When the application runs, click the
“Go” button to make the necessary changes to upgrade the database. The Database
Deployment Wizard will only run on the primary server; this installation step will be skipped on
secondary servers (assuming that the patch has successfully installed on at least one server).
SDL TMS 2011 Installation Guide Page 18
3.5 Verify the Installation
3.5.1 Log in to SDL TMS
Now that the installation is complete you can verify the installation. To log on to SDL TMS:
1. Launch the web browser on the SDL TMS server and navigate to http://localhost/.
Note: You may need to disable your pop-up blocker when you open SDL TMS.
2. When prompted for a username and password, use the system administrator values you
entered in the SDL TMS Administration account screen when you installed SDL TMS.
If a new window is created and the SDL TMS Login screen appears, you have successfully
installed SDL TMS.

SDL enables global businesses to enrich their customers’ experience through the entire customer journey. SDL’s technology and services help brands to predict what their customers want and engage with them across multiple languages, cultures, channels and devices.
SDL has over 1,500 enterprise customers, 400 partners and a global infrastructure of 70 offices in 38 countries. 42 out of the top 50 brands work with SDL. For more information, visit www.sdl.com.
Copyright © 2015 SDL plc. All Rights Reserved. All company product or service names referenced herein are properties of their respective owners.