ScreenFlow Tech Tuesday
34
TECH TUESDAY www.depaul.edu/~jmoore/ ScreenFlow
Transcript of ScreenFlow Tech Tuesday

TECHTUESDAY
www.depaul.edu/~jmoore/
ScreenFlow

Technology Tuesdays:ScreenFlow
Version 2.01
Last Edited: Thursday, April 14, 2011
James Moore
1 East Jackson Blvd Chicago, IL 60604 T +1 (312) 362-5701 F +1 (312) 362-5066 [email protected] http://www.depaul.edu/~jmoore/

Table of Contents
Introduction 3
Contact Information 4
ScreenFlow Screencasting 5
ScreenFlow Alternatives 5
Recording A Presentation - Using An External Monitor 6
Recording With Keynote (External Monitor) 7
Recording With PowerPoint (External Monitor) 10
Recording A Presentation - Single Screen 13
Recording With Keynote 13
Recording With PowerPoint 15
Editing Your Recording 17
Exporting Your Recording 20
Exporting to QuickTime MOV 20
Exporting to M4V/iPod 21
Upload to iTunes U 22
Recording in the Classroom 24
Recording, Editing and Distribution 25
Pencasting 27
Livescribe Echo 27
Technology Tuesdays: Screenflow
www.depaul.edu/~jmoore/ Page 1 of 32

Papershow 28
Hardware and Software 29
Software 29
Hardware 30
Credits 32
Technology Tuesdays: Screenflow
www.depaul.edu/~jmoore/ Page 2 of 32

Introduction
I have updated these Technology Tuesdays handouts to include content from other presentation and documentation I
have created on vodcasting, pencasting and screen recording. Some of the material shared here can also be found in:
Barefoot Vodcasting
www.depau l .edu/~ jmoore/bare foot /
Guerilla Lecture Capture
www.depau l .edu/~ jmoore/guer i l l a /
Technology Tuesdays: Screenflow
www.depaul.edu/~jmoore/ Page 3 of 32

Contact Information
James Moore is the Director of Online Learning for DePaul University’s College of Commerce. He teaches
Internet Marketing classes in fully online, blended and face-to-face formats. He attempts to balance his
love of technology and gadgets with the knowledge that quick and simple solutions are best.
Unfortunately, creating quick and simple solutions often involves a long and complex process.
Contact DetailsContact Details
Office: DPC 6317 (6th floor of the DePaul Center, 1
East Jackson Blvd., Chicago, IL 60604 )
Telephone: +1 (312) 362-5701
e-mail: jmoore@depau l .edu
Twitter: h t tp : / / tw i t te r.com/mkt595
Twitter: h t tp : / / tw i t te r.com/P_ I_Marke t ing
Technology Tuesdays: Screenflow
www.depaul.edu/~jmoore/ Page 4 of 32

ScreenFlow Screencasting
ScreenFlow is a screencasting tool that captures live desktop video, microphone and computer audio, and video camera
input (internal or external) and then allows for editing after you have finished recording. There are other similar products
out there in the marketplace, but I have found ScreenFlow to be the best option for these reasons:
1. Affordable price. ScreenFlow has a “street” price of $99, and is available with a 10% educational discount.
2. Quick and easy recording. Unlike competing applications, ScreenFlow does not need to encode video
immediately after recording.
3. Sophisticated editing. ScreenFlows editing options include zoom, panning, callouts, overlays and titling.
Everything that I might need is there.
ScreenFlow runs only on OS X Leopard and above. You can download and purchase ScreenFlow from:
h t tp : / /www. te les t ream.net /sc reen- f low/overv iew.h tm
ScreenFlow Alternatives• Camtasia for Mac
ht tp : / /www. techsmi th .com/camtas ia /
• iShowU HD
ht tp : / /s to re .sh inywh i tebox .com
• Screen Mimic
ht tp : / /www.dec imus.ne t
• Snapz Pro X
ht tp : / /www.ambros iasw.com/ut i l i t i es /snapzprox/
Technology Tuesdays: Screenflow
www.depaul.edu/~jmoore/ Page 5 of 32

Recording A Presentation - Using An External Monitor
Secondary Monitor (Keynote) Primary Monitor (Keynote)
Secondary Monitor (PowerPoint) Primary Monitor (PowerPoint)
Ideally, you should record all presentations with a secondary monitor connected to your laptop or desktop computer. This
way you can record what is presented on the secondary monitor, but use the primary monitor as your workspace. The
advantage of this approach is that you can read “hidden” notes in your presentations and preview upcoming slides as
you record your video.
Technology Tuesdays: Screenflow
www.depaul.edu/~jmoore/ Page 6 of 32

Recording With Keynote (External Monitor)
1. Open System Preferences.
2. Click on Displays.
3. On the window that represents the secondary
display, change the Resolutions values to 1280 x
960.
4. Click on the Color LCD window.
5. Click on Arrangement.
6. Uncheck Mirror Displays .
7. Close System Preferences.
8. Open your Keynote presentation.
9. Click on Preferences.
10. Click on Slideshow and enable these settings:
• Scales slides up to fit display.
• Exit presentation after last slide.
• Reduce Cube transitions to avoid clipping.
• Reduce Flip transitions to avoid clipping.
• Show pointer when the mouse moves.
• Show playback controls when pointer is
over a movie.
• Present on secondary display.
Technology Tuesdays: Screenflow
www.depaul.edu/~jmoore/ Page 7 of 32

8. Click on Presenter Display and enable these
settings:
• Use alternate display to view presenter
information.
• Show: Current Slide.
• Build markers.
• Show: Next Slide.
• Show: Notes.
• Show: Clock.
• Show: Timer.
• Elapsed Time.
9. Close Preferences.
10. Open ScreenFlow.
11. Open Preferences and enable these settings:
• Show ScreenFlow options in menu bar.
• Countdown for 5 secs before recording.
12. Close Preferences.
13. Click on File / New Recording.
14. In the ScreenFlow window enable these settings:
• Record Desktop from: <secondary display>
• Record Video from: Built-in iSight
• Record Audio from: <external microphone>
• Record Computer Audio
15.Position the laptop so your face is appropriately
framed in the preview window.
16.Then click on the red Record button
Technology Tuesdays: Screenflow
www.depaul.edu/~jmoore/ Page 8 of 32

17. Wait for the countdown timer to finish.
18. Return to your Keynote presentation and click Play.
19. Make your presentation as normal.
Tips
• Speak clearly and precisely.
• Ensure that you are in a quiet environment.
• Enjoy the experience!
17.When you are finished presenting click on the
ScreenFlow icon in the menu bar and select Stop
Record. (NOTE: you can also press ⇧⌘2 )
18. Your ScreenFlow recording will appear after you
stop recording. Click on File / Save As and save
the recording into an appropriate place.
Tips
• Save your recording into a new directory.
Keep associated files (presentation, video,
etc.) in the same directory.
• ScreenFlow does not autosave. Remember
to save your file periodically.
• Create a title slide for the first and last pages
of your presentation.
Technology Tuesdays: Screenflow
www.depaul.edu/~jmoore/ Page 9 of 32

Recording With PowerPoint (External Monitor)
1. Open System Preferences.
2. Click on Displays.
3. On the window that represents the secondary
display, change the Resolutions values to 1280 x
960.
4. Click on the Color LCD window.
5. Click on Arrangement.
6. Uncheck Mirror Displays .
7. Close System Preferences.
8. Open your PowerPoint presentation.
Technology Tuesdays: Screenflow
www.depaul.edu/~jmoore/ Page 10 of 32

9. Open ScreenFlow.
10. Open Preferences and enable these settings:
• Show ScreenFlow options in menu bar.
• Countdown for 5 secs before recording.
11. Close Preferences.
12. Click on File / New Recording.
13. In the ScreenFlow window enable these settings:
• Record Desktop from: <secondary display>
• Record Video from: Built-in iSight
• Record Audio from: <external microphone>
• Record Computer Audio
15.Position the laptop so your face is appropriately
framed in the preview window.
16.Then click on the red Record button
Technology Tuesdays: Screenflow
www.depaul.edu/~jmoore/ Page 11 of 32

17. Wait for the countdown timer to finish.
18. Return to your PowerPoint presentation and click
Play Slide Show.
19. Make your presentation as normal.
Tips
• Speak clearly and precisely.
• Ensure that you are in a quiet environment.
• Enjoy the experience!
17.When you are finished presenting click on the
ScreenFlow icon in the menu bar and select Stop
Record. (NOTE: you can also press ⇧⌘2 )
18. Your ScreenFlow recording will appear after you
stop recording. Click on File / Save As and save
the recording into an appropriate place.
Tips
• Save your recording into a new directory.
Keep associated files (presentation, video,
etc.) in the same directory.
• ScreenFlow does not autosave. Remember
to save your file periodically.
• Create a title slide for the first and last pages
of your presentation.
Technology Tuesdays: Screenflow
www.depaul.edu/~jmoore/ Page 12 of 32

Recording A Presentation - Single Screen
Recording With Keynote
1. Open ScreenFlow.
2. Open Preferences and enable these settings:
• Show ScreenFlow options in menu bar.
• Countdown for 5 secs before recording.
3. Close Preferences.
4. Click on File / New Recording.
5. In the ScreenFlow window enable these settings:
• Record Video from: Built-in iSight
• Record Audio from: <external microphone>
• Record Computer Audio
15.Position the laptop so your face is appropriately
framed in the preview window.
16.Then click on the red Record button
Technology Tuesdays: Screenflow
www.depaul.edu/~jmoore/ Page 13 of 32

17. Wait for the countdown timer to finish.
18. Return to your Keynote presentation and click Play.
19. Make your presentation as normal.
Tips
• Speak clearly and precisely.
• Ensure that you are in a quiet environment.
• Enjoy the experience!
17.When you are finished presenting click on the
ScreenFlow icon in the menu bar and select Stop
Record. (NOTE: you can also press ⇧⌘2 )
18. Your ScreenFlow recording will appear after you
stop recording. Click on File / Save As and save
the recording into an appropriate place.
Tips
• Save your recording into a new directory.
Keep associated files (presentation, video,
etc.) in the same directory.
• ScreenFlow does not autosave. Remember
to save your file periodically.
• Create a title slide for the first and last pages
of your presentation.
Technology Tuesdays: Screenflow
www.depaul.edu/~jmoore/ Page 14 of 32

Recording With PowerPoint
1. Open ScreenFlow.
2. Open Preferences and enable these settings:
• Show ScreenFlow options in menu bar.
• Countdown for 5 secs before recording.
3. Close Preferences.
4. Click on File / New Recording.
5. In the ScreenFlow window enable these settings:
• Record Video from: Built-in iSight
• Record Audio from: <external microphone>
• Record Computer Audio
15.Position the laptop so your face is appropriately
framed in the preview window.
16.Then click on the red Record button
Technology Tuesdays: Screenflow
www.depaul.edu/~jmoore/ Page 15 of 32

17. Wait for the countdown timer to finish.
18. Return to your PowerPoint presentation and click
Play Slide Show.
19. Make your presentation as normal.
Tips
• Speak clearly and precisely.
• Ensure that you are in a quiet environment.
• Enjoy the experience!
17.When you are finished presenting click on the
ScreenFlow icon in the menu bar and select Stop
Record. (NOTE: you can also press ⇧⌘2 )
18. Your ScreenFlow recording will appear after you
stop recording. Click on File / Save As and save
the recording into an appropriate place.
Tips
• Save your recording into a new directory.
Keep associated files (presentation, video,
etc.) in the same directory.
• ScreenFlow does not autosave. Remember
to save your file periodically.
• Create a title slide for the first and last pages
of your presentation.
Technology Tuesdays: Screenflow
www.depaul.edu/~jmoore/ Page 16 of 32

Editing Your Recording
1. Open your ScreenFlow recording.
2. Remember to periodically save the file (ScreenFlow
can crash, you do not want to lose your work).
3. Resize the canvas area to 640 x 480 pixels and
then click on Apply.The canvas icon is on the left of
the screen, just above the timeline.
4. Click on View / Zoom to 100%. 5. Resize your Screen Recording so that it fits all of
the canvas.You can resize with the scroll button on
your mouse, or you can change the Scale value
under Video Properties.
6. Move your Screen Recording so that it is
centered within the canvas. “Snapping” and the
yellow guidelines will help you in centering the
image.
Technology Tuesdays: Screenflow
www.depaul.edu/~jmoore/ Page 17 of 32

7. Trim the start of your recording by moving the
scrubber (red line) to a point in your recording
where you want to delete all previous material. You
may want to zoom in (slider on bottom left-hand side
of screen) for greater control.
8. Then press the Command and A keys (⌘A) at the
same time to highlight all your clips in the timeline
(this will put a yellow border around each of your
clips).
9. Click on Edit / Trim Front to Scrubber.10. Click and drag your clips to the start of the timeline.
11. Trim the end of your recording by moving the
scrubber (red line) to a point in your recording
where you want to delete all subsequent material.
You may want to zoom in (slider on bottom left-hand
side of screen) for greater control.
12. Then press the Command and A keys (⌘A) at the
same time to highlight all your clips in the timeline
(this will put a yellow border around each of your
clips).
13. Click on Edit / Trim End to Scrubber.
Technology Tuesdays: Screenflow
www.depaul.edu/~jmoore/ Page 18 of 32

14. Click on the Built-in iSight clip in your preview pane
and then drag the clip to an appropriate place.
15. Resize the Built-in iSight clip by using either the
scroll button on your mouse or by changing the
Scale value in Video Properties.
16. Move the scrubber to a position in your recording
where you would like to fade-out your image. Click
on the Add Video Action button.
17. This will add a yellow Video Action to your timeline.
You can reposition the Video Action by clicking and
dragging.You can increase or decrease the duration
of the Video Action by clicking and dragging on the
handles.
18. Click on on the Built-in iSight clip (to the right of
the Video Action) and then change the Scale and
Opacity values in Video Properties to zero.
Technology Tuesdays: Screenflow
www.depaul.edu/~jmoore/ Page 19 of 32

Exporting Your Recording
Exporting to QuickTime MOVIf you wish to create a streaming video, export your completed video in the QuickTime format and then give this file to
your FITS consultant. Your FITS consultant will convert the QuickTime file into a streaming Ooyala video.
1. In ScreenFlow, click on File / Export.
2. Choose an appropriate filename in the Save As
textbox.
3. Change the Preset to Web - High.
4. Change the Dimensions to Scale by 100% to 640
x 480.
5. Under Options check Use Motion Blur.
6. Click on Export.
7. Wait for the QuickTime file to export.
8. After ScreenFlow has finished exporting, open the
QuickTime file (in the QuickTime player) and verify
that the video plays correctly.
9. Send the QuickTime file to your IDD consultant.
They will convert the file for you, and send you
HTML code to add to Blackboard or your website.
Technology Tuesdays: Screenflow
www.depaul.edu/~jmoore/ Page 20 of 32

Exporting to M4V/iPodIf you wish to create a downloadable video, export your completed video in the M4V format. The best way to distribute
this file is through iTunes U.
1. In ScreenFlow, click on File / Export.
2. Choose an appropriate filename in the Save As
textbox.
3. Change the Preset to iPod.
4. Change the Dimensions to Scale by 100% to 640
x 480.
5. Under Options check Use Motion Blur.
6. Click on Export.
7. Wait for the M4V file to export.
8. After ScreenFlow has finished exporting, open the
M4V file (in the QuickTime player or iTunes) and
verify that the video plays correctly.
9. Upload the M4V file to iTunes U.
Technology Tuesdays: Screenflow
www.depaul.edu/~jmoore/ Page 21 of 32

Upload to iTunes UNOTE: You will need to have an account on iTunes U. Contact Diane Tarkowski ([email protected]) if you need your
course to be on iTunes U
1. Using a Web browser go to http://itunes.depaul.edu/
2. Click on “Visit DePaul University on iTunes U
now” (the text below the photographs)
3. Type in your Campus Connection username (user
ID) and password and then click on Login
4. This should open iTunes U on your computer
Technology Tuesdays: Screenflow
www.depaul.edu/~jmoore/ Page 22 of 32

5. Under Academics click on College of Commerce
6. Click on your course
7. Click on Upload and Manage Files
8. Click on Add New File
9. Browse to the file that you want to upload and click
on Choose
10. When your file has finished uploading you can click
on Done
11. Your files are now on iTunes U for your students to
download
Technology Tuesdays: Screenflow
www.depaul.edu/~jmoore/ Page 23 of 32

Recording in the Classroom
My favored set-up is to present on an Apple MacBook Pro laptop. I use Telestream ScreenFlow
(www. te les t ream.net ) to record whatever materials I present in the classroom. Audio is captured by connecting a
Zoom H2 microphone (www.samsontech .com) via a shielded USB cable to my laptop. The Zoom H2 has four
microphones positioned in such as way as to allow 360-degree recording. Generally this is sufficient coverage for a
typical classroom. If the recording is not adequate, I can import my Sansa Clip audio (www.sand isk .com) .
If I have to present on a Microsoft Windows machine, I can use Camtasia Studio (www. techsmi th .com) as an
alternative to ScreenFlow. However, Camtasia does not have the instant encoding capability or rich post-production
options that ScreenFlow has. I can also Screenflow a Remote Desktop session to a Microsoft Windows machine if I need
to demonstrate Windows software.
To enhance the completed video, I split-screen classroom footage with whatever material is displayed on the projector.
There are two ways that I do this:
1) Importing from a Standalone Camera
One way I achieve this is by importing video from a standalone camera and combining
the videos at the editing stage. The camera I currently prefer is the Creative Labs
Vado HD (us .c rea t i ve .com). This particular model has an 8GB capacity, which
allows me to store up to eight hours of video (at 640x480 pixels). The Vado HD has a
replaceable, removable battery with an approximate recording time of two hours. The
combination of generous video storage and removable batteries in a small, pocketable
package ensures that I am easily able to record any class at a moment’s notice.
Finding a suitable location to place the camera in the classroom can be problematic. I
carry a small portable tripod, the Manfrotto 785 Modo Maxi
(www.manf ro t to .com), which fits in my briefcase, as well as two desktop/mobile
tripods—the Gorillapod (www. joby.com) and the UltraPod II
(www.pedcopods.com). The desktop/mobile tripods can be used to affix the
camera to walls and ceiling projections.
Technology Tuesdays: Screenflow
www.depaul.edu/~jmoore/ Page 24 of 32

2) LIve Import from Bluetooth Webcam
My preferred method is to pair my laptop with the Ecam BT-1 (www.bt -1 .com) . This is a
wireless webcam that I can position anywhere in the classroom within range of my laptop
(generally no further than 10 meters away). Once paired, the BT-1 acts as an alternative
video input. The BT-1 video feed is about a half-second slower than the desktop video feed,
but I can solve this easily in editing by moving the BT-1 track a half second ahead.
The BT-1 has a charge that lasts between 4-5 hours, which is sufficient to record an entire
class. The video quality (video resolution is 640x480 pixels, frame rate is 15 frames per
second) is not as good as the Vado HD, but it is enough for my needs.
Recording, Editing and DistributionThe three-stage process is as follows:
1. Recording
• If I am using the Vado HD, the camera is positioned optimally in the classroom and I begin recording just before
I speak. The BT-1 is switched on a few minutes before I start talking, and starts recording when ScreenFlow is
running.
• As soon as I start speaking, I start recording the desktop with ScreenFlow. The Sansa Clip is used for audio
backup.
2. Importing and Editing
• After class I open the ScreenFlow recordings and either import video footage from the Vado HD, or adjust the
timing of the BT-1 track. I trim and synchronize the recordings. This part of the process takes less than five
minutes.
• The edited recordings are exported as QuickTime MOV files. Exporting each recording can take as much as 30
to 45 minutes. However, this can take place in the background.
• I use an Apple Automator (h t tp : / /www.app le .com/macosx/ fea tu res/300.h tm l#automator )
workflow to append appropriate metadata to the QuickTime files and then send these to QuickTime
Professional (h t tp : / /www.app le .com/qu ick t ime/ ) to export as M4V files (which are suitable for iTunes,
iPods and Apple TVs) if I don’t want to distribute QuickTime MOV files..
Technology Tuesdays: Screenflow
www.depaul.edu/~jmoore/ Page 25 of 32

3. Distribution
• I distribute the videos in at least two formats: streamed and downloadable. The downloadable files (MOV or
M4V) are uploaded to iTunes U, and streaming takes place by uploading these files to Ooyala
(www.ooya la .com) .
• Streaming via Ooyala allows me to prevent redistribution of materials and to access comprehensive viewing
metrics. Once a file has been uploaded and converted to Ooyala, I simply paste some HTML code into my
Desire2Learn course. The videos are then viewable in a web browser using the Adobe Flash plug-in.
• Downloadable files via iTunes U are preferred by most students. However, this raises the potential issue of
redistributing copyrighted material. Guidance on how to follow either the Fair Use Guidelines for Educational
Multimedia or the TEACH Act can be confusing (Taleb, 2007).
Technology Tuesdays: Screenflow
www.depaul.edu/~jmoore/ Page 26 of 32

Pencasting
I bring both a Livescribe Echo smartpen (www. l i vescr ibe .com) and PaperShow smartpen
(www.papershow.com/us/ ) to classes. The Livescribe Echo allows me to record both what I say and what I draw/
write on special paper. This recording can then be shared as an embedded Flash video, exported as a PDF, or exported
as an audio file. The term that Livescribe has coined for this process is “pencasting.”
Livescribe EchoThe Livescribe Echo comes in up to 8GB capacity. This allows me to record up to 800
hours of audio on the device. The pen requires special dot paper to record and digitize
what is written. The dot paper can be purchased in a variety of formats (notebooks,
journals, notepads), or printed via certain color laser printers. Livescribe provides free
hosting services to share pencast recordings.
The advantage of using the Livescribe Echo is that all I need to carry with me is the pen
and paper. If a classroom has an overhead projector, I can provide an ad-hoc
presentation or lesson and then share this as a video after the class. For office hours I
can work through a problem on paper with student, and then share the recording with
them. The Livescribe desktop software allows me to export the session as an audio file
with accompanying PDF. My preferred format is an Adobe Flash video, which can be embedded in any web page or
shared via Facebook. The limitation to this approach is that Livescribe only provides 250MB of shared storage. My hope
is to find an alternative way to export video files directly from the desktop. The Livescribe software also allows me to use
the pen as a computer mouse, but I have found this to be of limited use
Technology Tuesdays: Screenflow
www.depaul.edu/~jmoore/ Page 27 of 32

PapershowThe disadvantage in the classroom to the Livescribe Echo is that I need
access to an overhead projector or to have software installed on a
computer in the rom. Instead, I can use a Papershow smartpen
(www.papershow.com) . The Papershow pen uses a similar
dotpaper to the Livescribe Pulse, but communicates over Bluetooth to
a USB drive connected to a classroom computer. Everything I write on
the dotpaper is broadcast to the classroom projector via the classroom
PC. Whilst the Papershow pen does not record in the same way as the
Livescribe Echo, it is a superior tool for presenting. I use ScreenFlow
to record in these situations where I need a video archive. My
presentations can be saved to the USB drive, and the dotpaper allows
me to navigate through the presentation.
Technology Tuesdays: Screenflow
www.depaul.edu/~jmoore/ Page 28 of 32

Hardware and Software
Software
Screenflow ($99)
ht tp : / /www. te les t ream.net /sc reen- f low/
iTunes (free)
ht tp : / /www.app le .com/ i tunes/
Technology Tuesdays: Screenflow
www.depaul.edu/~jmoore/ Page 29 of 32

Hardware
Snowball Mic ($60)
www.b luemic .com/snowba l l /
Zoom H2 ($150)
ht tp : / /www.samsontech .com
Sansa Clip (approx. $25-60)
ht tp : / /www.sand isk .com
Belkin AV22201-06 PureAV Digital Camera Cable ($25)
ht tp : / /www.be lk in .com
Technology Tuesdays: Screenflow
www.depaul.edu/~jmoore/ Page 30 of 32
Gorillapod ($20)
ht tp : / /www.amazon.com/Joby-GP1-E1EN-Gor i l l apod-F lex ib le -Tr ip
od/dp/B000EVSLRO/
Pedco UltraPod Digital ($18)
ht tp : / /www.amazon.com/Pedco-U l t raPod-D ig i ta l -L igh twe igh t -
Camera/dp/B000A1AQU8/
BT-1 Bluetooth Webcam ($150)
ht tp : / /www.bt -1 .com
Livescribe Echo Pen ($150-200)
ht tp : / /www. l i vescr ibe .com
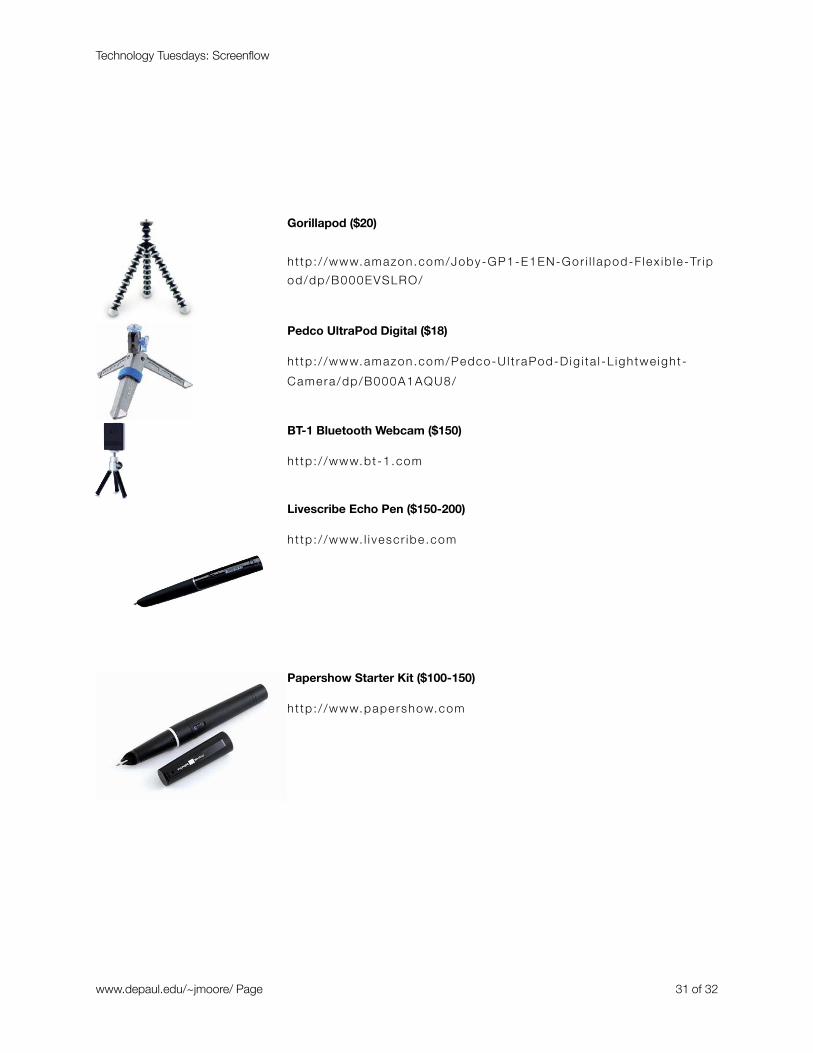
Papershow Starter Kit ($100-150)
ht tp : / /www.papershow.com
Technology Tuesdays: Screenflow
www.depaul.edu/~jmoore/ Page 31 of 32

Credits
Cover image taken from the Freewave Data DVD (Joel Evey - Blight)
Technology Tuesdays: Screenflow
www.depaul.edu/~jmoore/ Page 32 of 32