School Sanitation and Hygiene Education - India · School Sanitation and Hygiene Education - India...
47
School Sanitation and Hygiene Education - India
Transcript of School Sanitation and Hygiene Education - India · School Sanitation and Hygiene Education - India...
School Sanitation and
Hygiene Education - India
Snel, Mariëlle, Ganguly, Sumita and Shordt, Kathleen (2002). Sanitation and Hygiene Education – India: Handbook for
Teachers. Delft, the Netherlands, IRC International Water and Sanitation Centre. (Technical Paper Series; no. 39). ?? p.
Published jointly with UNICEF India
Copyright „ UNICEF and IRC International Water and Sanitation Centre 2002
IRC and UNICEF enjoy copyright under Protocol 2 of the Universal Copyright convention. Nevertheless, permission is
hereby granted for reproduction and adaptation of this material, in whole or part, for educational, scientific or
development-related purposes except those involving commercial sale. When reproducing these materials, please give full
citation to the source.
ISBN: XXXXXXXXXXXXXXXXXXXXXXXX
Design: Fabrique, Delft, the Netherlands
Printing: Giethoorn ten Brink, Meppel, the Netherlands.
To order more copies of this publication, please contact:
IRC International Water and Sanitation Centre
P.O. Box 2869, 2601 CW, Delft, The Netherlands
Tel: + 31 (0)15 2192939, Fax: +31 (0)15 2190955, E-mail: [email protected]
School Sanitation and
Hygiene Education - India
Handbook for Teachers
Mariëlle Snel, Sumita Ganguly and Kathleen Shordt
Technical Paper Series 39
IRC International Water and Sanitation Centre
Delft, the Netherlands

Table of Contents
Chapter 1 Introduction 7
Using this Handbook 7
Who is this Handbook for?
How can this Handbook be used?
Chapter 2 Nali Kali approach 9
Nali Kali method 9
Ways of learning 9
Chapter 3 Child-to-Child Approach 11
What is the Child-to-Child approach? 11
Activity sheets 11
1. Eye infections 11
2. Handwashing 11
3. Stools and hygiene (including fact sheet) 11
4. Clean and safe water (including fact sheet) 11
5. Diarrhoea (including fact sheet) 11
6. Intestinal worms (including fact sheet) 11
7. Malaria (including fact sheet) 11
Appendix 1 Nali-Kali Approach used from Standard I to IV 13
References 15
Table of contents
Introduction
Using this Handbook
Who is this Handbook for?
This Handbook is meant specifically for teachers working in pre-school and primary
school. It will help them in the classroom to teach children about hygiene and sanitation
by using one or more of the teaching approaches mentioned below. Parts of the
Handbook can also be used by those indirectly involved in training and orienting
education1.
This Handbook comes together with the School Sanitation and Hygiene Education
Resource Book. Although the Resource Book is aimed at managers and trainers, it
provides additional information and activities that will be relevant for pre-school and
primary school teachers as well.
How can this Handbook be used?
This Handbook consists of two different teaching methodologies which include the:
• Nali Kali approach
• Child-to-Child approach
The idea behind this Handbook is to give a ‘hands on’ look at activities that could be
undertaken in the classroom to promote better sanitation and hygiene behaviours.
Each of the teaching approaches includes a set of exercises that begin by explaining the
objective of the activity. This is followed by directions for the teacher. A number of
activities for the children are then suggested. Also included is a fact sheet for the
teacher with information that he/she may find useful. It should be noted that the
examples in this Handbook are only a few of the activities that the teacher can
undertake to encourage better school sanitation and hygiene behaviours.
7
Chapter 1
1 It should be noted that this Handbook has used information cited in Child-to-child: A resource book by
Grazyna Bonati and Hugh Hawes (1992) and Schools- The channels of hygiene promotion- Integrated
hygiene promotion in schools by WaterAid India (2001).
1
Nali Kali Approach
Nali Kali Method
The Nali Kali method began as an experiment designed to strengthen the formal system
of education in India. It was first tried out in Mysore district in Karnataka, India. The
Kannada word ‘Nali Kali’ translates into ‘joyful learning’. The method seeks to resolve
the problems of a poor environment and a failure to retain children in primary schools.
The main features of this method are:
• reduced learning load
• mastery at the minimum level of learning
The Nali Kali classroom gives autonomy to the teacher with its innovative teaching style
and creates the right atmosphere for the child to learn in a child-friendly, fun-filled way.
In India, the Nali-Kali approach resulted in the Janashala programme in 1998, which
operates in ten blocks that span six districts. Box 1 gives a brief explanation of the
Janashala programme.
The emphasis in the Nali Kali methodology is on child-centred activities. The teaching
learning methodology in Nali Kali is particularly suitable for the implementation of a
practical action-oriented sanitation and health curriculum.
9
Chapter 2
Goal
• To create awareness and bring about behavioural change among children and
through them, among parents and the community in selected districts.
General objectives
• To make hygiene education and environmental sanitation a people’s movement
through mobilising the network of the Panchayat Raj institutions
• To make school teachers catalysts in creating awareness, generating demand and
inculcating personal hygiene practices among the children and through them,
among their parents and in the community as a whole.
The strategy
• A three-pronged strategy is planned to ensure that school sanitation impacts upon
attitudes and practices rather than limiting itself to a mere provision of facilities.
These include:
- community partnerships for planning and monitoring,
- health, sanitation and environmental protection in the school curriculum,
- provision of basic facilities to inculcate sanitary habits and environmental
protection in school.
Box 1 The Janashala programme
2
This methodology divides concept learning into four major phases which children pass
through (Bailey, Hawes and Bonati, 1992). They are:
Exploration: Children are given an opportunity to conduct survey and outdoor activities
for prescribed topics
• Experience: Before expanding on the theoretical part of any subject, children are
given ample chance to have personal experiences
• Expansion: Based upon the knowledge that the child has acquired through survey
and personal experiences, discussions with the peer group and teacher helps in the
expansion and sharing of knowledge.
• Evaluation: To know whether the child has gained an understanding of the subject,
continuous evaluation is done through games.
(Refer to Appendix 1 for the division of activities between Standard I to IV 2.)
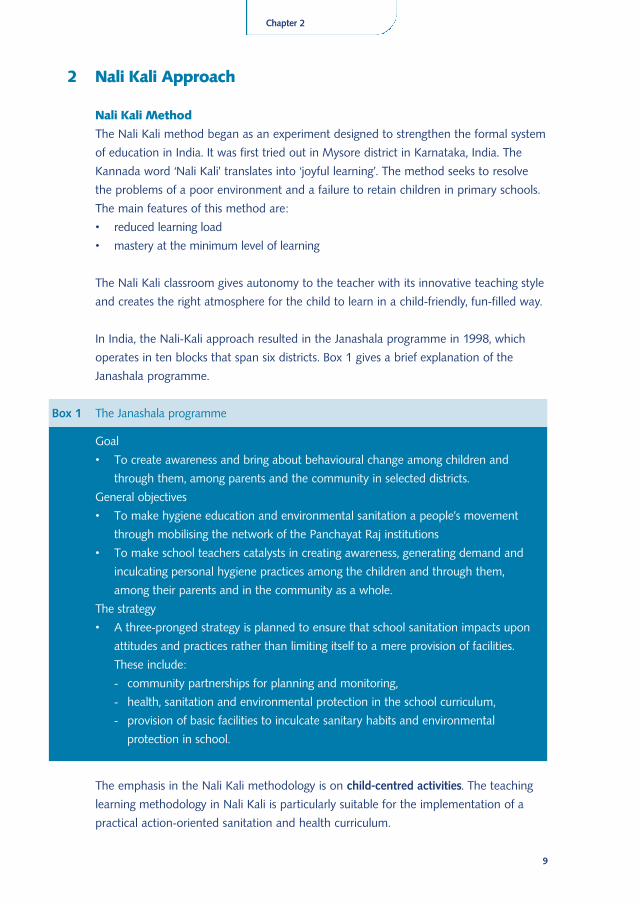
In the next section the various types of ways that children learn through activities are
explored in some more detail.
10
Figure 2.1 Children learning through group work
2 Standard I refers to children between the ages of 5 and 6; Standard II: age 6 – 7; Standard III: age 7-8;
Standard IV: age 8-9

Ways of learning
There are various ways in which children learn in and outside the classroom. Children
can learn through discussion, reading, listening, singing and even acting. In terms of
discussion, this is often a way for children to learn about others and also about
themselves and their own personal experience. Reading and listening allows children to
learn interact in a more passive way but one that is just as rewarding.
Learning through singing, acting and ‘fun’ activities is also an excellent way of learning.
These activities are used for entertainment as well as reflecting on concepts about every
day life. Children sign songs, mime situations or incidents based on every day life (for
example use of a bore-well) which is then discussed by all children. For example, stories
can be depicted through shadow puppets. It is possible for older children to conduct the
puppet show while younger children watch. Puppet shows can be based on a specific
theme or story.
11
Chapter 2
Figure 2.2: Children learning through puppet shows
Child-to-Child Approach
What is the Child-to-Child Approach?
The Child-to-Child approach is a way of teaching about health which encourages
children to participate actively in the process of learning and to put into practice what
they learn. It is based on the principle that children enjoy learning through active
participation. Children enjoy being involved and it helps them to learn better. This
makes teaching more fun and more effective.
The child-to-child activities have shown that children can improve their own health and
that of others through:
• caring for younger brothers and sisters and other young children in the community
(child-to-child),
• influencing other children in their community, especially those with less opportunities
and education than themselves (child-to-children),
• sharing information with their families (child-with-family),
• spreading health ideas and messages within their own communities (children-and
community).
In this section on the Child-to-Child approach we have selected activities which:
• are really important for the health of children and communities,
• can be well understood and are of interest to children,
• can be acted on by children.
Experience has shown that child-to-child activities fall into distinct categories, which are
best introduced in the following sequence:
13
Chapter 3
Examples
• Main causes of diarrhoea and dehydration
• Why dehydration kills
• How to recognise it
• The number of children who have had diarrhoea
• How people treat it
• What can ‘I’ do to prevent diarrhoea?
• What can ‘we’ do if another child is affected?
• Making and mixing a special drink (oral rehydration solution)
• How many of ‘us’ can make the special drink?
Activities related to:
Understanding
Finding out
Planning action
Doing
Discussing results
Table Child-to-child activities
3
14
Activity sheetsThe Child-to-Child approach is a way of teaching about health which encourages
children to participate actively in the process of learning and to put into practice what
they learn. The following activity sheets are designed to help the teacher teach health
education in a more exciting way using the Child-to-Child approach. The activity sheets
start off with the objective and learning points for the children. It then focuses on some
of the activities which children can undertake. Some activity sheets are followed by a
fact sheet for the teacher that explains the issue in more detail.
The following activity sheets specifically focus on a number of personal and community
hygiene activities. Note that these activities are taken from a number of different
sources (WaterAid, 1998; Bailey, Hawes and Bonati, 1992) (Refer to the appendix for the
full references).
Personal and community hygiene activities related to:
1. eye infections
2. handwashing
3. stools and hygiene
4. clean and safe water
5. diarrhoea
Health prevention activities related to:
6. intestinal worms
7. malaria
15
Chapter 3
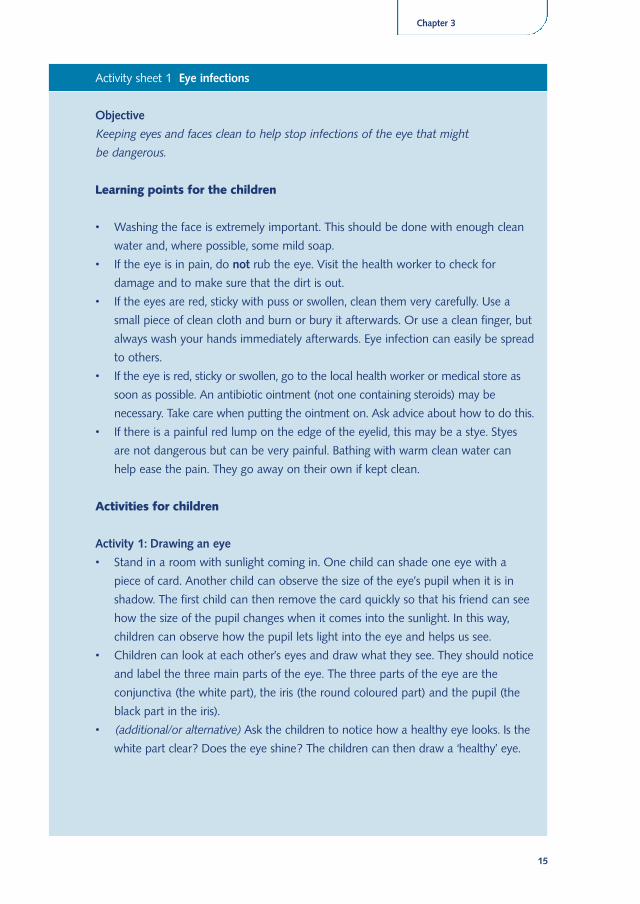
Activity sheet 1 Eye infections
Objective
Keeping eyes and faces clean to help stop infections of the eye that might
be dangerous.
Learning points for the children
• Washing the face is extremely important. This should be done with enough clean
water and, where possible, some mild soap.
• If the eye is in pain, do not rub the eye. Visit the health worker to check for
damage and to make sure that the dirt is out.
• If the eyes are red, sticky with puss or swollen, clean them very carefully. Use a
small piece of clean cloth and burn or bury it afterwards. Or use a clean finger, but
always wash your hands immediately afterwards. Eye infection can easily be spread
to others.
• If the eye is red, sticky or swollen, go to the local health worker or medical store as
soon as possible. An antibiotic ointment (not one containing steroids) may be
necessary. Take care when putting the ointment on. Ask advice about how to do this.
• If there is a painful red lump on the edge of the eyelid, this may be a stye. Styes
are not dangerous but can be very painful. Bathing with warm clean water can
help ease the pain. They go away on their own if kept clean.
Activities for children
Activity 1: Drawing an eye
• Stand in a room with sunlight coming in. One child can shade one eye with a
piece of card. Another child can observe the size of the eye’s pupil when it is in
shadow. The first child can then remove the card quickly so that his friend can see
how the size of the pupil changes when it comes into the sunlight. In this way,
children can observe how the pupil lets light into the eye and helps us see.
• Children can look at each other’s eyes and draw what they see. They should notice
and label the three main parts of the eye. The three parts of the eye are the
conjunctiva (the white part), the iris (the round coloured part) and the pupil (the
black part in the iris).
• (additional/or alternative) Ask the children to notice how a healthy eye looks. Is the
white part clear? Does the eye shine? The children can then draw a ‘healthy’ eye.
16
>
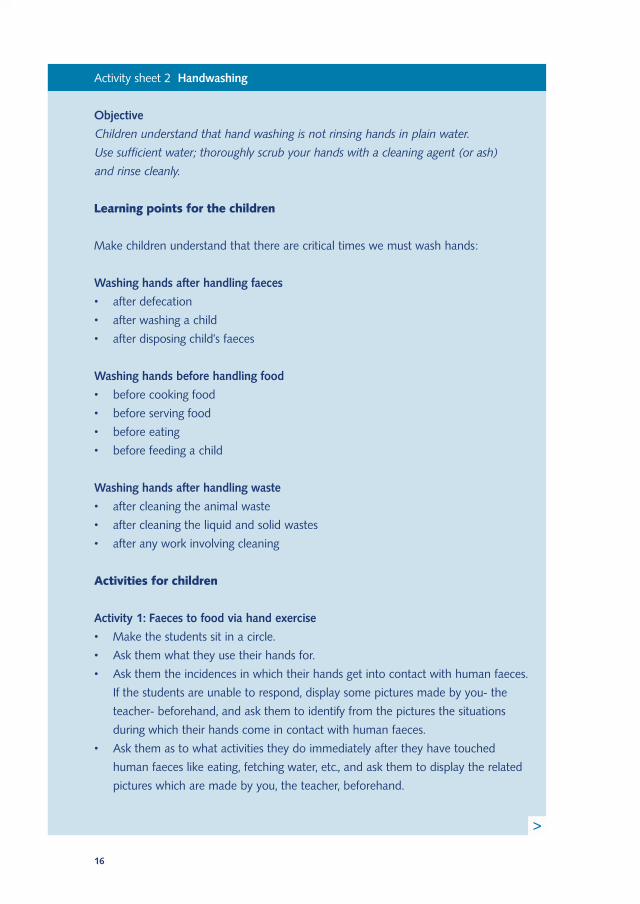
Activity sheet 2 Handwashing
Objective
Children understand that hand washing is not rinsing hands in plain water.
Use sufficient water; thoroughly scrub your hands with a cleaning agent (or ash)
and rinse cleanly.
Learning points for the children
Make children understand that there are critical times we must wash hands:
Washing hands after handling faeces
• after defecation
• after washing a child
• after disposing child’s faeces
Washing hands before handling food
• before cooking food
• before serving food
• before eating
• before feeding a child
Washing hands after handling waste
• after cleaning the animal waste
• after cleaning the liquid and solid wastes
• after any work involving cleaning
Activities for children
Activity 1: Faeces to food via hand exercise
• Make the students sit in a circle.
• Ask them what they use their hands for.
• Ask them the incidences in which their hands get into contact with human faeces.
If the students are unable to respond, display some pictures made by you- the
teacher- beforehand, and ask them to identify from the pictures the situations
during which their hands come in contact with human faeces.
• Ask them as to what activities they do immediately after they have touched
human faeces like eating, fetching water, etc., and ask them to display the related
pictures which are made by you, the teacher, beforehand.
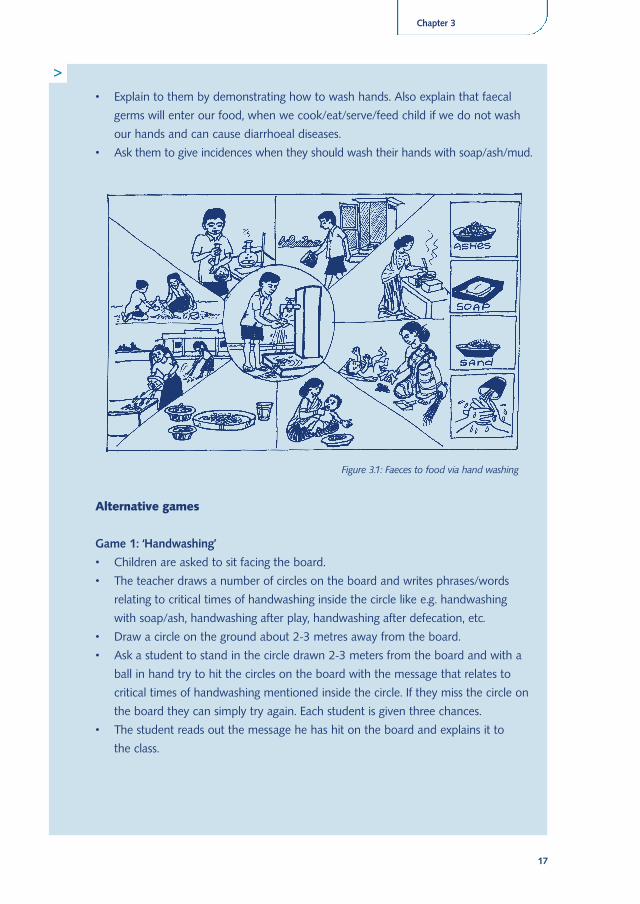
• Explain to them by demonstrating how to wash hands. Also explain that faecal
germs will enter our food, when we cook/eat/serve/feed child if we do not wash
our hands and can cause diarrhoeal diseases.
• Ask them to give incidences when they should wash their hands with soap/ash/mud.
Alternative games
Game 1: ‘Handwashing’
• Children are asked to sit facing the board.
• The teacher draws a number of circles on the board and writes phrases/words
relating to critical times of handwashing inside the circle like e.g. handwashing
with soap/ash, handwashing after play, handwashing after defecation, etc.
• Draw a circle on the ground about 2-3 metres away from the board.
• Ask a student to stand in the circle drawn 2-3 meters from the board and with a
ball in hand try to hit the circles on the board with the message that relates to
critical times of handwashing mentioned inside the circle. If they miss the circle on
the board they can simply try again. Each student is given three chances.
• The student reads out the message he has hit on the board and explains it to
the class.
17
Chapter 3
>
Figure 3.1: Faeces to food via hand washing
18
>
Activity Sheet 3 Stools and hygiene
Objective
Understand that diarrhoea and stools are dangerous.
Learning points for the children
• Make children understand that many people know that stools are dirty, but they
may not know that the germs in stools can cause diseases. Diarrhoea, worms,
cholera, typhoid and polio are spread when germs are passed from our stools to
hands and clothes, to the water we drink and the food we eat, making us ill.
• Explain that by using toilets, by keeping our hands and bodies clean after a bowel
movement, and by cleaning up any stools that are dropped in places where we live
and play, we can help to prevent the germs that cause these diseases from spreading.
• Explain that a child’s stool has perhaps five or six times as many germs as the stool
of an adult. When the small child has diarrhoea, the stool is especially dangerous
for all members of the family.
Activities for children
Activity 1: How do germs spread?
• Older children can discuss some things that help the germs to spread.
Examples would be:
• Taking a piece of cloth, wiping the bottom of the child, and leaving the cloth
lying around.
• Ask the children why some of their friends do not use a toilet. Ask them to explain
this. Discuss these reasons and agree on ways of encouraging use of the toilet.
• Form a group to make regular inspections of the toilets. The group could check
that the toilet holes are covered and that the toilets are clean. If they are not clean,
the group could report to a teacher or health worker and ask advice about how to
clean the toilets.
Activity 2: Building a child-size toilet
• Older children can build a child-size toilet in the school compound as an example,
measuring the pit and making a mould for the plates. A teacher or other adults
may need to supervise the children who do the construction themselves. Parents
can help by providing the materials such as sand, cement, wood, etc.
• The children can be grouped according to the places from which they come from.
In class, they can develop plans for helping each other build child-size toilets at
their homes. A progress chart in class can show each home with a small child.
19
Chapter 3
>
>
A tick can be placed when a toilet is built at that home, and another when the
small child has learned to use it.
Activity 3a: Safe disposal of human waste exercise
• Make the students sit in a circle
• Display before them pictures of open defecation near road, near field, near water
sources, open defecation near road with a snake nearby, defecating after dawn,
defecating and pigs, using toilet, covering faeces with mud etc. Note that these
should be made by you, the teacher, beforehand.
• Allow some time for them to see the pictures.
• Ask the group to identify the safe and unsafe way of human waste disposal and
ask them to explain about the ill effects of open defecation and benefits of using
a toilet.
• Ask the inherent dangers of open defecation and benefits of using a toilet. Make
them relate this to their daily activities.
• Identify their difficulties and views for not building a toilet. Explain to them the
option of low cost toilets.
• At the end of the exercise, summarise the discussions and once again explain to
the group members the problems of open defecation and the safe way of human
excreta disposal.
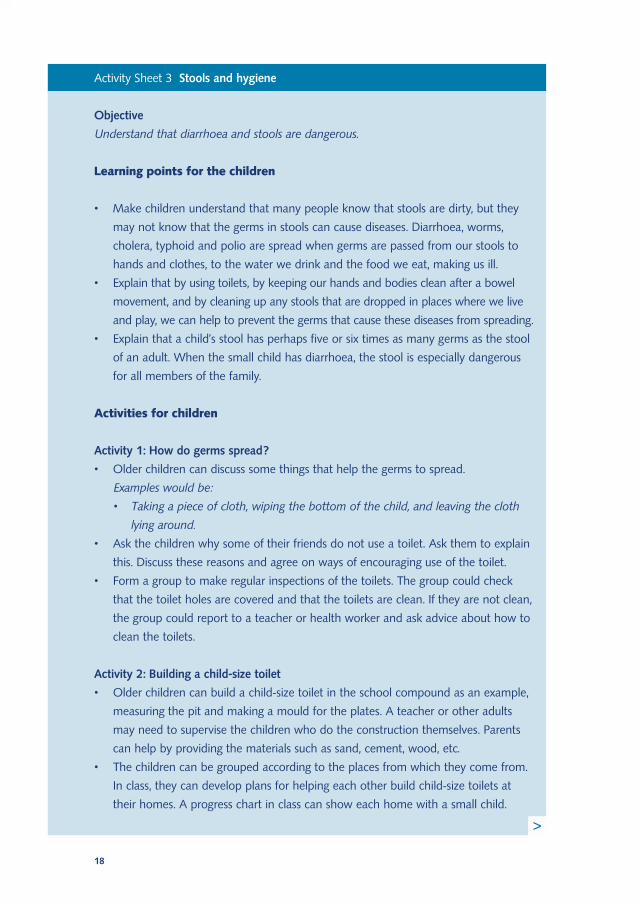
Figure 3.2: How to use a toilet
20
>
Fact sheet for the teacher Stools and hygiene
Diarrhoea is dangerous
Children have diarrhoea when they frequently pass watery stools. They may also vomit
and have a swollen belly with cramps. Diarrhoea is caused by germs that live in dust,
stale food, dirty water and human stools. These are so small that they are invisible.
Through the diarrhoea, the body tries to ‘wash out’ the bad germs and get rid of them.
Diarrhoea is a frequent cause of death in young children. They die from dehydration
when they lose large amounts of fluid (water and salt) from their bodies which is not
replaced.
Stools are dangerous
Many people know that stools are dirty, but they may not know that the germs in
stools can cause diseases. Diarrhoea, worms, cholera, typhoid and polio are spread
when germs are passed from our stools to hands and cloths, to the water we drink
and the food we eat, making us ill.
>
Games
Game 1: Space and the spread of disease
• Divide the groups into three (according to the size of the group).
• Give each group a newspaper sheet.
• Each group selects a leader who places the newspaper sheet on the floor.
• After the teacher starts clapping, the children start running in a circle.
• When the clapping stops the leader has to make one fold in the paper reducing its
size to half and again places it on the floor. The whole group has to stand on the
folded paper.
• Again after clapping starts, students run and after clapping stops, the paper is
folded twice, and the whole group has to again stand on the folded paper.
• Tell the group to do this again for two times by telling them to fold the paper
three to four times and make them stand on the folded paper until no one is able
to stand on the paper.
• Finally the teacher explains that the newspaper can represent a piece of land
around the village where people openly defecate. As the available space
(represented by the newspaper) becomes smaller so to does the threat of
spreading faecal germs and diseases.
21
Chapter 3
By using toilets, by keeping our hands and bodies clean after a bowel movement, and
by cleaning up any stools which are dropped in places where we live and play, we can
help to prevent the germs that cause these diseases from spreading.
Why children’s hygiene is important
Many people think that children’s stools are harmless, but this is wrong. A child’s stool
has perhaps five or six times as many germs as the stool of an adult. When the small
child has diarrhoea, the stool is especially dangerous for all members of the family.
Babies have no control over their bowels and may pass their stools in many different
places, both inside and outside the house. This is not only dirty but also very
dangerous because germs from these stools can spread easily to the rest of the family
and neighbours.
When they are older (about 2-3 years) and have learned to control their bowels,
children will copy what they see others doing. If they see others in the family defecate
in the field or in the garden, or squat in an alley or by the side of the road, they will
copy them because children want to be like others.
In addition, young children spend a lot of time crawling and sitting on the ground.
They often put things into their mouths. And so they pick up germs in the dust from
any stools that are lying on the ground around them.
It is very easy for anyone taking care of a young child to spread germs from stools.
Germs can be spread on hands from wiping a child’s bottom to food, cooking dishes,
the furniture, clothing or hands of other people. These germs can end up in the
mouths of other children or adults, and make them ill.
What can we do to stop the spread of germs?
Children can learn good hygiene habits that prevent the spread of germs causing
diarrhoea and other illnesses. Older children can discuss effective preventive measures
with younger children. In addition children can learn to use a toilet for defecation.
Use a toilet
One way of spreading germs is by defecating in the field or compound. Whenever
possible, use a toilet for bowel movements and not the field or compound. Help
younger children to use the toilet properly. Keep the toilet clean. When a toilet is not
available, stools should be buried to avoid germs being spread.
Keep hands and bodies clean
>
>
22
>Use water and ashes or soap, if available, to wash hands, child’s bottom and soiled
cloth. If the soiled cloth cannot be washed or leaves have been used for wiping the
bottom, bury them or throw them in the toilet. Clean a child’s bottom and hands if
they are dirty.
Keep the place clean
Clean up and bury stools dropped on the floor or in the yard. As often as possible
(even four times a day!) check to see that the places where young children play, crawl
and sit are clean. Wash spoons, dishes and things that young children have played with.
23
Chapter 3
Activity Sheet 4: Clean and safe water
Objective
To focus on how water is contaminated and how we can avoid this and prevent diseases.
Learning points for the children:
• Explain that dirty water can be an enemy.
• Explain that germs cause diseases and can get into the water: This can happen
when we find water; when we collect it and carry it home; and when we store it
and use it at home.
• Finally make the children understand that sometimes water looks clear and clean
but it is not good to drink because it has germs in it.
Collecting
• Wash the containers with a cleaning agent before collection.
• Ensure that while collecting water, there is no washing or cleaning activities taking
place nearby, which can contaminate water at the source.
• Ensure that you do not dip your hands in the water while lifting the pot, for this
can contaminate it.
• Cover the water container while carrying home.
Storing
• Keep the container with water covered at all times with a lid.
• Keep the container above ground level.
Handling
• Do not dip the hands and fingers in the water.
• Use a ladle with a long handle to take water from the container.
• A container with tap can be used to store water making it easy to handle.
• Where none of the above is available, tilt the container and take water.
Activities for children
Activity 1: Importance of water
• Ask a number of questions related to water: Why is water important? List all the
things you can do with water, at home, in the community, on farms, in the whole
country. Ask the following questions:
• Is water which is clear or which has a good taste always safe? How do germs get
into water?
>
• In what ways can water help us? In what ways can water harm us? Do some of
the children often have an upset stomach or diarrhoea? Are there other people in
the family who do? What about the babies? What do you think might have
caused this illness?
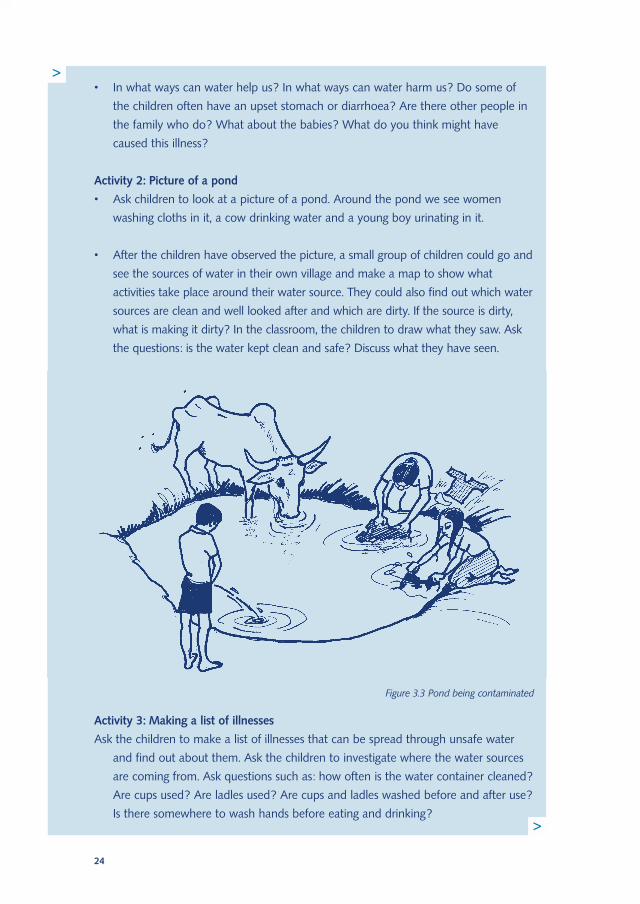
Activity 2: Picture of a pond
• Ask children to look at a picture of a pond. Around the pond we see women
washing cloths in it, a cow drinking water and a young boy urinating in it.
• After the children have observed the picture, a small group of children could go and
see the sources of water in their own village and make a map to show what
activities take place around their water source. They could also find out which water
sources are clean and well looked after and which are dirty. If the source is dirty,
what is making it dirty? In the classroom, the children to draw what they saw. Ask
the questions: is the water kept clean and safe? Discuss what they have seen.
Activity 3: Making a list of illnesses
Ask the children to make a list of illnesses that can be spread through unsafe water
and find out about them. Ask the children to investigate where the water sources
are coming from. Ask questions such as: how often is the water container cleaned?
Are cups used? Are ladles used? Are cups and ladles washed before and after use?
Is there somewhere to wash hands before eating and drinking?
24
Figure 3.3 Pond being contaminated
>
>
Activity 4: Safe water handling exercise
• The students should be asked to sit in a circle. The teacher then displays a picture
of a woman collecting water from a handpump. Ask what the person is doing (the
teacher should ask them to give a name to the lady), and whether she collects
water from the correct source.
• Now take a plastic bucket with water in it (which looks dirty) and tell them that it
is the same water taken by the woman from the handpump. Ask the students if
they have any doubts about its quality.
• Then take another plastic bucket tumbler with water and ask a student to rub
some ink on his finger and dip it in the plastic bucket. Ask the students what
happens. Also ask them the reasons why the water has become contaminated.
• Now display various pictures (pictures of unwashed vessels, dipping the hands in
water while lifting pot, dipping hands while taking water from pot, not covering the
pot and keeping it at ground level at home, dog licking the water). Ask them to
identify those behaviours that will contaminate the water.
• Finally ask them how to prevent contamination of water at home. Display various
pictures of the correct behaviours (picture of washing the vessel, no dipping hands
while lifting pot, covering the pot and taking it home, keeping the pot in a raised
position and keeping it covered, using a ladle to handle water). Finally ask them to
identify those behaviours that can help to keep the water safe from contamination.
Games
Game 1: ‘Find the right pair’
• Select volunteers for the game according to the number of pictures you, the
teacher, have or give the pictures in random order to the students in the class.
• Tell the students that the pictures given have wrong and right behaviours and they
have to match.
• Ask students to go around and find the right pair e.g. for a bad behaviour match
the ‘right’ behaviour from among the pictures given to the students.
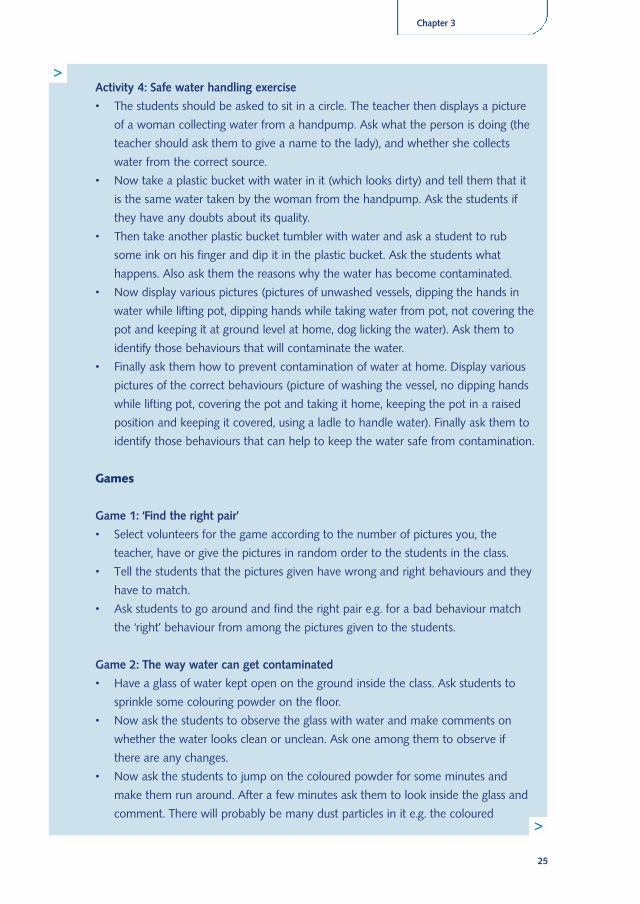
Game 2: The way water can get contaminated
• Have a glass of water kept open on the ground inside the class. Ask students to
sprinkle some colouring powder on the floor.
• Now ask the students to observe the glass with water and make comments on
whether the water looks clean or unclean. Ask one among them to observe if
there are any changes.
• Now ask the students to jump on the coloured powder for some minutes and
make them run around. After a few minutes ask them to look inside the glass and
comment. There will probably be many dust particles in it e.g. the coloured
25
Chapter 3
>
>
powder will have entered the glass and contaminated the water. Now the teacher
should stress the point of keeping water containers covered.
26
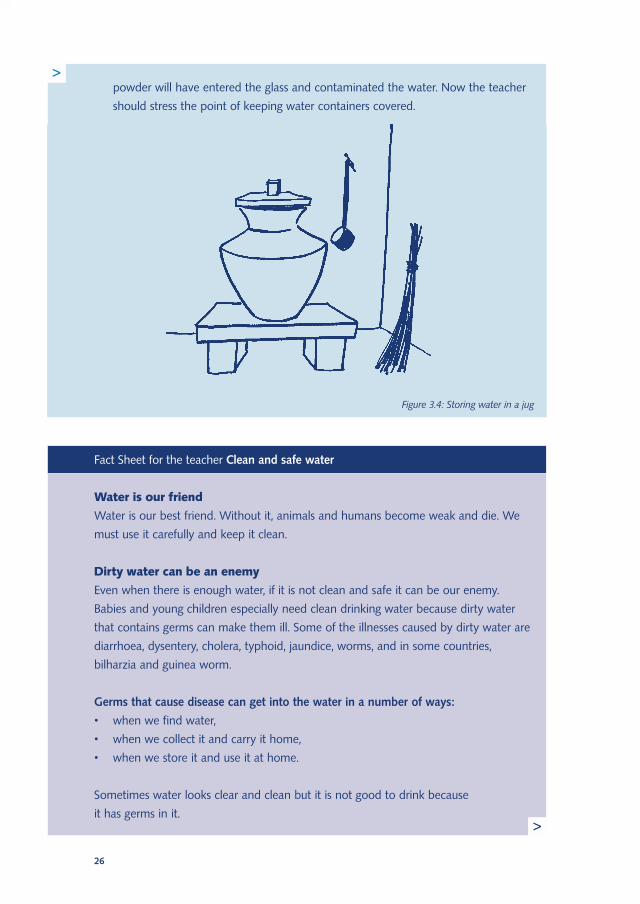
Figure 3.4: Storing water in a jug
Fact Sheet for the teacher Clean and safe water
Water is our friend
Water is our best friend. Without it, animals and humans become weak and die. We
must use it carefully and keep it clean.
Dirty water can be an enemy
Even when there is enough water, if it is not clean and safe it can be our enemy.
Babies and young children especially need clean drinking water because dirty water
that contains germs can make them ill. Some of the illnesses caused by dirty water are
diarrhoea, dysentery, cholera, typhoid, jaundice, worms, and in some countries,
bilharzia and guinea worm.
Germs that cause disease can get into the water in a number of ways:
• when we find water,
• when we collect it and carry it home,
• when we store it and use it at home.
Sometimes water looks clear and clean but it is not good to drink because
it has germs in it.
>
>
Keeping water clean and safe
We get water from many sources. Water comes from springs, rivers, ponds and wells.
It is collected from these places as well as from rainfall or taps. There are many things
that we can do to keep water clean. It is also important to keep it clean when we
carry it home, and when we store it.
Storing water
Always keep a metal or wooden cover over the container where water is stored. Wash
and dry the containers from time to time. Keep the stored water out of reach of small
children and animals. Below are some ways of making water clean.
Different ways of cleaning water
• Filtering with a cloth
Use a clean cloth (keep it well washed and dried) and place it over the empty
storage container. Tie it in place if necessary. Pour water carried from the well or
stream through the cloth to remove dirt, dust and insects.
• Using sunlight
Strong sunlight will also destroy many germs in water stored in a transparent
container and make it safer but of course leaving the cover on.
• Making a sand filter
To make a sand filter, cut the bottom off a clean plastic bottle. Cut out a circle of fine
mesh to make a wire screen large enough to block off the neck of the bottle. Put the
screen inside the bottle to cover the neck completely. Put a layer of coarse pebbles
on top of the screen, then a layer of coarse sand, and finally a layer of fine sand. Pour
water into the open end of the filter and place a clean cup, dish or container under
the filter to catch the clean water. The sand traps germs, but it needs to be taken out
of the filter and cleaned or replaced every few weeks. Replace the sand when the
water trickles through the filter more slowly or stops flowing altogether.
Drinking water
If the water has been kept clean, it is probably safe for drinking. If you know that the
water has been made safe by chemicals, you can certainly drink it safely!
If you are not sure that it is safe, the water can be made safe by boiling. Water must
be boiled for at least 10 minutes to kill all the germs. It is especially important to use
boiled water for babies, very young children and sick people. Remember to put it in a
clean container and to keep it covered.
When taking water from a storage jar, always use a clean ladle, and pour the water
into a clean glass or cup before drinking it.
27
Chapter 3
>
>
28
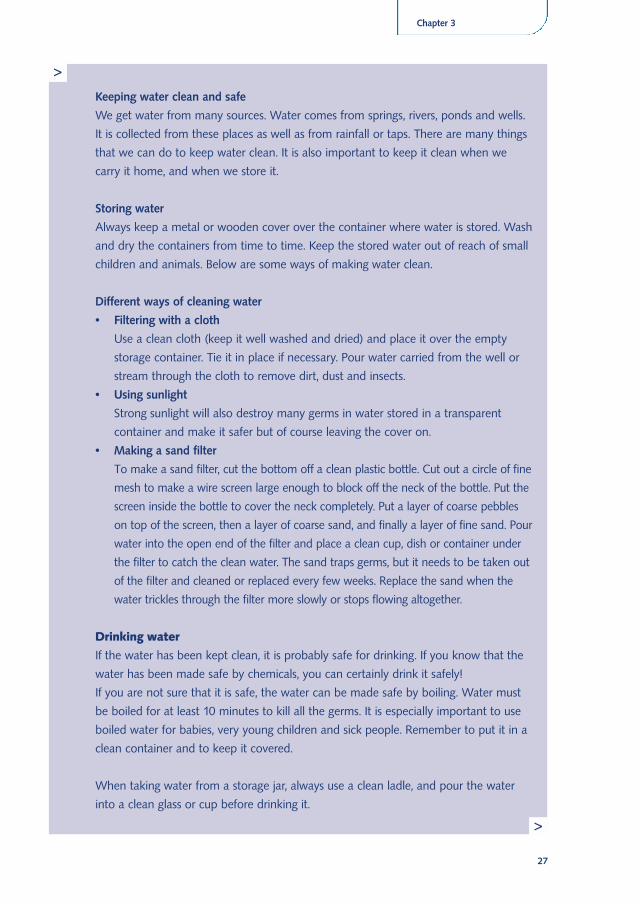
Figure 3.5 How to sterilise water for drinking purposes
Activity Sheet 5: Diarrhoea
Objective
To understand that diarrhoea is dangerous because it can both kill and cause
malnutrition. It can be prevented by keeping clean, using clean water and by eating
properly.
Learning points for the children:
• If the child has diarrhoea action should be taken immediately. Do not wait for signs
of severe dehydration. We can prevent serious dehydration by doing the following:
• Giving the child plenty to drink to replace the water that is lost, as soon as the
diarrhoea starts.
• Giving the child enough food to keep him/her strong.
• Food that contains salt is particularly important.
Activities for children
Activity 1: Collecting information about diarrhoea
• Children can collect information about diarrhoea and how common and
dangerous it is. How many times have their younger brothers and sisters had
diarrhoea in the last year? They can find out at what ages it is most common by
counting how many times children of different ages had diarrhoea.
They can see how often breast-fed babies and bottle-fed babies get diarrhoea. Which
get diarrhoea the most? Why?
How many children in the community have died of diarrhoea? This information can
be used later to help decide if different health activities have made a difference to
children’s health.
Activity 2: Knowledge of diarrhoea
• Make the group sit in a circle.
• Ask them if they or their siblings had diarrhoea recently.
• Display a picture of a child having diarrhoea in the centre of the circle. Stimulate
children to discuss the reasons why the person might have diarrhoea.
• Write their reasons on the board and let the children clarify them.
• Display all the pictures depicting possible treatments and ask them to identify the
treatments adopted in their village and display it around the picture of the child
having diarrhoea.
• Ask them the following questions:
• What are the reasons for choosing the treatment? Is it safe?
29
Chapter 3
>
• What was the effect of the treatment? Was there an improvement or did it
increase diarrhoea?
• Has there been any death in the family or in the village due to diarrhoea?
• What were the costs/resources involved in the treatment?
• Did it leave any harmful effects on the child after treatment?
• After you have identified the reasons and treatment methods adopted, explain
them in a separate session.
a. What are the reasons for getting diarrhoea?
b. What does diarrhoea lead to?
c. How do you identify dehydration?
d. What is the safe/correct treatment method for diarrhoea?
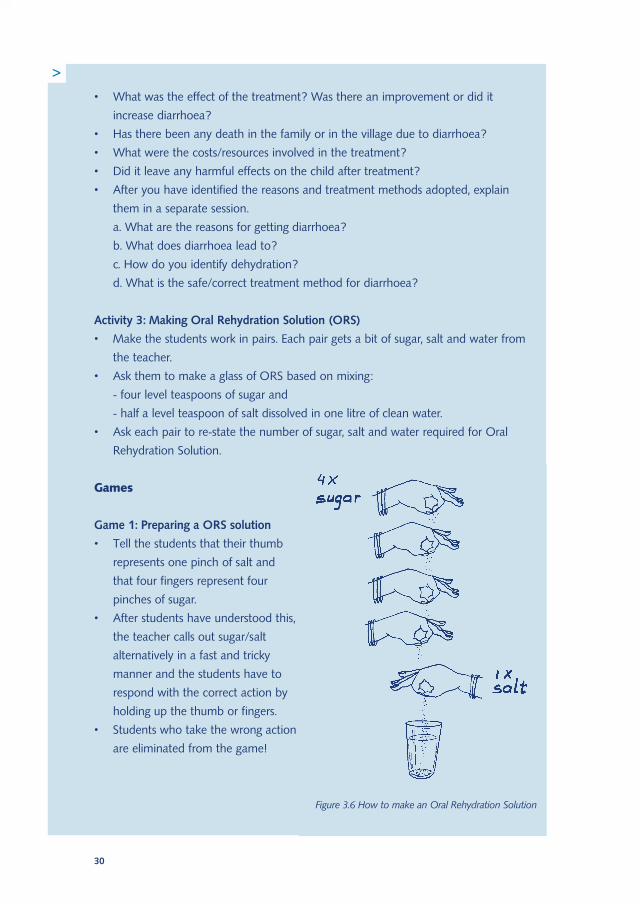
Activity 3: Making Oral Rehydration Solution (ORS)
• Make the students work in pairs. Each pair gets a bit of sugar, salt and water from
the teacher.
• Ask them to make a glass of ORS based on mixing:
- four level teaspoons of sugar and
- half a level teaspoon of salt dissolved in one litre of clean water.
• Ask each pair to re-state the number of sugar, salt and water required for Oral
Rehydration Solution.
Games
Game 1: Preparing a ORS solution
• Tell the students that their thumb
represents one pinch of salt and
that four fingers represent four
pinches of sugar.
• After students have understood this,
the teacher calls out sugar/salt
alternatively in a fast and tricky
manner and the students have to
respond with the correct action by
holding up the thumb or fingers.
• Students who take the wrong action
are eliminated from the game!
30
>
Figure 3.6 How to make an Oral Rehydration Solution

31
Chapter 3
>
Fact sheet for the teacher Diarrhoea
Diarrhoea is dangerous
Children who have diarrhoea lose a lot of water and salt, especially if they are
vomiting and have a fever. Children may die of diarrhoea, usually because they lose
too much water and vital salts from their bodies and nobody helps them to drink. This
loss of water and salts is called dehydration. The family should understand that the
water lost in diarrhoea needs to be quickly replaced.
What to do when a child has diarrhoea?
• Act immediately! Do not wait for signs of severe dehydration. We can prevent
serious dehydration by doing the following.
• Give the child plenty to drink to replace the water that is lost, as soon as the
diarrhoea starts.
• Give the child enough food to keep him/her strong.
• Food that contains salt is particularly important.
What are the signs of dehydration?
The child is thirsty or may appear irritable, restless or half-asleep. The mouth and
tongue become dry, and there are few tears when the child cries. Eyes appear sunken
and when the skin is pinched it returns to normal slowly. These signs only appear if the
child becomes very dehydrated from diarrhoea. A child with these signs is in great
danger.
Figure 3.7: Danger signs of a child who is dehydrated
Take the child to a health worker if any of these danger signs of dehydration begin or
if the diarrhoea lasts more than two days. Keep giving the child liquids (the oral
rehydration drink is best) while going to the health centre.
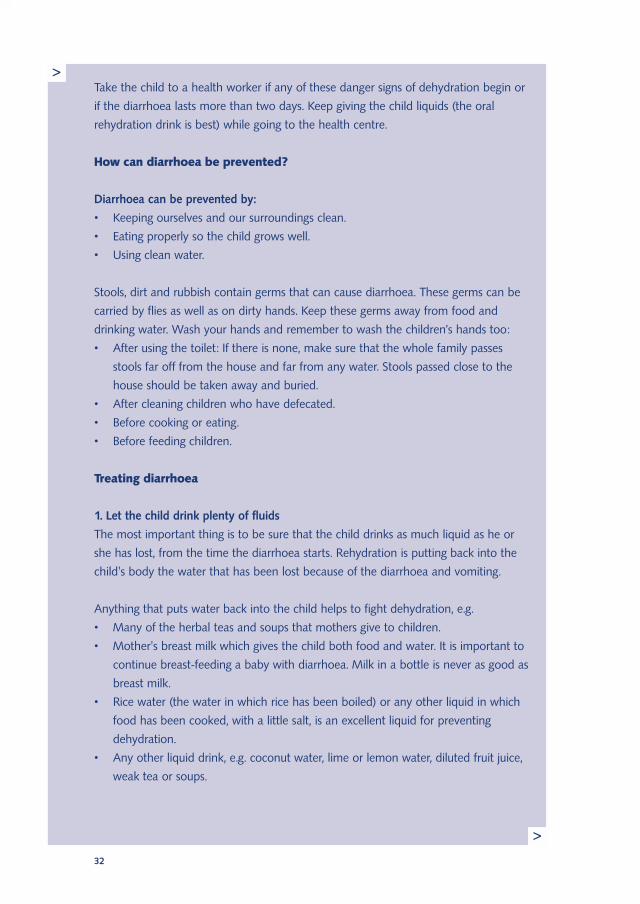
How can diarrhoea be prevented?
Diarrhoea can be prevented by:
• Keeping ourselves and our surroundings clean.
• Eating properly so the child grows well.
• Using clean water.
Stools, dirt and rubbish contain germs that can cause diarrhoea. These germs can be
carried by flies as well as on dirty hands. Keep these germs away from food and
drinking water. Wash your hands and remember to wash the children’s hands too:
• After using the toilet: If there is none, make sure that the whole family passes
stools far off from the house and far from any water. Stools passed close to the
house should be taken away and buried.
• After cleaning children who have defecated.
• Before cooking or eating.
• Before feeding children.
Treating diarrhoea
1. Let the child drink plenty of fluids
The most important thing is to be sure that the child drinks as much liquid as he or
she has lost, from the time the diarrhoea starts. Rehydration is putting back into the
child's body the water that has been lost because of the diarrhoea and vomiting.
Anything that puts water back into the child helps to fight dehydration, e.g.
• Many of the herbal teas and soups that mothers give to children.
• Mother's breast milk which gives the child both food and water. It is important to
continue breast-feeding a baby with diarrhoea. Milk in a bottle is never as good as
breast milk.
• Rice water (the water in which rice has been boiled) or any other liquid in which
food has been cooked, with a little salt, is an excellent liquid for preventing
dehydration.
• Any other liquid drink, e.g. coconut water, lime or lemon water, diluted fruit juice,
weak tea or soups.
32
>
>
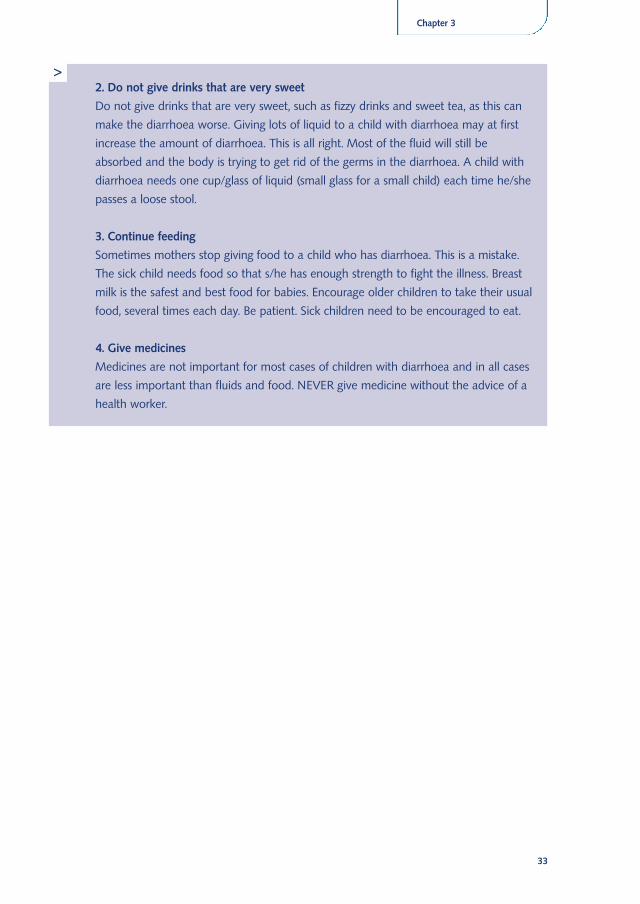
>2. Do not give drinks that are very sweet
Do not give drinks that are very sweet, such as fizzy drinks and sweet tea, as this can
make the diarrhoea worse. Giving lots of liquid to a child with diarrhoea may at first
increase the amount of diarrhoea. This is all right. Most of the fluid will still be
absorbed and the body is trying to get rid of the germs in the diarrhoea. A child with
diarrhoea needs one cup/glass of liquid (small glass for a small child) each time he/she
passes a loose stool.
3. Continue feeding
Sometimes mothers stop giving food to a child who has diarrhoea. This is a mistake.
The sick child needs food so that s/he has enough strength to fight the illness. Breast
milk is the safest and best food for babies. Encourage older children to take their usual
food, several times each day. Be patient. Sick children need to be encouraged to eat.
4. Give medicines
Medicines are not important for most cases of children with diarrhoea and in all cases
are less important than fluids and food. NEVER give medicine without the advice of a
health worker.
33
Chapter 3
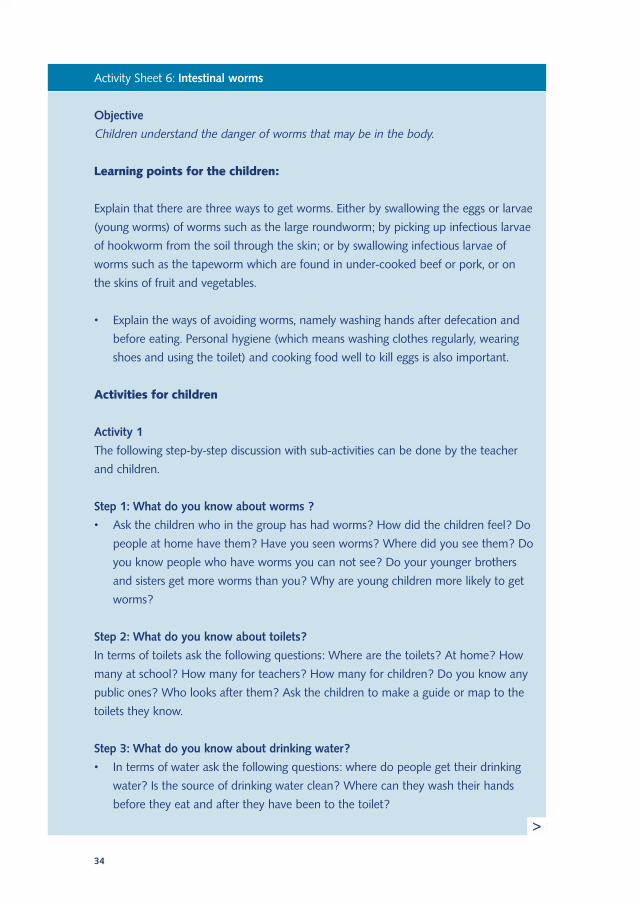
Activity Sheet 6: Intestinal worms
Objective
Children understand the danger of worms that may be in the body.
Learning points for the children:
Explain that there are three ways to get worms. Either by swallowing the eggs or larvae
(young worms) of worms such as the large roundworm; by picking up infectious larvae
of hookworm from the soil through the skin; or by swallowing infectious larvae of
worms such as the tapeworm which are found in under-cooked beef or pork, or on
the skins of fruit and vegetables.
• Explain the ways of avoiding worms, namely washing hands after defecation and
before eating. Personal hygiene (which means washing clothes regularly, wearing
shoes and using the toilet) and cooking food well to kill eggs is also important.
Activities for children
Activity 1
The following step-by-step discussion with sub-activities can be done by the teacher
and children.
Step 1: What do you know about worms ?
• Ask the children who in the group has had worms? How did the children feel? Do
people at home have them? Have you seen worms? Where did you see them? Do
you know people who have worms you can not see? Do your younger brothers
and sisters get more worms than you? Why are young children more likely to get
worms?
Step 2: What do you know about toilets?
In terms of toilets ask the following questions: Where are the toilets? At home? How
many at school? How many for teachers? How many for children? Do you know any
public ones? Who looks after them? Ask the children to make a guide or map to the
toilets they know.
Step 3: What do you know about drinking water?
• In terms of water ask the following questions: where do people get their drinking
water? Is the source of drinking water clean? Where can they wash their hands
before they eat and after they have been to the toilet?
34
>
35
Chapter 3
>
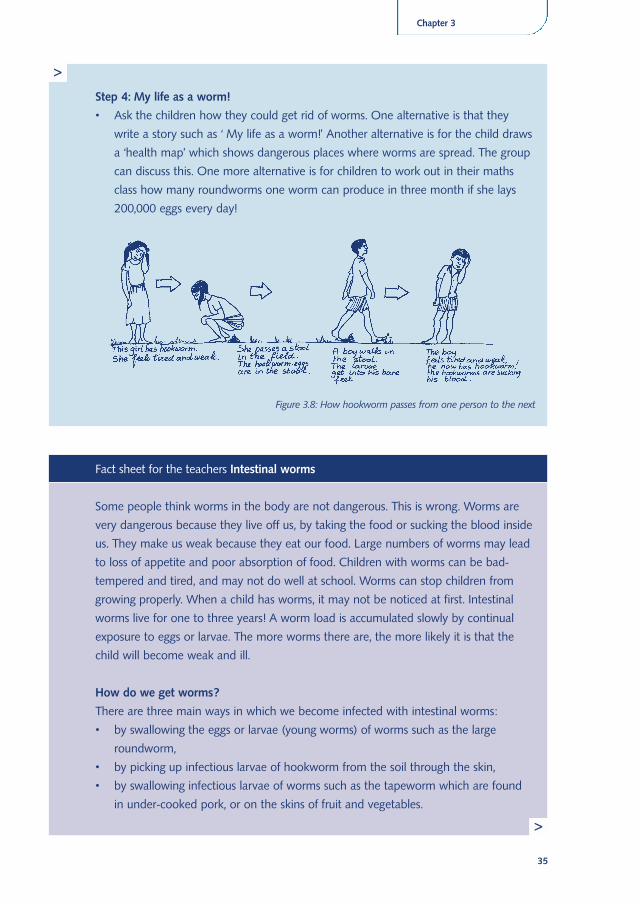
Figure 3.8: How hookworm passes from one person to the next
Step 4: My life as a worm!
• Ask the children how they could get rid of worms. One alternative is that they
write a story such as ‘ My life as a worm!’ Another alternative is for the child draws
a ‘health map’ which shows dangerous places where worms are spread. The group
can discuss this. One more alternative is for children to work out in their maths
class how many roundworms one worm can produce in three month if she lays
200,000 eggs every day!
>
Fact sheet for the teachers Intestinal worms
Some people think worms in the body are not dangerous. This is wrong. Worms are
very dangerous because they live off us, by taking the food or sucking the blood inside
us. They make us weak because they eat our food. Large numbers of worms may lead
to loss of appetite and poor absorption of food. Children with worms can be bad-
tempered and tired, and may not do well at school. Worms can stop children from
growing properly. When a child has worms, it may not be noticed at first. Intestinal
worms live for one to three years! A worm load is accumulated slowly by continual
exposure to eggs or larvae. The more worms there are, the more likely it is that the
child will become weak and ill.
How do we get worms?
There are three main ways in which we become infected with intestinal worms:
• by swallowing the eggs or larvae (young worms) of worms such as the large
roundworm,
• by picking up infectious larvae of hookworm from the soil through the skin,
• by swallowing infectious larvae of worms such as the tapeworm which are found
in under-cooked pork, or on the skins of fruit and vegetables.
During its lifetime, one worm can lay millions of tiny eggs, which we cannot see, but
only a few of these eggs actually become worms! When a worm reaches the intestine
it lays eggs which pass out of the body in the stools. Most worm eggs take over a
week to become infectious, so old stools are more dangerous than fresh stools.
If the stools are left where we walk and sit and eat, the eggs in the stools get onto
things we touch: furniture, water, soil, dust, etc. Flies can move from the stools and
carry the eggs onto our plates and cups, or onto the food we eat. Eggs also get onto
food that is prepared or eaten with dirty hands. We swallow these eggs without
knowing and they grow into worms inside us. Then they travel through the different
parts of our body until they reach our intestines, where they have easy access to our
food.
How do we prevent worms?
To become infected, a person needs to come in contact with old stools, not freshly
passed stools. Even though stools may have rooted away and can no longer be seen
on the ground, they are still dangerous. Although the ground may appear to be clean,
the eggs of some worms can live for many months in moist and shady places. It is
therefore important that children are encouraged to use a toilet from an early age.
Where this is not possible, all traces of stools lying on open ground should be
removed, and either dropped in a toilet or carefully buried in a newly dug hold. The
eggs may continue to develop even when the stools are buried, so the hole should be
deep. It is not enough to simply cover the stools with dirt.
Children should also be taught to wash their hands after defecation, and before eating.
Personal hygiene is very important, as it is possible for a child to become reinfected
immediately after treatment, so that within a few months the child may have as many
worms as before. Because an infection can be difficult to diagnose, and because the
treatment is simple and harmless, it is recommended that all members of a family
should be treated to avoid infection from the person suffering from worms.
36
>
37
Chapter 3
Activity Sheet 7: Malaria
Objective
To comprehend how and when malaria is spread and how it can be avoided.
Learning points for children:
Explain that malaria is a killer disease. One million children die of it every year! The
disease leaves many other children and adults weak and unable to do things.
• Explain that malaria is spread by mosquitoes and affects people in many countries.
Activities for children
Activity 1: Why is malaria common?
Ask the children why malaria is common. Ask them how many of their family
members have had malaria in the last year; how often did they have it; in which
months did they fall ill. Lastly and most importantly ask how to avoid getting malaria.
Activity 2: Mosquito map!
Ask the children to make a map that explains where mosquitoes breed based on the
rainy season. The map can be made of the area around the school, their home, etc.
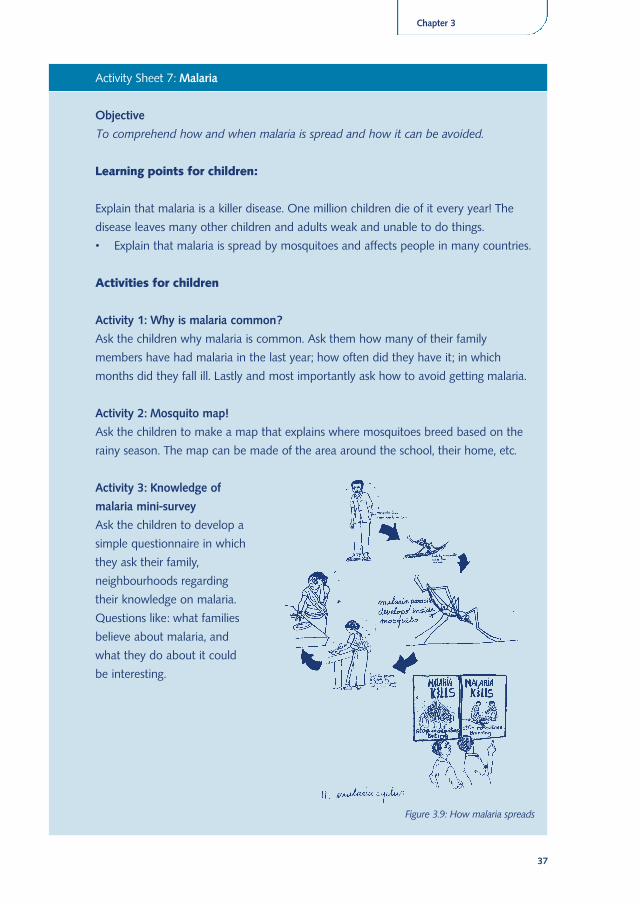
Activity 3: Knowledge of
malaria mini-survey
Ask the children to develop a
simple questionnaire in which
they ask their family,
neighbourhoods regarding
their knowledge on malaria.
Questions like: what families
believe about malaria, and
what they do about it could
be interesting.
Figure 3.9: How malaria spreads
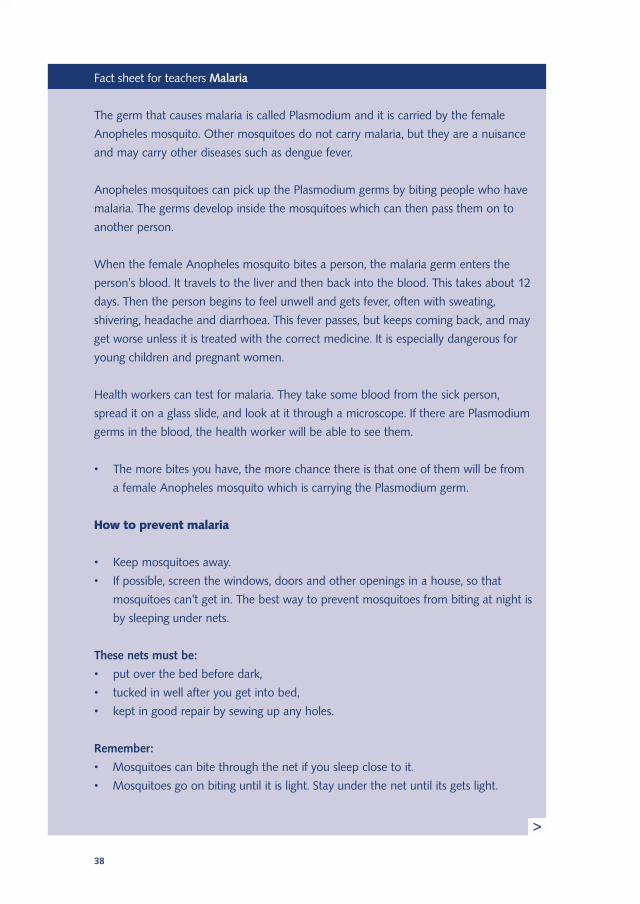
Fact sheet for teachers Malaria
The germ that causes malaria is called Plasmodium and it is carried by the female
Anopheles mosquito. Other mosquitoes do not carry malaria, but they are a nuisance
and may carry other diseases such as dengue fever.
Anopheles mosquitoes can pick up the Plasmodium germs by biting people who have
malaria. The germs develop inside the mosquitoes which can then pass them on to
another person.
When the female Anopheles mosquito bites a person, the malaria germ enters the
person's blood. It travels to the liver and then back into the blood. This takes about 12
days. Then the person begins to feel unwell and gets fever, often with sweating,
shivering, headache and diarrhoea. This fever passes, but keeps coming back, and may
get worse unless it is treated with the correct medicine. It is especially dangerous for
young children and pregnant women.
Health workers can test for malaria. They take some blood from the sick person,
spread it on a glass slide, and look at it through a microscope. If there are Plasmodium
germs in the blood, the health worker will be able to see them.
• The more bites you have, the more chance there is that one of them will be from
a female Anopheles mosquito which is carrying the Plasmodium germ.
How to prevent malaria
• Keep mosquitoes away.
• If possible, screen the windows, doors and other openings in a house, so that
mosquitoes can't get in. The best way to prevent mosquitoes from biting at night is
by sleeping under nets.
These nets must be:
• put over the bed before dark,
• tucked in well after you get into bed,
• kept in good repair by sewing up any holes.
Remember:
• Mosquitoes can bite through the net if you sleep close to it.
• Mosquitoes go on biting until it is light. Stay under the net until its gets light.
38
>
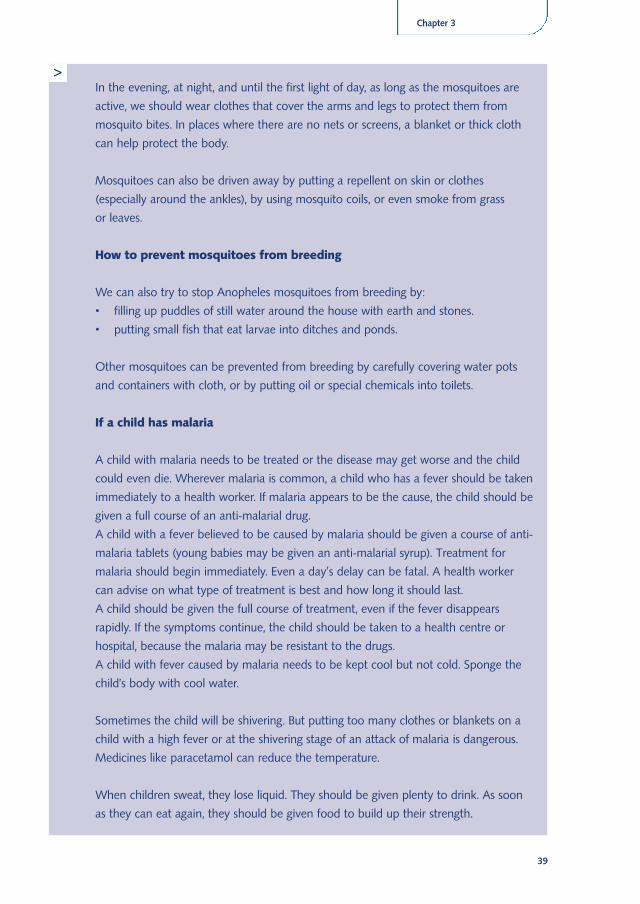
In the evening, at night, and until the first light of day, as long as the mosquitoes are
active, we should wear clothes that cover the arms and legs to protect them from
mosquito bites. In places where there are no nets or screens, a blanket or thick cloth
can help protect the body.
Mosquitoes can also be driven away by putting a repellent on skin or clothes
(especially around the ankles), by using mosquito coils, or even smoke from grass
or leaves.
How to prevent mosquitoes from breeding
We can also try to stop Anopheles mosquitoes from breeding by:
• filling up puddles of still water around the house with earth and stones.
• putting small fish that eat larvae into ditches and ponds.
Other mosquitoes can be prevented from breeding by carefully covering water pots
and containers with cloth, or by putting oil or special chemicals into toilets.
If a child has malaria
A child with malaria needs to be treated or the disease may get worse and the child
could even die. Wherever malaria is common, a child who has a fever should be taken
immediately to a health worker. If malaria appears to be the cause, the child should be
given a full course of an anti-malarial drug.
A child with a fever believed to be caused by malaria should be given a course of anti-
malaria tablets (young babies may be given an anti-malarial syrup). Treatment for
malaria should begin immediately. Even a day's delay can be fatal. A health worker
can advise on what type of treatment is best and how long it should last.
A child should be given the full course of treatment, even if the fever disappears
rapidly. If the symptoms continue, the child should be taken to a health centre or
hospital, because the malaria may be resistant to the drugs.
A child with fever caused by malaria needs to be kept cool but not cold. Sponge the
child’s body with cool water.
Sometimes the child will be shivering. But putting too many clothes or blankets on a
child with a high fever or at the shivering stage of an attack of malaria is dangerous.
Medicines like paracetamol can reduce the temperature.
When children sweat, they lose liquid. They should be given plenty to drink. As soon
as they can eat again, they should be given food to build up their strength.
39
Chapter 3
>
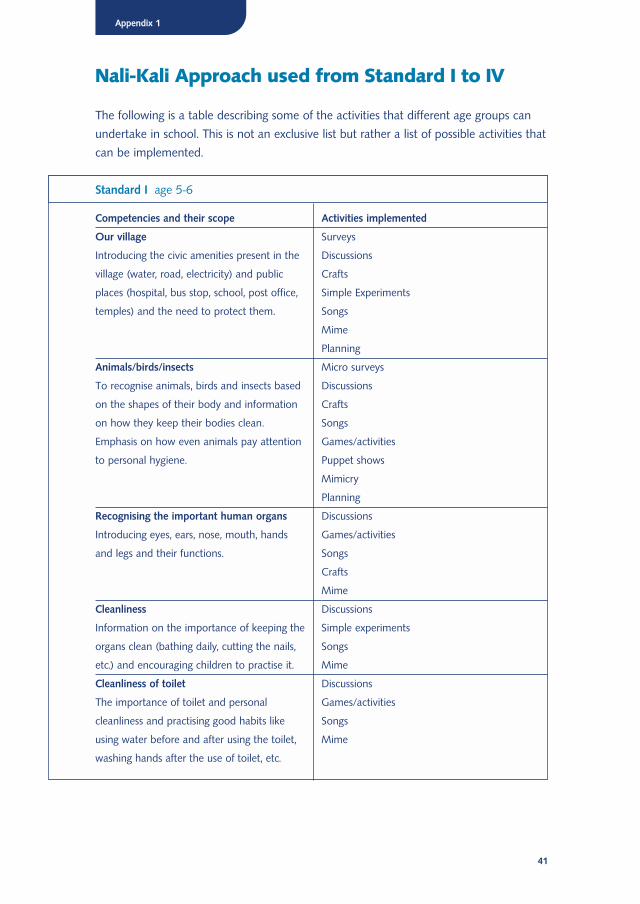
Nali-Kali Approach used from Standard I to IV
The following is a table describing some of the activities that different age groups can
undertake in school. This is not an exclusive list but rather a list of possible activities that
can be implemented.
41
Appendix 1
Competencies and their scope
Our village
Introducing the civic amenities present in the
village (water, road, electricity) and public
places (hospital, bus stop, school, post office,
temples) and the need to protect them.
Animals/birds/insects
To recognise animals, birds and insects based
on the shapes of their body and information
on how they keep their bodies clean.
Emphasis on how even animals pay attention
to personal hygiene.
Recognising the important human organs
Introducing eyes, ears, nose, mouth, hands
and legs and their functions.
Cleanliness
Information on the importance of keeping the
organs clean (bathing daily, cutting the nails,
etc.) and encouraging children to practise it.
Cleanliness of toilet
The importance of toilet and personal
cleanliness and practising good habits like
using water before and after using the toilet,
washing hands after the use of toilet, etc.
Standard I age 5-6
Activities implemented
Surveys
Discussions
Crafts
Simple Experiments
Songs
Mime
Planning
Micro surveys
Discussions
Crafts
Songs
Games/activities
Puppet shows
Mimicry
Planning
Discussions
Games/activities
Songs
Crafts
Mime
Discussions
Simple experiments
Songs
Mime
Discussions
Games/activities
Songs
Mime
42
43
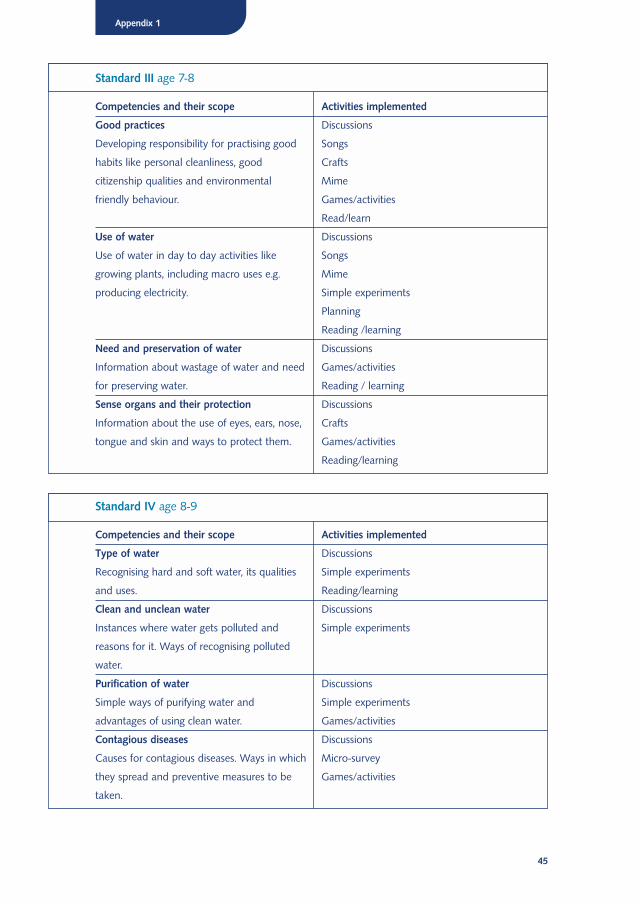
Competencies and their scope
Maintaining things neatly and carefully.
Good habits like keeping the books neatly,
maintaining punctuality, taking a bath daily
and brushing the teeth, etc. are encouraged.
These are essential characteristics that lead to
‘good’ citizenship.
Rules for the house and school
The rules followed at home like waking up
early, using the toilet, bathing, etc.
Rues of the school: being punctual, keeping
the school surrounding and toilets clean, etc.
are highlighted and encouraged.
Healthy food: Food habits
The food that is eaten should always be fresh,
clean and varied. Hands are to be washed
before and after eating. The place where the
food is prepared and the vessels used to
prepare the food should be clean. These
points along with various others are
highlighted to create awareness among
children.
Preservation of food and water
The food and water that we make use of
should be clean. Protective measures like
keeping storage jars closed, protecting public
water sources and using water carefully
should be practised.
Cleaning of food
Washing vegetable and fruits before use and
covering food. Not using uncovered food,
washing hands before and after eating food,
etc., are emphasised.
Standard II age 6-7
Activities implemented
Discussion
Games/activities
Mime
Discussion
Craft
Mime
Songs
Games/activities
Micro-surveys
Discussions
Games/activities
Songs
Mime
Surveys
Discussions
Crafts
Simple experiments
Surveys
Discussions
Crafts
Simple experiments
Appendix 1
45
Appendix 1
Competencies and their scope
Good practices
Developing responsibility for practising good
habits like personal cleanliness, good
citizenship qualities and environmental
friendly behaviour.
Use of water
Use of water in day to day activities like
growing plants, including macro uses e.g.
producing electricity.
Need and preservation of water
Information about wastage of water and need
for preserving water.
Sense organs and their protection
Information about the use of eyes, ears, nose,
tongue and skin and ways to protect them.
Standard III age 7-8
Activities implemented
Discussions
Songs
Crafts
Mime
Games/activities
Read/learn
Discussions
Songs
Mime
Simple experiments
Planning
Reading /learning
Discussions
Games/activities
Reading / learning
Discussions
Crafts
Games/activities
Reading/learning
Competencies and their scope
Type of water
Recognising hard and soft water, its qualities
and uses.
Clean and unclean water
Instances where water gets polluted and
reasons for it. Ways of recognising polluted
water.
Purification of water
Simple ways of purifying water and
advantages of using clean water.
Contagious diseases
Causes for contagious diseases. Ways in which
they spread and preventive measures to be
taken.
Standard IV age 8-9
Activities implemented
Discussions
Simple experiments
Reading/learning
Discussions
Simple experiments
Discussions
Simple experiments
Games/activities
Discussions
Micro-survey
Games/activities
46
Bailey, D., Hawes, H., and Bonati, G. 1992. Child-to-child: A resource book- Part 2- The
child-to-child activity sheets. The Child-to-Child Trust. London.
WaterAid India, 2001. Schools- The channels of hygiene promotion- Integrated hygiene
promotion in schools. Tamil Nadu.
47
References