SCEIS REQUISITIONING, PURCHASING, AND...
60
SCEIS REQUISITIONING, PURCHASING, AND RECEIVING GOODS AND SERVICES SUPPLEMENTAL COURSE SRM200i End User Training Columbia, SC SRM 7.2 Upgrade Version 2 – October 16, 2013
Transcript of SCEIS REQUISITIONING, PURCHASING, AND...
SCEIS REQUISITIONING,
PURCHASING, AND RECEIVING
GOODS AND SERVICES
SUPPLEMENTAL COURSE
SRM200i
End User Training
Columbia, SC
SRM 7.2 Upgrade
Version 2 – October 16, 2013
2
Welcome and Introductions
Welcome to SCEIS SRM 200i, Shopping Cart
Introductions
Sign-in sheet
Restrooms
Breaks
Parking lot
Classroom Logistics
3
Classroom etiquette
– Cell phones off/silenced
– No side conversations
Feel free to ask questions
No email or internet usage during class except
at breaks
Lesson 1: Key Terms and Concepts
– Supplier Relationship Management (SRM) 7.2
– Shopping Cart
– Shopping Cart Creator
– Shopping Cart Approver
– Documents in SRM
– Workflow
– Personalized Object Work List “Check Status”
– Budget check
– Enterprise Core Component (ECC) (Goods Receipt/MIGO)
Course Agenda
4
Lesson 2: How to Create a Shopping Cart
– Access Shopping Cart Options
– Shopping Cart Options
NIGP Search
Contract Search
Punch-out Catalog
Old Shopping Carts and Templates
Internal Goods/Services (inventory agencies only)
Course Agenda
5
Lesson 3: Exercises
Lesson 4: Best Practices and Tips
Lesson 5: Course Summary
Lesson 6: Link to and List of uPerforms
Business Process Procedures Related to this
Presentation
Course Agenda
6
7
Course Learning Objectives
Upon completion of this course, you should be
able to:
– Describe the goods and services requisitioning
processes in the Supplier Relationship Management
(SRM) system.
– Define key terms and concepts.
– Create a shopping cart for different types of
goods/services in SRM.
– Understand how to “look-up” the status of a Shopping
Cart.

8
Course Learning Objectives con’t
Upon completion of this course, you should be
able to:
– Manage a Rejected Shopping Cart
– Add and Replace an Approver
– Access resources for ongoing learning and practicing of
Shopping Cart functionality (uPerforms)
LESSON 1: KEY TERMS AND
CONCEPTS
Upon completion of this lesson, you should be able to:
– Describe key terms and concepts related to the
procurement process.
– Understand the procurement process in SCEIS SRM.
Lesson 1 Learning Objectives
10
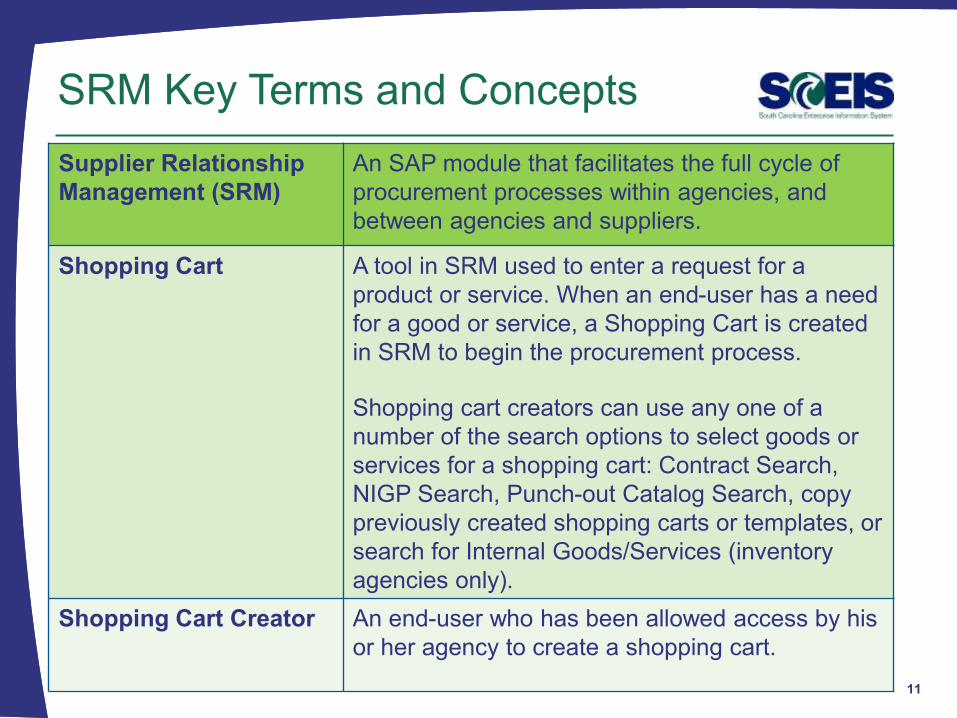
Supplier Relationship
Management (SRM)
An SAP module that facilitates the full cycle of
procurement processes within agencies, and
between agencies and suppliers.
Shopping Cart A tool in SRM used to enter a request for a
product or service. When an end-user has a need
for a good or service, a Shopping Cart is created
in SRM to begin the procurement process.
Shopping cart creators can use any one of a
number of the search options to select goods or
services for a shopping cart: Contract Search,
NIGP Search, Punch-out Catalog Search, copy
previously created shopping carts or templates, or
search for Internal Goods/Services (inventory
agencies only).
Shopping Cart Creator An end-user who has been allowed access by his
or her agency to create a shopping cart.
SRM Key Terms and Concepts
11
SRM Key Terms and Concepts
12
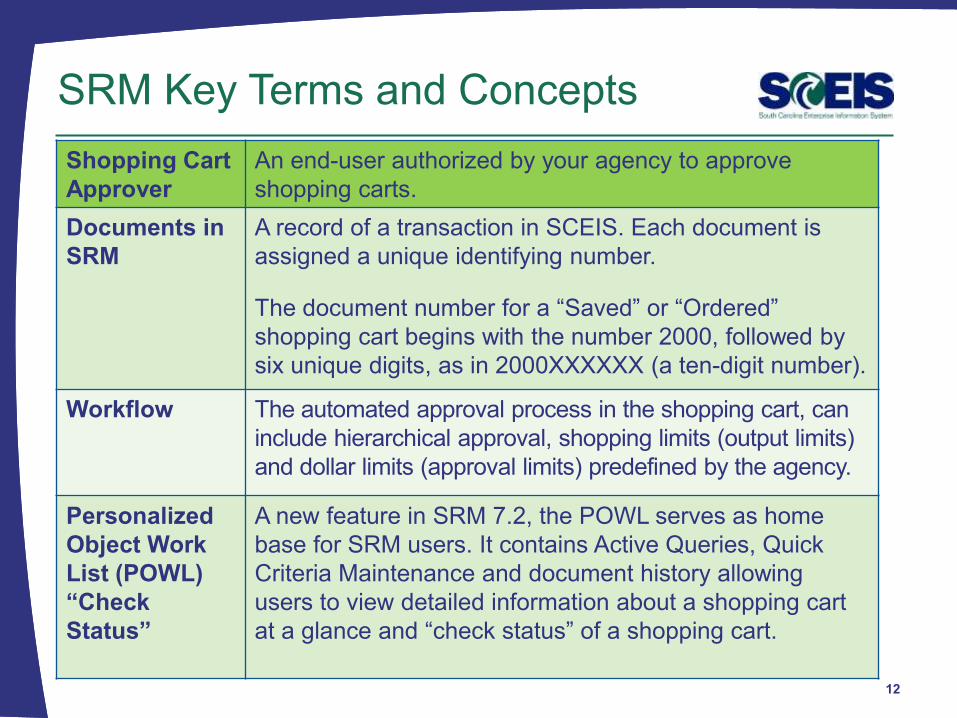
Shopping Cart
Approver
An end-user authorized by your agency to approve
shopping carts.
Documents in
SRM
A record of a transaction in SCEIS. Each document is
assigned a unique identifying number.
The document number for a “Saved” or “Ordered”
shopping cart begins with the number 2000, followed by
six unique digits, as in 2000XXXXXX (a ten-digit number).
Workflow The automated approval process in the shopping cart, can
include hierarchical approval, shopping limits (output limits)
and dollar limits (approval limits) predefined by the agency.
Personalized
Object Work
List (POWL)
“Check
Status”
A new feature in SRM 7.2, the POWL serves as home
base for SRM users. It contains Active Queries, Quick
Criteria Maintenance and document history allowing
users to view detailed information about a shopping cart
at a glance and “check status” of a shopping cart.
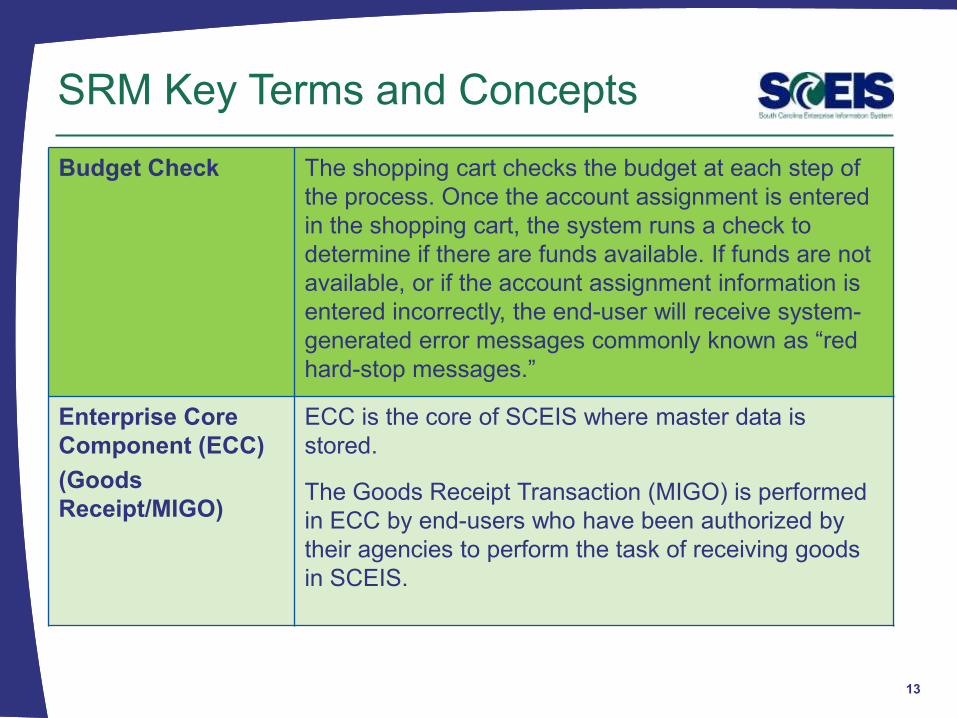
Budget Check The shopping cart checks the budget at each step of
the process. Once the account assignment is entered
in the shopping cart, the system runs a check to
determine if there are funds available. If funds are not
available, or if the account assignment information is
entered incorrectly, the end-user will receive system-
generated error messages commonly known as “red
hard-stop messages.”
Enterprise Core
Component (ECC)
(Goods
Receipt/MIGO)
ECC is the core of SCEIS where master data is
stored.
The Goods Receipt Transaction (MIGO) is performed
in ECC by end-users who have been authorized by
their agencies to perform the task of receiving goods
in SCEIS.
SRM Key Terms and Concepts
13
Goods Receipt (MIGO) Additional
Information
14
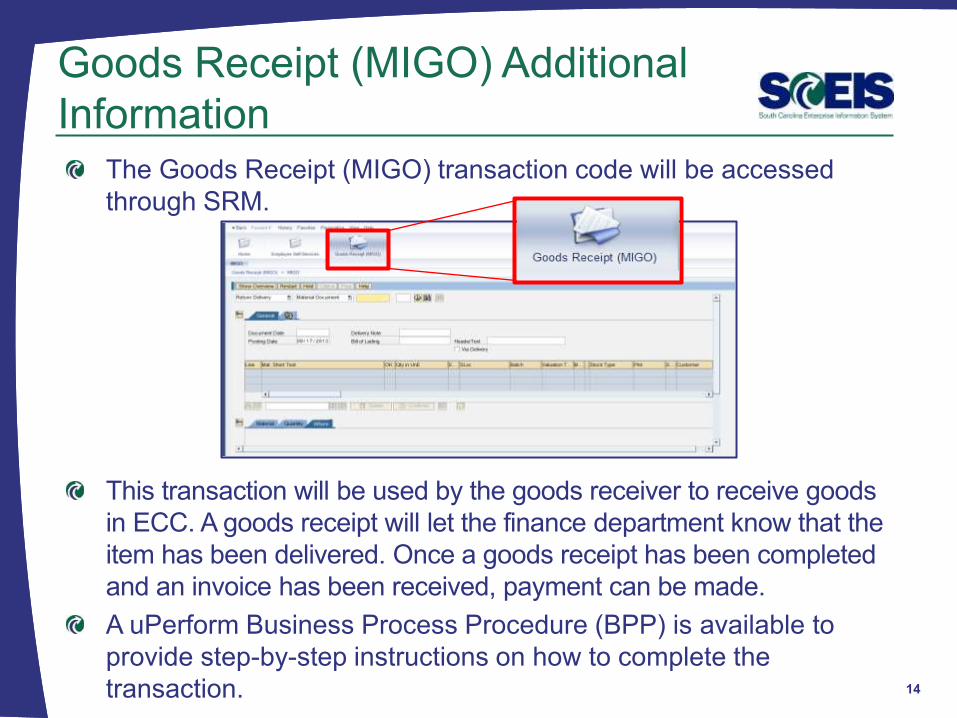
The Goods Receipt (MIGO) transaction code will be accessed
through SRM.
This transaction will be used by the goods receiver to receive goods
in ECC. A goods receipt will let the finance department know that the
item has been delivered. Once a goods receipt has been completed
and an invoice has been received, payment can be made.
A uPerform Business Process Procedure (BPP) is available to
provide step-by-step instructions on how to complete the
transaction.
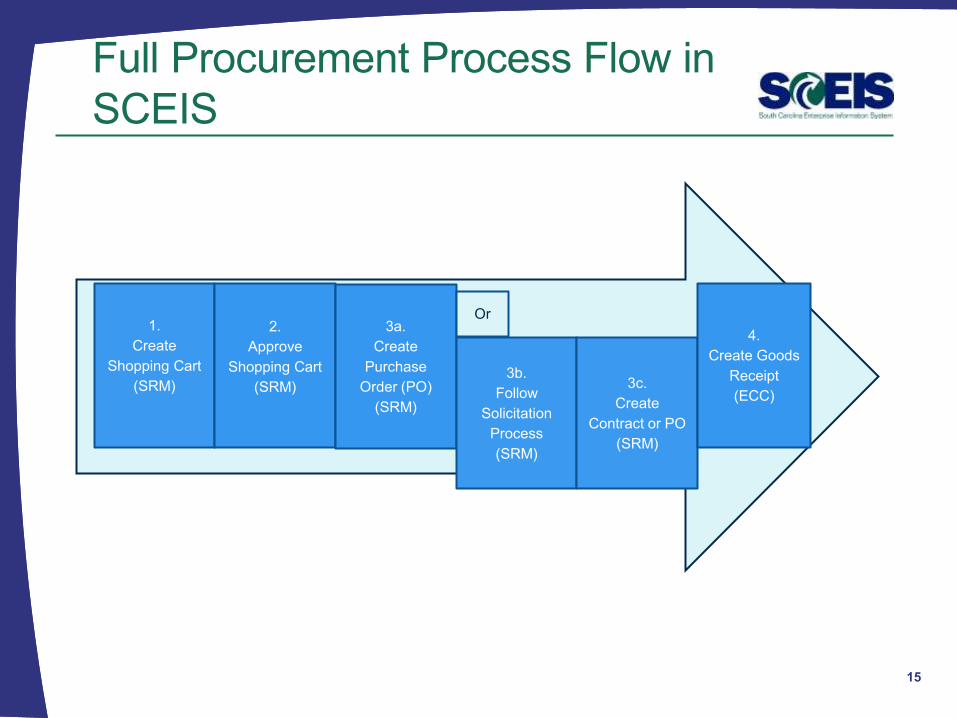
Full Procurement Process Flow in
SCEIS
15
1.
Create
Shopping Cart
(SRM)
2.
Approve
Shopping Cart
(SRM)
3a.
Create
Purchase
Order (PO)
(SRM)
Or
3b.
Follow
Solicitation
Process
(SRM)
3c.
Create
Contract or PO
(SRM)
4.
Create Goods
Receipt
(ECC)

You should now be able to:
– Understand the key terms and concepts of the
SRM Shopping Cart.
– Describe the process flow of procurement and
relevant SAP modules.
Lesson 1 Summary
16
LESSON 2: HOW TO CREATE A
SHOPPING CART
Lesson 2 Learning Objectives
Learn the steps to create a shopping cart (shop in 3
steps).
Understand different options to select goods/services
for creation of a shopping cart: Contract Search, NIGP
Search, Punch-out Catalog Search, Old Shopping
Carts and Templates, or search for Internal
Goods/Services (inventory agencies only).
Detail processes for:
– How to find and check the status of a shopping cart.
– How to copy an existing shopping cart.
– How to manage a rejected shopping cart.
– How to add and replace an approver.
18
Log-on
19
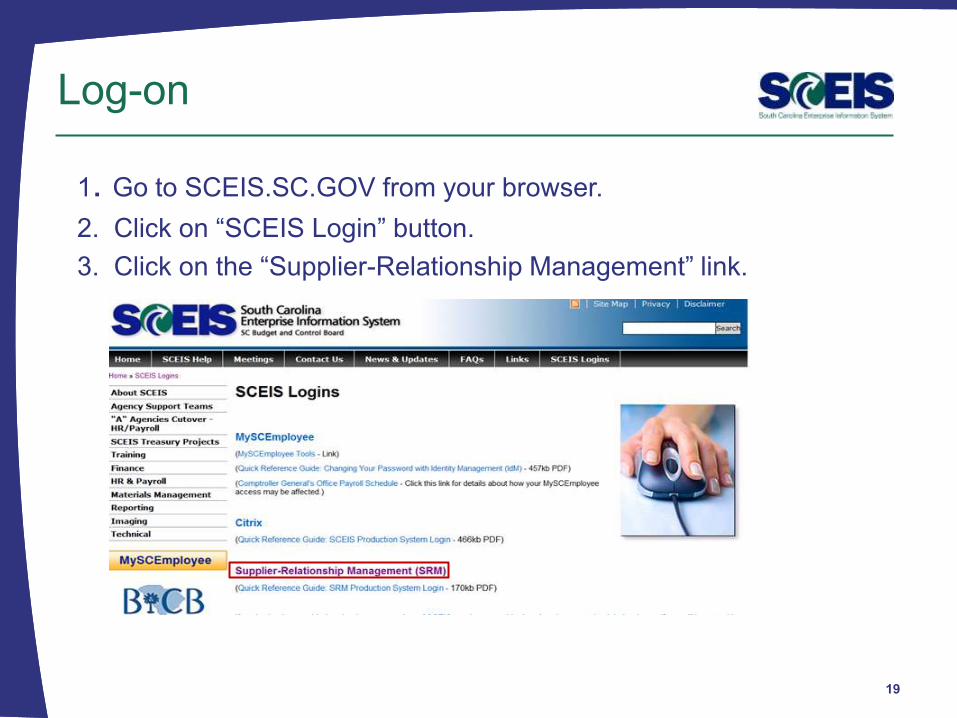
1. Go to SCEIS.SC.GOV from your browser.
2. Click on “SCEIS Login” button.
3. Click on the “Supplier-Relationship Management” link.
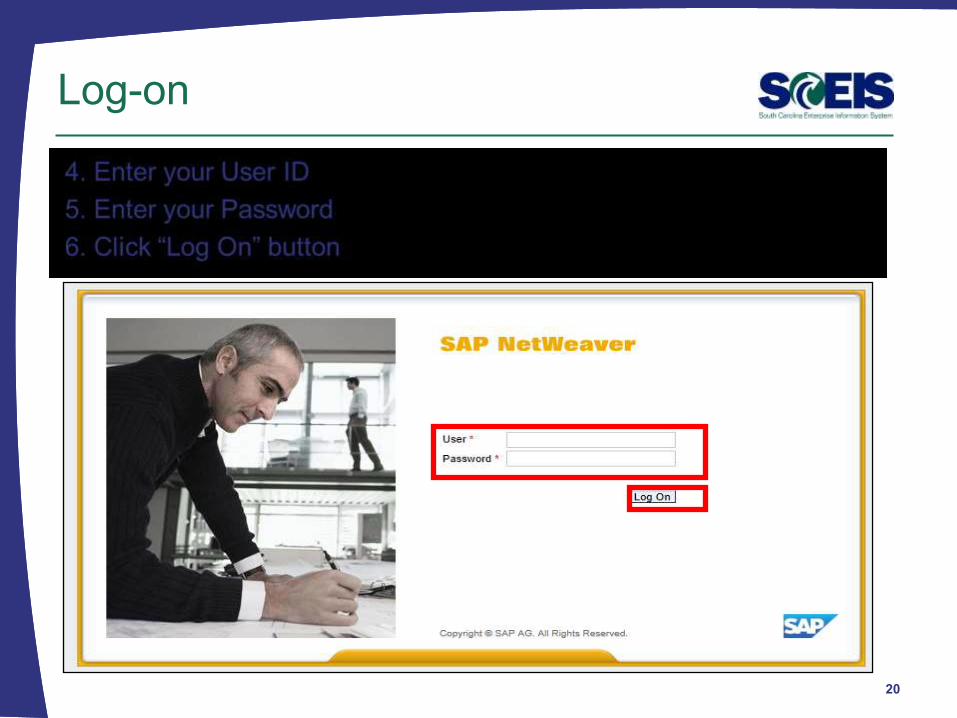
Log-on
20
Shopping Cart Creator SRM Folders
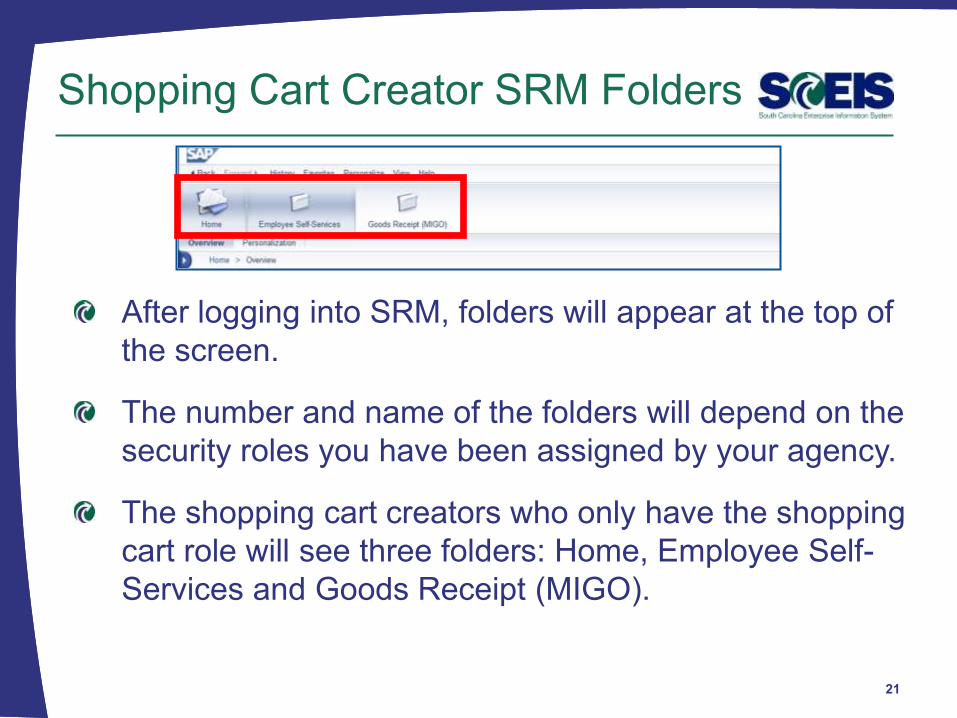
After logging into SRM, folders will appear at the top of
the screen.
The number and name of the folders will depend on the
security roles you have been assigned by your agency.
The shopping cart creators who only have the shopping
cart role will see three folders: Home, Employee Self-
Services and Goods Receipt (MIGO).
21
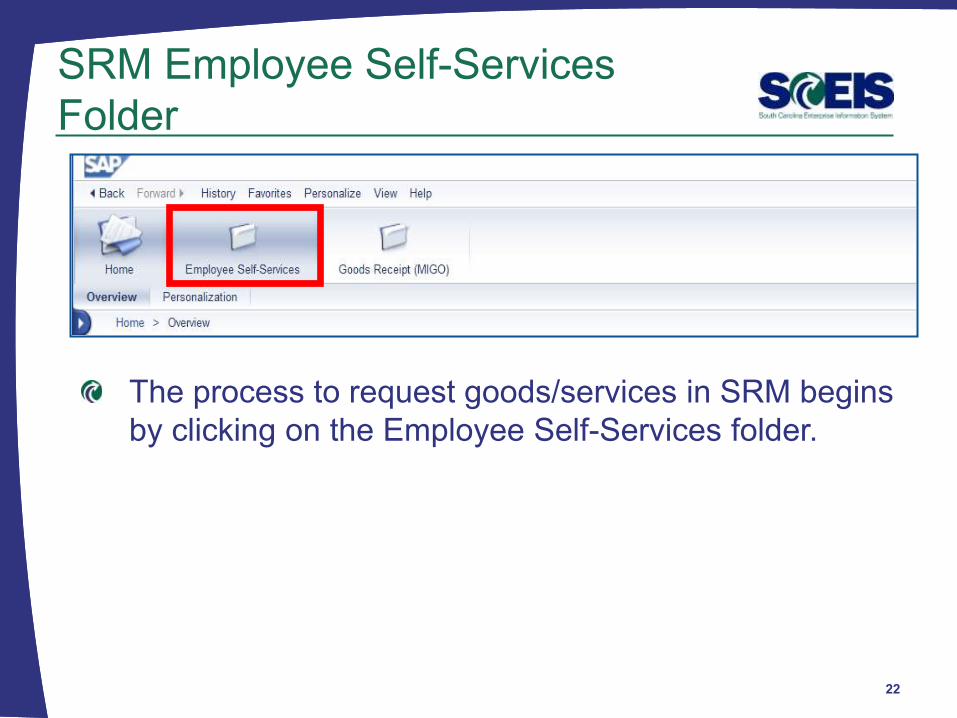
SRM Employee Self-Services
Folder
22
The process to request goods/services in SRM begins
by clicking on the Employee Self-Services folder.

Employee Self-Services
Folder Options
23
Shop: Create a new shopping cart.
Advanced Search: Search for an existing shopping
cart by using specific search criteria such as
shopping cart number, purchase order number,
timeframe, etc.

Shop
24
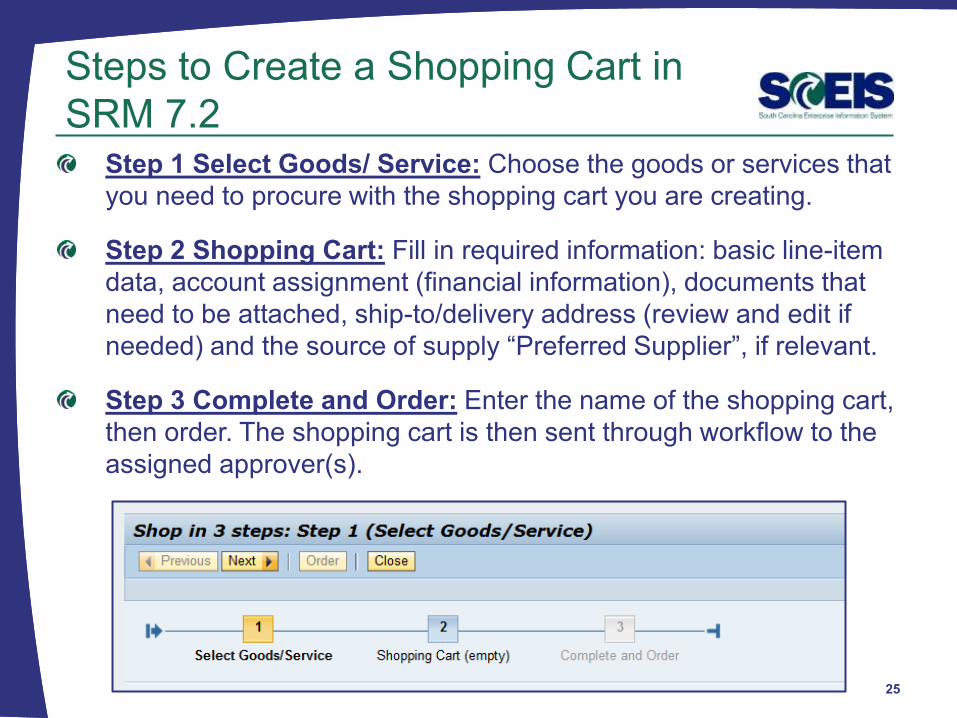
Steps to Create a Shopping Cart in
SRM 7.2
25
Step 1 Select Goods/ Service: Choose the goods or services that
you need to procure with the shopping cart you are creating.
Step 2 Shopping Cart: Fill in required information: basic line-item
data, account assignment (financial information), documents that
need to be attached, ship-to/delivery address (review and edit if
needed) and the source of supply “Preferred Supplier”, if relevant.
Step 3 Complete and Order: Enter the name of the shopping cart,
then order. The shopping cart is then sent through workflow to the
assigned approver(s).
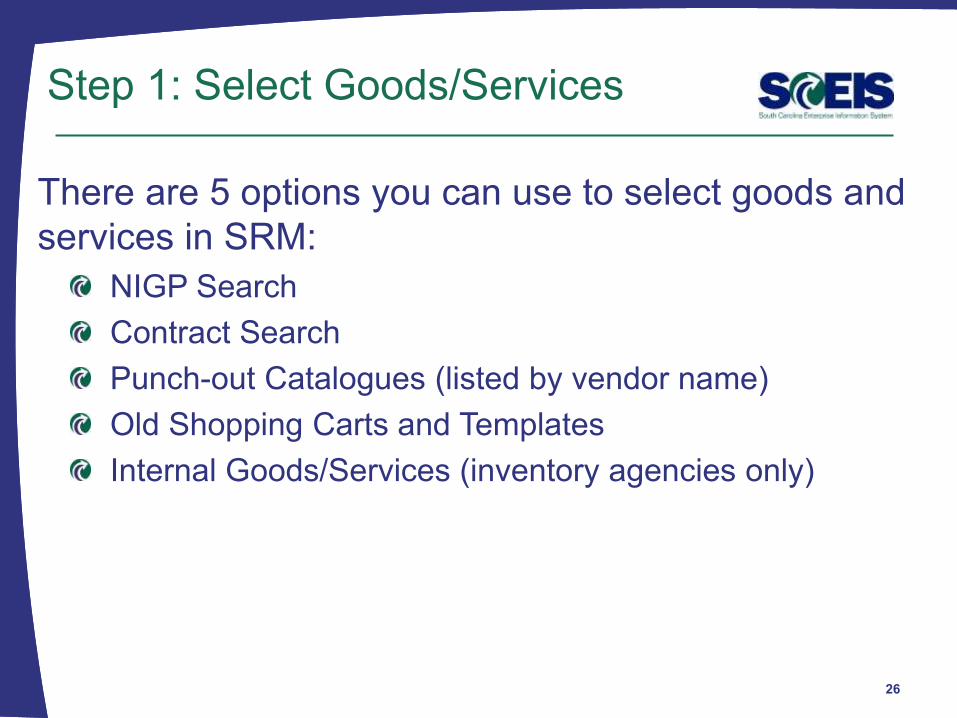
There are 5 options you can use to select goods and
services in SRM:
Step 1: Select Goods/Services
26
NIGP Search
Contract Search
Punch-out Catalogues (listed by vendor name)
Old Shopping Carts and Templates
Internal Goods/Services (inventory agencies only)
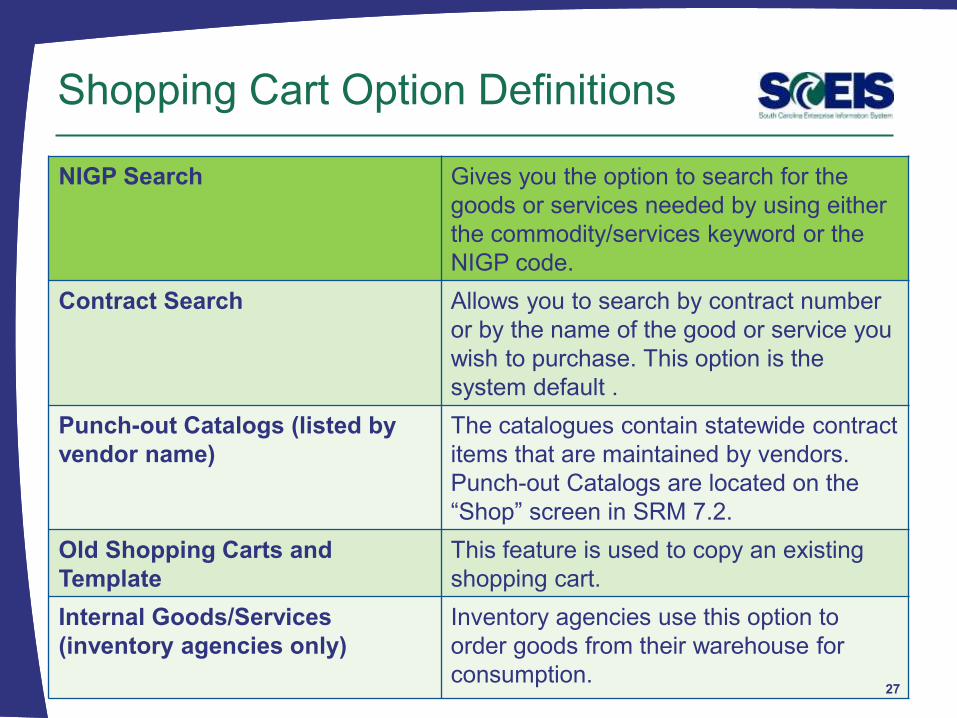
NIGP Search Gives you the option to search for the
goods or services needed by using either
the commodity/services keyword or the
NIGP code.
Contract Search Allows you to search by contract number
or by the name of the good or service you
wish to purchase. This option is the
system default .
Punch-out Catalogs (listed by
vendor name)
The catalogues contain statewide contract
items that are maintained by vendors.
Punch-out Catalogs are located on the
“Shop” screen in SRM 7.2.
Old Shopping Carts and
Template
This feature is used to copy an existing
shopping cart.
Internal Goods/Services
(inventory agencies only)
Inventory agencies use this option to
order goods from their warehouse for
consumption.
Shopping Cart Option Definitions
27
Step 2:
Shopping Cart Detail Information
28
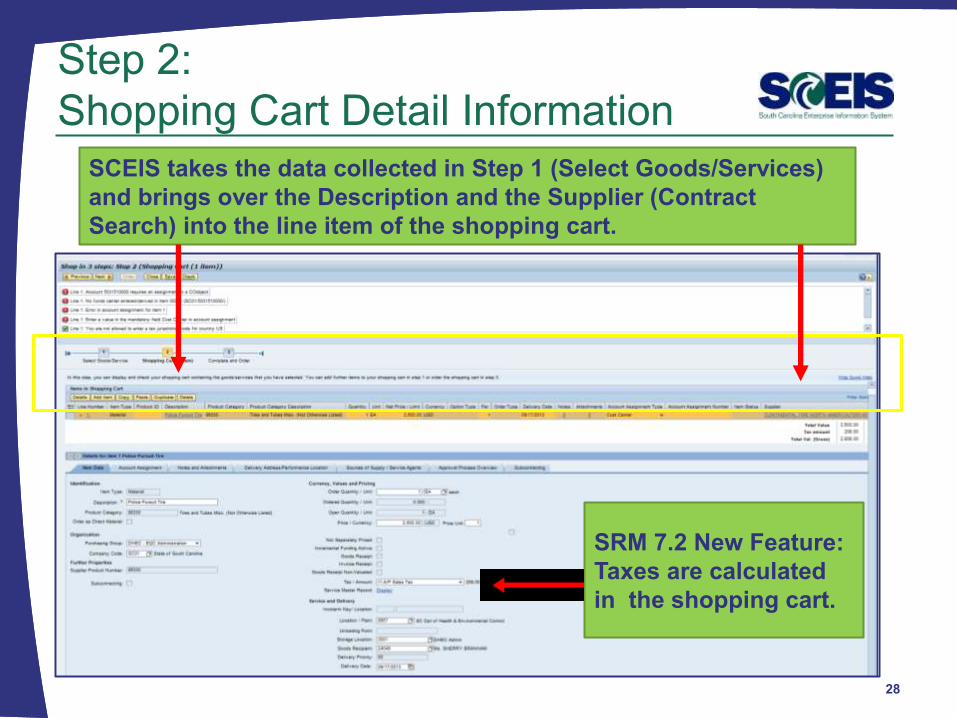
SCEIS takes the data collected in Step 1 (Select Goods/Services)
and brings over the Description and the Supplier (Contract
Search) into the line item of the shopping cart.
SRM 7.2 New Feature:
Taxes are calculated
in the shopping cart.
Step 2:
Shopping Cart Detail Information
29
The following details are included in the tab strip area
of the shopping cart:
– Item Data
– Account Assignment
– Notes and Attachments
– Delivery Address/Performance Location
– Sources of Supply/Service Agents
– Approval Process Overview
Step 2: Item Data
30
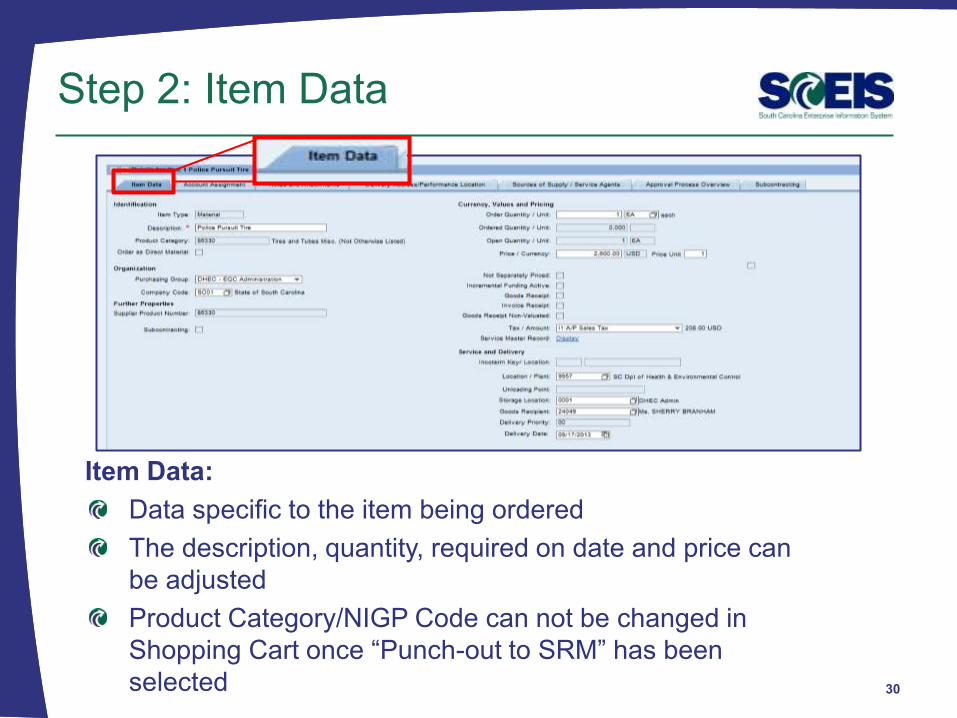
Item Data:
Data specific to the item being ordered
The description, quantity, required on date and price can
be adjusted
Product Category/NIGP Code can not be changed in
Shopping Cart once “Punch-out to SRM” has been
selected
Step 2:
Account Assignment
31
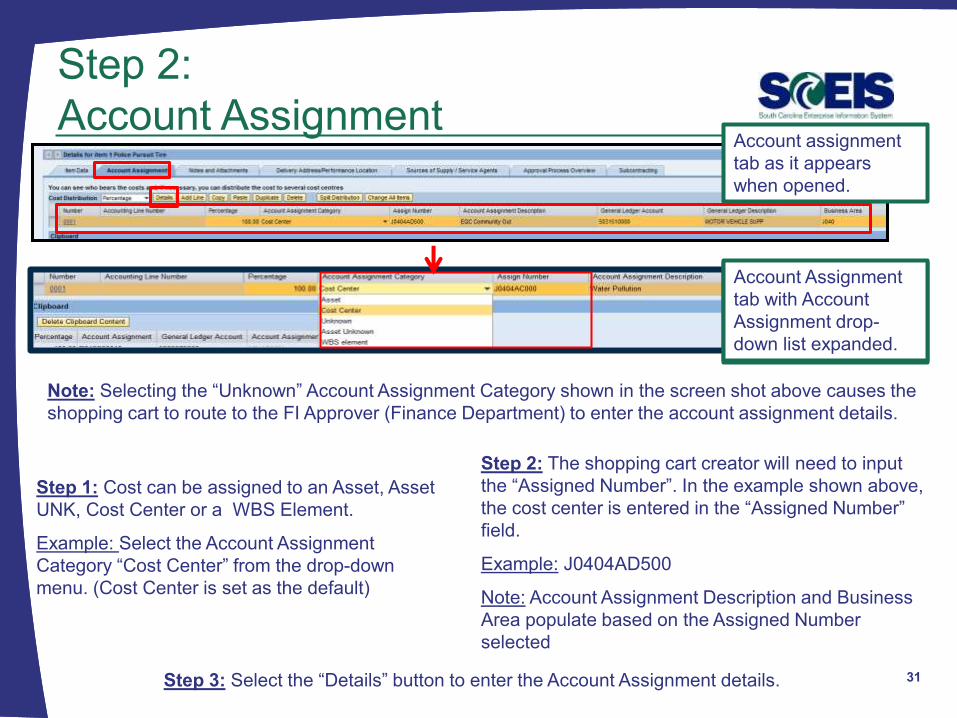
Step 2: The shopping cart creator will need to input
the “Assigned Number”. In the example shown above,
the cost center is entered in the “Assigned Number”
field.
Example: J0404AD500
Note: Account Assignment Description and Business
Area populate based on the Assigned Number
selected
Step 3: Select the “Details” button to enter the Account Assignment details.
Step 1: Cost can be assigned to an Asset, Asset
UNK, Cost Center or a WBS Element.
Example: Select the Account Assignment
Category “Cost Center” from the drop-down
menu. (Cost Center is set as the default)
Account assignment
tab as it appears
when opened.
Account Assignment
tab with Account
Assignment drop-
down list expanded.
Note: Selecting the “Unknown” Account Assignment Category shown in the screen shot above causes the
shopping cart to route to the FI Approver (Finance Department) to enter the account assignment details.
Account Assignment
tab with Account
Assignment drop-
down list expanded.
Step 2:
Account Assignment Details
32
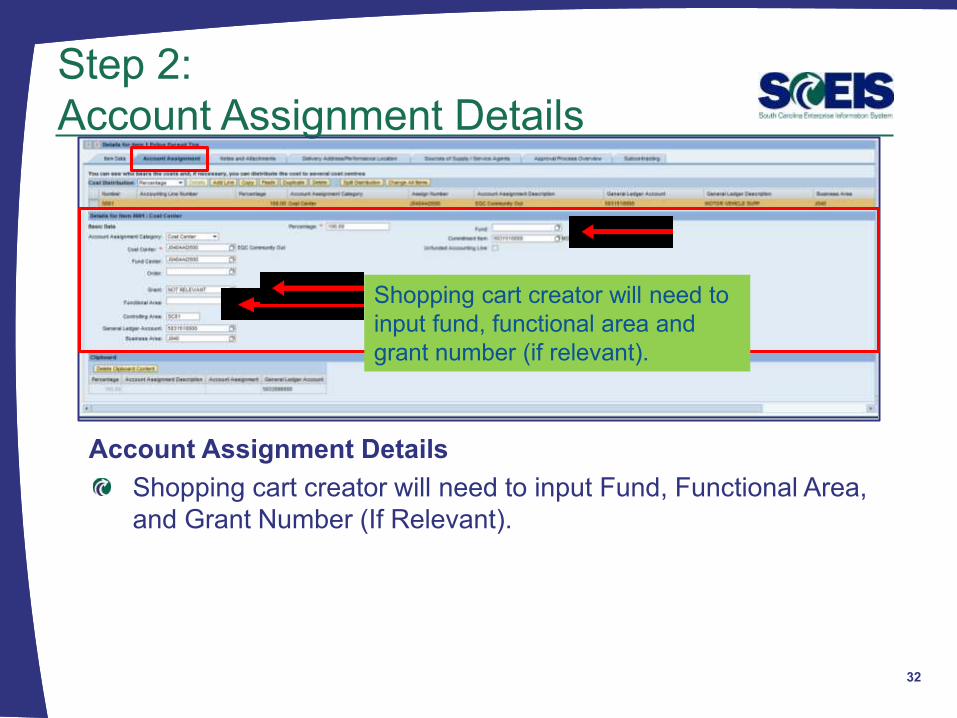
Account Assignment Details
Shopping cart creator will need to input Fund, Functional Area,
and Grant Number (If Relevant).
Shopping cart creator will need to
input fund, functional area and
grant number (if relevant).
Step 2:
Account Assignment Details
33
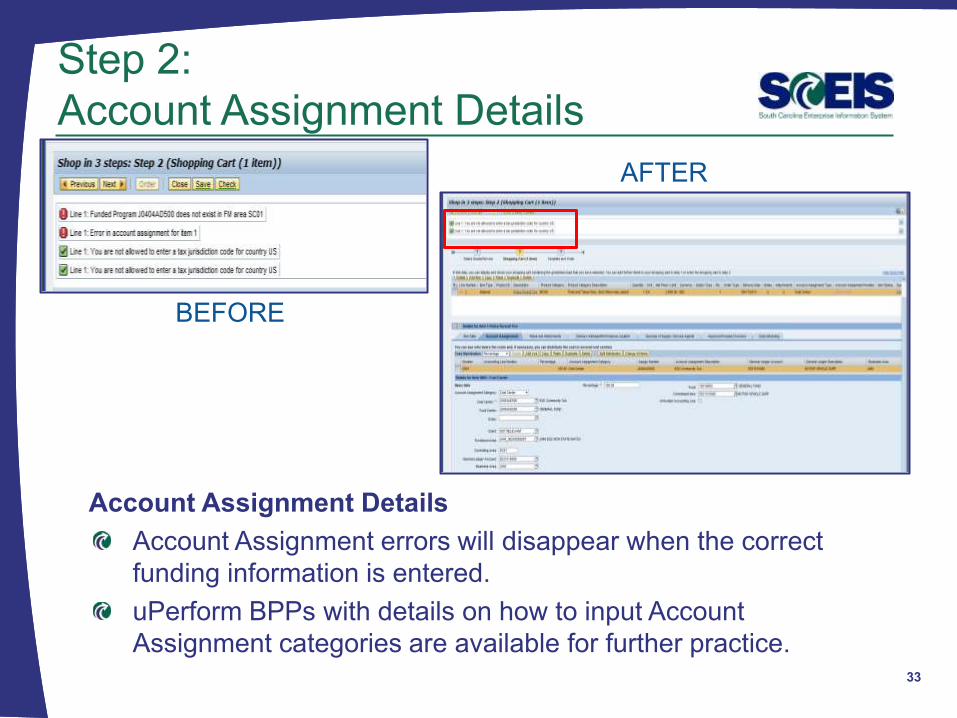
Account Assignment Details
Account Assignment errors will disappear when the correct
funding information is entered.
uPerform BPPs with details on how to input Account
Assignment categories are available for further practice.
BEFORE
AFTER
Step 2:
Notes and Attachments
34
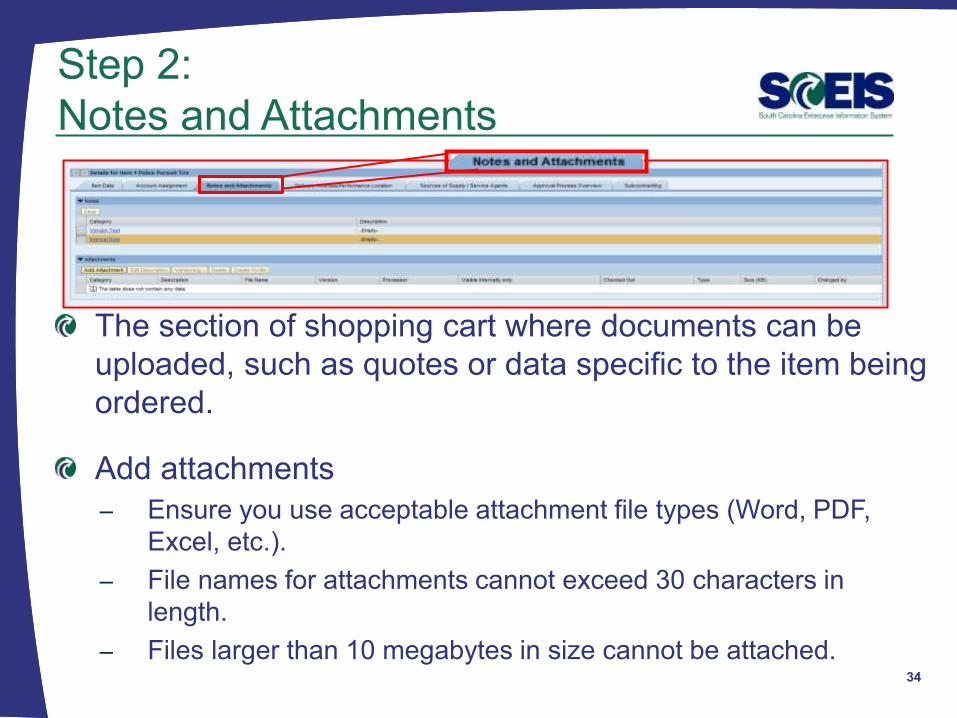
The section of shopping cart where documents can be
uploaded, such as quotes or data specific to the item being
ordered.
Add attachments
– Ensure you use acceptable attachment file types (Word, PDF,
Excel, etc.).
– File names for attachments cannot exceed 30 characters in
length.
– Files larger than 10 megabytes in size cannot be attached.
Step 2:
Notes and Attachments
35
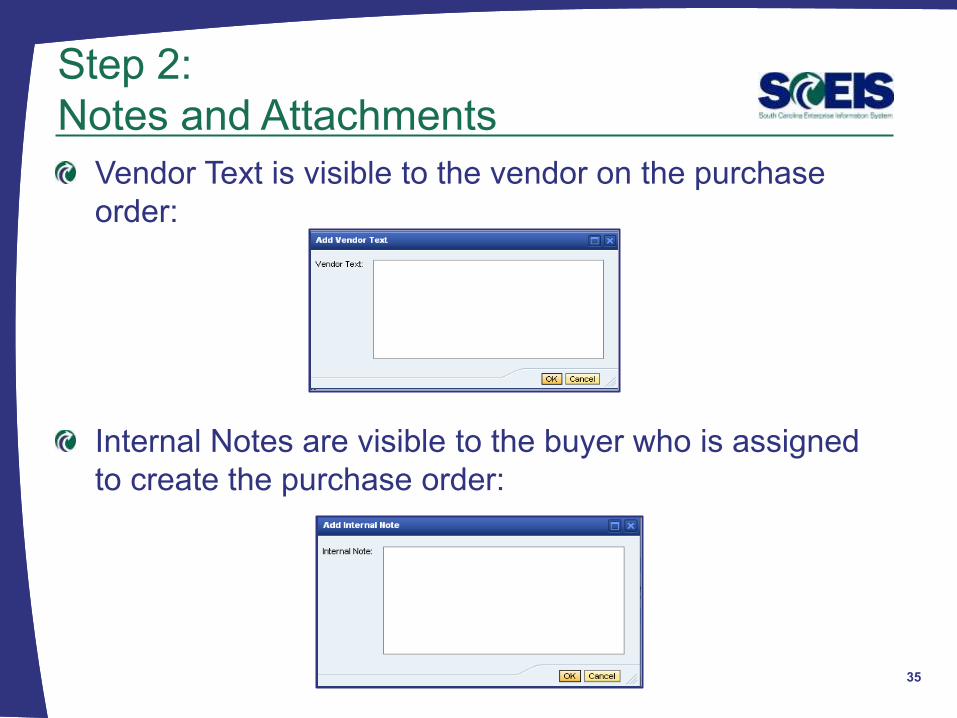
Vendor Text is visible to the vendor on the purchase
order:
Internal Notes are visible to the buyer who is assigned
to create the purchase order:
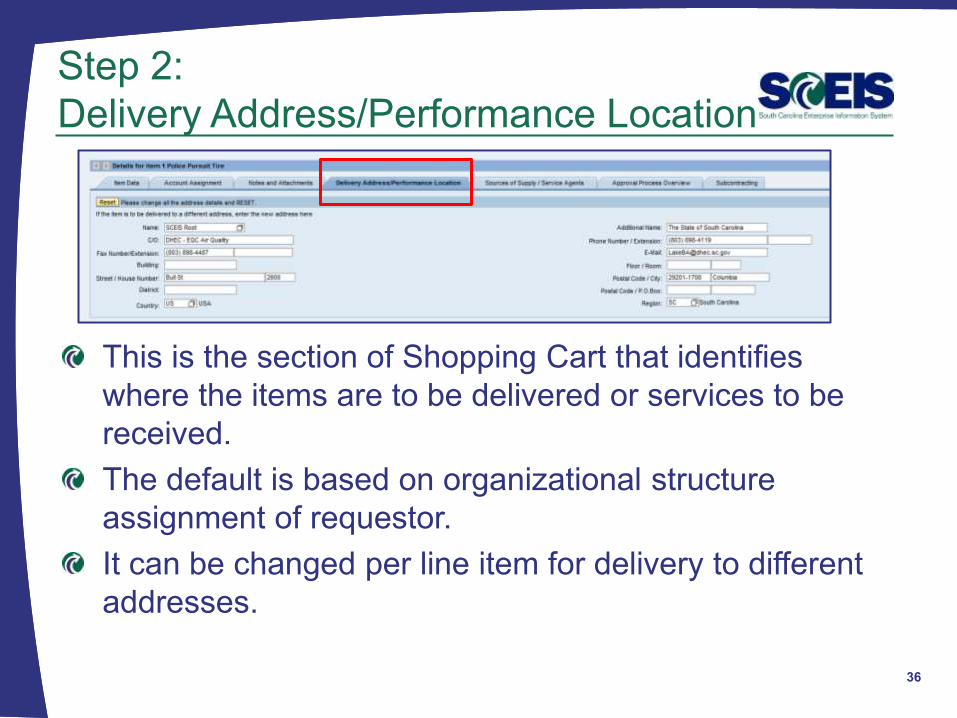
Step 2:
Delivery Address/Performance Location
36
This is the section of Shopping Cart that identifies
where the items are to be delivered or services to be
received.
The default is based on organizational structure
assignment of requestor.
It can be changed per line item for delivery to different
addresses.
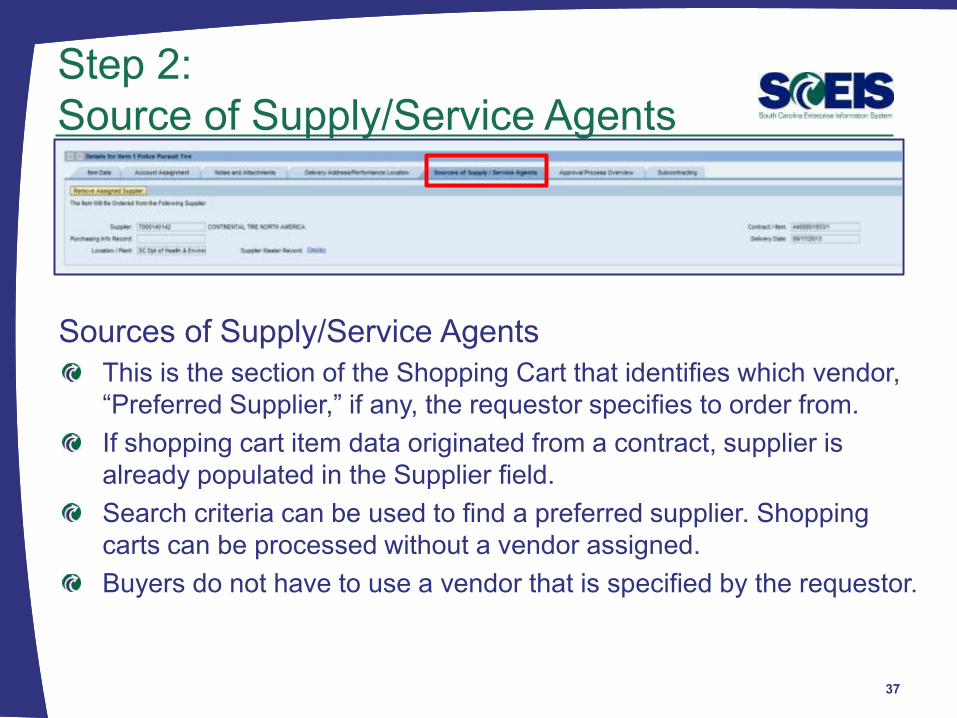
Sources of Supply/Service Agents
This is the section of the Shopping Cart that identifies which vendor,
“Preferred Supplier,” if any, the requestor specifies to order from.
If shopping cart item data originated from a contract, supplier is
already populated in the Supplier field.
Search criteria can be used to find a preferred supplier. Shopping
carts can be processed without a vendor assigned.
Buyers do not have to use a vendor that is specified by the requestor.
Step 2:
Source of Supply/Service Agents
37
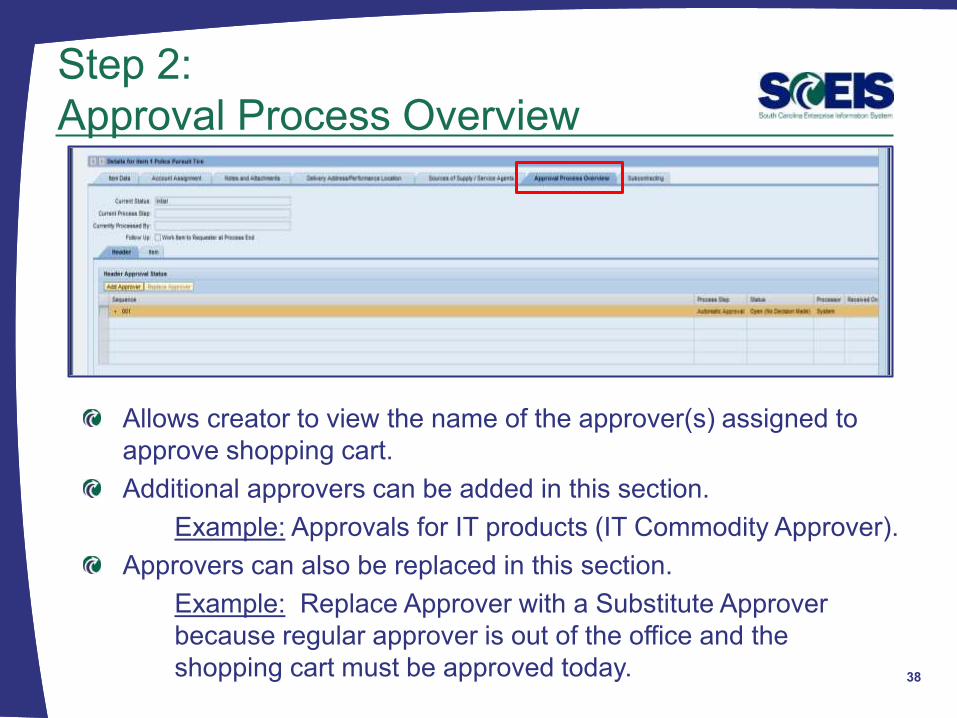
Step 2:
Approval Process Overview
38
Allows creator to view the name of the approver(s) assigned to
approve shopping cart.
Additional approvers can be added in this section.
Example: Approvals for IT products (IT Commodity Approver).
Approvers can also be replaced in this section.
Example: Replace Approver with a Substitute Approver
because regular approver is out of the office and the
shopping cart must be approved today.
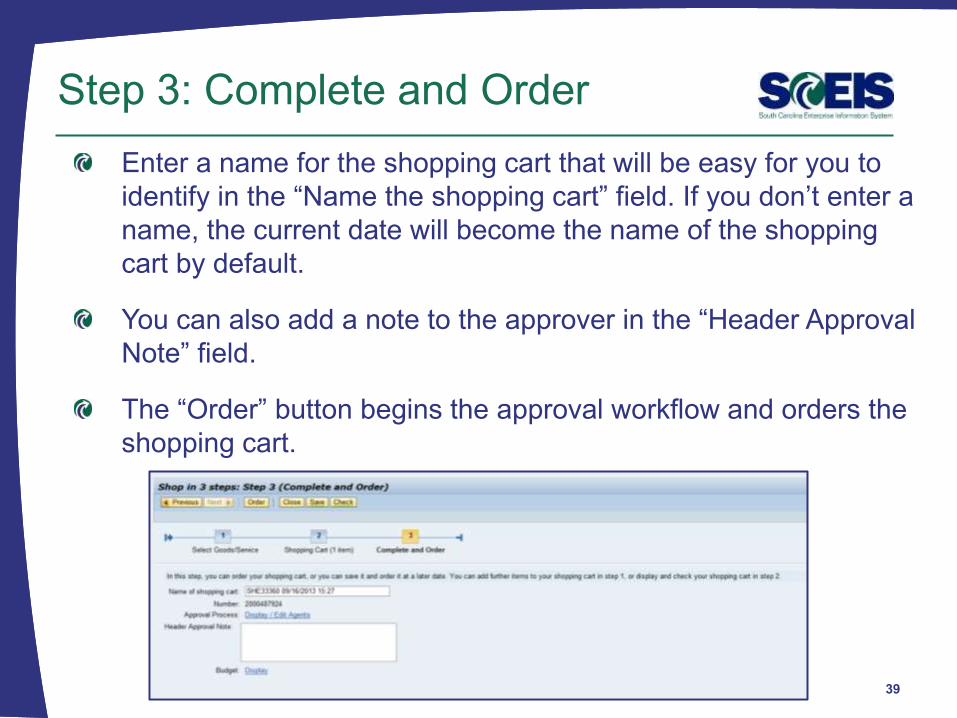
Step 3: Complete and Order
Enter a name for the shopping cart that will be easy for you to
identify in the “Name the shopping cart” field. If you don’t enter a
name, the current date will become the name of the shopping
cart by default.
You can also add a note to the approver in the “Header Approval
Note” field.
The “Order” button begins the approval workflow and orders the
shopping cart.
39
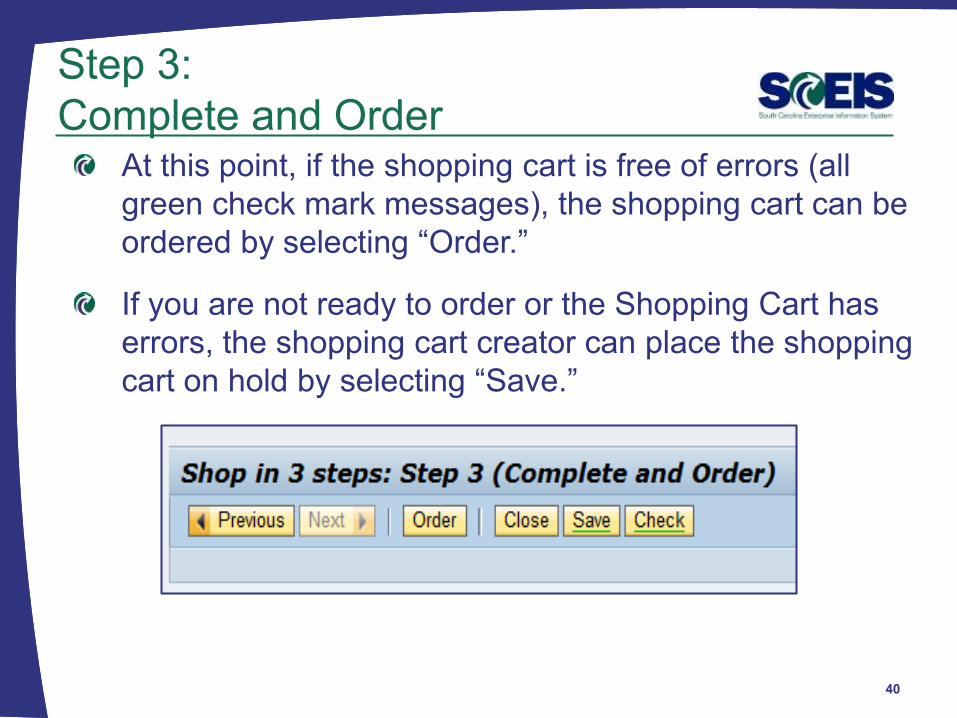
Step 3:
Complete and Order At this point, if the shopping cart is free of errors (all
green check mark messages), the shopping cart can be
ordered by selecting “Order.”
If you are not ready to order or the Shopping Cart has
errors, the shopping cart creator can place the shopping
cart on hold by selecting “Save.”
40
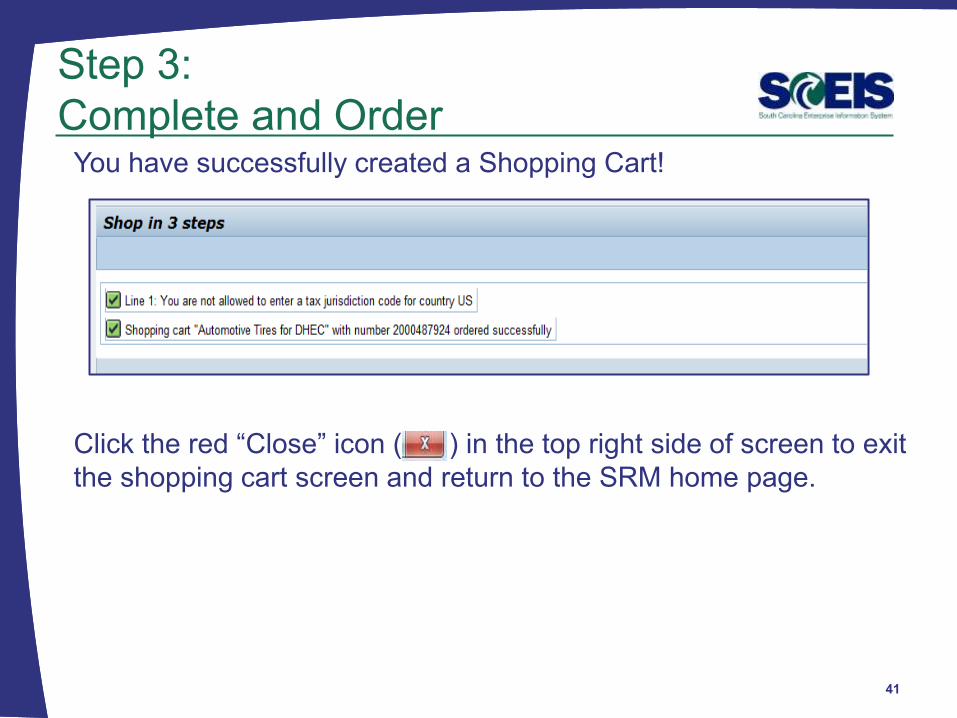
Step 3:
Complete and Order You have successfully created a Shopping Cart!
Click the red “Close” icon ( ) in the top right side of screen to exit
the shopping cart screen and return to the SRM home page.
41
How to Find a Shopping Cart and Check Status,
Show/Hide Quick Criteria Maintenance
42
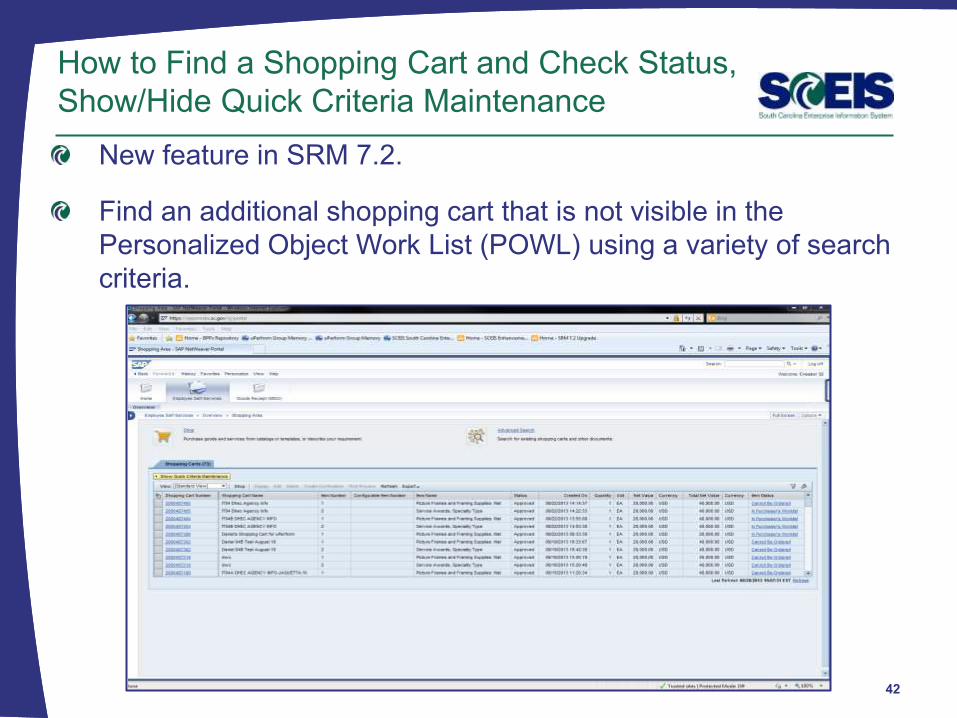
New feature in SRM 7.2.
Find an additional shopping cart that is not visible in the
Personalized Object Work List (POWL) using a variety of search
criteria.
How to Find a Shopping Cart and Check Status,
Show/Hide Quick Criteria Maintenance
43
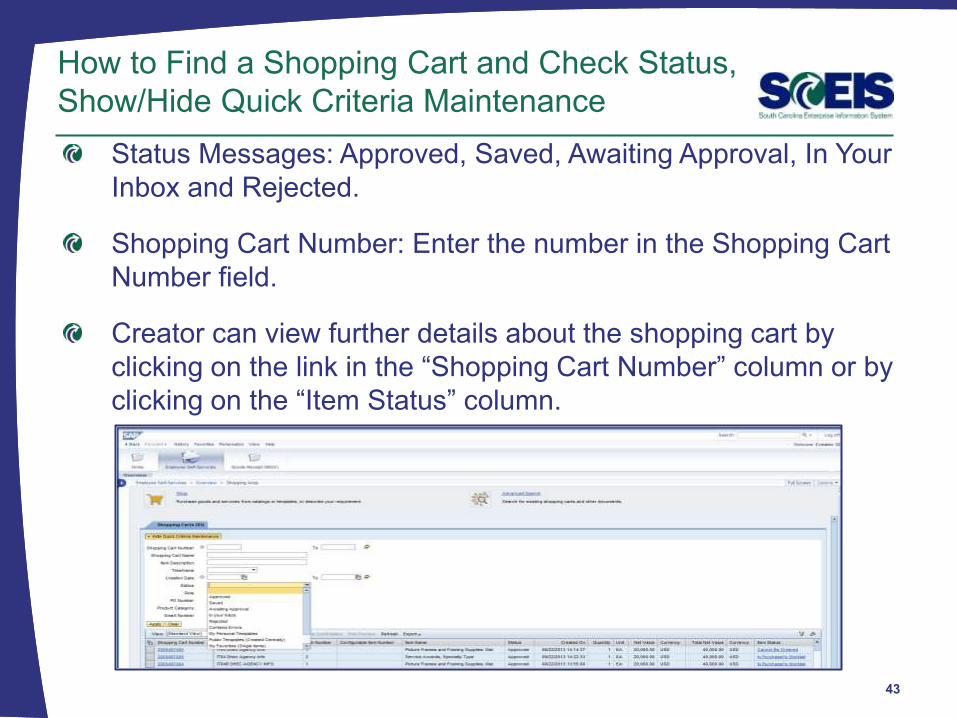
Status Messages: Approved, Saved, Awaiting Approval, In Your
Inbox and Rejected.
Shopping Cart Number: Enter the number in the Shopping Cart
Number field.
Creator can view further details about the shopping cart by
clicking on the link in the “Shopping Cart Number” column or by
clicking on the “Item Status” column.
How to Find a Shopping Cart and Check Status,
Show/Hide Quick Criteria Maintenance
44
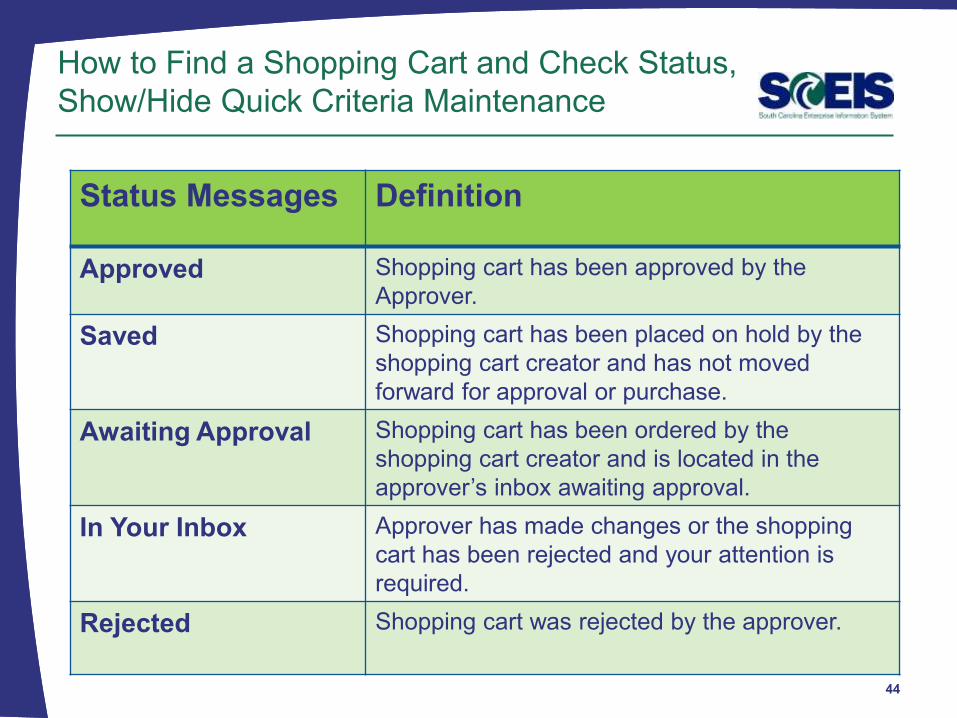
Status Messages
Definition
Approved Shopping cart has been approved by the
Approver.
Saved
Shopping cart has been placed on hold by the
shopping cart creator and has not moved
forward for approval or purchase.
Awaiting Approval
Shopping cart has been ordered by the
shopping cart creator and is located in the
approver’s inbox awaiting approval.
In Your Inbox
Approver has made changes or the shopping
cart has been rejected and your attention is
required.
Rejected
Shopping cart was rejected by the approver.

How to Find a Shopping Cart and Check Status,
Show/Hide Quick Criteria Maintenance
45
Additional Search Options:
Shopping Cart Number: Enter the number in the Shopping
Cart Number field.
Shopping Cart Creator can view further details about the
shopping cart by clicking on the link in the “Shopping Cart
Number” column or by clicking on the “Item Status” column.
How to Manage a Rejected Shopping Cart
46
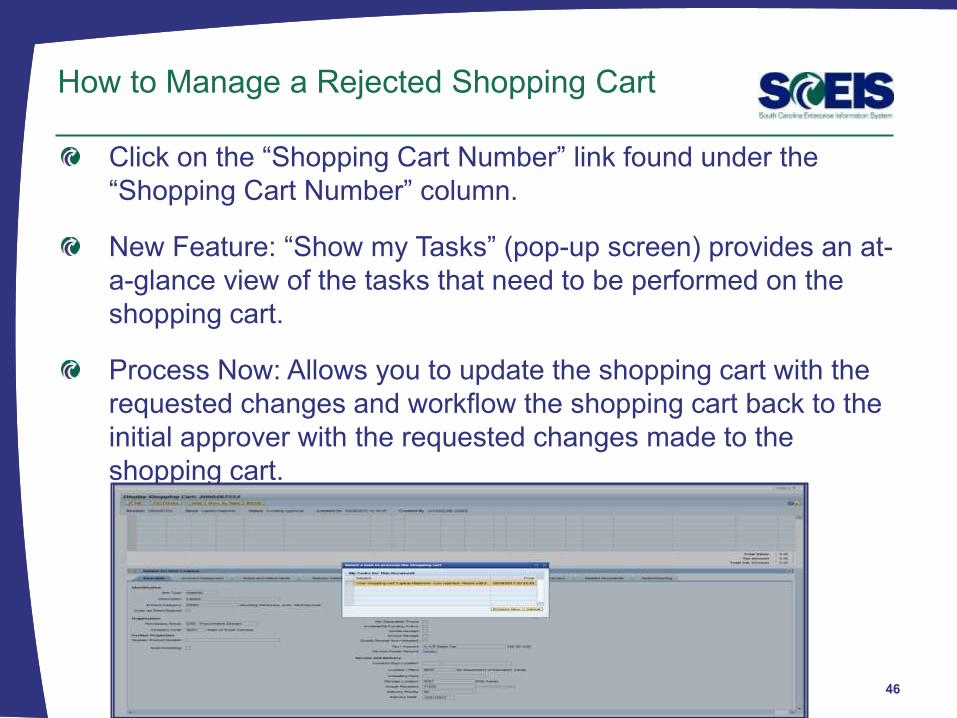
Click on the “Shopping Cart Number” link found under the
“Shopping Cart Number” column.
New Feature: “Show my Tasks” (pop-up screen) provides an at-
a-glance view of the tasks that need to be performed on the
shopping cart.
Process Now: Allows you to update the shopping cart with the
requested changes and workflow the shopping cart back to the
initial approver with the requested changes made to the
shopping cart.
How to Manage a Rejected Shopping Cart
47
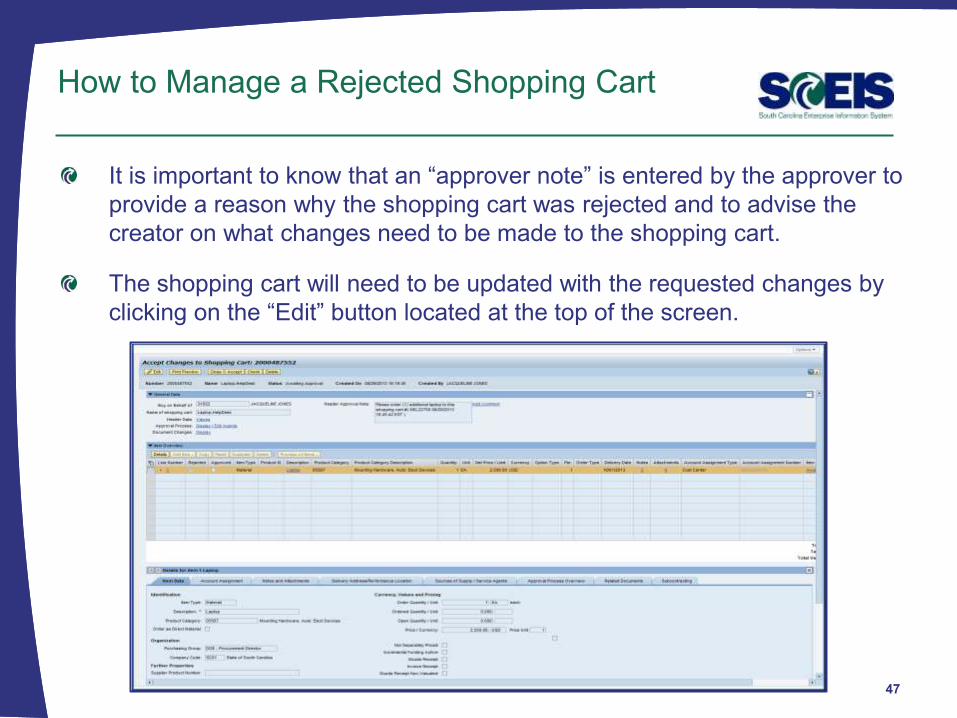
It is important to know that an “approver note” is entered by the approver to
provide a reason why the shopping cart was rejected and to advise the
creator on what changes need to be made to the shopping cart.
The shopping cart will need to be updated with the requested changes by
clicking on the “Edit” button located at the top of the screen.
How to Manage a Rejected Shopping Cart
48
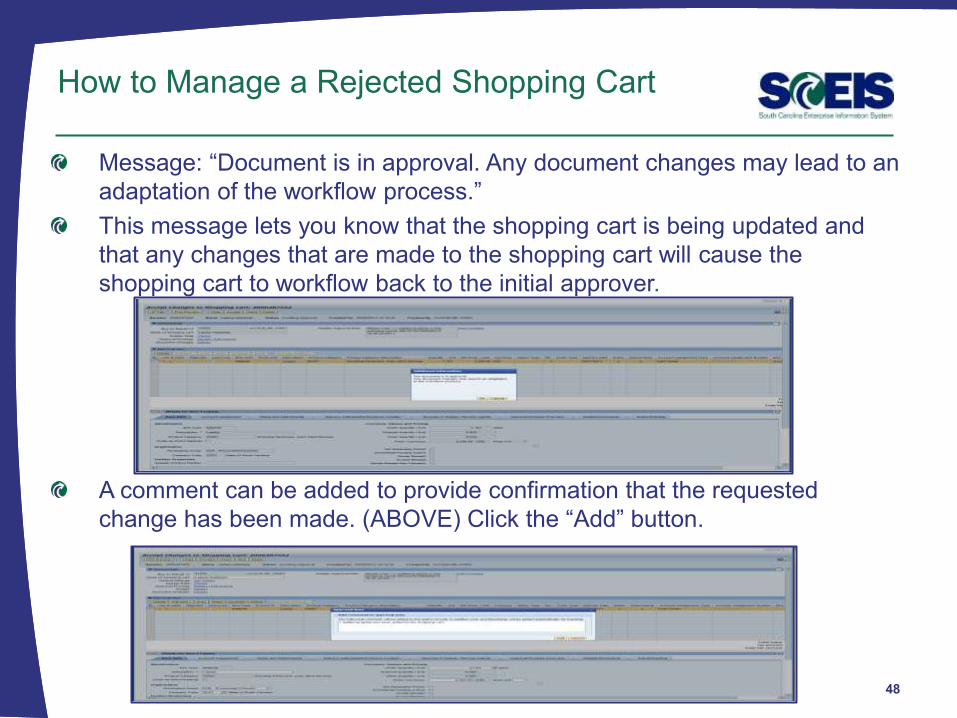
Message: “Document is in approval. Any document changes may lead to an
adaptation of the workflow process.”
This message lets you know that the shopping cart is being updated and
that any changes that are made to the shopping cart will cause the
shopping cart to workflow back to the initial approver.
A comment can be added to provide confirmation that the requested
change has been made. (ABOVE) Click the “Add” button.
How to Manage a Rejected Shopping Cart
49
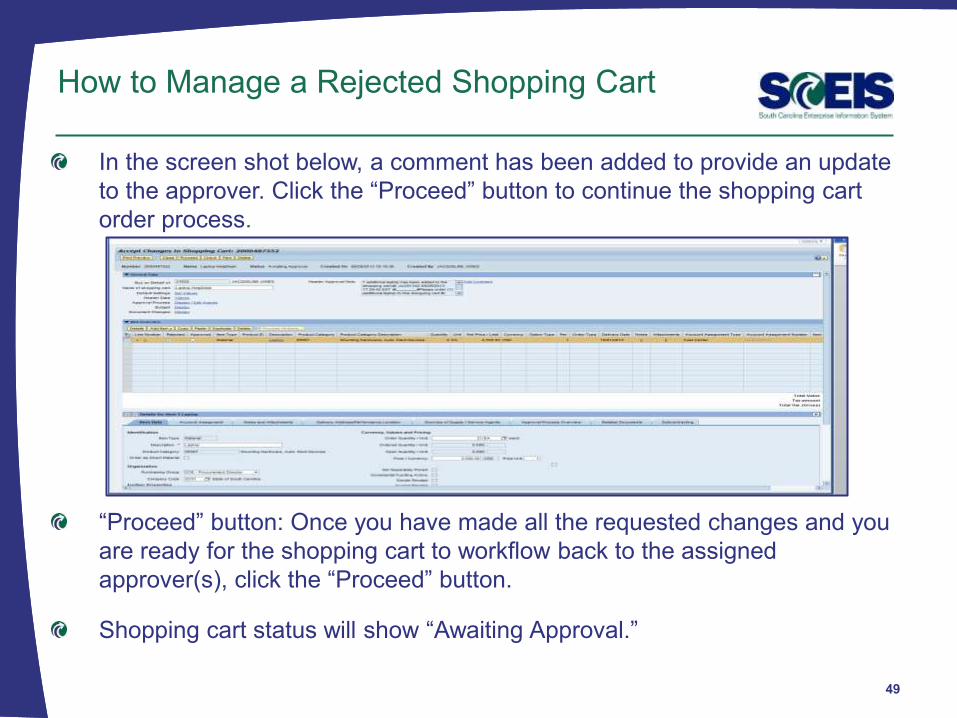
In the screen shot below, a comment has been added to provide an update
to the approver. Click the “Proceed” button to continue the shopping cart
order process.
“Proceed” button: Once you have made all the requested changes and you
are ready for the shopping cart to workflow back to the assigned
approver(s), click the “Proceed” button.
Shopping cart status will show “Awaiting Approval.”
To replace an approver, begin in the Approval Process
Overview tab.
If an approver has not set up a substitute, the shopping
cart creator can add an approver (before approving the
SC) or replace an approver in the workflow.
The approver replacement must have the Approver role
within the agency.
How to Add and Replace an Approver
50
A “Saved” or “Ordered” shopping cart begins with
the number 2000XXXXXX ?
(True or False)
Taxes are calculated in the Shopping Cart?
(True or False)
Vendor Text is visible on the Purchase Order?
(True or False)
Lesson 2: Knowledge Check
51
You should now understand how to:
Create a shopping cart in 3 steps using the
options to select goods and services available in
SCEIS (shop in 3 steps).
Find and check the status of a shopping cart.
Manage a rejected shopping cart.
Add and replace an approver.
Lesson 2 Summary
52
LESSON 3: UPERFORMS
AND HANDS-ON EXERCISES
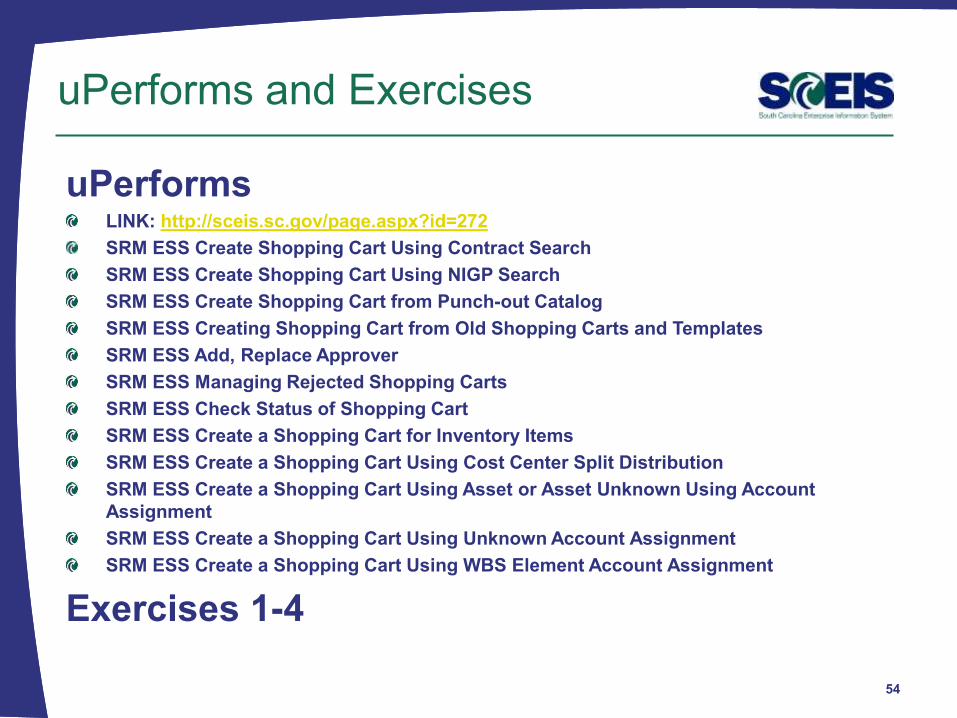
uPerforms LINK: http://sceis.sc.gov/page.aspx?id=272
SRM ESS Create Shopping Cart Using Contract Search
SRM ESS Create Shopping Cart Using NIGP Search
SRM ESS Create Shopping Cart from Punch-out Catalog
SRM ESS Creating Shopping Cart from Old Shopping Carts and Templates
SRM ESS Add, Replace Approver
SRM ESS Managing Rejected Shopping Carts
SRM ESS Check Status of Shopping Cart
SRM ESS Create a Shopping Cart for Inventory Items
SRM ESS Create a Shopping Cart Using Cost Center Split Distribution
SRM ESS Create a Shopping Cart Using Asset or Asset Unknown Using Account
Assignment
SRM ESS Create a Shopping Cart Using Unknown Account Assignment
SRM ESS Create a Shopping Cart Using WBS Element Account Assignment
Exercises 1-4
uPerforms and Exercises
54
LESSON 4: BEST PRACTICES
AND TIPS
Begin all shopping carts with the “Contract Search” to
ensure that you are linking to existing contracts.
Develop a naming convention for your shopping carts to
make them easy to find. One good rule of thumb is to
give shopping carts a name related to what is being
ordered.
Before adding or replacing an approver, check with the
person you are adding or replacing to verify their
availability to approve the shopping cart.
Best Practices and Tips
56
Best Practices and Tips
The shopping cart checks the budget at each step of
the process. If budget errors are received when
creating, ordering or approving a shopping cart, check
with the finance/budget department in your agency to
ensure funds are available.
Do NOT use the Internet browser arrows, use the SRM
navigation links.
57
LESSON 5: COURSE SUMMARY
You should be able to:
Discuss the shopping cart process and roles,
and describe how the shopping cart process is
related to the procurement process.
Create a shopping cart using the appropriate
option to select goods and services.
Check the status of a shopping cart.
Manage a shopping cart when it is rejected or
when you need to add or replace an approver.
Course Summary
59
Any Questions?
60


![[PPT]PowerPoint Presentation - South Carolina Enterprise ...sceis.sc.gov/documents/PR215 Purchasing Process... · Web viewWelcome and Introductions Welcome to SCEIS Purchasing Process](https://static.fdocuments.net/doc/165x107/5ab6561d7f8b9ab7638d9866/pptpowerpoint-presentation-south-carolina-enterprise-sceisscgovdocumentspr215.jpg)


![Purchasing Services - Standard Operating Procedure · PDF filePurchasing Services - Standard Operating Procedure [S.O.P.] - Purchase Order PROCESS: iProcurement Electronic Requisitioning](https://static.fdocuments.net/doc/165x107/5a713fb37f8b9a93538cc7be/purchasing-services-standard-operating-procedure-wwwuoguelphcafinancesitesuoguelphcafinancefilessoppdf.jpg)