Sacral Neuromodulation Technical aspects - WJ Weiser & Associates
28
Sacral Neuromodulation Technical aspects Gary E. Lemack, MD Professor of Urology and Neurology UT Southwestern Medical Center
Transcript of Sacral Neuromodulation Technical aspects - WJ Weiser & Associates

Sacral Neuromodulation Technical aspects
Gary E. Lemack, MD
Professor of Urology and Neurology
UT Southwestern Medical Center

Overview
Technique for the office – PNE
Technique for the operating room
1 stage
2 stage
Technique for removal

Sacral Neuromodulation
Urological Indications
Refractory Urinary Urgency
Refractory Urge Urinary Incontinence
Non-obstructive Urinary Retention
Pelvic Pain syndromes ????
Neurogenic OAB ????

Percutaneous nerve evaluation
PNE
Performed in the office
Procedure takes 30-60 minutes
1-2% lidocaine
Bilateral leads placed
Typically left in place for 7-10 days
Leads typically migrate
Infection rates higher after 10 days

PNE Who is not a candidate?
Unable to tolerate prone position without
sedation or monitoring for up to 60 minutes.
Indication – non obstructive urinary retention
Often requires more than 1 week to assess response
Lower back/upper buttock cellulitis

PNE Other relative contraindications
Elderly patients
Difficult/brittle sacrum
Multiple back surgeries
Challenging to place lead
Use fluoroscopy
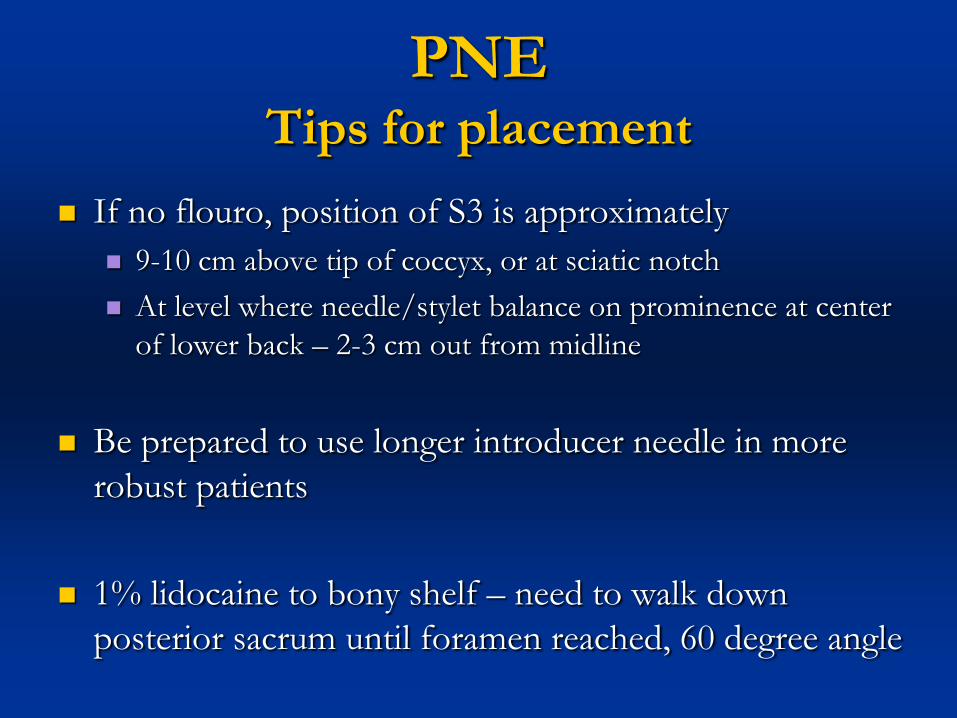
PNE Tips for placement
If no flouro, position of S3 is approximately
9-10 cm above tip of coccyx, or at sciatic notch
At level where needle/stylet balance on prominence at center
of lower back – 2-3 cm out from midline
Be prepared to use longer introducer needle in more
robust patients
1% lidocaine to bony shelf – need to walk down
posterior sacrum until foramen reached, 60 degree angle

PNE
Lateral Sacrum Posterior Sacrum

Important Fact
l SACRUM is not vertically
oriented
l “UPPER” Sacrum
(S1 & S2) approaches
horizontal plane
l “LOWER” Sacrum
(S3, S4, S5) approaches
frontal plane
August, 2006
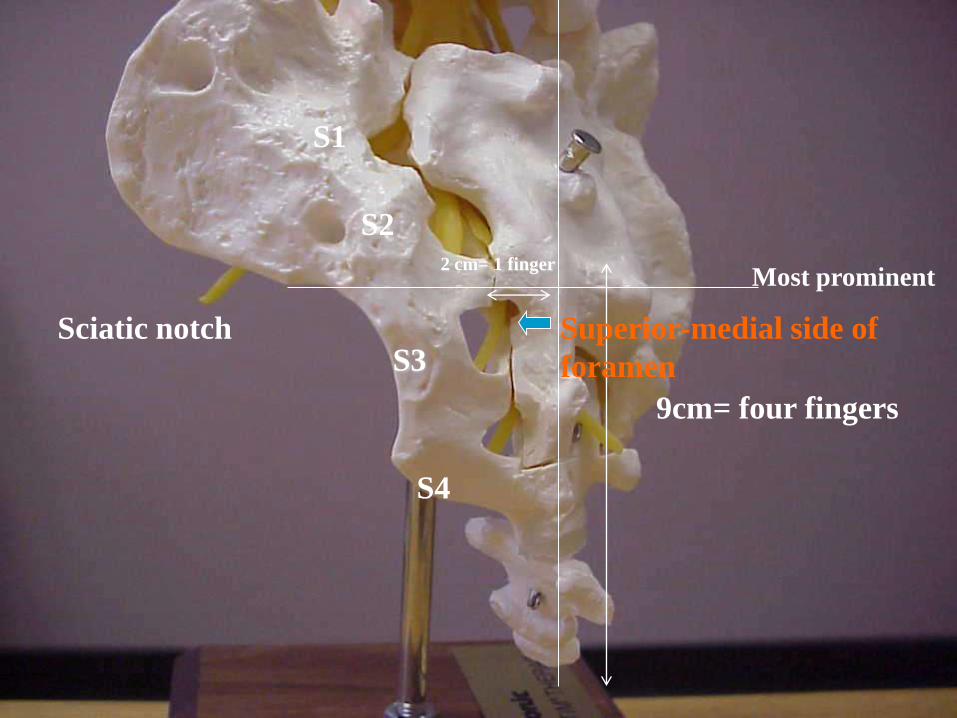
Sciatic notch S3
S4
9cm= four fingers
2 cm= 1 finger
Most prominent
S1
S2
Superior-medial side of
foramen

PNE Tips for assessing stimulation
Motor response often difficult to interpret
Often altered due to discomfort
Sensation may be most important parameter to
assess during a PNE
Women: vagina, rectum
Men: scrotum, penis, rectum
NOT buttock, thigh

PNE Tips
Lead is unipolar – proper location is imperative to testing response
Test response at several times during placement
Test needle (to locate S3)
Test lead through introducer needle
Test lead after needle removed
Firmly secure the leads in place

PNE
The lead will never work any better than
the minute you put it in.

Stage 1,2 Placement
Intraoperative flouroscopy to identify S3
“Cross Hairs” – start with AP view
Identify sciatic notch (SI joint)– mark on skin
Identify vertical midline - mark
At point where lines meet mark out about 2 cm laterally – this is position of S3
Go up 1-2 cm in skin for needle entry, 60 degrees trajectory

S3
iliac crest posterior
superior
iliac spine
sciatic notch
sacrum upper
edge
sacrum lower
edge
midline
Bony Landmarks
tip of coccyx
B
o
n
y
l
a
n
d
m
a
r
k
s

C-arm
Correct position of the C-arm for AP and LL x-ray

AP x-ray

Find out S3 in two steps
AP LL
1) Look for pelvis-sacrum junction sciatic notch (S3 level)
2) Look for and count the foramina arcs 2) Look for and count all the foramina
Tips:
- hump in internal border of the sacrum
Tips:
- usually you don´t see S4 arcs
- you see the arc not the foramen
(The foramen, in sacrum posterior face, is just over the arc)
- same size of the sacral vertebrae
- start to count from S1 (don´t from S4)

Technique
Stimulate after foramen located – on insulated
part of finder needle
Look for S3 response – flexion of great toe,
bellows response, sensory in vagina/scrotum,
rectum
Past stylet to correct depth through finder
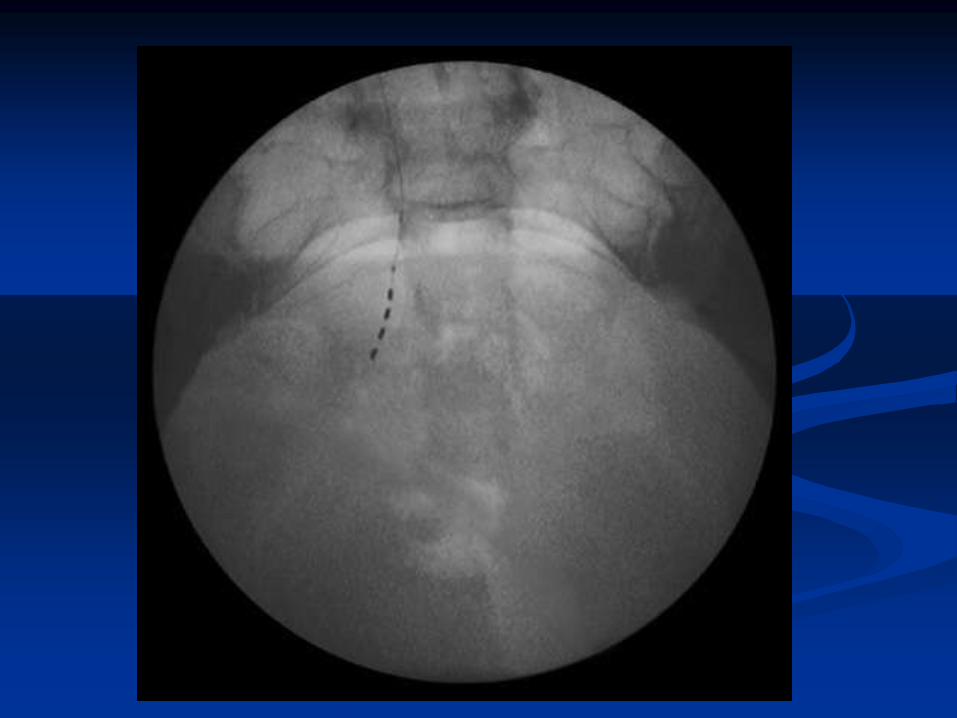
needle using lateral view, depth markers

LL x-ray
11,7 mm
9 mm The foramen beginning
at this level

Stage 1
Enlarge skin incision and pass trocar with sheath
under fluoroscopic guidance using radiolucent
guide on trocar – located between upper and
lower edge of sacrum – ie in the foramen.

… keep the depth marker
in the foramen

Stage 1
Once at proper location, withdraw trocar, leaving sheath in place and advance tined lead to pre-marked position on the lead – test lead at this point.
Under fluoroscopic guidance, remove sheath while maintaining lead in proper position.
Typically, lead “1” (the longest) or “2” should be bridging the lower edge of the sacrum. Lead “0” below, and lead “3” in the foramen, but move based on response.

Proper lead location

If placing external stimulator
Tunnel device to dominant side, upper buttock.
Make 3-4 cm incision at this point and connect
tined lead to lead extension
Make separate stab incision at least 4-5 cm away
from upper buttock incision for exit site of lead
extension

If placing IPG
Tunnel tined lead as previously, but make pocket large enough to accommodate IPG
Pocket should be deep enough to allow sufficient fat between IPG and skin (otherwise may pt may be bothered by it), but not into fascia of gluteal muscle.
IPG must lie flat. Test impedance after closing subcutaneous space.
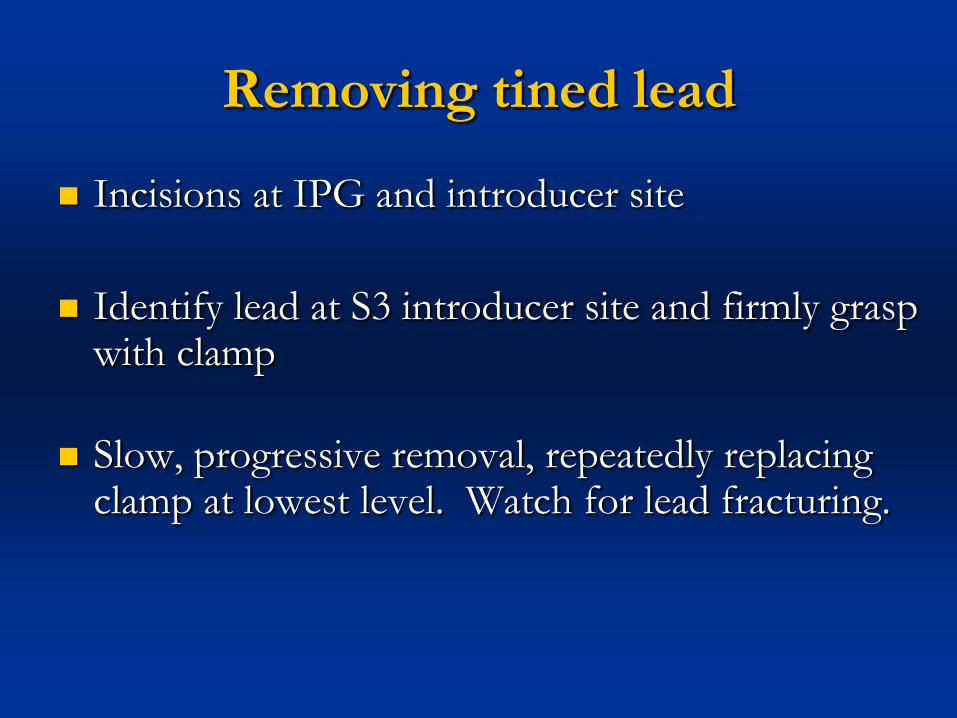
Removing tined lead
Incisions at IPG and introducer site
Identify lead at S3 introducer site and firmly grasp with clamp
Slow, progressive removal, repeatedly replacing clamp at lowest level. Watch for lead fracturing.