Ripples Tutorial - barnick.de · Ripples Tutorial Throughout this tutorial I am going to show you...
11
Ripples Tutorial Throughout this tutorial I am going to show you how to create the following image with only using DAZ Studio & Reality 4.
Transcript of Ripples Tutorial - barnick.de · Ripples Tutorial Throughout this tutorial I am going to show you...
Ripples TutorialThroughout this tutorial I am going to show you how to create the following image with only using DAZ Studio & Reality 4.
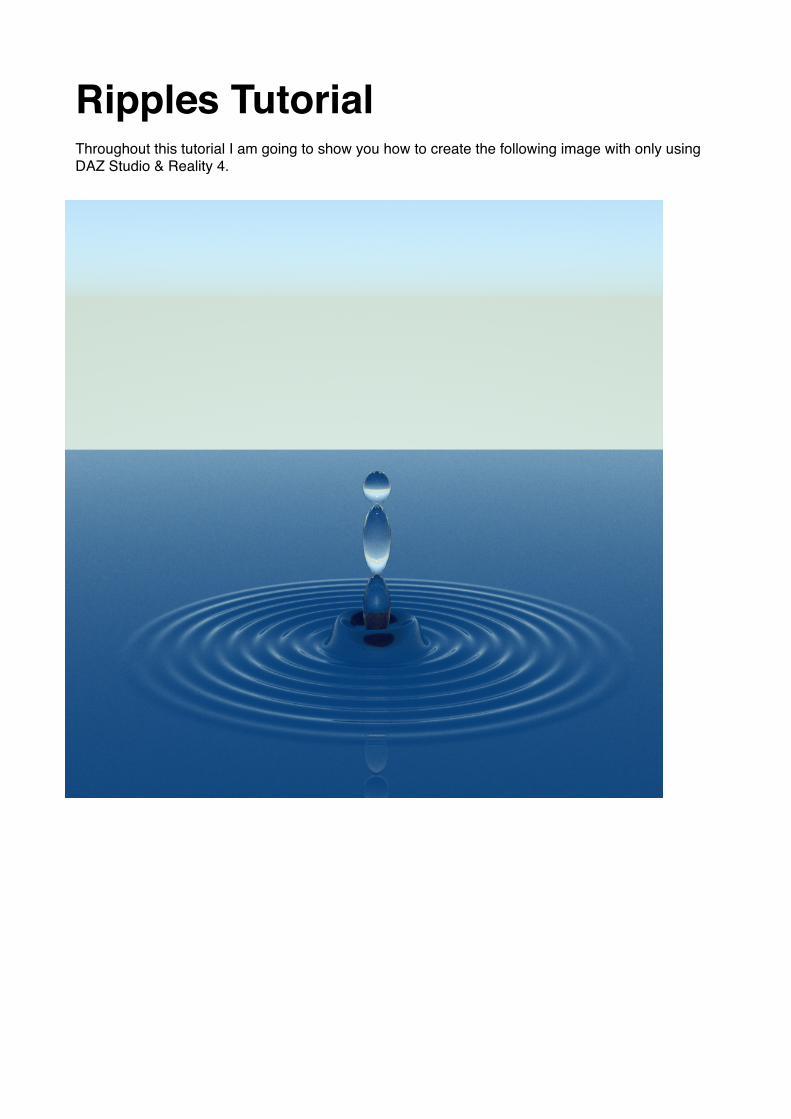
Step 1. Create a Plane with the following settings - Size 5m 600 Devisions
And scale the plane to 200%
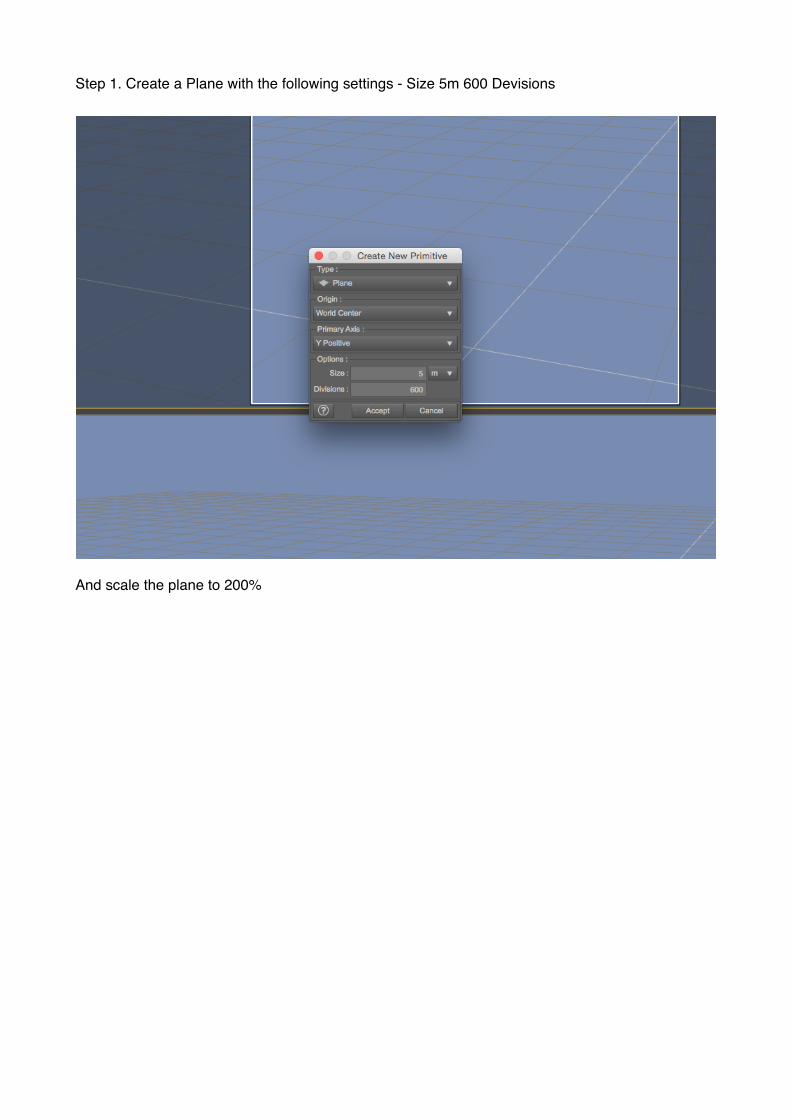
Step 2. Create a new D-Former and give it the name ‘Ripples’
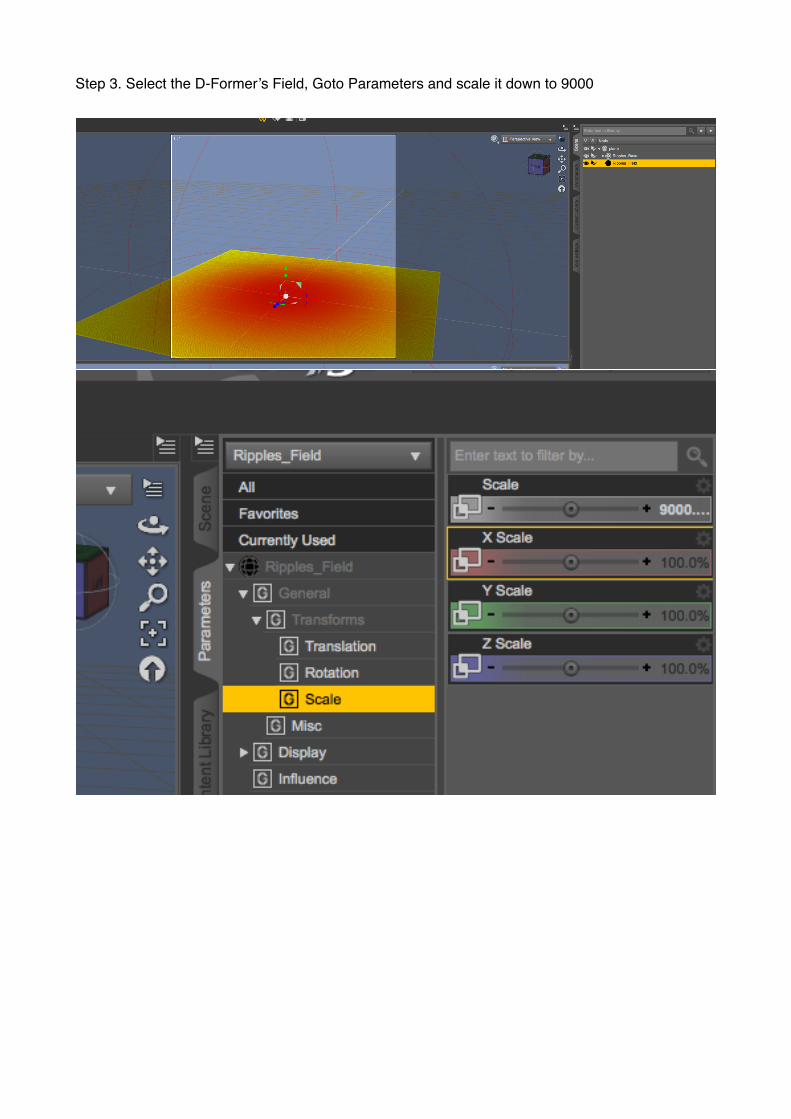
Step 3. Select the D-Former’s Field, Goto Parameters and scale it down to 9000
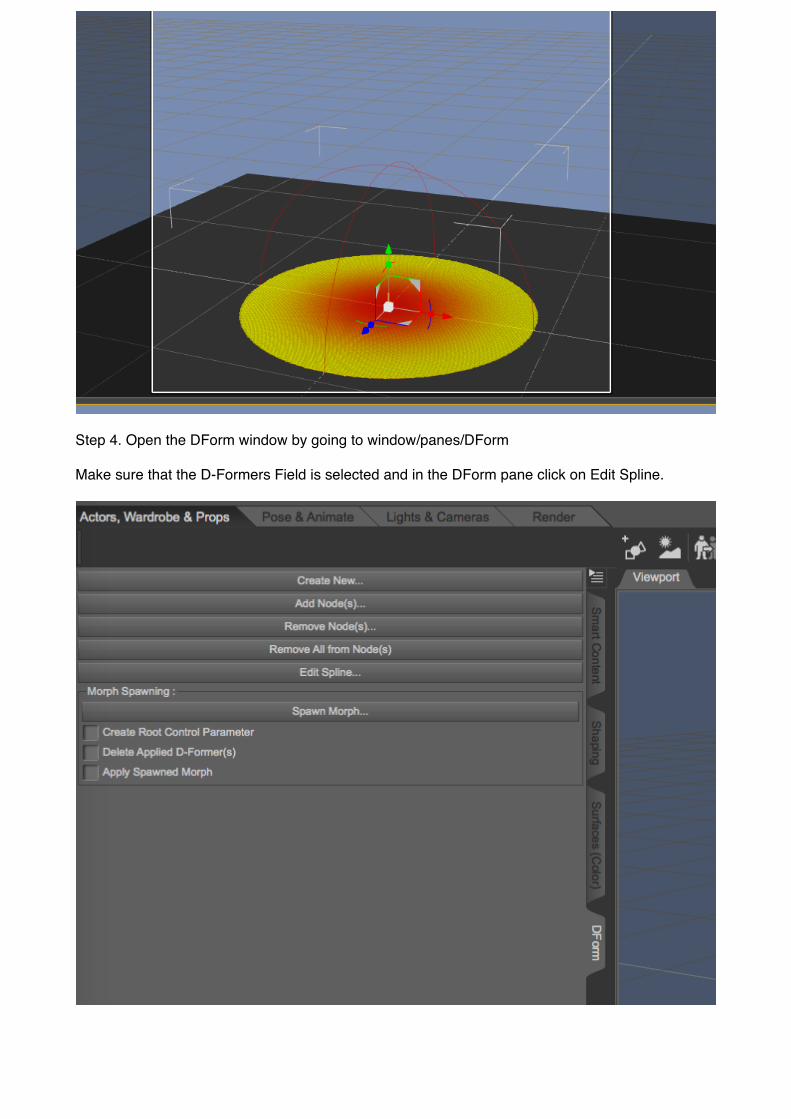
Step 4. Open the DForm window by going to window/panes/DForm
Make sure that the D-Formers Field is selected and in the DForm pane click on Edit Spline.
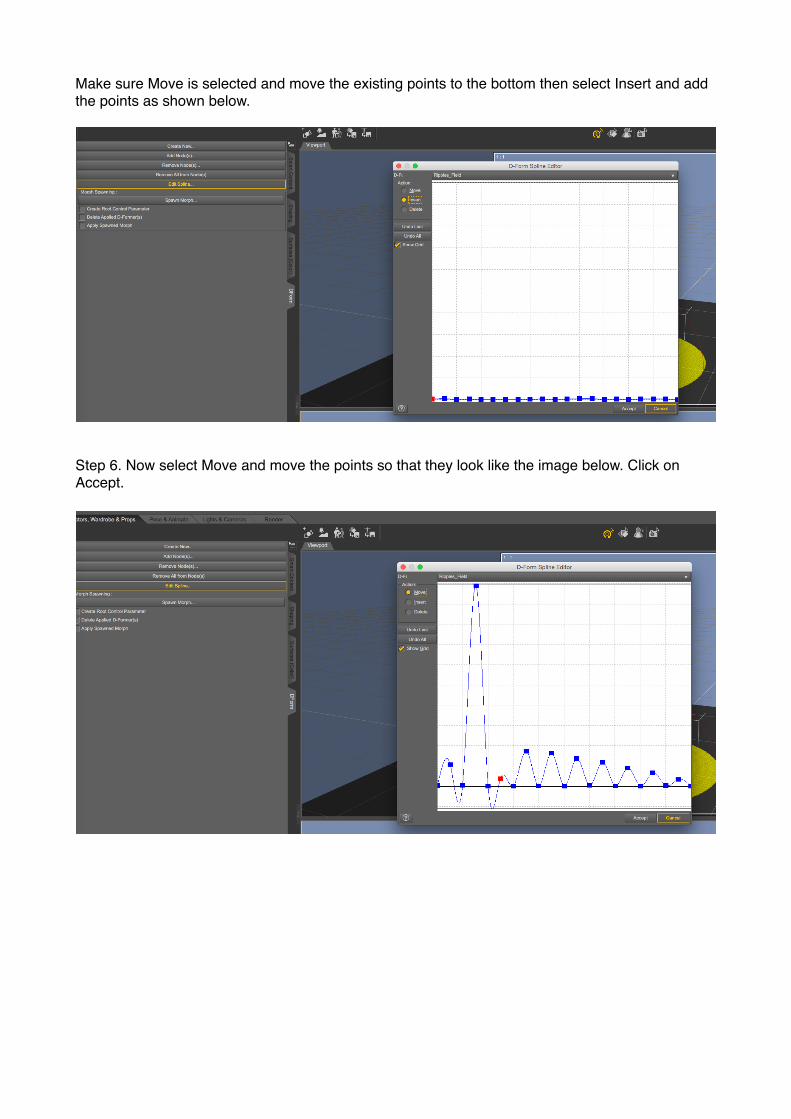
Make sure Move is selected and move the existing points to the bottom then select Insert and add the points as shown below.
Step 6. Now select Move and move the points so that they look like the image below. Click on Accept.

Step 7. Select the D-Former in the scene tab then goto the parameters tab and set the Y translate to 5.
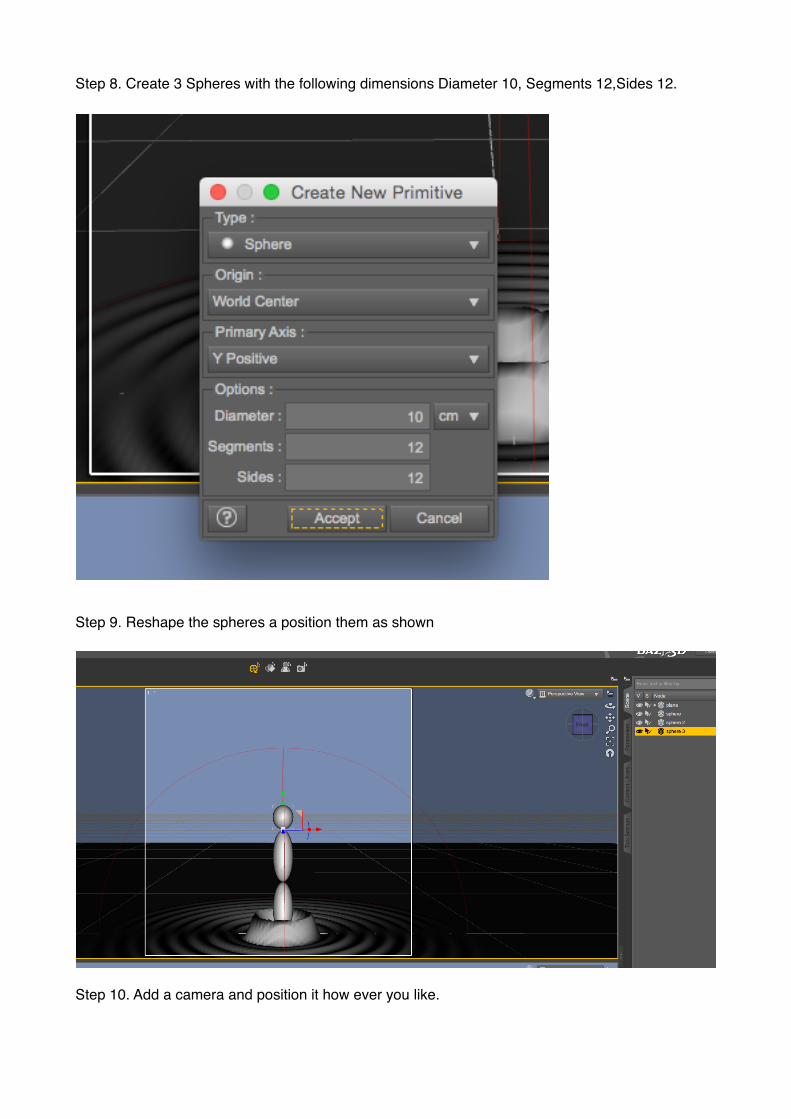
Step 8. Create 3 Spheres with the following dimensions Diameter 10, Segments 12,Sides 12.
Step 9. Reshape the spheres a position them as shown
Step 10. Add a camera and position it how ever you like.

Step 11. Goto ‘Reality - Lights & add the SunLight
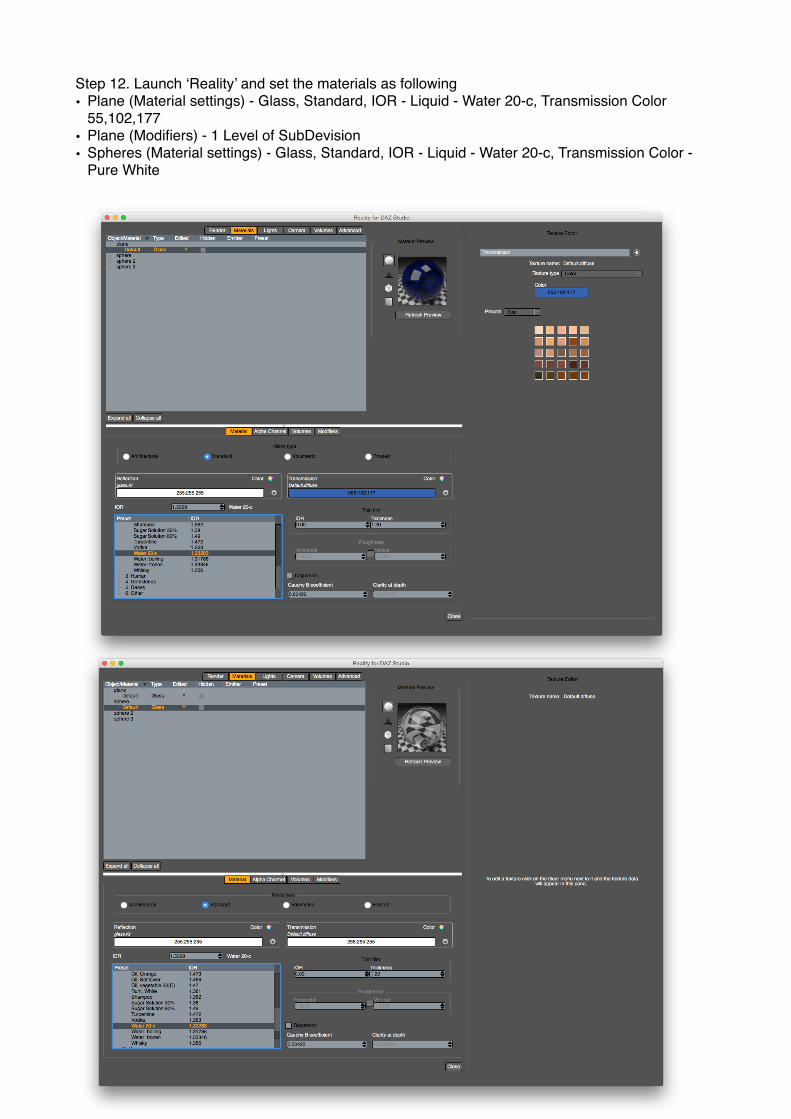
Step 12. Launch ‘Reality’ and set the materials as following• Plane (Material settings) - Glass, Standard, IOR - Liquid - Water 20-c, Transmission Color
55,102,177• Plane (Modifiers) - 1 Level of SubDevision• Spheres (Material settings) - Glass, Standard, IOR - Liquid - Water 20-c, Transmission Color -
Pure White

Final Step. Render