Residential steel - Midwest Manufacturing...IVORY ASH GRAY FOREST GREEN BURNISHED SLATE MIDNIGHT...
12
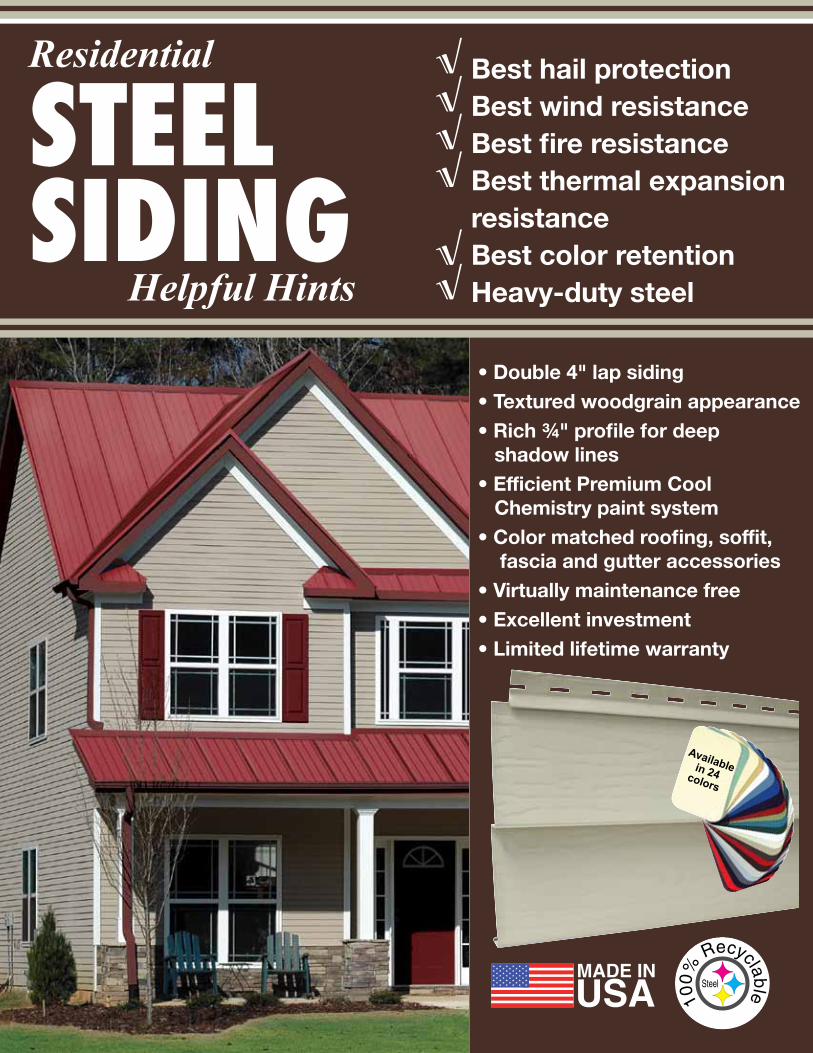
Steel 1 0 0 % R e c y c l a b l e Residential Helpful Hints STEEL SIDING Best hail protection Best wind resistance Best fire resistance Best thermal expansion resistance Best color retention Heavy-duty steel • Double 4" lap siding • Textured woodgrain appearance • Rich ¾" profile for deep shadow lines • Efficient Premium Cool Chemistry paint system • Color matched roofing, soffit, fascia and gutter accessories • Virtually maintenance free • Excellent investment • Limited lifetime warranty √ √ √ √ √ √ Available in 24 colors
Transcript of Residential steel - Midwest Manufacturing...IVORY ASH GRAY FOREST GREEN BURNISHED SLATE MIDNIGHT...
1Steel
100%
RecyclableResidential
Helpful Hints
steelsiding
Best hail protectionBest wind resistanceBest fire resistanceBest thermal expansionresistanceBest color retentionHeavy-duty steel
• Double 4" lap siding• Textured woodgrain appearance• Rich ¾" profile for deep shadow lines• Efficient Premium Cool Chemistry paint system• Color matched roofing, soffit, fascia and gutter accessories• Virtually maintenance free• Excellent investment• Limited lifetime warranty
√ √ √ √
√ √
Availablein 24colors
2
Steel
100%
Recyclable
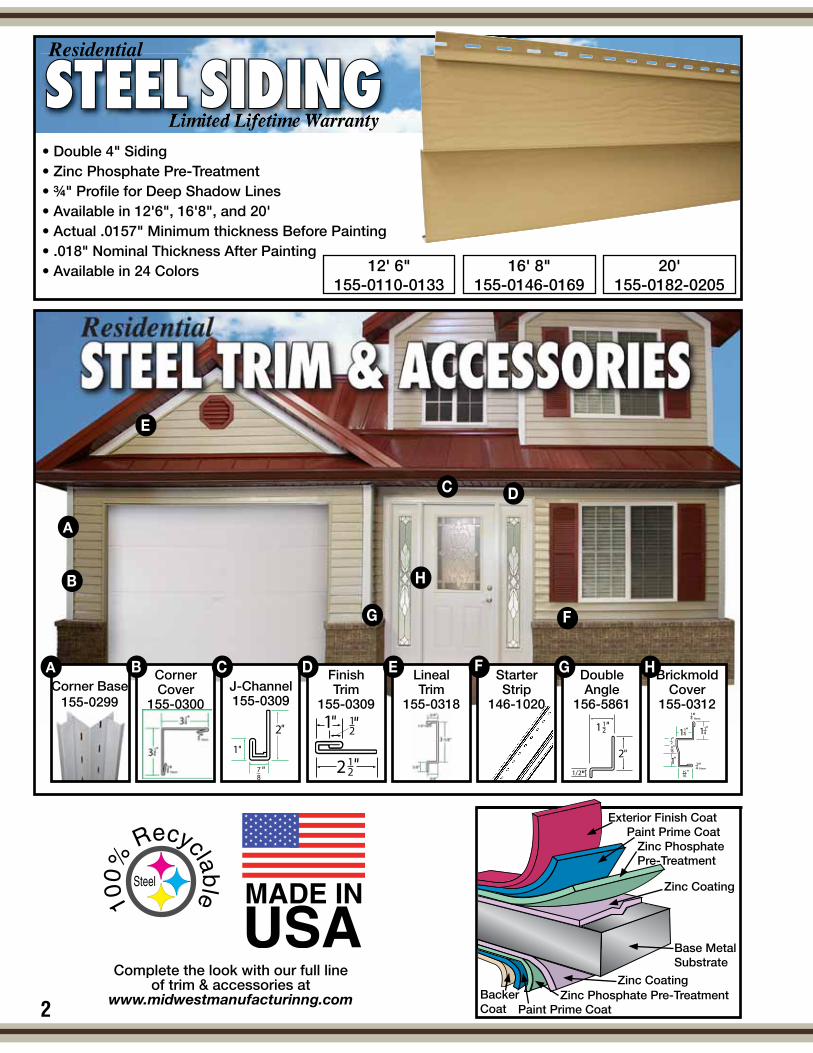
• Double 4" Siding• Zinc Phosphate Pre-Treatment• ¾" Profile for Deep Shadow Lines• Available in 12'6", 16'8", and 20'• Actual .0157" Minimum thickness Before Painting• .018" Nominal Thickness After Painting• Available in 24 Colors 12' 6"
155-0110-013316' 8"
155-0146-016920'
155-0182-0205
78_
1
2
212
12
1 1
1/2
21
2
A B C
C
D
D
E
E
F
F
G
G
H
HB
A
1
14
114
114
1516
916
12
Hem 14 Hem
1 14
11411
4
1516
916
12
Hem
14 Hem
Corner Base155-0299
CornerCover
155-0300J-Channel155-0309
FinishTrim
155-0309
Complete the look with our full line of trim & accessories at
www.midwestmanufacturinng.com
LinealTrim
155-0318
StarterStrip
146-1020
DoubleAngle
156-5861
BrickmoldCover
155-0312
Exterior Finish CoatPaint Prime Coat
Paint Prime Coat
Zinc PhosphatePre-Treatment
Zinc Phosphate Pre-Treatment
Zinc Coating
Zinc CoatingBackerCoat
Base MetalSubstrate
3
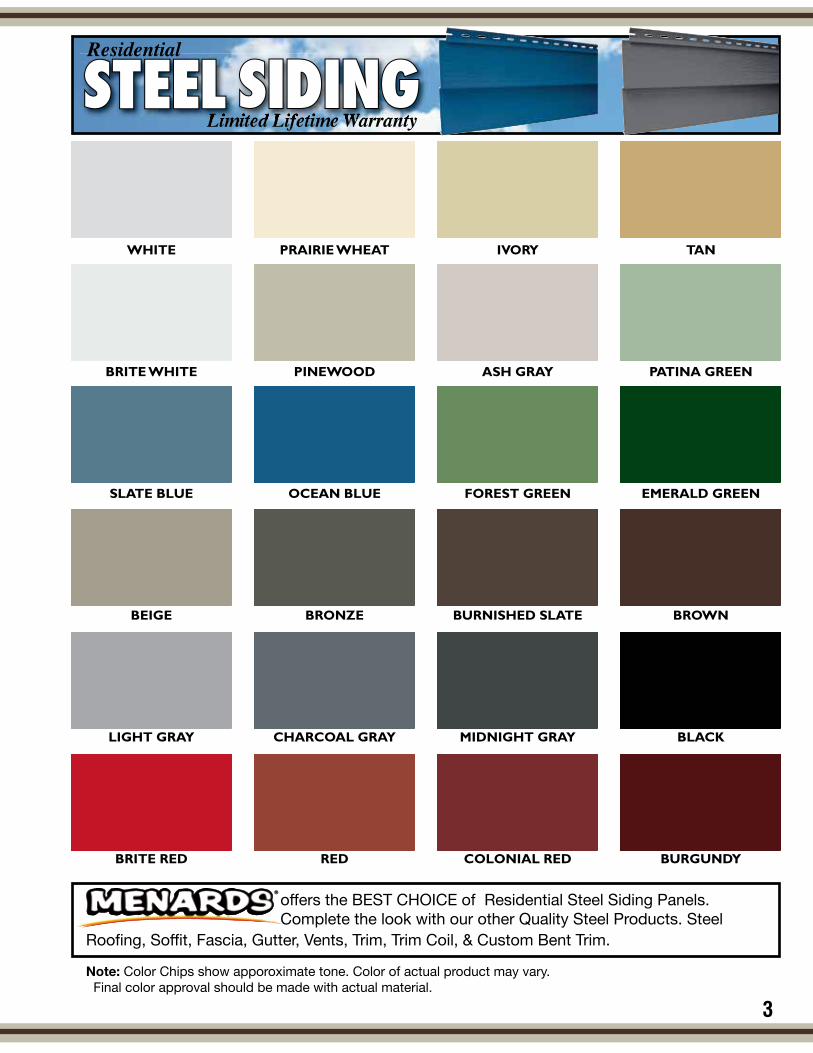
WHITE
BRITE WHITE
SLATE BLUE
BEIGE
LIGHT GRAY
BRITE RED
PRAIRIE WHEAT
PINEWOOD
OCEAN BLUE
BRONZE
CHARCOAL GRAY
RED
IVORY
ASH GRAY
FOREST GREEN
BURNISHED SLATE
MIDNIGHT GRAY
COLONIAL RED
TAN
PATINA GREEN
EMERALD GREEN
BROWN
BLACK
BURGUNDY
offers the BEST CHOICE of Residential Steel Siding Panels.Complete the look with our other Quality Steel Products. Steel
Roofing, Soffit, Fascia, Gutter, Vents, Trim, Trim Coil, & Custom Bent Trim.
Note: Color Chips show apporoximate tone. Color of actual product may vary. Final color approval should be made with actual material.
4
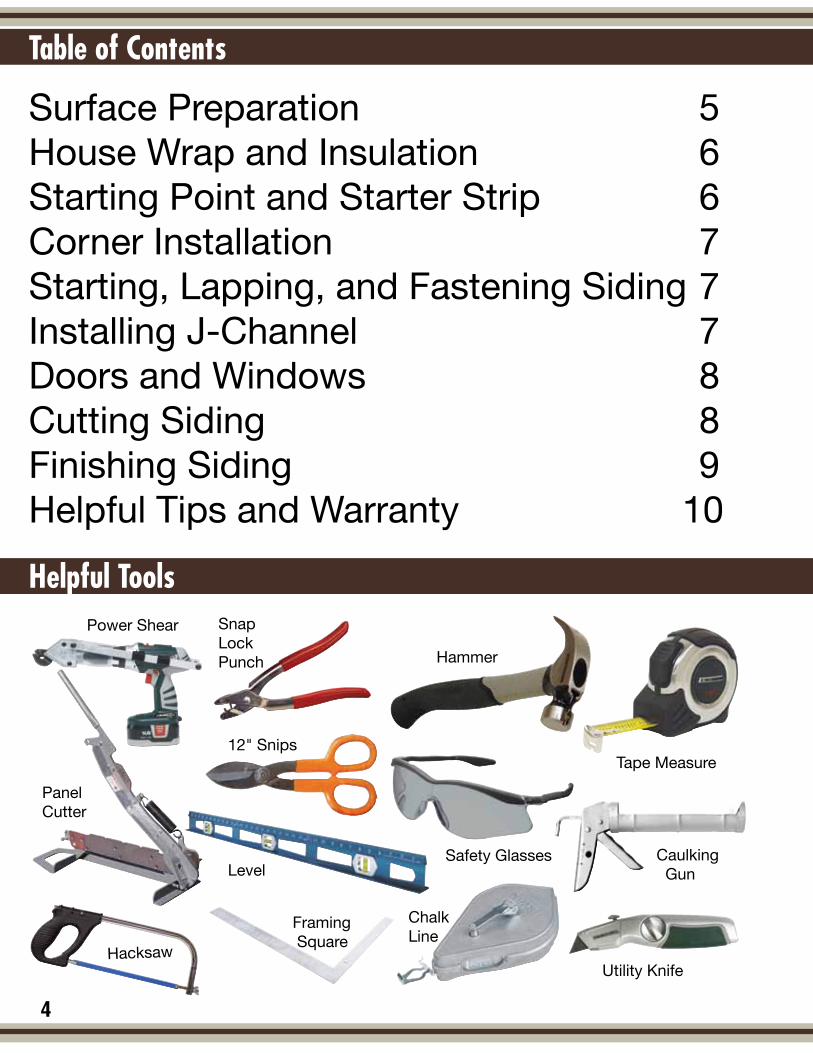
Hacksaw
Level
Hammer
Safety Glasses
Tape Measure
Utility Knife
Caulking Gun
12" Snips
Framing Square
Chalk Line
Panel Cutter
Snap Lock Punch
Power Shear
Surface Preparation 5House Wrap and Insulation 6Starting Point and Starter Strip 6Corner Installation 7Starting, Lapping, and Fastening Siding 7Installing J-Channel 7Doors and Windows 8Cutting Siding 8Finishing Siding 9Helpful Tips and Warranty 10
Table of Contents
Helpful Tools

5
The quality of the finished job depends on good preparation of the work surface. Check for low places on the surface of the wall and build out (shim) if required.
Wood furring is building out the wall surface to provide a smooth even base for nailing on the new siding. Lath strips are most commonly used. Furring is not usually necessary in new construction. Older homes often have uneven walls, and furring out low spots or shimming can help prevent a wavy appearance to the siding installation.
Prepare the entire house by replacing rotted wood and securing loose boards.
Make sure you scrape any old paint buildup, old caulking and hardened putty. This is important to do around windows and doors where it might interfere with the positioning of the new trim.
New caulk should be applied around doors and windows before installation of siding to prevent air infiltration.
Remove downspouts and downspout elbows from the wall so they are not in your way. You may also have to tie back shrubbery or vegetation to protect it from damage during the installation process.
Surface Preparation

6
Once the house is stripped and prepped, it is recommended to use a house wrap to help reduce airinfiltration. Most people wrap the entire house then come back to cut out door and window openings. House wrap is typically used on new construction, but can be used on existing homes as well.
If the walls are somewhat uneven or wavy you can shim them with lath and you can install fan foldinsulation to help give a smooth surface to apply your new siding. Sometimes on older homes you have to use a combination of lath and fanfold insulation. Once the house has been prepped you can begin to install your starter strip.
To begin, find the lowest corner of the house. Partially drive a nail about 10 inches above the lowestcorner or enough to clear the height of a full siding panel. Measure from the eave or soffit down to the nail you just put in. That dimension will be used to put a nail at all corners of the house. This will ensure you have a consistent distance from the soffit line to the starter strip. To establish a level plane, attach a string line from nail to nail and work your way around the house. Be sure to check the string lines with a level as you go just to make sure you are indeed level. Next, measure down approximately nine inches from the string line to find the bottom of where the starter strip will be placed. Install the starter strip all the way around the house. The starter strip should start and end approximately 3’’ from the corner of the house.
Note: The dimension you measure down from the string line could vary depending on the location of your string line and the location of the lowest corner of the house. You want the dimension to be consistent all the way around the house but you also want the starter strip at the bottom of the wall with no exposed wood
House Wrap and Insulation
Starting Point and Starter Strip
7
Corner Insulation
Starting, Lapping and Fastening Siding
Installing J-Channel
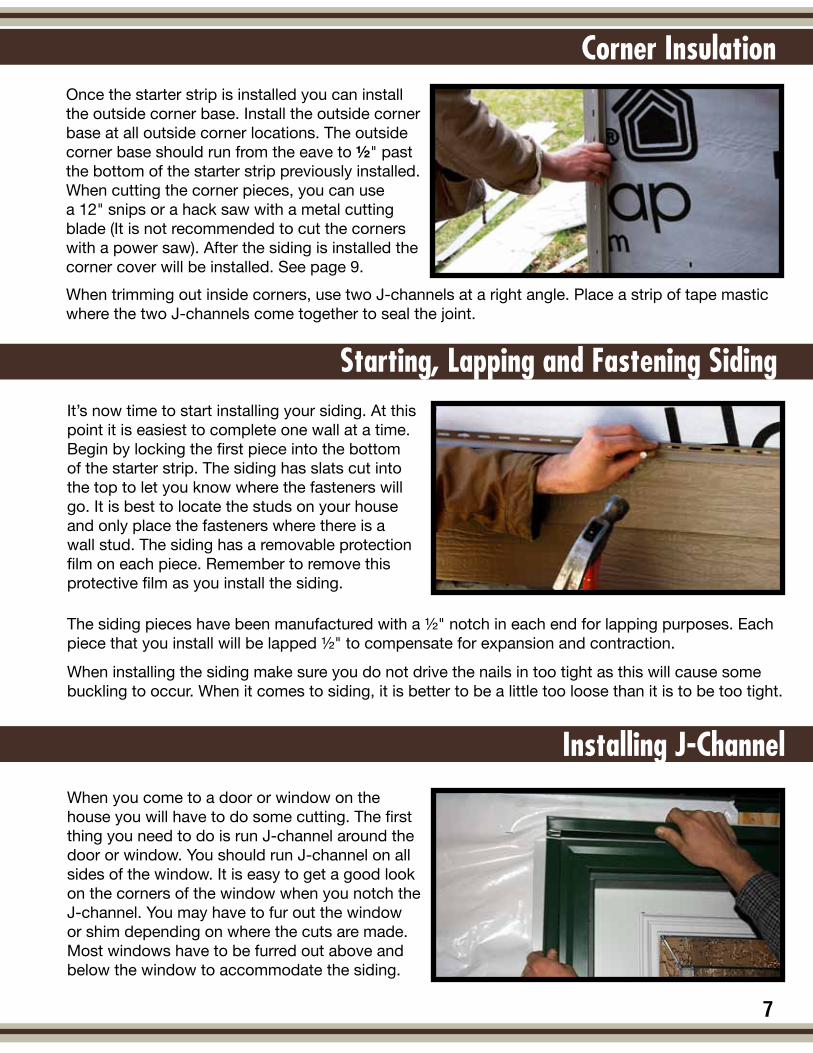
Once the starter strip is installed you can install the outside corner base. Install the outside corner base at all outside corner locations. The outside corner base should run from the eave to ½" past the bottom of the starter strip previously installed. When cutting the corner pieces, you can use a 12" snips or a hack saw with a metal cutting blade (It is not recommended to cut the corners with a power saw). After the siding is installed the corner cover will be installed. See page 9.When trimming out inside corners, use two J-channels at a right angle. Place a strip of tape mastic where the two J-channels come together to seal the joint.
It’s now time to start installing your siding. At this point it is easiest to complete one wall at a time. Begin by locking the first piece into the bottom of the starter strip. The siding has slats cut into the top to let you know where the fasteners will go. It is best to locate the studs on your house and only place the fasteners where there is a wall stud. The siding has a removable protection film on each piece. Remember to remove this protective film as you install the siding.
The siding pieces have been manufactured with a ½" notch in each end for lapping purposes. Eachpiece that you install will be lapped ½" to compensate for expansion and contraction.
When installing the siding make sure you do not drive the nails in too tight as this will cause some buckling to occur. When it comes to siding, it is better to be a little too loose than it is to be too tight.
When you come to a door or window on the house you will have to do some cutting. The first thing you need to do is run J-channel around the door or window. You should run J-channel on all sides of the window. It is easy to get a good look on the corners of the window when you notch the J-channel. You may have to fur out the window or shim depending on where the cuts are made. Most windows have to be furred out above and below the window to accommodate the siding.
8
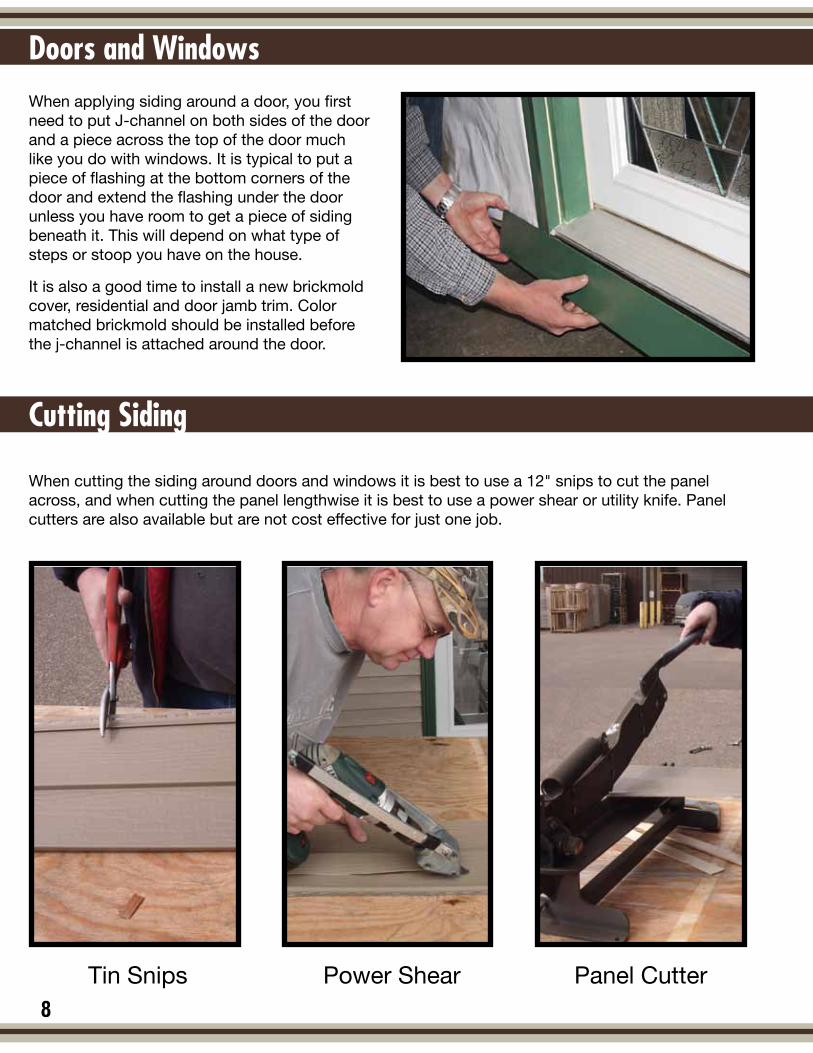
When cutting the siding around doors and windows it is best to use a 12" snips to cut the panel across, and when cutting the panel lengthwise it is best to use a power shear or utility knife. Panel cutters are also available but are not cost effective for just one job.
Doors and Windows
Cutting Siding
When applying siding around a door, you first need to put J-channel on both sides of the door and a piece across the top of the door much like you do with windows. It is typical to put a piece of flashing at the bottom corners of the door and extend the flashing under the door unless you have room to get a piece of siding beneath it. This will depend on what type of steps or stoop you have on the house.
It is also a good time to install a new brickmold cover, residential and door jamb trim. Color matched brickmold should be installed before the j-channel is attached around the door.
Panel CutterPower ShearTin Snips
9
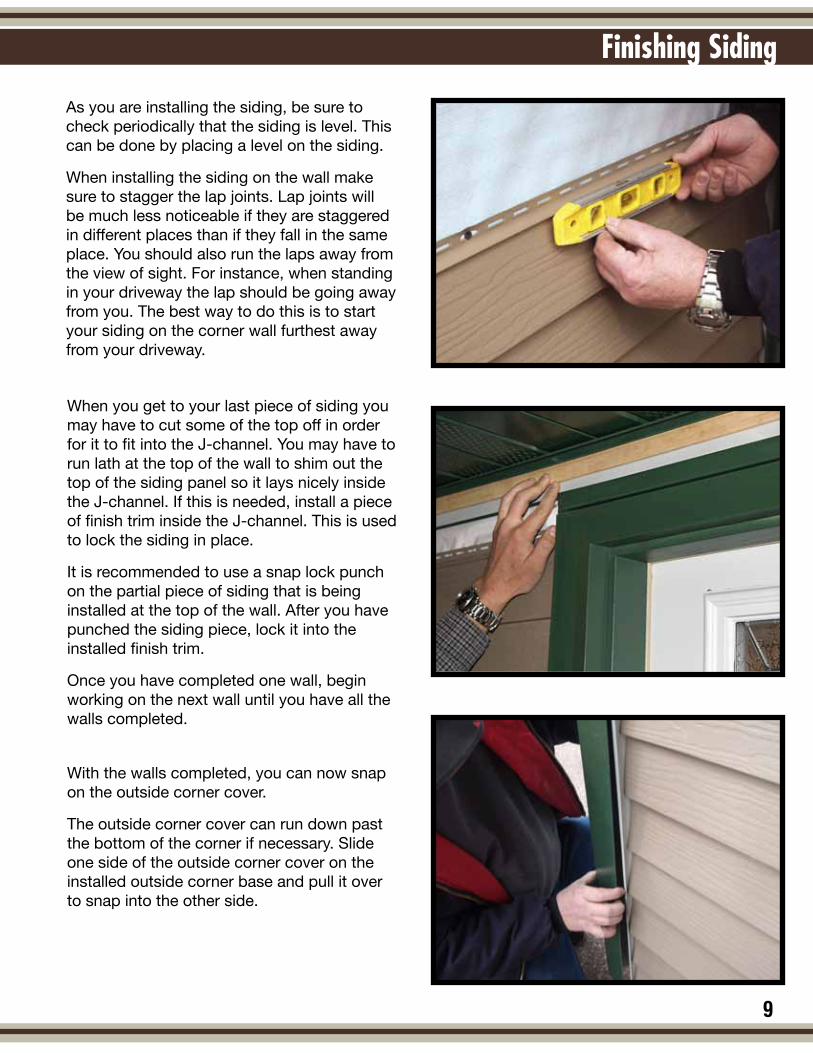
As you are installing the siding, be sure to check periodically that the siding is level. This can be done by placing a level on the siding.
When installing the siding on the wall make sure to stagger the lap joints. Lap joints will be much less noticeable if they are staggered in different places than if they fall in the same place. You should also run the laps away from the view of sight. For instance, when standing in your driveway the lap should be going away from you. The best way to do this is to start your siding on the corner wall furthest away from your driveway.
With the walls completed, you can now snap on the outside corner cover.
The outside corner cover can run down past the bottom of the corner if necessary. Slide one side of the outside corner cover on the installed outside corner base and pull it over to snap into the other side.
When you get to your last piece of siding you may have to cut some of the top off in order for it to fit into the J-channel. You may have to run lath at the top of the wall to shim out the top of the siding panel so it lays nicely inside the J-channel. If this is needed, install a piece of finish trim inside the J-channel. This is used to lock the siding in place.
It is recommended to use a snap lock punch on the partial piece of siding that is being installed at the top of the wall. After you have punched the siding piece, lock it into the installed finish trim.
Once you have completed one wall, begin working on the next wall until you have all the walls completed.
Finishing Siding
10
Helpful Tips• It is best to install your siding as soon as possible. Water can get into a sealed bundle bycondensation with temperature changes common to midwest summers. This can happen without direct exposure to rain or other sources of water. Moisture that is trapped in a bundle for an extended period can damage the paint surface, cause paint failure and even red rust. People often ask, “How long is too long?” This is a hard question to answer because it depends on how much moisture is in the bundle, and the warmer the temperature of the bundle, the faster the damage occurs.
• Store indoors with the bundle sloped enough so that any moisture that might be inside the bundle will drain out. If the material is kept absolutely dry inside the bundle, it could be stored indefinitely in a dry environment. Please keep in mind that condensation in the bundle can happen due to temperature swings or by just sitting in the sun.
• Never use a power saw, skil saw or mechanical blade that creates heat while cutting. Using any of these cutting methods will cause the steel to prematurely rust or cause red rust specks to be found on the panels.
• Stagger your laps. Never lap the siding all in the same place on the wall.
• Hang the siding. To avoid buckling the siding, don’t put the fasteners too tight.
• Fasteners should go into the studs on the wall. If you don’t hit a stud you might hit a pipe or wire that could be in the wall cavity.
• The most important part of installing siding is the first piece you put on. It is critical that it is level and the same distance from corner to corner as the eave to bottom dimension.
Limited Lifetime WarrantyFilm Integrity
Paint film integrity has Limited Lifetime Warranty for original purchaser. Residential Steel Siding will not peel, crack, check, or flake (not to be construed to include slight hairline cracking, which occurs during fabrication) for the lifetime of the original purchaser. Distance from salt water environment must exceed 2000 meters for warranty to apply.
Chalk IntegrityWill not chalk more than a number 8 rating on vertical installations for a period of 30 years, as determined by the procedure outlined in ASTM D-4214, Method A. Distance from saltwater environment must exceed 2000 meters for warranty to apply.
FadeWill not fade more than 5 NBS (Hunter) Units on vertical installations for a period of 30 years, as determined by ASTM D-2244 and ASTM D-3964. Distance from salt water environment must exceed 2000 meters for warranty to apply.
For specific guidelines refer to Akzo Nobel’s Ceram-A-Star 1050 Lifetime Warranty.
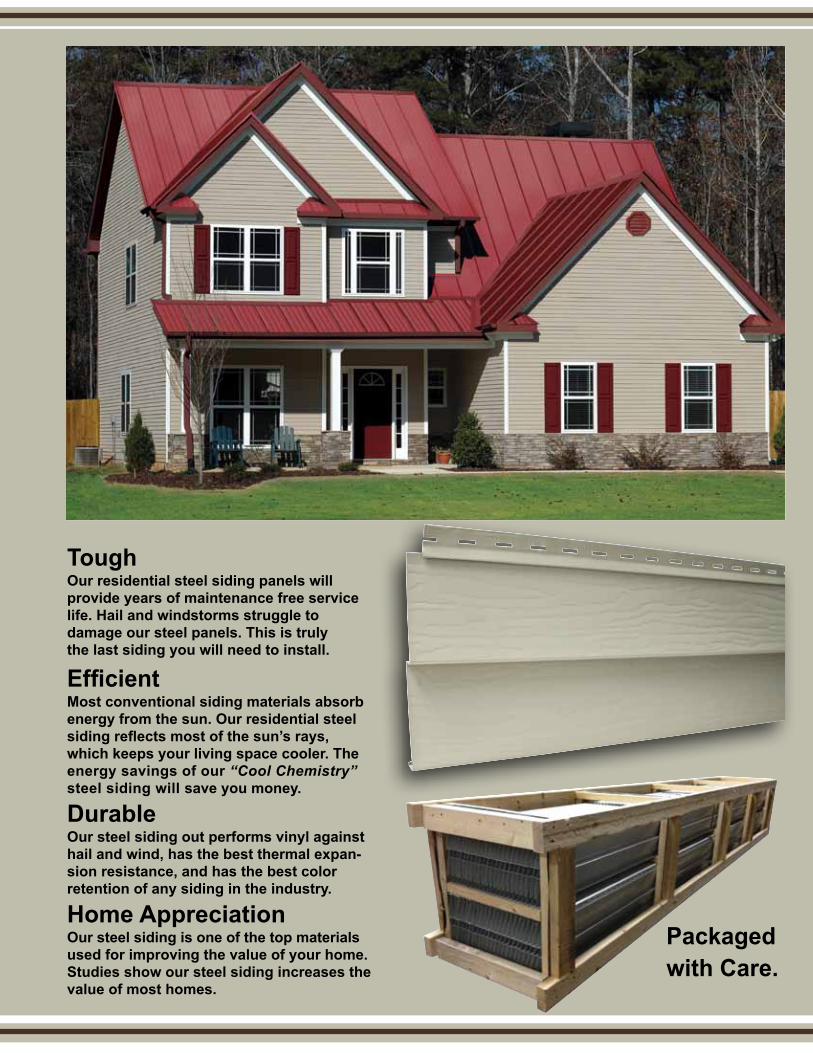
ToughOur residential steel siding panels will provide years of maintenance free service life. Hail and windstorms struggle to damage our steel panels. This is truly the last siding you will need to install.
EfficientMost conventional siding materials absorb energy from the sun. Our residential steel siding reflects most of the sun’s rays, which keeps your living space cooler. The energy savings of our “Cool Chemistry” steel siding will save you money.
DurableOur steel siding out performs vinyl against hail and wind, has the best thermal expan-sion resistance, and has the best color retention of any siding in the industry.
Home AppreciationOur steel siding is one of the top materials used for improving the value of your home. Studies show our steel siding increases the value of most homes.
Packagedwith Care.

with our other quality steel products!
Available atwww.midwestmanufacturing.com
Midwest Manufacturing © 12/12
Steel Soffit & Fascia
CUSTOM TRIM - You Draw It, We Bend It!
Steel Gutter Systems Steel Roofing
Steel
100%
Recyclable