removing FPD
7
Removing fixed prostheses using the ATD automatic crown and bridge remover By Dr. Ian E. Shuman, Baltimore, MD. Information provided by J. Morita USA When removing cemented provisionals and final fixed prostheses, several factors must be taken into consideration, including the type of luting agent used, the condition of the existing abutments and associated tissues, and the condition of the prosthesis both during and after removal. Mode of operation The ATD system uses a specialized handpiece that can attach to either a slowspeed electric or air-driven handpiece motor with speeds between 5,000 rpm and 25,000 rpm. The system is capable of producing a series of up to 20 tapping strokes per second and is available with connectors for either an E-type standard, Star Titan, or Midwest Shorty Two-Speed motors. It includes a range of hook and wire tips (Fig. 1) that a re designed for removing any fixed prosthetic configuration. Fig. 1 A range of hook and wire tips are included with the ATD. Both the intensity and frequency of the stroke force are adjustable. Intensity is the amount of force applied to the prosthesis and is adjusted by turning a ring below the insert. Once set, a regulated wave of stroke force is created, preventing a rebound effect and encouraging a break in the cement seal. Frequency is the number of strokes generated by the ATD handpiece and is directly proportional to the motor speed. The minimum 5,000 rpm frequency generates a one- stroke-per-second frequency. The maximum 25,000 rpm speed generates a frequency of 20 strokes per second. The Rotary Master variable-speed slowspeed electric motor (J. Morita USA) is ideally suited for the ATD remover. General usage instructions Regardless of the case involved, there are several general steps required for using the remover. 1. Assemble the appropriate wire or hook with the handpiece and stabilize it against the unit to be removed. 2. Activate the motor using the rheostat. 3. Before activating the tapping action, the ATD creates a vibrational frequency that
-
Upload
antony-sebastian -
Category
Documents
-
view
250 -
download
0
Transcript of removing FPD
8/3/2019 removing FPD
http://slidepdf.com/reader/full/removing-fpd 1/7
Removing fixed prostheses using the ATD automaticcrown and bridge remover
By Dr. Ian E. Shuman, Baltimore, MD. Information provided by J. Morita USA
When removing cemented provisionals and final fixed prostheses, several factors must be
taken into consideration, including the type of luting agent used, the condition of theexisting abutments and associated tissues, and the condition of the prosthesis both during
and after removal.
Mode of operation
The ATD system uses a specialized handpiece that can attach to either a slowspeed
electric or air-driven handpiece motor with speeds between 5,000 rpm and 25,000 rpm.The system is capable of producing a series of up to 20 tapping strokes per second and is
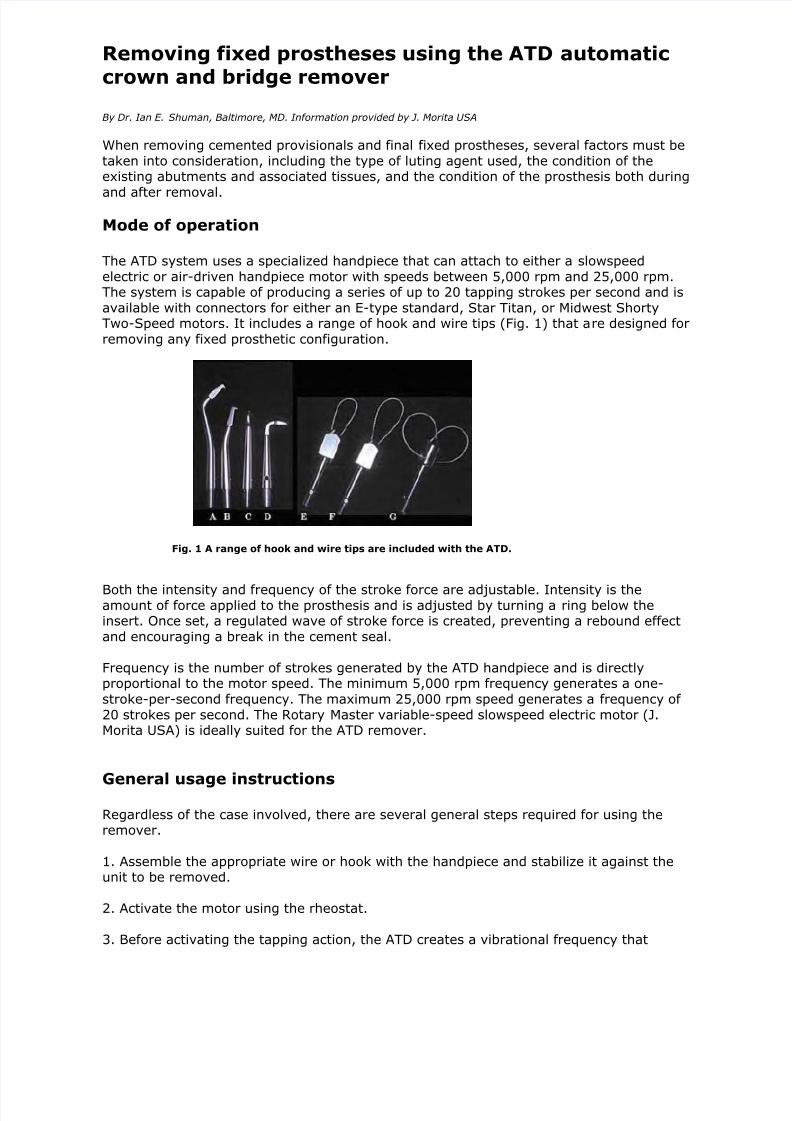
available with connectors for either an E-type standard, Star Titan, or Midwest ShortyTwo-Speed motors. It includes a range of hook and wire tips (Fig. 1) that are designed for
removing any fixed prosthetic configuration.
Fig. 1 A range of hook and wire tips are included with the ATD.
Both the intensity and frequency of the stroke force are adjustable. Intensity is theamount of force applied to the prosthesis and is adjusted by turning a ring below theinsert. Once set, a regulated wave of stroke force is created, preventing a rebound effect
and encouraging a break in the cement seal.
Frequency is the number of strokes generated by the ATD handpiece and is directlyproportional to the motor speed. The minimum 5,000 rpm frequency generates a one-
stroke-per-second frequency. The maximum 25,000 rpm speed generates a frequency of
20 strokes per second. The Rotary Master variable-speed slowspeed electric motor (J.Morita USA) is ideally suited for the ATD remover.
General usage instructions
Regardless of the case involved, there are several general steps required for using theremover.
1. Assemble the appropriate wire or hook with the handpiece and stabilize it against theunit to be removed.
2. Activate the motor using the rheostat.
3. Before activating the tapping action, the ATD creates a vibrational frequency that
8/3/2019 removing FPD
http://slidepdf.com/reader/full/removing-fpd 2/7
promotes the initial breakdown of the cement bond.
4. Pull the ATD in a coronal direction until the wire or hook engages against the unit to be
removed. A regulated force at regulated time intervals occurs, applying a steadyconcentration of energy against the desired location.
The following case reports illustrate several applications of the ATD automatic crown and
bridge remover.
Case 1: Single crown
A provisional crown requires removal to deliver the lab-fabricated porcelain-to-metalcrown.
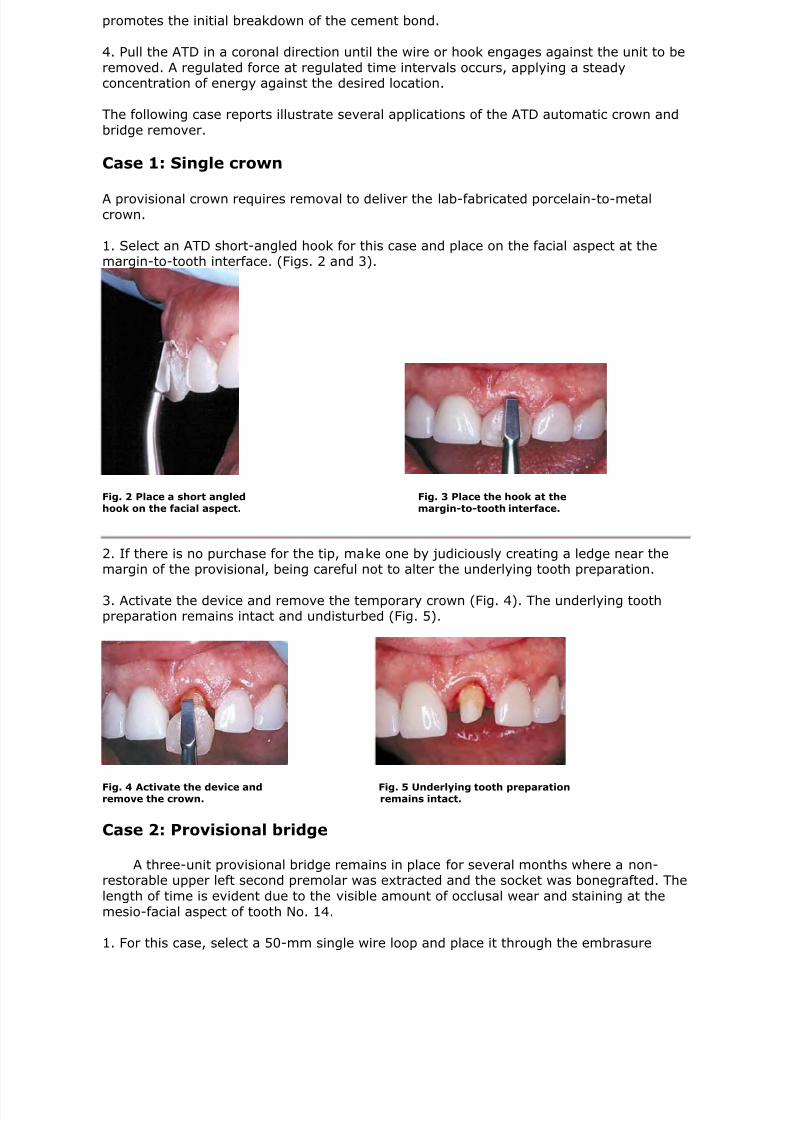
1. Select an ATD short-angled hook for this case and place on the facial aspect at themargin-to-tooth interface. (Figs. 2 and 3).
Fig. 2 Place a short angled Fig. 3 Place the hook at thehook on the facial aspect. margin-to-tooth interface.
2. If there is no purchase for the tip, make one by judiciously creating a ledge near themargin of the provisional, being careful not to alter the underlying tooth preparation.
3. Activate the device and remove the temporary crown (Fig. 4). The underlying toothpreparation remains intact and undisturbed (Fig. 5).
Fig. 4 Activate the device and Fig. 5 Underlying tooth preparationremove the crown. remains intact.
Case 2: Provisional bridge
A three-unit provisional bridge remains in place for several months where a non-restorable upper left second premolar was extracted and the socket was bonegrafted. The
length of time is evident due to the visible amount of occlusal wear and staining at the
mesio-facial aspect of tooth No. 14.
1. For this case, select a 50-mm single wire loop and place it through the embrasure
8/3/2019 removing FPD
http://slidepdf.com/reader/full/removing-fpd 3/7
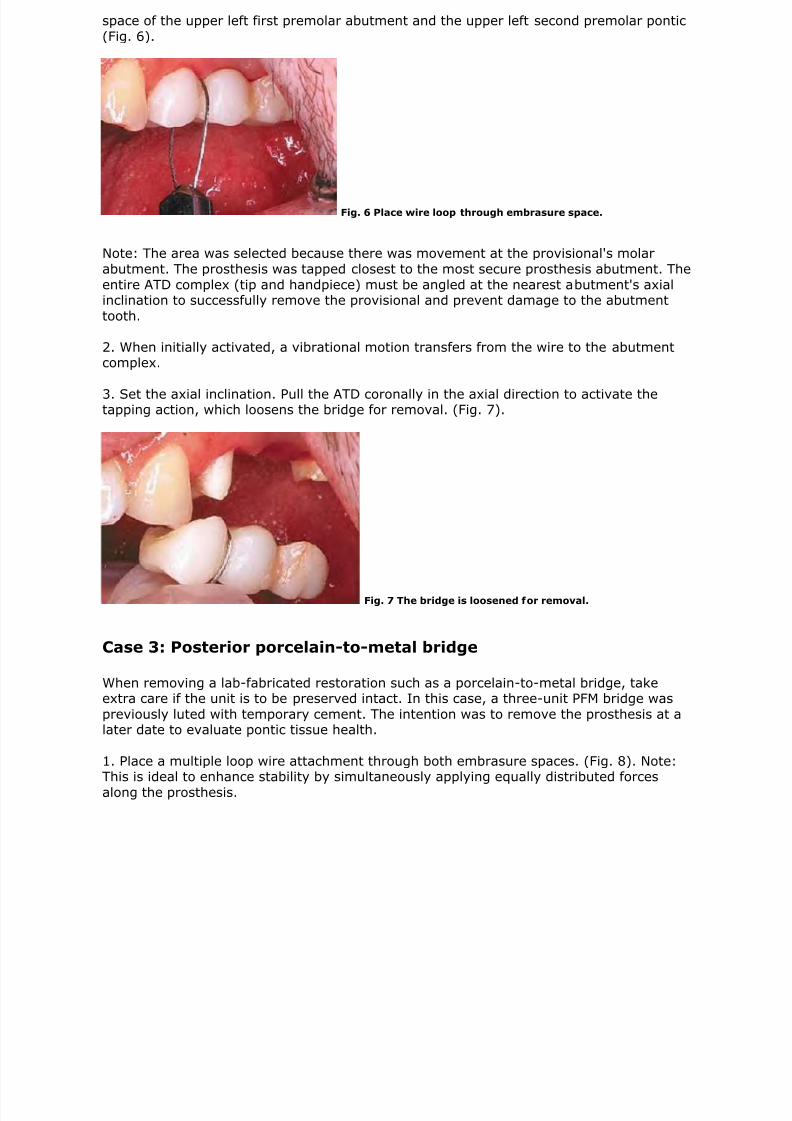
space of the upper left first premolar abutment and the upper left second premolar pontic
(Fig. 6).
Fig. 6 Place wire loop through embrasure space.
Note: The area was selected because there was movement at the provisional's molar
abutment. The prosthesis was tapped closest to the most secure prosthesis abutment. The
entire ATD complex (tip and handpiece) must be angled at the nearest abutment's axialinclination to successfully remove the provisional and prevent damage to the abutment
tooth.
2. When initially activated, a vibrational motion transfers from the wire to the abutmentcomplex.
3. Set the axial inclination. Pull the ATD coronally in the axial direction to activate thetapping action, which loosens the bridge for removal. (Fig. 7).
Fig. 7 The bridge is loosened for removal.
Case 3: Posterior porcelain-to-metal bridge
When removing a lab-fabricated restoration such as a porcelain-to-metal bridge, takeextra care if the unit is to be preserved intact. In this case, a three-unit PFM bridge was
previously luted with temporary cement. The intention was to remove the prosthesis at alater date to evaluate pontic tissue health.
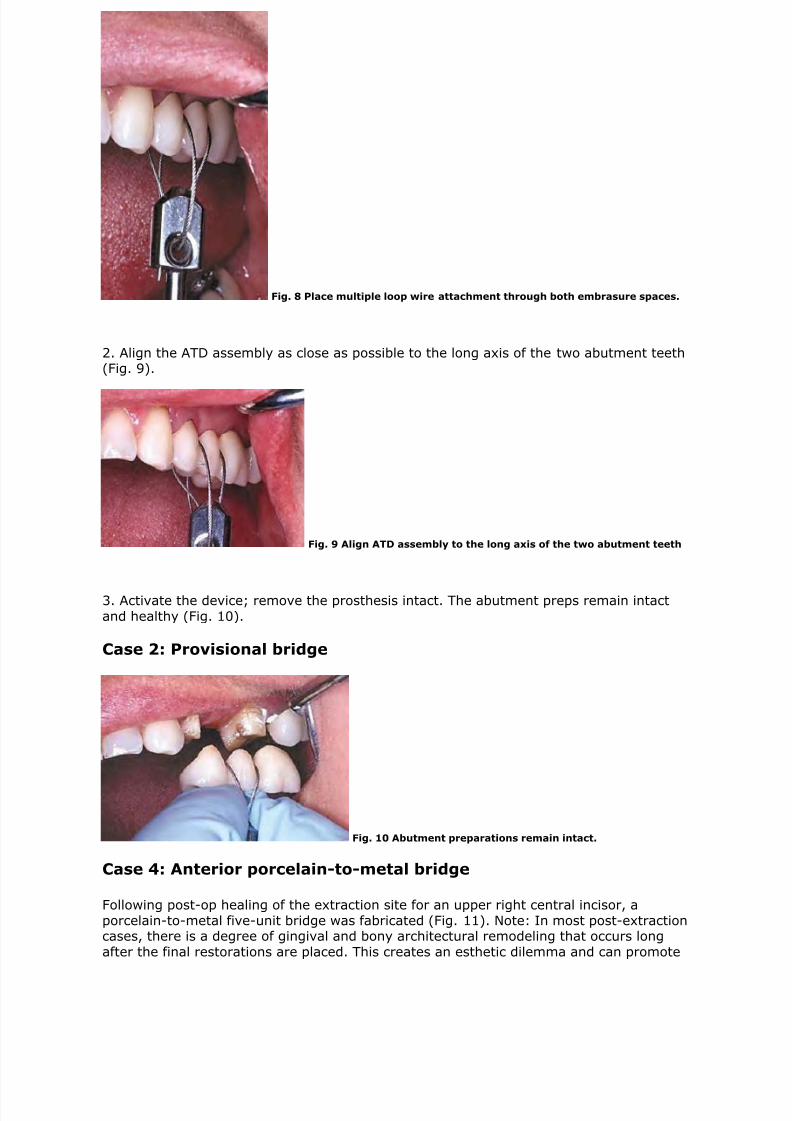
1. Place a multiple loop wire attachment through both embrasure spaces. (Fig. 8). Note:This is ideal to enhance stability by simultaneously applying equally distributed forces
along the prosthesis.
8/3/2019 removing FPD
http://slidepdf.com/reader/full/removing-fpd 4/7
Fig. 8 Place multiple loop wire attachment through both embrasure spaces.
2. Align the ATD assembly as close as possible to the long axis of the two abutment teeth(Fig. 9).
Fig. 9 Align ATD assembly to the long axis of the two abutment teeth
3. Activate the device; remove the prosthesis intact. The abutment preps remain intact
and healthy (Fig. 10).
Case 2: Provisional bridge
Fig. 10 Abutment preparations remain intact.
Case 4: Anterior porcelain-to-metal bridge
Following post-op healing of the extraction site for an upper right central incisor, a
porcelain-to-metal five-unit bridge was fabricated (Fig. 11). Note: In most post-extractioncases, there is a degree of gingival and bony architectural remodeling that occurs long
after the final restorations are placed. This creates an esthetic dilemma and can promote
8/3/2019 removing FPD
http://slidepdf.com/reader/full/removing-fpd 5/7
food impaction and gingival irritation leading to caries of adjacent abutment teeth and/or
periodontal disease.
Fig. 11 Porcelain-to-metal five-unit bridge.
To evaluate the area, the bridge was temporarily cemented into place and then removed 6months after placement to evaluate the space between the porcelain pontic and the upperright central incisor extraction site's pontic tissue.
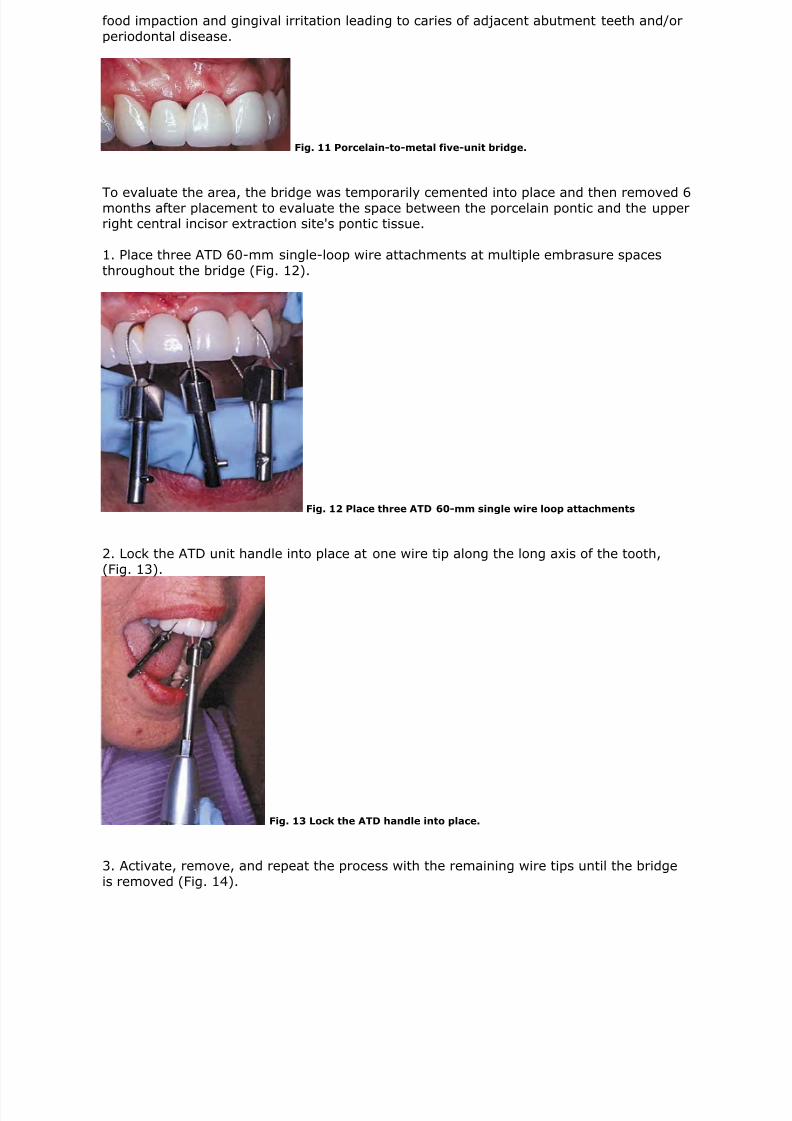
1. Place three ATD 60-mm single-loop wire attachments at multiple embrasure spaces
throughout the bridge (Fig. 12).
Fig. 12 Place three ATD 60-mm single wire loop attachments
2. Lock the ATD unit handle into place at one wire tip along the long axis of the tooth,
(Fig. 13).
Fig. 13 Lock the ATD handle into place.
3. Activate, remove, and repeat the process with the remaining wire tips until the bridge
is removed (Fig. 14).
8/3/2019 removing FPD
http://slidepdf.com/reader/full/removing-fpd 6/7
Fig. 14 The bridge is removed.
Note: For predictable results when preparations are parallel, as in this case, the process
requires patience, gentle tapping forces, and persistence.
Case 5: Maryland bridge
The weakest link in the retention of the cast Maryland bridge has been the adhesivecement bond breakdown between retainer wings and abutment tooth structure. In this
case, the condition had progressed from cement loss and marginal leakage to caries of the
abutment teeth (Fig. 15). The prosthesis became loosened at the molar but was still fixedto the premolar abutment.
Fig. 15 Condition has progressed to caries of the abutment teeth.
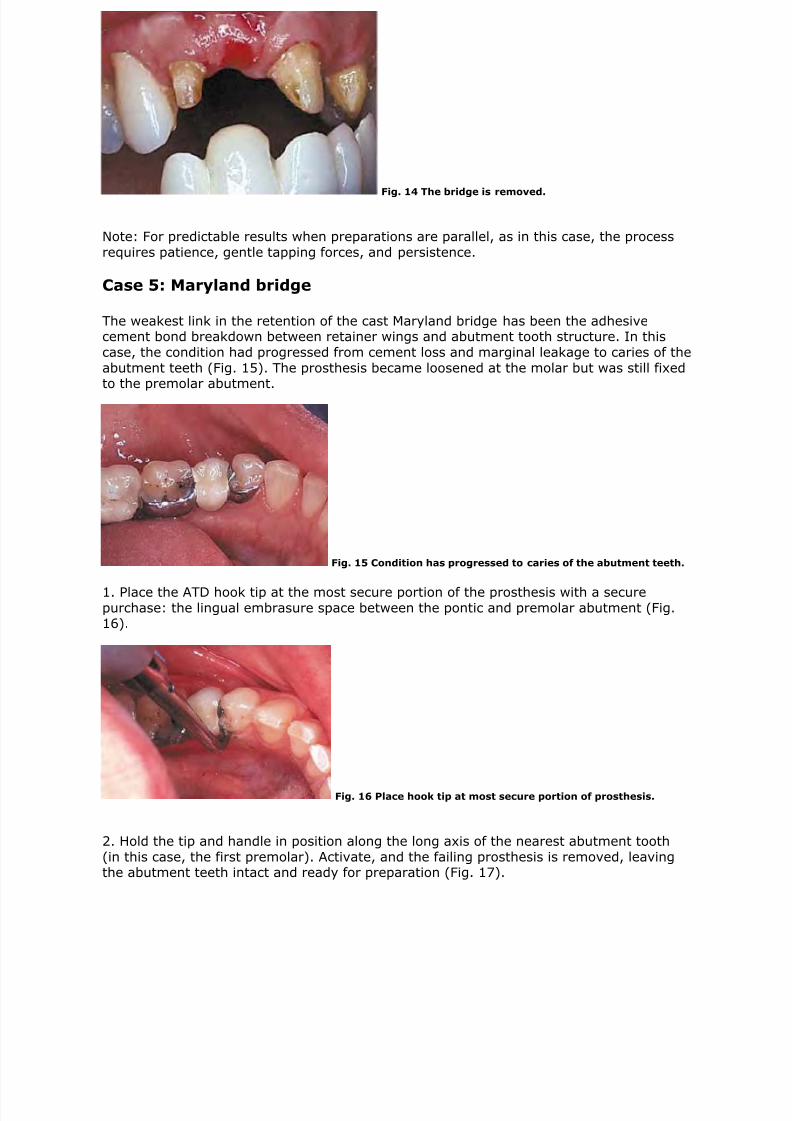
1. Place the ATD hook tip at the most secure portion of the prosthesis with a securepurchase: the lingual embrasure space between the pontic and premolar abutment (Fig.16).
Fig. 16 Place hook tip at most secure portion of prosthesis.
2. Hold the tip and handle in position along the long axis of the nearest abutment tooth
(in this case, the first premolar). Activate, and the failing prosthesis is removed, leavingthe abutment teeth intact and ready for preparation (Fig. 17).

8/3/2019 removing FPD
http://slidepdf.com/reader/full/removing-fpd 7/7
Fig. 17 Maryland bridge is removed, leaving abutment teeth intact.