Rell Documentation
153
Rell Documentation Release v0.10.1 ChromaWay AB Aug 22, 2021
Transcript of Rell Documentation

Rell DocumentationRelease v0.10.1
ChromaWay AB
Aug 22, 2021


Contents
1 Rell language 3
2 Chromia 52.1 Get Started with Web IDE . . . . . . . . . . . . . . . . . . . . . . . . . . . . . . . . . . . . . . . . 52.2 Rell Basics . . . . . . . . . . . . . . . . . . . . . . . . . . . . . . . . . . . . . . . . . . . . . . . . 92.3 Example Projects . . . . . . . . . . . . . . . . . . . . . . . . . . . . . . . . . . . . . . . . . . . . . 182.4 Language Features . . . . . . . . . . . . . . . . . . . . . . . . . . . . . . . . . . . . . . . . . . . . 282.5 Advanced Topics . . . . . . . . . . . . . . . . . . . . . . . . . . . . . . . . . . . . . . . . . . . . . 652.6 Upgrading to Rell 0.10.x . . . . . . . . . . . . . . . . . . . . . . . . . . . . . . . . . . . . . . . . . 1092.7 Eclipse IDE . . . . . . . . . . . . . . . . . . . . . . . . . . . . . . . . . . . . . . . . . . . . . . . . 1122.8 Run.XML . . . . . . . . . . . . . . . . . . . . . . . . . . . . . . . . . . . . . . . . . . . . . . . . . 145
i

ii

Rell Documentation, Release v0.10.1
This section discuss Rell and its position within the Chromia platform.
If you are eager to get started with Rell, you can safely skip straight to the Quick Start section.
For code references, visit Language Features.
Contents 1

Rell Documentation, Release v0.10.1
2 Contents

CHAPTER 1
Rell language
Most dapp blockchain platforms use virtual machines of various kinds. But a traditional virtual machine architecturedoesn’t work very well with the Chromia relational data model, as we need a way to encode queries as well asoperations. For this reason, we are taking a more language-centric approach: a new language called Rell (Relationallanguage) will be used for dapp programming. This language allows programmers to describe the data model/schema,queries, and procedural application code.
Rell code is compiled to an intermediate binary format which can be understood as code for a specialized virtualmachine. Chromia nodes will then translate queries contained in this code into SQL (while making sure this translationis safe) and execute code as needed using an interpreter or compiler.
Rell has the following features:
• Type safety / static type checks. It’s very important to catch programming errors at the compilation stage toprevent financial losses. Rell is much more type-safe than SQL, and it makes sure that types returned by queriesmatch types used in procedural code.
• Safety-optimized. Arithmetic operations are safe right out of the box, programmers do not need to worry aboutoverflows. Authorization checks are explicitly required.
• Concise, expressive and convenient. Many developers dislike SQL because it is highly verbose. Rell doesn’tbother developers with details which can be derived automatically. As a data definition language, Rell is up to7x more compact than SQL.
• Allows meta-programming. We do not want application developers to implement the basics from scratch forevery dapp. Rell will allow functionality to be bundled as templates.
Our research indicated that no existing language or environment has this feature set, and thus development of a newlanguage was absolutely necessary.
We designed Rell in such a way that it is easy to learn for programmers:
• Programmers can use relational programming idioms they are already familiar with. However, they don’t haveto go out of their way to express everything through relational algebra: Rell can seamlessly merge relationalconstructs with procedural programming.
• The language is deliberately similar to modern programming languages like JavaScript and Kotlin. A familiarlanguage is easier to adapt to, and our internal tests show that programmers can become proficient in Rell in
3

Rell Documentation, Release v0.10.1
matter of days. In contrast, the ALGOL-style syntax of PL/SQL generally feels unintuitive to modern develop-ers.
4 Chapter 1. Rell language

CHAPTER 2
Chromia
Rell is built for Chromia. Chromia is a new blockchain platform for decentralized applications, conceived in responseto the shortcomings of existing platforms and designed to enable a new generation of dapps to scale beyond what iscurrently possible
While platforms such as Ethereum allow any kind of application to be implemented in theory, in practice they havemany limitations: bad user experience, high fees, frustrating developer experience, poor security. This prevents de-centralized apps (dapps) from going mainstream.
We believe that to address these problems properly we need to seriously rethink the blockchain architecture andprogramming model with the needs of decentralized applications in mind. Our priorities are to:
• Allow dapps to scale to millions of users.
• Improve the user experience of dapps to achieve parity with centralized applications.
• Allow developers to build secure applications with using familiar paradigms.
2.1 Get Started with Web IDE
Important: Rell Web IDE is available at https://rellide-staging.chromia.dev/
Upon entering, you will see an interface similar to the image below.
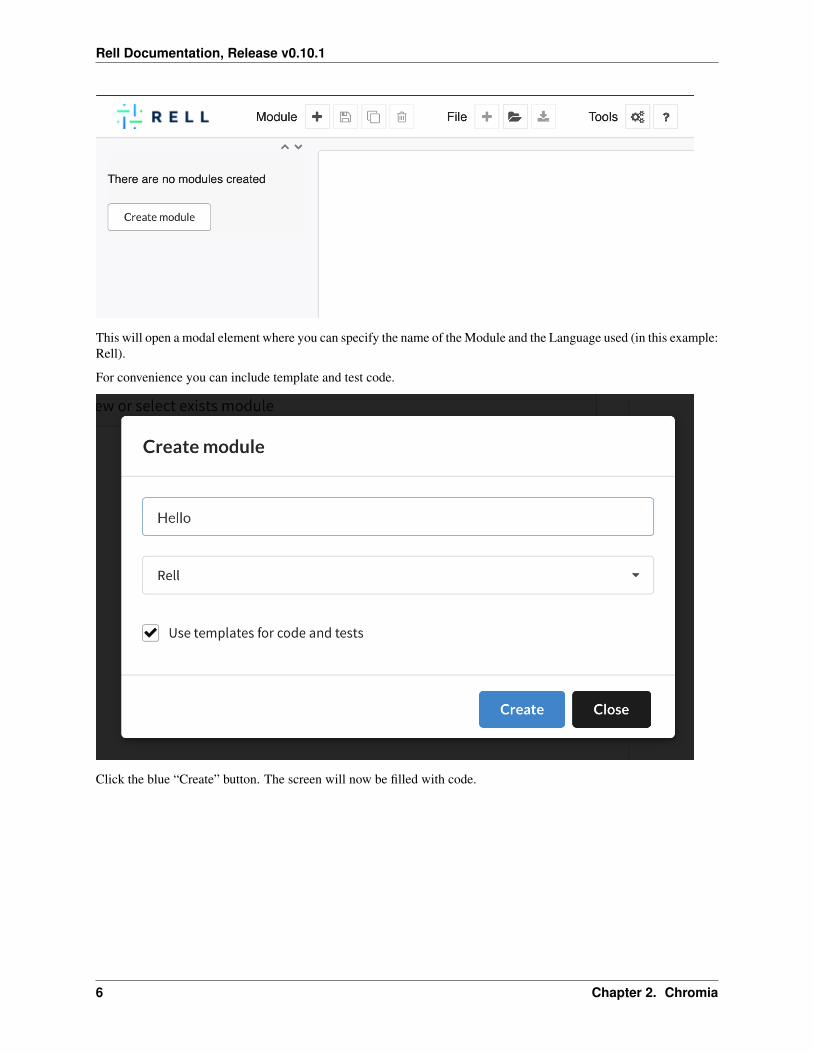
Click Create Module button:
5
Rell Documentation, Release v0.10.1
This will open a modal element where you can specify the name of the Module and the Language used (in this example:Rell).
For convenience you can include template and test code.
Click the blue “Create” button. The screen will now be filled with code.
6 Chapter 2. Chromia
Rell Documentation, Release v0.10.1
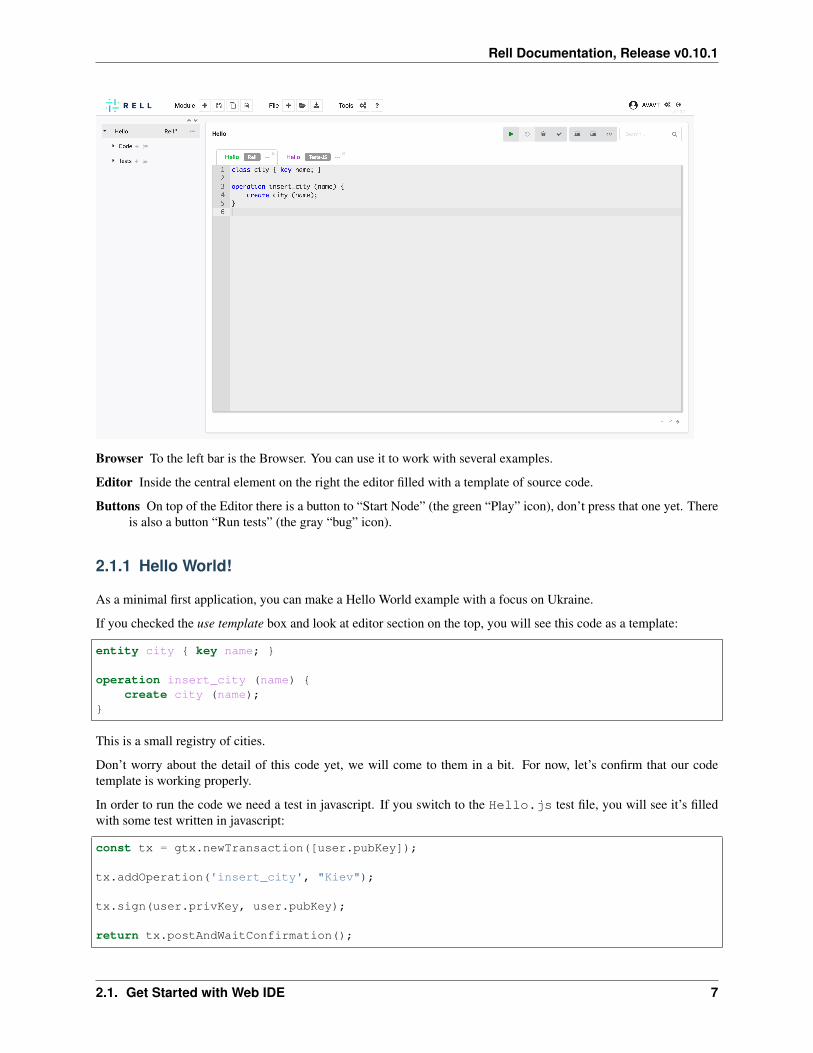
Browser To the left bar is the Browser. You can use it to work with several examples.
Editor Inside the central element on the right the editor filled with a template of source code.
Buttons On top of the Editor there is a button to “Start Node” (the green “Play” icon), don’t press that one yet. Thereis also a button “Run tests” (the gray “bug” icon).
2.1.1 Hello World!
As a minimal first application, you can make a Hello World example with a focus on Ukraine.
If you checked the use template box and look at editor section on the top, you will see this code as a template:
entity city { key name; }
operation insert_city (name) {create city (name);
}
This is a small registry of cities.
Don’t worry about the detail of this code yet, we will come to them in a bit. For now, let’s confirm that our codetemplate is working properly.
In order to run the code we need a test in javascript. If you switch to the Hello.js test file, you will see it’s filledwith some test written in javascript:
const tx = gtx.newTransaction([user.pubKey]);
tx.addOperation('insert_city', "Kiev");
tx.sign(user.privKey, user.pubKey);
return tx.postAndWaitConfirmation();
2.1. Get Started with Web IDE 7

Rell Documentation, Release v0.10.1
Click the ‘Run tests’ button, and a green message will appear.
Congratulations! After all this work, we suggest that you put “Relational Blockchain” on your CV.
2.1.2 Where to go next?
Next step is to learn about what those Rell code actually mean in the Rell Basics section.
But if you prefer learning by example, you can choose to start with one of our Example Projects instead.
8 Chapter 2. Chromia

Rell Documentation, Release v0.10.1
2.2 Rell Basics
In this chapter we discuss fundamental concepts of Rell language.
• The Main Concepts section guide you through the concepts needed to create node backend with Rell.
• While Client Side discuss how to work with such backend using a Javascript client.
2.2.1 Main Concepts
Language overview
Rell is a language for relational blockchain programming. It combines the following features:
1. Relational data modeling and queries similar to SQL. People familiar with SQL should feel at home once theylearn the new syntax.
2. Normal programming constructs: variables, loops, functions, collections, etc.
3. Constructs which specifically target application backends and, in particular, blockchain-style programming in-cluding request routing, authorization, etc.
Rell aims to make programming as ergonomic as possible. It minimizes boilerplate and repetition. At the same time,as a static type system it can detect and prevent many kinds of defects.
Blockchain programming
There are many different styles of blockchain programming. In the context of Rell, we see blockchain as a method forsecure synchronization of databases on nodes of the system. Thus Rell is very database-centric.
Programming in Rell is pretty much identical to programming application backends: you need to handle requests tomodify the data in the database and other requests which retrieve data from a database. Handling these two types ofrequests is basically all that a backend does.
But, of course, before you implement request handlers, you need to describe your data model first.
Entity definitions
In SQL, usually you define your data model using CREATE TABLE syntax. In Java, you can define data objects usingclass definition.
In Rell, we define them as entity.
Rell uses persistent objects, thus a entity definition automatically creates the storage (e.g. a table) necessary to persistobjects of a entity. As you might expect, Rell’s entity definition includes a list of attributes:
entity user {pubkey: pubkey;name: text;age: integer;
}
It is very common that the name of the attribute is the same as its type. For example, it makes sense to call user’spubkey “pubkey.” Rell allows you to shorten pubkey: pubkey; to just pubkey;. Rell also has a number ofconvenient semantic types, so there is a type called name as well. Thus you can rewrite the definition above as just:
2.2. Rell Basics 9

Rell Documentation, Release v0.10.1
entity user { pubkey; name; }
Typically a system should not allow different users to have the same name. That is, names should be unique. If nameis unique, it can be used to identify a user. In Rell, this can be done by defining a key, i.e. key name;. Note that it’snot necessary to define both key and attribute. Rell is smart enough to figure out that if you use an attribute in a key,that attribute should exist in a entity.
It also might be useful to find a user by his pubkey. Should it also be unique? Not necessarily. A user might haveseveral different identities. When you want to enable fast retrieval, but do not need uniqueness, you can use indexdefinition:
entity user {key name;index pubkey;
}
However, if you want pubkey to be unique for an user, you can add a second key:
entity user {key name;key pubkey;
}
Typically, when you define a class in a programming language, it creates a type which can be used to refer to instancesof that class. This is exactly how it works in Rell. The definition of entity user creates a type user which is a typeof references to objects stored in a database. References can themselves be used as attributes. For example, you mightwant to define something owned by a user, say, a channel. You can describe it like this:
entity channel {index owner: user;key name;
}
index makes it possible to efficiently find all channels owned by a user. key makes sure that channel names areunique within the system.
Let’s analyze channel entity definition from a point of view of a traditional relational database terminology. Asingle user can be associated with multiple channel objects, but a single channel is always related to a singleuser. Thus this represents one-to-many relationship. owner attribute of a channel refers to user object and thusconstitutes a foreign key.
If channel names should be unique only in context of a single user (e.g. alice/news and bob/news are differentchannels), then a composite key can be used:
entity channel {key owner: user, name;
}
This basically means that a pair of (owner, name) should be unique.
Finally, one might ask: what changes if we change index owner: user to key owner: user? This makesa user reference unique per channel table, thus there can be at most one channel per user in that case. (I.e. if owneris declared as a key, relationship between users and channels becomes a one-to-one relationship.)
10 Chapter 2. Chromia

Rell Documentation, Release v0.10.1
Operations
Now that we defined the data model, we can finally get to handling requests. As previously mentioned, Rell workswith two types of requests:
1. Data-modifying requests. We call them operations which are applied to the database state.
2. Data-retrieving requests. We call them queries.
But for both types of requests we are going to need to refer to things in the database, so let’s consider relationaloperators first.
Relational operator basics
First, let’s look how we create objects:
create user (pubkey=x→˓"0373599a61cc6b3bc02a78c34313e1737ae9cfd56b9bb24360b437d469efdf3b15",
name="Alice");
This is essentially the same as INSERT operation in SQL, but the syntax is a bit different. Rell is smart enough toidentify the connection between arguments and attributes based on their type. x"..." notation is a hexadecimalbyte_array literal which is compatible with pubkey type. On the other hand, name is provided via text literal.Thus we can write:
create user("Alice", x→˓"0373599a61cc6b3bc02a78c34313e1737ae9cfd56b9bb24360b437d469efdf3b15");
The order of arguments does not matter here, they are matched with attributes based on types.
How do we find that object now?
val alice = user @ {.name=="Alice"};
@ operator retrieves a single record (or an object in this case) satisfying the search criteria you provided. If there isno such record, or more than one exists, it raises an error. It’s recommended to use this construct when an operationneeds a single record to operate on. If this requirement is violated the operation will be aborted and all its effects willbe rolled back. Thus it is a succinct and effective way to deal with requirements.
(val defines a read-only variable which can later be used in an expression. A variable defined using var can bereassigned later.)
If you want to retrieve a list of users, you can use the @* operator. For example:
val all_users = user @* {};
This returns a list of all users (since no filter expression was provided, all users match it). Value declarations caninclude a type, for example, we can specify that all_users is of type list<user> like this:
val all_users: list<user> = user @* {};
Since the Rell compiler knows a type of every expression it does not really need a type declaration, however, if one isprovided, it will check against it. Type declarations are mostly useful as documentation for programmers reading thecode and should be omitted in cases where there is no ambiguity.
Both @ and @* correspond to SELECT in SQL.
2.2. Rell Basics 11

Rell Documentation, Release v0.10.1
Simple operation
Let’s make an operation which allows a user to create a new channel:
operation register_channel (user_pubkey: pubkey, channel_name: name) {require( is_signer(user_pubkey) );create channel (
owner = user@{.pubkey == user_pubkey},name = channel_name
);}
Let’s go through this line by line. First we declare the operation name and a list of parameters:
operation register_channel (user_pubkey: pubkey, channel_name: name) {
This is very similar to a function definitions in other languages. In fact, an operation is a function of a special kind:it can be invoked using a blockchain transaction by its name. When invoking register_channel, the caller mustprovide two arguments of specified types, otherwise it will fail.
require( is_signer(user_pubkey) );
We don’t want Alice to be able to pull a prank on Bob by registering a channel with a silly name on his behalf. Thuswe need to make sure that the transaction was signed with a key corresponding to the public key specified in the firstparameter. (In other words, if Bob’s public key is passed as user_pubkey, the transaction must also be signed byBob, that is, Bob is a signer of this transaction.) This is a common pattern in Rell – typically you specify an actor in aparameter of an operation and in the body of the operation you verify that the actor was actually the signer. requirefails the operation if the specified condition is not met.
create channel, obviously, creates a persistent object channel. You don’t need to explicitly store it, as allcreated objects are persisted if operation succeeds.
user@{.pubkey=user_pubkey} – now we retrieve a user object by its pubkey, which should be unique. If nosuch user exists operation will fail. We do not need to test for that explicitly as @ operator will do this job.
Rell can automatically find attribute names corresponding to arguments using types. As user and name are differenttypes, create channel can be written like this:
create channel (user@{.pubkey=user_pubkey}, channel_name);
Function
Sometimes multiple operations (or queries) need a same piece functionality, e.g. some kind of a validation code, orcode which retrieves objects in a particular way. In order to not repeat yourself you can use function. Functionswork similarly to operations: they get some input and can perform validations and work with data. Additionally, theyalso have a return type which can be specified after the list of parameters. For example, if you want to allow the userof a channel to change the name of the channel itself:
// We added mutable specifier to channel's attribute "name" to make name editable.// Note that in case both an attribute and a key need to be declared.
entity channel {mutable name;key name;index owner: user;
(continues on next page)
12 Chapter 2. Chromia

Rell Documentation, Release v0.10.1
(continued from previous page)
}
function get_channel_owned_by_user(user_pub: pubkey, channel_name: name): channel {val user = user@{.pubkey == user_pub};return channel@{channel_name, .owner == user};
}
operation change_channel_name(signer: pubkey, old_channel_name: name, new_channel_→˓name: name) {
require(is_signer(signer));val channel_to_change = get_channel_owned_by_user(signer, old_channel_name);update channel@{channel == channel_to_change}(.name = new_channel_name);
}
In the function get_channel_owned_by_user the code first retrieves a user with given public key and returnsa channel owned by the the retrieved user with the given channel name. Operator @ expects exactly one object to befound (see Cardinality for more information.), thus you can be sure that in case there is no user or channel with sucha pubkey or a name the function will fail and so will the operation that is calling it. Finally, the function returns thechannel instance that was validated, saving the developer the hassle to check owner every time a channel is retrieved.
Please note that you must mark the attribute name with the keyword mutable. This is because only the fields whichare declared mutable can be changed using the update statement.
Query
Storing data without the ability to access it again would be useless. Let’s consider a simple example - retrievingchannel names for a user with a certain name:
query get_channel_names (user_name: name) {return channel @* {
.owner == user@{.name==user_name}} (.name);
}
Here you see a selection operator you’re already familiar with – @*. We select all the channels with a given owner(which we first find by name).
Then we extract name attribute from retrieved objects using the (.name) construct.
Note that since we only need name from channel, is also possible to write
query get_channel_names (user_name: name) {return channel @* {
.owner == user@{.name==user_name}}.name;
}
Relational expressions
In general, a relational expression consists of five parts, some of which can be omitted:
FROM OPERATOR { WHERE } (WHAT) LIMIT
1. FROM describes where data is taken from. It can be a single entity, such as just user. Or, it can be combinationof multiple entities, e.g. (user, channel). In the later case, conceptually we are dealing with a Cartesian
2.2. Rell Basics 13
Rell Documentation, Release v0.10.1
product, which is a set of all possible combinations. But, in typically WHERE part will then provide a conditionwhich defines a correspondence between objects of difference entities. E.g. one can select such (user,channel) combinations where user is an owner of the channel. This works same way as JOIN in SQL,in fact, the optimizer will typically translate it to JOINs.
2. OPERATOR – there are different operators depending on required cardinality. They are:
• @ – exactly one, returns a value
• @* – any number, returns a list of values
• @+ – at least one, returns a list of values
• @? – one or zero, returns a nullable value
3. WHERE describes how to filter the FROM set. So, you would use your search criteria as well as JOINs.
4. WHAT describes how to process the set, for doing a projection, aggregation or sorting. If it is ommitted thenmembers of the set are returned as they are.
5. LIMIT for operators which return a list, limits the number of elements returned.
In SQL, the logical processing order does not match the order in which clauses are written, for example, FROM islogically processed before SELECT even though SELECT comes first. (SQL logical processing order can be founde.g. in SQL Server documentation).
The order of components of a relational expression in Rell matches the logical processing order. So, first a set isdefined, then it is filtered, and then it is post-processed. Of course, the query planner is allowed to perform operationsin a different order, but that shouldn’t affect the results. Thus a relational expression can be understood as a kind of apipeline.
Let’s see some examples of relational expressions. Suppose in addition to user and channel entities we providedbefore, we also have:
entity message {index channel;index timestamp;text;
}
We can retrieve all messages of a given user:
(channel, message) @* {channel.owner == given_user, message.channel == channel
}(message.text);
So, basically, we join channel with message. We can shorten the expression using entity aliases:
(c: channel, m: message) @* { c.owner == given_user, m.channel == c } (m.text, m.→˓timestamp)
We can easily read this expression left to right:
• consider all pairs (c, m) where c is channel and m is message
• find those where c.owner equals given_user and m.channel equals c
• extract text and timestamp from m
The result of this expression is a list of tuples with text and timestamp attributes.
The above expression can be easily modified to retrieve the latest 25 messages:
14 Chapter 2. Chromia

Rell Documentation, Release v0.10.1
(c: channel, m: message) @* {c.owner == given_user, m.channel == c
} (m.text, -sort m.timestamp) limit 25
Here we sorted results by timestamp in a descending order using -sort (minus prefix means descending) and limitedthe number of returned rows.
Composite indices
We can also only select recent messages by adding, for example, m.timestamp >= given_timestamp con-dition to WHERE part. But a database cannot filter messages efficiently (that is, without considering every message)using two criteria at once unless we create a composite index, changing the message entity definition in the followingway:
entity message {index channel, timestamp;text;
}
Instead two separate indexes we got one composite index. The idea here is that we want to retrieve not the latestmessages overall, but the latest messages for a given channel. Thus, we need to order messages by channels first.Paged retieval can be done using the following query:
query get_next_messages (user_name: name, upto_timestamp: timestamp) {val given_user = user@{user_name};return (c: channel, m: message) @* {
c.owner == given_user, m.channel == c, m.timestamp < upto_timestamp} (m.text, -sort m.timestamp) limit 25;
}
This can be used in an app like Twitter. A visitor might first retrieve the latest 25 messages, then go further – in whichcase the client will send a query with a timestamp of the oldest message retrieved.
To understand why this can work efficiently, consider that the index stores an ordered collection of pairs. For example:
1. (channel_1, 1000000) -> m12. (channel_1, 1000050) -> m33. (channel_1, 1000100) -> m54. (channel_2, 1000025) -> m25. (channel_2, 1000075) -> m4
A database can efficiently find a place which corresponds to a given timestamp in a given channel and traverse theindex through it.
Note: It’s worth noting that all SQL databases work this way, this feature is not unique to Rell. But in a decentralizedsystem resources are typically precious, thus it is important for Rell programmers to understand the query behaviorand use indices efficiently.
2.2.2 Client Side
This client tutorial is a continuation on the quickstart “city” example. In this section we illustrate how to send transac-tions to and retrieve information from a blockchain node running Rell.
2.2. Rell Basics 15

Rell Documentation, Release v0.10.1
Try the example code
First of all, we need to add a query to Rell source file:
query is_city_registered(city_name: text): boolean {return (city @? { city_name }) != null;
}
Clicking ‘Start node’ will start a Postchain node in a single-node mode which is convenient for testing.
The node builds blocks when there are transactions, or at least once every 30 seconds. It also has REST API we caninteract with to submit transactions and retrieve information.
The client code is written in JavaScript, this example uses the NodeJS environment. postchain-client-example can bedownloaded using git:
git clone https://bitbucket.org/chromawallet/postchain-client-example.git
To run it, execute:
npm installnode index.js
This will create a transaction, sign it, submit to a node. And once transaction is added to a block, client will perform aquery.
Now let’s see how this client code can be implemented:
Install the client
We assume you have nodejs installed. The client library is called postchain-client and can be installed from npm.
Create an new directory for your test. Open a terminal in the new directory, initialize npm and install the client.
npm init -ynpm install postchain-client --save
Connect to the node
To connect to a Postchain node we need to know its REST API URL and blockchain identifier. DevPreview bundlecomes with following defaults:
const pcl = require('postchain-client');
// using default postchain node REST API port// On rellide-staging.chromia.dev, check node log for api urlconst node_api_url = "http://localhost:7740";
// default blockchain identifier used for testingconst blockchainRID =→˓"78967baa4768cbcef11c508326ffb13a956689fcb6dc3ba17f4b895cbb1577a3";
const rest = pcl.restClient.createRestClient((node_api_url, blockchainRID, 5);
Once we set up the information about the the REST Client connection, we can create the gtxClient connection. Thisin particular, needs to receive the previous REST connection, the blockchainRID in Buffer format and an array thenames of the operations that you want call (at the moment this can be left empty):
16 Chapter 2. Chromia

Rell Documentation, Release v0.10.1
const gtx = pcl.gtxClient.createClient(rest,Buffer.from(blockchainRID, 'hex'),[]
);
Now that the connection is set, you can start to create transactions and queries.
Make a transaction (with operations inside)
You need to create the transaction client side, sign it with one or more keypairs, send it to the node and wait for it tobe included into a block.
First, let’s create the transaction and specify the public key of the person(s) that will sign it. To create a random userkeypair on the go you can use makeKeyPair() function.
const user = pcl.util.makeKeyPair();const tx = gtx.newTransaction([user.pubKey]);
Once it is created is possible call as many operations as you want.
tx.addOperation('insert_city', "Tel Aviv");tx.addOperation('insert_city', "Stockholm");/* etc */
Now, all is left is to sign and post the transaction
tx.sign(user.privKey, user.pubKey);tx.postAndWaitConfirmation();
Note: tx.postAndWaitConfirmation() returns a promise, and thus can be await-ed.
Query
Queries also make use of gtx client.
gtx.query accepts as first parameter the name of the query as specified in the module and then an object with asparameter name the variable name as specified in the query module.
E.g:
function is_city_registered(city_name) {return gtx.query("is_city_registered", {city_name: city_name});
}
will work with query specified in the Rell file:
query is_city_registered(city_name: text): boolean {return (city @? { city_name }) != null;
}
Note: gtx.query(queryName, queryObject) also returns a promise.
2.2. Rell Basics 17

Rell Documentation, Release v0.10.1
Examples and further exercises
For now we have covered the basics of working with Rell. In the next section, we have prepared some examples ofhow to implement other functionalities in Rell and Chromia.
2.3 Example Projects
2.3.1 Chroma Chat
In this section we will write the code for a public chat.
Requirements
The requirements we set are the following:
• There is one admin with an amount of tokens automatically assigned (say 1000000)
• The admin is the first person that registers themselves on the dapp
• Any registered user can register a new user and transfer some tokens to them, after having paid 100 tokens tothe admin as a fee.
• Users are identified by their public key
• Channels are streams of messages belonging to the same topic (which is specified in the name of the channel,e.g. “showerthoughts”, where you can send messages with the thoughts you had under the shower).
• Registered users can create channels
• When a new channel is created, only the creator is within the group. She can add any existing users. Thisoperation costs 1 token.
Entity definition
The structure of it will be:
entity user {key pubkey;key username: text;
}
entity channel {key name;admin: user;
}
entity channel_member {key channel, member: user;
}
entity message {key channel, timestamp;index posted_by: user;text;
}
(continues on next page)
18 Chapter 2. Chromia

Rell Documentation, Release v0.10.1
(continued from previous page)
entity balance {key user;mutable amount: integer;
}
Let’s analyse it:
User As said, user is solely identified by their public key
Channel Channels are identified by the name (which ideally reflects the topic of the channel itself) and the user whocreated it. Note that two channels cannot have the same name (key) and that an user can be admin of multiplechannels.
Message One message has the text and reference of the user who sent it. Additionally, the channel and timestampof publication is recorded. Note that key channel, timestamp means that only one message can be sentwithin a channel at given timestamp (but of course several messages on different channels can be recorded atsingle timestamp).
Balance This is kind of self explanatory: one user has an amount of tokens. Tokens can be spent (or more in generaltransfered), for this reason the field is marked as mutable.
Operations
Init
To initialize the module, we need to have at least one registered user.
We don’t want the user to call this function once the admin is set (i.e. we don’t want users to change the admin).To prevent such event, we create an operation called init which verified that no users are registered and, in case ofpositive response, creates a new ‘admin’ user.
operation init (founder_pubkey: pubkey) {require( (user@*{} limit 1).size() == 0 );val founder = create user (founder_pubkey, "admin");create balance (founder, 1000000);
}
The operation receives a public key as input (note that it does not verify that signer of the transaction is the samespecified in input field founder_pubkey, meaning you can specify a different public key).
The interesting point is require( (user@*{} limit 1).size() == 0 );. Here we retrieve a lists ofusers with a limit of 1: we get the first user in the table. If there is no user, it will return an empty list. Indeed we checkits size() and if it’s 0 we can proceed in running the operation since there are no users registered.
In the third and fourth line the an user with usernam “admin” is created and 1000000 tokens are given to her.
Transfer tokens (Function)
For convenience we create a function to transfer token from one user’s balance to another’s.
We write it because we don’t want to duplicate our checks and potentially create bugs.
2.3. Example Projects 19

Rell Documentation, Release v0.10.1
function transfer_balance(from:user, to:user, amount:integer){require( balance@{from}.amount >= amount);update balance@{from} (amount -= amount);update balance@{to} (amount += amount);
}
We also add a pay_fee function that is a transfer from one user to the admin account:
function pay_fee (user, deduct_amount: integer) {if(user.username != 'admin'){transfer_balance(user, user@{.username == 'admin'}, deduct_amount);
}}
Register a new user
As said, registered users should be allowed to add new users:
operation register_user (existing_user_pubkey: pubkey,new_user_pubkey: pubkey,new_user_username: text,transfer_amount: integer
) {require( is_signer(existing_user_pubkey) );val existing_user = user@{existing_user_pubkey};
require( transfer_amount > 0 );
val new_user = create user (new_user_pubkey, new_user_username);pay_fee(existing_user, 100);
create balance (new_user, 0);transfer_balance(existing_user, new_user, transfer_amount);
}
Here we:
• Verify that the signer exists with user@{existing_user_pubkey}, which require exactly one result forthe pubkey.
• Pay the fee of 100 tokens (transfer 100 tokens to ‘admin’ account)
• Then create the new user and transfer to them the specified positive amount of tokens.
Note: If at any point in the operation the conditions fail (for example, when the new username is already taken), thewhole operation is rolled back and the transaction is rejected.
This is why we don’t need to check if the signer’s balance has registration_cost + transfer_amounttokens beforehand.
Create a new channel
Registered users can create new channels.
20 Chapter 2. Chromia

Rell Documentation, Release v0.10.1
Given the public key and the name of the channel, we will verify that she is an actual registered user, transfer the fee,create the channel, and add that user as chat member.
operation create_channel ( admin_pubkey: pubkey, name) {require( is_signer(admin_pubkey) );val admin_usr = user@{admin_pubkey};pay_fee(admin_usr, 100);val channel = create channel (admin_usr, name);create channel_member (channel, admin_usr);
}
Add user to channel
The admin of a channel (the one who created the channel) can add another user after having paid a fee of 1 token.
So we check once again that the signer is the admin_pubkey specified, we have the channel admin pay 1 token, andwe add a new user to the channel via channel_member.
operation add_channel_member (admin_pubkey: pubkey, channel_name: name, member_→˓username: text) {require( is_signer(admin_pubkey) );val admin_usr = user@{admin_pubkey};pay_fee(admin_usr, 1);val channel = channel@{channel_name, .admin==user@{admin_pubkey}};create channel_member (channel, member=user@{.username == member_username});
}
Post a new message
People in a channel will love to share their opinions. They can do so with the post_message operation. The signer(is_signer(pubkey)) can post a message in the channel (val channel = channel@{channel_name};) if they are a member of the channel (require( channel_member@?{channel, member} );).
After the payment of 1 token fee, we add the new message to the channel:
operation post_message (channel_name: name, pubkey, message: text) {require( is_signer(pubkey) );val channel = channel@{channel_name};val member = user@{pubkey};require( channel_member@?{channel, member} );pay_fee(member, 1);create message (channel, member, text=message, op_context.last_block_time);
}
Queries
It is useful to write data into a database in a distributed fashion, although writing would be meaningless without theability to read.
Query all channels where a user is registered
Getting the channels one user is registered into is simple, selecting from channel_member with the given user’spublic key.
2.3. Example Projects 21

Rell Documentation, Release v0.10.1
query get_channels(pubkey):list<(name:text, admin: text)> {return channel_member@*{.member == user@{pubkey}} (name = .channel.name, admin = .
→˓channel.admin.username);}
Other simple queries
Likewise we can get the balance from one user.
query get_balance(pubkey) {return balance@{ user@{ pubkey } }.amount;
}
Retrieve messages sent in one channel sorted from the oldest to newest (sort .timestamp).
query get_last_messages(channel_name: name):list<(text:text, poster:text,→˓timestamp:timestamp)> {return message@*{ channel@{channel_name} }( .text, poster=.posted_by.username, sort .timestamp );
}
Run it
• Browse to https://rellide-staging.chromia.dev
• Create a new module
• Enter the above code in the code section (You can copy the full code from here).
• Click on Start Node (The green “Play” icon)
Congratulations! You should now have a running node.
Client side
At this stage we should have a running node with your freshly made module.
What about interface it with a classy JS based application?
Well to do it we need the postchain-client npm package
npm i --save postchain-client
const pcl = require('postchain-client');const crypto = require('crypto');
Then we need to declare the address of the REST server (which is ran by the node, default is 7740) and the blockchain-RID of the blockchain and the number of sockets (5).
We then get an instance of GTX Client, via gtxClient.createClient and giving the rest object and blockchain-RID in input. Last parameters is an empty list of operation (this is needed if you don’t use Rell language, in fact, youcan also code a module with standard SQL or as a proper kotlin/java module).
22 Chapter 2. Chromia

Rell Documentation, Release v0.10.1
// Check the node log on rellide-staging.chromia.dev to get node api url.const nodeApiUrl = "https://rellide-staging.chromia.dev/node/XXXXX/";const blockchainRID =→˓"78967baa4768cbcef11c508326ffb13a956689fcb6dc3ba17f4b895cbb1577a3"; // default RID→˓on rellide-staging.chromia.devconst rest = pcl.restClient.createRestClient(nodeApiUrl, blockchainRID, 5)const gtx = pcl.gtxClient.createClient(
rest,Buffer.from(
blockchainRID,'hex'
),[]
);
Note: If you are using Eclipse IDE, the configs should be:
const nodeApiUrl = "http://localhost:7740/";const blockchainRID =→˓"0123456789ABCDEF0123456789ABCDEF0123456789ABCDEF0123456789ABCDEF";
Create and send a transaction with the init operation
First thing we probably want is to register and create the admin, we do so calling the init function.
function init(adminPubkey, adminPrivkey) {const rq = gtx.newTransaction([adminPubkey]);rq.addOperation('init', adminPubkey);rq.sign(adminPrivkey, adminPubkey);return rq.postAndWaitConfirmation();
}
The first thing we do is to declare a new transaction and that it will be signed by admin private key (we provide thepublic key, so the node can verify the veracity of transaction).
We add the operation called init and we pass as input argument the admin public key. We then sign the transactionwith the private key (we specify the public key in order to correlate which private key refers to which public key incase of multiple signatures).
Finally we send the transaction to the node via the method postAndWaitconfirmation which returns a promiseand resolves once it is confirmed.
Given the following keypair, we can create the admin.
const adminPUB = Buffer.from('031b84c5567b126440995d3ed5aaba0565d71e1834604819ff9c17f5e9d5dd078f','hex'
);const adminPRIV = Buffer.from(
'0101010101010101010101010101010101010101010101010101010101010101','hex'
);
init(adminPUB, adminPRIV);
2.3. Example Projects 23

Rell Documentation, Release v0.10.1
Note: In your own project, you might want to generate the keypair using pcl.util.makeKeyPair() instead:
const user = pcl.util.makeKeyPair();const { pubKey, privKey } = user;
Create other operations
We can also create a new channel, post a message, invite a user to dapp, invite a user in a channel
function createChannel(admin, channelName) {const pubKey = pcl.util.toBuffer(admin.pubKey);const privKey = pcl.util.toBuffer(admin.privKey);const rq = gtx.newTransaction([pubKey]);rq.addOperation("create_channel", pubKey, channelName);rq.sign(privKey, pubKey);return rq.postAndWaitConfirmation();
}
function postMessage(user, channelName, message) {const pubKey = pcl.util.toBuffer(user.pubKey);const privKey = pcl.util.toBuffer(user.privKey);const rq = gtx.newTransaction([pubKey]);rq.addOperation("nop", crypto.randomBytes(32));rq.addOperation("post_message", channelName, pubKey, message);rq.sign(privKey, pubKey);return rq.postAndWaitConfirmation();
}
function inviteUser(existingUser, newUserPubKey, startAmount) {const pubKey = pcl.util.toBuffer(existingUser.pubKey);const privKey = pcl.util.toBuffer(existingUser.privKey);const rq = gtx.newTransaction([pubKey]);rq.addOperation("register_user", pubKey, pcl.util.toBuffer(newUserPubKey),
→˓parseInt(startAmount));rq.sign(privKey, pubKey);return rq.postAndWaitConfirmation();
}
function inviteUserToChat(existingUser, channel, newUserPubKey) {const pubKey = pcl.util.toBuffer(existingUser.pubKey);const privKey = pcl.util.toBuffer(existingUser.privKey);const rq = gtx.newTransaction([pubKey]);rq.addOperation("add_channel_member", pubKey, channel, pcl.util.
→˓toBuffer(newUserPubKey));rq.sign(privKey, pubKey);return rq.postAndWaitConfirmation();
}
Although there is really nothing critical in these functions, there are few things worth noting:
• We expect public and private keys in hex format, and we convert them to Buffer with pcl.util.toBuffer(admin.pubKey);
• In order to protect the system from replay attacks, the blockchain does not accept transactions which hash
24 Chapter 2. Chromia
Rell Documentation, Release v0.10.1
is equal to an already existing transaction. This means that an user is not allowed to write the samemessage twice in a channel since if at day one he writes “hello” the transaction will be something likerq.addOperation("post_message", the_channel, user_pub, "hello");, when he willwrite ‘hello’ a second time the transaction will be the same and therefore rejected. To solve this prob-lem, we add a “nop” operation with some random bytes via rq.addOperation("nop", crypto.randomBytes(32));, and create a different transaction hash.
Important: It is very important to remember this limitation imposed upon transactions. If your transaction is rejectedwith no obvious reason, chances are high that it is missing a “nop” operation.
Querying the blockchain from the client side
Previously we wrote the queries on blockchain side. Now we need to query from the dapp. To do so we use thepreviously mentioned postchain-client package.
// Rell query, reported here for easy look up// query get_balance(user_pubkey: text) {// return balance@{user@{byte_array(user_pubkey)}}.amount;// }
function getBalance(user) {return gtx.query("get_balance", {
user_pubkey: user.pubKey});
}
As you can see everything is contained into gtx.query: the first argument is the query name in the rell module, andthe second argument is the name of the expected attribute in the query itself wrapped in an object. The name of theobject is the one specified in module and the value, of course, the value we want to send. Please note that buffervalues must before be converted into hexadecimal strings.
Other queries:
function getChannels(user) {return gtx.query("get_channels", {
user_pubkey: user.pubKey});
}
function getMessages(channel) {return gtx.query("get_last_messages", {channel_name: channel});
}
Conclusion
At this point, we have created a Rell backend for the public chat, and a javascript client to communicate with it.
We encourage you to extends this sample in anyway you like, for example adding an user interace, or maybe add a“transfer” operation to send tokens to another user?
Or, if you are eager to see how the application running, we have implemented a simple UI for it at https://bitbucket.org/chromawallet/chat-sample/src/master/.
2.3. Example Projects 25

Rell Documentation, Release v0.10.1
2.3.2 Account-based token system
Tokens are the bread & butter of blockchains, thus it is useful to demonstrate how a token system can be implementedin Rell. There are roughly two different implementation strategies:
• Account-based tokens which maintain an updateable balance for each account (which can be associated with akey or an address)
• UTXO-based ones (Bitcoin-style) deal with virtual “coins” which are minted and destroyed in transactions
This section details the account-based implementation. For an example of a UTXO based system see UTXO-basedtoken system.
A minimal implementation can look like this:
class balance {key pubkey;mutable amount: integer;
}
operation transfer(from_pubkey: pubkey, to_pubkey: pubkey, xfer_amount: integer) {require( is_signer(from_pubkey) );require( xfer_amount > 0 );require( balance@{from_pubkey}.amount >= xfer_amount );update balance@{from_pubkey} (amount -= xfer_amount);update balance@{to_pubkey} (amount += xfer_amount);
}
There are a few items which should be highlighted in this code. First, let’s note that balance@{from_pubkey}.amount is simply a shorthand notation for balance@{from_pubkey} (amount).
update relational operator combines a relational expression specifying objects to update with a form which specifieshow to update their attributes. Attributes are updateable only if they are market as mutable.
Note: We don’t need to worry about concurrency issues (i.e. that the balance can change after we checked it) becauseRell applies operations within a single blockchain sequentially.
But this minimal implementation is not very useful, as there’s no mechanism for a wallet to identify payments itreceives (without somehow scanning the blockchain, or asking the payer to share the transaction with the recipient).Other blockchains systems might resort to third-party tools and complex protocols to handle this (for example, theElectrum Bitcoin wallet connects to Electrum Servers which perform blockchain indexing). Rell-based blockchainscan just use built-in indexing to keep track of payment history. For example, by using the additional payment class.To make things more efficient, we also wrap pubkey into user class, thus getting:
class user { key pubkey; }
class balance {key user;mutable amount: integer;
}
class payment {index from_user: user;index to_user: user;amount: integer;timestamp;
}
(continues on next page)
26 Chapter 2. Chromia
Rell Documentation, Release v0.10.1
(continued from previous page)
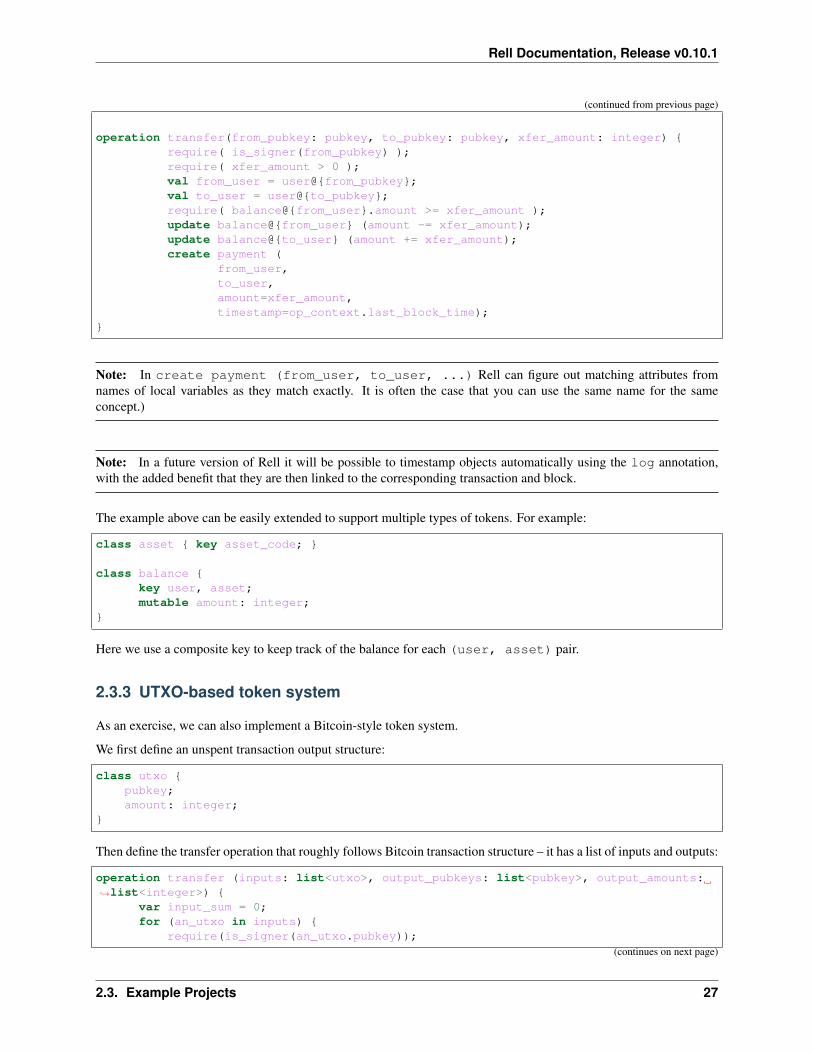
operation transfer(from_pubkey: pubkey, to_pubkey: pubkey, xfer_amount: integer) {require( is_signer(from_pubkey) );require( xfer_amount > 0 );val from_user = user@{from_pubkey};val to_user = user@{to_pubkey};require( balance@{from_user}.amount >= xfer_amount );update balance@{from_user} (amount -= xfer_amount);update balance@{to_user} (amount += xfer_amount);create payment (
from_user,to_user,amount=xfer_amount,timestamp=op_context.last_block_time);
}
Note: In create payment (from_user, to_user, ...) Rell can figure out matching attributes fromnames of local variables as they match exactly. It is often the case that you can use the same name for the sameconcept.)
Note: In a future version of Rell it will be possible to timestamp objects automatically using the log annotation,with the added benefit that they are then linked to the corresponding transaction and block.
The example above can be easily extended to support multiple types of tokens. For example:
class asset { key asset_code; }
class balance {key user, asset;mutable amount: integer;
}
Here we use a composite key to keep track of the balance for each (user, asset) pair.
2.3.3 UTXO-based token system
As an exercise, we can also implement a Bitcoin-style token system.
We first define an unspent transaction output structure:
class utxo {pubkey;amount: integer;
}
Then define the transfer operation that roughly follows Bitcoin transaction structure – it has a list of inputs and outputs:
operation transfer (inputs: list<utxo>, output_pubkeys: list<pubkey>, output_amounts:→˓list<integer>) {
var input_sum = 0;for (an_utxo in inputs) {
require(is_signer(an_utxo.pubkey));(continues on next page)
2.3. Example Projects 27

Rell Documentation, Release v0.10.1
(continued from previous page)
input_sum += an_utxo.amount;delete utxo@{utxo == an_utxo};
}var output_sum = 0;require(output_pubkeys.size() == output_amounts.size());for (out_index in range(output_pubkeys.size())) {
output_sum += output_amounts[out_index];create utxo (output_pubkeys[out_index],
output_amounts[out_index]);}require(output_sum <= input_sum);
}
There are quite a lot of new constructs used in this example:
• list<...> is, obviously, a collection. Besides lists, Rell also supports set and map
• in list<utxo> utxo object references are physically implemented using integer identifiers which are usedinterally
• an_utxo.pubkey accesses an attribute of an object, which is a database query identical toutxo@{utxo==an_utxo} (pubkey)
• variable type is automatically inferred from expression used for initialization. One can also write it like varoutput_sum : integer = 0;
• delete operation accepts a relational expression which identifies object(s)
• .size() method can be used get the size of a collection
• for (... in ...) works both for collections and for ranges of integer values
• [] is used to refer to an element of a collection
Note that we perform checks as we go. This is OK because Rell is transactional: if a requirement fails or an erroris generated, the whole operation (in fact, the whole transaction) is rolled back. Rell is typically used with a GTXtransaction format which supports multiple signers and multiple operations per transaction. Thus it can easily supportBitcoin-style multi-input transactions, atomic token swaps, multi-sig etc.
Now a bit about delete operator. Isn’t it strange to enable deletion of data from a blockchain?!
Here we aren’t deleting data “from a blockchain”, we are removing entries from the current blockchain state. This isexactly how it works in a Bitcoin node – once entries in an unspent transaction output set are spent, they are deleted.A typical Bitcoin node doesn’t keep track of spent transaction outputs.
A system based on Rell (e.g. Postchain or Chromia) works in exactly the same way: raw information about transactionsand operations is preserved in a blockchain. The database contains both raw blockchain transactions and processedcurrent state. The current state is what a Rell programmer can work with: he is allowed to do destructive updates anddelete entries. These operations do not affect the raw blockchain.
2.4 Language Features
2.4.1 Types
28 Chapter 2. Chromia

Rell Documentation, Release v0.10.1
Table of Contents
• Types
– Simple types
* boolean
* integer
* decimal
* text
* byte_array
* rowid
* json
* unit
* null
* Simple type aliases
– Complex types
* entity
* struct
* enum
* T? - nullable type
* tuple
* range
* gtv
– Collection types
* list<T>
* set<T>
* map<K,V>
– Virtual types
* virtual<list<T>>
* virtual<set<T>>
* virtual<map<K,V>>
* virtual<struct>
– Subtypes
Simple types
2.4. Language Features 29

Rell Documentation, Release v0.10.1
boolean
val using_rell = true;if (using_rell) print("Awesome!");
integer
val user_age : integer = 26;
integer.MIN_VALUE = minimum value (-2^63)
integer.MAX_VALUE = maximum value (2^63-1)
integer(s: text, radix: integer = 10) - parse a signed string representation of an integer, fail ifinvalid
integer(decimal): integer - converts a decimal to an integer, rounding towards 0 (5.99 becomes 5, -5.99becomes -5), throws an exception if the resulting value is out of range
integer.from_text(s: text, radix: integer = 10): integer - same asinteger(text, integer)
integer.from_hex(text): integer - parse an unsigned HEX representation
.abs(): integer - absolute value
.max(integer): integer - maximum of two values
.max(decimal): decimal - maximum of two values (converts this integer to decimal)
.min(integer): integer - minimum of two values
.min(decimal): decimal - minimum of two values (converts this integer to decimal)
.to_text(radix: integer = 10) - convert to a signed string representation
.to_hex(): text - convert to an unsigned HEX representation
.sign(): integer - returns -1, 0 or 1 depending on the sign
decimal
Represent a real number.
val approx_pi : decimal = 3.14159;val scientific_value : decimal = 55.77e-5;
It is not a normal floating-point type found in many other languages (like float and double in C/C++/Java):
• decimal type is accurate when working with numbers within its range. All decimal numbers (results ofdecimal operations) are implicitly rounded to 20 decimal places. For instance, decimal('1E-20') returnsa non-zero, while decimal('1E-21') returns a zero value.
• Numbers are stored in a decimal form, not in a binary form, so conversions to and from a string are lossless(except when rounding occurs if there are more than 20 digits after the point).
• Floating-point types allow to store much smaller numbers, like 1E-300; decimal can only store 1E-20, butnot a smaller nonzero number.
30 Chapter 2. Chromia

Rell Documentation, Release v0.10.1
• Operations on decimal numbers may be considerably slower than integer operations (at least 10 times slowerfor same integer numbers).
• Large decimal numbers may require a lot of space: ~0.41 bytes per decimal digit (~54KiB for 1E+131071) inmemory and ~0.5 bytes per digit in a database.
• Internally, the type java.lang.BigDecimal is used in the interpreter, and NUMERIC in SQL.
In the code one can use decimal literals:
123.4560.123.45633E+1055.77e-5
Such numbers have decimal type. Simple numbers without a decimal point and exponent, like 12345, haveinteger type.
decimal.PRECISION: integer = the maximum number of decimal digits in a decimal number (131072 +20)
decimal.SCALE: integer = the maximum number of decimal digits after the decimal point (20)
decimal.INT_DIGITS: integer = the maximum number of decimal digits before the decimal point (131072)
decimal.MIN_VALUE: decimal = the smallest nonzero absolute value that can be accurately stored in adecimal (1E-20)
decimal.MAX_VALUE: decimal = the largest value that can be stored in a decimal (1E+131072 - 1)
decimal(integer): decimal - converts integer to decimal
decimal(text): decimal - converts a text representation of a number to decimal. Exponential notation isallowed. Rounds the number to 20 decimal places, if necessary. Throws an exception if the number is out of range ornot a valid number.
.abs(): decimal - absolute value
.ceil(): decimal - ceiling value: rounds 1.0 to 1.0, 1.00001 to 2.0, -1.99999 to -1.0, etc.
.floor(): decimal - floor value: rounds 1.0 to 1.0, 1.9999 to 1.0, -1.0001 to -2.0, etc.
.min(decimal): decimal - minimum of two values
.max(decimal): decimal - maximum of two values
.round(scale: integer = 0): decimal - rounds to a specific number of decimal places, to a closervalue. Example: round(2.49) = 2.0, round(2.50) = 3.0, round(0.12345, 3) = 0.123. Negative scalesare allowed too: round(12345, -3) = 12000.
.sign(): integer - returns -1, 0 or 1 depending on the sign
.to_integer(): integer - converts a decimal to an integer, rounding towards 0 (5.99 becomes 5, -5.99becomes -5), throws an exception if the resulting value is out of range
.to_text(scientific: boolean = false): text
text
Textual value. Same as string type in some other languages.
2.4. Language Features 31

Rell Documentation, Release v0.10.1
val placeholder = "Lorem ipsum donor sit amet";print(placeholder.size()); // 26print(placeholder.empty()); // false
text.from_bytes(byte_array, ignore_invalid: boolean = false) - if ignore_invalidis false, throws an exception when the byte array is not a valid UTF-8 encoded string, otherwise replaces invalidcharacters with a placeholder.
.empty(): boolean
.size(): integer
.compare_to(text): integer - as in Java
.starts_with(text): boolean
.ends_with(text): boolean
.contains(text): boolean - true if contains the given substring
.index_of(text, start: integer = 0): integer - returns -1 if substring is not found (as in Java)
.last_index_of(text[, start: integer]): integer - returns -1 if substring is not found (as inJava)
.sub(start: integer[, end: integer]): text - get a substring (start-inclusive, end-exclusive)
.replace(old: text, new: text)
.upper_case(): text
.lower_case(): text
.split(text): list<text> - strictly split by a separator (not a regular expression)
.trim(): text - remove leading and trailing whitespace
.matches(text): boolean - true if matches a regular expression
.to_bytes(): byte_array - convert to a UTF-8 encoded byte array
.char_at(integer): integer - get a 16-bit code of a character
.format(...) - formats a string (as in Java):
• 'My name is <%s>'.format('Bob') - returns 'My name is <Bob>'
Special operators:
• + : concatenation
• [] : character access (returns single-character text)
byte_array
val user_pubkey : byte_array = x→˓"0373599a61cc6b3bc02a78c34313e1737ae9cfd56b9bb24360b437d469efdf3b15";print(user_pubkey.to_base64()); //A3NZmmHMazvAKnjDQxPhc3rpz9Vrm7JDYLQ31Gnv3zsV
byte_array(text) - creates a byte_array from a HEX string, e.g. '1234abcd', throws an exception if thestring is not a valid HEX sequence
byte_array.from_hex(text): byte_array - same as byte_array(text)
32 Chapter 2. Chromia

Rell Documentation, Release v0.10.1
byte_array.from_base64(text): byte_array - creates a byte_array from a Base64 string, throwsan exception if the string is invalid
byte_array.from_list(list<integer>): byte_array - creates a byte_array from a list; valuesmust be 0 - 255, otherwise an exception is thrown
.empty(): boolean
.size(): integer
.sub(start: integer[, end: integer]): byte_array - sub-array (start-inclusive, end-exclusive)
.to_hex(): text - returns a HEX representation of the byte array, e.g. '1234abcd'
.to_base64(): text - returns a Base64 representation of the byte array
.to_list(): list<integer> - list of values 0 - 255
.sha256(): byte_array - returns the sha256 digest as a byte_array
Special operators:
• + : concatenation
• [] : element access
rowid
Primary key of a database record, 64-bit integer, supports only comparison operations
json
Stored in Postgres as JSON type, and can be parsed to text;
val json_text = '{ "name": "Alice" }';val json_value: json = json(json_text);print(json_value);
json(text) - create a json value from a string; fails if not a valid JSON string
.to_text(): text - convert to string
unit
No value; cannot be used explicitly. Equivalent to unit type in Kotlin.
null
Type of null expression; cannot be used explicitly
2.4. Language Features 33

Rell Documentation, Release v0.10.1
Simple type aliases
• pubkey = byte_array
• name = text
• timestamp = integer
• tuid = text
Complex types
entity
entity user {key pubkey;index name;
}
struct
A struct is similar to an entity, but its instances exist in memory, not in a database.
struct user {name: text;address: text;mutable balance: integer = 0;
}
Functions available for all struct types:
T.from_bytes(byte_array): T - decode from a binary-encoded gtv (same as T.from_gtv(gtv.from_bytes(x)))
T.from_gtv(gtv): T - decode from a gtv
T.from_gtv_pretty(gtv): T - decode from a pretty-encoded gtv
.to_bytes(): byte_array - encode in binary format (same as .to_gtv().to_bytes())
.to_gtv(): gtv - convert to a gtv
.to_gtv_pretty(): gtv - convert to a pretty gtv
enum
enum account_type {single_key_account,multi_sig_account
}
entity account {key id: byte_array;
(continues on next page)
34 Chapter 2. Chromia
Rell Documentation, Release v0.10.1
(continued from previous page)
mutable account_type;mutable args: byte_array;
}
Assuming T is an enum type:
T.values(): list<T> - returns all values of the enum, in the order of declaration
T.value(text): T - finds a value by name, throws en exception if not found
T.value(integer): T - finds a value by index, throws an exception if not found
Enum value properties:
.name: text - the name of the enum value
.value: integer - the numeric value (index) associated with the enum value
T? - nullable type
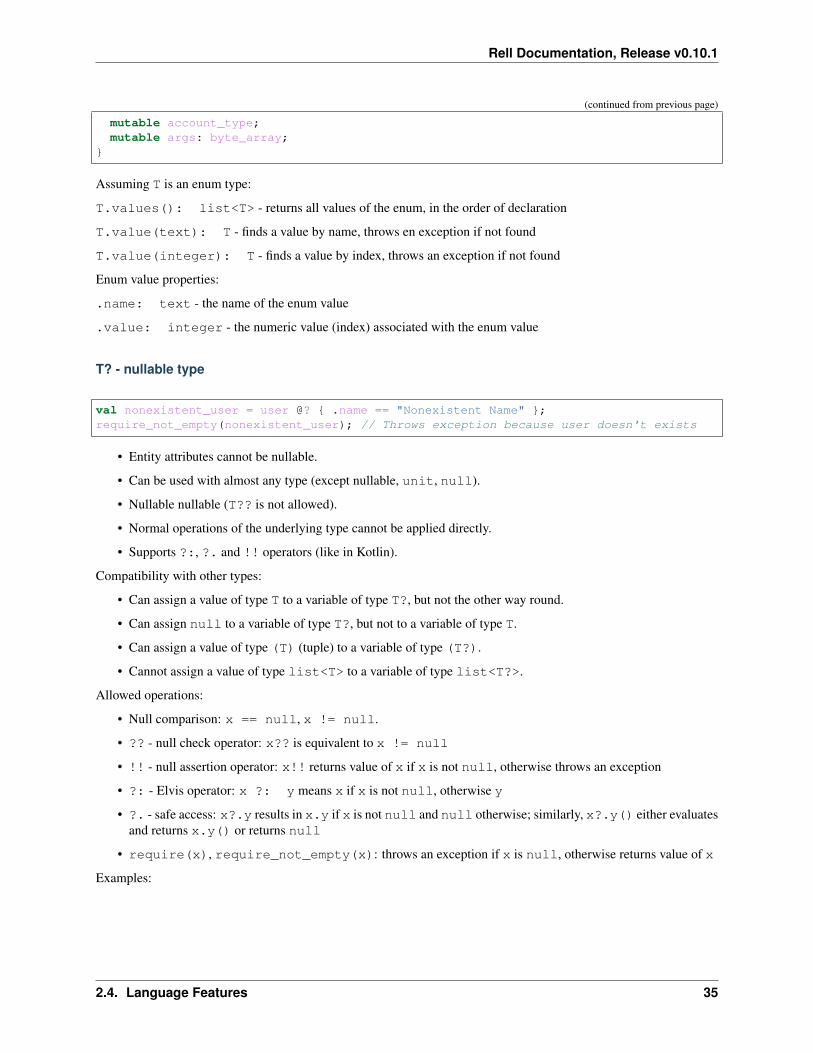
val nonexistent_user = user @? { .name == "Nonexistent Name" };require_not_empty(nonexistent_user); // Throws exception because user doesn't exists
• Entity attributes cannot be nullable.
• Can be used with almost any type (except nullable, unit, null).
• Nullable nullable (T?? is not allowed).
• Normal operations of the underlying type cannot be applied directly.
• Supports ?:, ?. and !! operators (like in Kotlin).
Compatibility with other types:
• Can assign a value of type T to a variable of type T?, but not the other way round.
• Can assign null to a variable of type T?, but not to a variable of type T.
• Can assign a value of type (T) (tuple) to a variable of type (T?).
• Cannot assign a value of type list<T> to a variable of type list<T?>.
Allowed operations:
• Null comparison: x == null, x != null.
• ?? - null check operator: x?? is equivalent to x != null
• !! - null assertion operator: x!! returns value of x if x is not null, otherwise throws an exception
• ?: - Elvis operator: x ?: y means x if x is not null, otherwise y
• ?. - safe access: x?.y results in x.y if x is not null and null otherwise; similarly, x?.y() either evaluatesand returns x.y() or returns null
• require(x), require_not_empty(x): throws an exception if x is null, otherwise returns value of x
Examples:
2.4. Language Features 35

Rell Documentation, Release v0.10.1
function f(): integer? { ... }
val x: integer? = f(); // type of "x" is "integer?"val y = x; // type of "y" is "integer?"
val i = y!!; // type of "i" is "integer"val j = require(y); // type of "j" is "integer"
val a = y ?: 456; // type of "a" is "integer"val b = y ?: null; // type of "b" is "integer?"
val p = y!!; // type of "p" is "integer"val q = y?.to_hex(); // type of "q" is "text?"
if (x != null) {val u = x; // type of "u" is "integer" - smart cast is applied to "x"
} else {val v = x; // type of "v" is "integer?"
}
tuple
Examples:
• val single_number : (integer) = (16,) - one value
• val invalid_tuple = (789) - not a tuple (no comma)
• val user_tuple: (integer, text) = (26, "Bob") - two values
• val named_tuple : (x: integer, y: integer) = (32, 26) - named fields (can be ac-cessed as named_tuple.x, named_tuple.y)
• (integer, (text, boolean)) - nested tuple
Tuple types are compatible only if names and types of fields are the same:
• (x:integer, y:integer) and (a:integer,b:integer) are not compatible.
• (x:integer, y:integer) and (integer,integer) are not compatible.
Reading tuple fields:
• t[0], t[1] - by index
• t.a, t.b - by name (for named fields)
Unpacking tuples:
val t = (123, 'Hello');val (n, s) = t; // n = 123, s = 'Hello'
Works for arbitrarily nested tuples:
val (n, (p, (x, y), q)) = calculate();
Special symbol _ is used to ignore a tuple element:
val (_, s) = (123, 'Hello'); // s = 'Hello'
36 Chapter 2. Chromia

Rell Documentation, Release v0.10.1
Variable types can be specified explicitly:
val (n: integer, s: text) = (123, 'Hello');
Unpacking can be used in a loop:
val l: list<(integer, text)> = get_tuples();for ((x, y) in l) {
print(x, y);}
range
Can be used in for statement:
for(count in range(10)){print(count); // prints out 0 to 9
}
range(start: integer = 0, end: integer, step: integer = 1) - start-inclusive, end-exclusive (as in Python):
• range(10) - a range from 0 (inclusive) to 10 (exclusive)
• range(5, 10) - from 5 to 10
• range(5, 15, 4) - from 5 to 15 with step 4, i. e. [5, 9, 13]
• range(10, 5, -1) - produces [10, 9, 8, 7, 6]
• range(10, 5, -3) - produces [10, 7]
Special operators:
• in - returns true if the value is in the range (taking step into account)
gtv
A type used to repsesent encoded arguments and results of remote operation and query calls. It may be a simple value(integer, string, byte array), an array of values or a string-keyed dictionary.
Some Rell types are not Gtv-compatible. Values of such types cannot be converted to/from gtv, and the types cannotbe used as types of operation/query parameters or result.
Rules of Gtv-compatibility:
• range is not Gtv-compatible
• a complex type is not Gtv-compatible if a type of its component is not Gtv-compatible
gtv.from_json(text): gtv - decode a gtv from a JSON string
gtv.from_json(json): gtv - decode a gtv from a json value
gtv.from_bytes(byte_array): gtv - decode a gtv from a binary-encoded form
.to_json(): json - convert to JSON
.to_bytes(): byte_array - convert to bytes
.hash(): byte_array - returns a cryptographic hash of the value
2.4. Language Features 37

Rell Documentation, Release v0.10.1
gtv-related functions:
Functions available for all Gtv-compatible types:
T.from_gtv(gtv): T - decode from a gtv
T.from_gtv_pretty(gtv): T - decode from a pretty-encoded gtv
.to_gtv(): gtv - convert to a gtv
.to_gtv_pretty(): gtv - convert to a pretty gtv
.hash(): byte_array - returns a cryptographic hash of the value (same as .to_gtv().hash())
Examples:
val g = [1, 2, 3].to_gtv();val l = list<integer>.from_gtv(g); // Returns [1, 2, 3]print(g.hash());
Collection types
Collection types are:
• list<T> - an ordered list
• set<T> - an unordered set, contains no duplicates
• map<K,V> - a key-value map
Collection types are mutable, elements can be added or removed dynamically.
Only a non-mutable type can be used as a map key or a set element.
Following types are mutable:
• Collection types (list, set, map) - always.
• Nullable type - only if the underlying type is mutable.
• Struct type - if the struct has a mutable field, or a field of a mutable type.
• Tuple - if a type of an element is mutable.
Creating collections:
// listval l1 = [ 1, 2, 3, 4, 5 ];val l2 = list<integer>();
// setval s = set<integer>();
// mapval m1 = [ 'Bob' : 123, 'Alice' : 456 ];val m2 = map<text, integer>();
38 Chapter 2. Chromia

Rell Documentation, Release v0.10.1
list<T>
Ordered collection type. Accept duplication.
var messages = message @* { } ( @sort timestamp = .timestamp );messages.add(new_message);
Constructors:
list<T>() - a new empty list
list<T>(list<T>) - a copy of the given list (list of subtype is accepted as well)
list<T>(set<T>) - a copy of the given set (set of subtype is accepted)
Methods:
.add(T): boolean - adds an element to the end, always returns true
.add(pos: integer, T): boolean - inserts an element at a position, always returns true
.add_all(list<T>): boolean
.add_all(set<T>): boolean
.add_all(pos: integer, list<T>): boolean
.add_all(pos: integer, set<T>): boolean
.clear()
.contains(T): boolean
.contains_all(list<T>): boolean
.contains_all(set<T>): boolean
.empty(): boolean
.index_of(T): integer - returns -1 if element is not found
.remove(T): boolean - removes the first occurrence of the value, return true if found
.remove_all(list<T>): boolean
.remove_all(set<T>): boolean
.remove_at(pos: integer): T - removes an element at a given position
.size(): integer
._sort() - sorts this list, returns nothing (name is _sort, because sort is a keyword in Rell)
.sorted(): list<T> - returns a sorted copy of this list
.to_text(): text - returns e. g. '[1, 2, 3, 4, 5]'
.sub(start: integer[, end: integer]): list<T> - returns a sub-list (start-inclusive, end-exclusive)
Special operators:
• [] - element access (read/modify)
• in - returns true if the value is in the list
2.4. Language Features 39

Rell Documentation, Release v0.10.1
set<T>
Unordered collection type. Does not accept duplication.
var my_classmates = set<user>();my_classmates.add(alice); // return truemy_classmates.add(alice); // return false
Constructors:
set<T>() - a new empty set
set<T>(set<T>) - a copy of the given set (set of subtype is accepted as well)
set<T>(list<T>) - a copy of the given list (with duplicates removed)
Methods:
.add(T): boolean - if the element is not in the set, adds it and returns true
.add_all(list<T>): boolean - adds all elements, returns true if at least one added
.add_all(set<T>): boolean - adds all elements, returns true if at least one added
.clear()
.contains(T): boolean
.contains_all(list<T>): boolean
.contains_all(set<T>): boolean
.empty(): boolean
.remove(T): boolean - removes the element, returns true if found
.remove_all(list<T>): boolean - returns true if at least one removed
.remove_all(set<T>): boolean - returns true if at least one removed
.size(): integer
.sorted(): list<T> - returns a sorted copy of this set (as a list)
.to_text(): text - returns e. g. '[1, 2, 3, 4, 5]'
Special operators:
• in - returns true if the value is in the set
map<K,V>
A key/value pair collection type.
var dictionary = map<text, text>();dictionary["Mordor"] = "A place where one does not simply walk into";
Constructors:
map<K,V>() - a new empty map
map<K,V>(map<K,V>) - a copy of the given map (map of subtypes is accepted as well)
Methods:
40 Chapter 2. Chromia

Rell Documentation, Release v0.10.1
.clear()
.contains(K): boolean
.empty(): boolean
.get(K): V - get value by key (same as [])
.put(K, V) - adds/replaces a key-value pair
.keys(): set<K> - returns a copy of keys
.put_all(map<K, V>) - adds/replaces all key-value pairs from the given map
.remove(K): V - removes a key-value pair (fails if the key is not in the map)
.size(): integer
.to_text(): text - returns e. g. '{x=123, y=456}'
.values(): list<V> - returns a copy of values
Special operators:
• [] - get/set value by key
• in - returns true if a key is in the map
Virtual types
A reduced data structure with Merkle tree. Type virtual<T> can be used only with following types T:
• list<*>
• set<*>
• map<text, *>
• struct
• tuple
Additionally, types of all internal elements of T must satisfy following constraints:
• must be Gtv-compatible
• for a map type, the key type must be text (i. e. map<text, *>)
Operations available for all virtual types:
• member access: [] for list and map, .name for struct and tuple
• .to_full(): T - converts the virtual value to the original value, if the value is full (all internal elementsare present), otherwise throws an exception
• .hash(): byte_array - returns the hash of the value, which is the same as the hash of the original value.
• virtual<T>.from_gtv(gtv): virtual<T> - decodes a virtual value from a Gtv.
Features of virtual<T>:
• it is immutable
• reading a member of type list<*>, map<*,*>, struct or tuple returns a value of the corresponding virtualtype, not of the actual member type
2.4. Language Features 41

Rell Documentation, Release v0.10.1
• cannot be converted to Gtv, so cannot be used as a return type of a query
Example:
struct rec { t: text; s: integer; }
operation op(recs: virtual<list<rec>>) {for (rec in recs) { // type of "rec" is "virtual<rec>", not "rec"
val full = rec.to_full(); // type of "full" is "rec", fails if the→˓value is not full
print(full.t);}
}
virtual<list<T>>
virtual<list<T>>.from_gtv(gtv): virtual<list<T>> - decodes a Gtv
.empty(): boolean
.get(integer): virtual<T> - returns an element, same as []
.hash(): byte_array
.size(): integer
.to_full(): list<T> - converts to the original value, fails if the value is not full
.to_text(): text - returns a text representation
Special operators:
• [] - element read, returns virtual<T> (or just T for simple types)
• in - returns true if the given integer index is present in the virtual list
virtual<set<T>>
virtual<set<T>>.from_gtv(gtv): virtual<set<T>> - decodes a Gtv
.empty(): boolean
.hash(): byte_array
.size(): integer
.to_full(): set<T> - converts to the original value, fails if the value is not full
.to_text(): text - returns a text representation
Special operators:
• in - returns true if the given value is present in the virtual set; the type of the operand is virtual<T>> (orjust T for simple types)
virtual<map<K,V>>
virtual<map<K,V>>.from_gtv(gtv): virtual<map<K,V>> - decodes a Gtv
.contains(K): boolean - same as operator in
42 Chapter 2. Chromia

Rell Documentation, Release v0.10.1
.empty(): boolean
.get(K): virtual<V> - same as operator []
.hash(): byte_array
.keys(): set<K> - returns a copy of keys
.size(): integer
.to_full(): map<K,V> - converts to the original value, fails if the value is not full
.to_text(): text - returns a text representation
.values(): list<virtual<V>> - returns a copy of values (if V is a simple type, returns list<V>)
Special operators:
• [] - get value by key, fails if not found, returns virtual<V> (or just V for simple types)
• in - returns true if a key is in the map
virtual<struct>
virtual<R>.from_gtv(gtv): R - decodes a Gtv
.hash(): byte_array
.to_full(): R - converts to the original value, fails if the value is not full
Subtypes
If type B is a subtype of type A, a value of type B can be assigned to a variable of type A (or passed as a parameter oftype A).
• T is a subtype of T?.
• null is a subtype of T?.
• (T,P) is a subtype of (T?,P?), (T?,P) and (T,P?).
2.4.2 Module definitions
Table of Contents
• Module definitions
– Entity
* Keys and Indices
* Entity annotations
* Changing existing entities
– Object
– Struct
2.4. Language Features 43

Rell Documentation, Release v0.10.1
– Enum
– Query
– Operation
– Function
– Namespace
– External
* External modules
* Transactions and blocks
– Mount names
Entity
Values (instances) of an entity in Rell are stored in a database, not in memory. They have to be created and deletedexplicitly using Rell create and delete expressions. An in-memory equivalent of an entity in Rell is a struct.
A variable of an entity type holds an ID (primary key) of the corresponding database record, but not its attribute values.
entity company {name: text;address: text;
}
entity user {first_name: text;last_name: text;year_of_birth: integer;mutable salary: integer;
}
If attribute type is not specified, it will be the same as attribute name:
entity user {name; // built-in type "name"company; // user-defined type "company" (error if no such type)
}
Attributes may have default values:
entity user {home_city: text = 'New York';
}
An ID (database primary key) of an entity value can be accessed via the rowid implicit attribute (of type rowid):
val u = user @ { .name == 'Bob' };print(u.rowid);
val alice_id = user @ { .name == 'Alice' } ( .rowid );print(alice_id);
44 Chapter 2. Chromia

Rell Documentation, Release v0.10.1
Keys and Indices
Entities can have key and index clauses:
entity user {name: text;address: text;key name;index address;
}
Keys and indices may have multiple attributes:
entity user {first_name: text;last_name: text;key first_name, last_name;
}
Attribute definitions can be combined with key or index clauses, but such definition has restrictions (e. g. cannotspecify mutable):
entity user {key first_name: text, last_name: text;index address: text;
}
Entity annotations
@log entity user {name: text;
}
The @log annotation has following effects:
• Special attribute transaction of type transaction is added to the entity.
• When an entity value is created, transaction is set to the result of op_context.transaction (currenttransaction).
• Entity cannot have mutable attributes.
• Values cannot be deleted.
Changing existing entities
When starting a Rell app, database structure update is performed: tables for new entities and objects are created andtables for existing ones are altered. There are limitations on changes that can be made in existing entities and objects.
What’s allowed:
• Adding an attribute with a default value (a column is added to the table and initialized with the default value).
• Adding an attribute without a default value - only if there are no records in the table.
• Removing an attribute (database column is not dropped, and the attribute can be readded later).
2.4. Language Features 45

Rell Documentation, Release v0.10.1
What’s not allowed:
• Any changes in keys/indices, including adding a new key/index attribute, making an existing attribute intokey/index, removing an attribute from an index, etc.
• Changing attribute’s type.
• Adding/removing the @log annotation.
Object
Object is similar to entity, but there can be only one instance of an object:
object event_stats {mutable event_count: integer = 0;mutable last_event: text = 'n/a';
}
Reading object attributes:
query get_event_count() = event_stats.event_count;
Modifying an object:
operation process_event(event: text) {update event_stats ( event_count += 1, last_event = event );
}
Features of objects:
• Like entities, objects are stored in a database.
• Objects are initialized automatically during blockchain initialization.
• Cannot create or delete an object from code.
• Attributes of an object must have default values.
Struct
Struct is similar to entity, but its values exist in memory, not in a database.
struct user {name: text;address: text;mutable balance: integer = 0;
}
Features of structs:
• Attributes are immutable by default, and only mutable when declared with mutable keyword.
• Attributes can have
• An attribute may have a default value, which is used if the attribute is not specified during construction.
• Structs are deleted from memory implicitly by a garbage collector.
Creating struct values:
46 Chapter 2. Chromia

Rell Documentation, Release v0.10.1
val u = user(name = 'Bob', address = 'New York');
Same rules as for the create expression apply: no need to specify attribute name if it can be resolved implicitly byname or type:
val name = 'Bob';val address = 'New York';val u = user(name, address);val u2 = user(address, name); // Order does not matter - same struct value is created.
Struct attributes can be accessed using operator .:
print(u.name, u.address);
Safe-access operator ?. can be used to read or modify attributes of a nullable struct:
val u: user? = find_user('Bob');u?.balance += 100; // no-op if 'u' is null
Enum
Enum declaration:
enum currency {USD,EUR,GBP
}
Values are stored in a database as integers. Each constant has a numeric value equal to its position in the enum (thefirst value is 0).
Usage:
var c: currency;c = currency.USD;
Enum-specific functions and properties:
val cs: list<currency> = currency.values() // Returns all values (in the order in→˓which they are declared)
val eur = currency.value('EUR') // Finds enum value by nameval gbp = currency.value(2) // Finds enum value by index
val usd_str: text = currency.USD.name // Returns 'USD'val usd_value: integer = currency.USD.value // Returns 0.
Query
• Cannot modify the data in the database (compile-time check).
• Must return a value.
• If return type is not explicitly specified, it is implicitly deducted.
2.4. Language Features 47

Rell Documentation, Release v0.10.1
• Parameter types and return type must be Gtv-compatible.
Short form:
query q(x: integer): integer = x * x;
Full form:
query q(x: integer): integer {return x * x;
}
Operation
• Can modify the data in the database.
• Does not return a value.
• Parameter types must be Gtv-compatible.
operation create_user(name: text) {create user(name = name);
}
Function
• Can return nothing or a value.
• Can modify the data in the database when called from an operation (run-time check).
• Can be called from queries, operations or functions.
• If return type is not specified explicitly, it is unit (no return value).
Short form:
function f(x: integer): integer = x * x;
Full form:
function f(x: integer): integer {return x * x;
}
When return type is not specified, it is considered unit:
function f(x: integer) {print(x);
}
Namespace
Definitions can be put in a namespace:
48 Chapter 2. Chromia

Rell Documentation, Release v0.10.1
namespace foo {entity user {
name;country;
}
struct point {x: integer;y: integer;
}
enum country {USA,DE,FR
}}
query get_users_by_country(c: foo.country) = foo.user @* { .country == c };
Features of namespaces:
• No need to specify a full name within a namespace, i. e. can use country under namespace foo directly, notas foo.country.
• Names of tables for entities and objects defined in a namespace contain the full name, e. g. the table for entityfoo.user will be named c0.foo.user.
• It is allowed to define namespace with same name multiple times with different inner definitions.
Anonymous namespace:
namespace {// some definitions
}
Can be used to apply an annotation to a set of definitions:
@mount('foo.bar')namespace {
entity user {}entity company {}
}
External
The @external annotation is used to access entities defined in other blockchains.
@external('foo') namespace {@log entity user {}@log entity company {}
}
@external('foo') @log entity city {}
query get_all_users() = user @* {};
2.4. Language Features 49
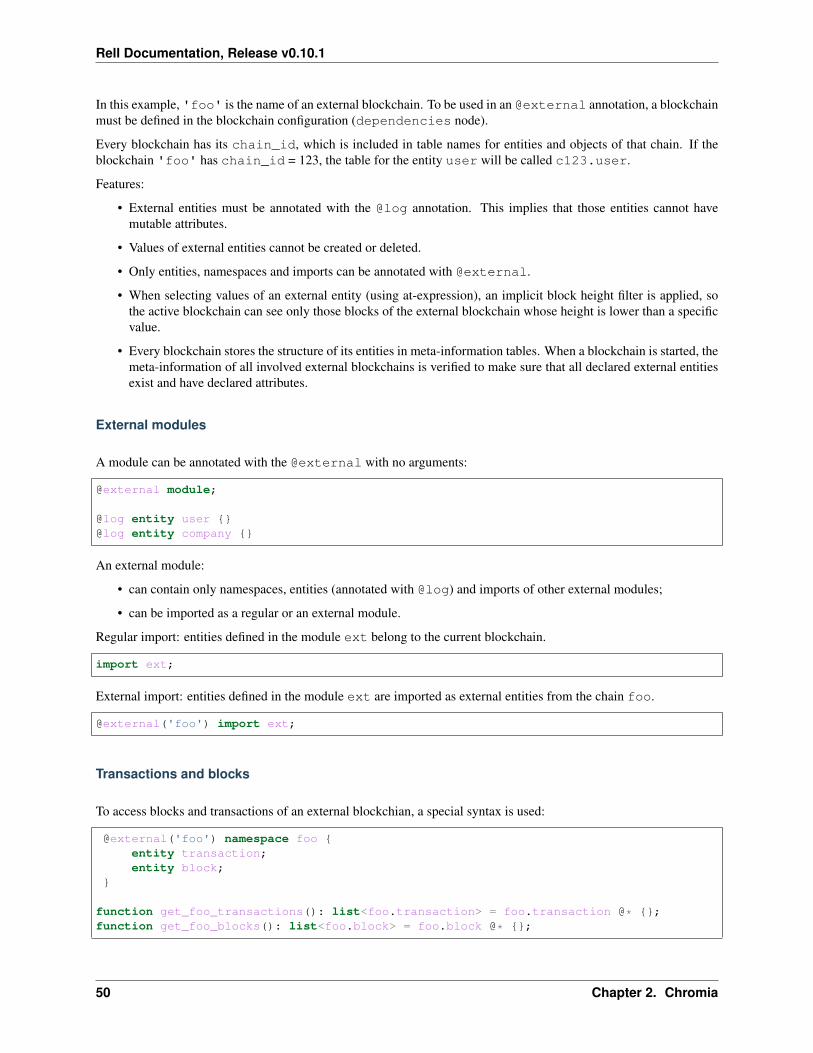
Rell Documentation, Release v0.10.1
In this example, 'foo' is the name of an external blockchain. To be used in an @external annotation, a blockchainmust be defined in the blockchain configuration (dependencies node).
Every blockchain has its chain_id, which is included in table names for entities and objects of that chain. If theblockchain 'foo' has chain_id = 123, the table for the entity user will be called c123.user.
Features:
• External entities must be annotated with the @log annotation. This implies that those entities cannot havemutable attributes.
• Values of external entities cannot be created or deleted.
• Only entities, namespaces and imports can be annotated with @external.
• When selecting values of an external entity (using at-expression), an implicit block height filter is applied, sothe active blockchain can see only those blocks of the external blockchain whose height is lower than a specificvalue.
• Every blockchain stores the structure of its entities in meta-information tables. When a blockchain is started, themeta-information of all involved external blockchains is verified to make sure that all declared external entitiesexist and have declared attributes.
External modules
A module can be annotated with the @external with no arguments:
@external module;
@log entity user {}@log entity company {}
An external module:
• can contain only namespaces, entities (annotated with @log) and imports of other external modules;
• can be imported as a regular or an external module.
Regular import: entities defined in the module ext belong to the current blockchain.
import ext;
External import: entities defined in the module ext are imported as external entities from the chain foo.
@external('foo') import ext;
Transactions and blocks
To access blocks and transactions of an external blockchian, a special syntax is used:
@external('foo') namespace foo {entity transaction;entity block;
}
function get_foo_transactions(): list<foo.transaction> = foo.transaction @* {};function get_foo_blocks(): list<foo.block> = foo.block @* {};
50 Chapter 2. Chromia

Rell Documentation, Release v0.10.1
• External and non-external transactions/blocks are distinct, incompatible types.
• When selecting external transactions or blocks, an implicit height filter is applied (like for external entities).
Entities transaction and block of an external chain can be accessed also via an external module:
@external('foo') import ext;
function get_foo_transactions(): list<ext.transaction> = ext.transaction @* {};function get_foo_blocks(): list<ext.block> = ext.block @* {};
The entities are implicitly added to the module’s namespace and can be accessed by its import alias.
Mount names
Entities, objects, operations and queries have mount names:
• for entities and objects, those names are the SQL table names where the data is stored
• for operations and queries, a mount name is used to invoke an operation or a query from the outside
By default, a mount name is defined by a fully-qualified name of a definition:
namespace foo {namespace bar {
entity user {}}
}
The mount name for the entity user is foo.bar.user.
To specify a custom mount name, @mount annotation is used:
@mount('foo.bar.user')entity user {}
The @mount annotation can be specified for entities, objects, operations and queries.
In addition, it can be specified for a namespace:
@mount('foo.bar')namespace ns {
entity user {}}
or a module:
@mount('foo.bar')module;
entity user {}
In both cases, the mount name of user is foo.bar.user.
A mount name can be relative to the context mount name. For example, when defined in a namespace
@mount('a.b.c')namespace ns {
entity user {}}
2.4. Language Features 51

Rell Documentation, Release v0.10.1
entity user will have following mount names when annotated with @mount:
• @mount('.d.user') -> a.b.c.d.user
• @mount('^.user') -> a.b.user
• @mount('^^.x.user') -> a.x.user
Special character . appends names to the context mount name, and ^ removes the last part from the context mountname.
A mount name can end with ., in that case the name of the definition is appended to the mount name:
@mount('foo.')entity user {} // mount name = "foo.user"
@mount('foo')entity user {} // mount name = "foo"
2.4.3 Expressions
Table of Contents
• Expressions
– Values
– Operators
* Special
* Comparison
* Arithmetical
* Logical
* If
* Other
Values
Simple values:
• Null: null (type is null)
• Boolean: true, false
• Integer: 123, 0, -456
• Text: 'Hello', "World"
• Byte array: x'1234', x"ABCD"
Text literals may have escape-sequences:
• Standard: \r, \n, \t, \b.
• Special characters: \", \', \\.
52 Chapter 2. Chromia

Rell Documentation, Release v0.10.1
• Unicode: \u003A.
Operators
Special
• . - member access: user.name, s.sub(5, 10)
• () - function call: print('Hello'), value.to_text()
• [] - element access: values[i]
Comparison
• ==
• !=
• ===
• !==
• <
• >
• <=
• >=
Operators == and != compare values. For complex types (collections, tuples, structs) they compare member values,recursively. For entity values only object IDs are compared.
Operators === and !== compare references, not values. They can be used only on types: tuple, struct, list,set, map, gtv, range.
Example:
val x = [1, 2, 3];val y = list(x);print(x == y); // true - values are equalprint(x === y); // false - two different objects
Arithmetical
• +
• -
• *
• /
• %
• ++
• --
2.4. Language Features 53

Rell Documentation, Release v0.10.1
Logical
• and
• or
• not
If
Operator if is used for conditional evaluation:
val max = if (a >= b) a else b;return max;
Other
• in - check if an element is in a range/set/map
2.4.4 Statements
Table of Contents
• Statements
– Local variable declaration
– Basic statements
– If statement
– When statement
– Loop statements
Local variable declaration
Constants:
val x = 123;val y: text = 'Hello';
Variables:
var x: integer;var y = 123;var z: text = 'Hello';
54 Chapter 2. Chromia

Rell Documentation, Release v0.10.1
Basic statements
Assignment:
x = 123;values[i] = z;y += 15;
Function call:
print('Hello');
Return:
return;return 123;
Block:
{val x = calc();print(x);
}
If statement
if (x == 5) print('Hello');
if (y == 10) {print('Hello');
} else {print('Bye');
}
if (x == 0) {return 'Zero';
} else if (x == 1) {return 'One';
} else {return 'Many';
}
Can also be used as an expression:
function my_abs(x: integer): integer = if (x >= 0) x else -x;
When statement
Similar to switch in C++ or Java, but using the syntax of when in Kotlin:
when(x) {1 -> return 'One';2, 3 -> return 'Few';else -> {
(continues on next page)
2.4. Language Features 55

Rell Documentation, Release v0.10.1
(continued from previous page)
val res = 'Many: ' + x;return res;
}}
Features:
• Can use both constants as well as arbitrary expressions.
• When using constant values, the compiler checks that all values are unique.
• When using with an enum type, values can be specified by simple name, not full name.
A form of when without an argument is equivalent to a chain of if . . . else if:
when {x == 1 -> return 'One';x >= 2 and x <= 7 -> return 'Several';x == 11, x == 111 -> return 'Magic number';some_value > 1000 -> return 'Special case';else -> return 'Unknown';
}
• Can use arbitrary boolean expressions.
• When multiple comma-separated expressions are specified, any of them triggers the block (i. e. they are com-bined via OR).
Both forms of when (with and without an argument) can be used as an expression:
return when(x) {1 -> 'One';2, 3 -> 'Few';else -> 'Many';
}
• else must always be specified, unless all possible values of the argument are specified (possible for booleanand enum types).
• Can be used in at-expression, in which case it is translated to SQL CASE WHEN . . . THEN expression.
Loop statements
For:
for (x in range(10)) {print(x);
}
for (u in user @* {}) {print(u.name);
}
The expression after in may return a range or a collection (list, set, map).
Tuple unpacking can be used in a loop:
val l: list<(integer, text)> = get_list();for ((n, s) in l) { ... }
56 Chapter 2. Chromia

Rell Documentation, Release v0.10.1
While:
while (x < 10) {print(x);x = x + 1;
}
Break:
for (u in user @* {}) {if (u.company == 'Facebook') {
print(u.name);break;
}}
while (x < 5) {if (values[x] == 3) break;x = x + 1;
}
2.4.5 Database Operations
Table of Contents
• Database Operations
– At-Operator
* Cardinality
* From-part
* Where-part
* What-part
* Tail part
* Result type
* Nested At-Operators
– Create Statement
– Update Statement
– Delete Statement
At-Operator
Simplest form:
user @ { .name == 'Bob' }
General syntax:
<from> <cardinality> { <where> } [<what>] [limit N]
2.4. Language Features 57

Rell Documentation, Release v0.10.1
Cardinality
Specifies whether the expression must return one or many objects:
• T @? {} - returns T, zero or one, fails if more than one found.
• T @ {} - returns T, exactly one, fails if zero or more than one found.
• T @* {} - returns list<T>, zero or more.
• T @+ {} - returns list<T>, one or more, fails if none found.
From-part
Simple (one entity):
user @* { .name == 'Bob' }
Complex (one or more entities):
(user, company) @* { user.name == 'Bob' and company.name == 'Microsoft' anduser.xyz == company.xyz }
Specifying entity aliases:
(u: user) @* { u.name == 'Bob' }
(u: user, c: company) @* { u.name == 'Bob' and c.name == 'Microsoft' andu.xyz == c.xyz }
Where-part
Zero or more comma-separated expressions using entity attributes, local variables or system functions:
user @* {} - returns all users
user @ { .name == 'Bill', .company == 'Microsoft' } - returns a specific user (all conditionsmust match)
Attributes of an entity can be accessed with a dot, e. g. .name or with an entity name or alias, user.name.
Entity attributes can also be matched implicitly by name or type:
val ms = company @ { .name == 'Microsoft' };val name = 'Bill';return user @ { name, ms };
Explanation: the first where-expression is the local variable name, there is an attribute called name in the entityuser. The second expression is ms, there is no such attribute, but the type of the local variable ms is company, andthere is an attribute of type company in user.
What-part
Simple example:
user @ { .name == 'Bob' } ( .company.name ) - returns a single value (name of the user’s company)
user @ { .name == 'Bob' } ( .company.name, .company.address ) - returns a tuple of twovalues
58 Chapter 2. Chromia
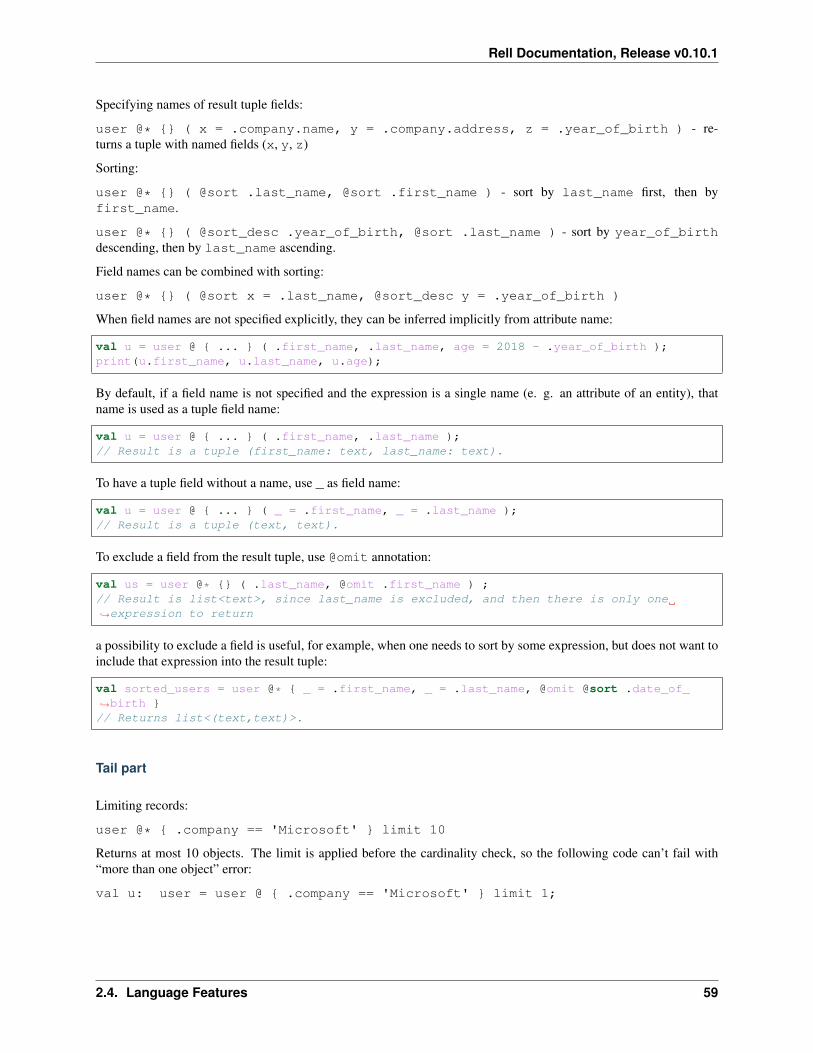
Rell Documentation, Release v0.10.1
Specifying names of result tuple fields:
user @* {} ( x = .company.name, y = .company.address, z = .year_of_birth ) - re-turns a tuple with named fields (x, y, z)
Sorting:
user @* {} ( @sort .last_name, @sort .first_name ) - sort by last_name first, then byfirst_name.
user @* {} ( @sort_desc .year_of_birth, @sort .last_name ) - sort by year_of_birthdescending, then by last_name ascending.
Field names can be combined with sorting:
user @* {} ( @sort x = .last_name, @sort_desc y = .year_of_birth )
When field names are not specified explicitly, they can be inferred implicitly from attribute name:
val u = user @ { ... } ( .first_name, .last_name, age = 2018 - .year_of_birth );print(u.first_name, u.last_name, u.age);
By default, if a field name is not specified and the expression is a single name (e. g. an attribute of an entity), thatname is used as a tuple field name:
val u = user @ { ... } ( .first_name, .last_name );// Result is a tuple (first_name: text, last_name: text).
To have a tuple field without a name, use _ as field name:
val u = user @ { ... } ( _ = .first_name, _ = .last_name );// Result is a tuple (text, text).
To exclude a field from the result tuple, use @omit annotation:
val us = user @* {} ( .last_name, @omit .first_name ) ;// Result is list<text>, since last_name is excluded, and then there is only one→˓expression to return
a possibility to exclude a field is useful, for example, when one needs to sort by some expression, but does not want toinclude that expression into the result tuple:
val sorted_users = user @* { _ = .first_name, _ = .last_name, @omit @sort .date_of_→˓birth }// Returns list<(text,text)>.
Tail part
Limiting records:
user @* { .company == 'Microsoft' } limit 10
Returns at most 10 objects. The limit is applied before the cardinality check, so the following code can’t fail with“more than one object” error:
val u: user = user @ { .company == 'Microsoft' } limit 1;
2.4. Language Features 59

Rell Documentation, Release v0.10.1
Result type
Depends on the cardinality, from- and what-parts.
• From- and what-parts define the type of a single record, T.
• Cardinality defines the type of the @-operator result: T?, T or list<T>.
Examples:
• user @ { ... } - returns user
• user @? { ... } - returns user?
• user @* { ... } - returns list<user>
• user @+ { ... } - returns list<user>
• (user, company) @ { ... } - returns a tuple (user,company)
• (user, company) @* { ... } - returns list<(user,company)>
• user @ { ... } ( .name ) - returns text
• user @ { ... } ( .first_name, .last_name ) - returns (first_name:text,last_name:text)
• (user, company) @ { ... } ( user.first_name, user.last_name, company ) - re-turns (text,text,company)
Nested At-Operators
A nested at-operator can be used in any expression inside of another at-operator:
user @* { .company == company @ { .name == 'Microsoft' } } ( ... )
This is equivalent to:
val c = company @ { .name == 'Microsoft' };user @* { .company == c } ( ... )
Create Statement
Must specify all attributes that don’t have default values.
create user(name = 'Bob', company = company @ { .name == 'Amazon' });
No need to specify attribute name if it can be matched by name or type:
val name = 'Bob';create user(name, company @ { company.name == 'Amazon' });
Can use the created object:
val new_company = create company(name = 'Amazon');val new_user = create user(name = 'Bob', new_company);print('Created new user:', new_user);
60 Chapter 2. Chromia
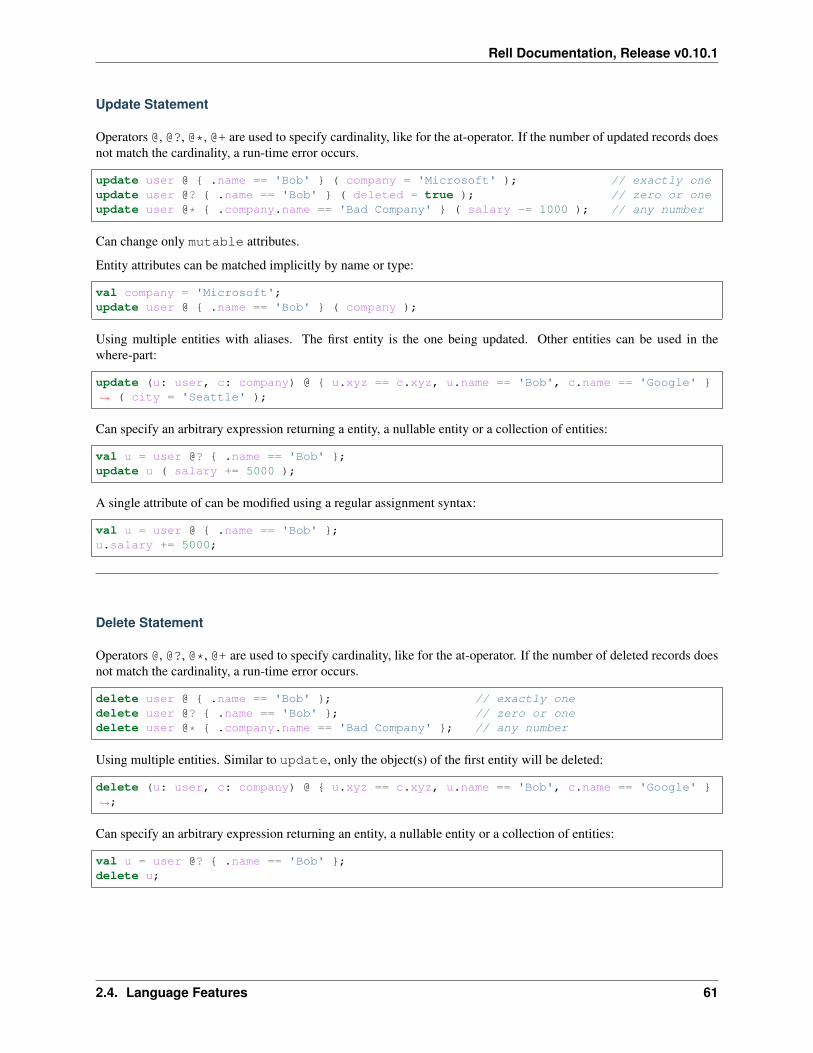
Rell Documentation, Release v0.10.1
Update Statement
Operators @, @?, @*, @+ are used to specify cardinality, like for the at-operator. If the number of updated records doesnot match the cardinality, a run-time error occurs.
update user @ { .name == 'Bob' } ( company = 'Microsoft' ); // exactly oneupdate user @? { .name == 'Bob' } ( deleted = true ); // zero or oneupdate user @* { .company.name == 'Bad Company' } ( salary -= 1000 ); // any number
Can change only mutable attributes.
Entity attributes can be matched implicitly by name or type:
val company = 'Microsoft';update user @ { .name == 'Bob' } ( company );
Using multiple entities with aliases. The first entity is the one being updated. Other entities can be used in thewhere-part:
update (u: user, c: company) @ { u.xyz == c.xyz, u.name == 'Bob', c.name == 'Google' }→˓ ( city = 'Seattle' );
Can specify an arbitrary expression returning a entity, a nullable entity or a collection of entities:
val u = user @? { .name == 'Bob' };update u ( salary += 5000 );
A single attribute of can be modified using a regular assignment syntax:
val u = user @ { .name == 'Bob' };u.salary += 5000;
Delete Statement
Operators @, @?, @*, @+ are used to specify cardinality, like for the at-operator. If the number of deleted records doesnot match the cardinality, a run-time error occurs.
delete user @ { .name == 'Bob' }; // exactly onedelete user @? { .name == 'Bob' }; // zero or onedelete user @* { .company.name == 'Bad Company' }; // any number
Using multiple entities. Similar to update, only the object(s) of the first entity will be deleted:
delete (u: user, c: company) @ { u.xyz == c.xyz, u.name == 'Bob', c.name == 'Google' }→˓;
Can specify an arbitrary expression returning an entity, a nullable entity or a collection of entities:
val u = user @? { .name == 'Bob' };delete u;
2.4. Language Features 61

Rell Documentation, Release v0.10.1
2.4.6 System Library (Globals)
Table of Contents
• System Library (Globals)
– Entities
– Namespaces
* chain_context
* op_context
– Global Functions
– Require function
Entities
entity block {block_height: integer;block_rid: byte_array;timestamp;
}
entity transaction {tx_rid: byte_array;tx_hash: byte_array;tx_data: byte_array;block;
}
It is not possible to create, modify or delete values of those entities in code.
Namespaces
chain_context
chain_context.args: module_args - module arguments specified in raw_config under path gtx.rell.moduleArgs.<module name>. The type is module_args, which must be a user-defined struct. If nomodule_args struct is defined in the module, the args field cannot be accessed.
Example of module_args:
struct module_args {s: text;n: integer;
}
Corresponding module configuration:
62 Chapter 2. Chromia

Rell Documentation, Release v0.10.1
{"gtx": {
"rell": {"moduleArgs": {
"module_name": {"s": "Hello","n": 123
}}
}}
}
Code that reads module_args:
function f() {print(chain_context.args.s);print(chain_context.args.n);
}
Every module can have its own module_args. Reading chain_context.args returns the args for the currentmodule, and the type of chain_context.args is different for different modules: it is the module_args structdefined in that module.
chain_context.blockchain_rid: byte_array - blockchain RID
chain_context.raw_config: gtv - blockchain configuration object, e. g.{"gtx":{"rell":{"mainFile":"main.rell"}}}
op_context
System namespace op_context can be used only in an operation or a function called from an operation, but not ina query.
op_context.block_height: integer - the height of the block currently being built (equivalent ofop_context.transaction.block.block_height).
op_context.last_block_time: integer - the timestamp of the last block, in milliseconds (likeSystem.currentTimeMillis() in Java). Returns -1 if there is no last block (the block currently being built isthe first block).
op_context.transaction: transaction - the transaction currently being built.
Global Functions
abs(integer): integer - absolute valueabs(decimal): decimal
empty(T?): boolean - returns true if the argument is null or an empty collection and false otherwise; fornullable collections checks both conditionsempty(list<T>): boolean
empty(set<T>): boolean
2.4. Language Features 63

Rell Documentation, Release v0.10.1
empty(map<K, V>): boolean
exists(T?): boolean - opposite to empty()exists(list<T>): boolean
exists(set<T>): boolean
exists(map<K, V>): boolean
is_signer(byte_array): boolean - returns true if a byte array is in the list of signers of current opera-tion
log(...) - print a message to the log (same usage as print)
max(integer, integer): integer - maximum of two valuesmax(decimal, decimal): decimal
min(integer, integer): integer - minimum of two valuesmin(decimal, decimal): decimal
print(...) - print a message to STDOUT:
• print() - prints an empty line
• print('Hello', 123) - prints "Hello 123"
verify_signature(message: byte_array, pubkey: pubkey, signature:byte_array): boolean - returns true if the given signature is a result of signing the message with aprivate key corresponding to the given public key
Require function
For checking a boolean condition:
require(boolean[, text]) - throws an exception if the argument is false
For checking for null:
require(T?[, text]): T - throws an exception if the argument is null, otherwise returns the argument
require_not_empty(T?[, text]): T - same as the previous one
For checking for an empty collection:
require_not_empty(list<T>[, text]): list<T> - throws an exception if the argument is an emptycollection, otherwise returns the argument
require_not_empty(set<T>[, text]): set<T> - same as the previous
require_not_empty(map<K,V>[, text]): map<K,V> - same as the previous
When passing a nullable collection to require_not_empty, it throws an exception if the argument is either nullor an empty collection.
Examples:
64 Chapter 2. Chromia
Rell Documentation, Release v0.10.1
val x: integer? = calculate();val y = require(x, "x is null"); // type of "y" is "integer", not "integer?"
val p: list<integer> = get_list();require_not_empty(p, "List is empty");
val q: list<integer>? = try_to_get_list();require(q); // fails if q is nullrequire_not_empty(q); // fails if q is null or an empty list
2.4.7 Miscellaneous
Comments
Single-line comment:
print("Hello"); // Some comment
Multiline comment:
print("Hello"/*, "World"*/);/*print("Bye");
*/
2.5 Advanced Topics
2.5.1 Modules in an Application
Rell application consists of modules. A module is either a single .rell file or a directory with one or multiple.rell files.
A single-file Rell module must have a module header:
module;
// entities, operations, queries, functions and other definitions
If a .rell file has no module header, it is a part of a directory-module. All such .rell files in a directory belongto the same directory-module. An exception is a file called module.rell: it always belongs to a directory-module,even if it has a module header. It is not mandatory for a directory-module to have a module.rell.
Every file of a directory-module sees definitions of all other files of the module. A file-module file sees only its owndefinitions.
Example of a Rell source directory tree:
.app
multifunctions.rellmodule.relloperations.rell
(continues on next page)
2.5. Advanced Topics 65

Rell Documentation, Release v0.10.1
(continued from previous page)
queries.rellsingle.rell
app/multi/functions.rell:
function g(): integer = 456;
app/multi/module.rell:
module;enum state { OPEN, CLOSED }
app/single.rell:
module;function f(): integer = 123;
Every module has a name defined by its source directory path. The sample source directory tree given above definestwo modules:
• app.multi - a directory-module in the directory app/multi (consisting of 4 files)
• app.single - a file-module in the file app/single.rell
There may be a root module - a directory-module which consists of .rell files located in the root of the source directory.Root module has an empty name. Web IDE uses the root module as the default main module of a Rell application.
Import
To access module’s definitions, the module has to be imported:
import app.single;
function test() {single.f(); // Calling the function "f" defined in the module "app.single
→˓".}
When importing a module, it is added to the current namespace with some alias. By default, the alias is the last partof the module name, i. e. single for the module app.single or multi for app.multi. The definitions of themodule can be accessed via the alias.
A custom alias can be specified:
import alias: app.multi;
function test() {alias.g();
}
It is possible to specify a relative name of a module when importing. In that case, the name of the imported module isderived from the name of the current module. For example, if the current module is a.b.c,
• import .d; imports a.b.c.d
• import alias: ^; imports a.b
• import alias: ^^; imports a
66 Chapter 2. Chromia

Rell Documentation, Release v0.10.1
• import ^.e; imports a.b.e
Run-time
At run-time, not all modules defined in a source directory tree are active. There is a main module which is specifiedwhen starting a Rell application. Only the main module and all modules imported by it (directly or indirectly) areactive.
When a module is active, its operations and queries can be invoked, and tables for its entities and objects are added tothe database on initialization.
2.5.2 Chromia Vault
Short Overview
Chromia Vault is a wallet in nature that supports asset transfers within the Chromia ecosystem. It can be used totransfer any kind of FT3 assets (Chromia equivalent of Ethereum ERC-20 and ERC-721 protocols).
However, besides just transfers, Vault has additional features like dapp account linking and browsing Chromia dapps.Dapp account linking feature allows you to Single Sign-On (SSO) into your dapp account using the Vault (same wayGoogle or Facebook login can be used to login into different websites), and to control your dapp account assets directlyfrom the Vault.
This section describe how an end user can perform such actions on the Chromia Vault webapp.
Accessing the Vault
Creating new account
Account creation is a 3-steps process.
1. First, user will have to choose the account name along with a password for it. The name and password are notpublic, and will only be used for accessing the account later on.
2.5. Advanced Topics 67

Rell Documentation, Release v0.10.1
2. After account name and password fields are filled, by clicking “Continue” user will be taken to the new screenshowing 15 words (the mnemonic).
It is highly advised to print out or write down these words and store them in a safe place.
Important: Knowing these 15 words in correct order is the only way to retrieve the account if the password has beenlost or the browser history is cleared for any reason.
3. After user has safely stored the words, clicking “Continue” will take user to a screen where they will have toclick (or drag&drop) the words in the correct order and thus “confirm” that they has stored the words somewhere.
68 Chapter 2. Chromia

Rell Documentation, Release v0.10.1
When all words are laid down in the correct order will the “Confirm” button be enabled.
By clicking “Confirm”, the account will be stored to local browser storage and user will be taken to the Dashboardscreen.
Accessing the account (Login)
All created accounts will be stored to local browser storage (on the device). Accounts are unlocked by a password thatwas chosen while creating an account.
If the user wants to access an existing account on a device, they can use the “Import Existing Account”:
2.5. Advanced Topics 69

Rell Documentation, Release v0.10.1
Importing existing account
Import existing account feature is used when you are trying to access your account on other devices, or when you haveforgotten your password so can’t login normally.
Importing account is a 2-steps process.
1. First user will be asked to provide the 15 words mnemonic from when they created that account in correct order.
2. On the next screen user will be asked to provide a name for the account and choose the password for it, whichwill be used to access the account on that device from now on.
Dashboard
The Dashboard page is separated into 3 different sections: Chromia Accounts, Linked Apps and Explore Apps.
70 Chapter 2. Chromia

Rell Documentation, Release v0.10.1
Chromia accounts
Chromia Accounts are something that we usually call “main chain” accounts. There could be multiple ChromiaAccounts within one Vault Account. Gaining access to a Vault Account will allow access to all Chromia Accountsbeneath it.
Explore Apps
Explore Apps section is basically app explorer (Google play / App store equivalent) where one can browse and exploreall the apps built in chromia ecosystem.
2.5. Advanced Topics 71

Rell Documentation, Release v0.10.1
Linked Apps
Linked Apps section contains all the apps that user has created an account for, which this Vault Account has controlover.
Each dapp in Chromia ecosystem has its own blockchain. Every account (that little “Tile”) on the dashboard representsa combination of blockchain and specific account on that particular blockchain. These “Tile” are composed of 2 parts:
• Automatically generated squared image created from Blockchain ID, and
• Automatically generated robo-icon created from the Account ID.
That means if you have multiple accounts on the same Blockchain, they will have the same squared image, whilerobo-icon will be the same for the one accountId on different dapps.
Clicking on any of the accounts in the dashboard is taking to the “wallet” functionality of the Vault, used to send/receiveassets from/to that specific account.
Asset Transfer (Wallet features)
In order to access the wallet section, one needs to select the account from the dashboard first:
72 Chapter 2. Chromia
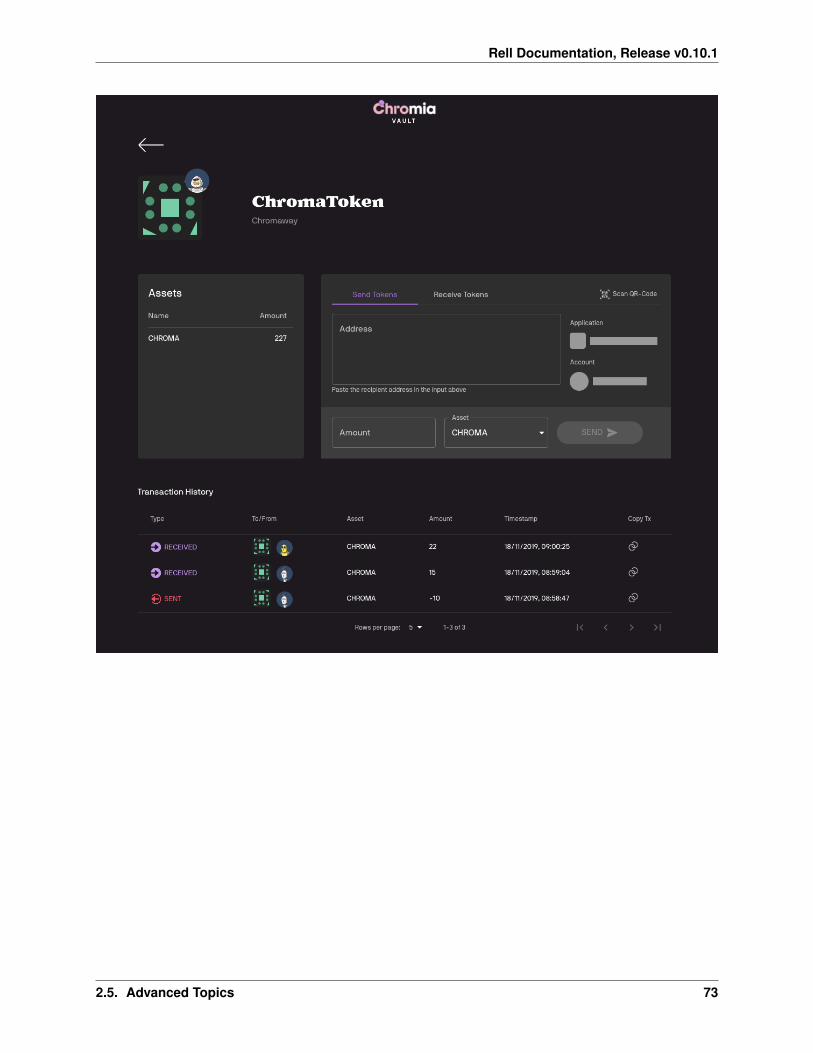
Rell Documentation, Release v0.10.1
2.5. Advanced Topics 73

Rell Documentation, Release v0.10.1
Assets
Assets section is showing the list of all the available assets in that specific Account.
74 Chapter 2. Chromia

Rell Documentation, Release v0.10.1
Sending assets
Assets are sent from the “Send Tokens” tab of the transfer section.
You can either enter the address manually (copy/paste) or use a QR scanner to scan the QR code containing recipientaddress info. The address is composed of 2 parts - blockchain id and account id, separated by the semicolon. So,address format is <blockhainId;accountId>.
Once address field is populated, “Application” and “Account” will be filled with appropriate hash icons automaticallygenerated from the input address.
After address is populated, select an appropriate Asset and Amount to send, and click “Send”.
2.5. Advanced Topics 75

Rell Documentation, Release v0.10.1
Receiving assets
On the “Receive Tokens” tab of transfer section, the address for this specific account is shown.
There is also a QR code shown next to the address. Instead of providing the address itself, it’s possible to provide QRcode which someone can scan and send assets.
Furthermore, besides holding just address info, QR code can also hold “Amount” and “Asset” information. Whenever“Amount” or “Asset” fields are changed, QR code is being updated.
When such a QR code (containing asset or amount info) is scanned from the “Send Tokens” tab, those fields will beauto-populated on the UI as well.
Transaction history
Transaction history is a table showing account’s transactional activities.
It contains info about transaction type (sending or receiving), the account to which we have sent or from which wehave received the assets (sender/recipient), along with some other information like which Assets were transferred, theamount, timestamp, etc.
76 Chapter 2. Chromia

Rell Documentation, Release v0.10.1
SSO and app linking
Chromia Vault offers Single Sign-On (SSO) service for the dapps in Chromia ecosystem. This allows users to loginto different systems (apps) using single account. In order to take advantage of it, the application needs to integratewith Chromia Vault SSO service. Similarly to “Login with Facebook” or “Login with Google” features, once ChromiaVault has been used for SSO, user will have to authorize the app in the system. That looks like on the image below:
2.5. Advanced Topics 77

Rell Documentation, Release v0.10.1
2.5.3 FT3 Module
FT3 is the recommended standards to handle accounts and tokens in Chromia ecosystem. It allow dapps to make fulluse of Chromia Vault, including Single Sign-On (SSO), assets transfer and visibility on the Vault’s dapp explorer.
78 Chapter 2. Chromia

Rell Documentation, Release v0.10.1
FT3 consists of Rell module which contains blockchain logic, and client side lib which provides js API for interactionwith the module.
Features
FT3 supports the following features:
• Account management
• Asset management and transaction history
• Single Sign-on (SSO) from the Vault
Account Management
The central entity of FT3 module is account. An account is uniquely identified by an id:
entity account {key id: byte_array;
}
Account can be controlled by multiple users with different level of access rights. The authentication descriptors defineswho can control an account and what he can do with it:
entity account_auth_descriptor {descriptor_id: byte_array;key account, descriptor_id;index descriptor_id;auth_type: text;args: byte_array;
}
At the moment, the module defines two types of authentication descriptors: SingleSig and MultiSig and two autho-rization types: Authentication ("A") and Transfer ("T"). The A flag specifies who can edit an account (and thus hasall priviledges to the account), and the T can only transfer assets.
Although there are only two predefined authorization flags, dapp developers are free to add more flag types to create acustom access control for his dapp.
SingleSig authentication descriptor is used to provide access to a single user. The descriptor accepts user’s public keyand authorization flags which specify what access rights the user has:
struct single_sig_args {flags: set<text>;pubkey;
}
MutliSig authentication descriptor provides M of N control of an account. It accepts a list of N public keys, of whicha minimum number M of signatures are required to authorize an operation and a set of authorization flags:
struct multi_sig_args {flags: set<text>;signatures_required: integer;pubkeys: list<pubkey>;
}
2.5. Advanced Topics 79

Rell Documentation, Release v0.10.1
Asset Management
FT3 provides support for multiple assets. The asset table contains list of registered assets:
entity asset {id: byte_array;key id;key name;issuing_chain_rid: byte_array;
}
Note: Although we can only transfer within the same chain for now. issuing_chain_rid is kept in preparationfor coming release when FT3 support cross-chain asset transfer.
The balance table keeps track of an account’s assets:
entity balance {key account, asset;mutable amount: integer = 0;
}
Single Sign-on (SSO)
SSO allows a user to login to different applications with a single account (similar to how “Login withGoogle/Facebook” work).
The Vault is a SSO service of the Chrommia ecosystem: any FT3 dapp can be configured to allow users to login usingtheir Vault account.
Project Setup
In this section, we explain how to setup a project to use FT3.
First let’s clone FT3’s bootstrap project repository:
git clone https://bitbucket.org/chromawallet/develop-chromia.git
Create a new directory for your project, and copy the postchain and rell directories over to your project. Theremaining client contains an example for Single Sign-On feature, so we will come back to it later.
Blockchain side setup
Config dapp description
1. Go to postchain/config/nodes/, you will find a dev directory. This is our postchain config directory.You can rename it to whichever name matching your convention (e.g. prod or dapp_name)
2. Inside dev directory, open the file blochains/app/config.template.xml, and change the settingsfor your chain:
80 Chapter 2. Chromia

Rell Documentation, Release v0.10.1
<run wipe-db="true"><nodes>
<config src="../../node-config.properties" add-signers="true" /></nodes><chains>
<chain name="YOUR_CHAIN_NAME" iid="0"><config height="0">
<app module=""><args module="lib.ft3.core">
<arg key="my_blockchain_name"><string>YOUR_DAPP_NAME</string></→˓arg>
<arg key="my_blockchain_website"><string>YOUR_DAPP_WEBSITE</→˓string></arg>
<arg key="my_blockchain_description"><string>YOUR_DAPP_→˓DESCRIPTION</string></arg>
<arg key="rate_limit_active"><int>1</int></arg><arg key="rate_limit_max_points"><int>10</int></arg><arg key="rate_limit_recovery_time"><int>30000</int></arg><arg key="rate_limit_points_at_account_creation"><int>1</int></
→˓arg></args>
</app></config>
</chain></chains>
</run>
my_blockchain_name Name of your chain.
my_blockchain_website “Main page” url of your dapp.
my_blockchain_description Description of your dapp.
The following arguments is settings for the rate limiter (spam prevention). The client will accumulate one “operationpoint” every rate_limit_recovery_time milliseconds, up to rate_limit_max_points. One point isspent for each operation.
rate_limit_active 0 for not active (no spam prevention) or 1 to acticate the rate limit.
Note that even if rate limiter is not active, you must set some values in the following args.
rate_limit_max_points Maximum amount of operation points that is possible to accumulate (and thereforethe maximum number of transactions that can be made at once)
rate_limit_recovery_time (In milliseconds) period of cool down before an account can receive one opera-tion point.
rate_limit_points_at_account_creation How many points an account have at the moment of creation(0 is min)
Note: Please note that if you use Single Sign-On, an account need to perform 1 operationimmediately at the moment of creation to add disposable auth_descriptor (eg. SSO needrate_limit_points_at_account_creation at minimum of 1).
Refer to the SSO Section for more information.
2.5. Advanced Topics 81

Rell Documentation, Release v0.10.1
Database setup
We have provided a docker image of the database for ease of use:
cd postchaindocker image pull chromaway/postgres:2.4.0-betadocker-compose up
Note: If you don’t want to use Docker, or want to setup your own database, please follow the instructions in DatabaseSetup.
Update the postchain/config/nodes/dev/node-config.properties file to match your database set-tings.
Running the chain
(From root directory) start your chain:
./postchain/bin/run-node.sh dev
Replace dev with the name of your postchain config directory if you have renamed it.
If everything is properly configured, you will soon see a success message printed to the console:
Postchain node launching is done
Above that line you will find the generated blockchain ID of the blockchain that looks like this:
INFO 2120-01-01 23:59:59.999 [main] BaseConfigurationDataStore - Creating initial→˓configuration for chain 1 with BC RID:→˓B61EFF348B43D7C93F67F6D2ABE17391D709A77F9A040D6309984665082DFE8A
Note down the blockchain ID, we will use it to connect to the chain.
Important: Postchain will generate a blockchain ID for dapp based on the dapp’s codebase.
Whenever you change blockchain code of dapp, you will need to wipe database by adding the -W option, in order toget new blockchainID:
postchain/bin/run-node.sh dapp_name -W
If you missed the log in console, you can always check previous log in logs/logfile.log file.
Verify the chain is working
Go to the Chain Explorer. Click the dropdown next to “Vault”, then choose “add custom chain”:
82 Chapter 2. Chromia

Rell Documentation, Release v0.10.1
In the following popup, enter your chain’s information, using information you entered in config.template.xmland the chain BRID:
If you see the chain’s information displayed, then your chain is working properly:
2.5. Advanced Topics 83

Rell Documentation, Release v0.10.1
If chain explorer can’t connect to your chain, it indicates something is wrong with your settings from previous steps.Verify that the host and ports are correct (7743 is the default port from node-config.properties), and alsoyour blockchainID.
With that the blockchain side is ready, we can go on to the client side.
Client side setup
The client directory you in bootstrap project is an example client, which will work with our current chain. In thissection, we will discuss how to create our own client that connect to the chain.
Create a client directory for your project, run npm init (or bootstrap a project using a generator, e.g.create-react-app).
Add dependencies to the nodejs project:
npm i --save ft3-libnpm i --save postchain-client
Add other libraries to your liking.
Set config variables
Choose your own method to set these important config variables:
export const blockchainRID = "<YOUR CHAIN BRID>";export const blockchainUrl = "http://localhost:7743/"; // This is default value in→˓node-config.properties fileexport const vaultUrl = "https://dev.vault.chromia-development.com"; // Vault's url→˓for SSO
That concluded the project setup process. In next section, we will continue working with the client library and discussthe features of ft3-lib npm package.
84 Chapter 2. Chromia

Rell Documentation, Release v0.10.1
Javascript library
In this section, we explain how to use the client side library (ft3-lib node package).
Initialize Blockchain object
The first thing that has to be done before a blockchain can be accessed is to initialize the Blockchain object used tointeract with the blockchain:
// /client/index.jsimport { Postchain } from 'ft3-lib';import { blockchainRID, blockchainUrl } from './configs/constants'; // these configs→˓are set in previous section
const chainId = Buffer.from(blockchainRID, 'hex');const blockchain = await new Postchain(blockchainUrl).blockchain(chainId);
Details of the initialized chain can be accessed from info property which has name, website and description proper-ties:
console.log("-------------- Blockchain Info --------------");console.log("name : ${blockchain.info.name} ");console.log("website : ${blockchain.info.website} ");console.log("description : ${blockchain.info.description} ");
These fields have the values which we previously set in the config.template.xml file.
The User class
The User class represents a logged in user, and is used to keep the user’s key pair and authentication descriptor.
Any method that require transaction signing will need an object of this class.
import { SingleSignatureAuthDescriptor, User, FlagsType } from 'ft3-lib';
...
const authDescriptor = new SingleSignatureAuthDescriptor(keyPair.pubKey,[FlagsType.Account, FlagsType.Transfer]
);const user = new User(keyPair, authDescriptor);
Many functions provided by Blockchain class require User object, for example:
const authDescriptor = ...;const user = ....;
// gets all accounts where this authDescriptor has control overconst accounts = await blockchain.getAccountsByAuthDescriptorId(authDescriptor.id,user
);
2.5. Advanced Topics 85

Rell Documentation, Release v0.10.1
In most of the cases the same User instance is used throughout an app (the “current user”). In order to avoid passingboth Blockchain and User objects around in an app, the BlockchainSession class is introduced.
It has many of the same functions as Blockchain class, but with a difference that functions provided by theBlockchainSession don’t require User parameter:
const authDescriptor = ...;const user = ....;
const session = blockchain.newSession(user);const accounts = await session.getAccountsByAuthDescriptorId(authDescriptor.id);
AuthDescriptor Rules
Both AuthDescriptor constructors accept an optional 3rd parameter of type Rules, which define constraint for thedescriptor’s “valid period”.
Supported constrains are:
Rules.operationCount Number of operations this authDescriptor can perform:
import { SingleSignatureAuthDescriptor, FlagsType, Rules } from 'ft3-lib';
const authDescriptor = new SingleSignatureAuthDescriptor(keyPair.pubKey,[FlagsType.Account, FlagsType.Transfer],Rules.operationCount.lessOrEqual(2) // This authDescriptor is only valid for 2
→˓operations);
Rules.blockTime Time period during which the authDescriptor has effect:
import { SingleSignatureAuthDescriptor, FlagsType, Rules } from 'ft3-lib';
const authDescriptor = new SingleSignatureAuthDescriptor(keyPair.pubKey,[FlagsType.Account, FlagsType.Transfer],Rules.blockTime.greaterThan(Date.now() + 12 * 60 * 60 * 1000) // This
→˓authDescriptor will start working 12 hours from now);
Rules.blockHeight Block heigh limitation of the authDescriptor:
import { SingleSignatureAuthDescriptor, FlagsType, Rules } from 'ft3-lib';
const authDescriptor = new SingleSignatureAuthDescriptor(keyPair.pubKey,[FlagsType.Account, FlagsType.Transfer],Rules.blockHeight.equal(0) // This authDescriptor is only valid when the chain was
→˓just created (0 block is in the chain));
Supported operators are:
• lessThan
• lessThanOrEqual
• equal
86 Chapter 2. Chromia

Rell Documentation, Release v0.10.1
• greaterThan
• greaterOrEqual
Is it also possible to build composite rules:
import { SingleSignatureAuthDescriptor, FlagsType, Rules } from 'ft3-lib';
// This authDescriptor will start working 12 hours from now and is only valid for 24→˓hoursconst startDate = Date.now() + 12 * 60 * 60 * 1000;const endDate = Date.now() + 36 * 60 * 60 * 1000;const authDescriptor = new SingleSignatureAuthDescriptor(keyPair.pubKey,[FlagsType.Account, FlagsType.Transfer],Rules.blockTime.greaterThan(startDate).and.blockTime.lessThanOrEqual(endDate)
);
The Account class
An Account object contains:
• assets: an array of AssetBalance instances.
• authDescriptor: an array of AuthDescriptor instances.
• session: the BlockchainSession that returned it.
Account registration
const ownerKeyPair = ...;const authDescriptor = new SingleSignatureAuthDescriptor(ownerKeyPair.pubKey,[FlagsType.Account, FlagsType.Transfer]
);
const account = await blockchain.registerAccount(authDescriptor, user);
More commonly the current user will be creating an account for themselves. In those case we can simply pass user.authDescriptor into the operation:
const account = await blockchain.registerAccount(user.authDescriptor, user);
Searching accounts
Accounts can be searched by account ID:
const account = await session.getAccountById(accountId);
by authentication descriptor ID:
const accounts = await session.getAccountsByAuthDescriptorId(authDescriptorId);
2.5. Advanced Topics 87
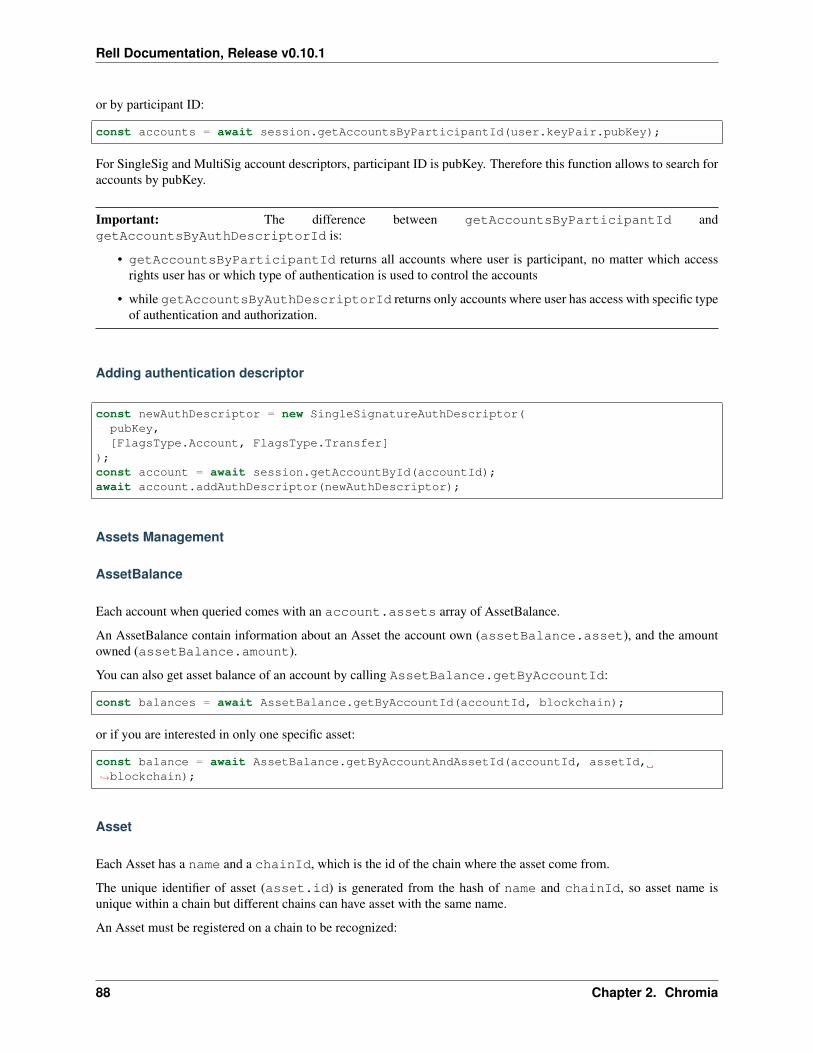
Rell Documentation, Release v0.10.1
or by participant ID:
const accounts = await session.getAccountsByParticipantId(user.keyPair.pubKey);
For SingleSig and MultiSig account descriptors, participant ID is pubKey. Therefore this function allows to search foraccounts by pubKey.
Important: The difference between getAccountsByParticipantId andgetAccountsByAuthDescriptorId is:
• getAccountsByParticipantId returns all accounts where user is participant, no matter which accessrights user has or which type of authentication is used to control the accounts
• while getAccountsByAuthDescriptorId returns only accounts where user has access with specific typeof authentication and authorization.
Adding authentication descriptor
const newAuthDescriptor = new SingleSignatureAuthDescriptor(pubKey,[FlagsType.Account, FlagsType.Transfer]
);const account = await session.getAccountById(accountId);await account.addAuthDescriptor(newAuthDescriptor);
Assets Management
AssetBalance
Each account when queried comes with an account.assets array of AssetBalance.
An AssetBalance contain information about an Asset the account own (assetBalance.asset), and the amountowned (assetBalance.amount).
You can also get asset balance of an account by calling AssetBalance.getByAccountId:
const balances = await AssetBalance.getByAccountId(accountId, blockchain);
or if you are interested in only one specific asset:
const balance = await AssetBalance.getByAccountAndAssetId(accountId, assetId,→˓blockchain);
Asset
Each Asset has a name and a chainId, which is the id of the chain where the asset come from.
The unique identifier of asset (asset.id) is generated from the hash of name and chainId, so asset name isunique within a chain but different chains can have asset with the same name.
An Asset must be registered on a chain to be recognized:
88 Chapter 2. Chromia

Rell Documentation, Release v0.10.1
await Asset.register(assetName, blockchainId, blockchain);
Registered assets can be queried by name:
const assets = await blockchain.getAssetsByName(assetName);
or by id:
const asset = await blockchain.getAssetById(assetId);
You can also get all assets of a chain by calling getAllAssets:
const assets = await blockchain.getAllAssets();
Transferring assets
const account = await session.getAccountById(accountId);await account.transfer(recipientId, assetId, amount);
Note: Here we see that the Account class retains the same characteristic as BlockchainSession: we don’t need toprovide an User object to sign the transaction.
Transfer History
const history = await account.getPaymentHistory();
getPaymentHistory return an array of PaymentHistoryEntryShort:
class PaymentHistoryEntryShort {readonly isInput: boolean; // true if account is the sender, false in case of
→˓receiverreadonly delta: number; // amount transfered: negative for sender (e.g. -10),
→˓positive for receiver (e.g. 12)readonly asset: string;readonly assetId: string;readonly entryIndex: number;readonly timestamp: Date;readonly transactionId: string;readonly transactionData: Buffer;readonly blockHeight: number;
}
Calling operations
Single operation
FT3 operations and other blockchain operations can also be directly called using the Blockchain and BlockchainSes-sion classes.
2.5. Advanced Topics 89

Rell Documentation, Release v0.10.1
For instance, the same “adding auth descriptor” operation above can be done using:
import { op } from 'ft3-lib';
const account = ...const user = ...const newAuthDescriptor = ...
await blockchain.call(op('ft3.add_auth_descriptor',accountId,user.authDescriptor.id,newAuthDescriptor
),user
)
Multiple operations
The transaction builder can be used if multiple operations have to be called in a single transaction:
await blockchain.transactionBuilder().add(op('foo', param1, param2)).add(op('bar', param)).buildAndSign(user).post();
Previous statement creates a single transaction with both foo and bar operations, adds signers from user’s authdescriptor and signs it with user’s private key.
If more control is needed over signers and signing then build and sign functions could be used instead:
await blockchain.transactionBuilder().add(op('foo', param1, param2)).add(op('bar', param)).build(signersPublicKeys).sign(keyPair1).sign(keyPair2).post();
Instead of immediately sending a transaction after building it, it is also possible to get a raw transaction:
const rawTransaction = blockchain.transactionBuilder().add(op('foo', param1, param2)).buildAndSign(user).raw();
which can be sent to a blockchain node later:
await blockchain.postRaw(rawTransaction);
The nop operation
To prevent replay attack postchain rejects a transaction if it has the same content as one of the transactions alreadystored on the blockchain. For example if we directly call ft3.transfer operation two times, the second call will fail.
90 Chapter 2. Chromia

Rell Documentation, Release v0.10.1
const inputs = ...const outputs = ...const user = ...
// first will succeedawait blockchain.call(op('ft3.transfer', inputs, outputs), user);
// second will failawait blockchain.call(op('ft3.transfer', inputs, outputs), user);
To avoid transaction failing, nop operation can be added to a second transaction in order to make it differ from the firsttransaction.
import { op, nop } from 'ft3-lib';
await blockchain.transactionBuilder().add(op('ft3.transfer', inputs, outputs)).add(nop()).buildAndSign(user).post();
nop() function returns nop operation with a random number as argument.
GtvSerializable interface
In typescript, op function is defined as:
function op(name: string, ...args: GtvSerializable[]): Operation {return new Operation(name, ...args);
}
It expects arguments to implement GtvSerializable interface, i.e. to have implemented toGTV() function.
Array, Buffer, String and Number are already extended with toGTV function.
If user defined object wants to be passed to an operation, it has to implement GtvSerializable interface, e.g.
class Player {constructor(firstName, lastName) {this.firstName = firstName;this.lastName = lastName;
}
toGTV() {return [this.firstName, this.lastName],
}}
await blockchain.call(op('some_op', new Player('John', 'Doe')),user
)
To be able to handle the Player object, on blockchain side, some_op would have to be defined as either:
2.5. Advanced Topics 91

Rell Documentation, Release v0.10.1
operation some_op(player: list<gtv>) {...
}
or
record player {first_name: text;last_name: text;
}
operation some_op(player) {...
}
Rell Integration
In the bootstrap project, rell/src directory is configurated to be the rell project’s root module. rell/src/lib/ft3 directory contains the FT3 module.
We also provided a rell/src/module.rell file with some template code which could serve as an entry pointfor your dapp, although you are free to choose any module structure to your liking.
Defining dapp_account entity
The account entity provided by .lib.ft3.account module can be used for account management. But yourdapp might need to record more information about the user, like username, email address, etc. We can add an an entityto record those information.
An example dapp’s account could be defined as:
import acc: .lib.ft3.account;
entity dapp_account {key account: acc.account;key username: text;
}
In this user model, there is no public key or user ID. Those details are provided by acc.account.
acc.account has an id property which uniquely identifies an account, and access is controlled by acc.account_auth_descriptor which include user’s public key.
The underlying structure of acc.account and acc.account_auth_descriptor is explained in AccountManagement.
After dapp_account entity is defined, the next step is to define operation used to create an instance ofdapp_account:
operation create_dapp_account(username: text,user_auth: acc.auth_descriptor
) {val account_id = acc.create_account_with_auth(user_auth);create dapp_account (
(continues on next page)
92 Chapter 2. Chromia

Rell Documentation, Release v0.10.1
(continued from previous page)
username,acc.account @ { account_id }
);}
query get_dapp_accounts() {return dapp_account @? {} ( id = dapp_account.account.id, first_name = .first_name,
→˓last_name = .last_name, age = .age);}
Restart the node for changes to take effect. Because we have changed database structure, we need to add -W option todelete the database and add new dapp_account table:
postchain/bin/run-node.sh <dapp_name> -W
Important: Make sure to update your client’s blockchainRID config with the newly generated blockchainRID
On the client side, operation can be called using ft3-lib (or postchain-client):
import DirectoryService from './lib/directory-service';import { util } from 'postchain-client';import { blockchainRID } from '../configs/constants';
import {op,Blockchain,SingleSignatureAuthDescriptor,FlagsType,User
} from 'ft3-lib';
const keyPair = util.makeKeyPair();const user = new User(
keyPair,new SingleSignatureAuthDescriptor(keyPair.pubKey,[FlagsType.Account, FlagsType.Transfer]
));
const blockchain = await Blockchain.initialize(blockchainRID,new DirectoryService()
);const session = blockchain.newSession(user);
await session.call(op('create_dapp_account','John','Doe',30,user.authDescriptor
));
We can check if create_dapp_account operation is executed successfully using get_dapp_accounts query
2.5. Advanced Topics 93

Rell Documentation, Release v0.10.1
we created:
const rest = pcl.restClient.createRestClient(nodeApiUrl, blockchainRID, 5)
const gtx = pcl.gtxClient.createClient(rest,Buffer.from(blockchainRID,'hex'
),[]
);
const allDappAccoounts = await gtx.query('get_dapp_accounts');
Modules
In this section, we will go through some of the built-in utilities that FT3 modules provide.
It should be noted that the built-in operations and queries all have matching interface in ft3-lib javascript library.
Account Module
import acc: .lib.ft3.account;
Functions:
function create_account_with_auth (auth_descriptor): byte_array
Create a new FT3 account using the provided ft3.account.auth_descriptor
• auth_descriptor: The auth_descriptor used to create this account.
• return: account.id (equal to auth_descriptor.hash())
function auth_and_log(account_id: byte_array, auth_descriptor_id: byte_array,→˓required_flags: list<text>): account
Authorize given auth_descriptor for required authorization flags, and apply the rate limiter constrains configurated inconfig.template.xml. This is meant to be the default authorization mechanism for operations.
• account_id: id of the account
• auth_descriptor_id: is equal to auth_descriptor.hash()
• required_flags: list of required authorization flags (see Account Management)
• return: the account instance
function require_auth (account, descriptor_id: byte_array, required_flags: list<text>)
Authorize given auth_descriptor, but does not apply rate limiter’s constrains.
function _add_auth_descriptor (account, auth_descriptor)function _delete_auth_descriptor(auth_descriptor: account_auth_descriptor)function _delete_all_auth_descriptors_exclude(account, auth_descriptor_id: byte_array)
94 Chapter 2. Chromia

Rell Documentation, Release v0.10.1
Utilities for managing auth_descriptors.
Operations:
operation delete_auth_descriptor (account_id: byte_array, auth_descriptor_id: byte_→˓array, delete_descriptor_id: byte_array)
operation delete_all_auth_descriptors_exclude(account_id: byte_array, auth_descriptor_→˓id: byte_array)
operation add_auth_descriptor (account_id: byte_array, auth_id: byte_array, new_desc:→˓acc.auth_descriptor)
Queries:
query get_account_auth_descriptors(id: byte_array)
query get_account_by_id(id: byte_array)
query get_account_by_auth_descriptor(auth_descriptor)
query get_accounts_by_participant_id(id: byte_array)
query get_accounts_by_auth_descriptor_id(descriptor_id: byte_array)
Core Module
import core: .lib.ft3.core;
Functions:
function register_asset (name, issuing_chain_rid: byte_array): asset
Register a new asset on the chain.
function _get_asset_balances(account_id: byte_array): list<(id:byte_array,name:text,→˓amount:integer,chain_id:byte_array)>
Get asset balance of an account.
function ensure_balance(acc.account, asset): balance
Get account’s balance of an asset, or create one if it doesn’t exist.
struct xfer_input {account_id: byte_array;asset_id: byte_array;auth_descriptor_id: byte_array;amount: integer;extra: map<text, gtv>;
}
struct xfer_output {account_id: byte_array;asset_id: byte_array;amount: integer;extra: map<text, gtv>;
(continues on next page)
2.5. Advanced Topics 95

Rell Documentation, Release v0.10.1
(continued from previous page)
}
function _transfer (inputs: list<xfer_input>, outputs: list<xfer_output>)
Perform an asset transfer from accounts described in xfer_input to accounts in xfer_output.
If xfer_output.extra map contains a reg_auth_desc key, then the value will be used asauth_descriptor to create a new account (meaning you can create a new account then transfer asset to it im-mediately in one transaction).
Operations:
operation transfer (inputs: list<ft3.xfer_input>, outputs: list<ft3.xfer_output>)
Queries:
query get_asset_balances(account_id: byte_array)
query get_asset_balance(account_id: byte_array, asset_id: byte_array)
query get_asset_by_name(name)
query get_asset_by_id(asset_id: byte_array)
query get_all_assets()
query get_payment_history(account_id: byte_array, after_block: integer)
Single Sign-on (SSO)
SSO allows user to login to different dapps with a single account. It is similar to how you can click a “Login withFacebook/Google” buttons to login to different services using a single Facebook/Google account.
In order for SSO to work, dapp must be integrated with a SSO service. Chromia Vault is the main SSO servicein Chromia ecosystem, though a custom SSO service can be easily implemented thanks to FT3 module’s flexibleauthentication model.
As discussed in previous sections, access to a FT3 account is controlled with authentication descriptors (See AccountManagement). So if we use a Vault account’s public key to create an authDescriptor with 'A' flag, and add itto a dapp account, Vault will have control over the dapp account.
The actual process is done in 3 steps:
• User login to their Vault account, and approve of the SSO request.
• Vault’s keyPair is used to create a new account for dapp (so dapp account and Vault account will have the sameaccountId). A second authDescriptor with only 'T' flag is created on-the-fly and added to this new dappaccount.
• The user can now use the second keyPair to perform transactions for the account.
This keyPair is meant to be disposable and can safely be discarded or replaced at user’s discretion.
This might sound rather complicated to implement, but fortunately ft3-lib library already handle all of the heavyworks, and dapps only have to config the SSO Class a bit for it to work.
The bootstrap project already contain a client directory that implement the SSO flow. Let’s go through how to setup the flow using bootstrap client, then we will discuss how to config SSO flow for your own client.
96 Chapter 2. Chromia

Rell Documentation, Release v0.10.1
SSO flow with bootstrap client
Backup your client directory somewhere safe, and replace it with the client directory from bootstrap project.
Set config variables
Bootstrap client use dotenv npm package to set config variables. In client directory you can see a .env.samplefile. Duplicate the file and rename it to .env. Update the file with your chain’s settings, besure to uncomment thoselines (remove leading #):
REACT_APP_VAULT_URL=https://vault-testnet.chromia.comREACT_APP_BLOCKCHAIN_RID=DAPP_BLOCKCHAIN_RIDREACT_APP_NODE_ADDRESS=http://localhost:7743
Setup the dapp on Vault
Because our dapp is not public on Chain Explorer yet, we need to config it for testing as a Custom DApp.
Go to the Vault page and login to your account (Follow the instruction at Chromia Vault section if you are unsure).
Scroll down to the “All DApps” section, and click “Add Custom DApp”. Fill in information of your chain (similar tohow you did with Chain Explorer during project setup).
2.5. Advanced Topics 97

Rell Documentation, Release v0.10.1
You will see your dapp tile added to the Vault’s dapp list.
Now the SSO flow is ready to use. Go back to your dapp (click the tile in Vault’s dapp list), and you will see a loginscreen. Clicking the login button will redirect you to Vault to login to your Vault account.
If everything was setup correctly, Vault will ask you to authorize dapp. Clicking “Authorize” button will redirect youback to your client, with the newly created account’s information displayed.
If the Authorize page is not displayed, it indicates a problem with your configs. Verify that the BRID and host iscorrect and try again.
We got the bootstrap client to work with SSO. You can use the bootstrap client as a base to build your own client. Butif you want to implement SSO in your own client, the next part discuss how to do exactly that.
98 Chapter 2. Chromia

Rell Documentation, Release v0.10.1
SSO Class
FT3 provides SSO functionality through SSO class. The first step in integrating SSO into a dapp is to initialize SSOclass on the app launch:
import { Blockchain, SSO } from 'ft3-lib';import { blockchainRID, blockchainUrl, vaultUrl } from './configs/constants'; //→˓these configs are set in project-setup section
const chainId = Buffer.from(blockchainRID, 'hex');const blockchain = await new Postchain(blockchainUrl).blockchain(chainId);
SSO.vaultUrl = vaultUrl;const sso = new SSO(blockchain);
Initiate login
When user click the “Login with Vault” button, dapp should call initiateLogin:
const { SSO } from 'ft3-lib';
const successUrl = `${window.location.origin}/success`;const cancelUrl = `${window.location.origin}/cancel`;
sso.initiateLogin(successUrl, cancelUrl);
initiateLogin navigates an user to the Vault, where they has to select one of their accounts in order to create anew dapp account or login to existing dapp account. After the user logs in to their vault account and authorizes loginor account creation, they will be redirected back to the dapp to finalize login.
• successUrl: where to redirect to after a successful login
• cancelUrl: where to redirect to when user cancels the login
Finalize login
If there were no errors, Vault will redirect the user to the location of successUrl.
Vault will add query parameters containing raw transaction - which needs to be signed by the dapp and posted to theblockchain.
Singing and posting is handled by the finalizeLogin method:
import { parse } from 'query-string';
const { rawTx } = parse(search); // extract rawTx query parameter
try {const [account, user] = await sso.finalizeLogin(rawTx);
} catch (error) {// handle error
}
finalizeLogin returns a tuple which contains ft3 account (Account instance) and ft3 user (User instance).
2.5. Advanced Topics 99

Rell Documentation, Release v0.10.1
If an account doesn’t already exist, call to finalizeLogin will create it, and if it was already created, only authdescriptor would be added to the account. Returned user object contains a key pair used to sign the transactions andan auth descriptor to authorize operations.
This same flow is used both for registering new dapp account and login to existing account.
Auto-login (Remember Me)
By default, SSO uses an instance of SSOStoreDefault to keep track of account (account id) and user (key pair)details in memory. As soon as SSO instance is destroyed (e.g. page refresh), account and user details are lost.
But it is also possible to persist them to local storage. Details will be stored to local storage if SSO is initialized withSSOStoreLocalStorage:
import { SSO, SSOStoreLocalStorage } from 'ft3-lib';
const sso = new SSO(blockchain, new SSOStoreLocalStorage());
On app launch, auto-login feature can be used to auto login user if they have already logged in previously:
const [account, user] = await sso.autoLogin();
if (account === null) {// redirect to login page
}
Like finalizeLogin method, autoLogin returns account and user objects.
Auto login will only work if SSO can find account id and keypair in LocalStorage, and if the authDescriptorwhich corresponds to stored key pair didn’t expire.
If autoLogin returns null for account and user, then user should be redirected to a normal login page, whereinitiateLogin should be called to login using the Vault.
Warning: Storing the key pair inside LocalStorage is potentially a security risk, thereforeSSOStoreLocalStorage should only be used if dapp doesn’t require a high level of security.
In high security cases, dapp should implement its own method of preserving user.keyPair for future use.
Logout
Call logout method to delete local cache and auth descriptor:
await sso.logout();
Note: Make sure you are using the same SSO instance which was used when calling finalizeLogin, becauseaccount and user details are stored in that object instance.
Low level details
As briefed in the beginning, SSO flow creates an ft3 account on a dapp’s chain which has the same accountId as theuser’s Vault account.
100 Chapter 2. Chromia

Rell Documentation, Release v0.10.1
In the flow, Vault is responsible for building a transaction which creates the account and adds an authDescriptor to it.Once Vault passes the transaction to the dapp (via request parameters), dapp signs it and posts it to the blockchain bycalling finalizeLogin.
This transaction will perform 2 operations, which add two auth descriptors to the account. One is added with a call toregister_account operation and second is added with add_auth_descriptor operation.
• First authDescriptor is created using Vault public key and has 'A' and 'T' flags
• The second is created using a disposable public key (generated by initializeLogin method) with only “T”flag.
If an account with the same accountId as Vault’s account already exists on the blockchain, SSO will only add thesecond authDescriptor with disposable public key.
Important: Because the new account need to add the disposable auth descriptor immediately at creation time, itis required that you set a value equal or greater than 1 for rate_limit_points_at_account_creation inconfig.template.xml as we have noted during Project Setup.
If you also need to record additional user information (as discussed below), the minimum value will need to beincreased further.
Dapp Account when using SSO
SSO can only create a ft3 account, but in most cases that is not enough to store dapp account details.
Using the same example dapp_account entity in Rell Integration:
entity dapp_account {key account: ft3.account;key username: text;
}
We can make some changes to support the SSO flow:
operation create_dapp_account(username: text,account_id: byte_array,auth_descriptor_id: byte_array
) {val account = auth_and_log(account_id,auth_descriptor_id,list<text>()
);
create dapp_account (account, username);}
query get_dapp_account(account_id: byte_array) {return dapp_account @? { .account.id == account_id } (account_id = .account.id,username = .username
);}
And then on the client side the login flow would look like this:
2.5. Advanced Topics 101

Rell Documentation, Release v0.10.1
const [account, user] = await blokchain.finalizeLogin(tx);
const dapp_account = await blockchain.query('get_dapp_account',{ account_id: account.id }
);
const username = 'john_doe'; // Fake username
if (!dapp_account) {await blockchain.call(op('create_dapp_account', username, account.id, user.authDescriptor.id),user
);}
On the login success page, we check if the dapp account exists by calling get_user query. If null is returned, thatmeans the account doesn’t exist yet, so we have to create it.
In this oversimplified example, it is done by calling create_user operation with hard-coded info. In a real dapp,we would need a form where user can enter those account details.
Next time the user logs in, get_user query will return the dapp account, so the dapp account creations step will beskipped.
How to update a dapp chain
Dapps evolve over time. And in this section, we discuss what to do in order to seamlessly update a dapp’s chain tonew version.
There are 2 approaches to update a chain:
• Specify different config entry points for old and new versions, or
• Reference compiled configuration of old version
Project structure before update
For both approaches, we will use an example project with a basic ft3 structure.
We have all of our chain’s code within rell/src folder:
rell/srclib
ft3... (other optional libraries)
module.rell
And our config.template.xml should look like the following:
<run wipe-db="true"><nodes>
<config src="../../node-config.properties" add-signers="true" /></nodes><chains>
<chain name="YOUR_CHAIN_NAME" iid="0">(continues on next page)
102 Chapter 2. Chromia

Rell Documentation, Release v0.10.1
(continued from previous page)
<config height="0"><app module="">
<args module="lib.ft3.core"><!-- ... (your chain configs) -->
</args></app>
</config></chain>
</chains></run>
Contents
• How to update a dapp chain
– Project structure before update
– Update by specifying different entry points
* Restructure the code
* Adding new codes
* Set the migration to new module
* Test the chain
– Update by referencing old configuration
* What does run-node.sh do?
* Backup old configuration
* Adding new codes
* Set the migration to new module
Update by specifying different entry points
Use this approach when you want to have a clear overview of old version’s code.
Note: An example project to demonstrate this approach is available at branch example/update-chain-keep-old-code of develop-chromia:
git clone https://bitbucket.org/chromawallet/develop-chromia.gitgit checkout example/update-chain-keep-old-code
Restructure the code
As mentioned ealier, the target of this approach is to have clear overview of old code after several updates. So it mightbe considered good procedure to create different entry module for each chain version.
2.5. Advanced Topics 103
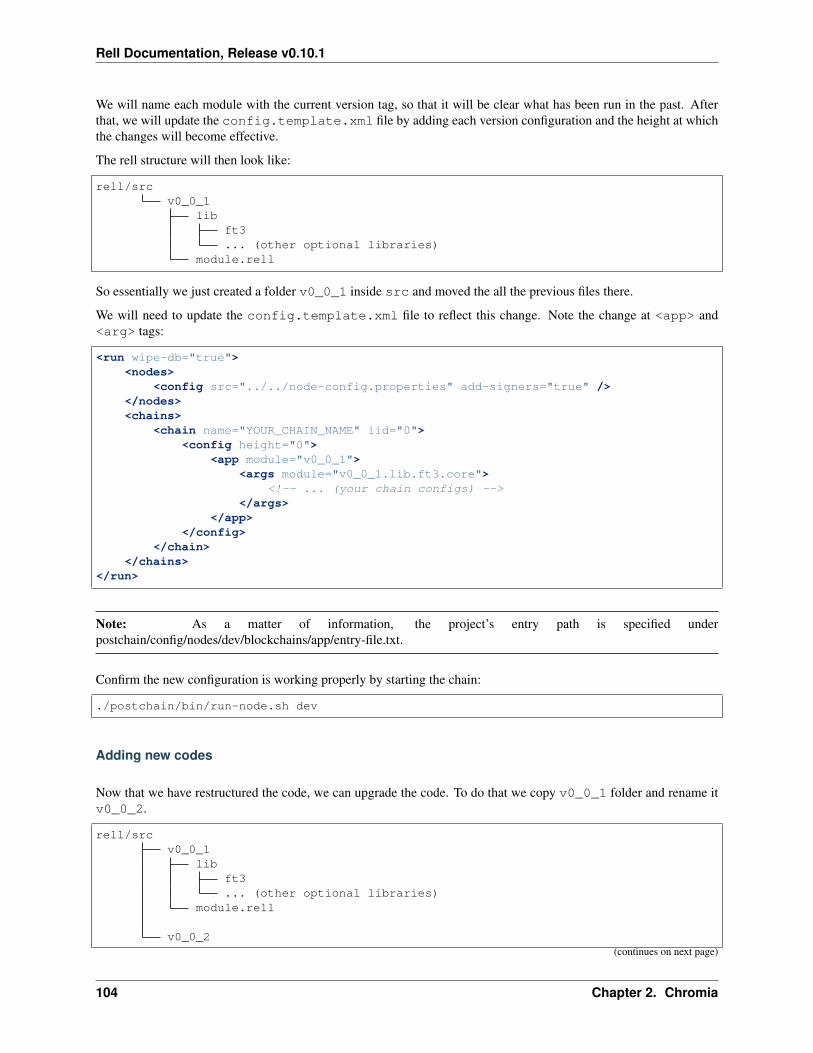
Rell Documentation, Release v0.10.1
We will name each module with the current version tag, so that it will be clear what has been run in the past. Afterthat, we will update the config.template.xml file by adding each version configuration and the height at whichthe changes will become effective.
The rell structure will then look like:
rell/srcv0_0_1
libft3... (other optional libraries)
module.rell
So essentially we just created a folder v0_0_1 inside src and moved the all the previous files there.
We will need to update the config.template.xml file to reflect this change. Note the change at <app> and<arg> tags:
<run wipe-db="true"><nodes>
<config src="../../node-config.properties" add-signers="true" /></nodes><chains>
<chain name="YOUR_CHAIN_NAME" iid="0"><config height="0">
<app module="v0_0_1"><args module="v0_0_1.lib.ft3.core">
<!-- ... (your chain configs) --></args>
</app></config>
</chain></chains>
</run>
Note: As a matter of information, the project’s entry path is specified underpostchain/config/nodes/dev/blockchains/app/entry-file.txt.
Confirm the new configuration is working properly by starting the chain:
./postchain/bin/run-node.sh dev
Adding new codes
Now that we have restructured the code, we can upgrade the code. To do that we copy v0_0_1 folder and rename itv0_0_2.
rell/srcv0_0_1
libft3... (other optional libraries)
module.rell
v0_0_2(continues on next page)
104 Chapter 2. Chromia

Rell Documentation, Release v0.10.1
(continued from previous page)
libft3... (other optional libraries)
module.rell
For easy testing, we can add one new query in the module.rell file of v0_0_2:
module;
import lf: .lib.ft3.ft3_basic_dev;
query get_version() {return "0.0.2";
}
If everything works correctly we will not receive any response when running the module v0_0_1 but we will receive0_0_2 when running the module v0_0_2.
Set the migration to new module
To migrate to the new module, we need to update the config.template.xml file.
We will add a new <config> tag inside our <chain>, and set it to be enabled at a certain (block) height:
<run wipe-db="true"><nodes>
<config src="../../node-config.properties" add-signers="true" /></nodes><chains>
<chain name="YOUR_CHAIN_NAME" iid="0"><config height="0">
<app module="v0_0_1"><args module="v0_0_1.lib.ft3.core">
<!-- ... (your chain configs) --></args>
</app></config><config height="20">
<app module="v0_0_2"><args module="v0_0_2.lib.ft3.core">
<!-- ... (your chain configs) --></args>
</app></config>
</chain></chains>
</run>
In this example, after 20 blocks the chain will change app module to v0_0_2.
Important: Ensure that the block height for the new configuration is safely higher than current height.
Setting a block height that is lower than current height might cause problems to nodes that want to sync by re-applyingall the transactions.
2.5. Advanced Topics 105
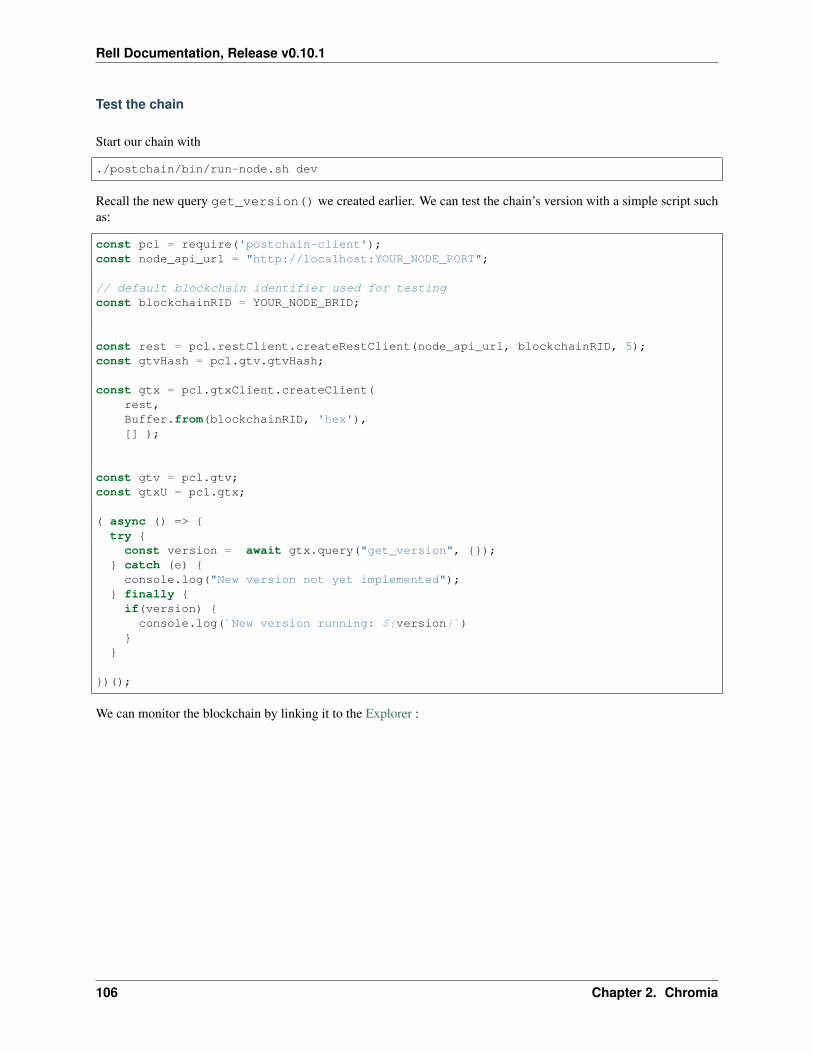
Rell Documentation, Release v0.10.1
Test the chain
Start our chain with
./postchain/bin/run-node.sh dev
Recall the new query get_version() we created earlier. We can test the chain’s version with a simple script suchas:
const pcl = require('postchain-client');const node_api_url = "http://localhost:YOUR_NODE_PORT";
// default blockchain identifier used for testingconst blockchainRID = YOUR_NODE_BRID;
const rest = pcl.restClient.createRestClient(node_api_url, blockchainRID, 5);const gtvHash = pcl.gtv.gtvHash;
const gtx = pcl.gtxClient.createClient(rest,Buffer.from(blockchainRID, 'hex'),[] );
const gtv = pcl.gtv;const gtxU = pcl.gtx;
( async () => {try {const version = await gtx.query("get_version", {});
} catch (e) {console.log("New version not yet implemented");
} finally {if(version) {
console.log(`New version running: ${version}`)}
}
})();
We can monitor the blockchain by linking it to the Explorer :
106 Chapter 2. Chromia

Rell Documentation, Release v0.10.1
At block 20 we will start getting a result back from the chain. It will return something like:
POST URL http://localhost:7743/query/→˓A54320E7D063AB94513467806FE800A1B95B26BF65C4F11D30C5D65859E4025C
0.0.2
Update by referencing old configuration
The second approach that can be used is to specify previous compiled configurations in the config tag.
Use this approach if you want cleaner code structure.
Note: An example project to demonstrate this approach is available at branch feature/CCD210-update-chain-tutorial of develop-chromia:
git clone https://bitbucket.org/chromawallet/develop-chromia.gitgit checkout feature/CCD210-update-chain-tutorial
2.5. Advanced Topics 107

Rell Documentation, Release v0.10.1
What does run-node.sh do?
In order to discuss this approach, we must first explain what happened when you execute ./postchain/bin/run-node.sh dev in the console.
This command does 3 things.
1. First it creates a target folder where the compiled blockchain configuration will be placed, something like:
mkdir -p ./postchain/runtime/nodes/dev
2. Then it generates the blockchain configuration by compiling the rell code with the config.template.xmlfile.
If it is a new chain (e.g. started with the -W option), the BRID is also generated at this step. Since we are dicussingupdating a chain here, we don’t want the BRID to change, so -W option should never be called while updating.
./postchain/lib/multigen.sh ./postchain/config/nodes/dev/blockchains/app/config.→˓template.xml -d ./rell/src -o ./postchain/runtime/nodes/dev/
It should create the following architecture inside postchain/runtime/nodes/dev:
postchain/runtime/nodes/devblockchains
00.gtv (creates a one file rell module)0.xml (creates the configuration that will be run, also by using the just
→˓created 0.gtv)brid.txt (just a file where is output the brid of the chain, n.b. it will
→˓remain constant nevertheless the updates)
node-config.propertiesprivate.properties
3. Finally, it runs the new configuration with
./postchain/lib/postchain.sh run-node-auto -d ./postchain/runtime/nodes/dev
Backup old configuration
Compile the current code (by executing ./postchain/bin/run-node.sh dev or only step 1 and 2 describedabove).
In the generated configuration folder, copy runtime/nodes/dev/0.xml into postchain/config/nodes/dev/blockchains/app, and rename it 0.0.1.xml
Adding new codes
In the previous approach, we were keeping track from a code point of view of previous versions. This time we willnot do that, so we can change the current code directly without copying anything.
Let’s just add the query into the module.rell file:
108 Chapter 2. Chromia

Rell Documentation, Release v0.10.1
module;
import lf: .lib.ft3.ft3_basic_dev;
query get_version() {return "0.0.2";
}
Set the migration to new module
Update the config.template.xml file to config the migration.
Note that unlike the other approach, this time we don’t have to change the <app> and <args> tags:
<run wipe-db="true"><nodes>
<config src="../../node-config.properties" add-signers="true" /></nodes><chains>
<chain name="YOUR_CHAIN_NAME" iid="0"><config height="0">
<gtv src="0.0.1.xml"/></config><config height="20">
<app module=""><args module="lib.ft3.core">
<!-- ... (your chain configs) --></args>
</app></config>
</chain></chains>
</run>
Important: Ensure that the block height for the new configuration is safely higher than current height.
Setting a block height that is lower than current height might cause problems to nodes that want to sync by re-applyingall the transactions.
Compile the new configuration and start the chain:
./postchain/bin/run-node.sh dev
We can now Test the chain as before. If we try to query for get_version() after block 20 we will see 0.0.2.
2.6 Upgrading to Rell 0.10.x
There are two kinds of breaking changes in Rell 0.10.x:
1. Rell Language:
• Module System; include is deprecated and will not work.
• Mount names: mapping of entities and objects to SQL tables changed.
2.6. Upgrading to Rell 0.10.x 109

Rell Documentation, Release v0.10.1
• class and record renamed to entity and struct, the code using old keywords will not compile.
• Previously deprecated library functions are now unavailable; the code using them will not compile.
2. Configuration and tools:
• Postchain blockchain.xml: now needs a list of modules instead of the main file name; module argu-ments are per-module.
• Run.XML format: specifying module instead of main file; module arguments are per-module.
• Command-line tools: accept a source directory path and main module name combination instead of themain .rell file path.
2.6.1 Step-by-step upgrade
1. Read about the Module System.
2. Read about mount names.
3. Use the migrate-v0.10.sh tool to rename class, record and deprecated function names (see below).
4. Manually update the source code to use the Module System instead of include.
5. Use @mount annotation to set correct mount names to entities, objects, operations and queries (recommendedto apply @mount to entire modules or namespaces, not to individual definitions).
6. Update configuration files, if necessary (see the details below).
7. The Web IDE users the root module as the main module, so make sure you have it and import all requiredmodules there.
2.6.2 Details
migrate-v0.10.sh tool
The tool can be found in the postchain-node directory of a Rell distribution. It renames class, record andmost of deprecated functions, e. g. requireNotEmpty() -> require_not_empty.
Usage: migrator [--dry-run] DIRECTORYReplaces deprecated keywords and names in all .rell files in the directory→˓(recursively)
DIRECTORY Directory--dry-run Do not modify files, only print replace counts
Specify a Rell source directory as an argument, and the tool will do renaming in all .rell files in that directory and itssubdirectories.
NOTE. UTF-8 encoding is always used by the tool; if files use a different encoding, some characters may be broken.It is recommended to not run the tool if there are uncommitted changes in the directory. After running it, review thechanges it made.
blockchain.xml
New blockchain.xml Rell configuration looks like this (only changed parts shown):
110 Chapter 2. Chromia

Rell Documentation, Release v0.10.1
<dict><entry key="gtx">
<dict><entry key="rell">
<dict><entry key="moduleArgs">
<dict><entry key="app.foo">
<dict><entry key="message">
<string>Some common message...</string></entry>
</dict></entry><entry key="app.bar">
<dict><entry key="x">
<int>123456</int></entry><entry key="y">
<string>Hello!</string></entry>
</dict></entry>
</dict></entry><entry key="modules">
<array><string>app.foo</string><string>app.bar</string>
</array></entry>
</dict></entry>
</dict></entry>
</dict>
What was changed:
• gtx.rell.moduleArgs is now a dictionary, specifying module_args for multiple modules (in olderversions there was only one module_args for a Rell application, now there can be one module_args permodule).
• gtx.rell.modules is an array of module names
run.xml
An example of a new run.xml file:
<run wipe-db="true"><nodes>
<config src="node-config.properties" add-signers="false" /></nodes><chains>
<chain name="test" iid="1" brid=→˓"01234567abcdef01234567abcdef01234567abcdef01234567abcdef01234567">
(continues on next page)
2.6. Upgrading to Rell 0.10.x 111

Rell Documentation, Release v0.10.1
(continued from previous page)
<config height="0"><app module="app.main">
<args module="app.bar"><arg key="x"><int>123456</int></arg><arg key="y"><string>Hello!</string></arg>
</args><args module="app.foo">
<arg key="message"><string>Some common message...</string></→˓arg>
</args></app>
</config></chain>
</chains></run>
What was changed:
• module tag replaced by app, which has module attribute
• there can be multiple args elements, each must have a module attribute
2.7 Eclipse IDE
2.7.1 Installation
Prerequisites
• Java 8+.
• To be able to run a Postchain node: PostgreSQL 10.
Using a full Rell Eclipse IDE bundle
Rell Eclipse IDE can be downloaded here: https://www.chromia.dev/rell-eclipse/index.html.
Download an archive for your OS.
• Linux: unpack, run eclipse
• Windows: unpack, run eclipse.exe
• MacOS: open the DMG image, run or install Eclipse.
Adding Rell plugin to an existing Eclipse IDE
If you already have an Eclipse IDE (for example, Eclipse IDE for Java), the Rell plugin can be added to it.
1. Go to the menu Help - Install New Software. . .
2. In the Install dialog, click Add. . . , then type:
• Name: Rell
• Location: https://www.chromia.dev/rell-eclipse/update
112 Chapter 2. Chromia
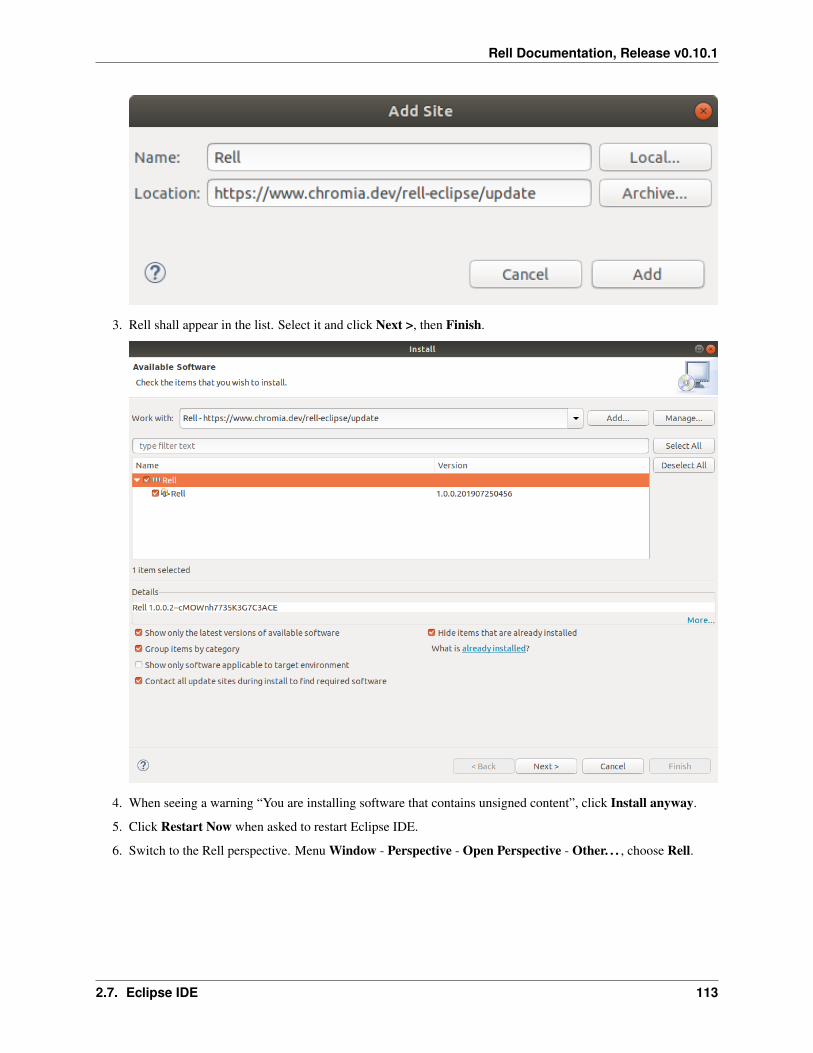
Rell Documentation, Release v0.10.1
3. Rell shall appear in the list. Select it and click Next >, then Finish.
4. When seeing a warning “You are installing software that contains unsigned content”, click Install anyway.
5. Click Restart Now when asked to restart Eclipse IDE.
6. Switch to the Rell perspective. Menu Window - Perspective - Open Perspective - Other. . . , choose Rell.
2.7. Eclipse IDE 113

Rell Documentation, Release v0.10.1
Next step is to create a Rell project (see Hello World Program).
How to update the Rell plugin
When a new version of the Rell plugin is released, it has to be updated in Eclipse. If Rell update URL has alreadybeen configured, Eclipse will check for updates automatically once in a while, and show a message when a plugin canbe updated.
To manually check for updates:
1. Menu: Help - Check for Updates.
2. If it shows that a new version of Rell plugin is available, install it.
If “No updates found” message is shown, check that Rell update site is set up.
1. Click available software sites link in the message dialog.
2. If there is no Rell in the list, click Add. . . to add it.
114 Chapter 2. Chromia
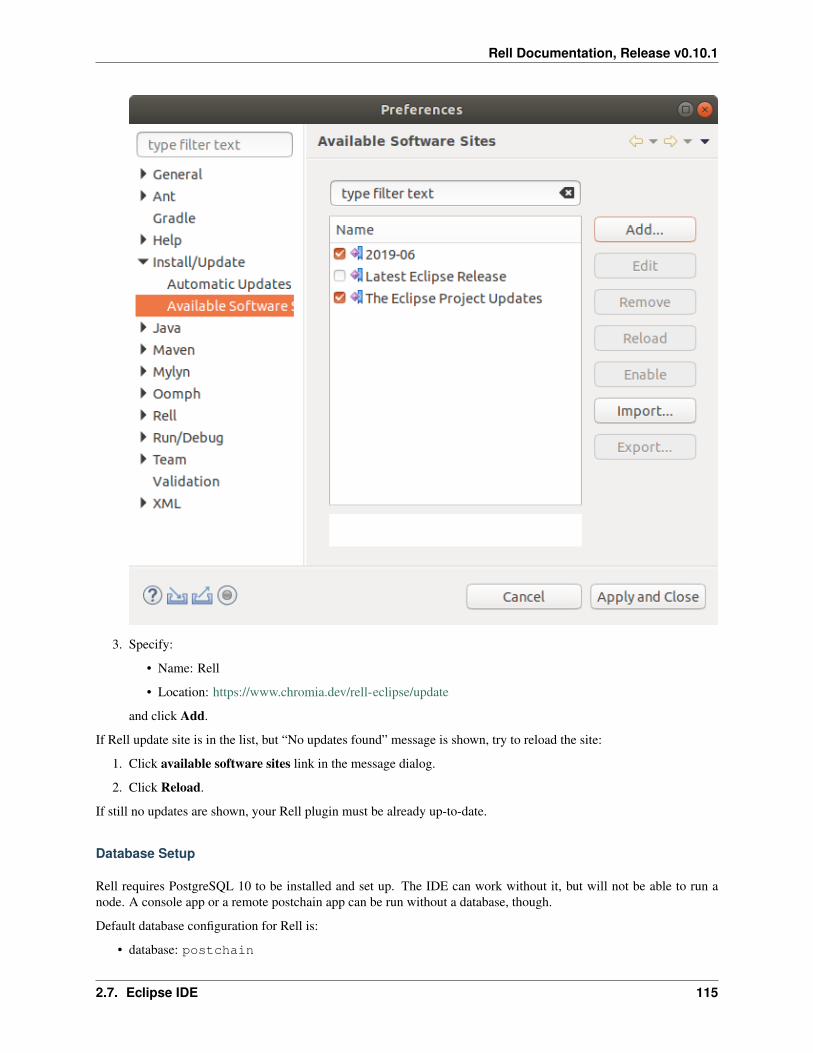
Rell Documentation, Release v0.10.1
3. Specify:
• Name: Rell
• Location: https://www.chromia.dev/rell-eclipse/update
and click Add.
If Rell update site is in the list, but “No updates found” message is shown, try to reload the site:
1. Click available software sites link in the message dialog.
2. Click Reload.
If still no updates are shown, your Rell plugin must be already up-to-date.
Database Setup
Rell requires PostgreSQL 10 to be installed and set up. The IDE can work without it, but will not be able to run anode. A console app or a remote postchain app can be run without a database, though.
Default database configuration for Rell is:
• database: postchain
2.7. Eclipse IDE 115

Rell Documentation, Release v0.10.1
• user: postchain
• password: postchain
Ubuntu (Debian)
Install PostgreSQL:
sudo apt-get install postgresql
Prepare a Rell database:
sudo -u postgres psql -c "CREATE DATABASE postchain;" -c "CREATE ROLE postchain LOGIN→˓ENCRYPTED PASSWORD 'postchain'; GRANT ALL ON DATABASE postchain TO postchain;"
MacOS
Install PostgreSQL:
brew install postgresqlbrew services start postgresqlcreateuser -s postgres
Prepare a Rell database:
psql -U postgres -c "CREATE DATABASE postchain;" -c "CREATE ROLE postchain LOGIN→˓ENCRYPTED PASSWORD 'postchain'; GRANT ALL ON DATABASE postchain TO postchain;"
2.7.2 Hello World Program
1. Switch to the Rell perspective, if not done already. Menu: Window - Perspective - Open Perspective -Other. . . , choose Rell.
2. Create a project:
• Menu File - New - Rell Project.
• Enter a project name test and click Finish.
116 Chapter 2. Chromia

Rell Documentation, Release v0.10.1
A Rell project with a default directory structure shall be created.
3. Create a Rell file:
• Right-click on the src folder and choose New - File.
• Enter a file name test.rell and click Finish.
4. Write the code in the editor:
function main() {print('Hello, World!');
}
Save: manu File - Save or CTRL-S (S).
5. Run the program: right-click on the editor and choose Run As - Rell Console App.
2.7. Eclipse IDE 117

Rell Documentation, Release v0.10.1
6. The output “Hello, World!” must be shown in the Console view.
118 Chapter 2. Chromia

Rell Documentation, Release v0.10.1
2.7.3 IDE Overview
Eclipse IDE window consists of different views. Every view has its own tab. By default, Rell IDE has following views:
• Project Explorer - shows projects and their directory trees.
• Problems - shows compilation warnings and errors.
• Console - console output (when running programs).
• Outline - shows the structure of a selected Rell file.
2.7. Eclipse IDE 119

Rell Documentation, Release v0.10.1
2.7.4 Running Applications
Right-click on a file (or an editor) and choose Run As. Run options available for the file will be shown.
120 Chapter 2. Chromia

Rell Documentation, Release v0.10.1
Alternatively, use keyboard shortcut CTRL-F11 (F11).
2.7. Eclipse IDE 121

Rell Documentation, Release v0.10.1
Rell Console App
Executes a *.rell file as a stand-alone console program, not as a module in a Postchain node.
The program must contain a function (or operation, or query) called main, which will be the entry point. The outputis displayed in the Console view.
The name of the main function and its arguments can be specified in a run configuration.
Database connection
By default, the program is executed without a database connection, and an attempt to perform a database operationwill result in a run-time error.
To run a console app with a database connection, there must be a file called console-db.properties, db.properties or node-config.properties in the directory of the Rell file or in the rell/config directoryof the project. The file shall contain database connection settings. For example:
database.driverclass=org.postgresql.Driverdatabase.url=jdbc:postgresql://localhost/postchaindatabase.username=postchain
(continues on next page)
122 Chapter 2. Chromia
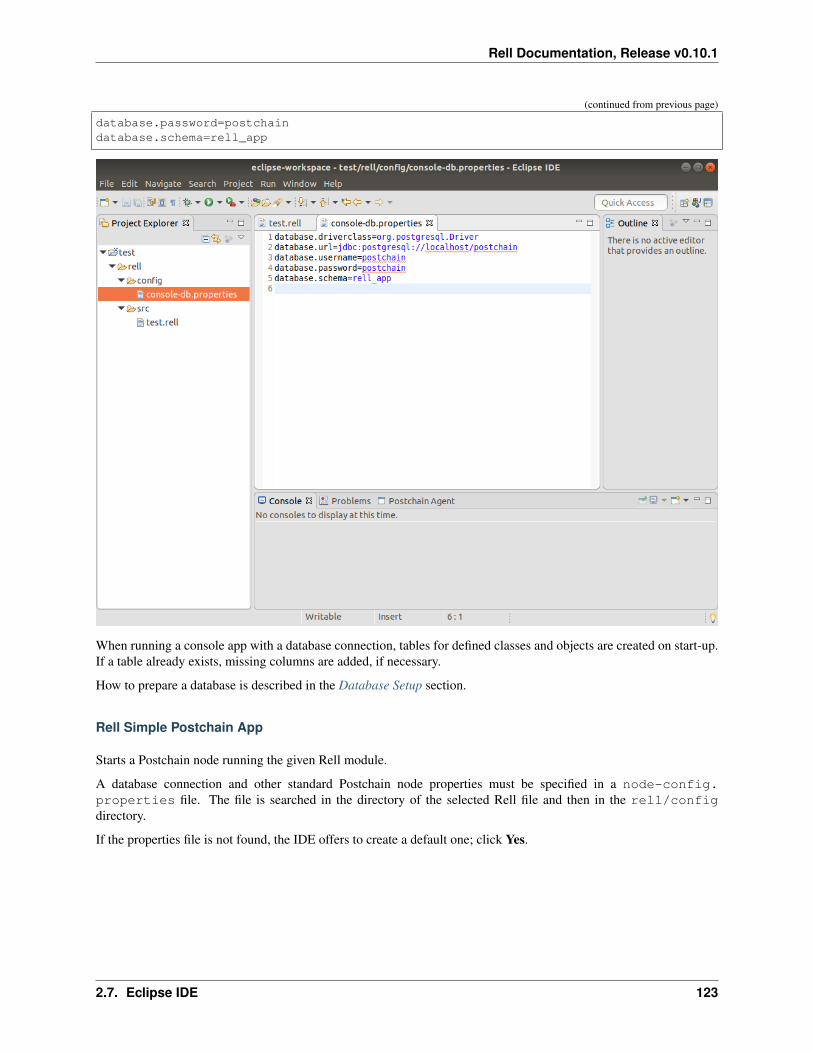
Rell Documentation, Release v0.10.1
(continued from previous page)
database.password=postchaindatabase.schema=rell_app
When running a console app with a database connection, tables for defined classes and objects are created on start-up.If a table already exists, missing columns are added, if necessary.
How to prepare a database is described in the Database Setup section.
Rell Simple Postchain App
Starts a Postchain node running the given Rell module.
A database connection and other standard Postchain node properties must be specified in a node-config.properties file. The file is searched in the directory of the selected Rell file and then in the rell/configdirectory.
If the properties file is not found, the IDE offers to create a default one; click Yes.
2.7. Eclipse IDE 123

Rell Documentation, Release v0.10.1
If a database configuration which is different from the default for Rell (postchain/postchain/postchain asdatabase/user/password) has to be used, specify it in the created file. Then run the app again.
Rell program output and Postchain node log is shown in the Console view. To stop a node, click the Terminate (redsquare) icon in the Console view.
One can use curl to call a query from the running node:
curl http://localhost:7740/query/→˓0123456789ABCDEF0123456789ABCDEF0123456789ABCDEF0123456789ABCDEF -X POST -d '{"type→˓":"q"}'
124 Chapter 2. Chromia

Rell Documentation, Release v0.10.1
By default, the blockchain RID is 0123456789ABCDEF0123456789ABCDEF0123456789ABCDEF0123456789ABCDEF.It can be changed in a run configuration.
Rell Postchain App
Starts a Postchain node with a configuration written in the Run.XML format. To use this option, right-click on a*.xml file, not on a *.rell file.
Using run.xml allows to run multiple blockchains in one Postchain node.
Example of a minimal run.xml:
<run><nodes>
<config>database.driverclass=org.postgresql.Driverdatabase.url=jdbc:postgresql://localhost/postchaindatabase.username=postchaindatabase.password=postchaindatabase.schema=rell_app
activechainids=1
api.port=7740api.basepath=
messaging.→˓privkey=3132333435363738393031323334353637383930313233343536373839303131
messaging.→˓pubkey=0350fe40766bc0ce8d08b3f5b810e49a8352fdd458606bd5fafe5acdcdc8ff3f57
node.0.id=node0node.0.host=127.0.0.1node.0.port=9870node.0.
→˓pubkey=0350fe40766bc0ce8d08b3f5b810e49a8352fdd458606bd5fafe5acdcdc8ff3f57</config>
</nodes><chains>
<chain name="user" iid="1"><config>
<app module="main" /></config>
</chain></chains>
</run>
2.7. Eclipse IDE 125

Rell Documentation, Release v0.10.1
Rell Simple Postchain Test
Runs tests written in XML format, same as used by the Web IDE. This run option is available for XML files *_test.xml. For a file X_test.xml there must be a file called X.rell in the same directory. The tests defined in the XMLfile will be run against the Rell file. Results are printed to the Console view.
Example of a test:
<test><block>
<transaction><signers>
<param type="bytea" key="Alice" /></signers><operations>
<operation name="insert_city"><string>Kiev</string>
</operation></operations>
</transaction></block>
</test>
And a corresponding .rell file:
126 Chapter 2. Chromia

Rell Documentation, Release v0.10.1
class city { key name; }
operation insert_city (name) {log('insert_city', name);create city (name);
}
Clear Database
This option is available for database properties files, *.properties (for instance, node-config.properties). Drops all tables (and stored procedures) in the database.
2.7. Eclipse IDE 127

Rell Documentation, Release v0.10.1
Run with a Keyboard
By default, CTRL-F11 (F11) shortcut runs the file of the active editor. It can be configured to run the last launchedapplication instead, which may be more convenient, as there is no need to choose an application type. Go to the menuWindow - Preferences (macOS: Eclipse - Preferences), then Run/Debug - Launching. In the Launch Operationbox, choose Always launch the previously launched application.
128 Chapter 2. Chromia

Rell Documentation, Release v0.10.1
Running Multiple Apps
It is possible to run multiple applications (e. g. multiple nodes) simultaneously. For example, one can define twoRun.XML configuration files that use the same Rell module, but different ports and database schemas.
The output of all running applications will be shown in the Console view, but on different pages. It is possible toswitch between the consoles of different applications using a button or a dropdown list.
2.7. Eclipse IDE 129
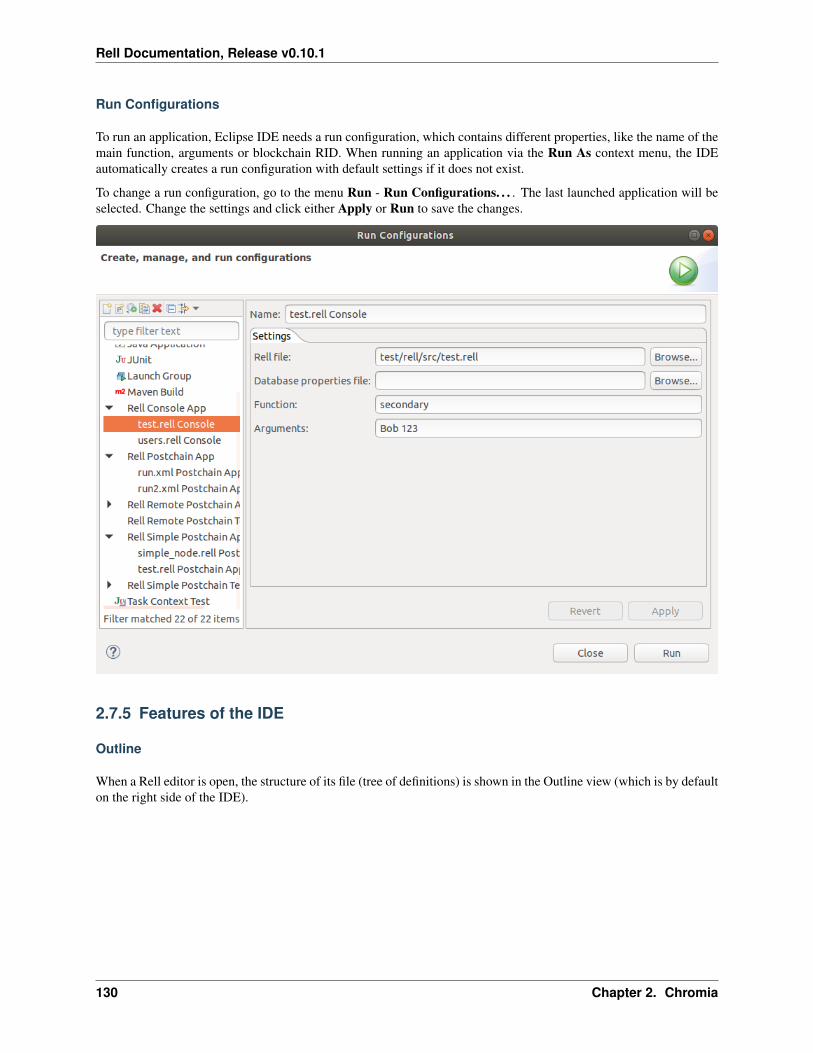
Rell Documentation, Release v0.10.1
Run Configurations
To run an application, Eclipse IDE needs a run configuration, which contains different properties, like the name of themain function, arguments or blockchain RID. When running an application via the Run As context menu, the IDEautomatically creates a run configuration with default settings if it does not exist.
To change a run configuration, go to the menu Run - Run Configurations. . . . The last launched application will beselected. Change the settings and click either Apply or Run to save the changes.
2.7.5 Features of the IDE
Outline
When a Rell editor is open, the structure of its file (tree of definitions) is shown in the Outline view (which is by defaulton the right side of the IDE).
130 Chapter 2. Chromia

Rell Documentation, Release v0.10.1
There is also a Quick outline window, which is activated by the CTRL-O (O) shortcut. Type a name to find its definitionin the file.
2.7. Eclipse IDE 131

Rell Documentation, Release v0.10.1
132 Chapter 2. Chromia

Rell Documentation, Release v0.10.1
Problems View
Problems view shows compiler warnings and errors found in all projects in the IDE. The list is updated when saving afile.
2.7. Eclipse IDE 133

Rell Documentation, Release v0.10.1
Global Text Search
Press CTRL-H (H) to open the Search dialog. It allows to search for a string in all files in the IDE. Select the FileSearch tab, enter the text to search for and file name pattern.
134 Chapter 2. Chromia
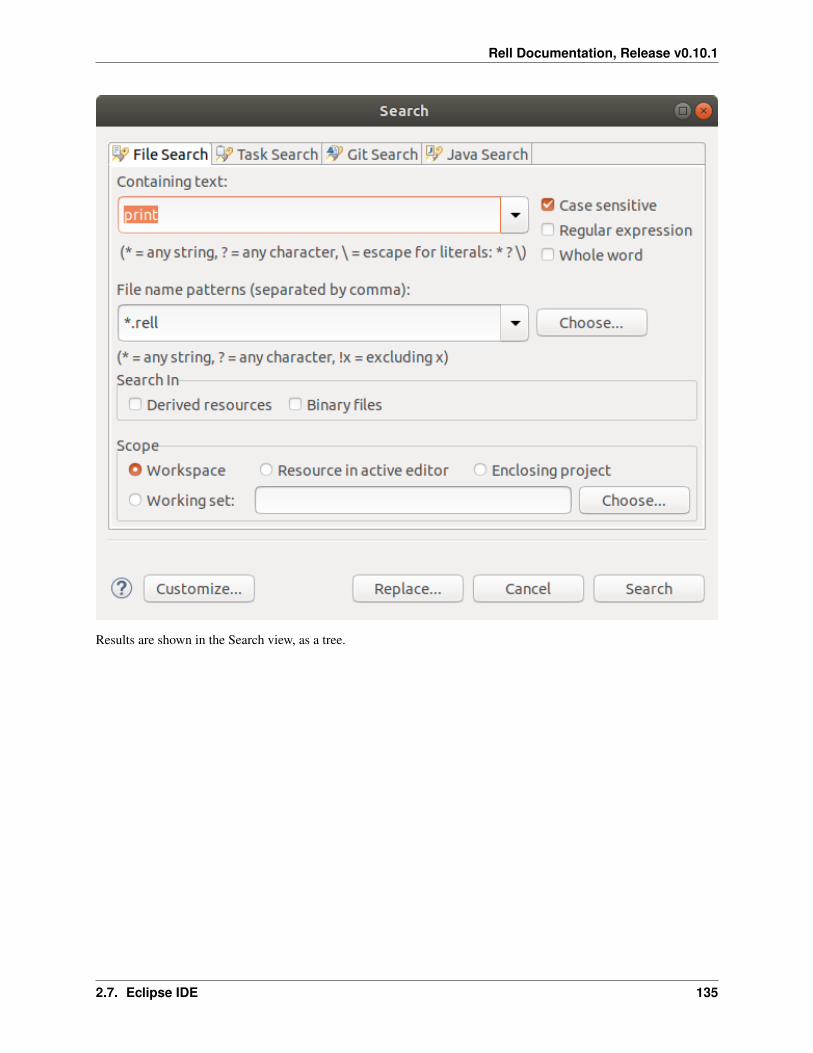
Rell Documentation, Release v0.10.1
Results are shown in the Search view, as a tree.
2.7. Eclipse IDE 135

Rell Documentation, Release v0.10.1
Git
Git operations are available via a context menu: right-click on a file and choose Team.
136 Chapter 2. Chromia

Rell Documentation, Release v0.10.1
To commit file(s), click Add to Index, then Commit...
File icon in the Project Explorer indicates whether the file is a new, changed or an unmodified file.
2.7. Eclipse IDE 137

Rell Documentation, Release v0.10.1
Changed files do not look very nice. To change the way how they are displayed, go to the Window - Preferences(macOS: Eclipse - Preferences) menu, then Team - Git - Label Decorations:
• on the Text Decorations tab: delete the “>” character in all text fields
• on the Icon Decoartions tab: check the Dirty resources checkbox
138 Chapter 2. Chromia

Rell Documentation, Release v0.10.1
• click Apply and Close
Now files look much better:
Spaces vs. Tabs
Eclipse uses tabs instead of spaces by default. It is recommented to use spaces. A few settings have to be changed:
1. Open the Preferences dialog: menu Window - Preferences (macOS: Eclipse - Preferences).
2. Type “tabs” in the search box.
3. Go to General - Editors - Text Editors and check Insert spaces for tabs.
2.7. Eclipse IDE 139

Rell Documentation, Release v0.10.1
4. Go to XML - XML Files - Editor, select Indent using spaces, specify Indentation size: 4.
140 Chapter 2. Chromia

Rell Documentation, Release v0.10.1
Miscellaneous
• To show or hide line numbers: right-click on the left margin of an editor, click Show Line Numbers.
2.7. Eclipse IDE 141

Rell Documentation, Release v0.10.1
• To comment a code fragment, select it and press CTRL-/ (/).
• Activate the Link with Editor icon, and the IDE will automatically select a file in the Project Explorer when itseditor is focused.
• CTRL-SHIFT-R (R) invokes the Open Resource dialog, which allows to search project files by name. Globpatterns (with * and ?) are supported.
142 Chapter 2. Chromia

Rell Documentation, Release v0.10.1
• The Show Whitespace Characters (paragraph) icon in the main toolbar allows to distinguish tabs from spaces.
• To see the full list of Eclipse keyboard shortcuts, press CTRL-SHIFT-L (L). Some shortcuts are for the Javaeditor, and do nothing in Rell.
2.7. Eclipse IDE 143
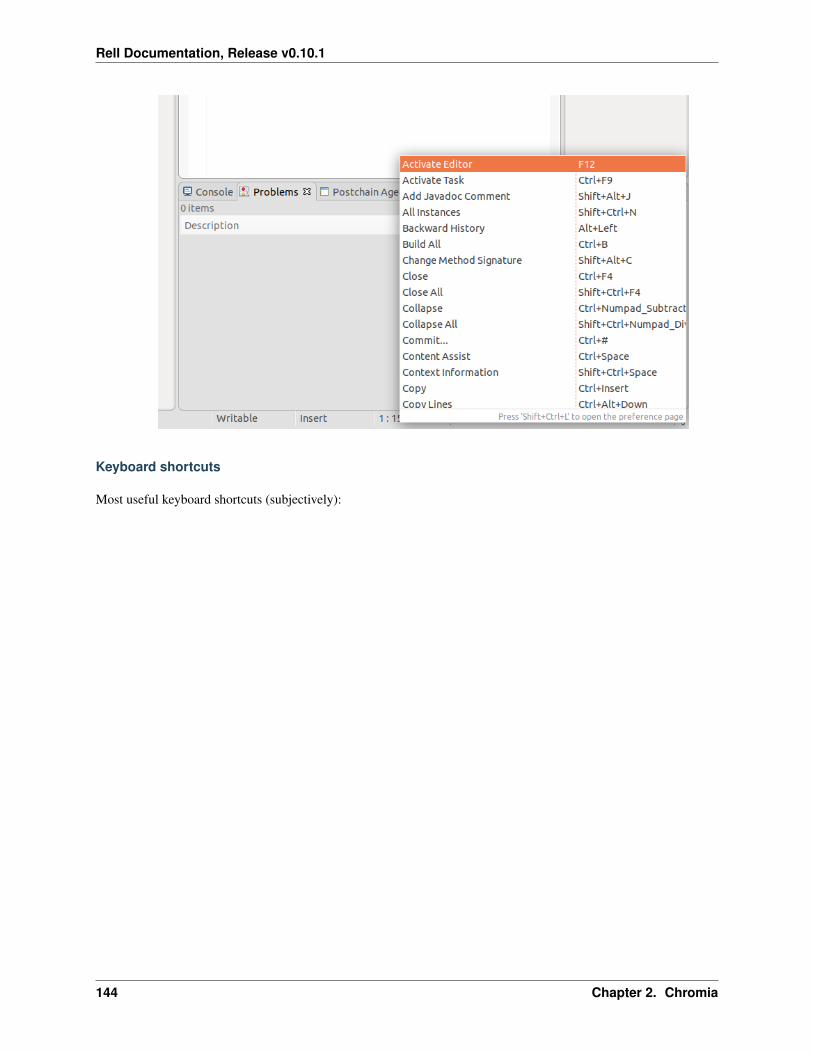
Rell Documentation, Release v0.10.1
Keyboard shortcuts
Most useful keyboard shortcuts (subjectively):
144 Chapter 2. Chromia
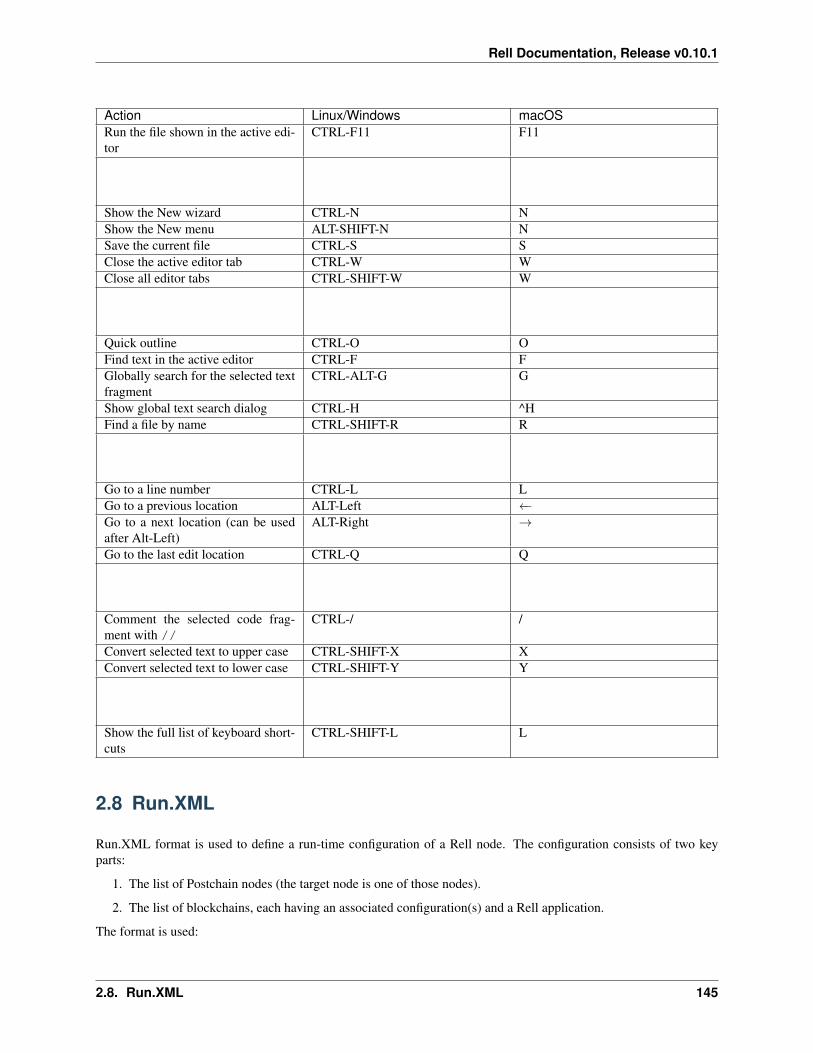
Rell Documentation, Release v0.10.1
Action Linux/Windows macOSRun the file shown in the active edi-tor
CTRL-F11 F11
Show the New wizard CTRL-N NShow the New menu ALT-SHIFT-N NSave the current file CTRL-S SClose the active editor tab CTRL-W WClose all editor tabs CTRL-SHIFT-W W
Quick outline CTRL-O OFind text in the active editor CTRL-F FGlobally search for the selected textfragment
CTRL-ALT-G G
Show global text search dialog CTRL-H ^HFind a file by name CTRL-SHIFT-R R
Go to a line number CTRL-L LGo to a previous location ALT-Left ←Go to a next location (can be usedafter Alt-Left)
ALT-Right →
Go to the last edit location CTRL-Q Q
Comment the selected code frag-ment with //
CTRL-/ /
Convert selected text to upper case CTRL-SHIFT-X XConvert selected text to lower case CTRL-SHIFT-Y Y
Show the full list of keyboard short-cuts
CTRL-SHIFT-L L
2.8 Run.XML
Run.XML format is used to define a run-time configuration of a Rell node. The configuration consists of two keyparts:
1. The list of Postchain nodes (the target node is one of those nodes).
2. The list of blockchains, each having an associated configuration(s) and a Rell application.
The format is used:
2.8. Run.XML 145

Rell Documentation, Release v0.10.1
• By Rell command-line utilities multirun.sh and multigen.sh.
• By the Eclipse IDE (which internally uses multirun.sh to launch Postchain applications).
2.8.1 The Format
Example of a Run.XML file:
<run wipe-db="true"><nodes>
<config src="config/node-config.properties" add-signers="false" /></nodes><chains>
<chain name="user" iid="1"><config height="0">
<app module="user" /><gtv path="gtx/rell/moduleArgs/user">
<dict><entry key="foo"><bytea>
→˓0373599a61cc6b3bc02a78c34313e1737ae9cfd56b9bb24360b437d469efdf3b15</bytea></entry></dict>
</gtv></config><config height="1000">
<app module="user_1000"><args module="user_1000">
<arg key="foo"><bytea>→˓0373599a61cc6b3bc02a78c34313e1737ae9cfd56b9bb24360b437d469efdf3b15</bytea></arg>
</args></app><gtv path="path" src="config/template.xml"/>
</config></chain><chain name="city" iid="2">
<config height="0" add-dependencies="false"><app module="city" /><gtv path="signers">
<array><bytea>
→˓0350fe40766bc0ce8d08b3f5b810e49a8352fdd458606bd5fafe5acdcdc8ff3f57</bytea></array>
</gtv><dependencies>
<dependency name="user" chain="user" /></dependencies>
</config><include src="config/city-include-1.xml"/><include src="config/city-include-2.xml" root="false"/>
</chain></chains>
</run>
Top-level elements are:
• nodes - defines Postchain nodes
• chains - defines blockchains
146 Chapter 2. Chromia

Rell Documentation, Release v0.10.1
Nodes
Node configuration is provided in a standard Postchain node-config.properties format.
Specifying a path to an existing node-config.properties file (path is relative to the Run.XML file):
<nodes><config src="config/node-config.properties" add-signers="false" />
</nodes>
Specifying node configuration properties directly, as text:
<nodes><config add-signers="false">
database.driverclass=org.postgresql.Driverdatabase.url=jdbc:postgresql://localhost/postchaindatabase.username=postchaindatabase.password=postchaindatabase.schema=test_app
activechainids=1
api.port=7740api.basepath=
node.0.id=node0node.0.host=127.0.0.1node.0.port=9870node.0.
→˓pubkey=0350fe40766bc0ce8d08b3f5b810e49a8352fdd458606bd5fafe5acdcdc8ff3f57
messaging.→˓privkey=3132333435363738393031323334353637383930313233343536373839303131
messaging.→˓pubkey=0350fe40766bc0ce8d08b3f5b810e49a8352fdd458606bd5fafe5acdcdc8ff3f57
</config></nodes>
Chains
A chain element can have multiple config elements and a dependencies element inside.
A single chain may have specific configurations assigned to specific block heights.
<config height="0" add-dependencies="false"><app module="city" /><gtv path="signers">
<array><bytea>0350fe40766bc0ce8d08b3f5b810e49a8352fdd458606bd5fafe5acdcdc8ff3f57
→˓</bytea></array>
</gtv></config>
An app element specifies a Rell application used by the chain. Attribute module is the name of the main module ofthe app. The source code of the main module and all modules it imports will be injected into the generated blockchainXML configuration.
2.8. Run.XML 147

Rell Documentation, Release v0.10.1
Elements gtv are used to inject GTXML fragments directly into the generated Postchain blockchain XML configu-ration. Attribute path specifies a dictionary path for the fragment (default is root). For example, the fragment
<gtv path="gtx/rell/moduleArgs/user"><dict>
<entry key="foo"><bytea>→˓0373599a61cc6b3bc02a78c34313e1737ae9cfd56b9bb24360b437d469efdf3b15</bytea></entry>
</dict></gtv>
will produce a blockchain XML:
<dict><entry key="gtx">
<dict><entry key="rell">
<dict><entry key="moduleArgs">
<dict><entry key="user">
<dict><entry key="foo">
<bytea>→˓0373599A61CC6B3BC02A78C34313E1737AE9CFD56B9BB24360B437D469EFDF3B15</bytea>
</entry></dict>
</entry></dict>
</entry></dict>
</entry></dict>
</entry></dict>
GTXML contents to be injected shall be either specified as a nested element of a gtv element, or placed in an XMLfile referenced via the src attribute.
Included files
Other XML files can be included anywhere in a Run.XML using include tag. Included files may include otherXML files as well.
Including a file with its root element replacing the include element:
<include src="config/city-include-1.xml"/>
Including a file without its root element, the include is replaced by the child elements of the root element of the file:
<include src="config/city-include-2.xml" root="false"/>
2.8.2 Utilities
Those utilities are a part of the Rell language.
148 Chapter 2. Chromia

Rell Documentation, Release v0.10.1
multirun.sh
Runs an application described by a Run.XML configuration.
Usage: RellRunConfigLaunch [-d=SOURCE_DIR] RUN_CONFIGLaunch a run config
RUN_CONFIG Run config file-d, --source-dir=SOURCE_DIR
Rell source code directory (default: current directory)
multigen.sh
Creates a Postchain blockchain XML configuration from a Run.XML configuration.
Usage: RellRunConfigGen [--dry-run] [-d=SOURCE_DIR] [-o=OUTPUT_DIR] RUN_CONFIGGenerate blockchain config from a run config
RUN_CONFIG Run config file--dry-run Do not create files
-d, --source-dir=SOURCE_DIRRell source code directory (default: current directory)
-o, --output-dir=OUTPUT_DIROutput directory
Example of a generated directory tree:
out/blockchains
10.gtv0.xml1000.gtv1000.xmlbrid.txt
20.gtv0.xml1000.gtv1000.xml2000.gtv2000.xml3000.gtv3000.xmlbrid.txt
node-config.propertiesprivate.properties
2.8. Run.XML 149