RefWorks level 2: Online bibliography and research tool Presenters: Roger Mills, Judy Reading, Nia...
32
RefWorks level 2: Online RefWorks level 2: Online bibliography and research bibliography and research tool tool Presenters: Roger Mills, Judy Presenters: Roger Mills, Judy Reading, Nia Roberts, Kate Reading, Nia Roberts, Kate Williams, Kate Petherbridge Williams, Kate Petherbridge and Gillian Pritchard and Gillian Pritchard Email @ouls.ox.ac.uk Email @ouls.ox.ac.uk
-
date post
22-Dec-2015 -
Category
Documents
-
view
215 -
download
0
Transcript of RefWorks level 2: Online bibliography and research tool Presenters: Roger Mills, Judy Reading, Nia...

RefWorks level 2: Online RefWorks level 2: Online bibliography and research bibliography and research
tooltool Presenters: Roger Mills, Judy Presenters: Roger Mills, Judy Reading, Nia Roberts, Kate Reading, Nia Roberts, Kate
Williams, Kate Petherbridge and Williams, Kate Petherbridge and Gillian PritchardGillian Pritchard
Email @ouls.ox.ac.ukEmail @ouls.ox.ac.uk
RefworksRefworks
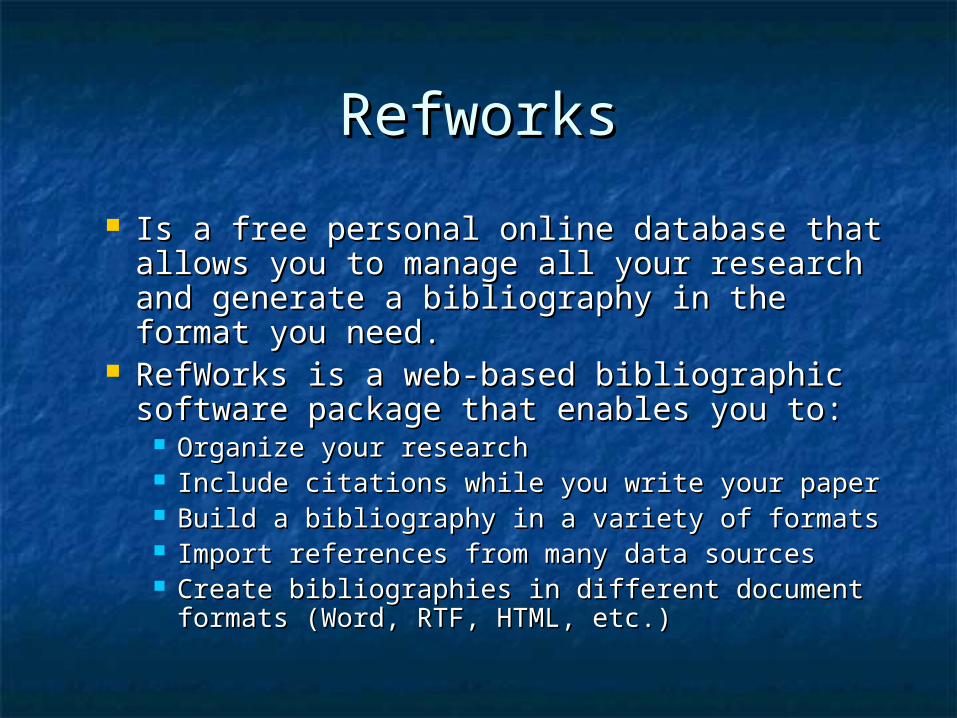
Is a free personal online database that allows Is a free personal online database that allows you to manage all your research and generate you to manage all your research and generate a bibliography in the format you need.a bibliography in the format you need.
RefWorks is a web-based bibliographic RefWorks is a web-based bibliographic software package that enables you to:software package that enables you to:
Organize your research Organize your research Include citations while you write your paper Include citations while you write your paper Build a bibliography in a variety of formats Build a bibliography in a variety of formats Import references from many data sources Import references from many data sources Create bibliographies in different document formats Create bibliographies in different document formats
(Word, RTF, HTML, etc.) (Word, RTF, HTML, etc.)

This sessionThis session
Introduction to basic features of Introduction to basic features of RefWorks RefWorks
Importing references from different Importing references from different sources sources
Managing your database of referencesManaging your database of references Creating a bibliography with Write-N-Creating a bibliography with Write-N-
Cite.Cite.

AccessAccess
No software to download and update No software to download and update Access your personal account from Access your personal account from
any computer connected to the webany computer connected to the web Free access for Oxford University Free access for Oxford University
membersmembers Outside Oxford network lOutside Oxford network log in via og in via
group code – seegroup code – seehttp://http://www.ouls.ox.ac.uk/eresources/refworkswww.ouls.ox.ac.uk/eresources/refworks

Cf. EndNoteCf. EndNoteCompare features:
EndNote Web
EndNoteDesktop RefWorks
Save references + + +
Organize & edit references + + +
Storage capacity (number of references) 10,000 unlimited unlimited
Import from many databases and OPACs + + +
Cite & format papers with bibliographies + + +
Create & save advanced searches + create (not save)
Customize views & displays + +
Edit reference import filters & output styles +RW can add or edit import filters
Users can edit output styles
Use term lists for auto-entry + +
Cite tables, figures, & equations + +
Work Offline (anytime/anywhere) +
Full access available online – can download database to work
offline
Local Personal Files and Documents + +
High Performance Desktop Environment +

Getting started: set-up an Getting started: set-up an accountaccount
Go to Go to www.refworks.com/refworkswww.refworks.com/refworks Click on Click on Sign up for a New AccountSign up for a New Account Fill in the formFill in the form Click on Click on RegisterRegister Then login to Refworks using your new Then login to Refworks using your new
username and passwordusername and password If accessing Refworks from outside the If accessing Refworks from outside the
University domain you need to use the University domain you need to use the Group code first – currently OxymoronGroup code first – currently Oxymoron

Adding new reference Adding new reference manuallymanually
Click Click ReferencesReferences | | Add a referenceAdd a reference Check you are happy with the choice Check you are happy with the choice
in the in the Fields used byFields used by box box Enter details in all fields marked with Enter details in all fields marked with Use Use see detailsee detail for help in choosing for help in choosing
what to enterwhat to enter SaveSave reference or reference or Save & add newSave & add new to to
continue adding more referencescontinue adding more references

Main options for importing Main options for importing references:references:
Entering references manuallyEntering references manually Export from “Direct Export Partners” Export from “Direct Export Partners”
eg SOLO, OxLIP+, SCOPUS, CSAeg SOLO, OxLIP+, SCOPUS, CSA Search from within Refworks (eg Search from within Refworks (eg
OLIS, Pubmed)OLIS, Pubmed) Import of data from other databases Import of data from other databases
using saved files – usually in plain using saved files – usually in plain text format with tagged fields text format with tagged fields

Direct import from Cambridge Direct import from Cambridge Scientific AbstractsScientific Abstracts
Conduct your search.Conduct your search. Select the records you want to export and click Select the records you want to export and click
on on RefWorksRefWorks Note:Note: if you do not see a RefWorks link, click on if you do not see a RefWorks link, click on
the the Save, Print, EmailSave, Print, Email link link Click the Click the Export to RefWorksExport to RefWorks button and the button and the
references are automatically exported to references are automatically exported to RefWorks. (Make sure you are not already RefWorks. (Make sure you are not already logged into Refworks before you export)logged into Refworks before you export)
Your records should appear in the Last Imported Your records should appear in the Last Imported Folder.Folder.
Check them for accuracy at this point.Check them for accuracy at this point.

Direct export from SOLODirect export from SOLO
Go to Go to http://http://solo.ouls.ox.ac.uksolo.ouls.ox.ac.uk and do a quick and do a quick search for your topic of choice.search for your topic of choice.
Mark some records, by ticking the box next to Mark some records, by ticking the box next to Add to e-shelf. Add to e-shelf.
LoginLogin to the system, on the top right corner of the to the system, on the top right corner of the screen, using your Single Sign On login, then click screen, using your Single Sign On login, then click on the blue logo for your on the blue logo for your E-shelf.E-shelf.
This will list all of the records you have marked. This will list all of the records you have marked. Select Select the ones you want to use. the ones you want to use. On the top right of the screen there is an option On the top right of the screen there is an option
to to savesave, which defaults to , which defaults to Push to RefWorksPush to RefWorks, just , just click click to export directly to RefWorks.to export directly to RefWorks.

Creating Folders in Creating Folders in RefWorksRefWorks
From the From the FoldersFolders menu select menu select Create New FolderCreate New Folder Enter a name in Enter a name in New Folder NameNew Folder Name and click and click OKOK Go back to Go back to ViewView – – Last Imported FolderLast Imported Folder and select and select
references references Use Use Put in FolderPut in Folder to save your selected references to to save your selected references to
the new folderthe new folder There is more information about managing folders and There is more information about managing folders and
sorting references in your Quick Start guide in help sorting references in your Quick Start guide in help and in tasks 3 and 21-4and in tasks 3 and 21-4
To remove duplicates choose View – Duplicates and To remove duplicates choose View – Duplicates and follow instructionsfollow instructions

Direct export from OxLIP+Direct export from OxLIP+ Go to Go to http://oxlip-plus.ox.ac.ukhttp://oxlip-plus.ox.ac.uk and then choose Cross- and then choose Cross-
Search.Search. Select the subject area you want to cross-search, and Select the subject area you want to cross-search, and
then mark the databases to include in your search. then mark the databases to include in your search. You can search up to 5 databases/e-resources at a You can search up to 5 databases/e-resources at a time. time.
Type your search terms in the search boxes at the top Type your search terms in the search boxes at the top of the screen and click of the screen and click GOGO..
You will see a list of results. Click on the basket icon You will see a list of results. Click on the basket icon next to some articles and then click on next to some articles and then click on My ResearchMy Research. . If you are not already logged in, click on the top right If you are not already logged in, click on the top right hand option to hand option to loginlogin, using your Single Sign-On login., using your Single Sign-On login.
From this screen, tick the box next to all the items you From this screen, tick the box next to all the items you would like to export to RefWorks and click on would like to export to RefWorks and click on SelectedSelected. Click on the option to . Click on the option to SaveSave and then under and then under Record formatRecord format, select the option for, select the option for RefWorks RefWorks..

About import filtersAbout import filters
To see a list of Direct Export partners To see a list of Direct Export partners choose: choose: ReferencesReferences – – Import Import –– List of List of Filters and Databases Filters and Databases -- Direct Export Direct Export PartnersPartners
For instructions relevant to most For instructions relevant to most databases look at: databases look at:
References References –– Import Import – – Import instructions Import instructions

To manually save and To manually save and export references: export references: Web of KnowledgeWeb of Knowledge
as an exampleas an example

After you perform your search, click in the After you perform your search, click in the checkbox to select the items you want to checkbox to select the items you want to save save
At the bottom of the pageAt the bottom of the page
- - step 1step 1, choose whether to output selected , choose whether to output selected items or all.items or all.
- - step 2step 2, choose the amount of information , choose the amount of information you want.you want.
- - step 3step 3, select , select “save as plain text”“save as plain text” from from the drop-down menu, then click on the drop-down menu, then click on Save Save to to save the file to your computersave the file to your computer. .

Log in to Log in to RefWorksRefWorks.. Select Select References/ImportReferences/Import from the from the
toolbar.toolbar. Select Select ISIISI as the data source and as the data source and Web of Web of
KnowledgeKnowledge as the database. as the database. BrowseBrowse to find the text file you saved to to find the text file you saved to
your computer.your computer. Click Click ImportImport.. Your records should appear in the Your records should appear in the Last Last
Imported FolderImported Folder..

To manually save and To manually save and export references: export references: CSA as an exampleCSA as an example

After you perform your search and are at the After you perform your search and are at the results window, click results window, click Save/Print/E-mail Save/Print/E-mail link.link.
Select either Select either Marked ReferencesMarked References or or Use Use Records from the Current SearchRecords from the Current Search..
Select Select FullFull FormatFormat.. Scroll down the page and choose document Scroll down the page and choose document
format format TextText and select the file type you want and select the file type you want (PC, Mac or Unix) and click (PC, Mac or Unix) and click SaveSave..
You will be prompted to either You will be prompted to either OpenOpen or or SaveSave the file (which is already named and is a text the file (which is already named and is a text file).file).
If you select open, then the references appear If you select open, then the references appear in your browser window and from the in your browser window and from the FileFile menu select menu select Save AsSave As..
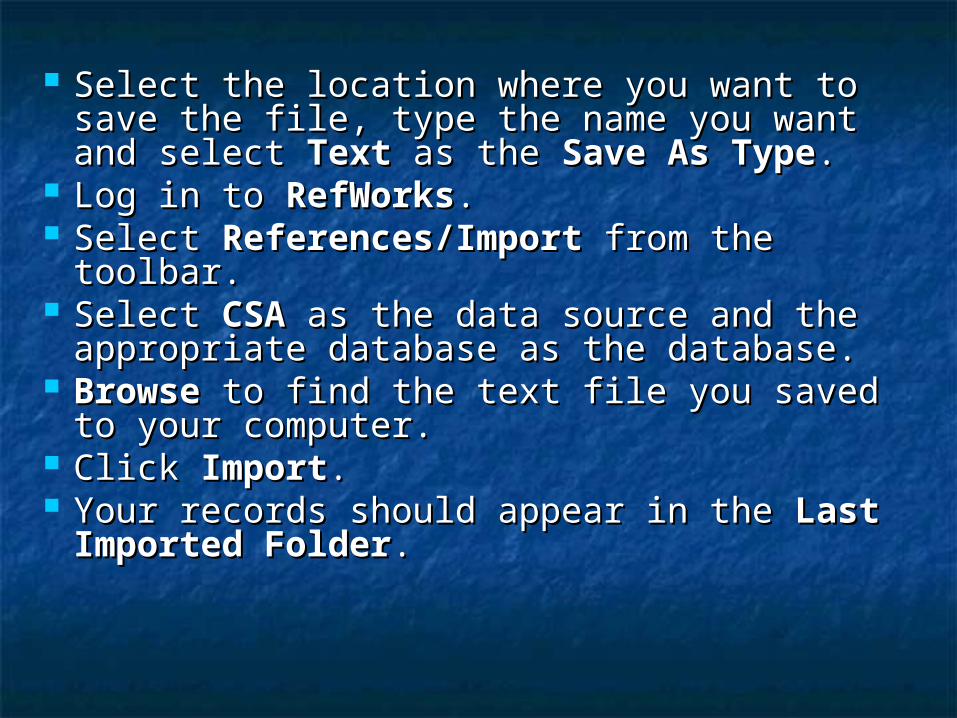
Select the location where you want to save Select the location where you want to save the file, type the name you want and select the file, type the name you want and select TextText as the as the Save As TypeSave As Type..
Log in to Log in to RefWorksRefWorks.. Select Select References/ImportReferences/Import from the from the
toolbar.toolbar. Select Select CSACSA as the data source and the as the data source and the
appropriate database as the database.appropriate database as the database. BrowseBrowse to find the text file you saved to to find the text file you saved to
your computer.your computer. Click Click ImportImport.. Your records should appear in the Your records should appear in the Last Last
Imported FolderImported Folder..

Library catalogue: Search OLIS Library catalogue: Search OLIS from within Refworks: from within Refworks:
Click on Click on SearchSearch - - Online Catalog or DatabaseOnline Catalog or Database Choose OLIS from the drop-down listChoose OLIS from the drop-down list You can choose how many records you want You can choose how many records you want Do a search (using descriptors and trying out Do a search (using descriptors and trying out
search in OLIS directly first helps)search in OLIS directly first helps) Import selected recordsImport selected records Close the Search results and return to Close the Search results and return to
RefworksRefworks

Searching resources from Searching resources from within RefWorks e.g. PubMedwithin RefWorks e.g. PubMed
Click on Click on SearchSearch - - Online Catalog or Online Catalog or DatabaseDatabase
Choose PubMed from the drop-down Choose PubMed from the drop-down listlist
Do a search Do a search Select and import some itemsSelect and import some items Close the Search results and return to Close the Search results and return to
RefworksRefworks

Formatting citations in your Formatting citations in your paper with Write-N-Citepaper with Write-N-Cite
Write-N-Cite is a tool you download Write-N-Cite is a tool you download into your word processor which into your word processor which allows you to easily place references allows you to easily place references into your paper.into your paper.
You need to download the Write-N-You need to download the Write-N-Cite plug the first time you want to Cite plug the first time you want to use it. Choose Tools – Write-N-Cite in use it. Choose Tools – Write-N-Cite in Refworks and follow the instructionsRefworks and follow the instructions

Create a bibliography with Create a bibliography with Write-N-CiteWrite-N-Cite
Log out of Refworks and open Word and type some Log out of Refworks and open Word and type some text for your dissertation or articletext for your dissertation or article
Click on the Write-n-cite plug-in on the toolbarClick on the Write-n-cite plug-in on the toolbar Log into your Refworks database and display a set of Log into your Refworks database and display a set of
references. references. View View –– All references All references or or ViewView--FolderFolder In Word document place cursor where the citation is In Word document place cursor where the citation is
to be insertedto be inserted From Write-N-Cite list click on From Write-N-Cite list click on citecite next to the one next to the one
you wantyou want Save your document Save your document On the Write-n-cite window click on bibliography and On the Write-n-cite window click on bibliography and
choose your preferred style eg Harvard – this will choose your preferred style eg Harvard – this will create a formatted document with in text citations create a formatted document with in text citations and a bibliography in the form your selected style and a bibliography in the form your selected style dictates.dictates.

Create a bibliography with Create a bibliography with WNCWNC
You can change your output style You can change your output style without creating a new documentwithout creating a new document
You can choose to unformat your You can choose to unformat your document by choosing Tools – document by choosing Tools – Display unformatted citationsDisplay unformatted citations

In-text “switches”In-text “switches” You can manually instruct the program to exclude or You can manually instruct the program to exclude or
include certain items in the citation.include certain items in the citation. You would do this to insert a page number in a You would do this to insert a page number in a
citation if it was not included in the style (eg Harvard) citation if it was not included in the style (eg Harvard) using /f [unless the style always includes page using /f [unless the style always includes page numbers in the in-text citation (eg MLA when use /s) numbers in the in-text citation (eg MLA when use /s) NB Footnotes always use /s]NB Footnotes always use /s]
Reference would look like: Reference would look like: {{23 Smith 2003/f p.43}}{{23 Smith 2003/f p.43}}
Easiest way to use switches is to use the Citation Easiest way to use switches is to use the Citation editor in Write-N-Cite which appears when you click editor in Write-N-Cite which appears when you click on Cite next to a reference – it lets you preview the on Cite next to a reference – it lets you preview the result.result.
More information about switches in Refworks help in More information about switches in Refworks help in the section: the section: Writing your paper and creating your Writing your paper and creating your bibliography / bibliography / Modifying an In-Text Citation or Modifying an In-Text Citation or FootnoteFootnote

Working With Footnotes And Working With Footnotes And Endnotes Endnotes
Some output styles prefer the use of footnotes and Some output styles prefer the use of footnotes and endnotes instead of in-text citations and a endnotes instead of in-text citations and a bibliography. Make sure the output style you select bibliography. Make sure the output style you select handles footnote and endnote formatting. handles footnote and endnote formatting.
Generally, you'll see the word Generally, you'll see the word NotesNotes in the title of in the title of the output style. This is a often a good indicator that the output style. This is a often a good indicator that the style will create footnotesthe style will create footnotes
If you are unsure whether a style will support If you are unsure whether a style will support footnote and endnotes, open the style with the footnote and endnotes, open the style with the Output Style EditorOutput Style Editor and look at the and look at the Citation TypeCitation Type drop-down. If it says drop-down. If it says Notes OnlyNotes Only or or In-text In-text Citations and NotesCitations and Notes, that output style will work for , that output style will work for you. If it says you. If it says In-Text Citations OnlyIn-Text Citations Only, you won't , you won't get the proper formatting you need.get the proper formatting you need.

Adding a Citation to a Footnote Adding a Citation to a Footnote or Endnoteor Endnote
Footnotes are placed at the bottom of the page Footnotes are placed at the bottom of the page on which the reference appears. Endnotes are on which the reference appears. Endnotes are similar to footnotes but instead of being added to similar to footnotes but instead of being added to the bottom of each page they are grouped the bottom of each page they are grouped together at the end of the document. together at the end of the document.
RefWorks does not actually create the endnote or RefWorks does not actually create the endnote or footnote in the document, but is used to insert footnote in the document, but is used to insert and format the citations. You create an endnote and format the citations. You create an endnote or footnote using your word processor.or footnote using your word processor.
In Word choose View – Print Layout then Insert – In Word choose View – Print Layout then Insert – Reference – Footnote. Go to Write N Cite and cite Reference – Footnote. Go to Write N Cite and cite a citationa citation

Creating bibliography Creating bibliography without Write-n-citewithout Write-n-cite
Type text into WordType text into Word Log into Refworks and look up a reference and choose Log into Refworks and look up a reference and choose One One
line / Citeline / Cite view view Choose a reference and click on Choose a reference and click on citecite A box will open – select the formatted citation number and A box will open – select the formatted citation number and
copy (Ctrl + C)copy (Ctrl + C) Place cursor in Word document and paste the citation (Ctrl Place cursor in Word document and paste the citation (Ctrl
+ V)+ V) Close and save your document Close and save your document In Refworks click on In Refworks click on BibliographyBibliography – choose a formatting – choose a formatting
style eg Harvard – Tick style eg Harvard – Tick Format paper and bibliography – Format paper and bibliography – Browse to your word file as the Document to Format – Click Browse to your word file as the Document to Format – Click on Create Bibliographyon Create Bibliography
You now have a document complete with proper citations You now have a document complete with proper citations and formatted bibliography and formatted bibliography

Working Offline with Write-N-Working Offline with Write-N-CiteCite
You need to make sure when you first You need to make sure when you first download the WNC tool you configure it to download the WNC tool you configure it to permit offline usagepermit offline usage
WNC allows you to view your references and WNC allows you to view your references and insert temporary citation placeholders and insert temporary citation placeholders and also allows you to format a bibliography in also allows you to format a bibliography in the style of your choice while being offline.the style of your choice while being offline.
While offline you cannot add, edit or delete While offline you cannot add, edit or delete references in your account. references in your account.

Download a copy of your Download a copy of your databasedatabase
Log into Write-N-Cite from within WordLog into Write-N-Cite from within Word From the Write-N-Cite Tools menu, select From the Write-N-Cite Tools menu, select
Create/Update Offline Database.Create/Update Offline Database. Click the Create button.Click the Create button. Your data is downloaded. Your data is downloaded. Click the Click the Work OfflineWork Offline checkbox to work checkbox to work
offline. offline. Deselect the work offline checkbox and Deselect the work offline checkbox and
repeat steps above to update your repeat steps above to update your informationinformation

Compatibility with other Compatibility with other wordprocessing packageswordprocessing packages
Open OfficeOpen Office The Write'n'Cite option is not available in Open Office. The Write'n'Cite option is not available in Open Office.
However, you can use Refworks with Open Office - use the However, you can use Refworks with Open Office - use the One Line/Cite View to add citations and create a One Line/Cite View to add citations and create a bibliography. For information on how to do this, see Task 14 bibliography. For information on how to do this, see Task 14 on the course handouts or look at the Refworks online help on the course handouts or look at the Refworks online help https://https://www.refworks.com/Refworks/help/Refworks.htmwww.refworks.com/Refworks/help/Refworks.htm - - under Output and Formattingunder Output and Formatting
LaTeXLaTeX You can export references from Refworks into BibTex, the You can export references from Refworks into BibTex, the
bibliography manager in LaTeX. bibliography manager in LaTeX. See useful instructions from MIT:See useful instructions from MIT:
http://libraries.mit.edu/help/refworks/refworkslatexfaq.htmlhttp://libraries.mit.edu/help/refworks/refworkslatexfaq.html#1#1

Help with using RefworksHelp with using Refworks
Use Use HelpHelp from the Refworks menu from the Refworks menu Report any problems or make requests for Report any problems or make requests for
new filters to [email protected] new filters to [email protected] Local help is available either from Local help is available either from
[email protected] or from any of [email protected] or from any of the Refworks presenters:the Refworks presenters:
[email protected]@ouls.ox.ac.uk, , [email protected]@ouls.ox.ac.uk, , [email protected],[email protected]@hcl.ox.ac.uk,[email protected] and and [email protected]@ouls.ox.ac.uk