
Red Hat Enterprise Virtualization 3.3 Installation Guide · Andrew Burden Steve Gordon Tim Hildred...
229
Andrew Burden Steve Gordon T im Hildred Cheryn Tan Red Hat Enterprise Virtualization 3.3 Installation Guide Installing Red Hat Enterprise Virtualization Environments
Transcript of Red Hat Enterprise Virtualization 3.3 Installation Guide · Andrew Burden Steve Gordon Tim Hildred...
Andrew Burden Steve Gordon Tim HildredCheryn Tan
Red Hat Enterprise Virtualization 3.3Installation Guide
Installing Red Hat Enterprise Virtualizat ion Environments


Red Hat Enterprise Virtualizat ion 3.3 Installat ion Guide
Installing Red Hat Enterprise Virtualizat ion Environments
Andrew [email protected]
Steve [email protected]
Cheryn [email protected]

Legal Notice
Copyright © 2014 Red Hat, Inc.
This document is licensed by Red Hat under the Creative Commons Attribution-ShareAlike 3.0Unported License. If you distribute this document, o r a modified version o f it, you must provideattribution to Red Hat, Inc. and provide a link to the original. If the document is modified, all RedHat trademarks must be removed.
Red Hat, as the licensor o f this document, waives the right to enforce, and agrees not to assert,Section 4d o f CC-BY-SA to the fullest extent permitted by applicable law.
Red Hat, Red Hat Enterprise Linux, the Shadowman logo, JBoss, MetaMatrix, Fedora, the InfinityLogo, and RHCE are trademarks o f Red Hat, Inc., registered in the United States and o thercountries.
Linux ® is the registered trademark o f Linus Torvalds in the United States and o ther countries.
Java ® is a registered trademark o f Oracle and/or its affiliates.
XFS ® is a trademark o f Silicon Graphics International Corp. or its subsidiaries in the UnitedStates and/or o ther countries.
MySQL ® is a registered trademark o f MySQL AB in the United States, the European Union andother countries.
Node.js ® is an o fficial trademark o f Joyent. Red Hat Software Collections is not fo rmallyrelated to or endorsed by the o fficial Joyent Node.js open source or commercial pro ject.
The OpenStack ® Word Mark and OpenStack Logo are either registered trademarks/servicemarks or trademarks/service marks o f the OpenStack Foundation, in the United States and o thercountries and are used with the OpenStack Foundation's permission. We are not affiliated with,endorsed or sponsored by the OpenStack Foundation, or the OpenStack community.
All o ther trademarks are the property o f their respective owners.
AbstractA comprehensive guide to installing Red Hat Enterprise Virtualization environments.

. . . . . . . . . . . . . . . . . . . . . . . . . . . . . . . . . . . . . . . . . . . . . . . . . . . . . . . . . . . . . . . . . . . . . . . . . . . . . . . . . . . . . . . . . . . . . . . . . . . . . . . . . . . . . . . . . . . . . . . . . . . . . . . . . . . . . . . . . . . . . . . . . . . . . . . . . . . . . . . . . . . . . . . . . . . . . . . . . . . . . . . . . . . . . . . . . . . . . . . . . . . . . . . . . . . . . . . . . . . . . . . . . . . . . . . . . . . . . . . . . . . . . . . . . . . . . . . . . . . . . . . . . . . . . . . . . . . . . . . .
. . . . . . . . . . . . . . . . . . . . . . . . . . . . . . . . . . . . . . . . . . . . . . . . . . . . . . . . . . . . . . . . . . . . . . . . . . . . . . . . . . . . . . . . . . . . . . . . . . . . . . . . . . . . . . . . . . . . . . . . . . . . . . . . . . . . . . . . . . . . . . . . . . . . . . . . . . . . . . . . . . . . . . . . . . . . . . . . . . . . . . . . . . . . . . . . . . . . . . . . . . . . . . . . . . . . . . . . . . . . . . . . . . . . . . . . . . . . . . . . . . . . . . . . . . . . . . . . . . . . . . . . . . . . . . . . . . . . . . . .
. . . . . . . . . . . . . . . . . . . . . . . . . . . . . . . . . . . . . . . . . . . . . . . . . . . . . . . . . . . . . . . . . . . . . . . . . . . . . . . . . . . . . . . . . . . . . . . . . . . . . . . . . . . . . . . . . . . . . . . . . . . . . . . . . . . . . . . . . . . . . . . . . . . . . . . . . . . . . . . . . . . . . . . . . . . . . . . . . . . . . . . . . . . . . . . . . . . . . . . . . . . . . . . . . . . . . . . . . . . . . . . . . . . . . . . . . . . . . . . . . . . . . . . . . . . . . . . . . . . . . . . . . . . . . . . . . . . . . . . .
. . . . . . . . . . . . . . . . . . . . . . . . . . . . . . . . . . . . . . . . . . . . . . . . . . . . . . . . . . . . . . . . . . . . . . . . . . . . . . . . . . . . . . . . . . . . . . . . . . . . . . . . . . . . . . . . . . . . . . . . . . . . . . . . . . . . . . . . . . . . . . . . . . . . . . . . . . . . . . . . . . . . . . . . . . . . . . . . . . . . . . . . . . . . . . . . . . . . . . . . . . . . . . . . . . . . . . . . . . . . . . . . . . . . . . . . . . . . . . . . . . . . . . . . . . . . . . . . . . . . . . . . . . . . . . . . . . . . . . . .
. . . . . . . . . . . . . . . . . . . . . . . . . . . . . . . . . . . . . . . . . . . . . . . . . . . . . . . . . . . . . . . . . . . . . . . . . . . . . . . . . . . . . . . . . . . . . . . . . . . . . . . . . . . . . . . . . . . . . . . . . . . . . . . . . . . . . . . . . . . . . . . . . . . . . . . . . . . . . . . . . . . . . . . . . . . . . . . . . . . . . . . . . . . . . . . . . . . . . . . . . . . . . . . . . . . . . . . . . . . . . . . . . . . . . . . . . . . . . . . . . . . . . . . . . . . . . . . . . . . . . . . . . . . . . . . . . . . . . . . .
. . . . . . . . . . . . . . . . . . . . . . . . . . . . . . . . . . . . . . . . . . . . . . . . . . . . . . . . . . . . . . . . . . . . . . . . . . . . . . . . . . . . . . . . . . . . . . . . . . . . . . . . . . . . . . . . . . . . . . . . . . . . . . . . . . . . . . . . . . . . . . . . . . . . . . . . . . . . . . . . . . . . . . . . . . . . . . . . . . . . . . . . . . . . . . . . . . . . . . . . . . . . . . . . . . . . . . . . . . . . . . . . . . . . . . . . . . . . . . . . . . . . . . . . . . . . . . . . . . . . . . . . . . . . . . . . . . . . . . . .
Table of Contents
Preface1. Do cument Co nventio ns1.1. Typ o g rap hic Co nventio ns1.2. Pull-q uo te Co nventio ns1.3. No tes and Warning s
2. Getting Help and G iving Feed b ack2.1. Do Yo u Need Help ?2.2. We Need Feed b ack!
Part I. Before you Begin
Chapt er 1 . Int roduct ion1.1. Red Hat Enterp rise Virtualizatio n Architecture1.2. Red Hat Enterp rise Virtualizatio n System Co mp o nents1.3. Red Hat Enterp rise Virtualizatio n Reso urces1.4. Red Hat Enterp rise Virtualizatio n API Sup p o rt Statement1.5. Intro d uctio n to Virtual Machines1.6 . Sup p o rted Virtual Machine Op erating Systems1.7. Red Hat Enterp rise Virtualizatio n Installatio n Wo rkflo w
Chapt er 2 . Syst em Requirement s2.1. Wo rkflo w Pro g ress — System Req uirements2.2. Hard ware Req uirements2.2.1. Red Hat Enterp rise Virtualizatio n Hard ware Req uirements Overview2.2.2. Red Hat Enterp rise Virtualizatio n Manag er Hard ware Req uirements2.2.3. Virtualizatio n Ho st Hard ware Req uirements2.2.3.1. Virtualizatio n Ho st Hard ware Req uirements Overview2.2.3.2. Virtualizatio n Ho st CPU Req uirements2.2.3.3. Virtualizatio n Ho st RAM Req uirements2.2.3.4. Virtualizatio n Ho st Sto rag e Req uirements2.2.3.5. Virtualizatio n Ho st PCI Device Req uirements
2.3. So ftware Req uirements2.3.1. Red Hat Enterp rise Virtualizatio n Op erating System Req uirements2.3.2. Red Hat Enterp rise Virtualizatio n Manag er Client Req uirements2.3.3. Red Hat Enterp rise Virtualizatio n Manag er So ftware Channels2.3.4. Directo ry Services2.3.4.1. Ab o ut Directo ry Services2.3.4.2. Directo ry Services Sup p o rt in Red Hat Enterp rise Virtualizatio n
2.3.5. Firewall Co nfig uratio n2.3.5.1. Red Hat Enterp rise Virtualizatio n Manag er Firewall Req uirements2.3.5.2. Virtualizatio n Ho st Firewall Req uirements2.3.5.3. Directo ry Server Firewall Req uirements2.3.5.4. Datab ase Server Firewall Req uirements
2.3.6 . Req uired User Acco unts and Gro up s2.3.6 .1. Red Hat Enterp rise Virtualizatio n Manag er User Acco unts2.3.6 .2. Red Hat Enterp rise Virtualizatio n Manag er Gro up s2.3.6 .3. Virtualizatio n Ho st User Acco unts2.3.6 .4. Virtualizatio n Ho st Gro up s
Part II. Inst alling Red Hat Ent erprise Virt ualizat ion Manager
Chapt er 3. Manager Inst allat ion3.1. Wo rkflo w Pro g ress — Install ing Red Hat Enterp rise Virtualizatio n Manag er
7778999
10
1 1
1 212131314151617
1 9191919202020212222232424242526262629293032333333333434
36
3737
T able of Cont ent s
1

. . . . . . . . . . . . . . . . . . . . . . . . . . . . . . . . . . . . . . . . . . . . . . . . . . . . . . . . . . . . . . . . . . . . . . . . . . . . . . . . . . . . . . . . . . . . . . . . . . . . . . . . . . . . . . . . . . . . . . . . . . . . . . . . . . . . . . . . . . . . . . . . . . . . . . . . . . . . . . . . . . . . . . . . . . . . . . . . . . . . . . . . . . . . . . . . . . . . . . . . . . . . . . . . . . . . . . . . . . . . . . . . . . . . . . . . . . . . . . . . . . . . . . . . . . . . . . . . . . . . . . . . . . . . . . . . . . . . . . . .
. . . . . . . . . . . . . . . . . . . . . . . . . . . . . . . . . . . . . . . . . . . . . . . . . . . . . . . . . . . . . . . . . . . . . . . . . . . . . . . . . . . . . . . . . . . . . . . . . . . . . . . . . . . . . . . . . . . . . . . . . . . . . . . . . . . . . . . . . . . . . . . . . . . . . . . . . . . . . . . . . . . . . . . . . . . . . . . . . . . . . . . . . . . . . . . . . . . . . . . . . . . . . . . . . . . . . . . . . . . . . . . . . . . . . . . . . . . . . . . . . . . . . . . . . . . . . . . . . . . . . . . . . . . . . . . . . . . . . . . .
. . . . . . . . . . . . . . . . . . . . . . . . . . . . . . . . . . . . . . . . . . . . . . . . . . . . . . . . . . . . . . . . . . . . . . . . . . . . . . . . . . . . . . . . . . . . . . . . . . . . . . . . . . . . . . . . . . . . . . . . . . . . . . . . . . . . . . . . . . . . . . . . . . . . . . . . . . . . . . . . . . . . . . . . . . . . . . . . . . . . . . . . . . . . . . . . . . . . . . . . . . . . . . . . . . . . . . . . . . . . . . . . . . . . . . . . . . . . . . . . . . . . . . . . . . . . . . . . . . . . . . . . . . . . . . . . . . . . . . . .
. . . . . . . . . . . . . . . . . . . . . . . . . . . . . . . . . . . . . . . . . . . . . . . . . . . . . . . . . . . . . . . . . . . . . . . . . . . . . . . . . . . . . . . . . . . . . . . . . . . . . . . . . . . . . . . . . . . . . . . . . . . . . . . . . . . . . . . . . . . . . . . . . . . . . . . . . . . . . . . . . . . . . . . . . . . . . . . . . . . . . . . . . . . . . . . . . . . . . . . . . . . . . . . . . . . . . . . . . . . . . . . . . . . . . . . . . . . . . . . . . . . . . . . . . . . . . . . . . . . . . . . . . . . . . . . . . . . . . . . .
. . . . . . . . . . . . . . . . . . . . . . . . . . . . . . . . . . . . . . . . . . . . . . . . . . . . . . . . . . . . . . . . . . . . . . . . . . . . . . . . . . . . . . . . . . . . . . . . . . . . . . . . . . . . . . . . . . . . . . . . . . . . . . . . . . . . . . . . . . . . . . . . . . . . . . . . . . . . . . . . . . . . . . . . . . . . . . . . . . . . . . . . . . . . . . . . . . . . . . . . . . . . . . . . . . . . . . . . . . . . . . . . . . . . . . . . . . . . . . . . . . . . . . . . . . . . . . . . . . . . . . . . . . . . . . . . . . . . . . . .
3.2. Install ing the Red Hat Enterp rise Virtualizatio n Manag er3.3. Sub scrib ing to the Red Hat Enterp rise Virtualizatio n Channels3.3.1. Sub scrib ing to the Red Hat Enterp rise Virtualizatio n Manag er Channels using Sub scrip tio nManag er3.3.2. Sub scrib ing to the Red Hat Enterp rise Virtualizatio n Manag er Channels Using RHNClassic
3.4. Install ing the Red Hat Enterp rise Virtualizatio n Manag er Packag es3.5. Co nfig uring Red Hat Enterp rise Virtualizatio n Manag er3.6 . Passwo rd s in Red Hat Enterp rise Virtualizatio n Manag er3.7. Prep aring a Po stg reSQL Datab ase fo r Use with Red Hat Enterp rise Virtualizatio n Manag er3.8 . Co nfig uring the Manag er to Use a Manually Co nfig ured Lo cal o r Remo te Po stg reSQLDatab ase3.9 . Co nnecting to the Ad ministratio n Po rtal3.10 . Remo ving Red Hat Enterp rise Virtualizatio n Manag er
Chapt er 4 . Self- Host ed Engine4.1. Ab o ut the Self-Ho sted Eng ine4.2. Limitatio ns o f the Self-Ho sted Eng ine4.3. Install ing the Self-Ho sted Eng ine4.4. Co nfig uring the Self-Ho sted Eng ine4.5. Mig rating to a Self-Ho sted Enviro nment4.6 . Install ing Ad d itio nal Ho sts to a Self-Ho sted Enviro nment4.7. Maintaining the Self-Ho sted Eng ine
Chapt er 5. Dat a Collect ion Set up and Report s Inst allat ion5.1. Wo rkflo w Pro g ress — Data Co llectio n Setup and Rep o rts Installatio n5.2. Data Co llectio n Setup and Rep o rts Installatio n Overview5.3. Install ing and Co nfig uring the Histo ry Datab ase5.4. Install ing and Co nfig uring Red Hat Enterp rise Virtualizatio n Manag er Rep o rts
Chapt er 6 . Updat ing t he Red Hat Ent erprise Virt ualizat ion Environment6 .1. Up g rad es b etween Mino r Releases6 .1.1. Checking fo r Red Hat Enterp rise Virtualizatio n Manag er Up d ates6 .1.2. Up d ating Red Hat Enterp rise Virtualizatio n Manag er6 .1.3. Tro ub lesho o ting fo r Up g rad ing Red Hat Enterp rise Virtualizatio n Manag er6 .1.4. Up d ating Red Hat Enterp rise Virtualizatio n Manag er Rep o rts6 .1.5. Up d ating Red Hat Enterp rise Virtualizatio n Hyp erviso rs6 .1.6 . Up d ating Red Hat Enterp rise Linux Virtualizatio n Ho sts6 .1.7. Up d ating the Red Hat Enterp rise Virtualizatio n Guest To o ls
6 .2. Up g rad ing to Red Hat Enterp rise Virtualizatio n 3.36 .2.1. Red Hat Enterp rise Virtualizatio n Manag er 3.3 Up g rad e Overview6 .2.2. Red Hat Enterp rise Virtualizatio n 3.3 Up g rad e Co nsid eratio ns6 .2.3. Up g rad ing to Red Hat Enterp rise Virtualizatio n Manag er 3.3
6 .3. Up g rad ing to Red Hat Enterp rise Virtualizatio n Manag er 3.26 .3.1. Up g rad ing to Red Hat Enterp rise Virtualizatio n Manag er 3.2
6 .4. Up g rad ing to Red Hat Enterp rise Virtualizatio n Manag er 3.16 .4.1. Up g rad ing to Red Hat Enterp rise Virtualizatio n Manag er 3.1
6 .5. Po st-up g rad e Tasks6 .5.1. Features Req uiring a Co mp atib il i ty Up g rad e to Red Hat Enterp rise Virtualizatio n 3.36 .5.2. Chang ing the Cluster Co mp atib il i ty Vers io n6 .5.3. Chang ing the Data Center Co mp atib il i ty Vers io n
Part III. Inst alling Virt ualizat ion Host s
Chapt er 7 . Int roduct ion t o Virt ualizat ion Host s
3740
40
41444549
50515253
55555555566 27172
7 474747576
7 87878788 08 08 18 38 38 48 48 48 58 78 78 98 99 39 39 49 5
9 7
9 8
Red Hat Ent erprise Virt ualizat ion 3.3 Inst allat ion Guide
2

. . . . . . . . . . . . . . . . . . . . . . . . . . . . . . . . . . . . . . . . . . . . . . . . . . . . . . . . . . . . . . . . . . . . . . . . . . . . . . . . . . . . . . . . . . . . . . . . . . . . . . . . . . . . . . . . . . . . . . . . . . . . . . . . . . . . . . . . . . . . . . . . . . . . . . . . . . . . . . . . . . . . . . . . . . . . . . . . . . . . . . . . . . . . . . . . . . . . . . . . . . . . . . . . . . . . . . . . . . . . . . . . . . . . . . . . . . . . . . . . . . . . . . . . . . . . . . . . . . . . . . . . . . . . . . . . . . . . . . . .
. . . . . . . . . . . . . . . . . . . . . . . . . . . . . . . . . . . . . . . . . . . . . . . . . . . . . . . . . . . . . . . . . . . . . . . . . . . . . . . . . . . . . . . . . . . . . . . . . . . . . . . . . . . . . . . . . . . . . . . . . . . . . . . . . . . . . . . . . . . . . . . . . . . . . . . . . . . . . . . . . . . . . . . . . . . . . . . . . . . . . . . . . . . . . . . . . . . . . . . . . . . . . . . . . . . . . . . . . . . . . . . . . . . . . . . . . . . . . . . . . . . . . . . . . . . . . . . . . . . . . . . . . . . . . . . . . . . . . . . .
7.1. Wo rkflo w Pro g ress — Install ing Virtualizatio n Ho sts7.2. Intro d uctio n to Virtualizatio n Ho sts
Chapt er 8 . Inst alling Red Hat Ent erprise Virt ualizat ion Hypervisor Host s8 .1. Red Hat Enterp rise Virtualizatio n Hyp erviso r Installatio n Overview8 .2. Install ing the Red Hat Enterp rise Virtualizatio n Hyp erviso r Packag es8 .3. Prep aring Hyp erviso r Installatio n Med ia8 .3.1. Prep aring USB Hyp erviso r Installatio n Med ia8 .3.1.1. Prep aring a Hyp erviso r USB Sto rag e Device8 .3.1.2. Prep aring USB Installatio n Med ia Using l ivecd -iso -to -d isk8 .3.1.3. Prep aring USB Installatio n Med ia Using d d8 .3.1.4. Prep aring USB Installatio n Med ia Using d d o n Linux Systems8 .3.1.5. Prep aring USB Installatio n Med ia Using d d o n Wind o ws Systems
8 .3.2. Prep aring Op tical Hyp erviso r Installatio n Med ia8 .3.3. Bo o ting fro m Hyp erviso r Installatio n Med ia8 .3.3.1. Bo o ting the Hyp erviso r fro m USB Installatio n Med ia8 .3.3.2. Bo o ting the Hyp erviso r fro m Op tical Installatio n Med ia8 .3.3.3. Tro ub lesho o ting BIOS Setting s and Bo o t Pro cess8 .3.3.4. Cho o sing Hyp erviso r Bo o t Op tio ns
8 .4. Install ing the Hyp erviso r8 .4.1. Hyp erviso r Menu Actio ns8 .4.2. Install ing the Hyp erviso r
8 .5. Co nfig uring the Hyp erviso r8 .5.1. Lo g g ing into the Hyp erviso r8 .5.2. Selecting Hyp erviso r Keyb o ard8 .5.3. Viewing Hyp erviso r Status8 .5.4. Co nfig uring Hyp erviso r Netwo rk8 .5.4.1. Hyp erviso r Netwo rk Screen8 .5.4.2. Co nfig uring Hyp erviso r Ho st Name8 .5.4.3. Co nfig uring Hyp erviso r Do main Name Servers8 .5.4.4. Co nfig uring Hyp erviso r Netwo rk Time Pro to co l8 .5.4.5. Co nfig uring Hyp erviso r Netwo rk Interfaces
8 .5.5. Co nfig uring Hyp erviso r Security8 .5.6 . Co nfig uring Hyp erviso r Simp le Netwo rk Manag ement Pro to co l8 .5.7. Co nfig uring Hyp erviso r Co mmo n Info rmatio n Mo d el8 .5.8 . Co nfig uring Lo g g ing8 .5.9 . Co nfig uring the Hyp erviso r fo r Red Hat Netwo rk8 .5.10 . Co nfig uring Hyp erviso r Kernel Dump s8 .5.11. Co nfig uring Hyp erviso r Remo te Sto rag e
8 .6 . Attaching the Hyp erviso r to the Red Hat Enterp rise Virtualizatio n Manag er8 .6 .1. Co nfig uring Hyp erviso r Manag ement Server8 .6 .2. Using the Hyp erviso r8 .6 .3. Ap p ro ving a Hyp erviso r
Chapt er 9 . Inst alling Red Hat Ent erprise Linux Host s9 .1. Red Hat Enterp rise Linux Ho sts9 .2. Ho st Co mp atib il i ty Matrix9 .3. Prep aring a Red Hat Enterp rise Linux Ho st9 .3.1. Install ing Red Hat Enterp rise Linux9 .3.2. Sub scrib ing to Req uired Channels Using Sub scrip tio n Manag er9 .3.3. Sub scrib ing to Req uired Channels Using RHN Classic9 .3.4. Co nfig uring Virtualizatio n Ho st Firewall9 .3.5. Co nfig uring Virtualizatio n Ho st sud o9 .3.6 . Co nfig uring Virtualizatio n Ho st SSH
9 89 8
1 0 010 010 010 210 210 210 210 410 510 610 810 910 910 9110111114114115118118118119119120120120121121123123124125126128128129129130130
1 32132132132132134136138140141
T able of Cont ent s
3

. . . . . . . . . . . . . . . . . . . . . . . . . . . . . . . . . . . . . . . . . . . . . . . . . . . . . . . . . . . . . . . . . . . . . . . . . . . . . . . . . . . . . . . . . . . . . . . . . . . . . . . . . . . . . . . . . . . . . . . . . . . . . . . . . . . . . . . . . . . . . . . . . . . . . . . . . . . . . . . . . . . . . . . . . . . . . . . . . . . . . . . . . . . . . . . . . . . . . . . . . . . . . . . . . . . . . . . . . . . . . . . . . . . . . . . . . . . . . . . . . . . . . . . . . . . . . . . . . . . . . . . . . . . . . . . . . . . . . . . .
. . . . . . . . . . . . . . . . . . . . . . . . . . . . . . . . . . . . . . . . . . . . . . . . . . . . . . . . . . . . . . . . . . . . . . . . . . . . . . . . . . . . . . . . . . . . . . . . . . . . . . . . . . . . . . . . . . . . . . . . . . . . . . . . . . . . . . . . . . . . . . . . . . . . . . . . . . . . . . . . . . . . . . . . . . . . . . . . . . . . . . . . . . . . . . . . . . . . . . . . . . . . . . . . . . . . . . . . . . . . . . . . . . . . . . . . . . . . . . . . . . . . . . . . . . . . . . . . . . . . . . . . . . . . . . . . . . . . . . . .
. . . . . . . . . . . . . . . . . . . . . . . . . . . . . . . . . . . . . . . . . . . . . . . . . . . . . . . . . . . . . . . . . . . . . . . . . . . . . . . . . . . . . . . . . . . . . . . . . . . . . . . . . . . . . . . . . . . . . . . . . . . . . . . . . . . . . . . . . . . . . . . . . . . . . . . . . . . . . . . . . . . . . . . . . . . . . . . . . . . . . . . . . . . . . . . . . . . . . . . . . . . . . . . . . . . . . . . . . . . . . . . . . . . . . . . . . . . . . . . . . . . . . . . . . . . . . . . . . . . . . . . . . . . . . . . . . . . . . . . .
. . . . . . . . . . . . . . . . . . . . . . . . . . . . . . . . . . . . . . . . . . . . . . . . . . . . . . . . . . . . . . . . . . . . . . . . . . . . . . . . . . . . . . . . . . . . . . . . . . . . . . . . . . . . . . . . . . . . . . . . . . . . . . . . . . . . . . . . . . . . . . . . . . . . . . . . . . . . . . . . . . . . . . . . . . . . . . . . . . . . . . . . . . . . . . . . . . . . . . . . . . . . . . . . . . . . . . . . . . . . . . . . . . . . . . . . . . . . . . . . . . . . . . . . . . . . . . . . . . . . . . . . . . . . . . . . . . . . . . . .
9 .3.6 . Co nfig uring Virtualizatio n Ho st SSH9 .4. Ad d ing a Red Hat Enterp rise Linux Ho st9 .5. Exp lanatio n o f Setting s and Co ntro ls in the New Ho st and Ed it Ho st Wind o ws9 .5.1. Ho st General Setting s Exp lained9 .5.2. Ho st Po wer Manag ement Setting s Exp lained9 .5.3. SPM Prio rity Setting s Exp lained9 .5.4. Ho st Co nso le Setting s Exp lained
Part IV. Environment Configurat ion
Chapt er 1 0 . Planning your Dat a Cent er10 .1. Wo rkflo w Pro g ress — Planning Yo ur Data Center10 .2. Planning Yo ur Data Center10 .3. Data Centers10 .3.1. Data Centers in Red Hat Enterp rise Virtualizatio n10 .3.2. Creating a New Data Center
10 .4. Clusters10 .4.1. Clusters in Red Hat Enterp rise Virtualizatio n10 .4.2. Creating a New Cluster10 .4.3. Enab ling G luster Pro cesses o n Red Hat Sto rag e No d es
Chapt er 1 1 . Net work Set up11.1. Wo rkflo w Pro g ress — Netwo rk Setup11.2. Netwo rking in Red Hat Enterp rise Virtualizatio n11.3. Lo g ical Netwo rks11.3.1. Creating a New Lo g ical Netwo rk in a Data Center o r Cluster11.3.2. Ed iting Ho st Netwo rk Interfaces and Ad d ing Lo g ical Netwo rks to Ho sts11.3.3. Exp lanatio n o f Setting s and Co ntro ls in the General Tab o f the New Lo g ical Netwo rk andEd it Lo g ical Netwo rk Wind o ws11.3.4. Ed iting a Lo g ical Netwo rk11.3.5. Desig nate a Sp ecific Traffic Typ e fo r a Lo g ical Netwo rk with the Manag e Netwo rks Wind o w11.3.6 . Exp lanatio n o f Setting s in the Manag e Netwo rks Wind o w11.3.7. Ad d ing Multip le VLANs to a Sing le Netwo rk Interface Using Lo g ical Netwo rks11.3.8 . Multip le Gateways
11.4. Using the Netwo rks Tab11.4.1. Imp o rting Netwo rks fro m External Pro vid ers11.4.2. Limitatio ns to Imp o rting Netwo rks fro m External Pro vid ers
11.5. Bo nd s11.5.1. Bo nd ing Lo g ic in Red Hat Enterp rise Virtualizatio n11.5.2. Bo nd ing Mo d es11.5.3. Creating a Bo nd Device Using the Ad ministratio n Po rtal11.5.4. Examp le Uses o f Custo m Bo nd ing Op tio ns with Ho st Interfaces
Chapt er 1 2 . St orage Set up12.1. Wo rkflo w Pro g ress — Sto rag e Setup12.2. Intro d uctio n to Sto rag e in Red Hat Enterp rise Virtualizatio n12.3. Ad d ing Sto rag e to the Enviro nment12.3.1. Ad d ing NFS Sto rag e12.3.1.1. Prep aring NFS Sto rag e12.3.1.2. Attaching NFS Sto rag e
12.3.2. Ad d ing p NFS Sto rag e12.3.2.1. Prep aring p NFS Sto rag e12.3.2.2. Attaching p NFS Sto rag e
12.3.3. Ad d ing iSCSI Sto rag e12.3.4. Ad d ing FCP Sto rag e
141142143143144146147
1 4 8
1 4 9149149150150151151151152153
1 55155155157157158
16 016 1
16 116 316 316 516 516 616 616 716 716 816 9170
1 7 217217217417417417617717717817918 1
Red Hat Ent erprise Virt ualizat ion 3.3 Inst allat ion Guide
4

. . . . . . . . . . . . . . . . . . . . . . . . . . . . . . . . . . . . . . . . . . . . . . . . . . . . . . . . . . . . . . . . . . . . . . . . . . . . . . . . . . . . . . . . . . . . . . . . . . . . . . . . . . . . . . . . . . . . . . . . . . . . . . . . . . . . . . . . . . . . . . . . . . . . . . . . . . . . . . . . . . . . . . . . . . . . . . . . . . . . . . . . . . . . . . . . . . . . . . . . . . . . . . . . . . . . . . . . . . . . . . . . . . . . . . . . . . . . . . . . . . . . . . . . . . . . . . . . . . . . . . . . . . . . . . . . . . . . . . . .
. . . . . . . . . . . . . . . . . . . . . . . . . . . . . . . . . . . . . . . . . . . . . . . . . . . . . . . . . . . . . . . . . . . . . . . . . . . . . . . . . . . . . . . . . . . . . . . . . . . . . . . . . . . . . . . . . . . . . . . . . . . . . . . . . . . . . . . . . . . . . . . . . . . . . . . . . . . . . . . . . . . . . . . . . . . . . . . . . . . . . . . . . . . . . . . . . . . . . . . . . . . . . . . . . . . . . . . . . . . . . . . . . . . . . . . . . . . . . . . . . . . . . . . . . . . . . . . . . . . . . . . . . . . . . . . . . . . . . . . .
12.3.5. Ad d ing Lo cal Sto rag e12.3.5.1. Prep aring Lo cal Sto rag e12.3.5.2. Ad d ing Lo cal Sto rag e
12.3.6 . Ad d ing POSIX Co mp liant File System Sto rag e12.3.6 .1. POSIX Co mp liant File System Sto rag e in Red Hat Enterp rise Virtualizatio n12.3.6 .2. Attaching POSIX Co mp liant File System Sto rag e
12.4. Po p ulating the ISO Do main12.4.1. Po p ulating the ISO Sto rag e Do main12.4.2. VirtIO and Guest To o l Imag e Files12.4.3. Up lo ad ing the VirtIO and Guest To o l Imag e Files to an ISO Sto rag e Do main
Log FilesA.1. Red Hat Enterp rise Virtualizatio n Manag er Installatio n Lo g FilesA.2. Red Hat Enterp rise Virtualizatio n Manag er Lo g FilesA.3. Red Hat Enterp rise Virtualizatio n Ho st Lo g FilesA.4. Remo tely Lo g g ing Ho st ActivitiesA.4.1. Setting Up a Virtualizatio n Ho st Lo g g ing ServerA.4.2. Co nfig uring Lo g g ingA.4.3. Co nfig uring Lo g g ing
Addit ional Ut ilit iesB.1. Do main Manag ement To o lB.1.1. What is the Do main Manag ement To o l?B.1.2. Syntax fo r the Do main Manag ement To o lB.1.3. Ad d ing Do mains to Co nfig uratio nB.1.4. Ed iting a Do main in the Co nfig uratio nB.1.5. Deleting a Do main fro m the Co nfig uratio nB.1.6 . Valid ating Do main Co nfig uratio nB.1.7. Lis ting Do mains in Co nfig uratio n
B.2. Co nfig uratio n To o lB.2.1. Co nfig uratio n To o lB.2.2. Syntax fo r eng ine-co nfig Co mmand
B.3. Imag e Up lo ad erB.3.1. Virtual Machine Imag e Up lo ad erB.3.2. Syntax fo r the eng ine-imag e-up lo ad er Co mmandB.3.3. Creating an OVF Archive That is Co mp atib le with the Imag e Up lo ad erB.3.4. Basic eng ine-imag e-up lo ad er Usag e Examp les
B.4. ISO Up lo ad erB.4.1. ISO Up lo ad erB.4.2. Syntax fo r eng ine-iso -up lo ad er Co mmandB.4.3. Usag e Examp lesB.4.3.1. Sp ecifying an NFS ServerB.4.3.2. Basic ISO Up lo ad er Usag e
B.5. Lo g Co llecto rB.5.1. Lo g Co llecto rB.5.2. Syntax fo r eng ine-lo g -co llecto r Co mmandB.5.3. Basic Lo g Co llecto r Usag e
B.6 . SPICE Pro xyB.6 .1. SPICE Pro xy OverviewB.6 .2. SPICE Pro xy Machine SetupB.6 .3. Turning o n SPICE Pro xyB.6 .4. Turning Off a SPICE Pro xy
B.7. Sq uid Pro xyB.7.1. Install ing and Co nfig uring a Sq uid Pro xy
18 318 318 418 518 518 618 718 718 818 8
1 9 019 019 019 119 119 119 219 3
1 9 519 519 519 519 719 819 819 920 020 020 020 120 220 220 220 420 520 520 620 620 820 820 820 920 920 9213213213214214215216216
T able of Cont ent s
5

. . . . . . . . . . . . . . . . . . . . . . . . . . . . . . . . . . . . . . . . . . . . . . . . . . . . . . . . . . . . . . . . . . . . . . . . . . . . . . . . . . . . . . . . . . . . . . . . . . . . . . . . . . . . . . . . . . . . . . . . . . . . . . . . . . . . . . . . . . . . . . . . . . . . . . . . . . . . . . . . . . . . . . . . . . . . . . . . . . . . . . . . . . . . . . . . . . . . . . . . . . . . . . . . . . . . . . . . . . . . . . . . . . . . . . . . . . . . . . . . . . . . . . . . . . . . . . . . . . . . . . . . . . . . . . . . . . . . . . . .
B.7.1. Install ing and Co nfig uring a Sq uid Pro xy
Revision Hist ory
216
2 2 1
Red Hat Ent erprise Virt ualizat ion 3.3 Inst allat ion Guide
6

Preface
1. Document Convent ions
This manual uses several conventions to highlight certain words and phrases and draw attention tospecific pieces of information.
1.1. T ypographic Convent ions
Four typographic conventions are used to call attention to specific words and phrases. Theseconventions, and the circumstances they apply to, are as follows.
Mono-spaced Bold
Used to highlight system input, including shell commands, file names and paths. Also used tohighlight keys and key combinations. For example:
To see the contents of the file my_next_bestselling_novel in your currentworking directory, enter the cat my_next_bestselling_novel command at theshell prompt and press Enter to execute the command.
The above includes a file name, a shell command and a key, all presented in mono-spaced bold andall distinguishable thanks to context.
Key combinations can be distinguished from an individual key by the plus sign that connects eachpart of a key combination. For example:
Press Enter to execute the command.
Press Ctrl+Alt+F2 to switch to a virtual terminal.
The first example highlights a particular key to press. The second example highlights a keycombination: a set of three keys pressed simultaneously.
If source code is discussed, class names, methods, functions, variable names and returned valuesmentioned within a paragraph will be presented as above, in mono-spaced bold . For example:
File-related classes include filesystem for file systems, file for files, and dir fordirectories. Each class has its own associated set of permissions.
Proport ional Bold
This denotes words or phrases encountered on a system, including application names; dialog-boxtext; labeled buttons; check-box and radio-button labels; menu titles and submenu titles. Forexample:
Choose System → Preferences → Mouse from the main menu bar to launchMouse Preferences . In the Buttons tab, select the Left-handed mouse checkbox and click Close to switch the primary mouse button from the left to the right(making the mouse suitable for use in the left hand).
To insert a special character into a gedit file, choose Applicat ions →Accessories → Character Map from the main menu bar. Next, choose Search →Find… from the Character Map menu bar, type the name of the character in the Search field and click Next. The character you sought will be highlighted in the
Preface
7

Character Table. Double-click this highlighted character to place it in the Text to copy field and then click the Copy button. Now switch back to your documentand choose Edit → Paste from the gedit menu bar.
The above text includes application names; system-wide menu names and items; application-specificmenu names; and buttons and text found within a GUI interface, all presented in proportional boldand all distinguishable by context.
Mono-spaced Bold Italic or Proportional Bold Italic
Whether mono-spaced bold or proportional bold, the addition of italics indicates replaceable orvariable text. Italics denotes text you do not input literally or displayed text that changes dependingon circumstance. For example:
To connect to a remote machine using ssh, type ssh [email protected] at ashell prompt. If the remote machine is example.com and your username on thatmachine is john, type ssh [email protected].
The mount -o remount file-system command remounts the named file system.For example, to remount the /home file system, the command is mount -o remount /home.
To see the version of a currently installed package, use the rpm -q packagecommand. It will return a result as follows: package-version-release.
Note the words in bold italics above: username, domain.name, file-system, package, version andrelease. Each word is a placeholder, either for text you enter when issuing a command or for textdisplayed by the system.
Aside from standard usage for presenting the title of a work, italics denotes the first use of a new andimportant term. For example:
Publican is a DocBook publishing system.
1.2. Pull-quote Convent ions
Terminal output and source code listings are set off visually from the surrounding text.
Output sent to a terminal is set in mono-spaced roman and presented thus:
books Desktop documentation drafts mss photos stuff svnbooks_tests Desktop1 downloads images notes scripts svgs
Source-code listings are also set in mono-spaced roman but add syntax highlighting as follows:
static int kvm_vm_ioctl_deassign_device(struct kvm *kvm, struct kvm_assigned_pci_dev *assigned_dev){ int r = 0; struct kvm_assigned_dev_kernel *match;
mutex_lock(&kvm->lock);
match = kvm_find_assigned_dev(&kvm->arch.assigned_dev_head, assigned_dev->assigned_dev_id); if (!match) { printk(KERN_INFO "%s: device hasn't been assigned
Red Hat Ent erprise Virt ualizat ion 3.3 Inst allat ion Guide
8

before, " "so cannot be deassigned\n", __func__); r = -EINVAL; goto out; }
kvm_deassign_device(kvm, match);
kvm_free_assigned_device(kvm, match);
out: mutex_unlock(&kvm->lock); return r;}
1.3. Notes and Warnings
Finally, we use three visual styles to draw attention to information that might otherwise be overlooked.
Note
Notes are tips, shortcuts or alternative approaches to the task at hand. Ignoring a note shouldhave no negative consequences, but you might miss out on a trick that makes your life easier.
Important
Important boxes detail things that are easily missed: configuration changes that only apply tothe current session, or services that need restarting before an update will apply. Ignoring abox labeled “ Important” will not cause data loss but may cause irritation and frustration.
Warning
Warnings should not be ignored. Ignoring warnings will most likely cause data loss.
2. Get t ing Help and Giving Feedback
2.1. Do You Need Help?
If you experience difficulty with a procedure described in this documentation, visit the Red HatCustomer Portal at http://access.redhat.com. Through the customer portal, you can:
search or browse through a knowledgebase of technical support articles about Red Hat products.
submit a support case to Red Hat Global Support Services (GSS).
access other product documentation.
Preface
9

Red Hat also hosts a large number of electronic mailing lists for discussion of Red Hat software andtechnology. You can find a list of publicly available mailing lists athttps://www.redhat.com/mailman/listinfo. Click on the name of any mailing list to subscribe to that listor to access the list archives.
2.2. We Need Feedback!
If you find a typographical error in this manual, or if you have thought of a way to make this manualbetter, we would love to hear from you! Please submit a report in Bugzilla: http://bugzilla.redhat.com/against the product Red Hat Enterprise Virtualiz at ion Manager.
When submitting a bug report, be sure to mention the manual's identifier: Guides-Install
If you have a suggestion for improving the documentation, try to be as specific as possible whendescribing it. If you have found an error, please include the section number and some of thesurrounding text so we can find it easily.
Red Hat Ent erprise Virt ualizat ion 3.3 Inst allat ion Guide
10

Part I. Before you Begin
Part I. Before you Begin
11

Chapter 1. Introduction
1.1. Red Hat Enterprise Virtualizat ion Architecture
A Red Hat Enterprise Virtualization environment consists of:
Virtual machine hosts using the Kernel-based Virtual Machine (KVM).
Agents and tools running on hosts including VDSM, QEMU, and libvirt. These tools providelocal management for virtual machines, networks and storage.
The Red Hat Enterprise Virtualiz at ion Manager; a centralized management platform for theRed Hat Enterprise Virtualization environment. It provides a graphical interface where you canview, provision and manage resources.
Storage domains to hold virtual resources like virtual machines, templates, ISOs.
A database to track the state of and changes to the environment.
Access to an external Directory Server to provide users and authentication.
Networking to link the environment together. This includes physical network links, and logicalnetworks.
Figure 1.1. Red Hat Enterprise Virtualiz at ion Plat form Overview
Red Hat Ent erprise Virt ualizat ion 3.3 Inst allat ion Guide
12

Report a bug
1.2. Red Hat Enterprise Virtualizat ion System Components
The Red Hat Enterprise Virtualization version 3.3 environment consists of one or more hosts (eitherRed Hat Enterprise Linux 6.5 or later hosts or Red Hat Enterprise Virtualization Hypervisor 6.5 or laterhosts) and at least one Red Hat Enterprise Virtualization Manager.
Hosts run virtual machines using KVM (Kernel-based Virtual Machine) virtualization technology.
The Red Hat Enterprise Virtualization Manager runs on a Red Hat Enterprise Linux 6 server andprovides interfaces for controlling the Red Hat Enterprise Virtualization environment. It managesvirtual machine and storage provisioning, connection protocols, user sessions, virtual machineimages, and high availability virtual machines.
The Red Hat Enterprise Virtualization Manager is accessed through the Administration Portal using aweb browser.
Report a bug
1.3. Red Hat Enterprise Virtualizat ion Resources
The components of the Red Hat Enterprise Virtualization environment fall into two categories:physical resources, and logical resources. Physical resources are physical objects, such as hostand storage servers. Logical resources are nonphysical groupings and processes, such as logicalnetworks and virtual machine templates.
Data Center - A data center is the highest level container for all physical and logical resourceswithin a managed virtual environment. It is a collection of clusters, virtual machines, storage, andnetworks.
Clusters - A cluster is a set of physical hosts that are treated as a resource pool for virtualmachines. Hosts in a cluster share the same network infrastructure and storage. They form amigration domain within which virtual machines can be moved from host to host.
Logical Networks - A logical network is a logical representation of a physical network. Logicalnetworks group network traffic and communication between the Manager, hosts, storage, andvirtual machines.
Hosts - A host is a physical server that runs one or more virtual machines. Hosts are groupedinto clusters. Virtual machines can be migrated from one host to another within a cluster.
Storage Pool - The storage pool is a logical entity that contains a standalone image repositoryof a certain type, either iSCSI, Fibre Channel, NFS, or POSIX. Each storage pool can containseveral domains, for storing virtual machine disk images, ISO images, and for the import andexport of virtual machine images.
Virtual Machines - A virtual machine is a virtual desktop or virtual server containing anoperating system and a set of applications. Multiple identical virtual machines can be created in aPool . Virtual machines are created, managed, or deleted by power users and accessed by users.
Template - A template is a model virtual machine with predefined settings. A virtual machine thatis based on a particular template acquires the settings of the template. Using templates is thequickest way of creating a large number of virtual machines in a single step.
Chapt er 1 . Int roduct ion
13

Virtual Machine Pool - A virtual machine pool is a group of identical virtual machines that areavailable on demand by each group member. Virtual machine pools can be set up for differentpurposes. For example, one pool can be for the Marketing department, another for Research andDevelopment, and so on.
Snapshot - A snapshot is a view of a virtual machine's operating system and all its applicationsat a point in time. It can be used to save the settings of a virtual machine before an upgrade orinstalling new applications. In case of problems, a snapshot can be used to restore the virtualmachine to its original state.
User Types - Red Hat Enterprise Virtualization supports multiple levels of administrators andusers with distinct levels of permissions. System administrators can manage objects of thephysical infrastructure, such as data centers, hosts, and storage. Users access virtual machinesavailable from a virtual machine pool or standalone virtual machines made accessible by anadministrator.
Events and Monitors - Alerts, warnings, and other notices about activities help theadministrator to monitor the performance and status of resources.
Reports - A range of reports either from the reports module based on JasperReports, or from thedata warehouse. Preconfigured or ad hoc reports can be generated from the reports module.Users can also generate reports using any query tool that supports SQL from a data warehousethat collects monitoring data for hosts, virtual machines, and storage.
Report a bug
1.4 . Red Hat Enterprise Virtualizat ion API Support Statement
Red Hat Enterprise Virtualization exposes a number of interfaces for interacting with the componentsof the virtualization environment. These interfaces are in addition to the user interfaces provided bythe Red Hat Enterprise Virtualization Manager Administration, User, and Reports Portals. Many ofthese interfaces are fully supported. Some however are supported only for read access or only whenyour use of them has been explicitly requested by Red Hat Support.
Supported In terfaces for Read and Write Access
Direct interaction with these interfaces is supported and encouraged for both read and write access:
Representat ional State Transfer (REST) API
The REST API exposed by the Red Hat Enterprise Virtualization Manager is a fullysupported interface for interacting with Red Hat Enterprise Virtualization Manager.
Sof tware Development Kit (SDK)
The SDK provided by the rhevm-sdk package is a fully supported interface for interactingwith Red Hat Enterprise Virtualization Manager.
Command Line Shell
The command line shell provided by the rhevm-cli package is a fully supported interface forinteracting with the Red Hat Enterprise Virtualization Manager.
VDSM Hooks
Red Hat Ent erprise Virt ualizat ion 3.3 Inst allat ion Guide
14

The creation and use of VDSM hooks to trigger modification of virtual machines based oncustom properties specified in the Administration Portal is supported on Red Hat EnterpriseLinux virtualization hosts. The use of VDSM Hooks on virtualization hosts running Red HatEnterprise Virtualization Hypervisor is not currently supported.
Supported In terfaces for Read Access
Direct interaction with these interfaces is supported and encouraged only for read access. Use ofthese interfaces for write access is not supported unless explicitly requested by Red Hat Support:
Red Hat Enterprise Virtualiz at ion Manager History Database
Read access to the Red Hat Enterprise Virtualization Manager history database using thedatabase views specified in the Administration Guide is supported. Write access is notsupported.
Libvirt on Virtualiz at ion Hosts
Read access to libvirt using the virsh -r command is a supported method ofinteracting with virtualization hosts. Write access is not supported.
Unsupported In terfaces
Direct interaction with these interfaces is not supported unless your use of them is explicitly requestedby Red Hat Support:
The vdsClient Command
Use of the vdsClient command to interact with virtualization hosts is not supportedunless explicitly requested by Red Hat Support.
Red Hat Enterprise Virtualiz at ion Hypervisor Console
Console access to Red Hat Enterprise Virtualization Hypervisor outside of the provided textuser interface for configuration is not supported unless explicitly requested by Red HatSupport.
Red Hat Enterprise Virtualiz at ion Manager Database
Direct access to and manipulation of the Red Hat Enterprise Virtualization Managerdatabase is not supported unless explicitly requested by Red Hat Support.
Important
Red Hat Support will not debug user created scripts or hooks except where it can bedemonstrated that there is an issue with the interface being used rather than the user createdscript itself. For more general information about Red Hat support policies seehttps://access.redhat.com/support/offerings/production/soc.html.
Report a bug
1.5. Int roduct ion to Virtual Machines
A virtual machine is a software implementation of a computer. The Red Hat Enterprise Virtualizationenvironment enables you to create virtual desktops and virtual servers.
Chapt er 1 . Int roduct ion
15

Virtual machines consolidate computing tasks and workloads. In traditional computingenvironments, workloads usually run on individually administered and upgraded servers. Virtualmachines reduce the amount of hardware and administration required to run the same computingtasks and workloads.
Report a bug
1.6. Supported Virtual Machine Operat ing Systems
The operating systems that can be virtualized as guest operating systems in Red Hat EnterpriseVirtualization are as follows:
Table 1.1. Operat ing systems that can be used as guest operat ing systems
Operat ing System Architecture SPICE supportRed Hat Enterprise Linux 3 32-bit, 64-bit YesRed Hat Enterprise Linux 4 32-bit, 64-bit YesRed Hat Enterprise Linux 5 32-bit, 64-bit YesRed Hat Enterprise Linux 6 32-bit, 64-bit YesSUSE Linux Enterprise Server 10 (select Other Linux forthe guest type in the user interface)
32-bit, 64-bit No
SUSE Linux Enterprise Server 11 (SPICE drivers (QXL) arenot supplied by Red Hat. However, the distribution'svendor may provide spice drivers as part of theirdistribution.)
32-bit, 64-bit No
Ubuntu 12.04 (Precise Pangolin LTS) 32-bit, 64-bit YesUbuntu 12.10 (Quantal Quetzal) 32-bit, 64-bit YesUbuntu 13.04 (Raring Ringtail) 32-bit, 64-bit NoUbuntu 13.10 (Saucy Salamander) 32-bit, 64-bit YesWindows XP Service Pack 3 and newer 32-bit YesWindows 7 32-bit, 64-bit YesWindows 8 32-bit, 64-bit NoWindows Server 2003 Service Pack 2 and newer 32-bit, 64-bit YesWindows Server 2003 R2 32-bit, 64-bit YesWindows Server 2008 32-bit, 64-bit YesWindows Server 2008 R2 64-bit YesWindows Server 2012 64-bit NoWindows Server 2012 R2 64-bit No
Of the operating systems that can be virtualized as guest operating systems in Red Hat EnterpriseVirtualization, the operating systems that are supported by Global Support Services are as follows:
Table 1.2. Guest operat ing systems that are supported by G lobal Support Services
Operat ing System ArchitectureRed Hat Enterprise Linux 3 32-bit, 64-bitRed Hat Enterprise Linux 4 32-bit, 64-bitRed Hat Enterprise Linux 5 32-bit, 64-bitRed Hat Enterprise Linux 6 32-bit, 64-bitSUSE Linux Enterprise Server 10 (select Other Linux for the guest typein the user interface)
32-bit, 64-bit
Red Hat Ent erprise Virt ualizat ion 3.3 Inst allat ion Guide
16

SUSE Linux Enterprise Server 11 (SPICE drivers (QXL) are not suppliedby Red Hat. However, the distribution's vendor may provide spice driversas part of their distribution.)
32-bit, 64-bit
Windows XP Service Pack 3 and newer 32-bitWindows 7 32-bit, 64-bitWindows 8 32-bit, 64-bitWindows Server 2003 Service Pack 2 and newer 32-bit, 64-bitWindows Server 2003 R2 32-bit, 64-bitWindows Server 2008 32-bit, 64-bitWindows Server 2008 R2 64-bitWindows Server 2012 64-bitWindows Server 2012 R2 64-bit
Operat ing System Architecture
Remote Desktop Protocol (RDP) is the default connection protocol for accessing Windows 8 andWindows 2012 guests from the user portal as Microsoft introduced changes to the Windows DisplayDriver Model that prevent SPICE from performing optimally.
Note
While Red Hat Enterprise Linux 3 and Red Hat Enterprise Linux 4 are supported, virtualmachines running the 32-bit version of these operating systems cannot be shut downgracefully from the administration portal because there is no ACPI support in the 32-bit x86kernel. To terminate virtual machines running the 32-bit version of Red Hat Enterprise Linux 3or Red Hat Enterprise Linux 4, right-click the virtual machine and select the Power Offoption.
Note
See http://www.redhat.com/resourcelibrary/articles/enterprise-linux-virtualization-support forinformation about up-to-date guest support.
Report a bug
1.7. Red Hat Enterprise Virtualizat ion Installat ion Workflow
Red Hat Enterprise Virtualization requires installation and configuration of several components tocreate a functioning virtualization environment. You must install and configure each component inthe order shown in this checklist:
Chapt er 1 . Int roduct ion
17
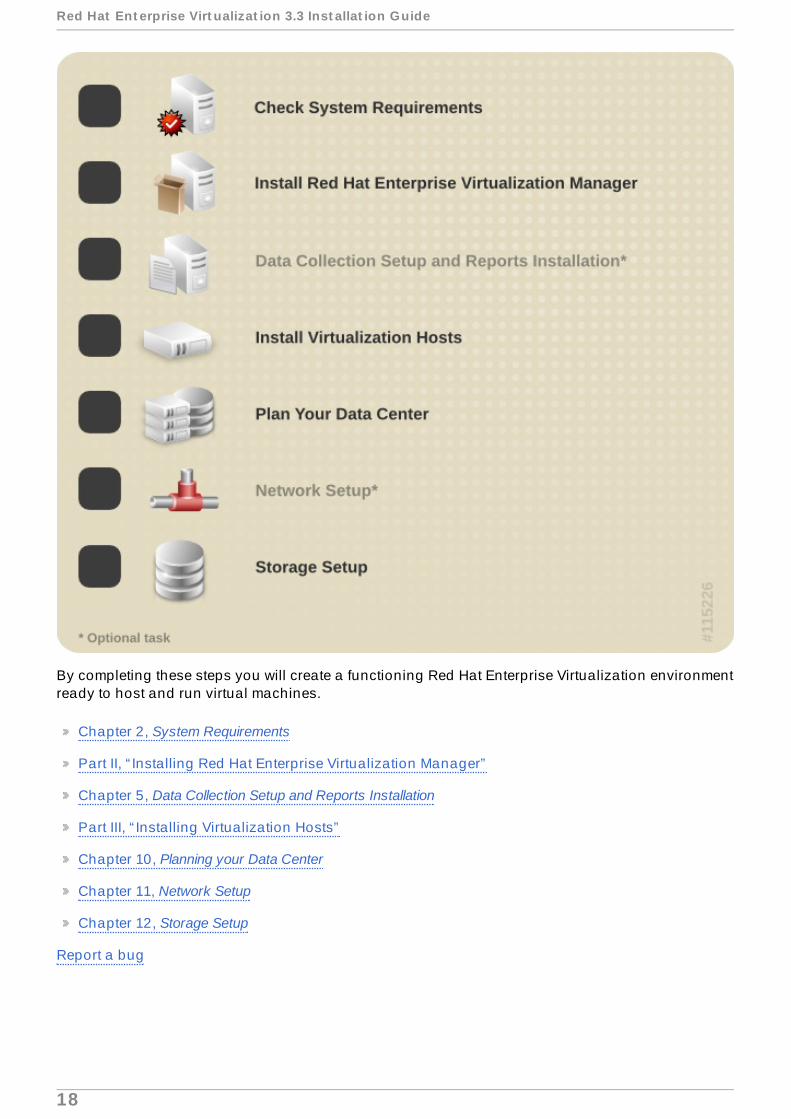
By completing these steps you will create a functioning Red Hat Enterprise Virtualization environmentready to host and run virtual machines.
Chapter 2, System Requirements
Part II, “ Installing Red Hat Enterprise Virtualization Manager”
Chapter 5, Data Collection Setup and Reports Installation
Part III, “ Installing Virtualization Hosts”
Chapter 10, Planning your Data Center
Chapter 11, Network Setup
Chapter 12, Storage Setup
Report a bug
Red Hat Ent erprise Virt ualizat ion 3.3 Inst allat ion Guide
18
Chapter 2. System Requirements
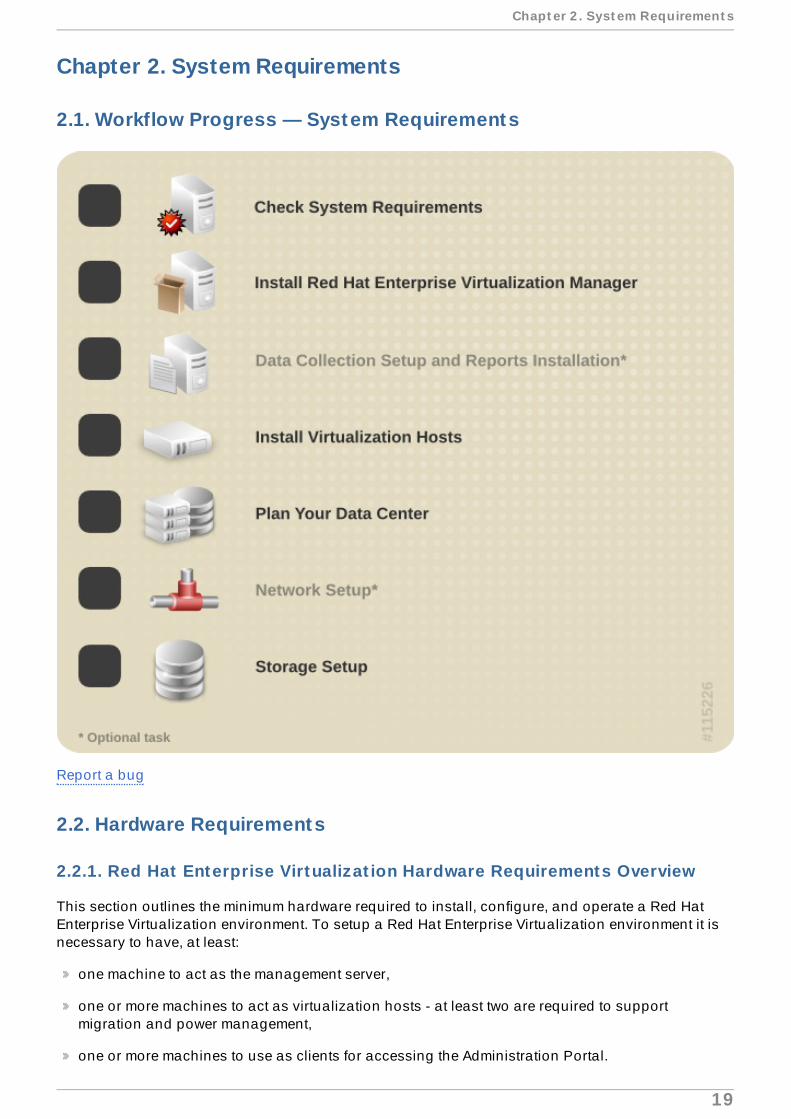
2.1. Workflow Progress — System Requirements
Report a bug
2.2. Hardware Requirements
2.2.1. Red Hat Enterprise Virtualizat ion Hardware Requirements Overview
This section outlines the minimum hardware required to install, configure, and operate a Red HatEnterprise Virtualization environment. To setup a Red Hat Enterprise Virtualization environment it isnecessary to have, at least:
one machine to act as the management server,
one or more machines to act as virtualization hosts - at least two are required to supportmigration and power management,
one or more machines to use as clients for accessing the Administration Portal.
Chapt er 2 . Syst em Requirement s
19

storage infrastructure provided by NFS, POSIX, iSCSI, SAN, or local storage.
The hardware required for each of these systems is further outlined in the following sections. The RedHat Enterprise Virtualization environment also requires storage infrastructure that is accessible to thevirtualization hosts. Storage infrastructure must be accessible using NFS, iSCSI, FC, or locallyattached to virtualization hosts. The use of other POSIX compliant filesystems is also supported.
See Also:
Section 2.2.2, “Red Hat Enterprise Virtualization Manager Hardware Requirements”
Section 2.2.3, “Virtualization Host Hardware Requirements”
Report a bug
2.2.2. Red Hat Enterprise Virtualizat ion Manager Hardware Requirements
The minimum and recommended hardware requirements outlined here are based on a typical smallto medium sized installation. The exact requirements vary between deployments based on sizing andload. Please use these recommendations as a guide only.
Minimum
A dual core CPU.
4 GB of available system RAM that is not being consumed by existing processes.
25 GB of locally accessible, writeable, disk space.
1 Network Interface Card (NIC) with bandwidth of at least 1 Gbps.
Recommended
A quad core CPU or multiple dual core CPUs.
16 GB of system RAM.
50 GB of locally accessible, writeable, disk space.
1 Network Interface Card (NIC) with bandwidth of at least 1 Gbps.
The Red Hat Enterprise Virtualization Manager runs on Red Hat Enterprise Linux. To confirm whetheror not specific hardware items are certified for use with Red Hat Enterprise Linux refer tohttp://www.redhat.com/rhel/compatibility/hardware/.
Report a bug
2.2.3. Virtualizat ion Host Hardware Requirements
2.2 .3.1 . Virt ualizat io n Ho st Hardware Requirement s Overview
Red Hat Enterprise Virtualization Hypervisors and Red Hat Enterprise Linux Hosts have a number ofhardware requirements and supported limits.
Section 2.2.3.2, “Virtualization Host CPU Requirements”
Section 2.2.3.3, “Virtualization Host RAM Requirements”
Red Hat Ent erprise Virt ualizat ion 3.3 Inst allat ion Guide
20

Section 2.2.3.4, “Virtualization Host Storage Requirements”
Section 2.2.3.5, “Virtualization Host PCI Device Requirements”
Report a bug
2.2 .3.2 . Virt ualizat io n Ho st CPU Requirement s
Red Hat Enterprise Virtualization supports the use of these CPU models in virtualization hosts:
AMD Opteron G1
AMD Opteron G2
AMD Opteron G3
AMD Opteron G4
AMD Opteron G5
Intel Conroe
Intel Penryn
Intel Nehalem
Intel Westmere
Intel Sandybridge
Intel Haswell
All CPUs must have support for the Intel® 64 or AMD64 CPU extensions, and the AMD-V™ or IntelVT® hardware virtualization extensions enabled. Support for the No eXecute flag (NX) is alsorequired. To check that your processor supports the required flags, and that they are enabled:
At the Red Hat Enterprise Linux or Red Hat Enterprise Virtualization Hypervisor boot screen pressany key and select the Boot or Boot with serial console entry from the list. Press Tab toedit the kernel parameters for the selected option. After the last kernel parameter listed ensure thereis a Space and append the rescue parameter.
Press Enter to boot into rescue mode.
At the prompt which appears, determine that your processor has the required extensions and thatthey are enabled by running this command:
# grep -E 'svm|vmx' /proc/cpuinfo | grep nx
If any output is shown, the processor is hardware virtualization capable. If no output is shown it isstill possible that your processor supports hardware virtualization. In some circumstancesmanufacturers disable the virtualization extensions in the BIOS. Where you believe this to be thecase consult the system's BIOS and the motherboard manual provided by the manufacturer.
As an additional check, verify that the kvm modules are loaded in the kernel:
# lsmod | grep kvm
If the output includes kvm_intel or kvm_amd then the kvm hardware virtualization modules areloaded and your system meets requirements.
Chapt er 2 . Syst em Requirement s
21

Report a bug
2.2 .3.3. Virt ualizat io n Ho st RAM Requirement s
It is recommended that virtualization hosts have at least 2 GB of RAM. The amount of RAM requiredvaries depending on:
guest operating system requirements,
guest application requirements, and
memory activity and usage of guests.
The fact that KVM is able to over-commit physical RAM for virtualized guests must also be taken intoaccount. This allows provisioning of guests with RAM requirements greater than physically presenton the basis where not all guests will be at peak load concurrently. KVM does this by only allocatingRAM for guests as required and shifting underutilized guests into swap.
A maximum of 2 TB of RAM per virtualization host is currently supported.
Report a bug
2.2 .3.4 . Virt ualizat io n Ho st St o rage Requirement s
Virtualization hosts require local storage to store configuration, logs, kernel dumps, and for use asswap space. The minimum storage requirements of the Red Hat Enterprise Virtualization Hypervisorare documented in this section. The storage requirements for Red Hat Enterprise Linux hosts varybased on the amount of disk space used by their existing configuration but are expected to begreater than those of the Red Hat Enterprise Virtualization Hypervisor.
It is recommended that each virtualization host has at least 2 GB of internal storage. The minimumsupported internal storage for each Hypervisor is the total of that required to provision the followingpartitions:
The root partitions require at least 512 MB of storage.
The configuration partition requires at least 8 MB of storage.
The recommended minimum size of the logging partition is 2048 MB.
The data partition requires at least 256 MB of storage. Use of a smaller data partition may preventfuture upgrades of the Hypervisor from the Red Hat Enterprise Virtualization Manager. By defaultall disk space remaining after allocation of swap space will be allocated to the data partition.
The swap partition requires at least 8 MB of storage. The recommended size of the swap partitionvaries depending on both the system the Hypervisor is being installed upon and the anticipatedlevel of overcommit for the environment. Overcommit allows the Red Hat Enterprise Virtualizationenvironment to present more RAM to guests than is actually physically present. The defaultovercommit ratio is 0.5.
The recommended size of the swap partition can be determined by:
Multiplying the amount of system RAM by the expected overcommit ratio, and adding
2 GB of swap space for systems with 4 GB of RAM or less, or
4 GB of swap space for systems with between 4 GB and 16 GB of RAM, or
8 GB of swap space for systems with between 16 GB and 64 GB of RAM, or
Red Hat Ent erprise Virt ualizat ion 3.3 Inst allat ion Guide
22

16 GB of swap space for systems with between 64 GB and 256 GB of RAM.
Example 2.1. Calculat ing Swap Part it ion Siz e
For a system with 8 GB of RAM this means the formula for determining the amount of swapspace to allocate is:
(8 GB x 0.5) + 4 GB = 8 GB
Important
By default the Red Hat Enterprise Virtualization Hypervisor defines a swap partition sizedusing the recommended formula. An overcommit ratio of 0.5 is used for this calculation. Forsome systems the result of this calculation may be a swap partition that requires more free diskspace than is available at installation. Where this is the case Hypervisor installation will fail.
If you encounter this issue, manually set the sizes for the Hypervisor disk partitions using the storage_vol boot parameter.
Example 2.2. Manually Set t ing Swap Part it ion Siz e
In this example the storage_vol boot parameter is used to set a swap partition size of4096 MB. Note that no sizes are specified for the other partitions, allowing the Hypervisor touse the default sizes.
storage_vol=:4096::::
Important
The Red Hat Enterprise Virtualization Hypervisor does not support installation on fakeraiddevices. Where a fakeraid device is present it must be reconfigured such that it no longerruns in RAID mode.
1. Access the RAID controller's BIOS and remove all logical drives from it.2. Change controller mode to be non-RAID. This may be referred to as compatibility or
JBOD mode.
Access the manufacturer provided documentation for further information related to the specificdevice in use.
Report a bug
2.2 .3.5 . Virt ualizat io n Ho st PCI Device Requirement s
Virtualization hosts must have at least one network interface with a minimum bandwidth of 1 Gbps. Itis recommended that each virtualization host have two network interfaces with a minimum bandwidthof 1 Gbps to support network intensive activity, including virtual machine migration.
Chapt er 2 . Syst em Requirement s
23

Report a bug
2.3. Software Requirements
2.3.1. Red Hat Enterprise Virtualizat ion Operat ing System Requirements
Red Hat Enterprise Virtualization Manager requires Red Hat Enterprise Linux 6.5 Server. Completesuccessful installation of the operating system prior to commencing installation of the Red HatEnterprise Virtualization Manager.
Important
See the Red Hat Enterprise Linux 6 Security Guide for security hardening information foryour Red Hat Enterprise Linux Servers.
Virtualization hosts must run either:
Red Hat Enterprise Virtualization Hypervisor 6.5
Red Hat Enterprise Linux 6.5
Important
Red Hat Enterprise Virtualization Manager must be installed on a base installation of Red HatEnterprise Linux. Do not install any additional packages after the base installation, as theymay cause dependency issues when attempting to install the packages required by theManager.
Report a bug
2.3.2. Red Hat Enterprise Virtualizat ion Manager Client Requirements
Use a client with a supported web browser to access the Administration Portal, and the User Portal.The portals support the following clients and browsers:
Mozilla Firefox 17, and later, on Red Hat Enterprise Linux is required to access both portals.
Internet Explorer 8, and later, on Microsoft Windows is required to access the User Portal. Use thedesktop version, not the touchscreen version of Internet Explorer 10.
Internet Explorer 9, and later, on Microsoft Windows is required to access the AdministrationPortal. Use the desktop version, not the touchscreen version of Internet Explorer 10.
Install a supported SPICE client to access virtual machine consoles. Supported SPICE clients areavailable on the following operating systems:
Red Hat Enterprise Linux 5.8+ (i386, AMD64 and Intel 64)
Red Hat Enterprise Linux 6.2+ (i386, AMD64 and Intel 64)
Red Hat Enterprise Linux 6.5+ (i386, AMD64 and Intel 64)
Red Hat Ent erprise Virt ualizat ion 3.3 Inst allat ion Guide
24
Windows XP
Windows XP Embedded (XPe)
Windows 7 (x86, AMD64 and Intel 64)
Windows 8 (x86, AMD64 and Intel 64)
Windows Embedded Standard 7
Windows 2008/R2 (x86, AMD64 and Intel 64)
Windows Embedded Standard 2009
Red Hat Enterprise Virtualization Certified Linux-based thin clients
Note
Check the Red Hat Enterprise Virtualization Manager Release Notes to see which SPICEfeatures your client supports.
When you access the portal(s) using Mozilla Firefox the SPICE client is provided by the spice-xpipackage, which you must manually install using yum.
When you access the portal(s) using Internet Explorer the SPICE ActiveX control will automatically bedownloaded and installed.
Report a bug
2.3.3. Red Hat Enterprise Virtualizat ion Manager Software Channels
Installation of the Red Hat Enterprise Virtualization Manager requires that the system be subscribedto a number of Red Hat Network channels in addition to those required for Red Hat Enterprise Linux.These channels are used to retrieve both the initial installation packages and later updates as theybecome available.
Note
See the Red Hat Enterprise Virtualization Manager Release Notes for specific channel namescurrent to your system.
You must ensure that you have entitlements to the required channels listed here before proceedingwith installation.
Cert if icate-based Red Hat Network
The Red Hat Enterprise Linux Server entitlement, provides Red Hat Enterprise Linux.
The Red Hat Enterprise Virtualization entitlement, provides Red Hat EnterpriseVirtualization Manager.
The Red Hat JBoss Enterprise Application Platform entitlement, provides thesupported release of the application platform on which the Manager runs.
Chapt er 2 . Syst em Requirement s
25
Red Hat Network Classic
The Red Hat Enterprise Linux Server (v. 6 for 64-bit x86_64) channel, alsoreferred to as rhel-x86_64-server-6 , provides Red Hat Enterprise Linux 6 Server. TheChannel Entitlement name for this channel is Red Hat Enterprise Linux Server (v. 6).
The RHEL Server Supplementary (v. 6 64-bit x86_64) channel, also referred to as rhel-x86_64-server-supplementary-6 , provides the virtio-win package. The virtio-winpackage provides the Windows VirtIO drivers for use in virtual machines. The Channel EntitlementName for the supplementary channel is Red Hat Enterprise Linux Server Supplementary (v. 6).
The Red Hat Enterprise Virtualization Manager (v3.3 x86_64) channel, alsoreferred to as rhel-x86_64-server-6-rhevm-3.3, provides Red Hat Enterprise VirtualizationManager. The Channel Entitlement Name for this channel is Red Hat Enterprise Virtualization Manager (v3).
The Red Hat JBoss EAP (v 6) for 6Server x86_64 channel, also referred to as jbappplatform-6-x86_64-server-6-rpm, provides the supported release of the applicationplatform on which the Manager runs. The Channel Entitlement Name for this channel is Red Hat JBoss Enterprise Application Platform (v 4, zip format).
See Also:
Section 3.3, “Subscribing to the Red Hat Enterprise Virtualization Channels”
Report a bug
2.3.4 . Directory Services
2.3.4 .1 . Abo ut Direct o ry Services
The term directory service refers to the collection of software, hardware, and processes that storeinformation about an enterprise, subscribers, or both, and make that information available to users.A directory service consists of at least one directory server and at least one directory client program.Client programs can access names, phone numbers, addresses, and other data stored in thedirectory service.
See Also:
Section 2.3.4.2, “Directory Services Support in Red Hat Enterprise Virtualization”
Report a bug
2.3.4 .2 . Direct o ry Services Suppo rt in Red Hat Ent erprise Virt ualizat io n
During installation Red Hat Enterprise Virtualization Manager creates its own internal administrationuser, admin. This account is intended for use when initially configuring the environment, and fortroubleshooting. To add other users to Red Hat Enterprise Virtualization you will need to attach adirectory server to the Manager using the Domain Management Tool, engine-manage-domains.
Once at least one directory server has been attached to the Manager you will be able to add usersthat exist in the directory server and assign roles to them using the Administration Portal. Users willbe identified by their User Principal Name (UPN) of the form user@domain. Attachment of more thanone directory server to the Manager is also supported.
The directory servers supported for use with Red Hat Enterprise Virtualization 3.3 are:
Red Hat Ent erprise Virt ualizat ion 3.3 Inst allat ion Guide
26

Active Directory
Identity Management (IdM)
Red Hat Directory Server 9 (RHDS 9)
OpenLDAP
You must ensure that the correct DNS records exist for your directory server. In particular you mustensure that the DNS records for the directory server include:
A valid pointer record (PTR) for the directory server's reverse look-up address.
A valid service record (SRV) for LDAP over TCP port 389 .
A valid service record (SRV) for Kerberos over TCP port 88.
A valid service record (SRV) for Kerberos over UDP port 88.
If these records do not exist in DNS then you will be unable to add the domain to the Red HatEnterprise Virtualization Manager configuration using engine-manage-domains.
For more detailed information on installing and configuring a supported directory server, see thevendor's documentation:
Active Directory - http://technet.microsoft.com/en-us/windowsserver/dd448614.
Identity Management (IdM) - http://docs.redhat.com/docs/en-US/Red_Hat_Enterprise_Linux/6/html/Identity_Management_Guide/index.html
Red Hat Directory Server (RHDS) - http://docs.redhat.com/docs/en-US/Red_Hat_Directory_Server/index.html
OpenLDAP - http://www.openldap.org/doc/
Important
A user must be created in the directory server specifically for use as the Red Hat EnterpriseVirtualization administrative user. Do not use the administrative user for the directory server asthe Red Hat Enterprise Virtualization administrative user.
Important
It is not possible to install Red Hat Enterprise Virtualization Manager (rhevm) and IdM (ipa-server) on the same system. IdM is incompatible with the mod_ssl package, which is requiredby Red Hat Enterprise Virtualization Manager.
Chapt er 2 . Syst em Requirement s
27

Important
If you are using Active Directory as your directory server, and you wish to use sysprep in thecreation of Templates and Virtual Machines, then the Red Hat Enterprise Virtualizationadministrative user must be delegated control over the Domain to:
Join a computer to the domainModify the membership of a group
For information on creation of user accounts in Active Directory, seehttp://technet.microsoft.com/en-us/library/cc732336.aspx.
For information on delegation of control in Active Directory, seehttp://technet.microsoft.com/en-us/library/cc732524.aspx.
Note
Red Hat Enterprise Virtualization Manager uses Kerberos to authenticate with directoryservers. RHDS does not provide native support for Kerberos. If you are using RHDS as yourdirectory server then you must ensure that the directory server is made a service within a validKerberos domain. To do this you will need to perform these steps while referring to the relevantdirectory server documentation:
Configure the memberOf plug-in for RHDS to allow group membership. In particular ensurethat the value of the memberofgroupattr attribute of the memberOf plug-in is set to uniqueMember. In OpenLDAP, the memberOf functionality is not called a "plugin" . It iscalled an "overlay" and requires no configuration after installation.
Consult the Red Hat Directory Server 9.0 Plug-in Guide for more information on configuringthe memberOf plug-in.
Define the directory server as a service of the form ldap/hostname@REALMNAME in theKerberos realm. Replace hostname with the fully qualified domain name associated with thedirectory server and REALMNAME with the fully qualified Kerberos realm name. TheKerberos realm name must be specified in capital letters.Generate a keytab file for the directory server in the Kerberos realm. The keytab filecontains pairs of Kerberos principals and their associated encrypted keys. These keys willallow the directory server to authenticate itself with the Kerberos realm.
Consult the documentation for your Kerberos principle for more information on generatinga keytab file.
Install the keytab file on the directory server. Then configure RHDS to recognize the keytab file and accept Kerberos authentication using GSSAPI.
Consult the Red Hat Directory Server 9.0 Administration Guide for more information onconfiguring RHDS to use an external keytab file.
Test the configuration on the directory server by using the kinit command to authenticateas a user defined in the Kerberos realm. Once authenticated run the ldapsearchcommand against the directory server. Use the -Y GSSAPI parameters to ensure the use ofKerberos for authentication.
Red Hat Ent erprise Virt ualizat ion 3.3 Inst allat ion Guide
28

See Also:
Section B.1, “Domain Management Tool”
Section 2.3.5.3, “Directory Server Firewall Requirements”
Report a bug
2.3.5. Firewall Configurat ion
2.3.5 .1 . Red Hat Ent erprise Virt ualizat io n Manager Firewall Requirement s
The Red Hat Enterprise Virtualization Manager requires that a number of ports be opened to allownetwork traffic through the system's firewall. The engine-setup script is able to configure thefirewall automatically, but this will overwrite any pre-existing firewall configuration.
Where an existing firewall configuration exists the firewall rules required by the Manager must insteadbe manually inserted into it. The engine-setup command will save a list of the iptables rulesrequired in the /usr/share/ovirt-engine/conf/iptables.example file.
The firewall configuration documented here assumes a default configuration. Where non-defaultHTTP and HTTPS ports are chosen during installation adjust the firewall rules to allow network trafficon the ports that were selected - not the default ports (80 and 443) listed here.
Table 2.1. Red Hat Enterprise Virtualiz at ion Manager Firewall Requirements
Port (s) Protocol Source Dest inat ion Purpose- ICMP
Red HatEnterpriseVirtualizationHypervisor(s)Red HatEnterpriseLinux host(s)
Red HatEnterpriseVirtualizationManager
When registeringto the Red HatEnterpriseVirtualizationManager,virtualizationhosts send anICMP pingrequest to theManager toconfirm that it isonline.
22 TCPSystem(s)used formaintenanceof the Managerincludingbackendconfiguration,and softwareupgrades.
Red HatEnterpriseVirtualizationManager
SSH (optional)
Chapt er 2 . Syst em Requirement s
29

80, 443 TCPAdministrationPortal clientsUser PortalclientsRed HatEnterpriseVirtualizationHypervisor(s)Red HatEnterpriseLinux host(s)REST APIclients
Red HatEnterpriseVirtualizationManager
Provides HTTPand HTTPSaccess to theManager.
Port (s) Protocol Source Dest inat ion Purpose
Important
In environments where the Red Hat Enterprise Virtualization Manager is also required to exportNFS storage, such as an ISO Storage Domain, additional ports must be allowed through thefirewall. Grant firewall exceptions for the ports applicable to the version of NFS in use:NFSv4
TCP port 2049 for NFS.
NFSv3
TCP and UDP port 2049 for NFS.TCP and UDP port 111 (rpcbind /sunrpc).TCP and UDP port specified with MOUNTD_PORT="port"TCP and UDP port specified with STATD_PORT="port"TCP port specified with LOCKD_TCPPORT="port"UDP port specified with LOCKD_UDPPORT="port"
The MOUNTD_PORT , STATD_PORT , LOCKD_TCPPORT , and LOCKD_UDPPORT ports areconfigured in the /etc/sysconfig/nfs file.
Report a bug
2.3.5 .2 . Virt ualizat io n Ho st Firewall Requirement s
Both Red Hat Enterprise Linux hosts and Red Hat Enterprise Virtualization Hypervisors require that anumber of ports be opened to allow network traffic through the system's firewall. In the case of theRed Hat Enterprise Virtualization Hypervisor these firewall rules are configured automatically. ForRed Hat Enterprise Linux hosts however it is necessary to manually configure the firewall.
Table 2.2. Virtualiz at ion Host Firewall Requirements
Red Hat Ent erprise Virt ualizat ion 3.3 Inst allat ion Guide
30

Port (s) Protocol Source Dest inat ion Purpose22 TCP
Red HatEnterpriseVirtualizationManager
Red HatEnterpriseVirtualizationHypervisor(s)Red HatEnterpriseLinux host(s)
Secure Shell(SSH) access.
5900 - 6411 TCPAdministrationPortal clientsUser Portalclients
Red HatEnterpriseVirtualizationHypervisor(s)Red HatEnterpriseLinux host(s)
Remote guestconsole accessvia VNC andSPICE. Theseports must beopen to facilitateclient access tovirtual machines.
5989 TCP, UDPCommonInformationModel ObjectManager(CIMOM)
Red HatEnterpriseVirtualizationHypervisor(s)Red HatEnterpriseLinux host(s)
Used by CommonInformation ModelObject Managers(CIMOM) tomonitor virtualmachines runningon thevirtualizationhost. If you wishto use a CIMOM tomonitor the virtualmachines in yourvirtualizationenvironment thenyou must ensurethat this port isopen.
16514 TCPRed HatEnterpriseVirtualizationHypervisor(s)Red HatEnterpriseLinux host(s)
Red HatEnterpriseVirtualizationHypervisor(s)Red HatEnterpriseLinux host(s)
Virtual machinemigration using libvirt.
Chapt er 2 . Syst em Requirement s
31

49152 - 49216 TCPRed HatEnterpriseLinuxHypervisor(s)Red HatEnterpriseLinux host(s)
Red HatEnterpriseLinuxHypervisor(s)Red HatEnterpriseLinux host(s)
Virtual machinemigration andfencing usingVDSM. Theseports must beopen facilitateboth automatedand manuallyinitiated migrationof virtualmachines.
54321 TCPRed HatEnterpriseVirtualizationManagerRed HatEnterpriseVirtualizationHypervisor(s)Red HatEnterpriseLinux host(s)
Red HatEnterpriseVirtualizationHypervisor(s)Red HatEnterpriseLinux host(s)
VDSMcommunicationswith the Managerand othervirtualizationhosts.
Port (s) Protocol Source Dest inat ion Purpose
Example 2.3. Opt ion Name: IPTablesConf ig
Recommended (default) values: Automatically generated by vdsm bootstrap script
*filter:INPUT ACCEPT [0:0]:FORWARD ACCEPT [0:0]:OUTPUT ACCEPT [0:0]-A INPUT -m state --state ESTABLISHED,RELATED -j ACCEPT-A INPUT -p icmp -j ACCEPT-A INPUT -i lo -j ACCEPT# vdsm-A INPUT -p tcp --dport 54321 -j ACCEPT# libvirt tls-A INPUT -p tcp --dport 16514 -j ACCEPT# SSH-A INPUT -p tcp --dport 22 -j ACCEPT# guest consoles-A INPUT -p tcp -m multiport --dports 5634:6166 -j ACCEPT# migration-A INPUT -p tcp -m multiport --dports 49152:49216 -j ACCEPT# snmp-A INPUT -p udp --dport 161 -j ACCEPT# Reject any other input traffic
Red Hat Ent erprise Virt ualizat ion 3.3 Inst allat ion Guide
32

-A INPUT -j REJECT --reject-with icmp-host-prohibited-A FORWARD -m physdev ! --physdev-is-bridged -j REJECT --reject-with icmp-host-prohibitedCOMMIT
Report a bug
2.3.5 .3. Direct o ry Server Firewall Requirement s
Red Hat Enterprise Virtualization requires a directory server to support user authentication. A numberof ports must be opened in the directory server's firewall to support GSS-API authentication as usedby the Red Hat Enterprise Virtualization Manager.
Table 2.3. Host Firewall Requirements
Port (s) Protocol Source Dest inat ion Purpose88, 464 TCP, UDP
Red HatEnterpriseVirtualizationManager
Directoryserver
Kerberosauthentication.
389, 636 TCPRed HatEnterpriseVirtualizationManager
Directoryserver
LightweightDirectory AccessProtocol (LDAP)and LDAP overSSL.
Report a bug
2.3.5 .4 . Dat abase Server Firewall Requirement s
Red Hat Enterprise Virtualization supports the use of a remote database server. If you plan to use aremote database server with Red Hat Enterprise Virtualization then you must ensure that the remotedatabase server allows connections from the Manager.
Table 2.4 . Host Firewall Requirements
Port (s) Protocol Source Dest inat ion Purpose5432 TCP, UDP
Red HatEnterpriseVirtualizationManager
PostgreSQLdatabaseserver
Default port forPostgreSQLdatabaseconnections.
If you plan to use a local database server on the Manager itself, which is the default option providedduring installation, then no additional firewall rules are required.
Report a bug
2.3.6. Required User Accounts and Groups
Chapt er 2 . Syst em Requirement s
33
2.3.6 .1 . Red Hat Ent erprise Virt ualizat io n Manager User Acco unt s
When the rhevm package is installed a number of user accounts are created to support Red HatEnterprise Virtualization. The user accounts created as a result of rhevm package installation are asfollows. The default user identifier (UID) for each account is also provided:
The vdsm user (UID 36 ). Required for support tools that mount and access NFS storage domains.
The ovirt user (UID 108). Owner of the ovirt-engine Red Hat JBoss Enterprise ApplicationPlatform instance.
Report a bug
2.3.6 .2 . Red Hat Ent erprise Virt ualizat io n Manager Gro ups
When the rhevm package is installed a number of user groups are created. The user groups createdas a result of rhevm package installation are as follows. The default group identifier (GID) for eachgroup is also listed:
The kvm group (GID 36 ). Group members include:
The vdsm user.
The ovirt group (GID 108). Group members include:
The ovirt user.
Report a bug
2.3.6 .3. Virt ualizat io n Ho st User Acco unt s
When the vdsm and qemu-kvm-rhev packages are installed a number of user accounts are created.These are the user accounts that are created on the virtualization host as a result of vdsm and qemu-kvm-rhev package installation. The default user identifier (UID) for each entry is also listed:
The vdsm user (UID 36 ).
The qemu user (UID 107).
The sanlock user (UID 179 ).
In addition Red Hat Enterprise Virtualization Hypervisor hosts define a admin user (UID 500 ). This admin user is not created on Red Hat Enterprise Linux virtualization hosts. The admin user iscreated with the required permissions to run commands as the root user using the sudo command.The vdsm user which is present on both types of virtualization hosts is also given access to the sudo command.
Important
The user identifiers (UIDs) and group identifiers (GIDs) allocated may vary between systems.The vdsm user however is fixed to a UID of 36 and the kvm group is fixed to a GID of 36 .
If UID 36 or GID 36 is already used by another account on the system then a conflict will ariseduring installation of the vdsm and qemu-kvm-rhev packages.
Report a bug
Red Hat Ent erprise Virt ualizat ion 3.3 Inst allat ion Guide
34

2.3.6 .4 . Virt ualizat io n Ho st Gro ups
When the vdsm and qemu-kvm-rhev packages are installed a number of user groups are created.These are the groups that are created on the virtualization host as a result of vdsm and qemu-kvm-rhev package installation. The default group identifier (GID) for each entry is also listed:
The kvm group (GID 36 ). Group members include:
The qemu user.
The sanlock user.
The qemu group (GID 107). Group members include:
The vdsm user.
The sanlock user.
Important
The user identifiers (UIDs) and group identifiers (GIDs) allocated may vary between systems.The vdsm user however is fixed to a UID of 36 and the kvm group is fixed to a GID of 36 .
If UID 36 or GID 36 is already used by another account on the system then a conflict will ariseduring installation of the vdsm and qemu-kvm-rhev packages.
Report a bug
Chapt er 2 . Syst em Requirement s
35

Part II. Installing Red Hat Enterprise Virtualization Manager
Red Hat Ent erprise Virt ualizat ion 3.3 Inst allat ion Guide
36
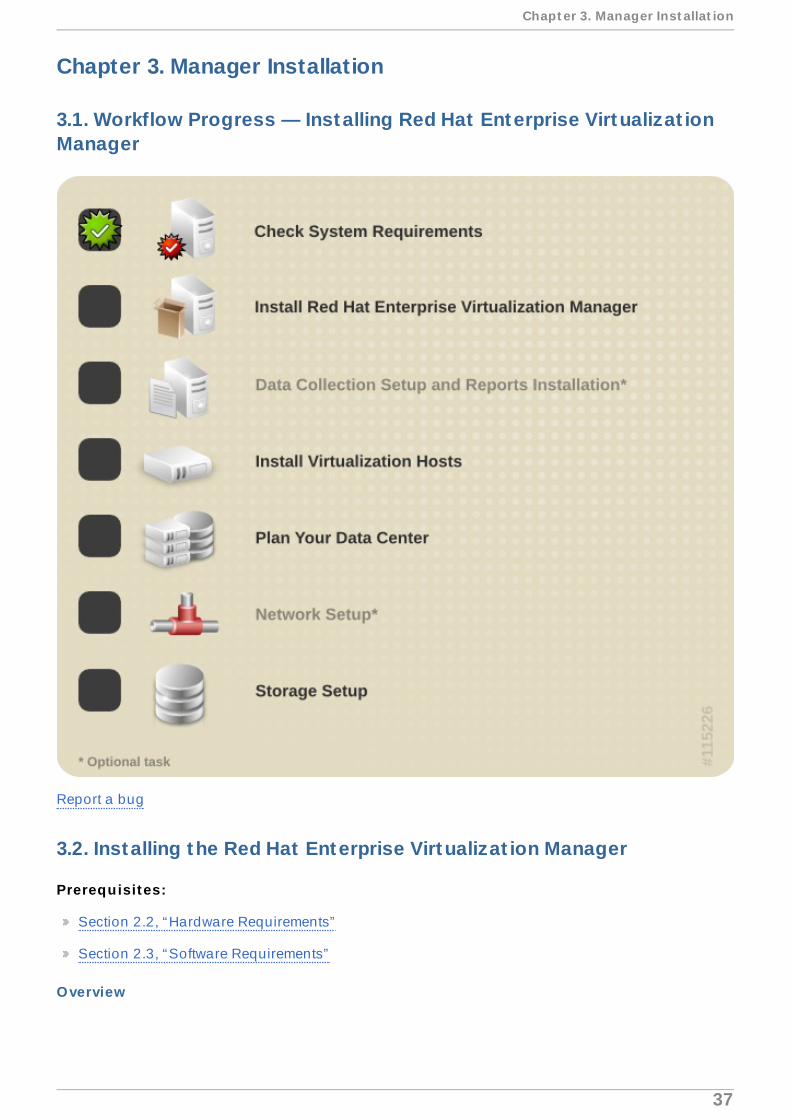
Chapter 3. Manager Installation
3.1. Workflow Progress — Installing Red Hat Enterprise Virtualizat ionManager
Report a bug
3.2. Installing the Red Hat Enterprise Virtualizat ion Manager
Prerequisites:
Section 2.2, “Hardware Requirements”
Section 2.3, “Software Requirements”
Overview
Chapt er 3. Manager Inst allat ion
37

The Red Hat Enterprise Virtualization Manager can be installed under one of two arrangements - astandard setup in which the Manager is installed on an independent physical machine or virtualmachine, or a self-hosted engine setup in which the Manager runs on a virtual machine that theManager itself controls.
Important
While the prerequisites for and basic configuration of the Red Hat Enterprise VirtualizationManager itself are the same for both standard and self-hosted engine setups, the process forsetting up a self-hosted engine is different from that of a standard setup. To install theManager as a self-hosted engine, follow the instructions in Self-Hosted Engine.
Prerequisites
Before installing the Red Hat Virtualization Manager, you must ensure you meet all the prerequisites.To complete installation of the Red Hat Enterprise Virtualization Manager successfully, you must alsobe able to determine:
1. The ports to be used for HTTP and HTTPS communication. The defaults ports are 80 and 443 respectively.
2. The fully qualified domain name (FQDN) of the system on which the Manager is to beinstalled.
3. The password you will use to secure the Red Hat Enterprise Virtualization administrationaccount.
4. The location of the database server to be used. You can use the setup script to install andconfigure a local database server or use an existing remote database server. To use a remotedatabase server you will need to know:
The host name of the system on which the remote database server exists.
The port on which the remote database server is listening.
That the uuid-ossp extension had been loaded by the remote database server.
You must also know the user name and password of a user that is known to the remotedatabase server. The user must have permission to create databases in PostgreSQL.
5. The organization name to use when creating the Manager's security certificates.
6. The storage type to be used for the initial data center attached to the Manager. The default isNFS.
7. The path to use for the ISO share, if the Manager is being configured to provide one. Thedisplay name, which will be used to label the domain in the Red Hat Enterprise VirtualizationManager also needs to be provided.
8. The firewall rules, if any, present on the system that need to be integrated with the rulesrequired for the Manager to function.
Conf igurat ion
Before installation is completed the values selected are displayed for confirmation. Once the valueshave been confirmed they are applied and the Red Hat Enterprise Virtualization Manager is ready foruse.
Red Hat Ent erprise Virt ualizat ion 3.3 Inst allat ion Guide
38

Example 3.1. Completed Installat ion
--== CONFIGURATION PREVIEW ==-- Database name : engineDatabase secured connection : FalseDatabase host : localhostDatabase user name : engineDatabase host name validation : FalseDatabase port : 5432NFS setup : TruePKI organization : demo.redhat.comApplication mode : bothFirewall manager : iptablesUpdate Firewall : TrueConfigure WebSocket Proxy : TrueHost FQDN : rhevm33.demo.redhat.comNFS mount point : /var/lib/exports/isoDatacenter storage type : nfsConfigure local database : TrueSet application as default page : TrueConfigure Apache SSL : True
Please confirm installation settings (OK, Cancel) [OK]:
Note
Automated installations are created by providing engine-setup with an answer file. Ananswer file contains answers to the questions asked by the setup command.
To create an answer file, use the --generate-answer parameter to specify a path and filename with which to create the answer file. When this option is specified, the engine-setup command records your answers to the questions in the setup process to the answerfile.
# engine-setup --generate-answer=ANSWER_FILE
To use an answer file for a new installation, use the --config-append parameter tospecify the path and file name of the answer file to be used. The engine-setup commandwill use the answers stored in the file to complete the installation.
# engine-setup --config-append=ANSWER_FILE
Run engine-setup --help for a full list of parameters.
Chapt er 3. Manager Inst allat ion
39
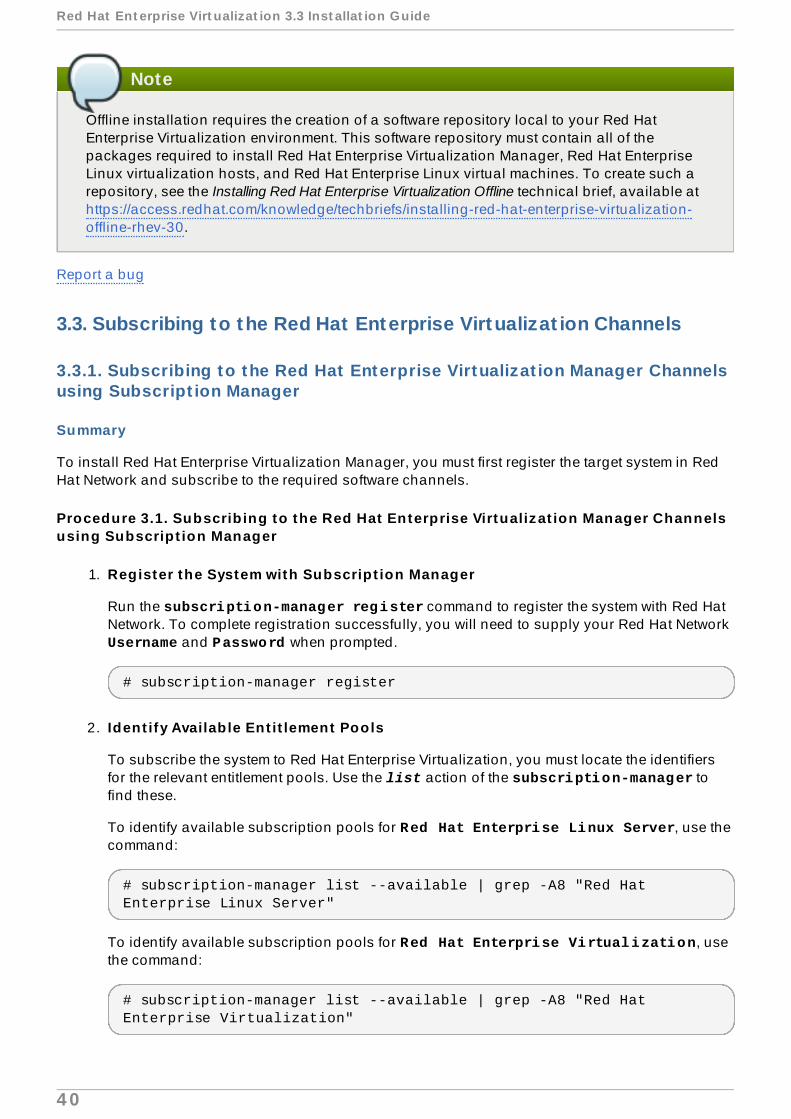
Note
Offline installation requires the creation of a software repository local to your Red HatEnterprise Virtualization environment. This software repository must contain all of thepackages required to install Red Hat Enterprise Virtualization Manager, Red Hat EnterpriseLinux virtualization hosts, and Red Hat Enterprise Linux virtual machines. To create such arepository, see the Installing Red Hat Enterprise Virtualization Offline technical brief, available athttps://access.redhat.com/knowledge/techbriefs/installing-red-hat-enterprise-virtualization-offline-rhev-30.
Report a bug
3.3. Subscribing to the Red Hat Enterprise Virtualizat ion Channels
3.3.1. Subscribing to the Red Hat Enterprise Virtualizat ion Manager Channelsusing Subscript ion Manager
Summary
To install Red Hat Enterprise Virtualization Manager, you must first register the target system in RedHat Network and subscribe to the required software channels.
Procedure 3.1. Subscrib ing to the Red Hat Enterprise Virtualiz at ion Manager Channelsusing Subscript ion Manager
1. Register the System with Subscript ion Manager
Run the subscription-manager register command to register the system with Red HatNetwork. To complete registration successfully, you will need to supply your Red Hat Network Username and Password when prompted.
# subscription-manager register
2. Ident ify Availab le Ent it lement Pools
To subscribe the system to Red Hat Enterprise Virtualization, you must locate the identifiersfor the relevant entitlement pools. Use the list action of the subscription-manager tofind these.
To identify available subscription pools for Red Hat Enterprise Linux Server, use thecommand:
# subscription-manager list --available | grep -A8 "Red Hat Enterprise Linux Server"
To identify available subscription pools for Red Hat Enterprise Virtualization, usethe command:
# subscription-manager list --available | grep -A8 "Red Hat Enterprise Virtualization"
Red Hat Ent erprise Virt ualizat ion 3.3 Inst allat ion Guide
4 0

3. Attach Ent it lement Pools to the System
Using the pool identifiers located in the previous step, attach the Red Hat Enterprise Linux Server and Red Hat Enterprise Virtualization entitlements to the system.To do so, use the attach parameter of the subscription-manager command, replacing[POOLID] with each of the pool identifiers:
# subscription-manager attach --pool=[POOLID]
4. Enable the Red Hat Enterprise Virtualiz at ion Manager 3.3 Repository
Attaching a Red Hat Enterprise Virtualization entitlement pool also subscribes thesystem to the Red Hat Enterprise Virtualization Manager 3.3 software repository. By default,this software repository is available but disabled. The Red Hat Enterprise VirtualizationManager 3.3 software repository must be enabled using the yum-config-managercommand:
# yum-config-manager --enable rhel-6-server-rhevm-3.3-rpms
5. Enable the Supplementary Repository
Attaching a Red Hat Enterprise Linux Server entitlement pool also subscribes thesystem to the supplementary software repository. By default, this software repository isavailable but disabled. The supplementary software repository must be enabled using the yum-config-manager command:
# yum-config-manager --enable rhel-6-server-supplementary-rpms
6. Enable the Red Hat JBoss Enterprise Applicat ion Plat form Repository
The JBoss Enterprise Application Platform channels required for Red Hat EnterpriseVirtualization are included in the Red Hat Enterprise Virtualization subscription. However, therepository that contains these channels is disabled by default, and must be enabled usingthe yum-config-manager command:
# yum-config-manager --enable jb-eap-6-for-rhel-6-server-rpms
Result
The system is now registered with Red Hat Network and subscribed to the channels required for RedHat Enterprise Virtualization Manager installation.
Report a bug
3.3.2. Subscribing to the Red Hat Enterprise Virtualizat ion Manager ChannelsUsing RHN Classic
Note
See the Red Hat Enterprise Virtualization Manager Release Notes for specific channel namescurrent to your system.
Chapt er 3. Manager Inst allat ion
4 1

Summary
To install Red Hat Enterprise Virtualization Manager you must first register the target system to RedHat Network and subscribe to the required software channels.
Procedure 3.2. Subscrib ing to the Red Hat Enterprise Virtualiz at ion Manager Channelsusing RHN Classic
1. Run the rhn_register command to register the system with Red Hat Network. To completeregistration successfully you will need to supply your Red Hat Network user name andpassword. Follow the onscreen prompts to complete registration of the system.
# rhn_register
2. Subscribe to Required Channels
You must subscribe the system to the required channels using either the web interface to RedHat Network or the command line rhn-channel command.
A. Using the rhn-channel Command
Run the rhn-channel command to subscribe the system to each of the requiredchannels. The commands which need to be run are:
# rhn-channel --add --channel=rhel-x86_64-server-6# rhn-channel --add --channel=rhel-x86_64-server-supplementary-6# rhn-channel --add --channel=rhel-x86_64-server-6-rhevm-3.3# rhn-channel --add --channel=jbappplatform-6-x86_64-server-6-rpm
Red Hat Ent erprise Virt ualizat ion 3.3 Inst allat ion Guide
4 2

Important
If you are not the administrator for the machine as defined in Red Hat Network, orthe machine is not registered to Red Hat Network, then use of the rhn-channelcommand will result in an error:
Error communicating with server. The message was:Error Class Code: 37Error Class Info: You are not allowed to perform administrative tasks on this system.Explanation: An error has occurred while processing your request. If this problem persists please enter a bug report at bugzilla.redhat.com. If you choose to submit the bug report, please be sure to include details of what you were trying to do when this error occurred and details on how to reproduce this problem.
If you encounter this error when using rhn-channel then to add the channel to thesystem you must use the web user interface.
B. Using the Web Interface to Red Hat Network
To add a channel subscription to a system from the web interface:
a. Log on to Red Hat Network (http://rhn.redhat.com).
b. Move the mouse cursor over the Subscriptions link at the top of the screen, andthen click the Registered Systems link in the menu that appears.
c. Select the system to which you are adding channels from the list presented on thescreen, by clicking the name of the system.
d. Click Alter Channel Subscriptions in the Subscribed Channels sectionof the screen.
e. Select the channels to be added from the list presented on the screen. Red HatEnterprise Virtualization Manager requires:
The Red Hat Enterprise Linux Server (v. 6 for 64-bit x86_64) channel. This channel is located under the Release Channels for Red Hat Enterprise Linux 6 for x86_64 expandable menu.
The RHEL Server Supplementary (v. 6 64-bit x86_64) channel.This channel is located under the Release Channels for Red Hat Enterprise Linux 6 for x86_64 expandable menu.
The Red Hat Enterprise Virtualization Manager (v.3.3 x86_64) channel. This channel is located under the Additional Services Channels for Red Hat Enterprise Linux 6 for x86_64 expandable menu.
Chapt er 3. Manager Inst allat ion
4 3

The Red Hat JBoss EAP (v 6) for 6Server x86_64 channel. Thischannel is located under the Additional Services Channels for Red Hat Enterprise Linux 6 for x86_64 expandable menu.
f. Click the Change Subscription button to finalize the change.
Result
The system is now registered with Red Hat Network and subscribed to the channels required for RedHat Enterprise Virtualization Manager installation.
Report a bug
3.4 . Installing the Red Hat Enterprise Virtualizat ion Manager Packages
Prerequisites:
Section 3.3, “Subscribing to the Red Hat Enterprise Virtualization Channels”
Summary
The Red Hat Enterprise Virtualization Manager and all of its dependencies are available via Red HatNetwork. To install the Manager you must ensure connectivity with either Red Hat Network or a RedHat Network Satellite Server is available. You must also ensure that you have access to all requiredRed Hat Network channels.
Procedure 3.3. Installing the Red Hat Enterprise Virtualiz at ion Manager Packages
1. Use yum to ensure that the most up to date versions of all installed packages are in use.
# yum upgrade
2. Use yum to initiate installation of the rhevm package and all dependencies. You must run thiscommand as the root user.
# yum install rhevm
Note
Installing the rhevm package also installs all packages which it depends on. Thisincludes the java-1.7.0-openjdk package. The java-1.7.0-openjdk package provides theOpenJDK Java Virtual Machine (JVM) required to run Red Hat Enterprise VirtualizationManager.
3. The rhevm package includes the rhevm-doc package as a dependency. The rhevm-docpackage provides a local copy of the Red Hat Enterprise Virtualization documentation suite.This documentation is also used to provide context sensitive help links from theAdministration and User Portals.
As localized versions of this package become available they will be released to Red HatNetwork. Follow these steps to find and install any available localized Red Hat EnterpriseVirtualization documentation packages that you require:
Red Hat Ent erprise Virt ualizat ion 3.3 Inst allat ion Guide
4 4

a. Use the yum command to search for translated Red Hat Enterprise VirtualizationManager documentation packages:
# yum search rhevm-doc
b. While logged in as the root user use the yum command to install translated Red HatEnterprise Virtualization Manager documentation packages. Here the Japanese (ja-JP ) version of the package is installed:
# yum install rhevm-doc-ja-JP
Result
All required packages and dependencies are installed. The required Java runtime environment wasalso selected as the default for the system. You must now configure the Red Hat EnterpriseVirtualization Manager.
See Also:
Section 3.5, “Configuring Red Hat Enterprise Virtualization Manager”
Section 6.1.2, “Updating Red Hat Enterprise Virtualization Manager”
Section 3.10, “Removing Red Hat Enterprise Virtualization Manager”
Report a bug
3.5. Configuring Red Hat Enterprise Virtualizat ion Manager
Prerequisites:
Section 3.4, “ Installing the Red Hat Enterprise Virtualization Manager Packages”
When installation of the packages is complete, the Red Hat Enterprise Virtualization Manager must beconfigured. The engine-setup script is provided to assist with this task. This script asks you aseries of questions, and configures your environment based on your answers. After the requiredvalues have been provided, the updated configuration is applied and the Red Hat EnterpriseVirtualization Manager services are started.
The engine-setup script guides you through several distinct configuration stages, eachcomprising several steps that require user input. At each step, suggested configuration defaults areprovided in square brackets. When these default values are acceptable for a given step, you canpress the Enter key to accept the default values and proceed to the next step or stage.
Procedure 3.4 . Manager Conf igurat ion Overview
1. Packages Check
The engine-setup script checks to see if it is performing an upgrade or an installation, andwhether any updates are available for the packages linked to the Manager. No user input isrequired at this stage.
[ INFO ] Checking for product updates...[ INFO ] No product updates found
Chapt er 3. Manager Inst allat ion
4 5
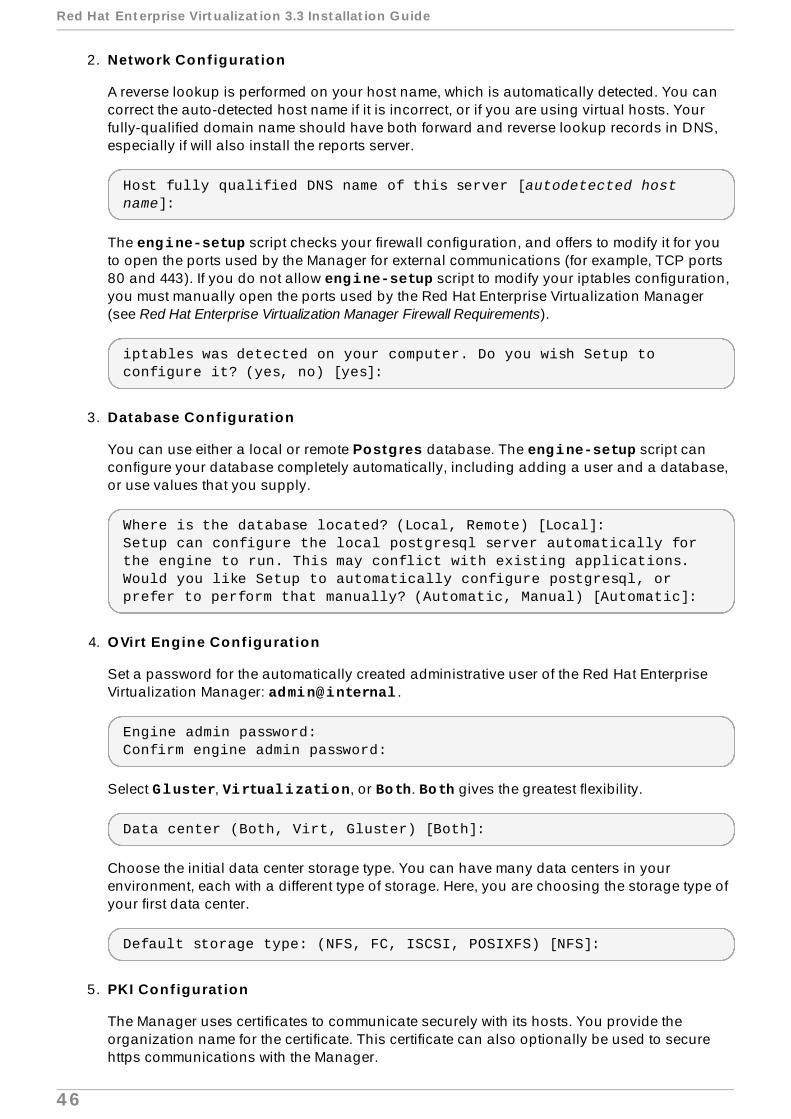
2. Network Conf igurat ion
A reverse lookup is performed on your host name, which is automatically detected. You cancorrect the auto-detected host name if it is incorrect, or if you are using virtual hosts. Yourfully-qualified domain name should have both forward and reverse lookup records in DNS,especially if will also install the reports server.
Host fully qualified DNS name of this server [autodetected host name]:
The engine-setup script checks your firewall configuration, and offers to modify it for youto open the ports used by the Manager for external communications (for example, TCP ports80 and 443). If you do not allow engine-setup script to modify your iptables configuration,you must manually open the ports used by the Red Hat Enterprise Virtualization Manager(see Red Hat Enterprise Virtualization Manager Firewall Requirements).
iptables was detected on your computer. Do you wish Setup to configure it? (yes, no) [yes]:
3. Database Conf igurat ion
You can use either a local or remote Postgres database. The engine-setup script canconfigure your database completely automatically, including adding a user and a database,or use values that you supply.
Where is the database located? (Local, Remote) [Local]: Setup can configure the local postgresql server automatically for the engine to run. This may conflict with existing applications.Would you like Setup to automatically configure postgresql, or prefer to perform that manually? (Automatic, Manual) [Automatic]:
4. OVirt Engine Conf igurat ion
Set a password for the automatically created administrative user of the Red Hat EnterpriseVirtualization Manager: admin@internal .
Engine admin password:Confirm engine admin password:
Select Gluster, Virtualization, or Both. Both gives the greatest flexibility.
Data center (Both, Virt, Gluster) [Both]:
Choose the initial data center storage type. You can have many data centers in yourenvironment, each with a different type of storage. Here, you are choosing the storage type ofyour first data center.
Default storage type: (NFS, FC, ISCSI, POSIXFS) [NFS]:
5. PKI Conf igurat ion
The Manager uses certificates to communicate securely with its hosts. You provide theorganization name for the certificate. This certificate can also optionally be used to securehttps communications with the Manager.
Red Hat Ent erprise Virt ualizat ion 3.3 Inst allat ion Guide
4 6
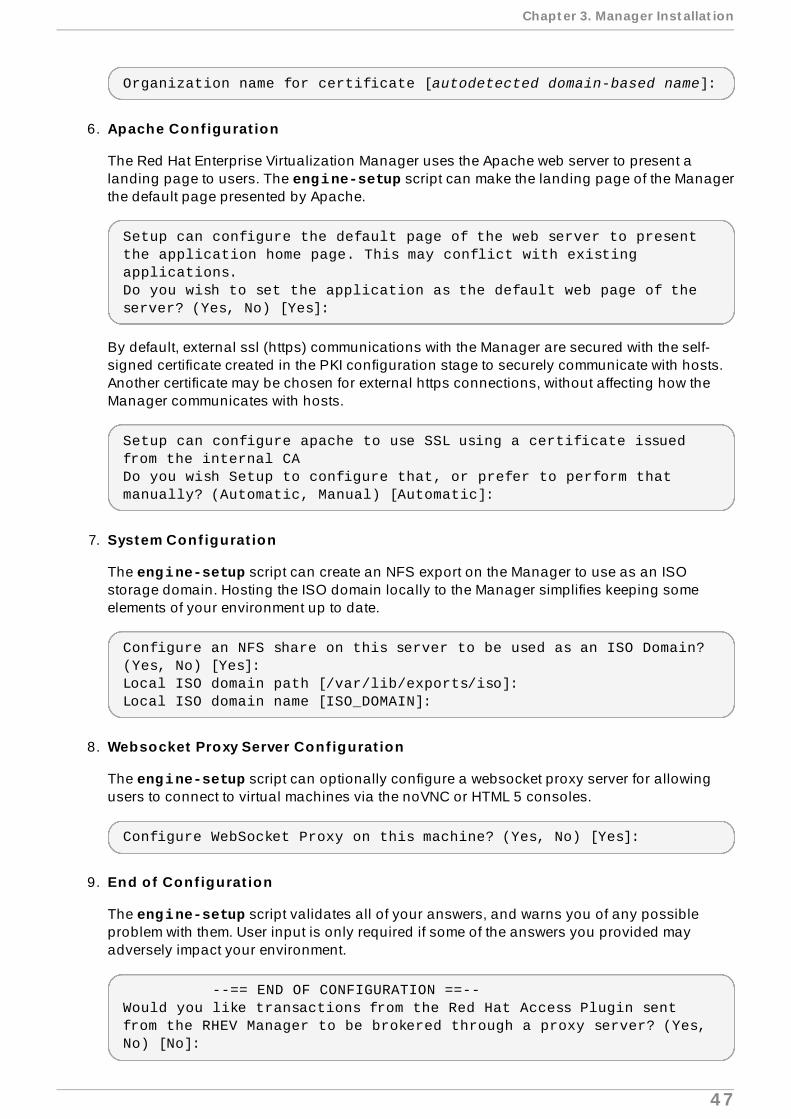
Organization name for certificate [autodetected domain-based name]:
6. Apache Conf igurat ion
The Red Hat Enterprise Virtualization Manager uses the Apache web server to present alanding page to users. The engine-setup script can make the landing page of the Managerthe default page presented by Apache.
Setup can configure the default page of the web server to present the application home page. This may conflict with existing applications.Do you wish to set the application as the default web page of the server? (Yes, No) [Yes]:
By default, external ssl (https) communications with the Manager are secured with the self-signed certificate created in the PKI configuration stage to securely communicate with hosts.Another certificate may be chosen for external https connections, without affecting how theManager communicates with hosts.
Setup can configure apache to use SSL using a certificate issued from the internal CADo you wish Setup to configure that, or prefer to perform that manually? (Automatic, Manual) [Automatic]:
7. System Conf igurat ion
The engine-setup script can create an NFS export on the Manager to use as an ISOstorage domain. Hosting the ISO domain locally to the Manager simplifies keeping someelements of your environment up to date.
Configure an NFS share on this server to be used as an ISO Domain? (Yes, No) [Yes]:Local ISO domain path [/var/lib/exports/iso]: Local ISO domain name [ISO_DOMAIN]:
8. Websocket Proxy Server Conf igurat ion
The engine-setup script can optionally configure a websocket proxy server for allowingusers to connect to virtual machines via the noVNC or HTML 5 consoles.
Configure WebSocket Proxy on this machine? (Yes, No) [Yes]:
9. End of Conf igurat ion
The engine-setup script validates all of your answers, and warns you of any possibleproblem with them. User input is only required if some of the answers you provided mayadversely impact your environment.
--== END OF CONFIGURATION ==--Would you like transactions from the Red Hat Access Plugin sent from the RHEV Manager to be brokered through a proxy server? (Yes, No) [No]:
Chapt er 3. Manager Inst allat ion
4 7
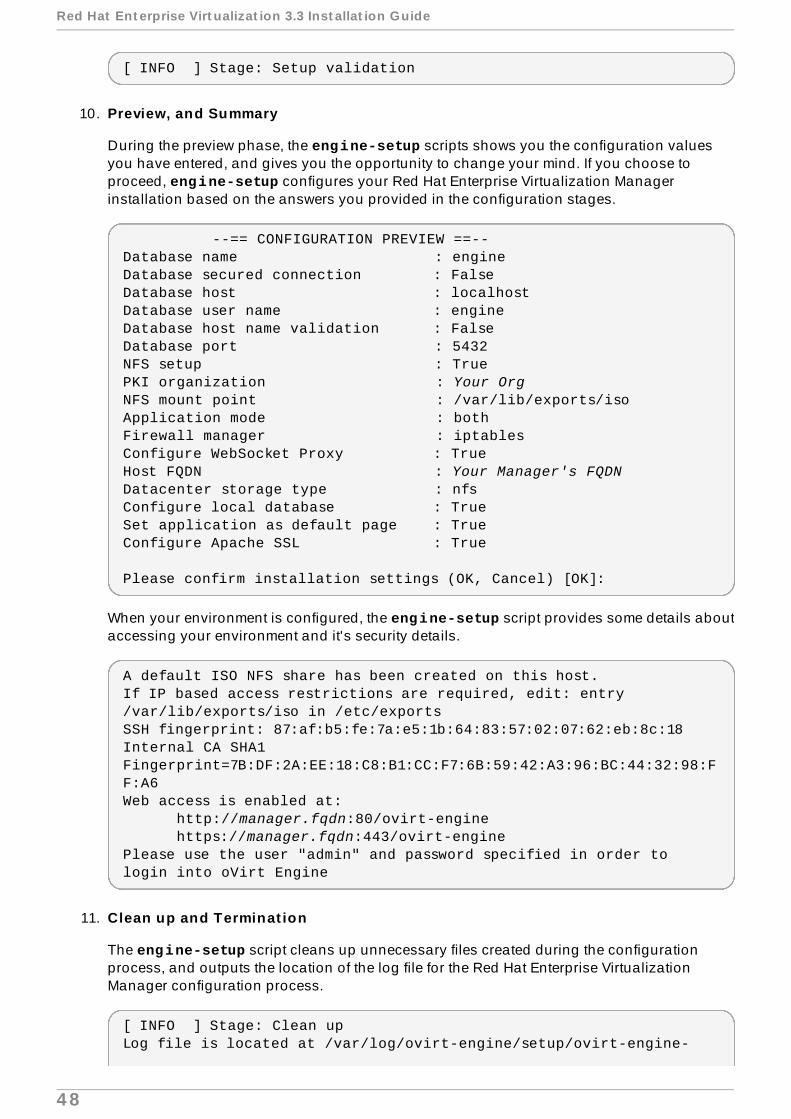
[ INFO ] Stage: Setup validation
10. Preview, and Summary
During the preview phase, the engine-setup scripts shows you the configuration valuesyou have entered, and gives you the opportunity to change your mind. If you choose toproceed, engine-setup configures your Red Hat Enterprise Virtualization Managerinstallation based on the answers you provided in the configuration stages.
--== CONFIGURATION PREVIEW ==--Database name : engineDatabase secured connection : FalseDatabase host : localhostDatabase user name : engineDatabase host name validation : FalseDatabase port : 5432NFS setup : TruePKI organization : Your OrgNFS mount point : /var/lib/exports/isoApplication mode : bothFirewall manager : iptablesConfigure WebSocket Proxy : TrueHost FQDN : Your Manager's FQDNDatacenter storage type : nfsConfigure local database : TrueSet application as default page : TrueConfigure Apache SSL : True Please confirm installation settings (OK, Cancel) [OK]:
When your environment is configured, the engine-setup script provides some details aboutaccessing your environment and it's security details.
A default ISO NFS share has been created on this host.If IP based access restrictions are required, edit: entry /var/lib/exports/iso in /etc/exportsSSH fingerprint: 87:af:b5:fe:7a:e5:1b:64:83:57:02:07:62:eb:8c:18Internal CA SHA1 Fingerprint=7B:DF:2A:EE:18:C8:B1:CC:F7:6B:59:42:A3:96:BC:44:32:98:FF:A6Web access is enabled at: http://manager.fqdn:80/ovirt-engine https://manager.fqdn:443/ovirt-enginePlease use the user "admin" and password specified in order to login into oVirt Engine
11. Clean up and Terminat ion
The engine-setup script cleans up unnecessary files created during the configurationprocess, and outputs the location of the log file for the Red Hat Enterprise VirtualizationManager configuration process.
[ INFO ] Stage: Clean upLog file is located at /var/log/ovirt-engine/setup/ovirt-engine-
Red Hat Ent erprise Virt ualizat ion 3.3 Inst allat ion Guide
4 8

setup-installation-date.log[ INFO ] Stage: Pre-termination[ INFO ] Stage: Termination[ INFO ] Execution of setup completed successfully
Result
When the engine-setup script completes successfully, the Red Hat Enterprise VirtualizationManager is configured and running on your server. You can log in as the admin@internal user tocontinue configuring the Manager, by adding clusters, hosts, and more.
You may want to immediately link your Red Hat Enterprise Virtualization Manager to a directoryserver, so you can add additional users. Red Hat Enterprise Virtualization supports directoryservices from RHDS, IdM, and Active Directory. Add a directory server to your environment using the engine-manage-domains command.
The engine-setup script also saves the answers you gave during configuration to a file, to helpwith disaster recovery.
See Also:
Section 2.3.5.1, “Red Hat Enterprise Virtualization Manager Firewall Requirements”
Chapter 5, Data Collection Setup and Reports Installation
Part III, “ Installing Virtualization Hosts”
Report a bug
3.6. Passwords in Red Hat Enterprise Virtualizat ion Manager
Passwords are generated by default in Red Hat Enterprise Virtualization in the following way.engine-setup generates a temporary password for the database and a temporary password for the admin@internal account. To change the admin@internal password, run engine-config onthe Red Hat Enterprise Virtualization Manager.
It is possible to specify a password manually by using the command engine-setup --answer-file=/[path_to_answer_file], with the temporary password specified in the answer file.Answer files are generated with the engine-setup --generate-answer=file command andoption. The format of the answer file is as follows:
# action=setup[environment:default]OVESETUP_CORE/engineStop=none:NoneOVESETUP_DIALOG/confirmSettings=bool:TrueOVESETUP_DB/database=str:engineOVESETUP_DB/fixDbViolations=none:NoneOVESETUP_DB/secured=bool:FalseOVESETUP_DB/host=str:localhostOVESETUP_DB/user=str:engineOVESETUP_DB/securedHostValidation=bool:FalseOVESETUP_DB/password=str:0056jKkYOVESETUP_DB/port=int:5432OVESETUP_SYSTEM/nfsConfigEnabled=bool:True...OVESETUP_APACHE/configureSsl=bool:True
Chapt er 3. Manager Inst allat ion
4 9
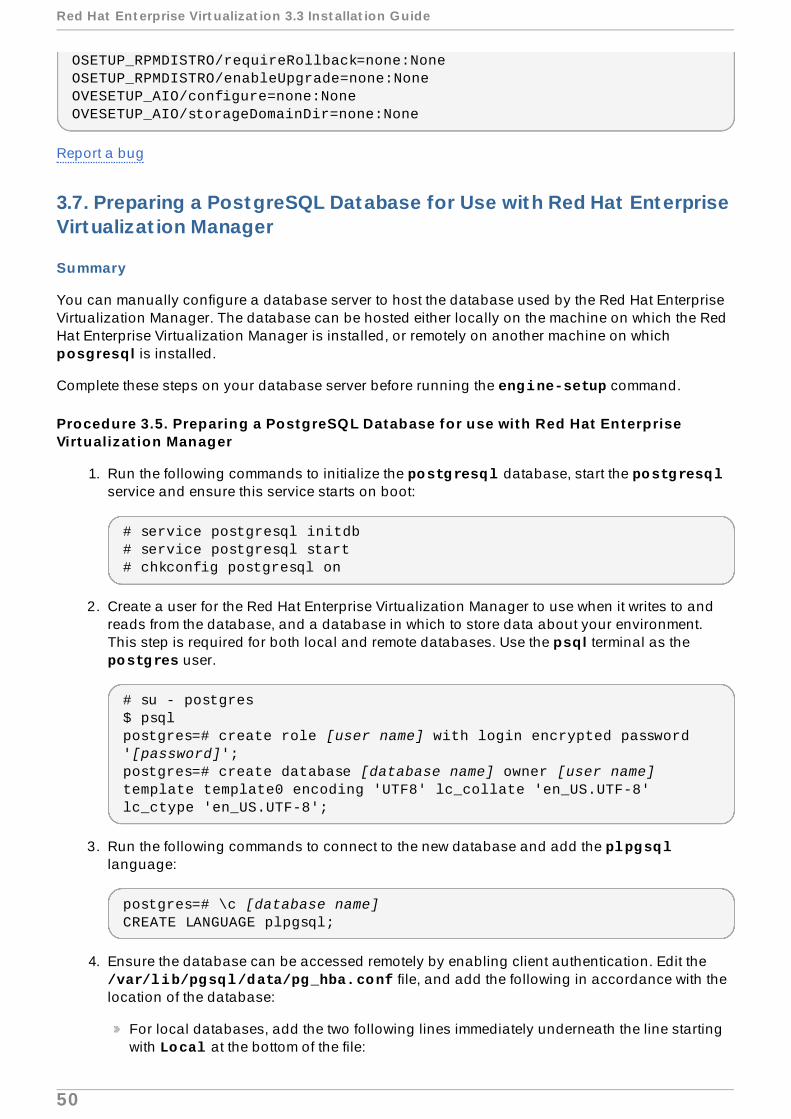
OSETUP_RPMDISTRO/requireRollback=none:NoneOSETUP_RPMDISTRO/enableUpgrade=none:NoneOVESETUP_AIO/configure=none:NoneOVESETUP_AIO/storageDomainDir=none:None
Report a bug
3.7. Preparing a PostgreSQL Database for Use with Red Hat EnterpriseVirtualizat ion Manager
Summary
You can manually configure a database server to host the database used by the Red Hat EnterpriseVirtualization Manager. The database can be hosted either locally on the machine on which the RedHat Enterprise Virtualization Manager is installed, or remotely on another machine on whichposgresql is installed.
Complete these steps on your database server before running the engine-setup command.
Procedure 3.5. Preparing a PostgreSQL Database for use with Red Hat EnterpriseVirtualiz at ion Manager
1. Run the following commands to initialize the postgresql database, start the postgresqlservice and ensure this service starts on boot:
# service postgresql initdb# service postgresql start# chkconfig postgresql on
2. Create a user for the Red Hat Enterprise Virtualization Manager to use when it writes to andreads from the database, and a database in which to store data about your environment.This step is required for both local and remote databases. Use the psql terminal as the postgres user.
# su - postgres$ psql postgres=# create role [user name] with login encrypted password '[password]';postgres=# create database [database name] owner [user name] template template0 encoding 'UTF8' lc_collate 'en_US.UTF-8' lc_ctype 'en_US.UTF-8';
3. Run the following commands to connect to the new database and add the plpgsqllanguage:
postgres=# \c [database name]CREATE LANGUAGE plpgsql;
4. Ensure the database can be accessed remotely by enabling client authentication. Edit the /var/lib/pgsql/data/pg_hba.conf file, and add the following in accordance with thelocation of the database:
For local databases, add the two following lines immediately underneath the line startingwith Local at the bottom of the file:
Red Hat Ent erprise Virt ualizat ion 3.3 Inst allat ion Guide
50

host [database name] [user name] 0.0.0.0/0 md5host [database name] [user name] ::0/0 md5
For remote databases, add the following line immediately underneath the line starting with Local at the bottom of the file, replacing X.X.X.X with the IP address of the Manager:
host [database name] [user name] X.X.X.X/32 md5
5. Allow TCP/IP connections to the database. This step is required for remote databases. Editthe /var/lib/pgsql/data/postgresql.conf file, and add the following line:
listen_addresses='*'
This example configures the postgresql service to listen for connections on all interfaces.You can specify an interface by giving its IP address.
6. Restart the postgres service. This step is required on both local and remote manuallyconfigured database servers.
service postgresql restart
Result
You have manually configured a PostgreSQL database to use with the Red Hat EnterpriseVirtualization Manager.
Report a bug
3.8. Configuring the Manager to Use a Manually Configured Local orRemote PostgreSQL Database
Prerequisites:
Section 3.7, “Preparing a PostgreSQL Database for Use with Red Hat Enterprise VirtualizationManager”
Summary
During the database configuration stage of configuring the Red Hat Enterprise VirtualizationManager using the engine-setup script, you can choose to use a manually configured database.You can select to use a locally or remotely installed PostgreSQL database.
Procedure 3.6 . Conf iguring the Manager to use a Manually Conf igured Local or RemotePostgreSQL Database
1. During configuration of the Red Hat Enterprise Virtualization Manager using the engine-setup script, you are prompted to decide where your database is located:
Where is the database located? (Local, Remote) [Local]:
Chapt er 3. Manager Inst allat ion
51
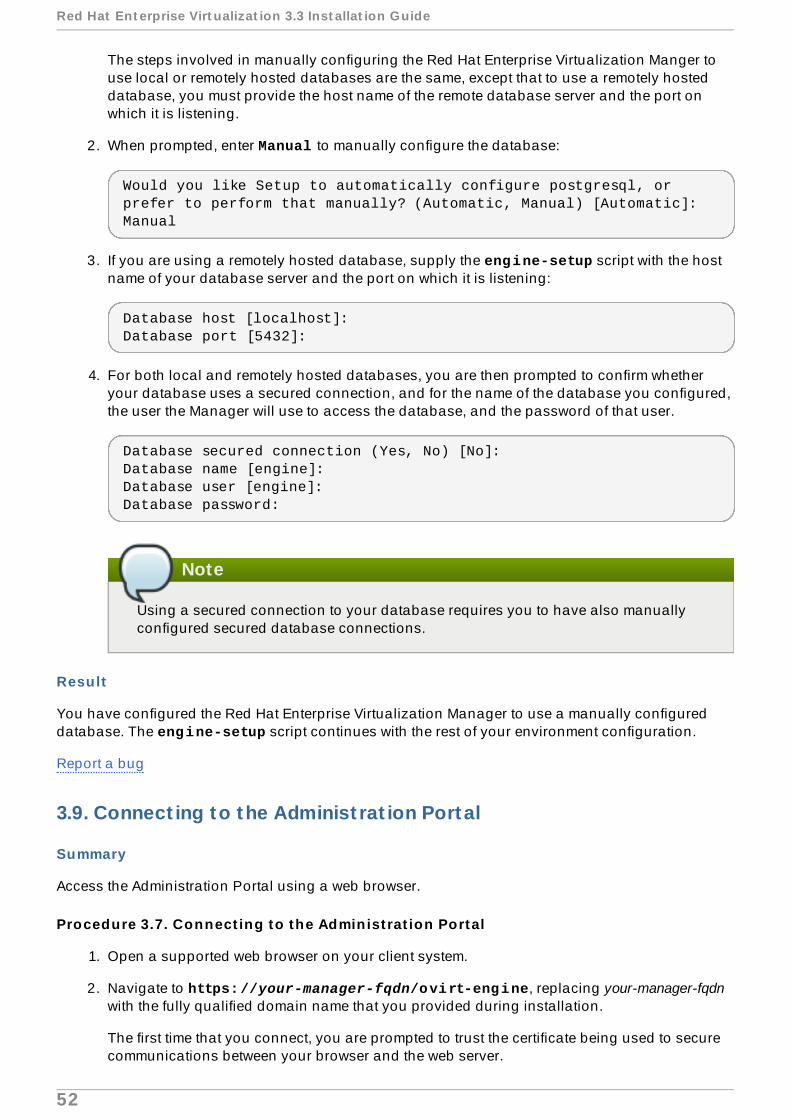
The steps involved in manually configuring the Red Hat Enterprise Virtualization Manger touse local or remotely hosted databases are the same, except that to use a remotely hosteddatabase, you must provide the host name of the remote database server and the port onwhich it is listening.
2. When prompted, enter Manual to manually configure the database:
Would you like Setup to automatically configure postgresql, or prefer to perform that manually? (Automatic, Manual) [Automatic]: Manual
3. If you are using a remotely hosted database, supply the engine-setup script with the hostname of your database server and the port on which it is listening:
Database host [localhost]:Database port [5432]:
4. For both local and remotely hosted databases, you are then prompted to confirm whetheryour database uses a secured connection, and for the name of the database you configured,the user the Manager will use to access the database, and the password of that user.
Database secured connection (Yes, No) [No]: Database name [engine]: Database user [engine]: Database password:
Note
Using a secured connection to your database requires you to have also manuallyconfigured secured database connections.
Result
You have configured the Red Hat Enterprise Virtualization Manager to use a manually configureddatabase. The engine-setup script continues with the rest of your environment configuration.
Report a bug
3.9. Connect ing to the Administ rat ion Portal
Summary
Access the Administration Portal using a web browser.
Procedure 3.7. Connect ing to the Administ rat ion Portal
1. Open a supported web browser on your client system.
2. Navigate to https://your-manager-fqdn/ovirt-engine, replacing your-manager-fqdnwith the fully qualified domain name that you provided during installation.
The first time that you connect, you are prompted to trust the certificate being used to securecommunications between your browser and the web server.
Red Hat Ent erprise Virt ualizat ion 3.3 Inst allat ion Guide
52

3. The login screen is displayed. Enter your User Name and Password in the fields provided. Ifyou are logging in for the first time, use the user name admin in conjunction with theadministrator password that you specified during installation.
4. Select the directory services domain to authenticate against from the Domain list provided. Ifyou are logging in using the internal admin user name, then select the internal domain.
5. The Administration Portal is available in multiple languages. The default selection will bechosen based on the locale settings of your web browser. If you would like to view theAdministration Portal in a language other than that selected by default, select your preferredlanguage from the list.
6. Click Login to log in.
Result
You have now successfully logged into the Administration Portal.
Report a bug
3.10. Removing Red Hat Enterprise Virtualizat ion Manager
Summary
Red Hat Enterprise Virtualization Manager provides the engine-cleanup script to allow quick andeasy removal of the files associated with the Red Hat Enterprise Virtualization Manager environment.
Procedure 3.8. Removing Red Hat Enterprise Virtualiz at ion Manager
1. Run the engine-cleanup command on the system on which Red Hat EnterpriseVirtualization Manager is installed.
# engine-cleanup
2. You are prompted to confirm removal of all Red Hat Enterprise Virtualization Managercomponents. These components include PKI keys, the locally hosted ISO domain file systemlayout, PKI configuration, the local NFS exports configuration, and the Engine databasecontent.
Do you want to remove all components? (Yes, No) [Yes]:
Note
A backup of the Engine database and a compressed archive of the PKI keys andconfiguration are always automatically created. These are saved under /var/lib/ovirt-engine/backups/, and include the date and engine- and engine-pki- in their file names respectively.
3. You are given another opportunity to change your mind and cancel the removal of the RedHat Enterprise Virtualization Manager. If you choose to proceed, the ovirt -engine service isstopped, and your environment's configuration is removed in accordance with the optionsyou selected.
Chapt er 3. Manager Inst allat ion
53

During execution engine service will be stopped (OK, Cancel) [OK]:ovirt-engine is about to be removed, data will be lost (OK, Cancel) [Cancel]:OK
Result
The configuration files of your environment have been removed according to your selections whenyou ran engine-cleanup.
--== SUMMARY ==-- A backup of the database is available at /var/lib/ovirt-engine/backups/engine-date-and-extra-characters.sqlEngine setup successfully cleaned upA backup of PKI configuration and keys is available at /var/lib/ovirt-engine/backups/engine-pki-date-and-extra-characters.tar.gz --== END OF SUMMARY ==-- [ INFO ] Generating answer file '/var/lib/ovirt-engine/setup/answers/20130827181911-cleanup.conf'[ INFO ] Stage: Clean up Log file is located at /var/log/ovirt-engine/setup/ovirt-engine-remove-date.log[ INFO ] Stage: Pre-termination[ INFO ] Stage: Termination[ INFO ] Execution of cleanup completed successfully
You can now safely remove the Red Hat Enterprise Virtualization packages using the yum command.
# yum remove rhevm* vdsm-bootstrap
Report a bug
Red Hat Ent erprise Virt ualizat ion 3.3 Inst allat ion Guide
54
Chapter 4. Self-Hosted Engine
4.1. About the Self-Hosted Engine
A self-hosted engine is a virtualized environment in which the engine, or Manager, runs on a virtualmachine on the hosts managed by that engine. The virtual machine is created as part of the hostconfiguration, and the engine is installed and configured in parallel to that host configurationprocess, referred to in these procedures as the deployment.
The virtual machine running the engine is created to be highly available. This means that if the hostrunning the virtual machine goes into maintenance mode, or fails unexpectedly, the virtual machinewill be migrated automatically to another host in the environment.
The primary benefit of the self-hosted engine is that it requires less hardware to deploy an instance ofRed Hat Enterprise Virtualization as the engine runs as a virtual machine, not on physical hardware.Additionally, the engine is configured to be highly available automatically, rather than requiring aseparate cluster.
The self-hosted engine currently only runs on Red Hat Enterprise Linux 6.5 hosts. Red Hat EnterpriseVirtualization Hypervisors and older versions of Red Hat Enterprise Linux are not recommended foruse with a self-hosted engine.
Report a bug
4.2. Limitat ions of the Self-Hosted Engine
At present there are two main limitations of the self-hosted engine configuration:
An NFS storage domain is required for the configuration.
The host and hosted engine must use Red Hat Enterprise Linux 6.5 or above. Red Hat EnterpriseVirtualization Hypervisors are not supported.
Report a bug
4.3. Installing the Self-Hosted Engine
Summary
Install a Red Hat Enterprise Virtualization environment that takes advantage of the self-hosted enginefeature, in which the engine is installed on a virtual machine within the environment itself.
You must be subscribed to the appropriate Red Hat Network channels to install the packages.
All steps in this procedure are to be conducted as the root user.
Chapt er 4 . Self- Host ed Engine
55

Important
While the ovirt-hosted-engine-setup package is provided by the Red Hat Enterprise VirtualizationManager channel and can be installed using the standard channels for the Manager, thevdsm package is a dependency of the ovirt-hosted-engine-setup package and is provided by theRed Hat Enterprise Virt Management Agent channel, which must be enabled. This channel is rhel-6-server-rhev-mgmt-agent-rpms in Subscription Manager and rhel-x86_64-rhev-mgmt-agent-6 in RHN Classic.
Procedure 4 .1. Installing the Self -Hosted Engine
1. Use yum to ensure that the most up-to-date versions of all installed packages are in use.
# yum upgrade
2. Use yum to initiate installation of the ovirt-hosted-engine-setup package and all dependencies.
# yum install ovirt-hosted-engine-setup
Result
You have installed the ovirt-hosted-engine-setup package and are ready to configure the self-hostedengine.
Report a bug
4.4 . Configuring the Self-Hosted Engine
Summary
When package installation is complete, the Red Hat Enterprise Virtualization Manager must beconfigured. The hosted-engine deployment script is provided to assist with this task. The scriptasks you a series of questions, and configures your environment based on your answers. When therequired values have been provided, the updated configuration is applied and the Red HatEnterprise Virtualization Manager services are started.
The hosted-engine deployment script guides you through several distinct configuration stages.The script suggests possible configuration defaults in square brackets. Where these default valuesare acceptable, no additional input is required.
This procedure requires a new Red Hat Enterprise Linux 6.5 host with the ovirt-hosted-engine-setuppackage installed. This host is referred to as 'Host-HE1', with a fully qualified domain name (FQDN)of Host-HE1.example.com in this procedure.
The hosted engine, the virtual machine created during configuration of Host-HE1 to manage theenvironment, is referred to as 'my-engine'. You will be prompted by the hosted-engine deploymentscript to access this virtual machine multiple times to install an operating system and to configure theengine.
All steps in this procedure are to be conducted as the root user for the specified machine.
Procedure 4 .2. Conf iguring the Self -Hosted Engine
Red Hat Ent erprise Virt ualizat ion 3.3 Inst allat ion Guide
56
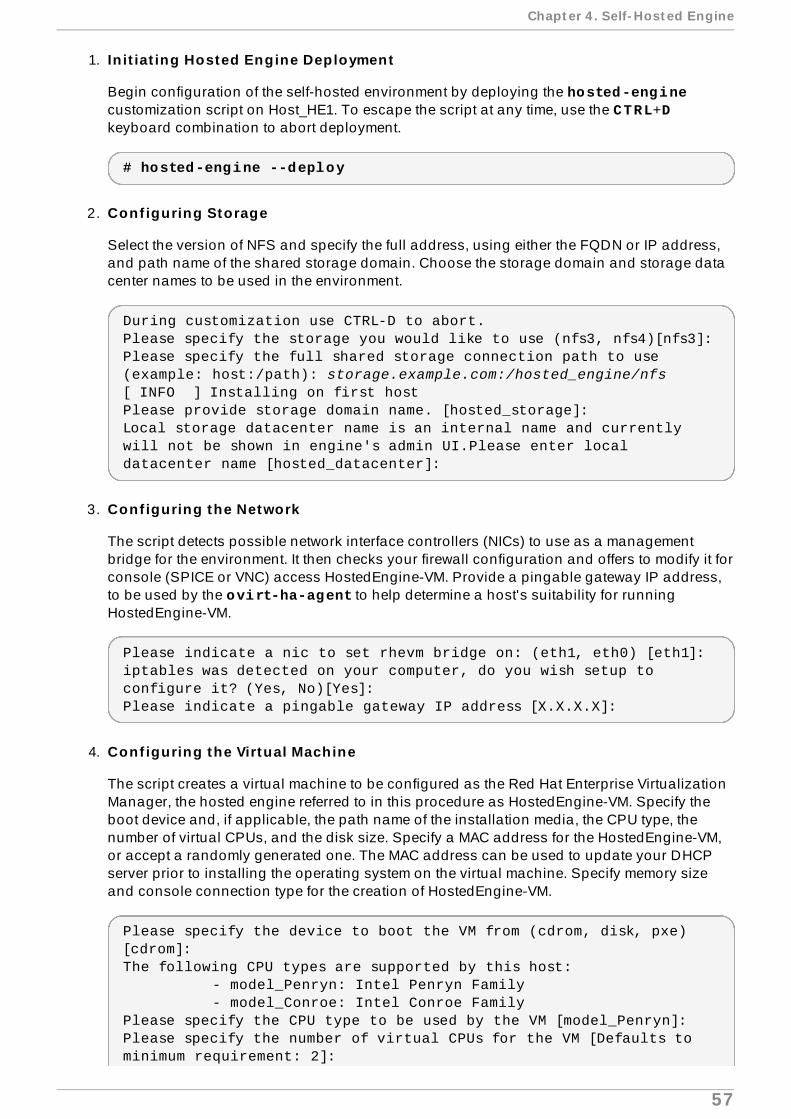
1. In it iat ing Hosted Engine Deployment
Begin configuration of the self-hosted environment by deploying the hosted-enginecustomization script on Host_HE1. To escape the script at any time, use the CTRL+Dkeyboard combination to abort deployment.
# hosted-engine --deploy
2. Conf iguring Storage
Select the version of NFS and specify the full address, using either the FQDN or IP address,and path name of the shared storage domain. Choose the storage domain and storage datacenter names to be used in the environment.
During customization use CTRL-D to abort.Please specify the storage you would like to use (nfs3, nfs4)[nfs3]: Please specify the full shared storage connection path to use (example: host:/path): storage.example.com:/hosted_engine/nfs[ INFO ] Installing on first hostPlease provide storage domain name. [hosted_storage]: Local storage datacenter name is an internal name and currently will not be shown in engine's admin UI.Please enter local datacenter name [hosted_datacenter]:
3. Conf iguring the Network
The script detects possible network interface controllers (NICs) to use as a managementbridge for the environment. It then checks your firewall configuration and offers to modify it forconsole (SPICE or VNC) access HostedEngine-VM. Provide a pingable gateway IP address,to be used by the ovirt-ha-agent to help determine a host's suitability for runningHostedEngine-VM.
Please indicate a nic to set rhevm bridge on: (eth1, eth0) [eth1]:iptables was detected on your computer, do you wish setup to configure it? (Yes, No)[Yes]: Please indicate a pingable gateway IP address [X.X.X.X]:
4. Conf iguring the Virtual Machine
The script creates a virtual machine to be configured as the Red Hat Enterprise VirtualizationManager, the hosted engine referred to in this procedure as HostedEngine-VM. Specify theboot device and, if applicable, the path name of the installation media, the CPU type, thenumber of virtual CPUs, and the disk size. Specify a MAC address for the HostedEngine-VM,or accept a randomly generated one. The MAC address can be used to update your DHCPserver prior to installing the operating system on the virtual machine. Specify memory sizeand console connection type for the creation of HostedEngine-VM.
Please specify the device to boot the VM from (cdrom, disk, pxe) [cdrom]: The following CPU types are supported by this host: - model_Penryn: Intel Penryn Family - model_Conroe: Intel Conroe FamilyPlease specify the CPU type to be used by the VM [model_Penryn]: Please specify the number of virtual CPUs for the VM [Defaults to minimum requirement: 2]:
Chapt er 4 . Self- Host ed Engine
57
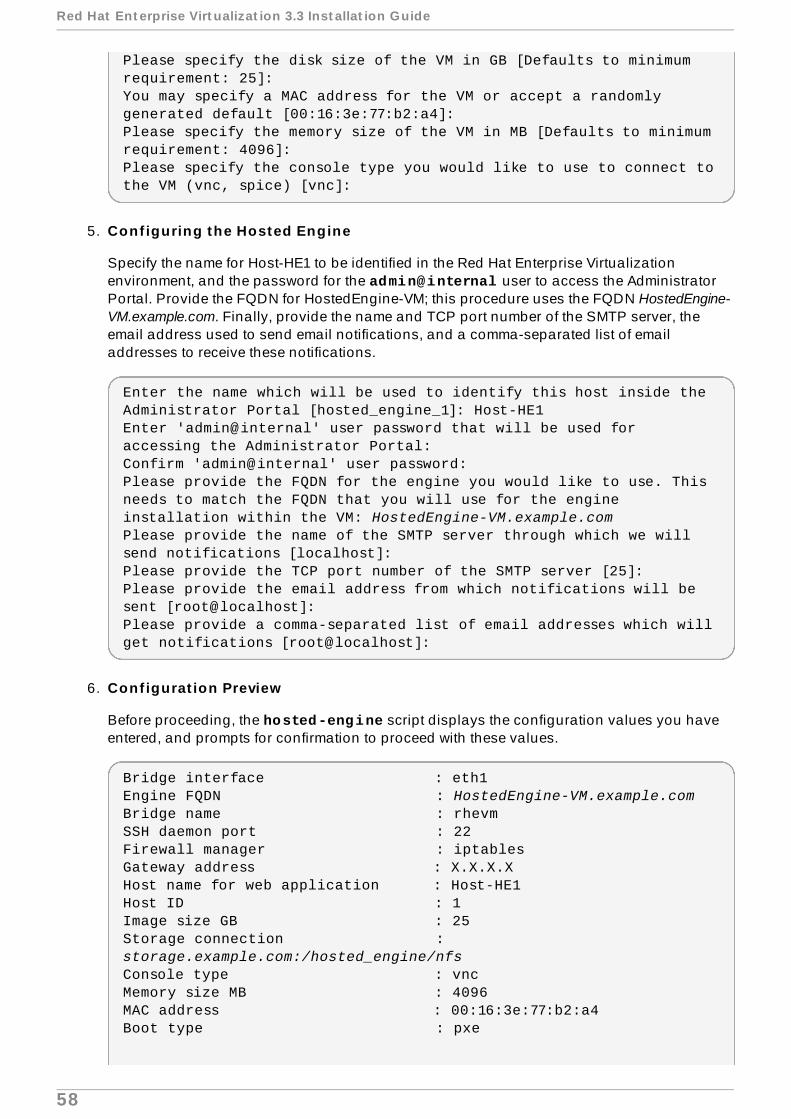
Please specify the disk size of the VM in GB [Defaults to minimum requirement: 25]: You may specify a MAC address for the VM or accept a randomly generated default [00:16:3e:77:b2:a4]: Please specify the memory size of the VM in MB [Defaults to minimum requirement: 4096]: Please specify the console type you would like to use to connect to the VM (vnc, spice) [vnc]:
5. Conf iguring the Hosted Engine
Specify the name for Host-HE1 to be identified in the Red Hat Enterprise Virtualizationenvironment, and the password for the admin@internal user to access the AdministratorPortal. Provide the FQDN for HostedEngine-VM; this procedure uses the FQDN HostedEngine-VM.example.com. Finally, provide the name and TCP port number of the SMTP server, theemail address used to send email notifications, and a comma-separated list of emailaddresses to receive these notifications.
Enter the name which will be used to identify this host inside the Administrator Portal [hosted_engine_1]: Host-HE1Enter 'admin@internal' user password that will be used for accessing the Administrator Portal: Confirm 'admin@internal' user password: Please provide the FQDN for the engine you would like to use. This needs to match the FQDN that you will use for the engine installation within the VM: HostedEngine-VM.example.comPlease provide the name of the SMTP server through which we will send notifications [localhost]: Please provide the TCP port number of the SMTP server [25]: Please provide the email address from which notifications will be sent [root@localhost]: Please provide a comma-separated list of email addresses which will get notifications [root@localhost]:
6. Conf igurat ion Preview
Before proceeding, the hosted-engine script displays the configuration values you haveentered, and prompts for confirmation to proceed with these values.
Bridge interface : eth1Engine FQDN : HostedEngine-VM.example.comBridge name : rhevmSSH daemon port : 22Firewall manager : iptablesGateway address : X.X.X.XHost name for web application : Host-HE1Host ID : 1Image size GB : 25Storage connection : storage.example.com:/hosted_engine/nfsConsole type : vncMemory size MB : 4096MAC address : 00:16:3e:77:b2:a4Boot type : pxe
Red Hat Ent erprise Virt ualizat ion 3.3 Inst allat ion Guide
58

Number of CPUs : 2CPU Type : model_Penryn
Please confirm installation settings (Yes, No)[No]:
7. Creat ing HostedEngine-VM
The script creates the virtual machine that will be configured to be HostedEngine-VM andprovides connection details. You will need to install an operating system on HostedEngine-VM before the hosted-engine script can proceed on Host-HE1.
[ INFO ] Generating answer file '/etc/ovirt-hosted-engine/answers.conf'[ INFO ] Stage: Transaction setup[ INFO ] Stage: Misc configuration[ INFO ] Stage: Package installation[ INFO ] Stage: Misc configuration[ INFO ] Configuring libvirt[ INFO ] Generating VDSM certificates[ INFO ] Configuring VDSM[ INFO ] Starting vdsmd[ INFO ] Waiting for VDSM hardware info[ INFO ] Creating Storage Domain[ INFO ] Creating Storage Pool[ INFO ] Connecting Storage Pool[ INFO ] Verifying sanlock lockspace initialization[ INFO ] Initializing sanlock lockspace[ INFO ] Initializing sanlock metadata[ INFO ] Creating VM Image[ INFO ] Disconnecting Storage Pool[ INFO ] Start monitoring domain[ INFO ] Configuring VM[ INFO ] Updating hosted-engine configuration[ INFO ] Stage: Transaction commit[ INFO ] Stage: Closing up[ INFO ] Creating VMYou can now connect to the VM with the following command: /usr/bin/remote-viewer vnc://localhost:5900Use temporary password "3042QHpX" to connect to vnc console.Please note that in order to use remote-viewer you need to be able to run graphical applications.This means that if you are using ssh you have to supply the -Y flag (enables trusted X11 forwarding).Otherwise you can run the command from a terminal in your preferred desktop environment.If you cannot run graphical applications you can connect to the graphic console from another host or connect to the console using the following command:virsh -c qemu+tls://Test/system console HostedEngineIf you need to reboot the VM you will need to start it manually using the command:hosted-engine --vm-startYou can then set a temporary password using the command:hosted-engine --add-console-passwordThe VM has been started. Install the OS and shut down or reboot it. To continue please make a selection:
Chapt er 4 . Self- Host ed Engine
59
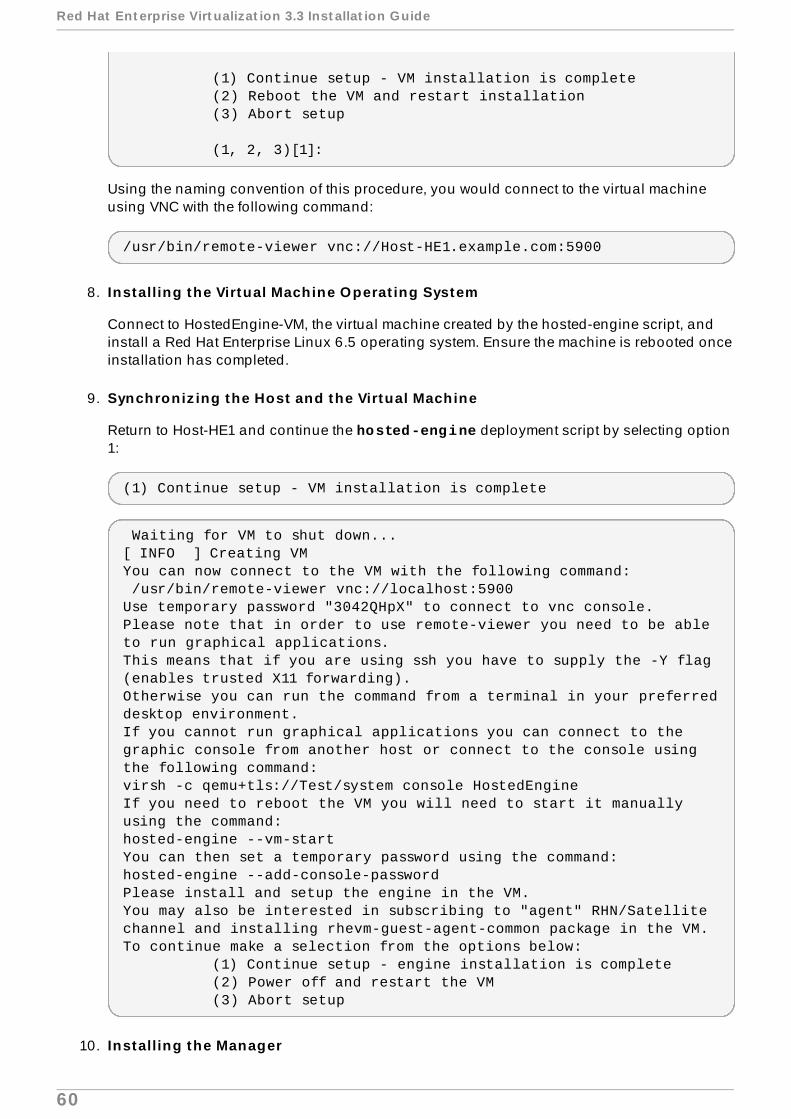
(1) Continue setup - VM installation is complete (2) Reboot the VM and restart installation (3) Abort setup (1, 2, 3)[1]:
Using the naming convention of this procedure, you would connect to the virtual machineusing VNC with the following command:
/usr/bin/remote-viewer vnc://Host-HE1.example.com:5900
8. Installing the Virtual Machine Operat ing System
Connect to HostedEngine-VM, the virtual machine created by the hosted-engine script, andinstall a Red Hat Enterprise Linux 6.5 operating system. Ensure the machine is rebooted onceinstallation has completed.
9. Synchroniz ing the Host and the Virtual Machine
Return to Host-HE1 and continue the hosted-engine deployment script by selecting option1:
(1) Continue setup - VM installation is complete
Waiting for VM to shut down...[ INFO ] Creating VMYou can now connect to the VM with the following command: /usr/bin/remote-viewer vnc://localhost:5900Use temporary password "3042QHpX" to connect to vnc console.Please note that in order to use remote-viewer you need to be able to run graphical applications.This means that if you are using ssh you have to supply the -Y flag (enables trusted X11 forwarding).Otherwise you can run the command from a terminal in your preferred desktop environment.If you cannot run graphical applications you can connect to the graphic console from another host or connect to the console using the following command:virsh -c qemu+tls://Test/system console HostedEngineIf you need to reboot the VM you will need to start it manually using the command:hosted-engine --vm-startYou can then set a temporary password using the command:hosted-engine --add-console-passwordPlease install and setup the engine in the VM.You may also be interested in subscribing to "agent" RHN/Satellite channel and installing rhevm-guest-agent-common package in the VM.To continue make a selection from the options below: (1) Continue setup - engine installation is complete (2) Power off and restart the VM (3) Abort setup
10. Installing the Manager
Red Hat Ent erprise Virt ualizat ion 3.3 Inst allat ion Guide
60

Connect to HostedEngine-VM, subscribe to the appropriate Red Hat Enterprise VirtualizationManager channels, ensure that the most up-to-date versions of all installed packages are inuse, and install the rhevm packages.
# yum upgrade
# yum install rhevm
11. Conf iguring the Manager
Configure the engine on HostedEngine-VM:
# engine-setup
12. Synchroniz ing the Host and the Manager
Return to Host-HE1 and continue the hosted-engine deployment script by selecting option1:
(1) Continue setup - engine installation is complete
[ INFO ] Engine replied: DB Up!Welcome to Health Status![ INFO ] Waiting for the host to become operational in the engine. This may take several minutes...[ INFO ] Still waiting for VDSM host to become operational...[ INFO ] The VDSM Host is now operational Please shutdown the VM allowing the system to launch it as a monitored service. The system will wait until the VM is down.
13. Shut t ing Down HostedEngine-VM
Shutdown HostedEngine-VM.
# shutdown now
14. Setup Conf irmat ion
Return to Host-HE1 to confirm it has detected that HostedEngine-VM is down.
[ INFO ] Enabling and starting HA services Hosted Engine successfully set up[ INFO ] Stage: Clean up[ INFO ] Stage: Pre-termination[ INFO ] Stage: Termination
Result
When the hosted-engine deployment script completes successfully, the Red Hat EnterpriseVirtualization Manager is configured and running on your server. In contrast to a bare-metalManager installation, the hosted engine Manager has already configured the data center, cluster,host (Host-HE1), storage domain, and virtual machine of the hosted engine (HostedEngine-VM). You
Chapt er 4 . Self- Host ed Engine
61
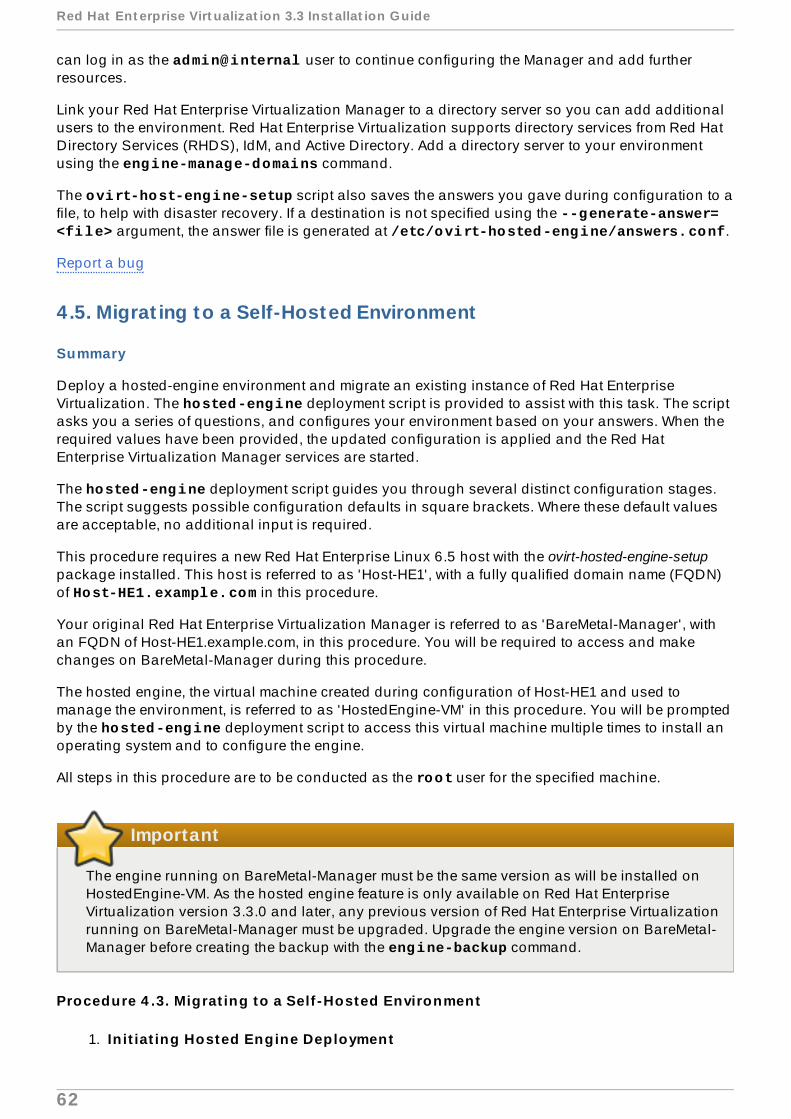
can log in as the admin@internal user to continue configuring the Manager and add furtherresources.
Link your Red Hat Enterprise Virtualization Manager to a directory server so you can add additionalusers to the environment. Red Hat Enterprise Virtualization supports directory services from Red HatDirectory Services (RHDS), IdM, and Active Directory. Add a directory server to your environmentusing the engine-manage-domains command.
The ovirt-host-engine-setup script also saves the answers you gave during configuration to afile, to help with disaster recovery. If a destination is not specified using the --generate-answer=<file> argument, the answer file is generated at /etc/ovirt-hosted-engine/answers.conf.
Report a bug
4.5. Migrat ing to a Self-Hosted Environment
Summary
Deploy a hosted-engine environment and migrate an existing instance of Red Hat EnterpriseVirtualization. The hosted-engine deployment script is provided to assist with this task. The scriptasks you a series of questions, and configures your environment based on your answers. When therequired values have been provided, the updated configuration is applied and the Red HatEnterprise Virtualization Manager services are started.
The hosted-engine deployment script guides you through several distinct configuration stages.The script suggests possible configuration defaults in square brackets. Where these default valuesare acceptable, no additional input is required.
This procedure requires a new Red Hat Enterprise Linux 6.5 host with the ovirt-hosted-engine-setuppackage installed. This host is referred to as 'Host-HE1', with a fully qualified domain name (FQDN)of Host-HE1.example.com in this procedure.
Your original Red Hat Enterprise Virtualization Manager is referred to as 'BareMetal-Manager', withan FQDN of Host-HE1.example.com, in this procedure. You will be required to access and makechanges on BareMetal-Manager during this procedure.
The hosted engine, the virtual machine created during configuration of Host-HE1 and used tomanage the environment, is referred to as 'HostedEngine-VM' in this procedure. You will be promptedby the hosted-engine deployment script to access this virtual machine multiple times to install anoperating system and to configure the engine.
All steps in this procedure are to be conducted as the root user for the specified machine.
Important
The engine running on BareMetal-Manager must be the same version as will be installed onHostedEngine-VM. As the hosted engine feature is only available on Red Hat EnterpriseVirtualization version 3.3.0 and later, any previous version of Red Hat Enterprise Virtualizationrunning on BareMetal-Manager must be upgraded. Upgrade the engine version on BareMetal-Manager before creating the backup with the engine-backup command.
Procedure 4 .3. Migrat ing to a Self -Hosted Environment
1. In it iat ing Hosted Engine Deployment
Red Hat Ent erprise Virt ualizat ion 3.3 Inst allat ion Guide
62

Begin configuration of the self-hosted environment by deploying the hosted-enginecustomization script on Host_HE1. To escape the script at any time, use the CTRL+Dkeyboard combination to abort deployment.
# hosted-engine --deploy
2. Conf iguring Storage
Select the version of NFS and specify the full address, using either the FQDN or IP address,and path name of the shared storage domain. Choose the storage domain and storage datacenter names to be used in the environment.
During customization use CTRL-D to abort.Please specify the storage you would like to use (nfs3, nfs4)[nfs3]: Please specify the full shared storage connection path to use (example: host:/path): storage.example.com:/hosted_engine/nfs[ INFO ] Installing on first hostPlease provide storage domain name. [hosted_storage]: Local storage datacenter name is an internal name and currently will not be shown in engine's admin UI.Please enter local datacenter name [hosted_datacenter]:
3. Conf iguring the Network
The script detects possible network interface controllers (NICs) to use as a managementbridge for the environment. It then checks your firewall configuration and offers to modify it forconsole (SPICE or VNC) access HostedEngine-VM. Provide a pingable gateway IP address,to be used by the ovirt-ha-agent to help determine a host's suitability for runningHostedEngine-VM.
Please indicate a nic to set rhevm bridge on: (eth1, eth0) [eth1]:iptables was detected on your computer, do you wish setup to configure it? (Yes, No)[Yes]: Please indicate a pingable gateway IP address [X.X.X.X]:
4. Conf iguring the Virtual Machine
The script creates a virtual machine to be configured as the Red Hat Enterprise VirtualizationManager, the hosted engine referred to in this procedure as HostedEngine-VM. Specify theboot device and, if applicable, the path name of the installation media, the CPU type, thenumber of virtual CPUs, and the disk size. Specify a MAC address for the HostedEngine-VM,or accept a randomly generated one. The MAC address can be used to update your DHCPserver prior to installing the operating system on the virtual machine. Specify memory sizeand console connection type for the creation of HostedEngine-VM.
Please specify the device to boot the VM from (cdrom, disk, pxe) [cdrom]: The following CPU types are supported by this host: - model_Penryn: Intel Penryn Family - model_Conroe: Intel Conroe FamilyPlease specify the CPU type to be used by the VM [model_Penryn]: Please specify the number of virtual CPUs for the VM [Defaults to minimum requirement: 2]: Please specify the disk size of the VM in GB [Defaults to minimum
Chapt er 4 . Self- Host ed Engine
63

requirement: 25]: You may specify a MAC address for the VM or accept a randomly generated default [00:16:3e:77:b2:a4]: Please specify the memory size of the VM in MB [Defaults to minimum requirement: 4096]: Please specify the console type you would like to use to connect to the VM (vnc, spice) [vnc]:
5. Conf iguring the Hosted Engine
Specify the name for Host-HE1 to be identified in the Red Hat Enterprise Virtualizationenvironment, and the password for the admin@internal user to access the AdministratorPortal. Provide the FQDN for HostedEngine-VM; this procedure uses the FQDN HostedEngine-VM.example.com. Finally, provide the name and TCP port number of the SMTP server, theemail address used to send email notifications, and a comma-separated list of emailaddresses to receive these notifications.
Important
The FQDN provided for the engine (HostedEngine-VM.example.com) must be the sameFQDN provided when BareMetal-Manager was initially set up.
Enter the name which will be used to identify this host inside the Administrator Portal [hosted_engine_1]: Host-HE1Enter 'admin@internal' user password that will be used for accessing the Administrator Portal: Confirm 'admin@internal' user password: Please provide the FQDN for the engine you would like to use. This needs to match the FQDN that you will use for the engine installation within the VM: BareMetal-Manager.example.comPlease provide the name of the SMTP server through which we will send notifications [localhost]: Please provide the TCP port number of the SMTP server [25]: Please provide the email address from which notifications will be sent [root@localhost]: Please provide a comma-separated list of email addresses which will get notifications [root@localhost]:
6. Conf igurat ion Preview
Before proceeding, the hosted-engine script displays the configuration values you haveentered, and prompts for confirmation to proceed with these values.
Bridge interface : eth1Engine FQDN : BareMetal-Manager.example.comBridge name : rhevmSSH daemon port : 22Firewall manager : iptablesGateway address : X.X.X.XHost name for web application : Host-HE1Host ID : 1Image size GB : 25Storage connection :
Red Hat Ent erprise Virt ualizat ion 3.3 Inst allat ion Guide
64
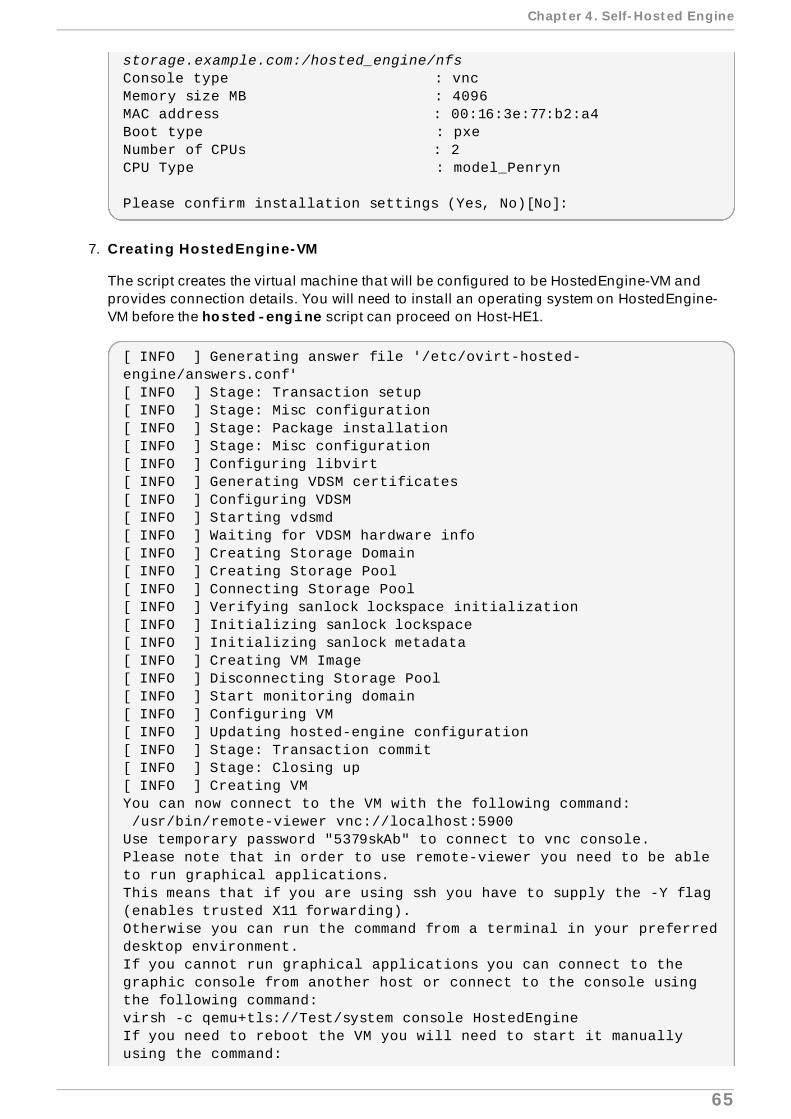
storage.example.com:/hosted_engine/nfsConsole type : vncMemory size MB : 4096MAC address : 00:16:3e:77:b2:a4Boot type : pxeNumber of CPUs : 2CPU Type : model_Penryn
Please confirm installation settings (Yes, No)[No]:
7. Creat ing HostedEngine-VM
The script creates the virtual machine that will be configured to be HostedEngine-VM andprovides connection details. You will need to install an operating system on HostedEngine-VM before the hosted-engine script can proceed on Host-HE1.
[ INFO ] Generating answer file '/etc/ovirt-hosted-engine/answers.conf'[ INFO ] Stage: Transaction setup[ INFO ] Stage: Misc configuration[ INFO ] Stage: Package installation[ INFO ] Stage: Misc configuration[ INFO ] Configuring libvirt[ INFO ] Generating VDSM certificates[ INFO ] Configuring VDSM[ INFO ] Starting vdsmd[ INFO ] Waiting for VDSM hardware info[ INFO ] Creating Storage Domain[ INFO ] Creating Storage Pool[ INFO ] Connecting Storage Pool[ INFO ] Verifying sanlock lockspace initialization[ INFO ] Initializing sanlock lockspace[ INFO ] Initializing sanlock metadata[ INFO ] Creating VM Image[ INFO ] Disconnecting Storage Pool[ INFO ] Start monitoring domain[ INFO ] Configuring VM[ INFO ] Updating hosted-engine configuration[ INFO ] Stage: Transaction commit[ INFO ] Stage: Closing up[ INFO ] Creating VMYou can now connect to the VM with the following command: /usr/bin/remote-viewer vnc://localhost:5900Use temporary password "5379skAb" to connect to vnc console.Please note that in order to use remote-viewer you need to be able to run graphical applications.This means that if you are using ssh you have to supply the -Y flag (enables trusted X11 forwarding).Otherwise you can run the command from a terminal in your preferred desktop environment.If you cannot run graphical applications you can connect to the graphic console from another host or connect to the console using the following command:virsh -c qemu+tls://Test/system console HostedEngineIf you need to reboot the VM you will need to start it manually using the command:
Chapt er 4 . Self- Host ed Engine
65

hosted-engine --vm-startYou can then set a temporary password using the command:hosted-engine --add-console-passwordThe VM has been started. Install the OS and shut down or reboot it. To continue please make a selection: (1) Continue setup - VM installation is complete (2) Reboot the VM and restart installation (3) Abort setup (1, 2, 3)[1]:
Using the naming convention of this procedure, you would connect to the virtual machineusing VNC with the following command:
/usr/bin/remote-viewer vnc://Host-HE1.example.com:5900
8. Installing the Virtual Machine Operat ing System
Connect to HostedEngine-VM, the virtual machine created by the hosted-engine script, andinstall a Red Hat Enterprise Linux 6.5 operating system.
9. Synchroniz ing the Host and the Virtual Machine
Return to Host-HE1 and continue the hosted-engine deployment script by selecting option1:
(1) Continue setup - VM installation is complete
Waiting for VM to shut down...[ INFO ] Creating VMYou can now connect to the VM with the following command: /usr/bin/remote-viewer vnc://localhost:5900Use temporary password "5379skAb" to connect to vnc console.Please note that in order to use remote-viewer you need to be able to run graphical applications.This means that if you are using ssh you have to supply the -Y flag (enables trusted X11 forwarding).Otherwise you can run the command from a terminal in your preferred desktop environment.If you cannot run graphical applications you can connect to the graphic console from another host or connect to the console using the following command:virsh -c qemu+tls://Test/system console HostedEngineIf you need to reboot the VM you will need to start it manually using the command:hosted-engine --vm-startYou can then set a temporary password using the command:hosted-engine --add-console-passwordPlease install and setup the engine in the VM.You may also be interested in subscribing to "agent" RHN/Satellite channel and installing rhevm-guest-agent-common package in the VM.
Red Hat Ent erprise Virt ualizat ion 3.3 Inst allat ion Guide
66
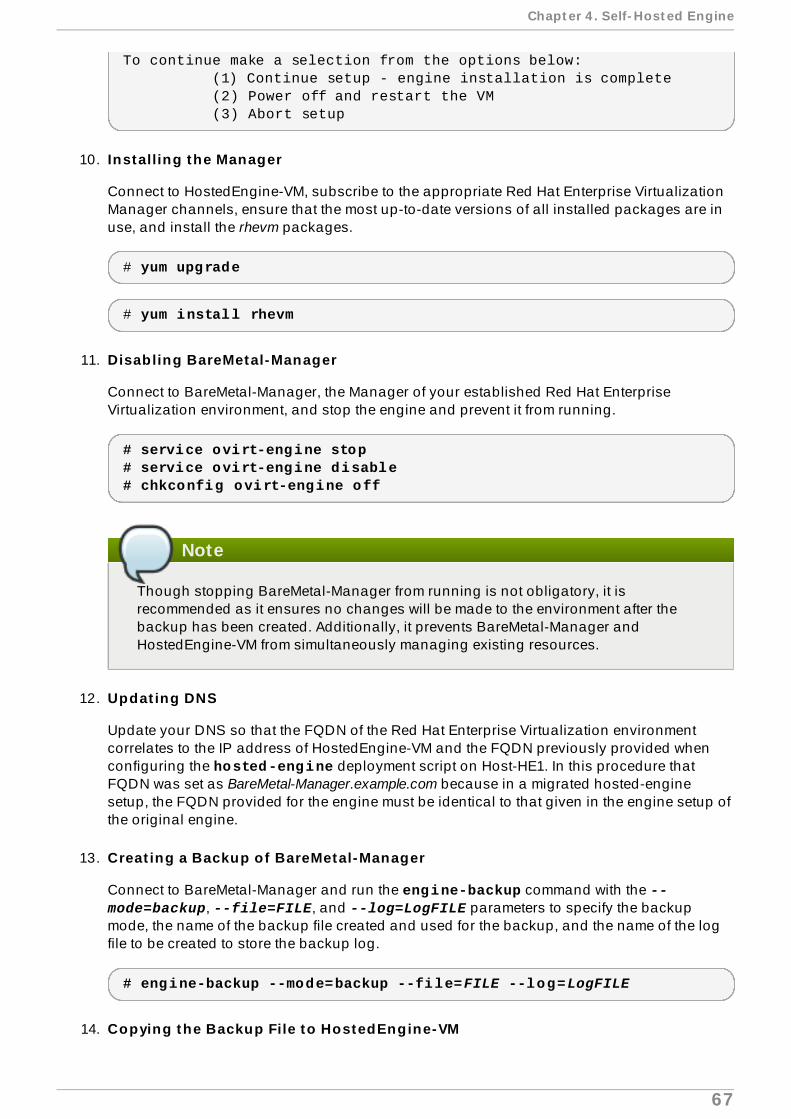
To continue make a selection from the options below: (1) Continue setup - engine installation is complete (2) Power off and restart the VM (3) Abort setup
10. Installing the Manager
Connect to HostedEngine-VM, subscribe to the appropriate Red Hat Enterprise VirtualizationManager channels, ensure that the most up-to-date versions of all installed packages are inuse, and install the rhevm packages.
# yum upgrade
# yum install rhevm
11. Disabling BareMetal-Manager
Connect to BareMetal-Manager, the Manager of your established Red Hat EnterpriseVirtualization environment, and stop the engine and prevent it from running.
# service ovirt-engine stop# service ovirt-engine disable# chkconfig ovirt-engine off
Note
Though stopping BareMetal-Manager from running is not obligatory, it isrecommended as it ensures no changes will be made to the environment after thebackup has been created. Additionally, it prevents BareMetal-Manager andHostedEngine-VM from simultaneously managing existing resources.
12. Updat ing DNS
Update your DNS so that the FQDN of the Red Hat Enterprise Virtualization environmentcorrelates to the IP address of HostedEngine-VM and the FQDN previously provided whenconfiguring the hosted-engine deployment script on Host-HE1. In this procedure thatFQDN was set as BareMetal-Manager.example.com because in a migrated hosted-enginesetup, the FQDN provided for the engine must be identical to that given in the engine setup ofthe original engine.
13. Creat ing a Backup of BareMetal-Manager
Connect to BareMetal-Manager and run the engine-backup command with the --mode=backup, --file=FILE, and --log=LogFILE parameters to specify the backupmode, the name of the backup file created and used for the backup, and the name of the logfile to be created to store the backup log.
# engine-backup --mode=backup --file=FILE --log=LogFILE
14. Copying the Backup File to HostedEngine-VM
Chapt er 4 . Self- Host ed Engine
67

Still on BareMetal-Manager, secure copy the backup file to HostedEngine-VM. In the followingexample, HostedEngine-VM.example.com is the FQDN for HostedEngine-VM, and /backup/ isany designated folder or path. If the designated folder or path does not exist, you will need toconnect to HostedEngine-VM and create it before secure copying the backup from BareMetal-Manager.
# scp -p backup1 HostedEngine-VM.example.com:/backup/
15. Restoring the Backup File on HostedEngine-VM
The engine-backup --mode=restore command does not create a database; you arerequired to create one on HostedEngine-VM before restoring the backup you created onBareMetal-Manager. Connect to HostedEngine-VM and create the database, as detailed inSection 3.7, “Preparing a PostgreSQL Database for Use with Red Hat EnterpriseVirtualization Manager” .
Note
The procedure in Section 3.7, “Preparing a PostgreSQL Database for Use with RedHat Enterprise Virtualization Manager” creates a database that is not empty, which willresult in the following error when you attempt to restore the backup:
FATAL: Database is not empty
Create an empty database using the following command in psql:
postgres=# create database [database name] owner [user name]
After the empty database has been created, restore the BareMetal-Manager backup using the engine-backup command with the --mode=restore --file=FILE --log=Restore.log parameters to specify the restore mode, the name of the file to be used torestore the database, and the name of the logfile to store the restore log. This restores the filesand the database but does not start the service.
To specify a different database configuration, use the --change-db-credentialsparameter to activate alternate credentials. Use the engine-backup --help command onthe Manager for a list of credential parameters.
# engine-backup --mode=restore --file=FILE --log=Restore.log --change-db-credentials --db-host=X.X.X.X --db-user=engine --db-password=password --db-name=engine
16. Conf iguring HostedEngine-VM
Configure the engine on HostedEngine-VM. This will identify the existing files and database.
# engine-setup
[ INFO ] Stage: Initializing[ INFO ] Stage: Environment setup
Red Hat Ent erprise Virt ualizat ion 3.3 Inst allat ion Guide
68

Configuration files: ['/etc/ovirt-engine-setup.conf.d/10-packaging.conf', '/etc/ovirt-engine-setup.conf.d/20-setup-ovirt-post.conf']Log file: /var/log/ovirt-engine/setup/ovirt-engine-setup-20140304075238.logVersion: otopi-1.1.2 (otopi-1.1.2-1.el6ev)[ INFO ] Stage: Environment packages setup[ INFO ] Yum Downloading: rhel-65-zstream/primary_db 2.8 M(70%)[ INFO ] Stage: Programs detection[ INFO ] Stage: Environment setup[ INFO ] Stage: Environment customization --== PACKAGES ==-- [ INFO ] Checking for product updates...[ INFO ] No product updates found --== NETWORK CONFIGURATION ==-- Setup can automatically configure the firewall on this system.Note: automatic configuration of the firewall may overwrite current settings.Do you want Setup to configure the firewall? (Yes, No) [Yes]: [ INFO ] iptables will be configured as firewall manager. --== DATABASE CONFIGURATION ==-- --== OVIRT ENGINE CONFIGURATION ==-- Skipping storing options as database already prepared --== PKI CONFIGURATION ==-- PKI is already configured --== APACHE CONFIGURATION ==-- --== SYSTEM CONFIGURATION ==-- --== END OF CONFIGURATION ==-- [ INFO ] Stage: Setup validation[WARNING] Less than 16384MB of memory is available[ INFO ] Cleaning stale zombie tasks --== CONFIGURATION PREVIEW ==-- Database name : engine Database secured connection : False Database host : X.X.X.X Database user name : engine Database host name validation : False Database port : 5432
Chapt er 4 . Self- Host ed Engine
69

NFS setup : True Firewall manager : iptables Update Firewall : True Configure WebSocket Proxy : True Host FQDN : HostedEngine-VM.example.com NFS mount point : /var/lib/exports/iso Set application as default page : True Configure Apache SSL : True Please confirm installation settings (OK, Cancel) [OK]:
Confirm the settings. Upon completion, the setup will provide an SSH fingerprint and aninternal Certificate Authority hash.
17. Synchroniz ing the Host and the Manager
Return to Host-HE1 and continue the hosted-engine deployment script by selecting option1:
(1) Continue setup - engine installation is complete
[ INFO ] Engine replied: DB Up!Welcome to Health Status![ INFO ] Waiting for the host to become operational in the engine. This may take several minutes...[ INFO ] Still waiting for VDSM host to become operational...[ INFO ] The VDSM Host is now operational Please shutdown the VM allowing the system to launch it as a monitored service. The system will wait until the VM is down.
18. Shut t ing Down HostedEngine-VM
Shutdown HostedEngine-VM.
# shutdown now
19. Setup Conf irmat ion
Return to Host-HE1 to confirm it has detected that HostedEngine-VM is down.
[ INFO ] Enabling and starting HA services Hosted Engine successfully set up[ INFO ] Stage: Clean up[ INFO ] Stage: Pre-termination[ INFO ] Stage: Termination
Result
Your Red Hat Enterprise Virtualization engine has been migrated to a hosted-engine setup. TheManager is now operating on a virtual machine on Host-HE1, called HostedEngine-VM in theenvironment. As HostedEngine-VM is highly available, it will be migrated to other hosts in theenvironment when applicable.
Red Hat Ent erprise Virt ualizat ion 3.3 Inst allat ion Guide
70

Report a bug
4.6. Installing Addit ional Hosts to a Self-Hosted Environment
Summary
Adding additional nodes to a self-hosted environment is very similar to deploying the original host,though heavily truncated as the script detects the environment.
As with the original host, additional hosts require Red Hat Enterprise Linux 6.5 with subscriptions tothe appropriate Red Hat Enterprise Virtualization channels.
All steps in this procedure are to be conducted as the root user.
Procedure 4 .4 . Adding the host
1. Install the ovirt-hosted-engine-setup package.
# yum install ovirt-hosted-engine-setup
2. Configure the host with the deployment command.
# hosted-engine --deploy
3. Conf iguring Storage
Specify the storage type and the full address, using either the Fully Qualified Domain Name(FQDN) or IP address, and path name of the shared storage domain used in the self-hostedenvironment.
Please specify the storage you would like to use (nfs3, nfs4)[nfs3]:Please specify the full shared storage connection path to use (example: host:/path): storage.example.com:/hosted_engine/nfs
4. Detect ing the Self -Hosted Engine
The hosted-engine script detects that the shared storage is being used and asks if this isan additional host setup. You are then prompted for the host ID, which must be an integer notalready assigned to an additional host in the environment.
The specified storage location already contains a data domain. Is this an additional host setup (Yes, No)[Yes]? [ INFO ] Installing on additional hostPlease specify the Host ID [Must be integer, default: 2]:
5. Conf iguring the System
The hosted-engine script uses the answer file generated by the original hosted-enginesetup. To achieve this, the script requires the FQDN or IP address and the password of the root user of that host so as to access and secure-copy the answer file to the additional host.
[WARNING] A configuration file must be supplied to deploy Hosted Engine on an additional host.The answer file may be fetched from the first host using scp.
Chapt er 4 . Self- Host ed Engine
71

If you do not want to download it automatically you can abort the setup answering no to the following question.Do you want to scp the answer file from the first host? (Yes, No)[Yes]: Please provide the FQDN or IP of the first host: Enter 'root' user password for host Host-HE1.example.com: [ INFO ] Answer file successfully downloaded
6. Conf iguring the Hosted Engine
Specify the name for the additional host to be identified in the Red Hat EnterpriseVirtualization environment, and the password for the admin@internal user.
Enter the name which will be used to identify this host inside the Administrator Portal [hosted_engine_2]: Enter 'admin@internal' user password that will be used for accessing the Administrator Portal: Confirm 'admin@internal' user password:
7. Conf igurat ion Preview
Before proceeding, the hosted-engine script displays the configuration values you haveentered, and prompts for confirmation to proceed with these values.
Bridge interface : eth1Engine FQDN : HostedEngine-VM.example.comBridge name : rhevmSSH daemon port : 22Firewall manager : iptablesGateway address : X.X.X.XHost name for web application : hosted_engine_2Host ID : 2Image size GB : 25Storage connection : storage.example.com:/hosted_engine/nfsConsole type : vncMemory size MB : 4096MAC address : 00:16:3e:05:95:50Boot type : diskNumber of CPUs : 2CPU Type : model_Penryn Please confirm installation settings (Yes, No)[No]:
Result
After confirmation, the script completes installation of the host and adds it to the environment.
Report a bug
4.7. Maintaining the Self-Hosted Engine
Red Hat Ent erprise Virt ualizat ion 3.3 Inst allat ion Guide
72

Setting the engine to global maintenance enables you to start, stop, and modify the engine withoutinterference from the high availability agents. This must be applied to the engine for any setup orupgrade operations that require the engine to be stopped, for instance the installation of the rhevm-dwh and rhevm-reports packages necessary for the Reports Portal .
# hosted-engine --set-maintenance --mode=global
To resume the high availability function of the engine, turn off global maintenance:
# hosted-engine --set-maintenance --mode=none
Both of these commands are to be conducted as the root user.
Report a bug
Chapt er 4 . Self- Host ed Engine
73

Chapter 5. Data Collection Setup and Reports Installation
5.1. Workflow Progress — Data Collect ion Setup and ReportsInstallat ion
Report a bug
5.2. Data Collect ion Setup and Reports Installat ion Overview
The Red Hat Enterprise Virtualization Manager optionally includes a comprehensive managementhistory database, which can be utilized by any application to extract a range of information at thedata center, cluster, and host levels. As the database structure changes over time a number ofdatabase views are also included to provide a consistent structure to consuming applications. Aview is a virtual table composed of the result set of a database query. The definition of a view isstored in the database as a SELECT statement. The result set of the SELECT statement populates thevirtual table returned by the view. If the optional comprehensive management history database hasbeen enabled, the history tables and their associated views are stored in the ovirt_engine_history database.
Red Hat Ent erprise Virt ualizat ion 3.3 Inst allat ion Guide
74

In addition to the history database Red Hat Enterprise Virtualization Manager Reports functionality isalso available as an optional component. Red Hat Enterprise Virtualization Manager Reportsprovides a customized implementation of JasperServer, and JasperReports. JasperServer is acomponent of JasperReports, an open source reporting tool capable of being embedded in Java-based applications. It produces reports which can be rendered to screen, printed, or exported to avariety of formats including PDF, Excel, CSV, Word, RTF, Flash, ODT and ODS. Reports built in RedHat Enterprise Virtualization Manager Reports are accessed via a web interface. In addition to arange of pre-configured reports and dashboards for monitoring the system, you are also able tocreate your own ad hoc reports.
Before proceeding with Red Hat Virtualization Manager Reports installation you must first haveinstalled the Red Hat Enterprise Virtualization Manager.
The Red Hat Enterprise Virtualization Manager Reports functionality depends on the presence of thehistory database, which is installed separately. Both the history database and the Red Hat EnterpriseVirtualization Manager Reports are optional components. They are not installed by default when youinstall the Red Hat Enterprise Virtualization Manager.
Report a bug
5.3. Installing and Configuring the History Database
Prerequisites:
Section 3.4, “ Installing the Red Hat Enterprise Virtualization Manager Packages”
Section 3.5, “Configuring Red Hat Enterprise Virtualization Manager”
Summary
Use of the history database is optional. To use the history or reporting capabilities of Red HatEnterprise Virtualization Manager, you must install and configure the history database.
Procedure 5.1. Installing and Conf iguring the History Database
1. Install the rhevm-dwh package. This package must be installed on the system on which theRed Hat Enterprise Virtualization Manager is installed.
# yum install rhevm-dwh
2. Once the required packages have been downloaded, they are listed for review. You will beprompted to confirm continuing with the installation. Upon confirmation, the packages areinstalled. However, some further configuration is required before the reports functionality canbe used.
3. Configure the history database. Use the rhevm-dwh-setup command to configure theExtract, Transform, Load (ETL) process and database scripts used to create and maintain aworking history database.
a. Run the rhevm-dwh-setup command on the system hosting the Red Hat EnterpriseVirtualization Manager:
# rhevm-dwh-setup
b. For the history database installation to take effect, the ovirt-engine service mustbe restarted. The rhevm-dwh-setup command prompts you:
Chapt er 5. Dat a Collect ion Set up and Report s Inst allat ion
75

In order to proceed the installer must stop the ovirt-engine serviceWould you like to stop the ovirt-engine service? (yes|no):
Type yes and then press Enter to proceed.
c. The rhevm-dwh-setup utility can optionally create a read-only user to allow remoteaccess to the history database.
This utility can configure a read only user for DB access. Would you like to do so? (yes|no):Provide a username for read-only user:Provide a password for read-only user:
If you choose to create a read-only user, the rhevm-dwh-setup utility automaticallyopens the required firewall ports and configures the database to listen on externallyfacing network interface devices.
Note
The rhevm-dwh-setup utility can configure read-only access to localdatabases only. If you chose to use a remote database during engine-setup, you have to manually configure read-only access to the historydatabase. See Connecting to the History Database in the Red Hat EnterpriseVirtualization Administration Guide.
d. The rhevm-dwh-setup utility can optionally configure the history database to usesecure connections
Should postgresql be setup with secure connection? (yes|no):
The command then creates and configures the ovirt_engine_history databaseand starts the ovirt-engine service.
Result
The ovirt_engine_history database has been created. Red Hat Enterprise VirtualizationManager is configured to log information to this database for reporting purposes.
Report a bug
5.4 . Installing and Configuring Red Hat Enterprise Virtualizat ionManager Reports
Prerequisites:
Section 5.3, “ Installing and Configuring the History Database”
Summary
Use of reports is optional. To use the reporting capabilities of Red Hat Enterprise VirtualizationManager, you must install and configure rhevm-reports.
Red Hat Ent erprise Virt ualizat ion 3.3 Inst allat ion Guide
76

Procedure 5.2. Installing and Conf iguring Red Hat Enterprise Virtualiz at ion ManagerReports
1. Install the rhevm-reports package. This package must be installed on the system on which theRed Hat Enterprise Virtualization Manager is installed.
# yum install rhevm-reports
2. Run the rhevm-reports-setup command on the system hosting the Red Hat EnterpriseVirtualization Manager:
# rhevm-reports-setup
3. For the Red Hat Enterprise Virtualization Manager Reports installation to take effect, the ovirt-engine service must be restarted. The rhevm-reports-setup command promptsyou:
In order to proceed the installer must stop the ovirt-engine serviceWould you like to stop the ovirt-engine service? (yes|no):
Type yes and then press Enter to proceed. The command then performs a number of actionsbefore prompting you to set the password for the Red Hat Enterprise Virtualization ManagerReports administrative users (rhevm-admin and superuser). Note that the reports systemmaintains its own set of credentials which are separate to those used for Red Hat EnterpriseVirtualization Manager.
Please choose a password for the reports admin user(s) (rhevm-admin and superuser):
You will be prompted to enter the password a second time to confirm it.
Result
Red Hat Enterprise Virtualization Manager Reports has been installed successfully. Access Red HatEnterprise Virtualization Manager Reports at http://[demo.redhat.com]/rhevm-reports,replacing [demo.redhat.com] with the fully-qualified domain name of the Red Hat EnterpriseVirtualization Manager. If during Red Hat Enterprise Virtualization Manager installation you selecteda non-default HTTP port then append : [port] to the URL, replacing [port] with the port that you chose.
Use the user name rhevm-admin and the password you set during reports installation to log in forthe first time. Note that the first time you log into Red Hat Enterprise Virtualization Manager Reports, anumber of web pages are generated, and as a result your initial attempt to login may take some timeto complete.
Report a bug
Chapt er 5. Dat a Collect ion Set up and Report s Inst allat ion
77

Chapter 6. Updating the Red Hat Enterprise VirtualizationEnvironment
6.1. Upgrades between Minor Releases
6.1.1. Checking for Red Hat Enterprise Virtualizat ion Manager Updates
Summary
Use the engine-upgrade-check command, included in Red Hat Enterprise VirtualizationManager, to check for updates.
Procedure 6 .1. Checking for Red Hat Enterprise Virtualiz at ion Manager Updates
1. Run engine-upgrade-check as a user with administrative privileges such as the rootuser.
# engine-upgrade-check
2. A. Where no updates are available the command will output the text No upgrade.
# engine-upgrade-checkVERB: queue package rhevm-setup for updateVERB: package rhevm-setup queuedVERB: Building transactionVERB: Empty transactionVERB: Transaction Summary:No upgrade
B. Where updates are available the command will list the packages to be updated.
# engine-upgrade-checkVERB: queue package rhevm-setup for updateVERB: package rhevm-setup queuedVERB: Building transactionVERB: Transaction builtVERB: Transaction Summary:VERB: updated - rhevm-lib-3.3.0-0.46.el6ev.noarchVERB: update - rhevm-lib-3.3.1-0.48.el6ev.noarchVERB: updated - rhevm-setup-3.3.0-0.46.el6ev.noarchVERB: update - rhevm-setup-3.3.1-0.48.el6ev.noarchUpgrade available
Result
You have successfully checked for Red Hat Enterprise Virtualization Manager updates.
Report a bug
6.1.2. Updat ing Red Hat Enterprise Virtualizat ion Manager
Summary
Red Hat Ent erprise Virt ualizat ion 3.3 Inst allat ion Guide
78

Updates to the Red Hat Enterprise Virtualization Manager are released via Red Hat Network. Beforeinstalling an update from Red Hat Network be sure to read the advisory text associated with it as wellas the most recent version of the Red Hat Enterprise Virtualization Release Notes, and the Red HatEnterprise Virtualization Technical Notes. A number of actions must be performed to complete anupgrade, including:
Stopping the ovirt-engine service.
Downloading and installing the updated packages.
Backing up and updating the database.
Performing post installation configuration.
Restarting the ovirt-engine service.
A script is included to perform these actions for you in an automated fashion. Active virtualizationhosts are not upgraded by this process and must be updated separately. As a result the virtualmachines running upon them are not affected. All commands in this task must be run while loggedinto the system hosting Red Hat Enterprise Virtualization Manager as the root user.
Procedure 6 .2. Updat ing Red Hat Enterprise Virtualiz at ion Manager
1. Run the yum command to update the rhevm-setup package.
# yum update rhevm-setup
2. Run the engine-setup command to update the Red Hat Enterprise Virtualization Manager.
# engine-setup
Note
From Version 3.3, installation of Red Hat Enterprise Virtualization Manager supports otopi , a standalone, plug-in-based installation framework for setting up systemcomponents. Under this framework, the rhevm-upgrade command used during theinstallation process has been updated to engine-setup and is now obsolete.
Note
The upgrade process may take some time; allow time for the upgrade process tocomplete and do not stop the process once initiated. Once the upgrade has beencompleted, you will also be instructed to separately upgrade the data warehouse andreports functionality. These additional steps are only required if these optionalpackages are installed.
Result
You have successfully updated Red Hat Enterprise Virtualization Manager.
Report a bug
Chapt er 6 . Updat ing t he Red Hat Ent erprise Virt ualizat ion Environment
79

6.1.3. T roubleshoot ing for Upgrading Red Hat Enterprise Virtualizat ionManager
Red Hat Enterprise Virtualiz at ion Troubleshoot ing Cases
SAM Channel Causes Conf licts with rhevm upgrade
Running Red Hat Enterprise Virtualization Manager on a machine that has SubscriptionAsset Manager (SAM) enabled is not supported. The yum update command fails to updaterhevm due to a " file conflicts" error if the sam-rhel-x86_64-server-6 channel isenabled.
If your Red Hat Enterprise Virtualization environment does not require Subscription AssetManager (SAM) features, you can disable the following channels in the customer portal:
1. sam-rhel-x86_64-server-6
2. sam-rhel-x86_64-server-6-debuginfo
Then, remove the package causing the conflict by issuing this command:
# yum remove apache-commons-codec
Alternatively, remove the channels from the command line:
# rhn-channel -r -c sam-rhel-x86_64-server-6# rhn-channel -r -c sam-rhel-x86_64-server-6-debuginfo
Then, remove the package causing the conflict by issuing this command:
# yum remove apache-commons-codec
Report a bug
6.1.4 . Updat ing Red Hat Enterprise Virtualizat ion Manager Reports
Summary
The Red Hat Enterprise Virtualization Manager Reports must be updated separately to the Red HatEnterprise Virtualization Manager. This task provides instructions for updating both the historydatabase and the reporting engine. You must run all commands in this task while logged into thesystem hosting Red Hat Enterprise Virtualization Manager as the root user.
Procedure 6 .3. Updat ing Red Hat Enterprise Virtualiz at ion Manager Reports
1. Use the yum command to update the rhevm-reports and rhevm-dwh packages.
# yum update -y rhevm-reports rhevm-dwh
2. Run the rhevm-dwh-setup command to update the ovirt_engine_history database.
# rhevm-dwh-setup
3. Run the rhevm-reports-setup command to update the reporting engine.
Red Hat Ent erprise Virt ualizat ion 3.3 Inst allat ion Guide
80

# rhevm-reports-setup
Result
You have successfully updated the Red Hat Enterprise Virtualization Manager Reports.
Report a bug
6.1.5. Updat ing Red Hat Enterprise Virtualizat ion Hypervisors
Summary
Updating Red Hat Enterprise Virtualization Hypervisors involves reinstalling the Hypervisor with anewer version of the Hypervisor ISO image. This includes stopping and restarting the Hypervisor.Virtual machines are automatically migrated to a different host, as a result it is recommended thatHypervisor updates are performed at a time when the host's usage is relatively low.
It is recommended that administrators update Red Hat Enterprise Virtualization Hypervisors regularly.Important bug fixes and security updates are included in updates. Hypervisors which are not up todate may be a security risk.
Warning
Upgrading Hypervisor hosts involves shutting down, deactivating guests, and restarting thephysical server. If any virtual machines are running on the Hypervisor, all data andconfiguration details may be destroyed if they are not shut down. Upgrading Hypervisors mustbe carefully planned and executed with care and consideration.
Important
Ensure that the cluster contains more than one host before performing an upgrade. Do notattempt to re-install or upgrade all the hosts at the same time, as one host must remainavailable to perform Storage Pool Manager (SPM) tasks.
Procedure 6 .4 . Updat ing Red Hat Enterprise Virtualiz at ion Hypervisors
1. Log in to the system hosting Red Hat Enterprise Virtualization Manager as the root user.
2. Ensure that:
the system is subscribed to the Red Hat Enterprise Virtualization entitlement —if using certificate-based Red Hat Network; or
the system is subscribed to the Red Hat Enterprise Virtualization Hypervisor (v.6 x86-64) (labeled rhel-x86_64-server-6-rhevh) — if using classic Red HatNetwork.
3. Run the yum command with the update rhev-hypervisor6 parameters to ensure that youhave the most recent version of the rhev-hypervisor6 package installed.
# yum update rhev-hypervisor6
Chapt er 6 . Updat ing t he Red Hat Ent erprise Virt ualizat ion Environment
81

4. Use your web browser to log in to the Administration Portal as a Red Hat EnterpriseVirtualization administrative user.
5. Click the Hosts tab, and then select the host that you intend to upgrade. If the host is notdisplayed, or the list of hosts is too long to filter visually, perform a search to locate the host.
6. With the host selected, click the General tab on the Details pane.
A. If the host requires updating, an alert message indicates that a new version of the Red HatEnterprise Virtualization Hypervisor is available.
B. If the host does not require updating, no alert message is displayed and no further actionis required.
7. Ensure the host remains selected and click the Maintenance button, if the host is notalready in maintenance mode. This will cause any virtual machines running on the host to bemigrated to other hosts. If the host is the SPM, this function will be moved to another host. Thestatus of the host changes as it enters maintenance mode. When the host status is Maintenance, the message in the general tab changes, providing you with a link whichwhen clicked will re-install or upgrade the host.
8. Ensure that the host remains selected, and that you are on the General tab of the the Details pane. Click the Upgrade link. The Install Host dialog box displays.
9. Select rhev-hypervisor.iso , which is symbolically linked to the most recent hypervisorimage.
10. Click OK to update and re-install the host. The dialog closes, the details of the host areupdated in the Hosts tab, and the status changes.
The host status will transition through these stages:
Installing ,
Reboot,
Non Responsive, and
Up.
These are all expected, and each stage will take some time.
11. Once successfully updated, the host displays a status of Up. Any virtual machines that weremigrated off the host, are at this point able to be migrated back to it.
Important
After a Red Hat Enterprise Virtualization Hypervisor is successfully registered to theRed Hat Enterprise Virtualization Manager and then upgraded, it may erroneouslyappear in the Administration Portal with the status of Install Failed . Click on the Activate button, and the hypervisor will change to an Up status and be ready foruse.
Result
You have successfully updated a Red Hat Enterprise Virtualization Hypervisor. Repeat these steps foreach Hypervisor in the Red Hat Enterprise Virtualization environment.
Red Hat Ent erprise Virt ualizat ion 3.3 Inst allat ion Guide
82

Report a bug
6.1.6. Updat ing Red Hat Enterprise Linux Virtualizat ion Hosts
Summary
Red Hat Enterprise Linux virtualization hosts are updated the same way as regular Red HatEnterprise Linux systems, using yum. It is highly recommended that you use yum to update yoursystems regularly, to ensure timely application of security and bug fixes. All steps in this task must berun while logged into the Red Hat Enterprise Linux virtualization host as the root user.
Procedure 6 .5. Updat ing Red Hat Enterprise Linux Virtualiz at ion Hosts
1. On the administration portal, navigate to the Hosts tab and select the host to be updated.Click Maintenance to place it into maintenance mode.
2. On the Red Hat Enterprise Linux virtualization host, run the yum command with the updateparameter to update all installed packages.
# yum update
3. If a package such as the kernel was updated, you must reboot the host to get the newfunctionality. If a package such as VDSM or libvirt was updated, you must restart that serviceto get the new functionality. Moreover, if the libvirt package is updated, you must restart the VDSM service.
Result
You have successfully updated the Red Hat Enterprise Linux virtualization host. Repeat this processfor each Red Hat Enterprise Linux virtualization host in the Red Hat Enterprise Virtualizationenvironment.
Report a bug
6.1.7. Updat ing the Red Hat Enterprise Virtualizat ion Guest T ools
Summary
The guest tools allow the Manager to communicate with running guests, providing information suchas IP addresses, memory usage, and installed applications for display in the Administration Portal.The guest tools are distributed as an ISO file that can be attached to guests. The ISO file is packagedas an RPM file, that can be installed and upgraded on registered Red Hat Enterprise VirtualizationManager servers.
Procedure 6 .6 . Updat ing the Red Hat Enterprise Virtualiz at ion Guest Tools
1. On the Manager, as root user, use the yum upgrade to upgrade the rhev-guest-tools-iso package.
# yum update -y rhev-guest-tools-iso*
2. When the rhev-guest-tools-iso package has been successfully upgraded, use the engine-iso-uploader command to upload it to your ISO storage domain. Replace[ISODomain] with the name of your ISO storage domain.
Chapt er 6 . Updat ing t he Red Hat Ent erprise Virt ualizat ion Environment
83
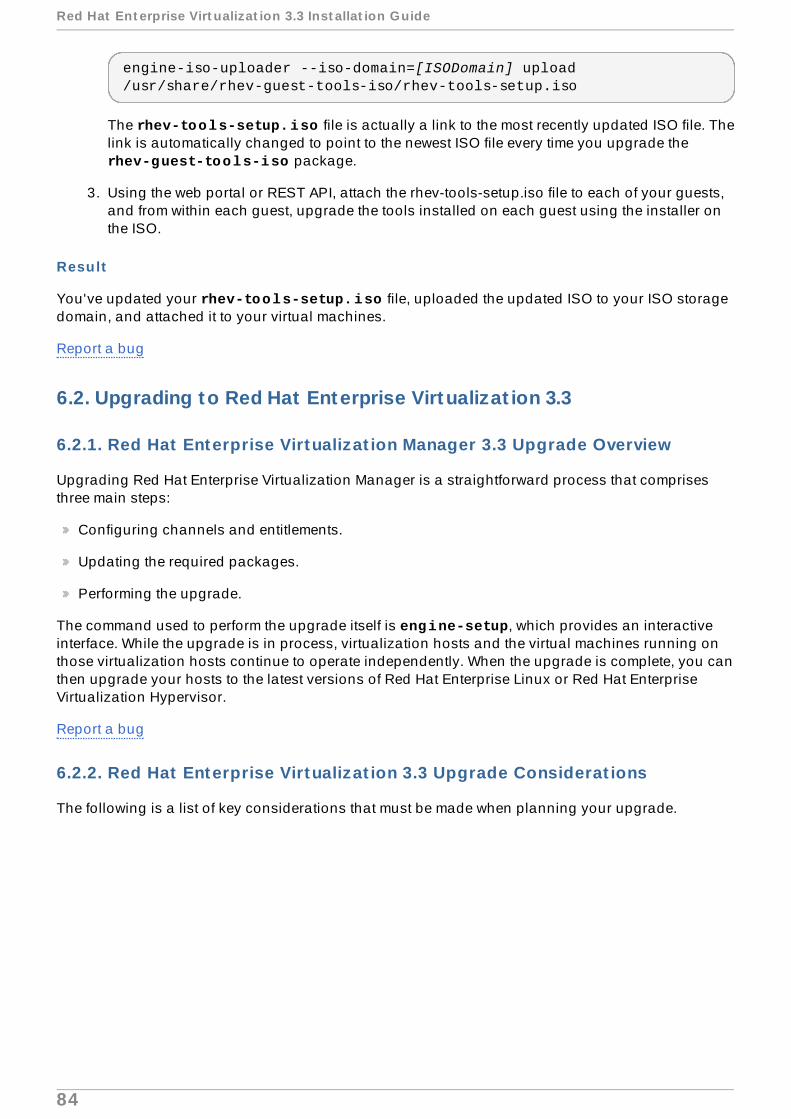
engine-iso-uploader --iso-domain=[ISODomain] upload /usr/share/rhev-guest-tools-iso/rhev-tools-setup.iso
The rhev-tools-setup.iso file is actually a link to the most recently updated ISO file. Thelink is automatically changed to point to the newest ISO file every time you upgrade the rhev-guest-tools-iso package.
3. Using the web portal or REST API, attach the rhev-tools-setup.iso file to each of your guests,and from within each guest, upgrade the tools installed on each guest using the installer onthe ISO.
Result
You've updated your rhev-tools-setup.iso file, uploaded the updated ISO to your ISO storagedomain, and attached it to your virtual machines.
Report a bug
6.2. Upgrading to Red Hat Enterprise Virtualizat ion 3.3
6.2.1. Red Hat Enterprise Virtualizat ion Manager 3.3 Upgrade Overview
Upgrading Red Hat Enterprise Virtualization Manager is a straightforward process that comprisesthree main steps:
Configuring channels and entitlements.
Updating the required packages.
Performing the upgrade.
The command used to perform the upgrade itself is engine-setup, which provides an interactiveinterface. While the upgrade is in process, virtualization hosts and the virtual machines running onthose virtualization hosts continue to operate independently. When the upgrade is complete, you canthen upgrade your hosts to the latest versions of Red Hat Enterprise Linux or Red Hat EnterpriseVirtualization Hypervisor.
Report a bug
6.2.2. Red Hat Enterprise Virtualizat ion 3.3 Upgrade Considerat ions
The following is a list of key considerations that must be made when planning your upgrade.
Red Hat Ent erprise Virt ualizat ion 3.3 Inst allat ion Guide
84

Important
Upgrading to version 3.3 can only be performed f rom version 3.2Users of Red Hat Enterprise Virtualization 3.1 must migrate to Red Hat EnterpriseVirtualization 3.2 before attempting to upgrade to Red Hat Enterprise Virtualization3.3.
Red Hat Enterprise Virtualiz at ion Manager cannot be installed on the samemachine as IPA
An error message displays if the ipa-server package is installed. Red Hat EnterpriseVirtualization Manager 3.3 does not support installation on the same machine asIdentity Management (IdM). To resolve this issue, you must migrate the IdMconfiguration to another system before re-attempting the upgrade. For furtherinformation, see https://access.redhat.com/knowledge/articles/233143.
Error: IPA was found to be installed on this machine. Red Hat Enterprise Virtualization Manager 3.3 does not support installing IPA on the same machine. Please remove ipa packages before you continue.
Upgrading to JBoss Enterprise Applicat ion Plat form 6 .1.0 is recommendedAlthough Red Hat Enterprise Virtualization Manager 3.3 supports EnterpriseApplication Platform 6.0.1, upgrading to the latest supported version of JBoss isrecommended. For more information on upgrading to JBoss Enterprise ApplicationPlatform 6.1.0, see Upgrade the JBoss EAP 6 RPM Installation.
The rhevm-upgrade command has been replaced by engine-setupFrom Version 3.3, installation of Red Hat Enterprise Virtualization Manager supports otopi , a standalone, plug-in-based installation framework for setting up systemcomponents. Under this framework, the rhevm-upgrade command used during theinstallation process has been updated to engine-setup and is now obsolete.
Report a bug
6.2.3. Upgrading to Red Hat Enterprise Virtualizat ion Manager 3.3
Prerequisites:
Section 6.3.1, “Upgrading to Red Hat Enterprise Virtualization Manager 3.2”
Summary
The following procedure outlines the process for upgrading Red Hat Enterprise VirtualizationManager 3.2 to Red Hat Enterprise Virtualization Manager 3.3. This procedure assumes that thesystem on which the Manager is hosted is subscribed to the channels and entitlements for receivingRed Hat Enterprise Virtualization 3.2 packages.
If the upgrade fails, the engine-setup command will attempt to roll your Red Hat EnterpriseVirtualization Manager installation back to its previous state. For this reason, the channels requiredby Red Hat Enterprise Virtualization 3.2 must not be removed until after the upgrade is complete asoutlined below. If the upgrade fails, detailed instructions display that explain how to restore yourinstallation.
Procedure 6 .7. Upgrading to Red Hat Enterprise Virtualiz at ion Manager 3.3
Chapt er 6 . Updat ing t he Red Hat Ent erprise Virt ualizat ion Environment
85

1. Subscribe the system to the required channels and entitlements for receiving Red HatEnterprise Virtualization Manager 3.3 packages.
Subscript ion Manager
Red Hat Enterprise Virtualization 3.3 packages are provided by the rhel-6-server-rhevm-3.3-rpms repository associated with the Red Hat Enterprise Virtualizationentitlement. Use the yum-config-manager command to enable the repository in your yumconfiguration.
# yum-config-manager --enable rhel-6-server-rhevm-3.3-rpms
Red Hat Network Classic
The Red Hat Enterprise Virtualization 3.3 packages are provided by the Red Hat Enterprise Virtualization Manager (v.3.3 x86_64) channel, also referred to as rhel-x86_64-server-6-rhevm-3.3 in Red Hat Network Classic. Use the rhn-channelcommand or the Red Hat Network web interface to subscribe to the Red Hat Enterprise Virtualization Manager (v.3.3 x86_64) channel:
# rhn-channel --add --channel=rhel-x86_64-server-6-rhevm-3.3
2. Update the rhevm-setup package to ensure you have the most recent version of engine-setup.
# yum update rhevm-setup
3. Run the engine-setup command and follow the prompts to upgrade Red Hat EnterpriseVirtualization Manager.
# engine-setup[ INFO ] Stage: Initializing Welcome to the RHEV 3.3.0 upgrade. Please read the following knowledge article for known issues and updated instructions before proceeding with the upgrade. RHEV 3.3.0 Upgrade Guide: Tips, Considerations and Roll-back Issues https://access.redhat.com/site/articles/408623 Would you like to continue with the upgrade? (Yes, No) [Yes]:
4. Remove Red Hat Enterprise Virtualization Manager 3.2 channels and entitlements to ensurethe system does not use any Red Hat Enterprise Virtualization Manager 3.2 packages.
Subscript ion Manager
Use the yum-config-manager command to disable the Red Hat Enterprise Virtualization3.2 repository in your yum configuration.
# yum-config-manager --disable rhel-6-server-rhevm-3.2-rpms
Red Hat Network Classic
Red Hat Ent erprise Virt ualizat ion 3.3 Inst allat ion Guide
86

Use the rhn-channel command or the Red Hat Network web interface to remove the Red Hat Enterprise Virtualization Manager (v.3.2 x86_64) channels.
# rhn-channel --remove --channel=rhel-x86_64-server-6-rhevm-3.2
5. Run the following command to ensure all packages related to Red Hat EnterpriseVirtualization are up to date:
# yum update
In particular, if you are using the JBoss Application Server from JBoss Enterprise ApplicationPlatform 6.0.1, you must run the above command to upgrade to Enterprise ApplicationPlatform 6.1.
Result
Red Hat Enterprise Virtualization Manager has been upgraded. To take full advantage of all Red HatEnterprise Virtualization 3.3 features you must also:
Ensure all of your virtualization hosts are up to date and running the most recent Red HatEnterprise Linux packages or Hypervisor images.
Change all of your clusters to use compatibility version 3.3.
Change all of your data centers to use compatibility version 3.3.
Report a bug
6.3. Upgrading to Red Hat Enterprise Virtualizat ion Manager 3.2
6.3.1. Upgrading to Red Hat Enterprise Virtualizat ion Manager 3.2
Prerequisites:
Section 6.4.1, “Upgrading to Red Hat Enterprise Virtualization Manager 3.1”
Summary
Upgrading Red Hat Enterprise Virtualization Manager to version 3.2 is performed using the rhevm-upgrade command. Virtualization hosts, and the virtual machines running upon them, will continueto operate independently while the Manager is being upgraded. Once the Manager upgrade iscomplete you will be able to upgrade your hosts, if you haven't already, to the latest versions of RedHat Enterprise Linux and Red Hat Enterprise Virtualization Hypervisor.
Important
Users of Red Hat Enterprise Virtualization 3.0 must migrate to Red Hat EnterpriseVirtualization 3.1 before attempting this upgrade.
Chapt er 6 . Updat ing t he Red Hat Ent erprise Virt ualizat ion Environment
87

Note
In the event that the upgrade fails the rhevm-upgrade command will attempt to roll your RedHat Enterprise Virtualization Manager installation back to its previous state. Where this alsofails detailed instructions for manually restoring the installation are displayed.
Procedure 6 .8. Upgrading to Red Hat Enterprise Virtualiz at ion Manager 3.2
1. Add Red Hat Enterprise Virtualiz at ion 3.2 Subscript ion
Ensure that the system is subscribed to the required channels and entitlements to receive RedHat Enterprise Virtualization Manager 3.2 packages. This procedure assumes that the systemis already subscribed to required channels and entitlements to receive Red Hat EnterpriseVirtualization 3.1 packages. These must also be available to complete the upgrade process.
Cert if icate-based Red Hat Network
The Red Hat Enterprise Virtualization 3.2 packages are provided by the rhel-6-server-rhevm-3.2-rpms repository associated with the Red Hat Enterprise Virtualizationentitlement. Use the yum-config-manager command to enable the repository in your yumconfiguration. The yum-config-manager command must be run while logged in as the root user.
# yum-config-manager --enable rhel-6-server-rhevm-3.2-rpms
Red Hat Network Classic
The Red Hat Enterprise Virtualization 3.2 packages are provided by the Red Hat Enterprise Virtualization Manager (v.3.2 x86_64) channel, also referred to as rhel-x86_64-server-6-rhevm-3.2 in Red Hat Network Classic.
rhn-channel --add --channel=rhel-x86_64-server-6-rhevm-3.2
Use the rhn-channel command, or the Red Hat Network Web Interface, to subscribe to the Red Hat Enterprise Virtualization Manager (v.3.2 x86_64) channel.
2. Remove Enterprise Virtualiz at ion 3.1 Subscript ion
Ensure that the system does not use any Red Hat Enterprise Virtualization Manager 3.1packages by removing the Red Hat Enterprise Vitulization Manager 3.1 channels andentitlements.
Cert if icate-based Red Hat Network
Use the yum-config-manager command to disable the Red Hat Enterprise Virtualization3.1 repository in your yum configuration. The yum-config-manager command must be runwhile logged in as the root user.
# yum-config-manager --disablerepo=rhel-6-server-rhevm-3.1-rpms
Red Hat Network Classic
Red Hat Ent erprise Virt ualizat ion 3.3 Inst allat ion Guide
88

Use the rhn-channel command, or the Red Hat Network Web Interface, to remove the Red Hat Enterprise Virtualization Manager (v.3.1 x86_64) channels.
# rhn-channel --remove --channel=rhel-6-server-rhevm-3.1
3. Update the rhevm-setup Package
To ensure that you have the most recent version of the rhevm-upgrade command installedyou must update the rhevm-setup package. Log in as the root user and use yum to updatethe rhevm-setup package.
# yum update rhevm-setup
4. Run the rhevm-upgrade Command
To upgrade Red Hat Enterprise Virtualization Manager run the rhevm-upgrade command.You must be logged in as the root user to run this command.
# rhevm-upgradeLoaded plugins: product-id, rhnpluginInfo: RHEV Manager 3.1 to 3.2 upgrade detectedChecking pre-upgrade conditions...(This may take several minutes)
5. If the ipa-server package is installed then an error message is displayed. Red Hat EnterpriseVirtualization Manager 3.2 does not support installation on the same machine as IdentityManagement (IdM).
Error: IPA was found to be installed on this machine. Red Hat Enterprise Virtualization Manager 3.2 does not support installing IPA on the same machine. Please remove ipa packages before you continue.
To resolve this issue you must migrate the IdM configuration to another system before re-attempting the upgrade. For further information seehttps://access.redhat.com/knowledge/articles/233143.
Result
Your Red Hat Enterprise Virtualization Manager installation has now been upgraded. To take fulladvantage of all Red Hat Enterprise Virtualization 3.2 features you must also:
Ensure that all of your virtualization hosts are up to date and running the most recent Red HatEnterprise Linux packages or Hypervisor images.
Change all of your clusters to use compatibility version 3.2.
Change all of your data centers to use compatibility version 3.2.
Report a bug
6.4 . Upgrading to Red Hat Enterprise Virtualizat ion Manager 3.1
6.4 .1. Upgrading to Red Hat Enterprise Virtualizat ion Manager 3.1
Chapt er 6 . Updat ing t he Red Hat Ent erprise Virt ualizat ion Environment
89
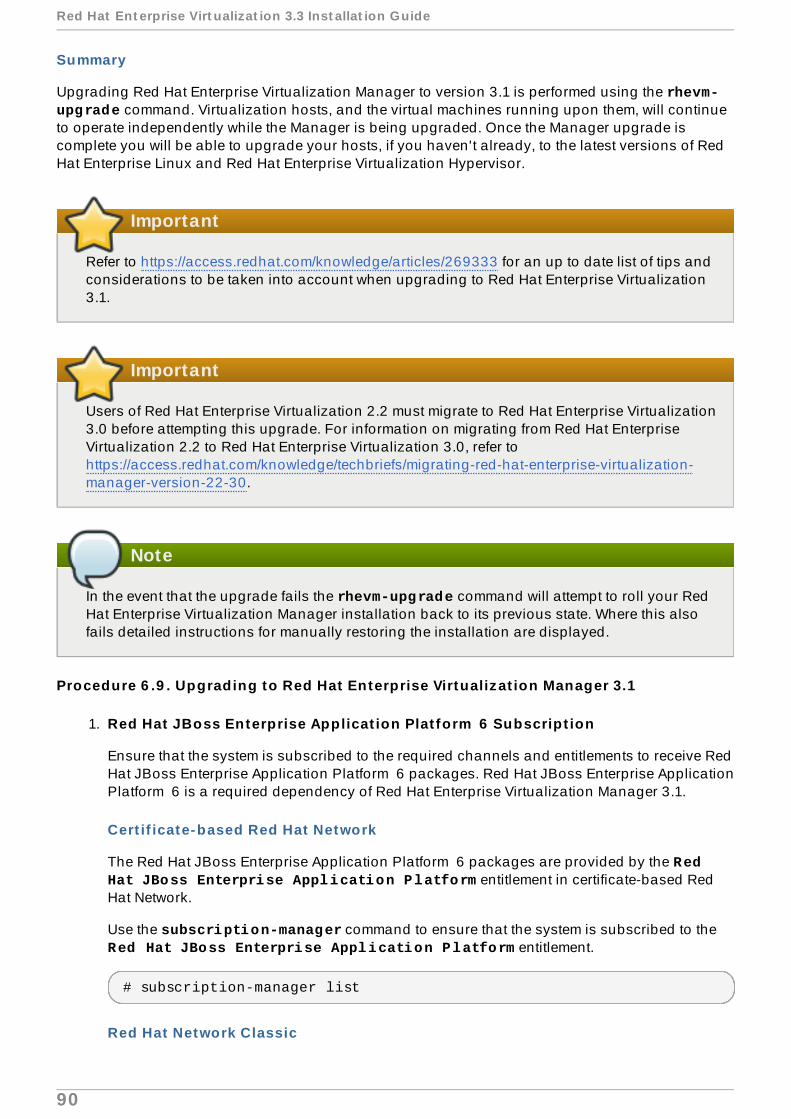
Summary
Upgrading Red Hat Enterprise Virtualization Manager to version 3.1 is performed using the rhevm-upgrade command. Virtualization hosts, and the virtual machines running upon them, will continueto operate independently while the Manager is being upgraded. Once the Manager upgrade iscomplete you will be able to upgrade your hosts, if you haven't already, to the latest versions of RedHat Enterprise Linux and Red Hat Enterprise Virtualization Hypervisor.
Important
Refer to https://access.redhat.com/knowledge/articles/269333 for an up to date list of tips andconsiderations to be taken into account when upgrading to Red Hat Enterprise Virtualization3.1.
Important
Users of Red Hat Enterprise Virtualization 2.2 must migrate to Red Hat Enterprise Virtualization3.0 before attempting this upgrade. For information on migrating from Red Hat EnterpriseVirtualization 2.2 to Red Hat Enterprise Virtualization 3.0, refer tohttps://access.redhat.com/knowledge/techbriefs/migrating-red-hat-enterprise-virtualization-manager-version-22-30.
Note
In the event that the upgrade fails the rhevm-upgrade command will attempt to roll your RedHat Enterprise Virtualization Manager installation back to its previous state. Where this alsofails detailed instructions for manually restoring the installation are displayed.
Procedure 6 .9 . Upgrading to Red Hat Enterprise Virtualiz at ion Manager 3.1
1. Red Hat JBoss Enterprise Applicat ion Plat form 6 Subscript ion
Ensure that the system is subscribed to the required channels and entitlements to receive RedHat JBoss Enterprise Application Platform 6 packages. Red Hat JBoss Enterprise ApplicationPlatform 6 is a required dependency of Red Hat Enterprise Virtualization Manager 3.1.
Cert if icate-based Red Hat Network
The Red Hat JBoss Enterprise Application Platform 6 packages are provided by the Red Hat JBoss Enterprise Application Platform entitlement in certificate-based RedHat Network.
Use the subscription-manager command to ensure that the system is subscribed to the Red Hat JBoss Enterprise Application Platform entitlement.
# subscription-manager list
Red Hat Network Classic
Red Hat Ent erprise Virt ualizat ion 3.3 Inst allat ion Guide
90

The Red Hat JBoss Enterprise Application Platform 6 packages are provided by the Red Hat JBoss Application Platform (v 6) for 6Server x86_64 channel, alsoreferred to as jbappplatform-6-x86_64-server-6-rpm, in Red Hat Network Classic.The Channel Entitlement Name for this channel is Red Hat JBoss Enterprise Application Platform (v 4, zip format).
Use the rhn-channel command, or the Red Hat Network Web Interface, to subscribe to the Red Hat JBoss Application Platform (v 6) for 6Server x86_64 channel.
2. Add Red Hat Enterprise Virtualiz at ion 3.1 Subscript ion
Ensure that the system is subscribed to the required channels and entitlements to receive RedHat Enterprise Virtualization Manager 3.1 packages.
Cert if icate-based Red Hat Network
The Red Hat Enterprise Virtualization 3.1 packages are provided by the rhel-6-server-rhevm-3.1-rpms repository associated with the Red Hat Enterprise Virtualizationentitlement. Use the yum-config-manager command to enable the repository in your yumconfiguration. The yum-config-manager command must be run while logged in as the root user.
# yum-config-manager --enable rhel-6-server-rhevm-3.1-rpms
Red Hat Network Classic
The Red Hat Enterprise Virtualization 3.1 packages are provided by the Red Hat Enterprise Virtualization Manager (v.3.1 x86_64) channel, also referred to as rhel-x86_64-server-6-rhevm-3.1 in Red Hat Network Classic.
Use the rhn-channel command, or the Red Hat Network Web Interface, to subscribe to the Red Hat Enterprise Virtualization Manager (v.3.1 x86_64) channel.
3. Remove Red Hat Enterprise Virtualiz at ion 3.0 Subscript ion
Ensure that the system does not use any Red Hat Enterprise Virtualization Manager 3.0packages by removing the Red Hat Enterprise Virtualization Manager 3.0 channels andentitlements.
Cert if icate-based Red Hat Network
Use the yum-config-manager command to disable the Red Hat Enterprise Virtualization3.0 repositories in your yum configuration. The yum-config-manager command must berun while logged in as the root user.
# yum-config-manager --disablerepo=rhel-6-server-rhevm-3-rpms
# yum-config-manager --disablerepo=jb-eap-5-for-rhel-6-server-rpms
Red Hat Network Classic
Use the rhn-channel command, or the Red Hat Network Web Interface, to remove the Red Hat Enterprise Virtualization Manager (v.3.0 x86_64) channels.
# rhn-channel --remove --channel=rhel-6-server-rhevm-3
Chapt er 6 . Updat ing t he Red Hat Ent erprise Virt ualizat ion Environment
91
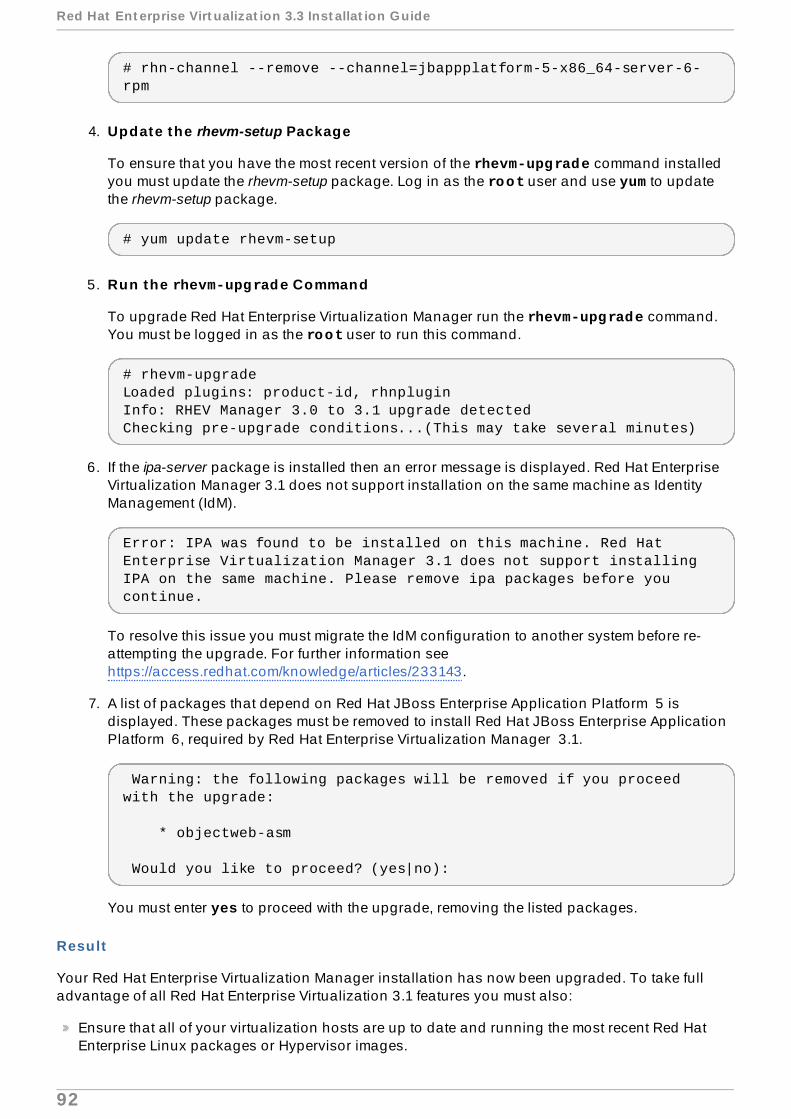
# rhn-channel --remove --channel=jbappplatform-5-x86_64-server-6-rpm
4. Update the rhevm-setup Package
To ensure that you have the most recent version of the rhevm-upgrade command installedyou must update the rhevm-setup package. Log in as the root user and use yum to updatethe rhevm-setup package.
# yum update rhevm-setup
5. Run the rhevm-upgrade Command
To upgrade Red Hat Enterprise Virtualization Manager run the rhevm-upgrade command.You must be logged in as the root user to run this command.
# rhevm-upgradeLoaded plugins: product-id, rhnpluginInfo: RHEV Manager 3.0 to 3.1 upgrade detectedChecking pre-upgrade conditions...(This may take several minutes)
6. If the ipa-server package is installed then an error message is displayed. Red Hat EnterpriseVirtualization Manager 3.1 does not support installation on the same machine as IdentityManagement (IdM).
Error: IPA was found to be installed on this machine. Red Hat Enterprise Virtualization Manager 3.1 does not support installing IPA on the same machine. Please remove ipa packages before you continue.
To resolve this issue you must migrate the IdM configuration to another system before re-attempting the upgrade. For further information seehttps://access.redhat.com/knowledge/articles/233143.
7. A list of packages that depend on Red Hat JBoss Enterprise Application Platform 5 isdisplayed. These packages must be removed to install Red Hat JBoss Enterprise ApplicationPlatform 6, required by Red Hat Enterprise Virtualization Manager 3.1.
Warning: the following packages will be removed if you proceed with the upgrade:
* objectweb-asm
Would you like to proceed? (yes|no):
You must enter yes to proceed with the upgrade, removing the listed packages.
Result
Your Red Hat Enterprise Virtualization Manager installation has now been upgraded. To take fulladvantage of all Red Hat Enterprise Virtualization 3.1 features you must also:
Ensure that all of your virtualization hosts are up to date and running the most recent Red HatEnterprise Linux packages or Hypervisor images.
Red Hat Ent erprise Virt ualizat ion 3.3 Inst allat ion Guide
92

Change all of your clusters to use compatibility version 3.1.
Change all of your data centers to use compatibility version 3.1.
See Also:
Section 6.1.5, “Updating Red Hat Enterprise Virtualization Hypervisors”
Section 6.1.6, “Updating Red Hat Enterprise Linux Virtualization Hosts”
Section 6.5.2, “Changing the Cluster Compatibility Version”
Section 6.5.3, “Changing the Data Center Compatibility Version”
Report a bug
6.5. Post -upgrade Tasks
6.5.1. Features Requiring a Compat ibilit y Upgrade to Red Hat EnterpriseVirtualizat ion 3.3
Some of the new features in Red Hat Enterprise Virtualization are only available if your data centers,clusters, and storage have a compatibility version of 3.3.
Table 6 .1. Features Requiring a Compat ib ility Upgrade to Red Hat EnterpriseVirtualiz at ion 3.3
Feature Descript ionLibvirt-to-libvirt virtual machine migration Perform virtual machine migration using libvirt-
to-libvirt communication. This is safer, moresecure, and has less host configurationrequirements than native KVM migration, but hasa higher overhead on the host CPU.
Isolated network to carry virtual machinemigration traffic
Separates virtual machine migration traffic fromother traffic types, like management and displaytraffic. Reduces chances of migrations causinga network flood that disrupts other importanttraffic types.
Define a gateway per logical network Each logical network can have a gatewaydefined as separate from the managementnetwork gateway. This allows morecustomizable network topologies.
Snapshots including RAM Snapshots now include the state of a virtualmachine's memory as well as disk.
Optimized iSCSI device driver for virtualmachines
Virtual machines can now consume iSCSIstorage as virtual hard disks using an optimizeddevice driver.
Host support for MOM management of memoryovercommitment
MOM is a policy-driven tool that can be used tomanage overcommitment on hosts. CurrentlyMOM supports control of memory ballooningand KSM.
GlusterFS data domains. Native support for the GlusterFS protocol wasadded as a way to create storage domains,allowing Gluster data centers to be created.
Chapt er 6 . Updat ing t he Red Hat Ent erprise Virt ualizat ion Environment
93

Custom device property support In addition to defining custom properties ofvirtual machines, you can also define customproperties of virtual machine devices.
Multiple monitors using a single virtual PCIdevice
Drive multiple monitors using a single virtualPCI device, rather than one PCI device permonitor.
Updatable storage server connections It is now possible to edit the storage serverconnection details of a storage domain.
Check virtual hard disk alignment Check if a virtual disk, the filesystem installed onit, and its underlying storage are aligned. If it isnot aligned, there may be a performancepenalty.
Extendable virtual machine disk images You can now grow your virtual machine diskimage when it fills up.
OpenStack Image Service integration Red Hat Enterprise Virtualization supports theOpenStack Image Service. You can importimages from and export images to an ImageService repository.
Gluster hook support You can manage Gluster hooks, which extendvolume life cycle events, from Red Hat EnterpriseVirtualization Manager.
Gluster host UUID support This feature allows a Gluster host to beidentified by the Gluster server UUID generatedby Gluster in addition to identifying a Glusterhost by IP address.
Network quality of service (QoS) support Limit the inbound and outbound network trafficat the virtual NIC level.
Cloud-Init support Cloud-Init allows you to automate earlyconfiguration tasks in your virtual machines,including setting hostnames, authorized keys,and more.
Feature Descript ion
Report a bug
6.5.2. Changing the Cluster Compat ibilit y Version
Prerequisites:
Section 6.1.5, “Updating Red Hat Enterprise Virtualization Hypervisors”
Section 6.1.6, “Updating Red Hat Enterprise Linux Virtualization Hosts”
Summary
Red Hat Enterprise Virtualization clusters have a compatibility version. The cluster compatibilityversion indicates the features of Red Hat Enterprise Virtualization supported by all of the hosts in thecluster. The cluster compatibility is set according to the version of the least capable host operatingsystem in the cluster.
Red Hat Ent erprise Virt ualizat ion 3.3 Inst allat ion Guide
94
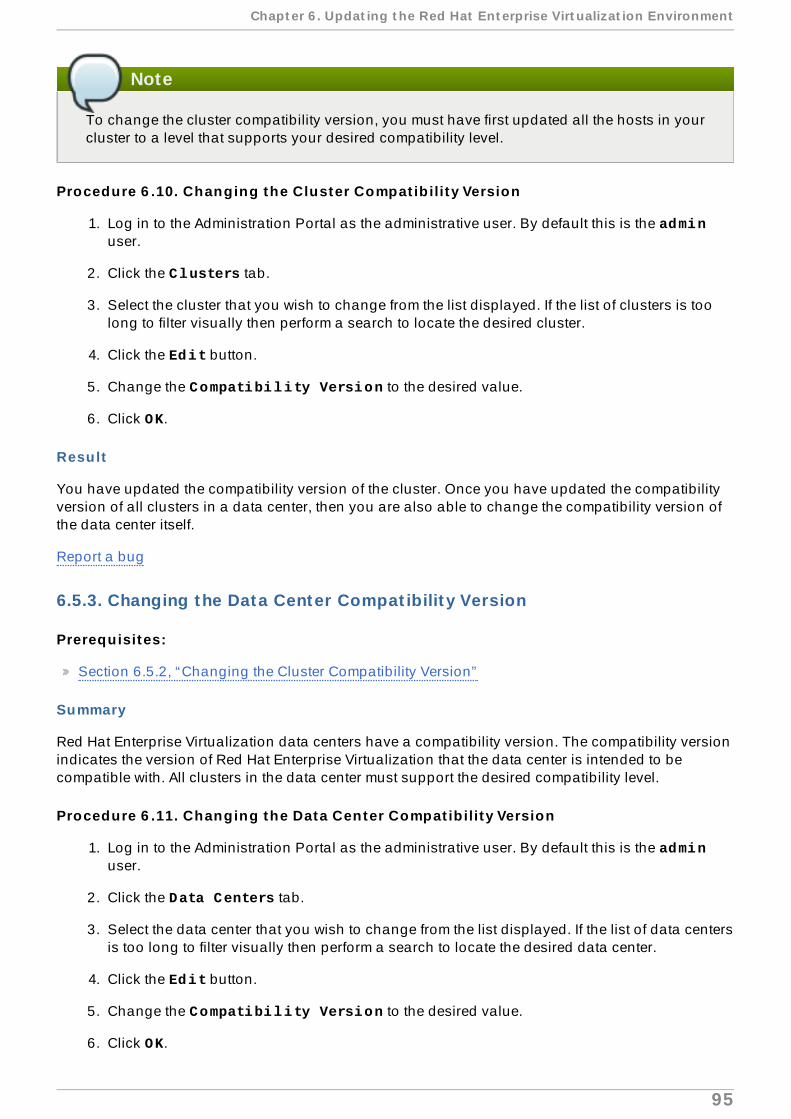
Note
To change the cluster compatibility version, you must have first updated all the hosts in yourcluster to a level that supports your desired compatibility level.
Procedure 6 .10. Changing the Cluster Compat ib ility Version
1. Log in to the Administration Portal as the administrative user. By default this is the adminuser.
2. Click the Clusters tab.
3. Select the cluster that you wish to change from the list displayed. If the list of clusters is toolong to filter visually then perform a search to locate the desired cluster.
4. Click the Edit button.
5. Change the Compatibility Version to the desired value.
6. Click OK.
Result
You have updated the compatibility version of the cluster. Once you have updated the compatibilityversion of all clusters in a data center, then you are also able to change the compatibility version ofthe data center itself.
Report a bug
6.5.3. Changing the Data Center Compat ibilit y Version
Prerequisites:
Section 6.5.2, “Changing the Cluster Compatibility Version”
Summary
Red Hat Enterprise Virtualization data centers have a compatibility version. The compatibility versionindicates the version of Red Hat Enterprise Virtualization that the data center is intended to becompatible with. All clusters in the data center must support the desired compatibility level.
Procedure 6 .11. Changing the Data Center Compat ib ility Version
1. Log in to the Administration Portal as the administrative user. By default this is the adminuser.
2. Click the Data Centers tab.
3. Select the data center that you wish to change from the list displayed. If the list of data centersis too long to filter visually then perform a search to locate the desired data center.
4. Click the Edit button.
5. Change the Compatibility Version to the desired value.
6. Click OK.
Chapt er 6 . Updat ing t he Red Hat Ent erprise Virt ualizat ion Environment
95

Result
You have updated the compatibility version of the data center.
Report a bug
Red Hat Ent erprise Virt ualizat ion 3.3 Inst allat ion Guide
96
Part III. Installing Virtualization Hosts
Part III. Inst alling Virt ualizat ion Host s
97

Chapter 7. Introduction to Virtualization Hosts
7.1. Workflow Progress — Installing Virtualizat ion Hosts
Report a bug
7.2. Int roduct ion to Virtualizat ion Hosts
Red Hat Enterprise Virtualization supports both virtualization hosts which run the Red Hat EnterpriseVirtualization Hypervisor, and those which run Red Hat Enterprise Linux. Both types of virtualizationhost are able to coexist in the same Red Hat Enterprise Virtualization environment.
Prior to installing virtualization hosts you should ensure that:
all virtualization hosts meet the hardware requirements, and
you have successfully completed installation of the Red Hat Enterprise Virtualization Manager.
Red Hat Ent erprise Virt ualizat ion 3.3 Inst allat ion Guide
98

Additionally you may have chosen to install the Red Hat Enterprise Virtualization Manager Reports.This is not mandatory and is not required to commence installing virtualization hosts. Once youhave completed the above tasks you are ready to install virtualization hosts.
Important
It is recommended that you install at least two virtualization hosts and attach them to the RedHat Enterprise Virtualization environment. Where you attach only one virtualization host youwill be unable to access features such as migration which require redundant hosts.
Important
The Red Hat Enterprise Virtualization Hypervisor is a closed system. Use a Red Hat EnterpriseLinux host if additional rpms are required for your environment.
Chapter 8, Installing Red Hat Enterprise Virtualization Hypervisor Hosts
Chapter 9, Installing Red Hat Enterprise Linux Hosts
See Also:
Section 2.2.3, “Virtualization Host Hardware Requirements”
Report a bug
Chapt er 7 . Int roduct ion t o Virt ualizat ion Host s
99
Chapter 8. Installing Red Hat Enterprise VirtualizationHypervisor Hosts
8.1. Red Hat Enterprise Virtualizat ion Hypervisor Installat ion Overview
Before commencing Hypervisor installation you must be aware that:
The Red Hat Enterprise Virtualization Hypervisor must be installed on a physical server. It mustnot be installed in a Virtual Machine.
The installation process will reconfigure the selected storage device and destroy all data.Therefore, ensure that any data to be retained is successfully backed up before proceeding.
All Hypervisors in an environment must have unique hostnames and IP addresses, in order toavoid network conflicts.
Instructions for using Network (PXE) Boot to install the Hypervisor are contained in the Red HatEnterprise Linux - Installation Guide, available at https://access.redhat.com/documentation/en-US/Red_Hat_Enterprise_Linux.
Red Hat Enterprise Virtualization Hypervisors can use Storage Attached Networks (SANs) andother network storage for storing virtualized guest images. However, a local storage device isrequired for installing and booting the Hypervisor.
Note
Red Hat Enterprise Virtualization Hypervisor installations can be automated or conductedwithout interaction. This type of installation is only recommended for advanced users.
Report a bug
8.2. Installing the Red Hat Enterprise Virtualizat ion HypervisorPackages
Summary
The Red Hat Enterprise Virtualization Hypervisor (v.6 x86_64) Red Hat Networkchannel contains the Hypervisor packages. The Hypervisor itself is contained in the rhev-hypervisor6package. Additional tools supporting USB and PXE installations are also installed as a dependency.You must install the Hypervisor packages on the system that you intend to use to create Hypervisorboot media.
Procedure 8.1. Installing the Red Hat Enterprise Virtualiz at ion Hypervisor Packages
1. A. Subscrib ing to Download the Hypervisor using Cert if icate-Based RHN
a. Ident ify Availab le Ent it lement Pools
To subscribe the system to Red Hat Enterprise Virtualization, you must locate theidentifier for the relevant entitlement pool. Use the list action of the subscription-manager to find these:
Red Hat Ent erprise Virt ualizat ion 3.3 Inst allat ion Guide
100

To identify available subscription pools for Red Hat Enterprise Virtualization, use the command:
# subscription-manager list --available | grep -A8 "Red Hat Enterprise Virtualization"
b. Attach Ent it lement Pools to the System
Using the pool identifiers located in the previous step, attach the Red Hat Enterprise Linux Server and Red Hat Enterprise Virtualizationentitlements to the system. Use the attach parameter of the subscription-manager command, replacing [POOLID] with each of the pool identifiers:
# subscription-manager attach --pool=[POOLID]
B. Subscrib ing to Download the Hypervisor using RHN Classic
a. Log on to Red Hat Network (http://rhn.redhat.com).
b. Move the mouse cursor over the Subscriptions link at the top of the page, andthen click Registered Systems in the menu that appears.
c. Select the system to which you are adding channels from the list presented on thescreen, by clicking the name of the system.
d. Click Alter Channel Subscriptions in the Subscribed Channels sectionof the screen.
e. Select the Red Hat Enterprise Virtualization Hypervisor (v.6 x86_64) channel from the list presented on the screen, then click the Change Subscription button to finalize the change.
2. Log in to the system on which the Red Hat Enterprise Virtualization Manager is installed. Youmust log in as the root user.
3. Use yum to install rhev-hypervisor6:
# yum install rhev-hypervisor6
4. Use yum to install livecd-tools:
# yum install livecd-tools
Result
The Hypervisor ISO image is installed into the /usr/share/rhev-hypervisor/ directory. The livecd-iso-to-disk and livecd-iso-to-pxeboot scripts are installed to the /usr/bindirectory.
Chapt er 8 . Inst alling Red Hat Ent erprise Virt ualizat ion Hypervisor Host s
101

Note
Red Hat Enterprise Linux 6.2 and later allows more than one version of the ISO image to beinstalled at one time. As such, /usr/share/rhev-hypervisor/rhev-hypervisor.iso isnow a symbolic link to a uniquely-named version of the Hypervisor ISO image, such as /usr/share/rhev-hypervisor/rhev-hypervisor-6.4-20130321.0.el6ev.iso .Different versions of the image can now be installed alongside each other, allowingadministrators to run and maintain a cluster on a previous version of the Hypervisor whileupgrading another cluster for testing.
Additionally, the symbolic link /usr/share/rhev-hypervisor/rhevh-latest-6.iso , iscreated. This links also targets the most recently installed version of the Red Hat EnterpriseVirtualization ISO image.
Report a bug
8.3. Preparing Hypervisor Installat ion Media
8.3.1. Preparing USB Hypervisor Installat ion Media
8.3.1 .1 . Preparing a Hyperviso r USB St o rage Device
Red Hat Enterprise Virtualization Hypervisor is able to install itself onto USB storage devices or solidstate disks. However, the initial boot/install USB device must be a separate device from theinstallation target. Network booting with PXE and tftp provides the greatest flexibility and scalability.For environments where network restrictions prevent network booting, or for systems without PXEcapable network interface cards, a local media installation such as CD-ROM or USB is necessary.Booting from USB storage devices is a useful alternative to booting from CD, for systems without CD-ROM drives.
Note
Not all systems support booting from a USB storage device. Ensure that your system's BIOSsupports booting from USB storage devices before proceeding.
See Also:
Section 8.3.1.2, “Preparing USB Installation Media Using livecd-iso-to-disk”
Section 8.3.1.3, “Preparing USB Installation Media Using dd”
Report a bug
8.3.1 .2 . Preparing USB Inst allat io n Media Using livecd-iso -t o -disk
Summary
Red Hat Ent erprise Virt ualizat ion 3.3 Inst allat ion Guide
102

The livecd-iso-to-disk utility included in the livecd-tools package can be used to write aHypervisor or other disk image to a USB storage device. Once a Hypervisor disk image has beenwritten to a USB storage device with this utility, systems that support booting via USB can boot theHypervisor using the USB storage device.
The basic syntax for the livecd-iso-to-disk utility is as follows:
# livecd-iso-to-disk [image] [device]
The [device] parameter is the path to the USB storage device on which to write the disk image. The[image] parameter is the path and file name of the disk image. The default Hypervisor image locationis /usr/share/rhev-hypervisor/rhev-hypervisor.iso . The livecd-iso-to-disk utilityrequires devices to be formatted with the FAT or EXT3 file system.
Note
The livecd-iso-to-disk utility uses a FAT or EXT3 formatted partition or block device.
Note
USB storage devices are sometimes formatted without a partition table. In this case, use ageneric identifier for the storage device such as /dev/sdb. When a USB storage device isformatted with a partition table, use the path name to the device, such as /dev/sdb1.
Procedure 8.2. Preparing USB Installat ion Media Using livecd- iso- to-d isk
1. Install the rhev-hypervisor package to download the latest version of the Hypervisor.
2. Use the livecd-iso-to-disk utility to copy the disk image, located in the /usr/share/rhev-hypervisor/ directory, to the USB storage device. The --formatparameter formats the USB device. The --reset-mbr parameter initializes the Master BootRecord (MBR).
Example 8.1. Use of livecd-iso-to-disk
This example demonstrates the use of livecd-iso-to-disk to write to a USB storagedevice named /dev/sdc and make the USB storage device bootable.
# livecd-iso-to-disk --format --reset-mbr /usr/share/rhev-hypervisor/rhev-hypervisor.iso /dev/sdcVerifying image.../usr/share/rhev-hypervisor/rhev-hypervisor.iso: eccc12a0530b9f22e5ba62b848922309Fragment sums: 8688f5473e9c176a73f7a37499358557e6c397c9ce2dafb5eca5498fb586Fragment count: 20Press [Esc] to abort check.Checking: 100.0%
The media check is complete, the result is: PASS.
Chapt er 8 . Inst alling Red Hat Ent erprise Virt ualizat ion Hypervisor Host s
103

It is OK to use this media.
WARNING: THIS WILL DESTROY ANY DATA ON /dev/sdc!!!Press Enter to continue or ctrl-c to abort
/dev/sdc: 2 bytes were erased at offset 0x000001fe (dos): 55 aaWaiting for devices to settle...mke2fs 1.42.7 (21-Jan-2013)Filesystem label=LIVEOS type: LinuxBlock size=4096 (log=2)Fragment size=4096 (log=2)Stride=0 blocks, Stripe width=0 blocks488640 inodes, 1953280 blocks97664 blocks (5.00%) reserved for the super userFirst data block=0Maximum filesystem blocks=200068300860 block groups32768 blocks per group, 32768 fragments per group8144 inodes per groupSuperblock backups stored on blocks: 32768, 98304, 163840, 229376, 294912, 819200, 884736, 1605632
Allocating group tables: done Writing inode tables: done Creating journal (32768 blocks): doneWriting superblocks and filesystem accounting information: done
Copying live image to target device.squashfs.img 163360768 100% 184.33MB/s 0:00:00 (xfer#1, to-check=0/1)
sent 163380785 bytes received 31 bytes 108920544.00 bytes/sectotal size is 163360768 speedup is 1.00osmin.img 4096 100% 0.00kB/s 0:00:00 (xfer#1, to-check=0/1)
sent 4169 bytes received 31 bytes 8400.00 bytes/sectotal size is 4096 speedup is 0.98Updating boot config fileInstalling boot loader/media/tgttmp.q6aZdS/syslinux is device /dev/sdcTarget device is now set up with a Live image!
Result
The Hypervisor disk image has been written to the USB storage device. You can now use it to boot asystem and install the Hypervisor.
Report a bug
8.3.1 .3. Preparing USB Inst allat io n Media Using dd
Red Hat Ent erprise Virt ualizat ion 3.3 Inst allat ion Guide
104

The dd command can also be used to install a hypervisor onto a USB storage device. Media createdwith the command can boot the Hypervisor on systems which support booting via USB. Red HatEnterprise Linux provides dd as part of the coreutils package. Versions of dd are also available on awide variety of Linux and Unix operating systems.
Windows users are able to obtain the dd command through installation of Red Hat Cygwin , a freeLinux-like environment for Windows.
The basic dd command usage follows this structure:
# dd if=image of=device
Where the device parameter is the device name of the USB storage device to install to. The imageparameter is a ISO image of the Hypervisor. The default hypervisor image location is /usr/share/rhev-hypervisor/rhev-hypervisor.iso . The dd command does not makeassumptions as to the format of the device as it performs a low-level copy of the raw data in theselected image.
See Also:
Section 8.3.1.4, “Preparing USB Installation Media Using dd on Linux Systems”
Section 8.3.1.5, “Preparing USB Installation Media Using dd on Windows Systems”
Report a bug
8.3.1 .4 . Preparing USB Inst allat io n Media Using dd o n Linux Syst ems
Summary
The dd command available on most Linux systems is suitable for creating USB installation media, toboot and install the Hypervisor.
Procedure 8.3. Preparing USB Installat ion Media using dd on Linux Systems
1. Install the rhev-hypervisor package.
# yum install rhev-hypervisor
2. Use the dd command to copy the image file to the disk.
Example 8.2. Use of dd
This example uses a USB storage device named /dev/sdc.
# dd if=/usr/share/rhev-hypervisor/rhev-hypervisor.iso of=/dev/sdc243712+0 records in243712+0 records out124780544 bytes (125 MB) copied, 56.3009 s, 2.2 MB/s
Chapt er 8 . Inst alling Red Hat Ent erprise Virt ualizat ion Hypervisor Host s
105

Warning
The dd command will overwrite all data on the device specified for the of parameter.Any existing data on the device will be destroyed. Ensure that the correct device isspecified and that it contains no valuable data before invocation of the dd command.
Result
The USB storage device is ready for use as Hypervisor installation media.
Report a bug
8.3.1 .5 . Preparing USB Inst allat io n Media Using dd o n Windo ws Syst ems
Summary
The dd command, available on Windows systems with Red Hat Cygwin installed, is suitable forcreating USB installation media to boot and install the Hypervisor.
Procedure 8.4 . Preparing USB Installat ion Media using dd on Windows Systems
1. Access http://www.redhat.com/services/custom/cygwin/ and click the Red Hat Cygwinof f icial installat ion ut ility link. The rhsetup.exe executable will download.
2. As the Administrator user run the downloaded rhsetup.exe executable. The Red HatCygwin installer will display.
3. Follow the prompts to complete a standard installation of Red Hat Cygwin . The Coreutilspackage within the Base package group provides the dd utility. This is automatically selectedfor installation.
4. Copy the rhev-hypervisor.iso file downloaded from Red Hat Network to C:\rhev-hypervisor.iso .
5. As the Administrator user run Red Hat Cygwin from the desktop. A terminal window willappear.
Important
On the Windows 7 and Windows Server 2008 platforms it is necessary to right clickthe Red Hat Cygwin icon and select the Run as Administrator... option toensure the application runs with the correct permissions.
6. In the terminal run cat /proc/partitions to see the drives and partitions currently visibleto the system.
Example 8.3. View of Disk Part it ions At tached to System
Administrator@test /$ cat /proc/partitionsmajor minor #blocks name 8 0 15728640 sda
Red Hat Ent erprise Virt ualizat ion 3.3 Inst allat ion Guide
106

8 1 102400 sda1 8 2 15624192 sda2
7. Plug the USB storage device which is to be used as the media for the Hypervisor installationinto the system. Re-run the cat /proc/partitions command and compare the output tothat of the previous run. A new entry will appear which designates the USB storage device.
Example 8.4 . View of Disk Part it ions At tached to System
Administrator@test /$ cat /proc/partitionsmajor minor #blocks name 8 0 15728640 sda 8 1 102400 sda1 8 2 15624192 sda2 8 16 524288 sdb
8. Use the dd command to copy the rhev-hypervisor.iso file to the disk. The example usesa USB storage device named /dev/sdb. Replace sdb with the correct device name for theUSB storage device to be used.
Example 8.5. Use of dd Command Under Red Hat Cygwin
Administrator@test /$ dd if=/cygdrive/c/rhev-hypervisor.iso of=/dev/sdb& pid=$!
The provided command starts the transfer in the background and saves the process identifierso that it can be used to monitor the progress of the transfer. Refer to the next step for thecommand used to check the progress of the transfer.
Warning
The dd command will overwrite all data on the device specified for the of parameter.Any existing data on the device will be destroyed. Ensure that the correct device isspecified and that it contains no valuable data before invocation of the dd command.
9. Transfer of the ISO file to the USB storage device with the version of dd included with RedHat Cygwin can take significantly longer than the equivalent on other platforms.
To check the progress of the transfer in the same terminal window that the process wasstarted in send it the USR1 signal. This can be achieved by issuing the kill command in theterminal window as follows:
kill -USR1 $pid
10. When the transfer operation completes the final record counts will be displayed.
Chapt er 8 . Inst alling Red Hat Ent erprise Virt ualizat ion Hypervisor Host s
107

Example 8.6 . Result o f dd In it iated Copy
210944+0 records in210944+0 records out108003328 bytes (108 MB) copied, 2035.82 s, 53.1 kB/s
[1]+ Done dd if=/cygdrive/c/rhev-hypervisor.iso of=/dev/sdb
Result
The USB storage device is ready for use as Hypervisor installation media.
Report a bug
8.3.2. Preparing Opt ical Hypervisor Installat ion Media
Summary
Burn the Hypervisor image to a CD-ROM with the wodim command. The wodim command is part ofthe wodim package.
Procedure 8.5. Preparing Opt ical Hypervisor Installat ion Media
1. Verify that the wodim package is installed on the system.
Example 8.7. Verify Installat ion of wodim Package
# rpm -q wodimwodim-1.1.9-11.el6.x86_64
If the package version is in the output the package is available.
If nothing is listed, install wodim:
# yum install wodim
2. Insert a blank CD-ROM or DVD into your CD or DVD writer.
3. Record the ISO file to the disc. The wodim command uses the following:
wodim dev=device image
This example uses the first CD-RW (/dev/cdrw) device available and the default hypervisorimage location, /usr/share/rhev-hypervisor/rhev-hypervisor.iso .
Example 8.8. Use of wodim Command
# wodim dev=/dev/cdrw /usr/share/rhev-hypervisor/rhev-hypervisor.iso
Red Hat Ent erprise Virt ualizat ion 3.3 Inst allat ion Guide
108

Result
If no errors occurred, the Hypervisor is ready to boot. Errors sometimes occur during the recordingprocess due to errors on the media itself. If this occurs insert another writable disk and repeat thecommand above.
The Hypervisor uses a program (isomd5sum) to verify the integrity of the installation media everytime the Hypervisor is booted. If media errors are reported in the boot sequence you have a bad CD-ROM. Follow the procedure above to create a new CD-ROM or DVD.
Report a bug
8.3.3. Boot ing from Hypervisor Installat ion Media
8.3.3.1 . Bo o t ing t he Hyperviso r fro m USB Inst allat io n Media
Summary
Booting a hypervisor from a USB storage device is similar to booting other live USB operatingsystems. Follow this procedure to boot the Hypervisor using USB installation media.
Procedure 8.6 . Boot ing the Hypervisor f rom USB Installat ion Media
1. Enter the system's BIOS menu to enable USB storage device booting if not already enabled.
a. Enable USB booting if this feature is disabled.
b. Set booting USB storage devices to be first boot device.
c. Shut down the system.
2. Insert the USB storage device that contains the Hypervisor boot image.
3. Restart the system.
Result
The Hypervisor boot process commences automatically.
See Also:
Section 8.3.3.3, “Troubleshooting BIOS Settings and Boot Process”
Section 8.3.3.4, “Choosing Hypervisor Boot Options”
Report a bug
8.3.3.2 . Bo o t ing t he Hyperviso r fro m Opt ical Inst allat io n Media
Summary
Booting the Hypervisor from optical installation media requires the system to have a correctly definedBIOS boot configuration.
Procedure 8.7. Boot ing the Hypervisor f rom Opt ical Installat ion Media
Chapt er 8 . Inst alling Red Hat Ent erprise Virt ualizat ion Hypervisor Host s
109

1. Ensure that the system's BIOS is configured to boot from the CD-ROM or DVD-ROM drive first.For many systems this the default.
Note
Refer to your manufacturer's manuals for further information on modifying the system'sBIOS boot configuration.
2. Insert the Hypervisor CD-ROM in the CD-ROM or DVD-ROM drive.
3. Reboot the system.
Result
The Hypervisor boot screen will be displayed.
See Also:
Section 8.3.3.3, “Troubleshooting BIOS Settings and Boot Process”
Section 8.3.3.4, “Choosing Hypervisor Boot Options”
Report a bug
8.3.3.3. T ro ublesho o t ing BIOS Set t ings and Bo o t Pro cess
Summary
Before installing Red Hat Enterprise Virtualization Hypervisors it is necessary to verify the BIOS iscorrectly configured for the chosen installation method. Many motherboard and PC manufacturersdisable different booting methods in the BIOS. Most BIOS chips boot from the following devices inorder:
1. 3.5 inch diskette
2. CD-ROM or DVD device
3. Local hard disk
Many BIOS chips have disabled one or more of the following boot methods: USB storage devices,CD-ROMs, DVDs or network boot. To boot from your chosen method, enable the method or deviceand set that device as the first boot device in BIOS.
Most but not all motherboards support the boot methods described in this chapter. Consult thedocumentation for your motherboard or system to determine whether it is possible to use a particularboot method.
Warning
BIOS settings vary between manufacturers. Any specific examples of BIOS settings may beinaccurate for some systems. Due to this inconsistency, it is necessary to review themotherboard or system manufacturer's documentation.
Red Hat Ent erprise Virt ualizat ion 3.3 Inst allat ion Guide
110

Procedure 8.8. Troubleshoot ing BIOS Set t ings and Boot Process
Verify that your system is capable of running the Red Hat Enterprise Virtualization Hypervisor.Hypervisors require that virtualization extensions are present and enabled in the BIOS beforeinstallation proceeds.
1. Boot the Hypervisor from removable media. For example, a USB stick or CD-ROM.
2. When the message Automatic boot in 30 seconds... is displayed, and beginscounting down from thirty, press any key to skip the automatic boot process.
3. Ensure the Install or Upgrade option is selected and press Tab to edit the bootparameters.
4. Add the rescue parameter to the list of boot parameters shown on the screen, then press Enter. This action will boot the Hypervisor in rescue mode.
5. Once the Hypervisor boots, verify your CPU contains the virtualization extensions with thefollowing command:
# grep -E "svm|vmx" /proc/cpuinfo
Output displays if the processor has the hardware virtualization extensions.
6. Verify that the KVM modules load by default:
# lsmod | grep kvm
Result
If the output includes kvm_intel or kvm_amd then the kvm hardware virtualization modules areloaded and the system meets the requirements. If the output does not include the required modulesthen you must check that your hardware supports the virtualization extensions and that they areenabled in the system's BIOS.
Report a bug
8.3.3.4 . Cho o sing Hyperviso r Bo o t Opt io ns
Summary
The Hypervisor boot menu presents a number of pre-configured boot modes, as well as the ability toadd and remove additional boot options.
Procedure 8.9 . Choosing Hypervisor Boot Opt ions
1. Insert the Red Hat Enterprise Virtualization Hypervisor installation media.
2. Power on the system and ensure the system boots from the installation media.
3. The boot splash screen appears. If no input is provided, the Hypervisor installation willcommence in 30 seconds, using default kernel parameters.
Chapt er 8 . Inst alling Red Hat Ent erprise Virt ualizat ion Hypervisor Host s
111

Figure 8.1. Boot Splash Screen
4. To modify the boot options, press any key. The boot menu will display.
Red Hat Ent erprise Virt ualizat ion 3.3 Inst allat ion Guide
112

Figure 8.2. Boot Menu Screen
The following boot options are available:
Install or Upgrade
Boot the Hypervisor installer.
Install (Basic Video)
Install or Upgrade the Hypervisor, using basic video mode.
Install or Upgrade with Serial Console
Install or Upgrade the Hypervisor, with the console redirected to a serial deviceattached to /dev/ttyS0 .
Reinstall
Reinstall the Hypervisor.
Reinstall (Basic Video)
Reinstall the Hypervisor, using basic video mode.
Reinstall with Serial Console
Reinstall the Hypervisor, with the console redirected to a serial device attached to /dev/ttyS0 .
Boot from Local Drive
Chapt er 8 . Inst alling Red Hat Ent erprise Virt ualizat ion Hypervisor Host s
113

Boot the operating system installed on the first local drive.
Select the appropriate boot option from the boot menu.
5. A. Press the Enter key to boot the Hypervisor with the default kernel parameters for theoption selected; or
B. press the Tab key to edit the kernel parameters. In edit mode you are able to add orremove kernel parameters. Kernel parameters must be separated from each other by aspace. Once the desired kernel parameters have been set press Enter to boot the system.Alternatively pressing Esc reverts any changes that you have made to the kernelparameters.
Figure 8.3. Boot Parameter Screen
Result
The Hypervisor boots with the provided boot options.
Report a bug
8.4 . Installing the Hypervisor
8.4 .1. Hypervisor Menu Act ions
The directional keys (Up, Down, Left, Right) are used to select different controls on the screen.Alternatively the Tab key cycles through the controls on the screen which are enabled.
Red Hat Ent erprise Virt ualizat ion 3.3 Inst allat ion Guide
114

Text fields are represented by a series of underscores (_). To enter data in a text field select it andbegin entering data.
Buttons are represented by labels which are enclosed within a pair of angle brackets (< and >).To activate a button ensure it is selected and press Enter or Space.
Boolean options are represented by an asterisk (*) or a space character enclosed within a pair ofsquare brackets ([ and ]). When the value contained within the brackets is an asterisk then theoption is set, otherwise it is not. To toggle a Boolean option on or off press Space while it isselected.
Report a bug
8.4 .2. Installing the Hypervisor
Summary
There are two methods for installing Red Hat Enterprise Virtualization Hypervisors:
Interactive installation.
Unattended installation.
This section outlines the procedure for installing a Hypervisor interactively.
Procedure 8.10. Installing the Hypervisor In teract ively
1. Use the prepared boot media to boot the machine on which the Hypervisor is to be installed.
2. Select Install Hypervisor and press Enter to begin the installation process.
3. The first screen that appears allows you to configure the appropriate keyboard layout foryour locale. Use the arrow keys to highlight the appropriate option and press Enter to saveyour selection.
Example 8.9 . Keyboard Layout Conf igurat ion
Keyboard Layout Selection Available Keyboard LayoutsSwiss German (latin1)TurkishU.S. EnglishU.S. International...
(Hit enter to select a layout)
<Quit> <Back> <Continue>
4. The installation script automatically detects all disks attached to the system. This informationis used to assist with selection of the boot and installation disks that the Hypervisor will use.Each entry displayed on these screens indicates the Location, Device Name, and Size ofthe disks.
Chapt er 8 . Inst alling Red Hat Ent erprise Virt ualizat ion Hypervisor Host s
115

a. Boot Disk
The first disk selection screen is used to select the disk from which the Hypervisor willboot. The Hypervisor's boot loader will be installed to the Master Boot Record (MBR)of the disk that is selected on this screen. The Hypervisor attempts to automaticallydetect the disks attached to the system and presents the list from which to choose theboot device. Alternatively, you can manually select a device by specifying a blockdevice name using the Other Device option.
Important
The selected disk must be identified as a boot device and appear in the bootorder either in the system's BIOS or in a pre-existing boot loader.
A. Automat ically Detected Device Select ion
i. Select the entry for the disk the Hypervisor is to boot from in the list andpress Enter.
ii. Select the disk and press Enter. This action saves the boot deviceselection and starts the next step of installation.
B. Manual Device Select ion
i. Select Other device and press Enter.
ii. When prompted to Please select the disk to use for booting RHEV-H, enter the name of the block device from which the Hypervisorshould boot.
Example 8.10. O ther Device Select ion
Please select the disk to use for booting RHEV-H/dev/sda
iii. Press Enter. This action saves the boot device selection and starts thenext step of installation.
b. The disk or disks selected for installation will be those to which the Hypervisor itself isinstalled. The Hypervisor attempts to automatically detect the disks attached to thesystem and presents the list from which installation devices are chosen.
Warning
All data on the selected storage devices will be destroyed.
i. Select each disk on which the Hypervisor is to be installed and press Spaceto toggle it to enabled. Where other devices are to be used for installation,either solely or in addition to those which are listed automatically, use Other Device.
Red Hat Ent erprise Virt ualizat ion 3.3 Inst allat ion Guide
116

ii. Select the Continue button and press Enter to continue.
iii. Where the Other Device option was specified, a further prompt will appear.Enter the name of each additional block device to use for Hypervisorinstallation, separated by a comma. Once all required disks have beenselected, select the <Continue> button and press Enter.
Example 8.11. O ther Device Select ion
Please enter one or more disks to use for installing RHEV-H. Multiple devices can be separated by comma.Device path: /dev/mmcblk0,/dev/mmcblk1______________
Once the installation disks have been selected, the next stage of the installationstarts.
5. The next screen allows you to configure storage for the Hypervisor.
a. Select or clear the Fill disk with Data partition check box. Clearing thistext box displays a field showing the remaining space on the drive and allows you tospecify the amount of space to be allocated to data storage.
b. Enter the preferred values for Swap, Config , and Logging .
c. If you selected the Fill disk with Data partition check box, the Data fieldis automatically set to 0 . If the check box was cleared, you can enter a whole numberup to the value of the Remaining Space field. Entering a value of -1 fills allremaining space.
6. The Hypervisor requires a password be set to protect local console access to the adminuser. The installation script prompts you to enter the preferred password in both the Password and Confirm Password fields.
Use a strong password. Strong passwords comprise a mix of uppercase, lowercase, numeric,and punctuation characters. They are six or more characters long and do not containdictionary words.
Once a strong password has been entered, select <Install> and press Enter to install theHypervisor on the selected disks.
Result
Once installation is complete, the message RHEV Hypervisor Installation Finished Successfully will be displayed. Select the <Reboot> button and press Enter to reboot thesystem.
Note
Remove the boot media and change the boot device order to prevent the installation sequencerestarting after the system reboots.
Chapt er 8 . Inst alling Red Hat Ent erprise Virt ualizat ion Hypervisor Host s
117
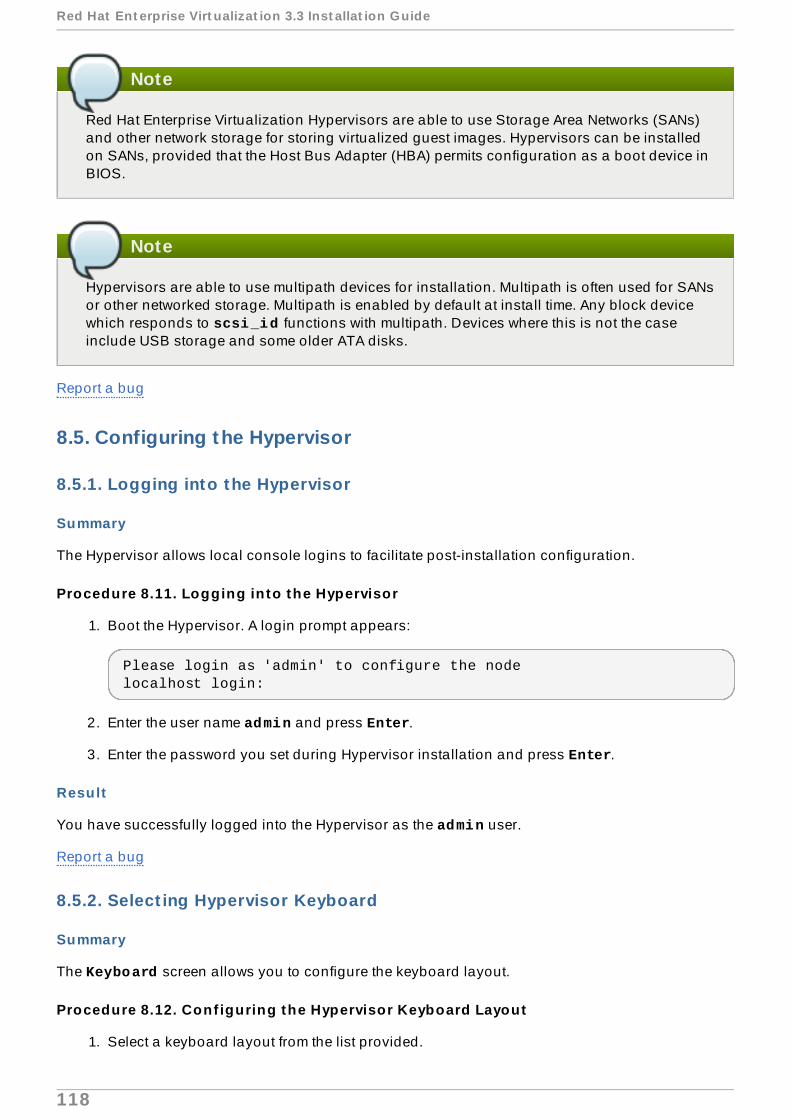
Note
Red Hat Enterprise Virtualization Hypervisors are able to use Storage Area Networks (SANs)and other network storage for storing virtualized guest images. Hypervisors can be installedon SANs, provided that the Host Bus Adapter (HBA) permits configuration as a boot device inBIOS.
Note
Hypervisors are able to use multipath devices for installation. Multipath is often used for SANsor other networked storage. Multipath is enabled by default at install time. Any block devicewhich responds to scsi_id functions with multipath. Devices where this is not the caseinclude USB storage and some older ATA disks.
Report a bug
8.5. Configuring the Hypervisor
8.5.1. Logging into the Hypervisor
Summary
The Hypervisor allows local console logins to facilitate post-installation configuration.
Procedure 8.11. Logging in to the Hypervisor
1. Boot the Hypervisor. A login prompt appears:
Please login as 'admin' to configure the nodelocalhost login:
2. Enter the user name admin and press Enter.
3. Enter the password you set during Hypervisor installation and press Enter.
Result
You have successfully logged into the Hypervisor as the admin user.
Report a bug
8.5.2. Select ing Hypervisor Keyboard
Summary
The Keyboard screen allows you to configure the keyboard layout.
Procedure 8.12. Conf iguring the Hypervisor Keyboard Layout
1. Select a keyboard layout from the list provided.
Red Hat Ent erprise Virt ualizat ion 3.3 Inst allat ion Guide
118

Keyboard Layout Selection Choose the Keyboard Layout you would like to apply to this system.
Current Active Keyboard Layout: U.S. EnglishAvailable Keyboard LayoutsSwiss German (latin1)TurkishU.S. EnglishU.S. InternationalUkranian...
<Save>
2. Select Save and press Enter to save the selection.
Result
You have successfully configured the keyboard layout.
Report a bug
8.5.3. Viewing Hypervisor Status
The status screen displays a brief overview of the current state of the Hypervisor. The informationdisplayed consists of:
The current status of the Hypervisor.
The current status of networking.
The destinations of logs and reports.
The number of active virtual machines.
The status screen also provides a number of buttons for viewing further details on the Hypervisorand for changing the state of the Hypervisor:
<View Host Key>: Displays the RSA host key fingerprint and host key of the Hypervisor.
<View CPU Details>: Displays details on the CPU used by the Hypervisor such as the CPUname and type.
<Lock>: Locks the Hypervisor. The user name and password must be entered to unlock theHypervisor.
<Log Off>: Logs off the current user.
<Restart>: Restarts the Hypervisor.
<Power Off>: Turns the Hypervisor off.
Report a bug
8.5.4 . Configuring Hypervisor Network
Chapt er 8 . Inst alling Red Hat Ent erprise Virt ualizat ion Hypervisor Host s
119
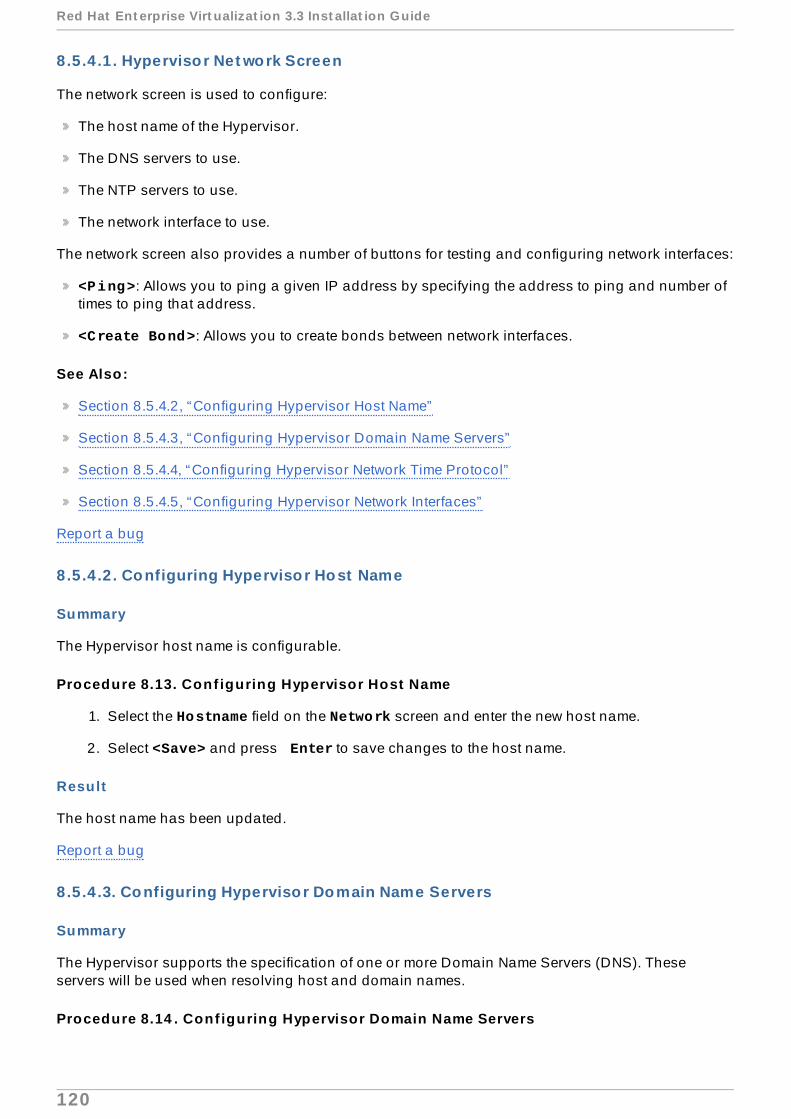
8.5 .4 .1 . Hyperviso r Net wo rk Screen
The network screen is used to configure:
The host name of the Hypervisor.
The DNS servers to use.
The NTP servers to use.
The network interface to use.
The network screen also provides a number of buttons for testing and configuring network interfaces:
<Ping>: Allows you to ping a given IP address by specifying the address to ping and number oftimes to ping that address.
<Create Bond>: Allows you to create bonds between network interfaces.
See Also:
Section 8.5.4.2, “Configuring Hypervisor Host Name”
Section 8.5.4.3, “Configuring Hypervisor Domain Name Servers”
Section 8.5.4.4, “Configuring Hypervisor Network Time Protocol”
Section 8.5.4.5, “Configuring Hypervisor Network Interfaces”
Report a bug
8.5 .4 .2 . Co nfiguring Hyperviso r Ho st Name
Summary
The Hypervisor host name is configurable.
Procedure 8.13. Conf iguring Hypervisor Host Name
1. Select the Hostname field on the Network screen and enter the new host name.
2. Select <Save> and press Enter to save changes to the host name.
Result
The host name has been updated.
Report a bug
8.5 .4 .3. Co nfiguring Hyperviso r Do main Name Servers
Summary
The Hypervisor supports the specification of one or more Domain Name Servers (DNS). Theseservers will be used when resolving host and domain names.
Procedure 8.14 . Conf iguring Hypervisor Domain Name Servers
Red Hat Ent erprise Virt ualizat ion 3.3 Inst allat ion Guide
120

1. To set or change the primary DNS server, select the DNS Server 1 field and enter the IPaddress of the new primary DNS server to use.
2. To set or change the secondary DNS server, select the DNS Server 2 field and enter the IPaddress of the new secondary DNS server to use.
3. Select <Save> and press Enter to save changes to the DNS configuration.
Result
The primary and secondary DNS servers queried by the Hypervisor are updated.
Report a bug
8.5 .4 .4 . Co nfiguring Hyperviso r Net wo rk T ime Pro t o co l
Summary
The Hypervisor supports the specification of one or more Network Time Protocol (NTP) servers withwhich the Hypervisor can synchronize its system clock. It is important that the Hypervisor issynchronized with the same time source as the Red Hat Enterprise Virtualization Manager. Thisensures accurate time keeping across the Red Hat Enterprise Virtualization environment.
Procedure 8.15. Conf iguring Hypervisor Network T ime Protocol
1. To set or change the primary NTP server, select the NTP Server 1 field and enter the IPaddress or host name of the new primary NTP server to use.
2. To set or change the secondary NTP server, select the NTP Server 2 field and enter the IPaddress or host name of the new secondary NTP server to use.
3. Select <Save> and press Enter to save changes to the NTP configuration.
Result
The primary and secondary NTP servers queried by the Hypervisor are updated.
Report a bug
8.5 .4 .5 . Co nfiguring Hyperviso r Net wo rk Int erfaces
Summary
For each network interface detected the Hypervisor will display the:
Device
Status
Model
MAC Address
At least one network interface must be configured before the Hypervisor can connect with the Red HatEnterprise Virtualization Manager.
Procedure 8.16 . Conf iguring Hypervisor Network In terfaces
Chapt er 8 . Inst alling Red Hat Ent erprise Virt ualizat ion Hypervisor Host s
121

1. Device Ident if icat ion
Select the network interface to be configured from the list and press Enter.
When it is unclear which physical device an entry in the list refers to, the Hypervisor can blinkthe network traffic lights on the physical device to assist with identification. To use this facility,select the entry from the list, select the <Flash Lights to Identify> button and press Enter. Take note of which physical device's lights start blinking. The configuration screen forthe selected device will be displayed.
2. IPv4 Set t ings
The Hypervisor supports both dynamic (DHCP) and static IPv4 network configuration.
A. Dynamic (DHCP) Network Conf igurat ion
Dynamic network configuration allows the Hypervisor to be dynamically assigned an IPaddress via DHCP . To enable dynamic IPv4 network configuration, select the DHCP optionunder IPv4 Settings and press Space to toggle it to enabled.
B. Static Network Conf igurat ion
Static network configuration allows the Hypervisor to be manually assigned an IPaddress. To enable static IPv4 network configuration select the Static option under IPv4 Settings and press Space to toggle it to enabled.
Selection of the Static option enables the IP Address, Netmask, and Gateway fields.The IP Address, Netmask, and Gateway fields must be populated to complete staticnetwork configuration.
In particular it is necessary that:
the IP Address is not already in use on the network,
the Netmask matches that used by other machines on the network, and
the Gateway matches that used by other machines on the network.
Where it is not clear what value should be used for the IP Address, Netmask, or Gateway field consult the network's administrator or consider a dynamic configuration.
Example 8.12. Stat ic IPv4 Networking Conf igurat ion
IPv4 Settings( ) Disabled ( ) DHCP (*) StaticIP Address: 192.168.122.100_ Netmask: 255.255.255.0___Gateway 192.168.1.1_____
3. IPv6 Set t ings
The Red Hat Enterprise Virtualization Manager does not currently support IPv6 networking.IPv6 networking must remain set to Disabled .
4. VLAN Conf igurat ion
Red Hat Ent erprise Virt ualizat ion 3.3 Inst allat ion Guide
122

If VLAN support is required, populate the VLAN ID field with the VLAN identifier for theselected device.
5. Save Network Conf igurat ion
Once all networking options for the selected device have been set, the configuration must besaved.
a. Select the <Save> button and press Enter to save the network configuration.
b. A screen showing the progress of configuration displays. Once configuration iscomplete, press the Enter key to close the window.
Result
The network screen is displayed. The device is listed as Configured .
Report a bug
8.5.5. Configuring Hypervisor Security
Summary
The Security screen is used to change the admin password for both local and remote access.SSH password authentication is also enabled or disabled via this screen.
Procedure 8.17. Conf iguring Hypervisor Security
1. Enable SSH Password Authent icat ion
To enable SSH password authentication for remote access, select the Enable ssh password authentication option and press Space to toggle it to enabled.
2. Change admin Password
a. Enter the desired admin password in the Password field. You should use a strongpassword.
Strong passwords contain a mix of uppercase, lowercase, numeric and punctuationcharacters. They are six or more characters long and do not contain dictionarywords.
b. Enter the desired admin password in the Confirm Password field. Ensure thevalue entered in the Confirm Password field matches the value entered in the Password field exactly. Where this is not the case, an error message will bedisplayed to indicate that the two values are different.
3. Select <Save> and press Enter to save the security configuration.
Result
The security configuration has been updated.
Report a bug
8.5.6. Configuring Hypervisor Simple Network Management Protocol
Chapt er 8 . Inst alling Red Hat Ent erprise Virt ualizat ion Hypervisor Host s
123
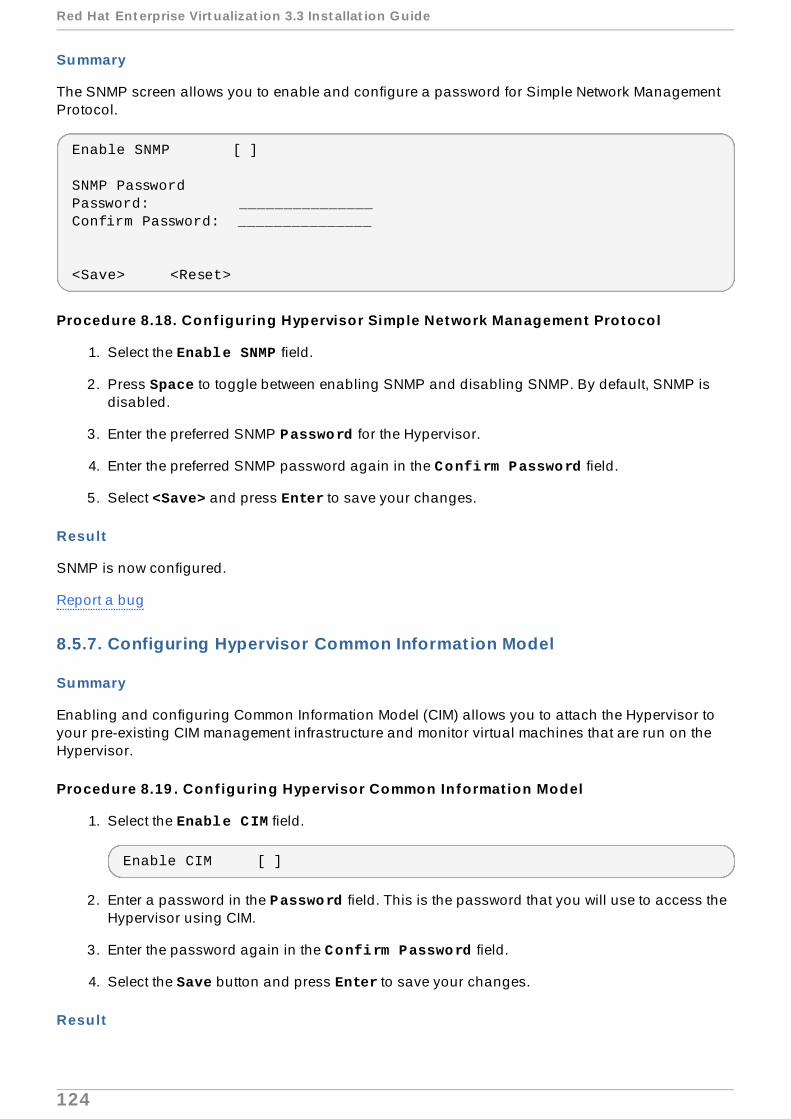
Summary
The SNMP screen allows you to enable and configure a password for Simple Network ManagementProtocol.
Enable SNMP [ ]
SNMP PasswordPassword: _______________Confirm Password: _______________
<Save> <Reset>
Procedure 8.18. Conf iguring Hypervisor Simple Network Management Protocol
1. Select the Enable SNMP field.
2. Press Space to toggle between enabling SNMP and disabling SNMP. By default, SNMP isdisabled.
3. Enter the preferred SNMP Password for the Hypervisor.
4. Enter the preferred SNMP password again in the Confirm Password field.
5. Select <Save> and press Enter to save your changes.
Result
SNMP is now configured.
Report a bug
8.5.7. Configuring Hypervisor Common Informat ion Model
Summary
Enabling and configuring Common Information Model (CIM) allows you to attach the Hypervisor toyour pre-existing CIM management infrastructure and monitor virtual machines that are run on theHypervisor.
Procedure 8.19 . Conf iguring Hypervisor Common Informat ion Model
1. Select the Enable CIM field.
Enable CIM [ ]
2. Enter a password in the Password field. This is the password that you will use to access theHypervisor using CIM.
3. Enter the password again in the Confirm Password field.
4. Select the Save button and press Enter to save your changes.
Result
Red Hat Ent erprise Virt ualizat ion 3.3 Inst allat ion Guide
124

You have configured the Hypervisor to accept CIM connections authenticated using a password. Usethis password when adding the Hypervisor to your Common Information Model Object Manager(CIMOM).
Report a bug
8.5.8. Configuring Logging
Summary
The Hypervisor creates and updates a number of log files. The Logging screen allowsconfiguration of a daemon to automatically export these log files to a remote server.
Procedure 8.20. Conf iguring Hypervisor Logging
1. logrotate Conf igurat ion
The logrotate utility simplifies the administration of log files. The Hypervisor useslogrotate to rotate logs when they reach a certain file size.
Log rotation involves renaming the current logs and starting new ones in their place. The Logrotate Max Log Size value set on the Logging screen is used to determine when alog will be rotated.
Enter the Logrotate Max Log Size in kilobytes. The default maximum log size is 1024kilobytes.
2. rsyslog Conf igurat ion
The rsyslog utility is a multithreaded syslog daemon. The Hypervisor is able to use rsyslogto transmit log files over the network to a remote syslog daemon. For information on settingup the remote syslog daemon, see the Red Hat Enterprise Linux Deployment Guide.
a. Enter the remote rsyslog server address in the Server Address field.
b. Enter the remote rsyslog server port in the Server Port field. The default port is 514 .
3. netconsole Conf igurat ion
The netconsole module allows kernel messages to be sent to a remote machine. TheHypervisor uses netconsole to transmit kernel messages over the network.
a. Enter the Server Address.
b. Enter the Server Port. The default port is 6666 .
4. Save Conf igurat ion
To save the logging configuration, select <Save> and press Enter.
Result
The logging configuration has been updated and logs will be exported to the remote rsyslog serverspecified.
Report a bug
Chapt er 8 . Inst alling Red Hat Ent erprise Virt ualizat ion Hypervisor Host s
125

8.5.9. Configuring the Hypervisor for Red Hat Network
Summary
Guests running on the Hypervisor may need to consume Red Hat Enterprise Linux virtualizationentitlements. In this case, the Hypervisor must be registered to Red Hat Network, a Satellite server, orSubscription Asset Manager. The Hypervisor can connect to these services via a HTTP proxy whereone is in use.
Note that when new versions of the Hypervisor itself become available, they are installed from the RedHat Enterprise Virtualization Manager and not Red Hat Network.
Procedure 8.21. Conf iguring Hypervisor for Red Hat Network
1. Authent icat ion
Enter your Red Hat Network user name in the Login field.
Enter your Red Hat Network password in the Password field.
2. Prof ile Name
Enter the profile name to be used for the system in the Profile Name field. This is the namethat the system will appear under when viewed in Red Hat Network.
3. Update Source
The Hypervisor can register directly to Red Hat Network or, if available, a Satellite installationor a Subscription Asset Manager.
A. To Connect Direct ly to RHN
Select the RHN option and press Space to toggle it to enabled. The RHN URL and CA URL values do not need to be provided.
Example 8.13. Red Hat Network Conf igurat ion
(X) RHN ( ) Satellite ( ) SAMRHN URL: _______________________________________________________________CA URL: _______________________________________________________________
B. To Connect via Satellite
a. Select the Satellite option and press Space to toggle it to enabled.
b. Enter the URL of the Satellite server in the RHN URL field.
c. Enter the URL of the certificate authority for the Satellite server in the CA URL field.
Example 8.14 . Satellite Conf igurat ion
Red Hat Ent erprise Virt ualizat ion 3.3 Inst allat ion Guide
126
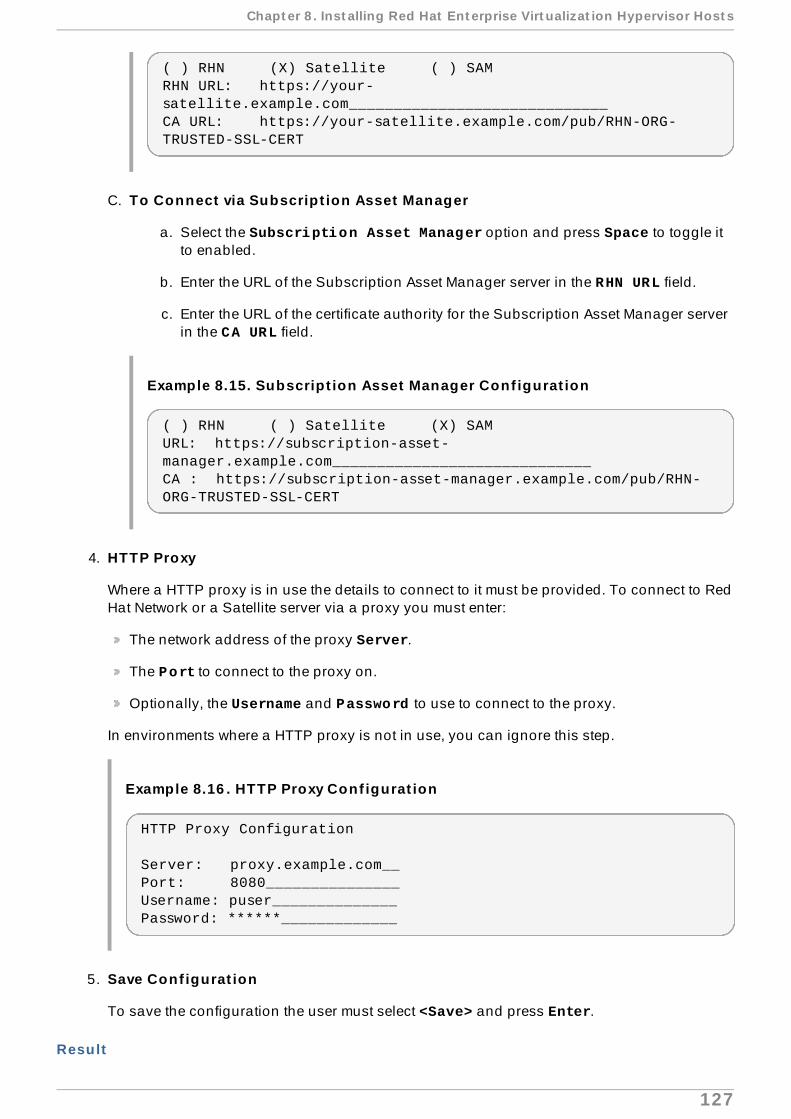
( ) RHN (X) Satellite ( ) SAMRHN URL: https://your-satellite.example.com_____________________________CA URL: https://your-satellite.example.com/pub/RHN-ORG-TRUSTED-SSL-CERT
C. To Connect via Subscript ion Asset Manager
a. Select the Subscription Asset Manager option and press Space to toggle itto enabled.
b. Enter the URL of the Subscription Asset Manager server in the RHN URL field.
c. Enter the URL of the certificate authority for the Subscription Asset Manager serverin the CA URL field.
Example 8.15. Subscript ion Asset Manager Conf igurat ion
( ) RHN ( ) Satellite (X) SAMURL: https://subscription-asset-manager.example.com_____________________________CA : https://subscription-asset-manager.example.com/pub/RHN-ORG-TRUSTED-SSL-CERT
4. HTTP Proxy
Where a HTTP proxy is in use the details to connect to it must be provided. To connect to RedHat Network or a Satellite server via a proxy you must enter:
The network address of the proxy Server.
The Port to connect to the proxy on.
Optionally, the Username and Password to use to connect to the proxy.
In environments where a HTTP proxy is not in use, you can ignore this step.
Example 8.16 . HTTP Proxy Conf igurat ion
HTTP Proxy Configuration Server: proxy.example.com__Port: 8080_______________Username: puser______________Password: ******_____________
5. Save Conf igurat ion
To save the configuration the user must select <Save> and press Enter.
Result
Chapt er 8 . Inst alling Red Hat Ent erprise Virt ualizat ion Hypervisor Host s
127

The Red Hat Network configuration of the Hypervisor has been updated.
Report a bug
8.5.10. Configuring Hypervisor Kernel Dumps
Summary
The Hypervisor supports the export of kernel dumps in the event of a system failure using the kdumpfacility. The kdump files can be delivered using NFS or SSH so that they can be analyzed at a laterdate. The Kdump screen allows you to configure this facility.
Procedure 8.22. Conf iguring Hypervisor Kernel Dumps
1. Crash dumps generated by kdump are exported over NFS or SSH. Select the preferredtransfer method and press Space to enable it.
For the selected export method, a location to which the kdump files are to be exported mustalso be specified.
a. NFS Locat ion
Set the NFS location to which crash logs are to be exported in the NFS Locationfield. The NFS Location must be the full NFS path which includes fully qualifieddomain name and directory path.
Example 8.17. NFS Locat ion
example.redhat.com:/var/crash
b. SSH Locat ion
Set the SSH location to which crash logs are to be exported in the SSH Locationfield. The SSH Location must be the full SSH login which includes the fully qualifieddomain name and user name.
Example 8.18. SSH Locat ion
2. Save Conf igurat ion
To save the configuration, select <Save> and press Enter.
Result
The kernel dump configuration has been updated and kernel dumps will be exported to the specifiedremote servers.
Report a bug
8.5.11. Configuring Hypervisor Remote Storage
Red Hat Ent erprise Virt ualizat ion 3.3 Inst allat ion Guide
128

Summary
The Hypervisor supports the use of a remote iSCSI initiator for storage. The iSCSI initiator to use isset from the Remote Storage screen.
Procedure 8.23. Conf iguring Hypervisor Remote Storage
1. iSCSI In it iator Name
Enter the initiator name in the iSCSI Initiator Name field.
Example 8.19 . iSCSI In it iator Name
iqn.1994-05.com.redhat:5189835eeb40
2. Save Conf igurat ion
To save the configuration the user must select <Save> and press Enter.
Result
The Remote Storage configuration has been updated.
Report a bug
8.6. At taching the Hypervisor to the Red Hat Enterprise Virtualizat ionManager
8.6.1. Configuring Hypervisor Management Server
Summary
You can attach the Hypervisor to the Red Hat Enterprise Virtualization Manager immediately if theaddress of the Manager is available. If the Manager has not yet been installed, you must instead seta password. This allows the Hypervisor to be added from the Administration Portal once the Managerhas been installed. Both modes of configuration are supported from the oVirt Engine screen inthe Hypervisor user interface.
Important
Setting a password on the oVirt Engine configuration screen sets the root password onthe Hypervisor and enables SSH password authentication. Once the Hypervisor hassuccessfully been added to the Manager, disabling SSH password authentication isrecommended.
Procedure 8.24 . Conf iguring a Hypervisor Management Server
1. A. Conf igurat ion Using a Management Server Address
a. Enter the IP address or fully qualified domain name of the Manager in the Management Server field.
Chapt er 8 . Inst alling Red Hat Ent erprise Virt ualizat ion Hypervisor Host s
129

b. Enter the management server port in the Management Server Port field. Thedefault value is 443. If a different port was selected during Red Hat EnterpriseVirtualization Manager installation, specify it here, replacing the default value.
c. Select the Retrieve Certificate option to verify that the fingerprint of thecertificate retrieved from the specified management server is correct. The value thatthe certificate fingerprint is compared against is returned at the end of Red HatEnterprise Virtualization Manager installation.
d. Leave the Password and Confirm Password fields blank. These fields are notrequired if the address of the management server is known.
B. Conf igurat ion Using a Password
a. Enter a password in the Password field. It is recommended that you use a strongpassword. Strong passwords contain a mix of uppercase, lowercase, numeric andpunctuation characters. They are six or more characters long and do not containdictionary words.
b. Re-enter the password in the Confirm Password field.
c. Leave the Management Server and Management Server Port fields blank. Aslong as a password is set, allowing the Hypervisor to be added to the Managerlater, these fields are not required.
2. Save Conf igurat ion
To save the configuration select <Save> and press Enter.
Result
The oVirt Engine configuration has been updated.
See Also:
Section 8.6.3, “Approving a Hypervisor”
Report a bug
8.6.2. Using the Hypervisor
If the Hypervisor was configured with the address of the Red Hat Enterprise Virtualization Manager,the Hypervisor reboots and is automatically registered with the Manager. The Red Hat EnterpriseVirtualization Manager interface displays the Hypervisor under the Hosts tab. To prepare theHypervisor for use, it must be approved using Red Hat Enterprise Virtualization Manager.
If the Hypervisor was configured without the address of the Red Hat Enterprise VirtualizationManager, it must be added manually. To add the Hypervisor manually, you must have both the IPaddress of the machine upon which it was installed and the password that was set on the oVirt Engine screen during configuration.
Report a bug
8.6.3. Approving a Hypervisor
Summary
Red Hat Ent erprise Virt ualizat ion 3.3 Inst allat ion Guide
130

It is not possible to run virtual machines on a Hypervisor until the addition of it to the environmenthas been approved in Red Hat Enterprise Virtualization Manager.
Procedure 8.25. Approving a Hypervisor
1. Log in to the Red Hat Enterprise Virtualization Manager Administration Portal.
2. From the Hosts tab, click on the host to be approved. The host should currently be listedwith the status of Pending Approval .
3. Click the Approve button. The Edit and Approve Hosts dialog displays. You can usethe dialog to set a name for the host, fetch its SSH fingerprint before approving it, andconfigure power management, where the host has a supported power management card. Forinformation on power management configuration, see the Power Management chapter of theRed Hat Enterprise Virtualization Administration Guide.
4. Click OK. If you have not configured power management you will be prompted to confirm thatyou wish to proceed without doing so, click OK.
Result
The status in the Hosts tab changes to Installing , after a brief delay the host status changes to Up .
See Also:
Section 9.5, “Explanation of Settings and Controls in the New Host and Edit Host Windows”
Report a bug
Chapt er 8 . Inst alling Red Hat Ent erprise Virt ualizat ion Hypervisor Host s
131

Chapter 9. Installing Red Hat Enterprise Linux Hosts
9.1. Red Hat Enterprise Linux Hosts
You can use a standard Red Hat Enterprise Linux 6 installation on capable hardware as a host. RedHat Enterprise Virtualization supports hosts running Red Hat Enterprise Linux 6 Server AMD64/Intel64 version.
Adding a host can take some time, as the following steps are completed by the platform: virtualizationchecks, installation of packages, creation of bridge and a reboot of the host. Use the Details pane tomonitor the hand-shake process as the host and management system establish a connection.
See Also:
Section 9.2, “Host Compatibility Matrix”
Report a bug
9.2. Host Compat ibilit y Mat rix
Red HatEnterpriseLinux Version
Red HatEnterpriseVirtualiz at ion3.3 clusters in3.0compat ib ilitymode
Red HatEnterpriseVirtualiz at ion3.3 clusters in3.1compat ib ilitymode
Red HatEnterpriseVirtualiz at ion3.3 clusters in3.2compat ib ilitymode
Red HatEnterpriseVirtualiz at ion3.3 clusters
6.2 Supported Unsupported Unsupported Unsupported6.3 Supported Supported Unsupported Unsupported6.4 Supported Supported Supported Unsupported6.5 Supported Supported Supported Supported
Report a bug
9.3. Preparing a Red Hat Enterprise Linux Host
9.3.1. Installing Red Hat Enterprise Linux
Summary
You must install Red Hat Enterprise Linux 6.5 Server on a system to use it as a virtualization host in aRed Hat Enterprise Virtualization 3.3 environment.
Procedure 9 .1. Installing Red Hat Enterprise Linux
1. Download and Install Red Hat Enterprise Linux 6 .5 Server
Download and Install Red Hat Enterprise Linux 6.5 Server on the target virtualization host,referring to the Red Hat Enterprise Linux 6 Installation Guide for detailed instructions. Only theBase package group is required to use the virtualization host in a Red Hat EnterpriseVirtualization environment.
Red Hat Ent erprise Virt ualizat ion 3.3 Inst allat ion Guide
132

Important
If you intend to use directory services for authentication on the Red Hat EnterpriseLinux host then you must ensure that the authentication files required by the useraddcommand are locally accessible. The vdsm package, which provides software that isrequired for successful connection to Red Hat Enterprise Virtualization Manager, willnot install correctly if these files are not locally accessible.
2. Ensure Network Connect ivity
Following successful installation of Red Hat Enterprise Linux 6.5 Server, ensure that there isnetwork connectivity between your new Red Hat Enterprise Linux host and the system onwhich your Red Hat Enterprise Virtualization Manager is installed.
a. Attempt to ping the Manager:
# ping address of manager
b. A. If the Manager can successfully be contacted, this displays:
ping manager.example.redhat.comPING manager.example.redhat.com (192.168.0.1) 56(84) bytes of data.64 bytes from 192.168.0.1: icmp_seq=1 ttl=64 time=0.415 ms64 bytes from 192.168.0.1: icmp_seq=2 ttl=64 time=0.419 ms64 bytes from 192.168.0.1: icmp_seq=3 ttl=64 time=1.41 ms64 bytes from 192.168.0.1: icmp_seq=4 ttl=64 time=0.487 ms64 bytes from 192.168.0.1: icmp_seq=5 ttl=64 time=0.409 ms64 bytes from 192.168.0.1: icmp_seq=6 ttl=64 time=0.372 ms64 bytes from 192.168.0.1: icmp_seq=7 ttl=64 time=0.464 ms
--- manager.example.redhat.com ping statistics ---7 packets transmitted, 7 received, 0% packet loss, time 6267ms
B. If the Manager cannot be contacted, this displays:
ping: unknown host manager.usersys.redhat.com
You must configure the network so that the host can contact the Manager. First,disable NetworkManager. Then configure the networking scripts so that the hostwill acquire an ip address on boot.
i. Disable NetworkManager.
# service NetworkManager stop# chkconfig NetworkManager disable
ii. Edit /etc/sysconfig/network-scripts/ifcfg-eth0 . Find this line:
ONBOOT=no
Chapt er 9 . Inst alling Red Hat Ent erprise Linux Host s
133

Change that line to this:
ONBOOT=yes
iii. Reboot the host machine.
iv. Ping the Manager again:
# ping address of manager
If the host still cannot contact the Manager, it is possible that your hostmachine is not acquiring an IP address from DHCP. Confirm that DHCP isproperly configured and that your host machine is properly configured toacquire an IP address from DHCP.
If the Manager can successfully be contacted, this displays:
ping manager.example.redhat.comPING manager.example.redhat.com (192.168.0.1) 56(84) bytes of data.64 bytes from 192.168.0.1: icmp_seq=1 ttl=64 time=0.415 ms64 bytes from 192.168.0.1: icmp_seq=2 ttl=64 time=0.419 ms64 bytes from 192.168.0.1: icmp_seq=3 ttl=64 time=1.41 ms64 bytes from 192.168.0.1: icmp_seq=4 ttl=64 time=0.487 ms64 bytes from 192.168.0.1: icmp_seq=5 ttl=64 time=0.409 ms64 bytes from 192.168.0.1: icmp_seq=6 ttl=64 time=0.372 ms64 bytes from 192.168.0.1: icmp_seq=7 ttl=64 time=0.464 ms
--- manager.example.redhat.com ping statistics ---7 packets transmitted, 7 received, 0% packet loss, time 6267ms
Result
You have installed Red Hat Enterprise Linux 6.5 Server. You must however complete additionalconfiguration tasks before adding the virtualization host to your Red Hat Enterprise Virtualizationenvironment.
Next Step in Preparing a Red Hat Enterprise Linux Host
Section 9.3.2, “Subscribing to Required Channels Using Subscription Manager”
Report a bug
9.3.2. Subscribing to Required Channels Using Subscript ion Manager
Previous Step in Preparing a Red Hat Enterprise Linux Host
Red Hat Ent erprise Virt ualizat ion 3.3 Inst allat ion Guide
134

Section 9.3.1, “ Installing Red Hat Enterprise Linux”
Summary
To be used as a virtualization host, a Red Hat Enterprise Linux host must be registered andsubscribed to a number of entitlements using either Subscription Manager or RHN Classic. You mustfollow the steps in this procedure to register and subscribe using Subscription Manager. Completionof this procedure will mean that you have:
Registered the virtualization host to Red Hat Network using Subscription Manager.
Attached the Red Hat Enterprise Linux Server entitlement to the virtualization host.
Attached the Red Hat Enterprise Virtualization entitlement to the virtualization host.
Do not follow the steps in this procedure to register and subscribe using RHN Classic.
Procedure 9 .2. Subscrib ing to Required Channels using Subscript ion Manager
1. Register
Run the subscription-manager command with the register parameter to register thesystem with Red Hat Network. To complete registration successfully, you will need to supplyyour Red Hat Network Username and Password when prompted.
# subscription-manager register
2. Ident ify Availab le Ent it lement Pools
To attach the correct entitlements to the system, you must first locate the identifiers for therequired entitlement pools. Use the list action of the subscription-manager to findthese.
To identify available subscription pools for Red Hat Enterprise Linux Server, use thecommand:
# subscription-manager list --available | grep -A8 "Red Hat Enterprise Linux Server"
To identify available subscription pools for Red Hat Enterprise Virtualization, usethe command:
# subscription-manager list --available | grep -A8 "Red Hat Enterprise Virtualization"
3. Attach Ent it lements to the System
Using the pool identifiers you located in the previous step, attach the Red Hat Enterprise Linux Server and Red Hat Enterprise Virtualization entitlements to the system.Use the attach parameter of the subscription-manager command, replacing [POOLID]with each of the pool identifiers:
# subscription-manager attach --pool=[POOLID]
4. Enable the Red Hat Enterprise Virtualiz at ion Management Agents Repository
Chapt er 9 . Inst alling Red Hat Ent erprise Linux Host s
135

Run the following command to enable the Red Hat Enterprise Virtualization ManagementAgents (RPMs) repository:
# subscription-manager repos --enable=rhel-6-server-rhev-mgmt-agent-rpms
Result
You have registered the virtualization host to Red Hat Network and attached the required entitlementsusing Subscription Manager.
Next Step in Preparing a Red Hat Enterprise Linux Host
Section 9.3.3, “Subscribing to Required Channels Using RHN Classic”
Report a bug
9.3.3. Subscribing to Required Channels Using RHN Classic
Previous Step in Preparing a Red Hat Enterprise Linux Host
Section 9.3.2, “Subscribing to Required Channels Using Subscription Manager”
Summary
To be used as a virtualization host, a Red Hat Enterprise Linux host must be registered andsubscribed to a number of entitlements using either Subscription Manager or RHN Classic. You mustfollow the steps in this procedure if you wish to register and subscribe using RHN Classic.Completion of this procedure will mean that you have:
Registered the virtualization host to Red Hat Network using RHN Classic.
Subscribed the virtualization host to the Red Hat Enterprise Linux Server (v. 6 for 64-bit AMD64 / Intel64) channel.
Subscribed the virtualization host to the Red Hat Enterprise Virt Management Agent (v 6 x86_64) channel.
Do not follow the steps in this procedure if you wish to register and subscribe using SubscriptionManager.
Procedure 9 .3. Subscrib ing to Required Channels using RHN Classic
1. Register
If the machine has not already been registered with Red Hat Network, run the rhn_registercommand as root to register it. To complete registration successfully you will need tosupply your Red Hat Network Username and Password . Follow the prompts displayed by rhn_register to complete registration of the system.
# rhn_register
2. Subscribe to channels
You must subscribe the system to the required channels using either the web interface to RedHat Network or the command line rhn-channel command.
Red Hat Ent erprise Virt ualizat ion 3.3 Inst allat ion Guide
136
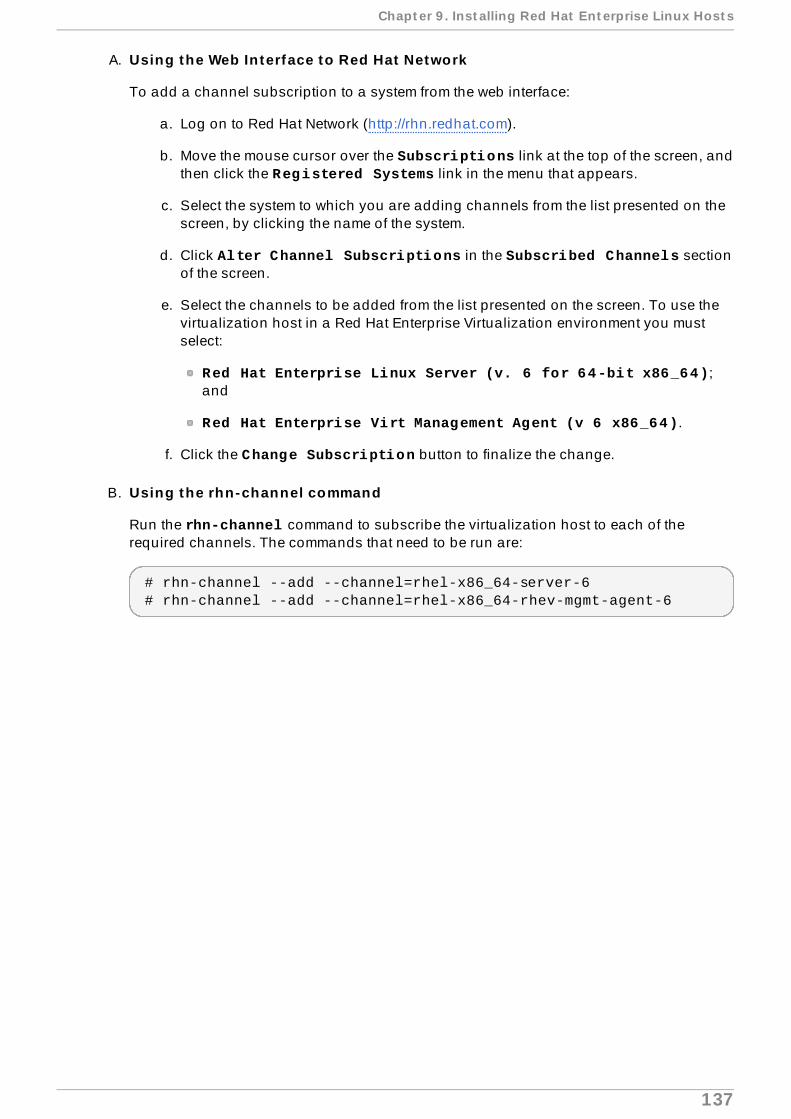
A. Using the Web Interface to Red Hat Network
To add a channel subscription to a system from the web interface:
a. Log on to Red Hat Network (http://rhn.redhat.com).
b. Move the mouse cursor over the Subscriptions link at the top of the screen, andthen click the Registered Systems link in the menu that appears.
c. Select the system to which you are adding channels from the list presented on thescreen, by clicking the name of the system.
d. Click Alter Channel Subscriptions in the Subscribed Channels sectionof the screen.
e. Select the channels to be added from the list presented on the screen. To use thevirtualization host in a Red Hat Enterprise Virtualization environment you mustselect:
Red Hat Enterprise Linux Server (v. 6 for 64-bit x86_64);and
Red Hat Enterprise Virt Management Agent (v 6 x86_64).
f. Click the Change Subscription button to finalize the change.
B. Using the rhn-channel command
Run the rhn-channel command to subscribe the virtualization host to each of therequired channels. The commands that need to be run are:
# rhn-channel --add --channel=rhel-x86_64-server-6# rhn-channel --add --channel=rhel-x86_64-rhev-mgmt-agent-6
Chapt er 9 . Inst alling Red Hat Ent erprise Linux Host s
137
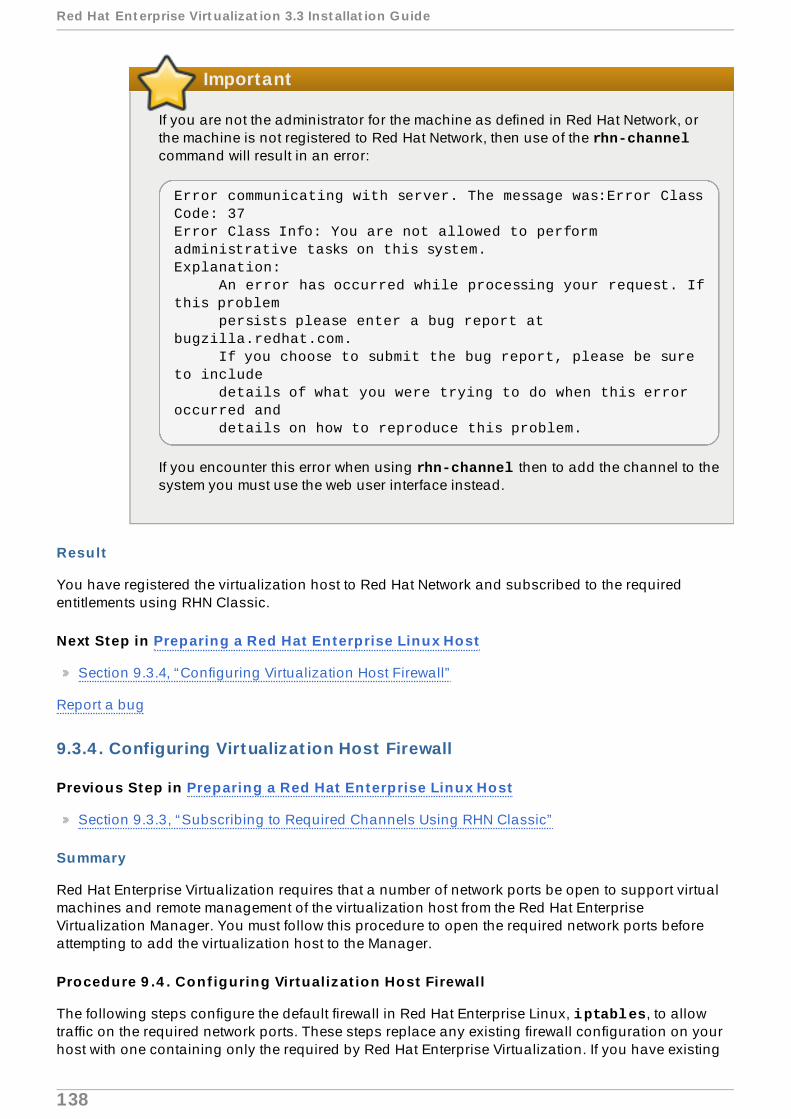
Important
If you are not the administrator for the machine as defined in Red Hat Network, orthe machine is not registered to Red Hat Network, then use of the rhn-channelcommand will result in an error:
Error communicating with server. The message was:Error Class Code: 37Error Class Info: You are not allowed to perform administrative tasks on this system.Explanation: An error has occurred while processing your request. If this problem persists please enter a bug report at bugzilla.redhat.com. If you choose to submit the bug report, please be sure to include details of what you were trying to do when this error occurred and details on how to reproduce this problem.
If you encounter this error when using rhn-channel then to add the channel to thesystem you must use the web user interface instead.
Result
You have registered the virtualization host to Red Hat Network and subscribed to the requiredentitlements using RHN Classic.
Next Step in Preparing a Red Hat Enterprise Linux Host
Section 9.3.4, “Configuring Virtualization Host Firewall”
Report a bug
9.3.4 . Configuring Virtualizat ion Host Firewall
Previous Step in Preparing a Red Hat Enterprise Linux Host
Section 9.3.3, “Subscribing to Required Channels Using RHN Classic”
Summary
Red Hat Enterprise Virtualization requires that a number of network ports be open to support virtualmachines and remote management of the virtualization host from the Red Hat EnterpriseVirtualization Manager. You must follow this procedure to open the required network ports beforeattempting to add the virtualization host to the Manager.
Procedure 9 .4 . Conf iguring Virtualiz at ion Host Firewall
The following steps configure the default firewall in Red Hat Enterprise Linux, iptables, to allowtraffic on the required network ports. These steps replace any existing firewall configuration on yourhost with one containing only the required by Red Hat Enterprise Virtualization. If you have existing
Red Hat Ent erprise Virt ualizat ion 3.3 Inst allat ion Guide
138

firewall rules with which this configuration must be merged then you must do so by manually editingthe rules defined in the iptables configuration file, /etc/sysconfig/iptables.
All commands in this procedure must be run as the root user.
1. Remove exist ing f irewall ru les f rom conf igurat ion
Remove any existing firewall rules using the --flush parameter to the iptables command.
# iptables --flush
2. Add new f irewall ru les to conf igurat ion
Add the new firewall rules, required by Red Hat Enterprise Virtualization, using the --appendparameter to the iptables command. The prompt character (#) has been intentionallyomitted from this list of commands to allow easy copying of the content to a script file orcommand prompt.
iptables --append INPUT -m state --state ESTABLISHED,RELATED -j ACCEPTiptables --append INPUT -p icmp -j ACCEPTiptables --append INPUT -i lo -j ACCEPTiptables --append INPUT -p tcp --dport 22 -j ACCEPTiptables --append INPUT -p tcp --dport 16514 -j ACCEPTiptables --append INPUT -p tcp --dport 54321 -j ACCEPTiptables --append INPUT -p tcp -m multiport --dports 5634:6166 -j ACCEPTiptables --append INPUT -p tcp -m multiport --dports 49152:49216 -j ACCEPTiptables --append INPUT -j REJECT --reject-with icmp-host-prohibitediptables --append FORWARD -m physdev ! --physdev-is-bridged -j REJECT \--reject-with icmp-host-prohibited
Note
The provided iptables commands add firewall rules to accept network traffic on anumber of ports. These include:
port 22 for SSH ,ports 5634 to 6166 for guest console connections,port 16514 for l ibvirt virtual machine migration traffic,ports 49152 to 49216 for VDSM virtual machine migration traffic, andport 54321 for the Red Hat Enterprise Virtualization Manager.
3. Save the updated f irewall conf igurat ion
Save the updated firewall configuration script using the save to the iptables initializationscript.
# service iptables save
Chapt er 9 . Inst alling Red Hat Ent erprise Linux Host s
139

4. Enable ip tables service
Ensure that the iptables service is configured to start on boot and has been restarted, orstarted for the first time if it was not already running.
# chkconfig iptables on# service iptables restart
Result
You have configured the virtualization host's firewall to allow the network traffic required by Red HatEnterprise Virtualization.
Next Step in Preparing a Red Hat Enterprise Linux Host
Section 9.3.5, “Configuring Virtualization Host sudo”
See Also:
Section 2.3.5.1, “Red Hat Enterprise Virtualization Manager Firewall Requirements”
Report a bug
9.3.5. Configuring Virtualizat ion Host sudo
Previous Step in Preparing a Red Hat Enterprise Linux Host
Section 9.3.4, “Configuring Virtualization Host Firewall”
Summary
The Red Hat Enterprise Virtualization Manager makes use of sudo to perform operations as the root on the host. The default Red Hat Enterprise Linux configuration, stored in /etc/sudoers,contains values that allow this. If this file has been modified since Red Hat Enterprise Linuxinstallation these values may have been removed. This procedure provides steps to verify that therequired entry still exists in the configuration, and add the required entry if it is not present.
Procedure 9 .5. Conf iguring Virtualiz at ion Host sudo
1. Log in
Log in to the virtualization host as the root user.
2. Run visudo
Run the visudo command to open the /etc/sudoers
# visudo
3. Edit sudoers f ile
Read the configuration file, and verify that it contains these lines:
# Allow root to run any commands anywhere root ALL=(ALL) ALL
Red Hat Ent erprise Virt ualizat ion 3.3 Inst allat ion Guide
14 0

If the file does not contain these lines, add them and save the file using the VIM :w command.
4. Exit ed itor
Exit visudo using the VIM :q command.
Result
You have configured sudo to allow use by the root user.
Next Step in Preparing a Red Hat Enterprise Linux Host
Section 9.3.6, “Configuring Virtualization Host SSH”
Report a bug
9.3.6. Configuring Virtualizat ion Host SSH
Previous Step in Preparing a Red Hat Enterprise Linux Host
Section 9.3.5, “Configuring Virtualization Host sudo”
Summary
The Red Hat Enterprise Virtualization Manager accesses virtualization hosts via SSH. To do this itlogs in as the root user using an encrypted key for authentication. You must follow this procedure toensure that SSH is configured to allow this.
Warning
The first time the Red Hat Enterprise Virtualization Manager is connected to the host it willinstall an authentication key. In the process it will overwrite any existing keys contained in the /root/.ssh/authorized_keys file.
Procedure 9 .6 . Conf iguring virtualiz at ion host SSH
All commands in this procedure must be run as the root user.
1. Install the SSH server (openssh-server)
Install the openssh-server package using yum.
# yum install openssh-server
2. Edit SSH server conf igurat ion
Open the SSH server configuration, /etc/ssh/sshd_config , in a text editor. Search forthe PermitRootLogin.
A. If PermitRootLogin is set to yes, or is not set at all, no further action is required.
B. If PermitRootLogin is set to no , then you must change it to yes.
Save any changes that you have made to the file, and exit the text editor.
Chapt er 9 . Inst alling Red Hat Ent erprise Linux Host s
14 1

3. Enable the SSH server
Configure the SSH server to start at system boot using the chkconfig command.
# chkconfig --level 345 sshd on
4. Start the SSH server
Start the SSH, or restart it if it is already running, using the service command.
# service sshd restart
Result
You have configured the virtualization host to allow root access over SSH.
Report a bug
9.4 . Adding a Red Hat Enterprise Linux Host
Summary
A Red Hat Enterprise Linux host is based on a standard "basic" installation of Red Hat EnterpriseLinux. The physical host must be set up before you can add it the Red Hat Enterprise Virtualizationenvironment.
The Red Hat Enterprise Virtualization Manager logs into the host to perform virtualization capabilitychecks, install packages, create a network bridge, and reboot the host. The process of adding a newhost can take up to 10 minutes.
Procedure 9 .7. Adding a Red Hat Enterprise Linux Host
1. Click the Hosts resource tab to list the hosts in the results list.
2. Click New to open the New Host window.
3. Use the drop-down menus to select the Data Center and Host Cluster for the new host.
4. Enter the Name, Address, and SSH Port of the new host.
5. Select an authentication method to use with the host.
A. Enter the root user's password to use password authentication.
B. Copy the key displayed in the SSH PublicKey field to /root/.ssh/authorized_keys on the host to use public key authentication.
6. You have now completed the mandatory steps to add a Red Hat Enterprise Linux host. Clickthe Advanced Parameters button to expand the advanced host settings.
a. Optionally disable automatic firewall configuration.
b. Optionally add a host SSH fingerprint to increase security. You can add it manually,or fetch it automatically.
Red Hat Ent erprise Virt ualizat ion 3.3 Inst allat ion Guide
14 2

7. You can configure the Power Management and SPM using the applicable tabs now;however, as these are not fundamental to adding a Red Hat Enterprise Linux host, they arenot covered in this procedure.
8. Click OK to add the host and close the window.
Result
The new host displays in the list of hosts with a status of Installing . Once installation iscomplete, the status will update to Reboot. The host must be activated for the status to change to Up.
Note
You can view the progress of the installation in the details pane.
See Also:
Section 9.5, “Explanation of Settings and Controls in the New Host and Edit Host Windows”
Report a bug
9.5. Explanat ion of Set t ings and Cont rols in the New Host and EditHost Windows
9.5.1. Host General Set t ings Explained
These settings apply when editing the details of a host or adding new Red Hat Enterprise Linux hostsand Foreman host provider hosts.
The General settings table contains the information required on the General tab of the New Hostor Edit Host window.
Table 9 .1. General set t ings
Field Name Descript ionData Center The data center to which the host belongs. Red
Hat Enterprise Virtualization Hypervisor hostscan not be added to Gluster-enabled clusters.
Host Cluster The cluster to which the host belongs.
Chapt er 9 . Inst alling Red Hat Ent erprise Linux Host s
14 3

Use External Providers Select or clear this check box to view or hideoptions for adding hosts provided by externalproviders. Upon selection, a drop-down list ofexternal providers that have been added to theManager displays. The following options arealso available:
Provider search filter - A text fieldthat allows you to search for hosts providedby the selected external provider. This optionis provider-specific; see providerdocumentation for details on forming searchqueries for specific providers. Leave this fieldblank to view all available hosts.External Hosts - A drop-down list that ispopulated with the name of hosts providedby the selected external provider. The entriesin this list are filtered in accordance with anysearch queries that have been input in the Provider search query field.
Name The name of the cluster. This text field has a 40-character limit and must be a unique name withany combination of uppercase and lowercaseletters, numbers, hyphens, and underscores.
Comment A field for adding plain text, human-readablecomments regarding the host.
Address The IP address, or resolvable hostname of thehost.
Root password The password of the host's root user. This canonly be given when you add the host, it cannotbe edited afterwards.
SSH PublicKey Copy the contents in the text box to the /root/.known_hosts file on the host if you'dlike to use the Manager's ssh key instead ofusing a password to authenticate with the host.
Automatically configure host firewall
When adding a new host, the Manager canopen the required ports on the host's firewall.This is enabled by default. This is an Advanced Parameter.
SSH Fingerprint You can fetch the host's SSH fingerprint, andcompare it with the fingerprint you expect thehost to return, ensuring that they match. This isan Advanced Parameter.
Field Name Descript ion
Report a bug
9.5.2. Host Power Management Set t ings Explained
The Power Management settings table contains the information required on the Power Management tab of the New Host or Edit Host windows.
Red Hat Ent erprise Virt ualizat ion 3.3 Inst allat ion Guide
14 4
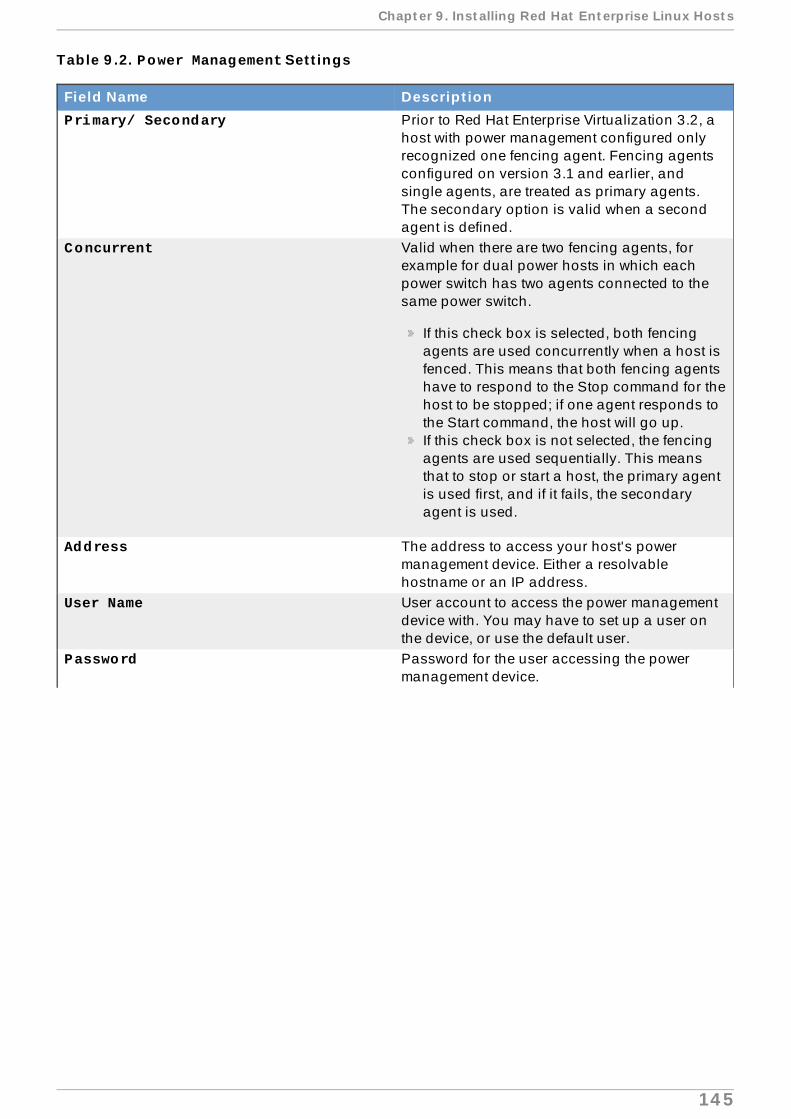
Table 9 .2. Power Management Set t ings
Field Name Descript ionPrimary/ Secondary Prior to Red Hat Enterprise Virtualization 3.2, a
host with power management configured onlyrecognized one fencing agent. Fencing agentsconfigured on version 3.1 and earlier, andsingle agents, are treated as primary agents.The secondary option is valid when a secondagent is defined.
Concurrent Valid when there are two fencing agents, forexample for dual power hosts in which eachpower switch has two agents connected to thesame power switch.
If this check box is selected, both fencingagents are used concurrently when a host isfenced. This means that both fencing agentshave to respond to the Stop command for thehost to be stopped; if one agent responds tothe Start command, the host will go up.If this check box is not selected, the fencingagents are used sequentially. This meansthat to stop or start a host, the primary agentis used first, and if it fails, the secondaryagent is used.
Address The address to access your host's powermanagement device. Either a resolvablehostname or an IP address.
User Name User account to access the power managementdevice with. You may have to set up a user onthe device, or use the default user.
Password Password for the user accessing the powermanagement device.
Chapt er 9 . Inst alling Red Hat Ent erprise Linux Host s
14 5

Type The type of power management device in yourhost.
Choose one of the following:
apc - APC MasterSwitch network powerswitch. Not for use with APC 5.x power switchdevices.apc_snmp - Use with APC 5.x power switchdevices.bladecenter - IBM Bladecentre RemoteSupervisor Adaptercisco_ucs - Cisco Unified ComputingSystemdrac5 - Dell Remote Access Controller forDell computerseps - ePowerSwitch 8M+ network powerswitchilo , ilo2, ilo3, ilo4 - HP IntegratedLights-Outipmilan - Intelligent Platform ManagementInterface and Sun Integrated Lights OutManagement devices.rsa - IBM Remote Supervisor Adaptorrsb - Fujitsu-Siemens RSB managementinterfacewti - WTI Network PowerSwitch
Port The port number used by the powermanagement device to communicate with thehost.
Options Power management device specific options.Give these as 'key=value' or 'key', refer to thedocumentation of your host's powermanagement device for the options available.
Secure Tick this check box to allow the powermanagement device to connect securely to thehost. This can be done via ssh, ssl, or otherauthentication protocols depending on andsupported by the power management agent.
Source Specifies whether the host will search within its cluster or data center for a fencing proxy.Use the Up and Down buttons to change thesequence in which the resources are used.
Field Name Descript ion
Report a bug
9.5.3. SPM Priority Set t ings Explained
The SPM settings table details the information required on the SPM tab of the New Host or Edit Host window.
Table 9 .3. SPM set t ings
Red Hat Ent erprise Virt ualizat ion 3.3 Inst allat ion Guide
14 6

Field Name Descript ionSPM Priority Defines the likelihood that the host will be given
the role of Storage Pool Manager(SPM). Theoptions are Low, Normal, and High priority,where Low priority means a reduced likelihoodof the host being assigned the role of SPM, andHigh priority increases the likelihood. Thedefault setting is Normal.
Report a bug
9.5.4 . Host Console Set t ings Explained
The Console settings table details the information required on the Console tab of the New Hostor Edit Host window.
Table 9 .4 . Console set t ings
Field Name Descript ionOverride display address Select this check box to enable overriding the
display addresses of the host. This feature isuseful in a case where the hosts are defined byinternal IP and are behind a NAT firewall. Whena user connects to a virtual machine fromoutside of the internal network, instead ofreturning the private address of the host onwhich the virtual machine is running, a public IPor FQDN (which is resolved in the externalnetwork to the public IP) is returned.
Display address The display address specified here will be usedfor all virtual machines running on this host.The address must be in the format of a fullyqualified domain name or IP.
Report a bug
Chapt er 9 . Inst alling Red Hat Ent erprise Linux Host s
14 7

Part IV. Environment Configuration
Red Hat Ent erprise Virt ualizat ion 3.3 Inst allat ion Guide
14 8

Chapter 10. Planning your Data Center
10.1. Workflow Progress — Planning Your Data Center
Report a bug
10.2. Planning Your Data Center
Successful planning is essential for a highly available, scalable Red Hat Enterprise Virtualizationenvironment.
Although it is assumed that your solution architect has defined the environment before installation,the following considerations must be made when designing the system.
CPU
Virtual Machines must be distributed across hosts so that enough capacity is available to handlehigher than average loads during peak processing. Average target utilization will be 50% ofavailable CPU.
Chapt er 1 0 . Planning your Dat a Cent er
14 9

Memory
The Red Hat Enterprise Virtualization page sharing process overcommits up to 150% of physicalmemory for virtual machines. Therefore, allow for an approximately 30% overcommit.
Networking
When designing the network, it is important to ensure that the volume of traffic produced by storage,remote connections and virtual machines is taken into account. As a general rule, allowapproximately 50 MBps per virtual machine.
It is best practice to separate disk I/O traffic from end-user traffic, as this reduces the load on theEthernet connection and reduces security vulnerabilities by isolating data from the visual stream. ForEthernet networks, it is suggested that bonds (802.3ad) are utilized to aggregate server traffic types.
Note
It is possible to connect both the storage and Hypervisors via a single high performanceswitch. For this configuration to be effective, the switch must be able to provide 30 GBps onthe backplane.
High Availab ility
The system requires at least two hosts to achieve high availability. This redundancy is useful whenperforming maintenance or repairs.
Report a bug
10.3. Data Centers
10.3.1. Data Centers in Red Hat Enterprise Virtualizat ion
The data center is the highest level container for all physical and logical resources within a managedvirtual environment. The data center is a collection of clusters of Hosts. It owns the logical network(that is, the defined subnets for management, guest network traffic and storage network traffic) andthe storage pool.
Red Hat Enterprise Virtualization contains a Default data center at installation. You can create newdata centers that will also be managed from the single Administration Portal. For example, you maychoose to have different data centers for different physical locations, business units, or for reasonsof security. It is recommended that you do not remove the Default data center, instead set up newappropriately named data centers.
The system administrator, as the superuser, can manage all aspects of the platform, that is, datacenters, storage domains, users, roles and permissions by default; however more specificadministrative roles and permissions can be assigned to other users. For example, the enterprisemay need a Data Center administrator for a specific data center, or a particular cluster may need anadministrator. All system administration roles for physical resources have a hierarchical permissionsystem. For example, a data center administrator will automatically have permission to manage allthe objects in that data center - including storage domains, clusters and hosts.
See Also:
Section 10.3.2, “Creating a New Data Center”
Red Hat Ent erprise Virt ualizat ion 3.3 Inst allat ion Guide
150
Section 10.4.1, “Clusters in Red Hat Enterprise Virtualization”
Report a bug
10.3.2. Creat ing a New Data Center
Summary
This procedure creates a data center in your virtualization environment. The data center requires afunctioning cluster, host, and storage domain to operate.
Note
The storage Type can be edited until the first storage domain is added to the data center.Once a storage domain has been added, the storage Type cannot be changed.
If you set the Compatibility Version as 3.1, it cannot be changed to 3.0 at a later time;version regression is not allowed.
Procedure 10.1. Creat ing a New Data Center
1. Select the Data Centers resource tab to list all data centers in the results list.
2. Click New to open the New Data Center window.
3. Enter the Name and Description of the data center.
4. Select the storage Type, Compatibility Version, and Quota Mode of the data centerfrom the drop-down menus.
5. Click OK to create the data center and open the New Data Center - Guide Me window.
6. The Guide Me window lists the entities that need to be configured for the data center.Configure these entities or postpone configuration by clicking the Configure Laterbutton; configuration can be resumed by selecting the data center and clicking the Guide Me button.
Result
The new data center is added to the virtualization environment. It will remain Uninitialized untila cluster, host, and storage domain is configured for it; use Guide Me to configure these entities.
See Also:
Section 10.3.1, “Data Centers in Red Hat Enterprise Virtualization”
Report a bug
10.4 . Clusters
10.4 .1. Clusters in Red Hat Enterprise Virtualizat ion
A cluster is a collection of physical hosts that share similar characteristics and work together to
Chapt er 1 0 . Planning your Dat a Cent er
151
provide computing resources in a highly available manner. In Red Hat Enterprise Virtualization thecluster must contain physical hosts that share the same storage domains and have the same type ofCPU. Because virtual machines can be migrated across hosts in the same cluster, the cluster is thehighest level at which power and load-sharing policies can be defined. The Red Hat EnterpriseVirtualization platform contains a Default cluster in the Default data center at installation time.
Every cluster in the system must belong to a data center, and every host in the system must belong toa cluster. This enables the system to dynamically allocate a virtual machine to any host in the cluster,according to policies defined on the Cluster tab, thus maximizing memory and disk space, as wellas virtual machine uptime.
At any given time, after a virtual machine runs on a specific host in the cluster, the virtual machinecan be migrated to another host in the cluster using Migrate. This can be very useful when a hostmust be shut down for maintenance. The migration to another host in the cluster is transparent to theuser, and the user continues working as usual. Note that a virtual machine can not be migrated to ahost outside the cluster.
Note
Red Hat Enterprise Virtualization 3.1 supports the use of clusters to manage Gluster storagebricks, in addition to virtualization hosts. To begin managing Gluster storage bricks, create acluster with the Enable Gluster Service option selected. For further information onGluster storage bricks, refer to the Red Hat Enterprise Storage Administration Guide, available athttp://docs.redhat.com/.
Note
Red Hat Enterprise Virtualization supports Memory Optimization by enabling and tuningKernel Same-page Merging (KSM) on the virtualization hosts in the cluster. For moreinformation on KSM refer to the Red Hat Enterprise Linux 6 Virtualization Administration Guide.
See Also:
Section 10.4.2, “Creating a New Cluster”
Section 10.3.1, “Data Centers in Red Hat Enterprise Virtualization”
Report a bug
10.4 .2. Creat ing a New Cluster
Summary
A data center can contain multiple clusters, and a cluster can contain multiple hosts. All hosts in acluster must be of the same CPU type (Intel or AMD). It is recommended that you create your hostsbefore you create your cluster to ensure CPU type optimization. However, you can configure thehosts at a later time using the Guide Me button.
Procedure 10.2. Creat ing a New Cluster
1. Select the Clusters resource tab.
Red Hat Ent erprise Virt ualizat ion 3.3 Inst allat ion Guide
152
2. Click New to open the New Cluster window.
3. Select the Data Center the cluster will belong to from the drop-down list.
4. Enter the Name and Description of the cluster.
5. Select the CPU Name and Compatibility Version from the drop-down lists. It isimportant to match the CPU processor family with the minimum CPU processor type of thehosts you intend to attach to the cluster, otherwise the host will be non-operational.
6. Select either the Enable Virt Service or Enable Gluster Service radio boxdepending on whether the cluster should be populated with virtual machine hosts or Gluster-enabled nodes. Note that you cannot add Red Hat Enterprise Virtualization Hypervisor hoststo a Gluster-enabled cluster.
7. Click the Optimization tab to select the memory page sharing threshold for the cluster,and optionally enable CPU thread handling and memory ballooning on the hosts in thecluster.
8. Click the Cluster Policy tab to optionally configure a power policy, scheduleroptimization settings, and enable trusted service for hosts in the cluster.
9. Click the Resilience Policy tab to select the virtual machine migration policy.
10. Click OK to create the cluster and open the New Cluster - Guide Me window.
11. The Guide Me window lists the entities that need to be configured for the cluster. Configurethese entities or postpone configuration by clicking the Configure Later button;configuration can be resumed by selecting the cluster and clicking the Guide Me button.
Result
The new cluster is added to the virtualization environment.
See Also:
Section 10.4.1, “Clusters in Red Hat Enterprise Virtualization”
Report a bug
10.4 .3. Enabling Gluster Processes on Red Hat Storage Nodes
Summary
This procedure explains how to allow Gluster processes on Red Hat Storage Nodes.
1. In the Navigation Pane, select the Clusters tab.
2. Select New.
3. Select the "Enable Gluster Service" radio button. Provide the address, SSH fingerprint, andpassword as necessary. The address and password fields can be filled in only when the Import existing Gluster configuration check box is selected.
Chapt er 1 0 . Planning your Dat a Cent er
153

Figure 10.1. Select ing the "Enable G luster Service" Radio But ton
4. Click OK.
Result
It is now possible to add Red Hat Storage nodes to the Gluster cluster, and to mount Gluster volumesas storage domains. ip tables rules no longer block storage domains from being added to thecluster.
Report a bug
Red Hat Ent erprise Virt ualizat ion 3.3 Inst allat ion Guide
154

Chapter 11. Network Setup
11.1. Workflow Progress — Network Setup
Report a bug
11.2. Networking in Red Hat Enterprise Virtualizat ion
Red Hat Enterprise Virtualization uses networking to support almost every aspect of operations.Storage, host management, user connections, and virtual machine connectivity, for example, all relyon a well planned and configured network to deliver optimal performance. Setting up networking is avital prerequisite for a Red Hat Enterprise Virtualization environment because it is much simpler toplan for your projected networking requirements and implement your network accordingly than it is todiscover your networking requirements through use and attempt to alter your network configurationretroactively.
It is however possible to deploy a Red Hat Enterprise Virtualization environment with noconsideration given to networking at all. Simply ensuring that each physical machine in theenvironment has at least one Network Interface Controller (NIC) is enough to begin using Red HatEnterprise Virtualization. While it is true that this approach to networking will provide a functional
Chapt er 1 1 . Net work Set up
155
environment, it will not provide an optimal environment. As network usage varies by task or action,grouping related tasks or functions into specialized networks can improve performance whilesimplifying the troubleshooting of network issues.
Red Hat Enterprise Virtualization separates network traffic by defining logical networks. Logicalnetworks define the path that a selected network traffic type must take through the network. They arecreated to isolate network traffic by functionality or virtualize a physical topology.
The rhevm logical network is created by default and labeled as the Management. The rhevm logicalnetwork is intended for management traffic between the Red Hat Enterprise Virtualization Managerand virtualization hosts. You are able to define additional logical networks to segregate:
Display related network traffic.
General virtual machine network traffic.
Storage related network traffic.
For optimal performance it is recommended that these traffic types be separated using logicalnetworks. Logical networks may be supported using physical devices such as NICs or logicaldevices, such as network bonds. It is not necessary to have one device for each logical network asmultiple logical networks are able to share a single device. This is accomplished using Virtual LAN(VLAN) tagging to isolate network traffic. To make use of this facility VLAN tagging must also besupported at the switch level.
The limits that apply to the number of logical networks that you may define in a Red Hat EnterpriseVirtualization environment are:
The number of logical networks attached to a host is limited to the number of available networkdevices combined with the maximum number of Virtual LANs (VLANs) which is 4096.
The number of logical networks in a cluster is limited to the number of logical networks that can beattached to a host as networking must be the same for all hosts in a cluster.
The number of logical networks in a data center is limited only by the number of clusters itcontains in combination with the number of logical networks permitted per cluster.
Note
From Red Hat Enterprise Virtualization 3.3, network traffic for migrating virtual machines hasbeen separated from network traffic for communication between the Manager and hosts. Thisprevents hosts from becoming non-responsive when importing or migrating virtual machines.
Note
A familiarity with the network concepts and their use is highly recommended when planningand setting up networking in a Red Hat Enterprise Virtualization environment. This documentdoes not describe the concepts, protocols, requirements or general usage of networking. It isrecommended that you read your network hardware vendor's guides for more information onmanaging networking.
Red Hat Ent erprise Virt ualizat ion 3.3 Inst allat ion Guide
156

Important
Additional care must be taken when modifying the properties of the rhevm network. Incorrectchanges to the properties of the rhevm network may cause hosts to become temporarilyunreachable.
Important
If you plan to use Red Hat Enterprise Virtualization nodes to provide any services, rememberthat the services will stop if the Red Hat Enterprise Virtualization environment stops operating.
This applies to all services, but you should be fully aware of the hazards of running thefollowing on Red Hat Enterprise Virtualization:
Directory ServicesDNSStorage
See Also:
Section 11.3, “Logical Networks”
Section 11.5, “Bonds”
Report a bug
11.3. Logical Networks
11.3.1. Creat ing a New Logical Network in a Data Center or Cluster
Summary
Create a logical network and define its use in a data center, or in clusters in a data center.
Procedure 11.1. Creat ing a New Logical Network in a Data Center or Cluster
1. Use the Data Centers or Clusters resource tabs, tree mode, or the search function to findand select a data center or cluster in the results list.
2. Click the Logical Networks tab of the details pane to list the existing logical networks.
3. From the Data Centers details pane, click New to open the New Logical Networkwindow.
From the Clusters details pane, click Add Network to open the New Logical Networkwindow.
4. Enter a Name, Description and Comment for the logical network.
5. In the Export section, select the Create on external provider check box to create thelogical network on an external provider. Select the external provider from the External Provider drop-down list and enter a Network Label for the logical network.
Chapt er 1 1 . Net work Set up
157

6. Select the Enable VLAN tagging , VM network and Override MTU to enable theseoptions.
7. From the Cluster tab, select the clusters to which the network will be assigned. You can alsospecify whether the logical network will be a required network.
8. From the Profiles tab, add vNIC profiles to the logical network as required.
9. Click OK.
Result
You have defined this logical network as a resource required by a cluster or clusters in the datacenter. You can now add this resource to the hosts in the cluster.
Note
When creating a new logical network or making changes to an existing logical network that isused as a display network, any running virtual machines that use that network must berebooted before the network becomes available or the changes are applied.
See Also:
Section 10.3.1, “Data Centers in Red Hat Enterprise Virtualization”
Section 10.4.1, “Clusters in Red Hat Enterprise Virtualization”
Report a bug
11.3.2. Edit ing Host Network Interfaces and Adding Logical Networks toHosts
Summary
You can change the settings of host network interfaces. Moving the rhevm management logicalnetwork between interfaces, and adding a newly created logical network to a network interface arecommon reasons to edit host networking.
Procedure 11.2. Edit ing Host Network In terfaces and Adding Logical Networks to Hosts
1. Use the Hosts resource tab, tree mode, or the search function to find and select the host inthe results.
2. Click the Network Interfaces tab in the details pane to list the network interfaces attachedto the host and their configurations.
3. Click the Setup Host Networks button to open the Setup Host Networks window.
Red Hat Ent erprise Virt ualizat ion 3.3 Inst allat ion Guide
158

Figure 11.1. The Setup Host Networks window
4. Attach a logical network to a network interface by selecting and dragging a logical networkinto the Assigned Logical Networks area next to the network interface.
Alternatively, right-click the logical network and select a network interface from the drop-downmenu.
5. Edit the logical networks by hovering your cursor over an assigned logical network andclicking the pencil icon to open the Edit Management Network window.
If your logical network definition is not synchronized with the network configuration on thehost, select the Sync network check box.
Select a Boot Protocol from:
None,
DHCP , or
Static.
If you have chosen Static, provide the IP , Subnet Mask, and the Gateway.
Click OK.
6. Select the Verify connectivity between Host and Engine check box to run anetwork check; this will only work if the host is in maintenance mode.
7. Select the Save network configuration check box if you want these network changesto be made persistent when the environment is rebooted.
8. Click OK to implement the changes and close the window.
Chapt er 1 1 . Net work Set up
159

Result
You have assigned logical networks to network interfaces and configured the host network.
Note
If not all network interface cards for the host are displayed, click the Refresh Capabilities button to update the list of network interface cards available for that host.
Report a bug
11.3.3. Explanat ion of Set t ings and Cont rols in the General T ab of the NewLogical Network and Edit Logical Network Windows
The table below describes the settings for the General tab of the New Logical Network and Edit Logical Network window.
Table 11.1. New Logical Network and Edit Logical Network Set t ings
Field Name Descript ionName The name of the logical network. This text field
has a 15-character limit and must be a uniquename with any combination of uppercase andlowercase letters, numbers, hyphens, andunderscores.
Description The description of the logical network. This fieldis recommended but not mandatory.
Comment A field for adding plain text, human-readablecomments regarding the logical network.
Export Allows you to export the logical network to anOpenStack Network Service that has beenadded to the Manager as an external provider.
External Provider - Allows you to select theexternal provider on which the logical networkwill be created.
Network Label - Allows you to specify thelabel of the logical network, such as eth0 .
Enable VLAN tagging VLAN tagging is a security feature that gives allnetwork traffic carried on the logical network aspecial characteristic. VLAN-tagged trafficcannot be read by interfaces that do not alsohave that characteristic. Use of VLANs on logicalnetworks also allows a single network interfaceto be associated with multiple, differently VLAN-tagged logical networks. Enter a numeric valuein the text entry field if VLAN tagging is enabled.
Red Hat Ent erprise Virt ualizat ion 3.3 Inst allat ion Guide
160
VM Network Select this option if only virtual machines usethis network. If the network is used for traffic thatdoes not involve virtual machines, such asstorage communications, do not select thischeck box.
Override MTU Set a custom maximum transmission unit for thelogical network. You can use this to match theMTU supported by your new logical network tothe MTU supported by the hardware it interfaceswith. Enter a numeric value in the text entry fieldif MTU override is enabled.
Field Name Descript ion
Report a bug
11.3.4 . Edit ing a Logical Network
Summary
Edit the settings of a logical network.
Procedure 11.3. Edit ing a Logical Network
1. Use the Data Centers resource tab, tree mode, or the search function to find and select thedata center of the logical network in the results list.
2. Click the Logical Networks tab in the details pane to list the logical networks in the datacenter.
3. Select a logical network and click Edit to open the Edit Logical Network window.
4. Edit the necessary settings.
5. Click OK to save the changes.
Result
You have updated the settings of your logical network.
See Also:
Section 11.3.3, “Explanation of Settings and Controls in the General Tab of the New LogicalNetwork and Edit Logical Network Windows”
Report a bug
11.3.5. Designate a Specific T raffic T ype for a Logical Network with theManage Networks Window
Prerequisites:
Section 11.3.1, “Creating a New Logical Network in a Data Center or Cluster”
Summary
Specify the traffic type for the logical network to optimize the network traffic flow.
Chapt er 1 1 . Net work Set up
161
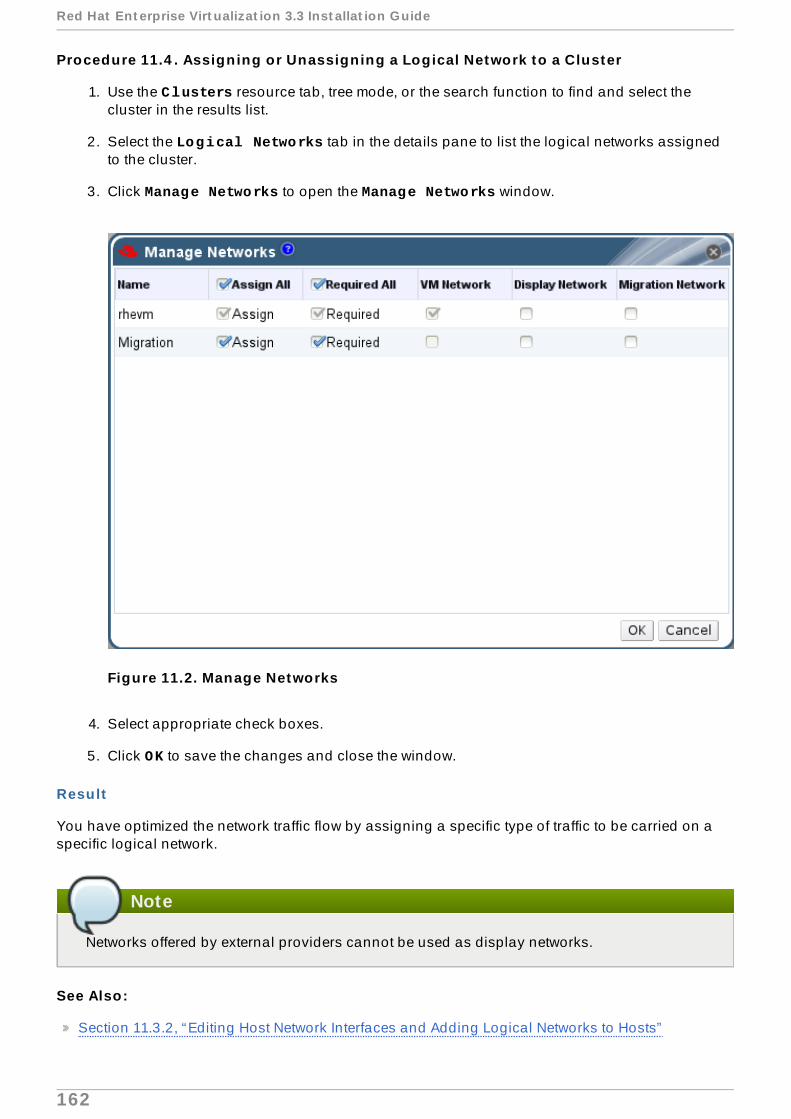
Procedure 11.4 . Assigning or Unassigning a Logical Network to a Cluster
1. Use the Clusters resource tab, tree mode, or the search function to find and select thecluster in the results list.
2. Select the Logical Networks tab in the details pane to list the logical networks assignedto the cluster.
3. Click Manage Networks to open the Manage Networks window.
Figure 11.2. Manage Networks
4. Select appropriate check boxes.
5. Click OK to save the changes and close the window.
Result
You have optimized the network traffic flow by assigning a specific type of traffic to be carried on aspecific logical network.
Note
Networks offered by external providers cannot be used as display networks.
See Also:
Section 11.3.2, “Editing Host Network Interfaces and Adding Logical Networks to Hosts”
Red Hat Ent erprise Virt ualizat ion 3.3 Inst allat ion Guide
162
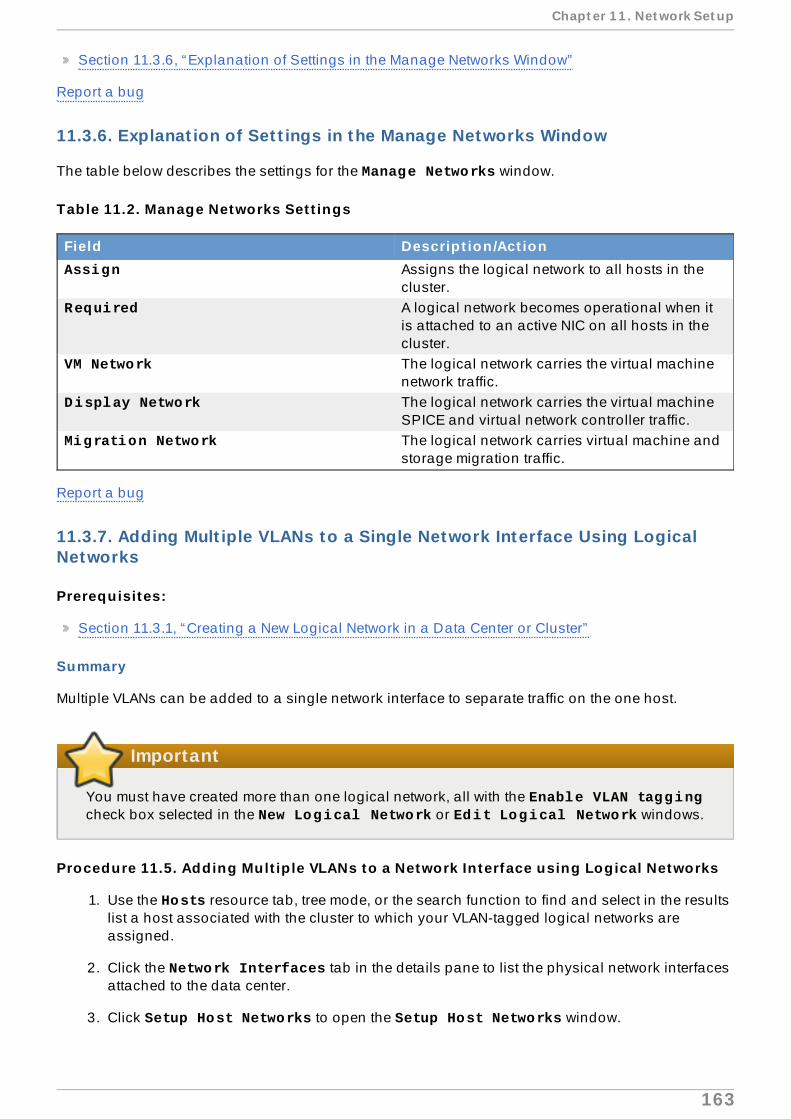
Section 11.3.6, “Explanation of Settings in the Manage Networks Window”
Report a bug
11.3.6. Explanat ion of Set t ings in the Manage Networks Window
The table below describes the settings for the Manage Networks window.
Table 11.2. Manage Networks Set t ings
Field Descript ion/Act ionAssign Assigns the logical network to all hosts in the
cluster.Required A logical network becomes operational when it
is attached to an active NIC on all hosts in thecluster.
VM Network The logical network carries the virtual machinenetwork traffic.
Display Network The logical network carries the virtual machineSPICE and virtual network controller traffic.
Migration Network The logical network carries virtual machine andstorage migration traffic.
Report a bug
11.3.7. Adding Mult iple VLANs to a Single Network Interface Using LogicalNetworks
Prerequisites:
Section 11.3.1, “Creating a New Logical Network in a Data Center or Cluster”
Summary
Multiple VLANs can be added to a single network interface to separate traffic on the one host.
Important
You must have created more than one logical network, all with the Enable VLAN taggingcheck box selected in the New Logical Network or Edit Logical Network windows.
Procedure 11.5. Adding Mult ip le VLANs to a Network In terface using Logical Networks
1. Use the Hosts resource tab, tree mode, or the search function to find and select in the resultslist a host associated with the cluster to which your VLAN-tagged logical networks areassigned.
2. Click the Network Interfaces tab in the details pane to list the physical network interfacesattached to the data center.
3. Click Setup Host Networks to open the Setup Host Networks window.
Chapt er 1 1 . Net work Set up
163

4. Drag your VLAN-tagged logical networks into the Assigned Logical Networks areanext to the physical network interface. The physical network interface can have multiplelogical networks assigned due to the VLAN tagging.
Figure 11.3. Setup Host Networks
5. Edit the logical networks by hovering your cursor over an assigned logical network andclicking the pencil icon to open the Edit Network window.
If your logical network definition is not synchronized with the network configuration on thehost, select the Sync network check box.
Select a Boot Protocol from:
None,
DHCP , or
Static,
Provide the IP and Subnet Mask.
Click OK.
6. Select the Verify connectivity between Host and Engine check box to run anetwork check; this will only work if the host is in maintenance mode.
7. Select the Save network configuration check box
8. Click OK.
Add the logical network to each host in the cluster by editing a NIC on each host in the cluster. Afterthis is done, the network will become operational
Red Hat Ent erprise Virt ualizat ion 3.3 Inst allat ion Guide
164

Result
You have added multiple VLAN-tagged logical networks to a single interface. This process can berepeated multiple times, selecting and editing the same network interface each time on each host toadd logical networks with different VLAN tags to a single network interface.
Report a bug
11.3.8. Mult iple Gateways
Summary
Users can define the gateway, along with the IP address and subnet mask, for a logical network. Thisis necessary when multiple networks exist on a host and traffic should be routed through thespecified network, rather than the default gateway.
If multiple networks exist on a host and the gateways are not defined, return traffic will be routedthrough the default gateway, which may not reach the intended destination. This would result inusers being unable to ping the host.
Red Hat Enterprise Virtualization 3.3 handles multiple gateways automatically whenever an interfacegoes up or down.
Procedure 11.6 . Viewing or Edit ing the Gateway for a Logical Network
1. Use the Hosts resource tab, tree mode, or the search function to find and select the host inthe results list.
2. Click the Network Interfaces tab in the details pane to list the network interfaces attachedto the host and their configurations.
3. Click the Setup Host Networks button to open the Setup Host Networks window.
4. Hover your cursor over an assigned logical network and click the pencil icon to open the Edit Management Network window.
Result
The Edit Management Network window displays the network name, the boot protocol, and the IP,subnet mask, and gateway addresses. The address information can be manually edited by selectinga Static boot protocol.
Report a bug
11.4 . Using the Networks Tab
The Networks resource tab provides a central location for users to perform network-relatedoperations and search for networks based on each network's property or association with otherresources.
All networks in the Red Hat Enterprise Virtualization environment display in the results list of the Networks tab. The New, Edit and Remove buttons allow you to create, change the properties of,and delete logical networks within data centers.
Click on each network name and use the Clusters, Hosts, Virtual Machines, Templates, andPermissions tabs in the details pane to perform functions including:
Chapt er 1 1 . Net work Set up
165

Attaching or detaching the networks to clusters and hosts
Removing network interfaces from virtual machines and templates
Adding and removing permissions for users to access and manage networks
These functions are also accessible through each individual resource tab.
Report a bug
11.4 .1. Import ing Networks from External Providers
Summary
If an external provider offering networking services has been registered in the Manager, the networksprovided by that provider can be imported into the Manager and used by virtual machines.
Procedure 11.7. Import ing a Network
1. Click on the Networks tab.
2. Click the Import button. The Import Networks window appears.
3. From the Network Provider drop-down list, select a provider. The networks offered by thatprovider are automatically discovered and display in the Provider Networks list.
4. Select the network to import in the Provider Networks list and click the down arrow tomove the network into the Networks to Import list.
5. Click the Import button.
Result
The selected networks are imported and can now be used within the Manager.
Important
External provider discovery and importing are Technology Preview features. TechnologyPreview features are not fully supported under Red Hat Subscription Service Level Agreements(SLAs), may not be functionally complete, and are not intended for production use. However,these features provide early access to upcoming product innovations, enabling customers totest functionality and provide feedback during the development process.
Report a bug
11.4 .2. Limitat ions to Import ing Networks from External Providers
While networks offered by external providers can be imported into the Manager, the followinglimitations apply to their usage:
Networks offered by external providers must be used as virtual machine networks.
Networks offered by external providers cannot be used as display networks.
The same network can be imported more than once, but only to different data centers.
Red Hat Ent erprise Virt ualizat ion 3.3 Inst allat ion Guide
166
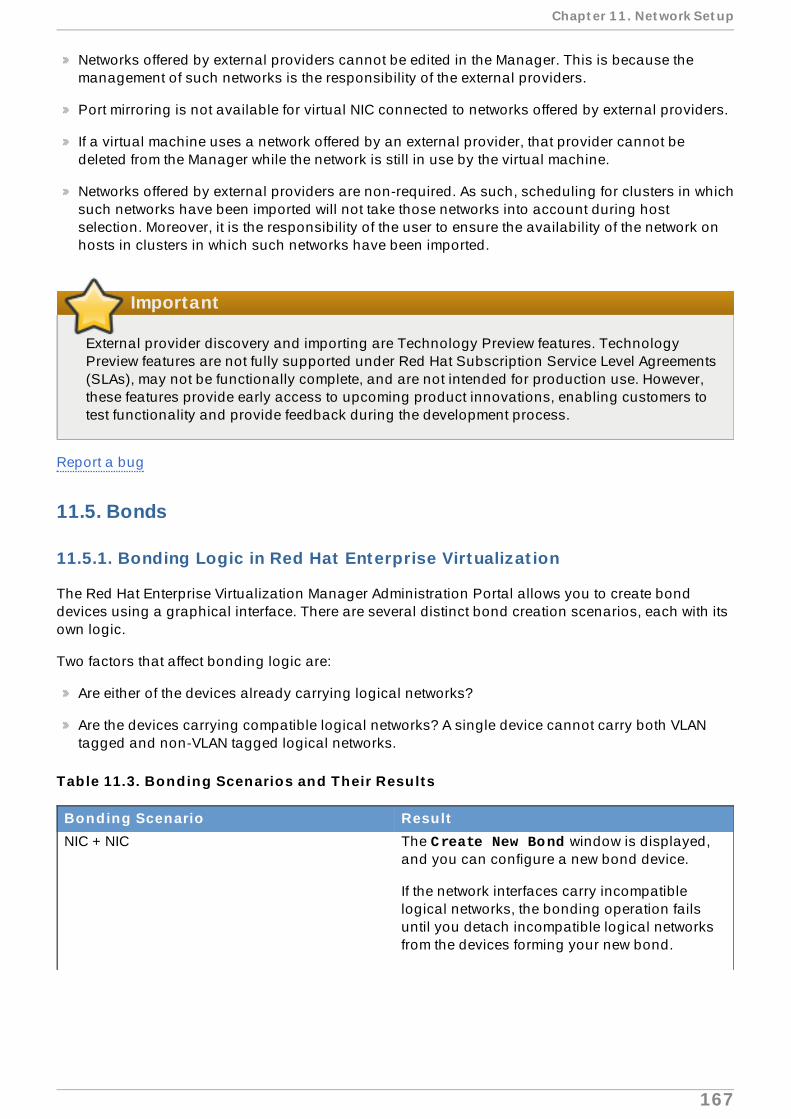
Networks offered by external providers cannot be edited in the Manager. This is because themanagement of such networks is the responsibility of the external providers.
Port mirroring is not available for virtual NIC connected to networks offered by external providers.
If a virtual machine uses a network offered by an external provider, that provider cannot bedeleted from the Manager while the network is still in use by the virtual machine.
Networks offered by external providers are non-required. As such, scheduling for clusters in whichsuch networks have been imported will not take those networks into account during hostselection. Moreover, it is the responsibility of the user to ensure the availability of the network onhosts in clusters in which such networks have been imported.
Important
External provider discovery and importing are Technology Preview features. TechnologyPreview features are not fully supported under Red Hat Subscription Service Level Agreements(SLAs), may not be functionally complete, and are not intended for production use. However,these features provide early access to upcoming product innovations, enabling customers totest functionality and provide feedback during the development process.
Report a bug
11.5. Bonds
11.5.1. Bonding Logic in Red Hat Enterprise Virtualizat ion
The Red Hat Enterprise Virtualization Manager Administration Portal allows you to create bonddevices using a graphical interface. There are several distinct bond creation scenarios, each with itsown logic.
Two factors that affect bonding logic are:
Are either of the devices already carrying logical networks?
Are the devices carrying compatible logical networks? A single device cannot carry both VLANtagged and non-VLAN tagged logical networks.
Table 11.3. Bonding Scenarios and Their Results
Bonding Scenario ResultNIC + NIC The Create New Bond window is displayed,
and you can configure a new bond device.
If the network interfaces carry incompatiblelogical networks, the bonding operation failsuntil you detach incompatible logical networksfrom the devices forming your new bond.
Chapt er 1 1 . Net work Set up
167

NIC + Bond The NIC is added to the bond device. Logicalnetworks carried by the NIC and the bond are alladded to the resultant bond device if they arecompatible.
If the bond devices carry incompatible logicalnetworks, the bonding operation fails until youdetach incompatible logical networks from thedevices forming your new bond.
Bond + Bond If the bond devices are not attached to logicalnetworks, or are attached to compatible logicalnetworks, a new bond device is created. Itcontains all of the network interfaces, andcarries all logical networks, of the componentbond devices. The Create New Bond windowis displayed, allowing you to configure your newbond.
If the bond devices carry incompatible logicalnetworks, the bonding operation fails until youdetach incompatible logical networks from thedevices forming your new bond.
Bonding Scenario Result
Report a bug
11.5.2. Bonding Modes
Red Hat Enterprise Virtualization supports the following common bonding modes:
Mode 1 (active-backup policy) sets all interfaces to the backup state while one remains active.Upon failure on the active interface, a backup interface replaces it as the only active interface inthe bond. The MAC address of the bond in mode 1 is visible on only one port (the networkadapter), to prevent confusion for the switch. Mode 1 provides fault tolerance and is supported inRed Hat Enterprise Virtualization.
Mode 2 (XOR policy) selects an interface to transmit packages to based on the result of an XORoperation on the source and destination MAC addresses modulo NIC slave count. Thiscalculation ensures that the same interface is selected for each destination MAC address used.Mode 2 provides fault tolerance and load balancing and is supported in Red Hat EnterpriseVirtualization.
Mode 4 (IEEE 802.3ad policy) creates aggregation groups for which included interfaces share thespeed and duplex settings. Mode 4 uses all interfaces in the active aggregation group inaccordance with the IEEE 802.3ad specification and is supported in Red Hat EnterpriseVirtualization.
Mode 5 (adaptive transmit load balancing policy) ensures the outgoing traffic distribution isaccording to the load on each interface and that the current interface receives all incoming traffic.If the interface assigned to receive traffic fails, another interface is assigned the receiving roleinstead. Mode 5 is supported in Red Hat Enterprise Virtualization.
Report a bug
11.5.3. Creat ing a Bond Device Using the Administ rat ion Portal
Red Hat Ent erprise Virt ualizat ion 3.3 Inst allat ion Guide
168

Summary
You can bond compatible network devices together. This type of configuration can increaseavailable bandwidth and reliability. You can bond multiple network interfaces, pre-existing bonddevices, and combinations of the two.
A bond cannot carry both vlan tagged and non-vlan traffic.
Procedure 11.8. Creat ing a Bond Device using the Administ rat ion Portal
1. Use the Hosts resource tab, tree mode, or the search function to find and select the host inthe results list.
2. Click the Network Interfaces tab in the details pane to list the physical network interfacesattached to the host.
3. Click Setup Host Networks to open the Setup Host Networks window.
4. Select and drag one of the devices over the top of another device and drop it to open the Create New Bond window. Alternatively, right-click the device and select another devicefrom the drop-down menu.
If the devices are incompatible, for example one is vlan tagged and the other is not, the bondoperation fails with a suggestion on how to correct the compatibility issue.
Figure 11.4 . Bond Devices Window
5. Select the Bond Name and Bonding Mode from the drop-down menus.
Bonding modes 1, 2, 4, and 5 can be selected. Any other mode can be configured using the Custom option.
Chapt er 1 1 . Net work Set up
169

6. Click OK to create the bond and close the Create New Bond window.
7. Assign a logical network to the newly created bond device.
8. Optionally choose to Verify connectivity between Host and Engine and Save network configuration.
9. Click OK accept the changes and close the Setup Host Networks window.
Result :
Your network devices are linked into a bond device and can be edited as a single interface. Thebond device is listed in the Network Interfaces tab of the details pane for the selected host.
Bonding must be enabled for the ports of the switch used by the host. The process by which bondingis enabled is slightly different for each switch; consult the manual provided by your switch vendor fordetailed information on how to enable bonding.
Report a bug
11.5.4 . Example Uses of Custom Bonding Opt ions with Host Interfaces
You can create customized bond devices by selecting Custom from the Bonding Mode of the Create New Bond window. The following examples should be adapted for your needs. For acomprehensive list of bonding options and their descriptions, see the Linux Ethernet Bonding DriverHOWTO on Kernel.org.
Example 11.1. xmit_hash_policy
This option defines the transmit load balancing policy for bonding modes 2 and 4. For example, ifthe majority of your traffic is between many different IP addresses, you may want to set a policy tobalance by IP address. You can set this load-balancing policy by selecting a Custom bondingmode, and entering the following into the text field:
mode=4, xmit_hash_policy=layer2+3
Example 11.2. ARP Monitoring
ARP monitor is useful for systems which can't or don't report link-state properly via ethtool. Set an arp_interval on the bond device of the host by selecting a Custom bonding mode, andentering the following into the text field:
mode=1, arp_interval=1, arp_ip_target=192.168.0.2
Example 11.3. Primary
You may want to designate a NIC with higher throughput as the primary interface in a bond device.Designate which NIC is primary by selecting a Custom bonding mode, and entering the followinginto the text field:
mode=1, primary=eth0
Red Hat Ent erprise Virt ualizat ion 3.3 Inst allat ion Guide
170

Chapter 12. Storage Setup
12.1. Workflow Progress — Storage Setup
Report a bug
12.2. Int roduct ion to Storage in Red Hat Enterprise Virtualizat ion
Red Hat Enterprise Virtualization uses a centralized storage system for virtual machine disk images,ISO files and snapshots. Storage networking can be implemented using:
Network File System (NFS)
GlusterFS exports
Other POSIX compliant file systems
Internet Small Computer System Interface (iSCSI)
Local storage attached directly to the virtualization hosts
Red Hat Ent erprise Virt ualizat ion 3.3 Inst allat ion Guide
172

Fibre Channel Protocol (FCP)
Parallel NFS (pNFS)
Setting up storage is a prerequisite for a new data center because a data center cannot be initializedunless storage domains are attached and activated.
As a Red Hat Enterprise Virtualization system administrator, you need to create, configure, attach andmaintain storage for the virtualized enterprise. You should be familiar with the storage types and theiruse. Read your storage array vendor's guides, and refer to the Red Hat Enterprise Linux StorageAdministration Guide for more information on the concepts, protocols, requirements or general usageof storage.
The Red Hat Enterprise Virtualization platform enables you to assign and manage storage using theAdministration Portal's Storage tab. The Storage results list displays all the storage domains, andthe details pane shows general information about the domain.
Red Hat Enterprise Virtualization platform has three types of storage domains:
Data Domain: A data domain holds the virtual hard disks and OVF files of all the virtualmachines and templates in a data center. In addition, snapshots of the virtual machines are alsostored in the data domain.
The data domain cannot be shared across data centers, and the data domain must be of thesame type as the data center. For example, a data center of a iSCSI type, must have an iSCSI datadomain.
You must attach a data domain to a data center before you can attach domains of other types toit.
ISO Domain: ISO domains store ISO files (or logical CDs) used to install and boot operatingsystems and applications for the virtual machines. An ISO domain removes the data center's needfor physical media. An ISO domain can be shared across different data centers.
Export Domain: Export domains are temporary storage repositories that are used to copy andmove images between data centers and Red Hat Enterprise Virtualization environments. Exportdomains can be used to backup virtual machines. An export domain can be moved between datacenters, however, it can only be active in one data center at a time.
Important
Support for export storage domains backed by storage on anything other than NFS isbeing deprecated. While existing export storage domains imported from Red Hat EnterpriseVirtualization 2.2 environments remain supported new export storage domains must becreated on NFS storage.
Only commence configuring and attaching storage for your Red Hat Enterprise Virtualizationenvironment once you have determined the storage needs of your data center(s).
Important
To add storage domains you must be able to successfully access the Administration Portal,and there must be at least one host connected with a status of Up.
Chapt er 1 2 . St orage Set up
173

See Also:
Section 12.3.1, “Adding NFS Storage”
Section 12.3.3, “Adding iSCSI Storage”
Section 12.3.4, “Adding FCP Storage”
Section 12.3.5, “Adding Local Storage”
Section 12.3.6, “Adding POSIX Compliant File System Storage”
Section 12.4, “Populating the ISO Domain”
Report a bug
12.3. Adding Storage to the Environment
12.3.1. Adding NFS Storage
12.3.1 .1 . Preparing NFS St o rage
Summary
These steps must be taken to prepare an NFS file share on a server running Red Hat Enterprise Linux6 for use with Red Hat Enterprise Virtualization.
Procedure 12.1. Preparing NFS Storage
1. Install nfs-utils
NFS functionality is provided by the nfs-utils package. Before file shares can be created,check that the package is installed by querying the RPM database for the system:
$ rpm -qi nfs-utils
If the nfs-utils package is installed then the package information will be displayed. If no outputis displayed then the package is not currently installed. Install it using yum while logged in asthe root user:
# yum install nfs-utils
2. Conf igure Boot Scripts
To ensure that NFS shares are always available when the system is operational both the nfsand rpcbind services must start at boot time. Use the chkconfig command while logged inas root to modify the boot scripts.
# chkconfig --add rpcbind# chkconfig --add nfs# chkconfig rpcbind on# chkconfig nfs on
Once the boot script configuration has been done, start the services for the first time.
Red Hat Ent erprise Virt ualizat ion 3.3 Inst allat ion Guide
174

# service rpcbind start# service nfs start
3. Create Directory
Create the directory you wish to share using NFS.
# mkdir /exports/iso
Replace /exports/iso with the name, and path of the directory you wish to use.
4. Export Directory
To be accessible over the network using NFS the directory must be exported. NFS exports arecontrolled using the /etc/exports configuration file. Each export path appears on aseparate line followed by a tab character and any additional NFS options. Exports to beattached to the Red Hat Enterprise Virtualization Manager must have the read, and write,options set.
To grant read, and write access to /exports/iso using NFS for example you add thefollowing line to the /etc/exports file.
/exports/iso *(rw)
Again, replace /exports/iso with the name, and path of the directory you wish to use.
5. Reload NFS Conf igurat ion
For the changes to the /etc/exports file to take effect the service must be told to reload theconfiguration. To force the service to reload the configuration run the following command as root:
# service nfs reload
6. Set Permissions
The NFS export directory must be configured for read write access and must be owned byvdsm:kvm. If these users do not exist on your external NFS server use the following command,assuming that /exports/iso is the directory to be used as an NFS share.
# chown -R 36:36 /exports/iso
The permissions on the directory must be set to allow read and write access to both the ownerand the group. The owner should also have execute access to the directory. The permissionsare set using the chmod command. The following command arguments set the requiredpermissions on the /exports/iso directory.
# chmod 0755 /exports/iso
Result
The NFS file share has been created, and is ready to be attached by the Red Hat EnterpriseVirtualization Manager.
Chapt er 1 2 . St orage Set up
175

Report a bug
12.3.1 .2 . At t aching NFS St o rage
Prerequisites:
Section 12.3.1.1, “Preparing NFS Storage”
Summary
An NFS type Storage Domain is a mounted NFS share that is attached to a data center. It is usedto provide storage for virtualized guest images and ISO boot media. Once NFS storage has beenexported it must be attached to the Red Hat Enterprise Virtualization Manager using theAdministration Portal.
NFS data domains can be added to NFS data centers. You can add NFS, ISO, and export storagedomains to data centers of any type.
Procedure 12.2. At taching NFS Storage
1. Click the Storage resource tab to list the existing storage domains.
2. Click New Domain to open the New Domain window.
Figure 12.1. NFS Storage
Red Hat Ent erprise Virt ualizat ion 3.3 Inst allat ion Guide
176

3. Enter the Name of the storage domain.
4. Select the Data Center, Domain Function / Storage Type, and Use Host from thedrop-down menus.
If applicable, select the Format from the drop-down menu.
5. Enter the Export Path to be used for the storage domain.
The export path should be in the format of 192.168.0.10:/data or domain.example.com:/data
6. Click Advanced Parameters to enable further configurable settings. It is recommended thatthe values of these parameters not be modified.
Important
All communication to the storage domain is from the selected host and not directly fromthe Red Hat Enterprise Virtualization Manager. At least one active host must beattached to the chosen Data Center before the storage is configured.
7. Click OK to create the storage domain and close the window.
Result
The new NFS data domain is displayed on the Storage tab with a status of Locked while the diskprepares. It is automatically attached to the data center upon completion.
Report a bug
12.3.2. Adding pNFS Storage
12.3.2 .1 . Preparing pNFS St o rage
Support for Parallel NFS (pNFS) as part of the NFS v4.1 standard is available as of Red HatEnterprise Linux 6.4. The pNFS architecture improves the scalability of NFS, with possibleimprovements to performance. That is, when a server implements pNFS as well, a client is able toaccess data through multiple servers concurrently. The pNFS protocol supports three storageprotocols or layouts: files, objects, and blocks. Red Hat Enterprise Linux 6.4 supports only the " files"layout type.
To enable support for pNFS functionality, use one of the following mount options on mounts from apNFS-enabled server:
-o minorversion=1
or
-o v4.1
Set the permissions of the pNFS path so that Red Hat Enterprise Virtualization can access them:
# chown 36:36 [path to pNFS resource]
Chapt er 1 2 . St orage Set up
177

After the server is pNFS-enabled, the nfs_layout_nfsv41_files kernel is automatically loaded on thefirst mount. Verify that the module was loaded:
$ lsmod | grep nfs_layout_nfsv41_files
Another way to verify a successful NFSv4.1 mount is with the mount command. The mount entry in theoutput should contain minorversion=1.
Report a bug
12.3.2 .2 . At t aching pNFS St o rage
Summary
A pNFS type Storage Domain is a mounted pNFS share attached to a data center. It providesstorage for virtualized guest images and ISO boot media. After you have exported pNFS storage, itmust be attached to the Red Hat Enterprise Virtualization Manager using the Administration Portal.
Procedure 12.3. At taching pNFS Storage
1. Click the Storage resource tab to list the existing storage domains.
2. Click New Domain to open the New Domain window.
Figure 12.2. NFS Storage
Red Hat Ent erprise Virt ualizat ion 3.3 Inst allat ion Guide
178

3. Enter the Name of the storage domain.
4. Select the Data Center, Domain Function / Storage Type, and Use Host from thedrop-down menus.
If applicable, select the Format from the drop-down menu.
5. Enter the Export Path to be used for the storage domain.
The export path should be in the format of 192.168.0.10:/data or domain.example.com:/data
6. In the VFS Type field, enter nfs4 .
7. In the Mount Options field, enter minorversion=1.
Important
All communication to the storage domain comes from the selected host and not fromthe Red Hat Enterprise Virtualization Manager. At least one active host must beattached to the chosen Data Center before the storage is configured.
8. Click OK to create the storage domain and close the window.
Result
The new pNFS data domain is displayed on the Storage tab with a status of Locked while the diskprepares. It is automatically attached to the data center upon completion.
Report a bug
12.3.3. Adding iSCSI Storage
Summary
Red Hat Enterprise Virtualization platform supports iSCSI storage by creating a storage domain froma volume group made of pre-existing LUNs. Neither volume groups nor LUNs can be attached to morethan one storage domain at a time.
For information regarding the setup and configuration of iSCSI on Red Hat Enterprise Linux, see theRed Hat Enterprise Linux Storage Administration Guide.
Note
You can only add an iSCSI storage domain to a data center that is set up for iSCSI storagetype.
Procedure 12.4 . Adding iSCSI Storage
1. Click the Storage resource tab to list the existing storage domains in the results list.
2. Click the New Domain button to open the New Domain window.
3. Enter the Name of the new storage domain.
Chapt er 1 2 . St orage Set up
179

Figure 12.3. New iSCSI Domain
4. Use the Data Center drop-down menu to select an iSCSI data center.
If you do not yet have an appropriate iSCSI data center, select (none).
5. Use the drop-down menus to select the Domain Function / Storage Type and the Format. The storage domain types that are not compatible with the chosen data center arenot available.
6. Select an active host in the Use Host field. If this is not the first data domain in a data center,you must select the data center's SPM host.
Important
All communication to the storage domain is via the selected host and not directly fromthe Red Hat Enterprise Virtualization Manager. At least one active host must exist in thesystem, and be attached to the chosen data center, before the storage is configured.
7. The Red Hat Enterprise Virtualization Manager is able to map either iSCSI targets to LUNs, orLUNs to iSCSI targets. The New Domain window automatically displays known targets with
Red Hat Ent erprise Virt ualizat ion 3.3 Inst allat ion Guide
180

unused LUNs when iSCSI is selected as the storage type. If the target that you are addingstorage from is not listed then you can use target discovery to find it, otherwise proceed to thenext step.
iSCSI Target Discovery
a. Click Discover Targets to enable target discovery options. When targets havebeen discovered and logged in to, the New Domain window automatically displaystargets with LUNs unused by the environment.
Note
LUNs used externally to the environment are also displayed.
You can use the Discover Targets options to add LUNs on many targets, ormultiple paths to the same LUNs.
b. Enter the fully qualified domain name or IP address of the iSCSI host in the Addressfield.
c. Enter the port to connect to the host on when browsing for targets in the Port field.The default is 3260 .
d. If the Challenge Handshake Authentication Protocol (CHAP) is being used to securethe storage, select the User Authentication check box. Enter the CHAP user name and CHAP password .
e. Click the Discover button.
f. Select the target to use from the discovery results and click the Login button.
Alternatively, click the Login All to log in to all of the discovered targets.
8. Click the + button next to the desired target. This will expand the entry and display all unusedLUNs attached to the target.
9. Select the check box for each LUN that you are using to create the storage domain.
10. Click OK to create the storage domain and close the window.
Result
The new iSCSI storage domain displays on the storage tab. This can take up to 5 minutes.
Report a bug
12.3.4 . Adding FCP Storage
Summary
Red Hat Enterprise Virtualization platform supports SAN storage by creating a storage domain from avolume group made of pre-existing LUNs. Neither volume groups nor LUNs can be attached to morethan one storage domain at a time.
Chapt er 1 2 . St orage Set up
181

Red Hat Enterprise Virtualization system administrators need a working knowledge of Storage AreaNetworks (SAN) concepts. SAN usually uses Fibre Channel Protocol (FCP) for traffic between hostsand shared external storage. For this reason, SAN may occasionally be referred to as FCP storage.
For information regarding the setup and configuration of FCP or multipathing on Red Hat EnterpriseLinux, please refer to the Storage Administration Guide and DM Multipath Guide.
Note
You can only add an FCP storage domain to a data center that is set up for FCP storage type.
Procedure 12.5. Adding FCP Storage
1. Click the Storage resource tab to list all storage domains in the virtualized environment.
2. Click New Domain to open the New Domain window.
3. Enter the Name of the storage domain
Figure 12.4 . Adding FCP Storage
Red Hat Ent erprise Virt ualizat ion 3.3 Inst allat ion Guide
182

4. Use the Data Center drop-down menu to select an FCP data center.
If you do not yet have an appropriate FCP data center, select (none).
5. Use the drop-down menus to select the Domain Function / Storage Type and the Format. The storage domain types that are not compatible with the chosen data center arenot available.
6. Select an active host in the Use Host field. If this is not the first data domain in a data center,you must select the data center's SPM host.
Important
All communication to the storage domain is via the selected host and not directly fromthe Red Hat Enterprise Virtualization Manager. At least one active host must exist in thesystem, and be attached to the chosen data center, before the storage is configured.
7. The New Domain window automatically displays known targets with unused LUNs when Data / Fibre Channel is selected as the storage type. Select the LUN ID check box toselect all of the available LUNs.
8. Click OK to create the storage domain and close the window.
Result
The new FCP data domain displays on the Storage tab. It will remain with a Locked status while itis being prepared for use. When ready, it is automatically attached to the data center.
Report a bug
12.3.5. Adding Local Storage
12.3.5 .1 . Preparing Lo cal St o rage
Summary
A local storage domain can be set up on a host. When you set up host to use local storage, the hostautomatically gets added to a new data center and cluster that no other hosts can be added to.Multiple host clusters require that all hosts have access to all storage domains, which is not possiblewith local storage. Virtual machines created in a single host cluster cannot be migrated, fenced orscheduled.
Important
On Red Hat Enterprise Virtualization Hypervisors the only path permitted for use as localstorage is /data/images. This directory already exists with the correct permissions onHypervisor installations. The steps in this procedure are only required when preparing localstorage on Red Hat Enterprise Linux virtualization hosts.
Procedure 12.6 . Preparing Local Storage
1. On the virtualization host, create the directory to be used for the local storage.
Chapt er 1 2 . St orage Set up
183

# mkdir -p /data/images
2. Ensure that the directory has permissions allowing read/write access to the vdsm user (UID36) and kvm group (GID 36).
# chown 36:36 /data /data/images
# chmod 0755 /data /data/images
Result
Your local storage is ready to be added to the Red Hat Enterprise Virtualization environment.
Report a bug
12.3.5 .2 . Adding Lo cal St o rage
Summary
Storage local to your host has been prepared. Now use the Manager to add it to the host.
Adding local storage to a host in this manner causes the host to be put in a new data center andcluster. The local storage configuration window combines the creation of a data center, a cluster,and storage into a single process.
Procedure 12.7. Adding Local Storage
1. Use the Hosts resource tab, tree mode, or the search function to find and select the host inthe results list.
2. Click Maintenance to place the host into maintenance mode.
3. Click Configure Local Storage to open the Configure Local Storage window.
Red Hat Ent erprise Virt ualizat ion 3.3 Inst allat ion Guide
184
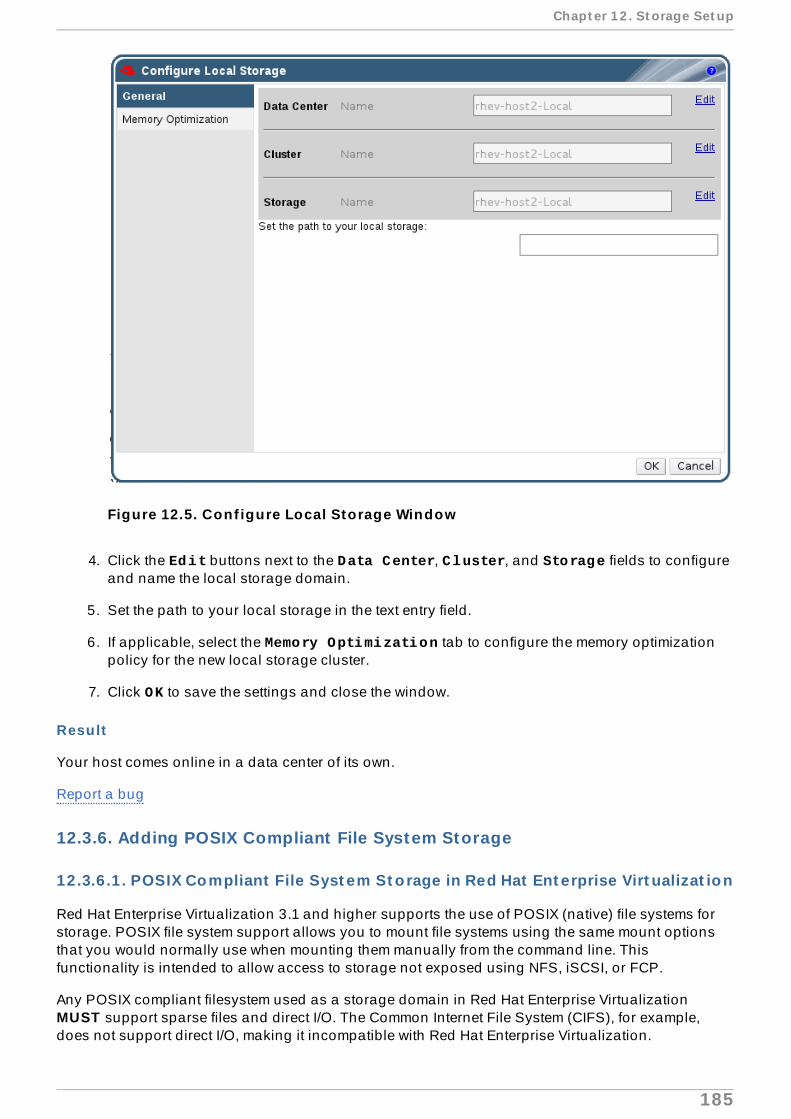
Figure 12.5. Conf igure Local Storage Window
4. Click the Edit buttons next to the Data Center, Cluster, and Storage fields to configureand name the local storage domain.
5. Set the path to your local storage in the text entry field.
6. If applicable, select the Memory Optimization tab to configure the memory optimizationpolicy for the new local storage cluster.
7. Click OK to save the settings and close the window.
Result
Your host comes online in a data center of its own.
Report a bug
12.3.6. Adding POSIX Compliant File System Storage
12.3.6 .1 . POSIX Co mpliant File Syst em St o rage in Red Hat Ent erprise Virt ualizat io n
Red Hat Enterprise Virtualization 3.1 and higher supports the use of POSIX (native) file systems forstorage. POSIX file system support allows you to mount file systems using the same mount optionsthat you would normally use when mounting them manually from the command line. Thisfunctionality is intended to allow access to storage not exposed using NFS, iSCSI, or FCP.
Any POSIX compliant filesystem used as a storage domain in Red Hat Enterprise VirtualizationMUST support sparse files and direct I/O. The Common Internet File System (CIFS), for example,does not support direct I/O, making it incompatible with Red Hat Enterprise Virtualization.
Chapt er 1 2 . St orage Set up
185

Important
Do not mount NFS storage by creating a POSIX compliant file system Storage Domain. Alwayscreate an NFS Storage Domain instead.
Report a bug
12.3.6 .2 . At t aching POSIX Co mpliant File Syst em St o rage
Summary
You want to use a POSIX compliant file system that is not exposed using NFS, iSCSI, or FCP as astorage domain.
Procedure 12.8. At taching POSIX Compliant File System Storage
1. Click the Storage resource tab to list the existing storage domains in the results list.
2. Click New Domain to open the New Domain window.
Figure 12.6 . POSIX Storage
Red Hat Ent erprise Virt ualizat ion 3.3 Inst allat ion Guide
186

3. Enter the Name for the storage domain.
4. Select the Data Center to be associated with the storage domain. The Data Center selectedmust be of type POSIX (POSIX compliant FS). Alternatively, select (none).
5. Select Data / POSIX compliant FS from the Domain Function / Storage Typedrop-down menu.
If applicable, select the Format from the drop-down menu.
6. Select a host from the Use Host drop-down menu. Only hosts within the selected data centerwill be listed. The host that you select will be used to connect the storage domain.
7. Enter the Path to the POSIX file system, as you would normally provide it to the mountcommand.
8. Enter the VFS Type, as you would normally provide it to the mount command using the -targument. See man mount for a list of valid VFS types.
9. Enter additional Mount Options, as you would normally provide them to the mountcommand using the -o argument. The mount options should be provided in a comma-separated list. See man mount for a list of valid mount options.
10. Click OK to attach the new Storage Domain and close the window.
Result
You have used a supported mechanism to attach an unsupported file system as a storage domain.
Report a bug
12.4 . Populat ing the ISO Domain
12.4 .1. Populat ing the ISO Storage Domain
Summary
An ISO storage domain is attached to a data center, ISO images must be uploaded to it. Red HatEnterprise Virtualization provides an ISO uploader tool that ensures that the images are uploadedinto the correct directory path, with the correct user permissions.
The creation of ISO images from physical media is not described in this document. It is assumed thatyou have access to the images required for your environment.
Procedure 12.9 . Populat ing the ISO Storage Domain
1. Copy the required ISO image to a temporary directory on the system running Red HatEnterprise Virtualization Manager.
2. Log in to the system running Red Hat Enterprise Virtualization Manager as the root user.
3. Use the engine-iso-uploader command to upload the ISO image. This action will takesome time, the amount of time varies depending on the size of the image being uploaded andavailable network bandwidth.
Example 12.1. ISO Uploader Usage
Chapt er 1 2 . St orage Set up
187

In this example the ISO image RHEL6.iso is uploaded to the ISO domain called ISODomain using NFS. The command will prompt for an administrative user name andpassword. The user name must be provided in the form user name@domain.
# engine-iso-uploader --iso-domain=ISODomain upload RHEL6.iso
Result
The ISO image is uploaded and appears in the ISO storage domain specified. It is also available inthe list of available boot media when creating virtual machines in the data center which the storagedomain is attached to.
See Also:
Section 12.4.2, “VirtIO and Guest Tool Image Files”
Section 12.4.3, “Uploading the VirtIO and Guest Tool Image Files to an ISO Storage Domain”
Report a bug
12.4 .2. Virt IO and Guest T ool Image Files
The virtio-win ISO and Virtual Floppy Drive (VFD) images, which contain the VirtIO drivers forWindows virtual machines, and the rhev-tools-setup ISO, which contains the Red Hat EnterpriseVirtualization Guest Tools for Windows virtual machines, are copied to an ISO storage domain uponinstallation and configuration of the domain.
These image files provide software that can be installed on virtual machines to improve performanceand usability. The most recent virtio-win and rhev-tools-setup files can be accessed via the followingsymbolic links on the file system of the Red Hat Enterprise Virtualization Manager:
/usr/share/virtio-win/virtio-win.iso
/usr/share/virtio-win/virtio-win_x86.vfd
/usr/share/virtio-win/virtio-win_amd64.vfd
/usr/share/rhev-guest-tools-iso/rhev-tools-setup.iso
These image files must be manually uploaded to ISO storage domains that were not created locallyby the installation process. Use the engine-iso-uploader command to upload these images toyour ISO storage domain. Once uploaded, the image files can be attached to and used by virtualmachines.
See Also:
Section 12.4.3, “Uploading the VirtIO and Guest Tool Image Files to an ISO Storage Domain”
Report a bug
12.4 .3. Uploading the Virt IO and Guest T ool Image Files to an ISO StorageDomain
The example below demonstrates the command to upload the virtio-win.iso , virtio-win_x86.vfd , virtio-win_amd64.vfd , and rhev-tools-setup.iso image files to the ISODomain.
Red Hat Ent erprise Virt ualizat ion 3.3 Inst allat ion Guide
188

Example 12.2. Uploading the Virt IO and Guest Tool Image Files
# engine-iso-uploader --iso-domain=[ISODomain] upload /usr/share/virtio-win/virtio-win.iso /usr/share/virtio-win/virtio-win_x86.vfd /usr/share/virtio-win/virtio-win_amd64.vfd /usr/share/rhev-guest-tools-iso/rhev-tools-setup.iso
See Also:
Section 12.4.2, “VirtIO and Guest Tool Image Files”
Report a bug
Chapt er 1 2 . St orage Set up
189

Log Files
A.1. Red Hat Enterprise Virtualizat ion Manager Installat ion Log Files
Table A.1. Installat ion
Log File Descript ion/var/log/ovirt-engine/engine-cleanup_yyyy_mm_dd_hh_mm_ss.log
Log from the engine-cleanup command. Thisis the command used to reset a Red HatEnterprise Virtualization Manager installation. Alog is generated each time the command is run.The date and time of the run is used in thefilename to allow multiple logs to exist.
/var/log/ovirt-engine/engine-db-install-yyyy_mm_dd_hh_mm_ss.log
Log from the engine-setup commanddetailing the creation and configuration of the rhevm database.
/var/log/ovirt-engine/rhevm-dwh-setup-yyyy_mm_dd_hh_mm_ss.log
Log from the rhevm-dwh-setup command.This is the command used to create the ovirt_engine_history database forreporting. A log is generated each time thecommand is run. The date and time of the run isused in the filename to allow multiple logs toexist concurrently.
/var/log/ovirt-engine/ovirt-engine-reports-setup-yyyy_mm_dd_hh_mm_ss.log
Log from the rhevm-reports-setup command.This is the command used to install the Red HatEnterprise Virtualization Manager Reportsmodules. A log is generated each time thecommand is run. The date and time of the run isused in the filename to allow multiple logs toexist concurrently.
/var/log/ovirt-engine/setup/ovirt-engine-setup-yyyymmddhhmmss.log
Log from the engine-setup command. A log isgenerated each time the command is run. Thedate and time of the run is used in the filenameto allow multiple logs to exist concurrently.
Report a bug
A.2. Red Hat Enterprise Virtualizat ion Manager Log Files
Table A.2. Service Act ivity
Log File Descript ion/var/log/ovirt-engine/engine.log Reflects all Red Hat Enterprise Virtualization
Manager GUI crashes, Active Directory look-ups, Database issues, and other events.
/var/log/ovirt-engine/host-deploy Log files from hosts deployed from the Red HatEnterprise Virtualization Manager.
/var/lib/ovirt-engine/setup-history.txt
Tracks the installation and upgrade ofpackages associated with the Red HatEnterprise Virtualization Manager.
Report a bug
Red Hat Ent erprise Virt ualizat ion 3.3 Inst allat ion Guide
190

A.3. Red Hat Enterprise Virtualizat ion Host Log Files
Table A.3.
Log File Descript ion/var/log/vdsm/libvirt.log Log file for libvirt./var/log/vdsm/spm-lock.log Log file detailing the host's ability to obtain a
lease on the Storage Pool Manager role. Thelog details when the host has acquired,released, renewed, or failed to renew the lease.
/var/log/vdsm/vdsm.log Log file for VDSM, the Manager's agent on thevirtualization host(s).
/tmp/ovirt-host-deploy-@[email protected] Host deployment log, copied to engine as/var/log/ovirt-engine/host-deploy/ovirt-@DATE@-@HOST@-@[email protected] after the host hasbeen successfully deployed.
Report a bug
A.4. Remotely Logging Host Act ivit ies
A.4 .1. Set t ing Up a Virtualizat ion Host Logging Server
Summary
Red Hat Enterprise Virtualization hosts generate and update log files, recording their actions andproblems. Collecting these log files centrally simplifies debugging.
This procedure should be used on your centralized log server. You could use a separate loggingserver, or use this procedure to enable host logging on the Red Hat Enterprise VirtualizationManager.
Procedure A.1. Set t ing up a Virtualiz at ion Host Logging Server
1. Configure SELinux to allow rsyslog traffic.
# semanage port -a -t syslogd_port_t -p udp 514
2. Edit /etc/rsyslog.conf and add below lines:
$template TmplAuth, "/var/log/%fromhost%/secure" $template TmplMsg, "/var/log/%fromhost%/messages"
$RuleSet remoteauthpriv.* ?TmplAuth*.info,mail.none;authpriv.none,cron.none ?TmplMsg$RuleSet RSYSLOG_DefaultRuleset$InputUDPServerBindRuleset remote
Uncomment the following:
Log Files
191
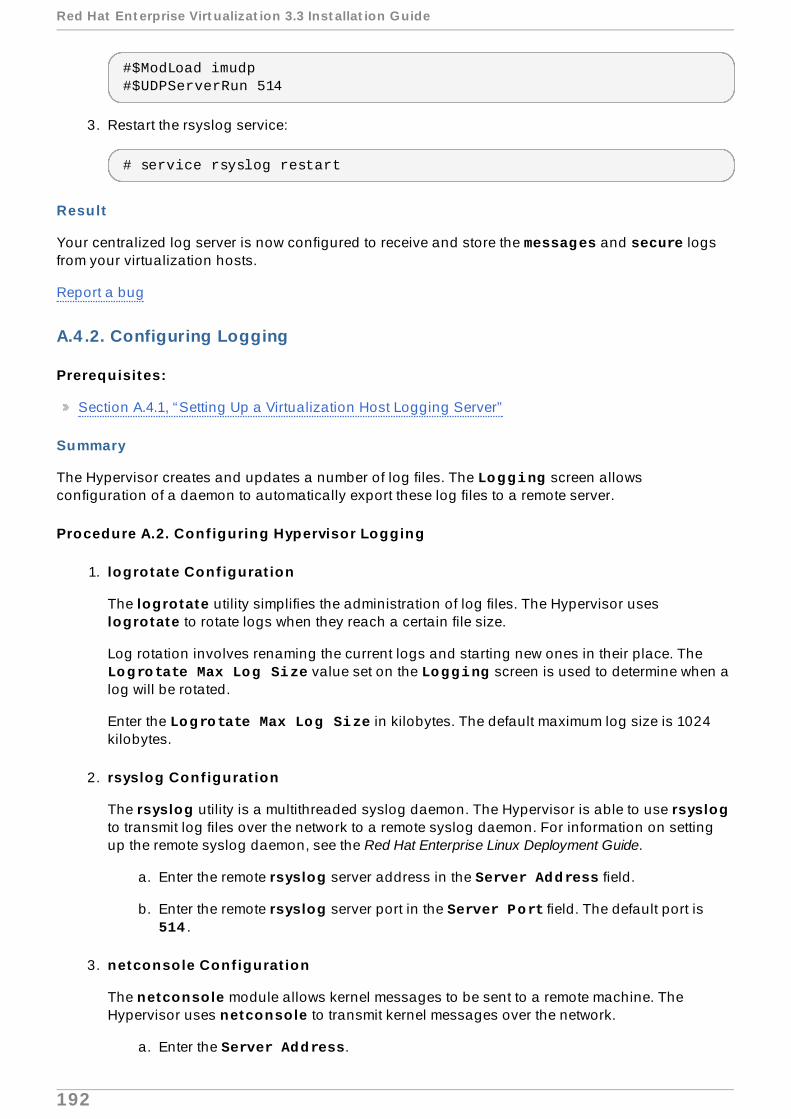
#$ModLoad imudp#$UDPServerRun 514
3. Restart the rsyslog service:
# service rsyslog restart
Result
Your centralized log server is now configured to receive and store the messages and secure logsfrom your virtualization hosts.
Report a bug
A.4 .2. Configuring Logging
Prerequisites:
Section A.4.1, “Setting Up a Virtualization Host Logging Server”
Summary
The Hypervisor creates and updates a number of log files. The Logging screen allowsconfiguration of a daemon to automatically export these log files to a remote server.
Procedure A.2. Conf iguring Hypervisor Logging
1. logrotate Conf igurat ion
The logrotate utility simplifies the administration of log files. The Hypervisor useslogrotate to rotate logs when they reach a certain file size.
Log rotation involves renaming the current logs and starting new ones in their place. The Logrotate Max Log Size value set on the Logging screen is used to determine when alog will be rotated.
Enter the Logrotate Max Log Size in kilobytes. The default maximum log size is 1024kilobytes.
2. rsyslog Conf igurat ion
The rsyslog utility is a multithreaded syslog daemon. The Hypervisor is able to use rsyslogto transmit log files over the network to a remote syslog daemon. For information on settingup the remote syslog daemon, see the Red Hat Enterprise Linux Deployment Guide.
a. Enter the remote rsyslog server address in the Server Address field.
b. Enter the remote rsyslog server port in the Server Port field. The default port is 514 .
3. netconsole Conf igurat ion
The netconsole module allows kernel messages to be sent to a remote machine. TheHypervisor uses netconsole to transmit kernel messages over the network.
a. Enter the Server Address.
Red Hat Ent erprise Virt ualizat ion 3.3 Inst allat ion Guide
192
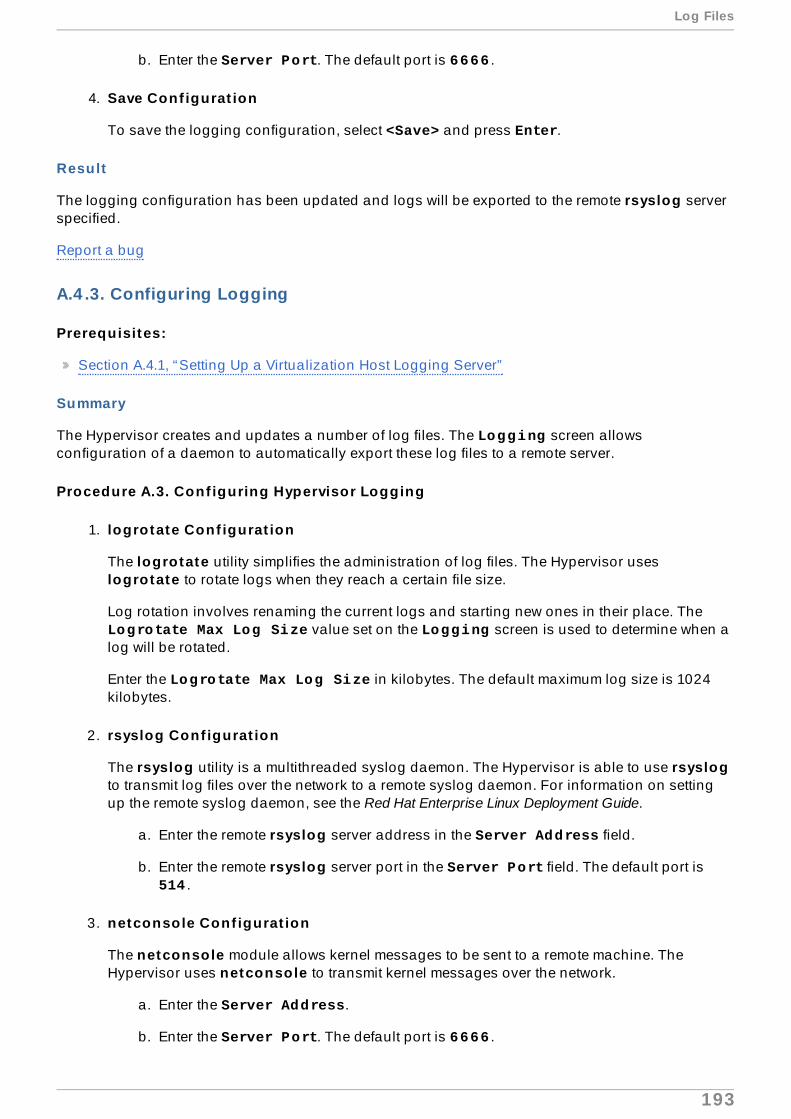
b. Enter the Server Port. The default port is 6666 .
4. Save Conf igurat ion
To save the logging configuration, select <Save> and press Enter.
Result
The logging configuration has been updated and logs will be exported to the remote rsyslog serverspecified.
Report a bug
A.4 .3. Configuring Logging
Prerequisites:
Section A.4.1, “Setting Up a Virtualization Host Logging Server”
Summary
The Hypervisor creates and updates a number of log files. The Logging screen allowsconfiguration of a daemon to automatically export these log files to a remote server.
Procedure A.3. Conf iguring Hypervisor Logging
1. logrotate Conf igurat ion
The logrotate utility simplifies the administration of log files. The Hypervisor useslogrotate to rotate logs when they reach a certain file size.
Log rotation involves renaming the current logs and starting new ones in their place. The Logrotate Max Log Size value set on the Logging screen is used to determine when alog will be rotated.
Enter the Logrotate Max Log Size in kilobytes. The default maximum log size is 1024kilobytes.
2. rsyslog Conf igurat ion
The rsyslog utility is a multithreaded syslog daemon. The Hypervisor is able to use rsyslogto transmit log files over the network to a remote syslog daemon. For information on settingup the remote syslog daemon, see the Red Hat Enterprise Linux Deployment Guide.
a. Enter the remote rsyslog server address in the Server Address field.
b. Enter the remote rsyslog server port in the Server Port field. The default port is 514 .
3. netconsole Conf igurat ion
The netconsole module allows kernel messages to be sent to a remote machine. TheHypervisor uses netconsole to transmit kernel messages over the network.
a. Enter the Server Address.
b. Enter the Server Port. The default port is 6666 .
Log Files
193

4. Save Conf igurat ion
To save the logging configuration, select <Save> and press Enter.
Result
The logging configuration has been updated and logs will be exported to the remote rsyslog serverspecified.
Report a bug
Red Hat Ent erprise Virt ualizat ion 3.3 Inst allat ion Guide
194

Additional Utilities
B.1. Domain Management Tool
B.1.1. What is the Domain Management T ool?
Red Hat Enterprise Virtualization Manager authenticates users using directory services. To add usersto Red Hat Enterprise Virtualization Manager you must first use the internal admin user to add thedirectory service that the users must be authenticated against. You add and remove directoryservices domains using the included domain management tool, engine-manage-domains.
The engine-manage-domains command is only accessible on the machine on which Red HatEnterprise Virtualization Manager is installed. The engine-manage-domains command must berun as the root user.
See Also:
Section B.1.2, “Syntax for the Domain Management Tool”
Section B.1.3, “Adding Domains to Configuration”
Section B.1.4, “Editing a Domain in the Configuration”
Section B.1.5, “Deleting a Domain from the Configuration”
Section B.1.6, “Validating Domain Configuration”
Section B.1.7, “Listing Domains in Configuration”
Report a bug
B.1.2. Syntax for the Domain Management T ool
The usage syntax is:
engine-manage-domains -action=ACTION [options]
Available actions are:
add
Add a domain to Red Hat Enterprise Virtualization Manager's directory servicesconfiguration.
edit
Edit a domain in Red Hat Enterprise Virtualization Manager's directory servicesconfiguration.
delete
Delete a domain from Red Hat Enterprise Virtualization Manager's directory servicesconfiguration.
validate
Validate Red Hat Enterprise Virtualization Manager's directory services configuration. Thiscommand attempts to authenticate each domain in the configuration using the configured
Addit ional Ut ilit ies
195

command attempts to authenticate each domain in the configuration using the configureduser name and password.
list
List Red Hat Enterprise Virtualization Manager's current directory services configuration.
These options can be combined with the actions on the command line:
-domain=DOMAIN
Specifies the domain on which the action will be performed. The -domain parameter ismandatory for add, edit, and delete.
-provider=PROVIDER
Specifies the LDAP provider type of the directory server for the domain. Valid values are:
ActiveDirectory - Active Directory.
IPA - Identity Management (IdM).
RHDS - Red Hat Directory Server. Red Hat Directory Server does not come with Kerberos.Red Hat Enterprise Virtualization requires Kerberos authentication. RHDS must be madea service within a Kerberos domain to provide directory services to the Manager.
Note
If you want to use RHDS as your directory server, you must have the memberofplugin installed in RHDS. To use the memberof plugin, your users must be inetusers. For more information about using the memberof plugin, see the RedHat Directory Server Plug-in Guide.
-user=USER
Specifies the domain user to use. The -user parameter is mandatory for add, and optionalfor edit.
-passwordFile=FILE
Specifies that the domain user's password is on the first line of the provided file. Thisoption, or the -interactive option, must be used to provide the password for use withthe add action.
-addPermissions
Specifies that the domain user will be given the SuperUser role in Red Hat EnterpriseVirtualization Manager. By default, if the -addPermissions parameter is not specified, the SuperUser role is not assigned to the domain user. The -addPermissions option isoptional. It is only valid when used in combination with the add and edit actions.
-interactive
Specifies that the domain user's password is to be provided interactively. This option, orthe -passwordFile option, must be used to provide the password for use with the addaction.
-configFile=FILE
Red Hat Ent erprise Virt ualizat ion 3.3 Inst allat ion Guide
196

Specifies an alternate configuration file that the command must load. The -configFileparameter is always optional.
-report
In conjunction with the validate action results in the output of a report of all encounteredvalidation errors.
For full usage information consult the engine-manage-domains command's help output:
# engine-manage-domains --help
See Also:
Section B.1.1, “What is the Domain Management Tool?”
Section B.1.3, “Adding Domains to Configuration”
Section B.1.4, “Editing a Domain in the Configuration”
Section B.1.5, “Deleting a Domain from the Configuration”
Section B.1.6, “Validating Domain Configuration”
Section B.1.7, “Listing Domains in Configuration”
Report a bug
B.1.3. Adding Domains to Configurat ion
In this example, the engine-manage-domains command is used to add the IdM domain directory.demo.redhat.com to the Red Hat Enterprise Virtualization Manager configuration.The configuration is set to use the admin user when querying the domain; the password is providedinteractively.
Example B.1. engine-manage-domains Add Act ion
# engine-manage-domains -action=add -domain=directory.demo.redhat.com -provider=IPA -user=admin -interactiveloaded template kr5.conf filesetting default_tkt_enctypessetting realmssetting domain realmsuccessUser guid is: 80b71bae-98a1-11e0-8f20-525400866c73Successfully added domain directory.demo.redhat.com. oVirt Engine restart is required in order for the changes to take place (service ovirt-engine restart).
See Also:
Section B.1.1, “What is the Domain Management Tool?”
Section B.1.2, “Syntax for the Domain Management Tool”
Addit ional Ut ilit ies
197

Section B.1.4, “Editing a Domain in the Configuration”
Section B.1.5, “Deleting a Domain from the Configuration”
Section B.1.6, “Validating Domain Configuration”
Section B.1.7, “Listing Domains in Configuration”
Report a bug
B.1.4 . Edit ing a Domain in the Configurat ion
In this example, the engine-manage-domains command is used to edit the directory.demo.redhat.com domain in the Red Hat Enterprise Virtualization Managerconfiguration. The configuration is updated to use the admin user when querying this domain; thepassword is provided interactively.
Example B.2. engine-manage-domains Edit Act ion
# engine-manage-domains -action=edit -domain=directory.demo.redhat.com -user=admin -interactiveloaded template kr5.conf filesetting default_tkt_enctypessetting realmssetting domain realmosuccessUser guide is: 80b71bae-98a1-11e0-8f20-525400866c73Successfully edited domain directory.demo.redhat.com. oVirt Engine restart is required in order for the changes to take place (service ovirt-engine restart).
See Also:
Section B.1.1, “What is the Domain Management Tool?”
Section B.1.2, “Syntax for the Domain Management Tool”
Section B.1.3, “Adding Domains to Configuration”
Section B.1.5, “Deleting a Domain from the Configuration”
Section B.1.6, “Validating Domain Configuration”
Section B.1.7, “Listing Domains in Configuration”
Report a bug
B.1.5. Delet ing a Domain from the Configurat ion
In this example, the engine-manage-domains command is used to remove the directory.demo.redhat.com domain from the Red Hat Enterprise Virtualization Managerconfiguration. Users defined in the removed domain will no longer be able to authenticate with theRed Hat Enterprise Virtualization Manager. The entries for the affected users will remain defined in theRed Hat Enterprise Virtualization Manager until they are explicitly removed.
Red Hat Ent erprise Virt ualizat ion 3.3 Inst allat ion Guide
198

The domain being removed in this example is the last one listed in the Red Hat EnterpriseVirtualization Manager configuration. A warning is displayed highlighting this fact and that only the admin user from the internal domain will be able to log in until another domain is added.
Example B.3. engine-manage-domains Delete Act ion
# engine-manage-domains -action=delete -domain='directory.demo.redhat.com'WARNING: Domain directory.demo.redhat.com is the last domain in the configuration. After deleting it you will have to either add another domain, or to use the internal admin user in order to login.Successfully deleted domain directory.demo.redhat.com. Please remove all users and groups of this domain using the Administration portal or the API.
See Also:
Section B.1.1, “What is the Domain Management Tool?”
Section B.1.2, “Syntax for the Domain Management Tool”
Section B.1.3, “Adding Domains to Configuration”
Section B.1.4, “Editing a Domain in the Configuration”
Section B.1.6, “Validating Domain Configuration”
Section B.1.7, “Listing Domains in Configuration”
Report a bug
B.1.6. Validat ing Domain Configurat ion
In this example, the engine-manage-domains command is used to validate the Red Hat EnterpriseVirtualization Manager configuration. The command attempts to log into each listed domain with thecredentials provided in the configuration. The domain is reported as valid if the attempt is successful.
Example B.4 . engine-manage-domains Validate Act ion
# engine-manage-domains -action=validateUser guide is: 80b71bae-98a1-11e0-8f20-525400866c73Domain directory.demo.redhat.com is valid.
See Also:
Section B.1.1, “What is the Domain Management Tool?”
Section B.1.2, “Syntax for the Domain Management Tool”
Section B.1.3, “Adding Domains to Configuration”
Section B.1.4, “Editing a Domain in the Configuration”
Addit ional Ut ilit ies
199

Section B.1.5, “Deleting a Domain from the Configuration”
Section B.1.7, “Listing Domains in Configuration”
Report a bug
B.1.7. List ing Domains in Configurat ion
The engine-manage-domains command lists the directory services domains defined in the RedHat Enterprise Virtualization Manager configuration. This command prints the domain, the user namein User Principal Name (UPN) format, and whether the domain is local or remote for eachconfiguration entry.
Example B.5. engine-manage-domains List Act ion
# engine-manage-domains -action=listDomain: directory.demo.redhat.com User name: [email protected] This domain is a remote domain.
See Also:
Section B.1.1, “What is the Domain Management Tool?”
Section B.1.2, “Syntax for the Domain Management Tool”
Section B.1.3, “Adding Domains to Configuration”
Section B.1.4, “Editing a Domain in the Configuration”
Section B.1.5, “Deleting a Domain from the Configuration”
Section B.1.6, “Validating Domain Configuration”
Report a bug
B.2. Configurat ion Tool
B.2.1. Configurat ion T ool
Installing the Red Hat Enterprise Virtualization Manager modifies only a subset of configurationsettings from their defaults. Further modifications are made using the configuration tool: engine-config .
The configuration tool does not require Red Hat JBoss Enterprise Application Platform or the Red HatEnterprise Virtualization Manager to be running to update the configuration. Configuration keyvalues are stored in the database; configuration changes will not be saved unless the database isoperational. Changes are applied when Red Hat JBoss Enterprise Application Platform is restarted.
The Red Hat Enterprise Virtualization Manager stores configuration settings as a series of key-to-value pair mappings. The configuration tool allows you to:
list all available configuration keys,
list all available configuration values,
Red Hat Ent erprise Virt ualizat ion 3.3 Inst allat ion Guide
200
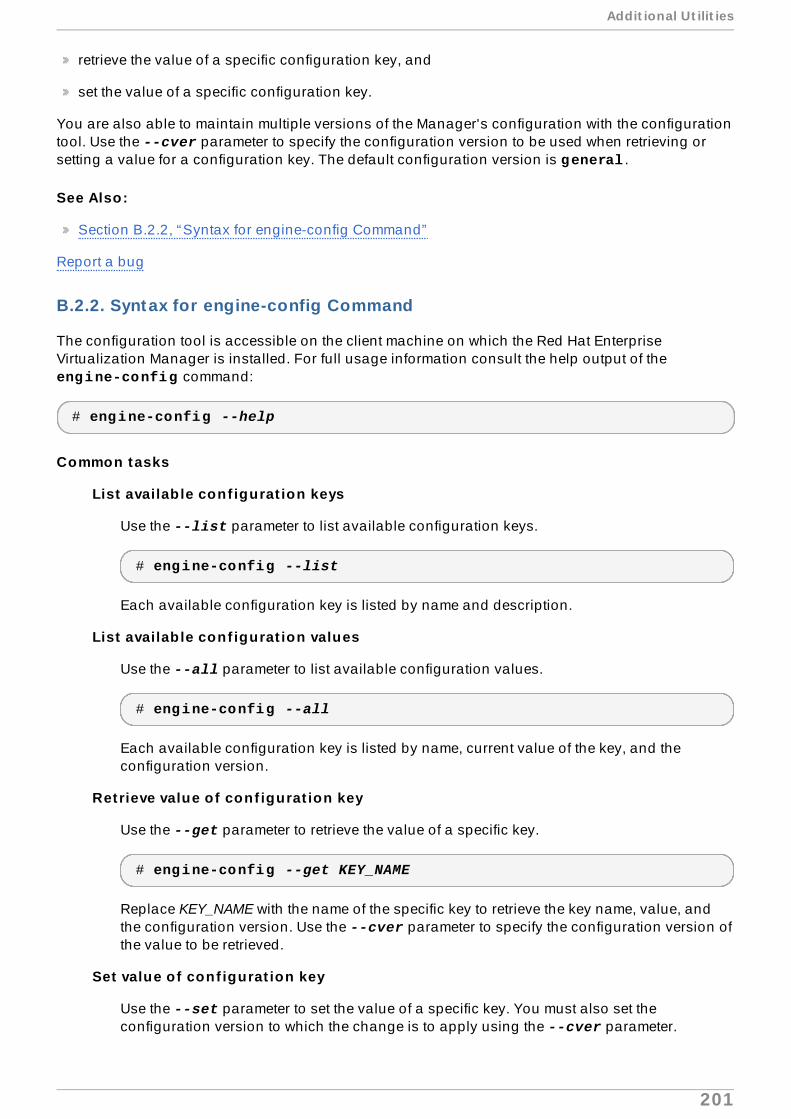
retrieve the value of a specific configuration key, and
set the value of a specific configuration key.
You are also able to maintain multiple versions of the Manager's configuration with the configurationtool. Use the --cver parameter to specify the configuration version to be used when retrieving orsetting a value for a configuration key. The default configuration version is general .
See Also:
Section B.2.2, “Syntax for engine-config Command”
Report a bug
B.2.2. Syntax for engine-config Command
The configuration tool is accessible on the client machine on which the Red Hat EnterpriseVirtualization Manager is installed. For full usage information consult the help output of the engine-config command:
# engine-config --help
Common tasks
List availab le conf igurat ion keys
Use the --list parameter to list available configuration keys.
# engine-config --list
Each available configuration key is listed by name and description.
List availab le conf igurat ion values
Use the --all parameter to list available configuration values.
# engine-config --all
Each available configuration key is listed by name, current value of the key, and theconfiguration version.
Retrieve value of conf igurat ion key
Use the --get parameter to retrieve the value of a specific key.
# engine-config --get KEY_NAME
Replace KEY_NAME with the name of the specific key to retrieve the key name, value, andthe configuration version. Use the --cver parameter to specify the configuration version ofthe value to be retrieved.
Set value of conf igurat ion key
Use the --set parameter to set the value of a specific key. You must also set theconfiguration version to which the change is to apply using the --cver parameter.
Addit ional Ut ilit ies
201

# engine-config --set KEY_NAME=KEY_VALUE --cver=VERSION
Replace KEY_NAME with the name of the specific key to set; replace KEY_VALUE with thevalue to be set. Environments with more than one configuration version require theVERSION to be specified.
See Also:
Section B.2.1, “Configuration Tool”
Report a bug
B.3. Image Uploader
B.3.1. Virtual Machine Image Uploader
Using the engine-image-uploader command, you can list export storage domains and uploadvirtual machines in OVF to an export storage domain and have them automatically recognized in theRed Hat Enterprise Virtualization Manager. The tool only supports gzip compressed OVF files createdby Red Hat Enterprise Virtualization.
The image uploader makes creating distributable virtual machine images practical.
The archive contains images and master directories that are in the following format:
|-- images| |-- [Image Group UUID]| |--- [Image UUID (this is the disk image)]| |--- [Image UUID (this is the disk image)].meta|-- master| |---vms| |--- [UUID]| |--- [UUID].ovf
See Also:
Section B.3.2, “Syntax for the engine-image-uploader Command”
Section B.3.3, “Creating an OVF Archive That is Compatible with the Image Uploader”
Section B.3.4, “Basic engine-image-uploader Usage Examples”
Report a bug
B.3.2. Syntax for the engine-image-uploader Command
The basic syntax for the image uploader command is:
engine-image-uploader [options] listengine-image-uploader [options] upload [file].[file]...[file]
The two supported modes of operation are list and upload.
The list parameter lists the valid export storage domains available for image uploads.
Red Hat Ent erprise Virt ualizat ion 3.3 Inst allat ion Guide
202

The upload parameter uploads selected image file(s) to the specified image storage domain.
The image uploader command requires either the list or upload parameter be included for basicusage. The upload parameter requires a minimum of one local file name to upload.
There are numerous parameters to further refine the engine-image-uploader command. You canset defaults for any of these in the /etc/ovirt-engine/imageuploader.conf file.
General Opt ions
-h, --help
Displays command usage information and returns to prompt.
--conf-file=PATH
Sets PATH as the configuration file the tool is to use. The default is etc/ovirt-engine/imageuploader.conf.
--log-file=PATH
Sets PATH as the specific file name the command should use for the log output.
--quiet
Sets quiet mode, reducing console output to a minimum. Quiet mode is off by default.
-v, --verbose
Sets verbose mode, providing more console output. Verbose mode is off by default.
-f, --force
Force mode is necessary when the source file being uploaded has an identical file name asan existing file at the destination; it forces the existing file to be overwritten. Force mode isoff by default.
Red Hat Enterprise Virtualiz at ion Manager Opt ions
-u USER, --user=USER
Sets the user associated with the file to be uploaded. The USER is specified in the formatuser@domain, where user is the user name and domain is the directory services domain inuse. The user must exist in directory services and be known to the Red Hat EnterpriseVirtualization Manager.
-r FQDN, --rhevm=FQDN
Sets the fully qualified domain name of the Red Hat Enterprise Virtualization Managerserver from which to upload images, where FQDN is replaced by the fully qualified domainname of the Manager. It is assumed that the image uploader is being run on the same clientmachine as the Red Hat Enterprise Virtualization Manager; the default value is localhost:443.
Export Storage Domain Opt ions
These options specify the export domain to which files are uploaded. They are alternatives; do notuse these parameters together.
-e, --export-domain=EXPORT_DOMAIN
Addit ional Ut ilit ies
203
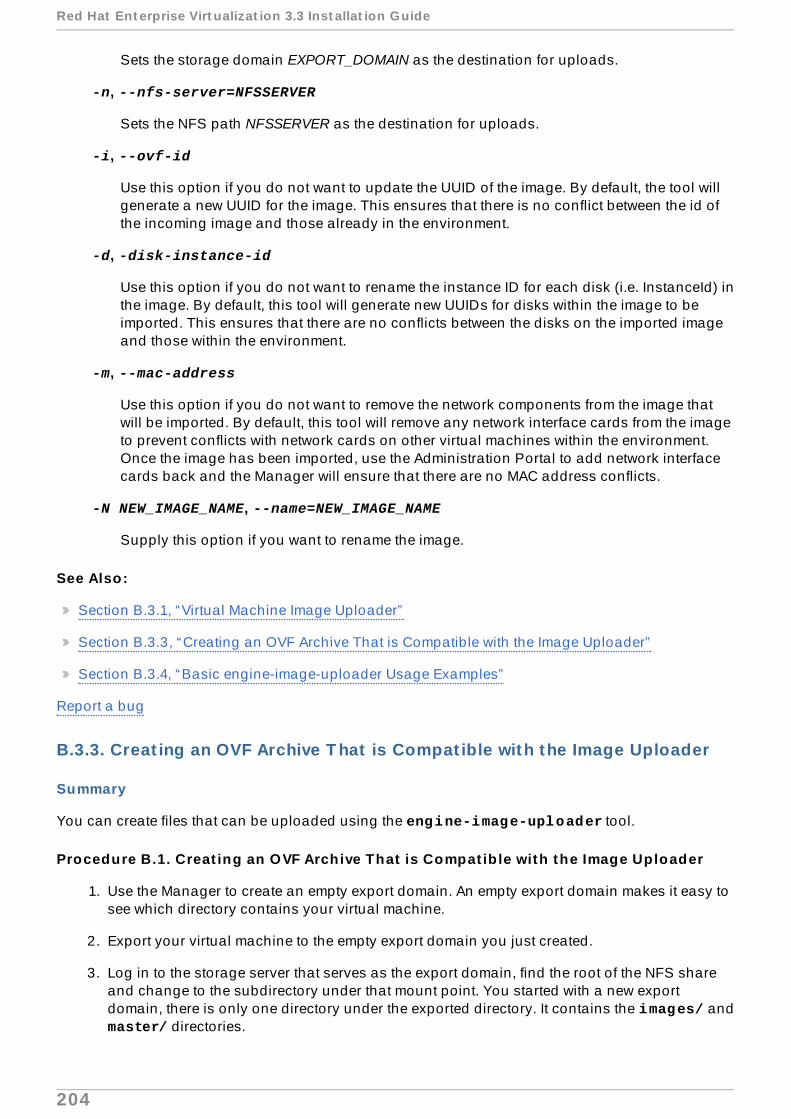
Sets the storage domain EXPORT_DOMAIN as the destination for uploads.
-n, --nfs-server=NFSSERVER
Sets the NFS path NFSSERVER as the destination for uploads.
-i, --ovf-id
Use this option if you do not want to update the UUID of the image. By default, the tool willgenerate a new UUID for the image. This ensures that there is no conflict between the id ofthe incoming image and those already in the environment.
-d, -disk-instance-id
Use this option if you do not want to rename the instance ID for each disk (i.e. InstanceId) inthe image. By default, this tool will generate new UUIDs for disks within the image to beimported. This ensures that there are no conflicts between the disks on the imported imageand those within the environment.
-m, --mac-address
Use this option if you do not want to remove the network components from the image thatwill be imported. By default, this tool will remove any network interface cards from the imageto prevent conflicts with network cards on other virtual machines within the environment.Once the image has been imported, use the Administration Portal to add network interfacecards back and the Manager will ensure that there are no MAC address conflicts.
-N NEW_IMAGE_NAME, --name=NEW_IMAGE_NAME
Supply this option if you want to rename the image.
See Also:
Section B.3.1, “Virtual Machine Image Uploader”
Section B.3.3, “Creating an OVF Archive That is Compatible with the Image Uploader”
Section B.3.4, “Basic engine-image-uploader Usage Examples”
Report a bug
B.3.3. Creat ing an OVF Archive T hat is Compat ible with the Image Uploader
Summary
You can create files that can be uploaded using the engine-image-uploader tool.
Procedure B.1. Creat ing an OVF Archive That is Compat ib le with the Image Uploader
1. Use the Manager to create an empty export domain. An empty export domain makes it easy tosee which directory contains your virtual machine.
2. Export your virtual machine to the empty export domain you just created.
3. Log in to the storage server that serves as the export domain, find the root of the NFS shareand change to the subdirectory under that mount point. You started with a new exportdomain, there is only one directory under the exported directory. It contains the images/ andmaster/ directories.
Red Hat Ent erprise Virt ualizat ion 3.3 Inst allat ion Guide
204

4. Run the tar -zcvf my.ovf images/ master/ command to create the tar/gzip ovfarchive.
5. Anyone you give the resulting ovf file to (in this example, called my.ovf) can import it to RedHat Enterprise Virtualization Manager using the engine-image-uploader command.
Result
You have created a compressed OVF image file that can be distributed. Anyone you give it to can usethe engine-image-uploader command to upload your image into their Red Hat EnterpriseVirtualization environment.
See Also:
Section B.3.1, “Virtual Machine Image Uploader”
Section B.3.2, “Syntax for the engine-image-uploader Command”
Section B.3.4, “Basic engine-image-uploader Usage Examples”
Report a bug
B.3.4 . Basic engine-image-uploader Usage Examples
Here is an example of how to use engine-image-uploader to list storage domains:
Example B.6 . Uploading a f ile Using the engine- image-uploader Tool
# engine-image-uploader listPlease provide the REST API username for RHEV-M: admin@internalPlease provide the REST API password for the admin@internal RHEV-M user: **********Export Storage Domain Name | Datacenter | Export Domain Statusmyexportdom | Myowndc | active
To upload an Open Virtualization Format (ovf) file, you need to enter an NFS server name (-n NFSSERVER) or export domain (-e EXPORT_STORAGE_DOMAIN) and the name of the .ovf file:
# engine-image-uploader -e myexportdom upload myrhel6.ovfPlease provide the REST API username for RHEV-M: admin@internalPlease provide the REST API password for the admin@internal RHEV-M user: **********
See Also:
Section B.3.1, “Virtual Machine Image Uploader”
Section B.3.2, “Syntax for the engine-image-uploader Command”
Section B.3.3, “Creating an OVF Archive That is Compatible with the Image Uploader”
Report a bug
B.4. ISO Uploader
Addit ional Ut ilit ies
205
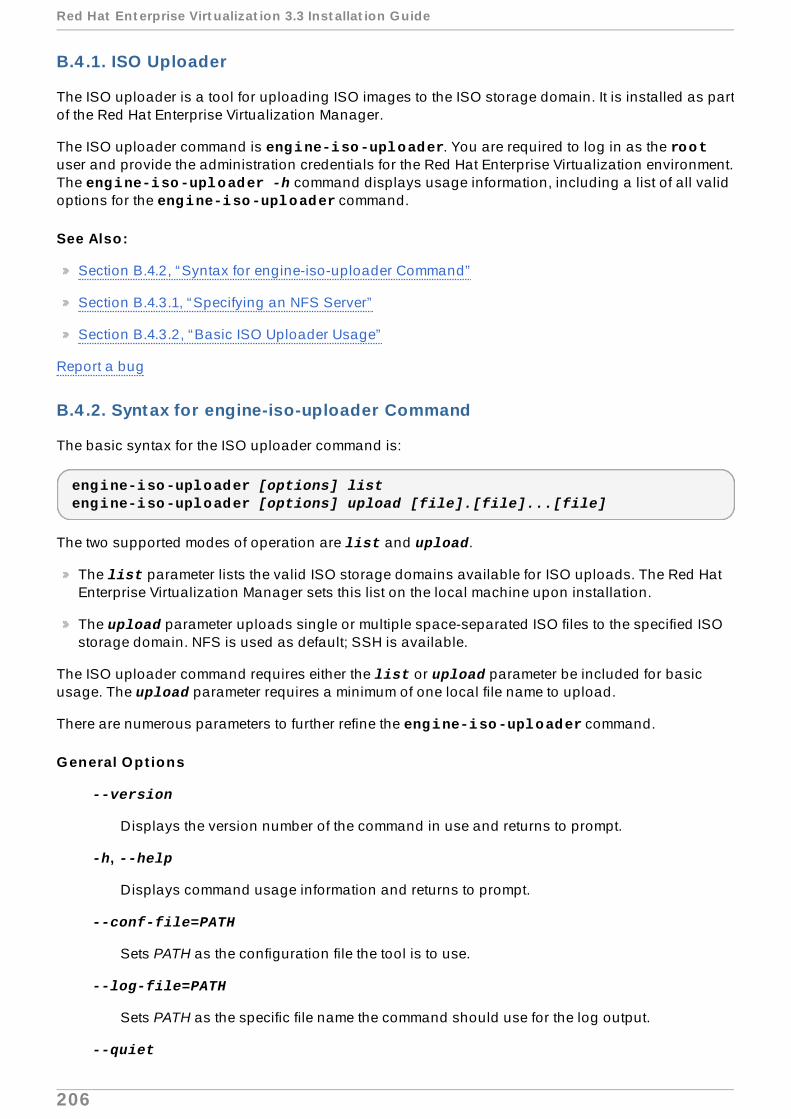
B.4 .1. ISO Uploader
The ISO uploader is a tool for uploading ISO images to the ISO storage domain. It is installed as partof the Red Hat Enterprise Virtualization Manager.
The ISO uploader command is engine-iso-uploader. You are required to log in as the rootuser and provide the administration credentials for the Red Hat Enterprise Virtualization environment.The engine-iso-uploader -h command displays usage information, including a list of all validoptions for the engine-iso-uploader command.
See Also:
Section B.4.2, “Syntax for engine-iso-uploader Command”
Section B.4.3.1, “Specifying an NFS Server”
Section B.4.3.2, “Basic ISO Uploader Usage”
Report a bug
B.4 .2. Syntax for engine-iso-uploader Command
The basic syntax for the ISO uploader command is:
engine-iso-uploader [options] listengine-iso-uploader [options] upload [file].[file]...[file]
The two supported modes of operation are list and upload.
The list parameter lists the valid ISO storage domains available for ISO uploads. The Red HatEnterprise Virtualization Manager sets this list on the local machine upon installation.
The upload parameter uploads single or multiple space-separated ISO files to the specified ISOstorage domain. NFS is used as default; SSH is available.
The ISO uploader command requires either the list or upload parameter be included for basicusage. The upload parameter requires a minimum of one local file name to upload.
There are numerous parameters to further refine the engine-iso-uploader command.
General Opt ions
--version
Displays the version number of the command in use and returns to prompt.
-h, --help
Displays command usage information and returns to prompt.
--conf-file=PATH
Sets PATH as the configuration file the tool is to use.
--log-file=PATH
Sets PATH as the specific file name the command should use for the log output.
--quiet
Red Hat Ent erprise Virt ualizat ion 3.3 Inst allat ion Guide
206

Sets quiet mode, reducing console output to a minimum. Quiet mode is off by default.
-v, --verbose
Sets verbose mode, providing more console output. Verbose mode is off by default.
-f, --force
Force mode is necessary when the source file being uploaded has an identical file name asan existing file at the destination; it forces the existing file to be overwritten. Force mode isoff by default.
Red Hat Enterprise Virtualiz at ion Manager Opt ions
-u USER, --user=USER
Sets the user associated with the file to be uploaded. The USER is specified in the formatuser@domain, where user is the user name and domain is the directory services domain inuse. The user must exist in directory services and be known to the Red Hat EnterpriseVirtualization Manager.
-r FQDN, --rhevm=FQDN
Sets the fully qualified domain name of the Red Hat Enterprise Virtualization Managerserver from which to upload ISOs, where FQDN is replaced by the fully qualified domainname of the Manager. It is assumed that the ISO uploader is being run on the same clientmachine as the Red Hat Enterprise Virtualization Manager; the default value is localhost.
ISO Storage Domain Opt ions
These options specify the ISO domain to which files are uploaded. They are alternatives; do not usethese parameters together.
-i, --iso-domain=ISODOMAIN
Sets the storage domain ISODOMAIN as the destination for uploads.
-n, --nfs-server=NFSSERVER
Sets the NFS path NFSSERVER as the destination for uploads.
Connect ion Opt ions
The ISO uploader uses NFS as default to upload files. These options specify SSH file transferinstead.
--ssh-user=USER
Sets USER as the SSH user name to use for the upload.
--ssh-port=PORT
Sets PORT as the port to use when connecting to SSH.
-k KEYFILE, --key-file=KEYFILE
Sets KEYFILE as the public key to use for SSH authentication. You will be prompted to enterthe password of the user specified with --ssh-user=USER if no key is set.
See Also:
Addit ional Ut ilit ies
207

Section B.4.1, “ ISO Uploader”
Section B.4.3.1, “Specifying an NFS Server”
Section B.4.3.2, “Basic ISO Uploader Usage”
Report a bug
B.4 .3. Usage Examples
B.4.3.1 . Specifying an NFS Server
Example B.7. Uploading to an NFS Server
# engine-iso-uploader --nfs-server=storage.demo.redhat.com:/iso/path upload RHEL6.0.iso
See Also:
Section B.4.1, “ ISO Uploader”
Section B.4.2, “Syntax for engine-iso-uploader Command”
Section B.4.3.2, “Basic ISO Uploader Usage”
Report a bug
B.4.3.2 . Basic ISO Uplo ader Usage
The example below demonstrates the ISO uploader and the list parameter. The first command lists theavailable ISO storage domains; the admin@internal user is used because no user was specifiedin the command. The second command uploads an ISO file over NFS to the specified ISO domain.
Example B.8. List Domains and Upload Image
# engine-iso-uploader listPlease provide the REST API password for the admin@internal oVirt Engine user (CTRL+D to abort):ISO Storage Domain Name | Datacenter | ISO Domain StatusISODomain | Default | active
# engine-iso-uploader --iso-domain=[ISODomain] upload [RHEL6.iso]Please provide the REST API password for the admin@internal oVirt Engine user (CTRL+D to abort):
See Also:
Section B.4.1, “ ISO Uploader”
Section B.4.2, “Syntax for engine-iso-uploader Command”
Red Hat Ent erprise Virt ualizat ion 3.3 Inst allat ion Guide
208
Section B.4.3.1, “Specifying an NFS Server”
Report a bug
B.5. Log Collector
B.5.1. Log Collector
A log collection tool is included in the Red Hat Enterprise Virtualization Manager. This allows you toeasily collect relevant logs from across the Red Hat Enterprise Virtualization environment whenrequesting support.
The log collection command is engine-log-collector. You are required to log in as the rootuser and provide the administration credentials for the Red Hat Enterprise Virtualization environment.The engine-log-collector -h command displays usage information, including a list of allvalid options for the engine-log-collector command.
See Also:
Section B.5.2, “Syntax for engine-log-collector Command”
Section B.5.3, “Basic Log Collector Usage”
Appendix A, Log Files
Report a bug
B.5.2. Syntax for engine-log-collector Command
The basic syntax for the log collector command is:
engine-log-collector [options] list [all, clusters, datacenters]engine-log-collector [options] collect
The two supported modes of operation are list and collect.
The list parameter lists either the hosts, clusters, or data centers attached to the Red HatEnterprise Virtualization Manager. You are able to filter the log collection based on the listedobjects.
The collect parameter performs log collection from the Red Hat Enterprise VirtualizationManager. The collected logs are placed in an archive file under the /tmp/logcollectordirectory. The engine-log-collector command assigns each log a specific file name.
Unless another parameter is specified, the default action is to list the available hosts together with thedata center and cluster to which they belong. You will be prompted to enter user names andpasswords to retrieve certain logs.
There are numerous parameters to further refine the engine-log-collector command.
General opt ions
--version
Displays the version number of the command in use and returns to prompt.
-h, --help
Addit ional Ut ilit ies
209

Displays command usage information and returns to prompt.
--conf-file=PATH
Sets PATH as the configuration file the tool is to use.
--local-tmp=PATH
Sets PATH as the directory in which logs are saved. The default directory is /tmp/logcollector.
--ticket-number=TICKET
Sets TICKET as the ticket, or case number, to associate with the SOS report.
--upload=FTP_SERVER
Sets FTP_SERVER as the destination for retrieved logs to be sent using FTP. Do not usethis option unless advised to by a Red Hat support representative.
--log-file=PATH
Sets PATH as the specific file name the command should use for the log output.
--quiet
Sets quiet mode, reducing console output to a minimum. Quiet mode is off by default.
-v, --verbose
Sets verbose mode, providing more console output. Verbose mode is off by default.
Red Hat Enterprise Virtualiz at ion Manager Opt ions
These options filter the log collection and specify authentication details for the Red Hat EnterpriseVirtualization Manager.
These parameters can be combined for specific commands. For example, engine-log-collector --user=admin@internal --cluster ClusterA,ClusterB --hosts "SalesHost"* specifies the user as admin@internal and limits the log collection to only SalesHost hosts in clusters A and B.
--no-hypervisors
Omits virtualization hosts from the log collection.
-u USER, --user=USER
Sets the user name for login. The USER is specified in the format user@domain, where user isthe user name and domain is the directory services domain in use. The user must exist indirectory services and be known to the Red Hat Enterprise Virtualization Manager.
-r FQDN, --rhevm=FQDN
Sets the fully qualified domain name of the Red Hat Enterprise Virtualization Managerserver from which to collect logs, where FQDN is replaced by the fully qualified domainname of the Manager. It is assumed that the log collector is being run on the same localhost as the Red Hat Enterprise Virtualization Manager; the default value is localhost.
-c CLUSTER, --cluster=CLUSTER
Red Hat Ent erprise Virt ualizat ion 3.3 Inst allat ion Guide
210
Collects logs from the virtualization hosts in the nominated CLUSTER in addition to logsfrom the Red Hat Enterprise Virtualization Manager. The cluster(s) for inclusion must bespecified in a comma-separated list of cluster names or match patterns.
-d DATACENTER, --data-center=DATACENTER
Collects logs from the virtualization hosts in the nominated DATACENTER in addition tologs from the Red Hat Enterprise Virtualization Manager. The data center(s) for inclusionmust be specified in a comma-separated list of data center names or match patterns.
-H HOSTS_LIST, --hosts=HOSTS_LIST
Collects logs from the virtualization hosts in the nominated HOSTS_LIST in addition to logsfrom the Red Hat Enterprise Virtualization Manager. The hosts for inclusion must bespecified in a comma-separated list of host names, fully qualified domain names, or IPaddresses. Match patterns are also valid.
SOS Report Opt ions
The log collector uses the JBoss SOS plugin. Use the following options to activate data collectionfrom the JMX console.
--jboss-home=JBOSS_HOME
JBoss installation directory path. The default is /var/lib/jbossas.
--java-home=JAVA_HOME
Java installation directory path. The default is /usr/lib/jvm/java.
--jboss-profile=JBOSS_PROFILE
Displays a quoted and space-separated list of server profiles; limits log collection tospecified profiles. The default is 'rhevm-slimmed'.
--enable-jmx
Enables the collection of run-time metrics from Red Hat Enterprise Virtualization's JBossJMX interface.
--jboss-user=JBOSS_USER
User with permissions to invoke JBoss JMX. The default is admin.
--jboss-logsize=LOG_SIZE
Maximum size in MB for the retrieved log files.
--jboss-stdjar=STATE
Sets collection of JAR statistics for JBoss standard JARs. Replace STATE with on or off.The default is on.
--jboss-servjar=STATE
Sets collection of JAR statistics from any server configuration directories. Replace STATEwith on or off. The default is on.
--jboss-twiddle=STATE
Sets collection of twiddle data on or off. Twiddle is the JBoss tool used to collect data fromthe JMX invoker. Replace STATE with on or off. The default is on.
Addit ional Ut ilit ies
211

the JMX invoker. Replace STATE with on or off. The default is on.
--jboss-appxml=XML_LIST
Displays a quoted and space-separated list of applications with XML descriptions to beretrieved. Default is all .
SSH Conf igurat ion
--ssh-port=PORT
Sets PORT as the port to use for SSH connections with virtualization hosts.
-k KEYFILE, --key-file=KEYFILE
Sets KEYFILE as the public SSH key to be used for accessing the virtualization hosts.
--max-connections=MAX_CONNECTIONS
Sets MAX_CONNECTIONS as the maximum concurrent SSH connections for logs fromvirtualization hosts. The default is 10 .
PostgreSQL Database Opt ions
The pg-pass parameter includes the Red Hat Enterprise Virtualization Manager database in the log.The database user name and database name must be specified if they have been changed from thedefault values.
Use the pg-dbhost parameter if the database is not on the local host. Use the optional pg-host-key parameter to collect remote logs. The PostgreSQL SOS plugin must be installed on the databaseserver for remote log collection to be successful.
--no-postgresql
Disables collection of database. Database collection is performed by default.
--pg-user=USER
Sets USER as the user name to use for connections with the database server. The default is postgres.
--pg-dbname=DBNAME
Sets DBNAME as the database name to use for connections with the database server. Thedefault is rhevm.
--pg-dbhost=DBHOST
Sets DBHOST as the host name for the database server. The default is localhost.
--pg-host-key=KEYFILE
Sets KEYFILE as the public identity file (private key) for the database server. This value isnot set by default; it is required only where the database does not exist on the local host.
See Also:
Section B.5.1, “Log Collector”
Section B.5.3, “Basic Log Collector Usage”
Red Hat Ent erprise Virt ualizat ion 3.3 Inst allat ion Guide
212

Report a bug
B.5.3. Basic Log Collector Usage
When the engine-log-collector command is run without specifying any additional parameters,its default behavior is to collect all logs from the Red Hat Enterprise Virtualization Manager and itsattached hosts. It will also collect database logs unless the --no-postgresql parameter is added.In the following example, log collector is run to collect all logs from the Red Hat EnterpriseVirtualization Manager and three attached hosts.
Example B.9 . Log Collector Usage
# engine-log-collectorINFO: Gathering oVirt Engine information...INFO: Gathering PostgreSQL the oVirt Engine database and log files from localhost...Please provide REST API password for the admin@internal oVirt Engine user (CTRL+D to abort):About to collect information from 3 hypervisors. Continue? (Y/n):INFO: Gathering information from selected hypervisors...INFO: collecting information from 192.168.122.250INFO: collecting information from 192.168.122.251INFO: collecting information from 192.168.122.252INFO: finished collecting information from 192.168.122.250INFO: finished collecting information from 192.168.122.251INFO: finished collecting information from 192.168.122.252Creating compressed archive...INFO Log files have been collected and placed in /tmp/logcollector/sosreport-rhn-account-20110804121320-ce2a.tar.xz.The MD5 for this file is 6d741b78925998caff29020df2b2ce2a and its size is 26.7M
See Also:
Section B.5.1, “Log Collector”
Section B.5.2, “Syntax for engine-log-collector Command”
Report a bug
B.6. SPICE Proxy
B.6.1. SPICE Proxy Overview
The SPICE Proxy is a tool used to connect SPICE Clients to guests when the SPICE Clients areoutside the network that connects the hypervisors.
Setting up a SPICE Proxy consists of installing Squid on a machine and configuring ip tables toallow proxy traffic through the firewall.
Turning a SPICE Proxy on consists of using engine-conf ig on the Manager to set the key SpiceProxyDefault to a value consisting of the name and port of the proxy.
Addit ional Ut ilit ies
213

Turning a SPICE Proxy off consists of using engine-conf ig on the Manager to remove the valuethat the key SpiceProxyDefault has been set to.
Report a bug
B.6.2. SPICE Proxy Machine Setup
Summary
This procedure explains how to set up a machine as a SPICE Proxy. A SPICE Proxy makes itpossible to connect to the Red Hat Enterprise Virtualization network from outside the network. We useSquid in this procedure to provide proxy services.
Procedure B.2. Installing Squid on a RHEL Machine
1. Install Squid on the Proxy machine:
# yum install squid
2. Open /etc/squid/squid.conf. Change
http_access deny CONNECT !SSL_ports
To
http_access deny CONNECT !Safe_ports
3. Restart the proxy:
# service squid restart
4. Open the default squid port:
# iptables -A INPUT -p tcp --dport 3128 -j ACCEPT
5. Make this iptables rule persistent:
# iptables-save
Result
You have now set up a machine as a SPICE proxy. Before connecting to the Red Hat EnterpriseVirtualization network from outside the network, activate the SPICE proxy.
Report a bug
B.6.3. T urning on SPICE Proxy
Summary
This procedure explains how to activate (or turn on) the SPICE proxy.
Procedure B.3. Act ivat ing SPICE Proxy
Red Hat Ent erprise Virt ualizat ion 3.3 Inst allat ion Guide
214

1. On the Manager, use the engine-config tool to set a proxy:
# engine-config -s SpiceProxyDefault=someProxy
2. Restart the ovirt -engine service:
# service ovirt-engine restart
The proxy must have this form:
protocol://[host]:[port]
Note
Only the http protocol is supported by SPICE clients. If https is specified, the client willignore the proxy setting and attempt a direct connection to the hypervisor.
Result
SPICE Proxy is now activated (turned on). It is now possible to connect to the Red Hat EnterpriseVirtualization network through the SPICE proxy.
Report a bug
B.6.4 . T urning Off a SPICE Proxy
Summary
This procedure explains how to turn off (deactivate) a SPICE proxy.
Procedure B.4 . Turning Of f a SPICE Proxy
1. Log in to the Manager:
$ ssh root@[IP of Manager]
2. Run the following command to clear the SPICE proxy:
# engine-config -s SpiceProxyDefault=""
3. Restart the Manager:
# service ovirt-engine restart
Result
SPICE proxy is now deactivated (turned off). It is no longer possible to connect to the Red HatEnterprise Virtualization network through the SPICE proxy.
Report a bug
Addit ional Ut ilit ies
215

B.7. Squid Proxy
B.7.1. Installing and Configuring a Squid Proxy
Summary
This section explains how to install and configure a Squid Proxy to the User Portal.
Procedure B.5. Conf iguring a Squid Proxy
1. Obtain ing a Keypair
Obtain a keypair and certificate for the HTTPS port of the Squid proxy server.
You can obtain this keypair the same way that you would obtain a keypair for anotherSSL/TLS service. The keypair is in the form of two PEM files which contain the private key andthe signed certificate. In this document we assume that they are named proxy.key and proxy.cer.
The keypair and certificate can also be generated using the certificate authority of the oVirtengine. If you already have the private key and certificate for the proxy and do not want togenerate it with the oVirt engine certificate authority, skip to the next step.
2. Generat ing a Keypair
Decide on a host name for the proxy. In this procedure, the proxy is called proxy.example.com.
Decide on the rest of the distinguished name of the certificate for the proxy. The important parthere is the "common name", which contains the host name of the proxy. Users' browsers usethe common name to validate the connection. It is good practice to use the same country andsame organization name used by the oVirt engine itself. Find this information by logging in tothe oVirt engine machine and running the following command:
[root@engine ~]# openssl x509 -in /etc/pki/ovirt-engine/ca.pem -noout -subject
This command will output something like this:
subject= /C=US/O=Example Inc./CN=engine.example.com.81108
The relevant part here is /C=us/O=Example Inc. . Use this to build the completedistinguished name for the certificate for the proxy:
/C=US/O=Example Inc./CN=proxy.example.com
Log in to the proxy machine and generate a certificate signing request:
[root@proxy ~]# openssl req -newkey rsa:2048 -subj '/C=US/O=Example Inc./CN=proxy.example.com' -nodes -keyout proxy.key -out proxy.req
Red Hat Ent erprise Virt ualizat ion 3.3 Inst allat ion Guide
216

Note
The quotes around the distinguished name for the certificate are very important. Do notleave them out.
The command will generate the key pair. It is very important that the private key isn'tencrypted (that is the effect of the -nodes option) because otherwise you would need to typethe password to start the proxy server.
The output of the command looks like this:
Generating a 2048 bit RSA private key......................................................+++.................................................................................+++writing new private key to 'proxy.key'-----
The command will generate two files: proxy.key and proxy.req . proxy.key is the privatekey. Keep this file safe. proxy.req is the certificate signing request. proxy.req doesn'trequire any special protection.
To generate the signed certificate, copy the private.csr file to the oVirt engine machine,using the scp command:
[root@proxy ~]# scp proxy.req engine.example.com:/etc/pki/ovirt-engine/requests/.
Log in to the oVirt engine machine and run the following command to sign the certificate:
[root@engine ~]# /usr/share/ovirt-engine/bin/pki-enroll-request.sh --name=proxy --days=3650 --subject='/C=US/O=Example Inc./CN=proxy.example.com'
This will sign the certificate and make it valid for 10 years (3650 days). Set the certificate toexpire earlier, if you prefer.
The output of the command looks like this:
Using configuration from openssl.confCheck that the request matches the signatureSignature okThe Subject's Distinguished Name is as followscountryName :PRINTABLE:'US'organizationName :PRINTABLE:'Example Inc.'commonName :PRINTABLE:'proxy.example.com'Certificate is to be certified until Jul 10 10:05:24 2023 GMT (3650days)
Write out database with 1 new entriesData Base Updated
Addit ional Ut ilit ies
217

The generated certificate file is available in the directory /etc/pki/ovirt-engine/certsand should be named proxy.cer. Copy this file to the proxy machine:
[root@proxy ~]# scp engine.example.com:/etc/pki/ovirt-engine/certs/proxy.cer .
Make sure that both the proxy.key and proxy.cer files are present on the proxy machine:
[root@proxy ~]# ls -l proxy.key proxy.cer
The output of this command will look like this:
-rw-r--r--. 1 root root 4902 Jul 12 12:11 proxy.cer-rw-r--r--. 1 root root 1834 Jul 12 11:58 proxy.key
You are now ready to install and configure the proxy server.
3. Install the Squid proxy server package
Install this system as follows:
[root@proxy ~]# yum -y install squid
4. Conf igure the Squid proxy server
Move the private key and signed certificate to a place where the proxy can access them, forexample to the /etc/squid directory:
[root@proxy ~]# cp proxy.key proxy.cer /etc/squid/.
Set permissions so that the "squid" user can read these files:
[root@proxy ~]# chgrp squid /etc/squid/proxy.*[root@proxy ~]# chmod 640 /etc/squid/proxy.*
The Squid proxy will connect to the oVirt engine web server using the SSL protocol, and mustverify the certificate used by the engine. Copy the certificate of the CA that signed thecertificate of the oVirt engine web server to a place where the proxy can access it, for example /etc/squid . The default CA certificate is located in the /etc/pki/ovirt-engine/ca.pem file in the oVirt engine machine. Copy it with the following command:
[root@proxy ~]# scp engine.example.com:/etc/pki/ovirt-engine/ca.pem /etc/squid/.
Make sure that the "squid" user can read that file:
[root@proxy ~]# chgrp squid /etc/squid/ca.pem[root@proxy ~]# chmod 640 /etc/squid/ca.pem
If SELinux is in enforcing mode, change the context of port 443 using the semanage tool.This permits Squid to use port 443.
[root@proxy ~]# yum install -y policycoreutils-python
Red Hat Ent erprise Virt ualizat ion 3.3 Inst allat ion Guide
218

[root@proxy ~]# semanage port -m -p tcp -t http_cache_port_t 443
Replace the existing squid configuration file with the following:
https_port 443 key=/etc/squid/proxy.key cert=/etc/squid/proxy.cer ssl-bump defaultsite=engine.example.comcache_peer engine.example.com parent 443 0 no-query originserver ssl sslcafile=/etc/squid/ca.pem name=enginecache_peer_access engine allow allssl_bump allow allhttp_access allow all
5. Restart the Squid Proxy Server
Run the following command in the proxy machine:
[root@proxy ~]# service squid restart
6. Conf igure the websockets proxy
Note
This step is optional. Do this step only if you want to use the noVNC console or theSpice HTML 5 console.
To use the noVNC or Spice HTML 5 consoles to connect to the console of virtual machines,the websocket proxy server must be configured on the machine on which the engine isinstalled. If you selected to configure the websocket proxy server when prompted duringinstalling or upgrading the engine with the engine-setup command, the websocket proxyserver will already be configured. If you did not select to configure the websocket proxy serverat this time, you can configure it later by running the engine-setup command with thefollowing option:
engine-setup --otopi-environment="OVESETUP_CONFIG/websocketProxyConfig=bool:True"
You must also make sure that the ovirt -websocket -proxy service is started and will startautomatically on boot:
[root@engine ~]# service ovirt-websocket-proxy status[root@engine ~]# chkconfig ovirt-websocket-proxy on
Both the noVNC and the Spice HTML 5 consoles use the websocket protocol to connect to thevirtual machines, but squid proxy server does not support the websockets protocol, so thiscommunication cannot be proxied with Squid. Tell the system to connect directly to thewebsockets proxy running in the machine where the engine is running. To do this, update theWebSocketProxy configuration parameter using the "engine-config" tool:
[root@engine ~]# engine-config \-s WebSocketProxy=engine.example.com:6100[root@engine ~]# service ovirt-engine restart
Addit ional Ut ilit ies
219

Important
If you skip this step the clients will assume that the websockets proxy is running in theproxy machine, and thus will fail to connect.
7. Connect to the user portal using the complete URL
Connect to the User Portal using the complete URL, for instance:
https://proxy.example.com/UserPortal/org.ovirt.engine.ui.userportal.UserPortal/UserPortal.html
Note
Shorter URLs, for example https://proxy.example.com/UserPortal , will notwork. These shorter URLs are redirected to the long URL by the application server,using the 302 response code and the Location header. The version of Squid in RedHat Enterprise Linux and Fedora (Squid version 3.1) does not support rewriting theseheaders.
Summary
You have installed and configured a Squid proxy to the User Portal.
Report a bug
Red Hat Ent erprise Virt ualizat ion 3.3 Inst allat ion Guide
220

Revision History
Revision 3.3-4 4 Fri 20 Mar 2015 Tahlia RichardsonBZ#1203488 - Removed references to now-defunct Hypervisor Deployment Guide.
Revision 3.3-4 3 Tue 07 Oct 2014 Julie WuBZ#1145040 - Added a note referencing the RHEL Security Guide.
Revision 3.3-4 2 Thu 22 May 2014 Andrew BurdenIncorrect admonition regarding Self-Hosted Engine removed.
Revision 3.3-4 1 Wed 5 Mar 2014 Andrew DahmsBZ#1073160 - Updated the file names for the VirtIO virtual diskettes.
Revision 3.3-4 0 Tue 4 Mar 2014 Andrew BurdenBZ#1072491 - Added a topic outlining the limitations of using a self-hosted engine.BZ#978108 - Updated Self-Hosted Engine procedures.
Revision 3.3-39 Mon 3 Mar 2014 Andrew DahmsBZ#1071701 - Added a note to the topic on installing the self-hosted engine to enable the channelthat provides the vdsm package.
Revision 3.3-38 Mon 17 Feb 2014 Andrew DahmsBZ#1059772 - Updated old references to beta channels and packages with full release versions.BZ#973962 - Added a step for enabling the RHEV Management Agents repository for Red HatEnterprise Linux hosts.
Revision 3.3-37 Fri 14 Feb 2014 Andrew DahmsBZ#1064137 - Updated the procedure for manually configuring a PostgreSQL database.BZ#1059522 - Added a path to installation media in the procedure for configuring the self-hostedengine.BZ#1047672 - Added a note that the VDSM service must be restarted after libvirt is updated.
Revision 3.3-36 Fri 07 Feb 2014 Andrew DahmsBZ#1063498 - Corrected the command for disabling repos in the procedure for upgrading to version3.3.BZ#1062795 - Updated the method for configuring a websocket proxy server.BZ#1062793 - Corrected the order of the procedure for upgrading to version 3.3.BZ#1062791 - Generalized the final step in the procedure for upgrading to version 3.3.BZ#1062719 - Added a note that users installing a self-hosted engine setup must follow theinstructions in the relevant section.BZ#1061761 - Changed 'authorized_hosts' to 'authorized_keys' in the procedure for adding Linuxhosts.BZ#1058934 - Corrected the RHN channel to disable during the upgrade from Red Hat EnterpriseVirtualization 3.2 to 3.3.BZ#1058353 - Corrected the packages for installing the Manager on 'my-engine' when configuring aself-hosted engine.BZ#1057366 - Changed a reference to 'hypervisor' in the introduction to the self-hosted engine to'Red Hat Enterprise Virtualization'.BZ#1057181 - Updated the channel and package required for installing the livecd-iso-to-disk tool.BZ#1053101 - Changed references to Red Hat Enterprise Linux version 6 to version 6.5.BZ#1039968 - Changed the CIDR notation for postgresql database configuration to '32'.
Revision Hist ory
221

Revision 3.3-35 Thu 23 Jan 2014 Andrew DahmsBZ#1059506 - Added two steps to the procedure for manually configuring a postgresql database.BZ#1055863 - Updated the syntax for creating and using answer files in conjunction with engine-setup.
Revision 3.3-34 Thu 09 Jan 2014 Andrew DahmsBZ#973962 - Added details on enabling the RHEV Management Agents repo in subscriptionmanager.
Revision 3.3-33 Tue 07 Jan 2014 Zac DoverPublican 4 test
Revision 3.3-32 Mon 23 Dec 2013 Andrew BurdenUpdating Revision History for test build.
Revision 3.3-31 Wed 18 Dec 2013 Andrew DahmsBZ#1045269 - Updated the output from and description of the livecd-iso-to-disk utility.BZ#1044876 - Updated the procedure for and output from configuring Hypervisors.BZ#1044852 - Updated the procedure for and output from installing Hypervisors from boot media.BZ#1044340 - Edited the process for upgrading to RHEVM 3.3 for clarity.BZ#1044289 - Updated the standard output for and syntax of the engine-log-collector command.BZ#1044251 - Updated the standard output for the engine-iso-uploader command.BZ#1036425 - Revised the section on supported protocols in SPICE proxy configuration.BZ#978198 - Generating and specifying passwords in Red Hat Enterprise Virtualization.
Revision 3.3-30 Tue 17 Dec 2013 Andrew DahmsBZ#1039450 - Updated the list of supported bonding modes for network interface cards.BZ#976566 - Updated the New Host and Edit Host settings to include details on Foreman hostprovider hosts.BZ#977619 - Support for Gluster processes on RHS nodes.
Revision 3.3-29 Tue 17 Dec 2013 Zac DoverBZ#962529 - RHEVM + SAM causes a conflict that causes #yum upgrade rhevm to fail -troubleshooting section added.
Revision 3.3-28 Mon 16 Dec 2013 Andrew DahmsBZ#969575 - Added a note outlining limitations on shutting down RHEL 3 and RHEL 4 systems.
Revision 3.3-27 Fri 13 Dec 2013 Andrew DahmsBZ#1042694 - Updated the procedure for adding a new cluster.BZ#1042676 - Changed the syntax of all command-line tools from 'rhevm-' to 'engine-'.BZ#981063 - Removed warnings that the rhevm network cannot be edited after addition of a cluster.
Revision 3.3-26 Thu 12 Dec 2013 Andrew BurdenBZ#978108 - Added a new chapter, 'Self-Hosted Engine', with six new topics.
Revision 3.3-25 Wed 11 Dec 2013 Andrew Dahms
Red Hat Ent erprise Virt ualizat ion 3.3 Inst allat ion Guide
222

BZ#1039795 - Updated the syntax, output and procedure for running 'engine-cleanup'.BZ#1039792 - Updated the syntax, output and procedure for running 'engine-setup'.BZ#1039768 - Updated the 'subscription-manager subscribe' command syntax to 'subscription-manager attach'.BZ#1039273 - Changed all references to 'User Principle Name' to 'User Principal Name'.BZ#1039232 - Removed reference of adding a JBoss entitlement.BZ#1038725 - Added a line outlining the need to restart the ovirt-engine service on turning off aSPICE proxy.BZ#1018399 - Added a line outlining the need to disable NetworkManager.BZ#984747 - Added a note to use a base installation of RHEL for RHEVM installations.BZ#975683 - Updated the process for and output of the procedure for installing reports under otopi.BZ#975680 - Updated the process for and output of the procedure for installing dwh under otopi.BZ#974367 - Changed references to 'Red Hat Enterprise Manager' to 'Red Hat EnterpriseVirtualization Manager'.
Revision 3.3-24 Fri 06 Dec 2013 Andrew DahmsBZ#1030004 - Changed references to 'version.number' to '3.3'.
Revision 3.3-23 Mon 25 Nov 2013 Zac DoverBZ#978641 - Squid (User Portal Proxy)
Revision 3.3-22 Mon 25 Nov 2013 Andrew DahmsBZ#975668 - Outlined the use of otopi in installation and updated screen output.BZ#975639 - Updated procedure for upgrading to version 3.3.
Revision 3.3-21 Fri 22 Nov 2013 Andrew DahmsBZ#978720 - Added procedure for importing external provider networks and an outline of thelimitations thereof.
Revision 3.3-20 Mon 18 Nov 2013 Andrew DahmsBZ#960581 - Added a step to the 3.3 upgrade process to outline the procedure for updating EAP toversion 6.1.
Revision 3.3-19 Wed 13 Nov 2013 Red Hat EngineeringContent Services
Completed line edits on the Installation Guide.
Revision 3.3-18 Wed 13 Nov 2013 Jodi BiddleBZ#978677 - Added 3.3 upgrade topic.
Revision 3.3-17 Thu 17 Oct 2013 Red Hat EngineeringContent Services
BZ#719765 - Added processing rule to Setting up a Virtualization Host Logging Server. Now, localmessages are processed separately from received messages.
Revision 3.3-16 Tue 15 Oct 2013 Zac DoverBZ#978157 - Support ISO domain on any file storage
Revision 3.3-15 Fri 11 Oct 2013 Red Hat EngineeringContent Services
Revision Hist ory
223

BZ#975620 - updated Installing and Configuring the History Database to reflect automatic creationof read-only user for safe remote access.BZ#978708 - Added GlusterFS storage domains to the Introduction to Storage content.
Revision 3.3-14 Wed 09 Oct 2013 Zac DoverBZ#978875 - pNFS Client Support - bumping the revnumber so that the book travels through thebuildsystem.
Revision 3.3-13 Fri 04 Oct 2013 Red Hat EngineeringContent Services
BZ#978220- Fixed typos in bonding logic topic.BZ#976187 - Updated the title of "Designate a Specific Traffic Type for a Logical Network with theManage Networks Window".BZ#976187 - Added migration network as a network type.Replaced screenshot in "Designate a Specific Traffic Type" topic.BZ#975298 - Updated Host General Settings topic to include SSH public key and SSH fingerprint.Updated "Configuring Hypervisor Management Server" topic, changed "Verfify" to "Retrieve".BZ#975620 - Added note to rhevm-dwh-setup steps about opening TCP port 5432.BZ#975620 - Added rhevm-dwh-setup steps that configure read-only access to history database.BZ#994235 - Updated the "Changing the Cluster Compatibility Version" topic to make it clearer thathosts must be upgraded first, and that maintenance mode is not required.
Revision 3.3-12 Wed 02 Oct 2013 Andrew BurdenUpdated 'Edit Management Network' window title and content; associated with BZ#978092
Revision 3.3-11 Mon 30 Sep 2013 Red Hat EngineeringContent Services
BZ#976251 - Finished table of features requiring a compatibility upgrade to Red Hat EnterpriseVirtualization 3.3
Revision 3.3-10 Thu 26 Sep 2013 Charles BoyleBZ#978714 - Add information about new engine log.BZ#978854 - Changed JBoss Enterprise Application Platform to Red Hat JBoss EnterpriseApplication Platform.
Revision 3.3-9 Thu 29 Aug 2013 Red Hat EngineeringContent Services
Added basic database configuration steps.Adding information about manual database configuration.Rewrote the "Removing the Red Hat Enterprise Virtualization Manager" topic in light of the otopiinstallation framework.Updated URL used to access the Manager in "Connecting to the Administration Portal" topic.Rewrote "Configuring Red Hat Enterprise Virtualization Manager" for 3.3 in light of move to otopiinstaller.
Revision 3.3-8 Fri 23 Aug 2013 Red Hat EngineeringContent Services
BZ#978875 - pNFS supportBZ#978152 - Support for OpenLDAP as Directory ServiceBZ#995846 - Removing an incorrect "presently"
Revision 3.3-7 Thu 22 Aug 2013 Red Hat EngineeringContent Services
Red Hat Ent erprise Virt ualizat ion 3.3 Inst allat ion Guide
224

Changed engine-config to rhevm-config in SPICE Proxy content.
Revision 3.3-6 Fri 16 Aug 2013 Red Hat EngineeringContent Services
BZ#995916 - SPICE Proxy documentation added
Revision 3.3-5 Tue 13 Aug 2013 Red Hat EngineeringContent Services
BZ#988172 - Made it clear which SPICE features are supported by which clients.BZ#986735 - Updated host firewall ports to reflect change SPICE range.
Revision 3.3-4 Mon 12 Aug 2013 Red Hat EngineeringContent Services
BZ#981764 - Internet Explorer 10 touchscreen version not supported.BZ#988172 - Updated supported SPICE features in Red Hat Enterprise Linux 6 clients.BZ#719765 - Updated semanage command.Updated Host Compatibility Matrix for 3.3 release.
Revision 3.3-3 Fri 09 Aug 2013 Red Hat EngineeringContent Services
BZ#719765 - Updated selector to send specific messages to server.BZ#719765 - Updated semanage command.BZ#965332 - Changed suggested server type to install on Linux host from 6.3 to 6.BZ#988172 - Note the limitations in SPICE feature support in RHEL 5.XBZ#981764 - Added Windows 8 to list of SPICE clients.Removed mention of " four supported bonding modes" as all modes are supported using custombonds if not from the drop down menu.Changed 'rhev-hypervisor' to 'rhev-hypervisor6'.Edits to Win8/2012 SPICE support statement
Revision 3.3-2 Thu 01 Aug 2013 Red Hat EngineeringContent Services
BZ#989346 - change to support matrix to highlight that SPICE is not supported on Win 8/2012BZ#987207 - rhev-hypervisor corrected to rhev-hypervisor6thildred: rhev 3.3 installation guide revision history
Revision 3.3-1 Thu 18 Jul 2013 Tim HildredInitial creation for 3.3 release.
Revision Hist ory
225
![Red Hat CloudForms 4.1 Support Matrix · 2017. 5. 8. · Red Hat Enterprise Virtualization 3.3 and above [a] Yes Red Hat Virtualization 4.0 [a] Yes Red Hat OpenStack Platform 6.0](https://static.fdocuments.net/doc/165x107/60367560534a4d483e55ba2b/red-hat-cloudforms-41-support-matrix-2017-5-8-red-hat-enterprise-virtualization.jpg)