Quilted Serger Purse
6
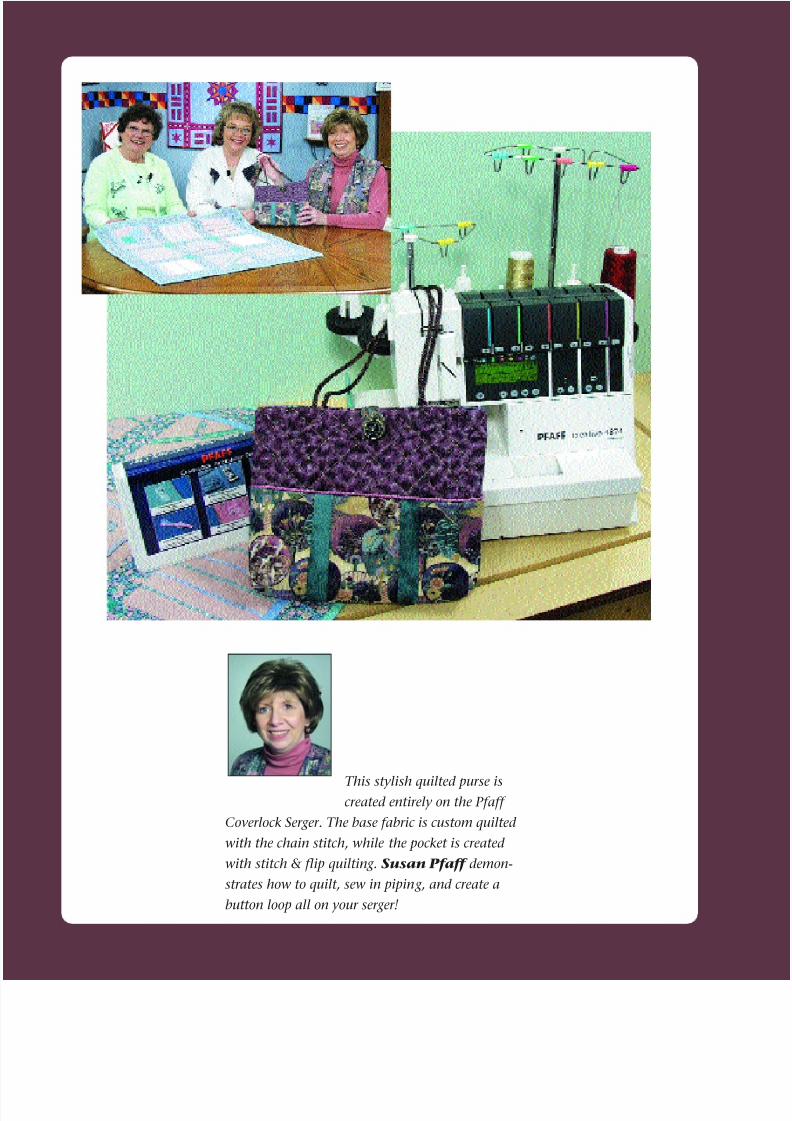
This stylish quilted purse is created entirely on the Pfaff Coverlock Serger. The base fabric is custom quilted with the chain stitch, while the pocket is created with stitch & flip quilting. Susan Pfaff demon- strates how to quilt, sew in pipin g, and create a button loop all on your serger!
Transcript of Quilted Serger Purse
8/6/2019 Quilted Serger Purse
http://slidepdf.com/reader/full/quilted-serger-purse 1/6
This stylish quilted purse iscreated entirely on the Pfaff
Coverlock Serger. The base fabric is custom quilted
with the chain stitch, while the pocket is created
with stitch & flip quilting. Susan Pfaff demon-
strates how to quilt, sew in piping, and create a
button loop all on your serger!

8/6/2019 Quilted Serger Purse
http://slidepdf.com/reader/full/quilted-serger-purse 2/6
Quilted Serger Purse
Susan Pfaff
AQC303
Sewing Supplies✄ Pfaff Coverlock Serger
✄ Rotary Cutter, Mat & Ruler
✄ Serger needles EL x 705
✄ Jeans Needle #100 or 110
✄ Sulky KK2000 Temporary AdhesiveSpray
✄ Serger Thread
✄ Water Erasable Fabric Pen
✄ 3/8 yd. main purse fabric
✄ 3/8 yd. lining fabric
✄ Warm & Natural cotton batting
✄ 1/2 yd. lightweight fusibleinterfacing
✄ 1/8 yard each of two coordinatingfabrics for outside pocket
✄ 1-3/8 yd. decorative cording for handles
✄ 1-1/2 yd. covered piping
✄ 1” button
✄ 1/4 yard lining fabric for pocket
To make the Quilted Serger Purse, cut:• Two 12” x 14” main purse fabrics• Two 12” x 14” battings• Two 10-1/2” x 13-1/2” lining fabrics• Two 10-1/2” x 13-1/2” fusible interfacings• 12-1/2” x 6-1/2”lining fabric for pocket• Three 3-3/4” x 7” fabric strips and batting for outside of pocket• Four 1-1/2” x 7” fabric strips and batting for outside pocket• One 1-1/4” x 6” bias strip of coordinating fabric• Two 20” lengths of decorative cording• One 13-1/2” length of covered piping• One 25” length of covered piping• Coverlock Piping foot #820325096
• Coverlock Strap and Belt Loop Foot #820313096
Optional: Make your own covered piping with:• One 1-1/4” x 15” bias strip• One 1-1/4” x 27” bias strip• One 15” cotton cord approx. 3/16”• One 25” cotton cord approx. 3/16”[Figures 1 and 2]
Note: To set your serger up for each of the techniques, follow theinstructions on the LCD display, or see your instruction manual.
Serge:Spray KK200 temporary adhesive sprayon each piece of batting. Place main fab-ric 12” x 14” fabrics onto batting, withthe wrong side of fabric to the batting.
Attach quilting guide bar. Mark initialstitching lines at 45 degree angles, mak-ing an X on the two 12” x 14” mainpieces. Quilt each piece, using a chainstitch (stitch #4) 1-1/2” apart. With arotary cutter, ruler and mat, trim eachpiece to 10-1/2” x 12-1/2”. Set aside.[Figures 3, 4 and 5]
Quilted Serger Purse
Figure 1
Figure 2
Figure 3 Figure 4
Figure 5

8/6/2019 Quilted Serger Purse
http://slidepdf.com/reader/full/quilted-serger-purse 3/6
Quilted Serger Purse18 AQC303
Outside pocket: Change serger stitch to4-Thread Overedge (#18). Working fromleft to right side of the pocket, place first1-1/2” x 7” fabric strip onto a battingstrip. Serge one long edge. [Figure 6]
Place a 3-3/4” x 7” strip on top of first,right sides together. Place a batting strip 3-3/4” x 7” under first batting strip. Sergeall four layers together. [Figure 7]
Flip open & press. [Figure 8]
Repeat with remaining five fabrics andbatting strips, alternating colors. [Figure 9]
Trim quilted piece to 12-1/2” x 6-1/2”.
Change serger to chain stitch (#4) or 5-threadsafety stitch #20. Snap on the Piping Foot.
Stitch piping to right side of upper pocketedge. [Figure 10]
Place the pocket lining right sides togetherwith the pocket and stitch over the same lineof stitching.
Change to the all purpose foot. Flip the liningover and serge the sides and bottom.
Place the pocket on one of the quilted pieces. Match thebottom and sides. Stitch the sides and bottom to baste inplace.
Change to wide Cover hem (stitch #3). Snap on the Strap& Belt Loop foot. Stitch a 6” long strap with the biasstrip. [Figures 11 and 12]
Trim to 4” long and baste to the center top of theremaining quilted piece for a button loop. [Figure 13]
Change to 5-Thread safety stitch #20. Place front withthe pocket and the back with the belt loop right sidestogether. Serge sides & bottom.
Square off bottom of the purse 2”. Serge with stitch #20. Turn rightside out. [Figure 14]
Baste piping around the top of the bag with thepiping foot and chain stitch #4. [Figure 15]
Attach decorative cording oneach side of purse, placingends 2-1/2” from center andbasting with the chain stitch.
Figure 6 Figure 7 Figure 8
Figure 9
Figure 10
Figure11
8/6/2019 Quilted Serger Purse
http://slidepdf.com/reader/full/quilted-serger-purse 4/6
Quilted Serger Purse AQC303
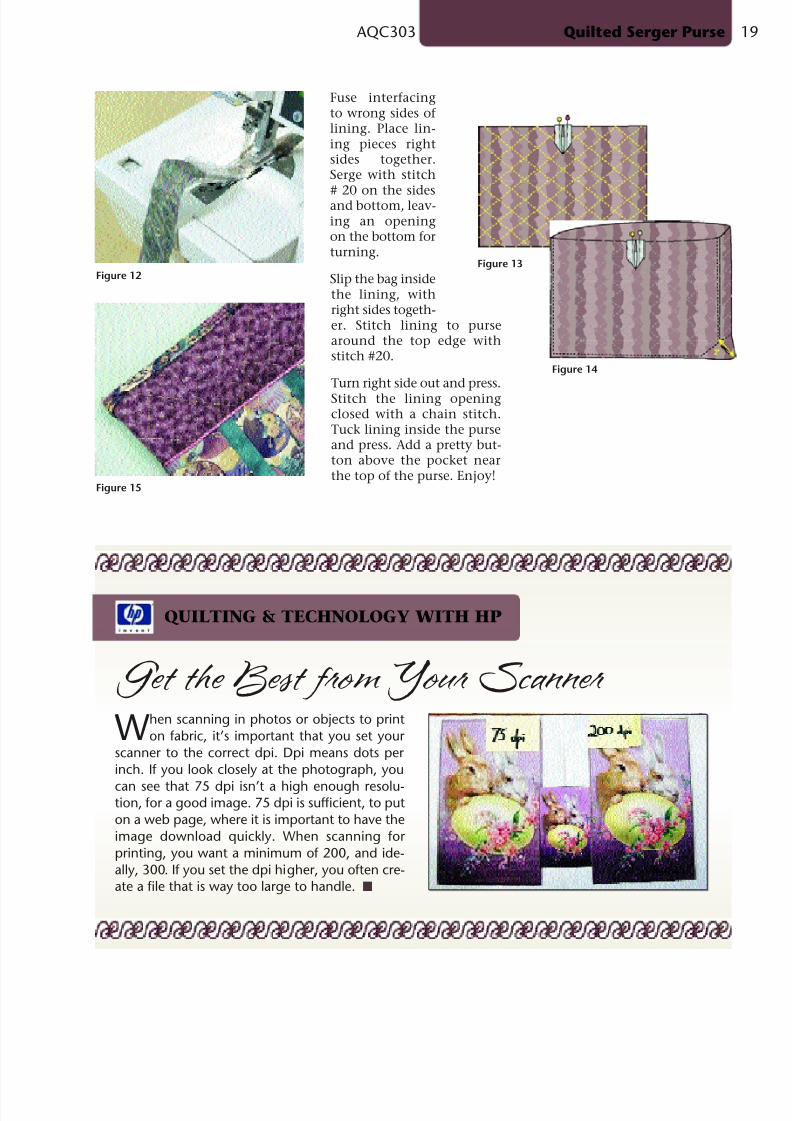
Fuse interfacingto wrong sides of lining. Place lin-ing pieces rightsides together.Serge with stitch
# 20 on the sidesand bottom, leav-ing an openingon the bottom forturning.
Slip the bag insidethe lining, withright sides togeth-er. Stitch lining to pursearound the top edge withstitch #20.
Turn right side out and press.Stitch the lining openingclosed with a chain stitch.Tuck lining inside the purseand press. Add a pretty but-ton above the pocket nearthe top of the purse. Enjoy!
Figure 12
Figure 14
Figure 15
Figure 13
QUILTING & TECHNOLOGY WITH HP
Get the Best from Your Scanner
When scanning in photos or objects to printon fabric, it’s important that you set your
scanner to the correct dpi. Dpi means dots per inch. If you look closely at the photograph, you
can see that 75 dpi isn’t a high enough resolu-tion, for a good image. 75 dpi is sufficient, to puton a web page, where it is important to have theimage download quickly. When scanning for printing, you want a minimum of 200, and ide-ally, 300. If you set the dpi higher, you often cre-ate a file that is way too large to handle. ■
8/6/2019 Quilted Serger Purse
http://slidepdf.com/reader/full/quilted-serger-purse 5/6
What’s New to Do!
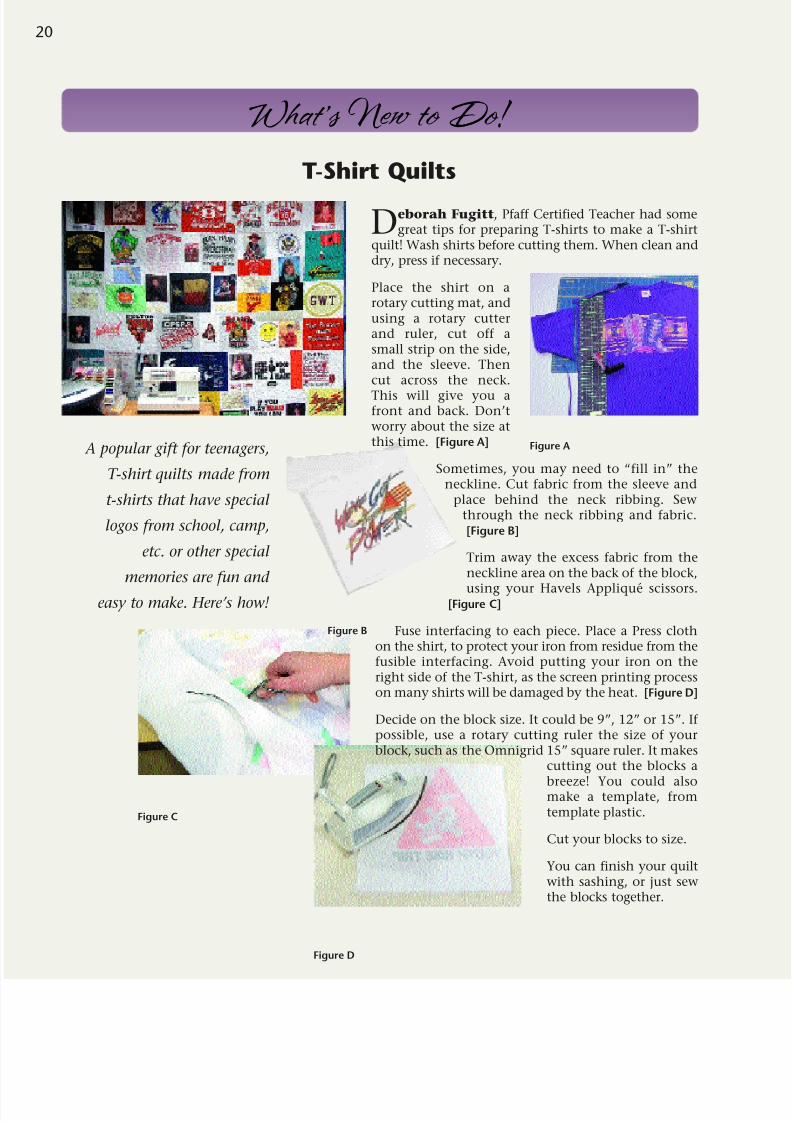
Deborah Fugitt, Pfaff Certified Teacher had somegreat tips for preparing T-shirts to make a T-shirt
quilt! Wash shirts before cutting them. When clean anddry, press if necessary.
Place the shirt on arotary cutting mat, andusing a rotary cutterand ruler, cut off asmall strip on the side,and the sleeve. Thencut across the neck.
This will give you afront and back. Don’tworry about the size atthis time. [Figure A]
Sometimes, you may need to “fill in” theneckline. Cut fabric from the sleeve and
place behind the neck ribbing. Sewthrough the neck ribbing and fabric.[Figure B]
Trim away the excess fabric from theneckline area on the back of the block,
using your Havels Appliqué scissors.[Figure C]
Fuse interfacing to each piece. Place a Press clothon the shirt, to protect your iron from residue from thefusible interfacing. Avoid putting your iron on theright side of the T-shirt, as the screen printing processon many shirts will be damaged by the heat. [Figure D]
Decide on the block size. It could be 9”, 12” or 15”. If possible, use a rotary cutting ruler the size of yourblock, such as the Omnigrid 15” square ruler. It makes
cutting out the blocks a
breeze! You could alsomake a template, fromtemplate plastic.
Cut your blocks to size.
You can finish your quiltwith sashing, or just sewthe blocks together.
T-Shirt Quilts
20
Figure A A popular gift for teenagers,
T-shirt quilts made from
t-shirts that have special
logos from school, camp,
etc. or other special
memories are fun and
easy to make. Here’s how!
Figure B
Figure C
Figure D

8/6/2019 Quilted Serger Purse
http://slidepdf.com/reader/full/quilted-serger-purse 6/6
Deborah had some ideas for making your quilt more interesting.
• Be sure to include the shirt neck with ribbing detail.
• Make a pocket using the neck opening to stash treasures.
• Combine front to back together to create one block.
• Add a part of the shirt with a pocket.
• Use plackets with buttons.
• Add several small designs from the front of shirts to create one
block.
• Create blocks from parts of shirts with no design.
• Create block with Photo transfers, pictures or maps to replace adesign on a shirt that is worn. HP has a project sheet for this ontheir web site, www.hp.com/go/quilting/.
• Embroider designs, messages, names, dates, etc.
• Use patches for events.
• Appliqué smaller designs to thelarger design to keep the shirt
pieces together.
• Add a backing fabric behindFootball jerseys with holes.
• Cut designs out of the t-shirt andadd to a piece of fabric.
• Inset a part of one design intoanother design.
• Include parts of other shirts, cos-tumes, or things that hold fondmemories.
• Add special buttons.
• Use sweatshirts.
• Make pillows out of leftover shirts.
What’s New to Do!
Sewing Supplies✄ Old T-shirts
✄ Sheer or cotton woven FusibleInterfacing
✄ Rotary Cutter, mat and ruler
✄ Havels Appliqué Scissors#140000752