Quick Start Guide - Nevionlabs.nevion.com/support/thor/Manuals/Thor Quick Start Guide.pdf ·...
13
THOR Router Management System Quick Start Guide Version 3.5
Transcript of Quick Start Guide - Nevionlabs.nevion.com/support/thor/Manuals/Thor Quick Start Guide.pdf ·...
THOR Router Management System
Quick Start Guide
Version 3.5
THOR - Quick Start Guide Version 3.5
Network Electronics ASA Thorøya
P.O. Box 1020 Sandefjord, Norway
Phone: +47 33 48 99 99
Fax: +47 33 48 99 98 E-mail: [email protected]
www.network-electronics.com
Service Phone: +47 90 60 99 99
Revision history Current revision of this document is the uppermost in the table below.
Revision Replaces Date Change description
3.5 3.0 3/6/05 Updated to reflect changes in version 3.5 and a new THOR structure.
3.0 2.9 24/11/04 Updated to reflect changes in version 3.0
2.9 - 10/02/04 Initial Revision, based on THOR Version 2.9
2
THOR - Quick Start Guide Version 3.5
Contents
Revision history............................................................................... 2
1 Installation step by step ............................................................... 4
1.1 Installation from CD-ROM ...........................................................................4 1.2 Installation from WEB ..................................................................................4
2 Setting up the system.................................................................. 6
2.1 Configure Communication Interfaces ..........................................................6 2.1.1 Compact Router Serial Interface (RS232) 7 2.1.2 System Controller Interface (TCP/IP) 8 2.2 Configure Routers........................................................................................9
3 Controlling the routers .............................................................. 11
3.1 Matrix Control...........................................................................................11 3.2 Salvo Control.............................................................................................12
3
THOR - Quick Start Guide Version 3.5
1 Installation step by step Together with this Quick-start Guide, you have received a CD-ROM or downloaded a file from the internet. This chapter will guide you through the installation of THOR – Router Management System.
1.1 Installation from CD-ROM
1. The CD-ROM should automatically start up the installation menu. However, if the auto-run function is disabled on your computer, please start the program by double clicking on the autorun.exe, located in the root directory of the CD-ROM.
2. Press “THOR – Router Management System” to start the installation.
3. Go to step 4 in Chapter 1.2, where the installation procedure is
continued…
1.2 Installation from WEB
1. Open the web page: http://www.network-electronics.com/ and select THOR. In the THOR pages select download.
2. Save thor.exe to your own PC.
3. Start thor.exe from the location where you saved it. The computer will start extracting the installation file, and start the installation program.
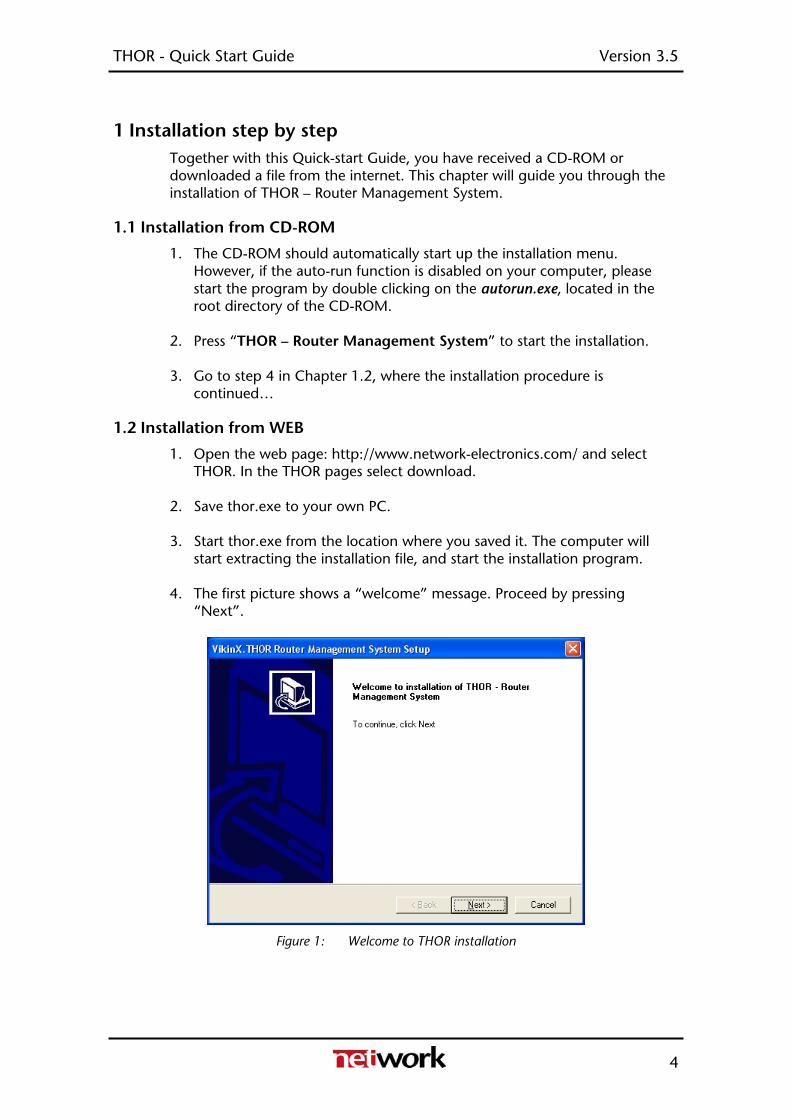
4. The first picture shows a “welcome” message. Proceed by pressing “Next”.
Figure 1: Welcome to THOR installation
4
THOR - Quick Start Guide Version 3.5
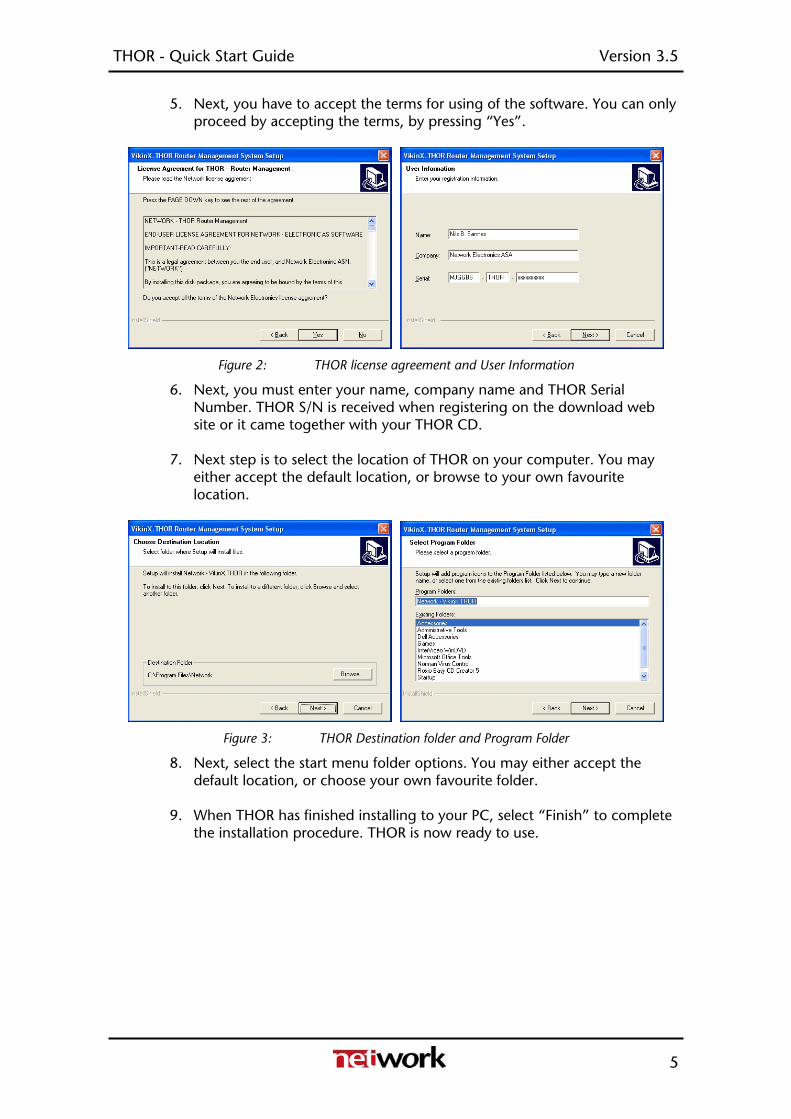
5. Next, you have to accept the terms for using of the software. You can only proceed by accepting the terms, by pressing “Yes”.
Figure 2: THOR license agreement and User Information
6. Next, you must enter your name, company name and THOR Serial Number. THOR S/N is received when registering on the download web site or it came together with your THOR CD.
7. Next step is to select the location of THOR on your computer. You may either accept the default location, or browse to your own favourite location.
Figure 3: THOR Destination folder and Program Folder
8. Next, select the start menu folder options. You may either accept the default location, or choose your own favourite folder.
9. When THOR has finished installing to your PC, select “Finish” to complete the installation procedure. THOR is now ready to use.
5
THOR - Quick Start Guide Version 3.5
2 Setting up the system This chapter explains how to set up the router system. Communication interfaces must be configured and routers must be detected and configured.
2.1 Configure Communication Interfaces
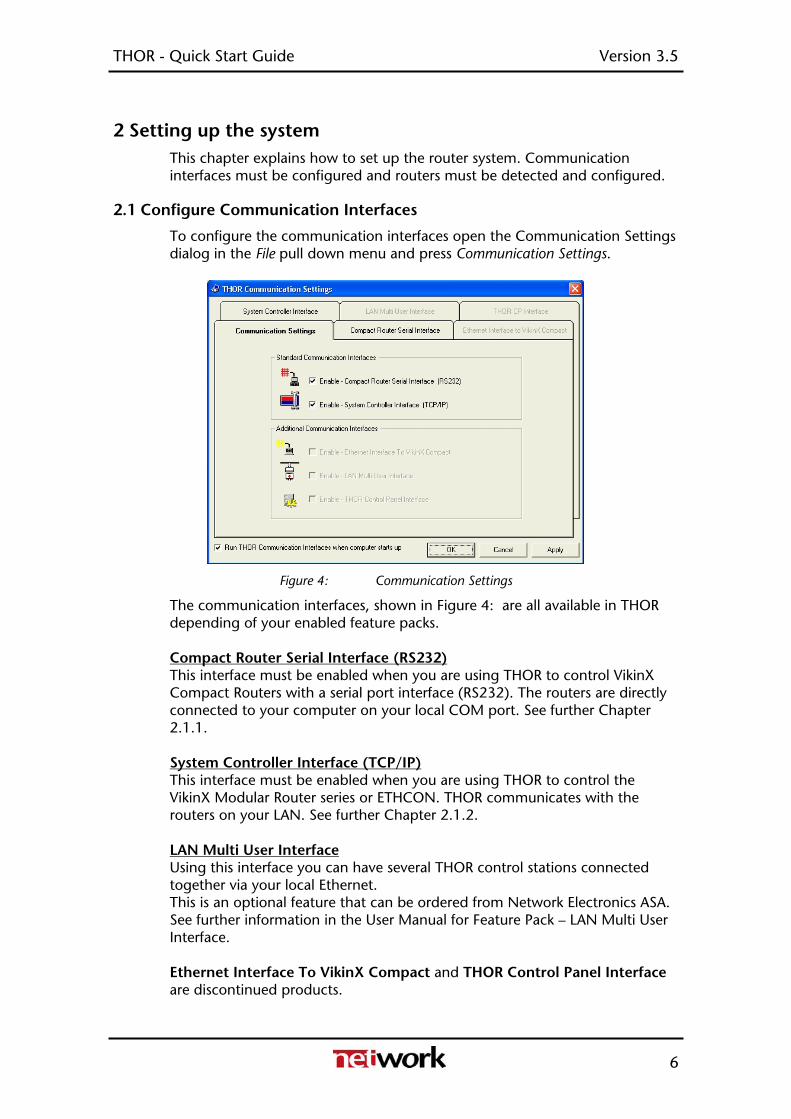
To configure the communication interfaces open the Communication Settings dialog in the File pull down menu and press Communication Settings.
Figure 4: Communication Settings
The communication interfaces, shown in Figure 4: are all available in THOR depending of your enabled feature packs. Compact Router Serial Interface (RS232) This interface must be enabled when you are using THOR to control VikinX Compact Routers with a serial port interface (RS232). The routers are directly connected to your computer on your local COM port. See further Chapter 2.1.1. System Controller Interface (TCP/IP) This interface must be enabled when you are using THOR to control the VikinX Modular Router series or ETHCON. THOR communicates with the routers on your LAN. See further Chapter 2.1.2. LAN Multi User Interface Using this interface you can have several THOR control stations connected together via your local Ethernet. This is an optional feature that can be ordered from Network Electronics ASA. See further information in the User Manual for Feature Pack – LAN Multi User Interface. Ethernet Interface To VikinX Compact and THOR Control Panel Interface are discontinued products.
6
THOR - Quick Start Guide Version 3.5
2.1.1 Compact Router Serial Interface (RS232)
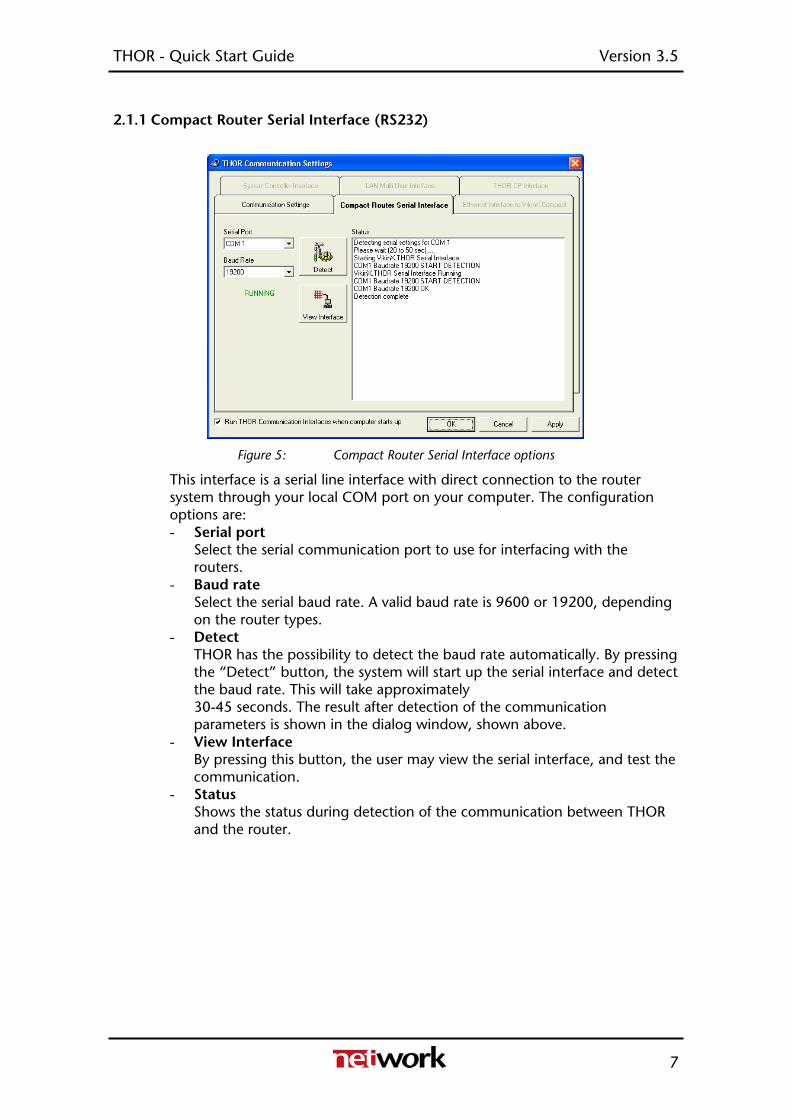
Figure 5: Compact Router Serial Interface options
This interface is a serial line interface with direct connection to the router system through your local COM port on your computer. The configuration options are: - Serial port
Select the serial communication port to use for interfacing with the routers.
- Baud rate Select the serial baud rate. A valid baud rate is 9600 or 19200, depending on the router types.
- Detect THOR has the possibility to detect the baud rate automatically. By pressing the “Detect” button, the system will start up the serial interface and detect the baud rate. This will take approximately 30-45 seconds. The result after detection of the communication parameters is shown in the dialog window, shown above.
- View Interface By pressing this button, the user may view the serial interface, and test the communication.
- Status Shows the status during detection of the communication between THOR and the router.
7
THOR - Quick Start Guide Version 3.5
2.1.2 System Controller Interface (TCP/IP)
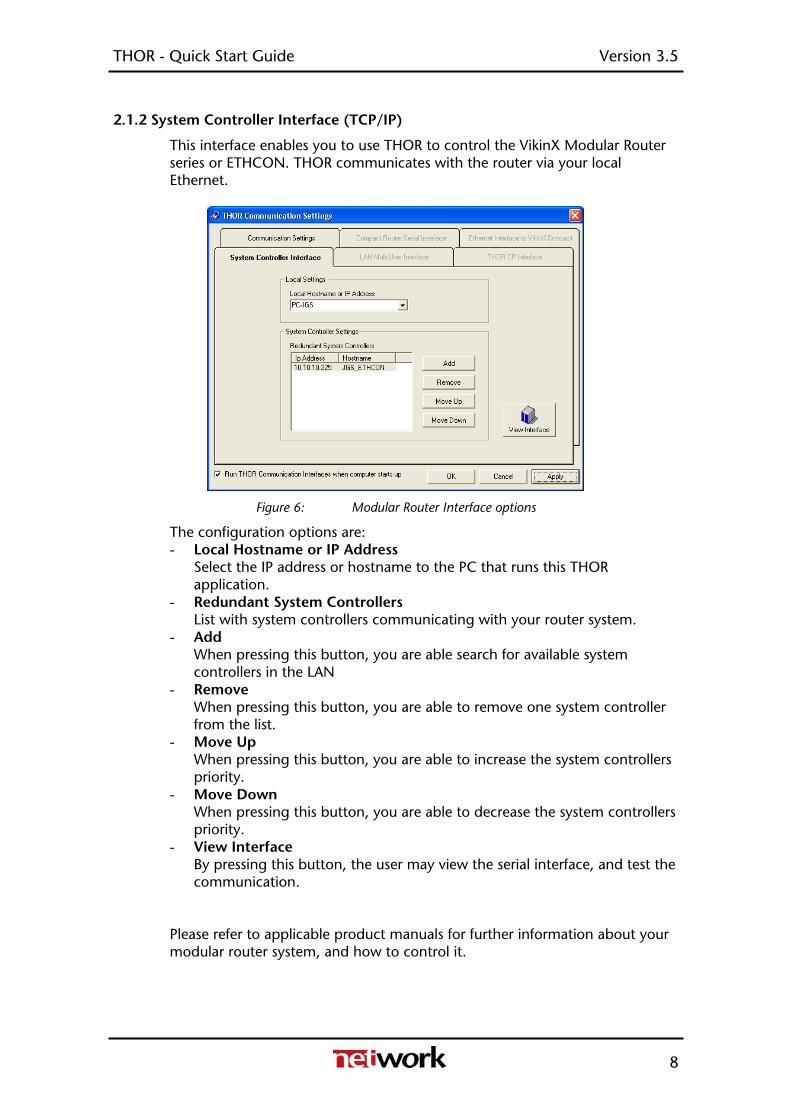
This interface enables you to use THOR to control the VikinX Modular Router series or ETHCON. THOR communicates with the router via your local Ethernet.
Figure 6: Modular Router Interface options
The configuration options are: - Local Hostname or IP Address
Select the IP address or hostname to the PC that runs this THOR application.
- Redundant System Controllers List with system controllers communicating with your router system.
- Add When pressing this button, you are able search for available system controllers in the LAN
- Remove When pressing this button, you are able to remove one system controller from the list.
- Move Up When pressing this button, you are able to increase the system controllers priority.
- Move Down When pressing this button, you are able to decrease the system controllers priority.
- View Interface By pressing this button, the user may view the serial interface, and test the communication.
Please refer to applicable product manuals for further information about your modular router system, and how to control it.
8
THOR - Quick Start Guide Version 3.5
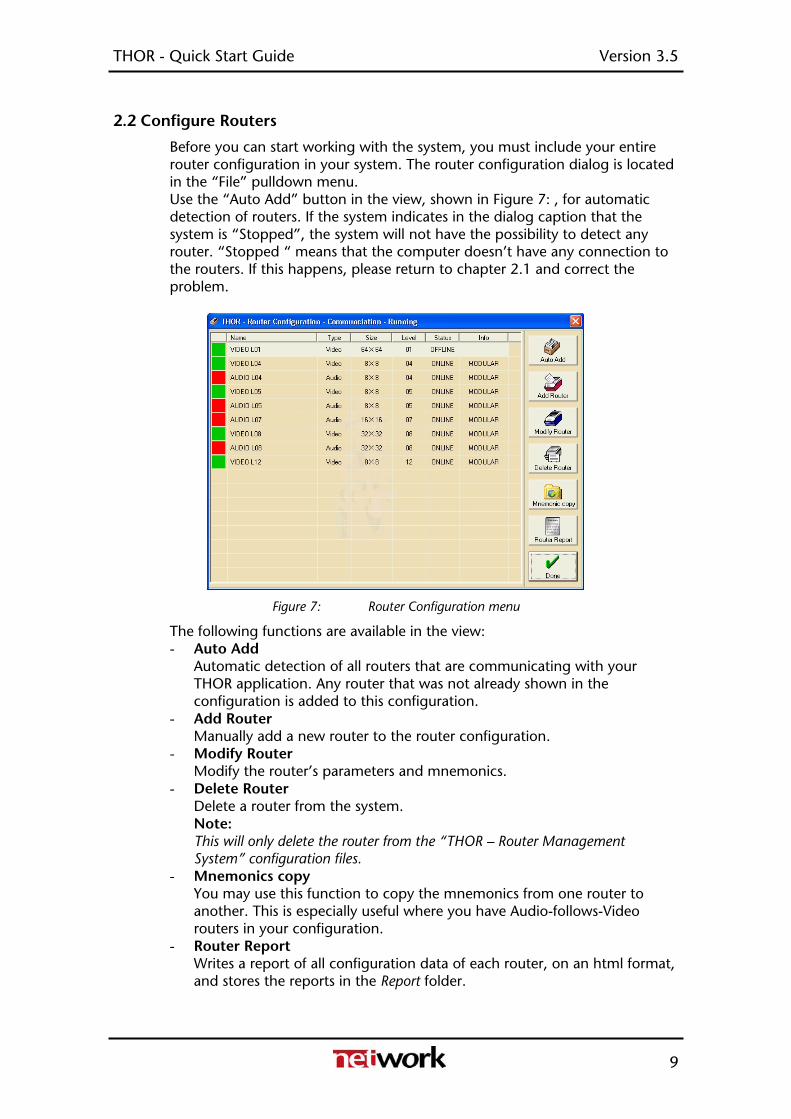
2.2 Configure Routers
Before you can start working with the system, you must include your entire router configuration in your system. The router configuration dialog is located in the “File” pulldown menu. Use the “Auto Add” button in the view, shown in Figure 7: , for automatic detection of routers. If the system indicates in the dialog caption that the system is “Stopped”, the system will not have the possibility to detect any router. “Stopped “ means that the computer doesn’t have any connection to the routers. If this happens, please return to chapter 2.1 and correct the problem.
Figure 7: Router Configuration menu
The following functions are available in the view: - Auto Add
Automatic detection of all routers that are communicating with your THOR application. Any router that was not already shown in the configuration is added to this configuration.
- Add Router Manually add a new router to the router configuration.
- Modify Router Modify the router’s parameters and mnemonics.
- Delete Router Delete a router from the system. Note: This will only delete the router from the “THOR – Router Management System” configuration files.
- Mnemonics copy You may use this function to copy the mnemonics from one router to another. This is especially useful where you have Audio-follows-Video routers in your configuration.
- Router Report Writes a report of all configuration data of each router, on an html format, and stores the reports in the Report folder.
9

THOR - Quick Start Guide Version 3.5
- Done Accept changes, and return to main program
10
THOR - Quick Start Guide Version 3.5
3 Controlling the routers THOR uses two basic ways to control the router, matrix views and salvos. This chapter gives a brief introduction to these control methods. Please refer to the main user manual for further information.
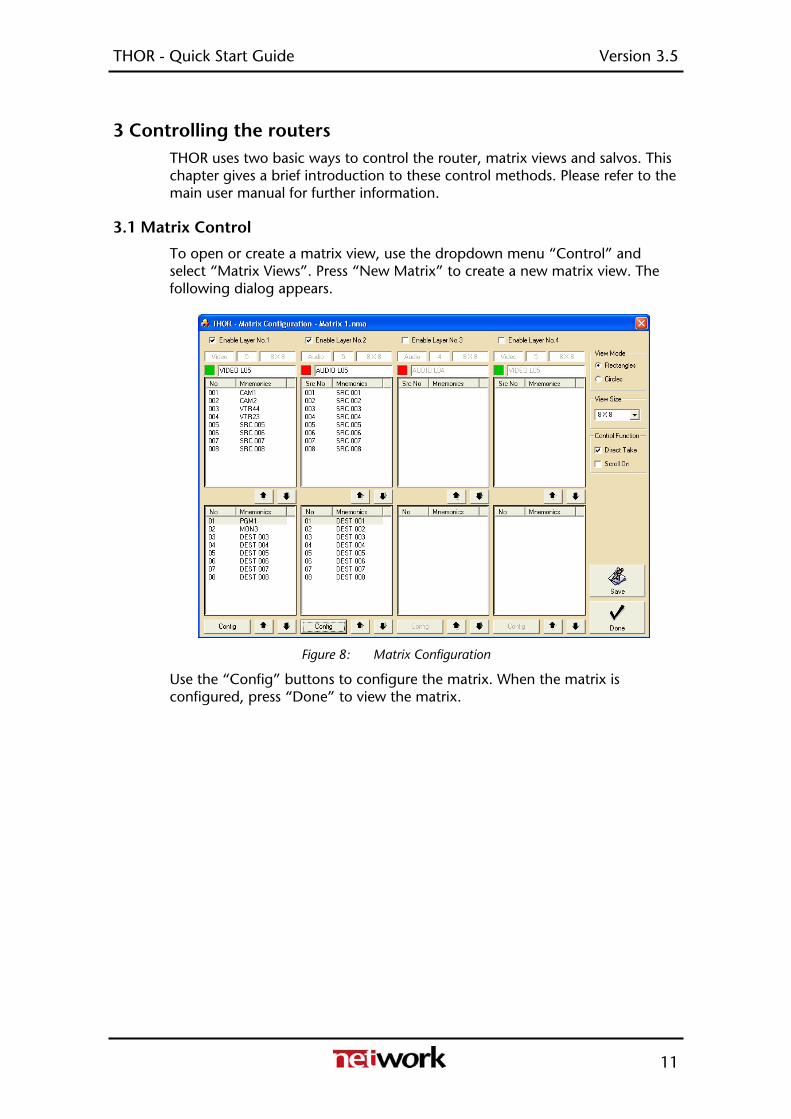
3.1 Matrix Control
To open or create a matrix view, use the dropdown menu “Control” and select “Matrix Views”. Press “New Matrix” to create a new matrix view. The following dialog appears.
Figure 8: Matrix Configuration
Use the “Config” buttons to configure the matrix. When the matrix is configured, press “Done” to view the matrix.
11
THOR - Quick Start Guide Version 3.5
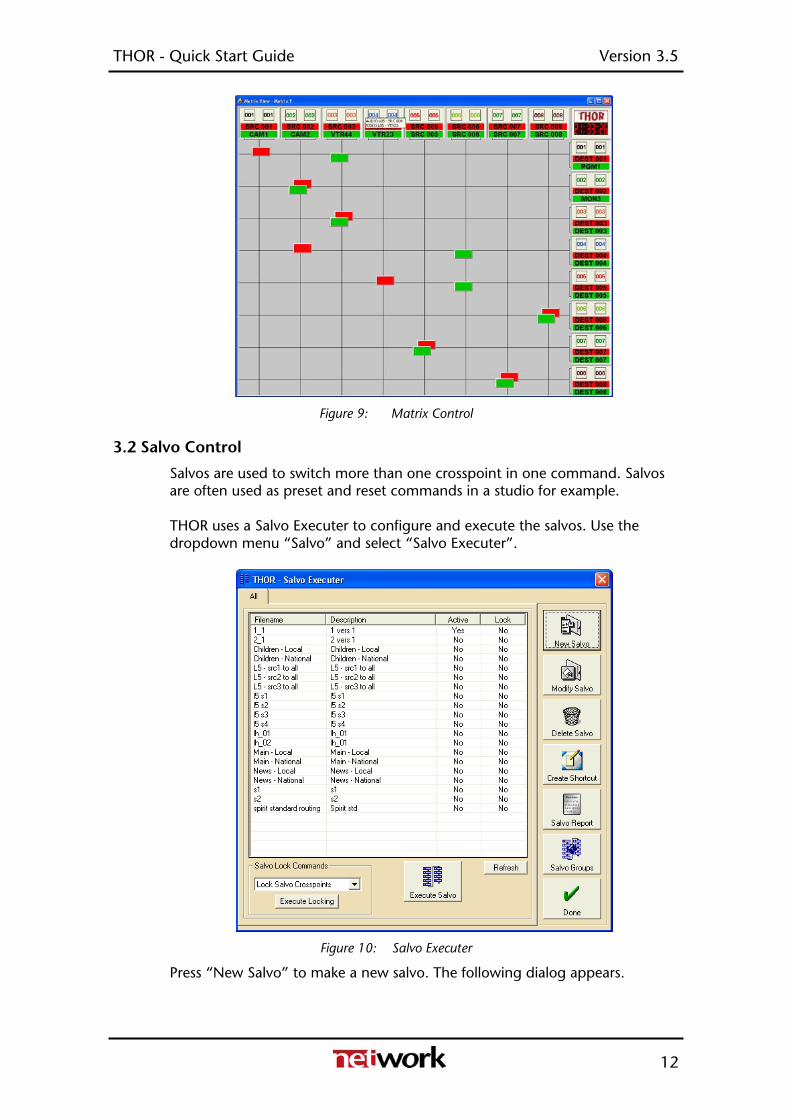
Figure 9: Matrix Control
3.2 Salvo Control
Salvos are used to switch more than one crosspoint in one command. Salvos are often used as preset and reset commands in a studio for example. THOR uses a Salvo Executer to configure and execute the salvos. Use the dropdown menu “Salvo” and select “Salvo Executer”.
Figure 10: Salvo Executer
Press “New Salvo” to make a new salvo. The following dialog appears.
12
THOR - Quick Start Guide Version 3.5
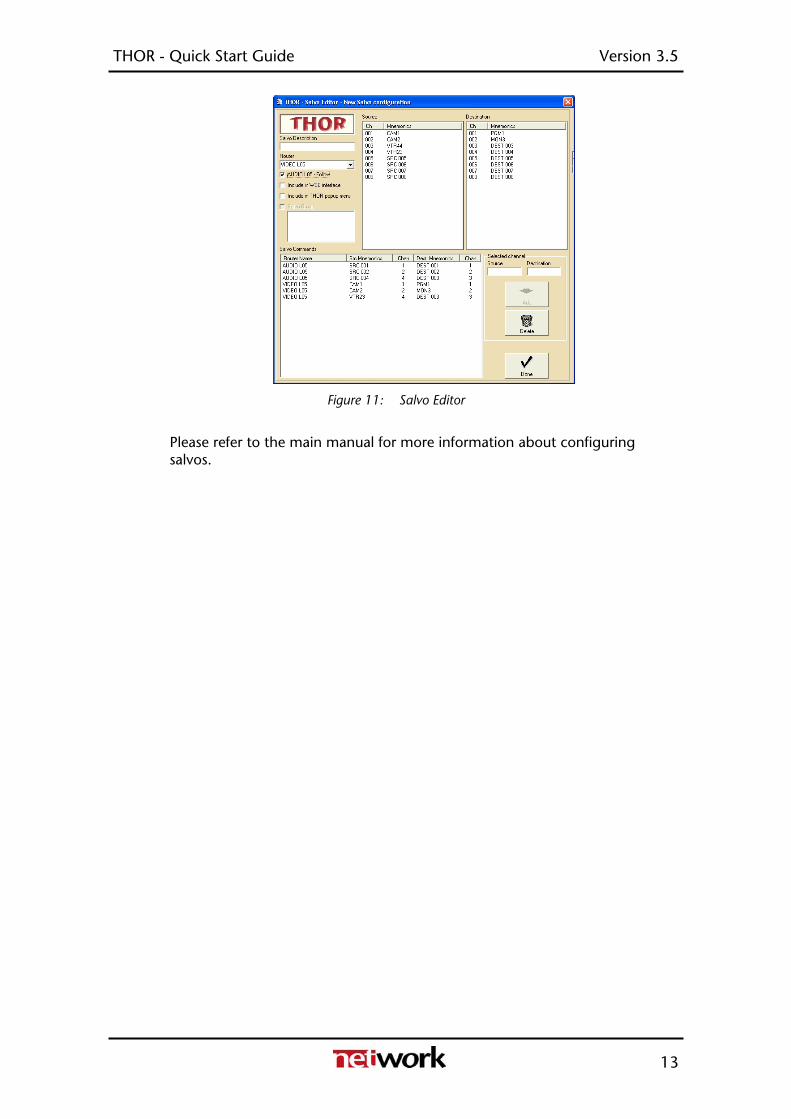
Figure 11: Salvo Editor
Please refer to the main manual for more information about configuring salvos.
13