Qubit® Fluorometer - The Functional Genomics Research...
20
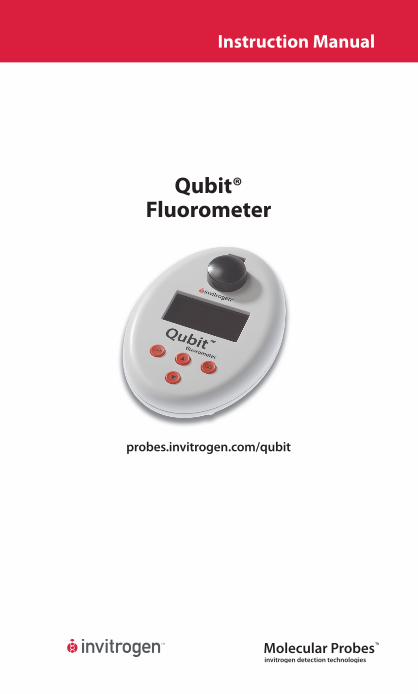
Instruction Manual probes.invitrogen.com/qubit Qubit® Fluorometer
Transcript of Qubit® Fluorometer - The Functional Genomics Research...
Instruction Manual
probes.invitrogen.com/qubit
Qubit® Fluorometer

W elcome to the Qubit® Quantitation Platform—
an efficient combination of sophisticated, accurate,
and highly sensitive fluorescence-based quantita-
tion assays with the most user-friendly fluo rometer
available. Because the Quant-iT™ assay kits use state-of-the-art
dyes selective for dsDNA, RNA, and protein, you don’t need to
worry about contaminants in your sample affecting the quantita-
tion. And because the Qubit® fluorometer uses the very latest in
illumination and detection technology for the highest sensitivity,
you can use as little as 1 µL of sample and still get great results,
even with very dilute samples. So plug in your new Qubit® fluo-
rometer, grab your samples, and experience higher confidence in
downstream applications.
To get the most out of your new Qubit® fluorometer, be sure to
register online at the Qubit® website (probes.invitrogen.com/
qubit). Registering your instrument ensures that you will receive
notifications of software upgrades and information on new assays
for use with the Qubit® fluorometer.

1
Table of Contents
Inspection and Setup. . . . . . . . . . . . . . . . . . 3
Using the Qubit® Fluorometer . . . . . . . . . . . . 5
General Considerations for Analysis . . . . . . . 10
Troubleshooting . . . . . . . . . . . . . . . . . . . . 12
Warranty . . . . . . . . . . . . . . . . . . . . . . . . . 14
Obtaining Service . . . . . . . . . . . . . . . . . . . 15
Product List . . . . . . . . . . . . . . . . . . . . . . . 16
Instrument Specifications . . . . . . . . . . . . . . 17

2
3
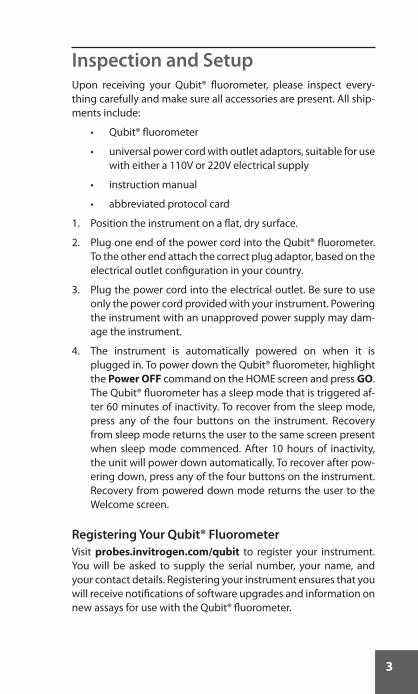
Inspection and SetupUpon receiving your Qubit® fluorometer, please inspect every-thing carefully and make sure all accessories are present. All ship-ments include:
Qubit® fluorometer•
universal power cord with outlet adaptors, suitable for use •with either a 110V or 220V electrical supply
instruction manual•
abbreviated protocol card•
Position the instrument on a flat, dry surface.1.
Plug one end of the power cord into the Qubit® fluorometer. 2. To the other end attach the correct plug adaptor, based on the electrical outlet configuration in your country.
Plug the power cord into the electrical outlet. Be sure to use 3. only the power cord provided with your instrument. Powering the instrument with an unapproved power supply may dam-age the instrument.
The instrument is automatically powered on when it is 4. plugged in. To power down the Qubit® fluorometer, highlight the Power OFF command on the HOME screen and press GO. The Qubit® fluorometer has a sleep mode that is triggered af-ter 60 minutes of inactivity. To recover from the sleep mode, press any of the four buttons on the instrument. Recovery from sleep mode returns the user to the same screen present when sleep mode commenced. After 10 hours of inactivity, the unit will power down automatically. To recover after pow-ering down, press any of the four buttons on the instrument. Recovery from powered down mode returns the user to the Welcome screen.
Registering Your Qubit® FluorometerVisit probes.invitrogen.com/qubit to register your instrument. You will be asked to supply the serial number, your name, and your contact details. Registering your instrument ensures that you will receive notifications of software upgrades and information on new assays for use with the Qubit® fluorometer.

4
Installing the Qubit® Data LoggerThe Qubit® fluorometer is designed for stand-alone use and does not require a connection with a PC. If data transfer to your PC is de-sired, you will need to install the Qubit® Data Logger. Visit the web address below and follow the instructions. When the software is installed, the Qubit® Data Logger icon will appear on your desk-top. The requirements for download are:
USB A/mini B 5-pin cable
available from Invitrogen (Cat. no. Q32858) or from most of-fice supply retailers
PC System requirements
USB port (1.1 or later)•
Windows XP•
Location of downloadable software
probes.invitrogen.com/qubit
5
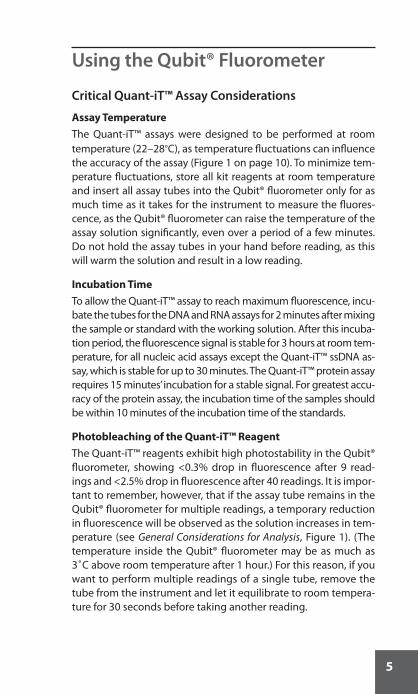
Using the Qubit® Fluorometer
Critical Quant-iT™ Assay Considerations
Assay Temperature
The Quant-iT™ assays were designed to be performed at room temperature (22–28°C), as temperature fluctuations can influence the accuracy of the assay (Figure 1 on page 10). To minimize tem-perature fluctuations, store all kit reagents at room temperature and insert all assay tubes into the Qubit® fluorometer only for as much time as it takes for the instrument to measure the fluores-cence, as the Qubit® fluorometer can raise the temperature of the assay solution significantly, even over a period of a few minutes. Do not hold the assay tubes in your hand before reading, as this will warm the solution and result in a low reading.
Incubation Time
To allow the Quant-iT™ assay to reach maximum fluorescence, incu-bate the tubes for the DNA and RNA assays for 2 minutes after mixing the sample or standard with the working solution. After this incuba-tion period, the fluorescence signal is stable for 3 hours at room tem-perature, for all nucleic acid assays except the Quant-iT™ ssDNA as-say, which is stable for up to 30 minutes. The Quant-iT™ protein assay requires 15 minutes’ incubation for a stable signal. For greatest accu-racy of the protein assay, the incubation time of the samples should be within 10 minutes of the incubation time of the standards.
Photobleaching of the Quant-iT™ Reagent
The Quant-iT™ reagents exhibit high photostability in the Qubit® fluorometer, showing <0.3% drop in fluorescence after 9 read-ings and <2.5% drop in fluorescence after 40 readings. It is impor-tant to remember, however, that if the assay tube remains in the Qubit® fluorometer for multiple readings, a temporary reduction in fluorescence will be observed as the solution increases in tem-perature (see General Considerations for Analysis, Figure 1). (The temperature inside the Qubit® fluorometer may be as much as 3˚C above room temperature after 1 hour.) For this reason, if you want to perform multiple readings of a single tube, remove the tube from the instrument and let it equilibrate to room tempera-ture for 30 seconds before taking another reading.
6
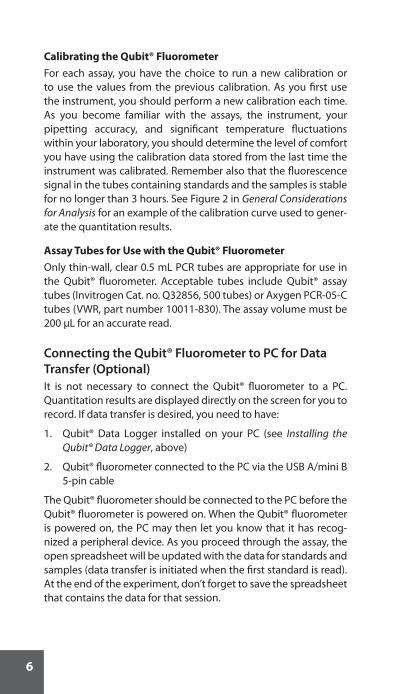
Calibrating the Qubit® Fluorometer
For each assay, you have the choice to run a new calibration or to use the values from the previous calibration. As you first use the instrument, you should perform a new calibration each time. As you become familiar with the assays, the instrument, your pipetting accuracy, and significant temperature fluctuations within your laboratory, you should determine the level of comfort you have using the calibration data stored from the last time the instrument was calibrated. Remember also that the fluorescence signal in the tubes containing standards and the samples is stable for no longer than 3 hours. See Figure 2 in General Considerations for Analysis for an example of the calibration curve used to gener-ate the quantitation results.
Assay Tubes for Use with the Qubit® Fluorometer
Only thin-wall, clear 0.5 mL PCR tubes are appropriate for use in the Qubit® fluorometer. Acceptable tubes include Qubit® assay tubes (Invitrogen Cat. no. Q32856, 500 tubes) or Axygen PCR-05-C tubes (VWR, part number 10011-830). The assay volume must be 200 µL for an accurate read.
Connecting the Qubit® Fluorometer to PC for Data Transfer (Optional)It is not necessary to connect the Qubit® fluorometer to a PC. Quantitation results are displayed directly on the screen for you to record. If data transfer is desired, you need to have:
Qubit® Data Logger installed on your PC (see 1. Installing the Qubit® Data Logger, above)
Qubit® fluorometer connected to the PC via the USB A/mini B 2. 5-pin cable
The Qubit® fluorometer should be connected to the PC before the Qubit® fluorometer is powered on. When the Qubit® fluorometer is powered on, the PC may then let you know that it has recog-nized a peripheral device. As you proceed through the assay, the open spreadsheet will be updated with the data for standards and samples (data transfer is initiated when the first standard is read). At the end of the experiment, don’t forget to save the spreadsheet that contains the data for that session.

7
Selecting a Quant-iT™ Assay1. If the fluorometer is powered down or in sleep mode, press
any of the four buttons to power up the fluorometer.
Note: If the instrument was in sleep mode, pressing any of the four buttons returns you to the last screen viewed before sleep mode commenced. To get to the HOME screen after reawakening, press HOME.
2. On the HOME screen, use the s or t key to highlight the as-say of choice.
3. When the Quant-iT™ assay you would like to run is highlight-ed, press GO.
Calibrating the Qubit® fluorometerFor each assay, you have the choice to run a new calibration or to use the values from the previous calibration. See Calibrating the Qubit® Fluorometer, above. Highlight either Run new calibration or Use last calibration and press GO.
Note: When using the fluorometer for the first time, there will not be an option to Use last calibration.
Running a New Calibration
Calibration of the Qubit® fluorometer requires the preparation of the appropriate standard solutions. For instructions on the prepa-ration of these standards, see the instruction manual that accom-panies the assay you are using.
Note: It is important to prepare standards in the appropriate 0.5 mL assay tubes. Acceptable tubes include Qubit® assay tubes (500, Invit-rogen Cat. no. Q32856) or Axygen PCR-05-C tubes (VWR, part number 10011-830). The assay volume must be 200 µL for an accurate read.
1. Insert Standard #1 and press GO. Ensure you use the Standard #1 appropriate for the assay you are performing.
2. The reading will take approximately 5 seconds.
3. Insert Standard #2, and press GO. Ensure you use the Standard #2 appropriate for the assay you are performing.
4. The Quant-iT™ protein assay requires a three-point calibra-tion, so if you are performing this assay, a prompt to insert Standard #3 will appear on the screen. After Standard #3 is in-serted, press GO.
8
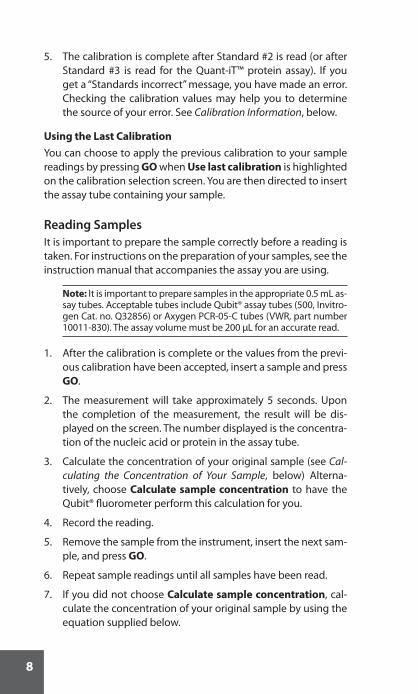
5. The calibration is complete after Standard #2 is read (or after Standard #3 is read for the Quant-iT™ protein assay). If you get a “Standards incorrect” message, you have made an error. Checking the calibration values may help you to determine the source of your error. See Calibration Information, below.
Using the Last Calibration
You can choose to apply the previous calibration to your sample readings by pressing GO when Use last calibration is highlighted on the calibration selection screen. You are then directed to insert the assay tube containing your sample.
Reading SamplesIt is important to prepare the sample correctly before a reading is taken. For instructions on the preparation of your samples, see the instruction manual that accompanies the assay you are using.
Note: It is important to prepare samples in the appropriate 0.5 mL as-say tubes. Acceptable tubes include Qubit® assay tubes (500, Invitro-gen Cat. no. Q32856) or Axygen PCR-05-C tubes (VWR, part number 10011-830). The assay volume must be 200 µL for an accurate read.
1. After the calibration is complete or the values from the previ-ous calibration have been accepted, insert a sample and press GO.
2. The measurement will take approximately 5 seconds. Upon the completion of the measurement, the result will be dis-played on the screen. The number displayed is the concentra-tion of the nucleic acid or protein in the assay tube.
3. Calculate the concentration of your original sample (see Cal-culating the Concentration of Your Sample, below) Alterna-tively, choose Calculate sample concentration to have the Qubit® fluorometer perform this calculation for you.
4. Record the reading.
5. Remove the sample from the instrument, insert the next sam-ple, and press GO.
6. Repeat sample readings until all samples have been read.
7. If you did not choose Calculate sample concentration, cal-culate the concentration of your original sample by using the equation supplied below.
9
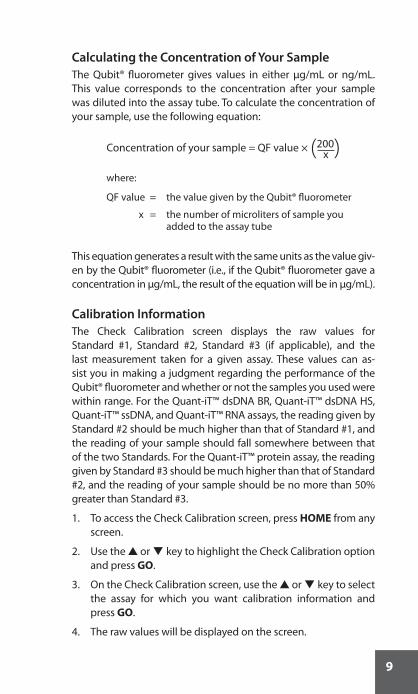
Calculating the Concentration of Your SampleThe Qubit® fluorometer gives values in either µg/mL or ng/mL. This value corresponds to the concentration after your sample was diluted into the assay tube. To calculate the concentration of your sample, use the following equation:
Concentration of your sample = QF value × (200)
x
where:
QF value = the value given by the Qubit® fluorometer
x = the number of microliters of sample you added to the assay tube
This equation generates a result with the same units as the value giv-en by the Qubit® fluorometer (i.e., if the Qubit® fluorometer gave a concentration in µg/mL, the result of the equation will be in µg/mL).
Calibration InformationThe Check Calibration screen displays the raw values for Standard #1, Standard #2, Standard #3 (if applicable), and the last measurement taken for a given assay. These values can as-sist you in making a judgment regarding the performance of the Qubit® fluorometer and whether or not the samples you used were within range. For the Quant-iT™ dsDNA BR, Quant-iT™ dsDNA HS, Quant-iT™ ssDNA, and Quant-iT™ RNA assays, the reading given by Standard #2 should be much higher than that of Standard #1, and the reading of your sample should fall somewhere between that of the two Standards. For the Quant-iT™ protein assay, the reading given by Standard #3 should be much higher than that of Standard #2, and the reading of your sample should be no more than 50% greater than Standard #3.
1. To access the Check Calibration screen, press HOME from any screen.
2. Use the s or t key to highlight the Check Calibration option and press GO.
3. On the Check Calibration screen, use the s or t key to select the assay for which you want calibration information and press GO.
4. The raw values will be displayed on the screen.

10
General Considerations for Analysis
Effect of Temperature on the Quant-iT™ AssaysThe Quant-iT™ assays were designed to be performed at room temperature (22–28°C), as temperature fluctuations can influence the accuracy of the assay (Figure 1). To minimize temperature fluc-tuations, store all kit reagents at room temperature and insert all assay tubes into the Qubit® fluorometer only for as much time as it takes for the instrument to measure the fluorescence, as the Qubit® fluorometer can raise the temperature of the assay solu-tion significantly, even over a period of a few minutes. Do not hold the assay tubes in your hand before reading, as this will warm the solution and result in a low reading.
Figure 1—Effect of temperature on the Quant-iT™ dsDNA BR assay. Quant-iT™ dsDNA HS, Quant-iT™ ssDNA, Quant-iT™ RNA, and Quant-iT™ protein assays show similar sensitivities over the same range.
Assay temperature (ºC)
10 302515 20 35
Rel
ativ
e flu
ores
cenc
e (n
orm
aliz
ed to
roo
m te
mpe
ratu
re)
0%
160%
140%
120%
100%
40%
20%
60%
80%

11
How the Qubit® Fluorometer Calculates ConcentrationThe Qubit® fluorometer generates concentration data based on the relationship between the two Standards used in calibration (three for the Quant-iT™ protein assay). The plot below shows the line corresponding to the curve-fitting algorithm (a modi-fied Hill plot) used in the calculation of concentration data for the Quant-iT™ RNA assay. For reference, the positions of the Standards and a set of data points from an actual experiment are shown su-perimposed onto the line. This plot demonstrates that the curve-fitting algorithm gives accurate values for quantitation.
Figure 2—The curve-fitting algorithm used to determine con-centration in the Quant-iT™ RNA assay. Data for the Quant-iT™ dsDNA BR, Quant-iT™ dsDNA HS, Quant-iT™ ssDNA, and Quant-iT™ protein assays are generated by a similar algorithm.
Concentration of RNA (ng/mL)
0 500400200100 300 600
Rel
ativ
e flu
ores
cenc
e
0
120
100
80
60
40
20
StandardsRaw DataCurve-Fitting Algorithm
12
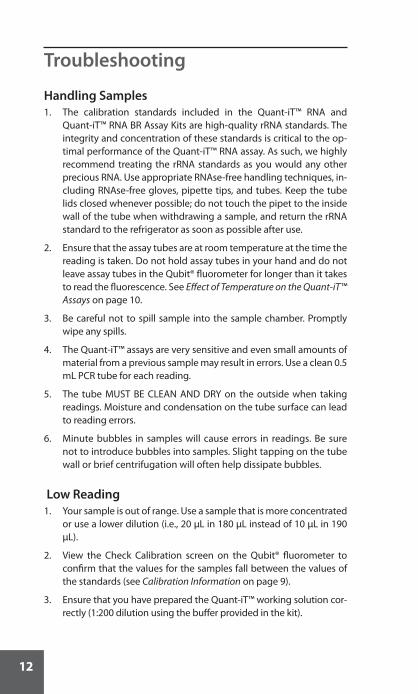
Troubleshooting
Handling SamplesThe calibration standards included in the Quant-iT™ RNA and 1. Quant-iT™ RNA BR Assay Kits are high-quality rRNA standards. The integrity and concentration of these standards is critical to the op-timal performance of the Quant-iT™ RNA assay. As such, we highly recommend treating the rRNA standards as you would any other precious RNA. Use appropriate RNAse-free handling techniques, in-cluding RNAse-free gloves, pipette tips, and tubes. Keep the tube lids closed whenever possible; do not touch the pipet to the inside wall of the tube when withdrawing a sample, and return the rRNA standard to the refrigerator as soon as possible after use.
Ensure that the assay tubes are at room temperature at the time the 2. reading is taken. Do not hold assay tubes in your hand and do not leave assay tubes in the Qubit® fluorometer for longer than it takes to read the fluorescence. See Effect of Temperature on the Quant-iT™ Assays on page 10.
Be careful not to spill sample into the sample chamber. Promptly 3. wipe any spills.
The Quant-iT™ assays are very sensitive and even small amounts of 4. material from a previous sample may result in errors. Use a clean 0.5 mL PCR tube for each reading.
The tube MUST BE CLEAN AND DRY on the outside when taking 5. readings. Moisture and condensation on the tube surface can lead to reading errors.
Minute bubbles in samples will cause errors in readings. Be sure 6. not to introduce bubbles into samples. Slight tapping on the tube wall or brief centrifugation will often help dissipate bubbles.
Low ReadingYour sample is out of range. Use a sample that is more concentrated 1. or use a lower dilution (i.e., 20 µL in 180 µL instead of 10 µL in 190 µL).
View the Check Calibration screen on the Qubit® fluorometer to 2. confirm that the values for the samples fall between the values of the standards (see Calibration Information on page 9).
Ensure that you have prepared the Quant-iT™ working solution cor-3. rectly (1:200 dilution using the buffer provided in the kit).

13
Ensure that you have prepared the standard tubes correctly (10 µL 4. of each standard in 190 µL of Quant-iT™ working solution).
Ensure the tubes are filled to at least 200 µL (standards and sam-5. ples).
Ensure that the reagents and standards you are using are not older 6. than the expiration dates assigned by the manufacturer.
The Quant-iT™ stock solution should be protected from light as 7. much as possible.
Select the correct Qubit® fluorometer assay for the Quant-iT™ assay 8. you are performing and calibrate the Qubit® fluorometer correctly. Standards must be used in the correct order.
Ensure that the assay is operated entirely at room temperature.9.
High ReadingYour sample is out of range. Use a sample that is less concentrated. 1.
View the Check Calibration screen on the Qubit® fluorometer to 2. confirm that the values for the samples fall between the values of the standards.
Ensure that the lid is closed while reading standards and samples. 3.
Prepare samples and standards according to the instructions in the 4. Quant-iT™ assay kit you are using.
Ensure that the assay is operated entirely at room temperature.5.
Standards IncorrectIf you get a “Standards incorrect” message, you have made an error. Ac-cessing the Check Calibration screen will allow you to view the raw val-ues for Standard #1, Standard #2, Standard #3 (if appli cable), and the last measurement taken for a given assay. These values can assist you in making a judgment regarding the performance of the Qubit® fluo-rometer and whether or not the samples you used were within range. See Calibration Information on page 9 for instructions for accessing the Check Calibration screen.
14
WarrantyInvitrogen warrants that this product will be free from defects in material and workmanship for a period of one (1) year from date of purchase. If a defect is present, Invitrogen will, at its option, repair, replace, or refund the purchase price of this product at no charge to you, provided it is returned during the warranty period. This warranty does not apply if the product has been damaged by acci-dent, abuse, misuse, or misapplication, or from ordinary wear and tear. For your protection, items being returned must be insured against possible damage or loss. Invitrogen cannot be responsible for damage incurred during shipment of a repair instrument; It is recommend that you save the original packing material in which the instrument was shipped. This warranty shall be limited to the replacement of defective products. IT IS EXPRESSLY AGREED THAT THIS WARRANTY WILL BE IN LIEU OF ALL WARRANTIES OF FITNESS AND IN LIEU OF THE WARRANTY OF MERCHANT-ABILITY.

15
Obtaining ServiceContact Invitrogen Technical Service (in the USA and Canada call 1-800-955-6288 or send an email to [email protected]) and describe the problem(s) you are experiencing. Carry out any suggested modifications or tests. DO NOT ship an instrument to us without prior telephone or email contact. Often the problem is a rel-atively simple one that you can solve yourself with our direction.
If it is determined by the Invitrogen Technical Service representa-tive that the instrument should be returned for repair, a Decon-tamination Certificate will be faxed to you. Once you have com-pleted the certificate, signed it, and returned it to the Invitrogen Technical Service representative, a Return Authorization number will be assigned and you will receive instructions for the return. If you are in the United States, and the instrument is under war-ranty, Invitrogen will repair or replace the unit, and pay for return shipment. If the instrument is not under warranty, Invitrogen will give you a cost estimate before repairing the unit. Repair and ship-ping costs both ways are your responsibility if the instrument is not under warranty.
If you are outside the United States and have purchased the in-strument from an authorized Invitrogen distributor, contact that distributor directly. If you purchased directly from Invitrogen, you are welcome to send the instrument for free repair within the lim-its of the warranty, using the procedure described above. If it is not under warranty, we will repair it on a time-and-materials basis. We cannot, however, pay for shipping, duties, and documentation costs outside the continental United States.
16
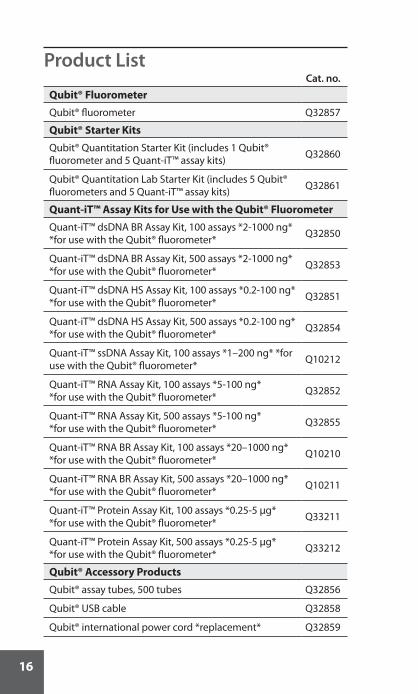
Product ListCat. no.
Qubit® Fluorometer
Qubit® fluorometer Q32857
Qubit® Starter Kits
Qubit® Quantitation Starter Kit (includes 1 Qubit® fluorometer and 5 Quant-iT™ assay kits)
Q32860
Qubit® Quantitation Lab Starter Kit (includes 5 Qubit® fluorometers and 5 Quant-iT™ assay kits)
Q32861
Quant-iT™ Assay Kits for Use with the Qubit® Fluorometer
Quant-iT™ dsDNA BR Assay Kit, 100 assays *2-1000 ng* *for use with the Qubit® fluorometer*
Q32850
Quant-iT™ dsDNA BR Assay Kit, 500 assays *2-1000 ng* *for use with the Qubit® fluorometer*
Q32853
Quant-iT™ dsDNA HS Assay Kit, 100 assays *0.2-100 ng* *for use with the Qubit® fluorometer*
Q32851
Quant-iT™ dsDNA HS Assay Kit, 500 assays *0.2-100 ng* *for use with the Qubit® fluorometer*
Q32854
Quant-iT™ ssDNA Assay Kit, 100 assays *1–200 ng* *for use with the Qubit® fluorometer*
Q10212
Quant-iT™ RNA Assay Kit, 100 assays *5-100 ng* *for use with the Qubit® fluorometer*
Q32852
Quant-iT™ RNA Assay Kit, 500 assays *5-100 ng* *for use with the Qubit® fluorometer*
Q32855
Quant-iT™ RNA BR Assay Kit, 100 assays *20–1000 ng* *for use with the Qubit® fluorometer*
Q10210
Quant-iT™ RNA BR Assay Kit, 500 assays *20–1000 ng* *for use with the Qubit® fluorometer*
Q10211
Quant-iT™ Protein Assay Kit, 100 assays *0.25-5 µg* *for use with the Qubit® fluorometer*
Q33211
Quant-iT™ Protein Assay Kit, 500 assays *0.25-5 µg* *for use with the Qubit® fluorometer*
Q33212
Qubit® Accessory Products
Qubit® assay tubes, 500 tubes Q32856
Qubit® USB cable Q32858
Qubit® international power cord *replacement* Q32859
17
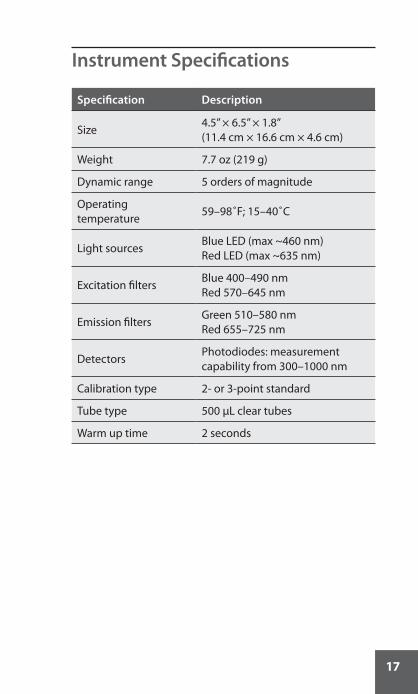
Instrument Specifications
Specification Description
Size4.5” × 6.5” × 1.8”(11.4 cm × 16.6 cm × 4.6 cm)
Weight 7.7 oz (219 g)
Dynamic range 5 orders of magnitude
Operating temperature
59–98˚F; 15–40˚C
Light sourcesBlue LED (max ~460 nm)Red LED (max ~635 nm)
Excitation filtersBlue 400–490 nmRed 570–645 nm
Emission filtersGreen 510–580 nmRed 655–725 nm
DetectorsPhotodiodes: measurement capability from 300–1000 nm
Calibration type 2- or 3-point standard
Tube type 500 µL clear tubes
Warm up time 2 seconds

©2007 Invitrogen Corporation. All rights reserved. These products may be covered by one or more Limited Use Label Licenses (see Invitrogen catalog or www.invitrogen.com). By use of these products you accept the terms and con-ditions of all applicable Limited Use Label Licenses. For research use only. Not intended for any animal or human therapeutic or diagnostic use, unless otherwise stated.O-070233-r4 US 1007
www.invitrogen.com