
Project 7 Mastering Digital Media: Audio and Video Files.
84
Project 7 Mastering Digital Media: Audio and Video Files
-
Upload
alicia-casey -
Category
Documents
-
view
232 -
download
4
Transcript of Project 7 Mastering Digital Media: Audio and Video Files.
Project 7
Mastering Digital Media:Audio and Video Files

2
Chapter Objectives
Launch Windows Media Player in full mode
Search for and play audio and video files from the Internet
Change views in Media Player
Play tracks on an audio CD
Choose a visualization and apply a skin

3
Chapter Objectives
Switch between full mode and skin mode
Understand licensing and content protection
Copy tracks from an audio CD to Media Library
Display album information and artist profile
Create and view a playlist

4
Chapter Objectives
Copy tracks to a playlist
Burn a CD using the tracks in a playlist
Listen to an Internet radio station
Launch Windows Movie Maker
Import a video file into Movie Maker

5
Chapter Objectives
Play and rename video clips
Add and edit video clips in the workspace
Preview and save a project
Save a movie
6
Project Overview
This project is an introduction to Windows Media Player and Windows Movie Maker.
Using Media Player and Movie Maker, you play music files located on the Internet, copy music from an audio CD to Media Library, burn a CD, listen to Internet radio stations, import video files into Movie Maker, play and edit video clips, preview and save a project, and save a movie.
7
Music to Go: The Digital Media Revolution
Timeline of the various music delivery media. the earliest -- car radio eight-track tape compact cassettes CDs Windows Media Player.
What is your experience with any of these older media?
What exposure have you had with to the latest media technologies (e.g., Internet radio, MP3 players, etc.)?

8
Digital Media
Digital media includes audio, video, and images
Digital media is stored in audio files, video files and picture files
A single song on an audio CD is referred to as a track.

9
Windows Media Player 9
Seven Main Features of Windows Media Player view digital media that is currently playing download and play audio and video files from the
internet copy music from an audio CD to the computer organize and play audio and video files listen to Internet radio stations copy audio files to a CD or portable music device change the visual appearance of Windows Media
Player
10
Launching: Windows Media Player 9
Click the Start button, point to All Programs on the Start menu, and then click Windows Media Player.

11
Windows Media Player 9
Full Mode allows access to the Media Player features allows you to display or not display the outer frame
Status pane displays messages
Video – copyright, playing message, video clip name, author name
Audio – copyright, transfer speed, track title, artist name
displays elapsed playing time

12
Windows Media Player 9
Hide/Show Taskbar button along the right side of the taskbar display or not display the features taskbar
Features taskbar contains seven (7) buttons along the left side
Media Guide is selected by default and the Media Guide view is displayed
Media Guide Pane WindowsMedia.com home page
Search for and play audio and video files Retrieve current news and entertainment stories Listen to radio stations Display other digital media site

13
Windows Media Player 9:Features Taskbar
14
Windows Media Player 9:Outer Frame
Outer Frame includes: Windows Media Player window Title bar Menu bar
Click the Show menu bar button to display the Windows Media Player outer frame.

15
Playlist Selection Area
Playlist Selection Area allows you to perform basic operations that you would perform if the menu bar in the outer frame were visible
16
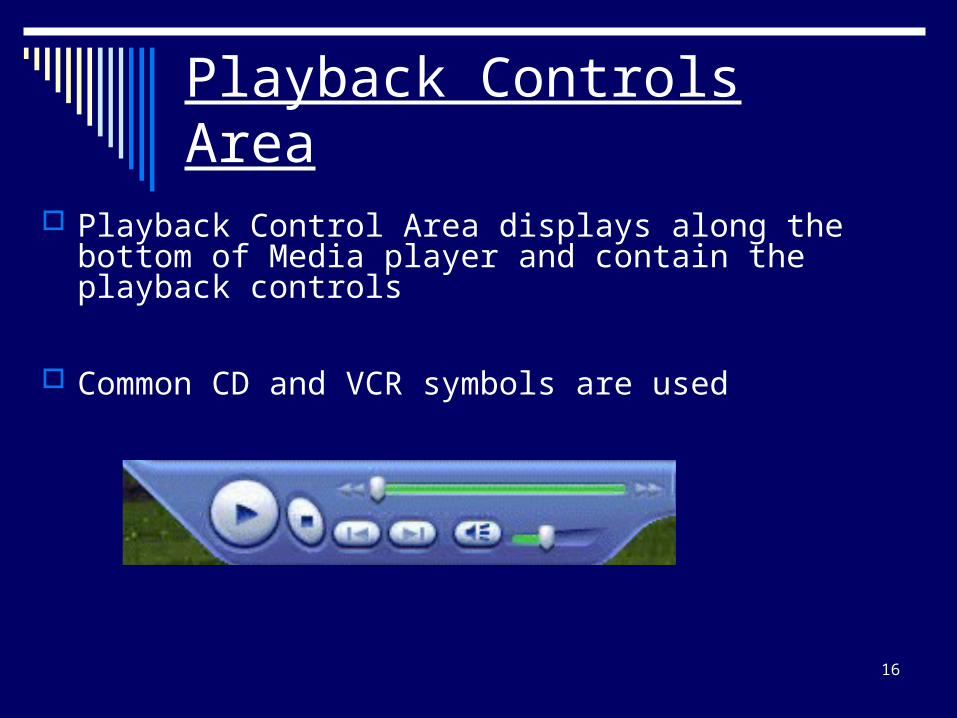
Playback Controls Area
Playback Control Area displays along the bottom of Media player and contain the playback controls
Common CD and VCR symbols are used
17
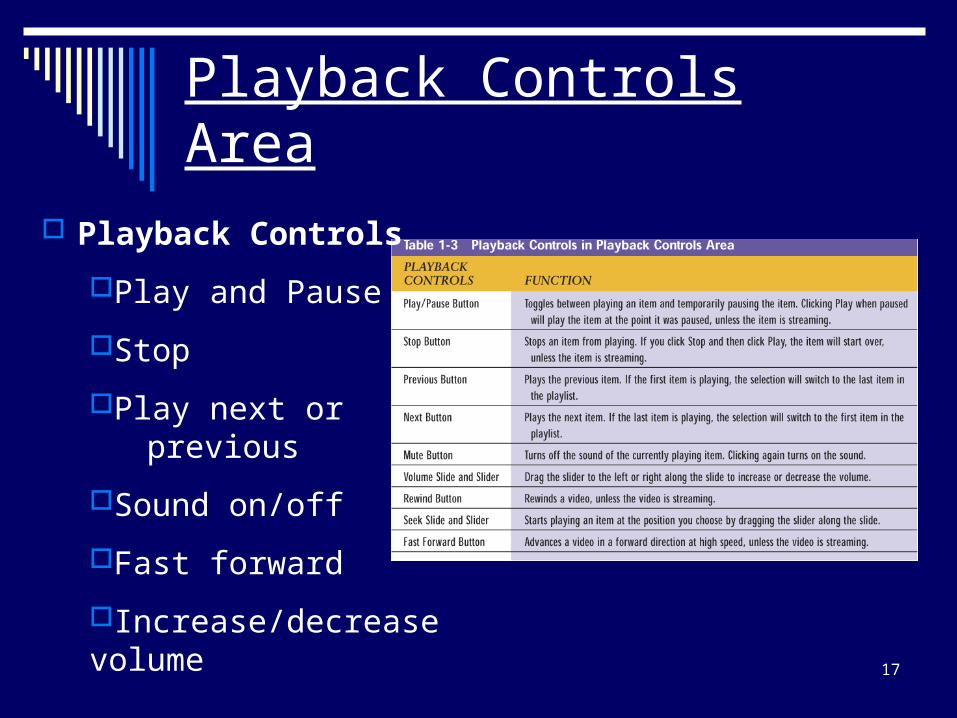
Playback Controls Area
Playback Controls
Play and Pause
Stop
Play next or previous
Sound on/off
Fast forward
Increase/decrease volume
18
Windows Media Player 9:Skin Mode
Switch to Skin Mode button
to the right of the playback controls
used to change form full mode to skin mode
Skin Mode
customize the appearance and functionality
apply visual design
odd shapes
bright colors
unusual designs
Full mode features are not available in Skin mode

19
Windows Media Player 9:Media Guide View
WindowsMedia.com icons
speaker icon identifies audio links
filmstrip icon identifies video links
Streaming – file is copied (streamed) from its location on the Internet to the computer
Streaming is a method of delivering a continuous flow of data from a Web site (server) on the Internet to another computer without interruption
Streaming allows the audio to begin playing immediately without waiting on the entire file to be received

20
Windows Media Player 9:Media Guide View
Buffer – is an area of computer memory reserved for holding data being transferred between two locations
Buffering
protects against the interruption of data flow from a Web site to the computer
is affected by the speed of the Internet connection

21
Playing a Video File on the WindowsMedia.Com Home Page
Filmstrip icon identifies each video link on the Web site
Now Playing view allows you to view the video and listen to any audio associated with the file
Locate a video link on the WindowsMedia.com home page and then point to the video link
Clicking a video link may display one or more open windows on the desktop…Do not close them…they are used in the streaming process

22
WindowsMedia.com:Now Playing View
Now playing view displays Visual pane
has three types of visual information that can display one at a time
Video Visualizations - is an animated design color of and
geometric shapes that change with the frequency and volume of the music
Album cover art
Playlist pane displays the current playlist
23
WindowsMedia.com: Playlist
A playlist is a list of links to various digital media files on a computer, network, or Internet
Current item in playlist is highlighted
Total time (minutes and seconds) to play the entire playlist displays to the right of the current item and at the bottom of the Playlist pane.
A vertical bar separates the Visual pane from the Playlist pane Drag left to right to change the size of one of the panes

24
Changing the Media Player View
Media Guide allows you can search for audio files on WindowsMedia.com page and play the audio file
Click the Media Guide button on the Features taskbar

25
Playing an Audio File on the WindowsMedia.com Home Page
Speaker icons identifies each audio link
Audio links do not change the view of Now Playing, however you can change it
Audio links may open one or more windows on the desktop

26
Playing an Audio File on the WindowsMedia.com Home Page
Visualizations are grouped into 8 collections Album art Ambience (default - Ambience: Random) Bars and Waves Battery Particle Plenoptic Spikes Musical color
Additional collections are available on the Internet
Presets are variations in the collections

27
Playing an Audio File on the WindowsMedia.com Home Page
Click the audio link on the WindowsMedia.com home page and listen to the tracks
Visual pane includes Artist name, track title, and the album name at the top of the pane Visualization plays in the middle A toolbar displays at the bottom of the pane and has three buttons
Select visualization or album art Previous visualization Next visualization
Toolbar also includes the Visualization name
Playlist pane includes An entry for artist name and album name List of tracks on the album Play length is displayed
28
Playing an Audio CD
If your computer is connected to the Internet when you play the CD your computer will connect to All Music Group through Windows Media Player to retrieve the metadata about the CD www.allmusicgroup.com
Metadata – is the information about the CD Album name, artist name, track title, track length
Insert an audio CD into the CD-ROM drive
View Full screen button expands the visualization to display across the entire desktop

29
Select a Visualization
Make the changes while the CD is playing
Right-click the Select visualization or album art button, and then click on the desired visualization
Clicking the Album Art command at the top will display the picture of the album cover in the Visual pane

30
Applying a Skin
Media Player has more than 20 skins to customize your Windows Media Player
Click the Skin Chooser button on the Features taskbar. Click the desired skin in the list of skins. Click apply.
There are three buttons at the top of the pane Apply Skin Button – apply skin and change to skin mode More Skins Button – download skins from
WindowsMedia.com Delete Button – delete a skin from the list
Switch to Full Mode – this button allows you to switch back to full mode

31
Copy from CD View
Copy from CD view allows you to: copy a single track or an entire audio CD to the computer Edit the text and picture information Read information about the artist View a list of similar artist
Default setting is digital copying (best sound) Reproduces the original sound exactly
Analog copying coverts the audio to analog to use with sound card then coverts it back to digital to be copied to the hard drive. (sound not as good)
Default setting stores files as Windows Media Audio (WMA), however, this can be changed to more popular formats (MP3)

32
Licensing and Content Protection
License is associated with a media file and protects the owner of the media against illegal distribution how media can be used time period for use
Content protection is the license that protects the use of media
Default setting is to protect content can only be played on that computer can be copied to a recordable CD
You can change the default setting, however, Windows Media Player will try to obtain the license and you may be ask to register or pay for the license.
33
Copying an Entire CD
You can copy a single track, a group of tracks, or an entire CD to the hard drive
Stored in the My Music folder and referenced to the Media Library (artist folder, album folder, tracks)
Click the Copy from CD button. Point to the Copy Music button. If the Windows Media Player dialog box appears, click the Do not protect content check box and then click the OK button. Click the Copy Music button
CD-ROM drive, Computer, and CD being used affect the speed and quality of the coping process

34
Copying an Entire CD
Toolbar contains the artist name, album name, and three buttons Copy Music – copies selected tracks from CD Get Names – searches the internet for the album name and
track titles and stores the information in Media Player Album Details – displays the album and artists information in
Media Player
Check marks indicate that a track is selected and will be copied
Status pane shows the number of tracks to be copied and the location where they will be copied.

35
Display Album Information And Artist Profile
While the tracks are being copied, point to the Album Details button
Album information includes a picture of the album cover, a list of tracks on the CD, and a review of the album
Artist Profile includes a biography of the artists, a discography (chronological listing of albums, singles, and boxed sets), and a list of related artists

36
Displaying the Folders in the My Music Folder
Click the Start button, click My Documents on the Start menu, and then double-click the My Music icon in the My Documents window
You can play any track in the folder by double-clicking its music icon. Media Player will launch and play the track

37
Media Library
Media Library organizes the audio and video files on your computer and the links to audio and video files on the Internet in a hierarchical structure
Media Library is divided into five categories Audio Video My Playlists Radio Tuner Presets Deleted Items

38
Media Library
Audio category is a database of links to audio files on the computer and the Internet and is organized into four categories All Audio Album Artists Genre – a particular style (Rock, Jazz, Classical, Country, etc.)
Video Category is a database of links to video files and is organized into two categories All Clips Author
39
Media Library
My Playlists Category contains playlists of audio and video content. create add rename delete
Radio Tuner Presets Category contains radio presets to stations on the Internet. listen to a station add and remove stations search for new stations visit web page for a station
Deleted Items Category contains deleted playlist and items deleted from a playlist and is permanently removed

40
Viewing the Media Library
Click the Media Library button on the Features taskbar. If necessary, scroll the Library Explorer pane to the left to display the contents of the pane. There are eight buttons on the toolbar
Plus sign – indicates additional folders are available
Minus sign – indicates additional folders are displayed below the icon

41
Search For and Adding Media Files to Media Library from the Hard Drive
Point to an area above the Media Player to display the Windows Media Player outer frames (window, title bar, and menu bar). Click Tools on the menu bar and then click the Search For Media Files command

42
Searching for a Track Title using the Media Library
Search button on the Media Library toolbar allows you to search the Media Library for a word or phrase in the track title, artist name, album name, genre, or file name
Click the Search button. Type the track title in the Search for items matching the wordstext box. Click the Search button in the Search Media Library dialog box. Click the View Results button

43
Expanding a Folder
Media Library displays a hierarchy of items in the Library Explorer pane and the contents of the highlighted folder in the Library Detail pane
To expand a folder click the plus sign in the small box to the left of the folder in the Library Explorer pane

44
Viewing the Contents of a Folder
To display the contents click the desired icon in the Library Explorer pane
To close the expanded folder click the minus sign to the left of the icon
Navigating the Library Explorer is an important skill to know because as your collection grows it will be easier to organize and play your files

45
Creating a Playlist
Media Library stores the tracks you select in a playlist so that they can be copied to a CD
Click the New playlist button on the toolbar. Type the desired name for the playlist in the Enter the new playlist name text box. Click the OK button
46
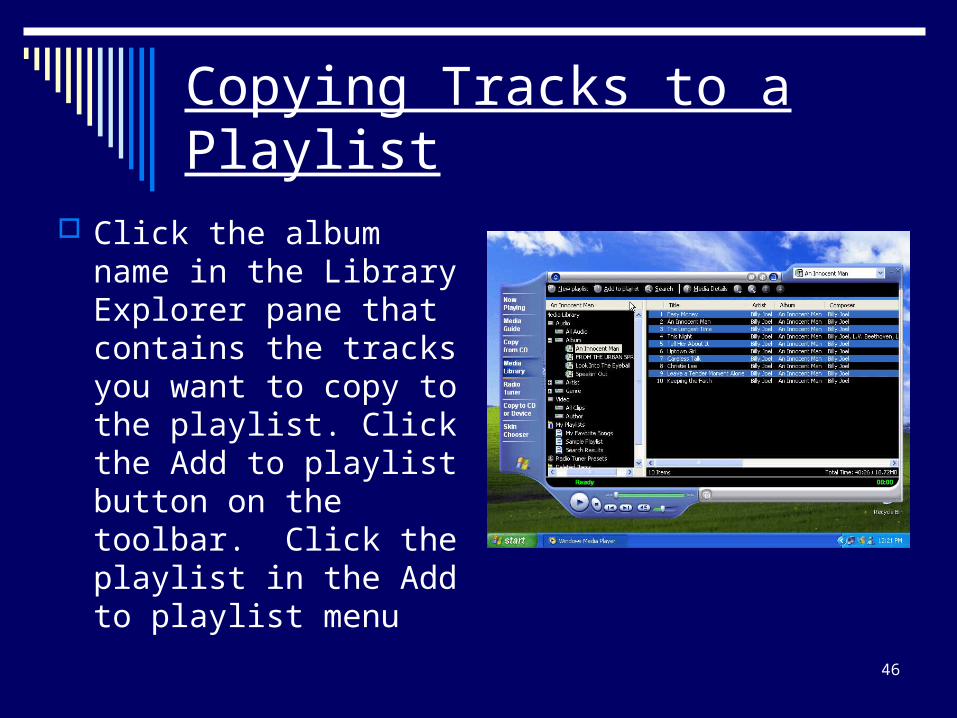
Copying Tracks to a Playlist
Click the album name in the Library Explorer pane that contains the tracks you want to copy to the playlist. Click the Add to playlist button on the toolbar. Click the playlist in the Add to playlist menu

47
Displaying the Tracks in a Playlist
Click the playlist in the Library Explorer pane
48
Copy to CD or Device View
Burning a CD is a three step process of copying tracks to a CD1. Media Player inspects each track to be copied for errors2. Media Player converts each track and then stores the
tracks in a temporary location on the computer (quality level and compression rating)
3. Media Player copies each track to the CD-R or CD-RW CD-R (recordable compact disk) – cannot change the
content - you must copy all tracks at the same time CD-RW (rewritable compact disk) – copy and delete
tracks – cannot add to used CD-RW without deleting its content first
Click the Copy to CD or Device button on the Features taskbar
49
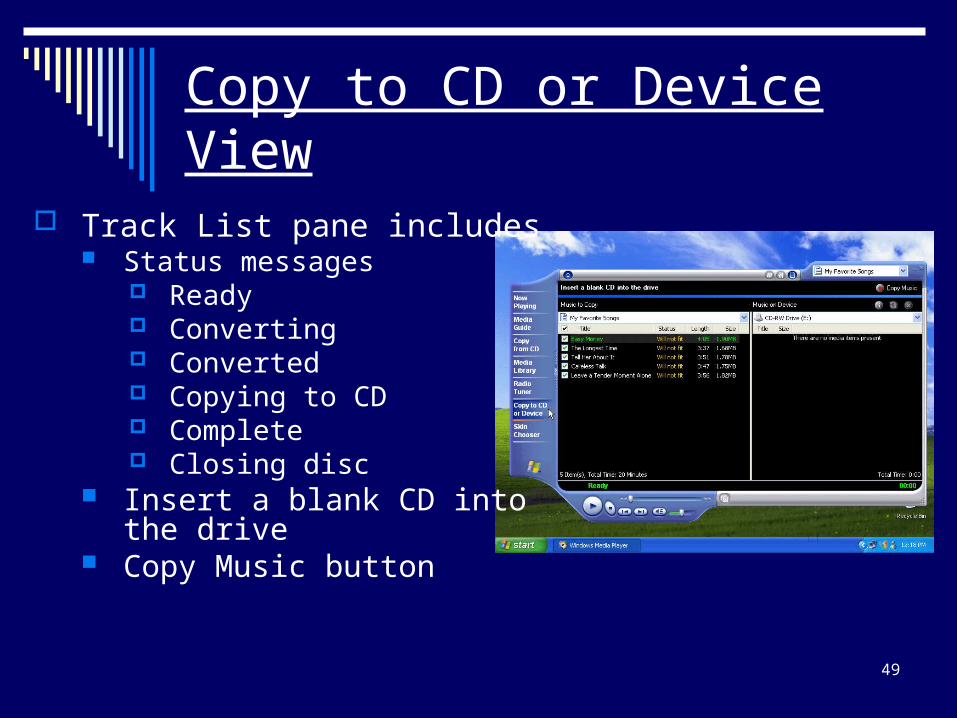
Copy to CD or Device View
Track List pane includes Status messages
Ready Converting Converted Copying to CD Complete Closing disc
Insert a blank CD into the drive
Copy Music button

50
Burning a CD using a Playlist
Insert a blank CD in the CD-ROM drive. Click the Copy Music button
The time it takes to copy depends on how many files are being copied and the speed of the CD drive

51
Portable Devices
There are several portable devices you can use to store and play audio tracks Packet and Handheld PC’s Digital Audio Players CD Recorders
The device has to be connected to the computer in order to copy tracks to them

52
Radio Tuner View
Radio Tuner view allows you to search for and play radio stations from around the world
Click the Radio Tuner button on the Features taskbar

53
Listening to a Radio Station
The default number of Radio stations is 10 in the Featured Stations area
Click the green right arrow to the left of the radio station name in the Featured Stations area to listen to that station
Click the radio station name or the double down arrow to view details about the radio station

54
Deleting a Playlist
Click the Media Library button on the Features taskbar
Select the album name in the Library Explorer pane
Select all the tracks in the Library Details pane
Click the Delete media from the playlist or library button on the toolbar
55
Deleting a Playlist
Click Delete from Library on the shortcut menu
Click the playlist in the My Playlists section in the Library Explorer pane
Click the Delete media from the playlist or library button on the toolbar
Click Delete Playlist on the shortcut menu

56
Closing Media Player
Click the Close button in Media Player

57
Windows Movie Maker
transfer recorded digital media from and analog or digital video camera to the computer
import existing audio and video files
combine audio and video clips to create a movie
edit the movie
e-mail a finished movie
post a finished movie to the World Wide Web

58
Creating a Movie
The first step in creating a movie is to record the source material
Source material is the original audio and video content recorded into Movie Maker. Stored with a .wmv file name extension
Recording is the process of converting the audio and video to the digital Windows Media format

59
Creating a Movie
Collection files is a database file that stores information about a collection and the clips in the collection. Stored with a .col file name extension
Capture device converts analog content to digital content

60
Creating a Movie
Source file is the original file that is imported into Movie Maker the three types are Audio source file name extension include .mp3 .asf
and .wma Video source file name extension
include .wmv .asf .avi and .mpg Still image source file name extension include .jpg
and .gif

61
Creating a Movie
The second step in creating a moving is to edit the project file
Project is the rough draft of a movie and is the file created when you save the results of adding various clips to the workspace
Workspace is an area in Movie Maker that contains the recorded source material

62
Creating a Movie
Editing is the process of rearranging clips, trimming clips to hide unwanted areas, creating transitions between clips and adding narration and is done in the workspace
Projects have a file name extension of .mswmm

63
Creating a Movie
The third step in creating a movie is to preview the project
You can preview a single clip or the entire project
The fourth step in creating a movie is to save the project as a movie on your hard drive and to distribute the movie by sending it in an e-mail. Movies are saved with a .wmv file name extension
Movie file is a file created by combining the audio, video, and still images contained in the project

64
Launching:Windows Movie Maker
Click the Start button, point to All Programs on the Start menu, point to Accessories, and then click Windows Movie Maker on the Accessories submenu
65
Windows Movie Maker
Standard toolbar contains buttons to start a new project, open an existing project, save a project, edit clips, delete a project and display clip properties
Project toolbar contains buttons to save a movie, send a movie, and record audio or video
Collection toolbar contains buttons to move up one level in the Collections area, add a new collection, display or remove the collections area and select a view
Location toolbar contain the Collection box

66
Windows Movie Maker
Storyboard view displays the sequence of clips in a project, allows you to look at the sequence of the clips and rearrange the clips
Timeline view displays the timing of the clips and allows you to review or modify the timing of the clips
There are five buttons to the left of the workspace in the storyboard and timeline view. Change the view Zoom in Zoom out Record narration Adjust the audio levels

67
Importing a Video into Movie Maker
Markers divides a Window Media file into manageable pieces, each of which describes a specific portion of the file or a separate event within a video
Click File on the menu bar and then click Import. Double-click the My Videos entry in the Select the File to Import dialog box. Select the Windows Movie Maker Sample File (or Sample if using the XP Home Edition) icon, and then Click the Open button

68
Renaming a Video Clip
Right-click the clip identified by the number 1. Point to Rename on the shortcut menu
Click Rename, type the new name in the icon title text box, and then press the ENTER key

69
Playing a Video Clip
Click the desired clip to select the clip and then click the Play button below the monitor

70
Adding a Collection to the Workspace
Workspace is an area in which you can work with the recorded or imported source material (clips) before saving the project
Click the Windows Movie Maker Sample File (or Sample) entry in the Collections pane of the Collections area to select the entry, click Clip on the menu bar, and then point to Add To Storyboard/Timeline

71
Editing the Project
You can add clips, remove clips, rearrange clips, trim clips to hide an unwanted segment of the clip, create the transition between two clips to move smoothly from one clip to another, and add narration that synchronizes with the clips.
You can preview the changes to the project in the monitor on the right side of the screen

72
Deleting a Clip from the Workspace
Click the desired clip on the storyboard to select the clip and then click the Delete button on the Standard toolbar

73
Rearranging and Coping a Clip in the Workspace
Right-drag the desired clip to the left along the storyboard until a black vertical bar appears to the left of the clip where you want to insert the clip on the storyboard.
Release the right mouse button.
Click copy

74
Previewing a Project
Click Play on the menu bar
Click Play Entire Storyboard/Timeline
75
Saving a Project
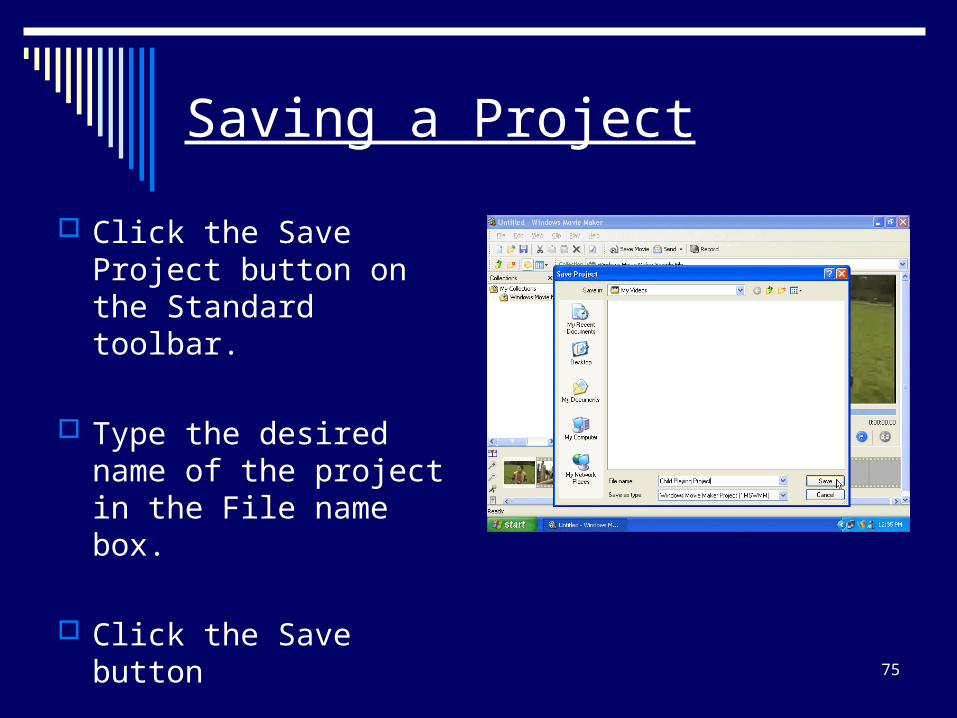
Click the Save Project button on the Standard toolbar.
Type the desired name of the project in the File name box.
Click the Save button

76
Saving a Movie
Click the Save Movie button on the Project toolbar.
Type the desired name in the Title text box.
Click the Author text box and then type your name in the Author text box.
Click the OK button in the Save Movie dialog box
Click the Save button. Click the Yes button in the Windows
Movie Maker dialog box

77
Deleting a Collection Folder, Project File, and Movie File
Click the desired File in the Collections pane
Click the Delete button on the Standard toolbar and then click the Yes button in the Windows Movie Maker dialog box
Click the Start button, point to My Documents, and then double-click the My Videos folder
Select the desired project icon and desired movie icon in the My Videos folder
78
Deleting a Collection Folder, Project File, and Movie File
Click the Delete the selected items task in the File and Folder Tasks area
Click the Yes button in the Confirm Multiple File Delete box
Close the My Videos window

79
Closing Movie Maker
Click the Close button in Movie Maker

80
Chapter Summary
Launch Windows Media Player in full mode
Search for and play audio and video files from the Internet
Change views in Media Player
Play tracks on an audio CD
Choose a visualization and apply a skin

81
Chapter Summary
Switch between full mode and skin mode
Understand licensing and content protection
Copy tracks from an audio CD to Media Library
Display album information and artist profile
Create and view a playlist
82
Chapter Summary
Copy tracks to a playlist
Burn a CD using the tracks in a playlist
Listen to an Internet radio station
Launch Windows Movie Maker
Import a video file into Movie Maker

83
Chapter Summary
Play and rename video clips
Add and edit video clips in the workspace
Preview and save a project
Save a movie
Windows XP - Project 7 - HOMEWORK
Read and complete steps for Project 7
Learn It Online # 3, page 7.69
In the Lab # 1, page 7.72 – 7.74
In the Lab # 2, page 7.74 – 7.76
In the Lab # 3, page 7.77
In the Lab # 4, page 7.78 – 7.80