Processing 2: Creative Coding Hotsh t - Packt Publishing | · PDF file ·...
31
Processing 2: Creative Coding Hotsh t Nikolaus Gradwohl Chapter No. 6 "Fly to the Moon"
Transcript of Processing 2: Creative Coding Hotsh t - Packt Publishing | · PDF file ·...

Processing 2: Creative Coding Hotsh t
Nikolaus Gradwohl
Chapter No. 6 "Fly to the Moon"

In this package, you will find: A Biography of the author of the book
A preview chapter from the book, Chapter NO.6 "Fly to the Moon"
A synopsis of the book’s content
Information on where to buy this book
About the Author Nikolaus Gradwohl was born in 1976 in Vienna, Austria, and always wanted to become an inventor like Gyro Gearloose. When he got his first Atari, he decide that becoming a computer programmer was the closest he could get to that dream. He has since made living writing programs for nearly anything that can be programmed, ranging from an 8-bit microcontroller to mainframes. In his free time, he likes gaining knowledge on programming languages and operating systems.
Nikolaus has been using Processing since 2008, and has written countless sketches and some Processing libraries.
You can see some of his work on his blog at http://www.local-guru.net/.
This is a huge thank you for my wife, Mars, and my kids for all their support, patience, and love.
I want to thank Zita, "the Spacegirl", for her feedback on the first project and on my robots.
I would also like to give a big thank you for all the help, answers, reminders to deadlines, and feedback to Amber D'souza, Kartikey Pandey, Hardik Patel, and Joel Noronha from Packt Publishing.
For More Information: www.packtpub.com/processing-2-creative-coding-hotshot/book

Processing 2: Creative Coding Hotsh t Processing is an open source programming language that was invented by Casey Reas and Benjamin Fry in 2001 for the Aesthetics and Computation group at the MIT Media Lab. The language is designed to serve as a sketchbook for visual design applications, media art, electronic arts, and teaching.
Processing 2: Creative Coding Hotshot will present you with nine exciting complete projects that will show you how to go beyond the basics and make your programs see, hear, and feel.
The projects show you how to make use of devices like a Kinect sensor board or an Arduino board in the Processing sketches.
What This Book Covers Project 1, Romeo and Juliet, will help you learn how to make some cardboard robots that perform the famous balcony scene from Shakespeare's Romeo and Juliet. We will create some talking robots using a pair of cheap speakers and some cardboard boxes, and learn how to install and use a text-to-speech library in Processing.
Project 2, The Stick Figure Dance Company, will help you in creating a dance company that is controlled using Microsoft Kinect. The dancers will be controlled using the Kinect skeletal tracking. After we have managed to control one stick figure, we will make more and more stick figures show up until we have a whole dance company, dancing the same moves the player makes.
Project 3, The Disco Dance Floor, will teach us how to play music and create a sound-reactive dance floor, since there is no dancing without music. We will learn how to use the Processingsound API to make an audio visualizer. Then we will turn the 2D visualizer into a 3D dancefloor and invite our stick figure dance company from the previous project to dance on it.
Project 4, Smilie-O-Mat, will help you in creating an application that allows the user to create a smiley that matches his or her current mood using a customized user interface. This smiley can then be posted to a social network to let your buddies know how you currently feel, because sometimes a picture tells more than 140 characters.
For More Information: www.packtpub.com/processing-2-creative-coding-hotshot/book

Project 5, The Smilie-O-Mat Controller, helps you generate a custom controller board using Arduino and use it to simplify the adjustment of the Smilie-O-Mat controller from our previous project. For the controller, we will use an Arduino board, learn how to set up a simple electronic circuit, and then how to interface it with a computer. Then we will use the input parameters generated by the controller to change the face of a smiley and post it to a social network.
Project 6, Fly to the Moon, explores the different modes Processing offers and teaches you how to export a sketch for the Web or run it as an Android app. We will create a small moon-lander-like game from scratch and learn how to adapt it to run on different hardware as well as use different input devices.
Project 7, The Neon Globe, wonders what world-domination plans would be without a spinning neon globe? Here, we will learn how to generate a rotating 3D sphere that we will turn into a spinning globe using image textures and some lighting. We will later highlight the continent borders and make them glow using a GLSL filter.
Project 8, Logfile Geo-visualizer, will help us learn how to visualize some data on the spinning globe we generated in the previous project. We will use a web server logfile as our input and learn how to parse it in Processing. Then, we will geocode the data and use the geocoordinates of the page requests to draw something on our globe.
Project 9, From Virtual to Real, will help us learn how to turn mathematics into physical objects. We will learn how to unleash the beauty of mathematical functions and use them to generate a printable object like a pen box or a flower vase. Then, we will learn how to export the object to a format that can be fed into a 3D printer.
For More Information: www.packtpub.com/processing-2-creative-coding-hotshot/book

Project 6Fly to the Moon
Ever since people got their hands on computers, they have used them for playing games. One of the fi rst games was a simulati on game named Lunar Lander, where the player had to land a lunar-landing capsule on the moon. The fi rst version was writt en in 1969 and was text-based. The fi rst graphical version of this game was writt en four years later for DEC Terminals. The moon-landing simulati on games have been ported to nearly every computer system ever since, which makes it a perfect game for our current mission, since we are going to use the Processing modes to make a game run in the browser using Processing.js and on Android devices.
Mission Briefi ngOur current mission is to create a moon-lander game . The fi rst version of the game will be a Processing sketch running on your computer like the ones we have created in the previous missions. Then, we will use the various Processing modes and make the game run in the browser using the JavaScript mode, and on Android devices using the Android mode.
For each of these modes, we will adjust the game controls to fi t the platf orm if necessary.
Why Is It Awesome?This project is awesome for two reasons: fi rst, we are writi ng a game, and this has been on the offi cial list of computer project awesomeness since the inventi on of computers, and second, we write a game that runs on your computer, your Android-powered mobile device, and in your browser. This allows us to cover nearly every Internet-capable platf orm that currently exists, from desktop computers and laptops to mobile phones, tablets, and smart TV's. When Java arrived, it made the promise of write once, run everywhere. Processing is taking this promise to the next level.
For More Information: www.packtpub.com/processing-2-creative-coding-hotshot/book

Fly to the Moon
138
Your Hotshot ObjectivesThis mission is split into four tasks. We will write a moon-lander simulati on game in the fi rst two tasks, and make it run in the browser and on Android devices in the remaining two tasks. The following is the list of objecti ves for our current task:
Drawing a sprite
Initi ati ng the landing sequence
Running your sketch in the browser
Running the game on an Android phone
Mission ChecklistThe fi rst two tasks of this mission are implemented using only Processing. In the third task, you will need a browser that supports the canvas element, like Firefox, Chrome, Safari, or Internet Explorer starti ng with Version 8.
For the last task, we will need to download and install the Android SDK, which is described in detail later.
Drawing a spriteThe fi rst task for our current mission is to create a sprite showing a spaceship and make it move and rotate on the screen. We will make use of the translate() and rotate() methods that Processing provides. We will also generate the level design for our game and generate a landing platf orm for our spaceship.
To make the game more interesti ng, these levels will be recreated every ti me the game is restarted.
Engage ThrustersLet's start creati ng the level design:
1. Create a new Processing sketch and add the setup() and draw() methods, as shown in the following code snippet:
void setup() {}
void draw() {}
For More Information: www.packtpub.com/processing-2-creative-coding-hotshot/book

Project 6
139
2. Now we set the size of the window to 300 by 300 and defi ne an array of integers, which we will use to draw our moon.
int[] moon;
void setup() { size( 300, 300 ); moon = new int[width/10+1]; for ( int i=0; i < moon.length; i++) { moon[i] = int( random( 10 )); }}
3. In our draw() method, we add a light blue grid that fi lls a white page to make it look like we made our level on a page from our mathemati cs notebook.
void draw() { background(255); stroke(200, 200, 255); for ( int i=0; i<height/10; i++) { line( 0, i*10, width, i*10); } for ( int i=0; i<width/10; i++) { line( i*10, 0, i*10, height ); }}
4. To draw our moon, we iterate over the array we initi alized in the setup() method and fi ll it with a transparent yellow color. We will add a drawMoon() method to our draw() method and create our yellow polygon using beginShape() and endShape().
void draw() { background(255); stroke(200, 200, 255); for ( int i=0; i<height/10; i++) { line( 0, i*10, width, i*10); } for ( int i=0; i<width/10; i++) { line( i*10, 0, i*10, height ); } drawMoon();}
void drawMoon() {
For More Information: www.packtpub.com/processing-2-creative-coding-hotshot/book

Fly to the Moon
140
stroke(0); fill(255, 200, 0, 60); beginShape(); vertex(0, height); for ( int i=0; i < moon.length; i++) { vertex( i * 10, height - 20 - moon[i] ); } vertex(width, height); endShape(CLOSE);}
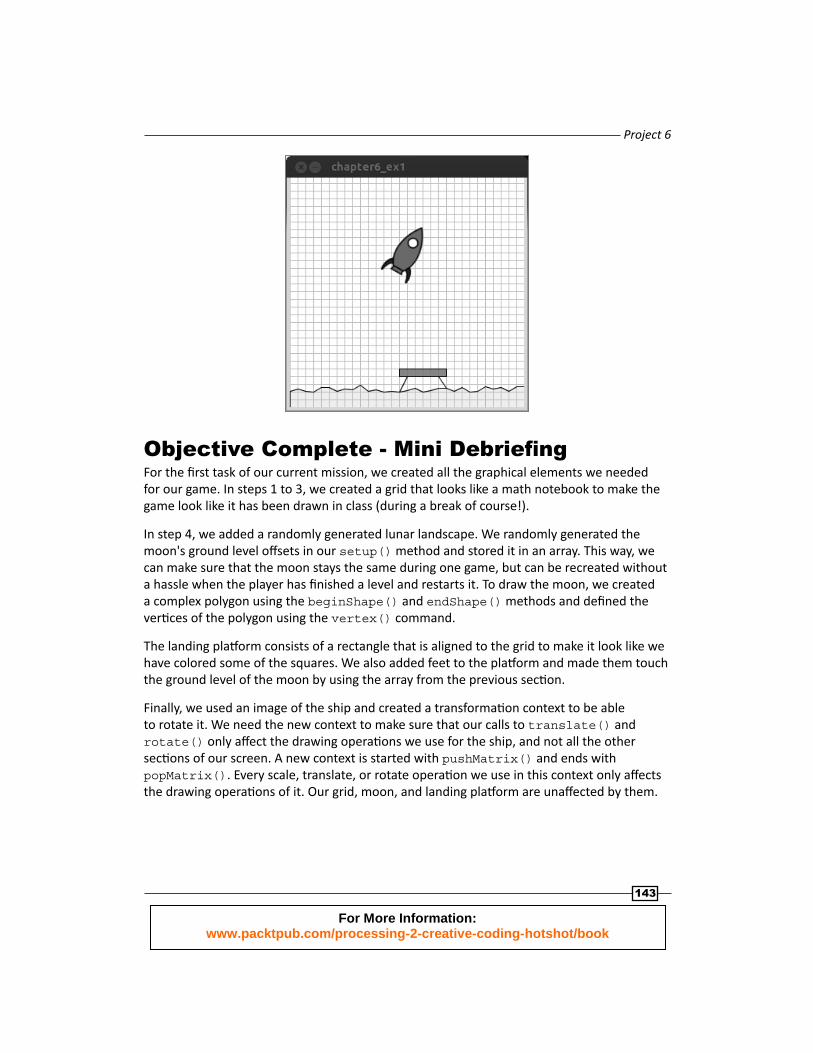
5. Run your sketch; it should look like the following screenshot:
6. In this game, the player should land a rocket on a landing platf orm. We are going to align the platf orm to the grid we created in step 3 to make it look like we colored some of the boxes of our grid. Add a variable to store the landing platf orm's x coordinate and initi alize it in the setup() method.
int[] moon;int landingX = 0;
void setup() { size( 300, 300 ); moon = new int[width/10+1]; for ( int i=0; i < moon.length; i++) { moon[i] = int( random( 10 )); } landingX = int( random(3, moon.length-4))*10;}
For More Information: www.packtpub.com/processing-2-creative-coding-hotshot/book
Project 6
141
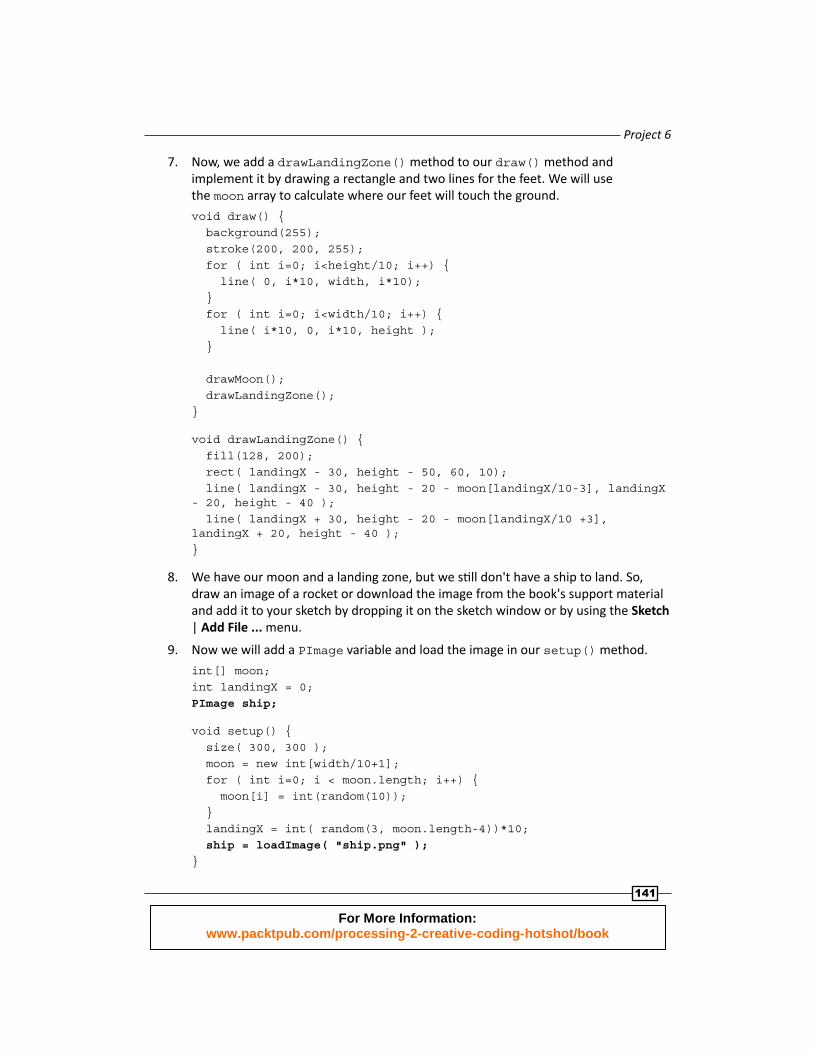
7. Now, we add a drawLandingZone() method to our draw() method and implement it by drawing a rectangle and two lines for the feet. We will use the moon array to calculate where our feet will touch the ground.
void draw() { background(255); stroke(200, 200, 255); for ( int i=0; i<height/10; i++) { line( 0, i*10, width, i*10); } for ( int i=0; i<width/10; i++) { line( i*10, 0, i*10, height ); } drawMoon(); drawLandingZone();}
void drawLandingZone() { fill(128, 200); rect( landingX - 30, height - 50, 60, 10); line( landingX - 30, height - 20 - moon[landingX/10-3], landingX - 20, height - 40 ); line( landingX + 30, height - 20 - moon[landingX/10 +3], landingX + 20, height - 40 );}
8. We have our moon and a landing zone, but we sti ll don't have a ship to land. So, draw an image of a rocket or download the image from the book's support material and add it to your sketch by dropping it on the sketch window or by using the Sketch | Add File ... menu.
9. Now we will add a PImage variable and load the image in our setup() method.
int[] moon;int landingX = 0;PImage ship;
void setup() { size( 300, 300 ); moon = new int[width/10+1]; for ( int i=0; i < moon.length; i++) { moon[i] = int(random(10)); } landingX = int( random(3, moon.length-4))*10; ship = loadImage( "ship.png" );}
For More Information: www.packtpub.com/processing-2-creative-coding-hotshot/book

Fly to the Moon
142
10. In our draw() method, add a call to a method named drawShip() and implement this method.
void draw() { background(255); stroke(200, 200, 255); for ( int i=0; i<height/10; i++) { line( 0, i*10, width, i*10); } for ( int i=0; i<width/10; i++) { line( i*10, 0, i*10, height ); } drawMoon(); drawLandingZone(); drawShip();}
void drawShip() { image(ship, 150, 100);}
11. Currently, we are able to positi on the ship where we want it by changing the x and y coordinates, but we also need to be able to rotate the ship, since in our game the player has to turn the ship and fi re the thruster to steer it to the platf orm and land as smoothly as possible. To fi x this, we will use the rotate() and translate() commands. We will also use pushMatrix() and popMatrix() to make sure our rotate() method only aff ects the image and not the whole window.
void drawShip() { pushMatrix(); translate(150, 100); rotate(PI/6); image( ship, -ship.width/2, -ship.height/2, ship.width, ship.height );
popMatrix();}
12. If you run your sketch now, the rocket is hovering above the moon at an angle of 30 degrees, but the moon, the landing platf orm, and our grid are unchanged.
For More Information: www.packtpub.com/processing-2-creative-coding-hotshot/book
Project 6
143
Objective Complete - Mini Debriefi ngFor the fi rst task of our current mission, we created all the graphical elements we needed for our game. In steps 1 to 3, we created a grid that looks like a math notebook to make the game look like it has been drawn in class (during a break of course!).
In step 4, we added a randomly generated lunar landscape. We randomly generated the moon's ground level off sets in our setup() method and stored it in an array. This way, we can make sure that the moon stays the same during one game, but can be recreated without a hassle when the player has fi nished a level and restarts it. To draw the moon, we created a complex polygon using the beginShape() and endShape() methods and defi ned the verti ces of the polygon using the vertex() command.
The landing platf orm consists of a rectangle that is aligned to the grid to make it look like we have colored some of the squares. We also added feet to the platf orm and made them touch the ground level of the moon by using the array from the previous secti on.
Finally, we used an image of the ship and created a transformati on context to be able to rotate it. We need the new context to make sure that our calls to translate() and rotate() only aff ect the drawing operati ons we use for the ship, and not all the other secti ons of our screen. A new context is started with pushMatrix() and ends with popMatrix(). Every scale, translate, or rotate operati on we use in this context only aff ects the drawing operati ons of it. Our grid, moon, and landing platf orm are unaff ected by them.
For More Information: www.packtpub.com/processing-2-creative-coding-hotshot/book

Fly to the Moon
144
Initiating the landing sequenceThe second task of our current mission is to implement the physics simulati on and the game controls for our moon-lander game. In this task, the game should able to run on desktop computers and laptops running Java. We will add keyboard controls to enable the player to turn the rocket left and right, and when the player hits the up cursor key, the thruster will fi re and accelerate the rocket a bit in the directi on it has been turned.
Engage ThrustersLet's start implementi ng the physics by adding moon gravity:
1. The fi rst thing we need to implement for our moon physics simulati on are the variables to store the ship's positi on, the directi on, the current speed, and the strength of the moon's gravity.
int[] moon;int landingX = 0;PImage ship;
PVector pos = new PVector( 150, 20 );PVector speed = new PVector( 0, 0 );PVector g = new PVector( 0, 1.622 );
2. Now we need to update the positi on of our ship at every frame, so we add an update() method to our sketch and call it from our draw() method.
void draw() { background(255); stroke(200, 200, 255); for ( int i=0; i<height/10; i++) { line( 0, i*10, width, i*10); } for ( int i=0; i<width/10; i++) { line( i*10, 0, i*10, height ); }
drawMoon(); drawLandingZone(); drawShip();
update();}
void update() {}
For More Information: www.packtpub.com/processing-2-creative-coding-hotshot/book

Project 6
145
3. We also need to change the call to the translate() command in our drawShip() method to use the new pos variable.
void drawShip() { pushMatrix(); translate(pos.x, pos.y); rotate(PI/6); image( ship, -ship.width/2, -ship.height/2, ship.width, ship.height ); popMatrix();}
4. In this update() method, we are going to implement all our physics calculati ons. So let's implement the infl uence of the gravity on our ship.
void update() { PVector gDelta = new PVector( g.x / frameRate, g.y / frameRate); speed.add( gDelta ); pos.add( speed );}
5. Since the moon's surface is quite solid, we also add a test that stops the ship once it reaches the surface.
void update() { PVector gDelta = new PVector( g.x / frameRate, g.y / frameRate); speed.add( gDelta ); pos.add( speed ); if ( pos.x > landingX - 40 && pos.x < landingX + 40 && pos.y > height-50 - ship.height/2 ) { pos.y = height - 50 - ship.height/2; } else if (pos.y > height - 20 - ship.height/2 ) { pos.y = height - 20 - ship.height/2;
}}
For More Information: www.packtpub.com/processing-2-creative-coding-hotshot/book

Fly to the Moon
146
6. Run your sketch now. The rocket should start from the top of our window, drop to the fl oor, and stop there as shown in the following screenshot:
7. Since the game is not about crashing rockets into the moon but rather about landing them, we need to implement a method to slow down the rocket. The game will be controlled using the keyboard, so let's add a variable for the accelerati on and the rotati on angle.
int[] moon;int landingX = 0;PImage ship;
PVector pos = new PVector( 150, 20 );PVector speed = new PVector( 0, 0 );PVector g = new PVector( 0, 1.622 );
float a = 0;float acc = 0;
8. Also, add a keyPressed() method to enable the player to change the rotati on and accelerati on of the rocket.
void keyPressed() { if ( keyCode == LEFT ) { a -= 0.1; } if ( keyCode == RIGHT ) { a += 0.1; } if ( keyCode == UP ) { acc += 0.04;
For More Information: www.packtpub.com/processing-2-creative-coding-hotshot/book

Project 6
147
acc = max( acc, 1/frameRate); }}
9. Now, we need to adapt our drawShip() method and use the rotati on variable to change the ship's rotati on.
void drawShip() { pushMatrix(); translate(pos.x, pos.y); rotate(a); image( ship, -20, -40, 40, 75 ); popMatrix();}
10. We also need to adapt our update() method to make the accelerati on and the rotati on angle infl uence our ship's speed and positi on.
void update() { PVector f = new PVector( cos( a+PI/2 ) * -acc, sin( a+PI/2 ) * -acc ); if ( acc > 0 ) { acc *= 0.95; } PVector gDelta = new PVector( g.x / frameRate, g.y / frameRate); speed.add( gDelta ); speed.add( f ); pos.add( speed ); if ( pos.x > landingX - 40 && pos.x < landingX + 40 && pos.y > height-50 – ship.height/2 ) { pos.y = height - 50 – ship.height/2; } else if (pos.y > height - 20 – ship.height/2 ) { pos.y = height - 20 – ship.height/2; }}
11. Our ship can now be turned and also reacts to the accelerati on commands. Now, we add some code to the drawShip() method to make fl ames come out of the thruster when the user accelerates the ship.
void drawShip() { pushMatrix(); translate(pos.x, pos.y);
For More Information: www.packtpub.com/processing-2-creative-coding-hotshot/book

Fly to the Moon
148
rotate(a); noFill(); for ( int i=4; i >= 0; i--) { stroke(255, i*50, 0); fill(255, i*50, 20); ellipse( 0, 30, min(1, acc*10) *i*4, min(1, acc*10)* i*10); }
image( ship, -ship.width/2, -ship.height/2, ship.width, ship.height ); popMatrix();}
12. Aft er the ship has landed on the platf orm or crashed to the moon surface, the game can only be played again by restarti ng the sketch. We are now going to fi x this by adding a game state to our sketch. Add a variable named state to store the current state and defi ne three constants named WAITING, RUNNING, and FINISHED. We initi alize the state variable to WAITING and extract the level generati on code from our setup() method to a method called reset().
int[] moon;int landingX = 0;
PVector pos = new PVector( 150, 20 );PVector speed = new PVector( 0, 0 );PVector g = new PVector( 0, 1.622 );
float a = 0;float acc = 0;
PImage ship;
int WAITING =1;int RUNNING = 2;int FINISHED = 3;
int state = WAITING;
void setup() { size(300, 300); ship = loadImage( "ship.png" ); reset();}
void reset() {
For More Information: www.packtpub.com/processing-2-creative-coding-hotshot/book

Project 6
149
moon = new int[width/10+1]; for ( int i=0; i < moon.length; i++) { moon[i] = int(random(10)); } landingX = int( random(3, moon.length-4))*10; pos = new PVector( 150, 20 ); a = 0; acc = 0; speed = new PVector(0,0);}
13. In our draw() method, we will check the state variable and only call the update() method when the state is RUNNING. We will also add the drawWaiting() and drawFinished() methods that get called in the corresponding states.
void draw() { background(255); stroke(200, 200, 255); for ( int i=0; i<height/10; i++) { line( 0, i*10, width, i*10); } for ( int i=0; i<width/10; i++) { line( i*10, 0, i*10, height ); } drawMoon(); drawLandingZone(); drawShip(); if ( state == WAITING ) { drawWaiting(); } else if ( state == RUNNING ) { update(); } else if ( state == FINISHED ) { drawFinished(); }}
void drawWaiting() { textAlign( CENTER ); fill(0);
For More Information: www.packtpub.com/processing-2-creative-coding-hotshot/book

Fly to the Moon
150
text( "Click mouse to start", width/2, height/2);}
void drawFinished() { textAlign( CENTER ); fill( 0 ); if ( pos.x > landingX - 40 && pos.x < landingX + 40 ) { text( "you landed the ship!", width/2, height/2); } else { text( "you missed the platform!", width/2, height/2); } text( "click to restart", width/2, height/2 + 20 );}
14. Now we add a mouseClicked() method that changes the state to RUNNING if the state was WAITING or FINISHED. In the latt er case, we also call the reset() method we created in step 12 to generate a new level.
void mousePressed() { if ( state == WAITING ) { state = RUNNING; } else if ( state == FINISHED ) { reset(); state = RUNNING; }}
15. In our update() method, we change the state of the game to FINISHED if our rocket lands on the platf orm or crashes to the moon surface.
void update() { PVector f = new PVector( cos( a+PI/2 ) * -acc, sin( a+PI/2 ) * -acc ); if ( acc > 0 ) { acc *= 0.95; }
PVector gDelta = new PVector( g.x / frameRate, g.y / frameRate);
speed.add( gDelta ); speed.add( f ); pos.add( speed );
if ( pos.x > landingX - 40 && pos.x < landingX + 40 && pos.y > height-50 - ship.height/2 ) { pos.y = height - 50 - ship.height/2; state = FINISHED;
For More Information: www.packtpub.com/processing-2-creative-coding-hotshot/book

Project 6
151
acc = 0; } else if (pos.y > height - 20 - ship.height/2 ) { pos.y = height - 20 - ship.height/2; state = FINISHED; acc = 0; } }
16. Run your sketch now and try to land the rocket on the platf orm by using the arrow keys. Your game window should look as shown in the following screenshot when the rocket is accelerated:
Objective Complete - Mini Debriefi ngIn this task of our current mission, we have completed the game for desktop and laptops running Mac OS X, Linux, or Windows. From step 1 to step 5, we implemented moon gravity to our sketch and made the rocket drop to the ground. We used a very simple physics simulati on that adds a fracti on of the moon's gravitati onal force to a speed variable at every frame and then adds the updated speed to the current positi on.
From step 6 to step 10, we implemented another force that infl uences our ship by implementi ng some keyboard control, allowing the player to turn the ship and to fi re the thruster. We also made some fl ames come out of the thruster in step 11 to give some visual clues to the player on how strong the rocket is being accelerated.
Starti ng with step 12, we implemented a game-state system to prevent the rocket from dropping to the fl oor as soon as the game has been started. It also enables the player to restart the game aft er the rocket has landed on the platf orm or crashed to the moon by clicking on the program window.
For More Information: www.packtpub.com/processing-2-creative-coding-hotshot/book

Fly to the Moon
152
Running your sketch in the browserThe next task of our current mission is to take the game we have created in the previous task and make it run in the browser using JavaScript. We will use the Processing.js mode to make our script run and we will create a customized HTML template for our game. The Processing.js mode allows us to run sketches that don't use any external libraries with litt le to no change in a modern browser.
Engage ThrustersLet's convert the game to a browser applicati on:
1. Open our sketch and switch from the Processing mode to the JavaScript mode by clicking on the icon above the New Tab icon and selecti ng JavaScript , as shown in the following screenshot:
2. Now run the sketch. Processing starts a small web server in the background and opens the default browser with an HTML page running our game. This following screenshot shows the game running in a Firefox browser:
For More Information: www.packtpub.com/processing-2-creative-coding-hotshot/book

Project 6
153
3. Processing.js is implementi ng a litt le workaround to make the image loading work. If we run our code as it is, it works perfectly on a local machine or on a very fast Internet connecti on, but we can make things easier for Processing by acti vati ng the preloading of the images we need. Click on the JavaScript | Playback Setti ngs (Directi ves) menu, and then on the dialog that opens click on the scan butt on next to "preload": images, as shown in the following screenshot:
For More Information: www.packtpub.com/processing-2-creative-coding-hotshot/book

Fly to the Moon
154
4. We also check the "pauseOnBlur" checkbox to make our sketch pause when the browser window is switched to the background and loses the focus, since we don't want the player's rockets to crash into the moon just because another applicati on window opened a dialog.
5. Aft er we click on OK, Processing inserts a comment at the beginning of our sketch and defi nes some directi ves for Processing.js, which are ignored by the other Processing modes.
6. When we run our sketch in the Processing.js mode, Processing generates an HTML page and draws the program's output on a canvas element. This HTML page is generated from a default template. We are now going to edit this template and add a litt le PNG graphic with a star patt ern as our background image. So, click on the JavaScript | Start Custom Template menu to generate a copy of the template for our program.
7. Now, click on the JavaScript | Show Custom Template menu to open the folder containing the template Processing uses for the HTML page.
8. We need an image we can use as our background, so either create a black image with white dots, or download my version from the book's support fi le at www.packtpub.com/support and drop it into the template folder next to the template.html and procesing.js fi les.
9. Open the template.html fi le using a text editor of your choice. The template.html fi le is a normal HTML fi le containing some special placeholder variables that get replaced by Processing when the sketch gets started. Find the CSS secti on at the beginning of the fi le and add a background directi ve to the style defi niti on of the body element.
body { background-color: #333; color: #bbb; line-height: normal; font-family: Lucida Grande, Lucida Sans, Arial, Helvetica Neue, Verdana, Geneva, sans-serif; font-size: 11px; font-weight: normal; text-decoration: none; line-height: 1.5em; background-image:url('stars.png'); }
10. Save the template and run the sketch again. The background of our HTML page is now sprinkled with stars like a cloudless night, as shown in the following screenshot—perfect for fl ying to the moon:
For More Information: www.packtpub.com/processing-2-creative-coding-hotshot/book
Project 6
155
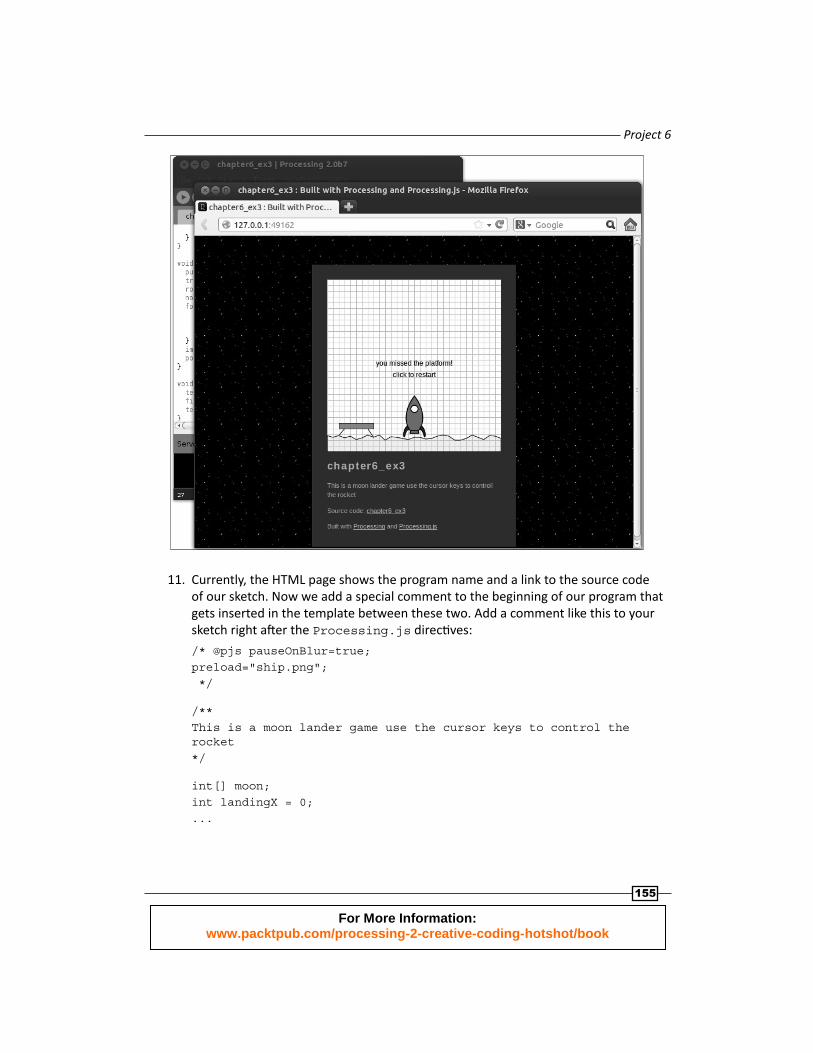
11. Currently , the HTML page shows the program name and a link to the source code of our sketch. Now we add a special comment to the beginning of our program that gets inserted in the template between these two. Add a comment like this to your sketch right aft er the Processing.js directi ves:
/* @pjs pauseOnBlur=true;preload="ship.png"; */
/**This is a moon lander game use the cursor keys to control the rocket*/
int[] moon;int landingX = 0;...
For More Information: www.packtpub.com/processing-2-creative-coding-hotshot/book

Fly to the Moon
156
12. When we have tested our JavaScript version and are sure that everything works as expected, we want to export the sketch so that we can deploy it on a web server. Save the sketch and click on the File | Export menu. Processing generates a folder named web-export containing all the fi les that need to be installed on a web server if you want to share your sketch with the world.
Objective Complete - Mini Debriefi ngOur current task for this mission was to run the moon-lander game in the browser using Processing's JavaScript mode, which was accomplished in step 1 and 2. For some tasks, like loading images, Processing.js has to rely on the network handling of the browser, which might cause delays in our sketch when we load an image for the fi rst ti me. Fortunately, Processing.js provides a method to preload our image before the sketch gets started, which we acti vated from step 3 to step 5.
Starti ng with step 6, we changed the HTML template where Processing embeds our sketch when we run or export it. We acti vated a custom template for our game and added a background image to the style defi niti on of our template's CSS secti on.
Finally, we exported the sketch and all the needed fi les to enable the installati on on a real web server.
Running the game on an Android phone
Our fi nal task of this mission is to make our moon-lander game run on Android devices. We will install the Android SDK and use the Android mode of Processing to turn our game into an Android app. We will use the Android emulator and make the sketch run on devices connected via USB. Since most Android devices come without a keyboard but do have a touch screen, we will adapt our game controls and then run in full-screen mode.
For More Information: www.packtpub.com/processing-2-creative-coding-hotshot/book

Project 6
157
Engage ThrustersLet's convert the game to an Android app:
1. Go to http://developer.android.com/sdk/index.html and download the Android SDK for your computer. We don't need the bundled version that comes with Eclipse. Since we already have an IDE (Processing), we need to scroll down to the SDK Tools Only secti on and download the SDK package for our operati ng system.
2. Unpack the downloaded fi le and run the Android command from the tools folder.
3. Processing creates apps that run on Android starti ng with Version 2.3.3, since this was the fi rst Android version with a hardware-accelerated OpenGL support. So let's select the SDK package and the Google API for this platf orm. If you are using Windows, you also need the Google USB driver package from the Extras folder. Linux and Mac OS X need no special driver. Select the packages as shown in the following screenshot and click on Install:
4. Now we need to tell Processing where it can fi nd the Android SDK. Open our Processing game and switch to the Android mode on the right. When you do this for the fi rst ti me, Processing asks you where it can fi nd the Android SDK, so point it to the folder you have unpacked in step 2. A detailed install instructi on can be found in the Processing wiki at http://wiki.processing.org/w/Android.
For More Information: www.packtpub.com/processing-2-creative-coding-hotshot/book

Fly to the Moon
158
5. We are now going to run our sketch in an emulator. Click on the Sketch | Run in Emulator menu item. Processing now compiles the sketch to an Android app, creates a virtual device for the Android emulator, and then starts it. Since starti ng the Android emulator can take a while, especially when it's run for the fi rst ti me, it's possible that you get a ti meout error. In this case, simply repeat the step. Aft er a while, you should see our sketch running in an emulator window like this:
For More Information: www.packtpub.com/processing-2-creative-coding-hotshot/book

Project 6
159
6. On a mobile device, applicati ons usually run in full-screen mode since there are now windowing systems. We will now tell our sketch to make use of the enti re screen. We also tell our sketch to run in landscape mode by using the orientation() method.
void setup() { size(displayWidth,displayHeight); orientation(LANDSCAPE); ship = loadImage( "ship.png" ); reset();}
7. Now the sketch runs in full-screen mode, but it is sti ll unplayable on most Android devices because very few of them come with a hardware keyboard. To fi x this, we need to implement controls that can be used with a touchscreen. The Android mode maps touch events to the mouse handling callbacks, so all we have to do is add some code to our mousePressed() method to control the ship. If our player touches the bott om third of the screen, we fi re the thruster. If the upper part of the screen gets touched, we turn the ship left or right.
void mousePressed() { if ( state == WAITING ) { state = RUNNING; } else if ( state == RUNNING ) { if ( mouseY > height * 2 / 3) { acc += 0.04; acc = max( acc, 1/frameRate); } else if ( mouseX < width / 2 ) { a -= 0.1; } else { a += 0.1; } } else if ( state == FINISHED ) { reset(); state = RUNNING; }}
For More Information: www.packtpub.com/processing-2-creative-coding-hotshot/book

Fly to the Moon
160
8. Run the sketch in the emulator again by clicking on the Sketch | Run in Emulator menu, and then play the game by clicking on the window.
9. With Processing in the Android mode, we can run our sketches on hardware devices too. So, if you have a mobile phone or a tablet running on Android, you can connect them to your computer using an USB cable and enable USB debugging in the Developer opti ons secti on of your phone setti ngs. Now you can run the sketch on the device by clicking on the Sketch | Run on Devices menu. Here is a picture of my mobile phone running the moon-lander game:
Objective Complete - Mini Debriefi ngFor this task of our current mission, we made our moon-lander game run on Android devices. From step 1 to step 4, we downloaded and installed the Android SDK, which is needed by Processing to compile the Android apps. We then made the game run in an emulator.
In step 6, we tweaked our code a litt le bit to make the game run in full-screen mode and to fi x the device orientati on to landscape mode. Since most Android devices come without a keyboard, we also added support for touchscreen input.
Finally, we made our app run on a real device.
Classifi ed IntelThe Android mode also allows you to export your sketch as an Android project that can be used to create a signed APK fi le that can then be used to upload the app to Google Play or if you want to distribute it on your own. You can fi nd detailed instructi ons on how to do this in the Processing Wiki at http://wiki.processing.org/w/Android#Distributing_Apps.
For More Information: www.packtpub.com/processing-2-creative-coding-hotshot/book

Project 6
161
Mission AccomplishedFor this mission, we created a moon-lander simulati on game and made it run in the browser using the Processing's JavaScript mode and on Android devices using the Android mode.
In the fi rst task, Drawing a sprite, we created the graphics for the game starti ng with a background grid to make the game look like it's drawn on a mathemati cs notebook. We then added a moon landscape and a landing platf orm. The rocket has to be able to move and rotate, so we used the pushMatrix() and popMatrix() methods to separate the translati ng and rotati on operati ons we want to perform on the image form the rest of the drawing code.
In the second task, Initi ati ng the landing sequence, we implemented the physics and the controls for our game. We started by adding a vector for the moon's gravity and one for the rocket's speed. For every frame, the gravity infl uences the speed of the ship, which in turn infl uences the rocket's positi on.
Then we implemented a keyPressed() method and enabled the player to rotate and accelerate the rocket. The accelerati on is also added to the speed vector of the rocket.
Finally, we implemented a game loop and stopped the game when the rocket hits the moon or lands on the platf orm.
In the third task, Running your sketch in the browser, we used the Processing's JavaScript mode to create a JavaScript version that runs in the browser. We acti vated the image preloading to ensure the image for our rocket is available as soon as the game starts, and we learned how to change the HTML template where our sketch is embedded.
In the fi nal task, Running the game on an Android phone, we created an Android app from our game by using the Processing's Android mode. We installed the Android SDK and the necessary APIs. We adapted our code a litt le bit to make the app run in full-screen mode and we also fi xed the rotati on to landscape.
To make the game playable on a device without a keyboard, we had to change the game controls to support touchscreens.
For More Information: www.packtpub.com/processing-2-creative-coding-hotshot/book

Fly to the Moon
162
You Ready to go Gung HO? A Hotshot Challenge
We created a nice litt le casual game for this example, which is playable, but can be extended and completed in various ways, like for example:
Calculate scores for the landings using the speed and the landing angle
Create a high score list
Use the ti lt sensor of an Android device for controlling the rocket
Limit the fuel the player has available for the landing
Try to make the moon surface circular and calculate the positi on of the landing platf orm using polar coordinates
Use an Android device as a game controller for the desktop version of the game
For More Information: www.packtpub.com/processing-2-creative-coding-hotshot/book

Where to buy this book You can buy Processing 2: Creative Coding Hotsh t from the Packt Publishing website: http://www.packtpub.com/processing-2-creative-coding-hotshot/book. Free shipping to the US, UK, Europe and selected Asian countries. For more information, please read our shipping policy.
Alternatively, you can buy the book from Amazon, BN.com, Computer Manuals and most internet book retailers.
www.PacktPub.com
For More Information: www.packtpub.com/processing-2-creative-coding-hotshot/book