Printing to Windows Shares from xPrintServer using...
13
Printing to Windows Shares from xPrintServer using IPP/HTTP Scenario: User has a printer connected directly to a Windows Server 2003 or 2008 server and wants to print to it from an iOS device using the xPrintServer. Solution: Use Internet Printing support in Windows Server. Method: Note: It is easier to set this up if the printer set up in Windows has a share name that is only one word with no spaces. The setup differs slightly between Windows Server 2003 and 2008. In 2003, the print services are added within the IIS installation. In Windows 2008, Print Services are added separately as a Role. For Windows Server 2003, start with this article to set up IIS with print services: http://support.microsoft.com/kb/323428 To configure the appropriate security settings, open the IIS Manager and do the following: 1. Open IIS 2. Expand the Server menu
Transcript of Printing to Windows Shares from xPrintServer using...
Printing to Windows Shares from xPrintServer using IPP/HTTP
Scenario: User has a printer connected directly to a Windows Server 2003 or 2008 server and wants to print to it from an iOS device using the xPrintServer.
Solution: Use Internet Printing support in Windows Server.
Method: Note: It is easier to set this up if the printer set up in Windows has a share name that is only one word with no spaces. The setup differs slightly between Windows Server 2003 and 2008. In 2003, the print services are added within the IIS installation. In Windows 2008, Print Services are added separately as a Role.
For Windows Server 2003, start with this article to set up IIS with print services: http://support.microsoft.com/kb/323428 To configure the appropriate security settings, open the IIS Manager and do the following:
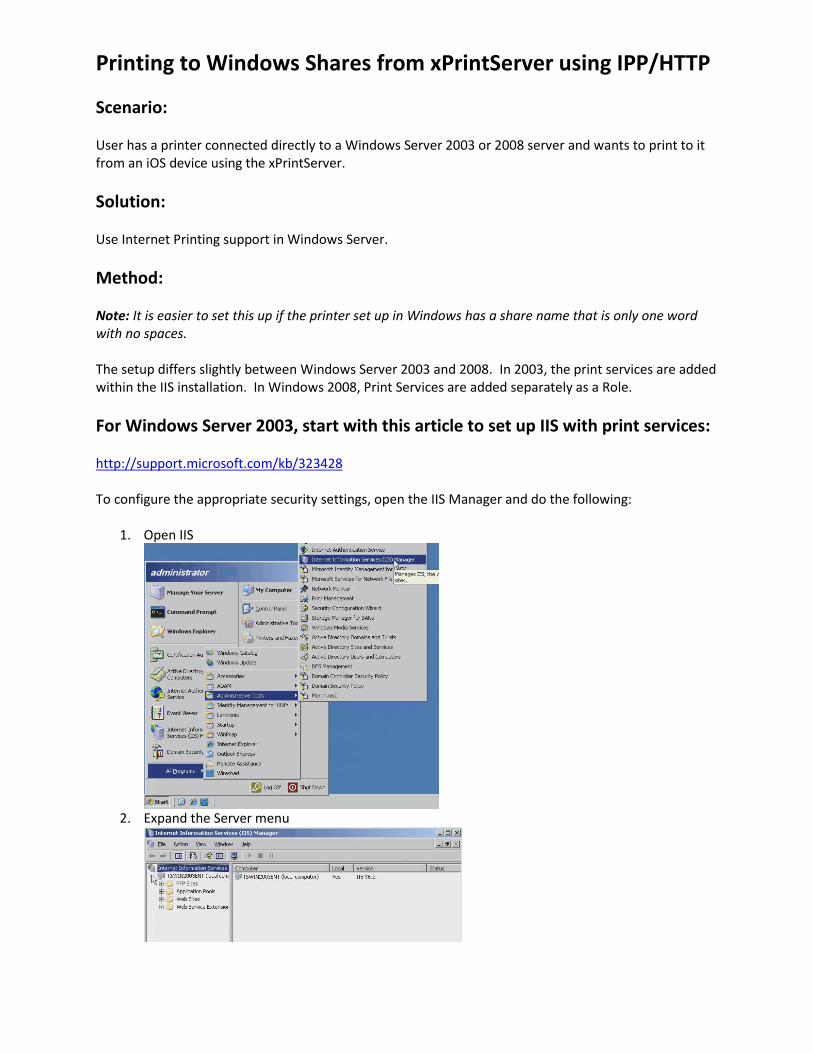
1. Open IIS
2. Expand the Server menu
Printing to Windows Shares from xPrintServer using IPP/HTTP
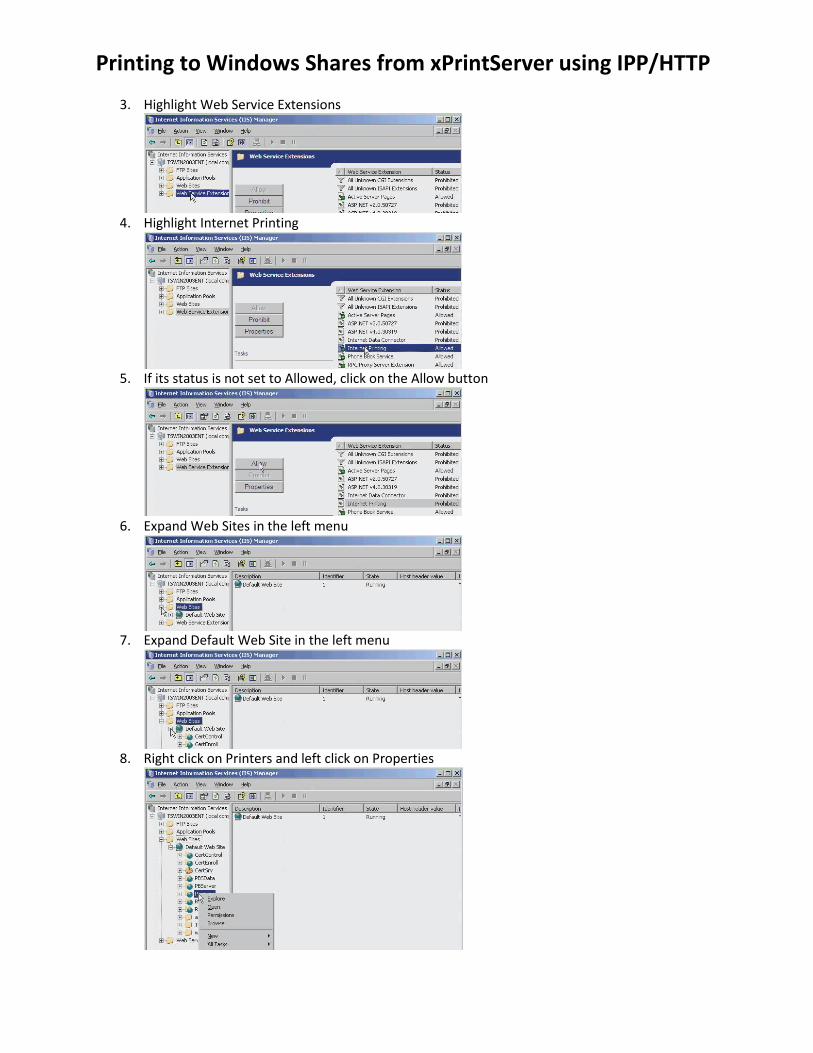
3. Highlight Web Service Extensions
4. Highlight Internet Printing
5. If its status is not set to Allowed, click on the Allow button
6. Expand Web Sites in the left menu
7. Expand Default Web Site in the left menu
8. Right click on Printers and left click on Properties

Printing to Windows Shares from xPrintServer using IPP/HTTP
9. Click on the Directory Security tab
10. Click on the Edit button under Authentication and access control
11. Check the box next to Enable anonymous access
12. Enter a valid username that is configured on the Windows server 13. Enter the user’s password (it will prompt you later re-enter the password as confirmation)

Printing to Windows Shares from xPrintServer using IPP/HTTP
14. Under Authenticated access, Integrated Windows authentication should be checked
15. Click on OK and then on OK in the next window
Windows Server 2008 is a bit different. IIS and Print Services are added separately.
1. In the Server Manager, make sure that both IIS and Print Services Roles are added
2. Make sure Internet Printing is installed as one of the Role Services under Print Services
3. To set the security on Windows Server 2008, in Server Manager, expand Roles in the left menu

Printing to Windows Shares from xPrintServer using IPP/HTTP
4. Expand Web Server (IIS)
5. Click on Internet Information Services
6. In the panel to the right of the far left panel, expand the server name
7. Expand Sites
8. Expand Default Web Sites

Printing to Windows Shares from xPrintServer using IPP/HTTP
9. Right click on Printers
10. Mouse over Manage Virtual Directory
11. Click on Advanced Settings

Printing to Windows Shares from xPrintServer using IPP/HTTP
12. Click on the field next to Physical Path Credentials
13. Click on the box containing … that appears on the right side of the field
14. Select the button next to Specific User and click on the Set… button
15. Enter a valid Windows username 16. Enter the username’s password twice
17. Click on OK 18. Click on OK 19. Click on the Printers folder you right clicked on earlier, double-click on the Authentication icon
to the right under IIS
20. Highlight Anonymous Authentication, then click on Enable under Actions to the right

Printing to Windows Shares from xPrintServer using IPP/HTTP
21. You can now exit out of the Server Manager
To manually add the printer in the xPrintServer:
1. Open a web browser session to the IP address of the Windows server and the directory /Printers, so the address looks something like this:
a. http://172.18.22.16/Printers
2. Click on the printer you wish to add to the xPrintServer
3. Click on Properties in the left menu
Printing to Windows Shares from xPrintServer using IPP/HTTP
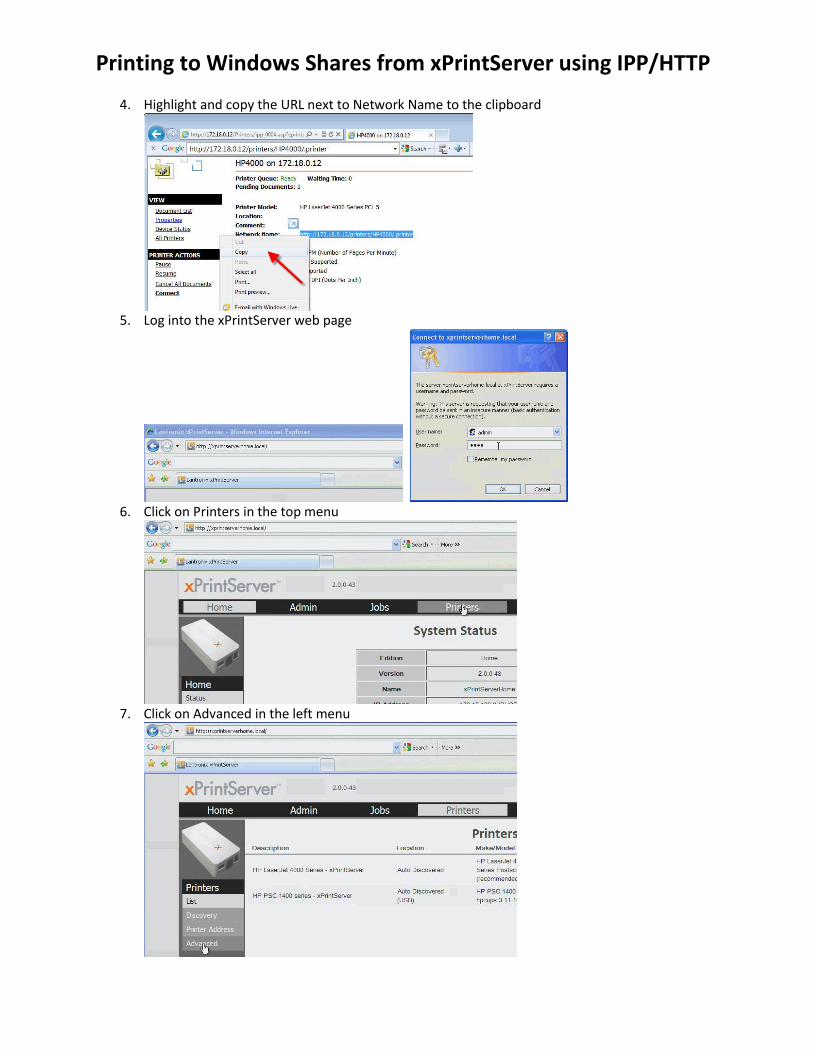
4. Highlight and copy the URL next to Network Name to the clipboard
5. Log into the xPrintServer web page
6. Click on Printers in the top menu
7. Click on Advanced in the left menu

Printing to Windows Shares from xPrintServer using IPP/HTTP
8. Click on the Manually Add Printer button
9. From the available selections, click on the button next to Internet Printing Protocol (http)
10. Click on Continue
11. In the field at the top, http will already be entered
Printing to Windows Shares from xPrintServer using IPP/HTTP
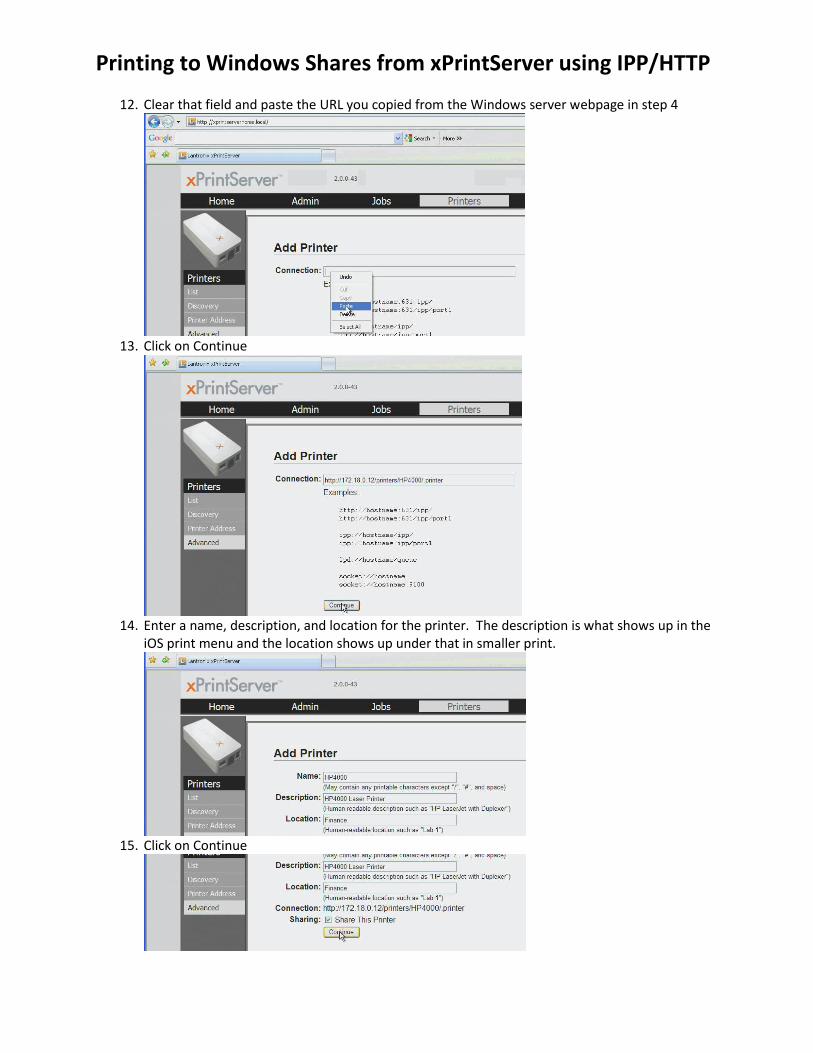
12. Clear that field and paste the URL you copied from the Windows server webpage in step 4
13. Click on Continue
14. Enter a name, description, and location for the printer. The description is what shows up in the
iOS print menu and the location shows up under that in smaller print.
15. Click on Continue

Printing to Windows Shares from xPrintServer using IPP/HTTP
16. Highlight the appropriate manufacturer under Make
17. Click on Continue
18. Highlight the appropriate model

Printing to Windows Shares from xPrintServer using IPP/HTTP
19. Click on Add Printer
20. Click on List in the left menu to make sure the printer has been added
21. Try a test print job directly from iOS