PRIMA’S OFFICIAL STRATEGY GUIDE - I Ate Your Baby Prima's Official Strategy... · No part of this...
170
PRIMA’S OFFICIAL STRATEGY GUIDE Joe Grant Bell ™
Transcript of PRIMA’S OFFICIAL STRATEGY GUIDE - I Ate Your Baby Prima's Official Strategy... · No part of this...

PRIMA’S OFFICIAL STRATEGY GUIDE
Joe Grant Bell
™

COMING IN M ARCH.
WWW.STARSIEGE.COM
© 1999 Sierra On-Line, Inc. All rights reserved. Starsiege is a trademark of Sierra On-Line, Inc.
Prima’s Official Strategy GuideJoe Grant Bell
Prima PublishingRocklin, California(916) 632-4400
www.primagames.com® and Prima Publishing® are registered trademarks of Prima Communications, Inc.
© 1999 by Prima Publishing. All rights reserved. No part of this book may be reproduced or transmitted in any form or by any means, electronic ormechanical, including photocopying, recording, or by any information storage or retrieval system without written permission from Prima Publishing, except for the inclusion of quotations in a review.
Project Editors: Jennifer Crotteau, David Mathews
Starsiege game© 1999 Sierra On-Line, Inc., Bellevue, WA 98007. Sierra, the “S” logo, Dynamix, Starsiege and the Starsiege icon are trademarks orregistered trademarks of Sierra On-Line, Inc. All Rights Reserved.
All products and characters mentioned in this book are trademarks of their respective companies.
Important:Prima Publishing has made every effort to determine that the information contained in this book is accurate. However, the publisher makes nowarranty, either expressed or implied, as to the accuracy, effectiveness, or completeness of the material in this book; nor does the publisher assume liability for damages, either incidental or consequential, that may result fromusing the information in this book. The publisher cannot provide information regarding game play, hints and strategies, or problems with hardware orsoftware. Questions should be directed to the support numbers provided by the game and device manufacturers in their documentation. Some gametricks require precise timing and may require repeated attempts before the desired result is achieved.
Library of Congress Catalog Card Number: 98-67759Printed in the United States of America
AcknowledgmentsThanks to the following people for their help with this book:
Scott Youngblood for showing off the game and answering numerous questions;
David Peterson for answering still more questions;
Jeff Hoff for introducing me to the game;
Shannon Bross for keeping me up to date;
Jennifer Crotteau for putting the book together;
Amy Raynor for assigning me the book in the first place;
Susan De Cicco for standing still while I shot at her;
And the Tribes team and beta testers for beating me badly enough to make me look for better strategies.
Special thanks to Tim Gift

I
ContentsChapter 1: Tribes–An Overview . . . . . . . . . . . . . . . . . . . . . . . . . . . .1
What Makes Tribes Unique . . . . . . . . . . . . . . . . . . . . . . . . . . . . . . . . . . . . . . . . . . . . . . . . . . . . .1The Contents of This Book . . . . . . . . . . . . . . . . . . . . . . . . . . . . . . . . . . . . . . . . . . . . . . . . . . . . .2Getting Started in Tribes . . . . . . . . . . . . . . . . . . . . . . . . . . . . . . . . . . . . . . . . . . . . . . . . . . . . . .3Onward . . . . . . . . . . . . . . . . . . . . . . . . . . . . . . . . . . . . . . . . . . . . . . . . . . . . . . . . . . . . . . . . . . . .5
Chapter 2: Armor & Weapons . . . . . . . . . . . . . . . . . . . . . . . . . . . .6Armor . . . . . . . . . . . . . . . . . . . . . . . . . . . . . . . . . . . . . . . . . . . . . . . . . . . . . . . . . . . . . . . . . . . . .6Weapons . . . . . . . . . . . . . . . . . . . . . . . . . . . . . . . . . . . . . . . . . . . . . . . . . . . . . . . . . . . . . . . . . . .9In-Depth Weapon Comparison . . . . . . . . . . . . . . . . . . . . . . . . . . . . . . . . . . . . . . . . . . . . . . . . .20
Chapter 3: Packs & Items . . . . . . . . . . . . . . . . . . . . . . . . . . . . . .24Packs . . . . . . . . . . . . . . . . . . . . . . . . . . . . . . . . . . . . . . . . . . . . . . . . . . . . . . . . . . . . . . . . . . . . .24Miscellaneous Items . . . . . . . . . . . . . . . . . . . . . . . . . . . . . . . . . . . . . . . . . . . . . . . . . . . . . . . . .31
Chapter 4: Turrets, Sensors, and Vehicles . . . . . . . . . . . . . . . . . . .34Exterior Features . . . . . . . . . . . . . . . . . . . . . . . . . . . . . . . . . . . . . . . . . . . . . . . . . . . . . . . . . . .34Interior Features . . . . . . . . . . . . . . . . . . . . . . . . . . . . . . . . . . . . . . . . . . . . . . . . . . . . . . . . . . . .40Vehicles . . . . . . . . . . . . . . . . . . . . . . . . . . . . . . . . . . . . . . . . . . . . . . . . . . . . . . . . . . . . . . . . . . .43
Chapter 5: Combat Basics . . . . . . . . . . . . . . . . . . . . . . . . . . . . . .46Setup . . . . . . . . . . . . . . . . . . . . . . . . . . . . . . . . . . . . . . . . . . . . . . . . . . . . . . . . . . . . . . . . . . . . .46Flight Preliminaries . . . . . . . . . . . . . . . . . . . . . . . . . . . . . . . . . . . . . . . . . . . . . . . . . . . . . . . . .48Movement Fundamentals . . . . . . . . . . . . . . . . . . . . . . . . . . . . . . . . . . . . . . . . . . . . . . . . . . . . .50Circle Strafing . . . . . . . . . . . . . . . . . . . . . . . . . . . . . . . . . . . . . . . . . . . . . . . . . . . . . . . . . . . . . .52Advanced Fighting Techniques . . . . . . . . . . . . . . . . . . . . . . . . . . . . . . . . . . . . . . . . . . . . . . . .53Teamwork . . . . . . . . . . . . . . . . . . . . . . . . . . . . . . . . . . . . . . . . . . . . . . . . . . . . . . . . . . . . . . . . .55Getting Better . . . . . . . . . . . . . . . . . . . . . . . . . . . . . . . . . . . . . . . . . . . . . . . . . . . . . . . . . . . . . .56
Chapter 6: Key Concepts . . . . . . . . . . . . . . . . . . . . . . . . . . . . . . .57Buying and Favorites . . . . . . . . . . . . . . . . . . . . . . . . . . . . . . . . . . . . . . . . . . . . . . . . . . . . . . . .57Using Jump Jets . . . . . . . . . . . . . . . . . . . . . . . . . . . . . . . . . . . . . . . . . . . . . . . . . . . . . . . . . . . .58The Sensor Network . . . . . . . . . . . . . . . . . . . . . . . . . . . . . . . . . . . . . . . . . . . . . . . . . . . . . . . . .59Building Infrastructure and Defenses . . . . . . . . . . . . . . . . . . . . . . . . . . . . . . . . . . . . . . . . . . .61Understanding Terrain . . . . . . . . . . . . . . . . . . . . . . . . . . . . . . . . . . . . . . . . . . . . . . . . . . . . . . .61The Commander View . . . . . . . . . . . . . . . . . . . . . . . . . . . . . . . . . . . . . . . . . . . . . . . . . . . . . . .62Destroying Objects . . . . . . . . . . . . . . . . . . . . . . . . . . . . . . . . . . . . . . . . . . . . . . . . . . . . . . . . . .65Evading Turrets and Infiltrating Bases . . . . . . . . . . . . . . . . . . . . . . . . . . . . . . . . . . . . . . . . . .66Taking a Role . . . . . . . . . . . . . . . . . . . . . . . . . . . . . . . . . . . . . . . . . . . . . . . . . . . . . . . . . . . . . . .66Getting Organized . . . . . . . . . . . . . . . . . . . . . . . . . . . . . . . . . . . . . . . . . . . . . . . . . . . . . . . . . .67
Chapter 7: Training Missions . . . . . . . . . . . . . . . . . . . . . . . . . . . .68Mission 1: Welcome . . . . . . . . . . . . . . . . . . . . . . . . . . . . . . . . . . . . . . . . . . . . . . . . . . . . . . . . .68Mission 2: Weapons . . . . . . . . . . . . . . . . . . . . . . . . . . . . . . . . . . . . . . . . . . . . . . . . . . . . . . . . .70Mission 3: Vehicle . . . . . . . . . . . . . . . . . . . . . . . . . . . . . . . . . . . . . . . . . . . . . . . . . . . . . . . . . . .71Mission 4: Command & Target . . . . . . . . . . . . . . . . . . . . . . . . . . . . . . . . . . . . . . . . . . . . . . . .72Mission 5: CTF . . . . . . . . . . . . . . . . . . . . . . . . . . . . . . . . . . . . . . . . . . . . . . . . . . . . . . . . . . . . .73

II TRIBES: PRIMA’S OFFICIAL STRATEGY GUIDE
Chapter 7: Training Missions, continuedMission 6: Towers . . . . . . . . . . . . . . . . . . . . . . . . . . . . . . . . . . . . . . . . . . . . . . . . . . . . . . . . . . .75Mission 7: Retrieval . . . . . . . . . . . . . . . . . . . . . . . . . . . . . . . . . . . . . . . . . . . . . . . . . . . . . . . . .76Mission 8: Destroy . . . . . . . . . . . . . . . . . . . . . . . . . . . . . . . . . . . . . . . . . . . . . . . . . . . . . . . . . .77Overview . . . . . . . . . . . . . . . . . . . . . . . . . . . . . . . . . . . . . . . . . . . . . . . . . . . . . . . . . . . . . . . . . .78
Chapter 8: Getting Started in Multiplayer Games . . . . . . . . . . . . . .79Understand Your Connection . . . . . . . . . . . . . . . . . . . . . . . . . . . . . . . . . . . . . . . . . . . . . . . . . .79Learn Your Objectives . . . . . . . . . . . . . . . . . . . . . . . . . . . . . . . . . . . . . . . . . . . . . . . . . . . . . . .81Study the Map . . . . . . . . . . . . . . . . . . . . . . . . . . . . . . . . . . . . . . . . . . . . . . . . . . . . . . . . . . . . . .82Approach Your Base . . . . . . . . . . . . . . . . . . . . . . . . . . . . . . . . . . . . . . . . . . . . . . . . . . . . . . . . .82Play Defense . . . . . . . . . . . . . . . . . . . . . . . . . . . . . . . . . . . . . . . . . . . . . . . . . . . . . . . . . . . . . . .84Onward . . . . . . . . . . . . . . . . . . . . . . . . . . . . . . . . . . . . . . . . . . . . . . . . . . . . . . . . . . . . . . . . . . .85
Chapter 9: Defense Primer . . . . . . . . . . . . . . . . . . . . . . . . . . . . .86Perimeter Defense vs. Point-of-Attack Defense . . . . . . . . . . . . . . . . . . . . . . . . . . . . . . . . . . . .87Mastering Point-of-Attack Defense . . . . . . . . . . . . . . . . . . . . . . . . . . . . . . . . . . . . . . . . . . . . .87Mastering Perimeter Defense . . . . . . . . . . . . . . . . . . . . . . . . . . . . . . . . . . . . . . . . . . . . . . . . . .93All-purpose Defense . . . . . . . . . . . . . . . . . . . . . . . . . . . . . . . . . . . . . . . . . . . . . . . . . . . . . . . . .96Defense Overview . . . . . . . . . . . . . . . . . . . . . . . . . . . . . . . . . . . . . . . . . . . . . . . . . . . . . . . . . . .97
Chapter 10: “Midfielder” Primer . . . . . . . . . . . . . . . . . . . . . . . . . .98The Midfielder Position . . . . . . . . . . . . . . . . . . . . . . . . . . . . . . . . . . . . . . . . . . . . . . . . . . . . . .98Reconnaissance . . . . . . . . . . . . . . . . . . . . . . . . . . . . . . . . . . . . . . . . . . . . . . . . . . . . . . . . . . . . .99Midfield Sniper . . . . . . . . . . . . . . . . . . . . . . . . . . . . . . . . . . . . . . . . . . . . . . . . . . . . . . . . . . . . .99Infrastructure Builder . . . . . . . . . . . . . . . . . . . . . . . . . . . . . . . . . . . . . . . . . . . . . . . . . . . . . .102Infrastructure Destroyer . . . . . . . . . . . . . . . . . . . . . . . . . . . . . . . . . . . . . . . . . . . . . . . . . . . .103Emergency Defender . . . . . . . . . . . . . . . . . . . . . . . . . . . . . . . . . . . . . . . . . . . . . . . . . . . . . . .104Situational Attacker . . . . . . . . . . . . . . . . . . . . . . . . . . . . . . . . . . . . . . . . . . . . . . . . . . . . . . . .104
Chapter 11: Assault Primer . . . . . . . . . . . . . . . . . . . . . . . . . . . .106Preliminaries . . . . . . . . . . . . . . . . . . . . . . . . . . . . . . . . . . . . . . . . . . . . . . . . . . . . . . . . . . . . . .106Stealth Attacks . . . . . . . . . . . . . . . . . . . . . . . . . . . . . . . . . . . . . . . . . . . . . . . . . . . . . . . . . . . .108Speed Attacks . . . . . . . . . . . . . . . . . . . . . . . . . . . . . . . . . . . . . . . . . . . . . . . . . . . . . . . . . . . . .111Power Attacks . . . . . . . . . . . . . . . . . . . . . . . . . . . . . . . . . . . . . . . . . . . . . . . . . . . . . . . . . . . . .112Combined Attacks . . . . . . . . . . . . . . . . . . . . . . . . . . . . . . . . . . . . . . . . . . . . . . . . . . . . . . . . . .115Avoiding Battle Lock . . . . . . . . . . . . . . . . . . . . . . . . . . . . . . . . . . . . . . . . . . . . . . . . . . . . . . . .116
Chapter 12: Command Primer . . . . . . . . . . . . . . . . . . . . . . . . . .118Three Levels of Command . . . . . . . . . . . . . . . . . . . . . . . . . . . . . . . . . . . . . . . . . . . . . . . . . . .118Leading By Example . . . . . . . . . . . . . . . . . . . . . . . . . . . . . . . . . . . . . . . . . . . . . . . . . . . . . . . .120Field Command . . . . . . . . . . . . . . . . . . . . . . . . . . . . . . . . . . . . . . . . . . . . . . . . . . . . . . . . . . .121Dedicated Command . . . . . . . . . . . . . . . . . . . . . . . . . . . . . . . . . . . . . . . . . . . . . . . . . . . . . . .122Coordinating Attacks . . . . . . . . . . . . . . . . . . . . . . . . . . . . . . . . . . . . . . . . . . . . . . . . . . . . . . .124Overview of Assignments . . . . . . . . . . . . . . . . . . . . . . . . . . . . . . . . . . . . . . . . . . . . . . . . . . . .124
Chapter 13: Advanced Battle Guide . . . . . . . . . . . . . . . . . . . . . . .127Maps . . . . . . . . . . . . . . . . . . . . . . . . . . . . . . . . . . . . . . . . . . . . . . . . . . . . . . . . . . . . . . . . . . . .127A Dish Served Best Cold . . . . . . . . . . . . . . . . . . . . . . . . . . . . . . . . . . . . . . . . . . . . . . . . . . . . .127

IIIAnthill . . . . . . . . . . . . . . . . . . . . . . . . . . . . . . . . . . . . . . . . . . . . . . . . . . . . . . . . . . . . . . . . . . .128Blood Runs Cold . . . . . . . . . . . . . . . . . . . . . . . . . . . . . . . . . . . . . . . . . . . . . . . . . . . . . . . . . . .129Bloody Vengeance . . . . . . . . . . . . . . . . . . . . . . . . . . . . . . . . . . . . . . . . . . . . . . . . . . . . . . . . . .130Broadside . . . . . . . . . . . . . . . . . . . . . . . . . . . . . . . . . . . . . . . . . . . . . . . . . . . . . . . . . . . . . . . . .130Citadels . . . . . . . . . . . . . . . . . . . . . . . . . . . . . . . . . . . . . . . . . . . . . . . . . . . . . . . . . . . . . . . . . .131Criss Cross . . . . . . . . . . . . . . . . . . . . . . . . . . . . . . . . . . . . . . . . . . . . . . . . . . . . . . . . . . . . . . .132Dangerous Crossing . . . . . . . . . . . . . . . . . . . . . . . . . . . . . . . . . . . . . . . . . . . . . . . . . . . . . . . .132Death Knell . . . . . . . . . . . . . . . . . . . . . . . . . . . . . . . . . . . . . . . . . . . . . . . . . . . . . . . . . . . . . . .133Desert of Death . . . . . . . . . . . . . . . . . . . . . . . . . . . . . . . . . . . . . . . . . . . . . . . . . . . . . . . . . . . .134Fallen . . . . . . . . . . . . . . . . . . . . . . . . . . . . . . . . . . . . . . . . . . . . . . . . . . . . . . . . . . . . . . . . . . . .134Fog-of-War . . . . . . . . . . . . . . . . . . . . . . . . . . . . . . . . . . . . . . . . . . . . . . . . . . . . . . . . . . . . . . .135Four Way Dance . . . . . . . . . . . . . . . . . . . . . . . . . . . . . . . . . . . . . . . . . . . . . . . . . . . . . . . . . . .135Free for All . . . . . . . . . . . . . . . . . . . . . . . . . . . . . . . . . . . . . . . . . . . . . . . . . . . . . . . . . . . . . . .136Hammer Down . . . . . . . . . . . . . . . . . . . . . . . . . . . . . . . . . . . . . . . . . . . . . . . . . . . . . . . . . . . .137Ice Ridge . . . . . . . . . . . . . . . . . . . . . . . . . . . . . . . . . . . . . . . . . . . . . . . . . . . . . . . . . . . . . . . . .137King Under the Hill . . . . . . . . . . . . . . . . . . . . . . . . . . . . . . . . . . . . . . . . . . . . . . . . . . . . . . . .138Lucky Seven . . . . . . . . . . . . . . . . . . . . . . . . . . . . . . . . . . . . . . . . . . . . . . . . . . . . . . . . . . . . . .138Mudslide . . . . . . . . . . . . . . . . . . . . . . . . . . . . . . . . . . . . . . . . . . . . . . . . . . . . . . . . . . . . . . . . .139No Man’s Land . . . . . . . . . . . . . . . . . . . . . . . . . . . . . . . . . . . . . . . . . . . . . . . . . . . . . . . . . . . .139No Quarter . . . . . . . . . . . . . . . . . . . . . . . . . . . . . . . . . . . . . . . . . . . . . . . . . . . . . . . . . . . . . . .140Peak Performance . . . . . . . . . . . . . . . . . . . . . . . . . . . . . . . . . . . . . . . . . . . . . . . . . . . . . . . . . .140Peekaboo . . . . . . . . . . . . . . . . . . . . . . . . . . . . . . . . . . . . . . . . . . . . . . . . . . . . . . . . . . . . . . . . .141Raindance . . . . . . . . . . . . . . . . . . . . . . . . . . . . . . . . . . . . . . . . . . . . . . . . . . . . . . . . . . . . . . . .141Rollercoaster . . . . . . . . . . . . . . . . . . . . . . . . . . . . . . . . . . . . . . . . . . . . . . . . . . . . . . . . . . . . . .142Sand Storm . . . . . . . . . . . . . . . . . . . . . . . . . . . . . . . . . . . . . . . . . . . . . . . . . . . . . . . . . . . . . . .142Scarabrae . . . . . . . . . . . . . . . . . . . . . . . . . . . . . . . . . . . . . . . . . . . . . . . . . . . . . . . . . . . . . . . . .143Seek and Destroy . . . . . . . . . . . . . . . . . . . . . . . . . . . . . . . . . . . . . . . . . . . . . . . . . . . . . . . . . .143Siege . . . . . . . . . . . . . . . . . . . . . . . . . . . . . . . . . . . . . . . . . . . . . . . . . . . . . . . . . . . . . . . . . . . .144Snow-Blind . . . . . . . . . . . . . . . . . . . . . . . . . . . . . . . . . . . . . . . . . . . . . . . . . . . . . . . . . . . . . . .144Stonehenge . . . . . . . . . . . . . . . . . . . . . . . . . . . . . . . . . . . . . . . . . . . . . . . . . . . . . . . . . . . . . . .145Strung Out . . . . . . . . . . . . . . . . . . . . . . . . . . . . . . . . . . . . . . . . . . . . . . . . . . . . . . . . . . . . . . .145Temple of Doom . . . . . . . . . . . . . . . . . . . . . . . . . . . . . . . . . . . . . . . . . . . . . . . . . . . . . . . . . . .146The Red Sands . . . . . . . . . . . . . . . . . . . . . . . . . . . . . . . . . . . . . . . . . . . . . . . . . . . . . . . . . . . .147Towers . . . . . . . . . . . . . . . . . . . . . . . . . . . . . . . . . . . . . . . . . . . . . . . . . . . . . . . . . . . . . . . . . . .147Triple Threat . . . . . . . . . . . . . . . . . . . . . . . . . . . . . . . . . . . . . . . . . . . . . . . . . . . . . . . . . . . . . .148Valhalla . . . . . . . . . . . . . . . . . . . . . . . . . . . . . . . . . . . . . . . . . . . . . . . . . . . . . . . . . . . . . . . . . .148Final Advice . . . . . . . . . . . . . . . . . . . . . . . . . . . . . . . . . . . . . . . . . . . . . . . . . . . . . . . . . . . . . . .149
Appendix A: Joining a Tribe . . . . . . . . . . . . . . . . . . . . . . . . . . . . .151Appendix B: Quick Reference Damage Tables . . . . . . . . . . . . . . . .153
Base Damage . . . . . . . . . . . . . . . . . . . . . . . . . . . . . . . . . . . . . . . . . . . . . . . . . . . . . . . . . . . . . .153Armor Modifiers . . . . . . . . . . . . . . . . . . . . . . . . . . . . . . . . . . . . . . . . . . . . . . . . . . . . . . . . . . .154Modified Damage Percentage . . . . . . . . . . . . . . . . . . . . . . . . . . . . . . . . . . . . . . . . . . . . . . . . .155Shots to Kill . . . . . . . . . . . . . . . . . . . . . . . . . . . . . . . . . . . . . . . . . . . . . . . . . . . . . . . . . . . . . .156
Index . . . . . . . . . . . . . . . . . . . . . . . . . . . . . . . . . . . . . . . . . . . .157

IV TRIBES: PRIMA’S OFFICIAL STRATEGY GUIDE
FOREWORDYou hold in your hands something special. This is a guide for the first game to focus on theexcitement and special challenge of strategic squad-based play. The strategies and tips you find insidewill shape the way your team handles itself in the ever-changing, virtual battlefields of StarsiegeTRIBES.
TRIBES was designed to maximize multiplayer, team-based play. With that goal in mind, webuilt in a lot of innovative elements to reward organized squads and coordinated strategies. Featureslike the Commander Screen, all the communications options, and the multitude of remote sensorsallow a squad to plan tactics and launch sophisticated attacks. You’ll see quickly as you get deeperinto the TRIBES environment that traditional deathmatch-oriented players who fight alone will belittle or no threat when up against a disciplined, well-trained squad. A commander with imaginationcan systematically bombard enemy positions, stage diversions, coordinate assaults, and suckeropponents into traps. In short, the choice of who leads you on the battlefield now becomes hugelyimportant. Poor commanders won’t last long.
The other side of the equation involves squad discipline. Raw skill will still be important, butso will the ability of players to carry out orders. Well-drilled squads will become the kings of the newbattlefield, while teams who can’t learn to work together will be mulched, no matter how awesometheir general. Players will build reputations for being good soldiers or unreliable mavericks. Squadswill build reputations around how well they conceive and execute strategy, how daring orconservative they are in their planning, and on how well they hold their cool under fire.
The TRIBES community will grow, too (see www.tribesplayers.com). Alliances will becomemore important, since it’s going to be crucial to depend on a companion squad. Multi-squad warfarein the sweeping terrain of Starsiege TRIBES will showcase commander talents and squad skill inworking alongside other squads to achieve common objectives. Naturally, some squads (let’s call ’em"Tribes" now) will specialize in certain kinds of warfare. Some will prefer full frontal assaults; otherswill become adept at stealth and sniping. Any way you look at it, the team element suddenly becomesparamount. Your allies’ talents become almost as important as those of your own Tribe.
Your Tribe’s organization is a final component to consider. Will you have sub-commanders?Will you be the kind of general who sticks to directing troops and rarely enters combat, or will yougive orders from the field? How will you organize your Tribe? Create fire support teams? Assaultteams? Recon teams? Remember that even with the huge and sweeping landscapes, tribal warriors are

Vstill incredibly mobile. Your sub-commanders will have to be able to think on their feet. You can’t bedirecting everyone at once.
So you want to be one of the legendary commanders, the leader of an elite Tribe? You’ll haveto think about weapon selection, movement of troops, unit organization, use of terrain, coordinationof attacks, vehicle use, deployment of remotes, mine placement, defensive considerations — andplenty more. Fortunately, just about everything you need to lead your online forces to greatness isright inside this book. Read on. It’s a whole new world of squad-based strategy and tactics out there.And now you’ve got the jump.
Tim Gift aka “Slacker” – Director, Starsiege TRIBESScott Youngblood aka “Cornboy!”– Game Designer, Starsiege TRIBESMark Frohnmayer aka “Got Milk?”– Lead Programmer, Starsiege TRIBES
January 1999
If you recently bought Tribes, you already know that it’s an intense game of multiplayer action andstrategy. But what you might not know—especially if you haven’t played it for long—is that we’renot kidding about the strategy.We understand if you’re skeptical. Most 3D action games pay lip service to both action and
strategy. But somewhere along the way, the strategy part ends up in the scrap heap. Sure, the actionis fast and frantic, but it’s also paper-thin. Dig beneath the surface, and you’ll find a lot of nothing.
Tribes is genuinely different. It requires skill and reflexes, but it also requires a whole lot more.There’s a place for fast moves and quick trigger fingers, but there’s also a place for stealth, cunning,and carefully orchestrated tactics. It helps to have played other 3D action games, but the skills youlearned there will only take you halfway to greatness in Tribes. That’s because Tribes pushesmultiplayer action to the next level, rewarding smart play and good organization.
The end result is a game with a steep learning curve. If you’re used to just pointing, shooting, and winning, then you’re in for a painful surprise. Even players expecting a challenge may beoverwhelmed by the limitless options of Tribes: Which weapon to use? Which armor? Where to go?What to do? The answers, you’ll find, are seldom easy.
Why slog through all this complexity? The answer is simple: It allows for a depth of strategy thatis unknown in other 3D action games. That initial learning period may be tough—sure, you’ll takeyour knocks—but there comes a moment when everything starts to make sense. When that momentarrives, and you start to master Tribes’ possibilities rather than fear them, the game becomesextremely rewarding. Instead of winning with reflexes and luck, you’ll win with skill and knowledge.It’s a thrill that few other games can offer.
The only downside to all this depth is the time it takes to master it. When you join your firstgame, chances are good that you’ll be shell-shocked. Nothing will make sense, you won’t know whatto do, and everyone but you will seem to have a sense of purpose.
That’s where this guide comes into play. Read it thoroughly and use it as a companion while youplay Tribes. Consult it when you’re confused. It’ll help get you through those difficult early games andguide you toward excellence once you’ve got the basics mastered.
And whatever you do, don’t give up—at least not until you’ve played Tribes a good long while. Ittakes time, even with the help of this book, to figure the game out. And once you do, you’ll be gladyou stuck around.
Introduction

Tribes can be both difficult and frustrating, especially for a beginner. This chapter helps ease youinto the game.
The first part of this chapter explains what makes Tribes unique. The second part gives you thelowdown on what you’ll find in this book, and exactly where to find it. Finally, the third part gives youa plan that’ll help you through your first few games.
This book isn’t foolproof; it can’t save you from getting blown to smithereens countless times, andit can’t substitute for practice. It will, however, help you learn faster, so you can progress beyond therole of cannon fodder in a relatively short period of time. Keep reading, and you’ll learn how to startthat process.
What Makes Tribes Unique?Tribes sets itself apart from other games with its steep learning curve. You can’t just jump in andstart mindlessly shooting and hope to help your team. But there are other differences as well. Let’sbriefly review the biggest differences.
Team PlayFirst and foremost, Tribes is a team game. If youdon’t acknowledge your teammates, you probablywon’t get far, even if you have good combat skills.On the other hand, if you’re a good team player, youcan compensate for poor combat skills. Team playcuts both ways.
If you’re used to playing individualistic, death-match-style multiplayer games, you’ll have to con-stantly remind yourself to play as a team member.Otherwise, you’re doomed to frustration.
Figure 1-1. You’ll succeed if you learn to cooperate,rather than doing everything alone.
1Tribes—An Overview

2 TRIBES: PRIMA’S OFFICIAL STRATEGY GUIDE
ComplexityWe’ve already stated that Tribes is complex. We aren’t just talking about overt complexity, though. It’sthe subtle things that make Tribes so intricate. Players must use complicated team strategies and takeadvantage of weapons’ subtle nuances. Furthermore, players must view the game from a strategic,“big picture” viewpoint instead of getting absorbed in meaningless tactical exchanges.
VariationTribes is played on a variety of maps, and the rules change from game to game. Some missionsrequire your team to collect and hold flags, while other missions require you to actually “capture” the
flag. Other assignments require you to maintain controlof towers for a given amount of time. To master Tribes,you must learn to be flexible and adapt your style ofplay to fit the current scenario.
ChallengeTribes is challenging. The exact level of challengedepends on who you’re playing against and how goodyour teammates are. When you first start out, anyonewith experience will be able to defeat you; later, you’llcome into your own. No matter how good you get,you’ll find that the level of challenge remains consis-tently high. The people who play Tribes thrive on com-petition, and many of them are highly dedicated. You’llneed every bit of information in this book, plus a lot ofpractice, to reach a level where you can challenge them.
The Contents of This BookThis book is designed to help get you through those tough early games and become a competentTribes player. To benefit from the information, you first need to know where to find it. Here’s a look atevery chapter of this book, and a brief description of what each contains:
• Chapter 1 is what you’re reading now.
• Chapter 2 discusses weapons and armor. It provides a thorough description of each item, insightfulstrategies on how to use it, and a numerical rating of its damage or protection.
• Chapter 3 examines packs and miscellaneous items and discusses how you can use them to improveyour game.
• Chapter 4 reviews terrain features and vehicles. You’ll learn how to fly Scout Flyers and Transports.You’ll also gain insight into the major terrain features (such as turrets) that loom large in theTribes landscape.
• Chapter 5 discusses combat, explaining the techniques that separate great fighters from HeavyMortar fodder.
• Chapter 6 explains key game concepts and helps you translate your understanding of those con-cepts into better play.
Figure 1-2. This mission requires you to capture andhold towers, like the one seen here. Other missionshave different objectives.

CHAPTER 1: TRIBES—AN OVERVIEW 3• Chapter 7 puts everything you’ve learned to this point into practice and walks you through the
single-player training missions.
• Chapter 8 provides detailed tips on surviving your first few multiplayer games.
• Chapter 9 is a primer on defense, explaining the ins and outs of defending a base, flag, or other significant locales.
• Chapter 10 is a primer on reconnaissance, sniping, and “mid-field” play.
• Chapter 11 is a primer on offense, providing strategies for taking out enemy targets with stealth,speed, or power.
• Chapter 12 is a primer on commanding your teammates.
• Chapter 13 provides advanced strategies, including strategies specific to each map. It also offerssuggestions on how to keep improving your game.
• The appendices offer information on joining a Tribe and provide easy-reference weapon damage tables.
Getting Started in TribesHere’s the worst-case scenario: You buy Tribes, rushhome, rip it open, and install it. Eager for some action,you jump online and join a multiplayer game. It’s chaos.There are players running everywhere, both friend andfoe. Unfamiliar weapons fire at you, but you have noidea what they are or how to avoid them. And then,before you really get a chance to figure out what’s goingon, you’re dead.
You start over, but you have no more luck thanbefore. Perhaps you manage to kill a foe. You’re elated,but then you realize that the game isn’t keeping track of kills. Instead, you’re supposed to achieve a primaryobjective—but you aren’t quite sure how to do it. Morefrustration.
Eventually the game ends, and another begins—andagain, you have no idea what you’re doing.
This is a tough way to approach Tribes, even if you pride yourself on your skill at 3D shooters.Sure, you’ll figure the game out eventually, but it’ll take a while and undoubtedly try your patience.Instead, you might want to follow the suggestions outlined in the next few pages.
Read the ManualStep one is to read the game manual. This might sound obvious, but many game players—the authorincluded—like to leap right in and play. That works just fine in simple action games. But it’s a badidea in Tribes—especially if you’re playing against highly skilled opponents that don’t give you timeto think and learn.
Before playing, therefore, skim the manual and try to get at least a general sense of what thegame is about. It’ll be hard to cram everything into your brain right away since you won’t have any
Figure 1-3. There’s no doubt about it: Your first fewgames are going to be rough.
4 TRIBES: PRIMA’S OFFICIAL STRATEGY GUIDE
playing experiences to relate the information to. Nevertheless, it’ll provide a framework of under-standing that will be useful when you do fire up the game.
While you’re at it, you can read Part I of this book, or any sections of Part I that interest you.(Part I encompasses Chapters 1-7.)
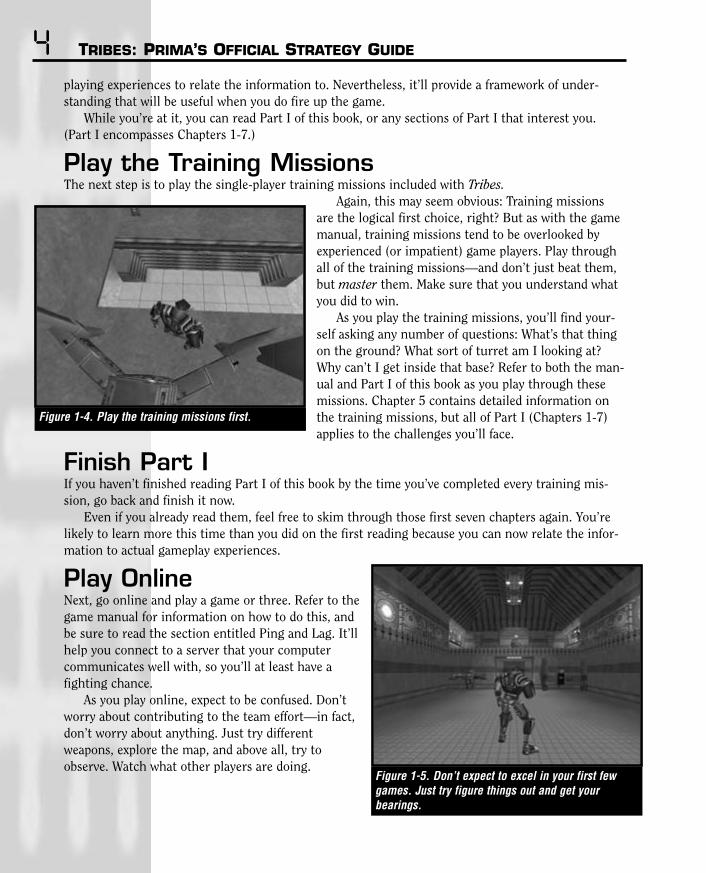
Play the Training MissionsThe next step is to play the single-player training missions included with Tribes.
Again, this may seem obvious: Training missions are the logical first choice, right? But as with the gamemanual, training missions tend to be overlooked byexperienced (or impatient) game players. Play throughall of the training missions—and don’t just beat them,but master them. Make sure that you understand whatyou did to win.
As you play the training missions, you’ll find your-self asking any number of questions: What’s that thingon the ground? What sort of turret am I looking at?Why can’t I get inside that base? Refer to both the man-ual and Part I of this book as you play through thesemissions. Chapter 5 contains detailed information onthe training missions, but all of Part I (Chapters 1-7)applies to the challenges you’ll face.
Finish Part IIf you haven’t finished reading Part I of this book by the time you’ve completed every training mis-sion, go back and finish it now.
Even if you already read them, feel free to skim through those first seven chapters again. You’relikely to learn more this time than you did on the first reading because you can now relate the infor-mation to actual gameplay experiences.
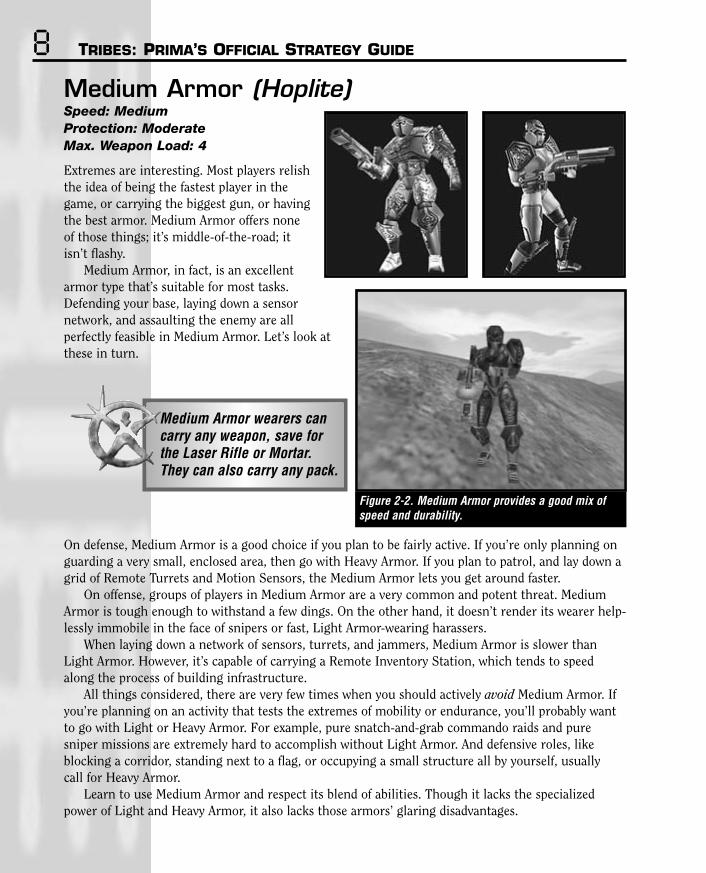
Play OnlineNext, go online and play a game or three. Refer to thegame manual for information on how to do this, andbe sure to read the section entitled Ping and Lag. It’llhelp you connect to a server that your computercommunicates well with, so you’ll at least have afighting chance.
As you play online, expect to be confused. Don’tworry about contributing to the team effort—in fact,don’t worry about anything. Just try differentweapons, explore the map, and above all, try toobserve. Watch what other players are doing.
Figure 1-4. Play the training missions first.
Figure 1-5. Don’t expect to excel in your first fewgames. Just try figure things out and get your bearings.

CHAPTER 1: TRIBES—AN OVERVIEW 5After playing a couple of discouraging games, you might be tempted to call it quits. Don’t even
think about it! The only reason you played those games was to gain a bit of experience. The moreexperience you have with the game, the easier it is for you to grasp the concepts explained both in thegame manual and this book.
Read More of This BookNow that you’ve played through the single-player missions and tasted multiplayer combat, you might want to sit down and read the rest of this book. How much or how little you read depends on your personal tastes. In any case, you’ll find that theinformation in Part II will help make you a better player.
OnwardUltimately, it’s entirely up to you how to read this book.You can read it all in one sitting, refer to it sparinglylike a dictionary, or just read the parts that interest you.The path described above is merely one way to accessthe information.
Without further ado then, let’s get on with the book.There’s a lot of information for you to digest, so take it slowly and remember: It takes time to master Tribes. Stick with it, and you will improve.
Figure 1-6. It’s a long road to complete mastery ofthe game, but you’ll get there if you practice.

This chapter reviews the armor and weapons of Tribes. You can get basic information on theseitems from your game manual. But this chapter goes a step farther and provides hard data onthe damage each weapon does, and the punishment each armor type can absorb. Furthermore,
this chapter explains each armor and weapon type’s strengths, weaknesses, and quirks, so you’ll havea more complete understanding of each item’s capabilities.
Armor is discussed first because your armor determines both the number and type of weaponsthat you can carry. Weapons are covered next. Finally, the end of the chapter contains detailednumerical data on both weapons and armor.
ArmorThere are three types of armor available to you. Every armor type performs certain common func-tions. It protects you, gives you access to PDA displays like the Commander Screen, and has jump jetsthat allow you to travel quickly from place to place.
Despite these common traits, the three armor types are very distinct. Here’s a comprehensive lookat how the armor types differ.
2Armor & Weapons

CHAPTER 2: ARMOR & WEAPONS 7Light Armor (Peltast)Speed: FastProtection: LowMax. Weapon Load: 3
Light Armor affords very little protection, leavingyou vulnerable to weapons fire of all descriptions.It can’t carry many weapons either, so you’ll haveto be selective when you wear this armor.
Why suffer these inconveniences? The upsideof Light Armor is its incredible mobility. LightArmor lets you run much faster than the otherarmor types, and its jump jets carry you muchhigher. Sure, you’re vulnerable in light armor, butyour speed lets you pick and choose your fightsand evade shots that would otherwise hit you.
Light Armor, when used in conjunction withthe Energy Pack, allows you to carry the LaserRifle. This deadly, long-range sniper’s weapon isextremely potent and is barred from the other twoarmor classes. On the downside, however, wearersof Light Armor can’t carry Remote Turrets orRemote Inventory Stations.
You can only pilot a flying vehicle while you’re wearing LightArmor. Players in other armor types can be passengers, but theycan’t fly the craft.
The value of the Light Armor’s mobility can’t be overstated. Heavier armor types can be slow andunwieldy whereas Light Armor is ideal for speed. Light Armor wearers have more movement optionsthan wearers of heavier armor. For example, when assaulting a multi-level base, Light Armor wearerscan often fly up to the roof and then drop down inside the base. Heavier armor types often can’t makeit that far and thus are forced to enter through lower portals.
Light Armor is ideal for the would-be sniper, for players trying to establish a sensor networkquickly, and for perimeter base defense. It’s also the best armor to use for snatch-and-grab tactics. Forexample, you can sneak into an enemy base undetected, take the flag, and run away. Heavier armortypes may be more durable, but their lack of speed makes them unsuited for raids requiring purestealth and speed.
Ultimately, like every armor type, Light Armor can be used effectively in almost every situation.The key is to become familiar with its strengths and weaknesses. That way, you instinctively capitalizeon the former, while avoiding situations that let your enemy exploit the latter.
Figure 2-1. Light Armor allows unparalleled mobility.It is also the default armor for the game.
8 TRIBES: PRIMA’S OFFICIAL STRATEGY GUIDE
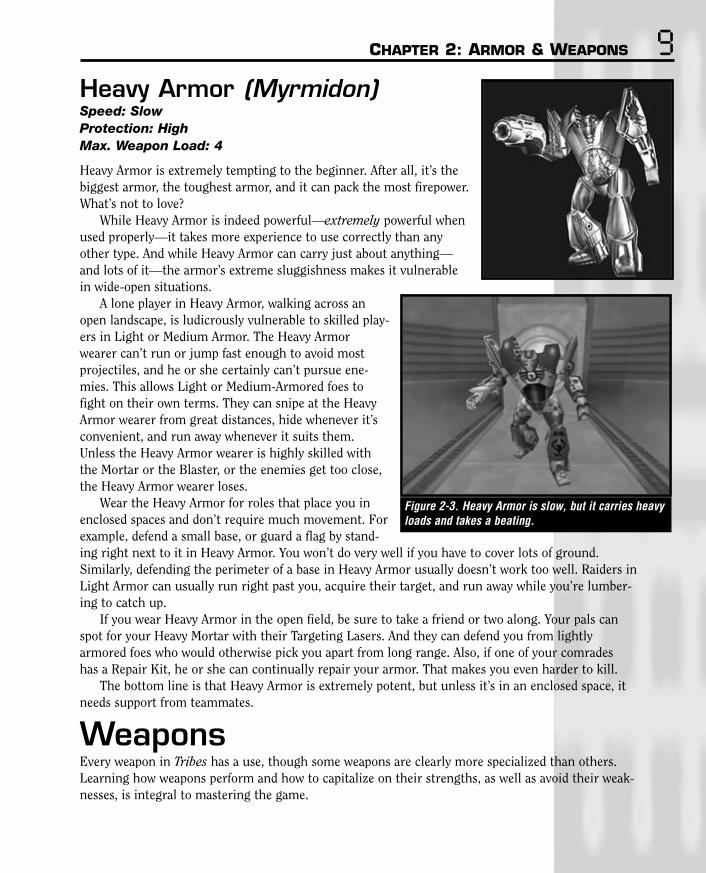
Medium Armor (Hoplite)Speed: MediumProtection: ModerateMax. Weapon Load: 4
Extremes are interesting. Most players relishthe idea of being the fastest player in thegame, or carrying the biggest gun, or havingthe best armor. Medium Armor offers noneof those things; it’s middle-of-the-road; itisn’t flashy.
Medium Armor, in fact, is an excellentarmor type that’s suitable for most tasks.Defending your base, laying down a sensor network, and assaulting the enemy are all perfectly feasible in Medium Armor. Let’s look atthese in turn.
Medium Armor wearers cancarry any weapon, save forthe Laser Rifle or Mortar.They can also carry any pack.
On defense, Medium Armor is a good choice if you plan to be fairly active. If you’re only planning onguarding a very small, enclosed area, then go with Heavy Armor. If you plan to patrol, and lay down agrid of Remote Turrets and Motion Sensors, the Medium Armor lets you get around faster.
On offense, groups of players in Medium Armor are a very common and potent threat. MediumArmor is tough enough to withstand a few dings. On the other hand, it doesn’t render its wearer help-lessly immobile in the face of snipers or fast, Light Armor-wearing harassers.
When laying down a network of sensors, turrets, and jammers, Medium Armor is slower thanLight Armor. However, it’s capable of carrying a Remote Inventory Station, which tends to speedalong the process of building infrastructure.
All things considered, there are very few times when you should actively avoid Medium Armor. Ifyou’re planning on an activity that tests the extremes of mobility or endurance, you’ll probably wantto go with Light or Heavy Armor. For example, pure snatch-and-grab commando raids and puresniper missions are extremely hard to accomplish without Light Armor. And defensive roles, likeblocking a corridor, standing next to a flag, or occupying a small structure all by yourself, usually call for Heavy Armor.
Learn to use Medium Armor and respect its blend of abilities. Though it lacks the specializedpower of Light and Heavy Armor, it also lacks those armors’ glaring disadvantages.
Figure 2-2. Medium Armor provides a good mix ofspeed and durability.
CHAPTER 2: ARMOR & WEAPONS 9Heavy Armor (Myrmidon)Speed: SlowProtection: HighMax. Weapon Load: 4
Heavy Armor is extremely tempting to the beginner. After all, it’s thebiggest armor, the toughest armor, and it can pack the most firepower.What’s not to love?
While Heavy Armor is indeed powerful—extremely powerful whenused properly—it takes more experience to use correctly than anyother type. And while Heavy Armor can carry just about anything—and lots of it—the armor’s extreme sluggishness makes it vulnerablein wide-open situations.
A lone player in Heavy Armor, walking across anopen landscape, is ludicrously vulnerable to skilled play-ers in Light or Medium Armor. The Heavy Armorwearer can’t run or jump fast enough to avoid mostprojectiles, and he or she certainly can’t pursue ene-mies. This allows Light or Medium-Armored foes tofight on their own terms. They can snipe at the HeavyArmor wearer from great distances, hide whenever it’sconvenient, and run away whenever it suits them.Unless the Heavy Armor wearer is highly skilled withthe Mortar or the Blaster, or the enemies get too close,the Heavy Armor wearer loses.
Wear the Heavy Armor for roles that place you inenclosed spaces and don’t require much movement. Forexample, defend a small base, or guard a flag by stand-ing right next to it in Heavy Armor. You won’t do very well if you have to cover lots of ground.Similarly, defending the perimeter of a base in Heavy Armor usually doesn’t work too well. Raiders inLight Armor can usually run right past you, acquire their target, and run away while you’re lumber-ing to catch up.
If you wear Heavy Armor in the open field, be sure to take a friend or two along. Your pals canspot for your Heavy Mortar with their Targeting Lasers. And they can defend you from lightlyarmored foes who would otherwise pick you apart from long range. Also, if one of your comrades has a Repair Kit, he or she can continually repair your armor. That makes you even harder to kill.
The bottom line is that Heavy Armor is extremely potent, but unless it’s in an enclosed space, itneeds support from teammates.
WeaponsEvery weapon in Tribes has a use, though some weapons are clearly more specialized than others.Learning how weapons perform and how to capitalize on their strengths, as well as avoid their weak-nesses, is integral to mastering the game.
Figure 2-3. Heavy Armor is slow, but it carries heavyloads and takes a beating.
10 TRIBES: PRIMA’S OFFICIAL STRATEGY GUIDE
Every weapon described below has an entry called Shots to Kill. This entry lists the number of accurate shots required withthat weapon to kill players in each of the three armor types.(“Accurate” shots are shots that squarely hit the player, instead of narrowly missing and causing splash damage.)
Also, every weapon has an Ammo entry, expressed as threenumbers separated by slashes. These numbers are the maximumamounts of ammo that each armor type (Light, Medium, andHeavy) can carry for that weapon, without an Ammo Pack.
Instead of numbers, the word “Infinite” may appear in theAmmo entry. That means the weapon is energy-based and can fire indefinitely, drawing power from your armor’s built-in energy source.
Finally, if a dash (—) appears in the Ammo entry, it meansthat the armor type can’t carry the weapon. So, for example, theLaser Rifle’s Ammo columns look like this: Infinite/—/—. That’sbecause Medium and Heavy Armor can’t wield the Laser Rifle.
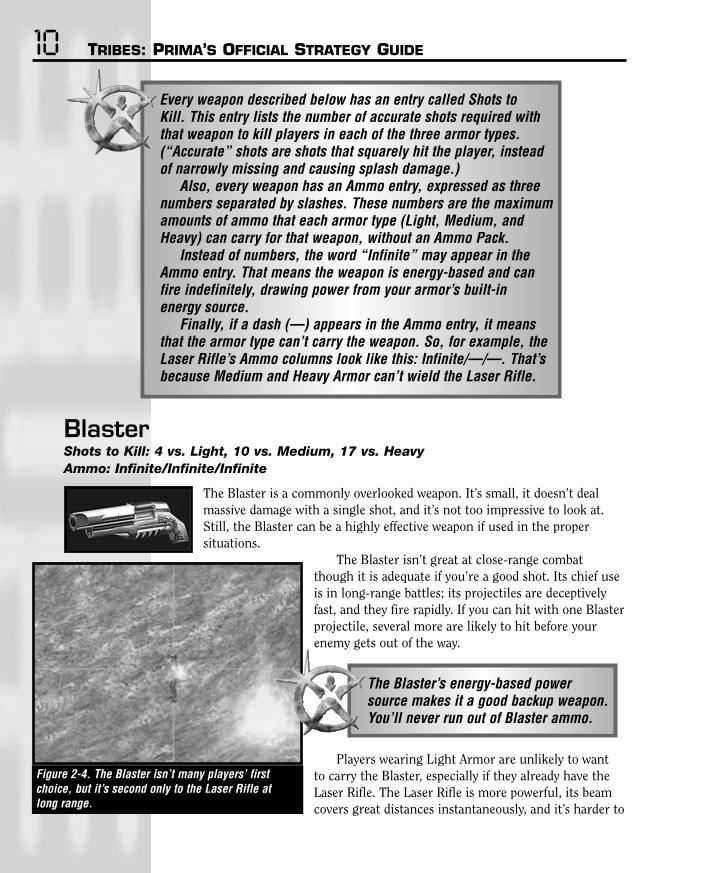
BlasterShots to Kill: 4 vs. Light, 10 vs. Medium, 17 vs. HeavyAmmo: Infinite/Infinite/Infinite
The Blaster is a commonly overlooked weapon. It’s small, it doesn’t dealmassive damage with a single shot, and it’s not too impressive to look at.Still, the Blaster can be a highly effective weapon if used in the proper situations.
The Blaster isn’t great at close-range combatthough it is adequate if you’re a good shot. Its chief useis in long-range battles; its projectiles are deceptivelyfast, and they fire rapidly. If you can hit with one Blasterprojectile, several more are likely to hit before yourenemy gets out of the way.
The Blaster’s energy-based powersource makes it a good backup weapon.You’ll never run out of Blaster ammo.
Players wearing Light Armor are unlikely to want to carry the Blaster, especially if they already have theLaser Rifle. The Laser Rifle is more powerful, its beamcovers great distances instantaneously, and it’s harder to
Figure 2-4. The Blaster isn’t many players’ firstchoice, but it’s second only to the Laser Rifle at long range.

CHAPTER 2: ARMOR & WEAPONS 11trace back to the source. The Blaster is more useful than the Laser Rifle in mid-range and close-rangecombat. But at those ranges the Light Armor wearer can usually produce something better; theChaingun, Disk Launcher, and Plasma Gun all come to mind.
But for Medium or Heavy Armor wearers, the Blaster functions as sort of a “poor man’s” LaserRifle. For these armor types, it serves a vital purpose beyond sniping at unwary targets: It allows play-ers in Medium or Heavy Armor to force the enemy to move. Without it, heavily armored players canfind themselves in the position of having no effective response when sniped at from afar by LightArmor wearers. The Blaster fires quickly enough to force a Light Armored enemy to move and dodge.Thus it buys time for heavier armor types to move to better ground.
Ultimately, the Blaster is a deceptively powerful weapon. It’s extremely good at picking off playersfrom a distance, especially when they fail to move around. And the Blaster is useful as a “brush-back”weapon. It’s used to keep distant enemies on their toes so they can’t dig in and fire at you nonstopfrom a fixed position.
Plasma GunShots to Kill: 2 vs. Light, 3 vs. Medium, 4 vs. HeavyAmmo: 25/35/50
While beginners tend togravitate toward power-ful explosive weaponslike the Disk Launcherand the Grenade
Launcher, make no mistake: The Plasma Gun is also a heavy hitter.
The Plasma Gun’s projectiles aren’t as fast asthe Disk Launcher’s explosive Disks, and they dissolve into nothingness at long range. So thePlasma Gun is inappropriate for sniping or forshooting at extremely nimble targets at mediumto long range.
On the plus side, the Plasma Gun’s projectilesdamage everything in a small radius around them.And its rate of fire is higher than that of the simi-larly powered Disk Launcher. The Plasma Gun also deals excellent damage against heavily armored targets, such as foes in Heavy Armor and stationary objects.
The Plasma Gun is one of very few weapons that’s powerfulenough to take out a Plasma Turret or Pulse Sensor by itself.You’ll have to rapid-fire at your target for quite some time, however, to destroy it.
Figure 2-5. The Plasma Gun is a heavy hitter,excelling at damaging heavily armored targets.

12 TRIBES: PRIMA’S OFFICIAL STRATEGY GUIDE
When should you use the Plasma Gun, and when should you use another weapon? Here are a fewsuggestions.
Put away the Plasma Gun when you’re firing at long-range targets. When firing at mid-range targets, try to use the Plasma Gun against foes that are relatively slug-
gish. The Disk Launcher’s faster projectiles reach the mark more quickly than those of the PlasmaGun, ensuring better accuracy.
At short to point-blank range, the Plasma Gun tends to edge out the Disk Launcher because of itsbetter rate of fire. You should also consider the Chaingun at that range.
Also, there’s one more thing to consider. The Disk Launcher is better than the Plasma Gunagainst Light and Medium Armor. However, the Plasma Gun is absolutely great against Heavy Armorand big, stationary objects such as Generators and Mini Fusion (Sentinel) Turrets. This makes thePlasma Gun an excellent tool for base assaults where you’ll encounter both heavily armored defendersand lots of stationary objects to destroy.
The Plasma Gun carries more ammo than the Disk Launcher making it more attractive on missions where ammo shortages are likely.
ChaingunShots to Kill: 5 vs. Light, 9 vs. Medium, 20 vs. HeavyAmmo: 100/150/200
The Chaingun is a very simple weapon in the sense that it’s extremely clear when and when not to use it. It’s an excellent addition to your arsenal,provided that you find yourself in situations where you can put its power to good use.
The Chaingun spews a constant stream of explosiveflechettes in the general direction it’s pointed. Whileaccurate at close range and medium-close range, theChaingun’s scattered bullets are completely ineffectiveat mid to long range. The bullets travel very quickly, soit’s not a matter of projectile speed. The problem is thatyou never know where those bullets are headed. Youshould therefore put away the Chaingun when facingdistant enemies, regardless of what armor they’re wear-ing and how fast they’re moving.
At relatively close range, however, the Chaingunshreds through enemies in seconds flat. Nothing canwithstand a steady stream of Chaingun fire. Better yet,there’s no splash damage (as with the Plasma Gun andDisk Launcher). So you can mow down an opponent atpoint-blank range with the Chaingun. Very few weaponsrival the Chaingun for short-range power.
Figure 2-6. The Chaingun quickly finishes off ene-mies at close range.
CHAPTER 2: ARMOR & WEAPONS 13Several weapons are effective at close range. Should you use the Disk Launcher, the Plasma Gun,
or the Chaingun? If you’re having trouble hitting a fast enemy with a slower-firing weapon, then theChaingun is a great choice. Its fast projectiles let you hose down your enemy. Just be sure to switchweapons if you find yourself fighting at medium to long range.
Similarly, if your enemy seems to be spending more time in the air than on the ground, theChaingun can be a good ground-to-air weapon. (It’s almost impossible to hit a jumping enemy withthe Disk Launcher or Plasma Gun, especially if you’re on the ground.)
Bear in mind that you never want to stand flat-footed while youropponent jumps over you. If you must stand on the ground, thenthe Chaingun is good for shooting foes out of the sky. Generallyspeaking though, you want to get into the sky as well, or elseyou’ll be easy to hit.
The Chaingun is at its best on relatively flat, obstacle-free terrain. If there are lots of corners,steep ridges, or other easy hiding places, your opponent can pop in and out of cover. This makes it hard to hose him or her down with the Chaingun. Try using a single-shot weapon in these cases instead.
Finally, if you’re skilled at staying close to the enemy while avoiding return fire, the Chaingun is an excellent weapon. If you aren’t comfortable with fighting at extremely close range, stick with a weapon that lets you fight from a distance. Or choose one that lets you pop in and out of cover.
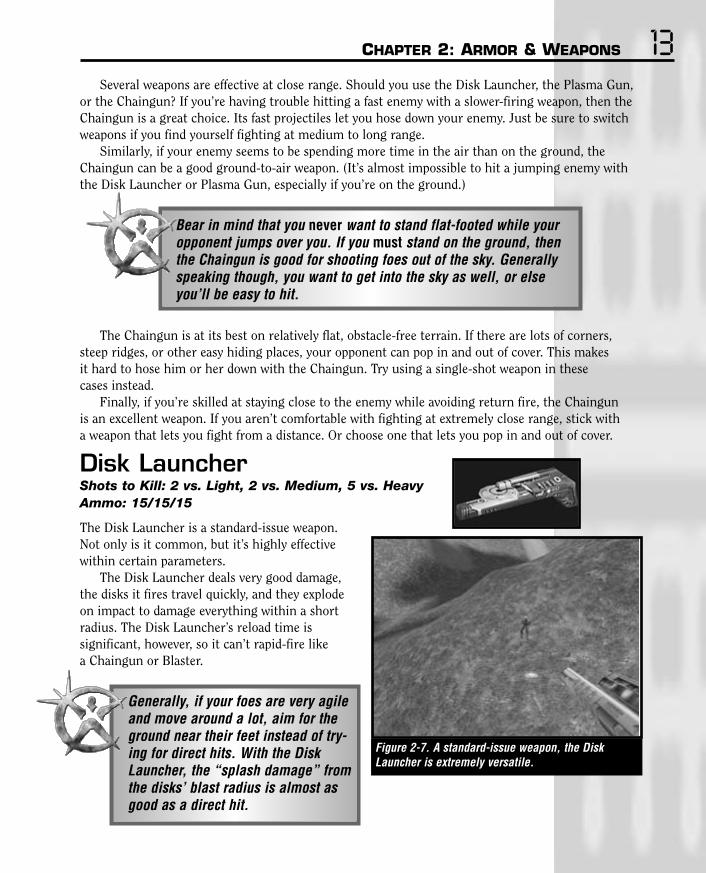
Disk LauncherShots to Kill: 2 vs. Light, 2 vs. Medium, 5 vs. HeavyAmmo: 15/15/15
The Disk Launcher is a standard-issue weapon.Not only is it common, but it’s highly effectivewithin certain parameters.
The Disk Launcher deals very good damage,the disks it fires travel quickly, and they explodeon impact to damage everything within a shortradius. The Disk Launcher’s reload time is significant, however, so it can’t rapid-fire like a Chaingun or Blaster.
Generally, if your foes are very agileand move around a lot, aim for theground near their feet instead of try-ing for direct hits. With the DiskLauncher, the “splash damage” fromthe disks’ blast radius is almost asgood as a direct hit.
Figure 2-7. A standard-issue weapon, the DiskLauncher is extremely versatile.

14 TRIBES: PRIMA’S OFFICIAL STRATEGY GUIDE
The Disk Launcher is a good choice for common combat tasks, but it’s poor at extremes. Forexample, when extreme range separates you from the target, the Disk Launcher’s disks aren’t fastenough against a moving enemy.
Against extremely close-range enemies, the Disk Launcher’s sluggish reload time coupled with itssplash damage make it somewhat inferior to the Chaingun. However, it can be effective if you makethe most of your jump jets and cover.
The Disk Launcher is better than the Plasma Gun against Light Armored foes. This is because itsdisks travel faster than plasma, and the disks deal more damage than plasma against Light Armor.However, the disks are significantly weaker against Heavy Armor and stationary objects. If possible,pull out the Plasma Gun, Grenade Launcher, or Chaingun to deal with these heavier targets.
Above all else, remember that the Disk Launcher is extremely versatile, and it can be used veryeffectively for most combat tasks. Even when you’re using it in a role it wasn’t designed for, you stillhave a fighting chance. That’s the truest testament to the weapon’s broad range of applications.
The Disk Launcher, like many weapons, is easier to fire whenyou’re jetting in the air and looking down at your enemy. Trying to hit an enemy on your level with a Disk Launcher can be hardbecause it’s difficult to get the angle just right.
Enemies standing on a hillside are also easy prey since disksthat hit the hill behind them will often damage them.
Grenade LauncherShots to Kill: 2 vs. Light, 2 vs. Medium, 5 vs. HeavyAmmo: 10/10/15
The Grenade Launcher is a powerful beast. Shot for shot, no mobile weapon,save for the Heavy Mortar, can deal out more punishment. But this vastpower comes at a price, and the Grenade Launcher is a relatively specialized
weapon in the hands of the inexperienced.The Grenade Launcher deals great damage, and its
Grenades affect a wide radius. It’s a true “room clearing”weapon, perfect for damaging several enemies at once orwrecking a room full of sensitive objects. The Grenadescan also be fired fairly quickly, resulting in massivedamage over a short period of time.
While you can destroy heavy turrets andPulse Sensors with the Grenade Launcher,it takes multiple, perfect shots in rapidsuccession to do so. You’ll find that theHeavy Mortar is the only weapon that per-forms that task with ease.
Figure 2-8. It takes practice to master the GrenadeLauncher’s bouncing projectiles.

CHAPTER 2: ARMOR & WEAPONS 15Since Grenades fired at short range bounce around a bit before detonating, you can bounce them
into an area without actually entering that area. For example, It’s common to see players roll aGrenade over a ridge before crossing, or bounce several Grenades around a corner before moving in.
Get into the habit of lobbing Grenades into a base’s open doorway or down its ceiling hatch before you enter yourself. This is a highly effective way of clearing out anyone who might be standing in there and destroying any Remote Turrets that have been placed nearby.
Now for the downside. Grenades are hard to use out in the open, particularly against nearby foesin Light Armor. True, the Grenades have a big blast radius, but nimble foes can jet up into the sky (orlaterally) and evade the Grenades. Meanwhile they can pelt you with a Chaingun, Disk Launcher, orother straight-shooting weapon.
If you become skillful enough with the Grenade Launcher, you can compensate for its deficien-cies. Predicting where a jetting enemy will fall, then depositing a Grenade there, can be deadly.Similarly, lobbing Grenades at a foe who’s standing at the bottom of a hill (where the Grenades willbounce into his lap) can be fun. But a smart, agile enemy in Light Armor can capitalize on theGrenades’ delayed blast and get out of the way more often than not.
Be particularly careful when using Grenades on steeply inclined terrain. Lobbing Grenades down-hill at an enemy is safe, but an enemy atop a sharp ridge is nearly impossible to hit. Grenades willsimply bounce away and roll down either side of the ridge. Worse yet, if you happen to be standing onlow ground, the Grenades might bounce back at you.
The bottom line is to use the Grenade Launcher against bases, against heavy foes, and in any situ-ation where indirect fire is an asset. Don’t use it to attack Light Armored scouts or enemies atop ahill, or you’ll find yourself missing more often than not.
Laser RifleShots to Kill: 2/2 vs. Light, 3/2 vs. Medium, 6/4 vs.Heavy (Body/Head) Ammo: Infinite/—/—The Laser Rifle is one of the most specialized weaponsin the game and also one of the most powerful. It’sessentially a powerful sniper rifle, deadly at long rangebut practically worthless up close.
The Laser Rifle is only available to a player in LightArmor who’s wearing an Energy Pack. This severely limits the roles the Laser Rifle can be used in. If youaren’t wearing the requisite Light Armor and EnergyPack, you’ll have to be content to use the Blaster forextremely long-range attacks.
Assuming that you can use the Laser Rifle, it opensup a whole new role for you: That of sniper. Snipers arevaluable both on offense and defense. On offense, theyharass and pick off defenders and clear the way for Figure 2-9. Nothing beats the Laser Rifle for long-
range sniping.

16 TRIBES: PRIMA’S OFFICIAL STRATEGY GUIDE
attacks on the enemy base. On defense, they whittle down enemies before they get too close to thefriendly base. And they harass heavy foes who would otherwise park themselves up on a hilltop andlob mortar shells onto the friendly base.
The Laser Rifle is the only weapon that rewards you for a head-shot. You’ll do about 50 percent more damage if you hit your target in the head.
The Laser Rifle is almost always used in conjunction with your armor’s built-in Image Enhancer. Sniping is most effective against motionless or slow-moving enemies and enemies who don’t yet real-ize you’re there. Foes in Heavy Armor are particularly vulnerable to the Laser Rifle, due to their lackof speed and elusiveness.
You cannot kill a perfectly healthy enemy outright with the Laser Rifle. However, you can almostkill a lightly armored foe with one headshot—and the second shot will finish the job. Keep in mindthat the power of each shot is dependent upon how much energy you have. Firing the Laser Rifle onlow energy does little damage. Wait for full energy to efficiently and effectively use this weapon.
Use the Laser Rifle often, but recognize its weaknesses. Put it away whenever an enemy, especiallyone in Light Armor, decides to charge toward you and attack at close range.
Electron Flux Gun (ELF Gun)Shots to Kill: 25 seconds vs. Light, 25 seconds vs. Medium, 25 seconds vs. HeavyAmmo: 17/25 /33
The Electron Flux Gun is even more specialized than the Laser Rifle. It drains the energy from yourtarget—a human enemy or an employed object suchas a turret—and deals slight damage in the mean-time. It also “grabs” at human enemies, preventingthem from escaping.
Since the Electron Flux Gun deals minimal dam-age, it’s only a good choice if you plan to use someteamwork. For example, let’s say that you and afriend, both in Light Armor, want to destroy a FusionTurret. One of you can activate a Sensor JammerPack, approach the turret, and drain away its energysupply with the Electron Flux Gun. Since the turret’senergy supply is used both for shooting and forshields, the ELF Gun effectively removes both its pro-tection and its ability to fire. That allows the second teammate to easily destroy the Fusion Turretwith a minor weapon such as a Plasma Gun or even a Disk Launcher.
Another use for the Electron Flux Gun is to ground Light Armored enemies who are flying aroundand causing trouble. Sucking away their energy with the ELF Gun leaves them earthbound and lessmobile. And if you get a good enough shot in, you can effectively freeze them in place. That allowsyour teammate to finish them off.
Figure 2-10. The Electron Flux Gun works best whenyou’ve got a friend with you.

CHAPTER 2: ARMOR & WEAPONS 17You’ll find the Electron Flux Gun very difficult to use if you’re playing commando. It’s a valuable
tool when you’re working closely with your teammates.
Heavy MortarShots to Kill: 1 vs. Light, 2 vs. Medium, 2 vs. HeavyAmmo: —/—/10
The Heavy Mortar is only available when you’re wearing Heavy Armor; this automatically limits how often you’llfind yourself carrying it. But if you are wearing HeavyArmor, it’s pretty much a given that you should take theMortar. After all, you can carry lots of different weaponsin Heavy Armor. Why not take the most powerfulweapon available?
The Heavy Mortar has limited ammo, and its projec-tiles must be shot in an arc rather than a straight line.This makes aiming at distant targets a tricky proposi-tion, unless you’ve got a friend using a Targeting Laserto paint the target.
If you’ve got a Heavy Mortar, you mightwant to use it in conjunction with an Ammo Pack. Otherwise, you’ll run emptypretty quickly.
Since Heavy Mortar shells deal massive damage and have a huge blast radius, you’ll find thatthey’re invaluable for ruining enemy bases. In fact, the Heavy Mortar is the only handheld weaponpotent enough to easily destroy heavy, emplaced objects (Sensor Towers, Plasma Turrets) withoutassistance. (Lesser weapons such as the Plasma Gun and Grenade Launcher also work. But thisrequires multiple perfect shots in a row from very close range, which is hard to do when you’re being shot at.)
The Heavy Mortar’s primary use is to level heavy, emplaced objects and clear out bases, either withor without the help of a Targeting Laser. You can also use it against individual human targets at longrange. You need to be extremely skilled to destroy moving enemies with a Heavy Mortar—assumingthat they’re actively dodging, of course. But it can be done. It’s just a question of getting to know theMortar well enough to accurately shell a spot without the help of the Targeting Laser. You also haveto guess where the enemy will be in a second or two. The Heavy Mortar’s wide blast radius helps withthis task, giving you occasional cheap kills even if your aim isn’t the greatest.
If you decide to shoot close-range enemies with the Heavy Mortar, aim slightly above your target.You’ll find that shells fired at nearby targets tend to stick on the ground where they land. So youneedn’t worry about the unpredictable bouncing associated with Grenades. However, like Grenades,Heavy Mortar shells have a short “arming” period after they’re fired. So you’ll need to wait a secondor two before the shell actually explodes if you shoot it at a nearby target. (If it weren’t for this arm-ing period, the Heavy Mortar would be truly unmatched as a short-range weapon. And you’d neverhave any reason not to use it.)
Figure 2-11. The Heavy Mortar’s damage and blastradius is unmatched.

18 TRIBES: PRIMA’S OFFICIAL STRATEGY GUIDE
Since you’re in Heavy Armor when you use the Mortar, and thuscan absorb more abuse than many of your foes, short-rangeattacks can be very useful. This is especially true when you’reatop a ridge or other obstacle and can quickly drop away to shieldyourself from the blast.
It takes as much practice to learn how to kill enemies at closerange with Mortar shells as it does at long range. Keep trying andkeep observing. You’ll find the Heavy Mortar incredibly potent atany range.
Attacking an enemy at extremely close range with the Heavy Mortar is dangerous because you’relikely to take serious damage from the blast. However, sometimes you’ll want to do this. If you’re atopa ridge, for example, you could plant a shell on one side of the ridge and then drop off the other side.You’ll escape the worst of the damage and perhaps take out your opponent. Or if a Light Armored foeis about to grab your flag inside your base, you might want to bite the bullet. Just plant a shell in thefloor and endure some damage since it hurts both you and your enemy.
When a teammate uses the Targeting Laser, a line extends upfrom the target. A pair of triangles dot this line. Fire at either triangle to hit the target; the lower triangle is a “low trajectory”path, while the higher one indicates a “high trajectory” path.
The lower path may be dangerous if you don’t have a clearshot. The high path is seldom risky, but your shells will takelonger to reach their destination.
The most accurate way to shoot a target is to center thecrosshair with the lower tip of the triangle.
Targeting LaserShots to Kill: n/aAmmo: Infinite/Infinite/Infinite
The Targeting Laser is meantto be used as an adjunct to theHeavy Mortar. Point at a targetand hold down the trigger, and
teammates with Heavy Mortars will see targeting trian-gles appear in the sky. The Targeting Laser can be usedwith the Grenade Launcher as well.
Other teammates can also see the TargetingLaser, but without the Mortar, it doesn’t do them muchgood. The main benefit to these teammates is that theycan see the areas that are soon to be shelled. They can
then either avoid them or chip in to help the attack with lesser weapons.
Figure 2-12. The Targeting Laser helps your team-mates use their Heavy Mortars.

CHAPTER 2: ARMOR & WEAPONS 19The Targeting Laser is only valuable in specific situations. If nobody’s in position with a Heavy
Mortar to capitalize on your helpful targeting, it all goes to waste. Plus, the laser is clearly visible toeveryone, so your enemies will eventually see it and return fire. This presents problems if you’re try-ing to hold steady and present a nice target for your teammates.
Also, extremely good Mortar-wielders can often shoot a target without any help. Keep in mindthough, that the Targeting Laser can help even the most skilled player use the Mortar at extreme range.
Since the Targeting Laser doesn’t occupy a true weapon slot, youshould always carry one. There’s no reason not to. Then, if youhappen to be in position to help a teammate with a Mortar dealsome damage, you’ll be prepared.
If you aren’t positive you’ll get Mortar support, though, think twice before targeting an enemy. It tends to give away your position. If you can get a clean, steady shot—especially on a stationaryhuman player—you’re sometimes better off using the Laser Rifle or Blaster instead.
MinesMines to Kill: 1 vs. Light, 2 vs. Medium, 3 vs. HeavyAmmo: 3/3/3
Mines are potent weapons if you use them correctly.They can also be a threat to your own team. The key isto use them judiciously and let everyone know whereyou put them.
Mines take a moment to arm themselves, duringwhich time they automatically drill themselves into theground. Be sure to get away as they do this becauseonce they become active, they don’t distinguish betweenfriend and foe. They just detonate when someone stepstoo close, dealing massive damage. If a Light Armorlands directly on a mine, he will die.
The most common use of mines is to plant themaround a flag you wish to defend. You should confinethe mining to very clearly defined areas. If you sprinklethem around your base, seemingly at random, yourteammates will be the most likely victims. Tell yourteam when you’re mining, and make it clear whereyou’re dropping the mines.
Mines are hard to use in combat situations, mainly because your opponent tends to see you dropthem. If you’re particularly clever though, and your opponent doesn’t see you drop them, you canplace a couple in mid-fight and try to lure your opponent over them.
Figure 2-13. Mines automatically burrow into theground, just seconds after you drop them.

20 TRIBES: PRIMA’S OFFICIAL STRATEGY GUIDE
GrenadesShots to Kill: 2 vs. Light, 2 vs. Medium, 5 vs. HeavyAmmo: 5/6/8
Grenades are similar to those lobbed by a GrenadeLauncher, save that they’re fractionally less potent, andthey don’t have the same long-range delivery. Instead,they’re tossed a few feet in front of you—more or lessdepending on how long you hold down the buttonbefore releasing it.
Grenades can be used to supplement your standardweapons, but it’s awfully hard to keep track of anythingbut your primary weapon in combat. Instead, you’llprobably find yourself using them most often in cat-and-mouse situations. These occur when you and anopponent are fighting in an enclosed area, such as abase. In such cases, you can often flush out the enemy(or deal some damage) with a Grenade. Just slip onearound a corner, down a hole, or into the middle of aroom you suspect your enemy is standing in.
In-Depth Weapon ComparisonWe’ll end the chapter with some hard numbers on weapon damage. These come in the form of fourtables, which we’ll explain in a moment.
Included in these tables are damage ratings for turrets, and for the rockets fired from the ScoutFlier. Read these tables to get a sense of how much damage each weapon does, and how protectiveeach armor type is against various weapon types.
Basic DamageThe following table shows basic damage for each weapon. Basic damage is sort of a “raw damage”number that indicates the overall power of the weapon. It’s expressed as a percentage. So for example,the Disk Launcher has a basic damage rating of 50 percent. That means that a direct disk hit will takeaway 50 percent of some enemies’ health.
Basic damage doesn’t tell the whole story, however. Keep reading, and you’ll find that differentarmor types absorb different amounts of damage.
Figure 2-14. Hold down the button longer to deliverGrenades at longer distances.

CHAPTER 2: ARMOR & WEAPONS 21Table 2-1. Basic DamageWEAPON BASIC DAMAGE %Mortar Turret 132Mortar 100Flyer Rocket 50Missile Turret 50Disk Launcher 50Grenade 40Plasma Gun 45Laser Rifle 42Fusion Turret 25Chaingun 11Remote Turret 10Blaster 12ELF Turret (Seconds) 6ELF (Seconds) 4
Armor ModifiersA weapon’s basic damage doesn’t tell the whole story. Different armor types absorb different amountsof damage.
Generally speaking, heavier armor absorbs more damage than lighter armor. Refer to the follow-ing table to see what percentage of each weapon’s basic damage gets through each type of armor.
Table 2-2. Armor ModifiersWEAPON LIGHT % MEDIUM % HEAVY %Blaster 130 100 70Remote Turret 130 100 70Fusion Turret 130 100 70Mortar 130 100 70Mortar Turret 130 100 70Grenade 120 100 80Chaingun 120 100 60Plasma Gun 100 100 80Disk Launcher 100 100 60Flyer Rocket 100 100 60Missile Turret 100 100 60ELF (Seconds) 100 100 100ELF Turret (Seconds) 100 100 100Laser 100 100 60
Note that most weapons’ damage drops off atlong range. In particular, energy weapons likethe Plasma Gun and the Fusion Turret becomeextremely weak at extreme range. The LaserRifle is one of the few weapons that doesn’thave any long-range penalties.
Also, note that you’ll score extra damage if you hit an enemy in the head with the LaserRifle—approximately 50 percent more. This isn’t true of other weapons, so don’t bothergoing for tricky head shots when using them.

22 TRIBES: PRIMA’S OFFICIAL STRATEGY GUIDE
Modified Damage PercentageIf you take each weapon’s basic damage and modify it by each armor type’s armor modifier, and divideinto the base damage for each armor, you get Modified Damage Percentage. This is the truest mea-sure of a weapon’s damage, showing exactly what percentage of a player’s health is taken away with adirect shot from each weapon.
Table 2-3. Modified Damage PercentageWEAPON LIGHT % MEDIUM % HEAVY %Mortar Turret 260 132 70
Mortar 196 100 53
Disk Launcher 75 50 22
Flyer Rocket 75 50 22
Missile Turret 75 50 22
Grenade 72 50 24
Plasma Gun 68 45 27
Laser Rifle* 63(95) 42(63) 19(28)
Fusion Turret 49 25 13
Blaster 25 10 6
Remote Turret 20 10 5
Chaingun 20 11 5
ELF Turret (Seconds) 6 6 6
ELF (Seconds) 4 4 4
*Damage in parenthesis refers to head shots.
Shots to KillOur last table is Accurate Shots to Kill an Enemy. This is merely another way of presenting the datafrom the Modified Damage Percentage table, showing how many perfect shots it takes to kill anenemy with each weapon.
As always, bear in mind that indirect shots deal less damage than direct hits, and head shots doextra damage when using a Laser Rifle. Also, note that players can use all sorts of tools (such asShield Packs, Repair Packs and Repair Kits) to heal themselves in midbattle. So you can’t always

CHAPTER 2: ARMOR & WEAPONS 23count on killing an enemy in the exact number of shots listed here.
Table 2-4. Accurate Shots to Kill an EnemyWEAPON LIGHT MEDIUM HEAVY
Chaingun 5 9 20
Fusion Turret 3 4 8
Remote Turret 5 10 20
Blaster 4 10 17
Plasma Gun 2 3 4
Disk Launcher 2 2 5
Grenade 2 2 5
Mortar 1 1 2
Mortar Turret 1 2 2
Flyer Rocket 2 2 5
Missile Turret 2 2 5
ELF (Seconds) 25 25 25
ELF Turret (Seconds) 16.67 16.67 16.67
Laser Rifle* 2(2) 3(2) 6(4)
*Damage in parenthesis refers to head shots.

Armor and weapons aren’t the only items you can wear or carry in Tribes. Players can alsowear packs, which provide a vast array of benefits. Also, each player can carry a limitednumber of miscellaneous items, which perform useful support functions.
Never underestimate the value of packs and miscellaneous items. Though they may not initiallyseem as crucial as armor and weapons, these items often mean the difference between life and death.
PacksYou can wear exactly one pack at any given time. Assuming that you’re playing a mission whereInventory Stations are readily available, there’s absolutely no reason not to be wearing a pack at alltimes. They’re so useful that you’ll be at a huge disadvantage without one.
Just as you should select appropriate armor and weapons, you should select a pack that’ll make adirect impact on your ability to achieve your goal.
PermanentsPermanent packs are worn until you get killed, drop them, or buy a different pack. They never get“used up.” However, packs that derive power from your armor’s energy cell will turn themselves offautomatically when the power runs out.
Some packs are constantly in effect while others need to be turned on when you want to use them.
AMMO PACKThe Ammo Pack increases the total amount of ammo you can carry. Itrequires no energy to operate. If you drop the pack, excess ammo is droppedas well.
The Ammo Pack is a poor choice if you’re using lots of weapons thatoperate on energy, such as the Blaster, ELF Gun, and Laser Rifle. Also, it’snot typically a pack you’ll want to select if you’re wearing Light Armor. This
3Packs & Items
CHAPTER 3: PACKS & ITEMS 25is because you probably won’t need tons of ammo if you’re in Light Armor. And you’re likely to bene-fit more from an Energy Pack or a Jammer Pack.
However, the Ammo Pack really comes into its own if you’re in Heavy Armor and wielding a HeavyMortar. This weapon is unbelievably powerful but short on ammo, so any extra ammo you can carrywill make it that much more potent.
Even if you don’t have a Heavy Mortar, the Ammo Pack can be valuable. Use it in situations whereyou anticipate a great need for ammo (e.g. perhaps you’re going to shell a base with tons ofGrenades). But only do so if you won’t benefit more from a different pack.
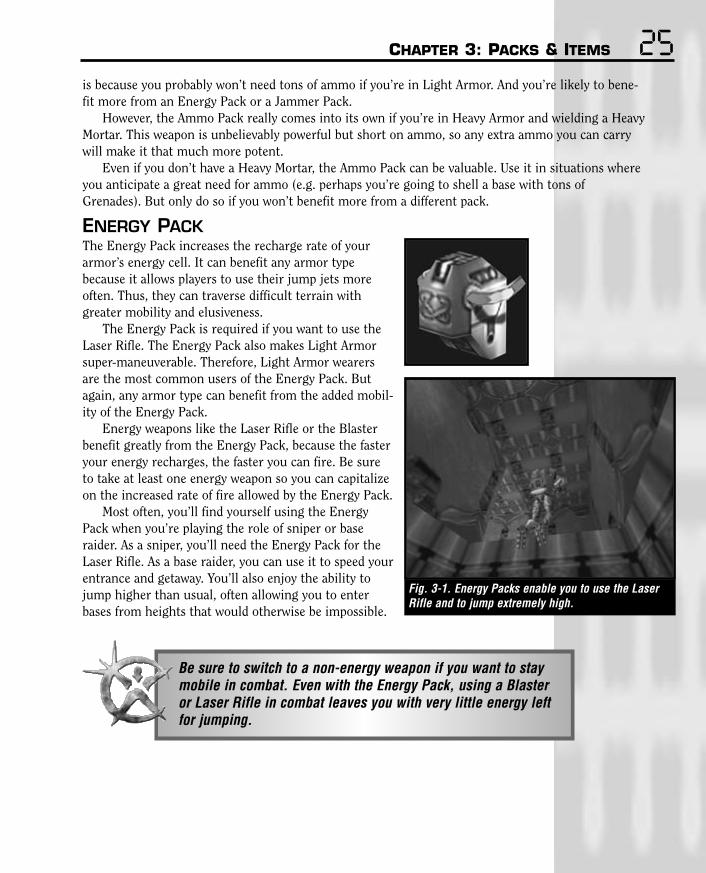
ENERGY PACKThe Energy Pack increases the recharge rate of yourarmor’s energy cell. It can benefit any armor typebecause it allows players to use their jump jets moreoften. Thus, they can traverse difficult terrain withgreater mobility and elusiveness.
The Energy Pack is required if you want to use theLaser Rifle. The Energy Pack also makes Light Armorsuper-maneuverable. Therefore, Light Armor wearersare the most common users of the Energy Pack. Butagain, any armor type can benefit from the added mobil-ity of the Energy Pack.
Energy weapons like the Laser Rifle or the Blasterbenefit greatly from the Energy Pack, because the fasteryour energy recharges, the faster you can fire. Be sureto take at least one energy weapon so you can capitalizeon the increased rate of fire allowed by the Energy Pack.
Most often, you’ll find yourself using the EnergyPack when you’re playing the role of sniper or baseraider. As a sniper, you’ll need the Energy Pack for theLaser Rifle. As a base raider, you can use it to speed yourentrance and getaway. You’ll also enjoy the ability tojump higher than usual, often allowing you to enterbases from heights that would otherwise be impossible.
Be sure to switch to a non-energy weapon if you want to staymobile in combat. Even with the Energy Pack, using a Blaster or Laser Rifle in combat leaves you with very little energy left for jumping.
Fig. 3-1. Energy Packs enable you to use the LaserRifle and to jump extremely high.

26 TRIBES: PRIMA’S OFFICIAL STRATEGY GUIDE
SHIELD PACKThe Shield Pack absorbs dam-age, but at a cost of energy. Itslowly drains your energy sup-ply while active, so you can’tleave it on indefinitely. Also,each hit absorbed by the ShieldPack drains extra energy, so themore you get shot, the fasterit’ll turn itself off.
The Shield Pack can helpanyone absorb more damage, but it tends to bemost useful to players in Heavy Armor. This isbecause players in Light and Medium Armor aremuch more likely to do lots of jetting during com-bat. This reduces the energy available to power theShield. Players in Heavy Armor don’t benefit as much from jetting extensively in combat—after all,they can only get a few meters off the ground. So it’s often better to just ignore the jets and use theShields to absorb damage.
Also, the Shield Pack is at its best in enclosed areas, which is where players in Heavy Armor arelikely to spend the most time. That’s because maneuverability is limited indoors, and you can’t alwaysavoid damage. So it’s better to just absorb damage with the Shield Pack than to try to avoid it.
JAMMER PACKThe Jammer Pack is a powerful tool in the right hands. When activated, itblocks you from enemy Pulse Sensors. And avoiding detection by the enemy
is key to success in Tribes. Ifyou are detected, you’ll appearon enemy Commander Screens,and a red triangle will appearover your head on enemyHUDs. So you’ll be marked asan easy target.
The Jammer Pack hides you from Pulse Sensors andRemote Pulse Sensors. But it cannot shield you fromMotion Detectors, Cameras, and visual detection byenemy players. The pack doesn’t make you invisible,therefore. But since Pulse Sensors affect a vast area andare the most commonly used sensors, you’ll be muchless noticeable when wearing this pack.
The Jammer Pack can be used effectively by anyarmor type, but Light Armor is the most common user.(It’s hard to be stealthy in Heavy Armor!) A player in
Light Armor can hide behind terrain features, then use the Jammer Pack when crossing areas wherehe or she is exposed to radar. Then that player can use the Light Armor’s speed to quickly infiltratethe enemy base.
Fig. 3-2. This Heavy Armor wearer has an activeShield Pack. You can tell because the Shield glim-mers faintly whenever he’s hit.
Fig. 3-3. This Remote Turret won’t shoot at the player because he’s currently using a SensorJammer Pack.

CHAPTER 3: PACKS & ITEMS 27The question you must ask yourself before taking the Jammer Pack is, “Do I need this thing?” The
answer depends on the map and the sort of defenses you’re facing. If the enemy base is riddled withturrets, and there’s not much cover leading up to it, then yes, you should have the Jammer Pack. Onthe other hand, if the enemy base has lots of hilly terrain around it, you can often sneak up withoutthe Jammer Pack. Also, if your target has lots of vigilant human defenders, you’ll probably be seendespite the pack.
It’s important to understand that pure stealth will only get you sofar. Once you’ve grabbed the enemy flag or started to destroy partsof the enemy base, you’ll be detected regardless of the JammerPack. If you think you can make it to the base without the jammer,you might be better off with an Energy Pack. That way, you canbeat a hasty retreat once you’re detected.
REPAIR PACKIt’s tempting to take a Repair Packall the time. The lure of constantrepairs, after all, is strong: Nobodywants to run back to base everytime they get shot up. And indeed,the Repair Pack is a solid choice forany armor type. It allows you torepair yourself, or a teammate,between battles. And it also allows
you to repair turrets, sensors, and other crucial objects.Bear in mind, though, that the Repair Pack doesn’t
help you much during a battle unless you’re fighting anenemy who’s slower than you. Then you can effectivelyrun away while healing yourself. Usually, healing your-self in midbattle is tempting but a bad idea: The minute you stop returning fire, you stop pressingyour opponent, and he or she will get better shots at you.
The Repair Pack is more useful in heavier armor since you’re more likely to take serious damagebut still survive a combat in Heavy Armor. In Light Armor, you should instead strive to avoid beingdamaged in the first place.
If you’re in a large group, it’s great if at least one player has a Repair Pack and can heal the otherswhen they’re injured.
Also, take the Repair Pack if you suspect you’ll need to fix turrets or other useful objects.
DeployablesDeployables provide no benefit until they’re dropped on the ground. Then they become somethinguseful: A Remote Inventory Station, a Remote Pulse Sensor, a Remote Jammer…you name it.
The beginner often dismisses the power of deployables, instead favoring the boost to combat abilityprovided by permanents. But deployables are used to build an infrastructure of Inventory Stations, sen-sors, and turrets that aids your entire team. These items are extremely powerful! Don’t dismiss them.
Fig. 3-4. The Repair Pack can be used to repairdamaged objects and teammates, as well as simplyheal yourself.

28 TRIBES: PRIMA’S OFFICIAL STRATEGY GUIDE
REMOTE PULSE SENSORThe more you play the game, the more you’ll realize how important your team’s sensor network is.There are too many players in the average game for you to just guess where they all are. So you’ll rely
on the sensor network to give you clues about where enemies are located and whatthey’re up to.
The Remote Pulse Sensor extends your team’s sensor range. Like all PulseSensors, it works on a line-of-sight basis. So a Remote Pulse Sensor placed on thecrest of a hill will see much more of the terrain than one placed deep in a valley.Of course, a Remote Pulse Sensor is more likely to be seen and destroyed on a hilltop than in a valley. Therefore, you must strike a balance between visibility and effectiveness.
You can see the radius of effect of a Remote Pulse Sensor by looking at the mapin the Commander Screen. Bear in mind that Remote Pulse Sensors are subject to jamming just likebig Pulse Sensors, so there may be unseen enemies within that radius. These enemies may be usingjammers, or they may be hidden behind terrain features so the Remote Pulse Sensor can’t see them.
The bottom line is that it’s extremely valuable to have a network of sensors scattered across themap. And the Remote Pulse Sensor, with its wide area of detection, is the best choice for covering vasttracts of ground.
REMOTE MOTION SENSORThe Remote Motion Sensor, like a Remote Pulse Sensor, detects enemies and addsthem to your team’s sensor network.
The Remote Motion Sensor has a much smaller effective radius than theRemote Pulse Sensor, and it cannot detect enemies that are perfectly stationary.They must be moving to be seen.
Despite these drawbacks, the Motion Sensor has several qualities that make itabsolutely invaluable. First, unlike a Pulse Sensor, the Motion Sensor cannot bejammed. Furthermore, the Motion sensor does not need a line of sight with thetarget to “see” it. So you can put it next to a wall, and it will “see” an enemy that’s
on the other side of the wall. Remember, though, theenemy must be within its effective radius.
The value of these qualities can’t be overstated.Since Remote Motion Sensors can’t be jammed, you canuse them to protect any area from enemies trying to use jammers and stealth tactics. Furthermore, sincethey can see through walls, hills, ceilings, and floors,you can stick them in small nooks and crannies. There,the enemy is unlikely to see them—and thus, unlikelyto destroy them.
Because of the Remote Motion Sensor’s small effec-tive radius, you probably won’t have enough time tocover the map with them. Instead of using them to blan-ket the map (which is a job for Remote Pulse Sensors),you should place them in highly important locales. Putthem near your base, near turrets, and near crucialspots such as towers.
Fig. 3-5. Since Remote Motion Sensors can seethrough walls and other obstacles, you can placethem in highly shielded areas.
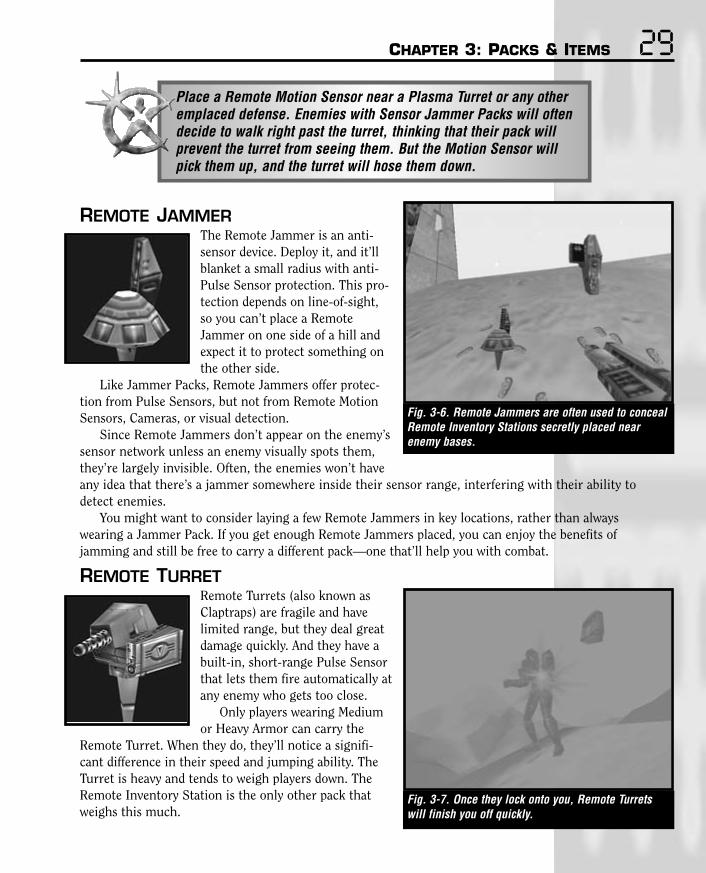
CHAPTER 3: PACKS & ITEMS 29Place a Remote Motion Sensor near a Plasma Turret or any otheremplaced defense. Enemies with Sensor Jammer Packs will oftendecide to walk right past the turret, thinking that their pack willprevent the turret from seeing them. But the Motion Sensor willpick them up, and the turret will hose them down.
REMOTE JAMMERThe Remote Jammer is an anti-sensor device. Deploy it, and it’llblanket a small radius with anti-Pulse Sensor protection. This pro-tection depends on line-of-sight,so you can’t place a RemoteJammer on one side of a hill andexpect it to protect something onthe other side.
Like Jammer Packs, Remote Jammers offer protec-tion from Pulse Sensors, but not from Remote MotionSensors, Cameras, or visual detection.
Since Remote Jammers don’t appear on the enemy’ssensor network unless an enemy visually spots them,they’re largely invisible. Often, the enemies won’t haveany idea that there’s a jammer somewhere inside their sensor range, interfering with their ability todetect enemies.
You might want to consider laying a few Remote Jammers in key locations, rather than alwayswearing a Jammer Pack. If you get enough Remote Jammers placed, you can enjoy the benefits ofjamming and still be free to carry a different pack—one that’ll help you with combat.
REMOTE TURRETRemote Turrets (also known asClaptraps) are fragile and havelimited range, but they deal greatdamage quickly. And they have abuilt-in, short-range Pulse Sensorthat lets them fire automatically atany enemy who gets too close.
Only players wearing Mediumor Heavy Armor can carry the
Remote Turret. When they do, they’ll notice a signifi-cant difference in their speed and jumping ability. TheTurret is heavy and tends to weigh players down. TheRemote Inventory Station is the only other pack thatweighs this much.
Fig. 3-6. Remote Jammers are often used to concealRemote Inventory Stations secretly placed nearenemy bases.
Fig. 3-7. Once they lock onto you, Remote Turretswill finish you off quickly.

30 TRIBES: PRIMA’S OFFICIAL STRATEGY GUIDE
Remote Turrets generate an interference field, so there’s a limit to how many you can place in agiven area. You’ll find that you’re forced to spread them out somewhat.
A wide network of Remote Turrets and various sensors makes your base awfully hard to attack.Also, Remote Turrets placed out in the open or at clever places inside a base can lay unsuspectingenemies low very quickly.
It’s strongly recommended that you use Remote Turrets to defend crucial areas, including yourbase. Later chapters provide detailed advice on getting the most out of these important items.
Remote CameraThe Remote Camera only detects enemies within a small range, and it must bepointed more or less toward those enemies to see them. This makes it a poor sub-stitute for Remote Pulse Sensors if you’re trying to cover a large outdoor area.However, the Remote Camera has certain unique benefits.
First, the Remote Camera cannot be jammed. Also, unlike a Motion Sensor,the Remote Camera can see a player regardless of whether he or she is moving.Add these two qualities up, and you’ll realize that the Remote Camera cannot befoiled. If a player gets close enough, and the Camera is pointing in the right direc-tion, it will always see and add the player to the sensor network.
Also, unlike other sensors, Remote Cameras can—and should—be stuck onto any surface. Ceilings, walls,and sheer slopes can all hold Remote Cameras. Thisallows you to place them in spots where enemies aren’tlikely to see and destroy them. Whenever possible, youshould jet up to the ceiling and stick cameras up there,where they’re almost never noticed.
Finally, Cameras can be controlled from theControllable Objects List of the Commander Screen.Just select a Camera from this list. Then you can lookthrough its eyes, rotating it to a new direction and evenzooming in with the Image Enhancer.
The best places to position Cameras are inside bases,on high vantage points, and near turrets. Cameras infriendly bases are ideal for spotting enemies for turrets.Cameras in enemy bases allow you to see exactly what
the enemy is up to. And Cameras on tall vantage points allow you to see what’s going on in remoteparts of the map. Just take a second to access them from the Commander Screen.
After placing a Camera, be sure to access it from the CommanderScreen and rotate its view until it’s looking in the direction youwant. For example, aim it down a hallway that enemies tend toenter your base through. Then, return to the Commander Screenor your HUD view. The Camera will stay focused in the directionyou left it.
Fig. 3-8. Place Remote Cameras on walls and ceil-ings where your enemies will never suspect them.

CHAPTER 3: PACKS & ITEMS 31REMOTE INVENTORY AND AMMO STATIONSThese deployables can only be carried by a Tribesman in Medium or Heavy Armor.As with Remote Turrets, the Remote Inventory Pack is so heavy that it affectsjumping ability and maneuverability when carried. The Remote Ammo Stationconfers no such penalty.
When deployed, these packs create miniature versions of full-sized Inventoryand Ammo Stations. There are two main differences between these packs and theirfull-sized counterparts, however. These stations havelimited energy (and thus will run dry after enough pur-chases). And you can’t purchase armor from RemoteInventory Stations—you need to visit a full-sized stationfor that.
Remote Inventory Stations are among the most cru-cial items in the game while Remote Ammo Stations areuseful but limited. Remote Inventory Stations are usu-ally preferable. Not only do they provide weapons, packs,and miscellaneous items, but they also restore players’health (something the Ammo Stations can’t do). Andthey can replenish ammo just like a Remote AmmoStation. If you’re going to go through the trouble oflugging a Remote Station out into the field, therefore,make it an Inventory Station. Only use a Remote AmmoStation if you physically can’t get where you want to gowith a Remote Inventory Station. Or if you need to getsomewhere faster than the Remote Inventory Station will allow, use a Remote Ammo Station instead.
Think of Remote Inventory Stations as miniature bases. They can be used to supplement full-sizedInventory Stations in bases where Inventory Stations are in short supply. And they can be droppedanywhere to create an instant staging area for attack on enemy territory. We’ll discuss them at lengthin later chapters.
For now, just be aware that great players often make heavy use of Remote Inventory Stations.
Miscellaneous ItemsMiscellaneous items cover a wide range of functions. All miscellaneous items, save for the RepairPatch, may be purchased at an Inventory Station. You can carry a finite number of miscellaneousitems, but carrying one doesn’t prevent you from taking another. For example, you can carry a RepairKit and your maximum load of Target Beacons, and your maximum load of Mines and Grenades.
There’s no good reason not to take all available miscellaneous items every time you visit anInventory Station. They’re cheap, they can be carried in addition to weapons andpacks, and they sometimes come in handy. Make them a part of your Favorites list.
Repair PatchRepair Patches cannot be purchased or carried. They’re found lying on the groundin certain deathmatch-style missions. Just run across them to restore a percentageof your armor.
Fig. 3-9. Remote Inventory Stations are crucial toefficient play.
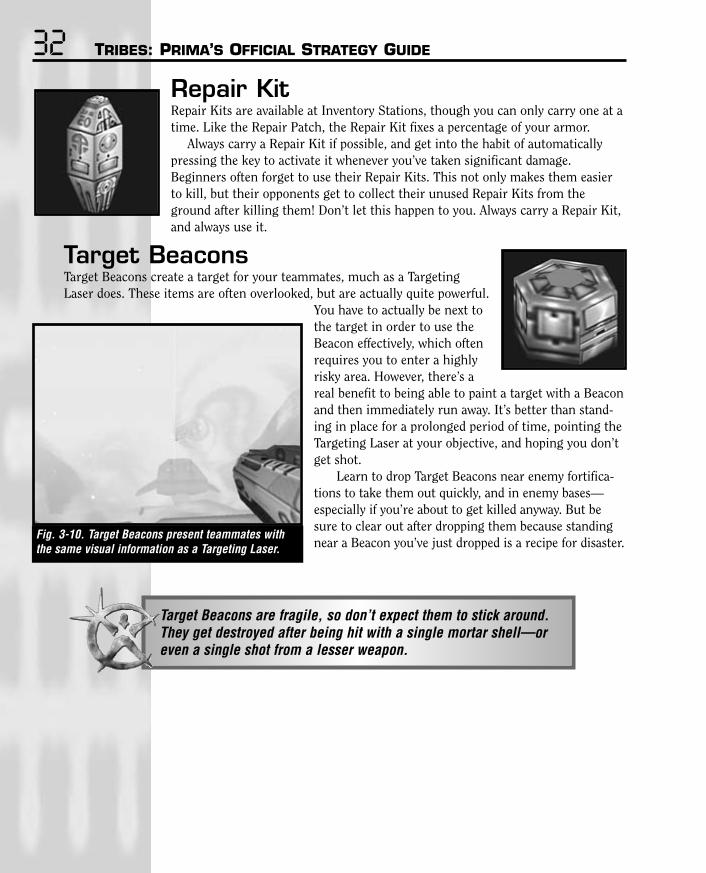
32 TRIBES: PRIMA’S OFFICIAL STRATEGY GUIDE
Repair KitRepair Kits are available at Inventory Stations, though you can only carry one at atime. Like the Repair Patch, the Repair Kit fixes a percentage of your armor.
Always carry a Repair Kit if possible, and get into the habit of automaticallypressing the key to activate it whenever you’ve taken significant damage.Beginners often forget to use their Repair Kits. This not only makes them easierto kill, but their opponents get to collect their unused Repair Kits from theground after killing them! Don’t let this happen to you. Always carry a Repair Kit,and always use it.
Target BeaconsTarget Beacons create a target for your teammates, much as a TargetingLaser does. These items are often overlooked, but are actually quite powerful.
You have to actually be next tothe target in order to use theBeacon effectively, which oftenrequires you to enter a highlyrisky area. However, there’s areal benefit to being able to paint a target with a Beaconand then immediately run away. It’s better than stand-ing in place for a prolonged period of time, pointing theTargeting Laser at your objective, and hoping you don’tget shot.
Learn to drop Target Beacons near enemy fortifica-tions to take them out quickly, and in enemy bases—especially if you’re about to get killed anyway. But besure to clear out after dropping them because standingnear a Beacon you’ve just dropped is a recipe for disaster.
Target Beacons are fragile, so don’t expect them to stick around.They get destroyed after being hit with a single mortar shell—oreven a single shot from a lesser weapon.
Fig. 3-10. Target Beacons present teammates withthe same visual information as a Targeting Laser.

CHAPTER 3: PACKS & ITEMS 33Grenades and MinesWe discussed Grenades and Mines in Chapter 2, but they’re counted as miscellaneous items as far asinventory is concerned. That means you can carry them around for “free,” and they don’t take uproom that’s reserved for other weapons. Be sure to buy them whenever you visit an Inventory Station!
SummaryIt’ll take time for you to learn how to get the most out of packs and miscellaneous items. Be sure toexperiment with different packs in different situations. And try to remember to use Mines andGrenades to supplement your already formidable arsenal.
Both packs and miscellaneous items can give you a tremendous boost if you use them properly.It’s often enough of a boost to move you from mediocrity to excellence.

The Tribes landscape is dotted with significant features. Understanding these features isabsolutely vital to becoming a good player. You need to know how a Pulse Sensor works, how damaging a Fusion Turret is, and what causes a Missile Turret to fire at you. Otherwise,
you’re going to have a rough, confusing, and frustrating experience.This chapter discusses turrets, sensors, vehicles—essentially, anything that isn’t a player or an
inactive part of the landscape. Instead of organizing features by category, you’ll find them organizedby where you’ll find them, either outdoors or indoors. A small section at the chapter’s end discussesvehicles separately as they require a bit of extra explanation.
Exterior FeaturesThe great outdoors is a dangerous place in Tribes. It’s virtually crawling with enemies, some obviousand some not so obvious. A key to survival is to understand the non-human threats you’ll encounter,so you won’t be constantly laid low by forces beyond your comprehension.
Note that we aren’t covering everything located outdoors in the following pages—just mechanicaland electronic threats. Furthermore, note that certain packs can be deployed both outside and inside,and you’ll encounter them frequently, in addition to the threats mentioned here. Refer back toChapter 3 for more information on these objects, which are often just miniature versions of the fea-tures discussed in this chapter.
4Turrets, Sensors,
and Vehicles

CHAPTER 4: TURRETS, SENSORS, & VEHICLES 35BaseThough a base isn’t so much an object as a collection ofobjects, we’ll discuss bases here because they’re soimportant to the game.
A base is simply a collection of fortifications andresources. For example, the typical base is a walled orenclosed structure that possesses several turrets fordefense. It offers crucial resources such as InventoryStations, Command Stations, and Ammo Stations. Itpossesses one or more entrances, but if those entrances
are properlydefended, a base is atough nut to crack.
Most bases haveGenerators located inthem. If a base has Generators, all (or most) of its mechanical assets(turrets, elevators, Pulse Sensors, Inventory Stations, etc.) are pow-ered by those Generators. If the Generators are destroyed, the base’smechanical assets are rendered useless until they’re repaired.
Your base is always vital, but in some missions, it’s more vitalthan in others. For example, in a Capture the Flag style game,each base has a flag that must be captured. Then it must betouched to the opposing flag (also located in a base). These mis-sions require strong base defense because the base is likely to beunder constant assault.
Other missions don’t emphasize bases. For example, you mayhave a mission where the sole object is to maintain control of
three neutral towers in the middle of the map. This mission doesn’t call for you to defend your basethat much—those three towers are the center of attention instead.
Even if bases aren’t the focal point of a mission,they’re strategically important. If your base gets invadedand destroyed, your team will have to waste valuabletime and effort on repairs. This is extremely distracting.Therefore, it’s always a good idea to defend your base.
If you happen upon an enemy base, be advised thatyou usually can’t just rush in, commando-style, andwreck it. You’ll have to employ cunning stealth tactics,blazing speed, or massive firepower to deal significantharm to a base. This usually means attacking withfriends.
TowerTowers are usually neutral. That means there’s a square,rotating “trigger” block in the center that any teammember can touch, thus claiming the tower for his or
Fig. 4-1. Bases come in a variety of different shapesand sizes. Some of them, like this one, even float.
Fig. 4-2. Towers, like bases, come in a variety ofshapes and sizes. Towers usually have a “trigger”block that you can touch to claim them for your team.

36 TRIBES: PRIMA’S OFFICIAL STRATEGY GUIDE
her team. Control of towers can change hands many times during a mission. (Some towers in certainmissions don’t have a trigger block; like bases, they belong to one side or the other.)
When teammates are killed, they tend to reappear near your team’s base. Since towers are usuallyconsidered neutral, teammates won’t often reappear there.
Towers don’t always look like towers. Some towers, for example,look more like dugouts or bunkers.
When we use the term “tower,” we’re referring to any fortifiedoutpost, with turrets or other useful features that can changehands during a mission.
While typically smaller and less fortified than bases, towers sometimes possess the same ameni-ties, such as Inventory Stations and various turrets. However, towers are usually located in territorythat’s “up for grabs.” Towers do act as respawn points for the team that owns them.
When a team takes control of a tower, it takes control of the tower’s turrets, stations, and otheramenities. This often poses a challenge: When taking control of an enemy tower, should you leave itsassets intact, preserving them for your team’s later use? Or should you destroy them so that yourattack on the tower is easier? The former technique makes the tower easier to defend from counterat-tack. But it makes your assault on the tower that much more difficult. The latter technique is some-times the only way to proceed.
Don’t bother rebuilding a tower’s defenses unless you plan to keep enough teammates around todefend it. There’s nothing worse than fully repairing a tower, only to have it fall to the enemy.
Pulse SensorPulse Sensors are your team’sprimary sensors. They’re big,rotating dishes that cover a vastradius with their radar-likevision. Enemies and enemyobjects in the Pulse Sensor’sfield of view are added to yourteam’s sensor network.
Pulse Sensors operate on line-of-sight and thus can-not “see” things located behind walls or ridges. If you’reever in doubt as to whether a Pulse Sensor can see you,just think of it as a big set of eyes. If you’re in a positionwhere you can see it, and you’re within its effectiverange, then it can assuredly see you. If you can’t see it,then it probably can’t see you either. Use the sensor indi-cator on the HUD. Red means you’ve been spotted, andgreen means you have not been spotted.
Fig. 4-3. Pulse Sensors are crucial resources. Ifthey’re knocked out, it’s hard to figure out where theenemy is.
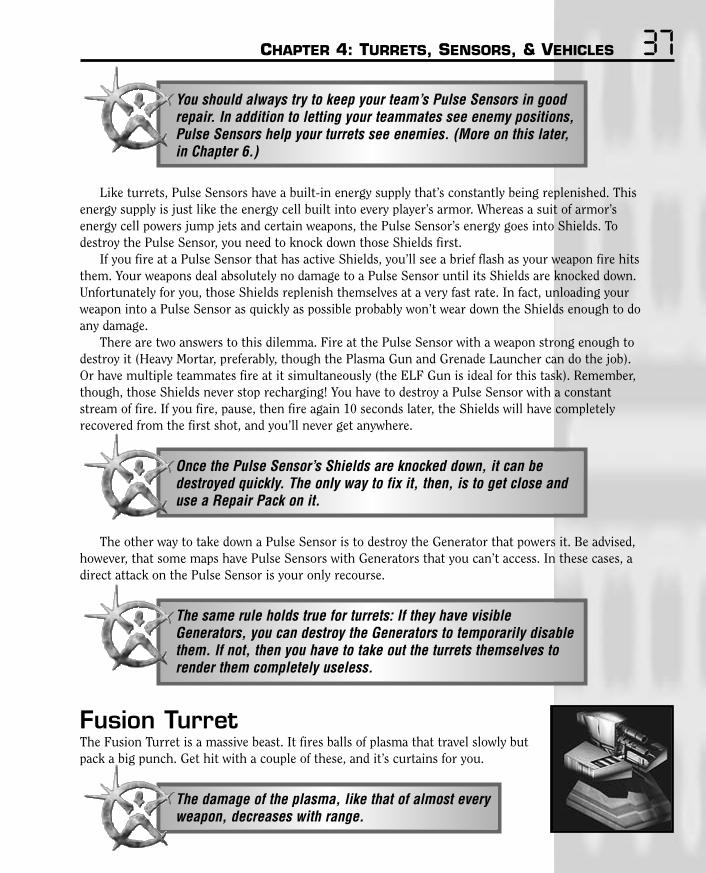
CHAPTER 4: TURRETS, SENSORS, & VEHICLES 37You should always try to keep your team’s Pulse Sensors in goodrepair. In addition to letting your teammates see enemy positions,Pulse Sensors help your turrets see enemies. (More on this later,in Chapter 6.)
Like turrets, Pulse Sensors have a built-in energy supply that’s constantly being replenished. Thisenergy supply is just like the energy cell built into every player’s armor. Whereas a suit of armor’senergy cell powers jump jets and certain weapons, the Pulse Sensor’s energy goes into Shields. Todestroy the Pulse Sensor, you need to knock down those Shields first.
If you fire at a Pulse Sensor that has active Shields, you’ll see a brief flash as your weapon fire hitsthem. Your weapons deal absolutely no damage to a Pulse Sensor until its Shields are knocked down.Unfortunately for you, those Shields replenish themselves at a very fast rate. In fact, unloading yourweapon into a Pulse Sensor as quickly as possible probably won’t wear down the Shields enough to doany damage.
There are two answers to this dilemma. Fire at the Pulse Sensor with a weapon strong enough todestroy it (Heavy Mortar, preferably, though the Plasma Gun and Grenade Launcher can do the job).Or have multiple teammates fire at it simultaneously (the ELF Gun is ideal for this task). Remember,though, those Shields never stop recharging! You have to destroy a Pulse Sensor with a constantstream of fire. If you fire, pause, then fire again 10 seconds later, the Shields will have completelyrecovered from the first shot, and you’ll never get anywhere.
Once the Pulse Sensor’s Shields are knocked down, it can bedestroyed quickly. The only way to fix it, then, is to get close anduse a Repair Pack on it.
The other way to take down a Pulse Sensor is to destroy the Generator that powers it. Be advised,however, that some maps have Pulse Sensors with Generators that you can’t access. In these cases, adirect attack on the Pulse Sensor is your only recourse.
The same rule holds true for turrets: If they have visibleGenerators, you can destroy the Generators to temporarily disablethem. If not, then you have to take out the turrets themselves torender them completely useless.
Fusion TurretThe Fusion Turret is a massive beast. It fires balls of plasma that travel slowly butpack a big punch. Get hit with a couple of these, and it’s curtains for you.
The damage of the plasma, like that of almost everyweapon, decreases with range.

38 TRIBES: PRIMA’S OFFICIAL STRATEGY GUIDE
The Fusion Turret has excellent range. Despite thisfact, it only fires at enemies within a fairly limitedradius—even if those targets are detected by your team’ssensor network. You can rectify this shortcoming bymanually taking control of the Fusion Turret with aCommand Station. However, you’ll find that its projec-tiles move slowly enough that it’s very hard to hit dis-tant, moving targets.
When should you take control of a Fusion Turret,and when should you leave it alone? The Fusion Turretdoesn’t always take advantage of its range. So it’s some-times to your advantage to take control of it manually ifthere are multiple targets hovering at long range. Youprobably won’t kill many targets if they don’t comecloser, but you might catch a few off guard. And you canuse the Fusion Turret to harass enemies that would oth-
erwise plant themselves on a hilltop and shell your base with mortar fire. There’s value in keepingsuch enemies on their toes; leave them alone, and they’ll pick your base apart.
At close range, however, the Fusion Turret usually holds its own without your intervention.Whenever enemies approach the turret at close range, you’re often better off allowing it to fight itsown battles.
As with all turrets, you can render the Fusion Turret temporarily useless in one of three ways.The first and most direct approach is to destroy it with weapons fire. Note that the same energy thatpowers the Fusion Turret’s Shields also powers its plasma shots. Therefore, the turret won’t be able to shoot back after you’ve damaged it beyond a certain point. This is also true with other turrets.
The second way to disable the Fusion Turret is to destroy the Generator that powers it. Again,you should note that while some turrets have Generators, others have “implied” Generators that theoretically exist somewhere, but aren’t accessible. For these turrets, cutting off the power sourceis not an option.
ELF Turret
The ELF Turret works like a larger version of the Electron Flux Gun. It sucksenergy out of its target while dealing moderate damage. This Turret can’talways be counted on to kill enemies. But it does render them incapable ofusing Jump Jets or other energy-based devices for a short time, leaving themvulnerable to defenders.
Fig. 4-4. Fusion Turrets fire projectiles that are slowbut very deadly at close range.

CHAPTER 4: TURRETS, SENSORS, & VEHICLES 39The ELF Turret is a short-range weapon, and
it’s highly effective within that range. There’s usu-ally little value in taking control of this type ofturret as it does a good job all by itself.
You can destroy or evade the ELF Turret usingthe methods outlined under Fusion Turret:Destroy the ELF Turret directly, destroy aGenerator powering it, or simply stay off theenemy sensor network.
Missile TurretMissile Turrets are highlyunique. They fire energy-seeking missiles that dealgreat damage. These missileshome in on their target, sothe Missile Turret is extremely accurate at long range.
With all these assets, the Missile Turret naturally has a few limitations aswell. The main limitation is that it won’t automatically fire at anything picked up
by the sensor network. Its target must not only be vis-ible on the sensor network, but also using jump jets,or flying in a vehicle. (Both jump jets and vehiclesproduce great amounts of energy, which in turn alertsthe Missile Turret to enemy presence.)
Thus, while getting shot by a Missile Turret isnasty, you can walk right past an unmanned MissileTurret and it won’t fire at you. Just remember not touse your jump jets or fly past it in a vehicle.
Of course, enemy players can take control of aMissile Turret with a Command Station. If this hap-pens, they can shoot at anything, even players notusing jump jets. The missiles still home in on theirtarget, so they’re extremely deadly. However, if the tar-get is not jetting the missile tracking is less accurate.
The Missile Turret’s missiles lock onto the closestenergy source they’re fired at, regardless of team affiliation. So it’s easy for a player in manual controlof a Missile Turret to kill his or her teammates. Exercise caution, and don’t aim into a crowd if yourteammates are amidst it.
You can destroy, disable, or evade Missile Turrets in any of the usual ways. And as we just dis-cussed, you can avoid confrontations with Missile Turrets by staying on the ground—provided that ahuman player isn’t manning it. Also, you can sometimes avoid a missile that’s already been fired atyou by dropping from the sky like a stone, or by dropping behind a ridge.
Make no mistake: Missile Turrets are a force to be reckoned with. It’s often highly profitable totake manual control of them, which makes them even more potent.
Fig. 4-5. The ELF Turret sucks the energy out of enemies at medium to close range and deals twiceas much damage as the ELF Gun.
Fig. 4-6. Missile Turrets’ homing missiles areextremely potent and accurate at extreme range.

40 TRIBES: PRIMA’S OFFICIAL STRATEGY GUIDE
Mortar TurretThe Mortar Turret is unique in thatit never fires automatically. A playermust take control of it and fire itmanually.
The Mortar Turret is incrediblydamaging; after all, it’s an even big-ger version of the Heavy Mortaravailable to Heavy Armor. It’s usu-ally found in protected spots whereit doesn’t have a particularly great
field of view. So your teammates will have to spot ene-mies for it with the Targeting Laser or Target Beacons.
The Mortar Turret can easily blow itself up if youfire a shell at too low of an angle and stick it on theground nearby. A single misfire will blow up theMortar Turret, so be careful and fire at a reasonably high angle.
As with other turrets, the Mortar Turret can be blown up directly or disabled by taking out itsGenerator. Otherwise you can usually avoid it as it lies dormant when not manned, and it can’t easilyfire at targets that get too close. As with any mortar fire, the best way to avoid it is just to keep on the move.
Interior FeaturesThe following features are generally found indoors or at the edges of bases or turrets, though excep-tions do exist. Read on for a more thorough understanding of these crucial objects.
Mini-Fusion (Sentinel) Turret The Mini-Fusion Turret, or Sentinel, fires Blaster-sized projectiles that can chewaway an enemy in mere seconds. It takes a moment for the Turret to switch fromits dormant state to a firing state. But once it’s ready, it can hose down an enemy
in no time flat.The Sentinel is not as durable
as, say, a full-sized Fusion Turret,but it can take a great deal of pun-ishment.
There are several ways of defeating a Sentinel. Thefirst way is to blow it up outright, preferably with HeavyMortar shells, Grenades, or Plasma Gun shots. Anotheroption is to destroy the Generator that powers it.
Sneaking past a Sentinel is another popular tech-nique. First, run forward until the Sentinel pops out ofits dormant state and aims at you; then immediatelystop dead in your tracks. (The Sentinel “sees” you with abuilt-in motion sensor, but it won’t shoot at you if you
Fig. 4-7. Mortar Turrets usually aren’t positioned inspots where they can see the enemy, so they mustbe aided with Targeting Lasers.
Fig. 4-8. This Mini-Fusion Turret probably won’tshoot if you freeze in your tracks.

CHAPTER 4: TURRETS, SENSORS, & VEHICLES 41aren’t moving.) Wait until it goes back into its dormant state again, and then advance a few moresteps. Keep repeating until you’re past the Sentinel.
This technique works just fine if there aren’t any other enemies in the area. If there are, however,this technique won’t work. They’ll hose you down with weapons fire while you’re standing there likean idiot, waiting for the turret to go away. If you suspect there are enemies in the area, you eitherneed to destroy the turret or infiltrate the base from some other direction.
Also, if there are additional sensors in the area, such as a Camera looking directly at you, it canalert the Sentinel to your position even if you stop in your tracks. In this case, stopping only gets youkilled faster.
Inventory StationInventory Stations are perhaps the most important objects in thegame. They allow your team toequip itself with the armor,weapons, and gear it needs.They’re also relatively fragile, sothey’re an obvious target.
If you get a chance to infiltratean enemy base, you should try to
destroy everything in sight. However, if you have to beselective, take out Inventory Stations and Generatorsfirst. Inventory Stations are a choke point even undernormal circumstances, amassing crowds of players lin-ing up to use them. Destroying a few of them makes the enemy’s task even harder.
Be sure to use the Favorites option to create several sets of your favorite weapons and armor com-binations. Then you can select a whole set of items at once just by pressing a single button. Thisallows you to get in and get out quickly. If you don’t use Favorites, you’ll cause a traffic jam, andeveryone on your team will be guaranteed to hate you.
Inventory Stations also heal injured players, adding to their alreadyimmense value.
Ammo StationAmmo stations restock players’ ammo but don’t providethe healing that Inventory Stations do. While this is theoretically useful, Ammo Stations are usually locatedinside a base, not out in thefield where you really needthem. Thus, Ammo Stationstend to be ignored under mostcircumstances.
Fig. 4-9. Inventory Stations are always at a premiumand sometimes generate lines.
Fig. 4-10. Ammo Stations provide a quick ammo boost.

42 TRIBES: PRIMA’S OFFICIAL STRATEGY GUIDE
If all you need is more ammo, visit an Ammo Station. If you need healing or need to purchasesomething, an Inventory Station is your best bet.
If you invade an enemy base and are looking to do some damage, ignore the Ammo Stations untilyou’ve taken out everything else.
CommandStationThe Command Station allowsyou to enter the CommandScreen. From there, you cancontrol turrets by selectingthem from the ControllableObjects list.
The value of controlling turrets varies from missionto mission, and from turret to turret. Practice control-ling various turrets, and you’ll soon get the hang ofwhen to control them manually and when to let themdo their own thing.
Vehicle StationThe Vehicle Station is like an Inventory Station,except that you can only purchase vehicles there—no armor or weapons. Purchase a vehicle, and onewill appear on a nearby launching pad.
You can’t purchase a vehicle if there’s alreadyone sitting on the pad.
Try not to buy superfluous vehicles and leavethem sitting on the pad; this only gets in the wayof teammates who may want to buy a different sort of vehicle.
Generators and Solar Panels
Generators are absolutely criti-cal to bases. If you manage to sneak inside the enemy’s base, destroying itsGenerators should be your first priority. Everything from Inventory Stations to turrets to elevators will shut down if the Generators are destroyed.
Some bases possess more than one Generator. If there’s more than one, you’llusually find them side by side, so you can destroy both easily.
Also, some bases possess Solar Panels, which tend to be located on the roof.You’ll have to destroy these Solar Panels in addition to Generators if you want tocompletely knock out the base’s power.
Fig. 4-11. Command Stations allow you to controlturrets.
Fig. 4-12. Vehicle Stations allow you to purchasevehicles, which usually appear on a launching pad nearby.
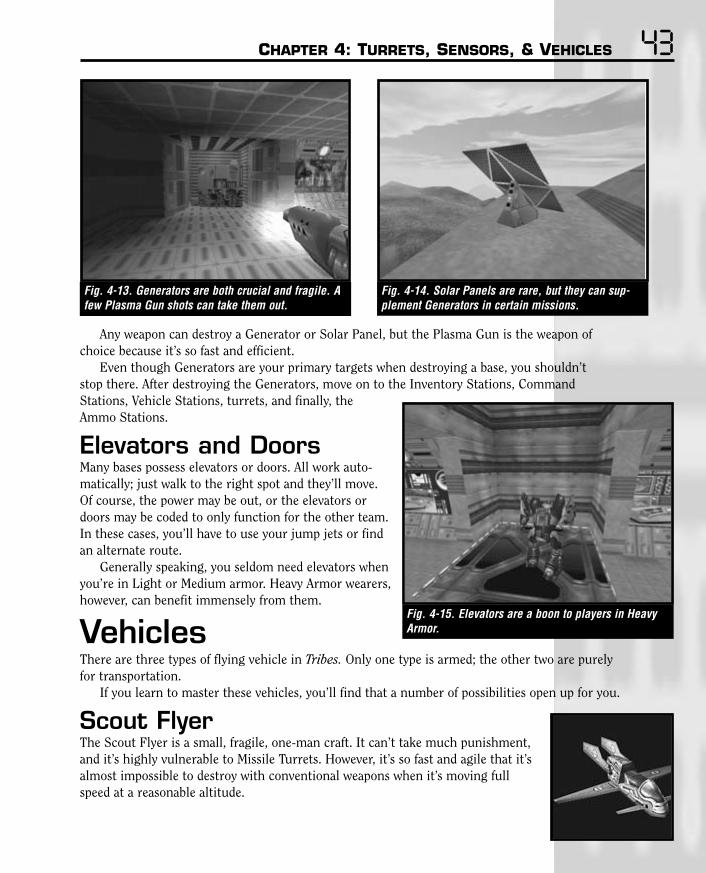
CHAPTER 4: TURRETS, SENSORS, & VEHICLES 43
Any weapon can destroy a Generator or Solar Panel, but the Plasma Gun is the weapon of choice because it’s so fast and efficient.
Even though Generators are your primary targets when destroying a base, you shouldn’t stop there. After destroying the Generators, move on to the Inventory Stations, Command Stations, Vehicle Stations, turrets, and finally, theAmmo Stations.
Elevators and DoorsMany bases possess elevators or doors. All work auto-matically; just walk to the right spot and they’ll move.Of course, the power may be out, or the elevators ordoors may be coded to only function for the other team.In these cases, you’ll have to use your jump jets or findan alternate route.
Generally speaking, you seldom need elevators whenyou’re in Light or Medium armor. Heavy Armor wearers,however, can benefit immensely from them.
VehiclesThere are three types of flying vehicle in Tribes. Only one type is armed; the other two are purely for transportation.
If you learn to master these vehicles, you’ll find that a number of possibilities open up for you.
Scout FlyerThe Scout Flyer is a small, fragile, one-man craft. It can’t take much punishment,and it’s highly vulnerable to Missile Turrets. However, it’s so fast and agile that it’salmost impossible to destroy with conventional weapons when it’s moving fullspeed at a reasonable altitude.
Fig. 4-13. Generators are both crucial and fragile. Afew Plasma Gun shots can take them out.
Fig. 4-14. Solar Panels are rare, but they can sup-plement Generators in certain missions.
Fig. 4-15. Elevators are a boon to players in HeavyArmor.

44 TRIBES: PRIMA’S OFFICIAL STRATEGY GUIDE
The Scout Flyer is the only armed vehicle in Tribes.It fires powerful rockets; these rockets are dumb-fired,meaning that they won’t home in on a target. It takessome practice to reach the point where you can aimthese rockets accurately, especially when you’re flying at full speed.
As with other flying vehicles, you can make theScout Flyer go higher by pressing the key normally usedto trigger jump jets. You can make it move forward byholding down the button usually reserved for walkingforward. You can also gain altitude slowly by pointingthe nose of the Flyer up as you move forward.
While you may want to hold down the “up” and“forward” buttons at the same time, in reality, the Flyerwon’t listen to both buttons at once. Concentrate on
using one button at a time. The best policy is usually to use the “up” button until you’re at cruisingat a respectable altitude, then move forward.
As stated previously, the Scout Flyer is a one-man craft. Like all flying craft, it can only be pilotedby someone in Light Armor. Jump onto it to pilot it, and jump again to leap out.
It’s easy to crash a Scout Flyer. Remember, if you get in trouble, concentrate on vertical move-ment rather than forward movement.
If you’re being harassed by a Flyer, your options are limited; Flyers are extremely hard to shootdown with conventional weapons. Your best bet is to run to the safety of a Missile Turret; Flyers areseldom available on maps that don’t have Missile Turrets. You can also just try to avoid the Flyer, ortry to shoot it down if you’re extremely good.
When piloting a Flyer, bear in mind that you can harass your enemies and even destroy toughground targets with rockets. But you can’t do anything decisive (like grab a flag) without disembarking.
Practice using a Scout Flyer. At first you’ll be clumsy and crash prone. But in time, you’ll learnhow to avoid the ground and fire rockets accurately, and you’ll learn that Flyers are effective weapons.
Light Personnel Carrier (LPC)The Light Personnel Carrier can take somewhatmore abuse than the Scout Flyer, and it can carrytwo passengers in addition to its pilot. On thedownside, it isn’t as fast as the Scout Flyer andpossesses no weapons.
Fig. 4-16. Scout Flyers take time to learn, but they’repowerful in the right hands.
Fig. 4-17. Light Personnel Carriers are used to moveplayers rapidly, and to keep them as a cohesive group.

CHAPTER 4: TURRETS, SENSORS, & VEHICLES 45The Light Personnel Carrier’s main function is to get small groups of players from one side of the
battlefield to the other. This is extremely valuable when you’ve got a mixed group including players inHeavy Armor. Heavy Armored players can take a long time to cross great distances otherwise.
If you’re organized, you can employ “fly-by” tactics with the LPC, having passengers rain downHeavy Mortar and Grenade Launcher fire on targets below. This requires both skill and a goodInternet connection, however. Slower modem connections might bog down to the point where aim-ing is difficult when flying in a vehicle.
Also, you can use the LPC as a getaway vehicle. Send a passenger in to steal a flag while you parkthe vehicle nearby. Then wait for the passenger to run back and hop in for a fast escape with the flag.
Heavy Personnel Carrier (HPC)The Heavy Personnel Carrier islike a bigger, slower LPC thatcan carry up to four passengersin addition to the pilot. It’sideal for deep, heavy-hitting forays into enemy territory, orfor gunship duties.
As with the LPC, successful use of the HPC is highly dependent on your team’s ability to function as a cohesive unit. In a game where everybody’s busy doing their own thing, the HPC is almost worthless.
Fig. 4-18. You can use “fly-by” tactics when you’re apassenger in a Heavy Personnel Carrier.

Unfortunately, you won’t become a great fighter just by reading a book. You can learn how toimprove your tactics, and what techniques to master, but the actual reading won’t take youwhere you want to go. Getting better takes practice, and lots of it.
This chapter explains how to get started on combat and how to improve your chances of winning.But to actually improve, you need to get in there and start fighting. Above all else, you have toobserve. Players who shut off their minds as they fight won’t get much out of the experience. On the other hand, players who analyze what their opponents did to beat them are likely candidates tokeep improving.
SetupThe first thing to consider, before you even jump into a multiplayer game, is what controller to useand how to set it up. An inadequate controller or control scheme will put limits on your abilities.You’ll find it very hard to switch to a different scheme once you’ve become accustomed to one. Try,therefore, to pick a good one from the start.
Choose ControllersThe mouse and keyboard combination is recommended because it’s extremely versatile. The mouseprovides great control, allowing you to turn quickly or slowly. The keyboard supplements the mouse,adding enough keys to let you trigger all vital combat commands.
Joysticks are generally not recommended. They tend not to offer the full range of motion and pre-cise degree of control offered by a mouse. High-quality analog joysticks might suffice, but then again,they tend not to be nearly as precise as a mouse.
Using a mouse to control an action game might seem unnatural to you at first. But as you con-tinue to use it, you’ll grow comfortable with it, and the benefits will become apparent.
5Combat Basics

CHAPTER 5: COMBAT BASICS 47Configure your ControlsMastery of the controls is key to succeeding in Tribes.
You’ll need to set up a configuration that works wellfor you. There’s no ideal configuration that fits everyoneperfectly; you’ll have to experiment and find one thatyou can live with.
Regardless of what setup you choose, all vital combatcommands should be within easy reach. You should sel-dom, if ever, have to look at the keyboard to find a com-mand key. When this does happen, it should only be forrelatively uncommon commands that aren’t essential tocombat, such as dropping ammo.
Sample SetupHere’s a sample configuration that uses a three-buttonmouse and keyboard. This happens to be the configuration that the author uses, so rest assured thatit works. Feel free to try it, but don’t hesitate to abandon it if it doesn’t suit you.
First, go to the Options panel from the main menu. Under Controls and Movement, make surethat Free Look Always On is checked.
Free Look Always On is used by many of the best 3D actiongamers. When it’s enabled, your mouse movements control whatdirection you’re looking in, rather than moving your feet.
This option enables you to look up and down with zero effort.This is absolutely vital in games like Tribes, where most of yourenemies will be located somewhere above or below you.
Disabling this option severely limits your ability to play Tribes.
You also might want to check the Flip Mouse Vertical box, also found on this menu. This invertsyour mouse movements so that pulling back translates into “look up,” and pushing forward translatesto “look down.” Try it and see if it makes sense to you. If you’re used to flight simulators, chances aregood that it will.
Finally, you’ll want to adjust the mouse sensitivity slider. You’ll have to actually play to decidewhat mouse sensitivity works for you, but many players tend to do well with the slider set a bit left of center.
Now it’s time to set up keys using the Movement, General, and Inventory menus.Your right hand controls the mouse. Mouse buttons are set up as follows:
• Mouse movement controls your orientation
• Right mouse button is Forward
• Left mouse button is Fire Weapon
• Center mouse button is Zoom
Fig. 5-1. Configure your controls before starting to play.

48 TRIBES: PRIMA’S OFFICIAL STRATEGY GUIDE
Your left hand rests on the keyboard, with your index finger on . and your pinkie on N. Keys areset up as follows:
• / Switches to the next weapon
• . Strafe Right
• , Strafe Left
• M Backward
• N Jetpack
• B Commander Screen
• z Jump
For the most part, these commands are mapped to the keys that your fingers rest upon. TheCommander Screen key isn’t directly underneath your fingers, but you can slide your pinkie over and tap it quickly. So it’s extremely easy to locate.
Also, the Spacebar isn’t directly under your fingers, but you can reach it with your thumb or hit it by lowering your palm.
If you frequently switch from first person to third person view mode, as some players do, youshould bind the 1st/3rd Toggle command to something easily accessible as well.
There are several other commands that are used frequently. These are arranged on the next rowup so that you can reach up and tap them quickly:
• ; Use Pack
• L Use Repair Kit
• K Deploy Beacon
• J Throw Grenade
• H Throw Mine
This is a simple arrangement that lets you handle just about anything you might want to do incombat. Primary commands are all either under your fingers or close at hand.You might also want to assign your favorite weapons to nearby keys. That way, you can quickly switchto a favorite without having to cycle through weapons with /.
Less crucial or less common commands can be set up any way you’d like, or simply left at theirdefault keys. Just be sure to remember where they are.
Get Comfortable with the ControlsOnce you’ve settled on a configuration that seems to work, stick with it and practice. If a particularcommand needs to be moved because it’s hard to access, move it as soon as you identify the problem,and keep practicing.
You won’t be particularly good at Tribes as long as you have to think about what keys to press.Only when the controls become second nature will you start to excel.
Fight PreliminariesOK, you’ve got your controls set up, and you’re fairly used to them. Now you can jump into a gameand at least not worry about fumbling for the right key. But there are still a number of things youshould do before you even get into a fight.

CHAPTER 5: COMBAT BASICS 49Scan the AreaTribes features huge, multi-level game environmentsinstead of the small, claustrophobic hallways that domi-nate many 3D action games. This means that your ene-mies won’t always be readily visible. They may be way offin the distance, aiming a Laser Rifle at you from a hill-top. Or they may be skulking behind a ridgeline, using aJammer Pack to avoid detection. Or they may be stand-ing above or below your base, safe from radar detection,waiting for an opportune moment to strike.
Even if you manage to detect an enemy, if you fail toobserve your surroundings, you might not notice histeammates. Tribes is a team game, and getting attackedby more than one player at once is a serious risk. Evenplayers with great combat skills will have trouble if theycontinually fight against superior odds.
The bottom line is that situational awareness is a big deal in Tribes. You have to develop tech-niques for staying aware of your surroundings. The three most common ways are as follows:
Keep scanning the terrain.
Periodically check the map in the Commander View.
Occasionally jet straight up in the air and spin around, thus gaining an elevated perspective and spotting enemies that would otherwise remain hidden.
Learn the Match-upsDon’t walk into fights that you’re ill equipped for.Understand the advantages and limitations of eachweapon and armor type, as well as the danger of attack-ing players in strong positions. Then you can avoid situ-ations that are disadvantageous.
For example, you should rarely attack two or moreenemies by yourself. Even if you have great skills, that’sa fight that’s difficult to win. You could, however, harassboth enemies if you have Light Armor and good move-ment skills. Perhaps you could draw them away fromtheir current location if that’s your main intent.
As another example, you should know better than tomarch out into the open in Heavy Armor, without anysupport. Skilled players will just cut you down fromlong range. On the flip side, if you’re wearing LightArmor and fighting someone in Heavy Armor, don’t get
too close and don’t stand around. Use your jets to get airborne and to fight from a distance. Capitalizeon your opponent’s lack of mobility; don’t get close, where he can easily shoot you.
We’ll discuss this topic more later in the chapter.
Fig. 5-2. Careful use of the Image Enhancer some-times reveals enemies who aren’t otherwise visible.
Fig. 5-3. Don’t walk into bad situations like walkingalone in Heavy Armor on a relatively flat map.
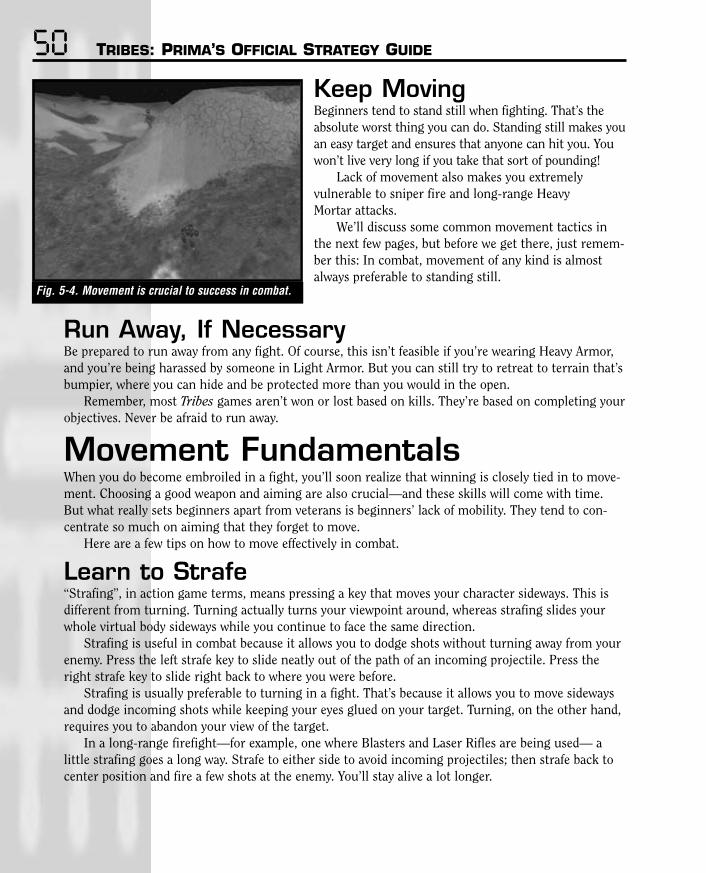
50 TRIBES: PRIMA’S OFFICIAL STRATEGY GUIDE
Keep MovingBeginners tend to stand still when fighting. That’s theabsolute worst thing you can do. Standing still makes youan easy target and ensures that anyone can hit you. Youwon’t live very long if you take that sort of pounding!
Lack of movement also makes you extremely vulnerable to sniper fire and long-range Heavy Mortar attacks.
We’ll discuss some common movement tactics inthe next few pages, but before we get there, just remem-ber this: In combat, movement of any kind is almostalways preferable to standing still.
Run Away, If NecessaryBe prepared to run away from any fight. Of course, this isn’t feasible if you’re wearing Heavy Armor,and you’re being harassed by someone in Light Armor. But you can still try to retreat to terrain that’sbumpier, where you can hide and be protected more than you would in the open.
Remember, most Tribes games aren’t won or lost based on kills. They’re based on completing yourobjectives. Never be afraid to run away.
Movement FundamentalsWhen you do become embroiled in a fight, you’ll soon realize that winning is closely tied in to move-ment. Choosing a good weapon and aiming are also crucial—and these skills will come with time.But what really sets beginners apart from veterans is beginners’ lack of mobility. They tend to con-centrate so much on aiming that they forget to move.
Here are a few tips on how to move effectively in combat.
Learn to Strafe“Strafing”, in action game terms, means pressing a key that moves your character sideways. This isdifferent from turning. Turning actually turns your viewpoint around, whereas strafing slides yourwhole virtual body sideways while you continue to face the same direction.
Strafing is useful in combat because it allows you to dodge shots without turning away from yourenemy. Press the left strafe key to slide neatly out of the path of an incoming projectile. Press theright strafe key to slide right back to where you were before.
Strafing is usually preferable to turning in a fight. That’s because it allows you to move sidewaysand dodge incoming shots while keeping your eyes glued on your target. Turning, on the other hand,requires you to abandon your view of the target.
In a long-range firefight—for example, one where Blasters and Laser Rifles are being used— a little strafing goes a long way. Strafe to either side to avoid incoming projectiles; then strafe back tocenter position and fire a few shots at the enemy. You’ll stay alive a lot longer.
Fig. 5-4. Movement is crucial to success in combat.
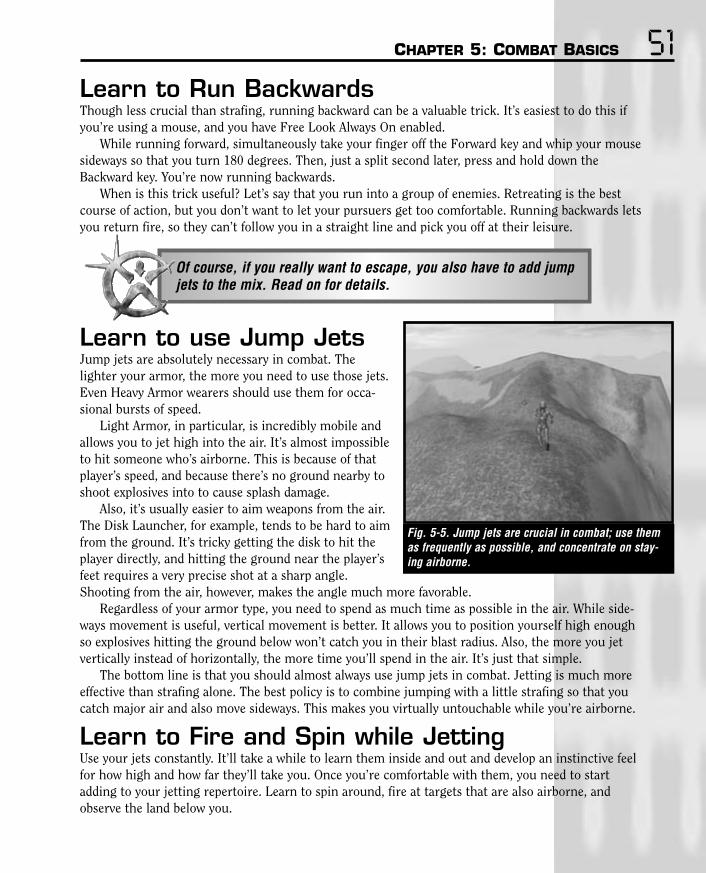
CHAPTER 5: COMBAT BASICS 51Learn to Run BackwardsThough less crucial than strafing, running backward can be a valuable trick. It’s easiest to do this ifyou’re using a mouse, and you have Free Look Always On enabled.
While running forward, simultaneously take your finger off the Forward key and whip your mousesideways so that you turn 180 degrees. Then, just a split second later, press and hold down theBackward key. You’re now running backwards.
When is this trick useful? Let’s say that you run into a group of enemies. Retreating is the bestcourse of action, but you don’t want to let your pursuers get too comfortable. Running backwards letsyou return fire, so they can’t follow you in a straight line and pick you off at their leisure.
Of course, if you really want to escape, you also have to add jumpjets to the mix. Read on for details.
Learn to use Jump JetsJump jets are absolutely necessary in combat. Thelighter your armor, the more you need to use those jets.Even Heavy Armor wearers should use them for occa-sional bursts of speed.
Light Armor, in particular, is incredibly mobile andallows you to jet high into the air. It’s almost impossibleto hit someone who’s airborne. This is because of thatplayer’s speed, and because there’s no ground nearby toshoot explosives into to cause splash damage.
Also, it’s usually easier to aim weapons from the air.The Disk Launcher, for example, tends to be hard to aimfrom the ground. It’s tricky getting the disk to hit theplayer directly, and hitting the ground near the player’sfeet requires a very precise shot at a sharp angle.Shooting from the air, however, makes the angle much more favorable.
Regardless of your armor type, you need to spend as much time as possible in the air. While side-ways movement is useful, vertical movement is better. It allows you to position yourself high enoughso explosives hitting the ground below won’t catch you in their blast radius. Also, the more you jetvertically instead of horizontally, the more time you’ll spend in the air. It’s just that simple.
The bottom line is that you should almost always use jump jets in combat. Jetting is much moreeffective than strafing alone. The best policy is to combine jumping with a little strafing so that youcatch major air and also move sideways. This makes you virtually untouchable while you’re airborne.
Learn to Fire and Spin while JettingUse your jets constantly. It’ll take a while to learn them inside and out and develop an instinctive feelfor how high and how far they’ll take you. Once you’re comfortable with them, you need to startadding to your jetting repertoire. Learn to spin around, fire at targets that are also airborne, andobserve the land below you.
Fig. 5-5. Jump jets are crucial in combat; use themas frequently as possible, and concentrate on stay-ing airborne.
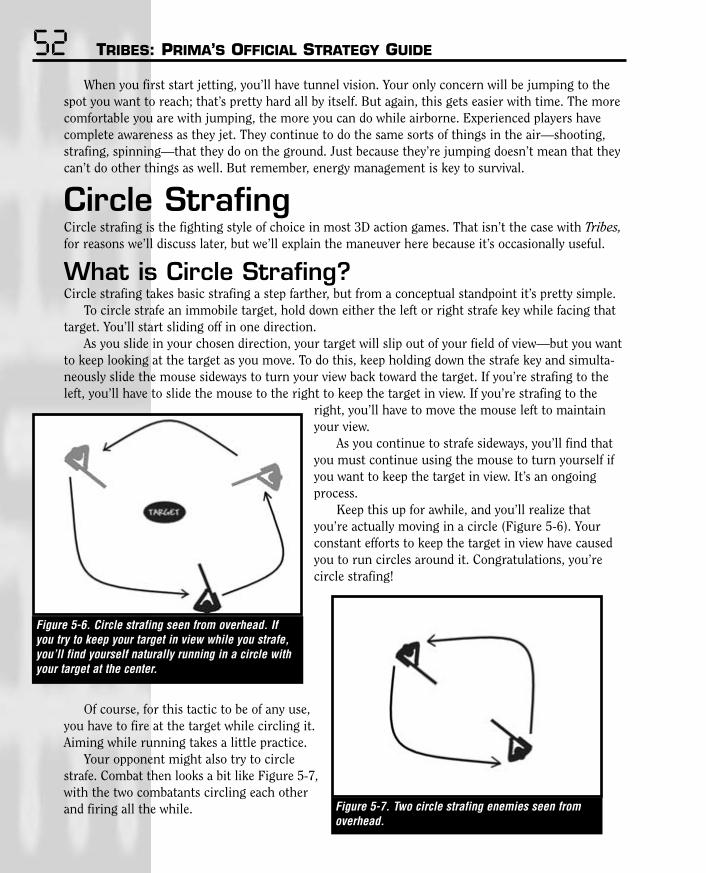
52 TRIBES: PRIMA’S OFFICIAL STRATEGY GUIDE
When you first start jetting, you’ll have tunnel vision. Your only concern will be jumping to thespot you want to reach; that’s pretty hard all by itself. But again, this gets easier with time. The morecomfortable you are with jumping, the more you can do while airborne. Experienced players havecomplete awareness as they jet. They continue to do the same sorts of things in the air—shooting,strafing, spinning—that they do on the ground. Just because they’re jumping doesn’t mean that theycan’t do other things as well. But remember, energy management is key to survival.
Circle StrafingCircle strafing is the fighting style of choice in most 3D action games. That isn’t the case with Tribes,for reasons we’ll discuss later, but we’ll explain the maneuver here because it’s occasionally useful.
What is Circle Strafing?Circle strafing takes basic strafing a step farther, but from a conceptual standpoint it’s pretty simple.
To circle strafe an immobile target, hold down either the left or right strafe key while facing thattarget. You’ll start sliding off in one direction.
As you slide in your chosen direction, your target will slip out of your field of view—but you wantto keep looking at the target as you move. To do this, keep holding down the strafe key and simulta-neously slide the mouse sideways to turn your view back toward the target. If you’re strafing to theleft, you’ll have to slide the mouse to the right to keep the target in view. If you’re strafing to the
right, you’ll have to move the mouse left to maintainyour view.
As you continue to strafe sideways, you’ll find thatyou must continue using the mouse to turn yourself ifyou want to keep the target in view. It’s an ongoingprocess.
Keep this up for awhile, and you’ll realize thatyou’re actually moving in a circle (Figure 5-6). Yourconstant efforts to keep the target in view have causedyou to run circles around it. Congratulations, you’re circle strafing!
Of course, for this tactic to be of any use,you have to fire at the target while circling it.Aiming while running takes a little practice.
Your opponent might also try to circlestrafe. Combat then looks a bit like Figure 5-7,with the two combatants circling each otherand firing all the while.
Figure 5-6. Circle strafing seen from overhead. Ifyou try to keep your target in view while you strafe,you’ll find yourself naturally running in a circle withyour target at the center.
Figure 5-7. Two circle strafing enemies seen fromoverhead.

CHAPTER 5: COMBAT BASICS 53If you aren’t in a big, open area you can’t always run in perfectcircles. That’s fine. Strafing while keeping your target in view isthe point, making a perfect circle isn’t.
Why Circle Strafe?What’s the point of circle strafing? It keeps you in perpetual motion, which makes you a lot harder to hit. Enemies have to lead you with their shots, which is trickier than firing at a motionless target.
Of course, your movement will initially make it harder for you to hit your target. But you’ll grad-ually learn to fire accurately on the run. Since you’ll know what you’re planning to do before you doit, you’ll have an easier time hitting enemies than they’ll have hitting you.
Adapting Circle Strafing for TribesPure Circle strafing is most valuable in games where players don’t have jump jets. In those games,lateral movement is the best way to avoid shots.
Since Tribes features jump jets, which allow you to move vertically, pure circle strafing is fairlyobsolete. Jumping vertically makes you much harder to hit than running laterally.
The key, then, is to incorporate parts of circle strafing into your jump jetting routine. If you cancircle strafe while airborne you’ll be an extremely effective fighter.
Advanced Fight TechniquesCombat in Tribes is highly situational; the best tactics for any situation depend largely on the circum-stances. The following sections examine specialized fighting techniques for specific situations.
SnipingSniping is a fairly easy way of picking off enemies, espe-cially those who don’t know you’re there.
First, try to get up on a high point. If you can avoiddetection, so much the better; unwary targets move lessthan ones who know of your presence. Ridgelines aregreat for sniping because you can slide back down theother side of the ridge to quickly hide.
Next, zoom in with the Image Enhancer. If you don’thave a good shot right away, be patient. Missing withthe first shot often gives away your position. Also, onlyfire when your energy is fully charged to do the most damage.
After you do take a shot, assuming that you didn’tkill the target, you should sneak back behind cover for afew moments. Players who have just been shot will lookfor the source; it’s best not to be visible at that time.
Then, after hiding for a few moments, pop up again and take another shot. Of course, most skilledenemies won’t stand around and let you shoot them a second time. But if you did a good enough jobof hiding, they might think you left the area.
Fig. 5-8. Sniping is both fun and valuable. It pre-vents enemies from holding one position too longand penalizes players for using Heavy Armor in bad spots.

54 TRIBES: PRIMA’S OFFICIAL STRATEGY GUIDE
Be aware that sniping leaves you open to enemy sniping. Since you tend to be immobile whenyou fire at the enemy, other snipers will have a perfect shot at you during that time. Scout the areaas thoroughly as possible before starting to snipe, or you’ll find yourself on the wrong end of theLaser Rifle.
Jet FightingPlayers in all armor types need to learn to use their jets, but Light Armored players especially canmake jetting while fighting an art form. As mentioned previously, you want to stay airborne as muchas possible during combat, especially in Light Armor. So you should devote lots of effort toward maxi-mizing your airtime.
Learn little tricks like jumping before jetting for extra lift, or tapping the Jetpack key, instead ofholding it, to let energy build back up. These will soon become second nature.
Never allow yourself to become complacent and remain on the ground a second longer than nec-essary. If this happens, you either need to prod yourself into action or choose a less mobile armortype. Never waste your Light Armor’s biggest asset—mobility.
Interior FightingInterior fights have their own set of rules, especially when they take place in enclosed spaces. Heavierarmor rules the corridors. If you’re in Light Armor, you need to master the art of firing and retreat-ing, firing and retreating.
Grenade Launchers are particularly crucial weaponsindoors because they let you hit enemies hiding behindcorners, or at least flush them out.
Lightly armored players should retreat quickly and try to approach heavily armored players from unexpected directions, in hopes of getting in a few quick shots. Plasma Guns and Grenade Launchers areideal weapons.
Heavily armored players fighting lightly armoredfoes should use explosive weapons such as DiskLaunchers. These are very effective against Light Armor, have a good blast radius, and have the addedbenefit of bouncing their victims around, disorientingthem slightly.
When two lightly armored foes meet indoors, theChaingun can be effective, as can the Disk Launcher. Heavily armored opponents tend to resort to thePlasma Gun and Heavy Mortar. These can easily hit heavy foes and deal tremendous damage, espe-cially in close quarters.
Using TerrainLearn to use the terrain as you fight. Particularly, observe these rules:
• Try to not let your enemy stand on higher ground than you. The higher you are, the more move-ment options open up for you.
• Standing on or near ridgelines helps. Being atop a ridge increases your options. You can drop offeither side of the ridge, use the ridge to block enemy fire, or jump to a great height.
Fig. 5-9. Indoor fights have their own set of rules.

CHAPTER 5: COMBAT BASICS 55• If you’re on a steep hillside, mentally draw a line that
starts with your opponent, hits you, and then goesslightly past you. If the line connects with the slopebehind you just a few feet after hitting you, you’re ina bad spot. The enemy can now fire an explosiveweapon such as a Disk Launcher or Plasma Gun.Even if they miss you, the projectiles will hit theground behind you and deal splash damage. If youfind yourself in this situation, jump away from thehillside and try to reach a spot where there’s noground directly behind you.
Exploiting VulnerabilitiesYou’ll eventually become more accustomed to variousarmor and weapons, and understand their capabilities better. Therefore, you’ll get an increasingly better grasp of how to exploit enemies’ weaknesses based on their armor and weapons choices. Thereare too many instances to list, but here are a few examples.
• When an enemy tries to gun you down with a Chaingun, seek cover briefly, then pop out again. TheChaingun takes a moment to start firing, and if you’re under cover, your opponent will usually stopfiring until you reappear. That gives you time to reappear and return fire for a moment before theChaingun has time to start up again.
• If your enemy is firing a Grenade Launcher at you, try to stand on a nearby slope. The Grenadeswill tend to bounce away from you, making you hard to hit.
• When enemies in Light Armor try to get too fancy with their jump jet tactics, use the DiskLauncher to shoot walls or ridgelines behind them. You can also use the ELF Gun to quickly dropthem, then switch to the Disk Launcher for an easy shot.
• Stay well away from enemies in Heavy Armor, and ping them with Laser Rifle or Blaster fire. Useyour mobility to disappear behind an obstacle, then reappear somewhere unexpected.
• Get extremely close to opponents in Heavy Armor who try to use the Heavy Mortar on you. Then,jet away at top speed when the mortar shell is fired. Often you can get an over-eager foe to kill him-self with the blast.
• Sink back to longer range when enemies try to use the Plasma Gun on you. Then switch to theDisk Launcher, which shoots faster projectiles than the Plasma Gun.
The list goes on. Keep your eyes open and pay attention to how your enemies kill you—particu-larly when they dispatch you with ease. Usually their choice of weapons and tactics is to some degreepredicated on the weapons and armor you’re using. This is the best way to learn what weapons andarmor to use in any given situation.
TeamworkThere’s a limit to how good you can be on your own. Teamwork will improve your effectivenessinstantly, without requiring lots of work on tricky combat skills. Just having a friend to distract enemies makes them more likely to forget about your presence and make a mistake.
Fig. 5-10. Try to stick to the high ground while fighting.

56 TRIBES: PRIMA’S OFFICIAL STRATEGY GUIDE
There are any number of ways to use teamwork, butfor combat purposes, the first and most important stepis just to use a partner system. Make sure that the play-ers on your team all have companions and go abouttheir tasks in pairs and trios instead of all alone. Again,just having someone to help you fight, even if no tacticshave been agreed upon, can really make a difference.
Once you’ve got friends, more sophisticated team-work is possible. For example, a teammate in HeavyArmor can walk into the enemy’s view while friends inLight Armor use a Jammer Pack and hide behind aridge. When enemies run out to pick on the lone HeavyArmor wearer, the light teammates can ambush them.
The exact degree of teamwork you can achievedepends on how well you know your teammates and
how effectively you can communicate with them. A local area network (LAN) encourages the mostcommunication because teammates can often physically shout to one another. On the Internet, com-munication is harder; you’ll need to play with people you know and continue to play with them overtime. Eventually you’ll get used to their styles of play.
The best way to improve teamwork is to join a Tribe. See Appendix A for more on this.
Getting BetterThis chapter points you in the right direction, butas we’ve tried to stress, it won’t take you all theway to greatness. The best way to improve is sim-ply to play, and to keep watching your enemies tolearn new techniques.
In particular, study the players that make youangry. Chances are, they’re making you angrybecause they’re beating you. Pay attention to theways they kill you—the armor type, the weapons,the footwork. Try to reason out what allowed themto beat you.
If you want to do even more homework, join agame and enter Observer mode. Look for a partic-ularly skilled player and lock onto him or her. Justwatch that player for a while, and put some thought into what you’re seeing.
Every time the player kills an enemy or achieves an objective, consider why it happened. Perhapsthe player you’re watching paid more attention to his surroundings. Perhaps he used armor that wasmore suited to his situation. Perhaps he stayed in the air longer than his opponent. There are hun-dreds of subtle tricks and skills that are hard to describe but easy to grasp if you see them in action.Watch your enemies carefully, and you’re certain to learn.
Fig. 5-11. Teamwork helps to improve your effectiveness.
Fig. 5-12. Use the Observer mode to watch particu-larly good players and learn from them.

This chapter discusses key concepts that will appear time and again as you play Tribes. Theseconcepts are listed in no particular order, but they share a common theme: They’re all topicsthat are central to understanding your game environment and becoming a better player. Most
of the information in this chapter can eventually be absorbed just by playing Tribes online. But we’representing it here so you can learn quickly and move on.
Buying and FavoritesOne of the first things you should do is develop five setsof Inventory Station Favorites. Then, whenever youwant your favorite weapons and armor, you can pur-chase them later with a single button click.
The game remembers your Favorites lists, so thetime you spend carefully selecting Favorites will pay dividends later. Setting your Favorites also benefits yourteam. It gets you out of the Inventroy Station quickly,allowing faster access to your teammates.
It’s recommended that you develop your Favoriteslist at an Inventory Station that isn’t very crowded.Better yet, host a multiplayer game and don’t have anyone else join it. You’ll find yourself all alone on anempty map. Then, you can wander up to any InventoryStation you choose and select Favorites at your leisure,when there are no distractions.
Fig. 6-1. Favorites lists should be developed as soonas possible.
6Key Concepts

58 TRIBES: PRIMA’S OFFICIAL STRATEGY GUIDE
Generally speaking, you want to select sets of Favorites that correspond to different roles. Forexample, you might have a set of Favorites for times when you want to play sniper. This set mightlook like this:
• Light Armor
• Energy Pack
• Laser Rifle
• Disk Launcher
• Plasma Gun
• Repair Kit
• Mine (3)
• Grenade (5)
• Assorted Ammo
Another set of Favorites might be a “heavy base defense” set. This might include Heavy Armor,several weapons, a Shield or Repair Pack (to repair parts of your base) and anything else you thinkyou’d need. You’d select this set whenever you choose to guard the interior of a small base.
Favorites shouldn’t be set in stone. They’re general-purpose lists and won’t always apply to everygame. If it’s clear that a particular set isn’t optimal for your game, modify it. This is preferable to buy-ing the Favorites, selling the unwanted items, and then buying replacements every time you visit theInventory Station.
Using Jump JetsJump jet mastery is crucial to success in Tribes.You should get in the habit of using jets constantly,both in combat and as you move from one place to another.
The first rule of jump jets is “Up, then Over.” Jetstraight up until you’re at the height you want; thenmove forward, sideways, or wherever you want to go.Moving laterally right away kills your upwardmomentum, so you won’t get much height if youstart pressing the Forward or Backward key too early.
The second rule is to always jump before you takeoff. This gives you extra lift and is particularly impor-tant in the heavier armor types, which need all thehelp they can get. Also, if you jump forward, your forward momentum will carry into your jump. Thisallows you to move forward right away, without pressing the Forward key and killing your upwardmomentum.
You might see players making jumps that you thought were impossible—for example, from a hill-top all the way to the top of a floating base. A combination of things makes these jumps possible. That combination usually begins with careful observation of the two rules we just explained. It alsoincludes Light Armor, jumping from the highest possible point, and perhaps even an Energy Pack formore jet power.
Fig. 6-2. Even in Heavy Armor, you should make useof jump jets whenever possible.

CHAPTER 6: KEY CONCEPTS 59The Sensor NetworkA key to understanding Tribes is to understand the sensor network. A faulty understanding of the sen-sor network will prevent you from becoming a good player.
The Enemy Sensor Network: Getting DetectedSensors come in many types, and they’re all slightly dif-ferent. (Read Chapters 3 and 4 for specifics on variousdeployable and permanent sensors, and how they work.)Anytime an enemy sensor or camera “sees” you, you’readded to the enemy sensor network.
You’re also added to the enemy sensor networkwhenever an enemy is looking in your direction, andyou’re within a certain visual range of that enemy.
Note that the key here is visual range, not actualrange. A very distant enemy looking your way mightbarely see you walking around. But if you’re outside of that visual range, the red triangle won’t appear overyour head. If that enemy uses an Image Enhancer tozoom in and stare at you “up close,” however, you’ll get added to the enemy sensor network.
To summarize:• An enemy who’s looking at you will add you to the enemy sensor
network unless he’s extremely far away.• An enemy whose back is turned to you won’t add you to the
sensor network, no matter how close you are. So it is indeedpossible to sneak up behind on an enemy undetected.
• An enemy looking at you from long range may or may not addyou to the enemy sensor network, depending on the distance. If that enemy zooms in on you with an Image Enhancer, though,you’re sure to be added to the sensor network.
The Consequences of DetectionWhat, exactly, does being added to the enemy sensor network entail? It means two things. First, ifyour enemies look at their Command Screens, you’ll appear on the map. This means that any enemylooking for a fight knows exactly where to find you. Second, any player looking in your general direc-tion will see a red triangle floating over your head. This even happens if you’re so far away that henormally wouldn’t be able to see you.
Fig. 6-3. Pulse Sensors are a common way to beadded to the enemy sensor network—but by nomeans the only way.

60 TRIBES: PRIMA’S OFFICIAL STRATEGY GUIDE
The red triangle leaves you open to all sorts of abuse. Laser Rifle sniping and Heavy Mortarshelling are two of the most common forms. That little red triangle is nothing more than a“Shoot me!” sign plastered on top of your head.That’s why evading the enemy sensor network is always desirable.
Staying UndetectedBig terrain features, such as hills and ridges, allowyou to hide from Pulse Sensors, which all operateon line of sight. It’s standard practice to hideunder cover of these features in an effort to stayoff the enemy’s sensor network as much as possi-ble. This is particularly key if you’re attempting a stealth mission, but even overt attacks workmore smoothly if they aren’t detected until they’renear their target.
Even if you have a Jammer Pack, use natural cover because it’ll hide from visual detection. Plus your jammer can’t work indefinitely.
On the flip side, be aware that enemies will do the same thing to you. So they won’t always appearon your sensor network—even if they’re technically within the radius of a Pulse Sensor.
A Sensor Jammer placed on the ground, or an active Jammer Pack on your back, will hide youfrom all types of enemy Pulse Sensors. They will not, however, shield you from Motion Sensors orenemies that visually detect you. Either of these threats is perfectly capable of adding you to theenemy sensor network.
Knowing When You’re DetectedRookies run around without any idea of whether they’ve been detected or not. Veterans learn how theenemy sensor network operates (which you just did by reading the last few pages). They constantlyask themselves, “Has anyone seen me? If not, is anyone likely to see me?” It’s important to know ifyou’ve been added to the enemy sensor network. Then, you can take evasive action if you have, andproceed efficiently with your business if you haven’t.
Learn to watch the Sensor Indicator in the upper right corner of your screen. If it’s green,enemy Pulse Sensors are not detecting you. If it’s yellow, you’re being protected from Pulse Sensorsby a jammer—either a Jammer Pack on your back or a Remote Jammer nearby. If it’s red, enemyPulse Sensors have indeed picked you up. If that’s the case, you’re guaranteed to be on the enemysensor network.
Fig. 6-4. Hiding behind ridgelines is a good way toavoid both Pulse Sensors and visual detection.

CHAPTER 6: KEY CONCEPTS 61Your Sensor Indicator can’t tell when an enemy visually spots you,when a motion detector picks you up, or when a Camera sightsyou. It just tells you when you’re being seen by Pulse Sensors,which are by no means the only things that can detect you. So beadvised that even though your Sensor Indicator is green, it’s stillpossible that you’re being watched.
Building Infrastructure and DefensesIt’s possible to win without building an infrastructure of Remote Pulse Sensors, Motion Sensors, RemoteInventory Stations, and Remote Turrets. But that infra-structure sure helps.
Ideally, you want to have sensor influence over muchof the map. This is easy to achieve if you have at leastone team member constantly doing things that willbuild infrastructure. So have someone deploy RemoteTurrets, Cameras, and Motion Sensors near bases andkey structures, and scatter Remote Pulse Sensors acrossthe map. Ideally, this team member will double as a basedefender if things get ugly.
Attacking players should also take it upon them-selves to place the occasional deployable on the map.The most common and effective deployables for offensive players include Remote Inventory Stationsand Sensor Jammers, both of which facilitate base attacks.
As a general rule, anything that can be deployed is easy to blow up. A few well-placed shots fromany weapon will take out Remote Turrets and Remote Pulse Sensors. However, most players aren’tfully committed to destroying these resources. They’re busy doing other things. Therefore, a numberof them are likely to remain. And as long as your team has a better sensor network than the enemydoes, you’ll have a definite advantage.
Be aware of enemy infrastructure. Whenever you stumble across a small object deployed in thebattlefield, check the map in the Commander View to see if it’s yours. If so, it’ll show up as a greenobject on the map. If it belongs to the enemy, it’ll be red or invisible. Destroy it if that’s the case,being sure to stand back slightly because deployables explode when they’re shot.
Understanding TerrainThe vast majority of the maps you’ll fight on are outdoor areas. Very few of these areas are particu-larly level; most feature prominent ridges, slopes, and inclines. Learning how to make the most ofthese features is crucial to survival.
Fig. 6-5. Several Remote Pulse Sensors have beenplaced on this map, greatly extending sensor range.

62 TRIBES: PRIMA’S OFFICIAL STRATEGY GUIDE
Terrain in BattlesTerrain figures prominently in most battles. So don’tlet your enemy stand on higher ground than you, anddon’t stand where there’s ground behind your back.For example, if you’re standing on a hillside whenyou’re attacked, you’ve got ground right behind yourback. So even if the enemy misses with the DiskLauncher or Plasma Gun, they projectiles will hit the ground behind you and deal splash damage.
Terrain and SensorsWe’ve already discussed the effects of terrain on PulseSensors under “Staying Undetected,” earlier in thischapter. Refer back to that section if necessary, andremember to stay hidden from enemy Pulse Sensorswhenever it’s feasible.
Limits of TerrainThe terrain of your combat area extends far beyond whatyou’ll see in the Command Screen map. However, ter-rain beyond the edges of the Command Screen map isconsidered to be outside the mission area.
In most cases, there’s no real penalty for wanderingoutside the mission area. It’s sometimes even desirableto do this if you’re trying to sneak somewhere sinceyou’re unlikely to encounter any enemies beyond themission area’s boundaries.
If you’re playing a mission with flags, however, andyou happen to be carrying a flag when you exit the mis-sion area, it’s another story. The flag returns to its originallocation the instant you leave the combat area. In thesecases, you should carefully avoid the edge of the map.
Also, in deathmatch-style missions, where the objective is to rack up kills, you’ll start gettingdamaged after a few seconds outside the mission area.
If you happen to get outside the mission area and can’t find your way back, just assign yourself awaypoint. Read the section titled “Setting Waypoints” for more details.
The Commander ViewThe Commander View is a powerful tool. It’s dominated by a map that shows you the position ofeverything that’s been detected by your team’s sensor network. That’s every team member, everyfriendly piece of equipment, and every enemy player or device—everything!
Read the manual for specifics on what the Commander View’s buttons and menu options do. Then read the following for insights on how to put that knowledge into practice.
Fig. 6-6. In battles, you want to stick to the air orhigh ground whenever possible.
Fig. 6-7. After leaving the mission area, there’s nogreen wedge on the map to show you where you are.

CHAPTER 6: KEY CONCEPTS 63Reading the MapThe Commander Screen’s biggest feature is a large map.This map is explained in your game manual, but a fewthings bear repeating.
First, note that all of your teammates will appear onthe map unless they’ve left the mission area. Your ene-mies, however, won’t all show up on the map. Only theenemies inside your team’s sensor network will appear.
Next, note that if players have lines extending fromthem to a point on the map, it means they have anassignment. Perhaps they were given an assignment by a commander; perhaps they gave themselves an assign-ment (see Setting Waypoints, below). It’s nice whenyour teammates have visible assignments. Then you cansee what they’re trying to accomplish without askingthem or observing them for a prolonged period of time.
Also, note that while the map shows the sweep ofyour team’s Pulse Sensors, there may be enemies hidingwithin those arcs. They may be hiding behind terrain features or using jammers of some kind.
Issuing CommandsHaving read the section of the manual that deals withcommands, you may be anxious to command others orreceive orders from your fellow players. Here are a fewthings to bear in mind.
First, you can issue commands to players underyour control. Players are placed under your control if they select your name from the CommanderScreen and press the Select Commander button. Youcan also issue commands to peers if they have notassigned themselves to a command, or been assignedone by a commander. There’s no way for you to forceyourself into a commanding role. A player has to actu-ally select you as a commander before you can orderthat player around.
As you can imagine, this leads to organizational problems when your team is inexperienced orcontains individuals who don’t want to be given orders. You can beg and plead with people to makeyou their commander, but you need their cooperation to make it happen. If players on your team areunwilling to designate a commander, you’re stuck with a disorganized team. (See Getting Organized,below, for more details on how to cope with this situation.)
If you’re keen on teamwork, but nobody will make you commander, feel free to select anotherteam member and make him or her your commander. At least that way, someone’s in control ofsomebody, which theoretically helps your team get coordinated.
Fig. 6-8. Learn to constantly refer to the map. If you don’t, you’ll have no idea what the big picturelooks like.
Fig. 6-9. You can only issue commands to yourselfor to someone under your control.

64 TRIBES: PRIMA’S OFFICIAL STRATEGY GUIDE
Setting WaypointsEven if you aren’t in control of anyone else, you’re still in control of yourself. You can select yourselffrom the Player List of the Commander Screen and issue yourself orders with the root menu underthe player list.
The last line on the chat HUD always displays the last commandissued to you. The text is yellow until you acknowledge the com-mand, at which point it turns green. Commands you issue to your-self are automatically green.
Why would you issue yourself an order? After all, you know exactly what you’re doing; formallyordering yourself to do something seems redundant. There are two reasons for issuing yourselforders: It helps with navigation, and it lets teammates know your plans.
First, issuing yourself a command helps you navigate. For example, if you order yourself to attackthe enemy base, you’ll notice that a green arrow appears on the compass of your HUD. This arrowindicates the direction of your objective, allowing you to instantly determine what direction it lies in.A number in the center of the compass indicates the distance to the objective.
It’s always nice to have that green arrow pointing you in the rightdirection. But it’s especially useful if you manage to wander out ofthe mission area and can’t see yourself on the map. In this situa-tion, it’s possible to actually get lost and not know how to get backonto the map. But if you’ve given yourself an objective, the greenarrow will help you get back on track.
Second, your teammates can look at the map and see a line that runs from you to your objective.This allows them to instantly see what you’re up to. For example, if the line runs to the enemy base,they can determine that you’re going to attack it.
If you just want a reference point on your compass, and you don’twant your teammates to know what you’re up to, press theObjective Completed key. This will remove the line from the mapbut retain the marker on your compass so you can easily navigate.
Controlling TurretsAnother thing you’ll want to do from the Commander Screen is take manual control of turrets. (Thisonly works if you’re at a Command Station.) Do this by selecting them from the Controllable Objectslist. Return to the Commander Screen by pressing q.

CHAPTER 6: KEY CONCEPTS 65Get used to quickly going back and forth between
the Commander Screen and a controllable object. This will come in handy. You can quickly locateincoming enemies with the Commander Screen’s map, then switch to the closest turret to hand outsome punishment.
You can also control Cameras in the same way you control turrets, but you don’t need to be at aCommand Station.
Destroying ObjectsAt some point in most games, you’ll want to destroyheavy enemy objects, such as turrets or Pulse Sensors.It’s key to understand your limitations as you attackthese objects. Otherwise, you’ll spend lots of time tryingto do something impossible.
First, understand that small, remote objects (thekind deployed from packs) are fragile. A couple shotsfrom anything will take them out. Fire at will!
Next on the fragility list come Stations (Inventory,Ammo, Command and Vehicle) and Generators. Theseobjects can be destroyed with just about any weaponbecause they don’t have Shields. A few shots from aPlasma Gun is the ideal way to take these things out,but again, anything will do.
More difficult to kill are the small Sentinel turretsgenerally found indoors. These turrets possess Shields,but since they won’t fire at you when you aren’t mov-ing, you can stand still and pound them. Bear in mindthat their Shields are constantly replenishing them-selves. So Grenade Launchers, Plasma Guns, and Heavy Mortars are the preferred way to take them out. Fire rapidly and constantly, and don’t stop until the turret is gone.
The same rule applies to all other turrets and PulseSensors. These objects are protected by heavy Shields. So you shouldn’t even consider attacking themwith anything less than a Plasma Gun, Grenade Launcher, or Heavy Mortar, the Heavy Mortar beingpreferable. (You’ll need a close shot, lots of ammo, direct aim, and an enemy-free environment to usethe Plasma Gun or Grenade Launcher.)
An alternative is to have one or two friends help attack the object. If everyone attacks simultane-ously, you can wear the object down with any weapons. Ideally, however, one player will use the ELFGun, which specializes in draining objects’ power so teammates can easily finish it off.
Fig. 6-10. Most turrets, like this Missile Turret, areat their best when you’re manually controlling them.
Fig. 6-11. You can shoot a Pulse Sensor with a DiskLauncher all you want, but you won’t really damageit unless a friend is helping you.

66 TRIBES: PRIMA’S OFFICIAL STRATEGY GUIDE
Since Shields repair themselves constantly, there’s no point inattacking a heavy object slowly. This only gives the Shields timeto repair themselves. Instead, you have to fire at these objects asquickly as possible to knock out the Shields, then destroy them.
Evading Turrets and Infiltrating BasesTo be successful in enemy territory, you must first learn how to avoid being gunned down by turrets.
The first step is learning how to avoid being added to the enemy sensor network. The sectionlabeled “The Sensor Network,” earlier in this chapter, will help you with that.
Next, you need to study individual turrets and learn what makes them fire. For example, theFusion Turret won’t automatically fire at you from long distance. And the Missile Turret won’t typi-cally bother you if you aren’t using your jump jets. Refer to Chapter 4 for details on each turret’speculiarities.
Finally, you need to realize that on maps with Command Stations, human players are capable oftaking control of turrets at any time. This makes them deadly and unpredictable. Watch for evidencethat a human enemy is controlling turrets, and adjust your strategy accordingly if you see it.
For more on this subject, look to Chapter 11. The topic of invading enemy territory is a big one,and you’ll find a detailed examination of how to approach it.
Taking a RoleWhile you’ll probably be aimless in your first fewgames, you’ll soon realize that the most effectiveplayers assign themselves a very definite role. Theyusually change roles as the circumstances dictate.But the important thing is that at any given timethey know exactly what they want to achieve.
For example, a player might decide to be apoint-of-attack base defender. This means standingnear the flag or near the entrance to a base, andguarding it from the enemy. Another role is thatof base raider. There are many roles to choosefrom. Chapters 8-12 explain the task of finding arole and how to excel at the role once you’veselected it.
Fig. 6-12. Lots of teammates are on offense rightnow. In this case, it may be best to play defense.

CHAPTER 6: KEY CONCEPTS 67It doesn’t matter whether a commander assigns a role to you, or whether you assigned it to yourself. Your game will start toimprove the minute you take a definite role.
Getting OrganizedThe final concept for you to grasp is that of organization. It’s important to determine, right away, whatsort of organization (or lack thereof) your team possesses, and how you fit into that organization.
If your team is well organized, with a commander already assigned, you should make that personyour commander as well, and play the role you’re given. Be happy if this is the case, for unless thecommander is hopelessly incompetent, your team is likely to benefit from the organization.
If your team doesn’t have an explicit commander, pay attention. Sometimes teams have an infor-mal command structure that’s just as effective as a formal one. For example, one player might beextremely good, and other players will follow him around and help him out. If this is the case, askthis player what you should be doing, and try to follow his or her suggestions.
If your teammates aren’t helpful in the least, and there’s no apparent organization, you can try to jump-start the process. Merely select someone as your commander and see if that player issues any orders.
Finally, if none of the above seems to be working, you have one of two options. First, you can look for an area that’s being sorely neglected (defense, for example) and fill it by yourself.
Second, you can try to try to team up with friendly players, even if they don’t really care. For example, locate a player that seems competent and use a “buddy” system. Stick near this player to increase the likelihood of his or her mission succeeding. Also, you can watch the Commander Screen map and try to join the flow of battle at opportune times. For example, if several teammates are attacking a position at once, try to get there fast and help out.
This sort of makeshift teamwork isn’t ideal, but it’s the best you can do when your team won’t accept formal command structures. Work with what you’ve got!
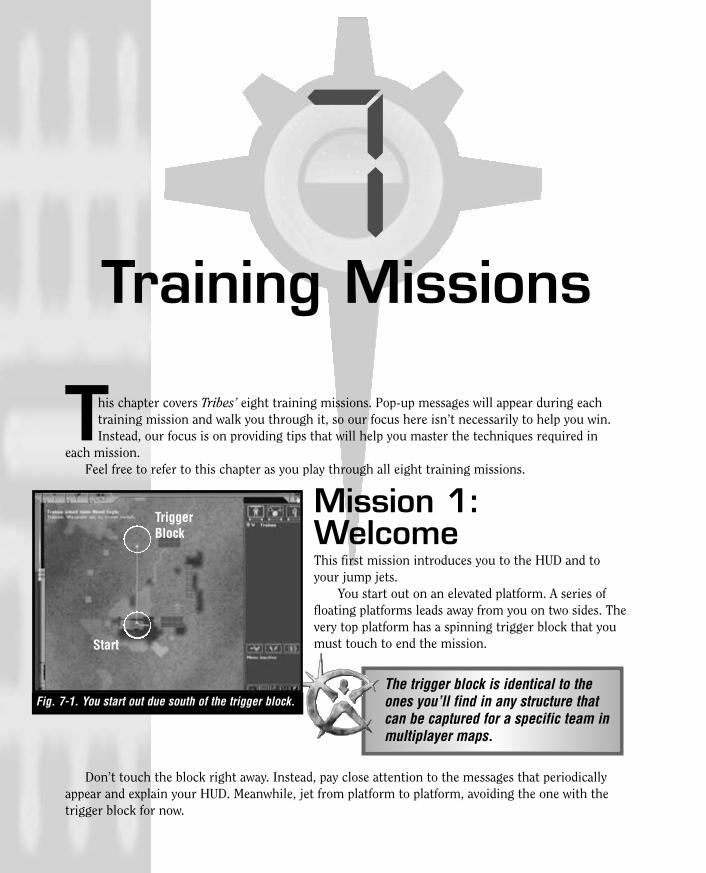
This chapter covers Tribes’ eight training missions. Pop-up messages will appear during eachtraining mission and walk you through it, so our focus here isn’t necessarily to help you win.Instead, our focus is on providing tips that will help you master the techniques required in
each mission.Feel free to refer to this chapter as you play through all eight training missions.
Mission 1:WelcomeThis first mission introduces you to the HUD and toyour jump jets.
You start out on an elevated platform. A series offloating platforms leads away from you on two sides. Thevery top platform has a spinning trigger block that youmust touch to end the mission.
The trigger block is identical to theones you’ll find in any structure thatcan be captured for a specific team inmultiplayer maps.
Don’t touch the block right away. Instead, pay close attention to the messages that periodicallyappear and explain your HUD. Meanwhile, jet from platform to platform, avoiding the one with thetrigger block for now.
7Training Missions
Fig. 7-1. You start out due south of the trigger block.
TriggerBlock
Start

CHAPTER 7: TRAINING MISSIONS 69As you jet around, bear the following tips in mind:
• The first rule of jumping is “up, then over.” Hold down the Jetpack key without pressing any othermovement keys until you reach the desired height. Then, after reaching that height, press anothermovement key (such as Forward) while holding down the Jetpack key to fly in the desired direction.If you try to move forward or backward or strafe too early, you’ll completely kill your upwardmomentum.
• Always jump before jetting and activate your jets at the top of your jump. This gives you more liftthan if you simply started jetting from the ground.
• If you jump while running forward, then trigger the jets at the top of the jump, your forwardmomentum will carry into your jump. The same holds true of backward or lateral movement.Again, be sure not to keep pressing a movement key during the initial phases of your jetting, oryou’ll kill your upward momentum.
• Lay off the jets before you reach your target, or you’ll overshoot it. You’ll need to practice awhilebefore you know how far you can expect your momentum to carry you. But it’s usually better to letup on the jets early. You can always use them again if it looks like you’re coming up short.Overshooting your target is a trickier problem to overcome.
• Simultaneously tap the Jetpack and Backward keys to slow down your forward progress. This is use-ful if you’re afraid you’ll fly too far and overshoot your target. Optionally, you can hold these keysdown to completely stall your movement or even start flying backwards. Or you can spin around180 degrees in midair, then press Forward. This also reverses your momentum.
• Especially in Light Armor, you can often use up all your energy in a jump, but then wait a split sec-ond and tap the Jetpack key again. This uses the energy that built up while you floated in midair.Also, it sometimes gives you a little extra lift to getyou over an obstacle or onto a high ledge.
• Try not to use every bit of your energy if you aren’tgoing to reach your target. Otherwise, you’ll fall fastand hard. Conserve a bit of energy and use it a secondor two before you hit the ground to break your fallsomewhat. If you do use all your energy in a jump, layoff the jets for a moment as you fall. A bit of energywill build up, so you can break your fall with that.
When the HUD information stops coming, jet up tothe top block and press up against the spinning triggerblock. This ends the mission.
You shouldn’t try to jet all the way from the ground to the triggerblock platform. However, it’s possible to jump from the ground all the way up to the platforms on either side of the trigger block. This requires a tall jump, but you might want to try it to test your skills.
Fig. 7-2. Touch the block to end the mission.

70 TRIBES: PRIMA’S OFFICIAL STRATEGY GUIDE
Mission 2:WeaponsThis mission tests your weapons skills. You needn’t worry about movement because you’restuck inside a small base, and you’ll be teleportedback inside if you try to leave.
Over the course of this mission, weapons willpop up automatically, and enemies will appear atvarious intervals. Your task is to shoot these ene-mies—not so difficult since they move slowly anddon’t shoot back.
Here are some tips that’ll get you through it:
• Pop-up tips tell you when enemies have enteredthe area. If you don’t see them and are unsurewhere they are, use the Commander Screen (itdefaults to C) and locate them on the map. Then close the Commander Screen and shoot them.
• Move around inside your base until you get aclear shot at your target.
• Lead your target.
• Use the Zoom feature. Learn to move and firewhile simultaneously holding down the Zoombutton. If this is difficult, assign it to a key that you can easily hold down while doing other things.
• When firing the Grenade Launcher, aim for the ground near your target and watch how theGrenades bounce.
• Aim for the feet of your target when using anexplosive weapon such as the Disk Launcher and the Plasma Gun.
The mission ends when all targets have been destroyed.
Fig. 7-3. Stay inside your base.
Fig. 7-4. Zoom in to get a better shot.
Base

CHAPTER 7: TRAINING MISSIONS 71Mission 3: VehicleThis mission introduces you to flying vehicles. It’s nottoo difficult if you take it slow and easy.
You start out in a base with a Vehicle Station.Approach the station and purchase a Scout. Jump intothe Scout and you’ll find yourself in the pilot’s seat.
Switching from first person to third person perspective can be especiallyvaluable when piloting a vehicle. Itgives you a better sense of your rela-tionship to the ground and any nearbyterrain obstacles.
Your task is now to fly to the waypoint marked onyour compass where another Vehicle Station awaits.Along the way are sets of pylons that you can flythrough if you wish, but doing so doesn’t confer anysort of bonus.
If you crash and destroy your vehicle,you’ll need to go back to the last stationyou visited, re-purchase it, and try again.
Here’s an overview of the controls:
• The Jetpack key makes the vehicle fly straight up.
• The Forward key makes the vehicle move in the direc-tion you’re pointing. If you point the nose of the craftslightly skyward, you’ll gain altitude as you move for-ward. If you point the nose toward the ground, you’lllose altitude.
• The Backward key can be used to halt forward movement and also to move backward.
• Strafe keys may be used to adjust your course, but it’s easier just to turn with the mouse. Strafingdoesn’t work too well in vehicles.
When flying a craft, here are some things to remember:
• The craft doesn’t respond to more than one key at once. Thus, if you press the Jetpack key and alsohold down the Forward key, you won’t get the benefits from both. (That’s because the craft has onlyone set of jets, which can only be pointed in one direction at any given time.) Alternate betweenkeys, therefore, depending on what your priority is.
Fig. 7-5. You’ll need to fly all three vehicle types tocomplete the mission.
Fig. 7-6. Flying through the pylons isn’t necessary,but you should master the controls to the point whereyou can easily do it.
LPC
Start
Finish
HPC

72 TRIBES: PRIMA’S OFFICIAL STRATEGY GUIDE
• To take off, hold down the Jetpack key for a second. Then let up and move forward. Don’t try tomove forward right away. Without that initial second of vertical Jetpack lift, you’ll probably scrapealong the bottom of the launch pad and damage the vehicle.
• There’s never any good reason to crash. If you’re speeding toward an obstacle and think you’ll hit it, lay off the Forward key and use the Jetpack key. When you’re at sufficient height to clear theobstacle, move forward again.
• As you gain experience you can approach your target at full speed and land perfectly. At first, how-ever, slow down as you approach your landing spot and lay off the Forward key. Then use only peri-odic taps of the Jetpack key so you will descend slowly. Remember that you can jump at any pointto exit the craft, which is particularly useful if you’re about to crash.
When you reach the waypoint, land the craft nearby and purchase a Light Personnel Carrier at the Vehicle Station. Fly this craft to the next waypoint where you can purchase a Heavy PersonnelCarrier. Finally, fly the Heavy Personnel Carrier to the final waypoint where the mission ends.
Mission 4: Command & TargetThis mission requires you to destroy several targets indirectly—by commanding a pair of HeavyMortar-wielding teammates. It’s not a complexmission if you approach it step by step.
First, visit the nearby Inventory Station.Purchase a Targeting Laser. You can also purchasean Energy Pack to increase your mobility, but thisisn’t required.
Approach the Solar Panels located at your firstwaypoint. Stand on a hill near the Solar Panels.
Avoid the Fusion Turrets in the tower to the west. If you get too close, they’ll shoot at you.
Now, enter the Commander Screen and selectyour two companions. Order both of them to attack a point on the ground near where you’re stand-ing. They won’t actually fire at this spot; they’ll just run up and join you.
Fig. 7-7. Your first waypoint is north-northwest.
Target 1
Start
Target 3
Target 2

CHAPTER 7: TRAINING MISSIONS 73Don’t order your companions to attack the actual waypoint. If youdo this, they’ll march underneath the platform the Solar Panelsare sitting on where they can’t get a good shot at it. Instead, justorder them to a spot where they’re within Heavy Mortar range ofthe target. Heavy Mortars can shoot a long way, so you’ve got alot of flexibility.
In multiplayer games, you needn’t worry about specifics likethis. You’ll be dealing with human teammates capable of makingtheir own decisions. So if you order them to attack a target, they’llknow enough to stand well back while they bombard it.
When your teammates are by your side, select theTargeting Laser from your weapons list, zoom in on theSolar Panels, and fire at them. Hold down the Fire but-ton for a long time and watch where the mortar shellshit. Adjust your aim if you’re slightly off.
If your companions aren’t shooting, they aren’t in aposition to do so. Make sure you’ve moved them closeenough that they can shoot at the target, but not soclose that they’re literally standing beneath it.
Once you’ve destroyed all the Solar Panels, it’s aneasy task to destroy the Pulse Sensor at the next way-point, and the two Fusion Turrets at the third. Be sureto order your teammates into position so they can hiteach new target.
The mission ends when all targets are destroyed.
Mission 5: CTFThis mission is a simplified Capture the Flag scenario.It features both enemy turrets and computer-controlledplayers. Don’t worry—the enemy won’t go after yourflag, so you don’t need to concern yourself with defense.All you have to do is retrieve the flag from the enemybase and touch it to your own flag, located slightlysouthwest of your base. You’ll need to do this threetimes to win.
If you get killed, you get to try again, but if you killany enemy players, they’re gone for good. This allowsyou to take one thing at a time and achieve your goalswithout much pressure.
Fig. 7-8. Stand in a place where you can see bothyour teammates and the target.
Fig. 7-9. The enemy base is off to the west. Ignorethe pyramid near the center of the map; it isn’timportant.
Enemy Base
Base

74 TRIBES: PRIMA’S OFFICIAL STRATEGY GUIDE
You can take any number of approaches to capturing the enemy’s flag, but we’ll discuss three in par-ticular. You can use one technique to capture the flag all three times, or you can use any combination.
Regardless of what technique you use, attack and kill the two enemy players roaming in the cen-ter of the map first.
Enemy players are highly vulnerable to the Laser Rifle at longrange. The Disk Launcher is also a good weapon to use againstthem. Be sure to use your jump jets and strafe from side to sideas you shoot them.
After capturing the flag for the first time, a new enemy willappear in the vicinity of the flag. Kill him before taking the flag again. After capturing the flag a second time, a final enemywill appear. Kill him as well.
To capture the flag with the “speed” technique, outfit yourself in Light Armor and an EnergyPack. Run toward the enemy base, dodging and jetting to avoid the two Fusion Turrets that guard it.Take the flag and keep running! Return to your base and touch the flag to yours.
The speed technique is pretty hard, especially for a newcomer.Don’t be discouraged if you fail; those Fusion Turrets are nasty.
The stealth approach involves Light Armor and a Jammer Pack. Approach the enemy base, turn onthe Jammer Pack when the Fusion Turrets start shooting at you, and grab the flag. Then get out ofthe area quickly before your energy runs out and the Jammer Pack stops working.
The stealth approach is easiest for the beginner.
Finally, the power approach involves takingHeavy Armor, an Ammo Pack, and a Heavy Mortar.Approach the two Fusion Turrets and destroythem with several low-trajectory Mortar shotsapiece. It may take a couple of tries to get theknack of hitting the Turrets. But once both aregone, you can approach the flag at your leisure.
Fig. 7-10. After leveling both Fusion Turrets withlow-trajectory Mortar fire, you can come and go asyou please without worrying about turret fire.
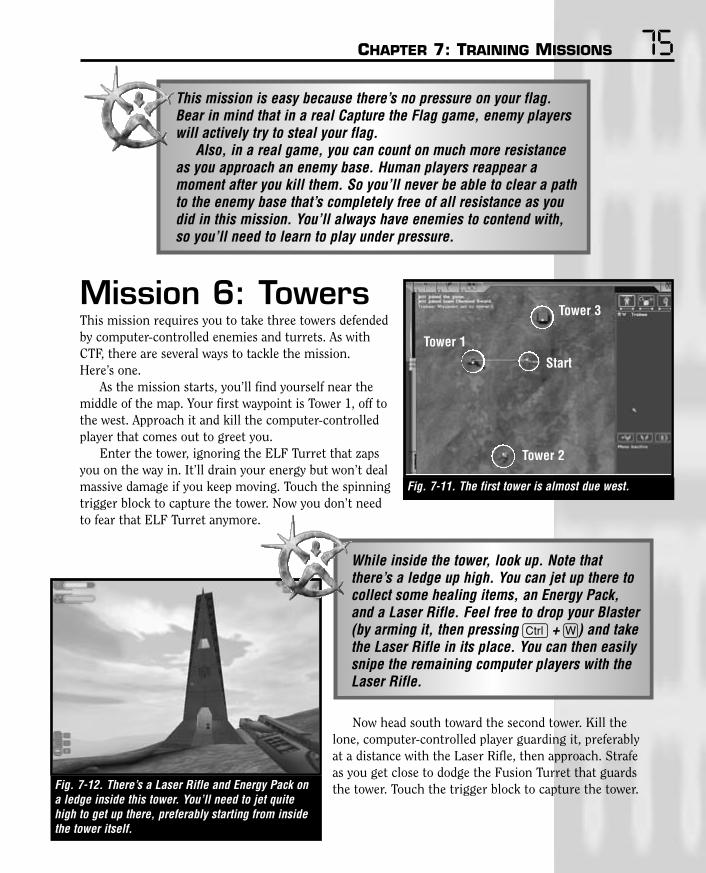
CHAPTER 7: TRAINING MISSIONS 75This mission is easy because there’s no pressure on your flag.Bear in mind that in a real Capture the Flag game, enemy playerswill actively try to steal your flag.
Also, in a real game, you can count on much more resistanceas you approach an enemy base. Human players reappear amoment after you kill them. So you’ll never be able to clear a pathto the enemy base that’s completely free of all resistance as youdid in this mission. You’ll always have enemies to contend with,so you’ll need to learn to play under pressure.
Mission 6: TowersThis mission requires you to take three towers defendedby computer-controlled enemies and turrets. As withCTF, there are several ways to tackle the mission. Here’s one.
As the mission starts, you’ll find yourself near themiddle of the map. Your first waypoint is Tower 1, off tothe west. Approach it and kill the computer-controlledplayer that comes out to greet you.
Enter the tower, ignoring the ELF Turret that zapsyou on the way in. It’ll drain your energy but won’t dealmassive damage if you keep moving. Touch the spinningtrigger block to capture the tower. Now you don’t needto fear that ELF Turret anymore.
While inside the tower, look up. Note thatthere’s a ledge up high. You can jet up there tocollect some healing items, an Energy Pack,and a Laser Rifle. Feel free to drop your Blaster(by arming it, then pressing c + W) and takethe Laser Rifle in its place. You can then easilysnipe the remaining computer players with theLaser Rifle.
Now head south toward the second tower. Kill thelone, computer-controlled player guarding it, preferablyat a distance with the Laser Rifle, then approach. Strafeas you get close to dodge the Fusion Turret that guardsthe tower. Touch the trigger block to capture the tower.
Fig. 7-11. The first tower is almost due west.
Fig. 7-12. There’s a Laser Rifle and Energy Pack ona ledge inside this tower. You’ll need to jet quitehigh to get up there, preferably starting from insidethe tower itself.
Tower 2
Tower 3
Tower 1
Start

76 TRIBES: PRIMA’S OFFICIAL STRATEGY GUIDE
Finally, approach the third tower, which is located due north. Snipe the computer-controlledplayer patrolling this tower’s roof. Then get inside, again strafing to avoid the Fusion Turret guardingit. Descend to the lower level and touch the trigger block to win the mission.
As with CTF, bear in mind that in a real Towers mission, you’llneed to play defense so the enemy can’t take back your towers.
Mission 7: RetrievalYou start out in a base in the western half of themap. The structure containing the three flags youmust retrieve lies to the east.
First, go to your base’s Inventory Station andequip yourself. For speed’s sake, the combination ofLight Armor and Energy Pack is recommended—but you can take anything you’d like.
Proceed toward the waypoint. As you approachit, you’ll need to kill a computer-controlled player.The structure with the flags in it has no entry atground level, so to get inside, you must jet up into it.
Grab the first flag you see inside, which is called the Tyantic Flag. Take it back to your base and place it on one of the three pedestals located next to theInventory Station. Heal yourself at the Inventory Station if necessary.
Return to the flag structure and jet inside. Godeeper into the structure. You’ll need to kill anotherenemy, and then you can collect a second flag, called the Orion Flag. Return it to your base and put it on a pedestal.
Interior combat is a bit different from exterior combat. There’sless room to maneuver. Learn to pop out from behind corners andthen quickly retreat.
Use the Disk Launcher or Grenade Launcher to kill the enemiesyou encounter inside.
Fig. 7-13. To the east lies the flag depository. You’llhave to make three trips there.
Fig. 7-14. You’ll need to use your jets to get inside.
Base
Flags

CHAPTER 7: TRAINING MISSIONS 77Finally, go to the flag structure one last time and kill a final enemy whom you’ll encounter deep
inside it. Now you can collect the third and final flag, called the Cyltic flag. Return it to your base,place it on a pedestal next to the others, and you’ll win.
Mission 8: DestroyBy now you’re familiar with the basics, so this should be an easy mission.
You start out next to a base with an Inventory Station. Equip yourself as you please; as usual, werecommend Light Armor, an Energy Pack, and a Laser Rifle for expediency’s sake.
Proceed due west toward your first waypoint. It’sguarded by a single defender; snipe the defender withyour Laser Rifle and proceed. Destroy the Solar Panel at this base with repeated weapons fire.
All three of your targets have a singledefender, but the targets are very close to one another. So it’s possible that a second enemy will attack you as you deal with the first target. If this is the case, realize that it’s just the defenderfrom one of the other targets.
Nearby is your second waypoint, a small basedefended by another computer-controlled player. Gundown this player and enter the base. You’ll see a PortableGenerator. Destroy the Generator and move along.
Don’t bother trying to destroy thePulse Sensor on top of this base; it’s very difficult to accomplish if you don’t have a Heavy Mortar.
The third waypoint marks the spot of the final target. Approach it and kill the enemy patrollingnearby. Then enter the base and shoot the Primary Generator located inside. It’s sitting up on a ledge,so be sure to look up.
Once you’ve destroyed this item, the mission is a success.
Fig. 7-15. Your three targets are located relativelyclose to one another.
Fig. 7-16. Your enemies are vulnerable to long-rangeLaser Rifle fire.
Target 1
Start
Target 3
Target 2

78 TRIBES: PRIMA’S OFFICIAL STRATEGY GUIDE
OverviewThese training missions have taught you several valuable skills, but they can’t prepare you for thespeed and chaos of a real multiplayer game. You won’t be fighting against predictable computer-controlled enemies that patrol in circles and don’t always notice you at long range. You’ll be upagainst real humans who can and will victimize you in the same way that you victimized those AI-controlled foes.
If any aspect of these missions—the jumping, the vehicle piloting, the gunnery—seems difficult to you, play the missions several times over. Play until every task is easy, and you can win without losing a single life. When you’ve reached that point, you aren’t necessarily ready to be effective in a multiplayer game. But you’ll at least have a firm grasp on the basics.

Starting out in a multiplayer game of Tribes can be brutal. This chapter suggests a method forgetting through your first few games.
Note that the advice in this chapter isn’t geared toward making you an effective player; that comeslater. All this chapter does is suggest ways to experiment, learn, and gain as much as possible fromyour first few games. Subsequent chapters deal with the larger task of honing specific skills.
Understand your ConnectionBefore you join a game of Tribes, consult the section of your manual entitled Ping and Lag. Itexplains what ping and lag are, and how they’ll affect your game experience.
You don’t need to worry much about these factors if you’re playing over a LAN. And you’ve got noworries if you’re connected to the Internet with a dedicated digital line (more on that in a moment).However, most Internet denizens use modems to connect to Tribes. If you’re one of those unluckysouls, it’s important to learn how ping and lag can affect (and even dominate) your game experience.
Interpret Your Ping NumbersEstablish an Internet connection before launching Tribes. Then launch the game, select Play Game,and select a name and appearance for your character. Next, select Join Multiplayer Game, and Tribeswill automatically “ping” all available Internet servers.
8Getting Started inMultiplayer Games

80 TRIBES: PRIMA’S OFFICIAL STRATEGY GUIDE
There are multiple columns of server informa-tion (Figure 8-1), including Server Name, Numberof Players, and Ping. The ping number is expressedin milliseconds, with lower numbers indicatingfaster connections.
If you’re using a modem connection, the bestyou can usually hope for is a ping less than 300.Pings around 150 are sometimes possible undernear-perfect conditions, but anything better thanthat is unlikely for a modem.
If you’re using a non-modem connection to theInternet, you’ll see much better performance. Yourping on some servers is likely to be less than 100.
As stated in the game manual, low ping usuallymeans less lag and a faster game. This isn’t alwaysthe case, but it’s generally true. Let ping play amajor role in which servers you choose. If you choose servers where you have low ping, you’re much more likely to hold your own and enjoy yourself.
Improve your ConnectionWith a modem, it’s pretty much guaranteed that you won’t get a good ping for every available server.You’ll only get consistently good pings (under 300) to servers that are either physically close to you,or have particularly fast connections to the Internet. Learn to stick with these servers.
ENHANCE YOUR MODEM CONNECTIONIf your connection to every server is poor—in other words, it’s always over 300—you should takesteps to improve it. Here are a few possibilities.
First, select the Options tab from the top of theTribes main menu, select Network, and then click theModem button (Figure 8-2). This tells Tribes that you’reusing a modem so that it sets certain internal values tomake the game experience smoother for you.
This alone won’t always help. There are severalother potential problems, and most of them requiremoney to fix. Furthermore, it’s hard to tell where theproblem really lies. So it’s possible to fix one or moreproblems without really getting to the heart of thematter. But in case you’re interested, here are the possibilities.
First, it helps to have a good modem. High-end, 56k U.S. Robotics modems are always a good bet. Low-end modems tend to have more trouble maintaining fastInternet connections.
Next, you need to dial in to an ISP (Internet Service Provider) that uses good, quality modems. Ifyou’re in the market for an ISP, ask prospective services how new their equipment is, and what sort of
Fig. 8-1. Lower ping numbers are better. The numbers you see here are fairly typical for a decent modem.
Fig. 8-2. Be sure to tell Tribes what sort of connec-tion you’re using.
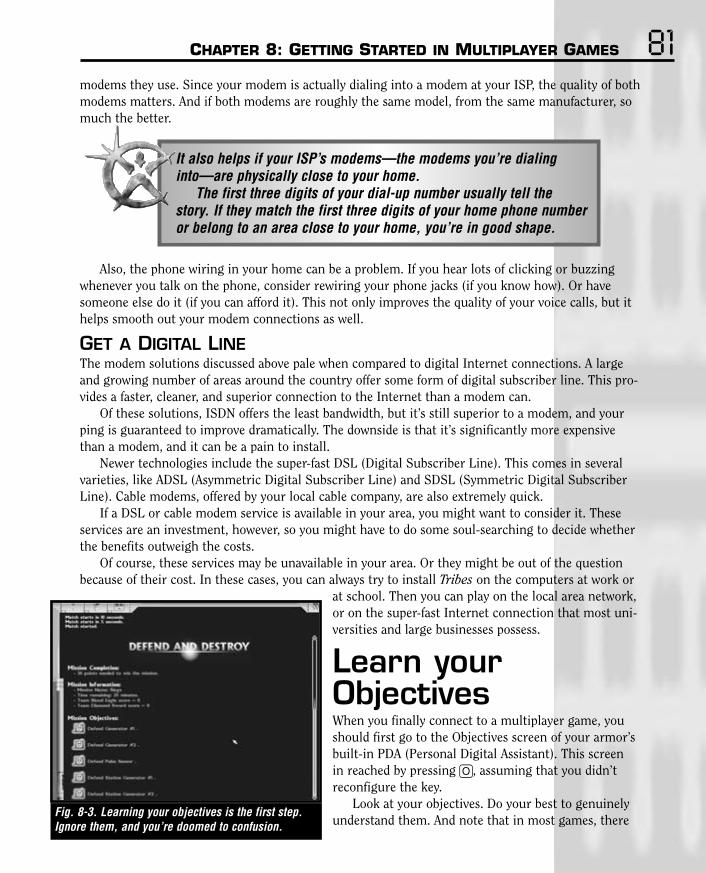
CHAPTER 8: GETTING STARTED IN MULTIPLAYER GAMES 81modems they use. Since your modem is actually dialing into a modem at your ISP, the quality of bothmodems matters. And if both modems are roughly the same model, from the same manufacturer, somuch the better.
It also helps if your ISP’s modems—the modems you’re dialinginto—are physically close to your home.
The first three digits of your dial-up number usually tell the story. If they match the first three digits of your home phone numberor belong to an area close to your home, you’re in good shape.
Also, the phone wiring in your home can be a problem. If you hear lots of clicking or buzzingwhenever you talk on the phone, consider rewiring your phone jacks (if you know how). Or havesomeone else do it (if you can afford it). This not only improves the quality of your voice calls, but ithelps smooth out your modem connections as well.
GET A DIGITAL LINEThe modem solutions discussed above pale when compared to digital Internet connections. A largeand growing number of areas around the country offer some form of digital subscriber line. This pro-vides a faster, cleaner, and superior connection to the Internet than a modem can.
Of these solutions, ISDN offers the least bandwidth, but it’s still superior to a modem, and yourping is guaranteed to improve dramatically. The downside is that it’s significantly more expensivethan a modem, and it can be a pain to install.
Newer technologies include the super-fast DSL (Digital Subscriber Line). This comes in severalvarieties, like ADSL (Asymmetric Digital Subscriber Line) and SDSL (Symmetric Digital SubscriberLine). Cable modems, offered by your local cable company, are also extremely quick.
If a DSL or cable modem service is available in your area, you might want to consider it. Theseservices are an investment, however, so you might have to do some soul-searching to decide whetherthe benefits outweigh the costs.
Of course, these services may be unavailable in your area. Or they might be out of the questionbecause of their cost. In these cases, you can always try to install Tribes on the computers at work or
at school. Then you can play on the local area network,or on the super-fast Internet connection that most uni-versities and large businesses possess.
Learn yourObjectivesWhen you finally connect to a multiplayer game, youshould first go to the Objectives screen of your armor’sbuilt-in PDA (Personal Digital Assistant). This screen in reached by pressing O, assuming that you didn’treconfigure the key.
Look at your objectives. Do your best to genuinelyunderstand them. And note that in most games, there
Fig. 8-3. Learning your objectives is the first step.Ignore them, and you’re doomed to confusion.

82 TRIBES: PRIMA’S OFFICIAL STRATEGY GUIDE
are no points awarded for killing members of the other team. That’s just something you’ll do as youpursue the mission’s larger goals.
When you’re finished evaluating your mission goals, it’s time to visit the Commander Screen.
Study the MapNow press C to activate the Commander Screen,which is dominated by a large map. This is whereyou’ll get a sense of what the terrain looks like andfigure out your next move.
Locate YourselfThe first task is to locate yourself on the map.You’re the green wedge. If you aren’t immediatelyvisible, zoom in on parts of the map where thereare large concentrations of friendly teammates andobjects. You could very well be somewhere in themess, and zooming in will reveal your location.
Look for Key FeaturesAfter locating yourself, look for key objects like bases and towers. Your base, if you have one, isn’tlabeled as such on the map. But you can figure out where it is. It’ll have a high concentration offriendly objects in it, and it’ll probably have a big Pulse Sensor whose arc is visible on the map.
If your team has a base, so does the enemy team. You can bet that it’s the big structure on theopposite side of the map.
If there are towers in this mission, they’ll also be clearly visible. Miscellaneous structures will also appear.
If you’re unclear as to what a particular structure is, the easiest solution is to run there and lookat it. Sure, you’ll get killed a few times as you do this. But it’s better to get killed now and figure outwhere everything is, rather than later, when you’re trying to make a difference.
Note Teammate PositionsAs you observe the map, watch your teammates. Particularly, watch what they’re doing. If they’rescattered around the map, separate from one another and attacking enemies individually, you’re on a bad—or a skilled but highly individualistic—team. Regardless, you’ll know not to expect much cooperation.
If your teammates are moving around in bands, however, and appear to be holding key locationson the map, you’ve probably joined an organized team.
Approach your BaseAfter absorbing all this information, you should turn your attention to your base. If it’s a game withtowers but no bases, focus on a tower that your team currently possesses. Locate it on the map andcommand yourself to defend it. This will place a waypoint marker on your HUD Compass, making iteasy to get there.
Fig. 8-4. Try to figure out where all the importantstuff is, and what your teammates are up to.
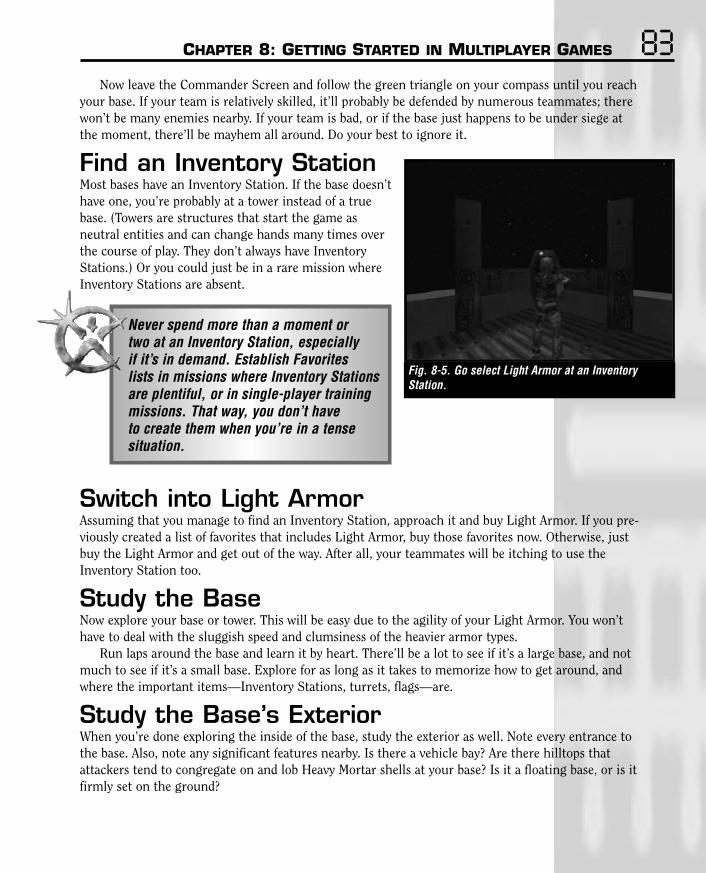
CHAPTER 8: GETTING STARTED IN MULTIPLAYER GAMES 83Now leave the Commander Screen and follow the green triangle on your compass until you reach
your base. If your team is relatively skilled, it’ll probably be defended by numerous teammates; therewon’t be many enemies nearby. If your team is bad, or if the base just happens to be under siege atthe moment, there’ll be mayhem all around. Do your best to ignore it.
Find an Inventory StationMost bases have an Inventory Station. If the base doesn’thave one, you’re probably at a tower instead of a truebase. (Towers are structures that start the game as neutral entities and can change hands many times overthe course of play. They don’t always have InventoryStations.) Or you could just be in a rare mission whereInventory Stations are absent.
Never spend more than a moment or two at an Inventory Station, especially if it’s in demand. Establish Favorites lists in missions where Inventory Stationsare plentiful, or in single-player training missions. That way, you don’t have to create them when you’re in a tense situation.
Switch into Light ArmorAssuming that you manage to find an Inventory Station, approach it and buy Light Armor. If you pre-viously created a list of favorites that includes Light Armor, buy those favorites now. Otherwise, justbuy the Light Armor and get out of the way. After all, your teammates will be itching to use theInventory Station too.
Study the BaseNow explore your base or tower. This will be easy due to the agility of your Light Armor. You won’thave to deal with the sluggish speed and clumsiness of the heavier armor types.
Run laps around the base and learn it by heart. There’ll be a lot to see if it’s a large base, and notmuch to see if it’s a small base. Explore for as long as it takes to memorize how to get around, andwhere the important items—Inventory Stations, turrets, flags—are.
Study the Base’s ExteriorWhen you’re done exploring the inside of the base, study the exterior as well. Note every entrance tothe base. Also, note any significant features nearby. Is there a vehicle bay? Are there hilltops thatattackers tend to congregate on and lob Heavy Mortar shells at your base? Is it a floating base, or is itfirmly set on the ground?
Fig. 8-5. Go select Light Armor at an InventoryStation.

84 TRIBES: PRIMA’S OFFICIAL STRATEGY GUIDE
Play DefenseNow that you know what your base looks like, both inside and out, you’re ready to play some rudi-mentary defense.
Switch Back to Medium ArmorFirst, return to the Inventory Station and purchase Medium Armor. Your Light Armor is highlymobile, but it isn’t the best choice for defense, at least for a beginner. Light Armor is fragile, and you probably aren’t skilled enough to make full use of its agility yet. It’s better to stick with the more durable Medium Armor. (Heavy Armor is frustrating for a beginner because it’s so hard to getaround in.)
Man the InteriorThe easiest form of defense for a beginner to play ispoint-of-attack defense, where you physically standnear a point of enemy attack. If you’re defending abase or tower, you can choose to guard one of itsentrances. Or if you’re guarding a flag, you shouldstay near the flag.
Defense is a fine art, and it’s discussed more inChapter 9. For now, just try to gun down enemieswho get too close, meanwhile staying near yourbase. If you stay near your base, your team’s turrets are likely to help you fight—plus, you’re likely to have teammates nearby.
Pursue AttackersAttackers intent on destroying your base won’t necessarily come after you. Instead, you’ll have tochase them. Practice chasing them around if they don’t initiate combat.
ExperimentAfter playing defense for awhile, switch gears. You may be tempted to stick with defense for now andcontinue to get the hang of it. But it’s best to explore just a bit more so you can experience a numberof different situations. Remember, the faster you try out different roles, the faster you’ll learn aboutthe game environment.
Try Different ArmorsFirst, experiment with different armor types. Try to play defense in Light Armor and Heavy Armor andsee how they affect your ability to defend. Again, don’t worry if you don’t seem to be too effective;you’re just gaining experience and learning about the game.
Don’t dismiss any armor type, even if you hate it at first. All three armor types have their place.None is better than the other, though some armors are better suited to certain roles and situations.
Fig. 8-6. Play defense. Don’t worry about the finepoints; just blast any enemy who gets too close toyour goal.
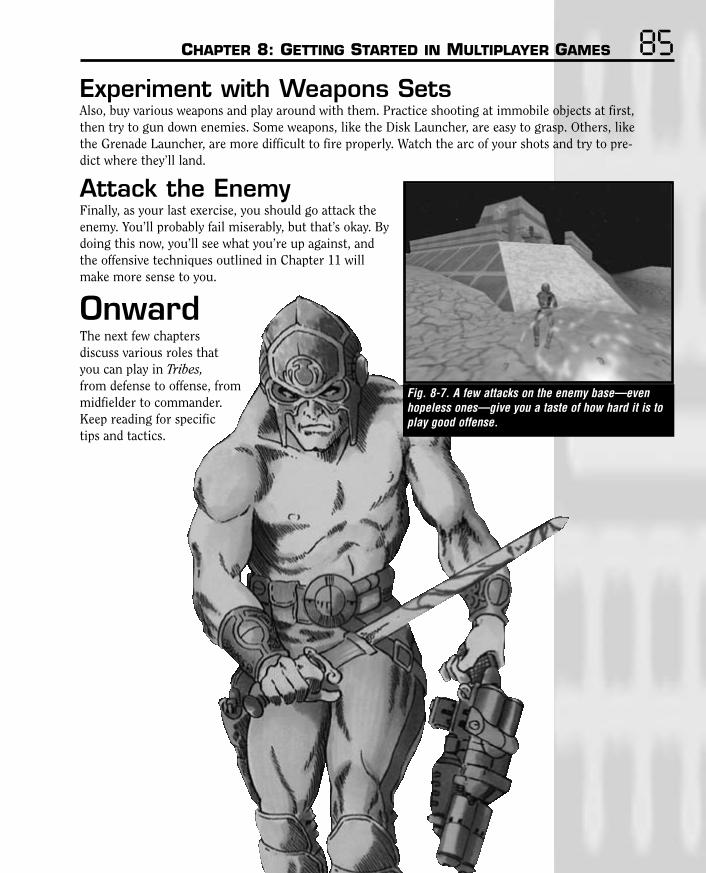
CHAPTER 8: GETTING STARTED IN MULTIPLAYER GAMES 85Experiment with Weapons SetsAlso, buy various weapons and play around with them. Practice shooting at immobile objects at first,then try to gun down enemies. Some weapons, like the Disk Launcher, are easy to grasp. Others, likethe Grenade Launcher, are more difficult to fire properly. Watch the arc of your shots and try to pre-dict where they’ll land.
Attack the EnemyFinally, as your last exercise, you should go attack theenemy. You’ll probably fail miserably, but that’s okay. Bydoing this now, you’ll see what you’re up against, andthe offensive techniques outlined in Chapter 11 willmake more sense to you.
OnwardThe next few chapters discuss various roles that you can play in Tribes,from defense to offense, from midfielder to commander. Keep reading for specific tips and tactics.
Fig. 8-7. A few attacks on the enemy base—evenhopeless ones—give you a taste of how hard it is toplay good offense.

Defense is a crucial role in any game except for pure “deathmatch” levels, where the onlygoal is to rack up kills. Other game types all feature objects and locations that must bedefended if your team is to win.
Defense is also the best role for a beginning player. Not only is it vital, but it’s relatively easy from both a conceptual and a skill standpoint. Conceptually, it’s easy because your goal is todefend something—and that’s it. There’s less decision making involved than with offense. Also,defense typically requires less skill than many other roles. You’re in your own territory, and youhave the benefit of friendly turrets and teammates to assist you.
Still, that doesn’t mean that defense isn’t challenging. Try to hold down the fort against a barrage of Heavy Mortar fire. Or try to defend your flag from an extremely skilled raider in LightArmor and an Energy Pack. You’ll soon see what we mean.
Keep reading to learn the fundamentals of playing defense.
Perimeter Defense vs. Point-of-Attack DefenseThere are many ways to approach defense, but for clarity’s sake, we’re going to emphasize two:perimeter defense and point-of-attack defense. We’ll also look at a hybrid or all-purpose defensivestyle, which uses elements of both perimeter and point-of-attack styles.
9Defense Primer

CHAPTER 9: DEFENSE PRIMER 87Point-of-Attack Defense Point-of-attack defense is easy to grasp. It involves locating the object or structure you’re trying to defend, staying close to it, and killing anyone who gets too close. There are numerous finepoints to grasp, and numerous ways to make yourself more effective. We’ll talk about these later in the chapter.
Point-of-attack defense typically takes place indoors, though it can be useful in certain outdoorsituations as well. It’s usually best when the defender wears Medium or Heavy armor, whichabsorbs lots of punishment and presents a formidable challenge in enclosed spaces.
Perimeter Defense Perimeter Defense involves defending your objective from a distance. Instead of letting enemies getclose to the object or location being defended, perimeter defenders array themselves a fair distancefrom the objective. Then they harass or intercept enemies before they get too close.
Most commonly, perimeter defenders station themselves between their objective and the enemybase since that’s where most enemies tend to come from. But perimeter defense is most effectivewhen there are defenders on all sides, encircling the objective so that nothing can break through and take it.
Medium and Light armor are common choices for perimeter defense because this defensivestyle involves interception and pursuit.
All-Purpose DefensesFinally, it’s possible to play a hybrid defensive role, which we’ll call all-purpose defense. This is useful when you’re the only person defending a particular objective, or when you’re in a game with very few players. When playing this type of defense, you can start out as a perimeter defender.Then you gradually retreat and become a point-of-attack defender as the onslaught comes toward you.
Mastering Point-of-AttackDefensePoint-of-attack defense is the most obviousdefense. If you’re supposed to defend a flag,you stand right by it; if you’re supposed todefend a base, you wait inside it. But aswith all useful techniques, you have to stepbeyond the obvious if you want to be trulygreat at it. Here are some guidelines for thewould-be point-of-attack defender.
Fig. 9-1. Point-of-attack defense is easy to play but difficultto master.

88 TRIBES: PRIMA’S OFFICIAL STRATEGY GUIDE
When to Use ItWhen should you play point-of-attack defense? Here are a few suggestions.
First of all, point-of-attack defense is seldom necessary in spots that aren’t focal points of themission. For example, if your mission is to capture towers, very few enemies will bother attack-ing your team’s base. Defend those towers, not the base! Since your teammates will automaticallyreappear near the base whenever they’re killed, you’re sure to have a few players wanderingaround there at most times. That’s good enough if the enemy isn’t making an effort to wreckyour base.
Next, understand that point-of-attack defense is very effective in enclosed areas, especially inlarge bases and areas with heavy fortifications like Plasma Turrets. It’s less effective in small struc-tures and in open areas. If you’re trying to defend a flag that’s sitting right out in the open, forexample, point-of-attack defense is a lousy idea. Enemies can shoot at you from all angles, pickingyou off at long range, and then run in and steal the flag after dispatching you.
Similarly, if you’re defending a small tower by yourself, with only a few turrets guarding thearea, pure point-of-attack defense usually won’t work. The tower is lightly fortified and offers very little protection. So once the enemy knows you’re in there, it’s an easy matter of usingHeavy Mortar shells or grenades to flush you out. These situations demand a more active,all-purpose defense.
Point-of-attack defense is best in big games with lots ofplayers, where key objects and locations have multipledefenders. In these cases, a single point-of-attack defenderin Heavy Armor can make a big difference against enemieswho manage to sneak through.
Who Should Use ItThere should seldom be more than one person on pure point-of-attack defense—for example, rightnext to the flag, or inside the base. The others should take a more active role, playing perimeterdefense. That way, most enemies won’t reach the point-of-attack defender in the first place.
In missions featuring particularly big bases with multiple entrances, it may be desirable tohave point-of-attack defenders guarding every entrance. However, in most cases these defenderscould be of more use in a perimeter defense or all-purpose defensive role. They should aggressivelytake on enemies and hold onto turf instead of hiding indoors.
Effective Weapons and ArmorIf you’re playing pure point-of-attack defense, guarding a small, enclosed area for an extendedperiod of time, you should probably wear Heavy Armor. Enclosed areas minimize the maneuver-ability of players in Light Armor, but they focus explosions and weapons fire, making HeavyArmor’s durability a real asset.

CHAPTER 9: DEFENSE PRIMER 89Medium Armor is also good, espe-
cially if you’re planning on movingaround a little, and possibly playingpoint-of-attack at more than one spot.For example, you’re guarding oneentrance to your base, but you know thata major attack is about to hit a different entrance. Ifyou’re wearing Medium Armor, you canget to the trouble spot faster.
So, you’ll probably be using HeavyArmor, and the enemies you’ll be facingprobably won’t be in Heavy Armor.Therefore, you should use big, damagingweapons that can deliver a beating atclose range. Since you’re well protected,you needn’t worry too much about keeping yourself alive.
Good choices for indoor fights are Disk Launchers, the Plasma Gun, and even the HeavyMortar. Grenade Launchers are great for taking out enemies who are hiding around corners, andfor pinning enemies in the middle of several explosive threats.
The Heavy Mortar is an ideal, last-ditch weapon. If your enemy is going to beat you, lob down a shell and hope it takes both of you out. If you’re both killed, you’re likely to reappear nearby, and your enemy will probably reappear in his team’s territory. So you’ll have effectively foiled his assault.
Effective TechniquesThe following suggestions will help you improve your point-of-attack skills. Even the most stalwartof defenders should read them.
USE EXISTING DEFENSESIt’s crucial that you pick a good spot fordefense. Just because you’re defending aflag doesn’t mean you have to stand righton top of it. And just because you’redefending an entrance doesn’t mean youhave to stand in the doorway.
The ideal defensive spot is some-where that an automated defensive itemcan help you out. For example, manybases have one or more Mini-FusionTurrets (otherwise known as Sentinels)
Fig. 9-2. The Heavy Mortar is an effective room-clearer.
Fig. 9-3. This Sentinel turret will alert the defender tointruders by popping up.

90 TRIBES: PRIMA’S OFFICIAL STRATEGY GUIDE
located near their entrances. If you’re guarding such an entrance, stand in a place where you can’tbe seen by intruders, but you can see the turret. Since Mini-Fusion Turrets use internal motiondetectors, they can’t be jammed. Thus, watching the turret will always let you know that anenemy is approaching.
Of course, the enemy might use the “advance, then halt, then advance again” technique tosneak past the Sentinel. But you’ll know immediately because the Sentinel will pop out but notfire. Wait a moment as the Sentinel retracts, then pops out again as the attacker creeps in still further. Then run around the corner and attack with a Disk Launcher! You’ll startle the enemywho’ll be forced to either stand and take the abuse, or run and get mowed down by the turret.
External turrets can be of use, too. Always try to situateyourself near defenses of some variety so they can help you out as you defend your position.
MAXIMIZESURPRISE VALUEIf you’re wearing Heavy Armor, you wantto position yourself in spots where you’llsurprise the enemy. You don’t wantopponents to see you down a long hall-way. Instead, you want them to turn acorner, and wham! You’re in their facesat point-blank range.
Therefore, you should either hidejust around a sharp corner, or in part ofa room that’s not immediately visible tosomeone entering. So for example, youdon’t want to stand in full view of adoorway. Instead, you want to stand offto the side of the doorway, hugging thewall, so that enemies can’t see you before they enter the room. Or, if there’s a balcony above theentrance, stand up there. You can then safely drop Grenades from above.
Once your enemy enters the area, attack first. The element of surprise, plus your Heavy Armor,should carry the battle.
BLOCK THE EXITSHeavy Armor takes up lots of space. This can be a problem if you’re wearing it because it can bedifficult to traverse narrow spaces, but it can also be an asset. You can block a narrow hallway or
Fig. 9-4. Stand beside the doorway, not in full view of it, sothat enemies won’t see you until they’ve entered.

CHAPTER 9: DEFENSE PRIMER 91doorway if you’re wearing Heavy Armor. This can trap a lightly armored foe whom you can poundinto oblivion. Be aware of this, and do your best to make the most of your size.
DON’T GET ANXIOUSYou might get into a standoff where your enemy is behind a corner or down a hallway, and both ofyou know that the other is there. But don’t get anxious and run into his line of fire. If you posi-tioned yourself well, you’re still between the enemy and his goal. Just let the fight come to you,and even gradually retreat if necessary.
Enhance the DefenseIf you’re truly serious about playing point-of-attack defense, you’ll place extra defenses in the spotyou’re trying to defend. This is particularly important when you’re wearing Heavy Armor and facing nimble foes. The extra defenses give them more to deal with, so they can’t focus all theirattention on evading your shots.
You should never play point-of-attackdefense without heavily fortifying yourbase, plus the area around your base ifyou have enough time. Those extradefenses will pay off handily, dispatchingcareless enemies and weakening othersto the point where you can finish themoff easily.
DROP THE STATIONIf there isn’t an Inventory Station rightnext to the spot you’re defending, grabone and slap it down. This greatly speedsthe process of placing defenses.
PLACE TURRETSNext, buy several Remote Turrets andplace them in the area you’re trying to defend. Make sure they’re facing in the direction you expectattacks to come from; that way they don’t have to swivel around before they start firing.
Also, be sure to place them around corners, below ridges, or anywhere else that they they’relikely to surprise the enemy. Just as you don’t want the enemy to see you from afar, you don’t wantthe enemy to see a Remote Turret either.
When you place Remote Turrets just around corners, stick them close to walls so that anattacker cannot see them without fully turning the corner. Optimally, place them in parts of aroom that an attacker won’t see the instant he or she walks in.
Fig. 9-5. A Mobile Inventory Station near the flag makes iteasy to place Remote Turrets quickly.
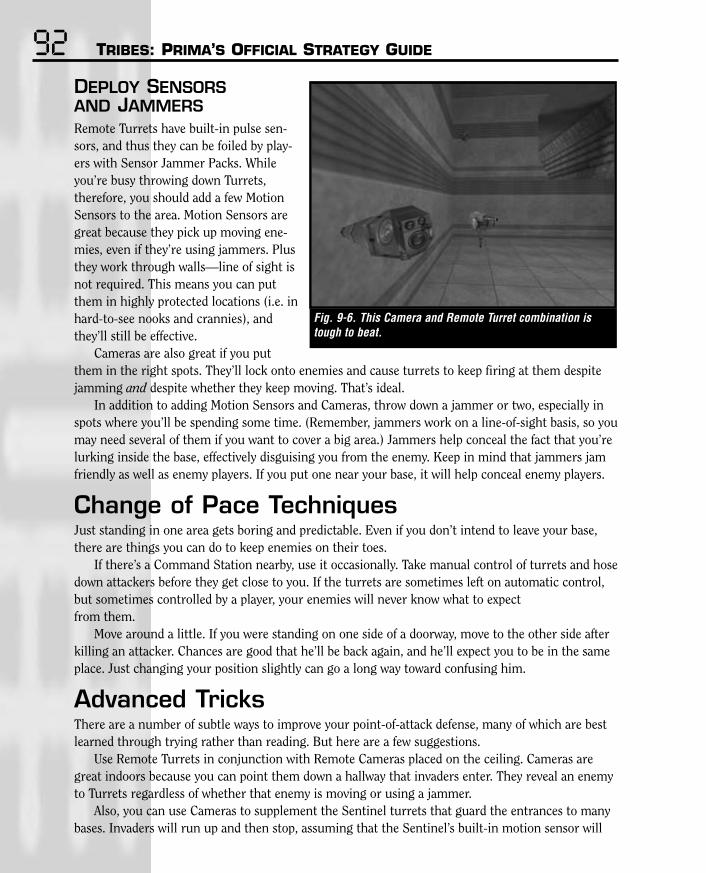
92 TRIBES: PRIMA’S OFFICIAL STRATEGY GUIDE
DEPLOY SENSORSAND JAMMERSRemote Turrets have built-in pulse sen-sors, and thus they can be foiled by play-ers with Sensor Jammer Packs. Whileyou’re busy throwing down Turrets,therefore, you should add a few MotionSensors to the area. Motion Sensors aregreat because they pick up moving ene-mies, even if they’re using jammers. Plusthey work through walls—line of sight isnot required. This means you can putthem in highly protected locations (i.e. inhard-to-see nooks and crannies), andthey’ll still be effective.
Cameras are also great if you putthem in the right spots. They’ll lock onto enemies and cause turrets to keep firing at them despitejamming and despite whether they keep moving. That’s ideal.
In addition to adding Motion Sensors and Cameras, throw down a jammer or two, especially inspots where you’ll be spending some time. (Remember, jammers work on a line-of-sight basis, so youmay need several of them if you want to cover a big area.) Jammers help conceal the fact that you’relurking inside the base, effectively disguising you from the enemy. Keep in mind that jammers jamfriendly as well as enemy players. If you put one near your base, it will help conceal enemy players.
Change of Pace TechniquesJust standing in one area gets boring and predictable. Even if you don’t intend to leave your base,there are things you can do to keep enemies on their toes.
If there’s a Command Station nearby, use it occasionally. Take manual control of turrets and hosedown attackers before they get close to you. If the turrets are sometimes left on automatic control,but sometimes controlled by a player, your enemies will never know what to expect from them.
Move around a little. If you were standing on one side of a doorway, move to the other side afterkilling an attacker. Chances are good that he’ll be back again, and he’ll expect you to be in the sameplace. Just changing your position slightly can go a long way toward confusing him.
Advanced TricksThere are a number of subtle ways to improve your point-of-attack defense, many of which are bestlearned through trying rather than reading. But here are a few suggestions.
Use Remote Turrets in conjunction with Remote Cameras placed on the ceiling. Cameras aregreat indoors because you can point them down a hallway that invaders enter. They reveal an enemyto Turrets regardless of whether that enemy is moving or using a jammer.
Also, you can use Cameras to supplement the Sentinel turrets that guard the entrances to manybases. Invaders will run up and then stop, assuming that the Sentinel’s built-in motion sensor will
Fig. 9-6. This Camera and Remote Turret combination istough to beat.

CHAPTER 9: DEFENSE PRIMER 93lose sight of them as they stand motionless. Butthanks to the Camera, they’ll be in for a big surprise.
When selecting weapons, remember that theDisk Launcher is a good weapon of choice fortaking down Light Armored enemies indoors.Most other weapons have relatively slow projec-tiles, and good players in Light Armor will makeyou miss.
If you’re in an enclosed area, and you’re agreat shot with the Heavy Mortar, you can “trap”enemies in lighter armor with mortar shells.Fire one shell behind enemies to prevent themfrom backtracking; then fire one in front ofthem (near you). They’ll be stuck between thetwo shells and will probably get blown up. You’llalso be damaged, but if you’re in Heavy Armor,you’ll probably survive. Also, using a Shield Pack increases your survival chances greatly.
Mines can be a deadly addition to any defense. But the key is letting your teammates knowwhere they are, and not mining areas that your teammates will be passing through constantly.Experiment with mines, and you’ll find that they can add incredible punch to your defense.
The Final WordPoint-of-attack defense isn’t appropriate for every mission, and you shouldn’t have too many playersdoing it. But it can be invaluable for catching enemies who make it through the perimeter defense.
MasteringPerimeterDefenseIn most missions, the majority of your defendersshould be playing perimeter defense.
As mentioned earlier, while point-of-attackdefense involves standing close to the objectbeing guarded, perimeter defense involvesguarding it from a distance.
A classic example of perimeter defense wouldinvolve a base located in a valley. If all thedefenders were to play point-of-attack defense,they’d crowd into the base. But that would allow
Fig. 9-7. Remote Cameras placed next to Sentinel turretsgreatly enhance their effectiveness.
Fig. 9-8. Perimeter Defense requires you to stay vigilantand intercept enemies well before they reach their goal.

94 TRIBES: PRIMA’S OFFICIAL STRATEGY GUIDE
attackers to run up to the base unharmed. They could then shell it with Heavy Mortar fire, set upRemote Inventory Stations nearby, and generally make themselves comfortable.
Instead, the defenders should play perimeter defense, spreading out on the hilltops surround-ing the base and watching for enemies in all directions. When enemies do arrive, the perimeterdefenders should harass and occupy them. They should first snipe with Laser Rifles and Blasters,then swarm the enemy and attack with closer-range weapons.
When to Use ItPerimeter defense is a great defensive style for just about every mission. It’s most effective whenyou have several friends helping you out.
If you have four players on defense, three or even four should be perimeter defenders.However, if all four players are on the perimeter, it’s important that they’re experienced enough towatch for sneak attacks. But it’s probably best to have at least one point-of-attack defender to stayat home and guard against stealthy raids.
Especially when you’re defending a base, you have little tolose by charging and attacking well before the enemy gets to your base. That’s because you’re likely to reappear nearyour base after getting killed. So you’ll be in a position tofight that same enemy again. If you’re lucky, you’ll evenhave time to buy your Favorites again.
Effective Weapons and ArmorPerimeter defenders can use whateverarmor and weapons suit the situation.The best choices are predicated on whatthe map is like and what tactics theenemy is using.
Regardless of the map, however, it’salways good to have a couple of peri-meter defenders in Light Armor withEnergy Packs. These players can serve asdefensive snipers, picking away at attack-ers with Laser Rifles before they even getclose. These players can often disruptmajor attacks well before they reach thecritical stage.
Fig. 9-9. Perimeter defenders in Light Armor are useful forpursuing enemies intent on snatching your flag—or thosethat have it and are trying to flee.

CHAPTER 9: DEFENSE PRIMER 95These snipers are also highly mobile. So they’re ideal for chasing enemies who manage to get
into the base, steal the flag, or start causing other problems.Medium Armor works well on the perimeter too, but you have to be smarter about being in
position to intercept your foes. On maps where snatch-and-grab tactics work (for example, whereyour flag is sitting right out in the open), Light Armor is often better. But Medium Armor is a goodchoice if a few of the defenders already have Light Armor.
Finally, Heavy Armor can be useful, but as always, you need to have teammates nearby to sup-port you. You’ll be able to disrupt enemy advances with your Heavy Mortar, and you can take lotsof punishment. But Heavy Armored players on perimeter defense tend to be vulnerable to snipershots and other long-range punishment. Players in Heavy Armor might want to consider retreatinginto the base when they’ve taken serious damage.
Heavy Armor is most useful on perimeter defense whenyou’re facing a slow, rumbling attack involving multiple enemies in Medium and Heavy Armor. It’s least useful indefending against speed and stealth attacks because it’shard to keep up with enemies in Light Armor.
Effective TechniquesStay on the high ground surrounding the object you’re defending. Periodicallycheck the Commander Screen map, and also scan the horizon visually. If enemiesappear at long range, snipe at them and alert your friends.
As enemies approach, multiple perime-ter defenders should gather and attack. Atleast one defender should stay back andwatch for attacks from other sides, however.
Tailor your defense to the attacks you’refacing. If the enemy keeps approachingfrom a given point, you might want to place Remote Turrets or mines there foradded defense. If the enemy constantlyattacks in Light Armor, make sure you have enough Light Armored defenders availableto give chase.
Fig. 9-10. Teamwork is a trademark of a good perimeterdefense.

96 TRIBES: PRIMA’S OFFICIAL STRATEGY GUIDE
Remote Inventory Stations can be useful on defense, eventhough you’re usually quite close to a base with a full-sizedInventory Station. They cut down on the time you’d other-wise take running back and forth from your post to theInventory Station.
Change of Pace TechniquesInstead of sniping at enemies and letting them know you’re there, perimeter defenders can hideand even use Jammer Packs to conceal themselves from attackers. Then, when the attackers enterthe base or get close to the objective, you can ambush them. This works best if the attackers arebusy trying to deal with emplaced defenses such as turrets because it further distracts them.
Feel free to move out farther than usual if you think the enemy is getting accustomed to see-ing you in a particular position. For example, if you’ve been standing on the same hill for quitesome time, move to another hill that’s closer to the enemy base. Then, when enemies approach,they won’t expect to see you when you attack.
You should occasionally patrol the area around your base. Enemies often like to set up “minibases” with Remote Inventory Stations and Sensor Jammers. And it’s vital to root these out sothey don’t provide a staging area for constant attacks.
The Final WordPerimeter defense is best when it includes a mix of armor types and weapons payloads. The oneconstant, however, is the need for fast, light snipers. These snipers can chase quick enemies thatget too close. And they can brush back enemies that would otherwise park themselves at longrange and fire Heavy Mortars to their hearts’ content.
All-purpose DefenseAll-purpose defense is a mixture of point-of-attack defense and perimeter defense. Essentially, it’s a phrase for any defense where you spend some time outside, then spend some time inside.
All-purpose defense is most useful when you’re the only defender at a particular location, orwhen you don’t have much support.
An example of all-purpose defense would be a player in Medium Armor guarding a tower. When the coast is clear, the player spends time setting up Turrets and Motion Sensors outside the base. Then, as an enemy approaches, the player does battle, staying close to the defenses he orshe has put up. Eventually, the player retreats into the tower if necessary, and continues the fightfrom inside.

CHAPTER 9: DEFENSE PRIMER 97Effective Weapons and ArmorYou can be effective in any armor type if you’replaying all-purpose defense. If you use HeavyArmor, a good technique is to stand on top ofthe structure you’re defending. Next, lob HeavyMortar shells at anyone who approaches. Then,drop down inside whatever you’re defending tocontinue the fight.
Medium and Light Armor require differenttactics. Since you don’t have the durability ofHeavy Armor, you’ll want to stay outside moreoften, where you’re most maneuverable. Followand harass the enemy, but be careful if thefight progresses to a more enclosed area.
If you have the opportunity, you can even use Light Armor outside and then quickly switch to a heavier armor type after dashing inside.
Effective TechniquesSince all-purpose defense combines elements of point-of-attack and perimeter defense, you shouldfollow the rules of those defense types. When you’re outside, use more of a perimeter defensivestyle. Either harass incoming enemies at long range with a Laser Rifle or Blaster, or hide andsneak up on them as they deal with emplaced defenses.
When the fight moves inside, employ more of a point-of-attack style. Make your stand in spotswhere you’ll be supported by emplaced defenses. And try not to stand somewhere obvious, whereyou can be flushed out by Grenades. Your enemy will know you’re there, so you’ve got to be some-where that’s reasonably well protected. (If no such place exists, you should stay outside.)
Defense OverviewIt doesn’t matter whether you employ a point-of-attack defense, a perimeter defense, or a combina-tion thereof. You can rest assured that whenever you’re playing defense, you’re making a differ-ence. Defense is fundamental, but it’s often overlooked by teams intent on attacking.
Remember, especially in capture-the-flag style games, you cannot lose if your defense holdsthrough the entire game.
Fig. 9-11. This defender in Heavy Armor can lob HeavyMortar shells at incoming enemies, then aim down anddefend the tower’s interior if need be.

Though offense and defense are the most clearly defined roles, you’ll spend a lot of time onthe in-between turf that separates key locations. You probably won’t want to spend yourentire game traversing this middle ground. However, there are valuable reasons to be there
and valuable things to do there. This chapter is devoted to helping you be effective in that area.
The Midfielder PositionThe “midfielder” role isn’t one that mostplayers take willingly. It’s simply a neces-sary evil. To get somewhere, you have totravel across unclaimed tracts of land.Still, there’s value to being in thatunpopular middle area, if only because itputs you in position to play differentroles quickly.
While in that middle area, you canperform reconnaissance, snipe at ene-mies, build infrastructure, destroyenemy infrastructure, and quickly moveto defensive and offensive roles.
10“Midfielder” Primer
Fig. 10-1. There’s a lot of territory out there. It’s not justdead space; make it work for you.

CHAPTER 10: “MIDFIELDER” PRIMER 99ReconnaissanceThe first valuable role performed by a midfield player is reconnaissance. Most maps are largeenough that it’s impossible to extend your team’s sensor range across the whole thing. Thus,there’s value in having players in the middle territory who are paying attention.
Recon is working best when it uncovers a major assault. This usually entails three or moreattackers advancing as a group. Such attacks can be deadly if not picked up well before they reachyour base.
When to use ReconnaissanceNobody should play a pure recon role throughout an entire game; there are too many other valu-able things you can be doing instead.
Rather, recon is something you should do while you’re working on something else—like layingdown a sensor network or proceeding toward an enemy base. Just keep your eyes open and watchthe terrain you’re crossing rather than single-mindedly trekking toward your goal.
When you do find something worth noting—usually a group of enemies—alert your team-mates. It’s important for everyone to be on the same page.
Tricks and TipsLight Armor is far and away the bestarmor for recon, especially when pairedwith an Energy Pack. This configurationalso lets you take on the role of sniper,something we’ll discuss momentarily.
Jump jets are crucial to spotting enemies. Good players will often jet high into the air, spinning around thewhole time. They can then look for enemies that would otherwise be hidden behind ridges or other promi-nent terrain features.
Also, players intent on scoutingshould periodically refer to theirCommander Screen. Even stealthyattackers sometimes appear on the sensor network for a moment.
Midfield SniperAnother role—one that’s more versatile than recon and worth spending some time at—is that ofmidfield sniper.
Defensive and offensive sniping serve obvious purposes, but midfield sniping can be equallyprofitable if you approach it with the right attitude. Here’s a look at what you can do.
Fig. 10-2. Spin around in midair to get a good view ofwhat’s happening below.

100 TRIBES: PRIMA’S OFFICIAL STRATEGY GUIDE
If your team is lacking adequate offense and defense, play oneof those roles instead of midfield sniper. That’s because mid-field sniping is pointless unless you’ve got a strong offense and defense.
Your role as midfield sniper is essentially to distract enemies rather than necessarily kill them outright. So it’simportant that there be teammates nearby to capitalize onthe distraction. They can do this by attacking a base afteryou’ve distracted the defenders. Or they can clean up anassault team after you’ve made its members scatter withyour sniper fire. But if those teammates aren’t ready to help, you might as well join the attack or defense team.
Harass DefendersKey enemy sites are likely to have anumber of defenders standing aroundoutside. These defenders get pretty com-fortable if there’s nobody around to pickon them. And pick on them you can, ifyou’re playing the role of midfield sniper.
The key to this sort of sniping is tounderstand your role: Distract defenders,make them uncomfortable, force themto leave their ideal defensive spots. Theymay even run out and attack you. Youaren’t trying to invade the base; that’snot going to work. You’re trying to pavethe way for your team’s real attackers bydisrupting the enemy defense.
If defenders try to pursue you, run away. Lure then away from their tasks. If they shift toanother spot, move around until you can see them again. Just be as annoying as possible; you’llget them out of their normal game plan.
Take Out Makeshift DefensesDefenders like to place deployable objects near their bases—Remote Turrets, Remote Jammers,Remote Inventory Stations, and so forth. If they do this properly, you won’t be able to see theseitems from long range.
Fig. 10-3. The defenders on this floating base will eitherhave to take cover or chase you in order to stop the sniping.

CHAPTER 10: “MIDFIELDER” PRIMER 101Defenders may be sloppy, however, or they
may just want to place as many items as possi-ble. In that case, some of those deployed itemswill be in full view of a sniper who’s zooming inwith an Image Enhancer. Since the Sniper Rifleis quite powerful, and since these deployableitems are extremely fragile, you can often takethem out with a single shot.
Destroying infrastructure in this way is veryefficient. The enemy spent a good deal of timelugging a pack out and deploying it whereas youcan destroy that object just by shooting at it.
Destroying makeshift defenses is often justas vital as harassing enemy defenders.
Disrupt PloddingOffensivesEvery so often, your enemies decide to attack your base with power, not stealth or speed. Theyassemble an assault team, most of whom usually wear Medium or Heavy Armor, and start lumber-
ing toward your base. One member of this team often carries a RemoteInventory Station. So when the teamgets close to its destination, it can set up a “mini-base” of sorts.
It’s important to catch these sorts ofattacks well before they reach your base.They can be extremely tough to dealwith when they get to high ground andstart shelling your base. In transit, how-ever, they’re vulnerable—especially ifthey have players in Heavy Armor.
Whenever you encounter such agroup, alert your teammates and thenstart sniping at the heaviest armoredplayers in the group. If their lightlyarmored companions are paying atten-tion, they’ll come attack you. Fly away
and let them pursue you. You’ll be surprised at what lengths some players will go to get a kill.They’ll even abandon their pals in Heavy Armor and leave them vulnerable.
Hopefully your teammates will listen to you and pick on the less mobile members of the teamwhile you distract the lighter members.
Fig. 10-4. Remote Turrets will fall with one well-placedsniper shot.
Fig. 10-5. This group of enemies should be disrupted beforethey reach your base.

102 TRIBES: PRIMA’S OFFICIAL STRATEGY GUIDE
Infrastructure BuilderAnother role you can assume is that of infrastructure builder. As with most mid-field roles, youprobably don’t want to spend all your time on this. But it’s something you can do while workingon other tasks.
Extend Sensor RangeAdding sensors to the map enhances your team’s view of the battlefield. The more informationeach team member can gain by looking at his or her Commander Screen, the better informed yourteam’s decisions will be.
Remote Pulse Sensors are the items of choice when establishing sensor networks that need tocover lots of ground. Remote Motion Sensors cover designated areas better than Remote PulseSensors. However, they cover a smaller radius.
Either deploy Remote Pulse Sensors on hilltops or just below hilltops. Generally they’ll lastlonger if they’re placed on the side of the hill facing your own base. Enemies won’t see themunless they look down constantly as they approach.
Add “Surprise” TurretsAdding the occasional Remote Turret to the open landscape helps keep theenemy on its toes. Turrets placed out in the open aren’t as potent as those inenclosed areas. But if the enemy getszapped by a Turret once, it’ll have to bethat much more cautious in the future.
Place Remote Turrets on ridges orslopes that face your base. That way,enemies won’t see them while approach-ing and will be shot the moment theycrest the hill. They’re likely to be look-ing at your base instead of at theground, so the turret might get in a few good shots.
Snipers can easily pick off remote Turrets placed on slopesfacing away from your base. Avoid placing Turrets in suchexposed areas as it seldom pays off.
Fig. 10-6. These Remote Turrets are just far enough down the slope that players coming from the other sidewon’t see them.

CHAPTER 10: “MIDFIELDER” PRIMER 103Create Jamming ZonesAnother valuable task is to create jamming zones with Remote Jammers. Specifically, it can beuseful to place a line of Remote Jammers that leads toward the enemy base, enabling teammatesto sneak up unannounced.
Note that the best place for these Jammers is off to the side rather than in a straight line fromyour base to the enemy’s. The enemy is likely to guard the straight-line approach well. And it’slikely to locate your players visually, despite the jamming, if they approach in such a direct route.
Infrastructure DestroyerAnother valuable role is that of infrastructure destroyer. Depending on how the enemy team oper-ates, this can be a vital role or a worthless quest. Some teams won’t bother placing many objectson the battlefield, and in this case, you’re better off in some other role.
Scan for Unmarked ItemsWhen you stumble upon a remote itemplaced on the map, it won’t be immediatelyobvious what team it belongs to. Quicklycheck your map. If the item appears thereand is green, it’s yours. If it doesn’t show up or it’s labeled in red, it’s the enemy’s.Get rid of it!
If you happen to destroy an enemy Remote Jammer,quickly look at the map again.Items that were previously hidden may now be visible on the map.
Watch your Sensor IndicatorSay you’re in a location where the main enemy Pulse Sensors shouldn’t reach, yet your SensorIndicator is flashing red. That means the enemy has placed an auxiliary Pulse Sensor somewhere.Look for it using the Sensor Indicator. By dropping down on various sides of a hill, you can deter-mine what direction the Pulse Sensor is located in, and then go destroy it.
Jump for Better PerspectivePeriodically jet straight up in the air and spin around, looking for suspicious objects and players.This will occasionally reveal a hornet’s nest of enemy activity that you’d previously missed.
Fig. 10-7. This Remote Inventory Station and RemoteJammer need to be destroyed.

104 TRIBES: PRIMA’S OFFICIAL STRATEGY GUIDE
Watch forGatheringsIf the enemy tends to gather at a specific point or always approaches your base from a specific area, that’s a good place to look for enemy gear.Approach cautiously and destroy anything you find. Occasionally you’ll discover a full-fledged mini base, complete with Remote InventoryStation, Remote Jammer, and possiblyeven Remote Turrets.
Emergency Defender When you’re playing a midfielder role, you’re free to go anywhere you’d like. And since you’reprobably in Light Armor, you can usually get there fast. This allows you to play the role of emer-
gency defender. You can rush to the aidof any key position that’s coming underheavy attack. Or you might intercept anenemy flag carrier who’s making a breakfor his base.
Don’t be afraid to abandon the mid-fielder role. It’s useful, but much of itsuse comes from its flexibility; you canhelp out wherever you’re needed.
SituationalAttackerJust as you can jump in on defense, feelfree to join a promising offensive ifyou’re in position to do so. For example,occasionally you’ll see a team of players
in Heavy and Medium Armor lumbering toward the enemy base. It could use support from some-one in Light Armor, to protect it from agile defenders. Go help its cause.
Fig. 10-8. Craggy areas near your base are where theenemy typically drops Remote Inventory Stations.
Fig. 10-9. The map shows that the base is under attack.Time to head back and help out!

CHAPTER 10: “MIDFIELDER” PRIMER 105Similarly, you might see a number of teammates launching a full-scale attack on an enemy
position. So you may want to sneak in from the rear and damage the target while its defenders areall occupied. This can be surprisingly effective, and often it’ll complement your teammates’ attackmuch more effectively than direct support.
Attacking an enemy position is a whole new role, whichwe’ll deal with extensively in the next chapter.

A ttacking a fortified enemy position ranks among the most difficult tasks in Tribes.Until you become familiar with the various turrets and sensors that guard most bases,you’re prone to getting gunned down every time you get close. And that’s without any
human enemies in the area! Throw in a few stalwart defenders, and you’ve got a task that looksnearly impossible.
Attacking enemy bases never gets easy, but it does get easier. Keep reading for tips on how toinfiltrate enemy strongholds and come away with your prize.
PreliminariesBefore you start smashing through enemy fortifications like they aren’t even there, you’ll need tomaster a few crucial skills.
Master the DefensesFirst, you need complete knowledge of every item in the game world. You need to be able to distin-guish different types of turrets from one another on sight. You also need to know what causesthose turrets to fire, and how to avoid them. You shouldn’t have to ask yourself what to do in anygiven situation; you should be able to instinctively react to the defenses you’re facing. This meansfreezing in your tracks at the sight of a Sentinel turret or staying on the ground as you pass aMissile Turret.
11Assault Primer

CHAPTER 11: ASSAULT PRIMER 107You’ll also do better if you have a good idea of how the enemy base or tower is laid out. You
don’t need a complete mental map. However, you should know how many entrances there are andwhat sorts of defenses lie beyond each entrance. You should also know roughly where the vitalobjects (flags, Generators) inside each base are. When in doubt, you can host a multiplayer gameand explore the bases at your leisure without any interference. Or, if you want to learn in a realgame situation, you can study your own base closely. There are usually minor differences betweenbases, but they’re generally just that—minor. If you understand your own base’s layout, you canbet that the enemy base is nearly identical.
Know your GoalsKnow what you’re trying to do beforeinfiltrating an enemy stronghold. Untilbase raiding becomes second nature toyou, the excitement of actually infiltrat-ing enemy territory may have a tendencyto obscure your real purpose. You’ll bewondering what to achieve.
If you’re trying to capture a tower,remember that your objective is to cap-ture the spinning block at the tower’scenter. If you want to capture a flag,remember to do so without getting distracted once you’re inside the base. If you plan on wrecking the enemy base, go right for the Generators.
Prepare YourselfOnce you know your goals, your choice of armor and equipment should become quite obvious. Areyou trying to jet to the top of the enemy fort and drop through a ceiling hatch? Light Armor andan Energy Pack are a good choice. Maybe you’re trying to take over a tower with a lone defender inHeavy Armor inside? A Grenade Launcher usually lets you soften up the tower from outside beforecharging in.
Think about what you’re trying to achieve; then select armor and weapons that will help youattain your goals.
Observe the EnemyThe enemy’s behavior and defensive style make a huge difference in what offensive tactics willwork. For example, if the enemy base is defended by a few enemies in Heavy Armor, a speed orstealth raid might capitalize on their sluggishness. If large numbers of Light Armored enemies areholding down the fort, distraction and long-distance shelling might be useful.
Fig. 11-1. What are your goals? Capturing a flag?Destroying a Generator? Figure it out before you attack.

108 TRIBES: PRIMA’S OFFICIAL STRATEGY GUIDE
Generally speaking, the more defend-ers stationed at the place you’re attack-ing, the less likely that commando-stylespeed or stealth raids will work. Allthose enemies will see you and gun youdown. Extremely well guarded spots willonly fall to powerful strikes by largestrike forces or a combination of powerand sneakiness.
StealthAttacksPure stealth raids are both exhilaratingand rewarding. There’s nothing betterthan sneaking up to an enemy base withSensor Jammer on, jetting to the top, dropping through a ceiling hatch, and sneaking past numerous turrets and defenses until you’ve reached your goal.
Of course, stealth attacks are also high-risk; once you’re caught, you’re usually in serious trouble. Of course, there’s always a chance that you can run away—and you can always try again.
When to Attack with StealthStealth attacks are most useful against lightly guarded targets and targets with multiple entrances.For example, a tower guarded by a single enemy is a good target. So is a massive base with
multiple entrances, some of which maybe poorly guarded.
Bad candidates for stealth raidsinclude bases with only one entrance and bases that are swarming withdefenders. You can use jamming to getyourself past any number of sensors. And if you’re cautious, you can evensneak past a couple of human defenders.But generally speaking, if there are multiple enemies in the area, you’rebound to be seen.
Fig. 11-2. Depending on where the defense has arrayeditself, you might want to adjust your tactics.
Fig. 11-3. This large craft, which is in fact an enemy base,has multiple entrances and is thus a good candidate for astealth raid.

CHAPTER 11: ASSAULT PRIMER 109How to ProceedStandard practice is to approach the targetalong a path that’s at least partially shieldedfrom Pulse Sensors. This means staying behindridges and hills. Also, don’t forget about thethreat of visual detection.
When you must cross relatively open areas,use a Jammer Pack to cut down the risk ofdetection. Also, try to make sure that there arefew enemies who might see you. (A JammerPack is usually required for pure stealth mis-sions, but if the defenders are distracted or inat-tentive enough, it’s not necessary.)
Don’t hesitate to stop for awhile behind a hill or ridge and letyour energy rise up to maximum. That way, you’ll have a fullcharge for your Jammer Pack when you break cover.
While you’re under cover, occasionally pop up and scanthe terrain you’re heading into. Watch the movement pat-terns of your enemies. Do your best to avoid them.
When you’re near the target, scan it again. This may involve standing on a hilltop with SensorJammer engaged, giving the base a once-over with the Image Enhancer. Then drop back to let your energy get back to full.
If there are so many defenders that it’s hard just to get near the base without being seen, stealth alone probably isn’t the best approach. Try speed or power instead, as discussedlater in this chapter.
When you’re ready, engage your Sensor Jammer (if you have one) and make your finalapproach on the target. If the target has multiple entrances, you often want to use the top one.Lower entrances usually swarm with defenders.
If all goes well, you’ll be able to drop inside the enemy base.
Fig. 11-4. Ceiling entrances, or entrances located beneathan enemy base, are ideal for stealthy attacks.

110 TRIBES: PRIMA’S OFFICIAL STRATEGY GUIDE
Inside the BaseInside the base, don’t lose your head. Proceed as quickly as possible, but stop short near cornersand junctions so you don’t run full speed into an enemy’s chest.
Deal with threats in the most convenient way possible. Sneak past Sentinel turrets and ignoreobjects that aren’t vital to your task.
In most cases you should ignore targets that aren’t central to your quest. Generators are an exception. If you happen uponGenerators, you should probably blow them up, even if yourmain task is to capture a flag. This sends the base into turmoil and paves the way for more attacks.
When you get to your goal, execute your task quickly and run, preferably back the way you came.After all, the way you came was clear the first time you did it, so it’s likely to be clear again. Also,you know what to expect.
VariationsAny number of things can and will gowrong on a stealth mission. Here aresome tips for overcoming adversity.
While it’s best to be as quiet as possi-ble, sometimes you’ll need to take outenemy fortifications. For example, youmight need to destroy a Remote Turretinside the enemy base. If you do,Grenade Launchers are the preferredweapon because they let you fire safelyfrom around corridors.
If you get caught very close to yourtarget, your two primary options are toflee or to wreck as much as possible. Theformer option works well if you aren’tactually inside yet. It also works if you’reattacking a tower or small base that’s more or less open to the air. The latter option is best if you’rewell inside a base and probably can’t escape. If this is the case, start running like crazy while lob-bing grenades and dropping mines if you can. Just try to wreck as many Inventory Stations andother useful objects as possible. That way, the enemy will at least have to spend some time repair-ing the damage.
Fig. 11-5. Even if you can’t accomplish your primary objec-tive, such as escaping with the flag, you can at least dealsome damage.

CHAPTER 11: ASSAULT PRIMER 111Finally, note that while speed attacks work just fine with one player, two players in close coor-
dination can be even better. With two players, you can efficiently destroy large enemy turrets(especially if one teammate has an ELF Gun). Also, you’ll stand a chance if you run into a loneenemy inside.
Jammer Packs not only protect the wearer from sensors butalso protect a small area around the wearer. Thus, if twoteammates stick close together, they can both benefit fromone player’s Jammer Pack.
Speed AttacksSpeed attacks, like stealth attacks, are often performed by a single player although having a part-ner or two can greatly assist you. Unlike the stealth attacker, who tries to hide from enemies at allcosts, the speed attacker only hides until it’s time to strike. He or she then uses the pure maneu-verability of the Light Armor and Energy Pack combination to zip in and strike the target. Theeffectiveness of this technique varies greatly and depends largely on the circumstances.
When to Use SpeedSpeed attacks are excellent for flag mis-sions where the flags are sitting more orless out in the open. In these missions,sneaking all the way up to the flags isnearly impossible. Instead, you cansometimes use your blazing speed andjumping ability to snatch the flag and get away.
Speed attacks are also useful againstlarge bases with multiple entrances, andtargets that are currently under attack.In these cases, you rely on the enemydefenders being distracted or out of posi-tion. You then capitalize by blasting infrom the opposite direction and makingthem pay.
You won’t be able to capture and holdan area with speed attacks. However, you’ll sometimes be able to snatch a flag or destroy aGenerator before the defenders manage to catch up.
Fig. 11-6. This mission, with its flags located right out inthe open, leaves the door open for speedy raids.

112 TRIBES: PRIMA’S OFFICIAL STRATEGY GUIDE
Pure speed is not feasible in many situations, but speed combined with stealth or power can bedeadly. The last major section of this chapter discusses the value of combination attacks.
TechniquesThe essence of the speed attack is to catch enemies napping, out of position, or stuck in heavierarmor than they should really be wearing.
Approach the enemy target with stealth, using ridges and hills as you would for a stealth attack.When you get close to the target, blast your way up to it. Or you can hang around and wait for
the defenders to shift until there’s an open spot in the defense. Do your best to avoid detection, butif you are detected, don’t sweat it. Use your jets to avoid getting shot, and go for the goal.
Once you do reach your goal, you’ll need to be fast. If it’s a flag, you need to be able to swoopdown and take it in one pass. If it’s a Generator, you need to shoot it rapidly with a Plasma Gun orother fast-acting weapon. You generally won’t have much of a chance to destroy your target beforethe defenders get to you.
Improving the Speed AttackThe value of speed attacks often comesdown to your raw skill with the jump jetsand your ability to maneuver skillfullyunder pressure. If you’re good, youmight be able to do some damage. Ifyou’re lousy, you should keep practicingand stick to stealth or power attacksuntil you improve.
As with stealth attacks, don’t try toforce the issue if a particular spot isextremely well defended. Stealth attacksand speed attacks don’t work too wellagainst well-prepared foes. In these casesyou need to combine your stealth orspeed with power, as explained in the lastsection of this chapter.
Power AttacksWhen Jammer Packs and nifty jump jet moves fail, power is necessary. A target that’s defended by a large contingent is a tough nut to crack. You can’t expect to take it by sneaking up to it in plainview of multiple enemies or by jetting into a hail of gunfire. In these cases, you need to present alegitimate threat and wear down the enemy defenses to the point where those first two attack typescan succeed.
Fig. 11-7. If the base is too well defended, pure speedattacks usually won’t work.

CHAPTER 11: ASSAULT PRIMER 113When to use PowerUse power attacks when the enemy has dugin and fortified heavily. Use them whendefenders are swarming around your objec-tive. In short, use them anytime that speedand stealth just aren’t getting it done.
Don’t bother with power attacks onlocales that are poorly defended in the firstplace. If there’s just one defender, shellingthe base with heavy Mortar fire is overkill.Just take out the defender and proceed from there.
However, you should understand thatwhen you’re playing against a competentteam, your main objectives will very rarelybe poorly defended. They’ll be extremelytough to approach, and power will be necessary.
The Value of TeamworkPower attacks require teamwork. Specifically, they require a crew of multiple attackers who hit thebase at the same time. Ideally this crew includes players in several different types of armor. Heavy
Armor wearers can shell the target ifnecessary. Medium Armor wearers act asall-purpose attackers, and Light Armorwearers provide mobility (and perhapscapitalize on weaknesses left by thedefenders).
Flat-out attacking an enemy target byyourself isn’t usually a great idea. You’llget killed by a crew of defenders if theother team is any good. Lone players canget away with stealth and speed raids,but they can’t summon the power tobreak down enemy defenses.
Fig. 11-8. Shelling the enemy base from afar is a staple ofmany power attacks.
Fig. 11-9. Without teammates at your side, your attack islikely to be a failure.
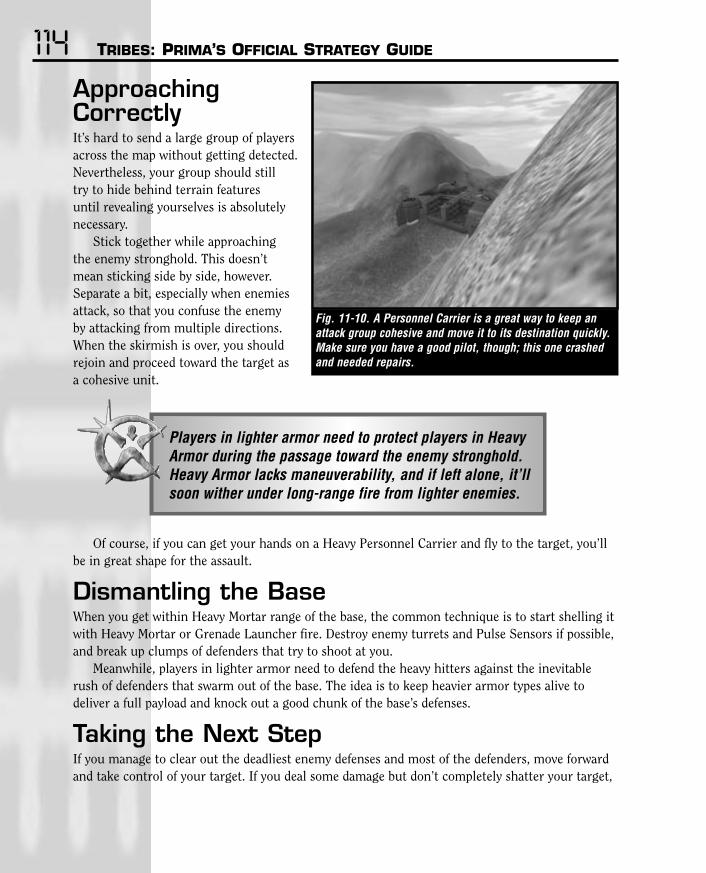
114 TRIBES: PRIMA’S OFFICIAL STRATEGY GUIDE
ApproachingCorrectlyIt’s hard to send a large group of playersacross the map without getting detected.Nevertheless, your group should still try to hide behind terrain features until revealing yourselves is absolutelynecessary.
Stick together while approaching the enemy stronghold. This doesn’tmean sticking side by side, however.Separate a bit, especially when enemiesattack, so that you confuse the enemy by attacking from multiple directions.When the skirmish is over, you shouldrejoin and proceed toward the target as a cohesive unit.
Players in lighter armor need to protect players in HeavyArmor during the passage toward the enemy stronghold.Heavy Armor lacks maneuverability, and if left alone, it’llsoon wither under long-range fire from lighter enemies.
Of course, if you can get your hands on a Heavy Personnel Carrier and fly to the target, you’llbe in great shape for the assault.
Dismantling the BaseWhen you get within Heavy Mortar range of the base, the common technique is to start shelling itwith Heavy Mortar or Grenade Launcher fire. Destroy enemy turrets and Pulse Sensors if possible,and break up clumps of defenders that try to shoot at you.
Meanwhile, players in lighter armor need to defend the heavy hitters against the inevitablerush of defenders that swarm out of the base. The idea is to keep heavier armor types alive todeliver a full payload and knock out a good chunk of the base’s defenses.
Taking the Next StepIf you manage to clear out the deadliest enemy defenses and most of the defenders, move forwardand take control of your target. If you deal some damage but don’t completely shatter your target,
Fig. 11-10. A Personnel Carrier is a great way to keep anattack group cohesive and move it to its destination quickly.Make sure you have a good pilot, though; this one crashedand needed repairs.
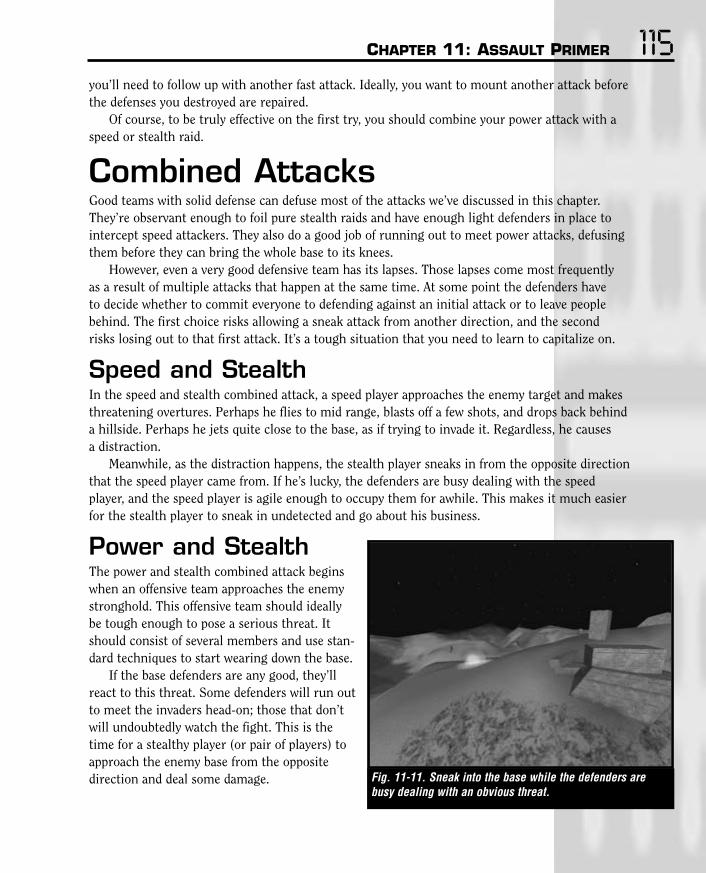
CHAPTER 11: ASSAULT PRIMER 115you’ll need to follow up with another fast attack. Ideally, you want to mount another attack beforethe defenses you destroyed are repaired.
Of course, to be truly effective on the first try, you should combine your power attack with aspeed or stealth raid.
Combined AttacksGood teams with solid defense can defuse most of the attacks we’ve discussed in this chapter.They’re observant enough to foil pure stealth raids and have enough light defenders in place tointercept speed attackers. They also do a good job of running out to meet power attacks, defusingthem before they can bring the whole base to its knees.
However, even a very good defensive team has its lapses. Those lapses come most frequently as a result of multiple attacks that happen at the same time. At some point the defenders have to decide whether to commit everyone to defending against an initial attack or to leave peoplebehind. The first choice risks allowing a sneak attack from another direction, and the second risks losing out to that first attack. It’s a tough situation that you need to learn to capitalize on.
Speed and StealthIn the speed and stealth combined attack, a speed player approaches the enemy target and makesthreatening overtures. Perhaps he flies to mid range, blasts off a few shots, and drops back behinda hillside. Perhaps he jets quite close to the base, as if trying to invade it. Regardless, he causes a distraction.
Meanwhile, as the distraction happens, the stealth player sneaks in from the opposite directionthat the speed player came from. If he’s lucky, the defenders are busy dealing with the speedplayer, and the speed player is agile enough to occupy them for awhile. This makes it much easierfor the stealth player to sneak in undetected and go about his business.
Power and StealthThe power and stealth combined attack beginswhen an offensive team approaches the enemystronghold. This offensive team should ideallybe tough enough to pose a serious threat. Itshould consist of several members and use stan-dard techniques to start wearing down the base.
If the base defenders are any good, they’llreact to this threat. Some defenders will run outto meet the invaders head-on; those that don’twill undoubtedly watch the fight. This is thetime for a stealthy player (or pair of players) toapproach the enemy base from the oppositedirection and deal some damage. Fig. 11-11. Sneak into the base while the defenders are
busy dealing with an obvious threat.

116 TRIBES: PRIMA’S OFFICIAL STRATEGY GUIDE
If your teammates are novices, they’ll initiate lots of weak,poorly considered attacks on the enemy base all by them-selves. This isn’t as good as a well considered attack.Nevertheless, these pathetic attempts at heroism can some-times distract defenders long enough for you to sneak in.
Power and SpeedThe power and speed attack is much like a power and stealth attack. The difference is that theplayer(s) sneaking up from the weak side use pure speed to blaze up to their target instead of stealth.
Avoiding Battle LockThere’s one final consideration when you’re on offense, and that’s avoiding “battle lock.” Observethe following simple rules to keep yourself focused.
Keep your Priorities StraightDon’t fight just for the sake of fighting. Don’t waste time shooting at players who aren’t in a posi-tion to harm your team effort or fighting meaningless battles well away from critical resources.Instead, tear yourself away and try to refocus on a clear goal.
Look for the Alternate BattleSometimes two teams will get so absorbed in a battle over a single piece of turf that they’ll forgetabout other important objectives. For example, players may fight over a watchtower yet leave theirbase undefended. Or on a Capture & Hold mission, players might get so wrapped up in battling forone tower that other, equally valuable towersare forgotten.
If the enemy seems to be locked in onfighting one particular battle, don’t be afraidto abandon the fight and look for easier targetselsewhere. Often you’ll do more good awayfrom the main fight than you would in it.
Don’t IgnoreDefendersWhen you’re attacking a target, don’t ignoredefenders. That doesn’t mean you have tofight. It just means that you can’t focus somuch on your target that you fail to accountfor them.
Fig. 11-12. Don’t do something shortsighted, like capturingthis trigger block while allowing an enemy to blast you.Take out the enemy first; then capture the block.

CHAPTER 11: ASSAULT PRIMER 117For example, in Capture & Hold missions, players will often rush in, ignoring defenders, and
touch the trigger block, capturing a tower for their team. That’s fine, but the defenders can simplyshoot in the direction of the trigger block, easily kill the attackers, and then retake the tower.
The moral of the story is to think things through and not get so focused on your goal that you achieve only a temporary one. Always try to consider the defenders in the area. Then ask yourself if you have a legitimate chance of beating them with the tactics you’re about to use. If not, you may need to go back to the drawing board and attack in a different way.

Command is a tough business. Often, the trick lies not in developing good battle plans,but in conveying your intentions to your teammates and getting them to listen. Thischapter takes a look at some of the difficulties associated with command and suggests
methods for overcoming them. However, it doesn’t delve as far into the X’s and O’s as you mighthave expected. That’s because you’ll often find yourself with limited control over your team’sactions. So any plans, save for basic ones, are likely to fall by the wayside.
If you start playing with a close-knit team, you’ll eventually develop finer control over yourteam. By the time you develop this control, however, you’re likely to have developed your own theories about the best way to command.
Three Levels of CommandThough the distinction is rather arbitrary, we’ll say that there are three levels of command inTribes. By “levels of command” we’re not talking about rank but rather about the degree of controlyou exert over your team. Sometimes you’ll select a level of command through conscious effort,but often you’ll find that it’s dictated by your teammates.
12Command Primer

CHAPTER 12: COMMAND PRIMER 119The Leader by ExampleThe leader by example doesn’t spendmuch time giving explicit orders.Mainly, such a leader spends his or hertime playing a normal role and doing itwell. Occasionally the leader might sug-gest tasks for other teammates. If theteammates are inclined to cooperate,they might help the leader accomplishthose tasks. Generally speaking though,the leader by example doesn’t spendmuch time barking orders.
If your team has a leader by example,and nothing more, you probably aren’tvery well organized. There’s a lot of freereign with people doing the things theywant to do rather than things they wereordered to do. This can work out fine ifyou have talented players on your team who actively seek out roles and perform them without any prompting.
Also, teammates who have been playing together for so long that they know their roles byheart can get away with this level of leadership. For teams such as these, formal orders can be a needless burden.
The Field CommanderIf your team is a bit more organized, you may be able to assume the role of field commander.
The field commander usually has direct control over most of the team. He plays a role—usually a fairly undemanding role, though, so he has time to give orders. Whenever he isn’t pursuing his role, he’s examining the map and issuing general orders to his underlings.
Field commanders are valuable in games where there aren’t many players. In such games, your team can’t afford to have someone just playing commander—you need everyone to con-tribute to the fight!
The Dedicated CommanderFinally, there is the dedicated commander role. A dedicated commander does nothing but com-mand. Most of his time is spent in a safe location (such as the heart of his team’s base) staring atthe commander screen.
Fig. 12-1. The leader by example spends much of his timein an ordinary combat role.
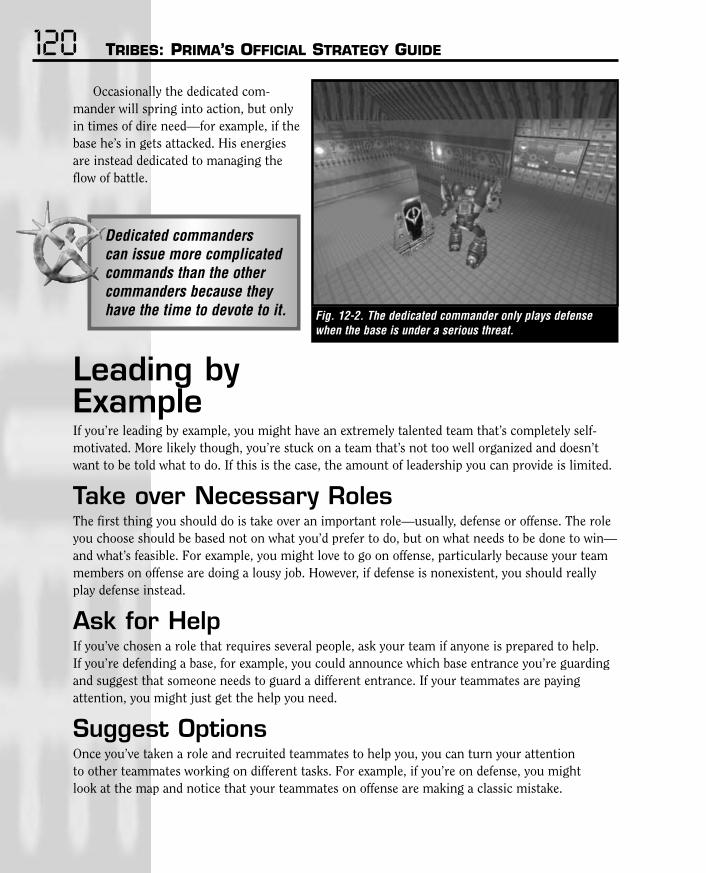
120 TRIBES: PRIMA’S OFFICIAL STRATEGY GUIDE
Occasionally the dedicated com-mander will spring into action, but onlyin times of dire need—for example, if thebase he’s in gets attacked. His energiesare instead dedicated to managing theflow of battle.
Dedicated commanders can issue more complicated commands than the other commanders because they have the time to devote to it.
Leading byExampleIf you’re leading by example, you might have an extremely talented team that’s completely self-motivated. More likely though, you’re stuck on a team that’s not too well organized and doesn’twant to be told what to do. If this is the case, the amount of leadership you can provide is limited.
Take over Necessary RolesThe first thing you should do is take over an important role—usually, defense or offense. The roleyou choose should be based not on what you’d prefer to do, but on what needs to be done to win—and what’s feasible. For example, you might love to go on offense, particularly because your teammembers on offense are doing a lousy job. However, if defense is nonexistent, you should reallyplay defense instead.
Ask for HelpIf you’ve chosen a role that requires several people, ask your team if anyone is prepared to help. If you’re defending a base, for example, you could announce which base entrance you’re guardingand suggest that someone needs to guard a different entrance. If your teammates are paying attention, you might just get the help you need.
Suggest OptionsOnce you’ve taken a role and recruited teammates to help you, you can turn your attention to other teammates working on different tasks. For example, if you’re on defense, you might look at the map and notice that your teammates on offense are making a classic mistake.
Fig. 12-2. The dedicated commander only plays defensewhen the base is under a serious threat.

CHAPTER 12: COMMAND PRIMER 121They’re attacking the enemy base indi-vidually instead of in waves. Suggest that they team up before attacking.
Of course, you can’t be sure thatthey’ll listen to you. Even if they do, ifthey aren’t committed to disciplinedplay, they won’t follow particularly complex commands. You’ll have to givesimple suggestions like “Everyone attackas a group!” or “Everyone get back ondefense!” instead of trying to coordinatecomplex strikes.
FieldCommandAs field commander, you juggle the roles of combatant and commander. You have direct control ofall or most of your team, but you aren’t ready to sit back in your base and devote yourself entirelyto command. Your reasons for that may vary; perhaps your team is short on manpower and needseveryone to fight. Maybe your team doesn’t respond well to orders other than simple ones, soyou’d be wasting your time as a dedicated commander. Or maybe the idea of just sitting aroundissuing commands bores you to death.
Regardless, the main difficulty as field commander is balancing your combat duties with yourcommand duties.
Perform a RoleFirst, pick a role. Defense is idealbecause on defense, you should have lots of downtime in which to issue commands.
If this mission has CommandStations, you can be an effective fieldcommander by issuing commands halfthe time, and manning the turrets theother half. You’ll be juggling back andforth between turret views and theCommander Screen in order to man theturrets. So it’s a natural progression toissue a few orders whenever you’re in the Commander Screen.
Fig. 12-3. As a commander by example, you can suggest,but you can’t really command.
Fig. 12-4. Splitting time between turret duty and commandmakes sense for a field commander.

122 TRIBES: PRIMA’S OFFICIAL STRATEGY GUIDE
Offense, being the most demanding role you can choose, istough to juggle with command. However, it can be rewardingif nobody else on your team is qualified to organize a legiti-mate assault on enemy territory.
Assign Initial CommandsAs you start the mission, you should assign your teammates initial commands. These should begeneral commands, and they don’t need to be updated that much. For example, you might assignthree players to defend your base and five players to attack the enemy base. Then you’d let thosecommands stand for awhile.
Assign Group LeadersIt’s useful to specify who’s in charge of various tasks. For example, if you assign five teammates toattack an enemy base, specify which one of them is the leader of that strike force. This helps withorganization, especially if the leader is an experienced player. Attacking an enemy fortificationrequires strategy. So if you allow all five attackers to proceed on their own, you’re likely to end up with a straggling, disjointed attack.
Periodically Revise CommandsEvery so often you should tear yourself away from whatever role you’re performing and look at theCommander Screen. Reevaluate what’s happening. Do you need more attackers or defenders? Doessomeone need to go out and establish a better sensor network? Assign new orders in accordancewith what you see; then go back to your other role.
Dedicated CommandThe dedicated commander does nothing but command. This means that there’s one less player onthe battlefield. Nevertheless, the benefit of having one person coordinating the entire team’s effortshould outweigh this drawback. If it doesn’t, you either aren’t a very good commander, or yourteam isn’t listening to you. In either case, step aside and either become a field commander or letsomeone else take the reins.
Establish YourselfThe first role of the dedicated commander is to establish himself in a safe spot, usually theteam’s base. In times of extreme crisis, the commander can break away from command todefend the base. During slow times, he can add to the base’s infrastructure by dropping RemoteTurrets, Cameras, and other fortifications. By and large though, he should be glued to theCommander Screen.
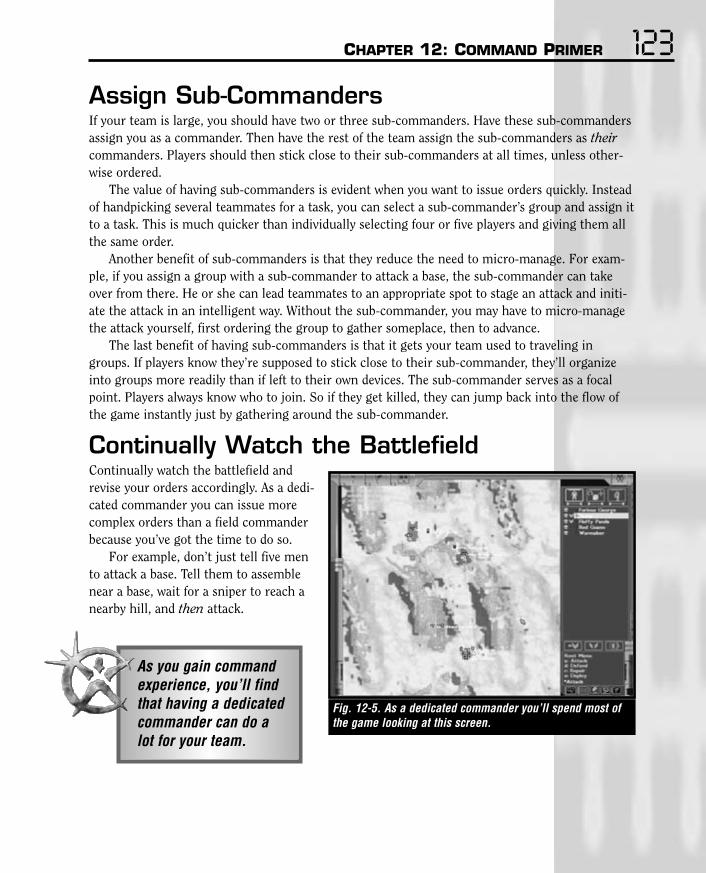
CHAPTER 12: COMMAND PRIMER 123Assign Sub-CommandersIf your team is large, you should have two or three sub-commanders. Have these sub-commandersassign you as a commander. Then have the rest of the team assign the sub-commanders as theircommanders. Players should then stick close to their sub-commanders at all times, unless other-wise ordered.
The value of having sub-commanders is evident when you want to issue orders quickly. Insteadof handpicking several teammates for a task, you can select a sub-commander’s group and assign itto a task. This is much quicker than individually selecting four or five players and giving them allthe same order.
Another benefit of sub-commanders is that they reduce the need to micro-manage. For exam-ple, if you assign a group with a sub-commander to attack a base, the sub-commander can takeover from there. He or she can lead teammates to an appropriate spot to stage an attack and initi-ate the attack in an intelligent way. Without the sub-commander, you may have to micro-managethe attack yourself, first ordering the group to gather someplace, then to advance.
The last benefit of having sub-commanders is that it gets your team used to traveling ingroups. If players know they’re supposed to stick close to their sub-commander, they’ll organizeinto groups more readily than if left to their own devices. The sub-commander serves as a focalpoint. Players always know who to join. So if they get killed, they can jump back into the flow ofthe game instantly just by gathering around the sub-commander.
Continually Watch the BattlefieldContinually watch the battlefield andrevise your orders accordingly. As a dedi-cated commander you can issue morecomplex orders than a field commanderbecause you’ve got the time to do so.
For example, don’t just tell five mento attack a base. Tell them to assemblenear a base, wait for a sniper to reach anearby hill, and then attack.
As you gain command experience, you’ll find that having a dedicated commander can do a lot for your team.
Fig. 12-5. As a dedicated commander you’ll spend most ofthe game looking at this screen.

124 TRIBES: PRIMA’S OFFICIAL STRATEGY GUIDE
Coordinating AttacksPerhaps the toughest thing to do as a commander is to coordinate attacks on enemy strongholds.Here are a few tips on how to do that successfully.
Assign GroupsIf you haven’t assigned sub-commanders, do so now. It saves you a lot of grief.
If sub-commanders aren’t feasible, you’ll have to mentally assign various players to groups andissue them commands simultaneously to get them into position.
Make them WaitThe biggest challenge facing a commander of an undisciplined team is making people wait. Players naturally want to sprint out and attack as soon as possible—which is a bad idea. Thisresults in scattered, ineffective attacks with players approaching the enemy base in a trickleinstead of a wave.
Make sure your attack group has properly assembled before letting it proceed on its way. If you can’t ensure a cohesive group, then your attacks won’t get very far.
Get Stealth Attackers into Place FirstCoordinating combination attacks, especially ones that use both power and stealth, can be veryrewarding. Whenever you’re doing this, the key is to let stealthy players get into position beforestarting the main attack. If you jump the gun and let the main force of your attack push ahead tooearly, the stealthy player won’t be ready. Successful stealth raids require both good positioning andabsolute concentration.
Overview of AssignmentsAfter commanding for a while, you’lldevelop your own theories on how toallocate your forces. To supplementthese theories, here are a few sugges-tions on how to divide your forces ineach of the major team game types.
Capture the FlagA prerequisite for Capture the Flag issolid defense. However, you may have a few truly skilled individuals handlingdefense. This allows you to place around70 percent of your forces on offensewhile leaving only a few defenders at the base. Fig. 12-6. Capture the Flag games require a solid founda-
tion of defense.

CHAPTER 12: COMMAND PRIMER 125Bear in mind that whenever individuals are killed, they tend to reappear near your base.
This provides a constant flow of extra teammates in the vicinity of the base in addition to dedicated defenders.
Also, if you’re acting as dedicated commander, you can break away from your role to help dealwith serious threats to your base.
Ultimately, the mix of offensive to defensive players is entirely up to you. Having too fewdefenders carries obvious risks. However, having too few attackers is also dangerous because ittakes pressure off the enemy and allows it to concentrate purely on offense.
Capture & HoldOn Capture & Hold missions, you wantyour team to split into several sub-groups. The size of these sub-groupsshould vary depending on the number of players on your team and the num-ber of towers to be held.
If, for example, you have seven players under your command, and youneed to capture three towers, form three attack groups. Make one group of three members and two groups of two members and send them all off tohold different towers.
Remember, holding only two of thethree towers for the majority of thegame will secure a victory. Therefore,you can create only two groups andassign them to two of the three towers. This way, your forces won’t be spread so thin, and you’ll be able to effectively defend those two towers.
On maps with more towers, it’s often useful to have at leastone roving player in Light Armor with a Jammer Pack orEnergy Pack. This player would be charged with locatingundefended towers and quickly grabbing them. Without sucha player, you run the risk of focusing too much on one or twotowers. Then the enemy can hold several uncontested towersin other parts of the map.
Fig. 12-7. Capture & Hold missions require you to split yourforces into multiple teams.

126 TRIBES: PRIMA’S OFFICIAL STRATEGY GUIDE
Defend & DestroyDefend & Destroy missions are much like Capture the Flag in that you must divide forces betweenbase defense and offense. However, it’s easier to destroy something than to carry a flag all the wayback to a base. So you might want to concentrate even more on defense.
Find & RetrieveFind & Retrieve missions can be divided into two stages: the acquisition phase and the battle phase.
In the acquisition stage, you should send the majority of your team out, preferably in LightArmor, to collect items and return to base. Only a few defenders should remain behind to ensurethat the base isn’t attacked.
Then, when a sufficient number ofitems has been collected, it’s a matter of defending them while simultaneouslytrying to take the enemy’s items.
Generally speaking, the ratio of attack-ers to defenders should fluctuate depend-ing on how many items your teamcontrols. If your team has more items thanthe enemy does, you should concentratealmost entirely on defense. Only feint atthe enemy base to keep them from over-committing their forces to offense. If yourteam has fewer items than the other team,you should concentrate most of yourforces on offense.
Fig. 12-8. The first stage of Find & Retrieve missions is tocollect objects from the map.
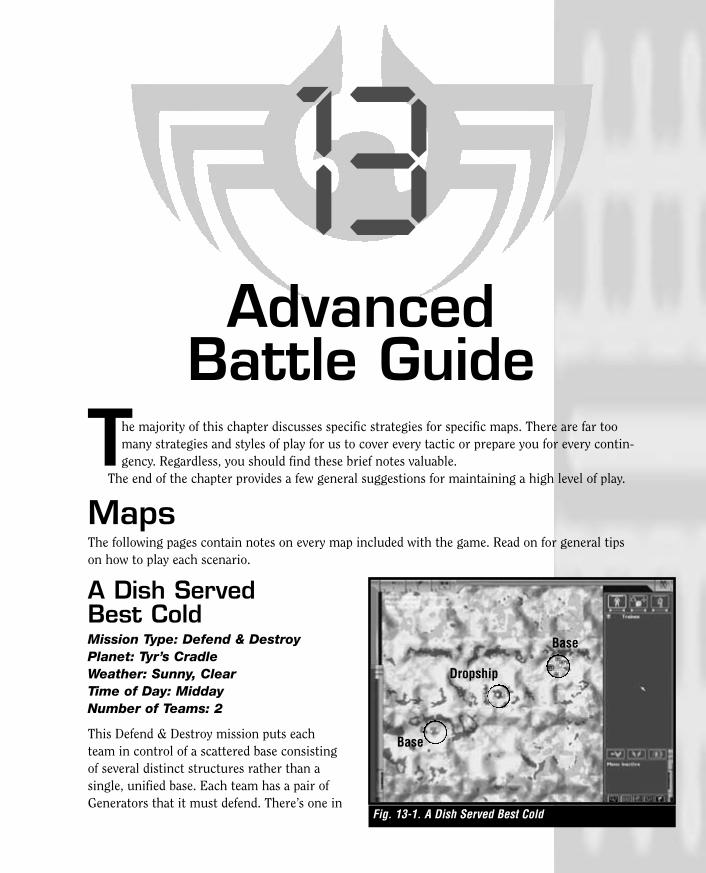
The majority of this chapter discusses specific strategies for specific maps. There are far toomany strategies and styles of play for us to cover every tactic or prepare you for every contin-gency. Regardless, you should find these brief notes valuable.
The end of the chapter provides a few general suggestions for maintaining a high level of play.
MapsThe following pages contain notes on every map included with the game. Read on for general tipson how to play each scenario.
A Dish Served Best ColdMission Type: Defend & DestroyPlanet: Tyr’s CradleWeather: Sunny, ClearTime of Day: MiddayNumber of Teams: 2
This Defend & Destroy mission puts each team in control of a scattered base consisting of several distinct structures rather than a single, unified base. Each team has a pair ofGenerators that it must defend. There’s one in
13Advanced
Battle Guide
Fig. 13-1. A Dish Served Best Cold
Base
Base
Dropship

128 TRIBES: PRIMA’S OFFICIAL STRATEGY GUIDE
an easy-to-attack tower and one in a small, two-level base that’s harder to get at. Destroying anenemy Generator is worth two points.
In addition, an abandoned dropship in the center of the map provides one point if it’s capturedand held. This dropship can be used as a tiebreaker in close games. However, it becomes lessimportant in games where a team has destroyed one or more of its targets.
As with all Defend & Destroy missions, destroyed objectivescan be repaired. For example, if the enemy destroys yourGenerator, you can use a Repair Pack to fix it, and it’ll generate power again. However, this doesn’t reverse thepoints the other team got by destroying the Generator; thoseare permanent.
If the enemy destroys the Generator a second time afteryou’ve fixed it, no more points are gained.
Vehicles are available in this mission, and they’re quite useful for transportation. Each base hasa single Missile Turret, which makes direct attacks with vehicles implausible. But if the Turret isdestroyed, such attacks become feasible.
AnthillMission Type: Capture & HoldPlanet: Theta Draconis IVWeather: ClearTime of Day: MiddayNumber of Teams: 2
Anthill is both complicated and extremelypopular, so it’s in your best interest to figureit out quickly. Read the next few paragraphsto learn more.
Most Capture & Hold missions featuremultiple towers, but this mission featuresonly a single alien structure. Thus, theentire game is a scramble to control thatsingle structure.
Both sides start out in bases located on the eastern and western edges of the map. The disputedstructure is located in the middle of the map, underground. And there’s only one way to reach it.Approach one of four towers near the map’s middle, enter that tower, and drop down to the bottomof a shaft. Each shaft leads to the same underground structure containing a massive vertical col-umn with several floors and an elevator in the center. The trigger block that determines control ofthe structure is at the top of this column. (If you’re having trouble visualizing this, host a multi-player game and check it out for yourself.)
Fig. 13-2. Anthill
Base
Base
Towers

CHAPTER 13: ADVANCE BATTLE GUIDE 129Above ground, two of the four towers have Missile Turrets atop them. Thus, once a team has
grabbed control of the structure, it can make life miserable for the other team. The Missile Turretsmake it tough to approach the towers, especially if a player is manually controlling them.Meanwhile, the rest of the team can hole up inside the structure and play defense.
A good strategy is to make a mad dash for the structure immediately, with everyone in LightArmor. If this succeeds, have a couple of players in heavier armor come to secure the area. It ispreferable for them to go with Remote Inventory Stations so you can drop Remote Turrets and fortify the structure.
If this fails, and the enemy takes control of the structure, you should then try to sneak some-one with Light Armor inside. Have him destroy the Generator at the bottom. This takes out powerto the Missile Turrets, which can otherwise ruin your attacks.
Failing this, you should have a player in Heavy Armor shell the Missile Turrets into oblivion.Otherwise, they’ll make it hard just to get near the bunker, much less attack it.
Then, attack the bunker in waves, and be sure to enter through more than just one tower. Ifyour attacks only come through one tower, the enemy will foil them easily.
A good mix of armor types helps out greatly. Light Armored players can jet around and wreakhavoc and even capture the structure for a brief time. But without companions in Medium andHeavy Armor, they won’t have any staying power.
Mines are very effective. You can mine the trigger block, along with the four entrances to thestructure. Even if enemies attack these mines and detonate them harmlessly, you’ll hear the noiseand have extra time to respond to the threat.
Blood Runs ColdMission Type: DeathmatchPlanet: Tyr’s CradleWeather: Cold, ClearTime of Day: MiddayNumber of Teams: —
This deathmatch level features a smalloutdoor area with a large structure inthe middle. Outside, towers indicate theborders of the mission area; pass beyondthem at your own risk. Clusters ofweapons and ammo lie in depressions inthe ground near these towers, not on thetowers themselves (as is often the casewith such maps).
The central structure runs deep underground and takes some time to get used to. It, too, ispacked with weapons, and you’ll find healing items and packs in here as well.
Don’t enter the brutal central structure until you’ve collected at least one good weapon.Explosive weapons are best, especially in the close confines indoors. As always with deathmatchmissions, look for chances to attack enemies who are otherwise engaged. Also, try not to getcaught in the middle of a firefight. Fixating on one enemy is usually a recipe for disaster.
Fig. 13-3. Blood Runs Cold

130 TRIBES: PRIMA’S OFFICIAL STRATEGY GUIDE
Bloody VengeanceMission Type: Defend & DestroyPlanet: Tombaugh VWeather: ClearTime of Day: DayNumber of Teams: 2
This Defend & Destroy mission placeseach team in a base fortified by massivewalls. Each base has multiple targets.There are two Solar Panels worth onepoint each, two Plasma Turrets worthtwo points each, and two Generatorsworth three points each.
The Solar Panels are located on top ofa pair of towers inside each base’s wallsand thus are easy to attack. The Plasma Turrets, likewise, are in plain view, mounted on top ofwalls. The Generators are the hardest to attain. They’re located underneath the bases and can onlybe reached by entering the towers through lofty openings.
Ammo Stations, Inventory Stations, Command Stations, and other key stations are hiddenunderground with the Generators. A Vehicle Station is located above ground, at the center of each base.
A key to success is maintaining a good ratio of defenders outside your base to defenders lurk-ing underground. If you have too many defenders underground, you’ll lose control of the exteriorof your base.
Also, realize that you must fly up a vertical shaft to get back to ground level after visiting theunderground Inventory Stations. It’s a long flight, so don’t expect to get into Heavy Armor andstill be able to jet back up.
BroadsideMission Type: Capture the FlagPlanet: Deus SanguinisWeather: ClearTime of Day: MiddayNumber of Teams: 2
This is a Capture the Flag mission that fea-tures extremely large, floating bases. They’reso large that it makes sense to have multipledefenders guarding both the lower (main)entrance and the upper (rooftop) entrances to your base. Also, there’s value in scatteringRemote Turrets all throughout the base andselectively mining the flag area.
Fig. 13-4. Bloody Vengeance
Fig. 13-5. Broadside
Base
Base
BaseBase

CHAPTER 13: ADVANCE BATTLE GUIDE 131However, don’t fall into the trap of putting too many defenders inside. Defenders guarding each
exit should split time between inside and outside. If too much time is spent inside, you’ll lose sightof what’s happening outside and allow enemies to swarm your base.
The first step is usually to destroy the turrets, Pulse Sensor, and Solar Panel on top of theenemy base. Also, you can often use the help of your own base’s Mortar Turret. Then, when theseitems are worn down, attackers can try to infiltrate. Multiple attackers in Light or Medium Armorare best. In Heavy Armor, you’d need to make extensive use of the step-like floating platforms lead-ing up to the enemy base. That would leave you vulnerable.
You should also make sure that there are a few team members standing on the exterior of yourbase at all times. Have them shoot and harass enemies on the other base, fix your turrets, and pre-vent the enemy from repairing its own base features.
If both teams are highly defensive minded, this mission could easily result in a draw. Don’t getimpatient and let your defense break down, though. There’s nothing worse than holding out formost of the mission, only to let it all slip away when everyone leaves for a massive attack.
CitadelsMission Type: Capture & HoldPlanet: Sarkanus VIIWeather: HazyTime of Day: MiddayNumber of Teams: 2
This Capture & Hold mission features threemassive floating citadels that are up for grabs atthe mission’s start. These citadels are fully func-tional bases, complete with turrets, a Generator,Inventory Stations, Ammo Stations, and aCommand Station.
Each side starts in a small base in the cornerof the map. These bases have automatic doorsthat are triggered only by friendly team mem-bers, so attacking the enemy’s base is rarely an easy task.
Each base has a Vehicle Station, and vehicles are quite important on this map. Aside from the fact that the map is large, the bases float high enough that players in Heavy Armor may havetrouble jumping in. This is especially true when assaulting the central base, which is extremelyhigh in the air. The central tower is even a tough jump for a player in Light Armor.
Each citadel has a Missile Turret, which makes it hard to fly a vehicle in the vicinity. If theenemy takes a citadel, you’ll usually have to take out its Missile Turret if you hope to launch agood assault on it. Otherwise, the Missile Turret will shoot you down.
Since there are only three citadels, and they’re all quite heavily fortified, you’d do well todefend them aggressively once you’ve taken them. Don’t bother trying commando raids on enemycitadels—their Missile Turrets and sheer height make it difficult to take them over. You must firstwear down the defenses, then bring a large contingent of teammates to secure them.
Fig. 13-6. Citadel
Base
Base
Citadels

132 TRIBES: PRIMA’S OFFICIAL STRATEGY GUIDE
Criss CrossMission Type: Capture & HoldPlanet: Ultima ThuleWeather: ClearTime of Day: DayNumber of Teams: 2
This mission features five towers that areup for grabs, arranged in a rough squarewith four towers at the corners, and oneat dead center.
Each team starts at a base that’s littlemore than a Missile Turret and someInventory Stations.
The towers themselves are not allidentical, and knowing their quirks isessential. The northwest and southeast towers have exterior turrets and Inventory Stations andthus are quite valuable. The northeast and southwest towers have Pulse Sensors, Mini-FusionTurrets and little else. So they don’t provide much for their defenders. These towers tend tochange hands a lot.
The central tower is the largest, and it is the prize tower. It doesn’t have an Inventory Station,but it has a Mortar Turret and big Pulse Sensor radius, plus a Command Station. Plus, it’s big andfeatures only one path leading to its trigger block, so it’s easy to defend.
Generally speaking, your team should do one of two things: Commit to taking the two towersclosest to your base, plus the central tower. Or ignore the central tower (save for destroying itsMortar Turret) and take three of the outer towers.
Dangerous CrossingMission Type: Capture the FlagPlanet: Tombaugh VWeather: HazyTime of Day: MiddayNumber of Teams: 2
This is a very simple mission, with twobases separated by a huge chasm. Eachbase is small and lightly fortified and hasa separate, outdoor Inventory Stationthat helps ease the usual InventoryStation bottlenecks.
Fig. 13-7. Criss Cross
Fig. 13-8. Dangerous Crossing
Base
Base
Towers
Base
Base

CHAPTER 13: ADVANCE BATTLE GUIDE 133The size of the map makes stealth and speed attractive, so a smart team will do its best to
defend against such attacks. The bridge leading across the chasm is a nice touch, but it isn’t a good idea to use it. Running
along the bridge just makes you an attractive target.
Death KnellMission Type: Find & RetrievePlanet: Theta Draconis IVWeather: ClearTime of Day: NightNumber of Teams: 2
This is a classic 20-minute Find & Retrieve mis-sion. Each team has a base with four pedestals.Near the middle of the map is an undefendedneutral installation that contains four flags.
Your task is to retrieve the four flags andhold them at your base. Very seldom are all fourflags actually captured by one team. Usually, themission is decided by which team has the mostflags when time runs out.
Additionally, capturing the flag installation and holding it garners your team a point. This istricky, however, as the installation has no built-in defenses.
The flags are located at the very bottom of the installation. Several players in Light Armorshould raid the installation at the mission’s start. Eventually, it’ll be a fight where the side withmore flags tries to defend them, and the side with fewer flags tries to steal more.
Beware, however, of leaving your base unprotected, even if your team has fewer flags. If astealthy attacker steals your last flag, you’ll automatically lose.
Finally, note that it’s easy to wander out of the mission area on this map because the bases are so close to the edges. Refer to the map periodically if you want to stay inbounds.
Fig. 13-9. Death Knell
Base
Base
FlagRepository

134 TRIBES: PRIMA’S OFFICIAL STRATEGY GUIDE
Desert of DeathMission Type: Capture the FlagPlanet: Omicron Argentis VIWeather: ClearTime of Day: NightNumber of Teams: 2
This unique Capture the Flag missioncontains no Inventory Stations, so you’restuck in the armor you started with. Inaddition, you’ll either have to use yourdefault weapons and items, or collectthem from the map.
There are a few valuable weapons anditems scattered across the map; they’reall located on stone ruins. Repair Packsand Energy Packs are relatively common. The most significant trove may very well lie in the center of the map. Here you’ll find a Plasma Gun and Ammo, plus a Laser Rifle.
To succeed in this mission, a truly disciplined team will gather into an army and swarm theenemy base. Individual heroics usually don’t work. This is because Fusion Turrets and ELF Turretsguard the pyramids holding the flags, and the flags are stuck in holes in the ground. Mines (whichcan be found near each base) are carefully placed at the pyramid entrances and by the flags. So, it’s extremely difficult for a lone attacker to swoop in and take the prize.
The Plasma Gun lets you take out enemy Pulse Sensors—quickly if you have a teammate helpout (perhaps with the Chaingun or Disk Launcher). This goes a long way toward making com-mando raids easier. However, a truly alert team won’t give you enough time to take out its PulseSensors. So, massive raids are often the best way to go.
FallenMission Type: Find & RetrievePlanet: Halcyon IIWeather: ClearTime of Day: DayNumber of Teams: 2
This relatively straightforward Find &Retrieve mission places each team incharge of a base at the periphery of themap. Three flags are located in the mainchamber of a wrecked ship near themap’s center. The teams are chargedwith retrieving these three flags and tak-ing them back to their respective bases.
Fig. 13-10. Desert of Death
Fig. 13-11. Fallen
Base
Base
Craft withFlags
Base
Base

CHAPTER 13: ADVANCE BATTLE GUIDE 135The only real twist is the ship containing the flags. It’s fallen on its side. So anyone trying to
get inside must jet up and enter through hard-to-find side openings. In addition, traversing theinterior of the ship is disorienting because of the skewed perspective.
There is one large entrance and one small entrance to the ship. The large entrance is easier toenter through but requires you to take a roundabout path to the flags. The smaller entrance is sortof a back door and is more direct.
The flags themselves reside near the top of the ship.As usual with these missions, make sure your team initially sprints out to take at least one flag
and retrieve it. Then try to take flags from the enemy base while defending your own.
Fog-of-WarMission Type: Find & RetrievePlanet: Garden of VishnuWeather: FoggyTime of Day: MiddayNumber of Teams: 2
Like Death Knell, Fog-of-War is a grab-the-flags mission with a twist. The mainobjective is to bring all four flags from theirfloating pedestals at the center of the mapto your team’s medium-sized base. Thereare also two valuable towers near theseflags, which contain Mortar Turrets, MissileTurrets, and even Inventory Stations.
The real trick here lies in striking a balance between controlling these towers, grabbing flags,and defending your base. If your team can grab all four flags and convey them all back to yourbase, you can concentrate entirely on defending. But that’s hard to do. More likely you’ll need tomaintain a strong presence in at least one of the two central towers. Meanwhile, leave a few team-mates behind to guard the flags.
Four Way DanceMission Type: Capture the FlagPlanet: Septa Scarabae IVWeather: Rain, Low VisibilityTime of Day: MiddayNumber of Teams: 4
This unusual, four-way Capture the Flagmission is intriguing, to say the least.Four teams start the game with smallbases arrayed around a central tower.
Fig. 13-13. Four Way Dance
Fig. 13-12. Fog-of-War
Base
Base
Base
Base
Base
Tower
Tower
Tower
Flags
Base

136 TRIBES: PRIMA’S OFFICIAL STRATEGY GUIDE
The tower doesn’t have any massive turrets or far-reaching Pulse Sensors. It does, however, have aVehicle Station, and one point is granted for possessing it.
The key to beating this mission is a blend of strong defense and opportunistic offense.Everyone’s base has a number of turrets. But the bases themselves are very small and thus proneto damage from shelling and vulnerable to hit-and-run raids. You’ll need a few skilled players ondefense to hold down the fort.
On the other hand, there’s more incentive to go on the offensive than in most Capture the Flag missions. Perfect defense in most Capture the Flag games ensures at least a tie. However, it’s entirely possible to never lose your flag in Four Way Dance yet still lose the mission. That’sbecause your enemies can steal other teams’ flags.
Be opportunistic. Steal flags from weakened bases. If a team decides to go on the defensive,leave it alone and go after bases that have fewer defenders. Selecting the right targets is extremely important.
Free for AllMission Type: Capture & HoldPlanet: Theta Draconis IVWeather: ClearTime of Day: MiddayNumber of Teams: 4
This mission is fundamentally identicalto Anthill, save that four teams competefor the central structure instead of two.Also, each of the four towers at the cen-ter of the map has a Missile Tower, asopposed to the Anthill mission, whereonly two of them do.
Attacking enemy bases is pointless inthis mission. There are just too manyfactions, and disrupting one of themwon’t affect the others.
In Anthill, you’ll often see a teamhold the central structure for a longtime. However, this is rare in Free for Alldue to the sheer number of attackers assaulting it at all times.
Attack in big, strong groups so you can fight your way to the trigger block and hold it for awhile when you get there. Also, have one team member in Light Armor whose only job is to fly upand touch the trigger block as frequently as possible. This technique usually won’t gain you thestructure for more than a few moments at a time. But those moments add up, especially in a four-player environment where games tend to be close.
Fig. 13-14. Free for All
Base
Base
Base
Base
Towers

CHAPTER 13: ADVANCE BATTLE GUIDE 137Hammer DownMission Type: Defend & DestroyPlanet: Tombaugh VWeather: ClearTime of Day: Midday Number of Teams: 2
This mission requires your team todefend three mini-bases, each with amission-critical Generator. The centralbase also has a Command Station thatmust be defended.
Since your bases are scattered,defending all three will be extremely dif-ficult, especially if your team isn’t verylarge. You may want to concede one ofyour three bases, allowing the enemy to destroy it, and focus on defending the other two extremelywell. Then, if you manage to destroy two of the enemy’s Generators, your team will win.
Another strategy is to guard only one base—the central one. Then launch a full-scale attackwith the other team members that would otherwise be on defense. If you manage to take down theenemy’s central base, this approach will definitely pay off.
Ice RidgeMission Type: Capture the FlagPlanet: Zeta Hercules XIWeather: FoggyTime of Day: MorningNumber of Teams: 2
This is a mission that requires solid perimeterdefense. Flags are right out in the open on eachbase’s rooftop. So a failure to establish a strongand vigilant perimeter defense means enemiescan easily swoop down, snatch your flag, thenmake off with it.
A valley runs down the middle of this mapconnecting the two teams’ bases. Stealth attack-ers will want to approach the enemy base fromeither side of this valley, not down the middle.
Perhaps the best way to capture a flag in this mission is to destroy the enemy’s main PulseSensor, then initiate a multiple-wave attack. Have several players swoop down slightly, one afteranother, from different directions. If one attacker can draw the majority of the defenders, anotherattacker should be in a good position to snatch the flag.
Fig. 13-15. Hammer Down
Fig. 13-16. Ice Ridge
Bases
Bases
Base
Base

138 TRIBES: PRIMA’S OFFICIAL STRATEGY GUIDE
King Under the HillMission Type: DeathmatchPlanet: FiafagonWeather: Partly CloudyTime of Day: NightNumber of Teams: None (Free for All)
A massive, multi-level, underground struc-ture runs through the middle of this death-match-style map. It contains weapons, ammo,and healing items. You can also locate goodweapons outside, on small structures scat-tered around the periphery of the map.
A Repair Pack on a huge pedestal insidethe structure is a valuable prize. Try to grabit if you can; it’ll greatly increase yourchances of staying alive.
As with all deathmatches, learn the terrain and look for targets of opportunity. Since teamworkdoesn’t apply here, use hard-hitting, splash damage weapons like the Plasma Gun and DiskLauncher. These weapons can finish the job and perhaps injure multiple enemies at once.
Lucky SevenMission Type: Capture & HoldPlanet: Avicord’s PlanetWeather: ClearTime of Day: NightNumber of Teams: 3
This three-way fight for seven towers isan exercise in decision making. Sincethere are three teams involved, you can’t count on there only being as manyenemies as teammates. Thus, you haveto be selective when you pick your fights.
The central and central southerntowers don’t have Inventory Stations,and their trigger blocks are right out in the open. So they’re likely to change hands quite a bit.The other towers are somewhat harder to assault.
Instead of agreeing upon towers to defend and sticking with them, watch the flow of the mission and go after towers that are weak. Sticking with a plan all through the game can be disas-trous. For example, let’s say you decide to attack the southeastern tower and hold it, along with acouple others. If another team has been beaten up so badly that they only hold that one tower,
Fig. 13-17. King Under the Hill
Fig. 13-18. Lucky Seven
UndergroundStructure
7 Towers
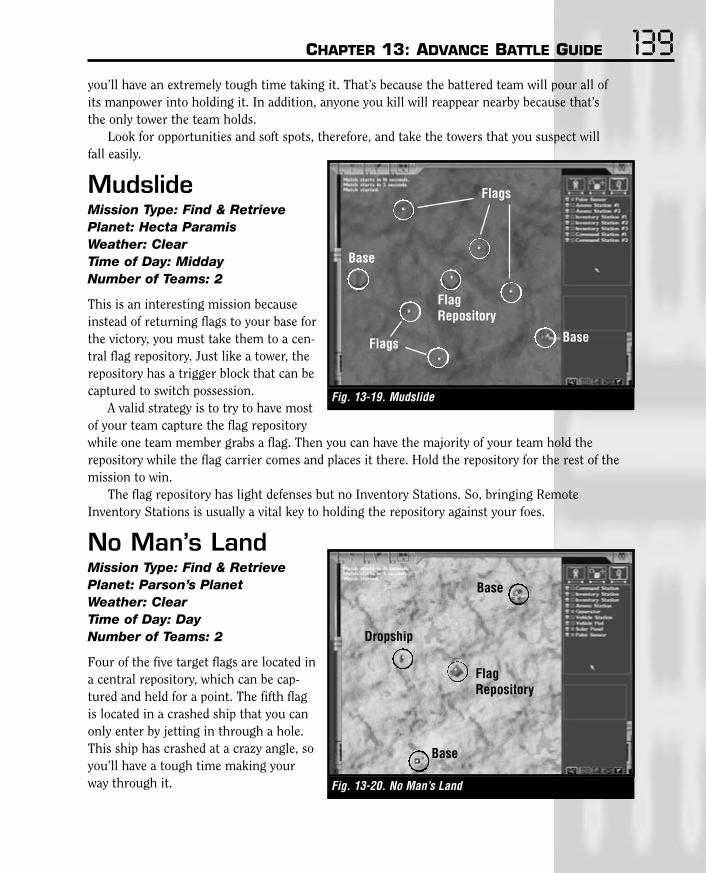
CHAPTER 13: ADVANCE BATTLE GUIDE 139you’ll have an extremely tough time taking it. That’s because the battered team will pour all of its manpower into holding it. In addition, anyone you kill will reappear nearby because that’s the only tower the team holds.
Look for opportunities and soft spots, therefore, and take the towers that you suspect will fall easily.
MudslideMission Type: Find & RetrievePlanet: Hecta ParamisWeather: ClearTime of Day: MiddayNumber of Teams: 2
This is an interesting mission becauseinstead of returning flags to your base forthe victory, you must take them to a cen-tral flag repository. Just like a tower, therepository has a trigger block that can becaptured to switch possession.
A valid strategy is to try to have mostof your team capture the flag repositorywhile one team member grabs a flag. Then you can have the majority of your team hold the repository while the flag carrier comes and places it there. Hold the repository for the rest of themission to win.
The flag repository has light defenses but no Inventory Stations. So, bringing RemoteInventory Stations is usually a vital key to holding the repository against your foes.
No Man’s LandMission Type: Find & RetrievePlanet: Parson’s PlanetWeather: ClearTime of Day: DayNumber of Teams: 2
Four of the five target flags are located ina central repository, which can be cap-tured and held for a point. The fifth flagis located in a crashed ship that you canonly enter by jetting in through a hole.This ship has crashed at a crazy angle, soyou’ll have a tough time making yourway through it.
Fig. 13-19. Mudslide
Fig. 13-20. No Man’s Land
Flags
FlagRepository
FlagRepository
Flags
Base
Base
Base
Base
Dropship

140 TRIBES: PRIMA’S OFFICIAL STRATEGY GUIDE
An effective strategy for this mission is to snatch as many flags as possible, as quickly as possible. Then take them all back to your base. If you manage to get four of the five flags, you can just hole up and ignore the repository. Even if the other team gets the last flag and holds therepository, they’ll only get two points.
However, if you only get three flags, you’ll need to defend both your base and the repository.The repository’s single point, in this case, will be enough to put your team over the top.
Finally, if you get only one or two flags at the start, you’ll need to attack the enemy base toretrieve at least one of them.
No QuarterMission Type: Defend & Destroy Planet: Priam IIIWeather: ClearTime of Day: MiddayNumber of Teams: 2
This Defend & Destroy mission puts eachteam in charge of a large base with twomain entrances—top and bottom. Theteam’s two mission-critical Generators areboth located inside this base, in the sameroom. So you can really stack up yourdefense around defending this room.
A pair of towers in between the two bases are each worth a point if they’re captured and held.Even more importantly, though, they have both Inventory Stations and Mortar Turrets, so theycan be used to harass the enemy. Allowing the enemy to take over both towers is a bad ideabecause you can expect a continual hail of mortar fire.
A good strategy is to take over the nearer of the two towers and try to destroy the MortarTurrets on the farther tower. This opens the way for subsequent attacks on the real prize, theenemy base.
Peak PerformanceMission Type: Capture & HoldPlanet: Hepta Ourubis IIWeather: ClearTime of Day: DayNumber of Teams: 2
This mission features five towers toCapture & Hold. The two northern tow-ers possess Inventory Stations while thecentral and southern towers don’t. It’sundesirable, therefore, to get stuck withonly the southern towers.
Fig. 13-21. No Quarter
Fig. 13-22. Peak Performance
Towers
5 Towers
BaseBase

CHAPTER 13: ADVANCE BATTLE GUIDE 141None of the towers have any built-in defenses, though all have Pulse Sensors. Also, the north-
ern two bases are more heavily walled than the other two. Try to secure the northern towers at all costs. The Inventory Stations located inside will allow
your team to access the weapons and Remote Turrets needed to fortify their position. Then venturesouth to capture a third tower for the win.
PeekabooMission Type: DeathmatchPlanet: Avicord’s PlanetWeather: Clear but HazyTime of Day: MiddayNumber of Teams: None (Free for All)
This deathmatch takes place outdoors. The cen-ter of the map contains a valuable Repair Packwhile weapons are located on small structuresscattered around the map’s periphery. Sinceweapons and gear are in short supply, possessingthe Repair Pack and a potent weapon will oftenkeep you alive for quite a while.
Learn to keep moving and not fixate on asingle target. The wide-open spaces of this map allow multiple enemies to see you at once, andeveryone starts out with a fast-firing Blaster. Add up these two facts, and you’ll realize that stand-ing still is a sure recipe for disaster.
RaindanceMission Type: Capture the FlagPlanet: Tawa MangahelaWeather: RainingTime of Day: MiddayNumber of Teams: 2
This Capture the Flag mission features a largegulch spanned by a bridge at the center of the map.
The flags in this mission are out in the open.But since they’re up on towers, they’re slightlyless prone to snatch-and-grab tactics than in Ice Ridge. There are also small bases withInventory Stations near the flags, plus turretsand Vehicle Stations.
Each base has a Missile Turret. Taking out the enemy’s Missile Turret leaves the enemy open toserious abuse from the skies. Destroy it, and you can send a couple of players in Scout Flyers overto make the enemy miserable.
Fig. 13-23. Peekaboo
Fig. 13-24. Raindance
Base
Base

142 TRIBES: PRIMA’S OFFICIAL STRATEGY GUIDE
As usual for missions where the flag is more or less out in the open, combined attacks are cru-cial to victory. Lone players usually can’t sneak in and grab the flag by themselves, especially whilethe Missile Turret and other defenses are up. Once these defenses are removed, however, anythingcan happen.
RollercoasterMission Type: Capture the FlagPlanet: Deus SanguinisWeather: ClearTime of Day: MiddayNumber of Teams: 2
Rollercoaster is a unique Capture theFlag mission. It features floating basesthat are large but completely open indesign. Flags are quite distant from themain base, so your team needs to extendits defenses somewhat to keep attackersat bay.
Turrets defend the ledges leading up to these floating bases. So, attackers in Medium or HeavyArmor will be in for a surprise if they try to use them as stepping stones. This makes Light Armorand vehicular attacks much more attractive.
A pair of force fields protects each team’s Inventory Stations. However, these force fields can be taken out by destroying two Solar Panels atop the enemy base; there’s no other power source.
Be sure to scatter your base defenders and have someone ready to repair those Solar Panels at all times. They’re quite fragile, and your base depends on them.
Sand StormMission Type: DeathmatchPlanet: Hepta Ourubis IIWeather: Sandstorm; Low VisibilityTime of Day: MiddayNumber of Teams: None (Free for All)
This deathmatch takes place on a rela-tively open plain with ruins scattered allaround. Weapons and packs are alwayslocated on or near ruins.
Visibility is limited by the sandstorm,but you can still see quite a lot due tothe lack of cliffs or other major terrainobstacles.
Fig. 13-25. Rollercoaster
Fig. 13-26. Sand Storm
Base
Base

CHAPTER 13: ADVANCE BATTLE GUIDE 143As always in deathmatch missions,
keep moving and try to pick up at leastone potent weapon before fighting.
ScarabraeMission Type: Capture the FlagPlanet: Avicord’s PlanetWeather: ClearTime of Day: MiddayNumber of Teams: 2
This popular mission is Capture the Flagwith a twist. Two large floating baseshouse flags as usual, but the center ofthe map contains a watchtower equippedwith potent Missile Turrets. Control ofthis tower at the mission’s end confers one point.
The watchtower cannot be ignored because its Missile Turrets are dangerous to anyone cross-ing the center of the map, especially flying craft.
If your defenders are solid enough, you can sometimes defend your base effectively with only a few men. Then you can have the rest hold the watchtower until the end for the victory. Anotherstrategy, which is also valid, is to wreck the watchtower’s Generator, Command Stations, andMissile Turrets. That way, the enemy can’t get much use out of them. Then largely ignore themwhile launching flag attacks on the enemy base.
Flying craft figure prominently in this mission since they allow extremely fast base attacks,despite the distance between bases. Again, though, you always have to keep that watchtower in mind.
Seek and DestroyMission Type: Defend & DestroyPlanet: Tyr’s CradleWeather: Snow and IceTime of Day: NightNumber of Teams: 2
This is a fundamentally simple Defend &Destroy mission, complicated slightly bytowers in the northeast and southwest.These towers can be held for one pointapiece, plus they each have a VehicleStation. However, they possess no otheruseful features, and they’re too far awayfrom significant targets to be of muchtactical value.
Fig. 13-27. Scarabrae
Fig. 13-28. Seek and Destroy
Base
Base
Watchtower
Base
Base
Tower
Tower

144 TRIBES: PRIMA’S OFFICIAL STRATEGY GUIDE
Both bases are tough and well defended by both exterior and interior turrets. Taking out theenemy base’s Missile Turret is crucial if you want to use aircraft to assault the base.
Since most of your primary targets are inside the enemy base, where the Inventory Stationsare also located, those bases are difficult to penetrate. Enemies can easily stack up on defense.Prepare to attack with power and numbers because the Sentinels guarding the bases’ interiorsmake it extremely difficult to sneak in.
SiegeMission Type: Defend & DestroyPlanet: Ultima ThuleWeather: ClearTime of Day: NightNumber of Teams: 2
This Defend & Destroy mission featurestough, massive floating bases. Each basecontains a wealth of targets, most ofwhich are clustered inside, in two keyplaces. The enemy Pulse Sensor is theonly target that’s relatively unprotected.
There’s a Mortar bunker in the mid-dle of the map. Controlling this bunkerlets you shell the enemy base. Each base has Missile Turrets (plus other turrets that make it diffi-cult to jet up and attack). Therefore, it’s very handy to control this bunker and use it to shell theexterior of the enemy base.
The bases in this mission are so large, and so complicated, that both power attacks and sneakattacks work well. Mix up your attacks and be sure to assign defenders to key defensive points.You’ll probably need to play this map a few times before you get the hang of how the bases are laid out and where you should establish your defenses.
Snow-BlindMission Type: Capture the FlagPlanet: Ymir Weather: FoggyTime of Day: MiddayNumber of Teams: 2
This interesting Capture the Flag gameplaces each team in control of a base witha flag and a tower near the center of themap. The towers cannot change hands,but they contain Inventory Stations andthus are useful as supply points.
Fig. 13-29. Siege
Fig. 13-30. Snow-Blind
Base
Base
MortarBunker
Base
Base
Towers
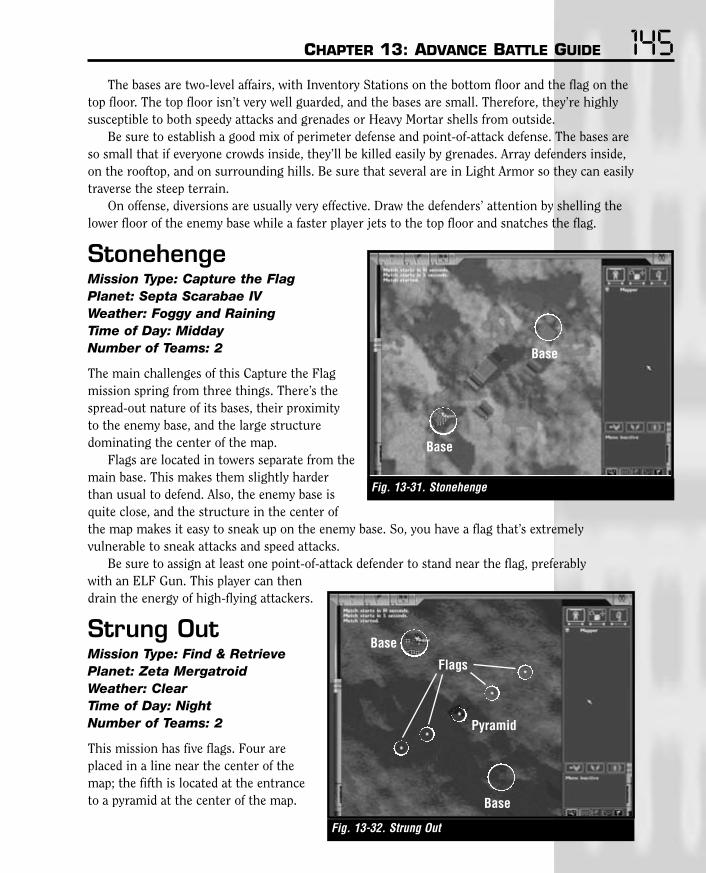
CHAPTER 13: ADVANCE BATTLE GUIDE 145The bases are two-level affairs, with Inventory Stations on the bottom floor and the flag on the
top floor. The top floor isn’t very well guarded, and the bases are small. Therefore, they’re highlysusceptible to both speedy attacks and grenades or Heavy Mortar shells from outside.
Be sure to establish a good mix of perimeter defense and point-of-attack defense. The bases areso small that if everyone crowds inside, they’ll be killed easily by grenades. Array defenders inside,on the rooftop, and on surrounding hills. Be sure that several are in Light Armor so they can easilytraverse the steep terrain.
On offense, diversions are usually very effective. Draw the defenders’ attention by shelling thelower floor of the enemy base while a faster player jets to the top floor and snatches the flag.
StonehengeMission Type: Capture the FlagPlanet: Septa Scarabae IVWeather: Foggy and RainingTime of Day: MiddayNumber of Teams: 2
The main challenges of this Capture the Flagmission spring from three things. There’s thespread-out nature of its bases, their proximity to the enemy base, and the large structure dominating the center of the map.
Flags are located in towers separate from themain base. This makes them slightly harderthan usual to defend. Also, the enemy base isquite close, and the structure in the center ofthe map makes it easy to sneak up on the enemy base. So, you have a flag that’s extremely vulnerable to sneak attacks and speed attacks.
Be sure to assign at least one point-of-attack defender to stand near the flag, preferably with an ELF Gun. This player can thendrain the energy of high-flying attackers.
Strung OutMission Type: Find & RetrievePlanet: Zeta MergatroidWeather: ClearTime of Day: NightNumber of Teams: 2
This mission has five flags. Four areplaced in a line near the center of themap; the fifth is located at the entranceto a pyramid at the center of the map.
Fig. 13-31. Stonehenge
Fig. 13-32. Strung Out
Base
Base
Base
Flags
Pyramid
Base

146 TRIBES: PRIMA’S OFFICIAL STRATEGY GUIDE
This pyramid can be captured and held for a point; it contains Inventory Stations but doesn’t haveany defenses.
The bases in this mission are unusual as they’re largely underground. Only the roofs peek out above ground level. The flag pedestals float in the air somewhat below ground level, in spotsthat are somewhat awkward to defend. You’ll probably want to have a strong perimeter defense for this mission.
When attacking the enemy base, you’ll want to clear out any Remote Turrets nearby. Then sendspeedy players down to quickly snatch a flag, then jet back out. Lobbing Heavy Mortar shells downinto the enemy base is often a great help as well.
Temple of DoomMission Type: Capture & HoldPlanet: Halcyon IIWeather: ClearTime of Day: DuskNumber of Teams: 2
This is a unique and intriguing Capture& Hold mission. Each team starts with abase consisting of the usual InventoryStations plus Vehicle Stations and otherniceties. However, that’s not what’sinteresting about this mission.
The uniqueness of the missionsprings from the fact that your seven tar-gets are not towers, but rather, floors ofthe same structure. This leads to nasty,claustrophobic infighting that’s guaran-teed to bring a smile to your face.
Taking over different floors allowsyour team to take control of InventoryStations, turrets, and other featuresassociated with each floor. You have to be careful not to take anything for granted. Just becauseyour team controls a few floors, you can’t assume that every turret you pass by is yours.
Try to attack in groups, and make heavy use of mines. Controlling the first floor entrance isvaluable, as is controlling the entrances to the structure’s upper levels. The basement and the verytop levels can only be reached through a central elevator shaft that goes through the entire struc-ture. Control of this shaft is key.
Heavy Armor is definitely useful in this scenario since you’ll absorb a lot of punishment in theclose confines of the structure.
Fig. 13-33. Temple of Doom
Base
Base
Temple

CHAPTER 13: ADVANCE BATTLE GUIDE 147The Red SandsMission Type: DeathmatchPlanet: Ultima ThuleWeather: Light Fog; Limited VisibilityTime of Day: MiddayNumber of Teams: None (Free for All)
This typical outdoor deathmatch features a big,flat map where visibility is limited only by thefog. Scattered ruins dot the map, and as youmight expect, that’s where you’ll find theweapons. Keep moving, and keep looking formore firepower.
TowersMission Type: Capture & HoldPlanet: Avicord’s PlanetWeather: ClearTime of Day: DayNumber of Teams: 2
This mission is a frantic grab for five towers. Asalways with this sort of mission, it can be a goodpolicy to hold three towers with all of your man-power. You shouldn’t spread people out thinlyand attack all five towers. Of course, you’ll stillwant to have occasional raiders in Light Armorsneak out and test the enemy’s towers, just tokeep them honest.
A lone player, especially a skilled one, canhold a tower for quite a while against a disor-ganized attack. The enemy may play commando-style, attacking your towers in a trickle ratherthan large, concentrated waves. In this case,you’ll do well to leave one man in each towerand try to capture all five towers at once. But ifthe enemy is organized, holding three towersand really digging in is usually the way to go.
The western two towers, as well as the easternmost, have Inventory Stations. The other two donot. If you’re holding only three towers, therefore, you probably want two of them to be towerswith Inventory Stations.
Fig. 13-34. The Red Sands
Fig. 13-35. Towers
5 Towers

148 TRIBES: PRIMA’S OFFICIAL STRATEGY GUIDE
Triple ThreatMission Type: Capture & HoldPlanet: Avicord’s PlanetWeather: ClearTime of Day: DayNumber of Teams: 3
This mission is identical to Towers, savethat three teams compete for the fivetowers instead of only two. This changesthe rules of engagement somewhat.Holding two towers for the majority ofthe game, plus occasionally capturing a third, usually gains you a victory. Be opportunistic, and let your game plan change as new opportunities appear.
ValhallaMission Type: Capture & HoldPlanet: YmirWeather: Clear Time of Day: DayNumber of Teams: 2This mission features two teams battlingfor three towers. Holding two of thethree towers for the majority of the game will net your team a win.Therefore, it’s often a good idea to selecttwo towers (usually the middle one, plus a side tower) and try to hold them.Then make only occasional feints at thethird tower to keep the enemy fromovercommitting to the attack.
The hilly terrain makes it easy tosneak up on a tower unseen. The towersthemselves have only two entrances—adoor at ground level and holes at the topwhere a flying player can enter. If you’retrying to attack with speed or stealth,entering through the top of the tower is recommended.
Fig. 13-36. Triple Threat
Fig. 13-37. Valhalla
5 Towers
Towers
Base
Base

CHAPTER 13: ADVANCE BATTLE GUIDE 149When defending a tower, it’s good to have one player standing at the top of the tower. This
player will be vulnerable to shots from outside, but it’s a great position to shoot anyone enteringbelow. Also, if the tower is captured, this player can simply fall down onto the trigger block andretake the tower.
Raiding and trashing the enemy base is also feasible in this mission. Just wait until the enemyis thoroughly occupied with the task of claiming the three central towers.
Final AdviceThough this book contains a lot of specific advice on how to accomplish various tasks in Tribes,we’ll leave you with some general advice.
Observe TrendsLearn to observe trends in the game. This is hard when you’re first getting started. But once youget to the point where you know what’s going on, you should start to look for trends and patternsin the flow of the game.
For example, you should be able to determine how the enemy is handling both offense anddefense after a few minutes of play. If most of its players overcommit to attacks, you can be certainthat its defense is soft. If most of its attackers use a speed attacking style, you should prepare for it instead of expecting power.
Just keep your eyes open and try to read the tone of the game. While you can’t always predictwhat the enemy will do based on what they’ve done in the past, you can usually guess with great accuracy.
Be PatientA big part of mastering Tribes is learning when to go full speed and when to take a break and bepatient. This is best illustrated by stealth attacks. If you rush in, out of control and jumping atshadows, you’ll be shredded by Sentinels and other defenses.
Learn to take your time. Run to the shadow of a wall and stop. Wait for your energy supply torestore itself. Then get going again. Instead of jumping through the door as soon as there’s anopening, wait a moment and see if there are any enemies in the vicinity.
There are countless opportunities if you learn to sit back, watch, and wait for them.
Don’t Try to Do EverythingSometimes you’ll find yourself worrying about too many things at once. Don’t; unless you’re thecommander, there’s no need. If your teammates are skillful, they’ll handle their jobs. And if theyaren’t, well, there’s no way you can help everyone at once.
Similarly, learn not to worry about remote contingencies. If you run inside an enemy base andstop because a Sentinel pops open, you can’t worry about whether there’s an enemy player hidingnearby. You’ve already committed yourself, so just carry on as if there’s no defender. The best
150 TRIBES: PRIMA’S OFFICIAL STRATEGY GUIDE
players understand that sometimes things break their way, and sometimes they don’t. They justpick a line of attack and follow it, hoping that it works, and not modifying it because some unseendefender might interfere. Once you start hesitating because something might go wrong, you’restarting down a dangerous path that leads to self-defeat.
Step BackFinally, learn to step back after every few games and analyze what’s going on. If you’re winning, ask yourself why. What made your team more successful than the other team? If you’re losing, consider the problem. Is it the rest of the team’s fault, or could you personally have done a little better?
You might occasionally want to save your games as demos and then replay them at a later date. They might be painful to watch, especially if your team lost the game. But they’ll reveal your errors—and those of your team—quite clearly.

Playing pickup games on the Internet can be really fun. But if you play Tribes a lot, youmay eventually grow tired of the inherent limitations of pickup games. For example, inmost pickup games you don’t know your teammates. So you have no idea what they’re
capable of, and you aren’t sure whether they’ll listen if you give them orders.The solution to this problem is to get connected to the Tribes community and join a tribe.
Where should you start? Here are a few suggestions.
1. Play lots of Tribes and hone your skills. If—to paraphrase a famous quote—you wouldn’t joinany team that’d have you as a member, you probably aren’t good enough yet. Keep working onyour skills so that teams you want to join will welcome you.
2. Keep your eyes open for players that you admire. If they belong to a Tribe, their game nameswill contain their Tribe name. Ask that player if the Tribe has any openings.
3. Also, check out www.tribesplayers.com. There, you’ll find a listing of Tribes and links to theirhome pages. Peruse the home pages and look for a Tribe that you’d like to join.
4. Investigate any related web sites that are linked to www.tribesplayers.com. These sites oftencontain detailed information on specific Tribes.
5. Use the IRC Chat feature built into Tribes to chat with other players. This is a great place tofind Tribes looking for new members.
Appendix A:Joining a Tribe

152 TRIBES: PRIMA’S OFFICIAL STRATEGY GUIDE
Don’t join a Tribe that’s either more dedicated to the game or more laid-back than you are. Agood thing to ask right away is how often the Tribe members play and practice. If they don’t haveany formal battles or practice times, they’re probably not too hard-core. But if they meet on apractice server every other day at 6:00 sharp, you can bet they’re serious about winning.
Try to make sure that the Tribe plays at times when you’re free. Also, be sure you get a goodping to that Tribe’s server if you’re playing with a modem connection. Lousy ping can turn you from an effective player into a walking target. Therefore, you need to be sure you’ll be playing somewhere that ping isn’t a problem.
Beyond that, it’s all up to you. Follow the links at www.tribesplayers.com and do your best to select an appropriate tribe. Be picky, and don’t commit to one that isn’t right for you. Careful selection will pay off. In the right group, you’ll have a great time and make several new friends.
Good luck!

This appendix contains damage tables for Tribes’ weapons. The same information appears at the end of Chapter 2, but it’s presented again here for easy reference.
Base DamageThe following table shows base damage for each weapon. Base damage indicates the overall power of the weapon, expressed as a percentage. For example, the Disk Launcher has a base damage rating of 50 percent. That means that a direct disk hit will take away 50 percent of an enemy’s health. The actual percentage of damage, however, depends on what armor type the target is wearing.
Table a-1. Base DamageWEAPON BASE DAMAGE %Chaingun 11Fusion Turret 25Remote Turret 10Blaster 10Plasma Gun 45Disk Launcher 50Grenade 50Mortar 100Mortar Turret 132Flyer Rocket 100Missile Turret 80ELF (/Sec) 4ELF Turret (/Sec) 6Laser Rifle 42
Appendix B: Quick ReferenceDamage Tables

154 TRIBES: PRIMA’S OFFICIAL STRATEGY GUIDE
Note that most weapons’ damage drops off at long range. In particular, energy weapons like the Plasma Gun and theFusion Turret become extremely weak at extreme range. TheLaser Rifle is one of the few weapons that doesn’t have anylong-range penalties.
Also, note that you’ll score extra damage if you hit anenemy in the head with the Laser Rifle—approximately 50 percent more. This isn’t true of other weapons, so don’t bother going for tricky head shots when using them.
Armor ModifiersA weapon’s base damage doesn’t tell the whole story. Different armor types absorb differentamounts of damage.
Generally speaking, heavier armor absorbs more damage than lighter armor. Refer to the following table to see what percentage of each weapon’s base damage gets through each type of armor.
Table a-2. Armor ModifiersWEAPON LIGHT % MEDIUM % HEAVY %Chaingun 120 100 60Fusion Turret 130 100 70Remote Turret 130 100 70Blaster 150 100 50Plasma Gun 100 100 80Disk Launcher 100 100 60Grenade 120 100 80Mortar 130 100 70Mortar Turret 130 100 70Flyer Rocket 100 100 60Missile Turret 100 100 60ELF (/Sec) 100 100 100ELF Turret (/Sec) 100 100 100Laser Rifle 100 100 60

APPENDIX B: QUICK REFERENCE DAMAGE TABLES 155Modified Damage PercentageIf you take each weapon’s base damage and modify it by each armor type’s armor modifier, you getModified Damage Percentage. This is the truest measure of a weapon’s damage. It shows exactlywhat percentage of a player’s health is taken away with a direct shot from each weapon.
Table a-3. Modified Damage PercentageWEAPON LIGHT % MEDIUM % HEAVY %Chaingun 13.2 11 6.6Fusion Turret 32.5 25 17.5Remote Turret 13 10 7Blaster 15 10 5Plasma Gun 45 45 36Disk Launcher 50 50 30Grenade 60 50 40Mortar 130 100 70Mortar Turret 171.6 132 92.4Flyer Rocket 100 100 60Missile Turret 80 80 48ELF (/Sec) 4 4 4ELF Turret (/Sec) 6 6 6Laser Rifle 42 42 25.2

156 TRIBES: PRIMA’S OFFICIAL STRATEGY GUIDE
Shots to KillShots to Kill is another way of presenting the data from the Modified Damage Percentage table. Itshows how many perfect shots it takes to kill an enemy with each weapon.
As always, bear in mind that indirect shots deal less damage than direct hits, and head shots do extra damage when using a Laser Rifle. Also, note that players can use all sorts of tools (such asShield Packs, Repair Packs and Repair Kits) to heal themselves in midbattle. So you can’t alwayscount on killing an enemy in the exact number of shots listed here.
Table a-4. Accurate Shots to Kill an EnemyWEAPON LIGHT MEDIUM HEAVY
Chaingun 8 10 16Fusion Turret 4 5 6Remote Turret 8 11 15Blaster 7 11 21Plasma Gun 3 3 3Disk Launcher 3 3 4Grenade 2 3 3Mortar 1 2 2Mortar Turret 1 1 2Flyer Rocket 2 2 2Missile Turret 2 2 3ELF (Seconds) 25 25 25ELF Turret (Secs) 16.67 16.67 16.67Laser Rifle 3 3 4

INDEX 157AAdvanced battle guide for Tribes, 127–150Ammo, maximum per armor type
of Blaster, 10of Chain Gun, 12of Disk Launcher, 13of Electron Flux (ELF) Gun, 16of Grenade Launcher, 14of Grenades, 20of Heavy Mortar, 17of Laser Rifle, 15of Mines, 19of Plasma Gun, 11of Targeting Laser, 18
Ammo Pack, 10advantages and disadvantages of, 24–25Training Mission 5 to practice power technique using, 74
Ammo, replenishing, 31Ammo Stations
in bases, 35destroying enemy’s, 43uses of, 41–42
Armor, 6–9damage absorbed by different, 20, 21, 154default, 8Heavy. See Heavy Armor (Myrmidon)Inventory Stations to obtain, 41Light. See Light Armor (Peltast)Medium. See Medium Armor (Hoplite)modifiers for, 21,. 22, 154PDA of, 81players with mixture of, 129Repair Patch or Repair Kit to restore percentage of, 31–32trying different, 84
Assault in Tribes, 106–117. See also Base attacks and Targetcoordinating, 124delegated to sub-commanders, 123disrupting plodding, 101, 104goals of, 107, 116–117Heavy Armor for, 107Light Armor for, 107preliminaries of, 106–108situational, by midfielder, 104–105
Asymmetric Digital Subscriber Line (ADSL), 81
BBase attacks
chasing enemies in, 84deployables for, 61inside enemy’s base, 110on lightly guarded or multiple-entrance targets, stealth, 108–111line on Commander Screen map showing, 64power attacks for, 114speed attacks for, 111Training Mission 8 to learn, 77
Base defenseawareness of enemy’s, 116–117in Capture the Flag missions, 35, 124–125dedicated commander as adding to, 122, 125in Defend & Destroy missions, 126in Find & Retrieve missions, 126Heavy Armor for, 8, 9in multiplayer game, 84observing enemy’s, 107–108
BasesCameras placed in, 30damage from each weapon to, 20–22enemy, 30, 32, 99, 106–117floating, 83, 130–131, 142–144infiltrating, 66
killed players reappearing near, 125layout of enemy’s, 107in multiplayer game, approaching, 82–83Remote Inventory Stations as miniature, 31Training Missions in, 70, 73, 77uses of, 35weapons usable again, 15, 17, 20
Battle guide for missions, 127–150Battle lock, avoiding, 116–117Beacon, key for using, 48Blaster
advantages and disadvantages of, 10–11, 13, 25, 55in defense, 94, 97
CCable modem service, 81Cameras, 26, 30, 41, 61
controlling, 65in defense, 92
Capture & Hold missions, 116–117, 125Anthill, 128–129Citadels, 131Criss Cross, 132Free for All, 136Lucky Seven, 138Peak Performance, 140–141Temple of Doom, 146Towers, 147Triple threat, 148Valhalla, 148–149
Capture the Flag missions, 35, 86, 124–125, 126Broadside, 130–131Dangerous Crossing, 132–133Desert of Death, 134Four Way Dance, 135–136Ice Ridge, 137Raindance, 141–142Rollercoaster, 142Scarabrae, 143Snow-Blind, 144–145Stonehenge, 145Training Mission as, 73–75
Chaingunadvantages and disadvantages of, 12–14, 55for interior fighting, 54
Claptraps, 29Combat. See also Interior fighting
advanced techniques of, 53–56basic techniques of, 46–53preliminaries for, 48–50
Combined attacks, 108, 112, 115–116, 124Command in Tribes, 118–126
allocating forces for, 124–126three levels of, 118–124
Command Stationsin bases, 35in defense for change of pace, 92destroying enemy’s, 43Fusion Turret controlled manually with, 38seizing control of Missile Turrets using, 39uses of, 42, 64
Commander, dedicated, 119–120base infrastructure and defense supplemented by, 122, 125established in safe spot, 122organization of, 67roles assigned by, 67, 123selecting someone as, 63, 67
Commander Screenaccessed from Command Station, 42appearing on enemy’s, 26
INDEX 157

158 INDEX
checked periodically by field commander, 122Controllable Objects List of, 30, 42, 64dedicated commander as glued to, 122, 123enemy’s appearance on your, 70issuing commands from, 121key setup for, 48maps of. See Mapsmultiplayer game map of, 82, 103radius of remote sensor shown on, 28returning from Controllable Objects list to, 64selecting name from Player List as commander on, 63, 72–73Training Mission 4 to learn to use, 72–73turrets controlled from, 64–65
Commander View, 62–65checking map in, 49, 61–64
Commando, weapons not to use as, 17Commands. See also Orders
initial, 122issued to others, 63, 121–122, 123issued to yourself, 64keys for, 48revising, 122, 123
Compass of HUD, arrow for objective shown on, 64Controllers
choosing, 46configuring, 47–48
DDamage tables
armor modifiers, 20, 21, 154for base, 20–21, 153–154modified, 22, 155shots to kill, 22–23, 156
Deathmatch missionsBlood Runs Cold, 129King Under the Hill, 138Peekaboo, 141Red Sands, The, 147Sand Storm, 142–143
Dedicated digital line, connection to Internet using, 79, 81Defend & Destroy missions
Bloody Vengeance, 130Dish Served Best Cold, A, 127–128Hammer Down, 137No Quarter, 140Seek and Destroy, 143–144Siege, 144
Defense in Tribes, 86–97advanced tricks for, 92–93all-purpose, 86, 88, 96–97blocking exits in, 90–91changing position in, 92, 96distracting enemy’s, 100enhancing, 91–92Heavy Armor for, 8, 9, 87, 88, 90–91, 95, 97Light Armor for, 87, 94, 97Medium Armor for, 87, 89, 95, 97perimeter, 86–88, 93–96, 137picking good place for, 89–90point-of-attack, 84, 86–93surprise value in, 90
Deployables, 27–31for base attacks, 61placing, 61
Digital Subscriber Line (DSL), 81Disk Launcher
advantages and disadvantages of, 11–14, 20, 51, 55for interior fighting, 54, 89, 90, 93splash damage from, 55Training Missions to learn, 70, 74, 76
EElectron Flux (ELF) Gun
advantages and disadvantages of, 16–17, 55uses of, 65, 111
Elevators and doors, uses of, 43ELF Turret
Training Mission 6 to learn, 75uses of, 38–39
Enemiesdistracting, midfield sniper for, 100exploiting vulnerabilities of, 55mastering defenses of, 106–107observing, 107–108practice with attacking, 85spotting, 49, 104
Enemy’s sensor networkconsequences of being detected by, 59–60disabling, 38getting detected by, 59knowing about detection using Sensor Indicator for, 60–61staying off, 38, 39, 66
Energy Packadvantages and disadvantages of, 25, 58, 72for assault, 107, 125capturing, 75carrying Laser Rifle using Light Armor and, 7, 15, 74, 77, 94for recon, 99
Exterior features, 34–40
FFavorites list
buying items on, 83creating sets of weapons and armor using, 41developing five sets of, 57for heavy base defense, 58miscellaneous items on, 31for playing sniper, 58
Field commander, 119, 121–122group leaders assigned by, 122initial commands assigned by, 122revised commands issued by, 122role also performed by, 121
Find & Retrieve missions, 126Death Knell, 133Fallen, 134–135Fog-of-War, 135Mudslide, 139No Man’s Land, 139–140Strung Out, 145–146Training Mission as, 76–77
Flag. See also Capture the Flag missionsHeavy Armor to guard, 8, 9in multiplayer game, guarding, 84, 88speed attacks to capture, 111Training Mission 7 to retrieve, 76–77underhanded way of stealing, 133
Flip Mouse Vertical box, 47Free Look Always On configuration, 47Fusion Turret
destroying enemy’s, 73plasma fired by, 37Training Mission 5 to learn to avoid, 74uses of, 37–38, 40, 66weapons effective against, 16
GGeneral menu, 47Generators
in bases, 35

INDEX 159destroying enemy’s, 41, 42–43, 110, 111, 127–128inaccessible, 37, 38Pulse Sensors, Fusion Turrets, and ELF Turrets disabled by destroying their, 37–39repairing, 128Solar Panels to complement, 42–43Training Mission 8 to practice destroying, 77weapons effective against, 12, 43
Grenade Launcheradvantages and disadvantages of, 14–15, 17, 20, 37, 55for interior fighting, 54, 89Training Missions to learn, 70, 76
Grenadesadvantages and disadvantages of, 14–15, 17, 20, 40all-purpose defense against, 88key for using, 48as miscellaneous items, 33
Group leaders, assigning, 122
HHealth, restoring, 31, 41–42
Training Mission 7 to practice, 76Heavy Armor (Myrmidon), 29, 31
advantages and disadvantages of, 8, 9, 49, 53, 55, 90–91for assault, 107for defense, 8, 9, 87, 88, 90–91, 95, 97deployables used by players wearing, 29, 31elevators used by, 43Heavy Mortar available for, 17–18, 40moving players wearing, 45, 51packs used by players wearing, 26–27teamwork with player wearing, 56, 114Training Mission 5 to practice power technique wearing, 74–75weapons effective against, 12weapons used by players wearing, 11
Heavy Mortaradvantages and disadvantages of, 14, 17–19, 37, 40, 60all-purpose defense against, 88all-purpose defense using, 97for interior fighting, 89, 93Training Mission 4 to learn to manage, 72–73Training Mission 5 to practice power technique using, 74–75
Heavy Personnel Carrier (HPC)Training Mission 3 to learn to use, 72uses of, 45
HUDcompass of, 64Training Mission 1 to learn, 68–69
IImage Enhancer
in armor, Laser Rifle used with, 16to scan target, 109zooming with, 30, 53, 59, 101
Infrastructure of defense, building, 61, 98, 102–103, 122Infrastructure of enemy
awareness of, 61destroying, 98, 103–104, 110
Interior features, 40–43Interior fighting, 54, 146
point-of-attack defense in, 88Training Missions to learn, 70, 76–77weapons for, 54, 89, 93
Internet connection, 79–81Internet service provider (ISP) modems, 80–81Inventory menu, 47Inventory Stations
in bases, 35, 83building, 27defense enhanced by adding, 91
destroying enemy’s, 43, 110miscellaneous items purchased at, 31 Training Missions using, 72, 76uses of, 41, 42
IRC Chat feature, chatting with players using, 151ISDN connection, 81Items, 31–33
JJammer Pack
advantages and disadvantages of, 26–27, 29, 60shared between teammates, 111Training Mission 5 to practice stealth approach using, 74uses of, 56, 60, 98, 109, 125
Jammersarmor for laying down, 8in defense, 92
Jamming zones, 103Jetpack key, 48, 54, 69, 71–72Joysticks, imprecision of, 46Jump jets
circle strafing while using, 53fighting from distance using, 49learning to use, 51–52, 54, 68–69midfielder’s use of, 103Missile Turret’s homing missiles using, 39moving around bases using, 43rules for using, 58in speed attacks, 112Training Missions to learn, 68–69, 76triggering, 44
KKeyboard
controller configuration, 46key setup on, 48
Killed players reappearing near base, 75, 125
LLaser Rifle
advantages and disadvantages of, 10, 11, 15–16, 55, 60in defense, 94, 97Energy Pack and Light Armor required for, 7, 10, 15, 25, 77, 94Training Mission 5 to learn, 74Training Mission 6 to learn sniping with, 75–76
Launching pad, purchased vehicles appearing on, 42Leader by example, 119, 120–121Light Armor (Peltast)
advantages and disadvantages of, 7, 8, 49for all-purpose defense, 97for assault, 107, 114, 125attacking enemies while wearing, 49buying, 83to collect items, 126for emergency defense, 104flying craft used by players wearing, 44interior fighting while wearing, 54jump jets used by players wearing, 51, 54, 58, 69packs used by players wearing, 24–26for perimeter defense, 87, 94for recon, 99teamwork with player wearing, 56Training Mission 5 to practice speed technique wearing, 74Training Mission 8 to learn enemy destruction wearing, 77weapons effective against, 12weapons used by players wearing, 10, 15, 16
Light Personnel Carrier (LPC)Training Mission 3 to learn, 72uses of, 44–45
160 INDEX
MMaps, 2, 127–149
Anthill, 128–129Blood Runs Cold, 129Bloody Vengeance, 130Broadside, 130–131Citadels, 131Criss Cross, 132Dangerous Crossing, 132–133Death Knell, 133Desert of Death, 134Dish Served Cold, A, 127–128Fallen, 134–135Fog-of-War, 135Four Way Dance, 135–136Free for All, 136Hammer Down, 137Ice Ridge, 137King Under the Hill, 138Lucky Seven, 138–139Mudslide, 139No Man’s Land, 139–140No Quarter, 140Peak Performance, 140–141Peekaboo, 141Raindance, 141–142Red Sands, The, 147Rollercoaster, 142Sand Storm, 142–143Scarabrae, 143Seek and Destroy, 143–144Siege, 144Snow-Blind, 144–145Stonehenge, 145Strung Out, 145–146Temple of Doom, 146Towers, 147Triple Threat, 148Valhalla, 148–149
Medium Armor (Hoplite)advantages and disadvantages of, 8for defense, 87, 89, 95, 97deployables used by players wearing, 29, 31switching to, in multiplayer game, 84weapons used by players wearing, 11, 12
Midfielder, 98–105emergency defense by, 104infrastructure building by, 98, 102–103infrastructure destruction by, 103–104recon by, 98, 99situational attack by, 104–105sniping by, 98–101
Minesadvantages and disadvantages of, 19for defense, 93, 95key for using, 48
Mini Fusion (Sentinel) Turretsas unjammable, 89–90uses of, 40–41, 92–93weapons effective against, 12, 40–41, 65
Miscellaneous items, 33Missile Turret, uses of, 39, 43, 44Missions. See also individual types
training, 68–78Mobility and Speed
of Heavy Armor, slow, 9of Light Armor, fast, 7, 8of Medium Armor, medium, 8
Modem connection to Internetenhancing, 80–81, 152ping number for, 80
Modified damage percentage table, 22, 155Mortar Turret, uses of, 40Motion Detectors, 26, 61, 92Mouse
button setup for, 47circle strafing using, 52to control game, 46–47inverting movements of, 47sensitivity slider for, 47
Movement in combatfundamentals of, 50–52vertical, 51
Movement menu, 47Multiplayer games of Tribes, 79–85
attacking enemy in, 79–81experimenting in, 84–85learning objectives of, 81–82playing defense in, 84setup of, 46–48
OObserver mode to watch skilled player, 56Observing surroundings before combat, 49Offensives. See Assault in TribesOrders
acknowledging, 64complexity of, 123giving, command levels for, 119, 121–123
PPacks, 24–27. See also individual types
destroying objects from, 65key for using, 48
Patience in mastering Tribes, 149Patrol
Medium Armor ideal for, 8in perimeter defense, 96
Permanent packs, 24–27Personal Digital Assistant (PDA) of armor, 81Ping in multiplayer games, 79–81, 152Plasma Gun
advantages and disadvantages of, 11–14, 17, 37, 40, 43, 55for destroying Stations, 65for interior fighting, 54, 89splash damage from, 55Training Mission 2 to learn to use, 70
Plasma Turretpoint-of-attack defense around, 88remote motion sensor placed near, 29weapons effective against, 11, 17
Power attacks, 112. See also Combined attacksapproaching enemy in, 114dismantling enemy base in, 114taking control of target during, 114–115value of teamwork in, 113when to use, 113
Primers for Tribesassault, 106–117command, 118–126defense, 86–97midfielder, 98–105
Pulse Sensoron Commander Screen map, 82destroying enemy’s, 73hiding to avoid detection by, 60, 62, 109Jammer Pack to block enemy, 26uses of, 36–38, 63Sensor Indicator to reveal auxiliary, 103Shields powered by energy from, 37weapons effective against, 11, 14, 37, 65

INDEX 161QQuick Reference, 153–156
RReconaissance (recon)
by midfielder, 98tricks and tips for, 99when to use, 99
Remote Ammo Station, advantages and disadvantages of, 31Remote Camera
advantages and disadvantages of, 30, 92as unjammable, 30, 92
Remote Inventory Stationadvantages and disadvantages of, 29, 31, 61defending against, 94, 96, 104in defense, 96Medium or Heavy Armor to carry, 8, 31in transit, catching enemy’s, 101
Remote Jammeradvantages and disadvantages of, 29destroying enemy’s, 103jamming zones created by, 103
Remote Motion Sensoradvantages and disadvantages of, 28–29, 102as unjammable, 28
Remote Pulse Sensoradvantages and disadvantages of, 28, 30, 61, 102Jammer Pack to block enemy, 26
Remote Turretadvantages and disadvantages of, 29–30, 61, 92inside enemy base, destroying, 110placed around defended area, 91–92, 95placed in open areas, 102
Repair Kitadvantages and disadvantages of, 32, 128key for using, 48
Repair Pack, advantages and disadvantages of, 27, 37Repair Patch, advantages and disadvantages of, 31Retreating, 50, 51
during defense, 91, 96for players wearing Light Armor, 54Training Mission 7 to learn, 76
Ridgelinescombat position near, 53, 54, 56hiding behind, 60, 109, 112Remote Turrets placed on, 102
Roleassigning yourself, 66–67, 121–122Commander assigning, 67taking over necessary, 120
Running backward, 51
SScout Flyer
uses of, 43–44Training Mission 3 to learn to use, 70weapons effective against, 43
Sensor Indicatorenemy’s auxiliary Pulse Sensor revealed by, 103showing detection by enemy’s sensor network, 60–61
Sensor Jammer Pack, 16, 60, 61Sensor Towers, weapons effective against, 17Sensors. See also individual sensors
armor for laying down, 8building, 27effects of terrain on, 62extending range of, 102
Sentinel Turrets. See Mini Fusion (Sentinel) TurretsShield Pack, advantages and disadvantages of, 26Shields
destroying objects having, 65energy for, 37as self-repairing, 66
Shots to Kill Enemyof Blaster, 10of Chaingun, 12of Disk Launcher, 13of Electron Flux (ELF) Gun, 16of Grenade Launcher, 14of Grenades, 20of Heavy Mortar, 17of Laser Rifle, 15of Mines, 19of Plasma Gun, 11table, 22–23, 156of Targeting Laser, 17
Snatch-and-grab tactics, 95Sniper Rifle, 101Sniping
at enemy (offensive), 53–54, 94–96from enemy (defensive), 54, 102favorites list for, 58midfield, 98–101Training Mission 6 to learn, 75–76Training Mission 8 to practice, 77
Solar Panels, destroying enemy’s, 42–43, 72–73Training Mission 8 to practice, 77
Speed attack, 108. See also Combined attacksimprovements to, 112techniques for, 112when to use, 111–112
Splash damageavoiding, 51, 55on hillsides, 62
Standing still, avoiding, 50Stealth attack, 26–27, 74. See also Combined attacks
deciding whether to launch, 107–108guarding against, 94how to proceed in, 109inside base, 110positioning, 124teammates in, 111variations of, 110–111when to use, 108, 112
Strafingcircle, 52–53defined, 50jump jets used while, 51–52keys for, 48, 71Training Mission 6 to learn, 75–76in vehicles, 71
Sub-commanders assigned by dedicated commander, 123, 124Symmetric Digital Subscriber Line (SDSL), 81
TTarget
aiming weapons at or near, 70lightly or poorly guarded, stealth attacks against, 108–109overshooting, 69painting, 32
Target Beacon, advantages and disadvantages of, 32, 40Targeting Laser
advantages and disadvantages of, 32Training Mission 4 to learn to use, 72–73uses of, 17, 18–19, 40
Team, 1, 2ability to function cohesively of, 45, 119, 124asked to help with your role, 120claiming tower for, 35–36coordinating, 63, 67, 82
Team assignments, 122, 123

162 INDEX
for Capture & Hold missions, 125for Capture the Flag missions, 124–125for Defend & Destroy missions, 126for Find & Retrieve missions, 126
Team’s sensor network, 36, 38Commander View map showing enemies detected by, 63extending, 102recon while laying down, 99
Teammatesambush with, 56base defense by, 61Commander View map showing, 63complementing attack by, 105creating and painting target for, 32destroying objects with, 65–66level of command dictated by, 118Missile Turrets killing your own, 39noting positions of, 82partner system for, 56for power attacks, 113–114sharing single Jammer Pack, 111suggesting options to, 120–121task forces (groups) of, 123–124, 125warned about mine locations, 93
Teamwork, best uses of, 55–56Terrain
limits of, 62sensors affected by, 62understanding, 61–62use in combat of, 54–55, 62, 114
Towerclaiming enemy’s, 35–36, 116. See also Capture & Hold missionsdefending, 87, 96–97, 125, 149layout of enemy’s, 107in multiplayer game, 83repairing, 36Training Mission 6 to learn to take, 75–76uses of, 35–36
Training missions, 4, 68–78Command & Target (4), 72–73CTF (5), 73–75Destroy (8), 77Retrieval (7), 76–77Towers (6), 75–76Vehicle (3), 71–72Weapons (2), 70Welcome (1), 68–69
Tribe, joining, 56, 151–152Tribes
advanced battle guide for, 127–150advice for mastering, 149–150assault primer for, 106–117command primer for, 118–126defense primer for, 86–97getting started in, tips for, 3–5key concepts of, 57–67levels of, 2manual for, reading, 3–4“midfielder” primer for, 98–105movement in, 50–52multiplayer games of, 79–85overview of, 1–5smart play and good organization for, viiistrategy for, viii, 2as team game, 1, 2training missions for, 4, 68–78trends in each game of, 149unique features of, 1–2
Trigger block, 68–69, 75, 128, 136, 138–139Turrets. See also individual turrets
armor for laying down, 8
building, 27Cameras placed near, 30controlling, 64–65defense around, 89–90destroying, 65–66evading, 66temporarily disabling, 38
VVehicle Station
destroying enemy’s, 43Training Mission 3 at, 71uses of, 42
Vehicles, 43–45. See also individual vehiclesre-purchasing, 71third person perspective to pilot, 71
WWaypoint marker on HUD Compass, 64, 82Weapons, 9–20. See also individual weapons
for all-purpose defense, 97base damage from, penetration of armor by, 20, 21, 154comparison among, 20–21for interior fighting, 54, 89, 93Inventory Stations to obtain, 41for perimeter defense, 94–95for point-of-attack defense, 88–89practicing with, in multiplayer games, 85Training Mission 2 to learn, 70
www.tribesplayers.com, linked sites for, 151, 152
ZZoom feature, 70Zooming in, Image Enhancer for
with Cameras, 30for sensor network, 59for sniping, 53, 101


![PRIMA’S OFFICIAL STRATEGY GUIDE...PRIMA’S OFFICIAL STRATEGY GUIDE [02] Welcome to Halo The Beginning Welcome to Halo, a game of combat that plunges you into the middle of interstellar](https://static.fdocuments.net/doc/165x107/60df8e51e0542532d9035aba/primaas-official-strategy-guide-primaas-official-strategy-guide-02-welcome.jpg)