Postage Stamps:: Postage Stamps,Stamp issue calender 2014 ...
Upload
rudolf-wilcoxCategory
view
216download
0
Postage Statement WizardMail.dat
Web Services
The 1-2-3 of
Electronic Postage Documentation

2
Table of ContentsIntroduction
Chapter 1. Getting Access
Chapter 2. Customer Support
Chapter 3. Methods of Electronic Submission
a. Postage Statement Wizard®
b. Web Services
c. Mail.dat®
Chapter 4. Electronic Submission Process
a. Postage Statement Wizard®
b. Web Services
c. Mail.dat®
3
Introduction
The United States Postal Service® is using the newest technology to modernize and improve its overall efficiency in mail processing and delivery. The PostalOne!® system that manages business mailing transactions is designed to use the Internet to streamline the mail acceptance process by facilitating the electronic exchange of mailing information between you and the Postal Service™.

4
Introduction
Audience:This presentation is for those using Bulk Business Mail or providing mailing services to people performing business mailings to reach their customers
Prerequisite:Hold a business mailing account at an acceptance unit; And/Or prepare and present business mailings to an acceptance unit;And/Or provide bulk business mailing services to their own customers
Assumptions:Computer with Internet connection
BMEU Clerk
Mail Preparer

5
Introduction
Manual Completion and Hard Copy Submission of Mailing Information
.
The Postage Statement &
documentation is ready to go to the BMEU.
The postage statement &
documentation is ready to go
to the Post Office.
The Postage Statement &
documentation is ready to go to the BMEU.
The Postage Statement &
documentation is ready to go to the BMEU.
The postage statement &
documentation is ready to go
to the Post Office.
The Postage Statement &
documentation is ready to go to the BMEU.
The postage statement &
documentation is ready to go
to the Post Office.
The Postage Statement &
documentation is ready to go to the BMEU.
The Postage Statement &
documentation is ready to go to the BMEU.
The postage statement &
documentation is ready to go
to the Post Office.
Cartoon

6
Manual Completion and Hard Copy Submission of Mailing Information
When you present your mailing and documents to mail acceptance personnel, they manually key your postage statement information into the PostalOne! system and provide you with a hard copy receipt.
Introduction
7
Introduction
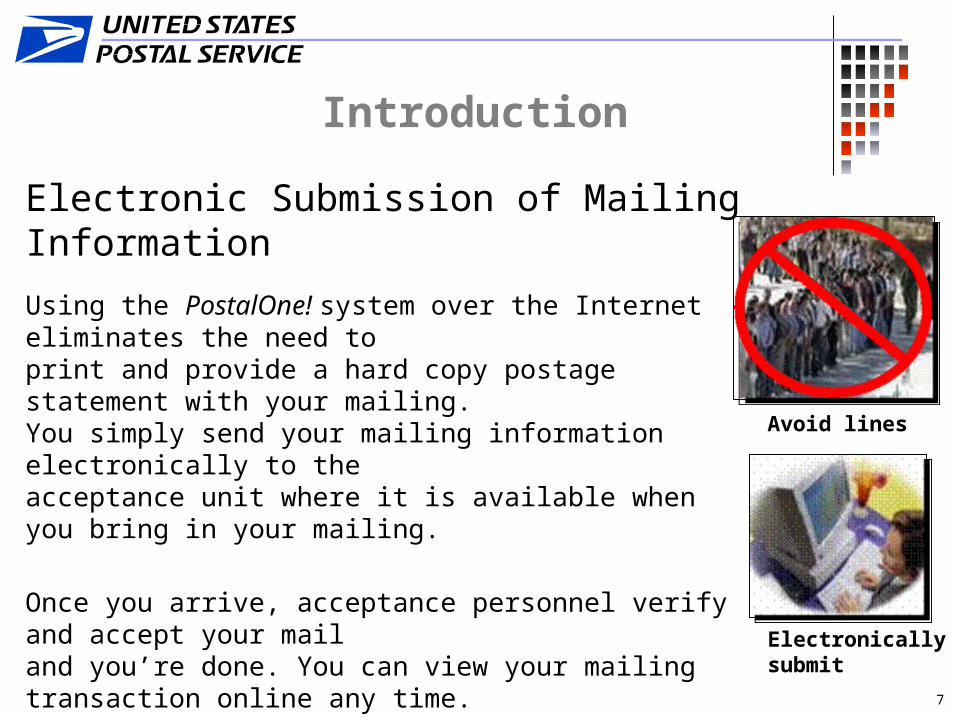
Electronic Submission of Mailing Information
Using the PostalOne! system over the Internet eliminates the need to print and provide a hard copy postage statement with your mailing. You simply send your mailing information electronically to the acceptance unit where it is available when you bring in your mailing.
Once you arrive, acceptance personnel verify and accept your mail and you’re done. You can view your mailing transaction online any time.
Having online access to your mailing account also enables you to check your available funds to ensure you have enough for your mailing. You can also view past transactions to track your mailing and cost trends.
Avoid lines
Electronically submit
8
Chapter 1 – Getting Access
In order to submit your mailing information electronically you must first obtain a PostalOne! account. To apply for a PostalOne! Account, contact your local Business Mail Entry (BME) office and make an appointment to preview Postage Statement Wizard.
At the BME, you can complete and submit the application. Upon receipt of the required documents, the Postage Statement Wizard Application Coordinator for your District will send you an email message that will include your user ID and password. You’re ready to log into PostalOne! – www.uspspostalone.com/postal1.

9
Chapter 1 – Getting Access
Contact your local Business Mail Entry Unit or post office
They will provide you with the forms that constitute the PostalOne! application: a. Data Exchange Agreement b. Site Administrator Designation Form c. PS Form 1357-C – Customer Request for Computer Access d. PostalOne! Online Access Application On PS Form 1357-C, Section B, Line 2 – enter the following information: a. PostalOne! as the “Application” b. enter MAIL OWNER or MAIL PREPARER c. enter your permit number and permit type d. enter the finance number of the BMEU or post office to which you will be electronically submitting postage statements

10
Chapter 1 – Getting Access
BMEU or post office personnel will mail the completed application to the district Postage Statement Wizard Application coordinator
Applicant will receive PostalOne! log on user ID and password via email

11Page 1 of 3
In order to obtain PostalOne! Online Access you will need to complete the following forms: MAIL OWNER:
1. PostalOne! Online Access Application 2. Customer Request for Web Access ( PS Form 1357-C) 3. Additional Permit Accounts (only use if adding multiple permits to your account)
MAILING AGENT: 1. PostalOne! Online Access Application 2. PostalOne! Participation Agreement (includes PS Form 1357-C )
1. Customer Information All fields are required Company HQ Name (no initials or abbreviations)
Address Line 1
Address Line 2
City State ZIP+4
Company’s Administrator’s Name
Company’s Admin’s Telephone #
Company Admin’s email address 2. Account Information If you want to add more than one permit, meter, or publication to your account, use the Additional Accounts Information Sheet. [] Check here if the Additional Accounts Information Sheet is used.
2a. Permit Type ___________________ (i.e. Permit Imprint, Business Reply Mail, Postage Due)
Permit Number______________________
2b. USPS Publication Number______________ USPS Publication Name
___________________________
2c. Finance number _____________________________
Post Office City ________________
PO State & ZIP+4 ______________
3. Applying As:
3a. Check only the one that best describes your role with this account.
Mail Owner
Mailing Agent
You must complete the PostalOne! participation Agreement.
If you intend to send Mail.dat files or use Web Services… STOP. Contact the PostalOne! Help Desk at (800) 522-9085 or apply on line at: www.uspspostalone.com
3b. Two signatures are required when the Mailing Agent is applying on behalf of the Mail Owner.
I certify that I have read and understand the terms and conditions outlined in section 3b on the reverse of this form.
Mail Owner Printed Name____________________________________________
Mail Owner Signature ______________________________________________
Date____/_____/20______
Mailing Agent Printed Name________________________________________
Mailing Agent Signature ___________________________________________
Date____/_____/20______
Applicant’s Printed Name _ _ _ _ _ _ _ _ _ _ _ _ _ _ _ _ _ _ _ Applicant’s Signature _ ______________ _________ Date ____ /____ /20___ _
®
USPS Use Date Processed: ____ /____ /_____ Date Sent to Coordinator: ____ /____ /_____ Date Access Issued: ___ /____ /_____ Date Notified Customer: _ ___ /____ /_____ USPS Rep Printed Name: ___________________ USPS Rep Signature: _____________________
PostalOne!OnlineAccessApplication

12
Chapter 2 – Customer Support
•Contact your local Business Mail Entry Office or contact the PostalOne! Help Desk at 800.522.9085
•Reference Documents can be obtained at the following sites:
•Additional information on Mail.dat is available at: http://www.usps.com/postalone/guides.htm
•Additional information on Web Services is available at: http://www.usps.com/postalone/guides.htm
•Additional information on the Postage Statement Wizard is be available at: http://www.usps.com/postalone/guides.htm
•Additional information on IDEAlliance is available at: http://www.idealliance.org

13
Chapter 3 -- Methods of Electronic Submission
There are three methods that allow you to submit postage statements electronically:
• Postage Statement Wizard®
• Web Services
• Mail.dat®
Desktop PC

14
Chapter 3 – Methods of Electronic Submission
What You Get With Online AccessAs a Mail Owner (permit holder), you will be able to view:
• Balances and Fees for permits
PostalOne! Business Customer Gateway HOME page Business Customer Gateway Balance & Fees page

15
Chapter 3 – Methods of Electronic Submission
As a Mail Owner (permit holder), you will be able to view: • Postage transactions• Electronic statements submitted online, that have not been processed• Mail quality reports
What You Get With Online Access
Business Customer Gateway Reports page

16
Chapter 3 – Methods of Electronic Submission
As a Mail Owner (permit holder), you will be able to view: • Postage transactions and detailed postage statements• Download finalized postage statements• Print your own postage statements & receipts
What You Get With Online Access
Business Customer Gateway Transactions page View when user clicks DOWNLOAD

17
Chapter 3 – Methods of Electronic Submission
As a Mail Owner (permit holder), you will be able to view a listing of:
• Pending Postage Statement Wizard® statements•The pending transactions are not available to view
What You Get With Online Access
Pending Postage Statements Report view

18
Chapter 3 – Methods of Electronic Submission
As a Mail Service Provider (agent/preparer), you will be able to view:
• Mailing information for the customer mailings you are preparing, including postage statements, supporting documentation, and other mail status reports
What You Get With Online Access
PostalOne! Dashboard

19
Chapter 3a -- Postage Statement Wizard®
The Postage Statement Wizard (PSW) is a tool that provides you a secure way to submit a postage statement online, through your PostalOne! account.
Submit from your computer at work or home

20
Chapter 3a -- Postage Statement Wizard® User Profile
The typical user of the Postage Statement Wizard falls into one or more of the following categories:
• Mailer who typically writes or types postage statements
• Mailer who does not use software to generate mailing information
• Mailer who typically mails less than $7000 annually
Submit from your computer at work or home

21
Chapter 3a -- Postage Statement Wizard®
All domestic postage statements can be typed into the PSW tool and electronically submitted.
• First-Class Mail® & Priority Mail® – PS Form 3600
• Periodicals - PS Form 3541
• Standard Mail® - PS Form 3602
• Package Services - PS Form 3605
• PS Form 3700 Part A – First-Class Mail International
No supporting documentation can be typed into PSW. You still need to provide hardcopy supporting documentation when presenting your mail.
PSW Submit a Form page

22
Chapter 3a -- Postage Statement Wizard® Benefits
• Eliminates hard copy postage statements
• Saves preparation time
• Rate calculations done by PSW
• Online verification of information reduces errors
• Reduces wait times at acceptance units since Postal Service employees do not have to manually type in postage
statements
• 24/7 online access to financial information & reports
• View & print statements as well as receipts
Submit from your computer at work or home
23
Chapter 3b -- Web Services
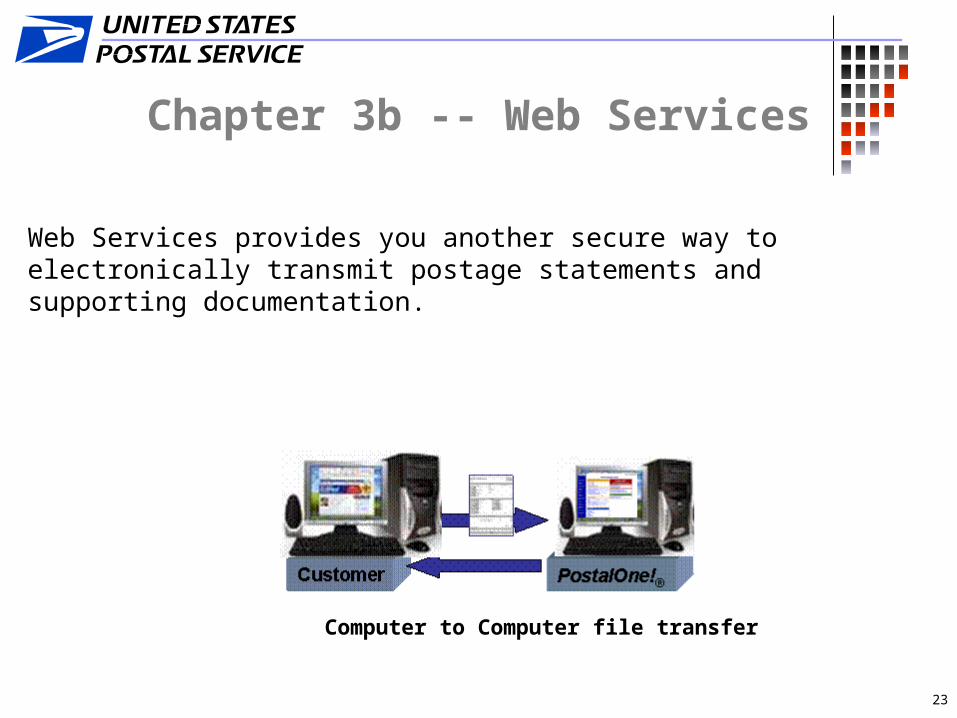
Web Services provides you another secure way to electronically transmit postage statements and supporting documentation.
Computer to Computer file transfer

24
Chapter 3b -- Web Services – User Profile
Typical mailer:
• Uses presort software programs
• Mails medium to large volumes
• Mails frequently (daily/weekly)
However, you must have presort software that has PostalOne! Web Services capabilities or has technology to produce XML outputs.
Submit from your computer

25
Chapter 3b -- Web Services
Postage statements that can be submitted using Web Services:
• First-Class Mail & Priority Mail - PS Form 3600
• Periodicals - PS Form 3541
• Standard Mail - PS Form 3602
• Package Services - PS Form 3605
Supporting documentation that will be generated:
• Qualification Report
Postage Statements

26
Chapter 3b -- Web Services - Benefits
• Eliminates hard copy postage statements and supporting documents
• Saves preparation time
• 24/7 online access to financial information & reports
• Reduces wait times at acceptance units since Postal Service employees do not have to manually type in postage statements
• Enables mailer to develop own browser “look & feel”
• Enables software vendors to provide additional value-added customer software offerings
• Postal Service controlled specification that requires no fee for use

27
Chapter 3c -- Mail.dat®
Mail.dat® is a tool that allows you to electronically submit files that contain your mailing information straight from your computer to the PostalOne! system. Unlike the Postage Statement Wizard, you do not have to perform data entry of postage statements through your PostalOne! account.
http://www.idealliance.org/

28
Chapter 3c -- Mail.dat® – User Profile
Typical user of Mail.dat® falls into one or more of the following categories:
• Use software programs to prepare and produce mailings
• Performs transportation planning & drop-shipping
• Mails large volumes and complex presorts
Computer to Computer file transfer

29
Chapter 3c -- Mail.dat®
Postage statements that can be submitted using Mail.dat®: • First-Class & Priority Mail - PS Form 3600
• Periodicals - PS Form 3541
• Standard Mail - PS Form 3602
• Package Services - PS Form 3605
Supporting documentation that will be generated:• Qualification Report
• Version Summary Report
• Customer Mail Report *
• Summary ZIP Destination Report*
• Postage Summary Report*
Data Entry Clerk

30
Chapter 3c -- Mail.dat® - Benefits
• Streamlines every aspect of high volume mail preparation
• Eliminates hard copy postage statements and supporting documents
• Reduces administrative costs for printing & storage
• Provides dashboard access to all mailing activity for multiple accounts
• Electronically inspects mail files for formatting and field requirements
Mail.dat Home page

31
Chapter 4 – Electronic Submission Process
Postage Statement Wizard®
Web Services Mail.dat®

32
Chapter 4a -- Postage Statement Wizard® Process
Select a Form
Select a Form
Enter • Permit • User Information• Mailing Characteristics
Go to theAppropriate
SectionSubmit Online
Submit Online
CompleteSections &
Review
CompleteSections &
Review
Mailer Presents Mail to USPS
Mailer Presents Mail to USPS
USPS Accesses Information
in PostalOne!
USPS Accesses Information
in PostalOne!
USPS Accepts and Verifies
USPS Accepts and Verifies
USPS Deducts Postage
USPS Deducts Postage
Log on to PostalOne!
Log on to PostalOne!
Submit from your computer
Step-by-Step Electronic Submission Process

33
Chapter 4a – Postage Statement Wizard Process
Logon to PostalOne!Click Submit a FormSelect Form you wish to completeEnter permit number & typeEnter piece weight, number of pieces, total weight of
mailingPostalOne! guides you to appropriate sections to
complete

34
Chapter 4a – Postage Statement Wizard Process
Review data entered Read “warning messages” if any appear on Review page Click Submit Make note of confirmation number (also called Mailing Group ID)
PSW Confirmation Page
35
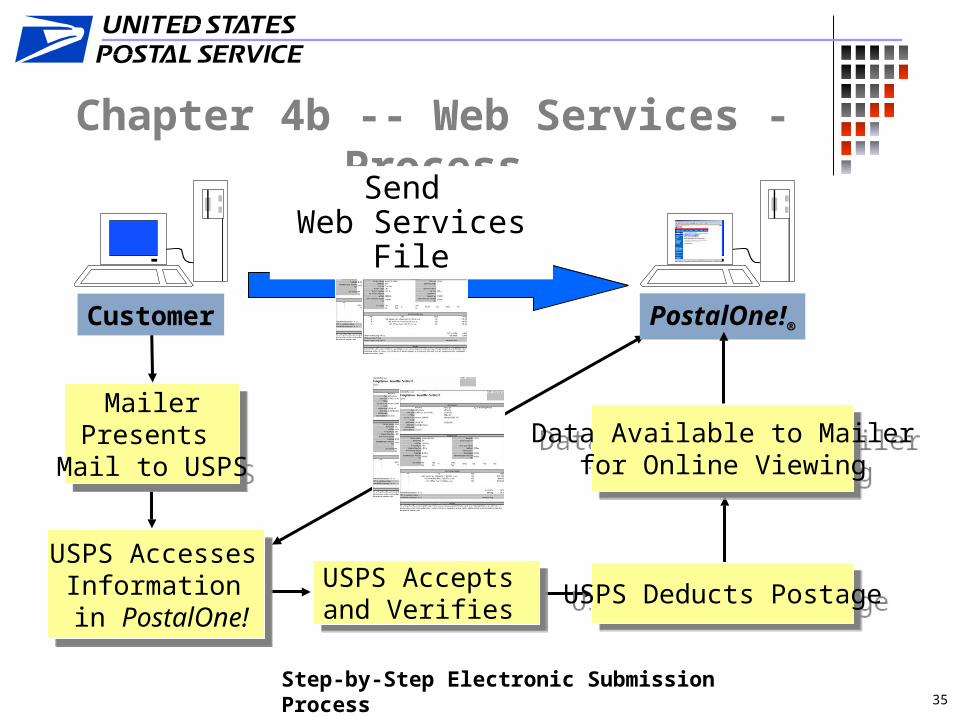
Chapter 4b -- Web Services - Process
USPS Accesses Information
in PostalOne!
USPS Accesses Information
in PostalOne!
PostalOne!®Customer
Send Web Services File
Mailer Presents
Mail to USPS
Mailer Presents
Mail to USPS
USPS Accepts and Verifies
USPS Accepts and Verifies USPS Deducts PostageUSPS Deducts Postage
Data Available to Mailer for Online Viewing
Data Available to Mailer for Online Viewing
Step-by-Step Electronic Submission Process

36
Chapter 4b – Web Services Process
Mail owners or mail preparers who wish to submit postage statement data via Web Services should review the technical specs located at: http://www.usps.com/postalone/guides.htm
Testing with the PostalOne! Help Desk will be necessary prior to being able to submit ‘live’ files.

37
Chapter 4c -- Mail.dat® - Process
Mailer Presents
Mail to USPS
Mailer Presents
Mail to USPS
Data Available to Mailer for
Online Viewing
Data Available to Mailer for
Online Viewing
PostalOne!®Customer
Send Mail.dat® file
USPS Accepts and Verifies
USPS Accepts and Verifies
USPS Accesses Information
in PostalOne!
USPS Accesses Information
in PostalOne!
USPS Deducts Postage
USPS Deducts Postage
Step-by-Step Electronic Submission Process

38
About File Transfer
The File Transfer tool lets mail preparers quickly transmit Mail.dat files to the PostalOne! system for later verification by the Postal Service. This reduces, and ultimately eliminates, paper documentation that is required by the Postal Service, which results in savings for both the Postal Service and its customers.
Chapter 4c -- Mail.dat® - File Transfer

39
Before Transferring Files…
Before transferring your jobs to the PostalOne! system, it is recommended that you first validate your files. This increases the likelihood that your jobs will transfer successfully.
VERY IMPORTANT: Ensure that your computer has sufficient memory, according to the chart below.
Net Size of Mail.Dat Job (MB) Recommended Physical RAM
0-10 64 MB
11-25 128 MB
26-50 256 MB
Chapter 4c -- Mail.dat® - File Transfer
Job Megabytes vs. Computer Memory

40
Before Transferring Files…
Make sure that your computer has the proper Java software (known as the JVM).NOTE: Some of the latest versions of Microsoft Windows® (such as XP) do not support the needed Java software that the File Validator uses. This is evident if you do not see the “All folders” and “File Contents of” panes on the File Validator page. For more information, see the section on technical/operational prerequisites specifically for software in the Mail.dat Technical Guide available on the PostalOne! website. Because newer Microsoft operating systems (such as Windows® XP) no longer support some Java software, users with new installations of Microsoft operating systems must now install Sun Microsystems Java Virtual Machine 1.4.2 or greater on their browsers. If you do not do this, the PostalOne! functions for file validation and manual file transfer will not work. The Batch Processor has a different requirement.
Chapter 4c -- Mail.dat® - File Transfer

41
To Transfer Mail.dat Job Files
1. On the left menu bar, click File Transfer. You may see a File Transfer Disclaimer stating that the information you are about to submit is true and can be monitored. To proceed, click I Accept. The File Transfer page displays the "All Folders" and "File Contents of" panes. (If you click I Do Not Accept, you cannot transfer files to the PostalOne! system.)
File Transfer Certification
Chapter 4c -- Mail.dat® - File Transfer

42
To Transfer Mail.dat Job Files (cont.)
2. The "All Folders" pane displays your computer's local hard drives (usually A, C, and D). Click the plus sign (+) next to the drive on which your jobs are saved.
3. In the "All Folders" pane, scroll up or down to locate the folder in which your job is saved. File Transfer
Chapter 4c -- Mail.dat® - File Transfer

43
To Transfer Mail.dat Job Files (cont.)
4. Select the proper folder by clicking the folder name. The "File Contents of" pane displays the job header files.
NOTE: If the folder containing your job is in a subfolder, click the plus sign (+) next to the main folder to display the subfolders. From the subfolders, locate and select
the appropriate folder.
5. In the “File Contents of” pane, select the header file of the job you want to transfer.NOTE: All files associated with a mailing job are transferred as a result of
selecting the header file. To transfer multiple jobs simultaneously, hold down the CTRL key and click the header files of the jobs one at a time to select them.
6. Once you have selected the job header file(s), you can determine the location and name of the log file, just as you did when using the File Validator. To do this, click Validation Log File. By default, the File Validator writes the results to C:\VALIDATION.log.
Chapter 4c -- Mail.dat® - File Transfer

Postage Payment Methods
44
To Transfer Mail.dat Job Files (cont.)
7. Click Transfer file(s) to begin the transfer. A File Transfer Certification page opens.
8. To proceed, click I Accept. While the file is transferring, you see a blue status bar beneath the “File Contents of” pane indicating transfer progress.
9. After your job has transferred, a message indicating the transfer status appears. Click OK to close the message and continue working. If you are transferring multiple jobs, the transfer message appears after each job is transferred.
NOTE: If you do not click OK to close the message, the remaining jobs will continue to transfer in the background.
10. To check the status of your transferred jobs, click Transfer Summary.
Chapter 4c -- Mail.dat® - File Transfer

45
Checking Job and File Upload Status
• After you have transferred your Mail.dat jobs, use the Transfer Summary tool to track the status of the mailings. It lists information about the status of all jobs and files you have transferred, including when they were transferred. It also lists detailed error messages for files that failed to transfer. Using this tool gives you detailed insight into the status of your mailings, enabling you as a preparer to more effectively communicate job status with your customers.
• To check job and file upload status:
On the File Transfer page, click Transfer Summary. The Job Status page opens. Initially, recently transferred jobs may not appear. To update the Jobs column, click Refresh. In the Job Status column, jobs will either be reported as “successful,” “In progress,” or “failed.” If your job is reported as “failed,” see the Mail.dat Technical Guide
Chapter 4c -- Mail.dat® - File Transfer

46
Checking Job and File Upload Status (cont.)
2. By default, the Job Status page displays the first eight jobs. To view the next eight jobs, click Next 8 at the bottom of the page.
NOTE: To change the number of jobs displayed per page, select a number from the Show records list.
3. To check file upload status, click a Job ID in the Jobs column or enter a Job ID in the Search Job ID box, then click Search. (The Job Detail page displays all files associated with the selected job, file upload date and time, and upload status appears. The Completed Job column will either list the date and time at which a file was successfully uploaded, or report the file upload as “Failed” or “In progress.”)
Chapter 4c -- Mail.dat® - File Transfer

47
Checking Job and File Upload Status (cont.)
4. To view the status of a file's progress, click the file name in the File (Click for Errors) column. A message box displays error details. For an explanation of error messages, check the Mail.dat Technical Guide.
5. To continue working, click Close.
Chapter 4c -- Mail.dat® - File Transfer

48
Alternate Access to File Transfer Application
• If you are unable to access the File Validator or Transfer tools, e-mail a Mail.dat job or a manifest file as a compressed WinZip file to: [email protected]. The subject field of the e-mail should include either “validation” or “insertion” to indicate whether the files should be validated or inserted in the PostalOne! database.
• The PostalOne! Help Desk makes every effort to process files within 48 hours of receipt. A confirmation e-mail will be sent once the files have been processed and will include the result. For submissions that contain validation errors, the validation log will be included as an attachment to the confirmation e-mail.
Chapter 4c -- Mail.dat® - File Transfer

49
About File Validator
The File Validator checks your Mail.dat® files to ensure that all required fields are populated and contain the correct character format. It also checks optional fields for correct character formatting. Now you will learn how to use the File Validator feature, which improves the likelihood that your Mail.dat jobs are successful.
Chapter 4c -- Mail.dat® - File Validator

50
Before Validating Files…
You may wish to change the validation.log file location and file name by clicking Validation Log File. The default name and location are C:\VALIDATION.log.
VERY IMPORTANT: Ensure that your computer has enough memory for the size of the file you are validating according to the chart below.
Net Size of Mail.Dat Job (MB) Recommended Physical RAM
0-10 64 MB
11-25 128 MB
26-50 256 MB
Chapter 4c -- Mail.dat® - File Validator
Job Megabytes vs Computer Memory

51
Before Validating Files…(cont.)
Make sure that your computer has the proper Java software (known as the JVM).NOTE: Some of the latest versions of Microsoft Windows® (such as XP) do not support the needed Java software that the File Validator uses. This is evident if you do not see the “All folders” and “File Contents of” panes on the File Validator page. For more information, see the section on technical/operational prerequisites specifically for software in the Mail.dat Technical Guide available on the PostalOne! website. Because newer Microsoft operating systems (such as Windows® XP) no longer support some Java software, users with new installations of Microsoft operating systems must now install Sun Microsystems Java Virtual Machine 1.4.2 or greater on their browsers. If you do not do this, the PostalOne! functions for file validation and manual file transfer will not work. The Batch Processor has a different requirement.
Chapter 4c -- Mail.dat® - File Validator

52
To Validate Mail.dat Files
1. On the left menu bar, click File Validator. If you see a Security Warning pop-up box, click Yes to load the File Validator on your system as a temporary file. (If you click No, you will not load it or be able to use the File Validator). The File Validator page opens. It contains the “All Folders” and “File Contents of” panes.
NOTE: You can also access the File Validator from the PostalOne! home page (http://www.usps.com/postalone/) by clicking Guides & Tools, then clicking Learn More under the PostalOne! File Validator section.
Chapter 4c -- Mail.dat® - File Validator

53
To Validate Mail.dat Files (cont.)
2. The “All Folders” pane displays your computer’s local drives (usually A, C, and D). From the list, click the plus sign (+) next to the drive on which your job is saved.
3. Scroll up or down to locate the folder in which your job is saved. File Validator
Chapter 4c -- Mail.dat® - File Validator

54
To Validate Mail.dat Files (cont.)
4. Select the proper folder by clicking the folder name. The “File Contents of” pane displays the job header files.NOTE: If the folder containing your job is in a subfolder, click the plus sign (+) next to the main folder to display the subfolders. From the subfolders, locate and select the appropriate folder.
5. In the “File Contents of” pane, select the job header file you want to validate. NOTE: To validate multiple job header files simultaneously, hold down the CTRL key while you select the job files.
6. To begin the validation, click Validate File(s).
Chapter 4c -- Mail.dat® - File Validator

Postage Payment Methods
55
To Validate Mail.dat Files (cont.)
7. If your job passes the file validation process, a message indicating that the validation was successful appears. If your job fails the validation process, an error message appears. To determine why the validation failed, write down the message, then see the C:\Validation.log file (or the file name and location to which you may have changed it). For details about examining the validation log file, see Opening the Validation Log.
8. Click OK to close the message. If you are validating multiple files, the message appears after each is done.
To perform other functions, click the appropriate link on the left menu bar.NOTE: If you are validating files from the PostalOne! home page, close the File
Validator window to return to the home page.
Chapter 4c -- Mail.dat® - File Validator
56
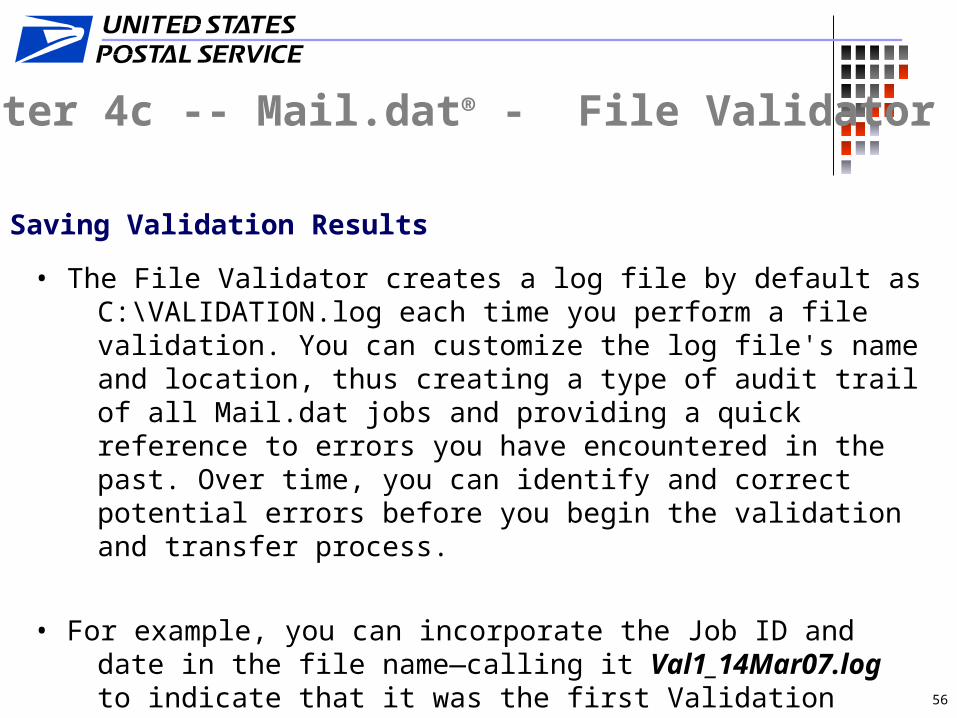
Saving Validation Results
• The File Validator creates a log file by default as C:\VALIDATION.log each time you perform a file validation. You can customize the log file's name and location, thus creating a type of audit trail of all Mail.dat jobs and providing a quick reference to errors you have encountered in the past. Over time, you can identify and correct potential errors before you begin the validation and transfer process.
• For example, you can incorporate the Job ID and date in the file name—calling it Val1_14Mar07.log to indicate that it was the first Validation attempt for March 14, 2007. If you leave the validation log file as the default, the log information for the current validation is appended to the end of the file each time.
Chapter 4c -- Mail.dat® - File Validator

57
Saving Validation Results (cont.)
1. To customize the name and location of the log file when you run the File Validator: While on the File Validator page (for details, see Validating Files), click Validation Log File. The Save Validation Log File as dialog box opens.
2. From the Save in list, select the drive to which you will save the file. Then locate and select the folder in which you will save it.
3. Enter the name of the file in the File name box.
Chapter 4c -- Mail.dat® - File Validator

58
Saving Validation Results (cont.)
4. Click Save. If a file of the same name exists in that folder, you see a prompt asking whether you want to replace the file. If you do not see this prompt, proceed to the next step.
NOTE: The File Validator does not actually replace the file. Click Yes to append validation information to the end of the existing file. A File Transfer dialog box displays a message confirming the name and location of the validation file that will be saved. (To customize the file name or location, click No.)
5. Click OK. The file is not actually saved yet. It is saved the next time you perform the file validation (click Validate files on the File Validator page).
Chapter 4c -- Mail.dat® - File Validator

59
Opening the Validation Log
1. From the Windows Start button, select Run. The Run dialog box opens.
2. Open the WordPad window (in the Open box, type WordPad and click OK).
3. From the File menu, select Open. The Open dialog box appears.
4. From the Look in box select the drive (such as “C:”) on which the log file was saved.
5. In the File name box, type validation.log, (or the file name to which you may have changed it when performing the validation).
Chapter 4c -- Mail.dat® - File Validator

60
Opening the Validation Log (cont.)
6. Click Open. WordPad displays the validation log file. The newest error messages display at the bottom of the file.
NOTE: A detailed list of errors associated with the job you have validated are stored in the validation.log file. You may open this file at any time to review the error messages and troubleshoot commonly occurring problems. After opening the validation.log file, print it or write down the specific message you are interested in, then consult File Validator User Manual: Troubleshooting Validation Log Errors (https://www.uspspostalone.com/postal1/helpfiles/validator_um/validator_webhelp/validator.htm) for possible solutions.
Chapter 4c -- Mail.dat® - File Validator

61
Alternate Access to File Validator
• If you are unable to access the File Validator or Transfer tools, e-mail a Mail.dat job or a manifest file as a compressed WinZip file to: [email protected]. The subject field of the e-mail should include either “validation” or “insertion” to indicate whether the files should be validated or inserted in the PostalOne! database.
• The PostalOne! Help Desk makes every effort to process all files within 48 hours of receipt. A confirmation e-mail will be sent once the files have been processed and will include the result. For submissions that contain validation errors, the validation log will be included as an attachment to the confirmation e-mail.
Chapter 4c -- Mail.dat® - File Validator

62
About Metrics Search
The Metrics Search provides access to metrics that help you identify important mailing trends. You can use this information to identify ways in which you can improve your experience using the PostalOne! system.
Chapter 4c -- Mail.dat® - Metrics Search

63
More About Metrics Search
For all jobs associated with a specific Job ID, Mailing Facility, Status type, or Transmission Date, the metrics search lists Transmission Dates, Transmission Times, Mailing Facilities, Types, File Names, Job IDs, Number of Files, Time to Load, File Size, Results, and Mail.dat File Versions.
For example, you can use it to identify the optimal file size and transmission time for submitting your jobs. In addition, you can access detailed error descriptions, which will help you identify common problems and avoid them in future file transmissions.
Chapter 4c -- Mail.dat® - Metrics Search

64
To Search for File Transfer Metrics
1. On the left menu bar, click Metrics Search. The Metrics Search page opens.
2. Enter the transfer metrics search criteria:• Job ID
• Mailing Facility• Status• Transmission Date
3. Click Search. The page displays Transmission Dates, Transmission Times, Mailing Facilities, Types, File Names, Job IDs, Number of Files, Time to Load, File Size, Results, and File Versions.
4. To open the Metrics Error Report and read error descriptions, click the result code in the Result column.
Chapter 4c -- Mail.dat® - Metrics Search

65
About File Transfer Metrics
The File Transfer Metrics displays transfer information to help you identify important trends. You can use this information to identify ways to improve your experience using the PostalOne! system. For example, it can help you identify and later avoid commonly occurring file transfer problems, which will help increase your file transfer success rate.
Chapter 4c -- Mail.dat® - Metrics Search

66
To View File Transfer Metrics1. On the left menu bar, click Metrics - File Transfer. The Metrics - File
Transfer page opens.
2. Enter a starting and ending date for the metrics, then select a Report Type:• Original Jobs Summary Report• Original Jobs Summary• System Success Rate Report• File Transfer Totals Report• Average File Size Report• Average Load Time Report• Postage Statement Revenue Report
3. Click search. The metrics report displays.
4. To quickly locate a specific item, use the browser's Find feature (press CTRL+F and in the Find What box, enter the term, then click Find Next).
Chapter 4c -- Mail.dat® - Metrics Search

67
If you have questions or need
additional assistance you may contact
your local post office or Business Mail
Entry Unit.
PostalOne!® Customer Support