Portable Timekeeper Manual
25
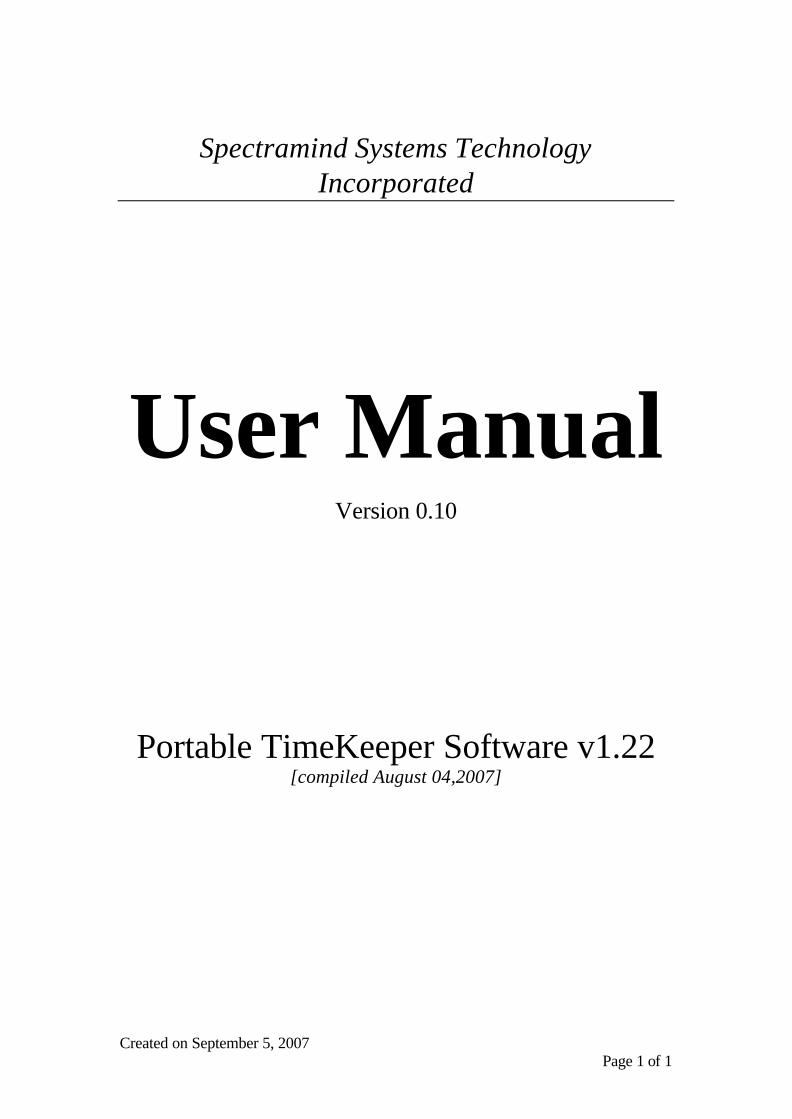
Created on September 5, 2007 Page 1 of 1 Spectramind Systems Technology Incorporated User Manual Version 0.10 Portable TimeKeeper Software v1.22 [compiled August 04,2007]
description
Manual for Biometric manual Portable timekeeper
Transcript of Portable Timekeeper Manual
Created on September 5, 2007 Page 1 of 1
Spectramind Systems Technology Incorporated
User Manual
Version 0.10
Portable TimeKeeper Software v1.22 [compiled August 04,2007]
Created on September 5, 2007 Page 2 of 2
Table of Contents Installation......................................................................................................................3 Program Start Menu.......................................................................................................3 Load Portable Timekeeper Software..............................................................................3 Create Administrator Account .......................................................................................4
Startup Installation.....................................................................................................4 Admin Menu ..................................................................................................................6
Maintenance ...............................................................................................................7 Add New Employees .............................................................................................7 Add New Company................................................................................................8 Add New Departments...........................................................................................9
Data Transfer............................................................................................................11 USB Flash Drive ..................................................................................................11 Network................................................................................................................13 IP List ...................................................................................................................15
TimeCard .................................................................................................................17 Raw Time.............................................................................................................17 Processed Time ....................................................................................................18 Verify Default Rawtime File................................................................................20
Reports .....................................................................................................................21 Tools.........................................................................................................................22
Clear Timecard.....................................................................................................22 Clear Device.........................................................................................................24
Exit ...........................................................................................................................25 Sign-On Screen........................................................................................................25
Created on September 5, 2007 Page 3 of 3
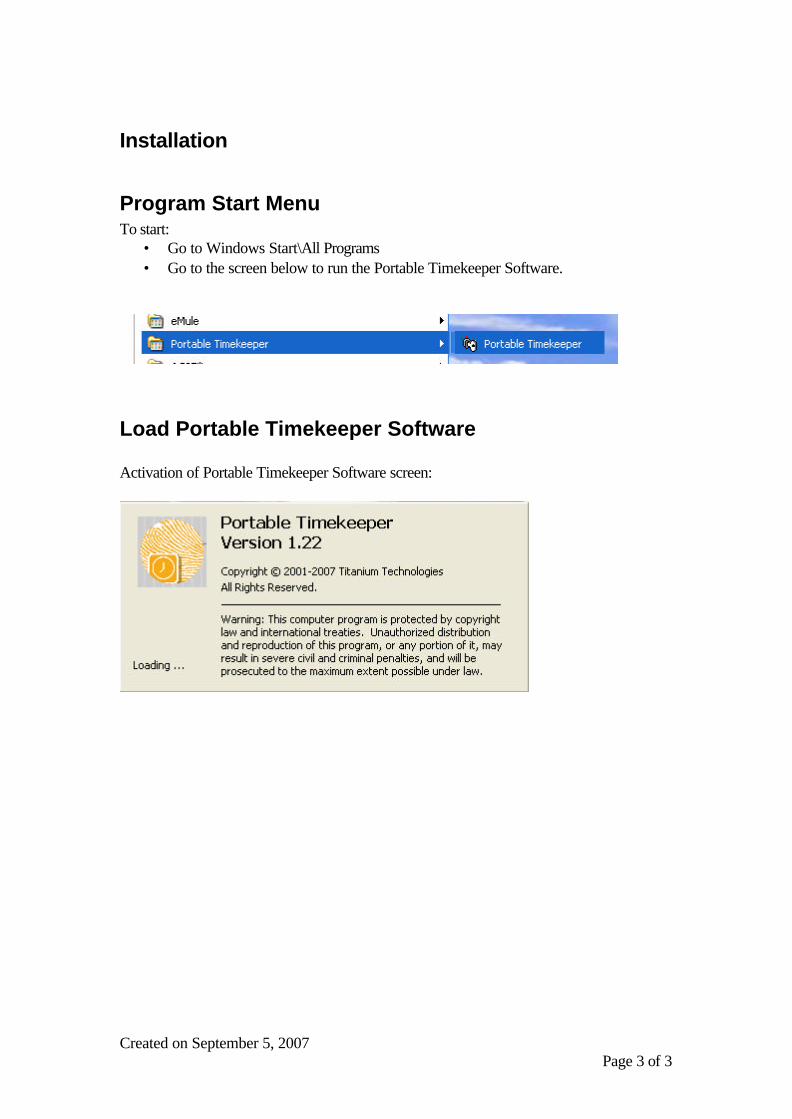
Installation
Program Start Menu To start:
• Go to Windows Start\All Programs • Go to the screen below to run the Portable Timekeeper Software.
Load Portable Timekeeper Software Activation of Portable Timekeeper Software screen:

Created on September 5, 2007 Page 4 of 4
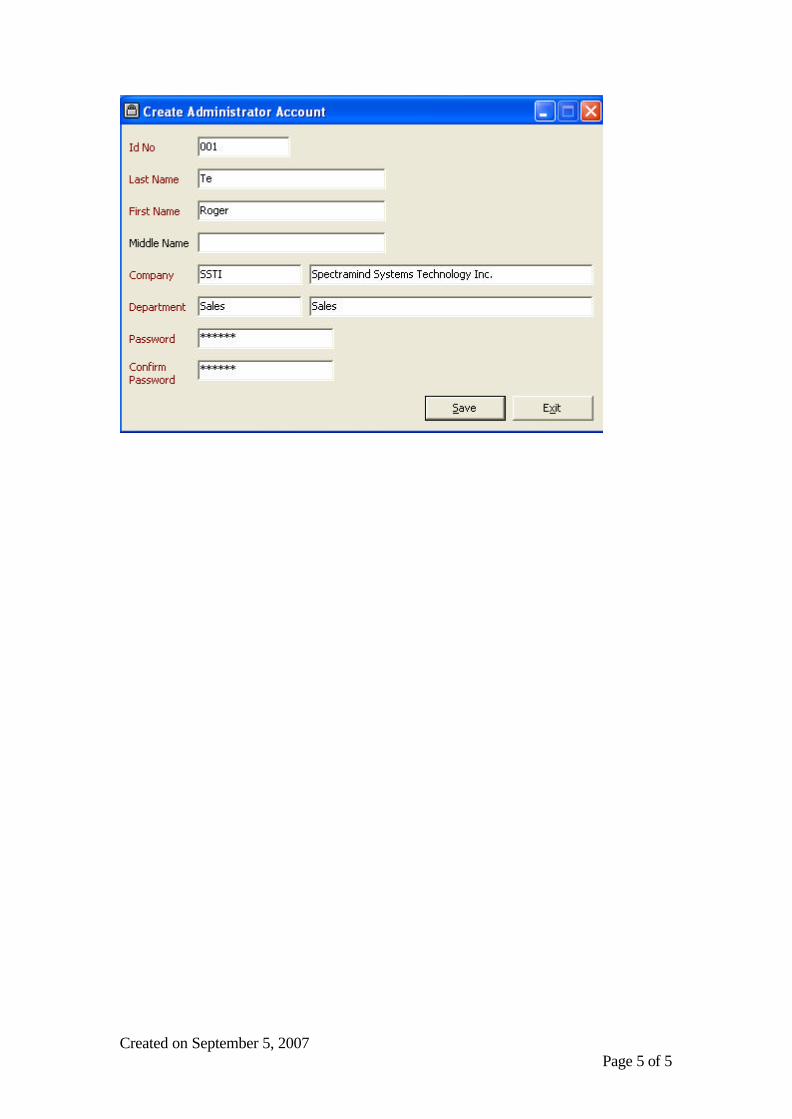
Create Administrator Account
Startup Installation
• One time Startup Installation. • Fill up the necessary details on screen • Click <Save> to proceed to the next screen. • Click <Exit> to cancel Startup Installation and return to desktop.
Sample screen with values for Startup Installation:
Created on September 5, 2007 Page 5 of 5
Created on September 5, 2007 Page 6 of 6
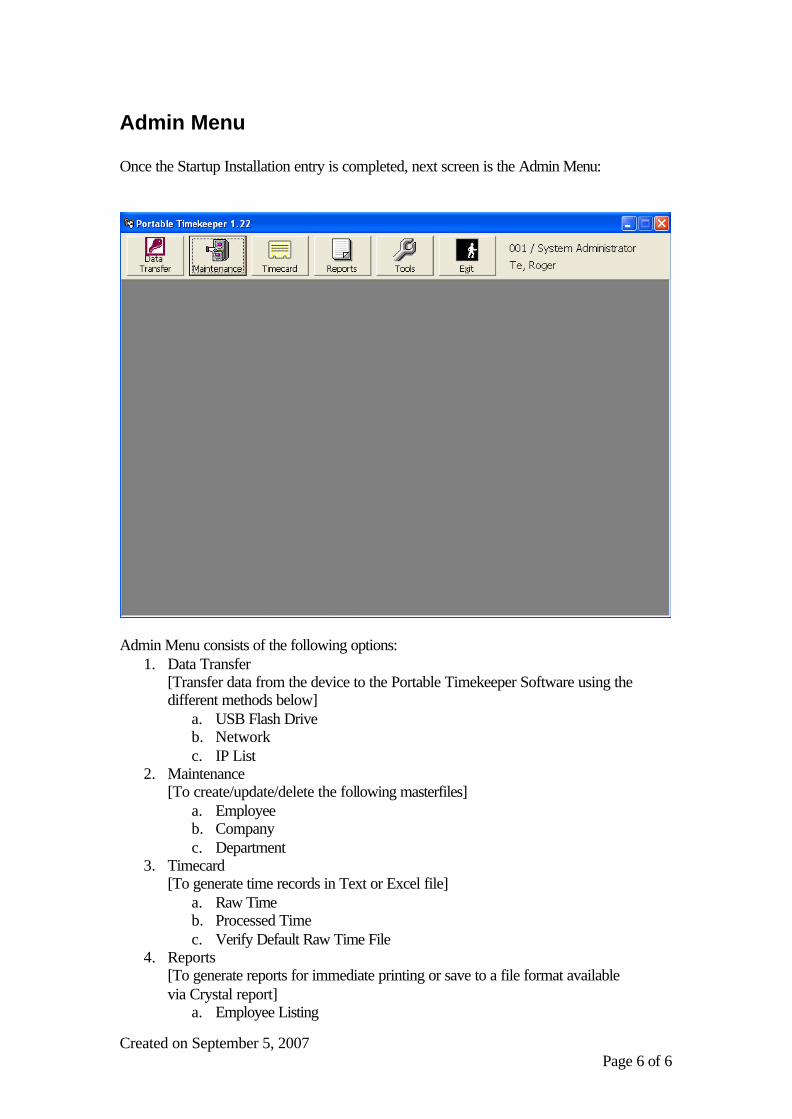
Admin Menu Once the Startup Installation entry is completed, next screen is the Admin Menu:
Admin Menu consists of the following options:
1. Data Transfer [Transfer data from the device to the Portable Timekeeper Software using the different methods below]
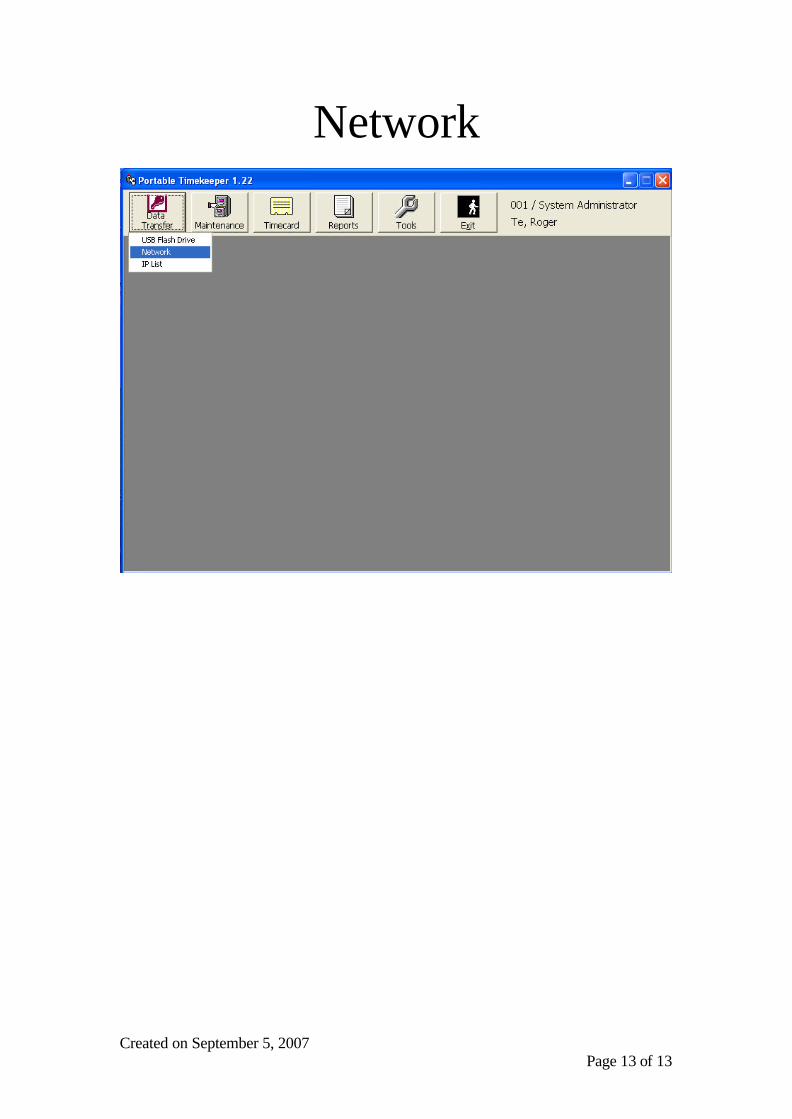
a. USB Flash Drive b. Network c. IP List
2. Maintenance [To create/update/delete the following masterfiles]
a. Employee b. Company c. Department
3. Timecard [To generate time records in Text or Excel file]
a. Raw Time b. Processed Time c. Verify Default Raw Time File
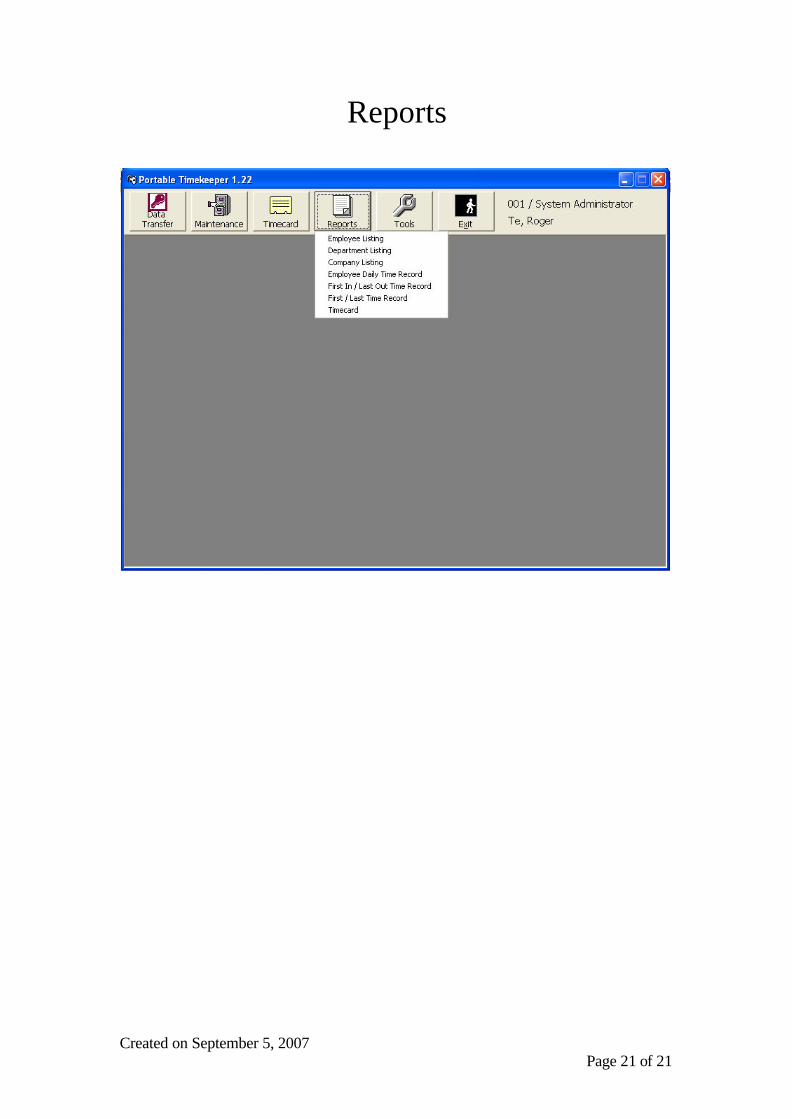
4. Reports [To generate reports for immediate printing or save to a file format available via Crystal report]
a. Employee Listing
Created on September 5, 2007 Page 7 of 7
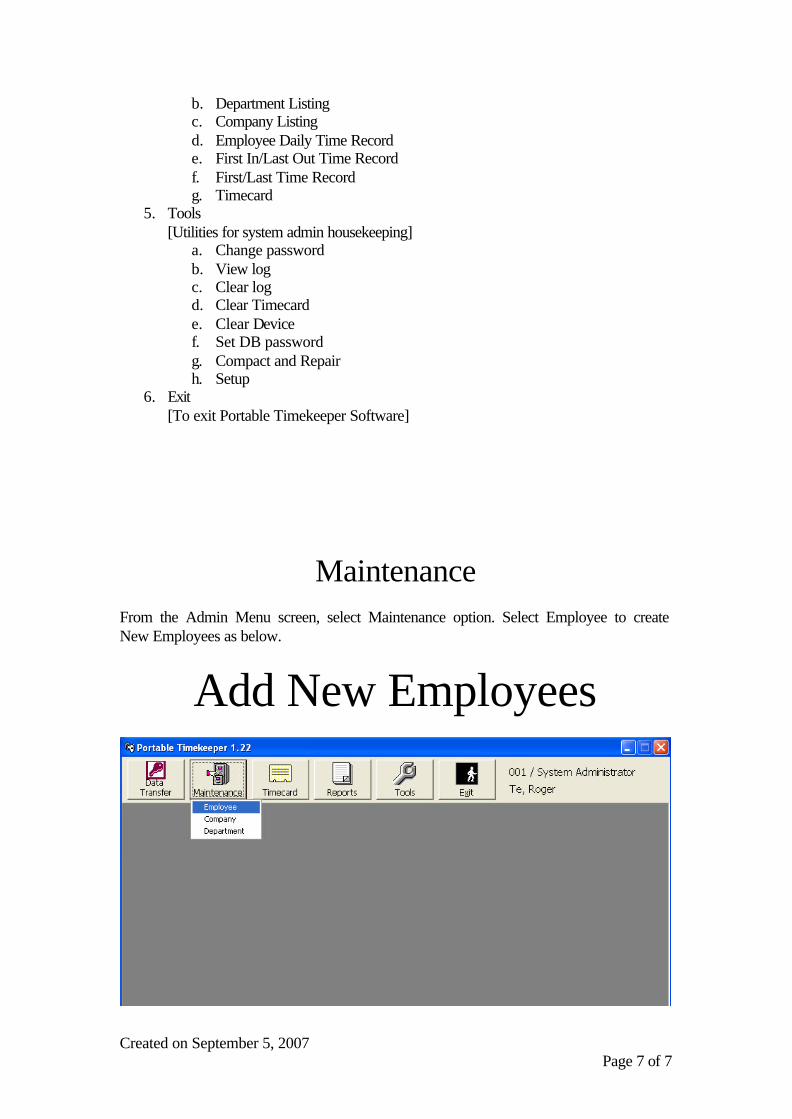
b. Department Listing c. Company Listing d. Employee Daily Time Record e. First In/Last Out Time Record f. First/Last Time Record g. Timecard
5. Tools [Utilities for system admin housekeeping]
a. Change password b. View log c. Clear log d. Clear Timecard e. Clear Device f. Set DB password g. Compact and Repair h. Setup
6. Exit [To exit Portable Timekeeper Software]
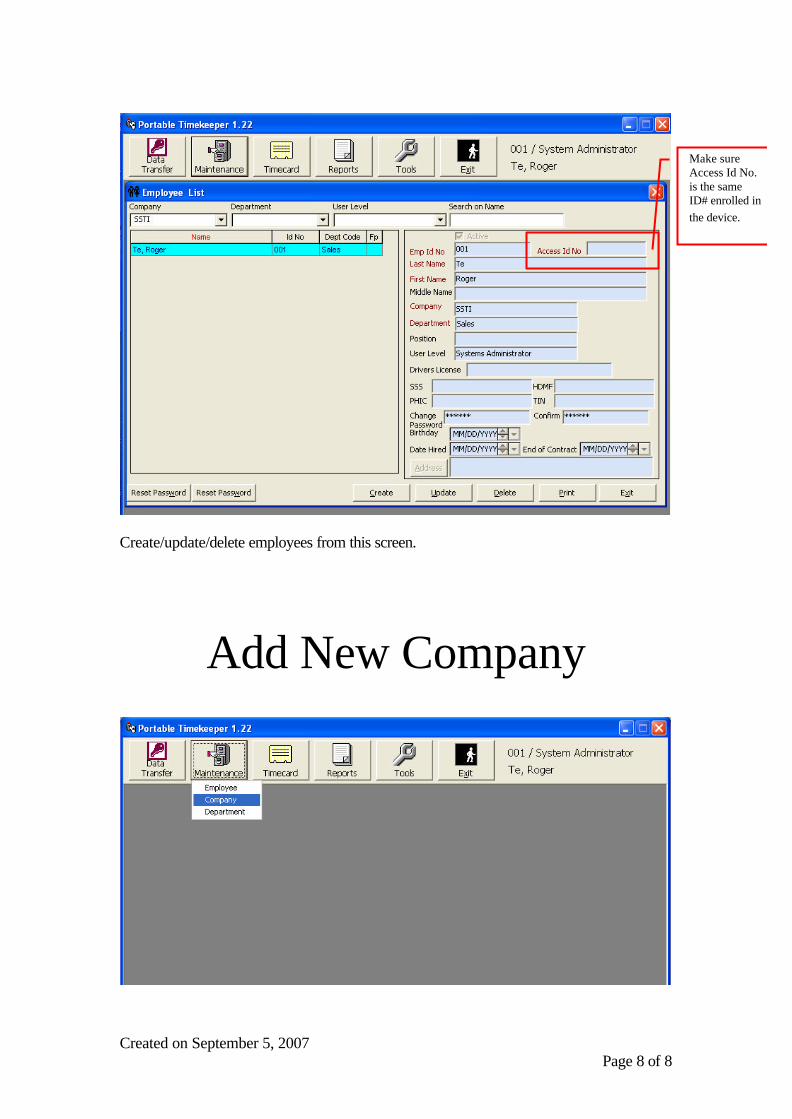
Maintenance From the Admin Menu screen, select Maintenance option. Select Employee to create New Employees as below.
Add New Employees
Created on September 5, 2007 Page 8 of 8
Create/update/delete employees from this screen.
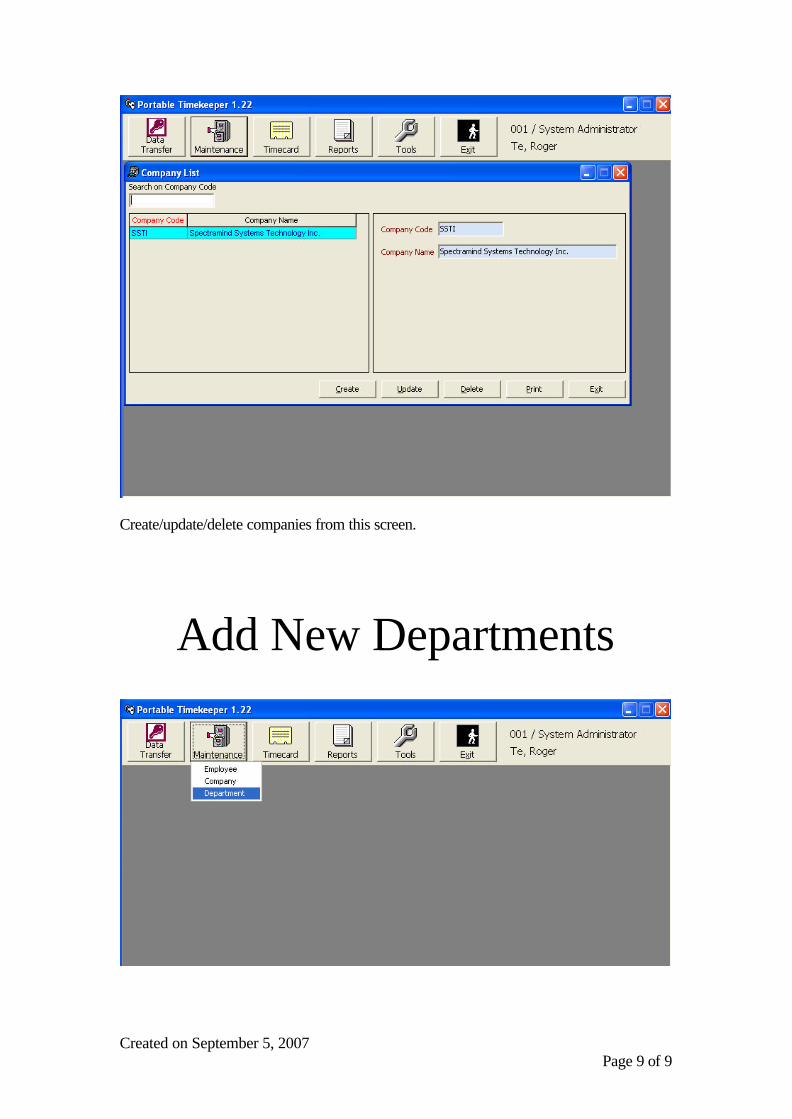
Add New Company
Make sure Access Id No. is the same ID# enrolled in the device.
Created on September 5, 2007 Page 9 of 9
Create/update/delete companies from this screen.
Add New Departments
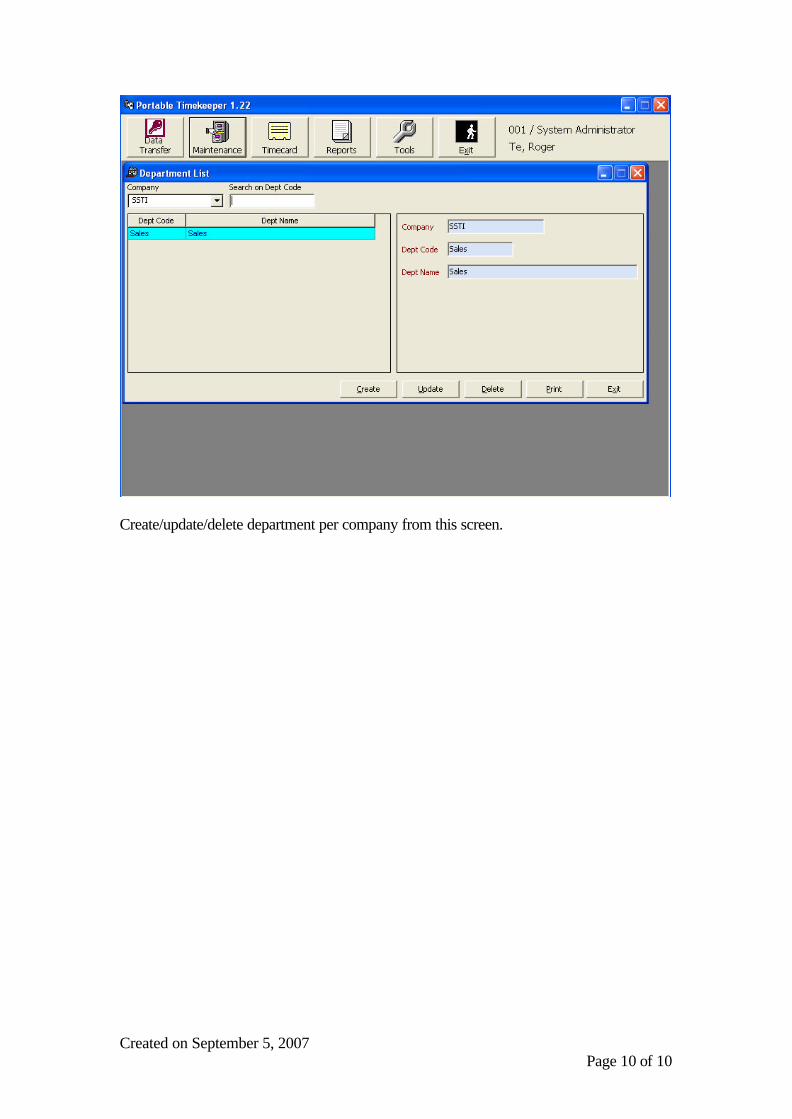
Created on September 5, 2007 Page 10 of 10
Create/update/delete department per company from this screen.

Created on September 5, 2007 Page 11 of 11
Data Transfer This feature allows data transfer from the timekeeping devise to the Portable Timekeeper Software.
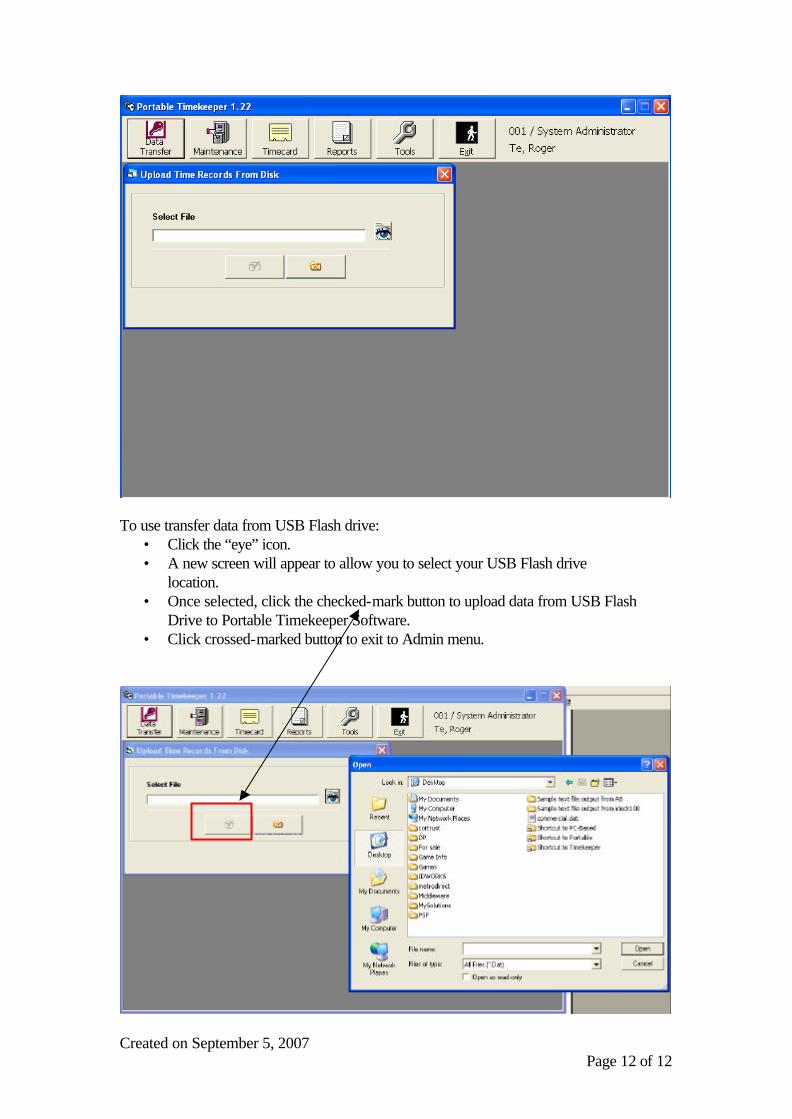
USB Flash Drive
Created on September 5, 2007 Page 12 of 12
To use transfer data from USB Flash drive:
• Click the “eye” icon. • A new screen will appear to allow you to select your USB Flash drive
location. • Once selected, click the checked-mark button to upload data from USB Flash
Drive to Portable Timekeeper Software. • Click crossed-marked button to exit to Admin menu.
Created on September 5, 2007 Page 13 of 13
Network
Created on September 5, 2007 Page 14 of 14
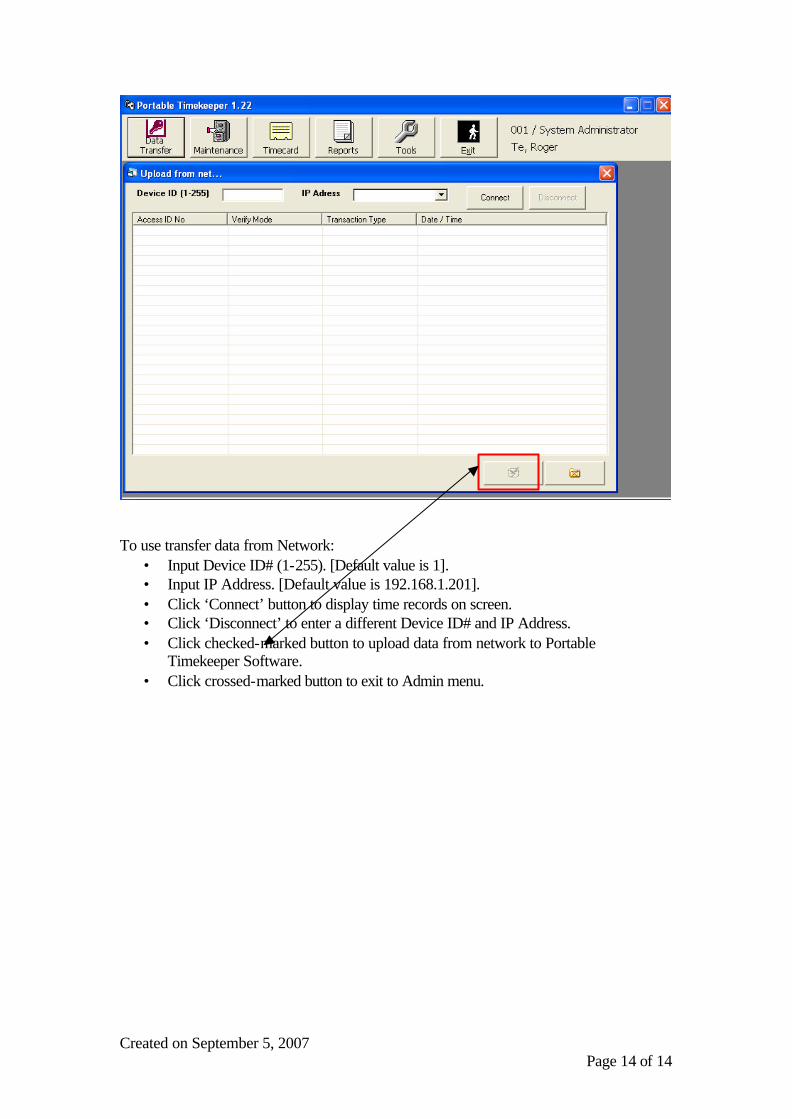
To use transfer data from Network:
• Input Device ID# (1-255). [Default value is 1]. • Input IP Address. [Default value is 192.168.1.201]. • Click ‘Connect’ button to display time records on screen. • Click ‘Disconnect’ to enter a different Device ID# and IP Address. • Click checked-marked button to upload data from network to Portable
Timekeeper Software. • Click crossed-marked button to exit to Admin menu.
Created on September 5, 2007 Page 15 of 15
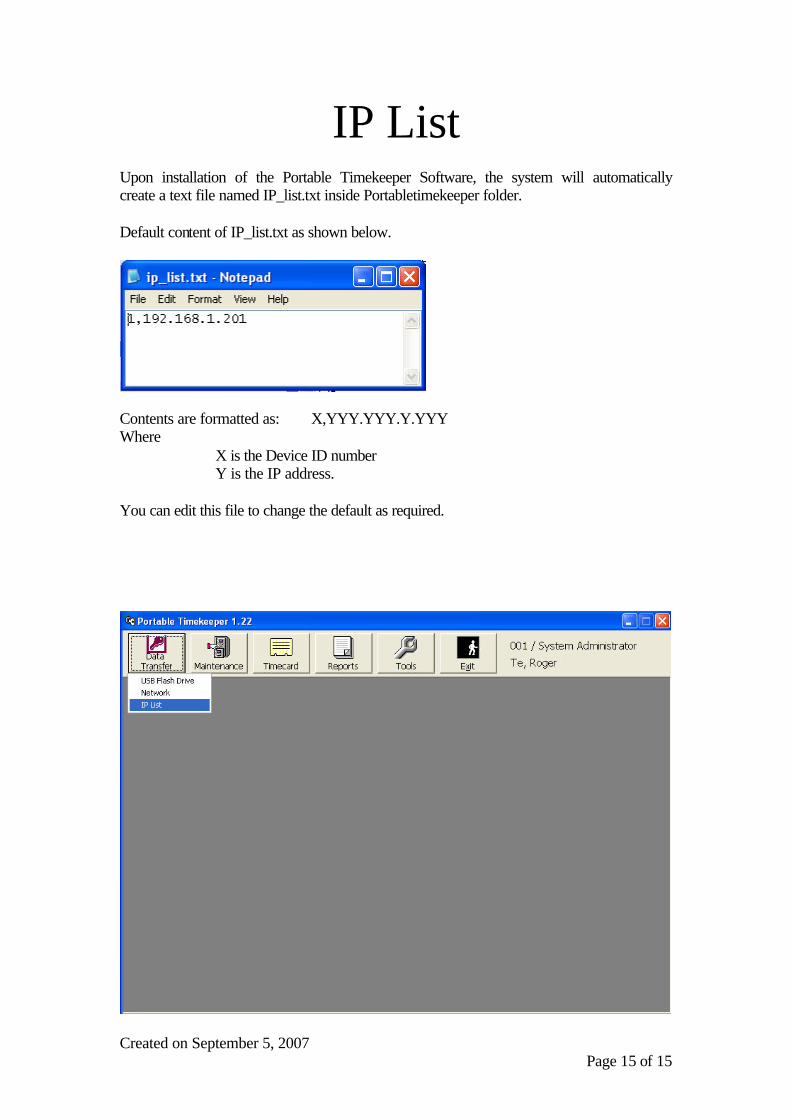
IP List Upon installation of the Portable Timekeeper Software, the system will automatically create a text file named IP_list.txt inside Portabletimekeeper folder. Default content of IP_list.txt as shown below.
Contents are formatted as: X,YYY.YYY.Y.YYY Where
X is the Device ID number Y is the IP address. You can edit this file to change the default as required.

Created on September 5, 2007 Page 16 of 16
To transfer data using IP List:
• The screen grid display will get data from the IP_list.txt file. • Click the checkbox to check or uncheck from the list. You can check the
Select All checkbox to select everything on the list. • Click the check-marked button afterwards for upload to Portable Timekeeper
Software. • Click crossed-marked button to exit to Admin menu.
Created on September 5, 2007 Page 17 of 17
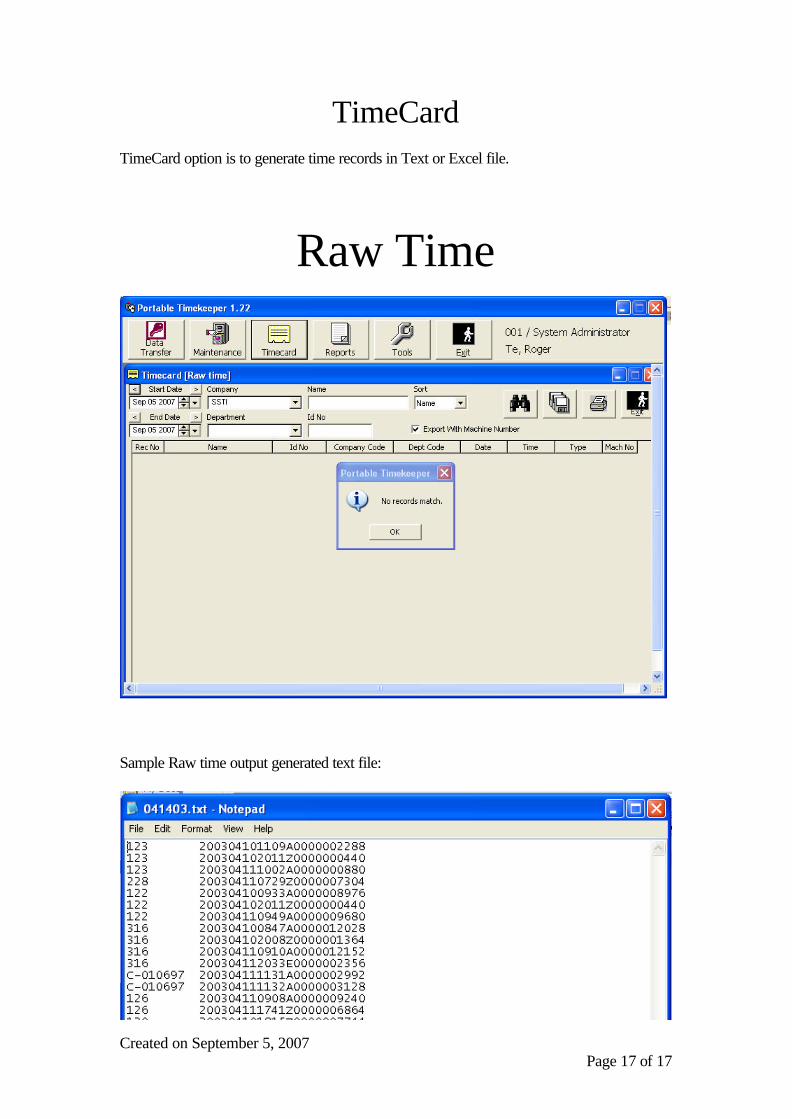
TimeCard TimeCard option is to generate time records in Text or Excel file.
Raw Time
Sample Raw time output generated text file:

Created on September 5, 2007 Page 18 of 18
Processed Time
Created on September 5, 2007 Page 19 of 19
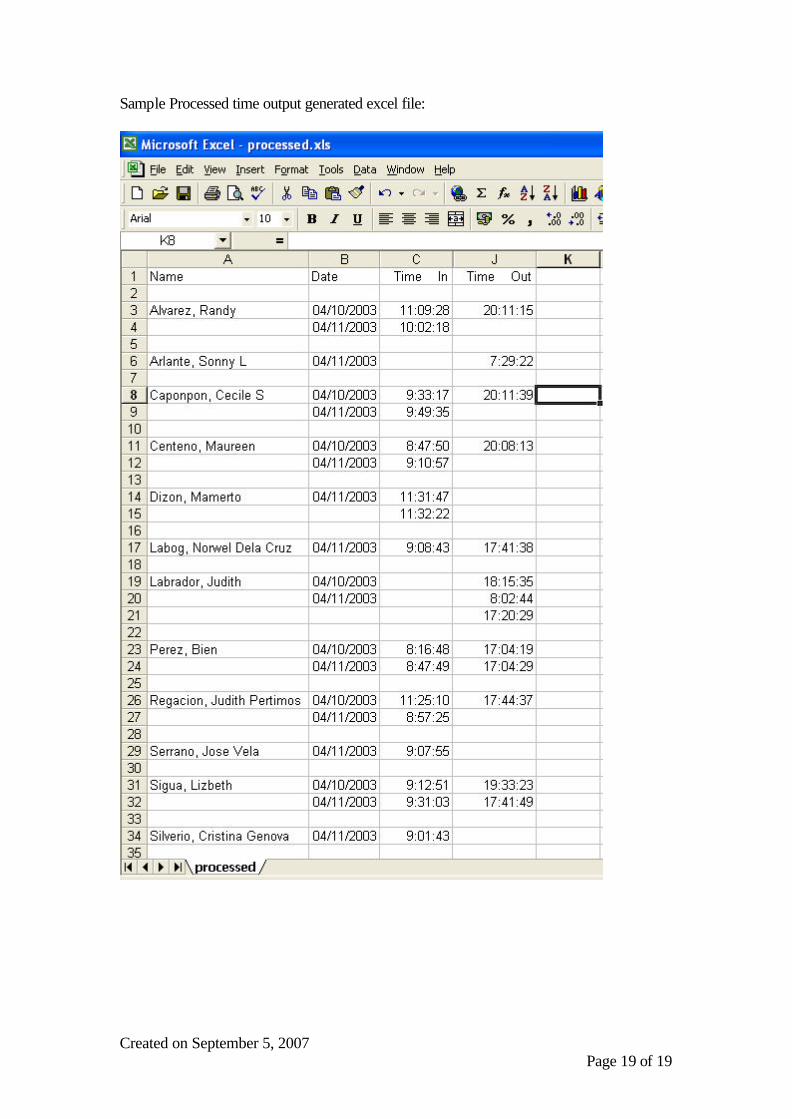
Sample Processed time output generated excel file:
Created on September 5, 2007 Page 20 of 20
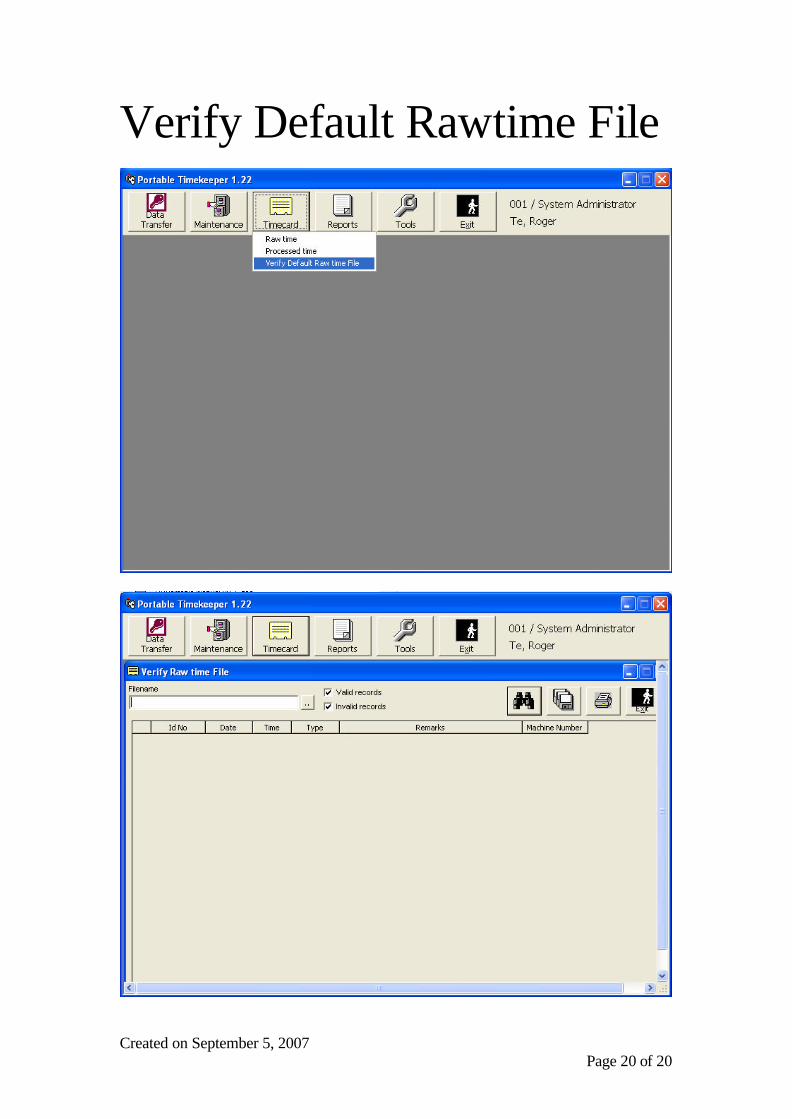
Verify Default Rawtime File
Created on September 5, 2007 Page 21 of 21
Reports

Created on September 5, 2007 Page 22 of 22
Tools
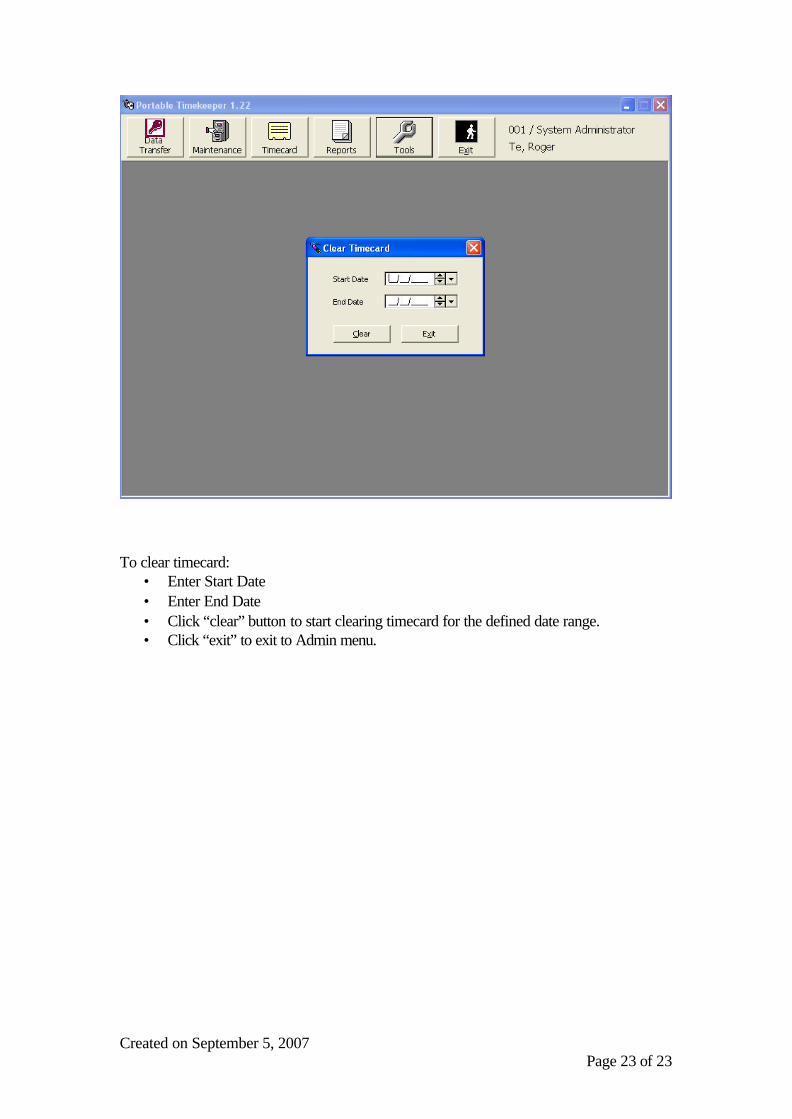
Clear Timecard
Created on September 5, 2007 Page 23 of 23
To clear timecard:
• Enter Start Date • Enter End Date • Click “clear” button to start clearing timecard for the defined date range. • Click “exit” to exit to Admin menu.
Created on September 5, 2007 Page 24 of 24
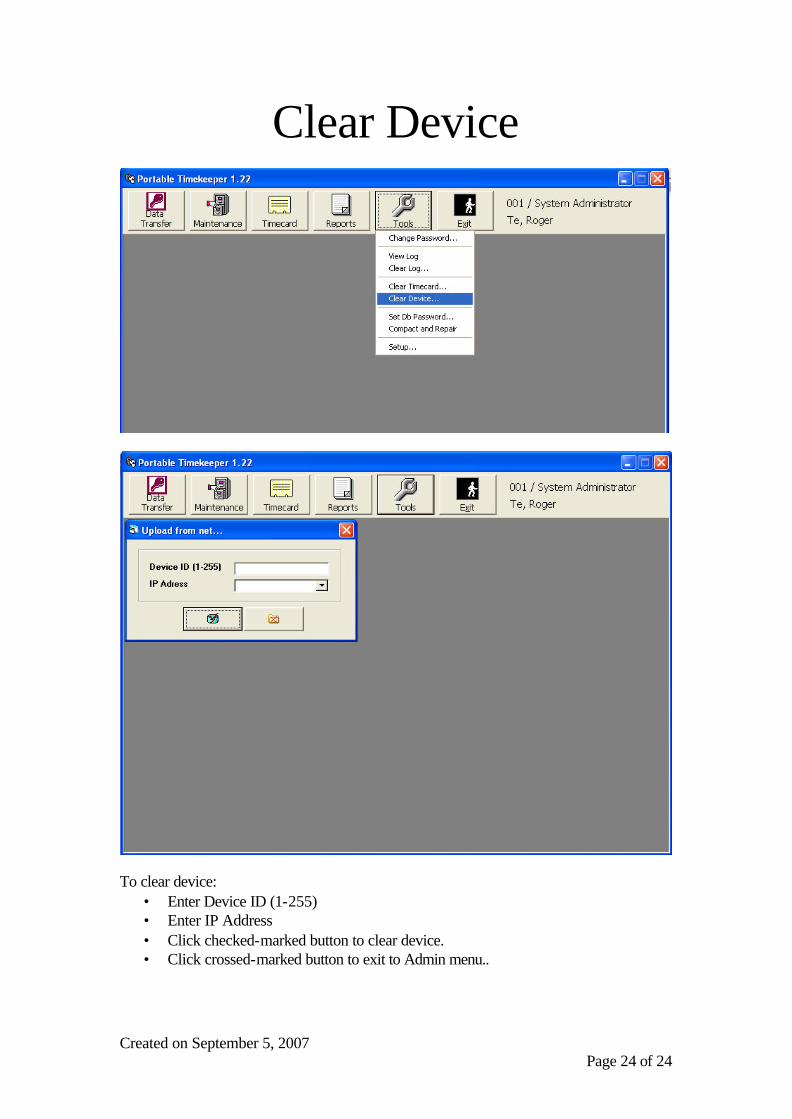
Clear Device
To clear device:
• Enter Device ID (1-255) • Enter IP Address • Click checked-marked button to clear device. • Click crossed-marked button to exit to Admin menu..
Created on September 5, 2007 Page 25 of 25
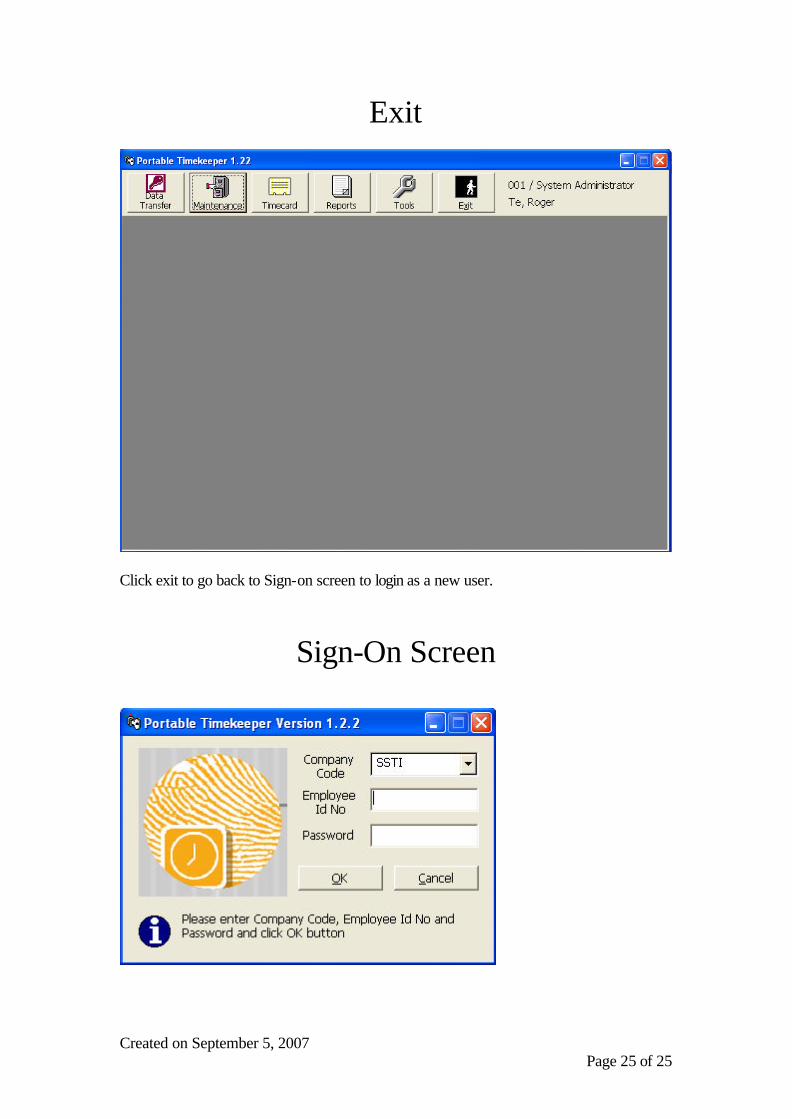
Exit
Click exit to go back to Sign-on screen to login as a new user.
Sign-On Screen