Please note that this applies only to CentOS 6.5 and not to 6 · PDF fileIn this tutorial I...
70
In this tutorial I will explain how to make Veritas Cluster Server believe that CentOS6.5 is RHEL 6.5. Please note that this applies only to CentOS 6.5 and not to 6.6 Veritas Cluster Server does not run on CentOS, and it is certified on RHEL. Unfortunately while CentOS is free, RHEL costs money. So, for our training purposes it makes sense to somehow use CentOS. I am using a HP DL 580 G5 with 4 quad core cpu's and 128GB of RAM and 900GB SFF SAS drive. At the time of writing this it was available on Ebay for about $239, the drive cost an extra $174. I installed CentOS 6.6 on this hardware and will now show you the post installation configuration, while installing CentOS 6.6 on the host, I chose, “software development workstation”: NOTE: I will install virtualbox on this CentOS 6.6 BUT will install CentOS6.5 guests on virtualbox for our VCS training requirements. First we have to edit /etc/selinux/config to look like this [root@kvm6-66 ~]# cat /etc/selinux/config # This file controls the state of SELinux on the system. # SELINUX= can take one of these three values: # enforcing - SELinux security policy is enforced. # permissive - SELinux prints warnings instead of enforcing. # disabled - No SELinux policy is loaded. SELINUX=disabled # SELINUXTYPE= can take one of these two values: # targeted - Targeted processes are protected, # mls - Multi Level Security protection. SELINUXTYPE=targeted So, I have changed SELINUX, to disabled [root@kvm6-66 ~]# chkconfig iptables off [root@kvm6-66 ~]# service iptables stop iptables: Setting chains to policy ACCEPT: mangle filter na[ OK ] iptables: Flushing firewall rules: [ OK ] iptables: Unloading modules: [ OK ] [root@kvm6-66 ~]#
Transcript of Please note that this applies only to CentOS 6.5 and not to 6 · PDF fileIn this tutorial I...

In this tutorial I will explain how to make Veritas Cluster Server believe that CentOS6.5 is RHEL 6.5.Please note that this applies only to CentOS 6.5 and not to 6.6
Veritas Cluster Server does not run on CentOS, and it is certified on RHEL. Unfortunately while CentOS is free, RHEL costs money. So, for our training purposes it makes sense to somehow use CentOS.
I am using a HP DL 580 G5 with 4 quad core cpu's and 128GB of RAM and 900GB SFF SAS drive. At the time of writing this it was available on Ebay for about $239, the drive cost an extra $174.
I installed CentOS 6.6 on this hardware and will now show you the post installation configuration, while installing CentOS 6.6 on the host, I chose, “software development workstation”:
NOTE: I will install virtualbox on this CentOS 6.6 BUT will install CentOS6.5 guests on virtualbox forour VCS training requirements.
First we have to edit /etc/selinux/config to look like this
[root@kvm6-66 ~]# cat /etc/selinux/config
# This file controls the state of SELinux on the system.# SELINUX= can take one of these three values:# enforcing - SELinux security policy is enforced.# permissive - SELinux prints warnings instead of enforcing.# disabled - No SELinux policy is loaded.SELINUX=disabled# SELINUXTYPE= can take one of these two values:# targeted - Targeted processes are protected,# mls - Multi Level Security protection.SELINUXTYPE=targeted
So, I have changed SELINUX, to disabled[root@kvm6-66 ~]# chkconfig iptables off[root@kvm6-66 ~]# service iptables stopiptables: Setting chains to policy ACCEPT: mangle filter na[ OK ]iptables: Flushing firewall rules: [ OK ]iptables: Unloading modules: [ OK ][root@kvm6-66 ~]#
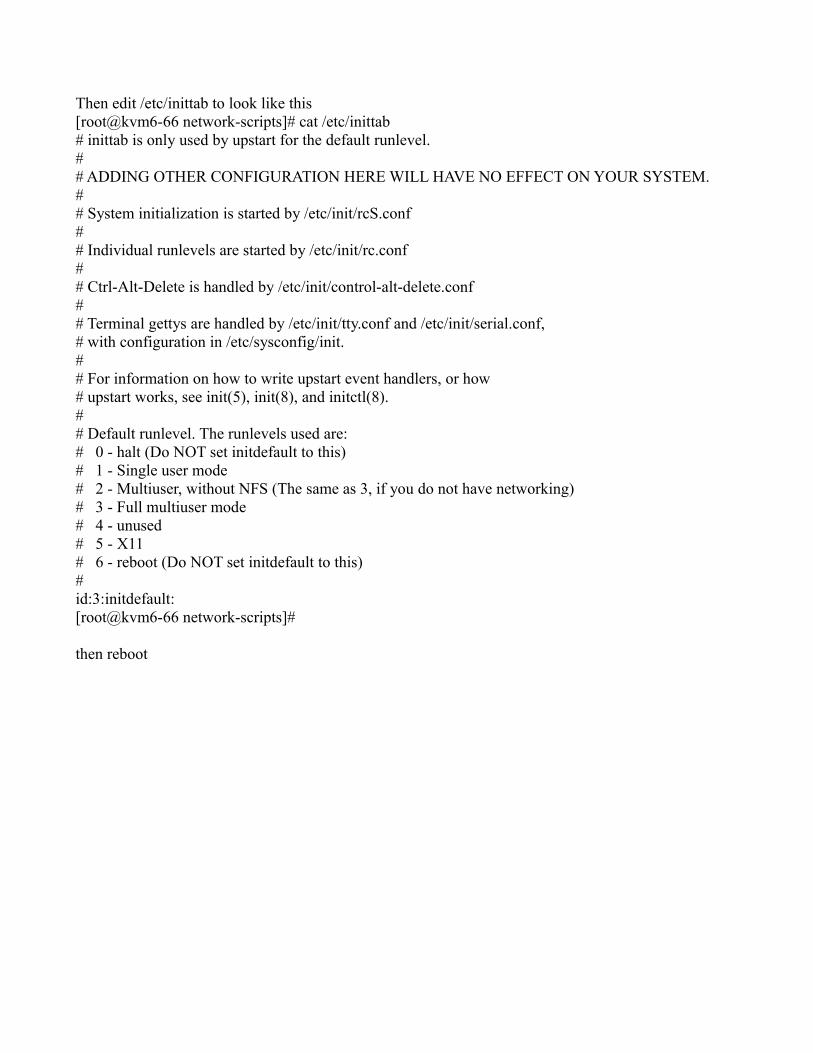
Then edit /etc/inittab to look like this[root@kvm6-66 network-scripts]# cat /etc/inittab# inittab is only used by upstart for the default runlevel.## ADDING OTHER CONFIGURATION HERE WILL HAVE NO EFFECT ON YOUR SYSTEM.## System initialization is started by /etc/init/rcS.conf## Individual runlevels are started by /etc/init/rc.conf## Ctrl-Alt-Delete is handled by /etc/init/control-alt-delete.conf## Terminal gettys are handled by /etc/init/tty.conf and /etc/init/serial.conf,# with configuration in /etc/sysconfig/init.## For information on how to write upstart event handlers, or how# upstart works, see init(5), init(8), and initctl(8).## Default runlevel. The runlevels used are:# 0 - halt (Do NOT set initdefault to this)# 1 - Single user mode# 2 - Multiuser, without NFS (The same as 3, if you do not have networking)# 3 - Full multiuser mode# 4 - unused# 5 - X11# 6 - reboot (Do NOT set initdefault to this)#id:3:initdefault:[root@kvm6-66 network-scripts]#
then reboot

We will first install VNC server on our basic system, this will allow us to configure virtualbox which uses a GUI environment.
[root@kvm6-66 ~]# yum install vnc-server -yLoaded plugins: fastestmirror, refresh-packagekit, securitySetting up Install ProcessLoading mirror speeds from cached hostfile * base: bay.uchicago.edu * extras: mirror.es.its.nyu.edu * updates: mirror.thelinuxfix.combase | 3.7 kB 00:00extras | 3.4 kB 00:00updates | 3.4 kB 00:00Resolving Dependencies--> Running transaction check---> Package tigervnc-server.x86_64 0:1.1.0-16.el6.centos will be installed--> Finished Dependency Resolution
Dependencies Resolved
=============================================================================================================================================================================================================== Package Arch Version Repository Size===============================================================================================================================================================================================================Installing: tigervnc-server x86_64 1.1.0-16.el6.centos updates 1.0 M
Transaction Summary===============================================================================================================================================================================================================Install 1 Package(s)
Total download size: 1.0 MInstalled size: 2.6 MDownloading Packages:tigervnc-server-1.1.0-16.el6.centos.x86_64.rpm | 1.0 MB 00:00Running rpm_check_debugRunning Transaction Test

Transaction Test SucceededRunning Transaction Installing : tigervnc-server-1.1.0-16.el6.centos.x86_64 1/1 Verifying : tigervnc-server-1.1.0-16.el6.centos.x86_64 1/1
Installed: tigervnc-server.x86_64 0:1.1.0-16.el6.centos
Complete![root@kvm6-66 ~]#
Now edit this file to look like this:[root@kvm6-66 ~]# cat /etc/sysconfig/vncservers# The VNCSERVERS variable is a list of display:user pairs.## Uncomment the lines below to start a VNC server on display :2# as my 'myusername' (adjust this to your own). You will also# need to set a VNC password; run 'man vncpasswd' to see how# to do that.## DO NOT RUN THIS SERVICE if your local area network is# untrusted! For a secure way of using VNC, see this URL:# https://access.redhat.com/knowledge/solutions/7027
# Use "-nolisten tcp" to prevent X connections to your VNC server via TCP.
# Use "-localhost" to prevent remote VNC clients connecting except when# doing so through a secure tunnel. See the "-via" option in the# `man vncviewer' manual page.
VNCSERVERS="0:root" VNCSERVERARGS[0]="-geometry 800x600 "
Please NOTE that the last two lines are uncommented. I have also removed “-nolisten tcp -localhost”.
[root@kvm6-66 ~]# vncpasswdPassword:Verify:[root@kvm6-66 ~]#
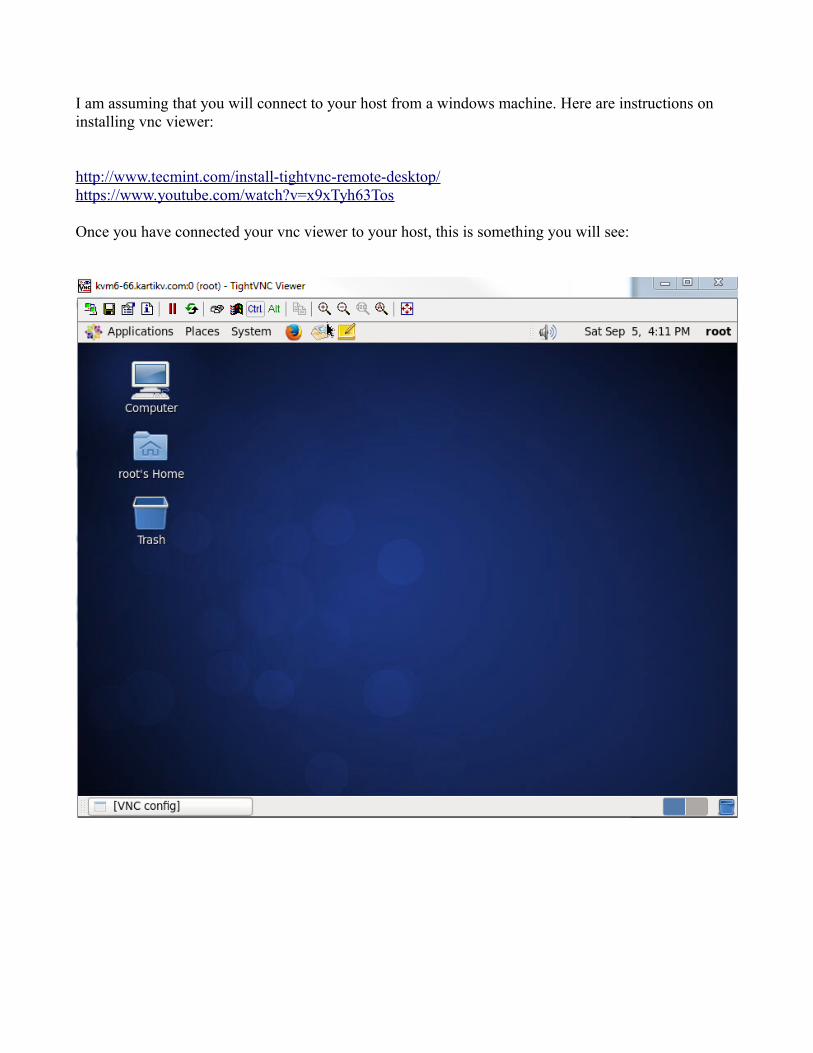
I am assuming that you will connect to your host from a windows machine. Here are instructions on installing vnc viewer:
http://www.tecmint.com/install-tightvnc-remote-desktop/https://www.youtube.com/watch?v=x9xTyh63Tos
Once you have connected your vnc viewer to your host, this is something you will see:

Now we will install virtualbox from our putty session:
For the sake of knowledge please browse to:http://dlc-cdn.sun.com/virtualbox/4.3.28/
This is from where we will get the rpm.
[root@kvm6-66 network-scripts]# rpm -ivh http://dlc-cdn.sun.com/virtualbox/4.3.28/VirtualBox-4.3-4.3.28_100309_el6-1.x86_64.rpmRetrieving http://dlc-cdn.sun.com/virtualbox/4.3.28/VirtualBox-4.3-4.3.28_100309_el6-1.x86_64.rpmwarning: /var/tmp/rpm-tmp.eVdlYH: Header V4 DSA/SHA1 Signature, key ID 98ab5139: NOKEYPreparing... ########################################### [100%] 1:VirtualBox-4.3 ########################################### [100%]
Creating group 'vboxusers'. VM users must be member of that group!
No precompiled module for this kernel found -- trying to build one. Messagesemitted during module compilation will be logged to /var/log/vbox-install.log.
Stopping VirtualBox kernel modules [ OK ]Recompiling VirtualBox kernel modules [ OK ]Starting VirtualBox kernel modules [ OK ][root@kvm6-66 network-scripts]#
We can see we now have virtualbox here:
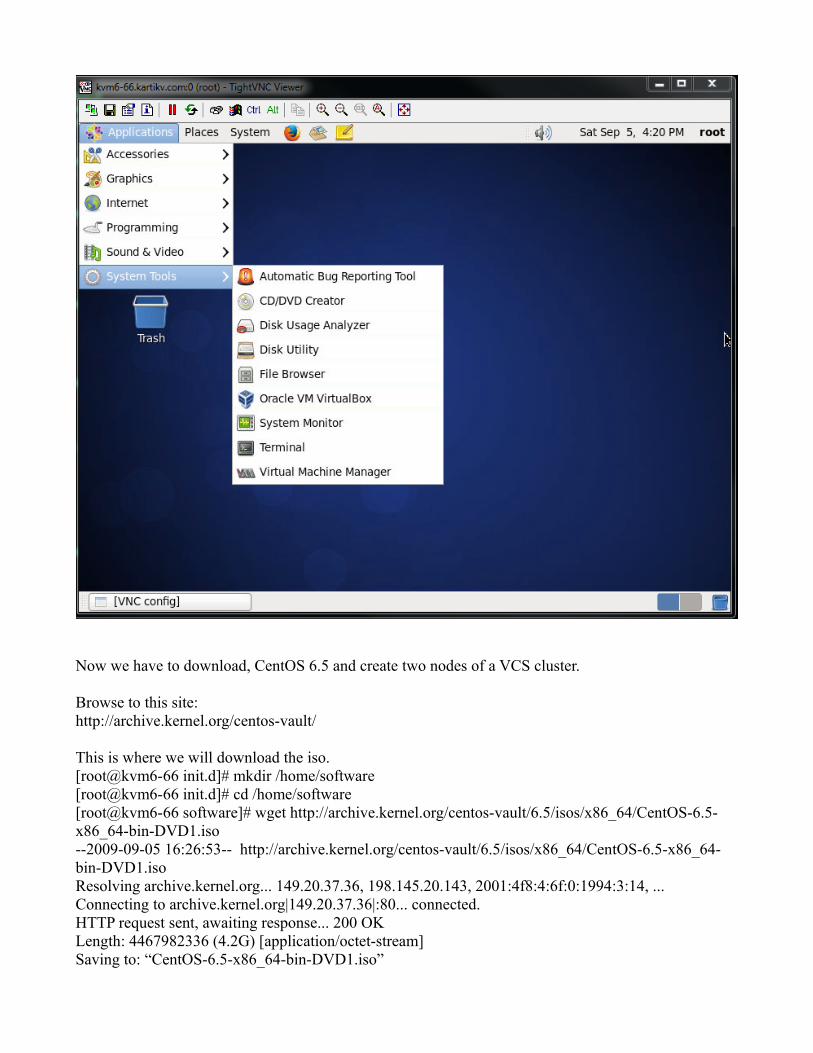
Now we have to download, CentOS 6.5 and create two nodes of a VCS cluster.
Browse to this site:http://archive.kernel.org/centos-vault/
This is where we will download the iso.[root@kvm6-66 init.d]# mkdir /home/software[root@kvm6-66 init.d]# cd /home/software[root@kvm6-66 software]# wget http://archive.kernel.org/centos-vault/6.5/isos/x86_64/CentOS-6.5-x86_64-bin-DVD1.iso--2009-09-05 16:26:53-- http://archive.kernel.org/centos-vault/6.5/isos/x86_64/CentOS-6.5-x86_64-bin-DVD1.isoResolving archive.kernel.org... 149.20.37.36, 198.145.20.143, 2001:4f8:4:6f:0:1994:3:14, ...Connecting to archive.kernel.org|149.20.37.36|:80... connected.HTTP request sent, awaiting response... 200 OKLength: 4467982336 (4.2G) [application/octet-stream]Saving to: “CentOS-6.5-x86_64-bin-DVD1.iso”

0% [ ] 2,558,598 1.03M/s
This may take a little bit of time.....
Finally:
Saving to: “CentOS-6.5-x86_64-bin-DVD1.iso”
100%[===================================================================================================================================================================>] 4,467,982,336 2.00M/s in 37m 23s
2009-09-05 17:04:16 (1.90 MB/s) - “CentOS-6.5-x86_64-bin-DVD1.iso” saved [4467982336/4467982336]
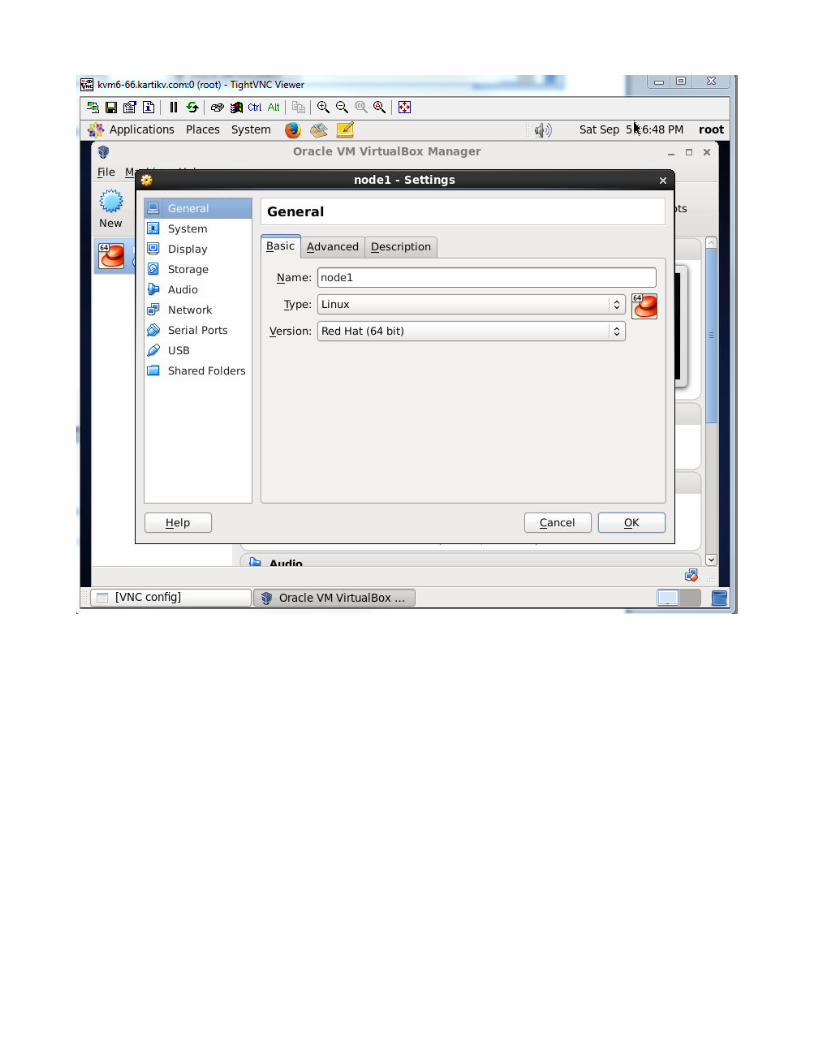
Now we are ready to create or CentOS 6.5 VM. We will name it “node1”.
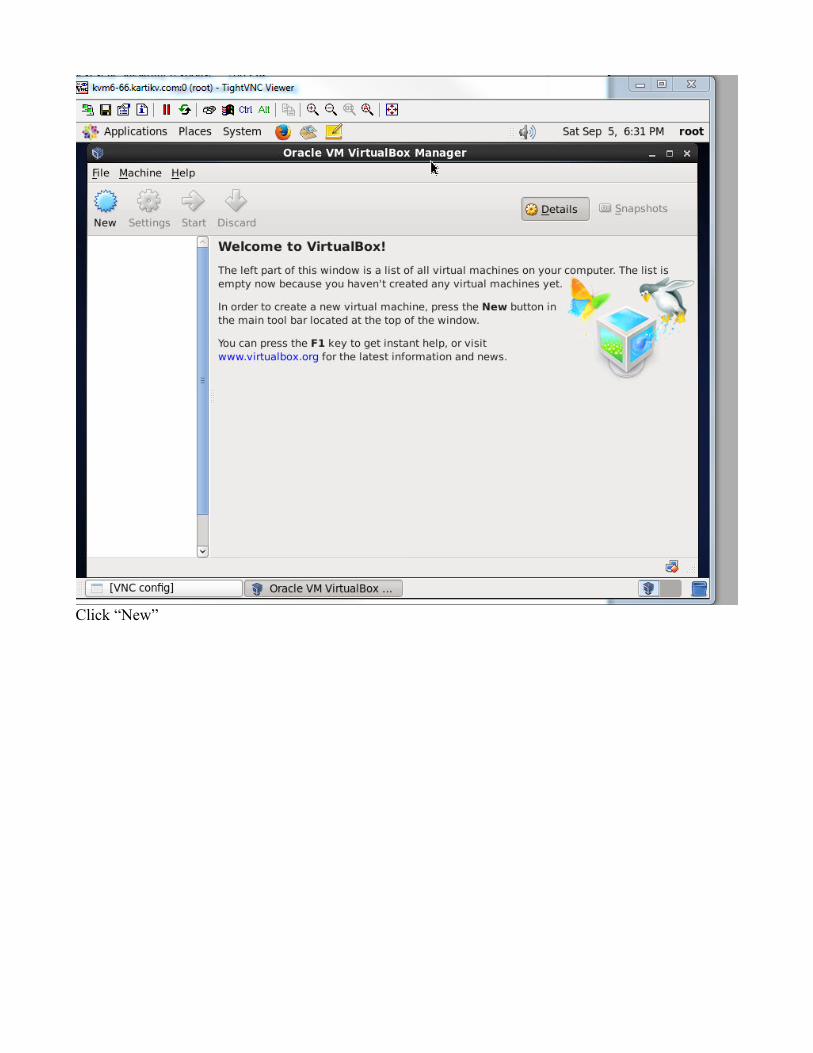
Click “New”
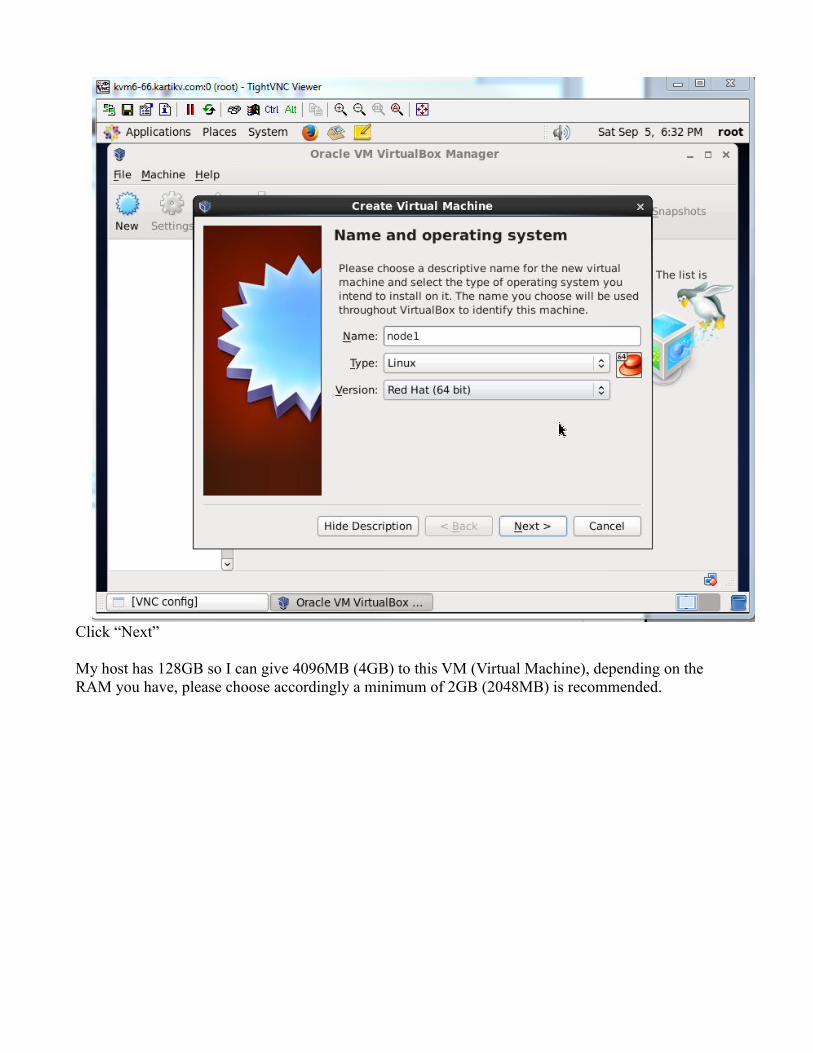
Click “Next”
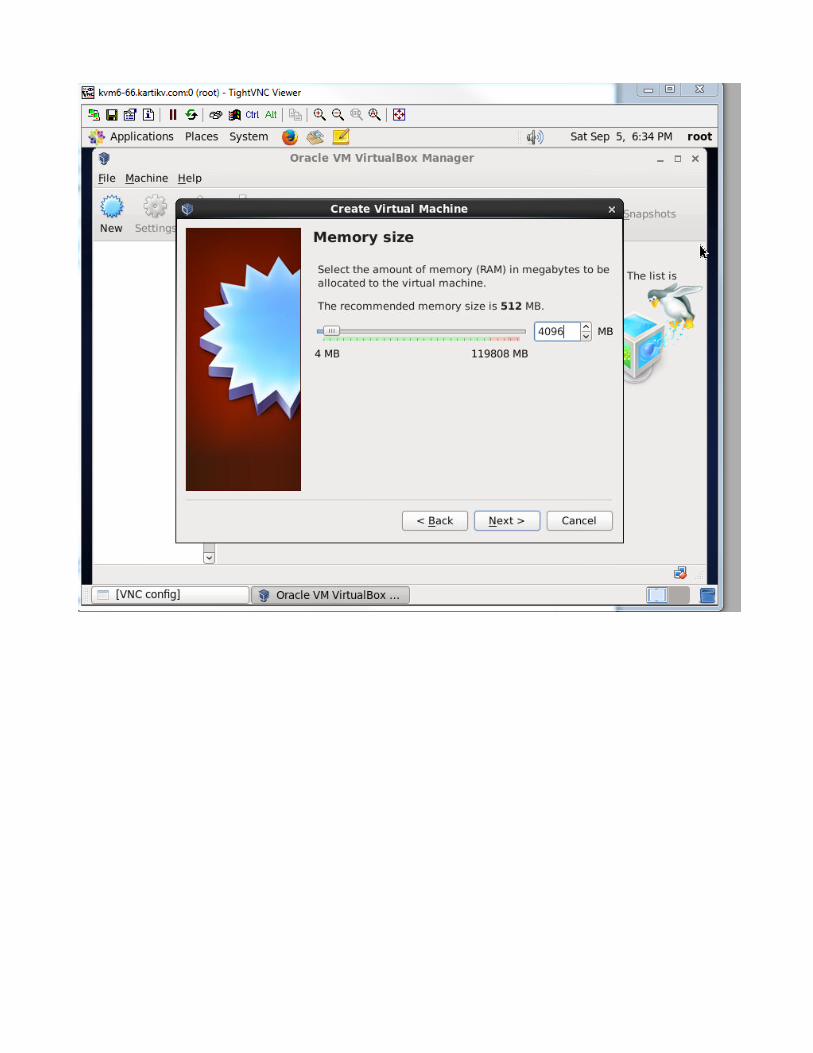
My host has 128GB so I can give 4096MB (4GB) to this VM (Virtual Machine), depending on the RAM you have, please choose accordingly a minimum of 2GB (2048MB) is recommended.

Click “Create”
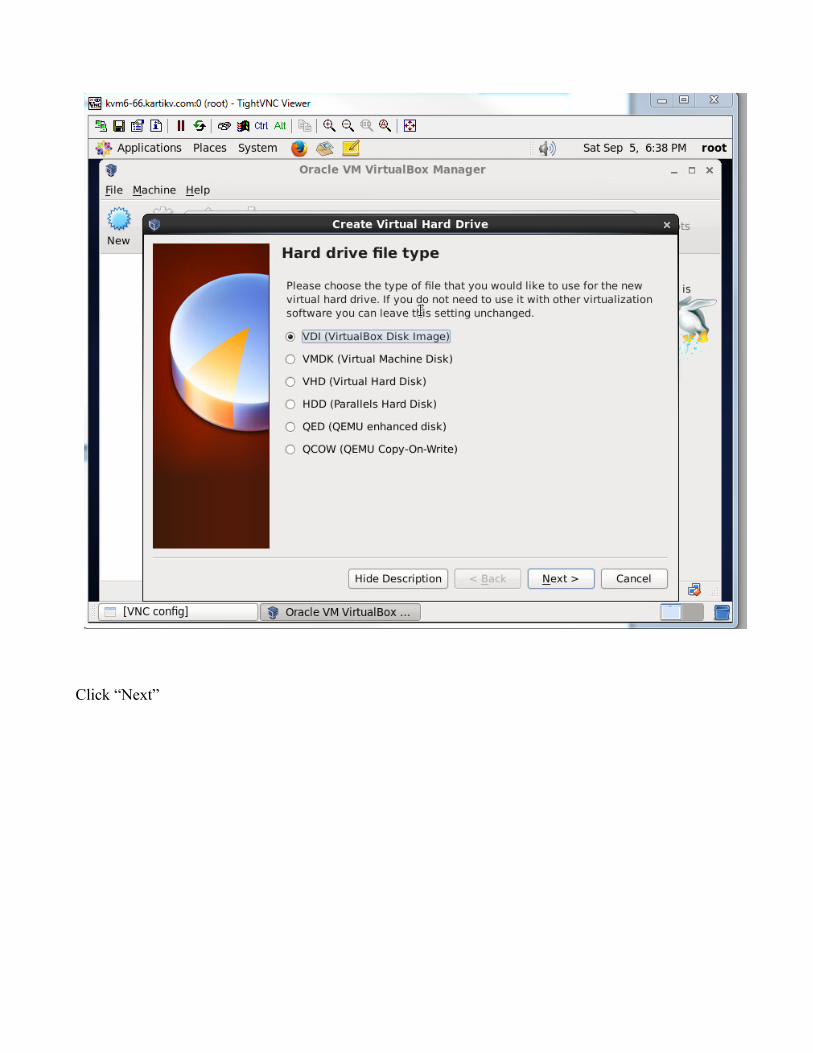
Click “Next”


Click “Next”

NOTE: I chose 32GB as the size of the virtual hard drive.
Please click “Create”
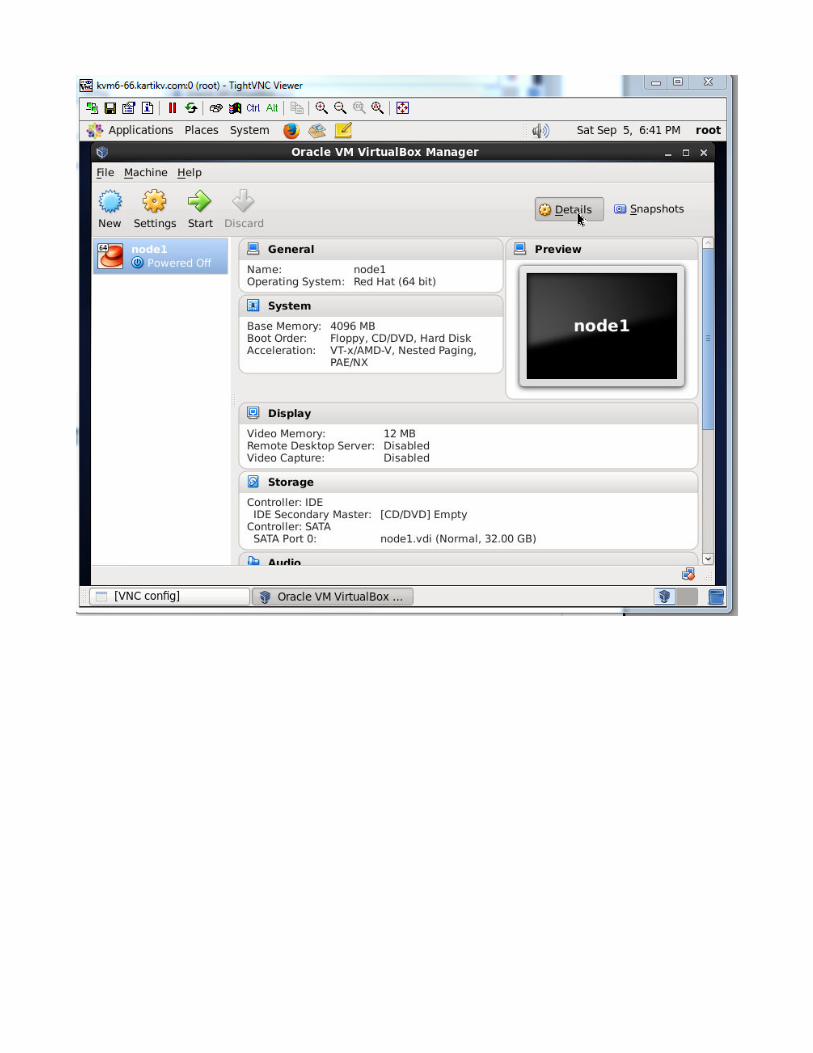

Next step is to set networking to be in bridged mode and to add two more network interfaces for the private interconnect.
Click Settings


Click “Network”
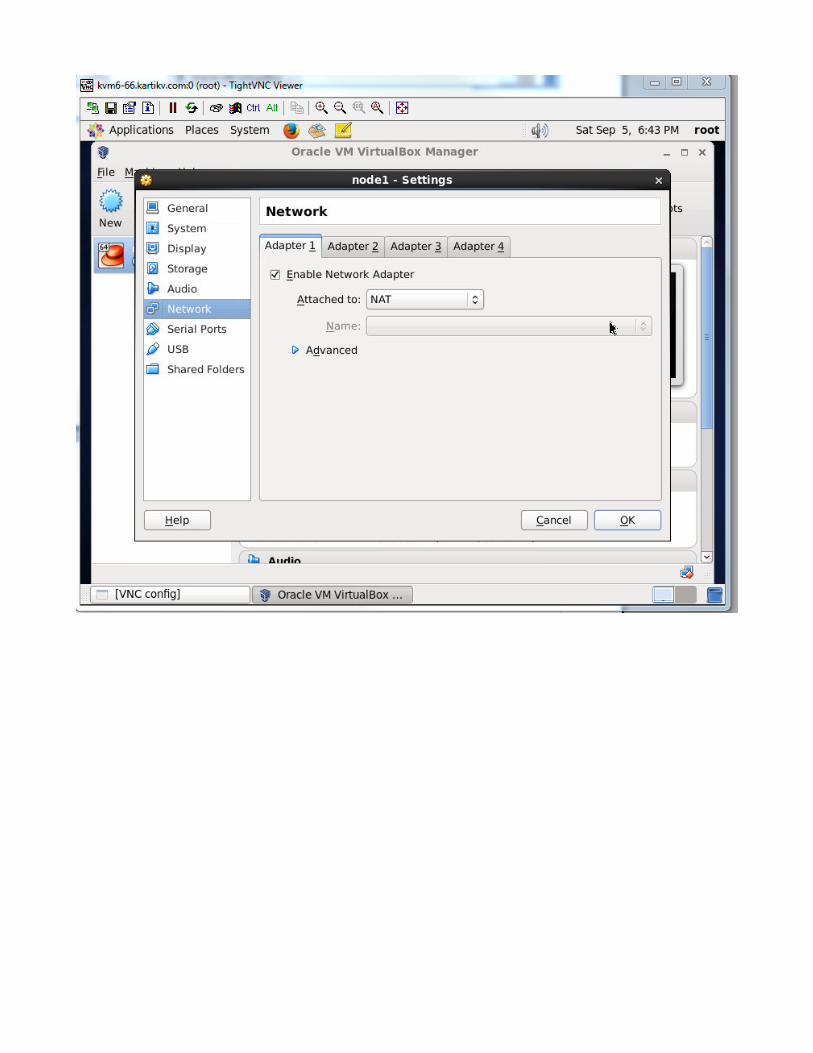

Change “NAT” to “Bridged Adapter”


Similarly click on Adapter 2


Enable Adapter 2 and make it “Bridged Adapter”


Similarly for adapter 3:


Click “OK”
Oops we forgot to attach a CD drive (our CentOS 6.5 iso file) for the VM to boot from....
Please go back to settings:

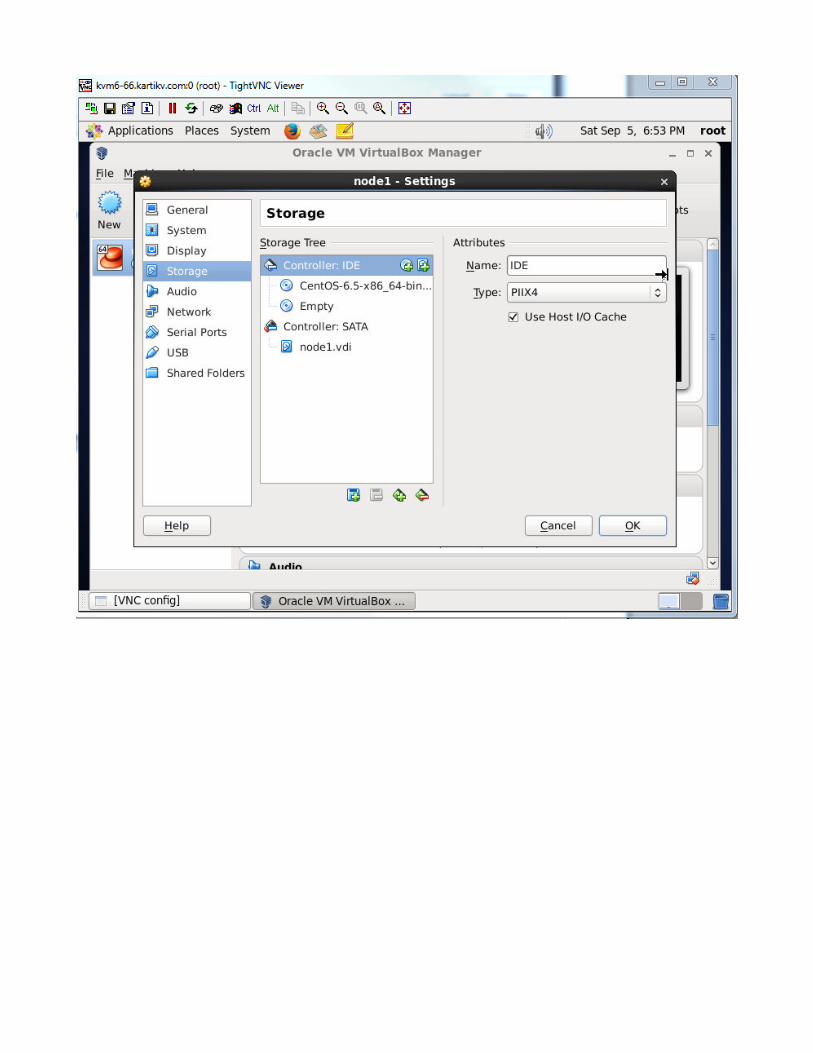
Now select Storage
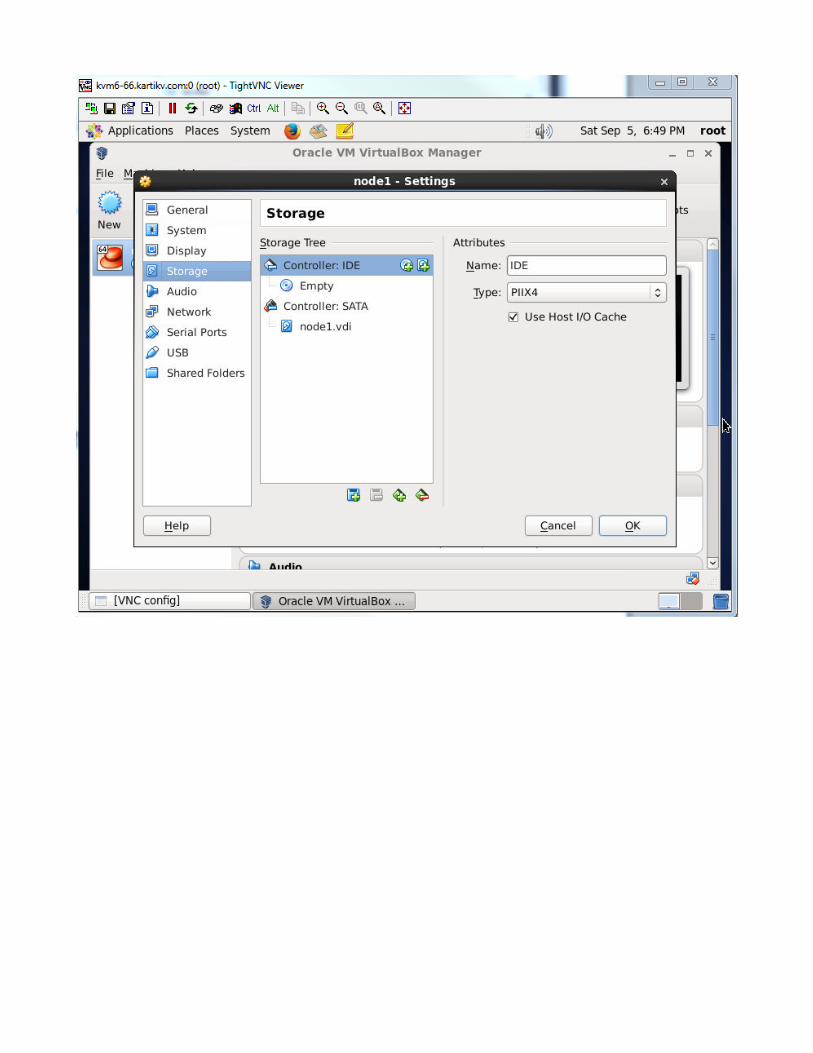

NOTE: Click on the circular CD symbol


select “Choose Disk”
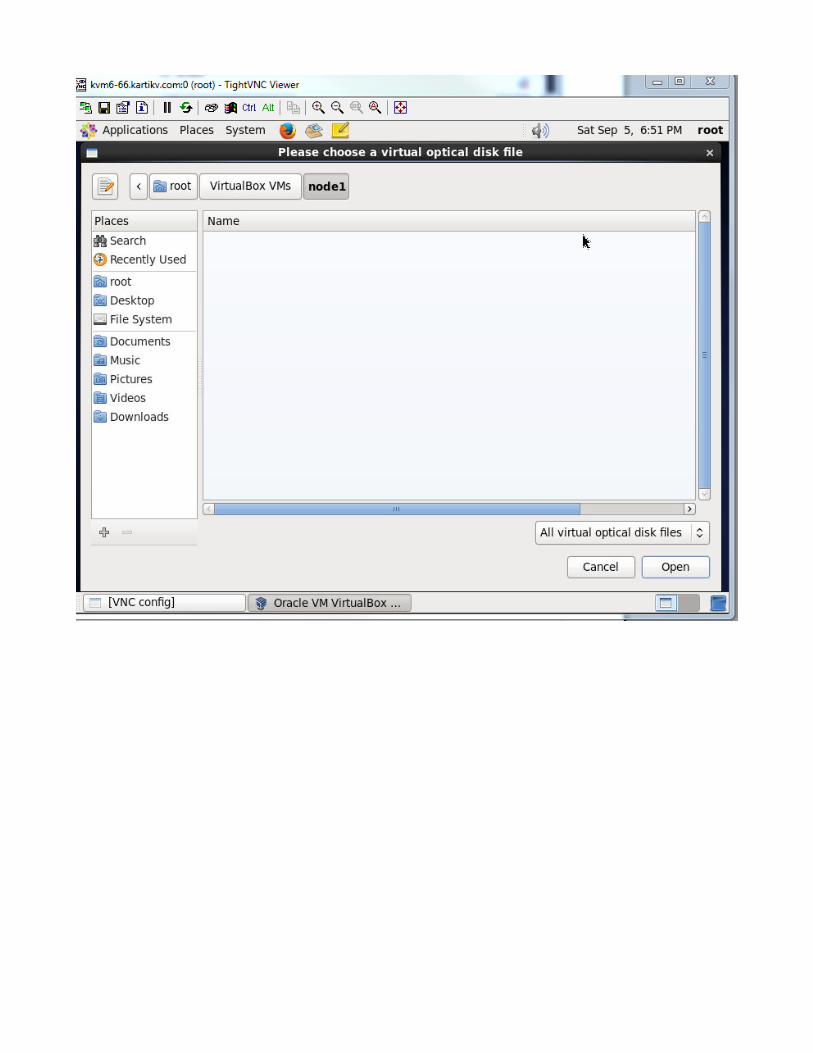

Please recall your CD iso image is in /home/software
Select “Filesystem” and navigate to that location
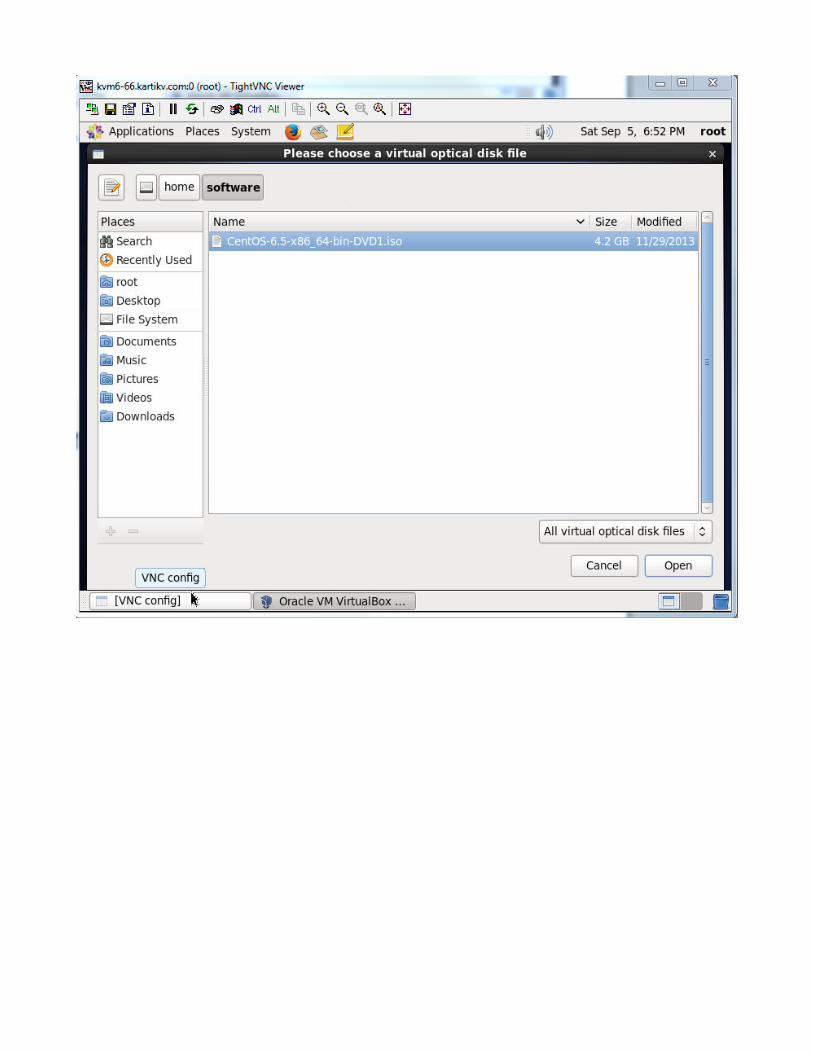

Click “Open”

Click “OK”
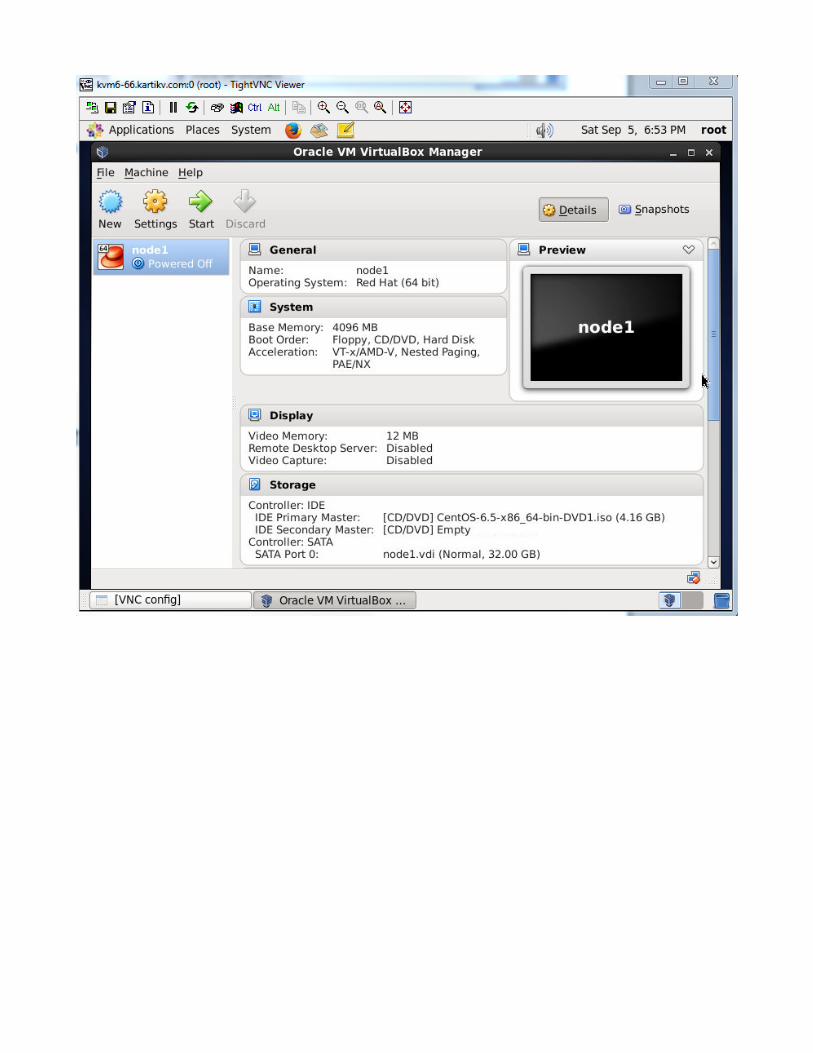

Click “Start”
Install CentOS. For packages installation please choose “software development workstation”
Similarly please start installation of node 2.
We will now convert our CentOS6.5 systems to RHEL 6.5
This is what it currently is:
[root@node1 ~]# cat /etc/redhat-releaseCentOS release 6.5 (Final)[root@node1 ~]#
We edit /etc/redhat-release, and it should look like this:
[root@node1 ~]# cat /etc/redhat-releaseRed Hat Enterprise Linux Server release 6.5 (Santiago)[root@node1 ~]#
Please do this on node 2 as well.
Also do the following on both nodes:[root@node1 ~]# service iptables stopiptables: Setting chains to policy ACCEPT: nat mangle filte[ OK ]iptables: Flushing firewall rules: [ OK ]

iptables: Unloading modules: [ OK ][root@node1 ~]# chkconfig iptables off
Modify /etc/selinux/config to become like this:
[root@node1 ~]# cat /etc/selinux/config
# This file controls the state of SELinux on the system.# SELINUX= can take one of these three values:# enforcing - SELinux security policy is enforced.# permissive - SELinux prints warnings instead of enforcing.# disabled - No SELinux policy is loaded.SELINUX=disabled# SELINUXTYPE= can take one of these two values:# targeted - Targeted processes are protected,# mls - Multi Level Security protection.SELINUXTYPE=targeted
disabled instead of enforcing
Also we have to give private LAN IP's to the interfaces eth1 and the2 on node 1 and node 2 both.
For example on node 1:
[root@node1 ~]# cat /etc/sysconfig/network-scripts/ifcfg-eth1DEVICE=eth1HWADDR=08:00:27:A0:D2:EDTYPE=EthernetUUID=bb2e8cca-7f05-416c-b54b-18c480cc7199ONBOOT=yesNM_CONTROLLED=yesBOOTPROTO=staticIPADDR=10.10.10.10[root@node1 ~]# cat /etc/sysconfig/network-scripts/ifcfg-eth2DEVICE=eth2HWADDR=08:00:27:85:F3:7ATYPE=EthernetUUID=acc45af6-d808-4318-9f35-8febf2698cddONBOOT=yesNM_CONTROLLED=yesBOOTPROTO=staticIPADDR=10.10.10.11
[root@node1 ~]#
Similarly on node 2:
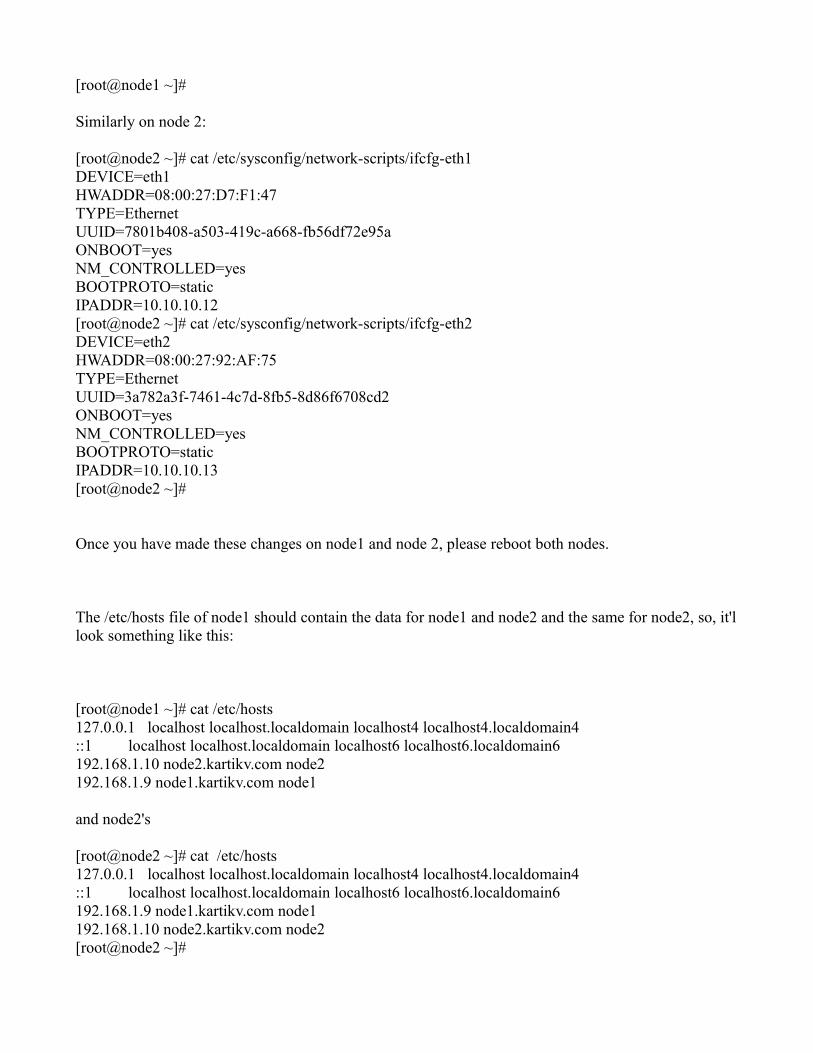
[root@node2 ~]# cat /etc/sysconfig/network-scripts/ifcfg-eth1DEVICE=eth1HWADDR=08:00:27:D7:F1:47TYPE=EthernetUUID=7801b408-a503-419c-a668-fb56df72e95aONBOOT=yesNM_CONTROLLED=yesBOOTPROTO=staticIPADDR=10.10.10.12[root@node2 ~]# cat /etc/sysconfig/network-scripts/ifcfg-eth2DEVICE=eth2HWADDR=08:00:27:92:AF:75TYPE=EthernetUUID=3a782a3f-7461-4c7d-8fb5-8d86f6708cd2ONBOOT=yesNM_CONTROLLED=yesBOOTPROTO=staticIPADDR=10.10.10.13[root@node2 ~]#
Once you have made these changes on node1 and node 2, please reboot both nodes.
The /etc/hosts file of node1 should contain the data for node1 and node2 and the same for node2, so, it'llook something like this:
[root@node1 ~]# cat /etc/hosts127.0.0.1 localhost localhost.localdomain localhost4 localhost4.localdomain4::1 localhost localhost.localdomain localhost6 localhost6.localdomain6192.168.1.10 node2.kartikv.com node2192.168.1.9 node1.kartikv.com node1
and node2's
[root@node2 ~]# cat /etc/hosts127.0.0.1 localhost localhost.localdomain localhost4 localhost4.localdomain4::1 localhost localhost.localdomain localhost6 localhost6.localdomain6192.168.1.9 node1.kartikv.com node1192.168.1.10 node2.kartikv.com node2[root@node2 ~]#

Now we are ready to install VCS software on these two nodes. Please be advised that you will need to follow my other training material at:http://www.kartik.com/vcs_and_oracle_ha.pdfhttp://www.kartik.com/vcs_and_oracle_ha.doc
that training material assumes you have access to RHEL 6.5. This document assumes you do not. The steps for adding a filesystem to your cluster, installing Oracle etc are documentaed in those two documents.
We download trial edition of Veritas Cluster Server Software from Symantec/Veritas web site.
https://www4.symantec.com/Vrt/offer?a_id=24928
I am going to be working with an earlier edition of the VCS trialware software, but you may feel free todownload the latest on the above website. The reason I am working with an earlier edition is because I would like to show you and advanced topic: “Show to upgrade Veritas Cluster Server” after finishing this particular training.
We will first make sure that the time on both nodes is the same. To this end we will install ntp.
On BOTH nodes, please do this:[root@node1 tmp]# yum install ntp ntpdate -y[root@node1 tmp]# chkconfig ntpd on[root@node1 tmp]# ntpdate pool.ntp.org 7 Jun 10:31:20 ntpdate[8429]: step time server 50.116.38.157 offset 181428407.243821 sec[root@node1 tmp]# dateSun Jun 7 10:31:29 EDT 2015[root@node1 tmp]#
And also on node 2:
[root@node2 ~]# yum install ntp ntpdate -y[root@node2 ~]# chkconfig ntpd on[root@node2 ~]# ntpdate pool.ntp.org 7 Jun 10:33:59 ntpdate[8476]: step time server 67.18.187.111 offset 181428397.006743 sec[root@node2 ~]# dateSun Jun 7 10:34:03 EDT 2015[root@node2 ~]#
Now our nodes are on the same time and same time zones. This is very important.

[root@node1 mnt]# cd /var/tmp[root@node1 tmp]# ls -altotal 949008drwxrwxrwt. 2 root root 4096 Sep 6 13:35 .drwxr-xr-x. 22 root root 4096 Sep 5 20:19 ..-rwxr--r-- 1 root root 971769103 Sep 6 13:36 VRTS_SF_HA_Solutions_6.0_RHEL.tar.gz[root@node1 tmp]# gzip -d VRTS_SF_HA_Solutions_6.0_RHEL.tar.gz [root@node1 tmp]#tar xvf VRTS_SF_HA_Solutions_6.0_RHEL.tar
[root@node1 tmp]# ls -altotal 1174944drwxrwxrwt. 3 root root 4096 Jun 7 10:36 .drwxr-xr-x. 22 root root 4096 Sep 5 2009 ..drwxr-xr-x 4 root root 4096 Nov 29 2011 dvd1-redhatlinux-rwxr--r-- 1 root root 1203126272 Jun 7 10:36 VRTS_SF_HA_Solutions_6.0_RHEL.tar[root@node1 tmp]#
[root@node1 tmp]# cd dvd1-redhatlinux/[root@node1 dvd1-redhatlinux]# ls -altotal 16drwxr-xr-x 4 root root 4096 Nov 29 2011 .drwxrwxrwt. 3 root root 4096 Jun 7 10:36 ..drwxrwxr-x 16 root root 4096 Nov 29 2011 rhel5_x86_64drwxrwxr-x 17 root root 4096 Nov 29 2011 rhel6_x86_64[root@node1 dvd1-redhatlinux]# cd rhel6_x86_64/[root@node1 rhel6_x86_64]# ls -altotal 1176drwxrwxr-x 17 root root 4096 Nov 29 2011 .drwxr-xr-x 4 root root 4096 Nov 29 2011 ..-rwxr-xr-x 1 root root 657308 Nov 29 2011 3rdpartyattributions.pdfdrwxrwxr-x 4 root root 4096 Nov 29 2011 cluster_server-rw-r--r-- 1 root root 860 Nov 29 2011 copyrightdrwxrwxr-x 4 root root 4096 Nov 29 2011 dynamic_multipathingdrwxrwxr-x 3 root root 4096 Nov 29 2011 file_system-rwxr-xr-x 1 root root 415782 Nov 29 2011 getting_started.pdf-rwxr-xr-x 1 root root 5292 Nov 29 2011 installerdrwxrwxr-x 4 root root 4096 Jun 6 2011 perl
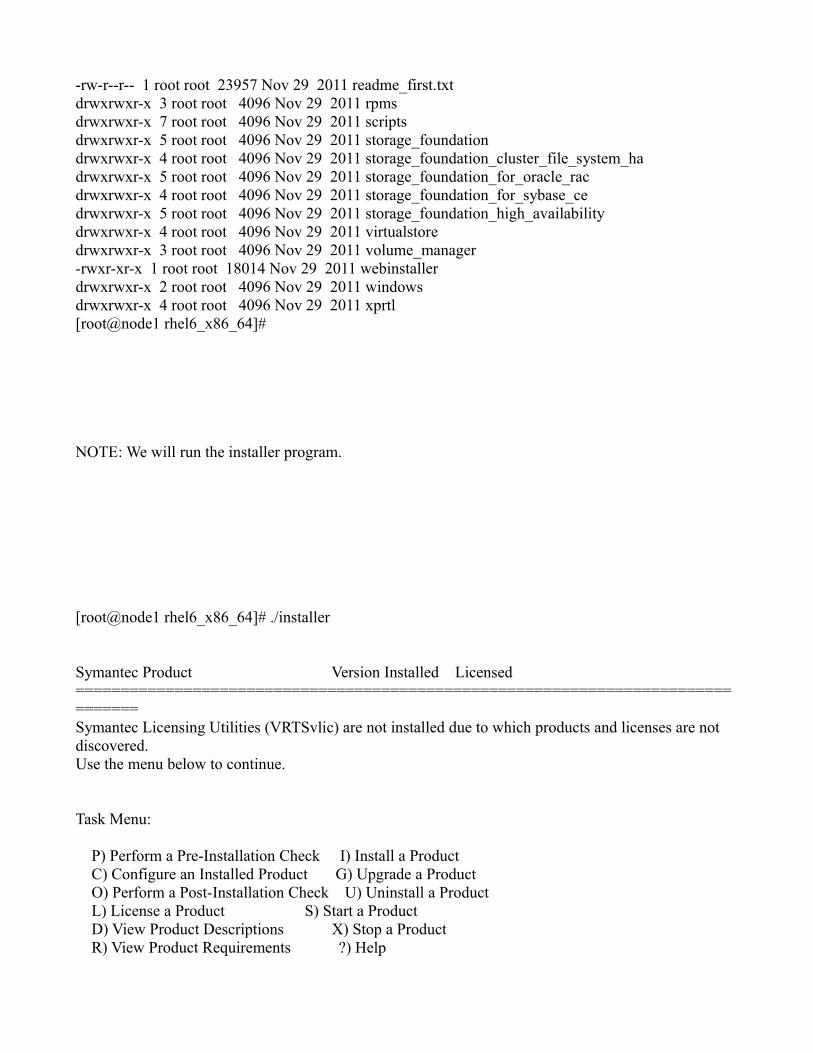
-rw-r--r-- 1 root root 23957 Nov 29 2011 readme_first.txtdrwxrwxr-x 3 root root 4096 Nov 29 2011 rpmsdrwxrwxr-x 7 root root 4096 Nov 29 2011 scriptsdrwxrwxr-x 5 root root 4096 Nov 29 2011 storage_foundationdrwxrwxr-x 4 root root 4096 Nov 29 2011 storage_foundation_cluster_file_system_hadrwxrwxr-x 5 root root 4096 Nov 29 2011 storage_foundation_for_oracle_racdrwxrwxr-x 4 root root 4096 Nov 29 2011 storage_foundation_for_sybase_cedrwxrwxr-x 5 root root 4096 Nov 29 2011 storage_foundation_high_availabilitydrwxrwxr-x 4 root root 4096 Nov 29 2011 virtualstoredrwxrwxr-x 3 root root 4096 Nov 29 2011 volume_manager-rwxr-xr-x 1 root root 18014 Nov 29 2011 webinstallerdrwxrwxr-x 2 root root 4096 Nov 29 2011 windowsdrwxrwxr-x 4 root root 4096 Nov 29 2011 xprtl[root@node1 rhel6_x86_64]#
NOTE: We will run the installer program.
[root@node1 rhel6_x86_64]# ./installer
Symantec Product Version Installed Licensed================================================================================Symantec Licensing Utilities (VRTSvlic) are not installed due to which products and licenses are not discovered.Use the menu below to continue.
Task Menu:
P) Perform a Pre-Installation Check I) Install a Product C) Configure an Installed Product G) Upgrade a Product O) Perform a Post-Installation Check U) Uninstall a Product L) License a Product S) Start a Product D) View Product Descriptions X) Stop a Product R) View Product Requirements ?) Help

Enter a Task: [P,I,C,G,O,U,L,S,D,X,R,?]
We choose “I”
1) Veritas Dynamic Multi-Pathing (DMP) 2) Veritas Cluster Server (VCS) 3) Veritas Storage Foundation (SF) 4) Veritas Storage Foundation and High Availability (SFHA) 5) Veritas Storage Foundation Cluster File System HA (SFCFSHA) 6) Symantec VirtualStore (SVS) 7) Veritas Storage Foundation for Sybase ASE CE (SFSYBASECE) 8) Veritas Storage Foundation for Oracle RAC (SF Oracle RAC) b) Back to previous menu
Select a product to install: [1-8,b,q]
We choose “4”
Do you agree with the terms of the End User License Agreement as specified in the storage_foundation_high_availability/EULA/en/EULA_SFHA_Ux_6.0.pdf file present on media? [y,n,q,?]
We choose “y”
1) Install minimal required rpms - 424 MB required 2) Install recommended rpms - 719 MB required 3) Install all rpms - 740 MB required 4) Display rpms to be installed for each option
Select the rpms to be installed on all systems? [1-4,q,?] (2)
NOTE: We choose “3”
Enter the 64 bit RHEL6 system names separated by spaces: [q,?]
NOTE: We enter the names of our RHEL systems, which is, node1 and node2
Enter the 64 bit RHEL6 system names separated by spaces: [q,?] node1 node2
Logs are being written to /var/tmp/installer-201506071038Ugk while installer is in progress
Verifying systems: 0% ___________________________________________________________________________________

____________________________________________________________________________________________
Estimated time remaining: (mm:ss) 0 of 8
Checking system communication \
Logs are being written to /var/tmp/installer-201506071038Ugk while installer is in progress
Verifying systems: 25% ____________________________________________________________________________________________________________________________________
Estimated time remaining: (mm:ss) 4:50 2 of 8
Checking system communication .................................................................................................................................................................... Done Checking release compatibility ................................................................................................................................................................... Done
Either ssh or rsh needs to be set up between the local system and node2 for communication
Would you like the installer to setup ssh or rsh communication automatically between the systems?Superuser passwords for the systems will be asked. [y,n,q] (y)

NOTE: We select “y”
Superuser passwords for the systems will be asked. [y,n,q] (y) y
Enter the superuser password for system node2:
1) Setup ssh between the systems 2) Setup rsh between the systems b) Back to previous menu
Select the communication method [1-2,b,q,?] (1)Setting up communication between systems. Please wait.
Logs are being written to /var/tmp/installer-201506071038Ugk while installer is in progress
Verifying systems: 100%
Estimated time remaining: (mm:ss) 0:00 8 of 8
Checking system communication .................................................................................................................................................................... Done Checking release compatibility ................................................................................................................................................................... Done Checking installed product ....................................................................................................................................................................... Done Checking prerequisite patches and rpms ......................................................................................................................................................... Failed Checking platform

version ........................................................................................................................................................................ Done Checking file system free space .................................................................................................................................................................. Done Checking product licensing ....................................................................................................................................................................... Done Performing product prechecks ..................................................................................................................................................................... Done
System verification checks completed
The following errors were discovered on the systems:
CPI ERROR V-9-30-2015 The following required OS rpms were not found on node1: nss-softokn-freebl-3.12.9-3.el6.i686 glibc-2.12-1.25.el6.i686 pam-1.1.1-8.el6.i686 libgcc-4.4.5-6.el6.i686 libstdc++-4.4.5-6.el6.i686 ksh-20100621-6.el6.x86_64 mksh-39-5.el6.x86_64
CPI ERROR V-9-30-2015 The following required OS rpms were not found on node2: nss-softokn-freebl-3.12.9-3.el6.i686 glibc-2.12-1.25.el6.i686 pam-1.1.1-8.el6.i686 libgcc-4.4.5-6.el6.i686 libstdc++-4.4.5-6.el6.i686 ksh-20100621-6.el6.x86_64 mksh-39-5.el6.x86_64
installer log files and summary file are saved at:
/opt/VRTS/install/logs/installer-201506071038Ugk
Would you like to view the summary file? [y,n,q] (n)NOTE: We need to install these missing rpm's on both nodes.
NOTE: we say “n” to viewing the summary file and start finding the rpm's and installing them.
NOTE: Google for these rpm's and download them, THIS IS THE WAY TO INSTALL THEM:
[root@node1 tmp]# rpm -ivh glibc-2.12-1.132.el6.i686.rpm --force --nodepsPreparing... ########################################### [100%] 1:glibc ########################################### [100%][root@node1 tmp]# rpm -ivh glibc-common-2.12-1.166.el6.i686.rpmerror: Failed dependencies: glibc = 2.12-1.166.el6 is needed by glibc-common-2.12-1.166.el6.i686 libcap.so.2 is needed by glibc-common-2.12-1.166.el6.i686[root@node1 tmp]# rpm -ivh glibc-common-2.12-1.166.el6.i686.rpm --force --nodepsPreparing... ########################################### [100%] 1:glibc-common ########################################### [100%][root@node1 tmp]# rpm -ivh ksh-20120801-10.el6.x86_64.rpm --force --nodepswarning: ksh-20120801-10.el6.x86_64.rpm: Header V4 DSA/SHA1 Signature, key ID 192a7d7d: NOKEYPreparing... ########################################### [100%]

1:ksh ########################################### [100%][root@node1 tmp]# rpm -ivh libgcc-4.4.7-4.el6.i686.rpm --force --nodepswarning: libgcc-4.4.7-4.el6.i686.rpm: Header V4 DSA/SHA1 Signature, key ID 192a7d7d: NOKEYPreparing... ########################################### [100%] 1:libgcc ########################################### [100%][root@node1 tmp]# rpm -ivh libstdc++-4.4.7-16.el6.i686.rpm --force --nodepsPreparing... ########################################### [100%] 1:libstdc++ ########################################### [100%][root@node1 tmp]# rpm -ivh libudev-147-2.51.el6.i686.rpm --nodeps --forcewarning: libudev-147-2.51.el6.i686.rpm: Header V4 DSA/SHA1 Signature, key ID 192a7d7d: NOKEYPreparing... ########################################### [100%] 1:libudev ########################################### [100%][root@node1 tmp]# rpm -ivh nss-softokn-freebl-3.14.3-9.el6.i686.rpm --nodeps --forcewarning: nss-softokn-freebl-3.14.3-9.el6.i686.rpm: Header V4 DSA/SHA1 Signature, key ID 192a7d7d: NOKEYPreparing... ########################################### [100%] 1:nss-softokn-freebl ########################################### [100%][root@node1 tmp]# rpm -ivh pam-1.1.1-17.el6.i686.rpm --force --nodepswarning: pam-1.1.1-17.el6.i686.rpm: Header V4 DSA/SHA1 Signature, key ID 192a7d7d: NOKEYPreparing... ########################################### [100%] 1:pam ########################################### [100%]
NOTE: You have to install on node2 as well.
Once done, let us try our VCS installation program again:
./installer
and pretty soon we get this most welcome output:
The following Veritas Storage Foundation and High Availability rpms will be installed on all systems:
Rpm Rpm Description
VRTSvlic Veritas LicensingVRTSperl Veritas Perl 5.12.2 RedistributionVRTSsfcpi60 Veritas Storage Foundation InstallerVRTSspt Veritas Software Support Tools by SymantecVRTSvxvm Veritas Volume Manager BinariesVRTSaslapm Veritas Volume Manager - ASL/APMVRTSob Veritas Enterprise Administrator Service by SymantecVRTSlvmconv Veritas Linux LVM to VxVM Converter
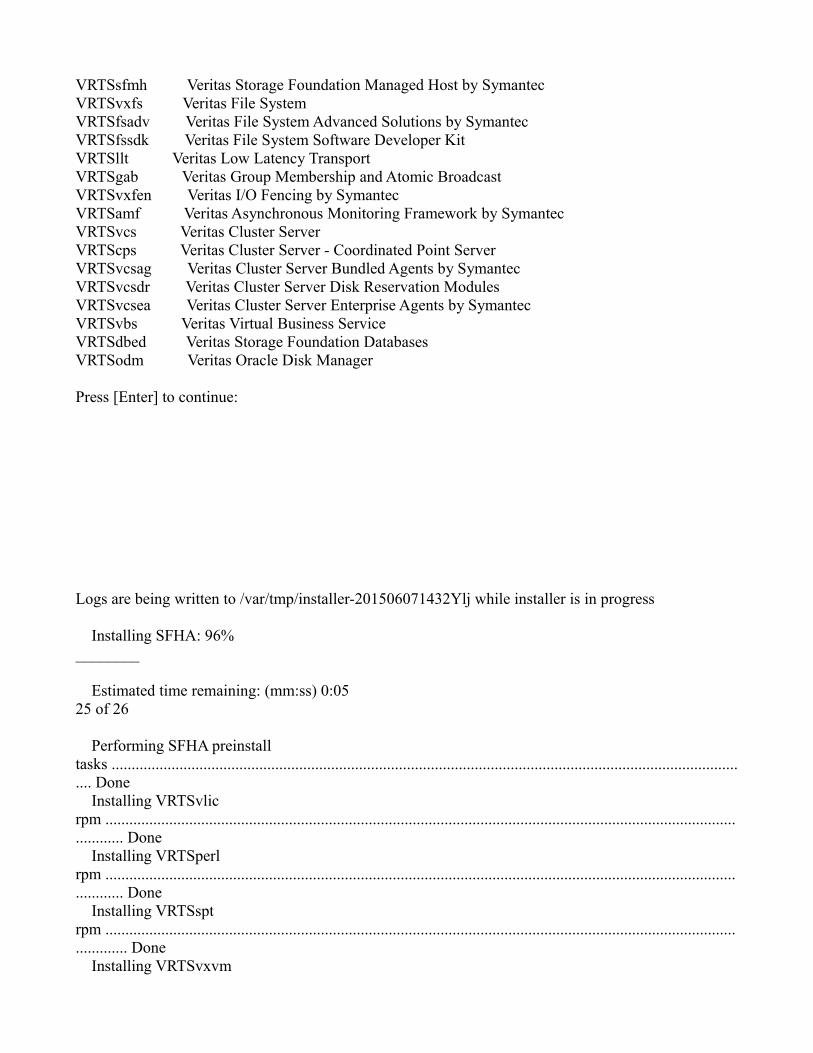
VRTSsfmh Veritas Storage Foundation Managed Host by SymantecVRTSvxfs Veritas File SystemVRTSfsadv Veritas File System Advanced Solutions by SymantecVRTSfssdk Veritas File System Software Developer KitVRTSllt Veritas Low Latency TransportVRTSgab Veritas Group Membership and Atomic BroadcastVRTSvxfen Veritas I/O Fencing by SymantecVRTSamf Veritas Asynchronous Monitoring Framework by SymantecVRTSvcs Veritas Cluster ServerVRTScps Veritas Cluster Server - Coordinated Point ServerVRTSvcsag Veritas Cluster Server Bundled Agents by SymantecVRTSvcsdr Veritas Cluster Server Disk Reservation ModulesVRTSvcsea Veritas Cluster Server Enterprise Agents by SymantecVRTSvbs Veritas Virtual Business ServiceVRTSdbed Veritas Storage Foundation DatabasesVRTSodm Veritas Oracle Disk Manager
Press [Enter] to continue:
Logs are being written to /var/tmp/installer-201506071432Ylj while installer is in progress
Installing SFHA: 96% ________
Estimated time remaining: (mm:ss) 0:05 25 of 26
Performing SFHA preinstall tasks ................................................................................................................................................................. Done Installing VRTSvlic rpm .......................................................................................................................................................................... Done Installing VRTSperl rpm .......................................................................................................................................................................... Done Installing VRTSspt rpm ........................................................................................................................................................................... Done Installing VRTSvxvm
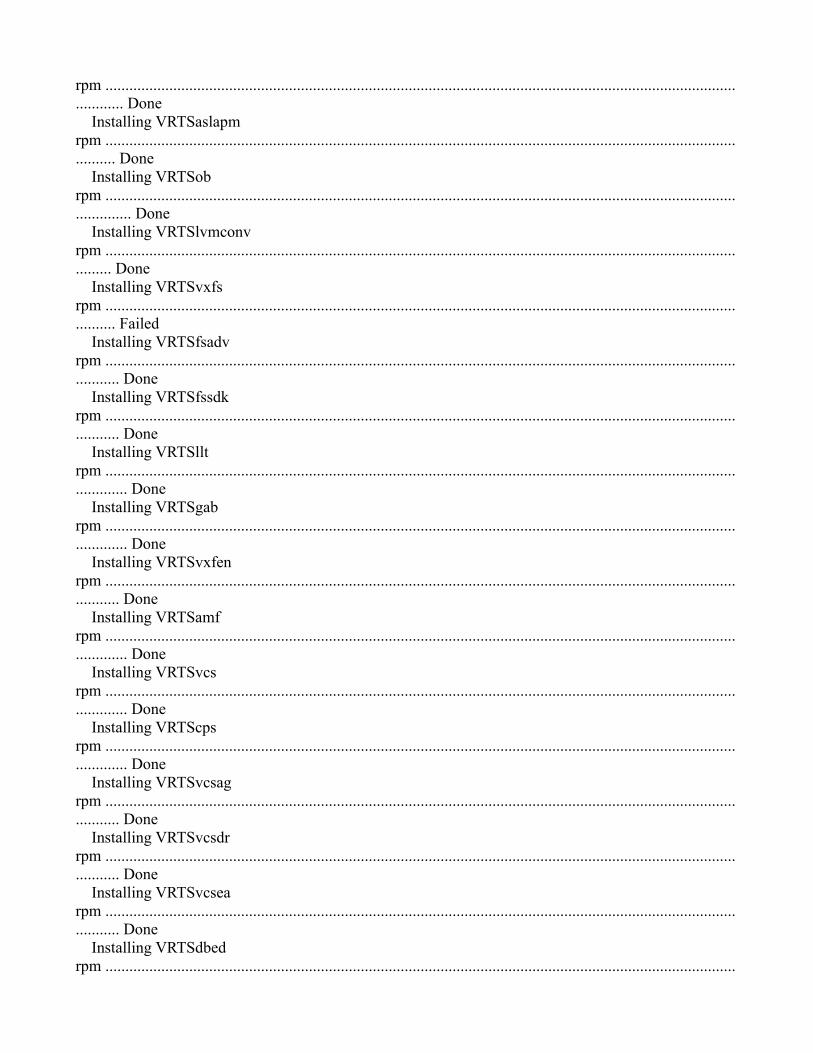
rpm .......................................................................................................................................................................... Done Installing VRTSaslapm rpm ........................................................................................................................................................................ Done Installing VRTSob rpm ............................................................................................................................................................................ Done Installing VRTSlvmconv rpm ....................................................................................................................................................................... Done Installing VRTSvxfs rpm ........................................................................................................................................................................ Failed Installing VRTSfsadv rpm ......................................................................................................................................................................... Done Installing VRTSfssdk rpm ......................................................................................................................................................................... Done Installing VRTSllt rpm ........................................................................................................................................................................... Done Installing VRTSgab rpm ........................................................................................................................................................................... Done Installing VRTSvxfen rpm ......................................................................................................................................................................... Done Installing VRTSamf rpm ........................................................................................................................................................................... Done Installing VRTSvcs rpm ........................................................................................................................................................................... Done Installing VRTScps rpm ........................................................................................................................................................................... Done Installing VRTSvcsag rpm ......................................................................................................................................................................... Done Installing VRTSvcsdr rpm ......................................................................................................................................................................... Done Installing VRTSvcsea rpm ......................................................................................................................................................................... Done Installing VRTSdbed rpm ..............................................................................................................................................................
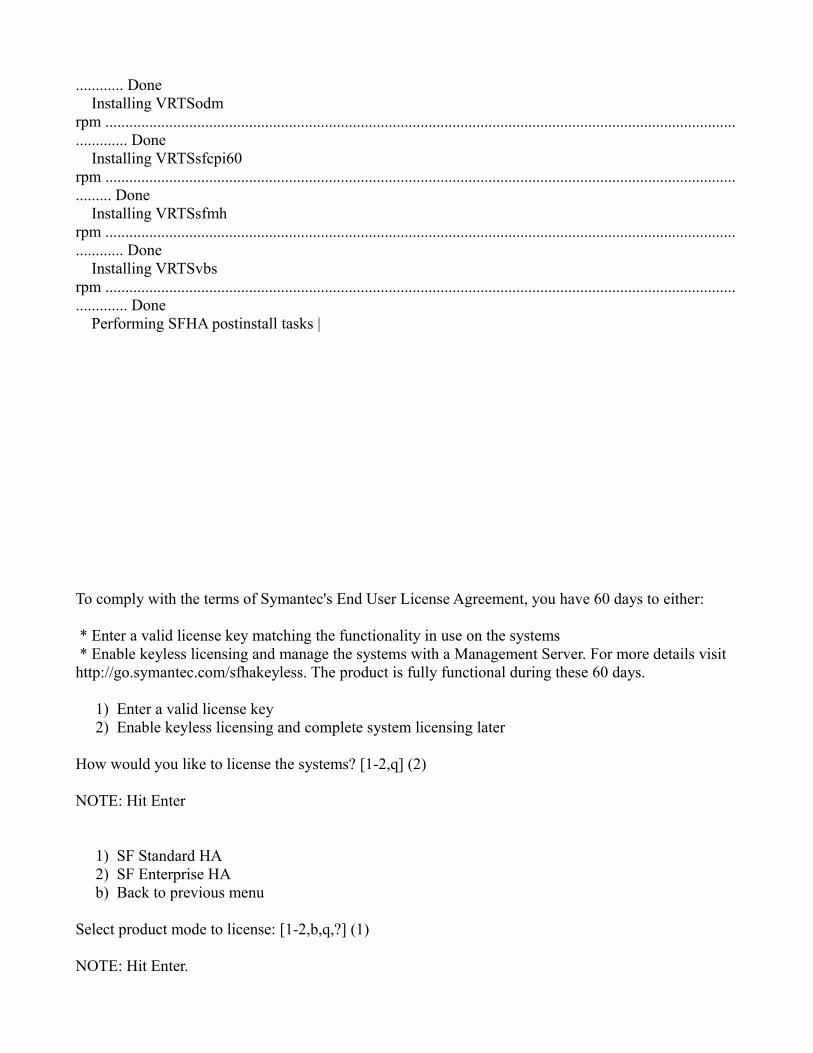
............ Done Installing VRTSodm rpm ........................................................................................................................................................................... Done Installing VRTSsfcpi60 rpm ....................................................................................................................................................................... Done Installing VRTSsfmh rpm .......................................................................................................................................................................... Done Installing VRTSvbs rpm ........................................................................................................................................................................... Done Performing SFHA postinstall tasks |
To comply with the terms of Symantec's End User License Agreement, you have 60 days to either:
* Enter a valid license key matching the functionality in use on the systems * Enable keyless licensing and manage the systems with a Management Server. For more details visit http://go.symantec.com/sfhakeyless. The product is fully functional during these 60 days.
1) Enter a valid license key 2) Enable keyless licensing and complete system licensing later
How would you like to license the systems? [1-2,q] (2)
NOTE: Hit Enter
1) SF Standard HA 2) SF Enterprise HA b) Back to previous menu
Select product mode to license: [1-2,b,q,?] (1)
NOTE: Hit Enter.
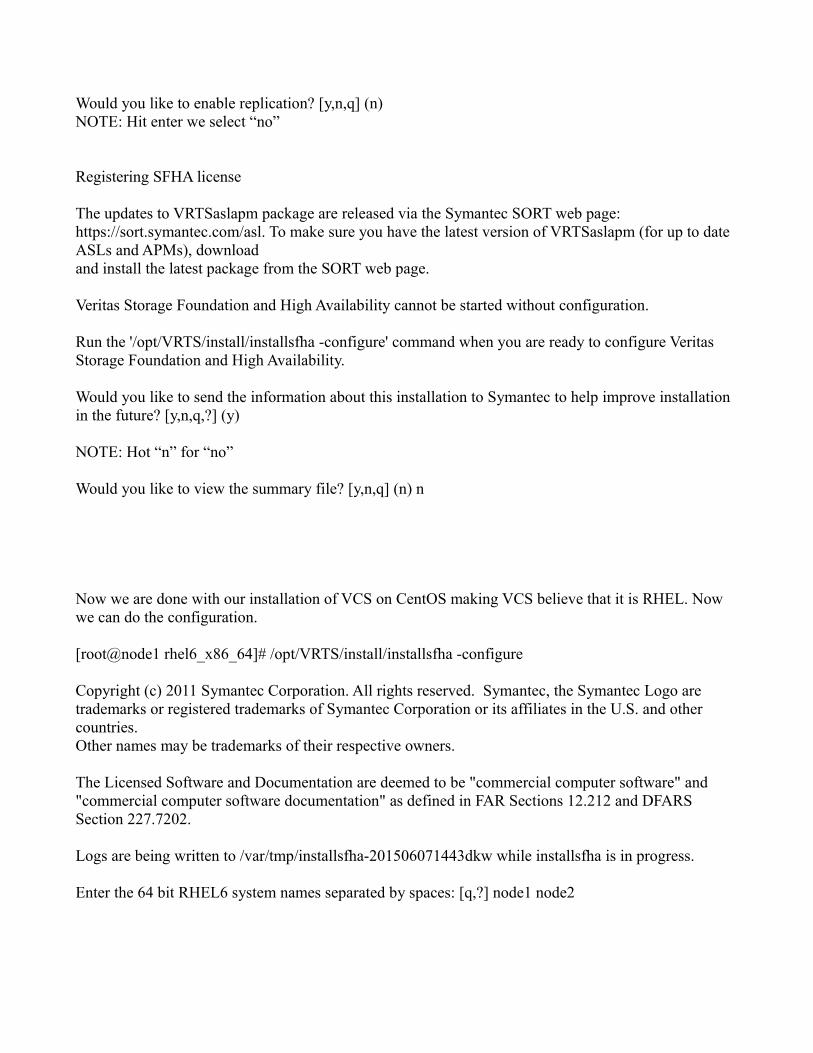
Would you like to enable replication? [y,n,q] (n)NOTE: Hit enter we select “no”
Registering SFHA license
The updates to VRTSaslapm package are released via the Symantec SORT web page: https://sort.symantec.com/asl. To make sure you have the latest version of VRTSaslapm (for up to date ASLs and APMs), downloadand install the latest package from the SORT web page.
Veritas Storage Foundation and High Availability cannot be started without configuration.
Run the '/opt/VRTS/install/installsfha -configure' command when you are ready to configure Veritas Storage Foundation and High Availability.
Would you like to send the information about this installation to Symantec to help improve installation in the future? [y,n,q,?] (y)
NOTE: Hot “n” for “no”
Would you like to view the summary file? [y,n,q] (n) n
Now we are done with our installation of VCS on CentOS making VCS believe that it is RHEL. Now we can do the configuration.
[root@node1 rhel6_x86_64]# /opt/VRTS/install/installsfha -configure
Copyright (c) 2011 Symantec Corporation. All rights reserved. Symantec, the Symantec Logo are trademarks or registered trademarks of Symantec Corporation or its affiliates in the U.S. and other countries.Other names may be trademarks of their respective owners.
The Licensed Software and Documentation are deemed to be "commercial computer software" and "commercial computer software documentation" as defined in FAR Sections 12.212 and DFARS Section 227.7202.
Logs are being written to /var/tmp/installsfha-201506071443dkw while installsfha is in progress.
Enter the 64 bit RHEL6 system names separated by spaces: [q,?] node1 node2

Logs are being written to /var/tmp/installsfha-201506071443dkw while installsfha is in progress
Verifying systems: 100%
Estimated time remaining: (mm:ss) 0:00 5 of 5
Checking system communication .................................................................................................................................................................... Done Checking release compatibility ................................................................................................................................................................... Done Checking installed product ....................................................................................................................................................................... Done Checking platform version ........................................................................................................................................................................ Done Performing product prechecks .....................................................................................................................................................
................ Done
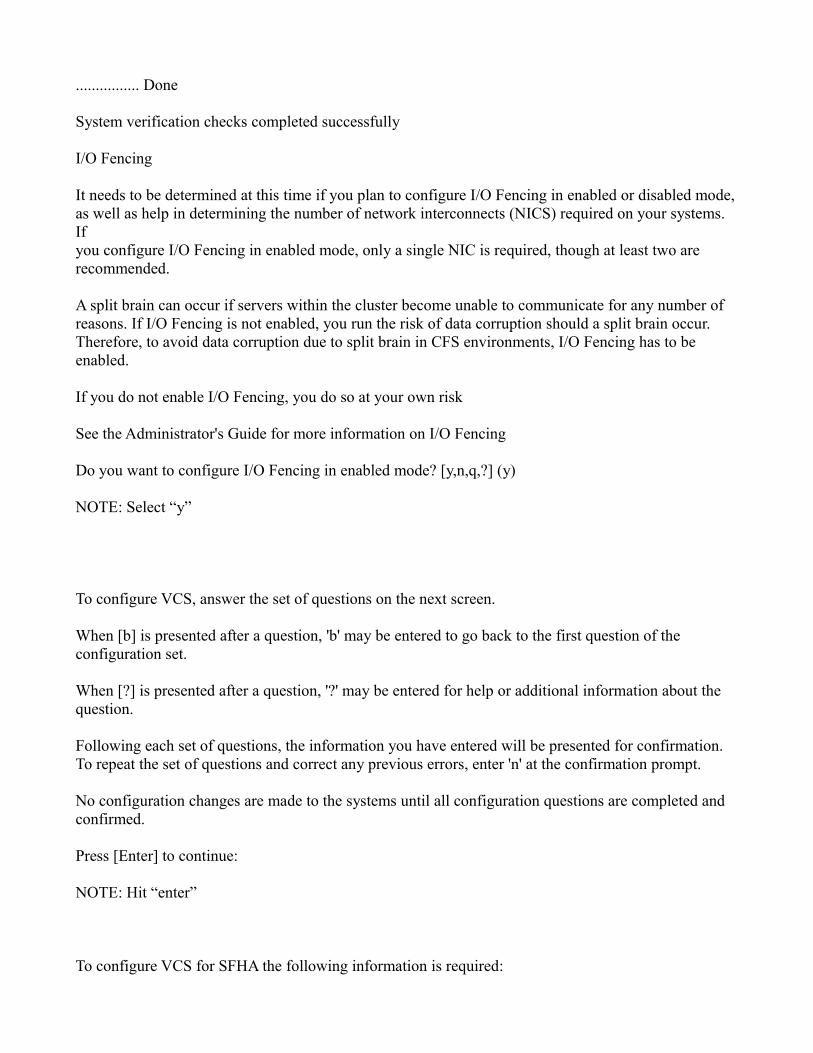
System verification checks completed successfully
I/O Fencing
It needs to be determined at this time if you plan to configure I/O Fencing in enabled or disabled mode,as well as help in determining the number of network interconnects (NICS) required on your systems. Ifyou configure I/O Fencing in enabled mode, only a single NIC is required, though at least two are recommended.
A split brain can occur if servers within the cluster become unable to communicate for any number of reasons. If I/O Fencing is not enabled, you run the risk of data corruption should a split brain occur.Therefore, to avoid data corruption due to split brain in CFS environments, I/O Fencing has to be enabled.
If you do not enable I/O Fencing, you do so at your own risk
See the Administrator's Guide for more information on I/O Fencing
Do you want to configure I/O Fencing in enabled mode? [y,n,q,?] (y)
NOTE: Select “y”
To configure VCS, answer the set of questions on the next screen.
When [b] is presented after a question, 'b' may be entered to go back to the first question of the configuration set.
When [?] is presented after a question, '?' may be entered for help or additional information about the question.
Following each set of questions, the information you have entered will be presented for confirmation. To repeat the set of questions and correct any previous errors, enter 'n' at the confirmation prompt.
No configuration changes are made to the systems until all configuration questions are completed and confirmed.
Press [Enter] to continue:
NOTE: Hit “enter”
To configure VCS for SFHA the following information is required:

A unique cluster name A unique cluster ID number between 0-65535 One or more NICs per system used for heartbeat links
One or more heartbeat links are configured as private links You can configure one heartbeat link as a low-priority link
All systems are being configured to create one cluster.
Enter the unique cluster name: [q,?] mycluster
1) Configure heartbeat links using LLT over Ethernet 2) Configure heartbeat links using LLT over UDP 3) Automatically detect configuration for LLT over Ethernet b) Back to previous menu
How would you like to configure heartbeat links? [1-3,b,q,?] (1)
NOTE: Hit “Enter”
1) Configure heartbeat links using LLT over Ethernet 2) Configure heartbeat links using LLT over UDP 3) Automatically detect configuration for LLT over Ethernet b) Back to previous menu
How would you like to configure heartbeat links? [1-3,b,q,?] (1)
Discovering NICs on

node1 ................................................................................................................................. Discovered eth0 eth1 eth2 virbr0-nic virbr0
Enter the NIC for the first private heartbeat link on node1: [b,q,?] (eth1)Would you like to configure a second private heartbeat link? [y,n,q,b,?] (n) yEnter the NIC for the second private heartbeat link on node1: [b,q,?] (eth2)Would you like to configure a third private heartbeat link? [y,n,q,b,?] (n)Do you want to configure an additional low-priority heartbeat link? [y,n,q,b,?] (n)Are you using the same NICs for private heartbeat links on all systems? [y,n,q,b,?] (y) Checking media speed for eth1 on node1 ....................................................................................................................................................... 1000Mb/s Checking media speed for eth2 on node1 ....................................................................................................................................................... 1000Mb/s Checking media speed for eth1 on node2 ....................................................................................................................................................... 1000Mb/s Checking media speed for eth2 on node2 ....................................................................................................................................................... 1000Mb/sEnter a unique cluster ID number between 0-65535: [b,q,?] (19464) 77
The cluster cannot be configured if the cluster ID 77 is in use by another cluster. Installer can perform acheck to determine if the cluster ID is duplicate. The check will take less than a minute tocomplete.Would you like to check if the cluster ID is in use by another cluster? [y,n,q] (y) n
Cluster information verification:
Cluster Name: mycluster Cluster ID Number: 77 Private Heartbeat NICs for node1: link1=eth1 link2=eth2 Private Heartbeat NICs for node2: link1=eth1 link2=eth2
Is this information correct? [y,n,q,?] (y)
NOTE: Hot “Enter”.

The following data is required to configure the Virtual IP of the Cluster:
A public NIC used by each system in the cluster A Virtual IP address and netmask
Do you want to configure the Virtual IP? [y,n,q,?] (n)NOTE: Select “y”
Do you want to configure the Virtual IP? [y,n,q,?] (n) yActive NIC devices discovered on node1: eth0 eth1 eth2 virbr0Enter the NIC for Virtual IP of the Cluster to use on node1: [b,q,?] (eth0)Is eth0 to be the public NIC used by all systems? [y,n,q,b,?] (y)Enter the Virtual IP address for the Cluster: [b,q,?] 192.168.1.99Enter the NetMask for IP 192.168.1.99: [b,q,?] (255.255.255.0)
NOTE: Hit “Enter”
Cluster Virtual IP verification:
NIC: eth0 IP: 192.168.1.99 NetMask: 255.255.255.0
Is this information correct? [y,n,q] (y)
NOTE: Hot “Enter”.
Veritas Cluster Server can be configured in secure mode
Running VCS in Secure Mode guarantees that all inter-system communication is encrypted, and users are verified with security credentials.
When running VCS in Secure Mode, NIS and system usernames and passwords are used to verify identity. VCS usernames and passwords are no longer utilized when a cluster is running in Secure Mode.
Would you like to configure the VCS cluster in secure mode? [y,n,q,?] (n)
NOTE: Hit “Enter”
The following information is required to add VCS users:
A user name A password for the user User privileges (Administrator, Operator, or Guest)

Do you wish to accept the default cluster credentials of 'admin/password'? [y,n,q] (y)
NOTE: Hot “enter”
Do you want to add another user to the cluster? [y,n,q] (n)
NOTE: Hot “Enter”
VCS User verification:
User: admin Privilege: Administrators
Passwords are not displayed
Is this information correct? [y,n,q] (y)
NOTE: Hot “Enter”
The following information is required to configure SMTP notification:
The domain-based hostname of the SMTP server The email address of each SMTP recipient A minimum severity level of messages to send to each recipient
Do you want to configure SMTP notification? [y,n,q,?] (n)
NOTE: Hot “Enter”
The following information is required to configure SNMP notification:
System names of SNMP consoles to receive VCS trap messages SNMP trap daemon port numbers for each console A minimum severity level of messages to send to each console
Do you want to configure SNMP notification? [y,n,q,?] (n)
NOTE: Hot “Enter”
All SFHA processes that are currently running must be stopped
Do you want to stop SFHA processes now? [y,n,q,?] (y)
NOTE: Hot Enter.
Logs are being written to /var/tmp/installsfha-201506071443dkw while installsfha is in progress
Stopping SFHA: 100%
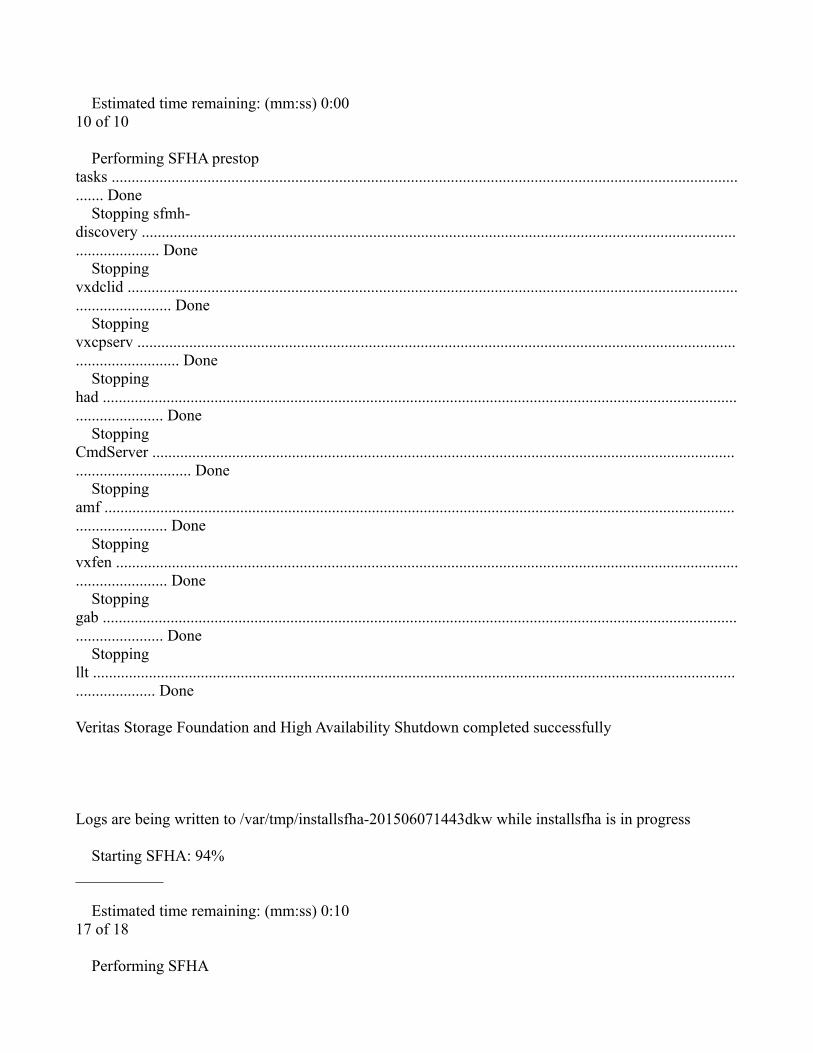
Estimated time remaining: (mm:ss) 0:00 10 of 10
Performing SFHA prestop tasks .................................................................................................................................................................... Done Stopping sfmh-discovery .......................................................................................................................................................................... Done Stopping vxdclid ................................................................................................................................................................................. Done Stopping vxcpserv ................................................................................................................................................................................ Done Stopping had ..................................................................................................................................................................................... Done Stopping CmdServer ............................................................................................................................................................................... Done Stopping amf ..................................................................................................................................................................................... Done Stopping vxfen ................................................................................................................................................................................... Done Stopping gab ..................................................................................................................................................................................... Done Stopping llt ..................................................................................................................................................................................... Done
Veritas Storage Foundation and High Availability Shutdown completed successfully
Logs are being written to /var/tmp/installsfha-201506071443dkw while installsfha is in progress
Starting SFHA: 94% ___________
Estimated time remaining: (mm:ss) 0:10 17 of 18
Performing SFHA
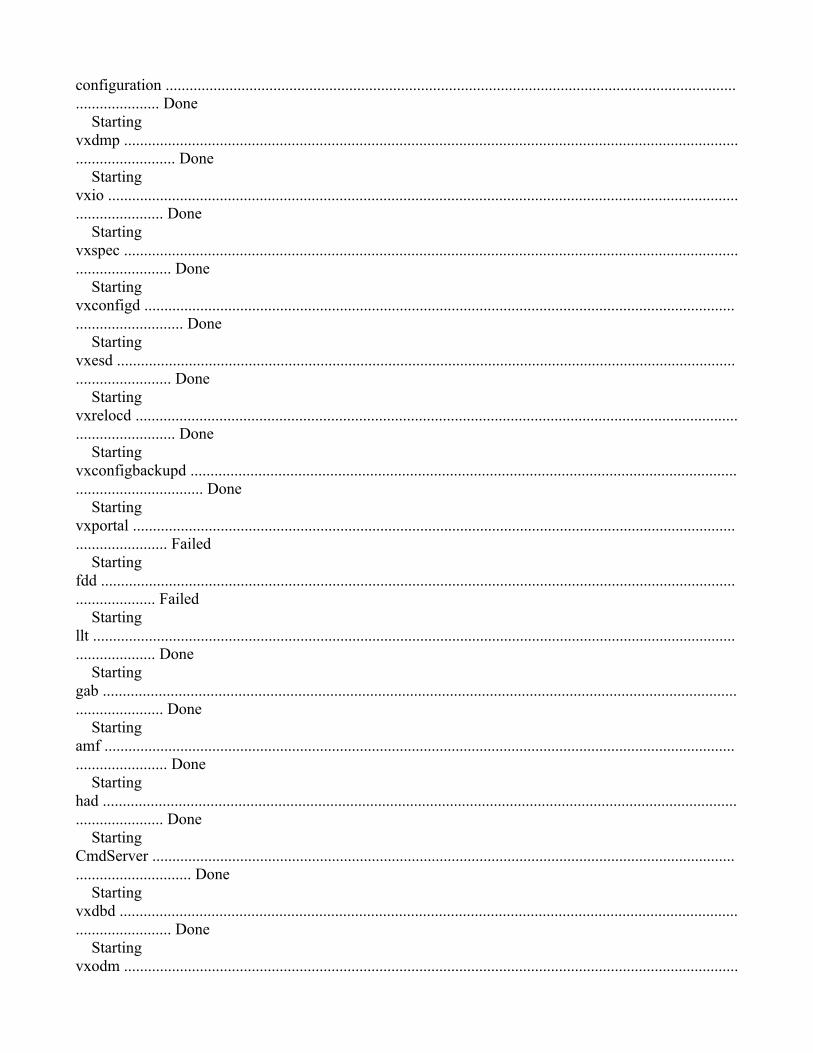
configuration .................................................................................................................................................................... Done Starting vxdmp ................................................................................................................................................................................... Done Starting vxio .................................................................................................................................................................................... Done Starting vxspec .................................................................................................................................................................................. Done Starting vxconfigd ............................................................................................................................................................................... Done Starting vxesd ................................................................................................................................................................................... Done Starting vxrelocd ................................................................................................................................................................................ Done Starting vxconfigbackupd ......................................................................................................................................................................... Done Starting vxportal .............................................................................................................................................................................. Failed Starting fdd ................................................................................................................................................................................... Failed Starting llt ..................................................................................................................................................................................... Done Starting gab ..................................................................................................................................................................................... Done Starting amf ..................................................................................................................................................................................... Done Starting had ..................................................................................................................................................................................... Done Starting CmdServer ............................................................................................................................................................................... Done Starting vxdbd ................................................................................................................................................................................... Done Starting vxodm ..........................................................................................................................................................
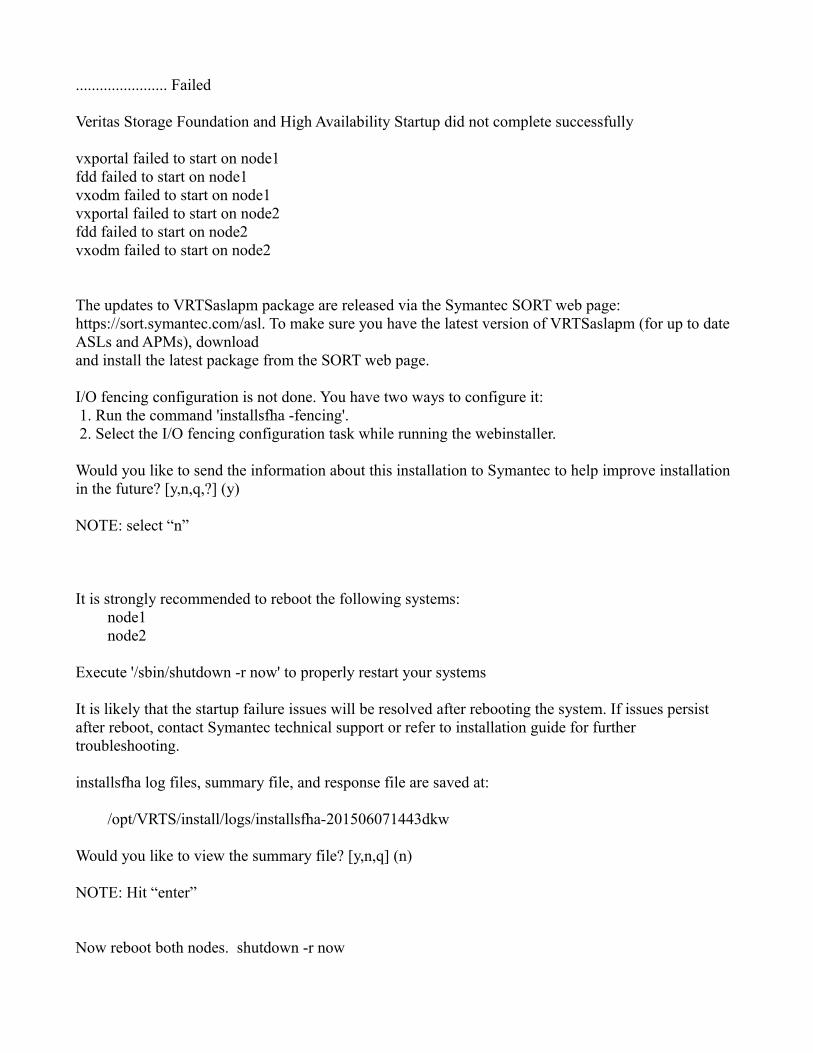
....................... Failed
Veritas Storage Foundation and High Availability Startup did not complete successfully
vxportal failed to start on node1fdd failed to start on node1vxodm failed to start on node1vxportal failed to start on node2fdd failed to start on node2vxodm failed to start on node2
The updates to VRTSaslapm package are released via the Symantec SORT web page: https://sort.symantec.com/asl. To make sure you have the latest version of VRTSaslapm (for up to date ASLs and APMs), downloadand install the latest package from the SORT web page.
I/O fencing configuration is not done. You have two ways to configure it: 1. Run the command 'installsfha -fencing'. 2. Select the I/O fencing configuration task while running the webinstaller.
Would you like to send the information about this installation to Symantec to help improve installation in the future? [y,n,q,?] (y)
NOTE: select “n”
It is strongly recommended to reboot the following systems: node1 node2
Execute '/sbin/shutdown -r now' to properly restart your systems
It is likely that the startup failure issues will be resolved after rebooting the system. If issues persist after reboot, contact Symantec technical support or refer to installation guide for furthertroubleshooting.
installsfha log files, summary file, and response file are saved at:
/opt/VRTS/install/logs/installsfha-201506071443dkw
Would you like to view the summary file? [y,n,q] (n)
NOTE: Hit “enter”
Now reboot both nodes. shutdown -r now

[root@node1 rhel6_x86_64]# shutdown -r now
Broadcast message from [email protected] (/dev/pts/0) at 14:59 ...
The system is going down for reboot NOW![root@node1 rhel6_x86_64]#
[root@node2 tmp]#Broadcast message from [email protected] (/dev/pts/1) at 14:59 ...
The system is going down for reboot NOW!
When they come up[root@node2 ~]# /opt/VRTSvcs/bin/hastatus -sum
-- SYSTEM STATE-- System State Frozen
A node1 RUNNING 0A node2 RUNNING 0
-- GROUP STATE-- Group System Probed AutoDisabled State
B ClusterService node1 Y N ONLINEB ClusterService node2 Y N OFFLINEOur Cluster is working.
From here on now you may follow the guide at:http://www.kartik.com/vcs_and_oracle_ha.pdfhttp://www.kartik.com/vcs_and_oracle_ha.doc
to configure shared storage (openfiler)install Oracle as a failover service.
Etcetc.