
Pivotal Command Centerpivotalhd-210.docs.pivotal.io/doc/1110/pdf/PCC_21_User.pdf · 1.1.2...
41
PRODUCT DOCUMENTATION Pivotal Command Center Version 2.1 User Guide Rev: A0 2 © 2013 GoPivotal, Inc.
Transcript of Pivotal Command Centerpivotalhd-210.docs.pivotal.io/doc/1110/pdf/PCC_21_User.pdf · 1.1.2...
PRODUCT DOCUMENTATION
Pivotal Command CenterVersion 2.1
User GuideRev: A02
© 2013 GoPivotal, Inc.

Copyright © 2013 GoPivotal, Inc. All rights reserved.
GoPivotal, Inc. believes the information in this publication is accurate as of its publication date. The information is subject to change without notice.
THE INFORMATION IN THIS PUBLICATION IS PROVIDED "AS IS." GOPIVOTAL, INC. ("Pivotal") MAKES NO REPRESENTATIONS OR WARRANTIES OF ANY KIND WITH RESPECT TO THE INFORMATION IN THIS PUBLICATION, AND SPECIFICALLY DISCLAIMS IMPLIED WARRANTIES OF MERCHANTABILITY OR FITNESS FOR A PARTICULAR PURPOSE.
Use, copying, and distribution of any Pivotal software described in this publication requires an applicable software license.
All trademarks used herein are the property of Pivotal or their respective owners.
Use of Open Source
This product may be distributed with open source code, licensed to you in accordance with the applicable open source license. If you would like a copy of any such source code, Pivotal will provide a copy of the source code that is required to be made available in accordance with the applicable open source license. Pivotal may charge reasonable shipping and handling charges for such distribution.
Revised November 2013

Pivotal Product Documentation
Page of 2 40
Table of Contents
1 Pivotal Command Center Overview _____________________________________________________ 5
1.1 About Pivotal Command Center ____________________________________________________ 5
1.1.1 Pivotal Command Center UI and CLI ___________________________________________ 5
1.1.2 Performance Monitor (nmon) _________________________________________________ 6
1.1.3 PostgreSQL Database ______________________________________________________ 6
1.2 Architectural Overview ___________________________________________________________ 7
2 Installing Pivotal Command Center ______________________________________________________ 8
2.1 Quick Start _____________________________________________________________________ 8
2.2 Supported Platforms and Browsers _________________________________________________ 10
2.2.1 Platforms _______________________________________________________________ 10
2.2.2 Browsers _______________________________________________________________ 10
2.3 Requirements _________________________________________________________________ 11
2.3.1 Prerequisites ____________________________________________________________ 11
2.3.2 Product Downloads _______________________________________________________ 12
2.3.3 Package Accessibility ______________________________________________________ 12
2.4 Installation Instructions __________________________________________________________ 13
2.4.1 Installing Pivotal Command Center ___________________________________________ 13
2.4.2 Installing PHD Services ____________________________________________________ 15
2.4.3 Enabling PHD Services ____________________________________________________ 15
2.4.4 Launching Pivotal Command Center __________________________________________ 16
2.5 Uninstalling Pivotal Command Center _______________________________________________ 16
2.6 Upgrading Pivotal Command Center ________________________________________________ 16
3 Using Pivotal Command Center _______________________________________________________ 18
3.1 Overview _____________________________________________________________________ 18
3.1.1 Status indicators __________________________________________________________ 18
3.2 Logging In ____________________________________________________________________ 19
3.2.1 Login Screen ____________________________________________________________ 19
3.3 Settings ______________________________________________________________________ 19
3.3.1 Users __________________________________________________________________ 20
3.3.2 Passwords ______________________________________________________________ 21
3.4 Cluster Status Page ____________________________________________________________ 21
3.5 Configuring and Deploying a Cluster ________________________________________________ 22
3.5.1 Adding a Cluster __________________________________________________________ 22
3.5.2 Post Installation for HAWQ _________________________________________________ 27
3.5.3 Starting the Cluster _______________________________________________________ 28
3.5.4 Initializing HAWQ _________________________________________________________ 28
3.6 Dashboard ____________________________________________________________________ 28
3.7 Cluster Analysis ________________________________________________________________ 30
3.8 MapReduce Job Monitor _________________________________________________________ 31
3.8.1 Job Details ______________________________________________________________ 32
3.9 YARN App Monitor _____________________________________________________________ 34
3.10 HAWQ Query Monitor ___________________________________________________________ 35

Pivotal Product Documentation
Page of 3 40
3.11 Topology _____________________________________________________________________ 36
3.11.1 Adding Slaves to the Cluster ________________________________________________ 36
3.11.2 Removing Slaves from a Cluster _____________________________________________ 37
4 Creating a YUM EPEL Repository ______________________________________________________ 38
5 Command Line Reference ____________________________________________________________ 39
5.1 Backup and Restore ____________________________________________________________ 39
5.1.1 Backup _________________________________________________________________ 39
5.1.2 Restore _________________________________________________________________ 39

Pivotal Product Documentation
Page of 4 40
Copyright © 2013 GoPivotal, Inc. All rights reserved.
GoPivotal, Inc. believes the information in this publication is accurate as of its publication date. The
information is subject to change without notice. THE INFORMATION IN THIS PUBLICATION IS PROVIDED
"AS IS." GOPIVOTAL, INC. ("Pivotal") MAKES NO REPRESENTATIONS OR WARRANTIES OF ANY KIND
WITH RESPECT TO THE INFORMATION IN THIS PUBLICATION, AND SPECIFICALLY DISCLAIMS
IMPLIED WARRANTIES OF MERCHANTABILITY OR FITNESS FOR A PARTICULAR PURPOSE.
Use, copying, and distribution of any Pivotal software described in this publication requires an applicable
software license.
All trademarks used herein are the property of Pivotal or their respective owners.
Use of Open Source
This product may be distributed with open source code, licensed to you in accordance with the applicable
open source license. If you would like a copy of any such source code, Pivotal will provide a copy of the
source code that is required to be made available in accordance with the applicable open source license.
Pivotal may charge reasonable shipping and handling charges for such distribution.
Pivotal Product Documentation
Page of 5 40
1 Pivotal Command Center OverviewThis document is a User Guide for the Pivotal Command Center (PCC) User Interface.
This section provides a brief overview of Pivotal Command Center, including:
About Pivotal Command Center
Pivotal Command Center UI and CLI
Performance Monitor (nmon)
PostgreSQL Database
Architectural Overview
1.1 About Pivotal Command Center
Pivotal Command Center (PCC) allows an administrative user to configure, deploy, monitor, and manage
one or more Pivotal HD clusters. The Command Center has both a graphical user interface and
command-line tools to deploy and configure, monitor, and administer Pivotal HD clusters.
For UI operations, see .Using Pivotal Command Center
For command line operations, see the .Pivotal HD Enterprise Installation and Administrator Guide
This release of Command Center allows administering and monitoring of only Pivotal HD Enterprise
1.1.x clusters.
PCC provides complete life cycle management for Pivotal HD Clusters by performing the following two main
groups of functions:
Cluster configuration and deployment
Cluster monitoring and management
These functions are served through a set of RESTful web services that run as a web application on Jetty
server on the Command Center admin host. This is called . This web application stores its metadata and
cluster configuration for Pivotal HD cluster nodes and services in the Pivotal Command Center PostgreSQL
database. It makes use of a Puppet Server to perform most of its HD cluster installation and configuration. It
also has a polling service that retrieves Hadoop metrics from the cluster and stores them in the Command
Center PostgreSQL Database at periodic intervals.
1.1.1 Pivotal Command Center UI and CLI

Pivotal Product Documentation
Page of 6 40
The PCC UI provides the user with a single web-based graphical user interface to configure and deploy,
monitor and manage one or more Pivotal HD cluster. This web application is hosted on a Ruby-on-Rails
application which presents the status and metrics of the clusters. The system metrics data is gathered by the
Performance Monitor (nmon) component. The Command Center UI invokes the APIs to retrieve all
Hadoop-specific cluster metrics and status information. This includes the Hadoop metrics that was
previously retrieved by the polling service.
PCC provides a command-line interface (CLI) for more advanced users to perform installation, configuration
and uninstalls. This tool invokes the APIs to install and configure the various Pivotal HD services. The CLI
also provides a way to perform other administrative actions such as starting and stopping clusters. For how
to use this CLI, please refer to the .Pivotal HD Enterprise Installation and Administrator Guide
1.1.2 Performance Monitor (nmon)
Pivotal Command Center comes with a Performance Monitor called (for node monitor). This makes use of a
highly scalable message passing architecture to gather performance metrics from each node that Command
Center monitors. This consists of a master daemon that runs on the Command Center admin host and an
daemon that runs on all the cluster nodes that report system metric information to the master. This includes
metrics such as CPU, memory, disk I/O and network usage information.
The master on the admin host dumps the system metrics it receives from the agents on the cluster nodes
into a PostgreSQL DB. This is then queried by the Command Center UI application to display its cluster
analysis graphs.
The agents hosts are deployed throughout the cluster during Pivotal HD cluster deployment itself (see for
details).
The agents are deployed as services on each host, including on the Pivotal Command Center admin host.
To stop or start the service run the following as :root
# service nmon stop
# service nmon start
1.1.3 PostgreSQL Database
Pivotal Command Center makes use of a PostgreSQL Database to store the following:
Cluster configurations
Hadoop cluster metrics
System metrics of the cluster
Pivotal Command Center Metadata

Pivotal Product Documentation
Page of 7 40
1.2 Architectural Overview
For more details about Pivotal HD Enterprise, refer to the .Pivotal HD Installation and Administrator Guide

Pivotal Product Documentation
Page of 8 40
2 Installing Pivotal Command CenterThis section describes how to install Pivotal Command Center and then use PCC to deploy and configure a
Pivotal HD cluster.
Quick Start
Supported Platforms and Browsers
Requirements
Installation Instructions
Uninstalling Pivotal Command Center
Upgrading Pivotal Command Center
2.1 Quick Start
Below is an Guide intended for users who are familiar with the product and various prerequisites;Quick Start
more detailed instructions are provided later in this section.
Task Sub-Task
Requirements
See forRequirements
more details.
Check JDK version
(as root)
# java -version
Ensure you're running Oracle Java JDK Version 1.7.
If not, download the appropriate version from Oracle.
Check Yum accessibility
(as )root
Verify that all hosts have yum access to an EPEL yum repository.
# sudo yum list <LIST OF PACKAGES>

Pivotal Product Documentation
Page of 9 40
1.
2.
3.
4.
5.
1.
2.
Install Pivotal Command
Center
See forInstalling PCC
more details.
(as )root
Copy tar file to your specified directory on the admin node, for
example:
# scp ./PCC-2.1.x. version.build.os .x86_64.tar.gz
host:/root/phd/
Login as root and untar to that directory:
# cd /root/phd
# tar --no-same-owner -zxvf PCC-2.1.x.
version.build.os .x86_64.tar.gz
Run the installation script from the directory where it is installed:
# ./install
As the rest of the installation is done as the gpadmin user, change to
that user:
# su - gpadmin
Enable Secure Connections
Import the PHD Services
packages to the Admin
Node
See Installing PHD
for more details.Services
(as gpadmin)
Copy the Pivotal HD services (PHD, ADS (HAWQ), and PHDTools
(optional for USS), tarballs from the initial download location to the
gpadmin home directory.
Change the owner of the packages to gpadmin and untar the tarballs.
For example: If the file is a tar.gz or tgz, use:
tar zxf packagename.tgz
If the file is a tar, use:
tar xf packagename.tar
Enable the PHD services
See Enabling PHD
for more details.Services
(as gpadmin)
For each service (PHD, ADS, PHDTools) you are enabling, run the following:
# icm_client import -s < PATH TO EXTRACTED PHD SERVICE
TAR BALL >
Launch Pivotal
Command Center UI
See forLaunching PCC
more details.
Launch a browser and enter the host on which you installed PCC:
https://CommandCenterHost:5443
The Command Center login page is launched in your browser. The default
username/password is / (case sensitive).gpadmin Gpadmin1

Pivotal Product Documentation
Page of 10 40
Configure and deploy a
cluster
See Configuring and
forDeploying a Cluster
more details.
After logging into PCC, click from the Cluster Status page.Add Cluster
Navigate through the Add Cluster Wizard to configure and deploy a cluster.
Post-Installation for
HAWQ
See Post Installation for
for more detailsHAWQ
(as gpadmin)
Exchange keys between HAWQ master and segment hosts:
Create a hostfile ( ) that contains the hostnamesHAWQ_Segment_Hosts.txt
of all your HAWQ segments, then:
# ssh < HAWQ_MASTER >
# source /usr/local/hawq/greenplum_path.sh
# /usr/local/hawq/bin/gpssh-exkeys -f
./HAWQ_Segment_Hosts.txt
Start the cluster
See Starting the Cluster
for more details.
Return to the PCC UI and start the cluster from the Cluster Status page.
Initialize HAWQ
See forInitializing HAWQ
more details.
(as gpadmin)
ssh to the HAWQ master, the run the following:
# source /usr/local/hawq/greenplum_path.sh
# /etc/init.d/hawq init
2.2 Supported Platforms and Browsers
2.2.1 Platforms
RHEL 6.1 64-bit, 6.2 64-bit
CentOS 6.1 64-bit, 6.2 64-bit
2.2.2 Browsers
Firefox 16, 19
IE 8, IE 9, both with Google Chrome Frame
Chrome 25.0.1364.172

Pivotal Product Documentation
Page of 11 40
2.3 Requirements
2.3.1 Prerequisites
Installation of Pivotal Command Center assumes the user has a working knowledge of the following:
: Enables you to install or update software from the command line. See Yum
.http://yum.baseurl.org/
(Redhat Package Manager).RPM
. See NTP http://www.ntp.org
(Secure Shell Protocol). See SSH http://www.linuxproblem.org/art_9.html
. Verify that the admin host is be able to reach every cluster node using its hostname andDNS lookup
IP address. Verify that every cluster node is able to reach every other cluster node using its hostname
and IP address:
ping -c 2 myhost.mycompany.com
The return code should be 0
ping -c 2 192.168.1.2
The return code should be 0
. Ensure that you are running Oracle JAVA JDK version 1.7:JAVA JDK
As root:
# java -version
If you are not running the correct JDK, you can download a supported version from the Oracle site here:
http://www.oracle.com/technetwork/java/javase/downloads/index.html
Notes
Oracle does not seem to be shipping self extracting JDK packages as of release 7. The current
release of Pivotal Command Center expects a self extracting ( ) package. So restrict the Java.bin
version to one that has a package.bin
Once you have installed Pivotal Command Center, you can use the following command to install a
downloaded JDK:
As gpadmin, run:
# icm_client import -f <PATH TO JDK>
. Verify that all hosts have yum access to an EPEL yum repository. See forYUM Package Accessibility
more details.

Pivotal Product Documentation
Page of 12 40
. You will need an active internet connection to install PCC. This is required toInternet Connectivity
pull the software dependencies for the UI.
2.3.2 Product Downloads
The following packages are required:
PCC-2.1.x.*.version_build_OS.x86_64.tar.gz
2.3.3 Package Accessibility
Pivotal Command Center and Pivotal HD Enterprise expect some prerequisite packages to be pre-installed
on each host, depending on the software that gets deployed on a particular host. In order to have a
smoother installation it is recommended that each host would have yum access to an EPEL yum repository.
If you have access to the Internet, then you can configure your hosts to have access to the external EPEL
repositories. However, if your hosts do not have Internet access (or you are deploying onto a large cluster),
then having a local yum EPEL repo is highly recommended. This will also give you some control on the
package versions you want deployed on your cluster. See for instructions on how to setup a local yum
repository or point your hosts to an EPEL repository.
For Pivotal Command Center 2.1.x, here is a list of prerequisites that need to either already be installed on
the Command Center admin host or on an accessible yum repository:
httpd
mod_ssl
postgresql
postgresql-devel
postgresql-server
compat-readline5
createrepo
sigar
sudo
Run the following command on the admin node to make sure that you are able to install the prerequisite
packages during installation.
$ sudo yum list <LIST OF PACKAGES>
For example:
$ sudo yum list httpd mod_ssl postgresql postgresql-devel postgresql-server
compat-readline5 createrepo sigar sudo
If any of them are not available or not already installed, then you may have not added the repository
correctly to your admin host.
Pivotal Product Documentation
Page of 13 40
1.
2.
For the cluster hosts (where you plan to install the cluster), the prerequisite packages depend on the
software you will eventually install there, but you may want to verify that the following two packages are
installed or accessible by yum on all hosts:
nc
postgresql-devel
2.4 Installation Instructions
Once you have met the prerequisites, you are ready to begin the installation. Perform the following
installation steps as a root user.
Avoid using hostnames that contain capital letters because Puppet has an issue generating
certificates for domains with capital letters. Also avoid using underscores as they are invalid
characters in hostnames.
If you are upgrading from an earlier version of Pivotal Command Center, see .Upgrading PCC
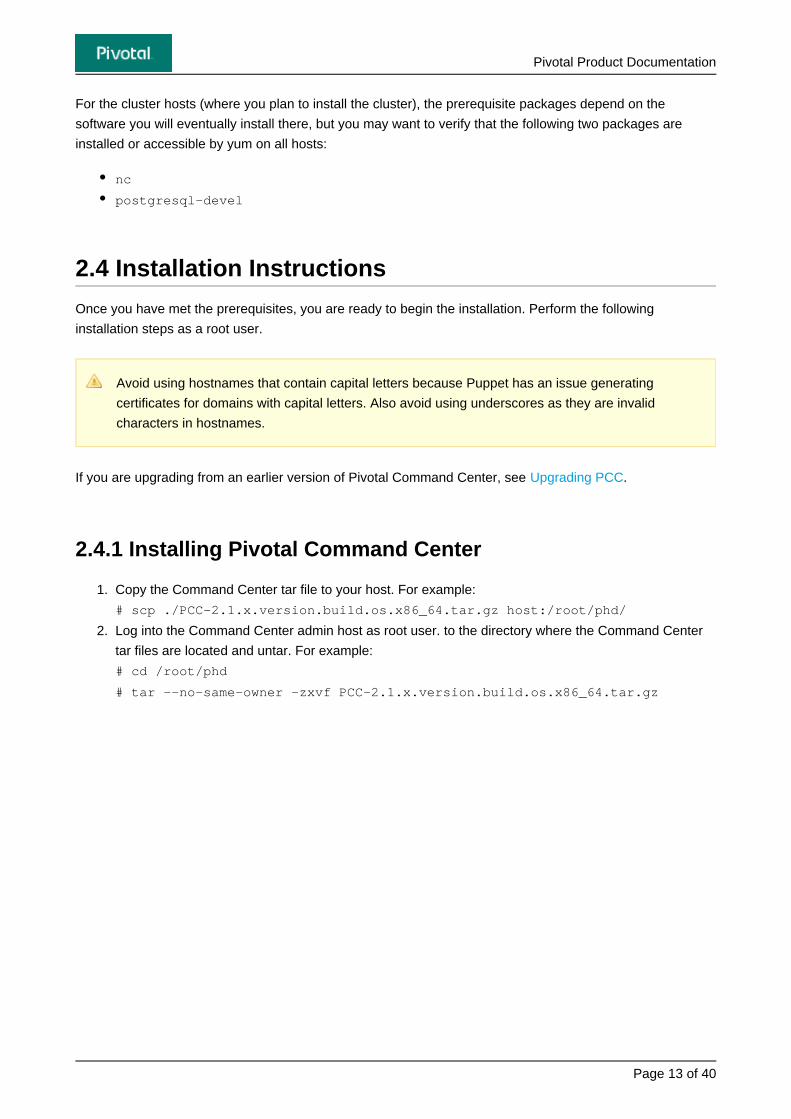
2.4.1 Installing Pivotal Command Center
Copy the Command Center tar file to your host. For example:
# scp ./PCC-2.1.x.version.build.os.x86_64.tar.gz host:/root/phd/
Log into the Command Center admin host as root user. to the directory where the Command Center
tar files are located and untar. For example:
# cd /root/phd
# tar --no-same-owner -zxvf PCC-2.1.x.version.build.os.x86_64.tar.gz

Pivotal Product Documentation
Page of 14 40
3.
4.
1.
2.
3.
5.
6.
Still as root user, run the installation script. This installs the required packages and configures both
Pivotal Command Center and starts services.
Important
You must run the installation script from the directory where it is installed, for example: For
example: PCC-2.1.x.version
For example:
# ls
PCC-2.1.x.version
PCC-2.1.x.version.build.os.x86_64.tar.gz
# cd PCC-version
# ./install
You will see installation progress information on the screen. Once the installation successfully
completes, you will receive an installation success message on your screen.
Once you have configured and deployed a cluster, you can view your cluster status here:
https://<CommandCenterHost>:5443/status
Enable Secure Connections:
Pivotal Command Center uses HTTPS to secure data transmission between the client browser and
the server. By default, the installation script generates a self-signed certificate. Alternatively you can
provide your own Certificate and Key by following these steps:
Edit /etc/httpd/conf.d/pcc- file and change following two directives tovhost.conf
point to location of ssl certificate and key:
: SSLCertificateFile /usr/local/greenplum-cc/ssl/sfo-w1.ic.cert
: SSLCertificateKeyFile /usr/local/greenplum-cc/ssl/sfo-w1.ic.key
Make sure that file permissions are set to 400 and owner to .gpadmin
Restart PCC with the following command:
service commander restart
Verify that your PCC instance is running by executing the following command:
$ service commander status
From now on you can switch to the gpadmin user. You should no longer need to be root for anything
else.
su - gpadmin
: then .Next Steps Installing PHD Services Enabling PHD Services
Starting, Stopping, and Restarting Command Center ServicesTo stop or restart Command Center services, run the following commands on the Pivotal Command Center
admin host:
$ service commander stop
$ service commander start
$ service commander restart

Pivotal Product Documentation
Page of 15 40
1.
2.
1.
2.
2.4.2 Installing PHD Services
Copy the Pivotal HD, ADS, and PHDTools tarballs from the initial download location to the gpadmin
home directory.
Change the owner of the packages to and untar the tarballs. For example:
For PHD, if the file is a or , use:tar.gz tgz
tar zxf PHD-1.1.x-x.tgz
If the file is a , use:tar
tar xf PHD-1.1.x-x.tar
For Pivotal ADS, if the file is a or , usetar.gz tgz
tar zxf PADS-1.1.x-x.tgz
If the file is a , use:tar
tar xf PADS-1.1.x-x.tar
For PHDTools, if the file is a or , usetar.gz tgz
tar zxf PHDTools-1.1.x-x.tgz
If the file is a , use:tar
tar xf PHDTools-1.1.x-x.tar
2.4.3 Enabling PHD Services
As gpadmin, extract the following tarball for Pivotal HD:
# icm_client import -s <PATH TO EXTRACTED PHD TAR BALL>
For example:
# icm_client import -s PHD-1.1.x-x/
Optional for HAWQ/PXF: As gpadmin, extract the following tar ball for HAWQ and PXF: #
icm_client import -s <PATH TO EXTRACTED ADS TAR BALL>
For example:
# icm_client import -s PADS-1.1.x-x/
For more information, see the log file located at:
/var/log/gphd/gphdmgr/gphdmgr-import.log

Pivotal Product Documentation
Page of 16 40
3.
1.
1.
2.
3.
Optional for USS: As gpadmin, extract the following tar ball for USS: # icm_client import -s
<PATH TO EXTRACTED PHDTools TAR BALL>
For example:
# icm_client import -s PHDTools-1.1.x-x/
For more information, see the log file located at:
/var/log/gphd/gphdmgr/gphdmgr-import.log
You are now ready to configure and deploy a cluster from the Pivotal Command Center UI.
2.4.4 Launching Pivotal Command Center
Launch a browser and navigate to the host on which you installed Command Center. For example:
https://CommandCenterHost:5443
The Command Center login page is launched in your browser. The default username/password is
/ 1 (case sensitive).gpadmin Gpadmin
Next StepsSee for details about using the application, including how to change theUsing Pivotal Command Center
default password and how to deploy and configure a HD cluster via the Command Center UI.
See the for instructions for using thePivotal HD Enterprise Installation and Administrator Guide
command-line interface (CLI) of Pivotal Command Center to deploy and configure a HD cluster.
2.5 Uninstalling Pivotal Command Center
Follow the steps below to uninstall Pivotal Command Center and the Pivotal HD cluster:
Stop services on all your clusters (See the Pivotal HD Enterprise Installation and Administrator Guide
for detailed steps).
Uninstall all your clusters (See the forPivotal HD Enterprise Installation and Administrator Guide
detailed steps).
From the directory where you untarred the Pivotal Command Center, run the uninstall script:
# cd /root/phd/PCC-2.1.x.version/
# ./uninstall
2.6 Upgrading Pivotal Command Center
The following instructions are for upgrading Pivotal Command Center from version 2.0.1 to 2.1.

Pivotal Product Documentation
Page of 17 40
1.
2.
3.
4.
5.
6.
Upgrade Notes
If you are upgrading to a new version of Pivotal Command Center, make sure you are also
upgrading to compatible versions of Pivotal HD and Pivotal ADS (optional).
See the latest version of the Pivotal Command Center Release notes for Pivotal
Interoperability Matrix.
We recommend that you always back up any critical data before performing any upgrades.
As of PCC 2.1.1, there is a new default password, , and new password rules areGpadmin1
being enforced (minimum 8 characters, case-sensitive, 1 uppercase letter, one number).
However if you are upgrading to this version of PCC, your original password (by default
) is maintained.gpadmin
Follow the steps below to upgrade your Pivotal CC to a newer version:
[Optional] As , stop the cluster:gpadmin
# icm_client -l CLUSTERNAME stop
As , stop the Command Center services:root
# service commander stop
Download the new PCC tarball and untar.
Run the installer from the new PCC location:
# ./install
Enable Secure Connections.
Pivotal Command Center uses HTTPS to secure data transmission between the client browser and
the server. By default, the installation script generates a self-signed certificate. Alternatively you can
provide your own Certificate and Key; to do this, follow the instructions provided in the installation
instructions, here: .Enable Secure Connections
Check status:nmon
# service nmon status
If the status anything other than , stop and restart nmon as follows:running
# service nmon stop
# service nmon start

Pivotal Product Documentation
Page of 18 40
3 Using Pivotal Command CenterThis section provides an overview of the Pivotal Command Center 2.1 user interface and details about using
the application to configure and deploy a Pivotal HD Cluster:
Overview
Cluster Status Page
Configuring and Deploying a Cluster
Dashboard
Cluster Analysis
MapReduce Job Monitor
YARN App Monitor
HAWQ Queries
Topology
3.1 Overview
Pivotal Command Center UI is a browser-based application for configuring, deploying, administering, and
monitoring Pivotal HD clusters. At a high level, the screens consist of:
—Provides status information about any clusters you have configured andCluster Status Page
deployed. Also provides access to the Add Cluster Wizard that allows you to configure and deploy
clusters from the UI. See for more details.Configuring and Deploying a Cluster
—Provides an overview of your Pivotal HD cluster. This screen shows at one glance theDashboard
most important states and metrics that an administrator needs to know about the Pivotal HD cluster.
—Provides detailed information about various metrics of your Pivotal HD cluster. ThisCluster Analysis
provides cluster-wide metrics all the way down to host-level metrics.
—Provides details about all, or a filtered set of MapReduce jobs.MapReduce Job Monitor
—Provides details about all, or a filtered set of YARN applications.YARN App Monitor
—When HAWQ (a revolutionary MPP database on Hadoop solution) is deployed onHAWQ Queries
the cluster, Command Center can show the progress of all actively running queries on HAWQ.
—This screen shows you what roles have been installed on each host. You can also addTopology
and remove slaves to the cluster from this screen.
3.1.1 Status indicators
Throughout the user interface the following indicators are used to indicate the status of nodes:
Green: Succeeded
Blue: Running
Grey: Stopped/Pending
Red: Killed/Failed

Pivotal Product Documentation
Page of 19 40
3.2 Logging In
Launch a browser and navigate to the host on which you installed Command Center. For example:
https://CommandCenterHost:5443
The Command Center login page is launched in your browser. The default username/password is /gpadmin
(case-sensitive).Gpadmin1
To change the default port (5443), update the port settings in the following file:
/usr/local/greenplum-cc/config/app.yml
3.2.1 Login Screen
The first time you launch the Command Center UI, a login screen appears showing the hostname of this
instance of Pivotal Command Center.
The default admin username/password is / (case-sensitive). You can change thisgpadmin Gpadmin1
password via the menu. Settings
Passwords are case-sensitive and must be at least 8 letters long and contain 1 upper-case letter and 1
number.
Once you have entered a valid username/password, click the button to launch the Command CenterLogin
UI.
3.3 Settings
Once you have logged in, you can click the gear icon in the upper right corner of the screen from any PCC
page to display the menu.Settings

Pivotal Product Documentation
Page of 20 40
From the settings menu you can select one of:
. Select this to display version information about this instance of PCCAbout
. Select this option to go back to the page to view the list of availableCluster Status Cluster Status
clusters.
. Select this option to add/edit user information. See below.Users Users
. Click this to change your password. See below.Change Password Passwords
. Select this option to logout from this instance of PCC.Logout
3.3.1 Users
Your options here depend upon whether you are an administrative user (super user) or not. An admin user
can add users, delete users, edit any user profiles, and change any user password. Non-admin users can
only edit their own details/passwords.
Once you have selected from the menu, a screen listing all current users appears:Users Settings
From this screen, , you can add users, edit your own or other users'depending upon your permissions
profiles, change your own or other users' passwords, and delete users.
Adding a User
If you have the appropriate permissions, click to create a new user.Add User
The is only displayed if you have admin privileges.Add User

Pivotal Product Documentation
Page of 21 40
A New User form appears. Enter the following information about the new user:
.First Name
.Last Name
. This must be a unique name.User Name
. Must be a valid email address.Email
. Must meet the minimum password requirements. Passwords are case-sensitive and mustPassword
be at least 8 letters long and contain 1 upper-case letter and 1 number.
. The password of the person creating the new user.Your Password
All the above fields are required.
3.3.2 Passwords
You can change your own password in one of two ways:
Select from the menu.Change Password Settings
Select from the menu, then click the link adjacent to your UserUsers Settings Change Password
Name.
If you have admin privileges you can change the passwords of others:
Select from the menu, then click the link adjacent to the UserUsers Settings Change Password
Name whose password you want to change.
3.4 Cluster Status Page
Once you have launched Command Center, the initial screen you see is the Cluster Status screen. This
displays a list of available clusters to monitor, the status of each cluster ( , ), and a list ofstarted stopped
services running on that cluster (Hive, Mahout, and so on).
From this page you can:
Click to launch the Add Cluster Wizard.Add Cluster
Click the cluster name in the table to view the Dashboard for that cluster.
From any point within Command Center UI, you can always select a different cluster by using the
drop-down menu in the upper right corner of the screen.Select Cluster
Either , , or a cluster. Depending on the state of the cluster, some of theseStart Stop Uninstall
buttons will be enabled while others are disabled.
Pivotal Product Documentation
Page of 22 40
3.5 Configuring and Deploying a Cluster
Before you can configure and deploy a cluster, make sure you have already installed and enabled
the PHD Services (see Install PHD Services and Enable the PHD Services).
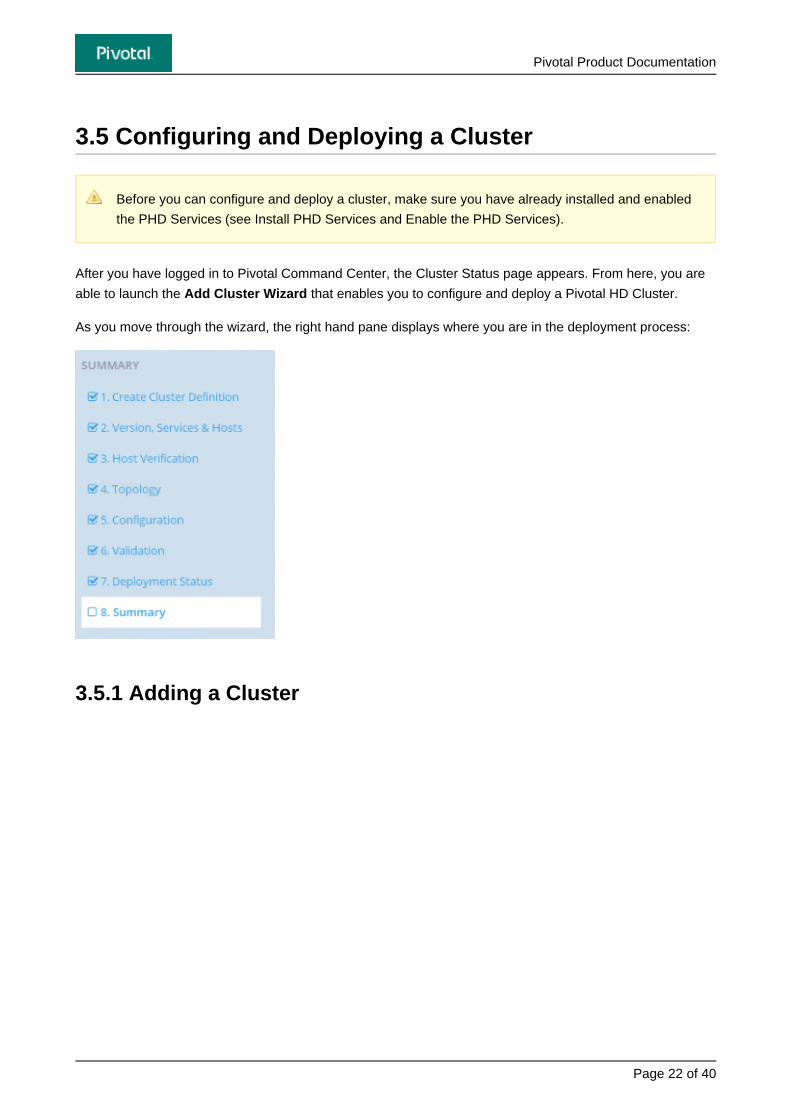
After you have logged in to Pivotal Command Center, the Cluster Status page appears. From here, you are
able to launch the that enables you to configure and deploy a Pivotal HD Cluster.Add Cluster Wizard
As you move through the wizard, the right hand pane displays where you are in the deployment process:
3.5.1 Adding a Cluster

Pivotal Product Documentation
Page of 23 40
1.
2.
1.
2.
3.
Click . The Add Cluster Wizard opens:Add Cluster
The Wizard allows you to create a new configuration from scratch or upload and edit any existing
configuration. The Summary panel along the right shows you the progress of your configuration and
deployment.
. Either:Create Cluster Definition
If you are configuring a new cluster, select then click .Create a new Cluster Definition Next
If you want to edit an existing cluster; select ,click , thenUpload Cluster Configuration Upload
navigate to the file that you wish to edit; then click . In this case,clusterConfig.xml Next
the following fields in the Wizard will be populated with the cluster definition properties of that
file you just uploaded. Follow the instructions below to edit thoseclusterConfig.xml
values.
:Versions, Services and Hosts

Pivotal Product Documentation
Page of 24 40
3.
4.
Notes
Hosts can be entered individually, newline-separated; or can be expressed in a
range, for example . They can also be expressed inhost[1-5].yourdomain.com
multiple ranges, for example . host [1-3].subdomain[1-2].yourdomain.com
Any hosts expressed in ranges are expanded during host verification.Hosts that do
not exist within a specified range will be ignored, so you can specify a wide range and
only those hosts that are available within that range will be added.
If you are editing an existing configuration, some if not all of these fields will be
prepopulated. Edit where appropriate.
You need to scroll down to view all the fields on this screen. The button will notNext
be active until you have entered all the required fields.
Enter the following information:
: Required. Enter a name for this cluster. Special characters are not supported.Name
: Required. Enter a new line-separated list of FQDN host names. You can also click Hosts
to use a text file containing a new line-separated list of host names.Upload
: Required. Enter the root password.Root Password
: Required. Enter the gpadmin user password. PCC creates this user onGP Admin Password
all nodes.
: Enter the JDK filename (not the absolute path). For example: JDK Path
.jdk-6u26-linux-x64-rpm.bin
: JDK 1.7 is a prerequisite. If not already installed, you can install using Note icm_client import
-f
: Check this box if you want to set up NTP (Network Time Protocol).Setup NTP
: Check this box if you want to disable SELinux. Recommended.Disable SELinux
: Check this box if you want to disable IPTables. Recommended.Disable IPTables
: Check this box if you want to run scanhosts. The scanhosts commandRun ScanHosts
verifies that prerequisites for the cluster node and provides a detailed report of any missing
prerequisites. Running this command ensures that clusters are deployed smoothly.
Click .Next
:Host Verification
The Host Verification page opens. This step may take a few minutes, it verifies connections to the
hosts you just set up. Once the field changes from , to for all hosts, youEligibilty Pending Eligible
can click . You will see any error and informational messages displayed in the comments fields.Next
If you specified hosts using ranges, they will be expanded at this point.

Pivotal Product Documentation
Page of 25 40
5. :Topology
This is the section where you specify the roles to be installed on the hosts. For example, you can
specify where your hadoop namenode, data node and so on, should be installed. Note that all
mandatory roles should have at least one host allocated.
Each service has its own section on this page; you can use the top menu options as shortcuts to
those sections on the page, or simply scroll down to each section.
Notes
You need to click or before each field is accepted. Once you enter the textEnter Tab
and click or , the text will change appearance and appear enclosed in aEnter Tab
box, as shown in the figure below. The entry on the left has been accepted, the entry
on the right has not.
Hosts can be specified in ranges, see the notes for , Versions, Services and Hosts
for more information.
At any point during this stage you can click at the top right of theSave Configuration
page. This saves the configuration file and downloads it. Once saved, a link to the
configuration file appears at the bottom of the page. Click that link to open and view
the file. You cannot edit this xml file directly.clusterConfig.xml
These are the roles that need to have installation nodes defined:
: ICM installs Pig, Hive, HBase, and Mahout libraries on this host.CLIENT
: Name Node, Secondary Name Node, Data NodesHDFS
: Resource Manager, History Server, Node ManagersYARN
: Zookeeper ServerZookeeper
: Hbase Master, HBase Region Servers.HBase
: Hive Master, Hive MetastoreHive
: Primary Node, Secondary Node, HAWQ Segment NodesHAWQ
: Name Node and CatalogUSS
: No hosts to configure. Installed on the client host.PXF
: No hosts to configure. Installed on the client host.Mahout
: No hosts to configure. Installed on the client host.Pig
Click once you have finished role-mapping.Next

Pivotal Product Documentation
Page of 26 40
6.
7.
8.
:Cluster Configuration
This page displays a list of all configuration files that define this cluster; the (toclusterConfig.xml
edit service configuration global values) as well as the service specific configuration files.
All these configuration files are already populated with the values you have already entered; or with
default values.
Click any file name to open that configuration file in an editor and enter/edit values.
If you make any changes, click to return to the Cluster Configuration page.Save
Once you have completed all your edits, click .Next
:Validation
If the configuration has errors they will be displayed here; otherwise you will see post-deployment
instructions.
Click Deploy
:Deployment Status
This screen shows the progression of the deployment. Information displayed includes:
Hostname
Status
Role
Messsages
Once the deployment is complete, click .Next

Pivotal Product Documentation
Page of 27 40
9.
10.
1.
2.
Summary
Once your cluster has successfully deployed, you can view a summary of the cluster, as shown here:
Return to the Cluster Status page:
Once you have reviewed this summary, click , to return to the Cluster Status page. Your newStatus
cluster will be listed on this page, with the status of .installed
If you are deploying HAWQ there is one more manual step you need to take before you can start the
cluster, see , below.Post Installation for HAWQ
3.5.2 Post Installation for HAWQ
You need to exchange SSH keys between HAWQ Master and Segment Nodes to complete HAWQ
installation.
Create a hostfile ( ) that contains the hostnames of all your HAWQHAWQ_Segment_Hosts.txt
segments.
As gpadmin, execute the following commands from the HAWQ Master.
# ssh <HAWQ_MASTER>
# source /usr/local/hawq/greenplum_path.sh
# /usr/local/hawq/bin/gpssh-exkeys -f ./HAWQ_Segment_Hosts.txt
: then .Next steps Starting the Cluster Initializing HAWQ

Pivotal Product Documentation
Page of 28 40
3.5.3 Starting the Cluster
To start your cluster; click : on the Cluster Status page.Actions Start
3.5.4 Initializing HAWQ
As gpadmin ssh to the HAWQ master, the run the following:
# source /usr/local/hawq/greenplum_path.sh
# /etc/init.d/hawq init
You have now completed your cluster configuration and deployment.
See the following sections of this document for details about using the PCC UI to administer and monitor
your cluster.
3.6 Dashboard
The dashboard gives you a high level view of a cluster at a glance. You are able to view the status of the
most important cluster services, such as HDFS and YARN, and allows you to start and stop each service
individually. It also shows you how the most important cluster metrics are trending in a visual way.
The graphs provide a unified view of the state of your system. They are also useful in detecting outliers and
pinpointing specific problems that may be present in your system.
The right side of the Dashboard displays the state of the following services, provided they have been
deployed for this cluster:

Pivotal Product Documentation
Page of 29 40
HDFS
For HDFS, the dashboard provides the following information/functionality:
The status of HDFS. You can use the dropdown menu to / dependingActions Start Stop HDFS
on its status.
When the last NameNode checkpoint occurred.
The percentage of cluster storage being used by HDFS and how much is free.
The number of DataNodes that are up and whether they are running normally or with problems.
The dropdown menu allows you to (redistribute your data across theActions Rebalance
cluster) your cluster, and to .View Rebalancer Log
If High Availability (HA) is enabled for your cluster, you will see the status of two NameNodes here.
YARN
For YARN, the dashboard provides the following information:
The status of YARN. You can use the dropdown menu to /Actions Start Stop YARN
depending on its status.
Whether or not the YARN History Server is running.
Note: The History Server stores a history of the mapreduce jobs run on the cluster.
The number of NodeManagers that are running.
HBase
For HBase, the dashboard provides the following information:
The status of the HBase master. You can use the dropdown menu to /Actions Start Stop
depending on its status.HBase
Zookeeper
For Zookeeper, the dashboard provides the following information:
The status of Zookeeper. You can use the dropdown menu to /Actions Start Stop Zookeeper
depending on its status.
The Status of the Zookeeper server host.
Hive
For Hive, the dashboard provides the following information:
The status of Hive. You can use the dropdown menu to / dependingActions Start Stop Hive
on its status.
The Dashboard also provides metrics about:
Pivotal Product Documentation
Page of 30 40
Mapreduce Slot Utilization
Namenode RPC Times
Hadoop Datanodes Average CPU
Hadoop Datanodes Average Bandwidth
Namenode Operations Per Second
Hadoop Datanodes Average Disk Bandwidth
Hadoop Datanodes Average Memory
Mapreduce Jobs By Status
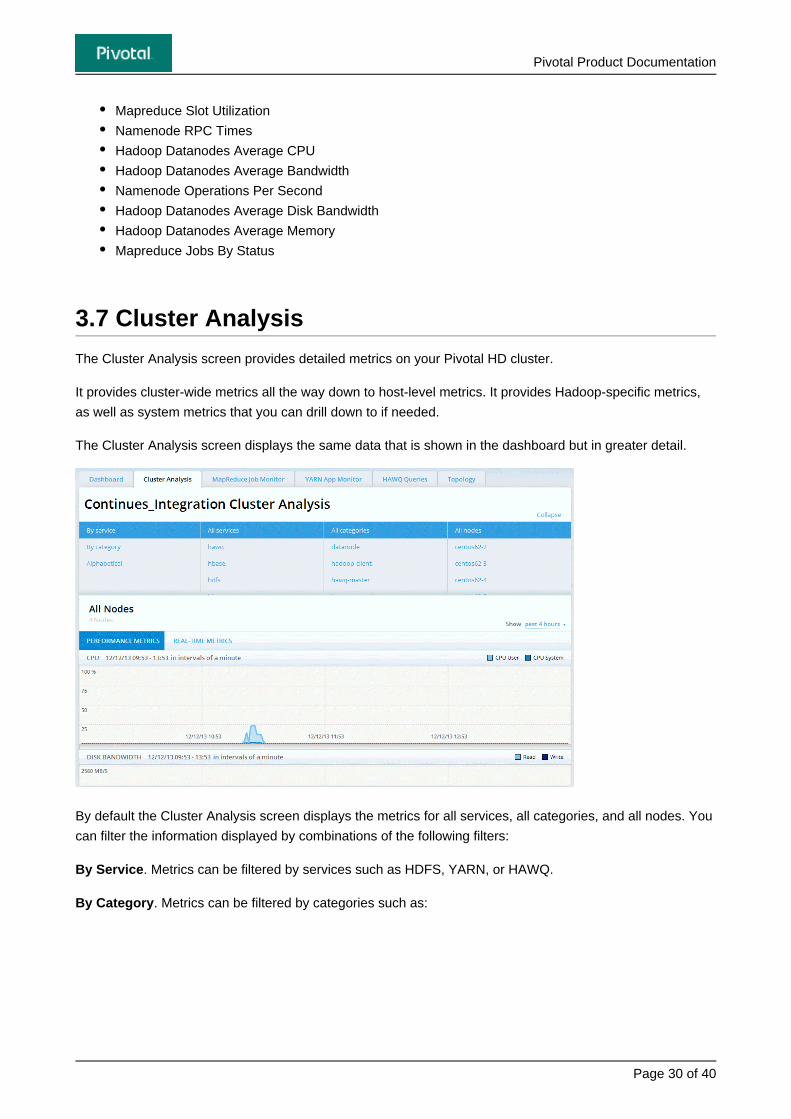
3.7 Cluster Analysis
The Cluster Analysis screen provides detailed metrics on your Pivotal HD cluster.
It provides cluster-wide metrics all the way down to host-level metrics. It provides Hadoop-specific metrics,
as well as system metrics that you can drill down to if needed.
The Cluster Analysis screen displays the same data that is shown in the dashboard but in greater detail.
By default the Cluster Analysis screen displays the metrics for all services, all categories, and all nodes. You
can filter the information displayed by combinations of the following filters:
. Metrics can be filtered by services such as HDFS, YARN, or HAWQ.By Service
. Metrics can be filtered by categories such as:By Category

Pivotal Product Documentation
Page of 31 40
namenode
secondarynamenode
datanode
yarn-resourcemanager
yarn-nodemanager
mapreduce-historyserver
hawq-master
hawq-segment
. Metrics can be filtered alphabetically.Alphabetically
Based on the filters you select, the lower part of the Cluster Analysis screen provides detailed graphs that
display data related to:
CPU
Disk Bandwidth
Network Bandwidth
Memory
Load
Swap Usage
Swap I/O
Network Operations
Disk Operations
You can view either the , which show the cluster/node utilization over-time, the Performance Metrics
which show the current metrics in real-time, or , which show metricsReal-time Metrics Storage Metrics
about cluster storage.
If you select Cluster Analysis for (the default), the Trending Metrics graph for the cluster isAll Nodes
displayed.
3.8 MapReduce Job Monitor
The Job Monitor screen tracks the MapReduce jobs that are executed in the Pivotal HD cluster when the
YARN MapReduce service is running. It provides details about all, or a filtered set of MapReduce jobs.

Pivotal Product Documentation
Page of 32 40
The MapReduce jobs displayed can be filtered by state and/or time range.
:By state
all jobs (set by default)
currently pending jobs
currently running jobs
succeeded jobs
failed jobs
killed jobs
: By selecting a preset time range in hours, weeks, months, year, or by specifying a customBy time range
time range.
The MapReduce jobs can also be filtered by searching for values for the following:
jobID
name
user
queue
Enter your search value in the search bar in the following format: searchKey=searchValue, where searchKey
is one of , , , or .jobID name user queue
These are substring searches. For example: will locate a job with jobID=1363920466130
jobID=job_1363920466130_0002
3.8.1 Job Details
When you click on any of the jobs in the Job Monitor more details of the job are shown.

Pivotal Product Documentation
Page of 33 40
This screen displays all the tasks that are have been allocated for the selected job and their progress. You
can see the mapper and the reducer tasks separately. In the above screen capture, the bars in the JOB
SUMMARY section represent the two Mapper tasks that have run, one took 19 seconds, the other, 20
seconds.
Clicking on each task ID will show even more details about that particular task. You can also filter on a
particular task ID in the search bar.
To see job related counters click on View more job details next to the job ID:

Pivotal Product Documentation
Page of 34 40
Click the link adjacent to the Status field to open a Vaidya report about the selected job, asAnalyze Job
shown below:
This capability is beta and will be improved in coming releases.
About VaidyaVaidya is a diagnostic tool installed with PHD for Map/Reduce jobs. After a job is executed successfully, it
uses a job history log and job configuration information to identify any performance or scalability problems
with the job. Upon execution, it provides a job analysis report indicating specific problems with the job along
with the remedy to correct them.
For more information about Vaidya, see the .PHD Enterprise Stack and Tool Reference Guide
3.9 YARN App Monitor

Pivotal Product Documentation
Page of 35 40
The YARN App Monitor screen tracks YARN applications that are executed in the Pivotal HD Cluster.
The YARN applications displayed can be filtered by category and/or time range:
By Category:
all apps (set by default)
currently pending apps
currently running apps
succeeded apps
failed apps
killed apps
By Time Range: By selecting a preset time range in hours, weeks, months, year, or by specifying a
custom time range.
The YARN applications can also be filtered by the following fields by entering it in the search bar in the
following format: searchKey=searchValue:
appID
name
user
These are substring searches. For example: will locate the application with appID=1363920466130
appID=application_1363920466130_0002
3.10 HAWQ Query Monitor
The HAWQ Query monitor is only displayed when HAWQ is installed on the cluster.
This screen displays all active queries running on the HAWQ cluster:
Pivotal Product Documentation
Page of 36 40
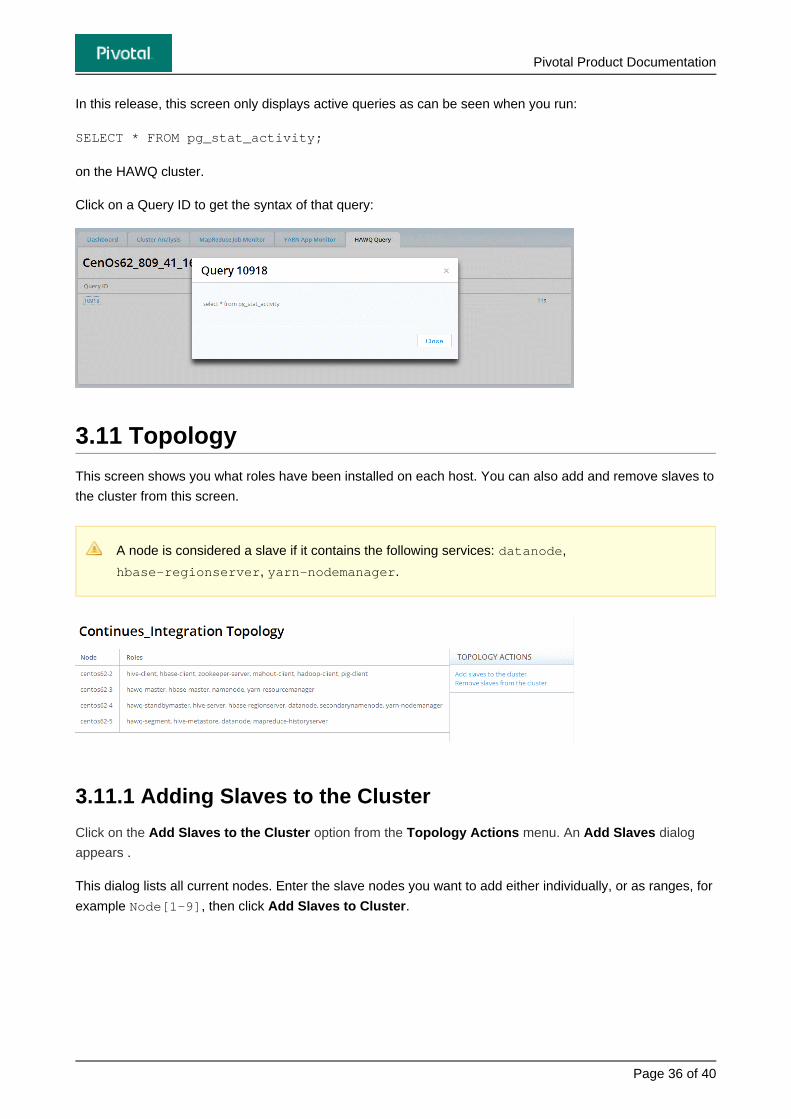
In this release, this screen only displays active queries as can be seen when you run:
SELECT * FROM pg_stat_activity;
on the HAWQ cluster.
Click on a Query ID to get the syntax of that query:
3.11 Topology
This screen shows you what roles have been installed on each host. You can also add and remove slaves to
the cluster from this screen.
A node is considered a slave if it contains the following services: , datanode
, .hbase-regionserver yarn-nodemanager
3.11.1 Adding Slaves to the Cluster
Click on the Add Slaves to the Cluster option from the Topology Actions menu. An Add Slaves dialog
.appears
This dialog lists all current nodes. Enter the slave nodes you want to add either individually, or as ranges, for
example , then click .Node[1-9] Add Slaves to Cluster

Pivotal Product Documentation
Page of 37 40
You have to provide the root password to add slave nodes.
If you type a node name twice, that name will flash yellow until one is deleted.
If you type the name of a node that already exists, that name becomes highlighted and you
are shown an error message warning you that:
.Highlighted hosts are duplicates and will not be added
If you close the dialog before the operation is finished, it continues in the background.
Refresh the Topology page to see if it has successfully completed.
3.11.2 Removing Slaves from a Cluster
Click on the Remove Slaves from the Cluster option from the Topology Actions menu. A Remove
.Slaves dialog appears
This dialog lists all current nodes. Enter the slave nodes you want to remove either individually, or as ranges,
for example , then click .Node[1-9] Remove Slaves from Cluster
You do not need to provide a password to remove slave nodes.
This text field auto-completes with nodes from the cluster.
If you try and enter a node that does not exist, the text field does not become active and you
are not able to perform the remove operation.
If you close the dialog before the operation is finished, it continues in the background.
Refresh the Topology page to see if it has successfully completed.
Pivotal Product Documentation
Page of 38 40
1.
2.
3.
4.
5.
6.
4 Creating a YUM EPEL RepositoryPivotal Command Center and Pivotal HD Enterprise expect some prerequisite packages to be pre-installed
on each host, depending on the software that gets deployed on a particular host. In order to have a
smoother installation it is recommended that each host would have yum access to an EPEL yum repository.
If you have access to the Internet, then you can configure your hosts to have access to the external EPEL
repositories. However, if your hosts do not have Internet access (or you are deploying onto a large cluster),
then having a local yum EPEL repo would be highly recommended. This will also give you some control on
the package versions you want deployed on your cluster.
Following are the steps to create a local yum repo:
Mount the RHEL/CentOS DVD on a machine that will act as the local yum repo.
Install a webserver on that machine (for example. httpd), making sure that HTTP traffic can reach this
machine.
Install the following packages on the machine:
yum-utilscreaterep
Go to the directory where the DVD is mounted and run the following command:
createrepo .
Create a repo file on each host with a descriptive filename in the
directory of each host (for example, ) with the following/etc/yum.repos.d/ CentOS-6.1.repo
contents:[CentOS-6.1]
name=CentOS 6.1 local repo for OS RPMS
baseurl=http://172.254.51.221/centos/$releasever/os/
$basearch/
enabled=1
gpgcheck=1
gpgkey=http://172.254.51.221/centos/$releasever/os/$basearch/RPM-GPG-KEY-CentOS-6
Validate that you can access the local yum repos by running the following command:
Yum list

Pivotal Product Documentation
Page of 39 40
5 Command Line ReferenceThis section provides descriptions and syntax for the command line operations you can perform.
You need to perform command line command on the Admin node.
5.1 Backup and Restore
You can backup data on the admin node where PCC is installed. Having the backup allows you to restore
the admin node and PCC to a given state in case of failures or data corruption.
Backup and restore operations should be performed as .root
5.1.1 Backup
Run the backup script to copy all configuration files and all data in the PCC database into a backup file on a
local disk. Once the tar file is created you should copy it off the admin node to a different storage to prevent
it from being lost if the admin node fails.
You should backup your data each time you make a configuration or topology change for your
cluster or if you add or delete clusters. Trying to restore old backup on the admin node when the
cluster topology or configuration has been changed since the backup will result in inconsistent
configuration and potentially unusable cluster.
To perform the backup run the following script:
# /usr/lib/gphd/gphdmgr/bin/gphdmgr_backup.sh
The script does not require any input and produces the backup file
in the current working directory, where is thephdmgr_backup_[timestamp].tar.gz timestamp
number corresponding to the current system time.
5.1.2 Restore
Run the restore script to replace all configuration files and all data in the PCC database from a backup file on
a local disk. There are two restore scenarios:

Pivotal Product Documentation
Page of 40 40
. If you had a backup from the old admin node and you need toRestore data on a new node
provision a new admin node, install PCC on the new admin node, then restore data from the backup
produced on the old admin node. Hostnames, IP addresses and system configuration of the old and
new nodes have to be identical.
. You can restore data from the backup file on the same admin nodeRestore data on the same node
where the backup was produced. Make sure the PCC version has not been updated since the backup
was made.
The restore procedure replaces all your configuration files and database data with the data from
the backup file, so use with caution.
To perform the restore run the following script:
# /usr/lib/gphd/gphdmgr/bin/gphdmgr_restore.sh phdmgr_backup_[timestamp].tar.gz
Your data will be permanently removed. Do you want to continue? y
The script takes the name of the backup file as an argument and asks the user for the confirmation before
proceeding with the restore. The script takes care of stopping the PCC services, performing the restore, and
restarting the services.


![[PPT]PowerPoint Presentation - FP&M SETA · Web viewDifferent Funding Types PIVOTAL - Fixed DG Funding Funding Type 2 NON-PIVOTAL & Special Projects PIVOTAL -Fixed DG Funding PIVOTAL](https://static.fdocuments.net/doc/165x107/5ad11a0c7f8b9aff738b54bc/pptpowerpoint-presentation-fpm-viewdifferent-funding-types-pivotal-fixed-dg.jpg)


