PHYS M10AL LABORATORY MANUAL By Prof. H. Fred …sunny.moorparkcollege.edu/~bbecht/PHYS M10A LAB...
44
PHYS M10AL LABORATORY MANUAL By Prof. H. Fred Meyer 1. Introduction: Algebraic Data Analysis 2. Measurements: Mass, Volume, and Density 3. Use of Graphs: The Simple Pendulum 4. Use of Graphs: The Acceleration of Gravity 5. Projectile Motion 6. Vector Addition of Forces: The Force Table 7. Friction 8. Center of Mass 9. Conservation of Linear Momentum 10. Rotational Motion and the Moment of Inerta 11. Young’s Modulus 12. Archimedes’ Principle 13. Melde’s Experiment 14. Specific Heat of Solids
Transcript of PHYS M10AL LABORATORY MANUAL By Prof. H. Fred …sunny.moorparkcollege.edu/~bbecht/PHYS M10A LAB...

PHYS M10AL LABORATORY MANUAL
By
Prof. H. Fred Meyer
1. Introduction: Algebraic Data Analysis
2. Measurements: Mass, Volume, and Density
3. Use of Graphs: The Simple Pendulum
4. Use of Graphs: The Acceleration of Gravity
5. Projectile Motion
6. Vector Addition of Forces: The Force Table
7. Friction
8. Center of Mass
9. Conservation of Linear Momentum
10. Rotational Motion and the Moment of Inerta
11. Young’s Modulus
12. Archimedes’ Principle
13. Melde’s Experiment
14. Specific Heat of Solids

MEASUREMENTS LAB
DETERMINING VOLUME , MASS AND DENSITY USING MICROMETERS,
VERNIER CALIPERS AND A LABORATORY BALANCE
INTRODUCTION
Instructional Objectives:
In this experiment are to learn how to use calipers, micrometers and a laboratory balance, and to
determine the “least count” of an instrument.
Determine the number of significant figures in a measurement.
Determine the calculated percent error in a measurement from the errors in the measurements.
Experimental Objectives:
Measure the dimensions and mass of various items use these measurements to determine the density
of these objects. The densities will be compared with accepted values to see if the experimental values
are within the predicted margin of error.
THE VERNIER CALIPER
Note the various measurement types listed below.
The Vernier CaliperInside Dimensions
Outside Dimensions
Depth Gauge
Metric Units (cm, mm)
English Units (inch)
Vernier Scales
The Vernier Caliper
Looking at the lower scale, note how measurements are read.

The least count is the smallest subdivision reading that can be read without estimating. Note that the
least count and determines the precision of the instrument. The least count shown above is 0.01 cm.
and the reading would be recorded as 3.47cm±0.01cm on the data sheet.
The ±0.01cm is called the absolute error in the measurement.
MICROMETER
The spindle of an ordinary metric micrometer has 2 threads per millimeter, and thus one complete revolution
moves the spindle through a distance of 0.5 millimeter. The longitudinal line on the frame is graduated with 1
millimeter divisions and 0.5 millimeter subdivisions. The thimble has 50 graduations, each being 0.01 millimeter
(one-hundredth of a millimeter). Convince yourself that the reading shown on the above micrometer is
12.93mm. (note that the thimble is 0.43mm past the 0.50mm mark on the sleeve. The reading would be
recorded as 12.94mm±0.01mm on the data sheet.

When using the micrometer, turn the ratchet (also called the friction clutch) until it slips. This provides the
proper torque on the thimble. Also, after using the micrometers, make sure to leave the jaws open so they
don’t get sprung with temperature changes.
Whole millimeter marks.
½ millimeter
marks.
.01 millimeter
marks
Notice that the least count on the micrometer is 0.01mm.
The above readings on the instruments assumed that they read zero when closed. Before taking a
reading, close the measuring device completely and take a zero reading. This will give you the “zero
correction.” If the zero correction is positive, this value must be subtracted from all readings. If the
zero correction is negative, this value must be added to each reading.
THEORY
The mass density of an object ρ is defined as MASS/VOLUME.
The volumes of various shapes are given by:
VSPHERE =
VCYLINDER =
L
THE EXPERIMENT
Caliper Measurements
DATA TABLE 1 Two measurements per partner.
Least count_________
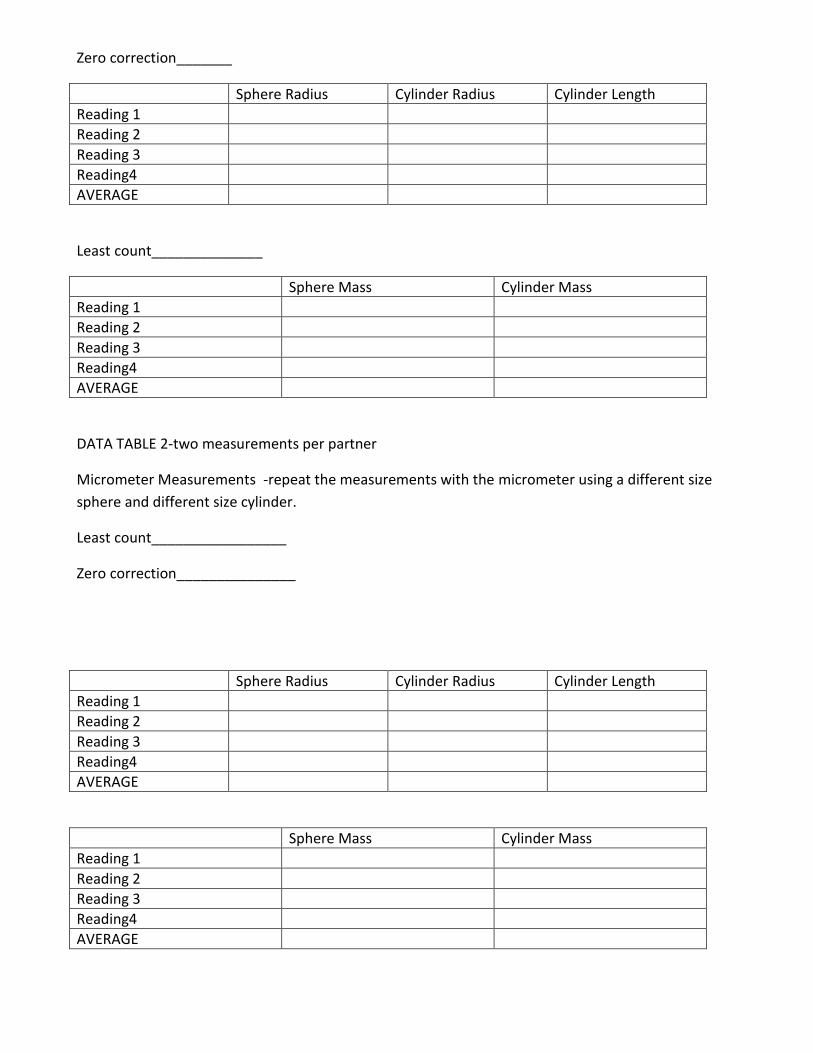
Zero correction_______
Sphere Radius Cylinder Radius Cylinder Length
Reading 1
Reading 2
Reading 3
Reading4
AVERAGE
Least count______________
Sphere Mass Cylinder Mass
Reading 1
Reading 2
Reading 3
Reading4
AVERAGE
DATA TABLE 2-two measurements per partner
Micrometer Measurements -repeat the measurements with the micrometer using a different size
sphere and different size cylinder.
Least count_________________
Zero correction_______________
Sphere Radius Cylinder Radius Cylinder Length
Reading 1
Reading 2
Reading 3
Reading4
AVERAGE
Sphere Mass Cylinder Mass
Reading 1
Reading 2
Reading 3
Reading4
AVERAGE

ANALYSIS
Using the equations given for volume and the data calculate the volume of each sphere and each
cylinder. ( be sure the results are stated with the proper number of significant figures and include the
units of either grams per cubic centimeter or kilograms per cubic meter)
Using the equation for density, calculate the density ρ of each object.
We are now going to use the estimated absolute error to calculate the predicted error in the density.
Add the absolute error (estimated from least count) to each of the measurements and calculate the
density again. Call this value ρ+ .

Now subtract the absolute error from each measurement and calculate the density of each object. Call
this value ρ- .
Calculate the percent predicted error using the equation
converted to percent.
Look up the accepted value of the density of each object.
Calculate the percent discrepancy using the equation
converted to percent.
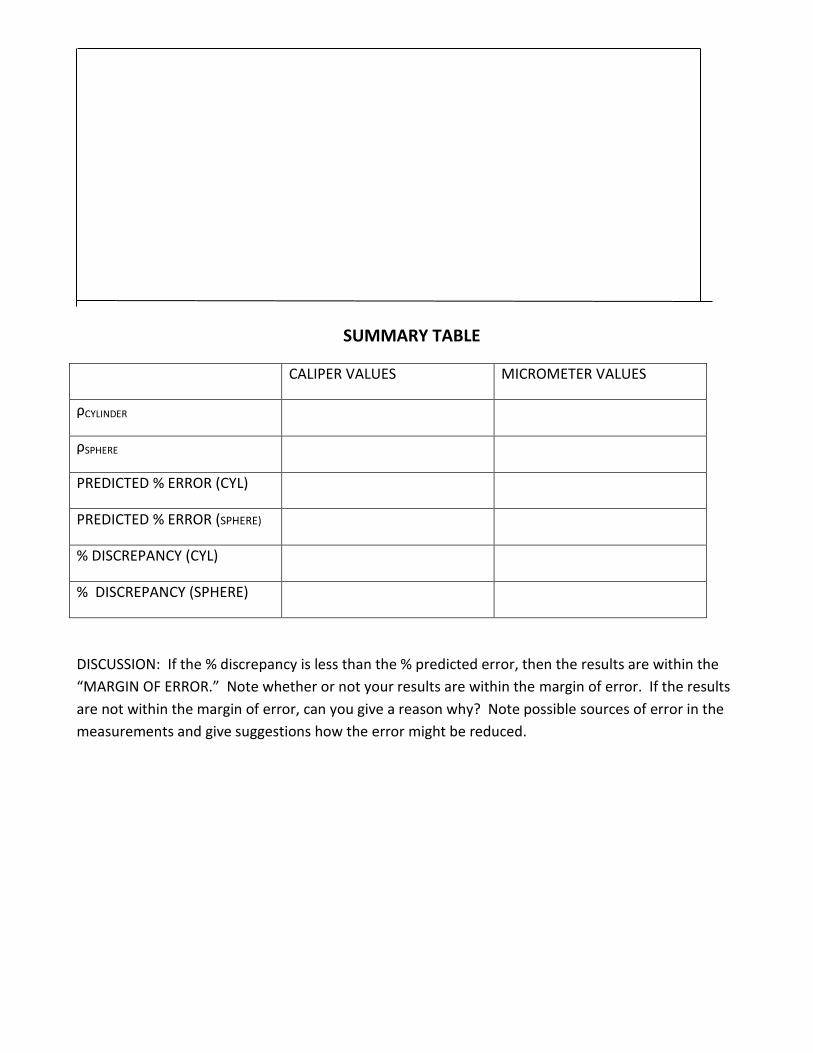
SUMMARY TABLE
CALIPER VALUES MICROMETER VALUES
ρCYLINDER
ρSPHERE
PREDICTED % ERROR (CYL)
PREDICTED % ERROR (SPHERE)
% DISCREPANCY (CYL)
% DISCREPANCY (SPHERE)
DISCUSSION: If the % discrepancy is less than the % predicted error, then the results are within the
“MARGIN OF ERROR.” Note whether or not your results are within the margin of error. If the results
are not within the margin of error, can you give a reason why? Note possible sources of error in the
measurements and give suggestions how the error might be reduced.
THE SIMPLE PENDULUM
INTRODUCTION: The Simple pendulum consists of small mass, m, suspended by a string. The
period of the pendulum, T, is the time for the mass (bob) to go from one extreme position to the other
and return (the time for one complete swing). The length, L of the pendulum is the distance from the
point of suspension to the center of the bob. The amplitude, θ, of the pendulum’s swing is the angle
between the vertical position and the extreme position. The experimental objective is to determine if the
period, T, depends on the variables θ, L, and m, and then find an empirical equation for the period, T, as
a function of those variables. The empirical equation will then be compared with the theoretical
equation.
INSTRUCTIONAL OBJECTIVES: Give the student practice in
1. Organizing a data sheet
2. Taking data when many variables are involved
3. Error estimation
4. Minimizing systematic errors
5. Representing data in graphic form
6. Obtaining equations from graphs
7. Comparing experimental results with accepted values
EQUIPMENT: Large wooden protractor, monofilament string, pendulum clamp, triple beam balance,
table clamp and rod, aluminum, lead, and steel spheres, meter stick, stop watch.
EXPERIMENTAL PROCEDURE:
1. Using a straight edge, organize a data sheet consisting of columns and rows. All of the variables
should be listed at the top of the column. Note: Reaction time is a significant source of error. To
minimize error due to reaction time, let the pendulum swing ten times. You will thus need 10T at the
top of a column as well as T.
2. Estimate the absolute error in each measurement and list it at the top of each column.
3. Set up the pendulum using the listed equipment.
4. Using a string length of about one meter and using the three masses, determine if the period depends
on the mass.
5. Keeping the length at about one meter and using the lead mass, determine if the period depends on
the angle, θ. Measure 10T for several amplitudes from 5 degrees to 80 degrees.
6. Using the lead mass and an angle of about 20 degrees, vary the length in 5cm increments starting at
one meter and decreasing the length to as small as possible as allowed by the protractor.

ANALYSIS: From each set of data, for the three variables, find, within experimental error, whether or
not the period depends upon the variable. If the period depends on the variable, plot a graph of T versus
the variable. (T goes on the y axis.)
From the graph of T vs. L, with L in meters, find the empirical equation of T as a function of L.
Determine the proportionality constant and the units of the constant.
The theoretical equation for small angles is Lg
T
2. Find the % discrepancy of your
proportionality constant compared tog
2. From your proportionality constant, determine a value for g
and compare it (% discrepancy) with the accepted value of g.
GRAPHING
BY HAND:
Plot a graph of period T versus L . Take L = 0 m to be at the origin. If this graph gives a straight
line, this shows that T depends on L . When drawing your graph, choose appropriate scales for the x
and y axes so the graph comes close to filling the page while, at the same time, keeping an easy to read
scale. The graph needs to have a descriptive title, the x and y axes need to be labeled with the variables
you are graphing and the units need to be on each axis also. Each point on the graph should be just a
small point with a protective circle around it. Your line should represent a visual best fit straight line (try
to draw a line which represents an average with about as many points on one side of the line as the
other). Draw a large slope triangle on your graph using easy to read grid points, and from this, determine
the slope of the line. This slope represents “g
2”. Draw maximum and minimum slope lines on your
graph and from maximum and minimum slopes on your graph, determine the % error in the slope.
EXTRA CREDIT QUESTION: (put calculations and answer in analysis section)
From an advanced mathematical solution for the period of the simple pendulum, the theoretical
expression for the period is:
...
2sin
64
9
2sin
4
112 42
g
LT
Where g is the acceleration of gravity and the terms in parentheses are part of an infinite series. For
small angles, the θ terms in the series are small and a good approximation for the period is found by
taking only the first term in the series. The approximation is
g
LT 2 . For an angle θ of 60º, how many additional terms must be used in order for
the theoretical period to exceed this approximation by 7%?

ACCELERATION OF GRAVITY
INTRODUCTION: The value of g, the acceleration of gravity, is to be determined using the Behr free-
fall apparatus. Measurements of distance intervals and time intervals will be used to calculate speeds at
various times. A graph of speed versus time will be used to calculate the magnitude of the acceleration
of a “freely falling” body.
EQUIPMENT: Behr free-fall apparatus, vernier calipers, meter stick.
INSTRUCTIONAL OBJECTIVES
1. Practice using the calipers
3. Organizing a data sheet
4. Experience drawing graphs on graph paper
5. Estimating error using maximum and minimum slopes
6. Learn to graph using Microsoft Excel
7. Become familiar with writing an ABSTRACT and an INTRODUCTION to a formal report
EXPERIMENTAL PROCEDURE
Since a free-falling body acquires a fairly large velocity in a short time interval, a special apparatus is
required to measure its position at short time intervals. The apparatus we will use is called the “Behr
Free-fall Apparatus.” It consists of a projectile which is dropped between two vertical wires and a
waxed tape. A high voltage spark timer produces sparks at the rate of 60 pulses per second between the
two wires and leaves small holes in the waxed tape each time it pulses. We thus have a waxed paper
strip which has marks on it at time intervals of 1/60th
of a second between each mark.

BEHR FREE-FALL APPARATUS
The tape appears as shown in the following figure with the points numbered.
__________________________________________________________________
. . . . . . . . . . . . . .
012 3 4 5 6 7 8 9 10 11 12 13 etc.
__________________________________________________________________
The time interval between each point is, of course, 1/60th
of a second.
Operate the apparatus and obtain one tape for each partner group.
Number the points on the tape 0, 1, 2, etc. Do not start your numbering at the first points since the first
few points are too close to permit accurate measurements. Start well down the tape where the points are
at least one cm apart. (Remember that you will be drawing a graph of v vs. t and the zero point for time
is arbitrary; it just means that the beginning velocity is not zero).
Take measurements of Δx values which will be used to calculate instantaneous velocities at various
times. For example, the instantaneous velocity at point 1 is v1= Δx 0,2/Δt . This would be the velocity
at time t1=1/60th
sec. v3= Δx 2,4/Δt would be the velocity at time t3= 3/60th
sec. Δt= 1/30th
of a second
for each interval.
As you can see, the measurements for Δx that you need to make are distances between points (0,2),
(2,4), (4,6) etc. which will be used to calculate v1, v3, v5, v7, etc. until you obtain at least ten points for a
graph of v vs. t. The average velocity over an interval, such v1= Δx 0,2/Δt gives the instantaneous
velocity v1 at the mid-time point of the interval. Using a straight edge, construct a data table with
columns and rows and label the top of the columns with Δx (i,j), Δt, t, vi. Measure the various Δx values
as accurately as possible using vernier calipers.
ANALYSIS
If the instantaneous velocities at various times are plotted on the y-axis verses the time on the x-axis, a
straight line should be obtained and the slope of the line will be the acceleration.
GRAPHING
BY HAND: ( see handout on graphing)
Plot a graph of your velocities against the time. Take time t = 0sec to be at the origin. When drawing
your graph, choose appropriate scales for the x and y axes so the graph comes close to filling the page,
while, at the same time, keeping an easy to read scale. The graph needs to have a descriptive title, the x
and y axes need to be labeled with the variables you are graphing and the units need to be on each axis
also. Each point on the graph should be just a small point with a protective circle around it. Your line
should represent a visual best fit straight line (try to draw a line which represents an average with about
as many points on one side of the line as the other). Draw a large slope triangle on your graph using easy
to read grid points, and from this, determine the slope of the line. This slope represents “g”. Draw
maximum and minimum slope lines on your graph and from maximum and minimum slopes on your
graph, determine the % error in g.

BALLISTIC PENDULUM AND
PROJECTILE MOTION
One period for part 1 and 2
One period for part 3
INTRODUCTION: The initial speed of a projectile fired from a spring gun will be determined by two
methods: Part 1 will use the ballistic pendulum to find the initial speed. In part 2, the measurement of
the projectile range, when it is fired horizontally from a known height, will be used to calculate the
initial speed. In part 3, the known initial speed from parts 1 or 2 or both will be used to calculate the
range of the projectile when it is fired at an angle θ from the table and lands on the floor. The projectile
will be fired and its actual range will be compared to the calculated value. Also in part 3, the projectile
will be fired at various angles at ground level and the range versus the angle will be plotted on a graph.
EQUIPMENT:
Ballistic pendulum apparatus (Record the equipment number on your data sheet.)
Triple beam balance
Table clamp
Tape Measure
Meter stick
Plumb bob
Target paper
Carbon paper
THEORY: (to be completed by the student before class)
Part 1 – Ballistic pendulum: The ball is shot horizontally form a spring gun with speed v0 and is caught
by the pendulum bob. The ball and the pendulum rise to an angle θ, the highest point.
Let m be the mass of the projectile, L is the pendulum length, M is the mass of the pendulum bob and
shaft, h is the maximum height to which both will rise, v0 is the initial speed of the ball (this is what we
want to find.) V represents the speed of the ball and pendulum immediately after impact.
The speed after impact, V, can be found by using conservation of mechanical energy:
(Kinetic Energy of pendulum and ball immediately after impact) = (Potential Energy of ball and
pendulum at angle θ).

From this equation the speed, V, can be found in terms of the vertical rise h. Note that masses cancel
out in this equation. Write down the equation and solve it for V. Call this Equation (1).
Next, we need to get v0 in terms of V. Using conservation of momentum for the completely inelastic
collision of m with M we have:
(momentum of the ball, m, before the collision) = (total momentum of the ball and pendulum, M+m,
after the collision)
Write down this equation and solve it for v0 in terms of V, m, and M. Call this equation (2). Combine
equations 1 and 2 and solve for v0 in terms of M, m, h, and g. Call this equation (3).
Next, it is necessary to get h in terms of the pendulum length L and the angle θ. From the diagram and
using some triangle trigonometry, show that h = L(1 - cosθ). Substitute this into equation (3) to get the
final equation.
Part 2: Calculation of v0 from the measurement of the range. The pendulum is moved up at 90º and
locked in position so it is out of the way and the projectile is fired horizontally from a known height H
above the floor. The range X is measured, and from this known range and height, the initial speed v0 can
be calculated. Using the equations of motion from lecture, derive the equation for v0 in terms of H, X,
and g. Derive this before class and include the derivation in your report. Hint, use the y motion to find t
and then substitute this time into the x equation. Let y=0 where it lands and call y0=H

Part 3: The spring gun will now be set at an angle θ with respect to the horizontal. Using the known
velocity v0, derive an equation for the range R of the projectile.
The equations you will use are tvxx cos00 and 2
002
1sin gttvyy
The equation for R will be in terms of v0, θ, H, and g. Derive this equation before coming to class. Hint,
use the y motion to find t and then substitute this time into the x equation. Let y=0 where it lands and
call y0=H. The solution of the y equation (quadratic) is a bit tricky and is subject to algebraic errors
(especially sign errors.) Work independently of your partner so you can check each other for errors.
Compare your final equation with your partner’s.
For the theory regarding the range versus the angle, you can look this up in your text.
PROCEDURE
Part 1: Initial velocity from the Ballistic Pendulum. Place the pendulum apparatus on the table. Put a
table clamp behind the launcher as a backstop (do not clamp the base to the table as it will crack the
base). Remove the ball from the launcher and mass it. Do the same for the pendulum and rod as a unit.
Put everything back together and put the ball back in the launcher. Use the ram rod to cock the launcher
to the desired spring tension (there are three levels). Set the angle meter to zero and fire the projectile
into the pendulum. Read the angle and repeat this at least 10 times. Calculate the value of v0 using the
equation derived in the theory section. Assume L = 28.5 cm
Part 2: On the launcher, there is a white circle with a cross on it. This is the reference point for all
height and distance measurements. Place the launcher next to the edge of the table so you can drop a
plumb bob from this point to the floor. Put a table clamp behind the launcher as a backstop. Drop your
plumb bob from the cross in the circle and put a mark on the floor, where it touches the floor as a

reference for your range measurements. Cock the launcher with the same spring tension as in part 1 and
do a test firing. Tape an 8 1/2 X 11 inch piece of paper on the floor, centered where your test firing
landed. Place a piece of carbon paper over this paper and fire the launcher at least 10 times. Remove
the carbon paper and measure to the center of the grouping. This will be your value of X. Measure the
distance from the floor to the cross on the launcher. This will be your value of H. Calculate v0 using the
equation derived in the theory section.
Part 3: The value of θ will be provided by your instructor. Remove the launcher from its mount, rotate it
180º and reconnect it to the launcher at the angle given. Measure the new height H from the floor to the
cross. Using equation derived in the theory section and the value you obtained for v0, (you decide
whether to use the average value of v0 obtained from parts 1 and 2 or the value of v0 from part 1 or part
2) calculate the range R . Again, work independently of your partner and compare results.
After calculating what R should be, tape a sheet of target paper to the floor, lengthwise along the line of
fire, centered at the calculated distance R. Place a sheet of carbon paper on top of the target paper. Do
not shoot the ball until your instructor has seen your calculated distance and is present to watch the shot.
Fire the ball several times to get a grouping of points. Remove the carbon paper and measure the
distance to the center of the grouping. Compare this distance to the calculated distance R. Points will
be assigned depending on what region of the target the ball lands.
Now fire the projectile at ground level for 5º intervals starting at 30º and ending at 60º. Graph the range
versus the angle. Is the shape of this graph as expected? Discuss in light of the theory from your text.

FORCE TABLE
INTRODUCTION: The force table is an apparatus that allows the experimental determination of the
resultant of force vectors. It consists of a large aluminum disk with the rim graduated in degrees. Forces
are applied to a central ring by means of strings passing over pulleys and attached to weight hangers.
The magnitude of the vector is varied by adding masses to the weight hangers and the direction of the
vector is changed by moving the pulleys along the rim at different angles. Vectors will be added
experimentally using the force table. The vectors will also be added graphically and analytically. The
magnitude of the experimental resultant will be compared to the magnitude of the resultant as found
from the analytical method.
EQUIPMENT: Force table apparatus, four pulleys, weights and weight hangers, string, protractor,
ruler, bubble level, graph paper.
THEORY: Review the analytical method using components and also the graphical methods of adding
vectors as found in your text. You may also go to:
http://www.rowan.edu/colleges/lasold/physicsandastronomy/LabManual/labs/TheForceTable.pdf

EXPERIMENTAL PROCEDURE:
When two or more forces are applied to the ring, their vector sum, or resultant R, can be found by
finding the additional force needed to balance the applied force. For example, if two forces are applied,
the resultant, or vector sum, is
(1) F1 + F2 = R
The magnitude and direction of R can be found by finding a third force E such that
F1 + F2 + E = 0 or,
(2) F1 + F2 = -E
E is called the equilibrant and we can see when comparing equations (1) and (2) that
-E = R
Remember that taking the negative of a vector is just reversing its direction by 180º. Thus, to find the
resultant, just find the equilibrant and add 180º to the angle.
1. Level the force table.
2. Place a pin in the hole at the center of the table.
3. Attach strings, and weight hangers to the ring. Make sure the strings are free to slide on the ring.
4. Attach the pulleys to the disk at the angles given in the vector problem.
5. Add the masses given in the vector problem (be sure to include the weight hanger in the total.)
6. Find the equilibrant needed to center the ring around the pin. (Note: You can find the proper
direction of the equilibrant by just pulling on the string with your hand while trying different angles
until you find the right angle to center the pin. You can then just add weights)
Using the above method, find R for the following vectors.
Note: If we assign a direction to a given mass on the weight hanger, we then have a magnitude and
direction for the mass and can hence treat it as a vector. It will not then be necessary to multiply the
mass by g to get force. We shall just do everything in mass units.
VECTOR PROBLEM I:
MAGNITUDE ANGLE
F1 200g 30º
F2 200g 120º
EI _____ ______
RI _____ ______
VECTOR PROBLEM II:

MAGNITUDE ANGLE
F1 500g 0º
F2 300g 90º
EII ______ _____
RII _________ ________
VECTOR PROBLEM III:
MAGNITUDE ANGLE
F1 200g 30º
F2 100g 90º
F3 300g 170º
EIII ______ ______
RIII ______ ______
ANALYSIS:
Using the polygon method, draw each vector to scale on graph paper. Use one sheet of paper per
problem. You do not need to draw the equilibrant, just the given vectors and the resultant. Choose a
scale so the vector diagram fills up most of the sheet (this gives more accuracy.) Make sure each vector
has arrows on the tip and show all the angles. Show the scale calculation for the resultant.
Using the diagrams from the graphical method, break each vector into x and y components and use the
component method to find R. Use a different color to show the components.
REPORT: Hand in your initialed data sheet, the graphical and analytical calculations, and a summary
table. Calculate the percent discrepancy comparing the resultant from the force table with the resultant
as calculated using the analytical method.
When there are several results to report, a summary table should always be included in the conclusion.
Since this is your first lab with several results, a sample summary table is shown.

PROBLEM FORCE TABLE GRAPHICAL ANALYTICAL % DISCREPANCY
R θ R θ R θ R
I
II
III
QUESTIONS:
1. Why is it necessary to include the mass of the weight hangers? Since they have the same mass
shouldn’t it cancel out?
2. What are the sources of error? List them. What is the largest source of error?
3. Why is it necessary to let the string slip on the ring?
4. What would be the effect of a more massive ring?

FRICTION
INTRODUCTION:
The coefficient of kinetic friction between a block of wood and a wooden plane will be determined by
measuring the friction force while varying the normal force and by measuring the angle of repose. The
effective contact area of the sliding surface will also be investigated.
THEORY:
When relatively smooth solid surfaces slide over each other, the force of kinetic friction, fk , is
proportional to the normal force FN and is directly opposite to the displacement. The coefficient of
kinetic friction is defined by the equation:
N
k
kF
f
Re-arranging the equation gives (1) Nkk Ff . When fk is plotted on the y-axis and FN is plotted on
the x-axis, the slope of the straight line is k .
Before the lab period, the student shall derive the equation for the angle of repose, θR, for kinetic friction
(the angle for which the block slides down the plane at constant speed).
Draw a force diagram, use 0 xF and 0 yF to derive the equation:
(2) Rk tan
EQUIPMENT:
Plane board, wood block, weight hanger, pulley, string, weights, table clamp, angle meter, right angle
clamp, rod, triple beam balance.
EXPERIMENTAL PROCEDURE:
Part 1: Mass the block. Place the plane board flat on the table, attach a pulley to one end and place the
block on the plane. Run a light string from the block, over the pulley, and attach a weight hanger. The
pulley should be attached to the end of the plane without the hole thru it. This will insure the grain of
the wood is in the same direction as in part 2 of this experiment. Notice that the block has two sliding
surfaces, one wide and one narrow. Start with the wide side down. Notice that there are three screw
holes in the end of the block. Make sure the eye screw is screwed into the lowest hole so the string is
parallel to the sliding surface. Another method of keeping the string parallel to the plane is to adjust the
height of the pulley itself. Loosen the pivot screw on the pulley, adjust it to the desired height, and
retighten the pivot screw. The wooden blocks should only be held by the sides. Touching the sliding
surface with sticky or greasy hands will change the coefficient of friction.
Add weight to the weight hanger until the block slides with constant speed when started in motion with a
light tap. Add masses to the block in 200g increments up to 1200g. For each mass M added to the
block, record the total mass m, hanging on the string, which makes the block move with constant speed.
Repeat part 1 with the narrow side of the block as the sliding surface.

Part 2. Slide a small rod thru the hole in the end of the wood plane and attach a right angle clamp to the
rod. Attach the right angle clamp to a vertical rod and then attach the vertical rod to a table clamp.
Keeping the grain of the block and plane the same as in part 1, place the wide side of the block on the
plane, change the angle between the plane and the table until the block slides down the plane at constant
speed when given a small tap. Measure this angle with the angle meter. This angle is the angle of
repose.
Repeat part 2 for the narrow side of the block.
ANALYSIS:
Part 1. The friction force is equal to mg where m is the mass attached to the string when the block
slides at constant speed. The normal force is equal to Mg where M is the mass of the block plus added
masses. Thus, equation (1) becomes Mgmg or Mm . Thus, we do not need to multiply the
masses by g to get weight and we can just graph m on the y-axis and M on the x-axis. The slope of the
line will be µ.
Plot graphs of m verses M for the wide side and the narrow side. Draw the best fit line thru the points
for each graph and find the slope of these lines. The slope will be the coefficient of friction. Put error
bars for m on the graph points. Draw maximum and minimum slopes on the graph and determine the
slope of the max and min slopes. The
% error in the slope is given by slope
slopeslope
slope2
minmax and this is the % error in µ.

Part 2. From the equation Rk tan , determine the coefficient of friction for the wide and the narrow
sides.
Find the % difference for the wide side using the results from parts 1 and 2.
Find the % difference for the narrow side using the results from parts1 and 2.
Note: percent difference =avgx
xx 21
REPORT: Unless asked by your instructor to do a formal report, your report shall include the following
sections:
THEORY
ANALYSIS
CONCLUSION (Summarize the results and state whether or not the contact area makes a
significant difference in the coefficient of friction? In other words, is the difference greater than
predicted by the % error in the value of µ? State sources of error and how the results could be
improved)
APPENDIX (answers to questions and original data sheet)
QUESTIONS:
1. If the tangential force of the string just balances the frictional force, why does the block move?
2. How does friction in the bearings of the pulley change the coefficient of friction?
3. (problem) Using the mass of your block and using the coefficient of friction for the wide side,
determine how much force parallel to the plane would be required to move the block up the plane at a
constant speed? Assume the plane angle is 30º

CENTER OF MASS
INTRODUCTION: Using five nearly identical meter sticks, you are to find the best systematic
procedure for stacking the sticks lengthwise, one on top of the other, out over the edge of the table such
that end of the top stick is at a maximum distance D from the edge of the table. Once the proper method
of stacking is found, measurements of the displacement of each stick, relative to the stick immediately
below it will be made and a sequence, for this displacement, determined from these measurements. This
sequence will be summed to find a series which can be used to predict the theoretical value of the
distance D. This sequence will also be used to predict the location of the center of mass of the stacked
sticks.
PROCEDURE: By trial and error, determine a systematic method for stacking the sticks. Should you
start with the bottom stick, the top stick, the middle stick, or what? We shall refer to the top stick as
stick number one, the second from the top as stick number two etc. In general, we can have n sticks, n =
5 for our case. If the proper method of stacking has been discovered, the distance D of the end of the top
stick from the edge of the table will be over 110 cm. Once the proper method of stacking has been
determined, take measurements of D, d1, d2, d3, d4, d5 as shown in the following diagram.
Systematically shuffle the sticks and repeat the measurements five times.
ANALYSIS: Let L represent the length of the sticks.
1. Find the closest fractional value of d1, d2, d3, d4, d5 in terms of the length L. For example, d1 = L/2.
You find the rest. These values of dn represent a sequence for the distance of the front edge of each
stick relative to the stick below it. Now find a general term for the sequence. An example of a general
term would be dn = L/n2. This, of course, is not the correct sequence.
D
d1 d2 d3
d4 d5

2. Represent the distance D as the sum of the sequence, D = d1 + d2 + d3 + d4 + d5 using the general
term determined from part 1 of the analysis. The sum of a sequence is called a series. Use this series to
predict the value of D and compare it to the measured value of D. For example, using the sample
sequence above, the series would be 5
12n
LD
3. Using the definition for the center of mass, find the location of the center of mass of the five sticks
using the sequence from part 1 of the analysis. Choose a coordinate system with the origin located at the
edge of the table. Let x1 be the coordinate of the number 1 stick (top stick), x2 the coordinate of stick
number 2 etc. Now x1=d5+d4+d3+d2. Now substitute the value for d5, d4, etc. using your sequence. Do
the same for x2, x3, etc. Substitute these values of xn into the equation iii xMxM 5
1
5
1 where x is
the center of mass and then solve for x . Hint, assume all masses are equal and simplify the above
expression by solving for x before doing any substitutions. Another hint is that x2=d5+d4+d3+d2 –L/2.
Where does your intuition tell you the center of mass is located?
4. Extra credit: How far from the table would the far end of the top stick be if the number of sticks
approached ∞? Or, if you let the number of sticks get larger and larger, say approaching ∞, what does
the value of D approach? Could D approach ∞? You may need to do a little research.
REPORT: In your report, be sure to include the stacking method, detailed analysis for each section
above, and a conclusion which summarizes your results and compares your measured results of D with
the calculated value.
ROTATIONAL MOTION AND THE MOMENT OF INERTIA
Introduction: When a sphere, solid cylinder, and a hollow cylinder are
released at the top of a triple track, one finds that the sphere arrives at the
bottom first, the solid cylinder arrives second, and the hollow cylinder arrives
last. The objective of this experiment is to measure the times it takes for each
object to travel down the track and compare these times with those predicted
from theory.
Equipment: Triple beam balance, Stop watch, Angle Meter,
Meter stick, Vernier calipers, Triple track,
Table Clamp, Rods (long and short) , Rod Connector
Rolling objects (sphere, solid and hollow cylinder)
Drawing tools ( T-Square, Triangles, ruler, etc.)
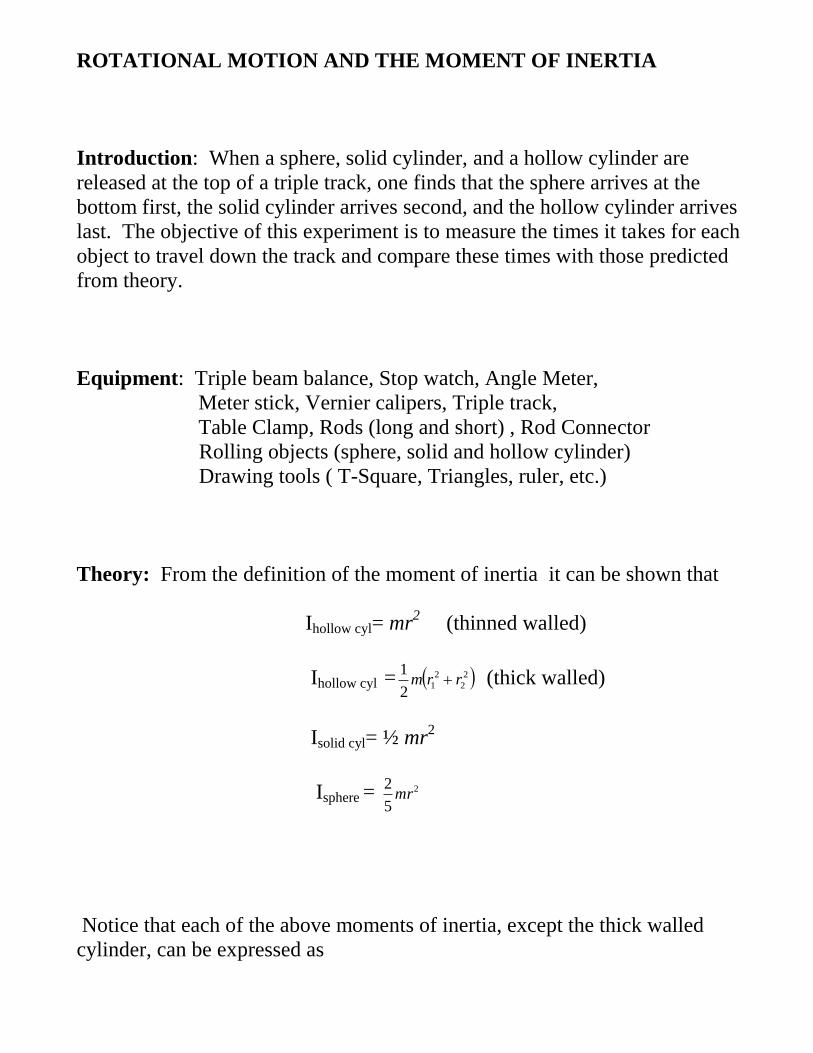
Theory: From the definition of the moment of inertia it can be shown that
Ihollow cyl= mr2 (thinned walled)
Ihollow cyl = 2
2
2
12
1rrm (thick walled)
Isolid cyl= ½ mr2
Isphere = 2
5
2mr
Notice that each of the above moments of inertia, except the thick walled
cylinder, can be expressed as

I = kmr2
where k=1 for the thinned walled cylinder, k=1/2 for the solid cylinder, and
k= 2/5 for the sphere.
To find an expression for the time it takes each object to travel down the
ramp, use conservation of energy to first find the final speed at the bottom of
the ramp.
22
2
1
2
1ImvmgH
where H is the height of release above the bottom of the ramp.
Substitute the expression for 2kmrI in the above equation and solve for v.
Once v has been found, it can be substituted into the equation for average
speed
t
Lvavg to find the time where L is the length of the
ramp.
Show that: gH
kLt
2
12
.
Note that H=Lsinθ

Procedure:
1) Adjust the incline to θ = 5º
2) Make ten measurements of t for each object
3) Measure L, H, m, θ, routside for all objects, and rinside for the hollow cylinder.
4) Include as part of your data, an estimate of the errors for the above
measurements.
5) Repeat all measurements for θ = 10º
Analysis: Using the equation gH
kLt
2
12
, calculate the time it takes for each
object to travel down the ramp for each angle. Compare your measured
values with the calculated values.
Report: This will be a formal report. You will have two lab periods to write
it. Be sure to include all of the sections necessary for a formal report. All
θ H
L

of the report must be done with a word processor including using equation
editor for all of the mathematics. Nothing except your data should be in
handwriting.
In your conclusion, you should include a summary table showing the
average of the measured values of t for each angle and the calculated value of
t for each angle along with the % difference.
Extra credit: Note that the equation for I of a thick walled hollow cylinder
cannot be expressed as I=kmr2 and therefore the equation shown for t is not as
accurate as one derived using
Ihollow cyl = 2
2
2
12
1rrm (thick walled)
Where r1 is the inside radius and r2 is the outside radius. Using this equation
for I, derive a new equation for t and use it to calculate new values of t.
Compare these times with the measured times and comment on the accuracy
using this equation when compared to the accuracy using the equation for
gH
kLt
2
12
to calculate t.

YOUNG’S MODULUS AND TORSION MODULUS
INTRODUCTION: The experimental objectives of this lab are to find values of Young’s modulus and
torsion (sheer) modulus for steel.
EQUIPMENT:
Young’s modulus apparatus with dial indicator
Torsion modulus apparatus and torsion rod
Bubble level
Micrometer
Meter stick
Assorted large and small weights and hangers
Bow calipers
THEORY:
Young’s Modulus
For the description of the elastic properties of linear objects like wires, rods, columns which are either
stretched or compressed, a convenient parameter is the Young's modulus of the material. Young's
modulus can be used to predict the elongation or compression of an object as long as the stress is less
than the yield strength of the material.
Young’s modulus is defined as the stress,A
F divided by the strain,
L
L where F is the force stretching
the material, A is the cross-sectional, ΔL is the elongation, and L is the original length of the material.
In this lab, a wire will be stretched by adding weights to a weight hanger. Thus, F=mg and Young’s
modulus becomes
L
LA
F
Y
=L
L
A
F
or
L
L
A
mgY
If we re-arrange this equation, we can write gL
LYAm
.
A graph of m vs. ΔL will then have a slope of gL
YA from which Y can be determined.
Torsion Modulus

Usually the sheer or torsion modulus is measured by applying a torque to one end of the rod which is
fixed at the other end and measuring the angular rotation φ. It can be shown, by using the definition of
sheer modulus, that the torsion modulus is given by:
4
2
r
lM
where M is the sheer modulus
l is the length of the rod
r is the radius of the rod
φ is the angle of twist or rotation in radians
A weight, mg, will be attached to a wheel of radius R to give a torque τ = mgR and the above equation
then becomes 4
2
r
lmgRM .
PROCEDURE:
Young’s modulus:
1. Place one kilogram on the weight hanger initially to eliminate kinks. Leave this on throughout the
experiment and do not count it as part of the load. The elongation which the initial weight produces will
not enter into your measurements since you have not zeroed your reading of the wire length.
2. Level the stand using the bubble level
3. Measure the diameter of the steel wire using micrometers
4. Measure the length of the wire which is subject to stretching.

5. Take a “zero” elongation reading of the dial indicator
6. Add weights one kilogram at a time and record the dial indicator reading each time.
7. Once you have added as many weights as possible and taken your dial indicator readings, remove the
weights one at a time and again take readings each time a weight is removed.

Note: Be sure to record the absolute error in all of your measurements since this will be needed for error
propagation in your analysis.
Torsion Modulus
The apparatus will be set up by the lab tech at the back of the lab. When through, please leave it as you
found it.
1. Adjust the vernier to zero when an initial mass of 200 grams is suspended from the strap. Do not
count this initial weight in your calculations.
2. Add masses ½ kg at a time and record the angle reading after each addition.
Do not twist the rod excessively. Do not exceed a total of 500 GRAMS!
3. Measure the rod’s length and diameter.
4. Measure the diameter of the wheel on which the masses are hung.
Note that the vernier for measuring the angle is in tenths of a degree.

ANALYSIS:
Young’ modulus: Plot a graph of m verses ΔL and from the slope, calculate a value of Y and using error
propagation, calculate the predicted % error in Y. Compare your value to the accepted value of 200
GN/m2.
Remember, “compare” means to find the % discrepancy and see if it is within the margin of your error
estimate.
Torsion modulus: Using the analysis of Young’s modulus as a guide, decide what quantities to graph
and perform an analysis similar to that described above for Young’s modulus.
Report: For your report, include all of the sections (abstract, introduction, etc.).

ARCHIMEDES’ PRINCIPLE
INTRODUCTION: Archimedes’ principle will be used to determine the density of a liquid, a solid
that has a density greater than that of water, and a solid with a density less than that of water.
EQUIPMENT: (for a group of 2)
2 Beakers
1 Triple beam balance
Table clamps and rods
1 Vernier caliper
1 Metal cube with hook
1 wood block
(for class use)
Monofilament line
Graduated cylinder filled with alcohol
Hydrometer (placed in graduated cylinder)
Analytical balance
Jug of alcohol mixture
THEORY: The mass density ρ, of a substance, is the mass per unit volume or,
Eqn. (1) V
m .
The mass density of water is 1.00 g/cm3
.
The specific gravity (s.g.) is defined as water
gs
.. .
Since the denominator has a numerical value of one when using the density of water as 1.00 g/cm3
, the
specific gravity will have the same numerical value as the density of the substance but will have no
units. Physics students know that w=mg and is in units of dynes or Newtons (chemistry students may
not know this.) However, since our balances “weight” things in grams, we will use grams as though it is
force and not multiply any masses by g. We will call it gram force.
Archimedes’ principle states that the buoyant force on a body immersed in a fluid has a buoyant force
(upward force in grams) equal to the “weight” of the fluid that the body displaces. This can be
expressed as:
Eqn. (2) buoyant force(gram force) =(Vfluid displaced)(ρ fluid )
(COMPLETE THE THEORY FOR PARTS 1, 2, AND 3 BEFORE THE CLASS MEETING)
Theory, part 1: Measurement of the density of a solid cube.
If we suspend a solid body (metal cube) from a balance and completely submerge it in a liquid, the sum
of the “gram forces” can be written as:
Eqn. (3) Fscale + buoyant force – m = 0

Combine equations (1), (2), and (3) and derive an equation for the volume of the cube and the density of
the cube in terms of m, buoyant force, and ρwater. .
Theory, part 2: Measurement of the density of an unknown liquid.
If we now suspend the submerged cube of known volume and mass m from the balance and measure the
new buoyant force, the density of the unknown liquid can be determined.
Derive the expression water
water
unk
unkFm
Fm
where F stands for scale reading.
Theory, part 3: Measurement of the density of a wood block using Archimedes’ principle by using
a “sinker” of known volume.
Use the metal cube of mass m from part 1 to submerge the wood block and suspend the assembly in a
beaker of water. Summing the forces in the y direction gives:
Eqn. (4) Fscale+ buoyant force –(mcube+mwood)=0
Combine equations (2) and (4) and derive an equation for the volume of the wood block in terms of
Fscale , mcube, mwood, ρwater, and Vblock.
Combine this derived equation with Eqn. (1) to get an equation for the density of the wood.
PROCEDURE:
Part 1: Density of metal cube
Measure the “weight” of the metal cube.
Using the vernier calipers, measure the dimensions of the cube.
Obtain a beaker of de-ionized water. Fasten a 1 cm diameter rod to a table clamp and mount the triple
beam balance on this vertical rod (see Figure 1 below.)
Using monofilament line, hang the cube from a notch provided in the lever arm underneath the balance.

Fig. 1
Record the scale reading while the cube is completely submerged in the water. Do not let the cube
touch the bottom or sides of the beaker. Take at least two readings—it is difficult to get accurate
readings because of the damping effect on the submerged weight. Use Eqn. (3) to calculate the buoyant
force.
The buoyant force can also be measured by “weighting” the beaker and water without the cube
suspended in the liquid and then “weighting” the beaker and the water with the cube suspended as
shown.
Fig. 2
Convince yourself using Newton’s third law that the buoyant force is the difference between these
readings. Take two readings using this method, and average the buoyant forces with those from the
previous method.
Remember that error estimates need to be included with all of your data.
Part 2: Density of an unknown liquid.
Record the measured density of the unknown liquid using the hydrometer and the graduated cylinder set
up at the front of the classroom
Dry the cube.
Obtain a beaker of unknown liquid and repeat the measurements taken in Part 1 using the unknown
liquid instead of water.
Part 3. Density of wood.
“Weight” a wood block using the analytical balance set up in classroom.
Attach the wood block to the cube used in Part 1, and “weight” them before you submerge both of them
in water, and after you submerge both of them as shown in Fig. 1.
Calculate the buoyant force using Eqn. (4).
ANALYSIS:
Using the measured mass m and the dimensions of the metal cube, calculate the density of the cube.
Using the measured mass m and the dimensions of the wood cube, calculate the density of the wood
cube.
For each part, re-write each equation that you derived in the theory section using Archimedes’ principle.
Use each equation and calculate the density of the metal cube, the alcohol, and the wood. Show a sample
calculation of each type in your report.
Look up the density of the metal. Calculate the percent discrepancy of the density for the metal cube.
Using the hydrometer reading as the accepted value for the unknown liquid, calculate a percent
discrepancy for the density of the unknown liquid obtained using Archemedes’ principle.
Using the density of the wood cube obtained from the dimension measurements as the accepted value,
calculate a percent discrepancy for the density obtained using Archemedes’ principle.
REPORT:
Unless instructed by your teacher, write a standard report.
In the conclusion be sure to summarize and compare your results.

MELDE’S EXPERIMENT
INTRODUCTION: Standing waves in a vibrating string will be used to find an empirical equation for
the velocity of the oppositely traveling waves in a string as a function of the tension in the string. This
equation and the proportionality constant will then be compared to the equation predicted from theory.
EQUIPMENT: String vibrator, frequency generator, braided fishing line, weight hanger and slotted
weights, pulley, table clamps and rods, analytical balance.
THEORY: When two waves of equal wavelength λ and amplitude are traveling in opposite directions a
standing wave occurs.
The velocity of a wave is given by the two equations: (1) v=λf, and (2)
Tv where T is the tension
in the string (equal to mg where m is the mass of the weights and the weight hangar) and µ is the linear
density of the string (equal to the mass of the string divided by its length).
The distance between nodes must be in integral number of half wavelengths. The wavelength can then
be determined by measuring between the nodes at a given frequency and tension T. The velocity can
then be calculated using equation (1) A graph of the velocity vs. tension can then be plotted to
determine the relationship between v and T. This equation can then be compared to equation (2).

PROCEDURE:
Set up the vibrator, string, pulley, and weight hanger as shown in the picture.
Decide on what measurements need to be made and organize a data sheet
Cut an additional one meter length of string and mass it with the analytical balance to determine
the linear density. Estimate the uncertainty in µ.
With a mass of 100 grams (the weight hanger plus 50g), turn on the generator and vary the
frequency until a standing wave of 2
3 occurs between the vibrator and pulley. Measure the
half-wavelength (use the two nodes 1/3 and 2/3 of the way down the string). Record the mass
and half-wavelength, and frequency.
Repeat the above measurements by adding masses in 50 gram increments up to a maximum of
500 grams total mass.
ANALYSIS: Using Excel chart wizard, plot a graph of velocity verses the square root of the tension
mg. Remember to use consistent units (grams, centimeters; or, kilograms, meters). Determine the slope
of this line.

The theoretical equation (2) shows that TT
v
1, as you can see, if v = y and T =x , the
equation becomes xy
1 which is a straight line with slope
1 . Using the slope of your line,
calculate µ and compare this value with the measured value using µ= m/L.
REPORT: Unless a formal report is required by your professor, you write up shall include a sample
calculation of each type, a conclusion containing a summary of results and a comparison with theory.
The conclusion should also include sources of error and how the experiment could be improved. The
original signed data sheet and answers to question should be placed in the appendix.
Question: In order to create more nodes in a string at a given frequency, would more or less mass need
to be attached to the string? Justify your answer mathematically.

SPECIFIC HEAT CAPACITY and HEAT OF FUSION for
WATER
INTRODUCTION: Using the method of mixtures, the specific heat capacity of copper and aluminum
will be measured;
APPARATUS: Steam generator, calorimeter, thermometers, solid specimens of copper and aluminum,
metric “Dial-O-Gram” balance.
THEORY:
Part 1. The specific heat capacity of a substance is defined as the heat energy per unit mass per unit
change in temperature or: Tm
Qc
The units we will use are gramC
cal
From the definition of specific heat capacity, we can express the change in heat energy, ∆Q , when the
temperature of a solid changes by ∆T, as:
TmcQ
The method of mixtures consists of determining the quantity of heat transferred from a given amount of
hot solid to a given amount of water and calorimeter at a given lower temperature. If it is assumed that
there is no heat exchange between the calorimeter and its surroundings, the heat lost by the hot solid is
equal to the heat gained by the water and calorimeter.
Let mw be the mass of the water in the calorimeter, mc is the mass of the calorimeter; both are at an
initial temperature T1. A solid of mass m is heated to a temperature of T2. After the solid is placed in
the water, the final temperature of the mixture is T.
The specific heat capacity of the calorimeter is given by cc.
The specific heat capacity of the solid is given by c and the specific heat of water is given by cw.
Conservation of energy means that the heat lost by the solid specimen equals the heat gained by the
calorimeter and water.
Thus, 112 TTmTTcmTTmc cww
As part of the theory in your report, this equation is to be solved for c.
Part 2. Heat of fusion is given by: fmLQ Where m is the amount of ice melting to water at 0ºC and
Lf is the latent heat of fusion for ice to water.

PROCEDURE:
Part 1:
Fill the steam generator two thirds full and plug it in.
Suspend the unknown solids with nylon threads in the steam generator.
“Weight” the empty aluminum container inside the calorimeter .
Fill the calorimeter about half full of water and weight it again.
Measure and record the temperature of the water inside the calorimeter.
Quickly transfer one of the specimens from the steam generator into the calorimeter. Stir the
mixture, and record the final temperature when equilibrium has been reached. (How do you
know when equilibrium has been reached?)
Repeat the process for the other solid.
It is assumed that the calorimeter and its contents are thermally isolated from its surroundings, i.e.
insulated. This is difficult to realize in practice, but the effect due the heat exchange can be
minimized by having the temperature difference between the initial calorimeter contents and the
surroundings about the same as the difference between the final temperature of the calorimeter
contents and the surroundings.
Part 2: In this part of the experiment, you will design an experiment to determine the heat of fusion
of ice. You should come to the laboratory with an outline of the procedure you plan to use. Include
in your report the details of the procedure you used.
ANALYSIS: Compute the specific heat capacities of the two metals. Estimate the percent uncertainty
in your results. Find the percent discrepancy between your results and the accepted values. Compute
the heat of fusion for ice and compute the percent discrepancy.
REPORT: Unless a formal report is required by your professor, your write up shall include a sample
calculation of each type, a conclusion containing a summary of results, and a comparison with theory.
(Is the percent discrepancy less than predicted error?) The conclusion should also include sources of
error and how the experiment could be improved. The original signed data sheet and answers to
questions should be placed in the appendix.