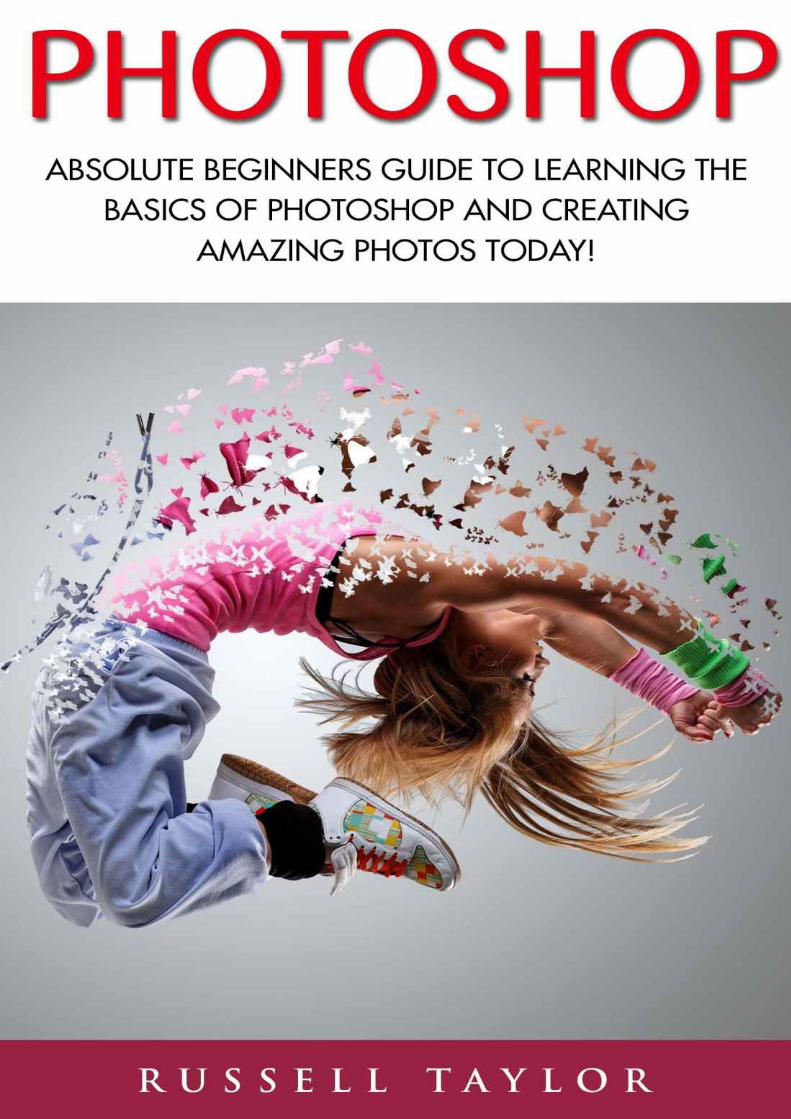
Photoshop Absolute Beginners Guide
35
-
Upload
razvan-scarlat -
Category
Documents
-
view
44 -
download
3
description
Photoshop Absolute Beginners Guide
Transcript of Photoshop Absolute Beginners Guide

Photoshop:
AbsoluteBeginnersGuidetoLearningtheBasicsofPhotoshopandCreatingAmazing
PhotosToday!

TableOfContentsIntroductionChapter1–ThePhotoshopToolbarChapter2–BasicPhotoshopDrawingswiththePenToolChapter3–ColorCorrections,Enhancements,andTouch-UpsConclusion

Introduction
Photoshop represents an incredibly powerful application with a host of intimidatingfeatures.For thosewhowish toget startedwithusingPhotoshopbut arenot sure as tohow, this ebookwill help you pick up all the basics of this amazing photo and imageeditingtool.
Holdon!Yousayyoudon’thavePhotoshop?
IfyouarenotaPhotoshopuseratpresent,youcanpickupa30-dayfreetrialplanfromAdobe.Itallowsyoutodownloadanduseafreeversionofthesoftwarethusgivingyouenoughtimetogetaccustomedwiththebasicsonhowthetoolworks.
Incaseyouareunwillingtopurchaseitlongtermbecauseofthelargeexpensesinvolved,muchof the things explainedherewill continue to be applicable for these are commonaspectsinmostofthepopularimageeditingtoolssuchasGIMPandPixelmator.
WehavedecidedtogoaheadwithPhotoshoplargelyconsideringitsoverallpopularityinthemodernmarket. Sowithout further ado, let’s get started and explore thewonderfulworldofphotoandimageediting.


Chapter1–ThePhotoshopToolbar
Ifwewere to takea lookateverysingle toolpresent in the toolbar, itwould requireaseparatebookof itsown.So, letus takea lookatsomeof thebasic tools thataremostcommonlyused.
Whileyouwillgetanoverviewofwhateachtooldoes,itwouldbebetterifyoucouldgetholdoftheapplicationitselfandplayedaroundonitforawhile.
MoveTool(Keyboard:V)
With theMove tool, you canmove objects around the Photoshop canvas on any givenlayer.Click anddrag anywhere on the canvas to use it.While dragging, thePhotoshoplayermovesalongwiththemouse.
Marquee(Keyboard:M)
Marquee allows the selection of a specific part of the canvas in a certain shape. Thedefaultshapeiseitherarectangleoraperfectsquare(usuallyproducedbyholdingdowntheShiftbuttonwhileselectingthecanvasarea).
Itcanalsobeintheshapeofanellipse(orcircle,onceagainproducedbyholdingdowntheShiftbuttonwhileselectingthearea).
Lasso(Keyboard:L)
Afree-formselectiontool,youcandragitaroundthecanvasandselectanythingthat iscoveredinthelassoedarea.Thepolygonlassoisaccessiblewithinthistoolandallowsaselectiontobecreatedbyclickingaroundonthecanvasandmarkingpoints.
Themagneticlassoworkssimilartotheregularlassobutattemptstoautodetectedgesandautomaticallysnapthemup.
MagicWand(Keyboard:W)
Whenyouuse themagicwand to clickon an area, it automatically tells thePhotoshopapplicationtoselectthespotandanythingsimilartoitaroundthevicinity.Thistoolisacrudemethodofremovingbackgroundsfromphotos.
CropTool(Keyboard:C)
As can be inferred from the name, this tool is used for cropping the pictures. Byspecifying the exact size, the tool can be constrained to those proportions or be usedsimplyasafreesize.
Eyedropper(Keyboard:I)
Withtheeyedroppertoolyoucanclickanywhereonthecanvasandsamplethecolorfromthat specific point. The tool will cause the foreground color to change to that it hassampledfromthecanvas.
HealingBrush(Keyboard:J)
Withthehealingbrushyoucansamplepartofthephotographanduseitforpaintingoverother parts. Once done, the Photoshop application examines the surrounding areas andtriestoblendthepaintedimagealongwiththerestofthepicture.
PaintbrushandPencil(Keyboard:B)
Thepaintbrushtooldoesallthethingsideallypossiblewithapaintbrushwhilethepencilemulatesapencil.Differentkindsofbrushesmaybesetforthepaintbrushtool.
Whileairbrushstylesandstandardairbrusharepopularoptions, leavesandothershapesmayalsobeusedtocreatepaintingmasterpieces.
CloneStamp(Keyboard:S)
Just like the healing brush, the clone stamp allows sampling of a small part of thephotograph.Itcanbeusedforpaintingoverotherparts.However,itdoesn’tdoanythingmorethanthatwiththeuseofthistoollimitedtopaintingoneareaoveranother.
HistoryBrush(Keyboard:Y)
Thehistorybrushallowspaintingback in time.With thePhotoshopapplicationkeepingtrackofeverymovebeingmadetheHistorybrushtoolallowsthepasttobepaintedintothecurrentphoto.
Forexample,ifyouhaveincreasedthebrightnessbutwanttochangethebrightnessofacertainparttoitsoriginalstate,usethehistorybrushonthatpartanditwillreturntoitsoriginaldarkness.
EraserTool(Keyboard:E)
Theerasetoolissimilartothepaintbrushtoolexceptforthefactthatiterasesratherthanpainting.
PaintCanandGradientTools(Keyboard:G)
This tool allows a specific area to be filled in with the current foreground color. Bydefault,thegradienttoolcreatesagradientthatblendsthebackgroundandforegroundofthetool.Presetgradientscanbecreatedandloadedaswellwithsomeofthemusingmore
thantwocolors.
Blur,Sharpen,andSmudgeTools(Keyboard:None)
Eachofthesethreetoolsactssimilartopaintbrushes,thoughtheimpactonthepictureisdifferentforeach.Theblurtoolblursthepaintarea,thesharpentoolsharpensit,andthesmudgetoolcreatesasmudgeoftheentireareaaroundthecanvas.
The latter is veryusefulwhen it comes to creating a nice blendof colors orwisps andsmokesthatcanbeaddedontothephotograph.
Burn,DodgeandSpongeTools(Keyboard:O)
Thesetoolsaresimilartothepaintbrushandcanbeusedformanipulatinglightandcolorintensity.Theburntooldarkensareasinthephotographwhilethedodgetoolmakesthemlighter.
Thespongetoolhelpsinsaturationorde-saturationofcolorintheareawhereitisapplied.Allofthesetoolsareusefulforcreatingtouchupsonthephoto.
PenTool(Keyboard:P)
Ifyouareplanning todrawvectorgraphics, this toolwillcome inveryuseful.Anotherarea for its application is in thecreationofpaths that canbeput touse in anumberofotherareasthatwillbediscussedinsubsequentchapters.
TypeTool(Keyboard:T)
With the type tool you are able to type horizontally. Tools that are hidden beneath thehorizontal type tool also allow typing to be done vertically apart from creation ofhorizontalandverticaltextmasks.
PathTool(Keyboard:A)
Youcanusethepathtoolformovingaroundanyofthecreatedpaths.Itisverysimilartothemovetoolbutcanbeusedonlyforpaths.
ShapeTool(Keyboard:U)
This tool allows the creation of vector rectangles, lines, polygons, circles, roundedrectangles, as well as custom shapes. They come in very handy while creating ordesigningshapemasksforphotos.
HandTool(Keyboard:H)
ClickingandholdingdownwiththehandtoolallowsyoutomovearoundthePhotoshopcanvas. If the entire canvas has a fit to the screen, this toolwon’t be able to fulfill itspurpose.
However,ifyouarezoomedin,thenthetoolwillalloweasynavigation.Itwillalsocomeinhandyonapicturethatistoobigtofitontothescreenat100%view.
ZoomTool(Keyboard:Z)
Withthezoomtoolyoucanzoominandoutofthecanvasareabyclickingonacertainpartof thePhotoshopcanvas.Thedefault setting is for it tozoomin.Forzoomingout,youneedtoholddowntheoptionkeyandusethetoolasinallordinarycircumstances.
Color Selection Tools (Keyboard: D for defaults, X to switch background andforegroundcolors)
Youcanmanagethecolorinusewiththehelpofthesetools.Foregroundcoloristhecoloronthetopandbackgroundcolorisonethatappearsinthebackground.Theformeriswhatthebrushesareideallygoingtouseandthelatteriswhatisgoingtobeusedupondeletingorextendingsomethingtothebackground.
Thecoupleofsmalleroptionspresentonthefrontareshortcutfunctions.Theleftone–ablacksquareonawhitesquare–setsthedefaultcolorforthebackgroundandforeground(keyboard: D); the curved double-headed arrow swaps the foreground and backgroundcolors (keyboard: X).When you click on the colors either in the foreground or in thebackground,acolorpickerisdisplayedsothattheprecisecolorcanbeset.

Chapter1.1–ThePhotoshopPalettes
Palettesarethosethingsthatcanbefoundontherighthandsideofthescreen.Theymakeit easier to navigate through the documents, switch modes, add adjustments, and do awholelotofotherthings.
Layers
The layers palette allows all the layers in a document to be seen. Once you becomefamiliarwiththeintrinsicworldofPhotoshop,youwillfindyourselfgoingbackandforthonthispalettemoreoftenthannot.
Itallowsorganizationandarrangementofthelayers,letyousetblendingmodes,opacityandvisibilityoflayers,allowlayerstobemergedandgrouped,anddoawholelotofotherinterestingthings.
Adjustments
Theadjustmentspaneliswhereadjustmentlayerscanbeeasilycreatedandedited.Theselayersarenon-destructiveimagealterationsthatimpactsubsequentlayersbelowthemandcanbeturnedonandoffwithoutmuchdifficulty.
Colorcorrectioniseasilyitsmostcommonusewhileanumberofotheradjustmentscanalsobeperformedfordramaticallyalteringthelookoftheimage.
ColorChannels
Withthecolorchannelspalette,youcantakealookatspecificcolorsthatcombineontoyourpicture.RGBmodewillgiveyoured,green,andblue.Thecolorchannelstypicallydifferfromonecolorspacetoanother.
Upon choosing a specific color, the image is shown in different versions of black andwhiteforeachofthecolorchannelsaresimplymonochromaticimagesthatrepresentthelightineachchannel.
Whenyou switch between these different channels, it gives channel-specific touch ups,overallcontrastenhancements,andalsoconvertsthephototoablackandwhiteshadeinaverycompellingmanner.
ColorPicker
Thispaletteallowstheforegroundandbackgroundcolorstobeeasilyalteredwiththehelpofsliders.
ColorSwatches
This isasetofpre-definedcolorsfromwhichquickchoicescanbemade.Anumberofotherpre-madeswatchcollectionscaneitherbe loadedinoryoucancreateoneofyourownaswell.
History
With thehistorypalette,youcangoback in timeandundoanypreviousalterationyoumayhavemade.Thestandardundocommandsimplyletsyoutogglebetweenanundoandredoofthelatestactionsontheimagebutthehistorypanelletsyougofurtherbackonthemodifications.
Text
The text palette aswell as theparagraphpalette that comesbelow it allows all sorts ofadjustmentstothetextbeingcreatedwiththetypetool.Theoptionsaresimilartowhatisseeninawordprocessorbutallowsadditionalspecificationssuchascharacterwidthandspacingwhichareusefulforthecreationofnewdesigns.

Chapter1.2–MenusinthePhotoshopApplication
MostofthethingsavailableinthePhotoshopmenucanbeaccessedwiththehelpofthetoolsalreadydiscussed.Nonetheless, thereareafewnotableitemsineachofthemenusthatareworthtakingalookat.
File
Like in all other applications, file handles the opening, closing, and saving of alloperations.
Edit
Editbringstheusualselectionofcut,copy,andpaste.IntermsofPhotoshop,thisis theplacethatletsyoutransformthelayersandalsosetyourcolorspaces.
Image
Thismenugivesyouaccesstoimageandcanvasadjustmentsincludingdestructiveeffectsthatcanbefoundintheadjustmentspalette.Themenuoptionsaredesignedtoaffecttheimageasawholethoughtheapplicationofmanyoftheadjustmentsislimitedtoonlyasinglelayer.
Layer
Layerallowsyoutodoallofthosethingsthatcanbedoneinthelayerpalettebutaddsanumberofotheroptionsintothepicture.Themenualsoallowscreationofsmartobjectsandadjustmentlayers.
Select
Thelassoandmarqueetoolsareusuallythemainoptionsofselectingthings.However,theselectmenuallowsarefinementofthatselectionorletsyoucreateentirelynewselectionsbasedoncriteriasuchasluminosityandcolorrange.
Analysis
Analysisprovidesmeasurement tools thatcanoftencome inhandy formakingaccuratealterationstotheimages.Forthebasiclessons,thisisjustaboutallthatyouwouldwanttoknow.
View

View lets youworkwith different viewing options, hide and show the line guides thathavebeencreated.ItmakesthePhotoshopapplicationtosnaptocorners,grids,andedgesonthecanvas.ViewingofthisinvisiblegridcanalsobecontrolledwiththeViewmenu.
Window
TheWindowmenuallowscertainpalettesandwindowstobeeithershownorhidden.ThePhotoshoppalettesandwindowscanalsobearranged thewayyouwantandsavedasawindowpreset.


Chapter2–BasicPhotoshopDrawingswiththePenTool
IntroducingthePenTool
ThePenTool isPhotoshop is extremelypowerfulbut it canalsohaveaverydeceivingeffectontheuser.Theprimaryideaofapenissomethingyouwouldnormallypressdownandmakeaflowingmarkwith.
The general idea of the pen as a tool that can create dots on paper and connect themautomaticallybasedonanumberoffactorsmayseemalittlefarfetchedbutthatisexactlywhat the Photoshop pen is capable of. Though itmay seem a little odd, the tool is anextremelypowerfuloneandusefulfordrawingvectorgraphics.
ThePenToolisessentiallyanumberoftoolsrolledintoone.Itsbasicoperationsinvolveclicking around the Photoshop canvas and getting points to appear. The points getconnectedbylinesandsoonstarttakingadefiniteshape.
Holdingdowntheshiftkeybeforecreatingapointensuresthelineiseitherstraightorintheformofaperfect45degreeangle.Thiscanbeidealfordrawingsimple,roughshapesbutcurvesandmoreuniqueshapeswillrequiresomemoreworktobeputin.
Startbycreatingapointon thecanvaswith thePenTool.Followthatupwithasecondpointandholddowntodrag.Soonacurvestarts toappear.Holdingdowntheshiftkeyallowscreationofperfectanglesandhelpsinthegenerationofamoreevencurve.
Whilecreatingpointsinthisfashion,youarelikelytoseetwolinesradiatingoutfromthepoint.Each of these lines has balls at the endwhich affect one side of the curvewhendragged.
One of the lines should be touching the curvewhile the other should not. The line nottouchingthecurveistheonethathasaneffectonthenextpointbeingmade.
Animmediatealterationcanbemadebyholdingdowntheoptionkeywhilethecurveisstillbeingdrawnintoposition.Ifyouwishtomakethealterationattheendofmakingthecurve, hold down the option key, click on the ball at one end of the line and drag itwhereveryouwant.Thelongeryoumaketheline,morerestrictiveitwillbeonthenextcurve.Thecreatedanglealsohasadramaticeffectonthecurve.
Smallerangleswillgiveyousharperedgeswhilewiderangleswillgivelargelyroundededges.YouneedtoworkwiththetoolalittletobetterunderstandhowtogoaboutwithhandlingthePenToolinPhotoshop.
Incaseyouarefacingtroublewithgettingthepentooltoworkasperyourwish,thegridcancomeinhandy.ThiscanbeturnedonthroughtheViewmenuandGridfromtheShowsubmenu.
Thegridmakesitaloteasiertoseewhatisbeingdoneandsnapsontotherightpoints.Shapessuchasaheartbecomealoteasiertodrawwhendonewiththehelpofthesegrids.
AllYouNeedIsaGoodDealofPractice

Because of its awkward nature, getting a grip on the Pen Tool can prove extremelydifficultatfirst.Tracingphotosisoneoftheeasiestmethodstopractice.
Silhouettesmakeforexcellentstartingpointsbecauseyouhavetodealwithjustonecolor.Onceyougetahangoftheshapesandstrokes,youcanmakeupmorecomplexdrawings.


Chapter3–ColorCorrections,Enhancements, andTouch-Ups
NowthatyouhaveabasicideaaboutwhatPhotoshophastooffer,it’stimetotakealookat how these can be used for correcting and altering colors, retouching blemishes, andotherunwantedpartsonyourphotos.
ColorCorrection
Colorcorrectionisawholeloteasierthanwhatyoumaybeinclinedtobelieve.Youhavetoknowthecolorsthatarecomplimentaryandyoucanmakeuseofthoseforcancellingouttoomuchofanyothercolor.
Youmustalsohave theability tospot theareaswhere thesecolorsaremostprominent.Thismeanshavingtheabilitytotell,say,whenthelightareaofthephotoisdominatedbyredorthedarkareaisunderdominationofabluecolor.
Theadditionofasimplebluefilterontheentirephotowilllikelygiveyoumoreneutralhighlights just the way you want them but the photo will become too cool with theshadowsbecomingoverlysaturatedwithbluecolor.
Therearetwoimportantaspectsyouneedtopayattentiontoforcolorcorrection:colorsthatdominatethephotographandcolorsthatdon’t.Alsoyouneedtofindoutwherethesedominatingcolorsareconcentratedfromatonalperspective.
This is something that you can do by simply eyeing the photo but the proper methodwouldbetoconsultthehistogramavailable.ChooseHistogramfromtheWindowmenutogainaccesstothistool.
The left side is for the shadows, right side for the highlights, and the middle sectionreflects themid-tones. If the photo is dominated in any area by a particular color, thatspaceonthehistogramwillbedominatedbythesamecolor.Thiscancomeinhandyforspottingnecessarycorrections.
ColorBalance
Thecolorbalancetooldoesnothaveagreatdealofflexibilitybutonoccasionswhenonlyminorcoloradjustmentsarenecessary,thistoolcanhelpingettingthemappliedquickly.
If thebrightestpartsonaphotohappentobea little toored,select theHighlightsradiobuttonandmove theslider towardsblueandcyanuntil thecolorsbecomemoreneutralandbalanced.
ColorBalancetoolcanalsobeusedforcreatinganumberofinterestingcoloreffectsbyemphasizingvariouscolorsintheirhighlights,mid-tones,orshadows.
Playingaroundwithitwillgiveyouanicefeelofallthatthistoolcando.ThistoolisnotsomethingpeoplewouldideallyusealotofthetimeswithCurvesbeingabetteroptioninthisregardwithbetterflexibility.
However, if youhave quick changes to bemade then theColorBalance tool definitelymakesforausefulchoice.
Levels
Levels tool is very much similar to the Curves tool with the added option of havingtrainingwheels.Therearethreemainslidersavailable.Theshadowsslideristotheleft–whenyoumoveittotherighttheintensityoftheshadowsincreases.
The highlights slider is to the right and moving it out towards the left increases theintensityofthehighlightsonthephoto.Themid-tonessliderisinthemiddle.Movingitleftbrightensupthephotoandslidingitrightmakesitdarker.
Theslidersarepresentmainlytoaffectthecontrastofthepicture,whiletheonespresentunderOutputLevelaffecttheimagebrightness.Whenyoumovetheblackslidertowardsthe white one, the image brightens up and vice versa, the darkness increases. Underdefaultsettings,theLevelstoolappliesallofthesechangesacrosstheentirephotobutyouhavetheoptionofselectingandalteringspecificcolorchannelsaswell.
At the top of theLevels panel is a little drop-downmenu that allows a selection to bemadeeitherfromallchannels(RGB)oroftheindividualchannels(red,green,andblue).If you wish to darken or brighten just the reds, select the red channel and make thenecessaryadjustments.
Curves
IfthereisonecolorcorrectiontoolinPhotoshopthatstandsoutfromallothers,itistheCurves tool. It can prove a little intimidating andmake you shy away from it though,especiallywhentheLevelstoollookslikeitisworkingalltoowell.
However,thisoneisalotbettersoyouwoulddowelltotakesometimeoutandlearnhowitworkssoyoucangetdowntodoingmostofyouradjustmentswithit.
This tool is powerful and versatile, and can be controlledwith ease once you have thehangofit.ItsfunctionalitybecomessimilartotheLevelstoolinalargenumberofwaysonceyouknowhowtosetyourownpoints.Adjustmentscanbemadeeithertotheentireimageoralongspecificchannels,similartowhatyouseeintheLevelstool.
Formakingapointofthecurve,clickanywhereonthelineanddragalonginaparticulardirection.Pulling towards the top left cornerwill brighten things upwhile a pull downtowardsthebottomrightcornerwillcauseeverythingtodarkenup.
Mid-tonesisrepresentedbythemiddleoftheline.Thebottomofthelinethattouchesthebottom left corner is a representation of the shadows with the top representing thehighlights.

AutoTone
Thereare instanceswhenyoucansimplyallowPhotoshop todoanumberof thingsonyour behalf.Though itwon’t be a good idea to rely on theAutoTone option, you cannevertheless use it and allow the application to make an educated guess on how yourphotoshouldlookintermsofthecolorandtoneadjustments.Itcanalsohelpyousavealittlebitoftimeonoccasions.
Thenagainthereareinstanceswhenitgetsthingsright.Youneedtosparenomorethantwo seconds to see if it is going towork. If it doesn’t, undo the changes and apply thecorrectionsonyourown.

Chapter3.1–PhotoRetouchingandEnhancing
Itisveryeasytodobasicenhancingandretouchingofphotos.Whendonewiththerightlevel of subtlety, it can also prove extremely effective. Here is a look at some of theoptions tohelpcorrectproblems inphotos suchasdust from lens,dryskin,cutson theface,etc.
TouchUps
Useofeither thecloningstamporhealingbrushwillhelp inaccomplishingmostof thetouchups thatneed tobeperformed. Ifall thatyouare trying todo ismakingapersonlooktheirverybestthenmostofthethingscanbedonewiththehelpofaclonestamporhealingbrush.
We have already given substantial amount of information on these tools earlier in thebook.Nevertheless,wewilltakeanotherlookatwhatisonoffer.
RevisitingtheHealingBrush
Thistoolhasalreadybeendiscussedagooddealsowearegoingtostayawayfromdivingintogreatdetails.Itbasicallyworkswiththeselectionofasourcepointandpaintingovertheareathatyouwishto“heal”withimagedatatakenfromthesourcepoint.Thetoolthenworks itsmagic andblends in the painted sourcematerialwith all that is present in itssurroundings.
Whileyoumayexpectamore realistic result thanwhatyou findwith theCloneBrush,suchisnotalwaysthecase.Thelatterhasthesameworkingprocessbutdoesnothaveanyfunctionalitytoheal.Itsimplyreplacesthetargetareawithallthathasbeenselectedasasourcepoint.
Technically speaking, cloning another part of the photomaymake it look a whole lotredundantbuttheCloneToolcanactuallycomeinveryhandywhenyouareworkingwithverysmallpartsaroundthephoto–especiallyareasofcontrastandnearhardedges.
Othertools
ApartfromtheCloneStampandHealingBrush,correctionscanbemadeinanumberofotherways.Forreducingrednessincertainpartsoftheskin,de-saturatingtheareaalittlebitwillgivethedesiredresults.ThiscanbeeasilyachievedwiththehelpoftheSpongeTool.
Forremovingblemishesandinordertogetcertainalternatives,theSpotHealingBrushisabetteroptiontotheHealingBrushasitdoesnotrequireasourcepointtobeset.
Content-AwareFillisonelastoptiontobeimplementedandisanewfeatureinsomeofthe latest Photoshop releases such as CS5. In order to use this tool, what has to be

removed should be present in the background layer.Use the Lasso orMarquee tool toselectthepartyouwishtoremoveandthenhitthe‘delete’button.
Thisshouldbefollowsbyadialogueboxthatpromptsyouregardingwhatyouwishtodowiththeselection.Setthe‘Use’areatoContent-AwareandthenselecttheOKbutton.
Following this, Photoshop tries to figure outwhat the photowill look likewithout theconcerned element. The success of Photoshop at replacing the part of your photo willdependontheprecisionofyourselection.
Incaseyouselectsomethingthatisbeyondtheareayouwishtoremove,theapplicationislikelytogetconfusedandwillproduceunsatisfactoryresults.
Content-Aware Fill should typically be reserved for removing items that are moreprominentthanblemishes.TheHealingBrushtoolisabetterchoiceinthisregardbuttheformercanjustaboutgetthejobdone!

Chapter3.2–EnhancingaPortrait
With the help of a couple ofminor enhancements, a portrait can bemade significantlybetterthantheoriginalphotograph.Photoshaveatendencyofpickingupfarmoredetailthanwhatsomeonewouldnormallynoticeanditisnotalwaysthatpeoplehavepimples,cuts,orotherblemishesmarringtheirfacialfeatures.
Enhancingaportraitisnotalwaysaboutmakingthephotolookbetter–sometimesitcansimplybeamatterofbringingoutthebestinaperson’sappearance.
ColorChanneling
Using color channels is one of the best and easiest tricks for enhancing a portrait. ThecolorchannelscanbefoundintheChannelspaletteontherighthandsideofthescreen.
IfyouareworkingwiththeRGBcolorspace,fouroptionswillcomeup–red,green,blue,andRGB.WhileRGBisthecolorchannelasyouareseeingit,othersaretherespectivechannels.
Whenyouclickoneachoneof them, the tangibledifferencesappear.Bluecontains themaximumamountofdetail,redhasthehighestamountoflight,whilegreenisasuitablecombinationofthetwo.
Whiledealingwithpeople’sportraits,skindetail issomethingyouwouldwanttoavoid.This ispreciselywhat the redchannelhelps indoing.Sometimesyoumayhaveanear-perfectblackandwhitephotoinyourhands,andyetworkingwithcolorscanmakeitallveryuseful.
Inordertogetaveryniceadjustment,firstselecttheredchannelandthendoaselectallbefore copying the image. Switch back to the combined RGB channel, go back to theLayers palette, and paste the red channel. A new layer gets created on top of thebackgroundandyouwillhaveonlyaredchannelappearingonthecanvas.
SelectablendingmodeofOverlayfromtheLayerspalettefortheredchannellayerandreduce theopacity to around20or30percent.Whilemaking the adjustments, youwillnoticetheniceeffectbeingproducedonyourimage.
Itisoneoftheeasiestadjustmentsforenhancingphotosandalsooneofthemoreusefulones.Ithelpsinremovingunwanteddetailsoftheskin,addscontrastwherenecessary,andimprovesthecolorofthephotoincertaininstancesaswell.
BurningandDodging
Thesetoolscanbeveryusefulwhenyouareapplying“virtualmake-ups”toyoursubjects.Thiscanbedoneforbothmenandwomenbecausetheprocedureisverysubtleandtheendresultasclosetothenaturalthingaspossible.
The primary objective is to place added contrasts to the facial features that require

emphasis:themouth,thenose,andtheeyes.
The burn tool can be used for burning the shadows and mid-tones of eyebrows andeyelashes,theinneredgesofthelips,andthecurveofthenose.Thedodgetoolcanalsobeusedforbrighteningthemid-tonesofthewhiteandcoloredpartsoftheeyesandalongtheinsideofthelips.
Thoughanumberoftheseenhancementsareextremelyminor,thedifferencetheymaketotheoveralllookofthephotoisprettysignificant.ItcanfeelprettyminorwhilemakingthechangesbutifyoutrackthechangesintheHistorypanelandgobacktowhattheoriginalphotolookedlike,youwillrealizehowmuchofachangeyouhaveappliedtothephotoandunderstandtheextenttowhichsubtlechangescanaltertheoveralllookofthephoto.


Conclusion
Despite the topics that we have covered over here, Photoshop is a very versatileapplication and offers a lot that is yet to be learnt. Learning the basics is away to getstartedbutthereisalotmoretoexploreasyoumakeyourwayontotheadvancedstages.
There are a number of books that you can explore apart fromonline resources such asLyndaandPSDTUTS+whereyougettutorialsontheuseofPhotoshop.
Lastbutnot the least,hopeyouhadaniceandenjoyableexperiencegoing through thisebook!