Photosensitive Seizures - A Panelarash.apanela.com/gw/gwn-manual-en.pdf · ·...
84
Transcript of Photosensitive Seizures - A Panelarash.apanela.com/gw/gwn-manual-en.pdf · ·...
Photosensitive Seizures
SEIZURE WARNING—Please Read Prior to Playing
A very small percentage of individuals may experience seizures when exposed to certain light patterns, flashing lights, or flashing images. Children and teenagers are more susceptible to seizure than adults, but even those with no history of seizure or epilepsy could experience them while playing or watching video games.
Symptoms of seizures include: lightheadedness, altered vision, jerking or shaking of the ex-tremities, loss of awareness, confusion, and twitching or full convulsions. Convulsions can lead to other injuries by causing an individual to fall off of a chair and/or strike objects nearby.
If you or anyone in your family has an epileptic condition or history of seizures, consult your physician prior to playing this game—you could have an undiagnosed condition. If you experi-ence any of the aforementioned symptoms of a seizure while playing, STOP PLAYING AND CONSULT YOUR DOCTOR IMMEDIATELY. Parents should ensure their children are not experi-encing symptoms.
In order to reduce the risk of photosensitive epileptic seizures, you should play NC Interactive games in a well-lit room while you are alert and awake. Avoid poorly lit rooms and playing when fatigued.
© 2006 ArenaNet, Inc. and NC Interactive, Inc. All rights reserved. NCsoft, the interlocking NC logo, ArenaNet, Guild Wars, Guild Wars Nightfall, and all associated logos and designs are trademarks or registered trademarks of NCsoft Corporation. All other trademarks are the property of their respective owners.
� �
�
43 Centaurs44 Harpies45 Heket46 Junundu47 Demons48 Djinn49 Corsairs50 Heroes
51 Koss52 Dunkoro53 Melonni54 Tahlkora55 Acolyte Sousuke55 Acolyte Jin56 Zhed57 Margrid58 Norgu59 Goren60 Master of Whispers61 Olias62 Zenmai63 Razah
66 Book Two: Elonian Adventures
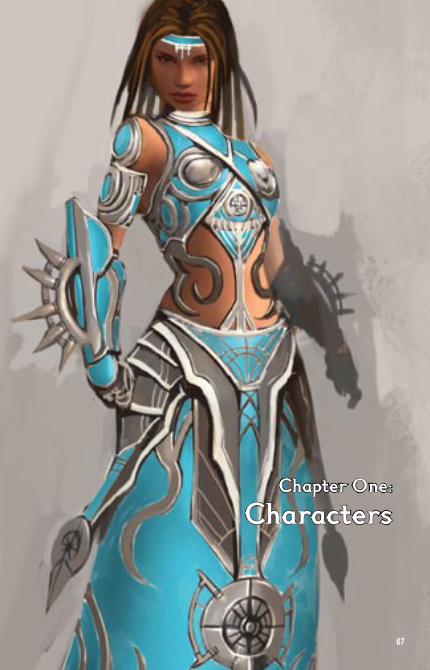
67 Chapter One: Characters68 Dark Times in Elona68 Creating Your Character
69 Primary and Secondary Professions70 Attributes
72 Leveling Up72 Gaining Attribute Points73 Gaining Skill Points74 Customizing Your Character 74 Expanding the World
Contents10 Book One: Land of the Golden Sun
11 Chapter One: Lands of Elona12 Istan13 Kourna14 Vabbi15 The Order of the Sunspears
17 Chapter Two: Gods of Elona18 The 5 True Gods19 Dwayna20 Balthazar21 Grenth22 Lyssa 23 Melandru24 Nightfall
25 Chapter Three: History of Elona26 The Elonian Calendar
26 Months and Seasons28 Unified Timeline30 The Shattered Dynasty Era32 Palawa Joko and Turai Ossa
35 Chapter Four: Allies and Enemies36 Varesh Ossa37 General Morgahn 37 General Bayel38 General Kahyet38 Elder Suhl39 Kormir40 Prince Mehtu the Wise41 Prince Bokka the Magnificent42 Prince Ahmtur the Mighty42 Palawa Joko
� �
75 Chapter Two: The Eight Professions77 Dervish78 Elementalist79 Mesmer80 Monk81 Necromancer 82 Paragon83 Ranger 84 Warrior85 Skills86 Builds
87 Chapter Three: Exploring 88 Getting Around
88 Keyboard Movement89 Mouse Movement89 Camera Control90 Districts
91 Using Maps91 Compass92 Mission Map93 World Map94 Traveling
95 Towns & Explorable Areas95 Trading96 Who’s Who in Town102 Storyline NPCs
103 Heroes104 Interacting with Players
104 Chat106 Playing Well with Others
107 Chapter Four: Adventuring108 Choose Your Skills
108 Skills and Attributes Panel108 Your Inventory
113 Character Status114 Health and Energy114 Skill Bar116 Death and Resurrection116 Morale116 Death Penalty117 Enchantments and Hexes117 Blazing through Combat118 Calling Your Target
120 Missions and Quests120 Multiple Characters121 Missions122 Quests123 Special Missions
124 Guilds125 Guild Halls125 Alliances
127 Chapter Five: Player Versus Player128 Creating a PvP Character128 The Battle Isles130 Balthazar’s Faction130 PvP Combat133 Heroes’ Ascent136 Observer Mode
� �
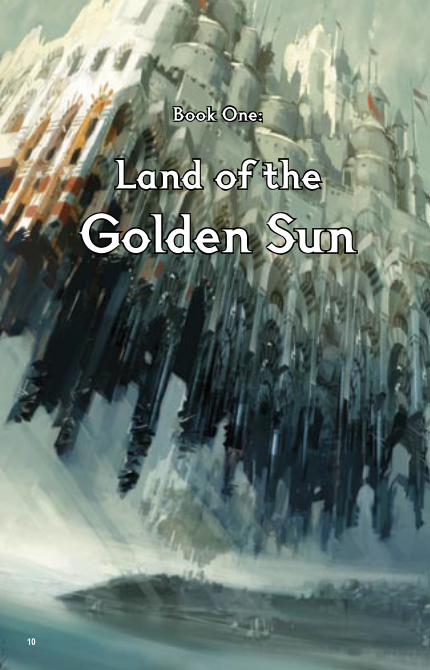
Book One:
Land of the Golden Sun
10
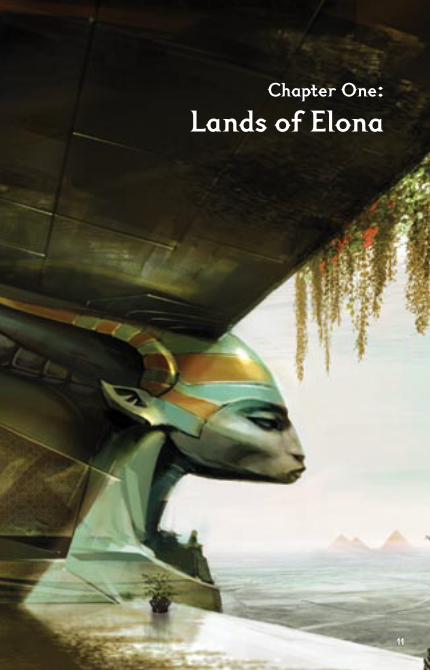
Chapter One: Lands of Elona
11
1� 1�
Great Istani heroes have been forged by great adversity: war, famine, invasion, and stranger threats. Over six hundred years ago, the infamous Scarab Plague devastated this province. Victims died horribly, as insects erupted through boils on their skin. Many believed the outbreak of plague had supernatural origins, blaming the suffering of the innocent on unseen forces. In this troubled time, heroes tended to the sick, evacuated towns and villages, and searched for the source of corruption. Though the origin of the plague was never found, great tales are still told of heroes helping the beleaguered populace.
To this day, Istan rewards bravery and accomplishment. No word describes its government more than “meritocracy:” the best and brightest are rewarded with promotion, and years of service are recognized. Village elders watch over many towns and outposts, eventually rising to positions of respect and authority on the Council of Elders. The province has its fair share of miscreants and scoundrels, of course—criminals typically sink to the dregs of society—but each dawn in Istan, another hero’s journey begins.
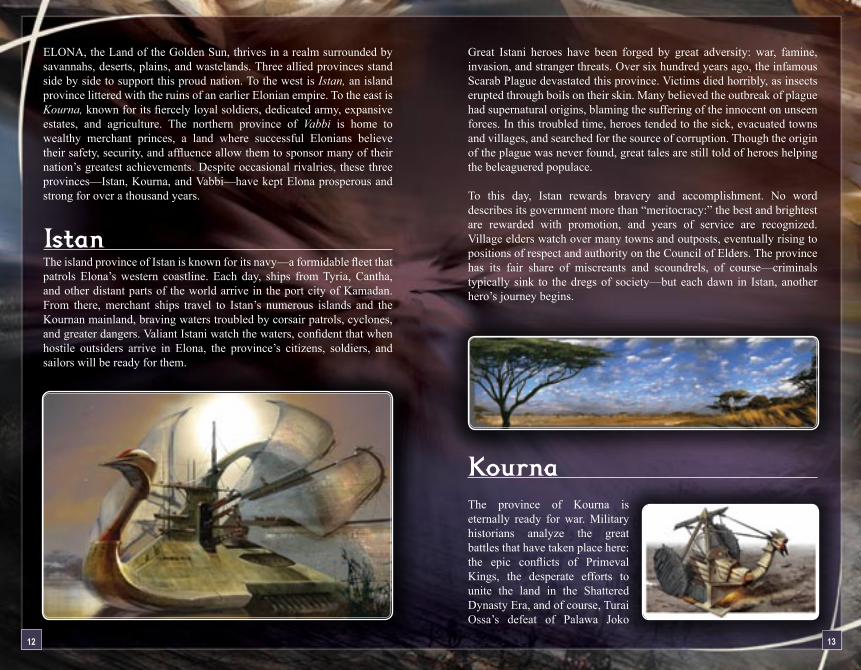
KournaThe province of Kourna is eternally ready for war. Military historians analyze the great battles that have taken place here: the epic conflicts of Primeval Kings, the desperate efforts to unite the land in the Shattered Dynasty Era, and of course, Turai Ossa’s defeat of Palawa Joko
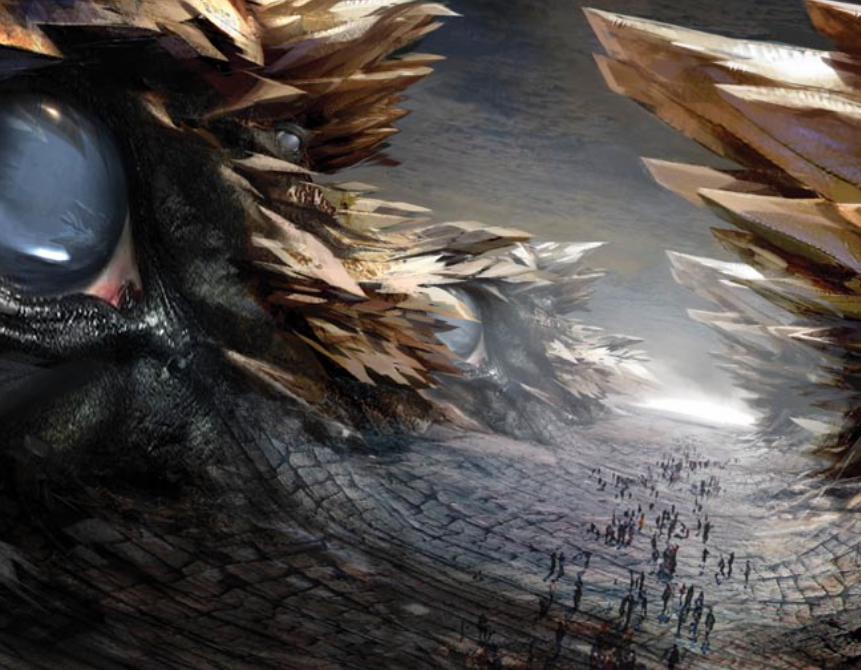
ELONA, the Land of the Golden Sun, thrives in a realm surrounded by savannahs, deserts, plains, and wastelands. Three allied provinces stand side by side to support this proud nation. To the west is Istan, an island province littered with the ruins of an earlier Elonian empire. To the east is Kourna, known for its fiercely loyal soldiers, dedicated army, expansive estates, and agriculture. The northern province of Vabbi is home to wealthy merchant princes, a land where successful Elonians believe their safety, security, and affluence allow them to sponsor many of their nation’s greatest achievements. Despite occasional rivalries, these three provinces—Istan, Kourna, and Vabbi—have kept Elona prosperous and strong for over a thousand years.
IstanThe island province of Istan is known for its navy—a formidable fleet that patrols Elona’s western coastline. Each day, ships from Tyria, Cantha, and other distant parts of the world arrive in the port city of Kamadan. From there, merchant ships travel to Istan’s numerous islands and the Kournan mainland, braving waters troubled by corsair patrols, cyclones, and greater dangers. Valiant Istani watch the waters, confident that when hostile outsiders arrive in Elona, the province’s citizens, soldiers, and sailors will be ready for them.
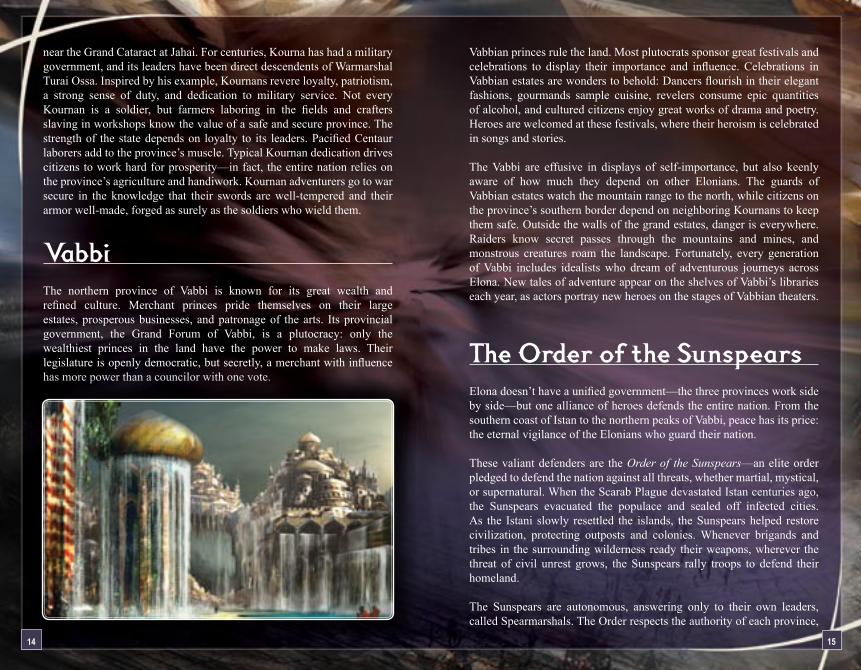
Vabbian princes rule the land. Most plutocrats sponsor great festivals and celebrations to display their importance and influence. Celebrations in Vabbian estates are wonders to behold: Dancers flourish in their elegant fashions, gourmands sample cuisine, revelers consume epic quantities of alcohol, and cultured citizens enjoy great works of drama and poetry. Heroes are welcomed at these festivals, where their heroism is celebrated in songs and stories. The Vabbi are effusive in displays of self-importance, but also keenly aware of how much they depend on other Elonians. The guards of Vabbian estates watch the mountain range to the north, while citizens on the province’s southern border depend on neighboring Kournans to keep them safe. Outside the walls of the grand estates, danger is everywhere. Raiders know secret passes through the mountains and mines, and monstrous creatures roam the landscape. Fortunately, every generation of Vabbi includes idealists who dream of adventurous journeys across Elona. New tales of adventure appear on the shelves of Vabbi’s libraries each year, as actors portray new heroes on the stages of Vabbian theaters.
The Order of the SunspearsElona doesn’t have a unified government—the three provinces work side by side—but one alliance of heroes defends the entire nation. From the southern coast of Istan to the northern peaks of Vabbi, peace has its price: the eternal vigilance of the Elonians who guard their nation. These valiant defenders are the Order of the Sunspears—an elite order pledged to defend the nation against all threats, whether martial, mystical, or supernatural. When the Scarab Plague devastated Istan centuries ago, the Sunspears evacuated the populace and sealed off infected cities. As the Istani slowly resettled the islands, the Sunspears helped restore civilization, protecting outposts and colonies. Whenever brigands and tribes in the surrounding wilderness ready their weapons, wherever the threat of civil unrest grows, the Sunspears rally troops to defend their homeland.
The Sunspears are autonomous, answering only to their own leaders, called Spearmarshals. The Order respects the authority of each province,
near the Grand Cataract at Jahai. For centuries, Kourna has had a military government, and its leaders have been direct descendents of Warmarshal Turai Ossa. Inspired by his example, Kournans revere loyalty, patriotism, a strong sense of duty, and dedication to military service. Not every Kournan is a soldier, but farmers laboring in the fields and crafters slaving in workshops know the value of a safe and secure province. The strength of the state depends on loyalty to its leaders. Pacified Centaur laborers add to the province’s muscle. Typical Kournan dedication drives citizens to work hard for prosperity—in fact, the entire nation relies on the province’s agriculture and handiwork. Kournan adventurers go to war secure in the knowledge that their swords are well-tempered and their armor well-made, forged as surely as the soldiers who wield them.
VabbiThe northern province of Vabbi is known for its great wealth and refined culture. Merchant princes pride themselves on their large estates, prosperous businesses, and patronage of the arts. Its provincial government, the Grand Forum of Vabbi, is a plutocracy: only the wealthiest princes in the land have the power to make laws. Their legislature is openly democratic, but secretly, a merchant with influence has more power than a councilor with one vote.
14 1�
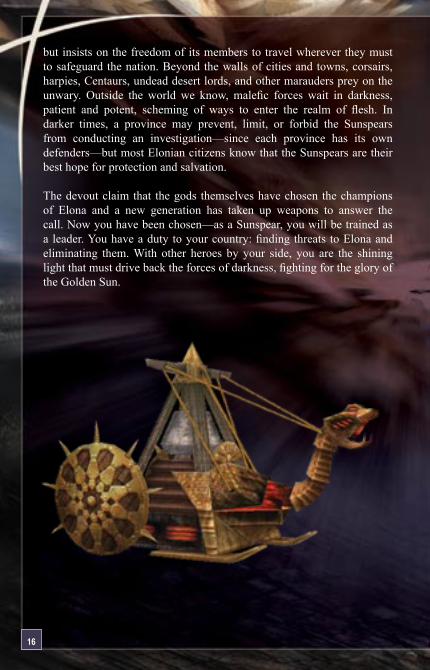
but insists on the freedom of its members to travel wherever they must to safeguard the nation. Beyond the walls of cities and towns, corsairs, harpies, Centaurs, undead desert lords, and other marauders prey on the unwary. Outside the world we know, malefic forces wait in darkness, patient and potent, scheming of ways to enter the realm of flesh. In darker times, a province may prevent, limit, or forbid the Sunspears from conducting an investigation—since each province has its own defenders—but most Elonian citizens know that the Sunspears are their best hope for protection and salvation.
The devout claim that the gods themselves have chosen the champions of Elona and a new generation has taken up weapons to answer the call. Now you have been chosen—as a Sunspear, you will be trained as a leader. You have a duty to your country: finding threats to Elona and eliminating them. With other heroes by your side, you are the shining light that must drive back the forces of darkness, fighting for the glory of the Golden Sun.
1�
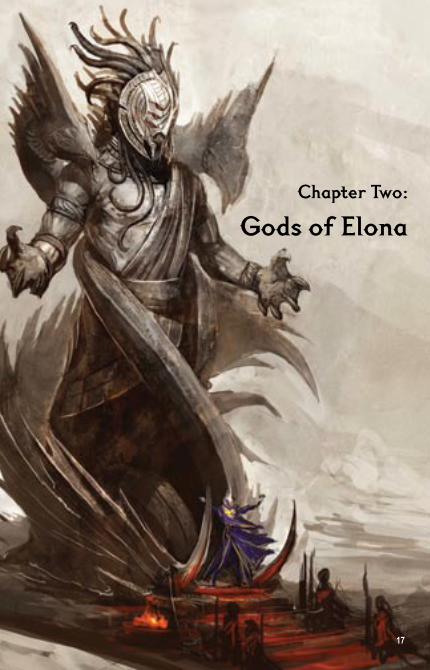
Chapter Two:
Gods of Elona
1�
1� 1�
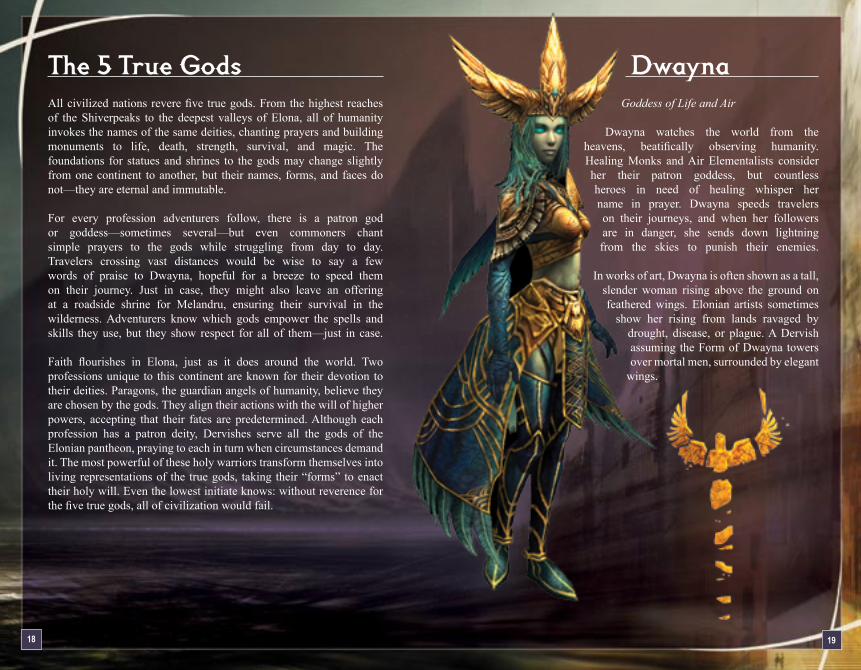
Dwayna
Goddess of Life and Air
Dwayna watches the world from the heavens, beatifically observing humanity. Healing Monks and Air Elementalists consider her their patron goddess, but countless heroes in need of healing whisper her name in prayer. Dwayna speeds travelers on their journeys, and when her followers are in danger, she sends down lightning from the skies to punish their enemies.
In works of art, Dwayna is often shown as a tall, slender woman rising above the ground on feathered wings. Elonian artists sometimes
show her rising from lands ravaged by drought, disease, or plague. A Dervish assuming the Form of Dwayna towers over mortal men, surrounded by elegant
wings.
The 5 True GodsAll civilized nations revere five true gods. From the highest reaches of the Shiverpeaks to the deepest valleys of Elona, all of humanity invokes the names of the same deities, chanting prayers and building monuments to life, death, strength, survival, and magic. The foundations for statues and shrines to the gods may change slightly from one continent to another, but their names, forms, and faces do not—they are eternal and immutable.
For every profession adventurers follow, there is a patron god or goddess—sometimes several—but even commoners chant simple prayers to the gods while struggling from day to day. Travelers crossing vast distances would be wise to say a few words of praise to Dwayna, hopeful for a breeze to speed them on their journey. Just in case, they might also leave an offering at a roadside shrine for Melandru, ensuring their survival in the wilderness. Adventurers know which gods empower the spells and skills they use, but they show respect for all of them—just in case. Faith flourishes in Elona, just as it does around the world. Two professions unique to this continent are known for their devotion to their deities. Paragons, the guardian angels of humanity, believe they are chosen by the gods. They align their actions with the will of higher powers, accepting that their fates are predetermined. Although each profession has a patron deity, Dervishes serve all the gods of the Elonian pantheon, praying to each in turn when circumstances demand it. The most powerful of these holy warriors transform themselves into living representations of the true gods, taking their “forms” to enact their holy will. Even the lowest initiate knows: without reverence for the five true gods, all of civilization would fail.

GrenthLord of Death and Ice
Necromancers revere Grenth, as do Water Elementalists, who often punish their enemies with chilling cold. When the world is at its darkest, fearful souls pray to him as a means of last resort. Worship of Grenth requires sacrifice. Any path to his hidden secrets tests the soul as much as it does the mind. His acolytes and cultists know that the veil between worlds is thin, but if they can pay a price of blood and souls, the bodies of the dead will rise up and wreak havoc in the world of the living. The faithful know that when they die, their souls will eventually pass on to the Mists…but they still pray to Grenth, so that he may ease their suffering along the way. Monuments to Grenth portray him with the body of a man and the narrow skull of a beast. Throughout Elona, many of these statues have piles of bone and ivory beneath them, left as offerings by anonymous and fearful commoners. When life is difficult, zealous worshipers leave offerings of flesh and sinew, showing their devotion with fanatic displays of sacrifice. A Dervish assuming the Form of Grenth glares at the world through a bestial skull, measuring the worth of each fallen corpse.
Balthazar Lord of War and Fire
Worshiped by Warriors and Fire Elementalists, the Lord of War watches over the battlefields and arenas of the world. Monks who practice Protection and Smiting disciplines speak his name with reverence. Balthazar gives strength to soldiers marching into battle and any adventurer who’s ready for a fight. He guides the sharpened edge of a sword or axe so that it cuts deeply. Many insist that he watches over the battlegrounds of the world to see who glorifies his name. In arenas protected by his priests, followers demonstrate their prowess in battle to earn his favor. Statues of Balthazar show him holding a greatsword, sometimes with a pair of faithful battle hounds sitting at his feet. Some Elonian art portrays him with majestic lions or other predatory companions crouching beside him. A Dervish taking the Form of Balthazar is a fiery presence, assaulting the world with armor as resilient as heavy plate and a weapon as lethal as the deity’s greatsword.
�0 �1

Melandru Goddess of Earth and Nature Rangers and Earth Elementalists leave offerings to Melandru, trusting to her guidance. Throughout Elona, roadside temples to the goddess offer shelter and water to weary travelers. Wandering Dervishes maintain many of these shrines. With her blessings, the ground can slow or snare enemies, wanderers can survive in the harshest wilderness, and masters of magic can shake the very foundations of the world. Most statues of Melandru show her as a tall, winged dryad rising from a tree-shaped base. Many temples use magic to shape that shrine from a living tree; for example, Elonian sculptures often rise from the base of a mebayah or a rooted dreamflower. A Dervish assuming the Form of Melandru has an arboreal appearance, acting with the same resolve as a tree with roots deep in the earth.
Lyssa
Goddess of Beauty and Illusion
The patron goddess of Mesmers wears many masks, appearing in myriad forms. Patrons of the
arts effusively praise her—particularly in the courts of wealthy Vabbi—but some fear her as a temperamental goddess. Behind her beautiful façade, some say, she maintains a deep communion with chaos. Displays of art and culture please her, but her wrath is terrible to behold. Her followers use her magic for illusion, trickery, and deception, twisting the magic of others to suit their own goals. By her whims, her enemies are brutalized by despair and hopelessness, while her beautiful followers are elevated to heights of rapture.
Tyrian artists often portray Lyssa as two goddesses: twin figures of exquisite beauty entwined in an eternal dance. In Elona, the masks may change, and the dance may change, but Lyssa’s dual nature does not. She is beautiful to some and terrifying to others. A Dervish assuming the Form of Lyssa wears multiple masks, channeling blessings for mayhem and magic.
�� ��
�4
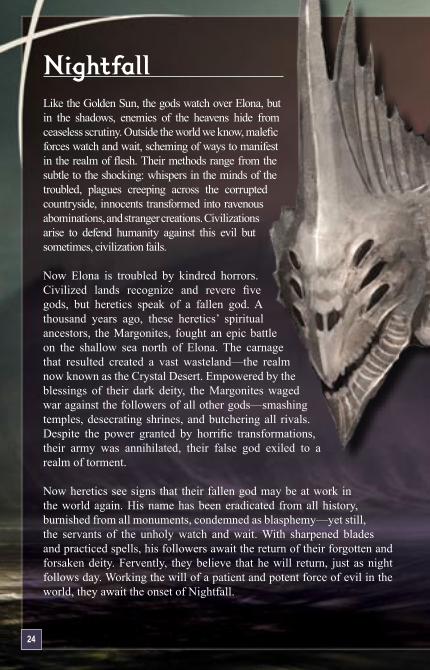
Nightfall Like the Golden Sun, the gods watch over Elona, but in the shadows, enemies of the heavens hide from ceaseless scrutiny. Outside the world we know, malefic forces watch and wait, scheming of ways to manifest in the realm of flesh. Their methods range from the subtle to the shocking: whispers in the minds of the troubled, plagues creeping across the corrupted countryside, innocents transformed into ravenous abominations, and stranger creations. Civilizations arise to defend humanity against this evil but sometimes, civilization fails.
Now Elona is troubled by kindred horrors. Civilized lands recognize and revere five gods, but heretics speak of a fallen god. A thousand years ago, these heretics’ spiritual ancestors, the Margonites, fought an epic battle on the shallow sea north of Elona. The carnage that resulted created a vast wasteland—the realm now known as the Crystal Desert. Empowered by the blessings of their dark deity, the Margonites waged war against the followers of all other gods—smashing temples, desecrating shrines, and butchering all rivals. Despite the power granted by horrific transformations, their army was annihilated, their false god exiled to a realm of torment.
Now heretics see signs that their fallen god may be at work in the world again. His name has been eradicated from all history, burnished from all monuments, condemned as blasphemy—yet still, the servants of the unholy watch and wait. With sharpened blades and practiced spells, his followers await the return of their forgotten and forsaken deity. Fervently, they believe that he will return, just as night follows day. Working the will of a patient and potent force of evil in the world, they await the onset of Nightfall.
Chapter 3: History of Elona [ART goes here. Something from an earlier era would be fantastic, or perhaps a battle scene. In this chapter, we should stress the Scarab Plague, Shattered Dynasty, Palawa Joko, and epic conflicts.]
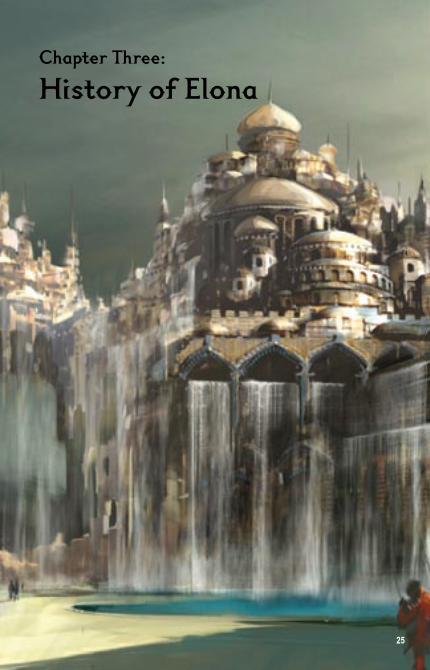
Chapter Three: History of Elona
��
��
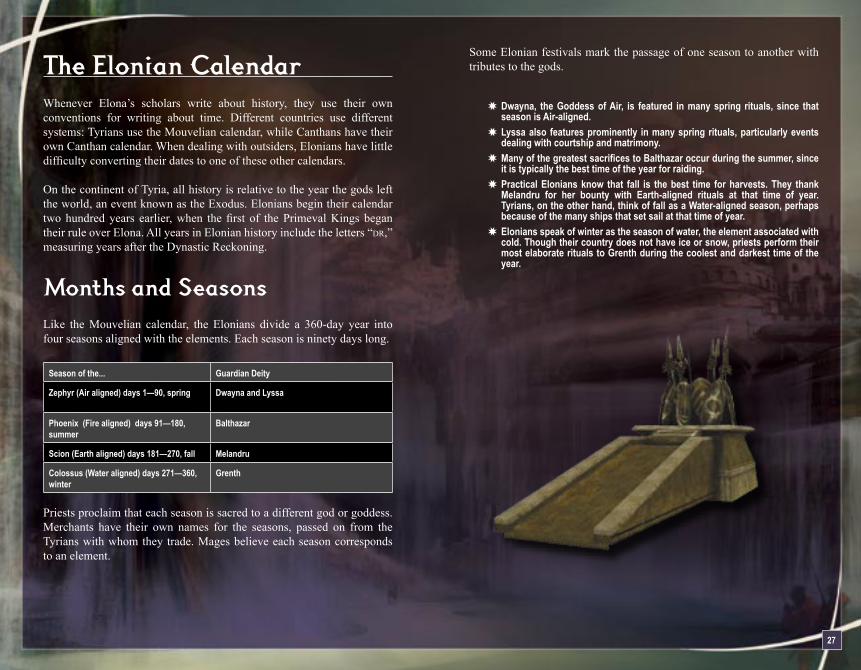
Some Elonian festivals mark the passage of one season to another with tributes to the gods.
Dwayna, the Goddess of Air, is featured in many spring rituals, since that season is Air-aligned.Lyssa also features prominently in many spring rituals, particularly events dealing with courtship and matrimony.Many of the greatest sacrifices to Balthazar occur during the summer, since it is typically the best time of the year for raiding.Practical Elonians know that fall is the best time for harvests. They thank Melandru for her bounty with Earth-aligned rituals at that time of year. Tyrians, on the other hand, think of fall as a Water-aligned season, perhaps because of the many ships that set sail at that time of year.Elonians speak of winter as the season of water, the element associated with cold. Though their country does not have ice or snow, priests perform their most elaborate rituals to Grenth during the coolest and darkest time of the year.
The Elonian Calendar Whenever Elona’s scholars write about history, they use their own conventions for writing about time. Different countries use different systems: Tyrians use the Mouvelian calendar, while Canthans have their own Canthan calendar. When dealing with outsiders, Elonians have little difficulty converting their dates to one of these other calendars. On the continent of Tyria, all history is relative to the year the gods left the world, an event known as the Exodus. Elonians begin their calendar two hundred years earlier, when the first of the Primeval Kings began their rule over Elona. All years in Elonian history include the letters “dr,” measuring years after the Dynastic Reckoning.
Months and Seasons Like the Mouvelian calendar, the Elonians divide a 360-day year into four seasons aligned with the elements. Each season is ninety days long.
Season of the... Guardian Deity
Zephyr (Air aligned) days 1—�0, spring Dwayna and Lyssa
Phoenix (Fire aligned) days �1—1�0, summer
Balthazar
Scion (Earth aligned) days 1�1—��0, fall Melandru
Colossus (Water aligned) days 271—360, winter
Grenth
Priests proclaim that each season is sacred to a different god or goddess. Merchants have their own names for the seasons, passed on from the Tyrians with whom they trade. Mages believe each season corresponds to an element.
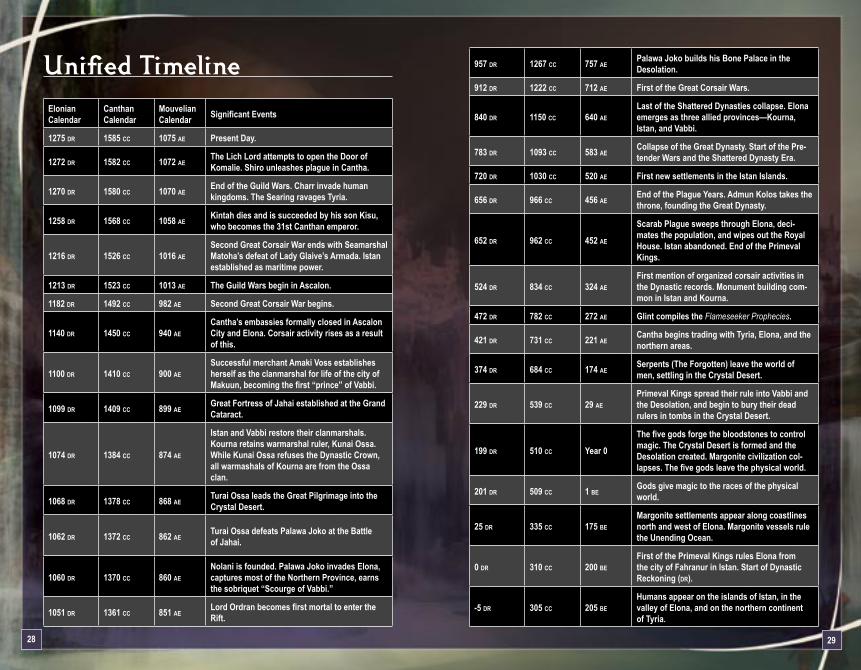
��� dr 1��� cc ��� aePalawa Joko builds his Bone Palace in the Desolation.
�1� dr 1��� cc �1� ae First of the Great Corsair Wars.
�40 dr 11�0 cc �40 aeLast of the Shattered Dynasties collapse. Elona emerges as three allied provinces—Kourna, Istan, and Vabbi.
��� dr 10�� cc ��� aeCollapse of the Great Dynasty. Start of the Pre-tender Wars and the Shattered Dynasty Era.
��0 dr 10�0 cc ��0 ae First new settlements in the Istan Islands.
��� dr ��� cc 4�� aeEnd of the Plague Years. Admun Kolos takes the throne, founding the Great Dynasty.
��� dr ��� cc 4�� ae
Scarab Plague sweeps through Elona, deci-mates the population, and wipes out the Royal House. Istan abandoned. End of the Primeval Kings.
��4 dr ��4 cc ��4 aeFirst mention of organized corsair activities in the Dynastic records. Monument building com-mon in Istan and Kourna.
4�� dr ��� cc ��� ae Glint compiles the Flameseeker Prophecies.
4�1 dr ��1 cc ��1 aeCantha begins trading with Tyria, Elona, and the northern areas.
��4 dr ��4 cc 1�4 aeSerpents (The Forgotten) leave the world of men, settling in the Crystal Desert.
��� dr ��� cc �� aePrimeval Kings spread their rule into Vabbi and the Desolation, and begin to bury their dead rulers in tombs in the Crystal Desert.
1�� dr �10 cc Year 0
The five gods forge the bloodstones to control magic. The Crystal Desert is formed and the Desolation created. Margonite civilization col-lapses. The five gods leave the physical world.
�01 dr �0� cc 1 beGods give magic to the races of the physical world.
�� dr ��� cc 1�� beMargonite settlements appear along coastlines north and west of Elona. Margonite vessels rule the Unending Ocean.
0 dr �10 cc �00 beFirst of the Primeval Kings rules Elona from the city of Fahranur in Istan. Start of Dynastic Reckoning (dr).
-� dr �0� cc �0� beHumans appear on the islands of Istan, in the valley of Elona, and on the northern continent of Tyria.
Unified TimelineElonian Calendar
CanthanCalendar
MouvelianCalendar Significant Events
1��� dr 1��� cc 10�� ae Present Day.
1��� dr 1��� cc 10�� aeThe Lich Lord attempts to open the Door of Komalie. Shiro unleashes plague in Cantha.
1��0 dr 1��0 cc 10�0 aeEnd of the Guild Wars. Charr invade human kingdoms. The Searing ravages Tyria.
1��� dr 1��� cc 10�� aeKintah dies and is succeeded by his son Kisu, who becomes the 31st Canthan emperor.
1�1� dr 1��� cc 101� aeSecond Great Corsair War ends with Seamarshal Matoha’s defeat of Lady Glaive’s Armada. Istan established as maritime power.
1�1� dr 1��� cc 101� ae The Guild Wars begin in Ascalon.
11�� dr 14�� cc ��� ae Second Great Corsair War begins.
1140 dr 14�0 cc �40 aeCantha’s embassies formally closed in Ascalon City and Elona. Corsair activity rises as a result of this.
1100 dr 1410 cc �00 aeSuccessful merchant Amaki Voss establishes herself as the clanmarshal for life of the city of Makuun, becoming the first “prince” of Vabbi.
10�� dr 140� cc ��� aeGreat Fortress of Jahai established at the Grand Cataract.
10�4 dr 1��4 cc ��4 ae
Istan and Vabbi restore their clanmarshals. Kourna retains warmarshal ruler, Kunai Ossa. While Kunai Ossa refuses the Dynastic Crown, all warmashals of Kourna are from the Ossa clan.
10�� dr 1��� cc ��� aeTurai Ossa leads the Great Pilgrimage into the Crystal Desert.
10�� dr 1��� cc ��� aeTurai Ossa defeats Palawa Joko at the Battle of Jahai.
10�0 dr 1��0 cc ��0 aeNolani is founded. Palawa Joko invades Elona, captures most of the Northern Province, earns the sobriquet “Scourge of Vabbi.”
10�1 dr 1��1 cc ��1 aeLord Ordran becomes first mortal to enter the Rift.
�� ��
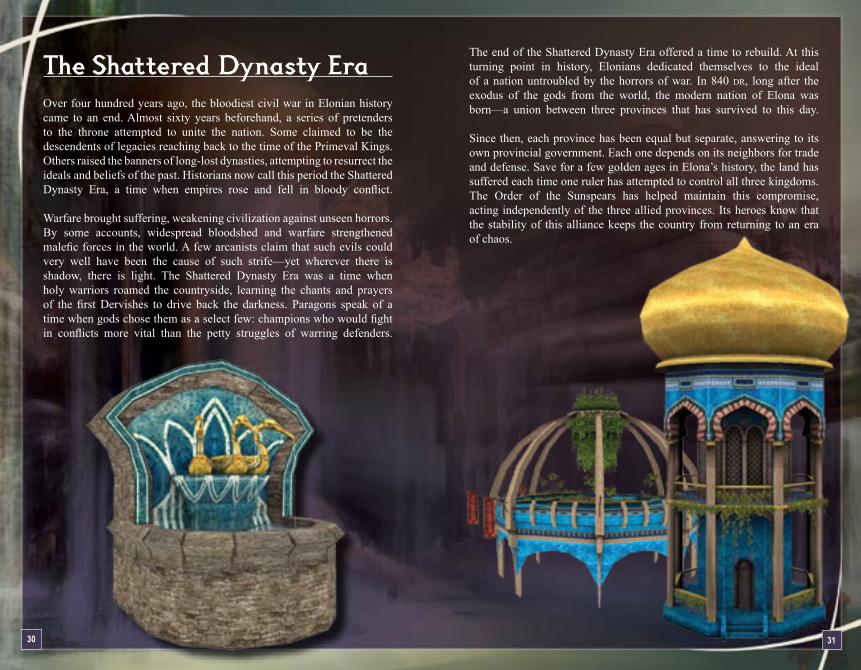
The end of the Shattered Dynasty Era offered a time to rebuild. At this turning point in history, Elonians dedicated themselves to the ideal of a nation untroubled by the horrors of war. In 840 dr, long after the exodus of the gods from the world, the modern nation of Elona was born—a union between three provinces that has survived to this day. Since then, each province has been equal but separate, answering to its own provincial government. Each one depends on its neighbors for trade and defense. Save for a few golden ages in Elona’s history, the land has suffered each time one ruler has attempted to control all three kingdoms. The Order of the Sunspears has helped maintain this compromise, acting independently of the three allied provinces. Its heroes know that the stability of this alliance keeps the country from returning to an era of chaos.
The Shattered Dynasty Era Over four hundred years ago, the bloodiest civil war in Elonian history came to an end. Almost sixty years beforehand, a series of pretenders to the throne attempted to unite the nation. Some claimed to be the descendents of legacies reaching back to the time of the Primeval Kings. Others raised the banners of long-lost dynasties, attempting to resurrect the ideals and beliefs of the past. Historians now call this period the Shattered Dynasty Era, a time when empires rose and fell in bloody conflict.
Warfare brought suffering, weakening civilization against unseen horrors. By some accounts, widespread bloodshed and warfare strengthened malefic forces in the world. A few arcanists claim that such evils could very well have been the cause of such strife—yet wherever there is shadow, there is light. The Shattered Dynasty Era was a time when holy warriors roamed the countryside, learning the chants and prayers of the first Dervishes to drive back the darkness. Paragons speak of a time when gods chose them as a select few: champions who would fight in conflicts more vital than the petty struggles of warring defenders.
�0 �1
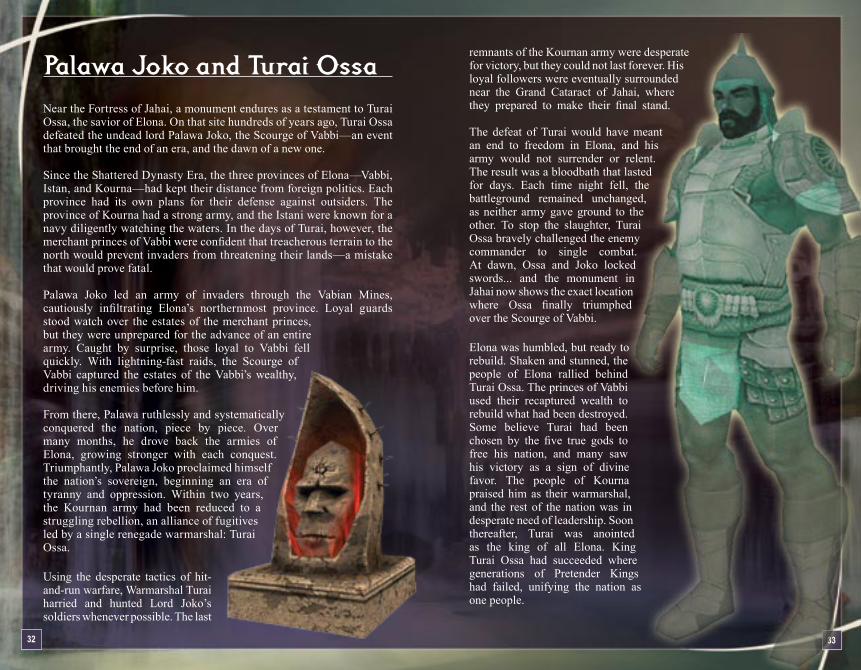
remnants of the Kournan army were desperate for victory, but they could not last forever. His loyal followers were eventually surrounded near the Grand Cataract of Jahai, where they prepared to make their final stand. The defeat of Turai would have meant an end to freedom in Elona, and his army would not surrender or relent. The result was a bloodbath that lasted for days. Each time night fell, the battleground remained unchanged, as neither army gave ground to the other. To stop the slaughter, Turai Ossa bravely challenged the enemy commander to single combat. At dawn, Ossa and Joko locked swords... and the monument in Jahai now shows the exact location where Ossa finally triumphed over the Scourge of Vabbi.
Elona was humbled, but ready to rebuild. Shaken and stunned, the people of Elona rallied behind Turai Ossa. The princes of Vabbi used their recaptured wealth to rebuild what had been destroyed. Some believe Turai had been chosen by the five true gods to free his nation, and many saw his victory as a sign of divine favor. The people of Kourna praised him as their warmarshal, and the rest of the nation was in desperate need of leadership. Soon thereafter, Turai was anointed as the king of all Elona. King Turai Ossa had succeeded where generations of Pretender Kings had failed, unifying the nation as one people.
�� ��
Palawa Joko and Turai OssaNear the Fortress of Jahai, a monument endures as a testament to Turai Ossa, the savior of Elona. On that site hundreds of years ago, Turai Ossa defeated the undead lord Palawa Joko, the Scourge of Vabbi—an event that brought the end of an era, and the dawn of a new one. Since the Shattered Dynasty Era, the three provinces of Elona—Vabbi, Istan, and Kourna—had kept their distance from foreign politics. Each province had its own plans for their defense against outsiders. The province of Kourna had a strong army, and the Istani were known for a navy diligently watching the waters. In the days of Turai, however, the merchant princes of Vabbi were confident that treacherous terrain to the north would prevent invaders from threatening their lands—a mistake that would prove fatal. Palawa Joko led an army of invaders through the Vabian Mines, cautiously infiltrating Elona’s northernmost province. Loyal guards stood watch over the estates of the merchant princes, but they were unprepared for the advance of an entire army. Caught by surprise, those loyal to Vabbi fell quickly. With lightning-fast raids, the Scourge of Vabbi captured the estates of the Vabbi’s wealthy, driving his enemies before him.
From there, Palawa ruthlessly and systematically conquered the nation, piece by piece. Over many months, he drove back the armies of Elona, growing stronger with each conquest. Triumphantly, Palawa Joko proclaimed himself the nation’s sovereign, beginning an era of tyranny and oppression. Within two years, the Kournan army had been reduced to a struggling rebellion, an alliance of fugitives led by a single renegade warmarshal: Turai Ossa.
Using the desperate tactics of hit-and-run warfare, Warmarshal Turai harried and hunted Lord Joko’s soldiers whenever possible. The last
King Turai had wealth, power, and influence, but he yearned for loftier goals. Openly, he ruled a grateful populace, but secretly, he spent his nights studying ancient wisdom. The more he read, the more he contemplated the role of the gods in his life. If he had been chosen by the gods as the savior of his nation, perhaps he was destined for greater accomplishments.
Musing on mysteries, Ossa sought his answers by seeking Ascension, a state of communion with the gods. He knew the path to that ideal ran through the wasteland north of Elona—lands that had been ruled by Palawa Joko years before. Turai stepped down from his position of authority, passing the title of warmarshal to his son, Kunai. Since that time, the title of warmarshal has been a hereditary one in Kourna, passed down through the many generations of Turai Ossa’s descendents.
Turai and his followers then began a great pilgrimage, marching north into the Crystal Desert, where the gods once walked among men. His loyal entourage erected temples, raising pillars toward the heavens... but Ascension eluded him. Instead of everlasting life, he found the torment of eternal living death. In ghostly form, he still walks the earth. Many of his followers died as well, and their ghosts have remained in the Crystal Desert.
Some Elonians remember Turai for his heroism; others remember him as a madman whose false pride led him on a doomed pilgrimage. Since that bygone age, no one ruler has reigned over all Elona—the three provinces have remained separate, but equal. Yet to this day, Turai Ossa’s descendents still rule over Kourna. Warmarshal Varesh Ossa represents the latest generation; and she shares her ancestor’s fascination with the role of the gods in the lives of mere men and women.
As for Turai, he maintains his vigil over Elona, guiding others who follow the path of heroes. Scholars of lore know of him as the savior of Kourna, the man who single-handedly defeated the Scourge of Vabbi—but for many, he is simply the Ghostly Hero, a champion who stalks the troubled wastelands north of Elona, eternally ready to stand beside its heroes.
�4
��
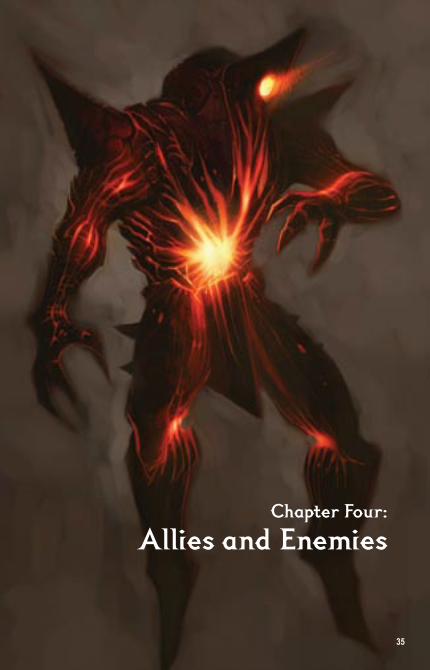
Chapter Four: Allies and Enemies
��
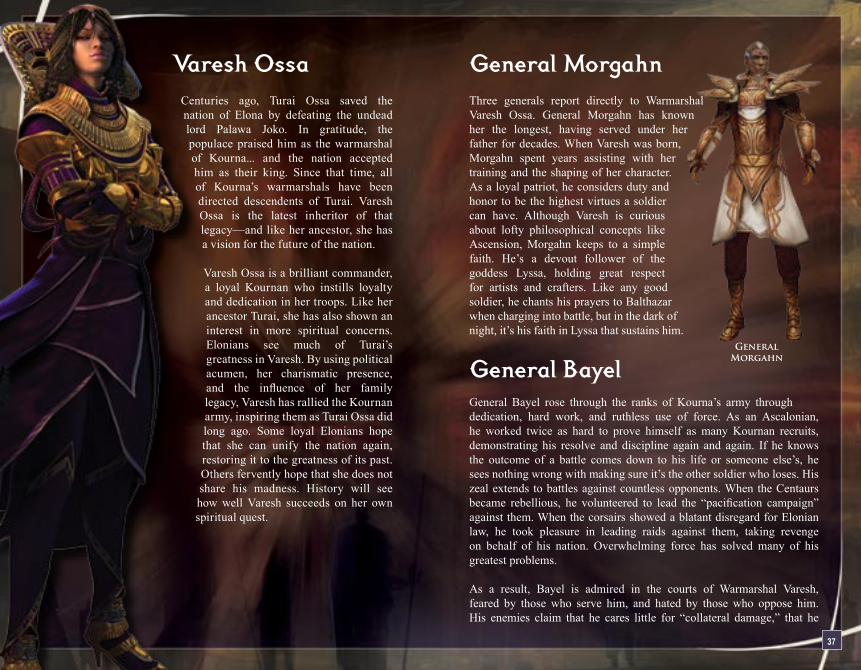
General Morgahn Three generals report directly to Warmarshal Varesh Ossa. General Morgahn has known her the longest, having served under her father for decades. When Varesh was born, Morgahn spent years assisting with her training and the shaping of her character. As a loyal patriot, he considers duty and honor to be the highest virtues a soldier can have. Although Varesh is curious about lofty philosophical concepts like Ascension, Morgahn keeps to a simple faith. He’s a devout follower of the goddess Lyssa, holding great respect for artists and crafters. Like any good soldier, he chants his prayers to Balthazar when charging into battle, but in the dark of night, it’s his faith in Lyssa that sustains him.
General Bayel General Bayel rose through the ranks of Kourna’s army through dedication, hard work, and ruthless use of force. As an Ascalonian, he worked twice as hard to prove himself as many Kournan recruits, demonstrating his resolve and discipline again and again. If he knows the outcome of a battle comes down to his life or someone else’s, he sees nothing wrong with making sure it’s the other soldier who loses. His zeal extends to battles against countless opponents. When the Centaurs became rebellious, he volunteered to lead the “pacification campaign” against them. When the corsairs showed a blatant disregard for Elonian law, he took pleasure in leading raids against them, taking revenge on behalf of his nation. Overwhelming force has solved many of his greatest problems.
As a result, Bayel is admired in the courts of Warmarshal Varesh, feared by those who serve him, and hated by those who oppose him. His enemies claim that he cares little for “collateral damage,” that he
General Morgahn
Varesh OssaCenturies ago, Turai Ossa saved the nation of Elona by defeating the undead lord Palawa Joko. In gratitude, the populace praised him as the warmarshal of Kourna... and the nation accepted him as their king. Since that time, all of Kourna’s warmarshals have been directed descendents of Turai. Varesh Ossa is the latest inheritor of that legacy—and like her ancestor, she has a vision for the future of the nation.
Varesh Ossa is a brilliant commander, a loyal Kournan who instills loyalty and dedication in her troops. Like her ancestor Turai, she has also shown an interest in more spiritual concerns. Elonians see much of Turai’s greatness in Varesh. By using political acumen, her charismatic presence, and the influence of her family legacy, Varesh has rallied the Kournan army, inspiring them as Turai Ossa did long ago. Some loyal Elonians hope that she can unify the nation again, restoring it to the greatness of its past. Others fervently hope that she does not share his madness. History will see how well Varesh succeeds on her own spiritual quest.
�� ��
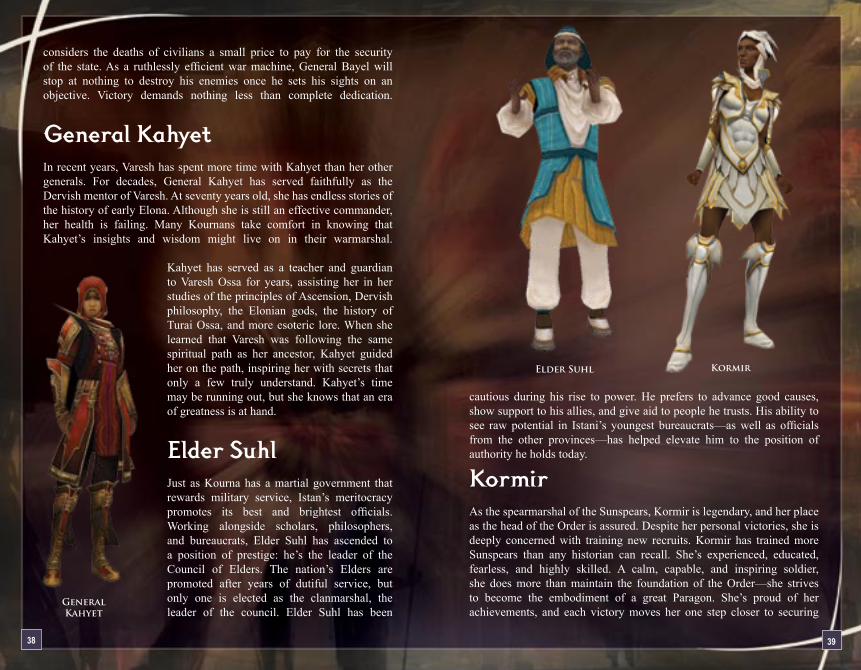
cautious during his rise to power. He prefers to advance good causes, show support to his allies, and give aid to people he trusts. His ability to see raw potential in Istani’s youngest bureaucrats—as well as officials from the other provinces—has helped elevate him to the position of authority he holds today.
Kormir As the spearmarshal of the Sunspears, Kormir is legendary, and her place as the head of the Order is assured. Despite her personal victories, she is deeply concerned with training new recruits. Kormir has trained more Sunspears than any historian can recall. She’s experienced, educated, fearless, and highly skilled. A calm, capable, and inspiring soldier, she does more than maintain the foundation of the Order—she strives to become the embodiment of a great Paragon. She’s proud of her achievements, and each victory moves her one step closer to securing
Elder Suhl Kormir
considers the deaths of civilians a small price to pay for the security of the state. As a ruthlessly efficient war machine, General Bayel will stop at nothing to destroy his enemies once he sets his sights on an objective. Victory demands nothing less than complete dedication.
General Kahyet In recent years, Varesh has spent more time with Kahyet than her other generals. For decades, General Kahyet has served faithfully as the Dervish mentor of Varesh. At seventy years old, she has endless stories of the history of early Elona. Although she is still an effective commander, her health is failing. Many Kournans take comfort in knowing that Kahyet’s insights and wisdom might live on in their warmarshal.
Kahyet has served as a teacher and guardian to Varesh Ossa for years, assisting her in her studies of the principles of Ascension, Dervish philosophy, the Elonian gods, the history of Turai Ossa, and more esoteric lore. When she learned that Varesh was following the same spiritual path as her ancestor, Kahyet guided her on the path, inspiring her with secrets that only a few truly understand. Kahyet’s time may be running out, but she knows that an era of greatness is at hand.
Elder SuhlJust as Kourna has a martial government that rewards military service, Istan’s meritocracy promotes its best and brightest officials. Working alongside scholars, philosophers, and bureaucrats, Elder Suhl has ascended to a position of prestige: he’s the leader of the Council of Elders. The nation’s Elders are promoted after years of dutiful service, but only one is elected as the clanmarshal, the leader of the council. Elder Suhl has been
General Kahyet
40 41
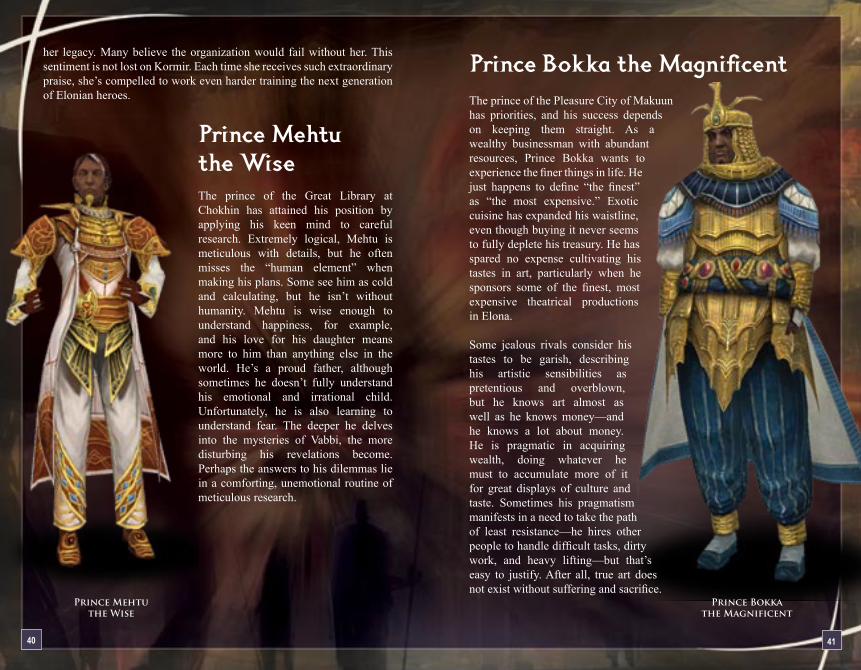
Prince Bokka the Magnificent The prince of the Pleasure City of Makuun has priorities, and his success depends on keeping them straight. As a wealthy businessman with abundant resources, Prince Bokka wants to experience the finer things in life. He just happens to define “the finest” as “the most expensive.” Exotic cuisine has expanded his waistline, even though buying it never seems to fully deplete his treasury. He has spared no expense cultivating his tastes in art, particularly when he sponsors some of the finest, most expensive theatrical productions in Elona.
Some jealous rivals consider his tastes to be garish, describing his artistic sensibilities as pretentious and overblown, but he knows art almost as well as he knows money—and he knows a lot about money. He is pragmatic in acquiring wealth, doing whatever he must to accumulate more of it for great displays of culture and taste. Sometimes his pragmatism manifests in a need to take the path of least resistance—he hires other people to handle difficult tasks, dirty work, and heavy lifting—but that’s easy to justify. After all, true art does not exist without suffering and sacrifice.
Prince Bokka the Magnificent
her legacy. Many believe the organization would fail without her. This sentiment is not lost on Kormir. Each time she receives such extraordinary praise, she’s compelled to work even harder training the next generation of Elonian heroes.
Prince Mehtu the Wise The prince of the Great Library at Chokhin has attained his position by applying his keen mind to careful research. Extremely logical, Mehtu is meticulous with details, but he often misses the “human element” when making his plans. Some see him as cold and calculating, but he isn’t without humanity. Mehtu is wise enough to understand happiness, for example, and his love for his daughter means more to him than anything else in the world. He’s a proud father, although sometimes he doesn’t fully understand his emotional and irrational child. Unfortunately, he is also learning to understand fear. The deeper he delves into the mysteries of Vabbi, the more disturbing his revelations become. Perhaps the answers to his dilemmas lie in a comforting, unemotional routine of meticulous research.
Prince Mehtu the Wise
4� 4�
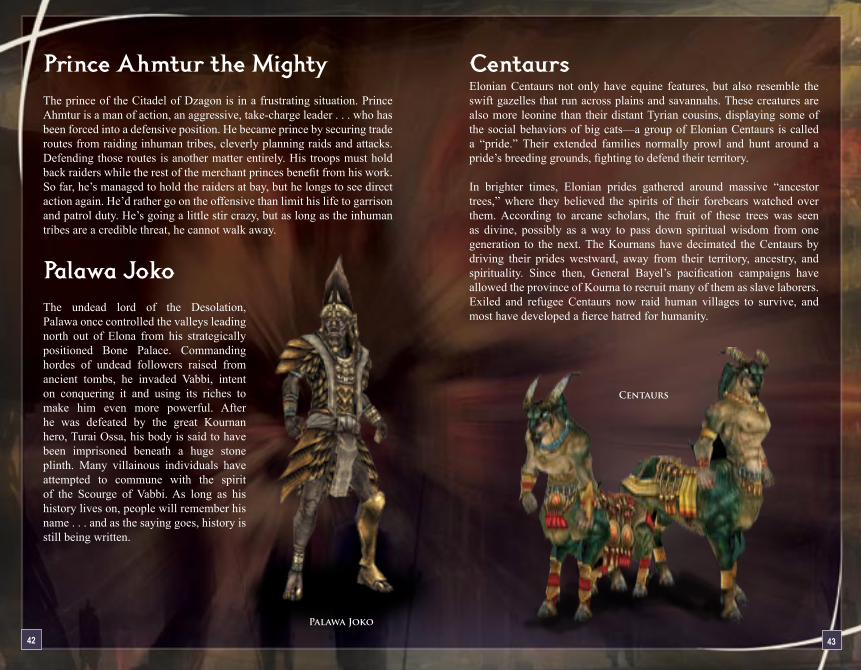
CentaursElonian Centaurs not only have equine features, but also resemble the swift gazelles that run across plains and savannahs. These creatures are also more leonine than their distant Tyrian cousins, displaying some of the social behaviors of big cats—a group of Elonian Centaurs is called a “pride.” Their extended families normally prowl and hunt around a pride’s breeding grounds, fighting to defend their territory.
In brighter times, Elonian prides gathered around massive “ancestor trees,” where they believed the spirits of their forebears watched over them. According to arcane scholars, the fruit of these trees was seen as divine, possibly as a way to pass down spiritual wisdom from one generation to the next. The Kournans have decimated the Centaurs by driving their prides westward, away from their territory, ancestry, and spirituality. Since then, General Bayel’s pacification campaigns have allowed the province of Kourna to recruit many of them as slave laborers. Exiled and refugee Centaurs now raid human villages to survive, and most have developed a fierce hatred for humanity.
Centaurs
Palawa Joko
Prince Ahmtur the Mighty The prince of the Citadel of Dzagon is in a frustrating situation. Prince Ahmtur is a man of action, an aggressive, take-charge leader . . . who has been forced into a defensive position. He became prince by securing trade routes from raiding inhuman tribes, cleverly planning raids and attacks. Defending those routes is another matter entirely. His troops must hold back raiders while the rest of the merchant princes benefit from his work. So far, he’s managed to hold the raiders at bay, but he longs to see direct action again. He’d rather go on the offensive than limit his life to garrison and patrol duty. He’s going a little stir crazy, but as long as the inhuman tribes are a credible threat, he cannot walk away.
Palawa Joko The undead lord of the Desolation, Palawa once controlled the valleys leading north out of Elona from his strategically positioned Bone Palace. Commanding hordes of undead followers raised from ancient tombs, he invaded Vabbi, intent on conquering it and using its riches to make him even more powerful. After he was defeated by the great Kournan hero, Turai Ossa, his body is said to have been imprisoned beneath a huge stone plinth. Many villainous individuals have attempted to commune with the spirit of the Scourge of Vabbi. As long as his history lives on, people will remember his name . . . and as the saying goes, history is still being written.
44 4�
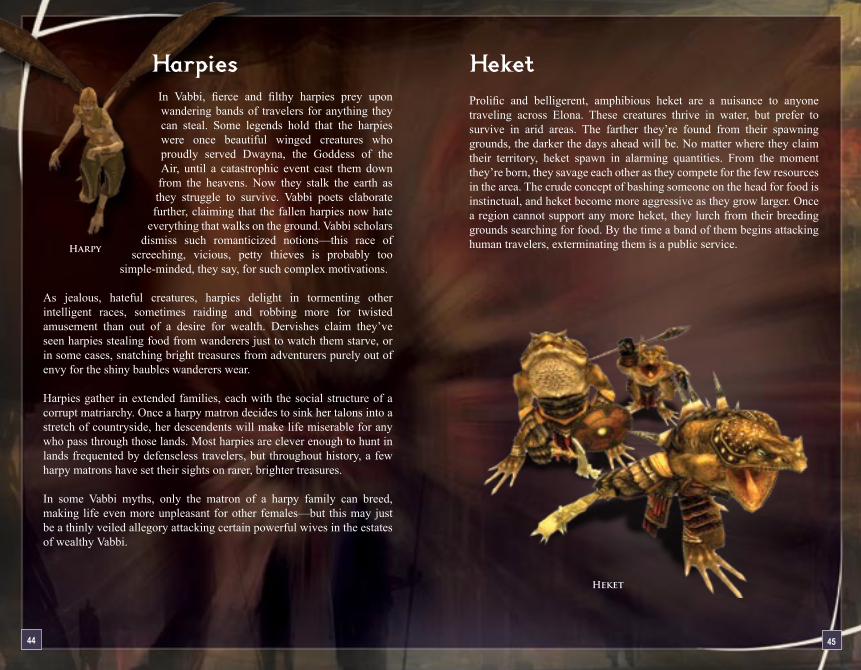
HeketProlific and belligerent, amphibious heket are a nuisance to anyone traveling across Elona. These creatures thrive in water, but prefer to survive in arid areas. The farther they’re found from their spawning grounds, the darker the days ahead will be. No matter where they claim their territory, heket spawn in alarming quantities. From the moment they’re born, they savage each other as they compete for the few resources in the area. The crude concept of bashing someone on the head for food is instinctual, and heket become more aggressive as they grow larger. Once a region cannot support any more heket, they lurch from their breeding grounds searching for food. By the time a band of them begins attacking human travelers, exterminating them is a public service.
Heket
Harpy
Harpies In Vabbi, fierce and filthy harpies prey upon wandering bands of travelers for anything they can steal. Some legends hold that the harpies were once beautiful winged creatures who proudly served Dwayna, the Goddess of the Air, until a catastrophic event cast them down from the heavens. Now they stalk the earth as they struggle to survive. Vabbi poets elaborate further, claiming that the fallen harpies now hate
everything that walks on the ground. Vabbi scholars dismiss such romanticized notions—this race of
screeching, vicious, petty thieves is probably too simple-minded, they say, for such complex motivations.
As jealous, hateful creatures, harpies delight in tormenting other intelligent races, sometimes raiding and robbing more for twisted amusement than out of a desire for wealth. Dervishes claim they’ve seen harpies stealing food from wanderers just to watch them starve, or in some cases, snatching bright treasures from adventurers purely out of envy for the shiny baubles wanderers wear.
Harpies gather in extended families, each with the social structure of a corrupt matriarchy. Once a harpy matron decides to sink her talons into a stretch of countryside, her descendents will make life miserable for any who pass through those lands. Most harpies are clever enough to hunt in lands frequented by defenseless travelers, but throughout history, a few harpy matrons have set their sights on rarer, brighter treasures.
In some Vabbi myths, only the matron of a harpy family can breed, making life even more unpleasant for other females—but this may just be a thinly veiled allegory attacking certain powerful wives in the estates of wealthy Vabbi.
4� 4�
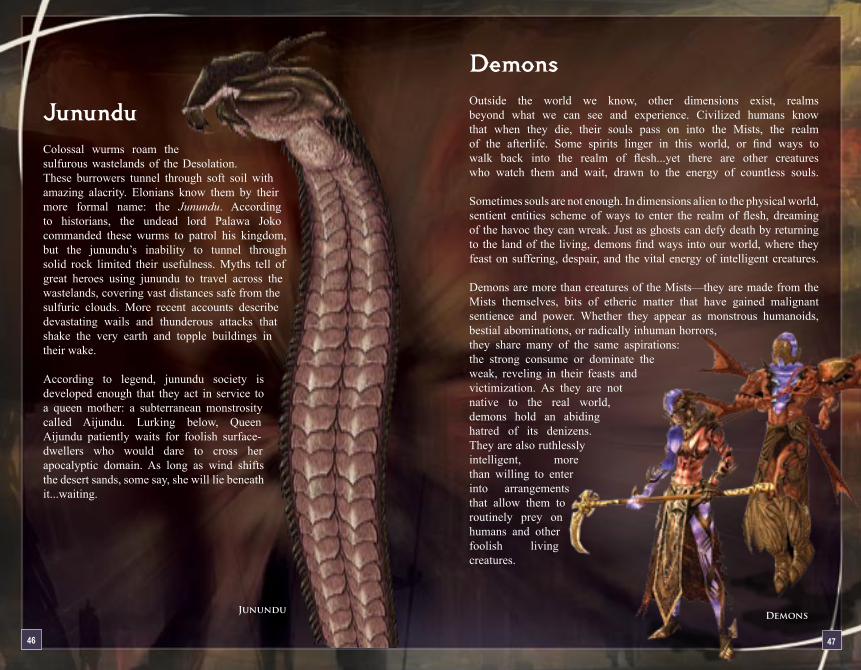
JununduColossal wurms roam the sulfurous wastelands of the Desolation. These burrowers tunnel through soft soil with amazing alacrity. Elonians know them by their more formal name: the Junundu. According to historians, the undead lord Palawa Joko commanded these wurms to patrol his kingdom, but the junundu’s inability to tunnel through solid rock limited their usefulness. Myths tell of great heroes using junundu to travel across the wastelands, covering vast distances safe from the sulfuric clouds. More recent accounts describe devastating wails and thunderous attacks that shake the very earth and topple buildings in their wake.
According to legend, junundu society is developed enough that they act in service to a queen mother: a subterranean monstrosity called Aijundu. Lurking below, Queen Aijundu patiently waits for foolish surface-dwellers who would dare to cross her apocalyptic domain. As long as wind shifts the desert sands, some say, she will lie beneath it...waiting.
Junundu
Demons Outside the world we know, other dimensions exist, realms beyond what we can see and experience. Civilized humans know that when they die, their souls pass on into the Mists, the realm of the afterlife. Some spirits linger in this world, or find ways to walk back into the realm of flesh...yet there are other creatures who watch them and wait, drawn to the energy of countless souls. Sometimes souls are not enough. In dimensions alien to the physical world, sentient entities scheme of ways to enter the realm of flesh, dreaming of the havoc they can wreak. Just as ghosts can defy death by returning to the land of the living, demons find ways into our world, where they feast on suffering, despair, and the vital energy of intelligent creatures. Demons are more than creatures of the Mists—they are made from the Mists themselves, bits of etheric matter that have gained malignant sentience and power. Whether they appear as monstrous humanoids, bestial abominations, or radically inhuman horrors, they share many of the same aspirations: the strong consume or dominate the weak, reveling in their feasts and victimization. As they are not native to the real world, demons hold an abiding hatred of its denizens. They are also ruthlessly intelligent, more than willing to enter into arrangements that allow them to routinely prey on humans and other foolish living creatures.
Demons

4� 4�
CorsairsOn land, Elona’s laws are defined and enforced by its three provincial governments. Life at sea is different. On every ship, a captain’s word is law, and many sailors follow their own personal codes of honor. Corsairs live outside the law, whether they’re standing on solid ground or the treacherous deck of a fast ship. As a matter of survival, each one recognizes the Code of the Corsairs, although many disagree on its particulars.
The most important concepts in the Code are loyalty to one’s captain (and the conditions under which you can justifiably mutiny), fair methods of distributing wealth (and the best times and places to steal it), and honorable ways of resolving differences (as well as the best ways to cheat in a duel). Land dwellers are often baffled by the inherent contradictions of this code. No matter how a sailor defines a personal code of honor, corsairs unite against their common enemies, setting aside all differences. The Code has kept the corsairs around for generations, passing on traditions, superstitions, and contradictions from one generation to the next. The corsairs have remained free by learning to survive in treacherous waters, sailing where the Istani will not or cannot follow. Their fleets remain hidden near the most dangerous stretches of the Elonian coast. Between the northwest coast of Cantha and the southern rim of Elona, a deadly sea is troubled by sudden storms and cyclones, hidden reefs, and dangerous sea creatures. These waters were once navigated by fearless Luxon raiders from Cantha, and to this day, brigands from many cultures search for secret coves hidden by these deadly waters.
Djinn Djinn are spirits with deep ties to the Elonian continent, usually bound to spiritually strong areas. In some Elonian legends, they have the power to act unseen. Like humans, they’re allegedly capable of choosing a path of good or evil. In a sense, djinn really can act unseen—many are shapeshifters, capable of assuming a human form when interacting with human beings and other species. Some Vabbian myths describe the djinn as protectors of the natural world, making them enemies of unnatural demons from other dimensions.
Most djinn are bound to the locations and places they protect, most commonly rivers, lakes, and stretches of desert. When humans first came to Elona, truly powerful wizards attempted to bind djinn to estates, caves, vaults, or other places where wealth was hidden. Djinn guardians who outlive their masters may forget their original commands, or they may become powerful enough to find their own motives.
Djinn are relentless when defending the items, places, and causes they protect, but they may also bestow their favor on people who aid them in those tasks. Vabbi legends hint at djinn granting wishes and bestowing powers. In more recent accounts, adventurers have shared stories of djinn who offered them magical knowledge and powerful magical items... including some salvaged from mighty heroes who dared to disturb the djinn.
Corsair
Djinn
�0 �1
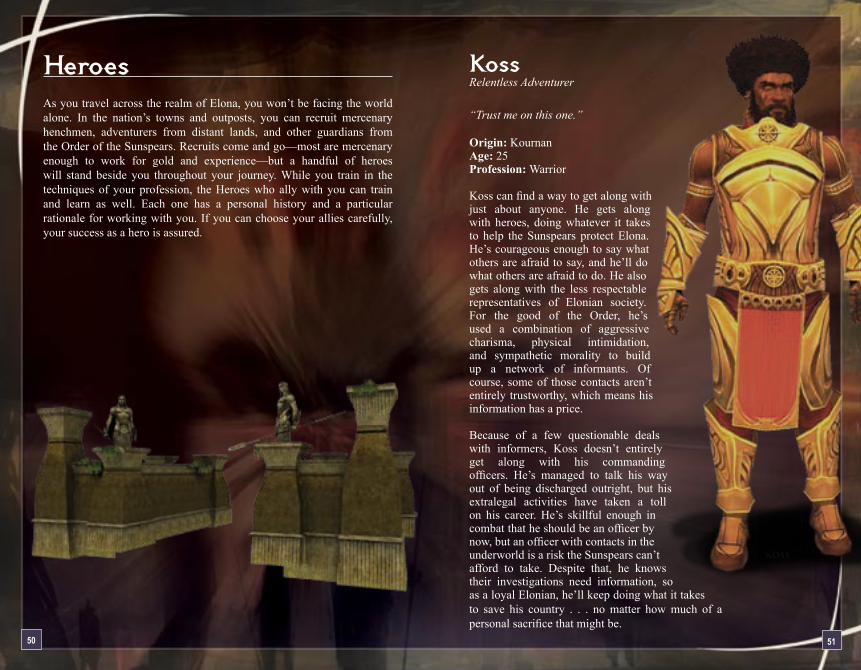
Koss Relentless Adventurer “Trust me on this one.”
Origin: KournanAge: 25Profession: Warrior
Koss can find a way to get along with just about anyone. He gets along with heroes, doing whatever it takes to help the Sunspears protect Elona. He’s courageous enough to say what others are afraid to say, and he’ll do what others are afraid to do. He also gets along with the less respectable representatives of Elonian society. For the good of the Order, he’s used a combination of aggressive charisma, physical intimidation, and sympathetic morality to build up a network of informants. Of course, some of those contacts aren’t entirely trustworthy, which means his information has a price. Because of a few questionable deals with informers, Koss doesn’t entirely get along with his commanding officers. He’s managed to talk his way out of being discharged outright, but his extralegal activities have taken a toll on his career. He’s skillful enough in combat that he should be an officer by now, but an officer with contacts in the underworld is a risk the Sunspears can’t afford to take. Despite that, he knows their investigations need information, so as a loyal Elonian, he’ll keep doing what it takes to save his country . . . no matter how much of a personal sacrifice that might be.
Koss
HeroesAs you travel across the realm of Elona, you won’t be facing the world alone. In the nation’s towns and outposts, you can recruit mercenary henchmen, adventurers from distant lands, and other guardians from the Order of the Sunspears. Recruits come and go—most are mercenary enough to work for gold and experience—but a handful of heroes will stand beside you throughout your journey. While you train in the techniques of your profession, the Heroes who ally with you can train and learn as well. Each one has a personal history and a particular rationale for working with you. If you can choose your allies carefully, your success as a hero is assured.
�� ��
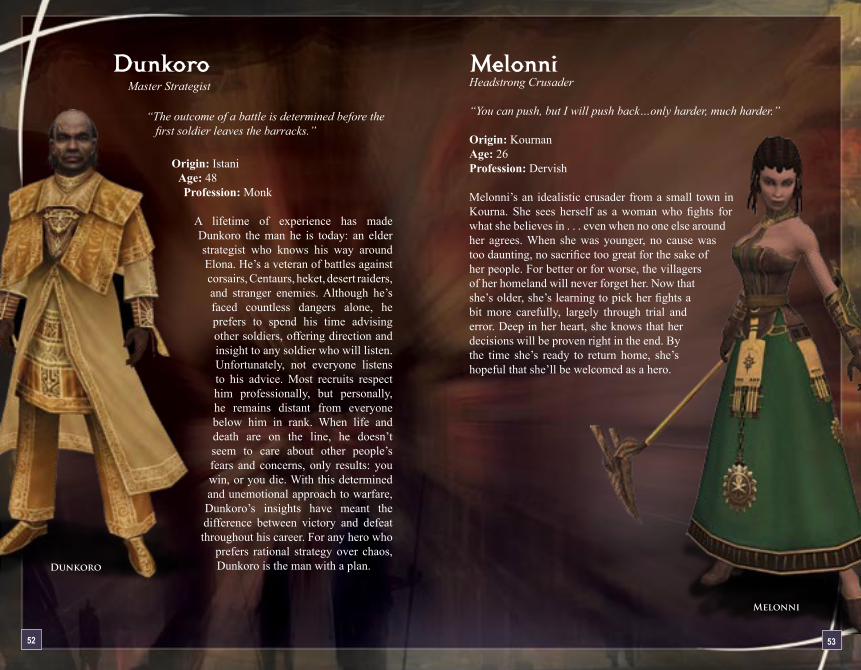
MelonniHeadstrong Crusader
“You can push, but I will push back…only harder, much harder.” Origin: KournanAge: 26Profession: Dervish
Melonni’s an idealistic crusader from a small town in Kourna. She sees herself as a woman who fights for what she believes in . . . even when no one else around her agrees. When she was younger, no cause was too daunting, no sacrifice too great for the sake of her people. For better or for worse, the villagers of her homeland will never forget her. Now that she’s older, she’s learning to pick her fights a bit more carefully, largely through trial and error. Deep in her heart, she knows that her decisions will be proven right in the end. By the time she’s ready to return home, she’s hopeful that she’ll be welcomed as a hero.
Melonni
DunkoroMaster Strategist
“The outcome of a battle is determined before the first soldier leaves the barracks.”
Origin: Istani
Age: 48Profession: Monk A lifetime of experience has made Dunkoro the man he is today: an elder strategist who knows his way around Elona. He’s a veteran of battles against corsairs, Centaurs, heket, desert raiders, and stranger enemies. Although he’s faced countless dangers alone, he prefers to spend his time advising other soldiers, offering direction and insight to any soldier who will listen. Unfortunately, not everyone listens to his advice. Most recruits respect him professionally, but personally, he remains distant from everyone below him in rank. When life and death are on the line, he doesn’t seem to care about other people’s fears and concerns, only results: you win, or you die. With this determined and unemotional approach to warfare, Dunkoro’s insights have meant the difference between victory and defeat throughout his career. For any hero who
prefers rational strategy over chaos, Dunkoro is the man with a plan.
Dunkoro
�4 ��
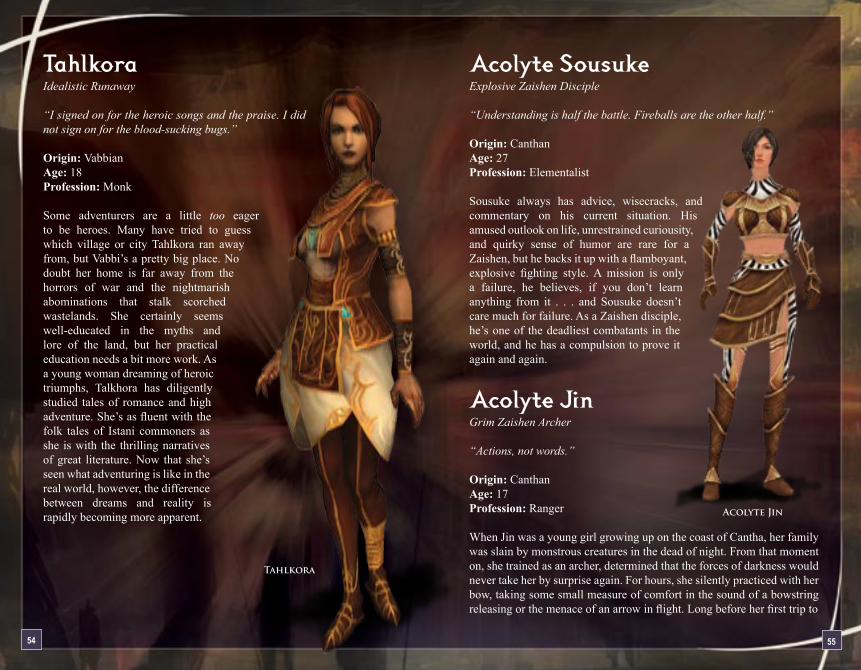
Acolyte SousukeExplosive Zaishen Disciple “Understanding is half the battle. Fireballs are the other half.” Origin: CanthanAge: 27Profession: Elementalist Sousuke always has advice, wisecracks, and commentary on his current situation. His amused outlook on life, unrestrained curiousity, and quirky sense of humor are rare for a Zaishen, but he backs it up with a flamboyant, explosive fighting style. A mission is only a failure, he believes, if you don’t learn anything from it . . . and Sousuke doesn’t care much for failure. As a Zaishen disciple, he’s one of the deadliest combatants in the world, and he has a compulsion to prove it again and again.
Acolyte JinGrim Zaishen Archer “Actions, not words.” Origin: CanthanAge: 17Profession: Ranger When Jin was a young girl growing up on the coast of Cantha, her family was slain by monstrous creatures in the dead of night. From that moment on, she trained as an archer, determined that the forces of darkness would never take her by surprise again. For hours, she silently practiced with her bow, taking some small measure of comfort in the sound of a bowstring releasing or the menace of an arrow in flight. Long before her first trip to
Acolyte Jin
TahlkoraIdealistic Runaway
“I signed on for the heroic songs and the praise. I did not sign on for the blood-sucking bugs.” Origin: VabbianAge: 18Profession: Monk
Some adventurers are a little too eager to be heroes. Many have tried to guess which village or city Tahlkora ran away from, but Vabbi’s a pretty big place. No doubt her home is far away from the horrors of war and the nightmarish abominations that stalk scorched wastelands. She certainly seems well-educated in the myths and lore of the land, but her practical education needs a bit more work. As a young woman dreaming of heroic triumphs, Talkhora has diligently studied tales of romance and high adventure. She’s as fluent with the folk tales of Istani commoners as she is with the thrilling narratives of great literature. Now that she’s seen what adventuring is like in the real world, however, the difference between dreams and reality is rapidly becoming more apparent.
Tahlkora
�� ��
death of their race, and Zhed agrees. At best, he sees the “two-legs” as a means to an end. In the worst of times, he sees them as rivals . . . or prey. His dealings with humans have not been good, but if he must work with adventurers to reach his goals—and adventurers need to work with him—he’ll need to set aside his animosity. How far he can be trusted is another matter entirely.
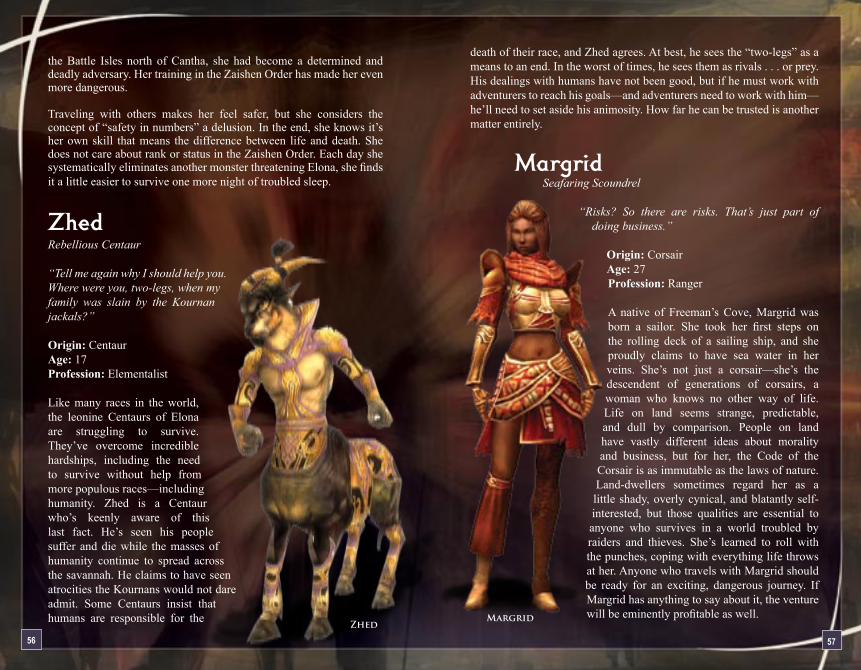
Margrid Seafaring Scoundrel
“Risks? So there are risks. That’s just part of
doing business.” Origin: CorsairAge: 27Profession: Ranger A native of Freeman’s Cove, Margrid was born a sailor. She took her first steps on the rolling deck of a sailing ship, and she proudly claims to have sea water in her veins. She’s not just a corsair—she’s the descendent of generations of corsairs, a woman who knows no other way of life. Life on land seems strange, predictable, and dull by comparison. People on land have vastly different ideas about morality and business, but for her, the Code of the Corsair is as immutable as the laws of nature. Land-dwellers sometimes regard her as a little shady, overly cynical, and blatantly self-interested, but those qualities are essential to anyone who survives in a world troubled by raiders and thieves. She’s learned to roll with the punches, coping with everything life throws at her. Anyone who travels with Margrid should be ready for an exciting, dangerous journey. If Margrid has anything to say about it, the venture will be eminently profitable as well.Margrid
the Battle Isles north of Cantha, she had become a determined and deadly adversary. Her training in the Zaishen Order has made her even more dangerous.
Traveling with others makes her feel safer, but she considers the concept of “safety in numbers” a delusion. In the end, she knows it’s her own skill that means the difference between life and death. She does not care about rank or status in the Zaishen Order. Each day she systematically eliminates another monster threatening Elona, she finds it a little easier to survive one more night of troubled sleep.
ZhedRebellious Centaur “Tell me again why I should help you. Where were you, two-legs, when my family was slain by the Kournan jackals?” Origin: Centaur Age: 17Profession: Elementalist
Like many races in the world, the leonine Centaurs of Elona are struggling to survive. They’ve overcome incredible hardships, including the need to survive without help from more populous races—including humanity. Zhed is a Centaur who’s keenly aware of this last fact. He’s seen his people suffer and die while the masses of humanity continue to spread across the savannah. He claims to have seen atrocities the Kournans would not dare admit. Some Centaurs insist that humans are responsible for the
Zhed

�� ��
GorenDedicated Bodyguard “The prince likes to give orders. I like to take orders. It’s a good life.”
Origin: VabbianAge: 28Profession: Warrior Goren is big. Goren is strong. Goren is really, really good at sprinting into battle. Unfortunately, Goren isn’t exactly the sharpest blade in the armory. He understands everyday conversation, and he can carry out simple commands—particularly sentences with the words “hit” and “smash” in them—but the finer philosophical passages of the Flameseeker Prophecies will remain eternally outside his comprehension. Eager for work, Goren has found employment working as the bodyguard of Prince Bokka the Magnificent. Money and influence don’t mean much to him, though. Loyalty does.
Goren
NorguStruggling Artist “Fame is fleeting, but a good meal will keep you going for days. You want that roll?”
Origin: VabbianAge: 24Profession: Mesmer/Actor Norgu is a classically trained actor, a visionary unappreciated in his own time, and a large, dramatic,
boisterous glad-hander. As the leader of the Lyssan Fools
acting troupe, he is currently on an extended tour of the estates of Vabbian
nobles. Everywhere he travels, he leaves a memorable impression. Few will forget
his insightfully accurate and delightfully humorous parody of General Bayel in Gandara, a performance that should keep him on an extended
tour for quite some time. Norgu claims to have traveled throughout Tyria and Cantha, returning with stories of a standing-room-
only performance in the court of Emperor Kisu and a standing ovation at the Henge
of Denravi. Moving quickly from one region to the next, he uses his sunny disposition and personal charisma to get last-minute invites to parties, audiences with the rich and powerful, and of course, free food. Norgu never
met a buffet he didn’t like.
Norgu

�0 �1
Olias
Olias Obsessed Necromancer “Grenth lives! You, on the other hand, must die!” Origin: Tyrian (Lion’s Arch)Age: 32Profession: Necromancer Olias used to take his marching orders from the White Mantle, but he now walks his own path. An encounter at the Temple of Ages convinced Olias that he had been chosen for a special mission: he now serves as Grenth’s personal “hand of judgment,” enacting what he sees as the will of his god. He lives by a simple code. Those who perish and return to life are expected by Grenth to live their lives well. If they do not, Olias ensures they are returned to the cold embrace of the Lord of Death.
Mysterious events in Elona now compel him to act on Grenth’s behalf. With strange disturbances in the land, Olias feels that the gods are threatened and the dead themselves are uneasy in their eternal sleep. He has sworn an oath to Grenth that he will find the source of the strange malady and correct it. And if it involves sending new minions to Grenth, so much the better! Death and killing delight him. He is willing to discuss other matters, but strangely enough, most discussions seem to lead back to death and killing.
Master of Whispers Cryptic Spymaster “Of course I know who you are. It’s my job to know.” Origin: UnknownAge: UnknownProfession: Unknown Dare not speak the name of the Master of Whispers—not unless you have a good reason for doing so. This cryptic figure is so mysterious that he’s hidden his real name; instead, he’s always addressed by his title. The Master of Whispers has unquestioned command of an efficient organization, although many debate what form his authority actually takes. One rumor holds that he’s the province’s spymaster, keeping a job where he serves as a central collector of information from spies across the nation (and perhaps beyond). Others believe he deals with supernatural threats, training his agents as ghost seekers and demon hunters. Whatever the truth may be, he often finds reason for traveling with adventurers exploring Elona (and perhaps beyond). His reasons for doing so are strictly on a need-to-know basis. You’re just not ready to learn that yet.
Master of Whispers
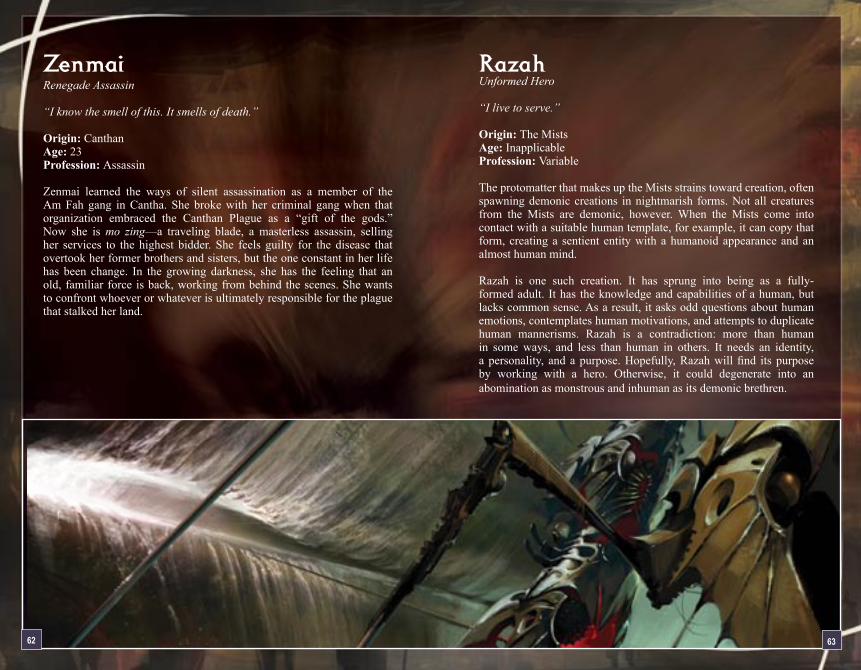
RazahUnformed Hero “I live to serve.” Origin: The MistsAge: InapplicableProfession: Variable The protomatter that makes up the Mists strains toward creation, often spawning demonic creations in nightmarish forms. Not all creatures from the Mists are demonic, however. When the Mists come into contact with a suitable human template, for example, it can copy that form, creating a sentient entity with a humanoid appearance and an almost human mind.
Razah is one such creation. It has sprung into being as a fully-formed adult. It has the knowledge and capabilities of a human, but lacks common sense. As a result, it asks odd questions about human emotions, contemplates human motivations, and attempts to duplicate human mannerisms. Razah is a contradiction: more than human in some ways, and less than human in others. It needs an identity, a personality, and a purpose. Hopefully, Razah will find its purpose by working with a hero. Otherwise, it could degenerate into an abomination as monstrous and inhuman as its demonic brethren.
��
ZenmaiRenegade Assassin “I know the smell of this. It smells of death.” Origin: CanthanAge: 23Profession: Assassin
Zenmai learned the ways of silent assassination as a member of the Am Fah gang in Cantha. She broke with her criminal gang when that organization embraced the Canthan Plague as a “gift of the gods.” Now she is mo zing—a traveling blade, a masterless assassin, selling her services to the highest bidder. She feels guilty for the disease that overtook her former brothers and sisters, but the one constant in her life has been change. In the growing darkness, she has the feeling that an old, familiar force is back, working from behind the scenes. She wants to confront whoever or whatever is ultimately responsible for the plague that stalked her land.
��
�4 ��

��
Book Two:
Elonian Adventures
Chapter One: Characters
��
CanthanCulture
��
Your character is at the heart of the game’s story, working with other heroes, henchmen, and characters you recruit along the way. Choosing your primary profession is the first step. The first Guild Wars campaign, Prophecies, introduced the six core professions: Warrior, Ranger, Monk, Mesmer, Elementalist, and Necromancer. Nightfall adds two new professions: the Dervish and Paragon.
Primary and Secondary ProfessionsEach time you create a character, you select one of those eight choices as your primary profession. Later in the game, you’ll choose one of them as your secondary profession The professions you choose determine your character’s attributes, armor, and fighting style, influencing the way you play the game.
Your primary and secondary professions also define which skills are available as you advance in the story. In fact, your character can eventually learn over 150 unique skills. Whenever your character is in a town or outpost, you can switch your hero’s skills and attributes. Since you have choices, you should feel free to experiment with different combinations of professions, skills, and attributes until you create a character that suits your play style best.
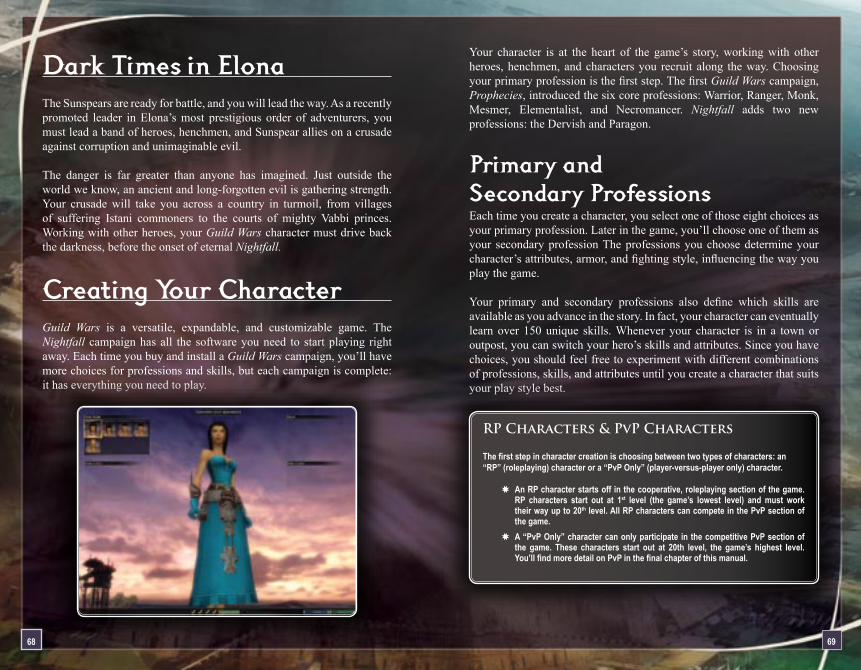
RP Characters & PvP Characters The first step in character creation is choosing between two types of characters: an “RP” (roleplaying) character or a “PvP Only” (player-versus-player only) character.
An RP character starts off in the cooperative, roleplaying section of the game. RP characters start out at 1st level (the game’s lowest level) and must work their way up to �0th level. All RP characters can compete in the PvP section of the game.A “PvP Only” character can only participate in the competitive PvP section of the game. These characters start out at 20th level, the game’s highest level. You’ll find more detail on PvP in the final chapter of this manual.
Dark Times in ElonaThe Sunspears are ready for battle, and you will lead the way. As a recently promoted leader in Elona’s most prestigious order of adventurers, you must lead a band of heroes, henchmen, and Sunspear allies on a crusade against corruption and unimaginable evil.
The danger is far greater than anyone has imagined. Just outside the world we know, an ancient and long-forgotten evil is gathering strength. Your crusade will take you across a country in turmoil, from villages of suffering Istani commoners to the courts of mighty Vabbi princes. Working with other heroes, your Guild Wars character must drive back the darkness, before the onset of eternal Nightfall.
Creating Your CharacterGuild Wars is a versatile, expandable, and customizable game. The Nightfall campaign has all the software you need to start playing right away. Each time you buy and install a Guild Wars campaign, you’ll have more choices for professions and skills, but each campaign is complete: it has everything you need to play.
��
The order in which you choose your two professions is important: only your primary profession includes a primary attribute. For example, a Warrior/Monk begins play with the Warrior’s primary attribute, Strength. The Monk/Warrior doesn’t; instead, that character begins play with the Monk’s primary attribute, Divine Favor.
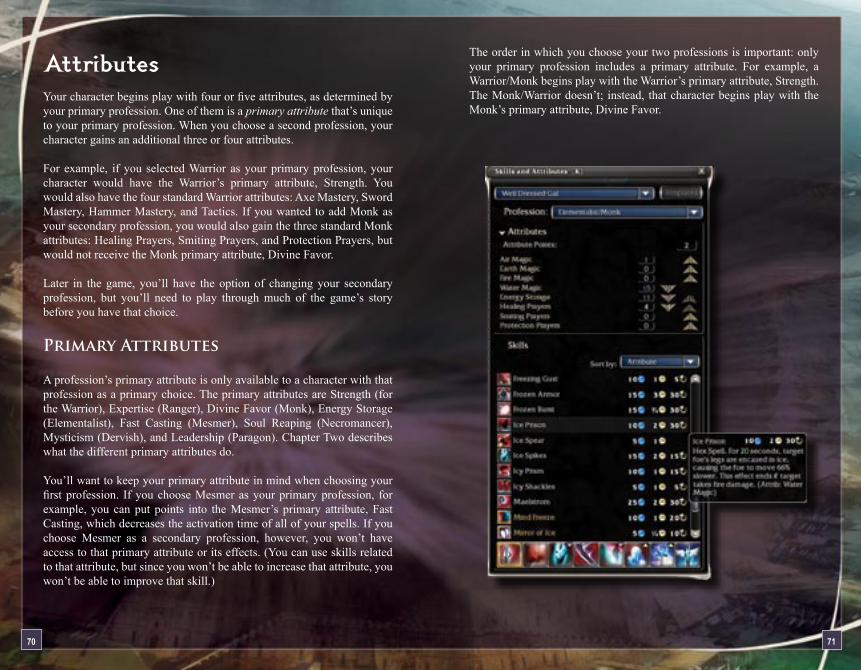
AttributesYour character begins play with four or five attributes, as determined by your primary profession. One of them is a primary attribute that’s unique to your primary profession. When you choose a second profession, your character gains an additional three or four attributes.
For example, if you selected Warrior as your primary profession, your character would have the Warrior’s primary attribute, Strength. You would also have the four standard Warrior attributes: Axe Mastery, Sword Mastery, Hammer Mastery, and Tactics. If you wanted to add Monk as your secondary profession, you would also gain the three standard Monk attributes: Healing Prayers, Smiting Prayers, and Protection Prayers, but would not receive the Monk primary attribute, Divine Favor. Later in the game, you’ll have the option of changing your secondary profession, but you’ll need to play through much of the game’s story before you have that choice.
Primary Attributes
A profession’s primary attribute is only available to a character with that profession as a primary choice. The primary attributes are Strength (for the Warrior), Expertise (Ranger), Divine Favor (Monk), Energy Storage (Elementalist), Fast Casting (Mesmer), Soul Reaping (Necromancer), Mysticism (Dervish), and Leadership (Paragon). Chapter Two describes what the different primary attributes do.
You’ll want to keep your primary attribute in mind when choosing your first profession. If you choose Mesmer as your primary profession, for example, you can put points into the Mesmer’s primary attribute, Fast Casting, which decreases the activation time of all of your spells. If you choose Mesmer as a secondary profession, however, you won’t have access to that primary attribute or its effects. (You can use skills related to that attribute, but since you won’t be able to increase that attribute, you won’t be able to improve that skill.)
�0 �1
or lowering each attribute. Changing your attributes doesn’t cost your character money or experience—that’s part of the customizable nature of Guild Wars.
This flexibility allows you to adapt to new situations, effectively using new weapons and skills. For example, suppose your Warrior finds a rare sword, but you’ve trained your Warrior to use hammers with the Hammer Mastery attribute. After traveling back to town, you can move points from Hammer Mastery to Sword Mastery. When you equip that rare sword, you’ll be more effective with it. When you’re learning the game, you’ll have time to adjust your attributes as you progress.
Gaining Skill PointsBy leveling up, resolving quests, and completing missions, your roleplaying character can also earn skill points. Each time your character purchases a new skill, you’ll need to spend one of that character’s skill points. Some of these skills are bought from Skill Trainers, who you can find in Elona’s many towns; other skills are available as rewards for completing quests. Before you leave a town or outpost, you can change the eight skills your character uses, so a large collection of skills can be useful. This ability to learn new skills and change the ones you’re using makes your characters more versatile.
Beyond 20th Level After your roleplaying character reaches �0th level, your character still gets a reward each time you gain enough XP to level up. You won’t gain additional Health or attribute points, but you earn a skill point each time you gain a level. Your hero will still be a 20th-level character, but those extra skill points can be very useful when you want to acquire more skills.
Attributes and Skills
Most skills are tied to a specific attribute. Improving an attribute improves its related skills. After you create a character, you can press K for a list of all your character’s skills and attributes, including a listing of which attributes affect which skills.
Leveling UpUnless you start the game with a 20th-level PvP character, you’ll need to “level up.” As your roleplaying character defeats enemies, complete missions, and finishes quests, your character earns experience points (XP) and gains levels. Each time you level up, your character gains a higher maximum Health (making you harder to kill). The first part of Nightfall advances your character to 20th level, the highest level you can attain.
Beyond that point, your character can continue to improve. By playing the cooperative or “roleplaying” content, you’ll be able to collect skills, upgrade weapons and armor, explore the world, and ally with other heroes. Each Guild Wars campaign also includes a story: in Nightfall, your character travels across the realm of Elona (and beyond), completing a series of quests and missions. Finishing the storyline is an epic achievement, but you’ll need to reach 20th level before you can attain that goal.
Gaining Attribute PointsEach time your roleplaying character gains a level, that character gains attribute points. The number of points you receive when your character gains a level varies as you progress through the game. By opening the Skills and Attributes panel (press K), you can see the total number of attribute points your character has. Attribute points are used to raise attributes; you can spend them at any time. Raising an attribute increases the effectiveness of skills and weapons related to that attribute. Whenever your character is in a town or outpost, you can change your allocation of attribute points, raising
�� ��
�4
Customizing Your Character Characters come in all shapes and sizes—they can be male or female, large or small. The professions, skills, and attributes your character learns and improves make your character distinct from any other. Over time, you can adjust your character further by improving equipment, altering appearance with tattoos and other modifications, modifying armor with dyes (found as loot or purchased from traders), and of course, continuing to expand your collection of skills.
Expanding the WorldYou can create up to four characters per unique Guild Wars account. For each additional Guild Wars campaign you buy and install, you gain an additional two character slots on your account. If you need more characters, you can buy additional character slots from the in-game online store, but you aren’t required to do so. At any time, you can delete or create new characters.
Characters you create in one campaign can eventually travel to certain areas of other campaigns, but only after you’ve bought and installed those campaigns. As part of each story, you’ll eventually reach a port city where ships set sail for other continents. For example, if Nightfall is your first Guild Wars campaign, you can eventually travel to the continent of Tyria (featured in Prophecies) or Cantha (as seen in Factions), but only after you add the corresponding campaigns to your account.
Kamadan is the port city in Nightfall. You’ll arrive there right before the main story begins. Characters from other campaigns can arrive in Elona at that point, including player characters from Prophecies and Factions.
Chapter Two: The Eight Professions
��
�� ��
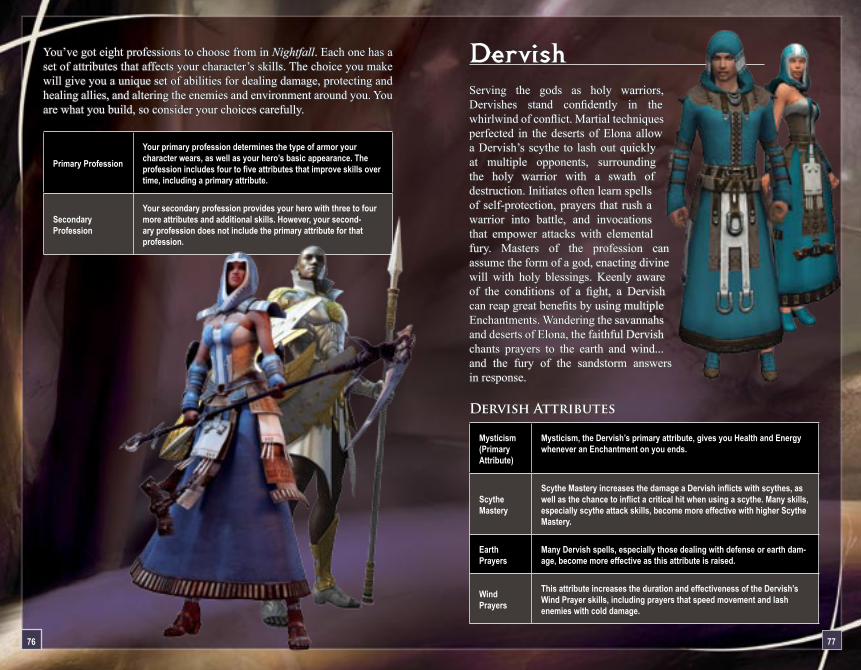
Dervish Serving the gods as holy warriors, Dervishes stand confidently in the whirlwind of conflict. Martial techniques perfected in the deserts of Elona allow a Dervish’s scythe to lash out quickly at multiple opponents, surrounding the holy warrior with a swath of destruction. Initiates often learn spells of self-protection, prayers that rush a warrior into battle, and invocations that empower attacks with elemental fury. Masters of the profession can assume the form of a god, enacting divine will with holy blessings. Keenly aware of the conditions of a fight, a Dervish can reap great benefits by using multiple Enchantments. Wandering the savannahs and deserts of Elona, the faithful Dervish chants prayers to the earth and wind... and the fury of the sandstorm answers in response.
Dervish Attributes
Mysticism(Primary Attribute)
Mysticism, the Dervish’s primary attribute, gives you Health and Energy whenever an Enchantment on you ends.
Scythe Mastery
Scythe Mastery increases the damage a Dervish inflicts with scythes, as well as the chance to inflict a critical hit when using a scythe. Many skills, especially scythe attack skills, become more effective with higher Scythe Mastery.
Earth Prayers
Many Dervish spells, especially those dealing with defense or earth dam-age, become more effective as this attribute is raised.
Wind Prayers
This attribute increases the duration and effectiveness of the Dervish’s Wind Prayer skills, including prayers that speed movement and lash enemies with cold damage.
You’ve got eight professions to choose from in Nightfall. Each one has a set of attributes that affects your character’s skills. The choice you make will give you a unique set of abilities for dealing damage, protecting and healing allies, and altering the enemies and environment around you. You are what you build, so consider your choices carefully.
Primary Profession
Your primary profession determines the type of armor your character wears, as well as your hero’s basic appearance. The profession includes four to five attributes that improve skills over time, including a primary attribute.
Secondary Profession
Your secondary profession provides your hero with three to four more attributes and additional skills. However, your second-ary profession does not include the primary attribute for that profession.
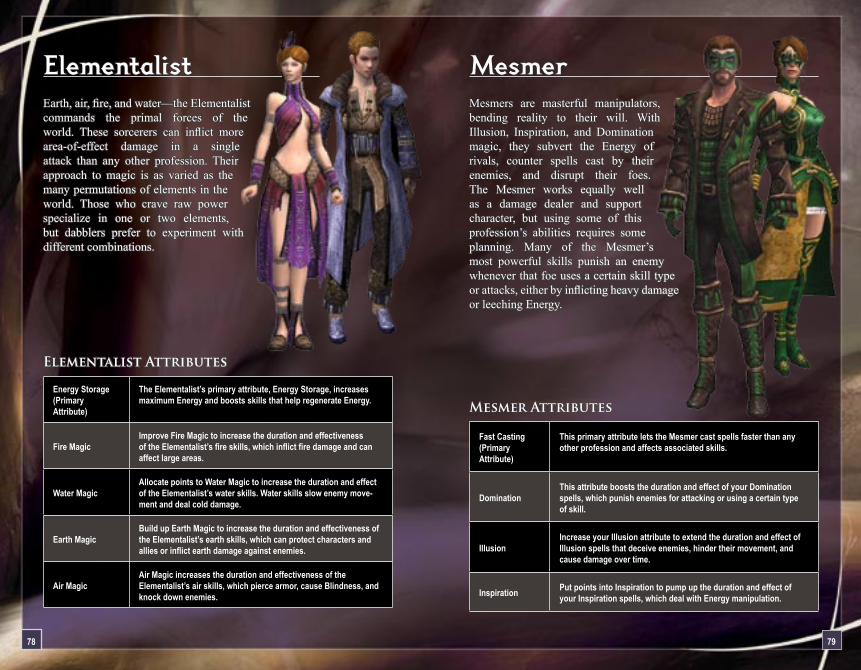
�� ��
Mesmer Mesmers are masterful manipulators, bending reality to their will. With Illusion, Inspiration, and Domination magic, they subvert the Energy of rivals, counter spells cast by their enemies, and disrupt their foes. The Mesmer works equally well as a damage dealer and support character, but using some of this profession’s abilities requires some planning. Many of the Mesmer’s most powerful skills punish an enemy whenever that foe uses a certain skill type or attacks, either by inflicting heavy damage or leeching Energy.
Mesmer Attributes
Fast Casting(Primary Attribute)
This primary attribute lets the Mesmer cast spells faster than any other profession and affects associated skills.
DominationThis attribute boosts the duration and effect of your Domination spells, which punish enemies for attacking or using a certain type of skill.
IllusionIncrease your Illusion attribute to extend the duration and effect of Illusion spells that deceive enemies, hinder their movement, and cause damage over time.
Inspiration Put points into Inspiration to pump up the duration and effect of your Inspiration spells, which deal with Energy manipulation.
Elementalist Earth, air, fire, and water—the Elementalist commands the primal forces of the world. These sorcerers can inflict more area-of-effect damage in a single attack than any other profession. Their approach to magic is as varied as the many permutations of elements in the world. Those who crave raw power specialize in one or two elements, but dabblers prefer to experiment with different combinations.
Elementalist Attributes
Energy Storage(Primary Attribute)
The Elementalist’s primary attribute, Energy Storage, increases maximum Energy and boosts skills that help regenerate Energy.
Fire MagicImprove Fire Magic to increase the duration and effectiveness of the Elementalist’s fire skills, which inflict fire damage and can affect large areas.
Water MagicAllocate points to Water Magic to increase the duration and effect of the Elementalist’s water skills. Water skills slow enemy move-ment and deal cold damage.
Earth MagicBuild up Earth Magic to increase the duration and effectiveness of the Elementalist’s earth skills, which can protect characters and allies or inflict earth damage against enemies.
Air MagicAir Magic increases the duration and effectiveness of the Elementalist’s air skills, which pierce armor, cause Blindness, and knock down enemies.
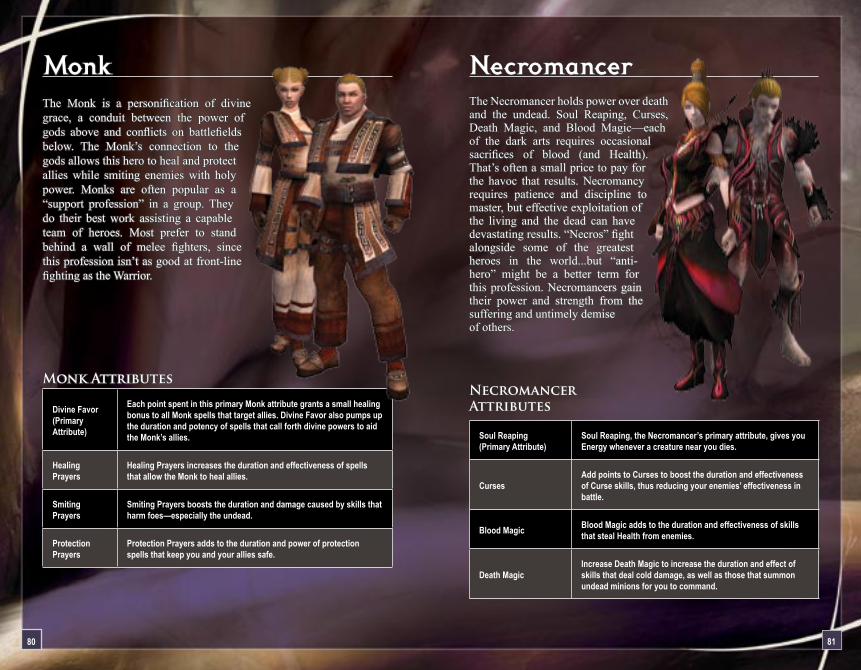
�0 �1
Monk The Monk is a personification of divine grace, a conduit between the power of gods above and conflicts on battlefields below. The Monk’s connection to the gods allows this hero to heal and protect allies while smiting enemies with holy power. Monks are often popular as a “support profession” in a group. They do their best work assisting a capable team of heroes. Most prefer to stand behind a wall of melee fighters, since this profession isn’t as good at front-line fighting as the Warrior.
Monk Attributes
Divine Favor(Primary Attribute)
Each point spent in this primary Monk attribute grants a small healing bonus to all Monk spells that target allies. Divine Favor also pumps up the duration and potency of spells that call forth divine powers to aid the Monk’s allies.
Healing Prayers
Healing Prayers increases the duration and effectiveness of spells that allow the Monk to heal allies.
Smiting Prayers
Smiting Prayers boosts the duration and damage caused by skills that harm foes—especially the undead.
Protection Prayers
Protection Prayers adds to the duration and power of protection spells that keep you and your allies safe.
Necromancer The Necromancer holds power over death and the undead. Soul Reaping, Curses, Death Magic, and Blood Magic—each of the dark arts requires occasional sacrifices of blood (and Health). That’s often a small price to pay for the havoc that results. Necromancy requires patience and discipline to master, but effective exploitation of the living and the dead can have devastating results. “Necros” fight alongside some of the greatest heroes in the world...but “anti-hero” might be a better term for this profession. Necromancers gain their power and strength from the suffering and untimely demise of others.
Necromancer Attributes
Soul Reaping(Primary Attribute)
Soul Reaping, the Necromancer’s primary attribute, gives you Energy whenever a creature near you dies.
CursesAdd points to Curses to boost the duration and effectiveness of Curse skills, thus reducing your enemies’ effectiveness in battle.
Blood Magic Blood Magic adds to the duration and effectiveness of skills that steal Health from enemies.
Death MagicIncrease Death Magic to increase the duration and effect of skills that deal cold damage, as well as those that summon undead minions for you to command.
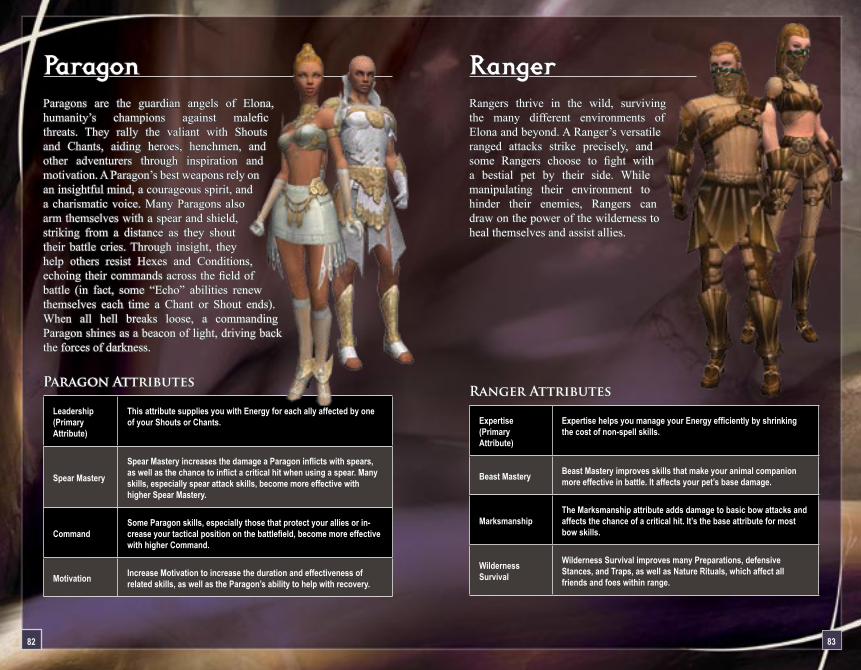
�� ��
Ranger Rangers thrive in the wild, surviving the many different environments of Elona and beyond. A Ranger’s versatile ranged attacks strike precisely, and some Rangers choose to fight with a bestial pet by their side. While manipulating their environment to hinder their enemies, Rangers can draw on the power of the wilderness to heal themselves and assist allies.
Ranger Attributes
Expertise(Primary Attribute)
Expertise helps you manage your Energy efficiently by shrinking the cost of non-spell skills.
Beast Mastery Beast Mastery improves skills that make your animal companion more effective in battle. It affects your pet’s base damage.
MarksmanshipThe Marksmanship attribute adds damage to basic bow attacks and affects the chance of a critical hit. It’s the base attribute for most bow skills.
Wilderness Survival
Wilderness Survival improves many Preparations, defensive Stances, and Traps, as well as Nature Rituals, which affect all friends and foes within range.
Paragon Paragons are the guardian angels of Elona, humanity’s champions against malefic threats. They rally the valiant with Shouts and Chants, aiding heroes, henchmen, and other adventurers through inspiration and motivation. A Paragon’s best weapons rely on an insightful mind, a courageous spirit, and a charismatic voice. Many Paragons also arm themselves with a spear and shield, striking from a distance as they shout their battle cries. Through insight, they help others resist Hexes and Conditions, echoing their commands across the field of battle (in fact, some “Echo” abilities renew themselves each time a Chant or Shout ends). When all hell breaks loose, a commanding Paragon shines as a beacon of light, driving back the forces of darkness.
Paragon Attributes
Leadership (Primary Attribute)
This attribute supplies you with Energy for each ally affected by one of your Shouts or Chants.
Spear Mastery
Spear Mastery increases the damage a Paragon inflicts with spears, as well as the chance to inflict a critical hit when using a spear. Many skills, especially spear attack skills, become more effective with higher Spear Mastery.
CommandSome Paragon skills, especially those that protect your allies or in-crease your tactical position on the battlefield, become more effective with higher Command.
Motivation Increase Motivation to increase the duration and effectiveness of related skills, as well as the Paragon’s ability to help with recovery.
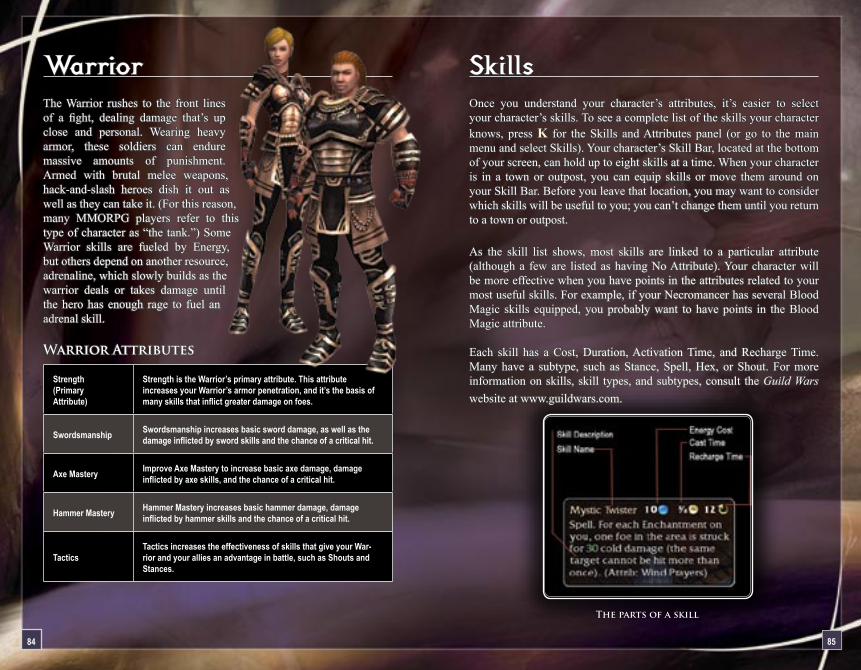
�4 ��
SkillsOnce you understand your character’s attributes, it’s easier to select your character’s skills. To see a complete list of the skills your character knows, press K for the Skills and Attributes panel (or go to the main menu and select Skills). Your character’s Skill Bar, located at the bottom of your screen, can hold up to eight skills at a time. When your character is in a town or outpost, you can equip skills or move them around on your Skill Bar. Before you leave that location, you may want to consider which skills will be useful to you; you can’t change them until you return to a town or outpost.
As the skill list shows, most skills are linked to a particular attribute (although a few are listed as having No Attribute). Your character will be more effective when you have points in the attributes related to your most useful skills. For example, if your Necromancer has several Blood Magic skills equipped, you probably want to have points in the Blood Magic attribute.
Each skill has a Cost, Duration, Activation Time, and Recharge Time. Many have a subtype, such as Stance, Spell, Hex, or Shout. For more information on skills, skill types, and subtypes, consult the Guild Wars website at www.guildwars.com.
The parts of a skill
Warrior The Warrior rushes to the front lines of a fight, dealing damage that’s up close and personal. Wearing heavy armor, these soldiers can endure massive amounts of punishment. Armed with brutal melee weapons, hack-and-slash heroes dish it out as well as they can take it. (For this reason, many MMORPG players refer to this type of character as “the tank.”) Some Warrior skills are fueled by Energy, but others depend on another resource, adrenaline, which slowly builds as the warrior deals or takes damage until the hero has enough rage to fuel an adrenal skill.
Warrior Attributes
Strength(Primary Attribute)
Strength is the Warrior’s primary attribute. This attribute increases your Warrior’s armor penetration, and it’s the basis of many skills that inflict greater damage on foes.
Swordsmanship Swordsmanship increases basic sword damage, as well as the damage inflicted by sword skills and the chance of a critical hit.
Axe Mastery Improve Axe Mastery to increase basic axe damage, damage inflicted by axe skills, and the chance of a critical hit.
Hammer Mastery Hammer Mastery increases basic hammer damage, damage inflicted by hammer skills and the chance of a critical hit.
TacticsTactics increases the effectiveness of skills that give your War-rior and your allies an advantage in battle, such as Shouts and Stances.

��
BuildsYou’ll hear the term “build” a great deal when players talk about characters in Guild Wars Nightfall, especially when they talk about player-versus-player games. The word refers to the eight skills you have when you leave a town or outpost (or start a PvP battle), along with the points you’ve allocated in those attributes. Some players tend to settle into a preferred build that fits their favorite style of play, while others adjust skills to prepare for a particular enemy or mission. After joining a group, some players coordinate their skills as part of a strategy for a team.
The skills in a character build should work well together and work effectively against the foes you expect to encounter. You may need to take into account the other characters in your group, especially if there’s a chance two characters might have the same specialty. For example, if your group includes two Monks, you might not want both of them to focus on Healing Prayer skills. Instead, you could set up the first one as a healer with Healing Prayer skills while the second one protects the party with Protection Prayer skills. Since you can change your character’s skills and adjust attributes in any town or outpost, you can alter your build as necessary before a quest or mission begins. When you’re ready to start a PvP battle, you can change your build again for competitive play.
Canthan Professions Factions introduced two professions from the nation of Cantha: the Assassin and Ritualist. Once your character arrives in Kamadan, you can fight alongside Canthan heroes. You can’t create a character with either of these professions if you haven’t installed that campaign. Assassin: Assassins learn mastery of their chosen weapon, the dagger, and they’re experts at inflicting Critical Strikes that cause massive damage. They can efficiently link attacks together in a chain without giving enemies a chance to strike back. Wearing lightweight armor, Assassins move swiftly and silently. Their magical skills include Hexes that lower a target’s defenses and protect the Assassin from harm. Ritualist: Ritualists channel otherworldly energies that summon allies from the void. With mystic binding rituals, they enslave spirits to their will. Ritualist skills can enhance the deadliness of an ally’s weapon and wreak havoc on an enemy’s Health. The Ritualist can also use the remains of the dead to defend the living, not by reanimating corpses, but through the ritual use of urns and ashes. Where the Ranger lives as one with the spirit world, the Ritualist can and will be its master.
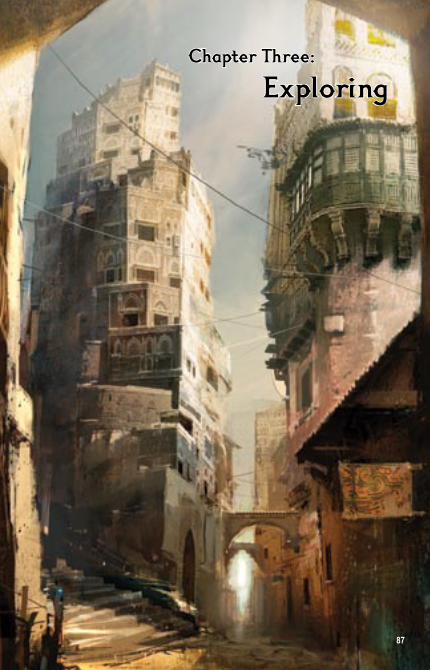
Chapter Three:
Exploring
��
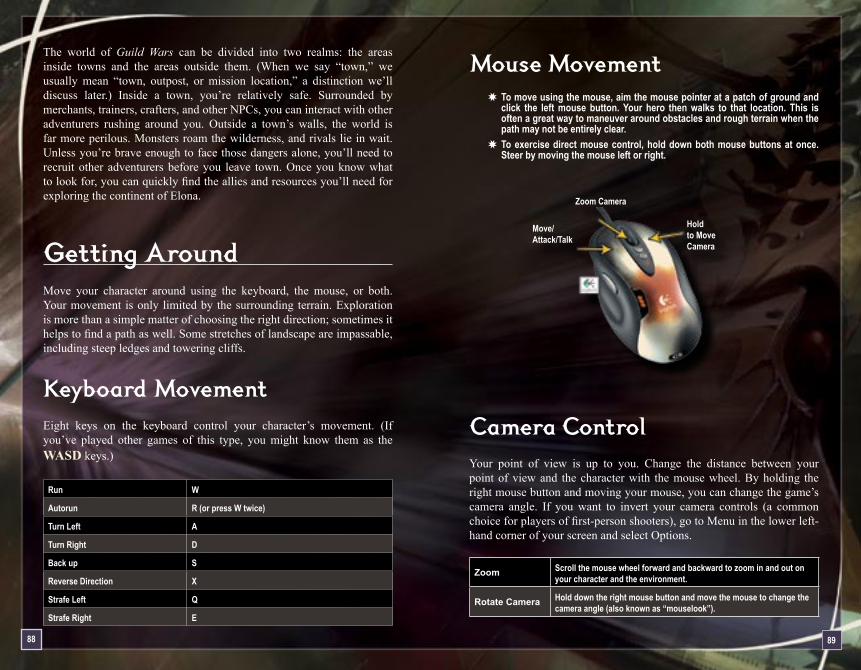
��
Mouse MovementTo move using the mouse, aim the mouse pointer at a patch of ground and click the left mouse button. Your hero then walks to that location. This is often a great way to maneuver around obstacles and rough terrain when the path may not be entirely clear. To exercise direct mouse control, hold down both mouse buttons at once. Steer by moving the mouse left or right.
Move/ Attack/Talk
Zoom Camera
Hold to Move Camera
Camera ControlYour point of view is up to you. Change the distance between your point of view and the character with the mouse wheel. By holding the right mouse button and moving your mouse, you can change the game’s camera angle. If you want to invert your camera controls (a common choice for players of first-person shooters), go to Menu in the lower left-hand corner of your screen and select Options.
Zoom Scroll the mouse wheel forward and backward to zoom in and out on your character and the environment.
Rotate Camera Hold down the right mouse button and move the mouse to change the camera angle (also known as “mouselook”).
The world of Guild Wars can be divided into two realms: the areas inside towns and the areas outside them. (When we say “town,” we usually mean “town, outpost, or mission location,” a distinction we’ll discuss later.) Inside a town, you’re relatively safe. Surrounded by merchants, trainers, crafters, and other NPCs, you can interact with other adventurers rushing around you. Outside a town’s walls, the world is far more perilous. Monsters roam the wilderness, and rivals lie in wait. Unless you’re brave enough to face those dangers alone, you’ll need to recruit other adventurers before you leave town. Once you know what to look for, you can quickly find the allies and resources you’ll need for exploring the continent of Elona.
Getting AroundMove your character around using the keyboard, the mouse, or both. Your movement is only limited by the surrounding terrain. Exploration is more than a simple matter of choosing the right direction; sometimes it helps to find a path as well. Some stretches of landscape are impassable, including steep ledges and towering cliffs.
Keyboard MovementEight keys on the keyboard control your character’s movement. (If you’ve played other games of this type, you might know them as the WASD keys.)
Run W
Autorun R (or press W twice)
Turn Left A
Turn Right D
Back up S
Reverse Direction X
Strafe Left Q
Strafe Right E
��
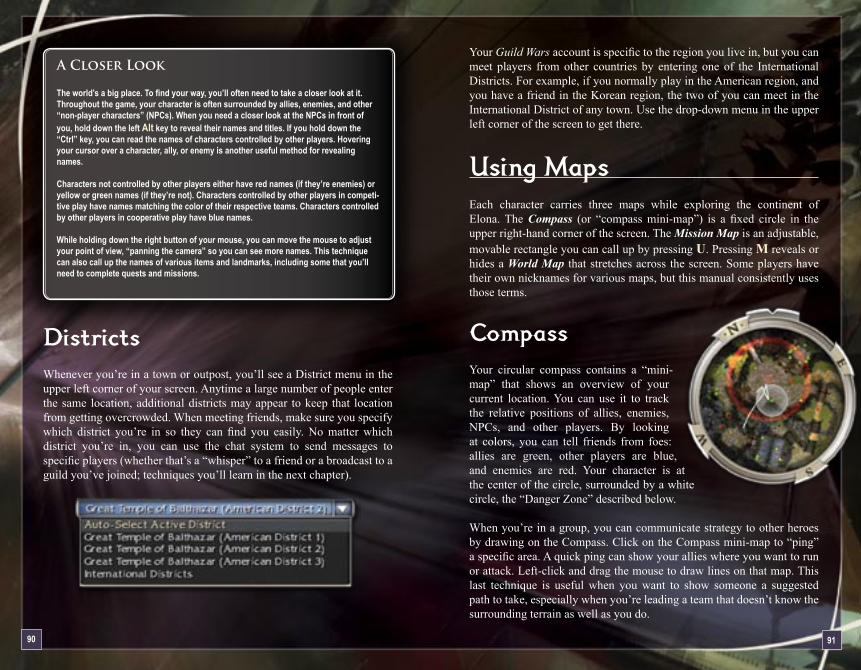
Your Guild Wars account is specific to the region you live in, but you can meet players from other countries by entering one of the International Districts. For example, if you normally play in the American region, and you have a friend in the Korean region, the two of you can meet in the International District of any town. Use the drop-down menu in the upper left corner of the screen to get there.
Using MapsEach character carries three maps while exploring the continent of Elona. The Compass (or “compass mini-map”) is a fixed circle in the upper right-hand corner of the screen. The Mission Map is an adjustable, movable rectangle you can call up by pressing U. Pressing M reveals or hides a World Map that stretches across the screen. Some players have their own nicknames for various maps, but this manual consistently uses those terms.
CompassYour circular compass contains a “mini-map” that shows an overview of your current location. You can use it to track the relative positions of allies, enemies, NPCs, and other players. By looking at colors, you can tell friends from foes: allies are green, other players are blue, and enemies are red. Your character is at the center of the circle, surrounded by a white circle, the “Danger Zone” described below. When you’re in a group, you can communicate strategy to other heroes by drawing on the Compass. Click on the Compass mini-map to “ping” a specific area. A quick ping can show your allies where you want to run or attack. Left-click and drag the mouse to draw lines on that map. This last technique is useful when you want to show someone a suggested path to take, especially when you’re leading a team that doesn’t know the surrounding terrain as well as you do.
A Closer Look The world’s a big place. To find your way, you’ll often need to take a closer look at it. Throughout the game, your character is often surrounded by allies, enemies, and other “non-player characters” (NPCs). When you need a closer look at the NPCs in front of you, hold down the left Alt key to reveal their names and titles. If you hold down the “Ctrl” key, you can read the names of characters controlled by other players. Hovering your cursor over a character, ally, or enemy is another useful method for revealing names.
Characters not controlled by other players either have red names (if they’re enemies) or yellow or green names (if they’re not). Characters controlled by other players in competi-tive play have names matching the color of their respective teams. Characters controlled by other players in cooperative play have blue names.
While holding down the right button of your mouse, you can move the mouse to adjust your point of view, “panning the camera” so you can see more names. This technique can also call up the names of various items and landmarks, including some that you’ll need to complete quests and missions.
DistrictsWhenever you’re in a town or outpost, you’ll see a District menu in the upper left corner of your screen. Anytime a large number of people enter the same location, additional districts may appear to keep that location from getting overcrowded. When meeting friends, make sure you specify which district you’re in so they can find you easily. No matter which district you’re in, you can use the chat system to send messages to specific players (whether that’s a “whisper” to a friend or a broadcast to a guild you’ve joined; techniques you’ll learn in the next chapter).
�0 �1
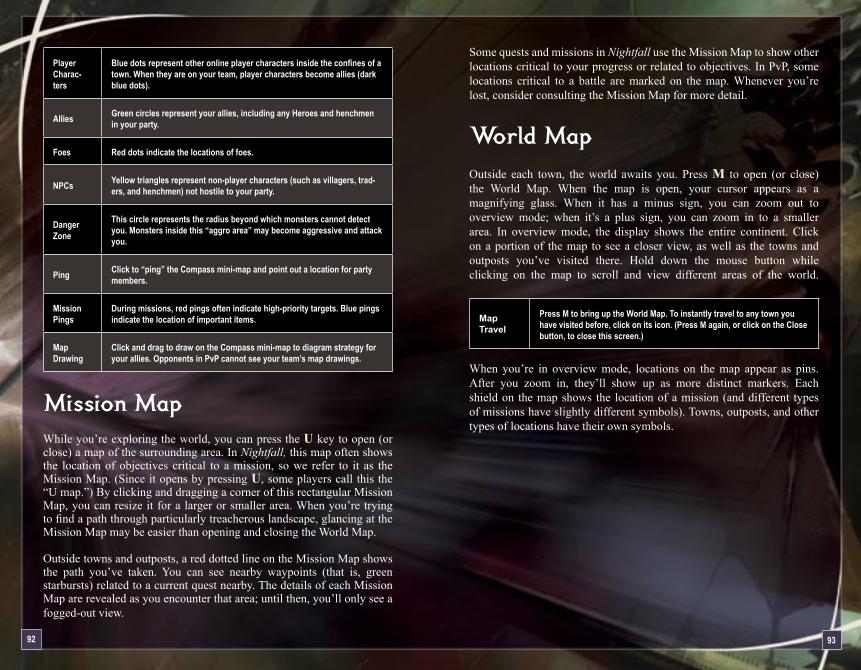
Some quests and missions in Nightfall use the Mission Map to show other locations critical to your progress or related to objectives. In PvP, some locations critical to a battle are marked on the map. Whenever you’re lost, consider consulting the Mission Map for more detail.
World MapOutside each town, the world awaits you. Press M to open (or close) the World Map. When the map is open, your cursor appears as a magnifying glass. When it has a minus sign, you can zoom out to overview mode; when it’s a plus sign, you can zoom in to a smaller area. In overview mode, the display shows the entire continent. Click on a portion of the map to see a closer view, as well as the towns and outposts you’ve visited there. Hold down the mouse button while clicking on the map to scroll and view different areas of the world.
Map Travel
Press M to bring up the World Map. To instantly travel to any town you have visited before, click on its icon. (Press M again, or click on the Close button, to close this screen.)
When you’re in overview mode, locations on the map appear as pins. After you zoom in, they’ll show up as more distinct markers. Each shield on the map shows the location of a mission (and different types of missions have slightly different symbols). Towns, outposts, and other types of locations have their own symbols.
Player Charac-ters
Blue dots represent other online player characters inside the confines of a town. When they are on your team, player characters become allies (dark blue dots).
Allies Green circles represent your allies, including any Heroes and henchmen in your party.
Foes Red dots indicate the locations of foes.
NPCs Yellow triangles represent non-player characters (such as villagers, trad-ers, and henchmen) not hostile to your party.
Danger Zone
This circle represents the radius beyond which monsters cannot detect you. Monsters inside this “aggro area” may become aggressive and attack you.
Ping Click to “ping” the Compass mini-map and point out a location for party members.
Mission Pings
During missions, red pings often indicate high-priority targets. Blue pings indicate the location of important items.
Map Drawing
Click and drag to draw on the Compass mini-map to diagram strategy for your allies. Opponents in PvP cannot see your team’s map drawings.
Mission MapWhile you’re exploring the world, you can press the U key to open (or close) a map of the surrounding area. In Nightfall, this map often shows the location of objectives critical to a mission, so we refer to it as the Mission Map. (Since it opens by pressing U, some players call this the “U map.”) By clicking and dragging a corner of this rectangular Mission Map, you can resize it for a larger or smaller area. When you’re trying to find a path through particularly treacherous landscape, glancing at the Mission Map may be easier than opening and closing the World Map.
Outside towns and outposts, a red dotted line on the Mission Map shows the path you’ve taken. You can see nearby waypoints (that is, green starbursts) related to a current quest nearby. The details of each Mission Map are revealed as you encounter that area; until then, you’ll only see a fogged-out view.
�� ��
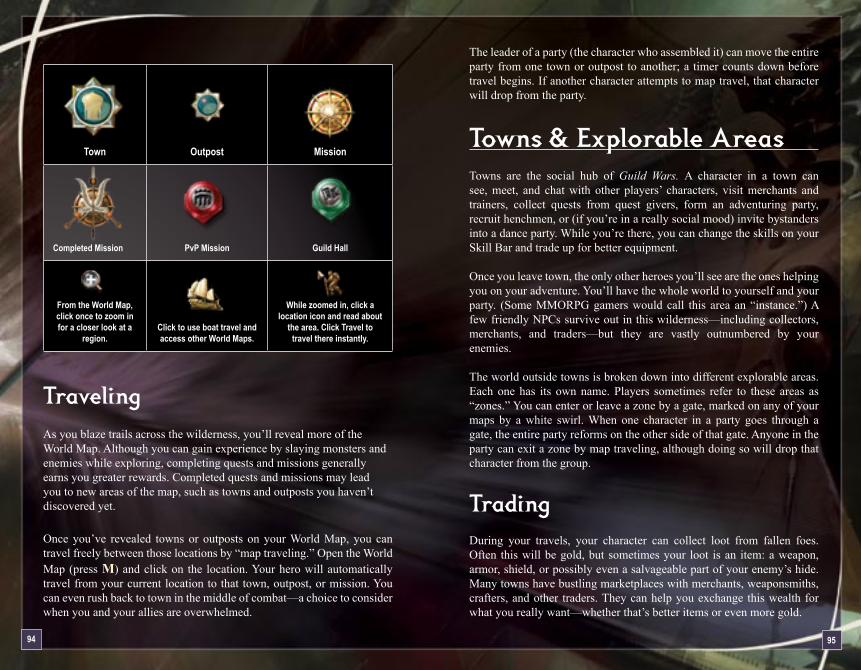
�4 ��
The leader of a party (the character who assembled it) can move the entire party from one town or outpost to another; a timer counts down before travel begins. If another character attempts to map travel, that character will drop from the party.
Towns & Explorable AreasTowns are the social hub of Guild Wars. A character in a town can see, meet, and chat with other players’ characters, visit merchants and trainers, collect quests from quest givers, form an adventuring party, recruit henchmen, or (if you’re in a really social mood) invite bystanders into a dance party. While you’re there, you can change the skills on your Skill Bar and trade up for better equipment.
Once you leave town, the only other heroes you’ll see are the ones helping you on your adventure. You’ll have the whole world to yourself and your party. (Some MMORPG gamers would call this area an “instance.”) A few friendly NPCs survive out in this wilderness—including collectors, merchants, and traders—but they are vastly outnumbered by your enemies.
The world outside towns is broken down into different explorable areas. Each one has its own name. Players sometimes refer to these areas as “zones.” You can enter or leave a zone by a gate, marked on any of your maps by a white swirl. When one character in a party goes through a gate, the entire party reforms on the other side of that gate. Anyone in the party can exit a zone by map traveling, although doing so will drop that character from the group.
TradingDuring your travels, your character can collect loot from fallen foes. Often this will be gold, but sometimes your loot is an item: a weapon, armor, shield, or possibly even a salvageable part of your enemy’s hide. Many towns have bustling marketplaces with merchants, weaponsmiths, crafters, and other traders. They can help you exchange this wealth for what you really want—whether that’s better items or even more gold.
Town Outpost Mission
Completed Mission PvP Mission Guild Hall
From the World Map, click once to zoom in for a closer look at a
region.Click to use boat travel and access other World Maps.
While zoomed in, click a location icon and read about
the area. Click Travel to travel there instantly.
TravelingAs you blaze trails across the wilderness, you’ll reveal more of the World Map. Although you can gain experience by slaying monsters and enemies while exploring, completing quests and missions generally earns you greater rewards. Completed quests and missions may lead you to new areas of the map, such as towns and outposts you haven’t discovered yet.
Once you’ve revealed towns or outposts on your World Map, you can travel freely between those locations by “map traveling.” Open the World Map (press M) and click on the location. Your hero will automatically travel from your current location to that town, outpost, or mission. You can even rush back to town in the middle of combat—a choice to consider when you and your allies are overwhelmed.
�� ��
Holding down the left Alt key (and moving the camera with the right mouse button, if necessary) shows the names of merchants and other NPCs in front of you. Whenever you get lost in town, you may want to (politely) ask other players for directions.
Henchmen
Adventurers gather in outposts and towns, organizing expeditions for their journeys outside city gates. Whenever your character is in town, you may occasionally find it difficult to assemble an ideal group of adventurers. When this happens, you can usually find several NPC adventurers waiting near the town gates, ready for recruitment. Henchmen are computer-controlled adventurers who are always ready to travel with you. Some players hire one or two henchmen to round out a team. Others actually prefer to play solo, using one character to lead an entire team of henchmen.
The level of a “henchie” depends on your current location. When you map travel to another town or outpost, henchmen who aren’t available in that location drop from your team. The ones who remain will have the same level they normally would if you recruited them from that location. Henchmen don’t gain experience—since their level depends on the place where you recruit them—but they do take their share of any gold and items you find on your adventures.
Goods and Services
A vibrant economy thrives in Elona. In addition to the buying and selling that takes place between characters, towns and outposts across the continent include markets that provide resources your adventurer needs. Merchants, crafters, and traders are all ready to help you—for the right price, of course.
Trading with NPCs
Left-click on a vendor to start a transaction. In most trades, you can select the type of item you want to buy or sell using the appropriate tabs at the top of the commerce window. Sometimes you’ll need to ask for a price quote beforehand, since the market for some commodities may change. To find NPC vendors faster in town, hold down the left Alt key.
Trading with Characters
To trade with another character, target that character and hit the Trade button at the top of the screen. Then either submit an offer in gold or put an item up for trade. Both players must accept the offer to seal the deal. Players who thrive on trading can use their chat interface to check the Trade channel in town.
Note for Experienced Guild Wars Players: Previous Guild Wars campaigns handled missions a little differently than the current campaign. In Prophecies and Factions, a character started a mission by entering a mission outpost, and then clicking an Enter Mission button. In Nightfall, you may need to approach a mission NPC before you can start a mission. The next chapter has more details.
Who’s Who in TownMost types of NPCs you’ll need can be found in towns and outposts. Smaller outposts are usually inhabited by a less diverse variety of citizens: a merchant, a Xunlai Storage Agent, and maybe one or two quest givers. The larger hub towns (marked accordingly on the map) usually have a larger population of NPCs. A town or outpost where you can start a mission appears on your map as a large shield icon; each of those locales in Nightfall includes an NPC you can use to start the mission.
�� ��
Armorers (Armor Crafters)
Armorers can create new armor out of raw materials you’ve found, salvaged, or bought, such as shells, hides, ingots, or slabs of rock. Some of the materials you need might be for sale nearby; look for a Materials merchant (described below) or talk to other characters nearby to find out if they’re available. An NPC with the word [Armor] after that merchant’s name can craft armor.
Traders
Traders buy and sell items you can use, either for altering existing items or creating new ones. They base their prices on what the market is offering, so you’ll need to get a price quote before you buy or sell from them. Traders specialize in different markets. A Materials Trader sells the resources crafters need; a Rune merchant sells enhancements to armor; a Dye merchant sells dyes you can use to visually customize your armor; and so on. Players who count their gold carefully compare the prices they get from Traders against the prices offered by other merchants and other players. A Trader’s specialty is listed after that NPC’s name: [Material Trader], [Rune Trader], [Dye Trader], and so on.
Skill Trainers
Skill Trainers sell skills for all professions. Each one usually has a specialty or unique selection. Buying skills requires more than gold. You’ll need to spend a skill point for each one. Be careful, though: some skills are available as rewards for completing quests, so you won’t need to buy all of your skills. A Skill Trainer’s name is followed by the word [Skills].
Merchants
Merchants buy and sell all manner of items—weapons and armor, skills, dye, crafting items, Identification and Salvage Kits, and more exotic commodities. Identification Kits tell you exactly what an unidentified magical item in your inventory does. Salvage Kits allow you to recover crafting materials from some of your loot. When you hold down the left Alt key to read the names of NPCs around you, citizens who sell these items have the word [Merchant] after their name. When you’re starting out, some merchants can sell you starter versions of weapons and armor.
Weaponsmiths
Weaponsmiths are crafters who customize weapons. A customized weapon provides a 20 percent damage increase, but it’s only useable by the individual who paid a crafter to customize it; other characters cannot use that weapon. If you plan on equipping and using a weapon (and possibly selling it to a merchant later), consider going to a weaponsmith to pay for customization. Weapons you want to sell on the open chat market shouldn’t be customized, on the other hand, since you wouldn’t want to prevent other people from using them. An NPC with the word [Weapons] after its name can customize weapons.
Note:Armor is always customized for the character using it, so don’t bother trying to sell or purchase armor from other player characters. Always use common sense when trading with other players. Take a good look at what you’re buying and selling before you agree to a trade.
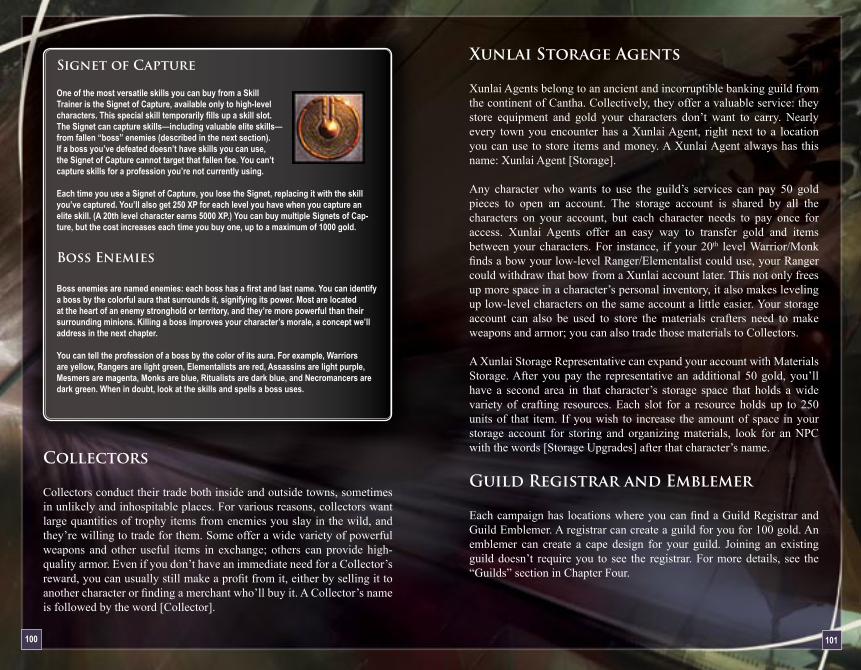
100 101
Xunlai Storage Agents
Xunlai Agents belong to an ancient and incorruptible banking guild from the continent of Cantha. Collectively, they offer a valuable service: they store equipment and gold your characters don’t want to carry. Nearly every town you encounter has a Xunlai Agent, right next to a location you can use to store items and money. A Xunlai Agent always has this name: Xunlai Agent [Storage].
Any character who wants to use the guild’s services can pay 50 gold pieces to open an account. The storage account is shared by all the characters on your account, but each character needs to pay once for access. Xunlai Agents offer an easy way to transfer gold and items between your characters. For instance, if your 20th level Warrior/Monk finds a bow your low-level Ranger/Elementalist could use, your Ranger could withdraw that bow from a Xunlai account later. This not only frees up more space in a character’s personal inventory, it also makes leveling up low-level characters on the same account a little easier. Your storage account can also be used to store the materials crafters need to make weapons and armor; you can also trade those materials to Collectors.
A Xunlai Storage Representative can expand your account with Materials Storage. After you pay the representative an additional 50 gold, you’ll have a second area in that character’s storage space that holds a wide variety of crafting resources. Each slot for a resource holds up to 250 units of that item. If you wish to increase the amount of space in your storage account for storing and organizing materials, look for an NPC with the words [Storage Upgrades] after that character’s name.
Guild Registrar and Emblemer
Each campaign has locations where you can find a Guild Registrar and Guild Emblemer. A registrar can create a guild for you for 100 gold. An emblemer can create a cape design for your guild. Joining an existing guild doesn’t require you to see the registrar. For more details, see the “Guilds” section in Chapter Four.
Signet of Capture
One of the most versatile skills you can buy from a Skill Trainer is the Signet of Capture, available only to high-level characters. This special skill temporarily fills up a skill slot. The Signet can capture skills—including valuable elite skills—from fallen “boss” enemies (described in the next section). If a boss you’ve defeated doesn’t have skills you can use, the Signet of Capture cannot target that fallen foe. You can’t capture skills for a profession you’re not currently using.
Each time you use a Signet of Capture, you lose the Signet, replacing it with the skill you’ve captured. You’ll also get 250 XP for each level you have when you capture an elite skill. (A 20th level character earns 5000 XP.) You can buy multiple Signets of Cap-ture, but the cost increases each time you buy one, up to a maximum of 1000 gold.
Boss Enemies
Boss enemies are named enemies: each boss has a first and last name. You can identify a boss by the colorful aura that surrounds it, signifying its power. Most are located at the heart of an enemy stronghold or territory, and they’re more powerful than their surrounding minions. Killing a boss improves your character’s morale, a concept we’ll address in the next chapter.
You can tell the profession of a boss by the color of its aura. For example, Warriors are yellow, Rangers are light green, Elementalists are red, Assassins are light purple, Mesmers are magenta, Monks are blue, Ritualists are dark blue, and Necromancers are dark green. When in doubt, look at the skills and spells a boss uses.
Collectors
Collectors conduct their trade both inside and outside towns, sometimes in unlikely and inhospitable places. For various reasons, collectors want large quantities of trophy items from enemies you slay in the wild, and they’re willing to trade for them. Some offer a wide variety of powerful weapons and other useful items in exchange; others can provide high-quality armor. Even if you don’t have an immediate need for a Collector’s reward, you can usually still make a profit from it, either by selling it to another character or finding a merchant who’ll buy it. A Collector’s name is followed by the word [Collector].
10� 10�
Mission NPCs
In Nightfall, after you travel to the location of a mission and put a team together—inviting Heroes, henchmen, or other characters—you’re ready to start a mission. In previous campaigns, each mission began when the party leader clicked on an “Enter Mission” button. In this campaign, some missions require you to talk to a mission NPC or “MNPC” to advance the story. Some missions have requirements you must meet before you can begin, along with an MNPC who can explain them to you. In some cases, everyone in the party must meet a mission’s requirement, and sometimes completing a previous quest is a requirement for starting a mission. Some missions in Nightfall also require you to have a specific Hero in your group before you can begin. Each time, the description should tip you off to the fact that you’re starting a mission instead of a quest. (See the next chapter for more information on missions.)
Missions are part of a larger storyline, linked by a series of primary quests. Following that story typically leads you to the quest givers and MNPCs you’ll need to advance the plot.
HeroesAs you advance through the game’s storyline, you’ll have opportunities to recruit adventurers (controlled by other players) and henchmen (computer-controlled allies). These alliances are temporary, usually long enough for you to finish a few quests or missions. The story also includes opportunities to recruit long-term allies: heroic non-player characters who play an ongoing role in the story. Completing specific quests allows you to unlock these unique heroic NPCs, commonly known as Heroes.
Heroes typically join your party as part of a quest. Sometimes the rewards for a quest include a chance to ally with that Hero: the NPC is unlocked for your current character. (Some Heroes are exclusive; completing the quest to gain one makes you ineligible for the quest required to gain another.) Your character can be allied with multiple Heroes. You can add a Hero to your party whenever you’re in a town, outpost, or
Quartermaster
Factions introduced a new type of NPC: the Quartermaster. These traders are similar to Collectors, but the items they collect are typically available as rewards for completing specific quests. Once you have enough of these items, you can trade them for useful equipment. For example, low-level characters in Guild Wars Factions could earn Monastery Credits by completing low-level quests, and then trade in those credits for weapons and armor. Some special events include chances to acquire exotic items and trade them into a Quartermaster (or an NPC who works like one) in exchange for a reward only available at that event.
Storyline NPCsThere’s more to life in Elona than buying and selling resources. Its citizens are caught up in adventures and intrigues every day. For a start, many NPCs are involved with the objectives of quests and missions. You’ll see the citizens of Elona fighting alongside you in battle, imploring you for help when they’re under attack, and passing on crucial information you need for your adventures. They’re extremely knowledgeable, providing ample information about the world around you, including history, current events, and dangers lurking on the horizon. Storyline NPCs are even more helpful: they help you advance the story.
Quest Givers
As your character gains experience, you can participate in quests and missions, two types of adventures that advance the game. Quest givers are NPCs that begin quests. When you see someone standing beneath a green exclamation mark, that person either starts or advances a quest. Once a quest begins, you can consult your Quest Log (press L) to keep track of your progress, including the objectives you’ll need to complete them. On many quests, you’ll return to the same quest giver. When you have a quest in your Quest Log, you’ll usually find a reference to the location of that adventure’s quest giver in its description.
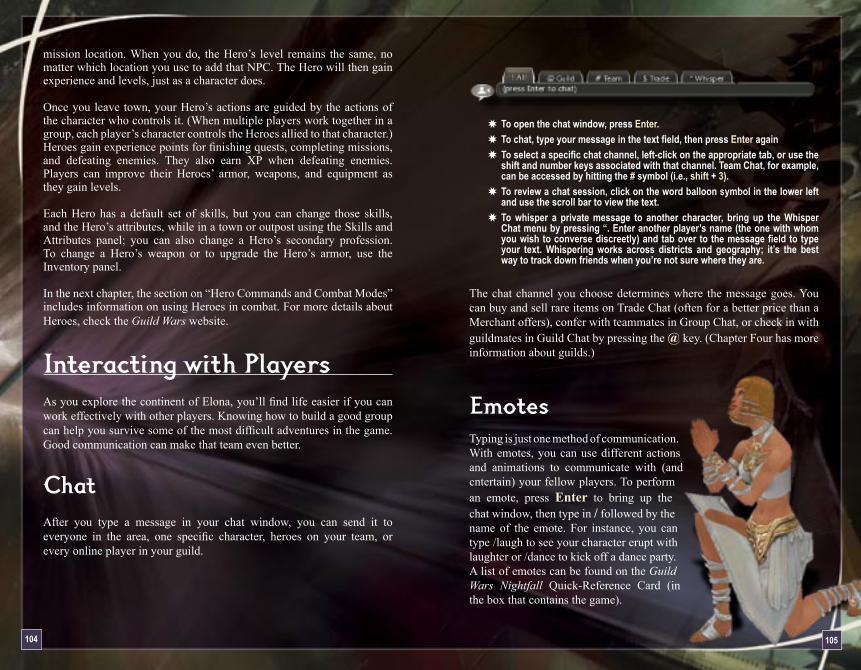
104 10�
To open the chat window, press Enter.To chat, type your message in the text field, then press Enter againTo select a specific chat channel, left-click on the appropriate tab, or use the shift and number keys associated with that channel. Team Chat, for example, can be accessed by hitting the # symbol (i.e., shift + �).To review a chat session, click on the word balloon symbol in the lower left and use the scroll bar to view the text. To whisper a private message to another character, bring up the Whisper Chat menu by pressing “. Enter another player’s name (the one with whom you wish to converse discreetly) and tab over to the message field to type your text. Whispering works across districts and geography; it’s the best way to track down friends when you’re not sure where they are.
The chat channel you choose determines where the message goes. You can buy and sell rare items on Trade Chat (often for a better price than a Merchant offers), confer with teammates in Group Chat, or check in with guildmates in Guild Chat by pressing the @ key. (Chapter Four has more information about guilds.)
EmotesTyping is just one method of communication. With emotes, you can use different actions and animations to communicate with (and entertain) your fellow players. To perform an emote, press Enter to bring up the chat window, then type in / followed by the name of the emote. For instance, you can type /laugh to see your character erupt with laughter or /dance to kick off a dance party. A list of emotes can be found on the Guild Wars Nightfall Quick-Reference Card (in the box that contains the game).
mission location. When you do, the Hero’s level remains the same, no matter which location you use to add that NPC. The Hero will then gain experience and levels, just as a character does.
Once you leave town, your Hero’s actions are guided by the actions of the character who controls it. (When multiple players work together in a group, each player’s character controls the Heroes allied to that character.) Heroes gain experience points for finishing quests, completing missions, and defeating enemies. They also earn XP when defeating enemies. Players can improve their Heroes’ armor, weapons, and equipment as they gain levels.
Each Hero has a default set of skills, but you can change those skills, and the Hero’s attributes, while in a town or outpost using the Skills and Attributes panel; you can also change a Hero’s secondary profession. To change a Hero’s weapon or to upgrade the Hero’s armor, use the Inventory panel.
In the next chapter, the section on “Hero Commands and Combat Modes” includes information on using Heroes in combat. For more details about Heroes, check the Guild Wars website.
Interacting with PlayersAs you explore the continent of Elona, you’ll find life easier if you can work effectively with other players. Knowing how to build a good group can help you survive some of the most difficult adventures in the game. Good communication can make that team even better.
ChatAfter you type a message in your chat window, you can send it to everyone in the area, one specific character, heroes on your team, or every online player in your guild.
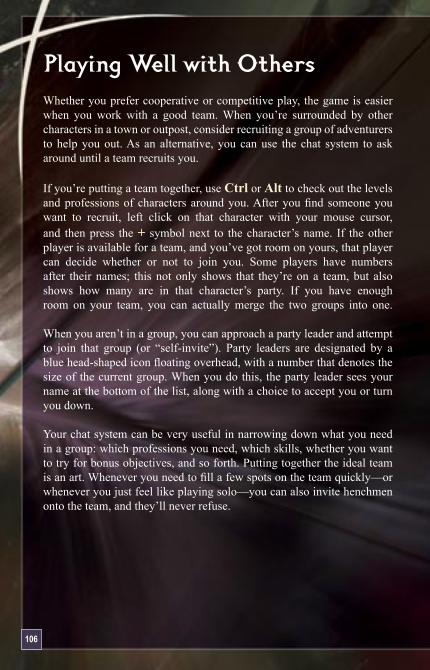
10�
Playing Well with OthersWhether you prefer cooperative or competitive play, the game is easier when you work with a good team. When you’re surrounded by other characters in a town or outpost, consider recruiting a group of adventurers to help you out. As an alternative, you can use the chat system to ask around until a team recruits you.
If you’re putting a team together, use Ctrl or Alt to check out the levels and professions of characters around you. After you find someone you want to recruit, left click on that character with your mouse cursor, and then press the + symbol next to the character’s name. If the other player is available for a team, and you’ve got room on yours, that player can decide whether or not to join you. Some players have numbers after their names; this not only shows that they’re on a team, but also shows how many are in that character’s party. If you have enough room on your team, you can actually merge the two groups into one.
When you aren’t in a group, you can approach a party leader and attempt to join that group (or “self-invite”). Party leaders are designated by a blue head-shaped icon floating overhead, with a number that denotes the size of the current group. When you do this, the party leader sees your name at the bottom of the list, along with a choice to accept you or turn you down.
Your chat system can be very useful in narrowing down what you need in a group: which professions you need, which skills, whether you want to try for bonus objectives, and so forth. Putting together the ideal team is an art. Whenever you need to fill a few spots on the team quickly—or whenever you just feel like playing solo—you can also invite henchmen onto the team, and they’ll never refuse.
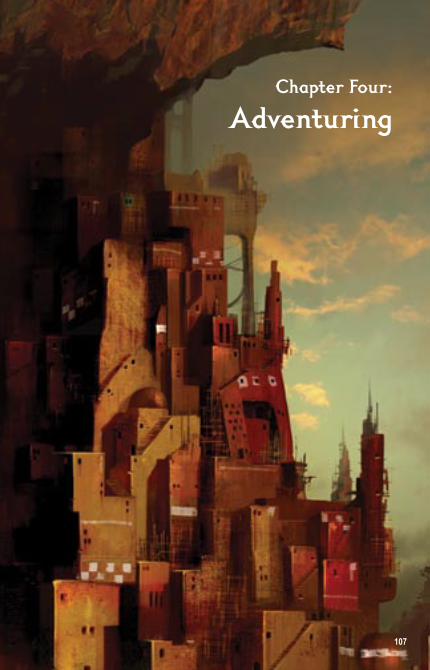
Chapter Four:
Adventuring
10�
10� 10�
Loot and Treasure
As you defeat enemies, items or gold may fall next to the body of the fallen. Any character in a group can pick up gold, but the amount is divided equally among all characters, Heroes, and henchmen in the group. Other types of loot are assigned randomly to the player characters in the group; you can only pick up items that have been reserved for you. If you have room in your Inventory, items you pick up appear there.
Item Rarity
An item’s usefulness and rarity determines its worth. You can tell an item’s rarity by the color of text used in its name: white for common items (including non-magical weapons and armor), blue for common magical items, purple for uncommon items, and gold for rare items. Sometimes a unique item belonging to a single boss monster drops when that boss dies—that item’s name is shown in green. A green “boss” item isn’t necessarily more powerful than a gold item.
When you want to sell an item, you may want to offer it on Trade Chat before going to a Merchant or Trader. If you’re a good negotiator, you might find a better price from another player. Identification and Salvage Kits can help you manage rare items; the section on “Kits” below has some advice.
Weapons
Each profession specializes in a few particular types of weapons. Although any profession can use any weapon, only a character who meets that weapon’s requirements gets all of its bonuses. Some weapons require you to have points in a specific attribute to get their full effects. (For instance, a Ranger can use a sword that requires Strength 5, but only a Warrior who meets that requirement gains its full benefits; otherwise, it deals the same amount of damage as a starter weapon.) A Weaponsmith can customize a weapon for you, increasing the amount of damage it deals, but you will be the only character able to use that customized weapon.
Conflict is a way of life in Elona. Anyone who ventures outside town should be ready for the dangers that lie ahead. Once an adventure starts, a little knowledge can mean the difference between life and death.
Choose Your SkillsBefore you leave a town or outpost, you can fill your Skill Bar with up to eight skills. Your character starts out without any skills but gradually gathers a collection of them as you advance through the game. Press K to call up a complete list of skills that character knows (along with the related attributes that character has). To organize that list, use the drop down menu in the corner of the skill window for different organization options. When you’re in town, you can click and drag skills from the skill list to that bar. One of the strengths of Guild Wars is the diverse collection of skills you’ll gather as you play it, so feel free to experiment with as many of them as you can.
Skills and Attributes Panel Nightfall has expanded your options for adjusting your skills and attributes. For a start, the Skills and Attributes panel gathers all the basic statistics for your character in one place: your attributes are listed at the top, and your skill list is at the bottom. With this panel, you can also adjust the skills and attributes for Heroes you control. Press K to open this interface. For more information on using the Skills and Attributes panel, including ways to create and adapt character “templates,” check the Guild Wars website.
Your InventoryPress I to open (or close) your inventory. Through that screen, you can equip weapons, armor, and off-hand items (such as shields and focus items). As you advance in the game, your character can acquire a belt pouch and additional bags for increased carrying capacity. A Rune of Holding can increase the carrying capacity of each bag, but not belt pouches or your backpack. To open a pouch or bag, click on its picture in the inventory screen. The F5 through F8 function keys open specific bags. F9 opens all of them at once. You can also use the Inventory menu to change the equipment your Heroes are carrying.
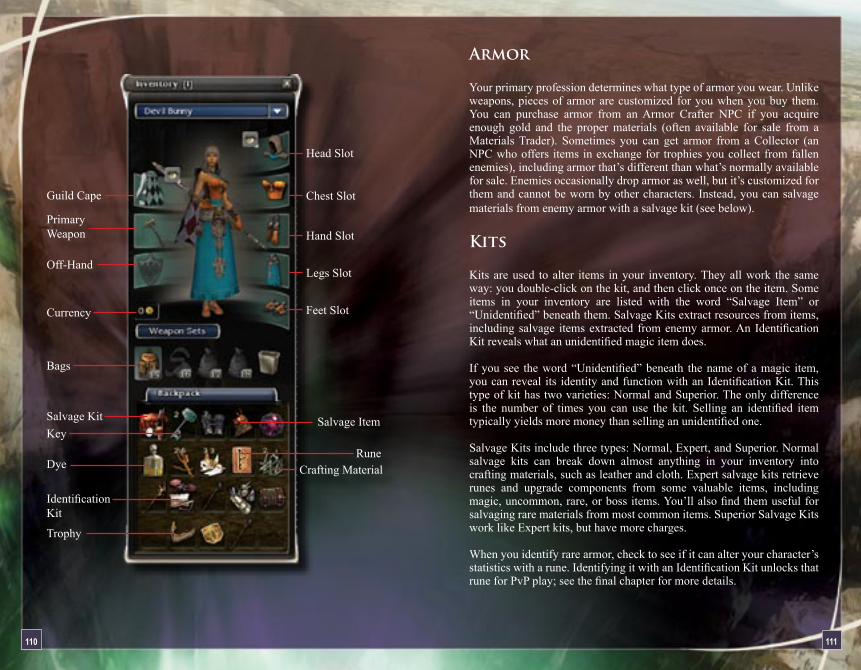
Armor
Your primary profession determines what type of armor you wear. Unlike weapons, pieces of armor are customized for you when you buy them. You can purchase armor from an Armor Crafter NPC if you acquire enough gold and the proper materials (often available for sale from a Materials Trader). Sometimes you can get armor from a Collector (an NPC who offers items in exchange for trophies you collect from fallen enemies), including armor that’s different than what’s normally available for sale. Enemies occasionally drop armor as well, but it’s customized for them and cannot be worn by other characters. Instead, you can salvage materials from enemy armor with a salvage kit (see below).
Kits
Kits are used to alter items in your inventory. They all work the same way: you double-click on the kit, and then click once on the item. Some items in your inventory are listed with the word “Salvage Item” or “Unidentified” beneath them. Salvage Kits extract resources from items, including salvage items extracted from enemy armor. An Identification Kit reveals what an unidentified magic item does.
If you see the word “Unidentified” beneath the name of a magic item, you can reveal its identity and function with an Identification Kit. This type of kit has two varieties: Normal and Superior. The only difference is the number of times you can use the kit. Selling an identified item typically yields more money than selling an unidentified one.
Salvage Kits include three types: Normal, Expert, and Superior. Normal salvage kits can break down almost anything in your inventory into crafting materials, such as leather and cloth. Expert salvage kits retrieve runes and upgrade components from some valuable items, including magic, uncommon, rare, or boss items. You’ll also find them useful for salvaging rare materials from most common items. Superior Salvage Kits work like Expert kits, but have more charges.
When you identify rare armor, check to see if it can alter your character’s statistics with a rune. Identifying it with an Identification Kit unlocks that rune for PvP play; see the final chapter for more details.
110 111
Salvage Item
RuneCrafting Material
Salvage Kit
Dye
Identification Kit
Currency
Guild Cape
PrimaryWeapon
Off-Hand
Bags
Key
Trophy
Feet Slot
Legs Slot
Hand Slot
Chest Slot
Head Slot
of experience everyone in your party receives; its effects end if you fail to kill a boss for five minutes.) Look for an NPC with the [Scroll Trader] tag to buy one. To buy a Rare Scroll, look for an NPC in town with the words [Rare Scroll Trader] after the merchant’s name. Make sure you have plenty of gold, since rare scrolls can be quite expensive.
Other Items
Trophies are items you can loot from fallen enemies. You can usually sell them to various merchants for gold or trade them to Collectors for other rewards.
Quest Items take up space in your inventory, but usually cannot be sold to a merchant. If you have multiple copies of a quest item you need to satisfy a quest objective, you can offer to trade those items with other characters. After you’ve finished the quest, you usually have no further need for the item.
Bundle Items are large enough that they won’t fit into a backpack, pouch, or bag—you need to carry one with both hands. You can’t use weapon attacks while you’re holding a Bundle Item, since your hands are full. However, you can still use skills while carrying a Bundle Item.
Most Bundle Items are associated with quest or mission objectives, but they occasionally serve other uses (such as the flags carried by characters in PvP play). A character can drop the item by clicking the Drop Item button or using map travel. Some special Bundle Items bestow a magical bonus when you drop them or while you carry them.
Character StatusOn every adventure, you’ll need to keep up to date on your character’s status. At the bottom of your screen (when the World Map is closed), three elements of the user interface are designed to keep track of status: the Skill Bar, Health Bar, and Energy Bar.
Crafting Materials
Crafting materials are either common or rare. Tanned hide squares, shells, wood planks, and steel ingots are all examples of materials crafters use to make weapons and armor. Fallen enemies sometimes drop materials, and you can also get materials by salvaging items. When you need a larger quantity of a specific material, you should track down a Materials Trader in town. (The NPC has the word [Material Trader] or [Rare Material Trader] after the merchant’s name.) These merchants buy and sell materials. The prices of their goods vary depending on what’s in demand.
Enhancements Runes, upgrade components, and scrolls all enhance items. They all work the same way: you double-click on the enhancement, and then click on an item it can affect. Only identifying a rune or upgrade component unlocks it for PvP play; see the final chapter for more details.
Runes permanently alter armor. Many towns include a Rune Merchant NPC (with the word [Rune Trader] after the merchant’s name) who buys and sells this commodity. Some uncommon and rare items in your inventory may contain runes as well; you can extract them by using a Superior or Expert Salvage Kit.
Your character can only use runes related to your primary profession. For instance, a Warrior/Monk can only use Warrior runes. Note that the effect of a rune is not increased if you wear multiple copies of it. For example, if you have the same Minor Swordsmanship rune on your helm and your boots, you won’t gain the same benefit twice.
Upgrade components enhance weapons. You can usually upgrade a weapon with multiple components (such as an axe that’s been upgraded by an axe haft and an axe grip).
Scrolls are special items that provide temporary enhancements, usually augmenting the amount of experience you and your allies receive. Scrolls have different levels of rarity, and some have effects with distinct time limits. (For example, a Scroll of Hunter’s Insight increases the amount
11� 11�
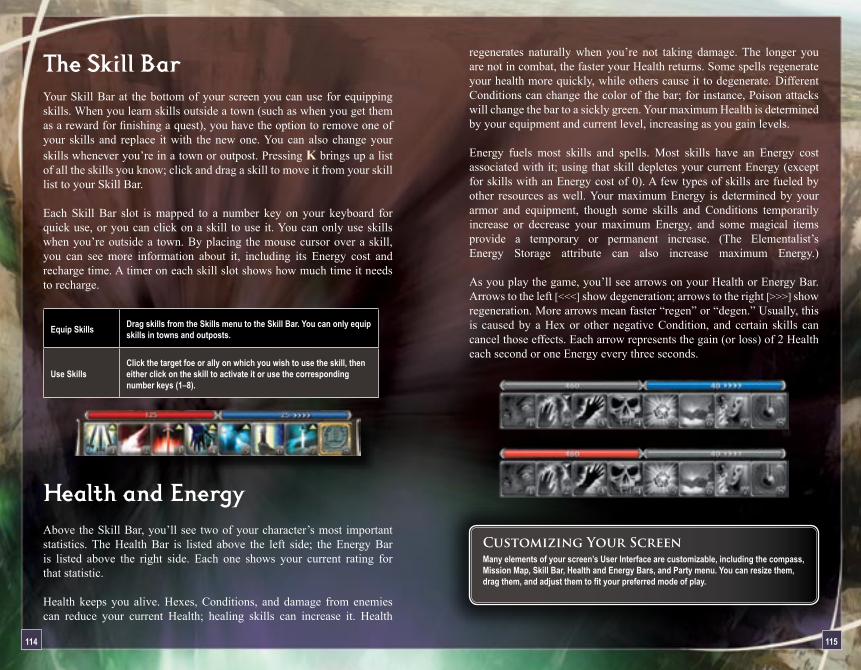
regenerates naturally when you’re not taking damage. The longer you are not in combat, the faster your Health returns. Some spells regenerate your health more quickly, while others cause it to degenerate. Different Conditions can change the color of the bar; for instance, Poison attacks will change the bar to a sickly green. Your maximum Health is determined by your equipment and current level, increasing as you gain levels. Energy fuels most skills and spells. Most skills have an Energy cost associated with it; using that skill depletes your current Energy (except for skills with an Energy cost of 0). A few types of skills are fueled by other resources as well. Your maximum Energy is determined by your armor and equipment, though some skills and Conditions temporarily increase or decrease your maximum Energy, and some magical items provide a temporary or permanent increase. (The Elementalist’s Energy Storage attribute can also increase maximum Energy.)
As you play the game, you’ll see arrows on your Health or Energy Bar. Arrows to the left [<<<] show degeneration; arrows to the right [>>>] show regeneration. More arrows mean faster “regen” or “degen.” Usually, this is caused by a Hex or other negative Condition, and certain skills can cancel those effects. Each arrow represents the gain (or loss) of 2 Health each second or one Energy every three seconds.
Customizing Your ScreenMany elements of your screen’s User Interface are customizable, including the compass, Mission Map, Skill Bar, Health and Energy Bars, and Party menu. You can resize them, drag them, and adjust them to fit your preferred mode of play.
The Skill BarYour Skill Bar at the bottom of your screen you can use for equipping skills. When you learn skills outside a town (such as when you get them as a reward for finishing a quest), you have the option to remove one of your skills and replace it with the new one. You can also change your skills whenever you’re in a town or outpost. Pressing K brings up a list of all the skills you know; click and drag a skill to move it from your skill list to your Skill Bar.
Each Skill Bar slot is mapped to a number key on your keyboard for quick use, or you can click on a skill to use it. You can only use skills when you’re outside a town. By placing the mouse cursor over a skill, you can see more information about it, including its Energy cost and recharge time. A timer on each skill slot shows how much time it needs to recharge.
Equip Skills Drag skills from the Skills menu to the Skill Bar. You can only equip skills in towns and outposts.
Use SkillsClick the target foe or ally on which you wish to use the skill, then either click on the skill to activate it or use the corresponding number keys (1–8).
Health and EnergyAbove the Skill Bar, you’ll see two of your character’s most important statistics. The Health Bar is listed above the left side; the Energy Bar is listed above the right side. Each one shows your current rating for that statistic.
Health keeps you alive. Hexes, Conditions, and damage from enemies can reduce your current Health; healing skills can increase it. Health
114 11�
morale boosts will gradually reduce it. Additionally, gaining a morale boost recharges all your skills; this is the only way to recharge your Resurrection Signet.
Enchantments and Hexes Enchantments and Hexes are spells that can affect Health, Energy, and other attributes. (Technically, they’re subtypes of spells, as noted in their spell descriptions.) Spells with the Enchantment subtype boost your abilities in battle by providing offensive and defensive advantages, such as extra armor, firepower, or healing. Hexes do the opposite, reducing a character’s abilities in battle.
When you’re under the effects of a Hex or Enchantment, an icon for that effect appears in the upper left-hand corner of your screen. Mouse over that icon for a detailed listed of the effect. Enchantments are especially important to the Dervish, since they affect some of that profession’s skills.
Blazing through Combat Fights can flash by quickly in this game, but fortunately, a few tips and tricks can help you blaze through them. One way to select and attack an enemy or ally is by clicking on its name, but shortcuts can help you target more quickly. Targeting Enemies
Press the Tab key repeatedly to cycle through the enemies you can see on your compass.After targeting your enemy, you start attacking that enemy by pressing the Spacebar.Press C to target the closest enemy.Each skill in your Skill Bar, including your special attacks, is mapped to a number on your keyboard. Clicking a number may be faster for you than clicking the button on your Skill Bar.
Death and ResurrectionWhen your current Health reaches zero, your character dies. Party members outside a town can resurrect you at that same location (using skills like Resurrect), but only if they’re near your body and alive. When everyone in your group dies, you’ll all reappear somewhere else. If you’re in an Explorable Area (that is, outside a town or outpost), you’ll “rez” at the nearest resurrection shrine. When everyone dies in a mission, the mission is over, and you reappear back at the mission location where you first entered it.
Morale The life of a hero is filled with trials and tribulations. On any adventure, death can be demoralizing, but you can still rally your troops by defeating powerful boss enemies.
Death Penalty Each time you resurrect, you receive a death penalty (DP) that reduces your maximum Health and Energy. Heroes, henchmen, and pets also receive a death penalty each time they’re resurrected. Your current DP (if you have one) is listed in the upper right-hand corner of your screen. Each death inflicts a 15 percent penalty, up to a maximum of 60 percent. (You cannot resurrect at a shrine during PvP, however, if you have 60 percent DP.) Earning experience slowly reduces that debt. The penalty is reset to zero when you return to a town or outpost. Whenever adversity becomes overwhelming, considering opening your World Map and using map travel to jump back to town before trying again.
Morale Boost
Defeating a boss monster (an enemy with a full name and glowing aura) gives you a +2 percent morale boost, increasing your maximum Health and Energy. You can gain this benefit multiple times for multiple bonuses; the effects stack up to 10 percent. If you have a death penalty,
11� 11�
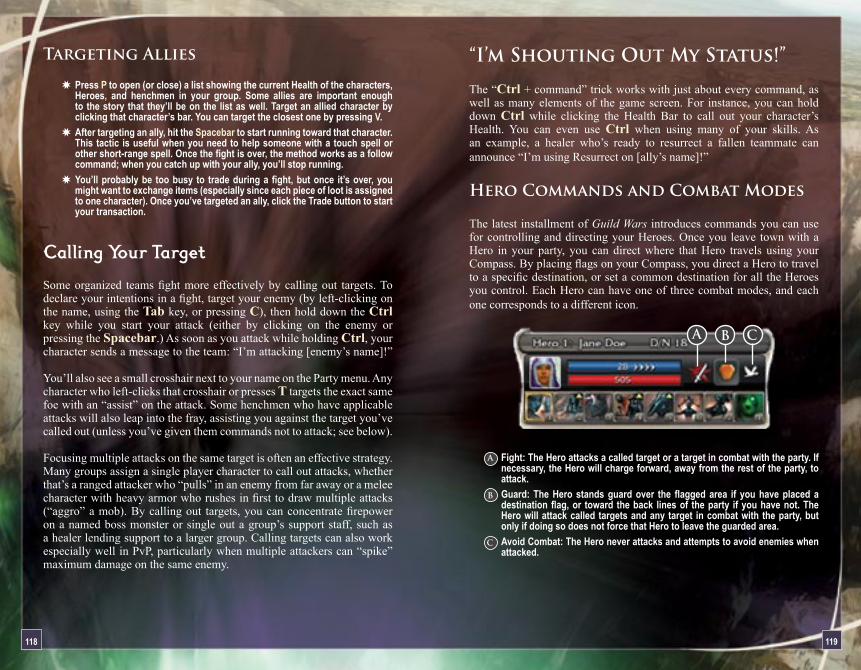
“I’m Shouting Out My Status!”
The “Ctrl + command” trick works with just about every command, as well as many elements of the game screen. For instance, you can hold down Ctrl while clicking the Health Bar to call out your character’s Health. You can even use Ctrl when using many of your skills. As an example, a healer who’s ready to resurrect a fallen teammate can announce “I’m using Resurrect on [ally’s name]!”
Hero Commands and Combat Modes
The latest installment of Guild Wars introduces commands you can use for controlling and directing your Heroes. Once you leave town with a Hero in your party, you can direct where that Hero travels using your Compass. By placing flags on your Compass, you direct a Hero to travel to a specific destination, or set a common destination for all the Heroes you control. Each Hero can have one of three combat modes, and each one corresponds to a different icon.
Fight: The Hero attacks a called target or a target in combat with the party. If necessary, the Hero will charge forward, away from the rest of the party, to attack.Guard: The Hero stands guard over the flagged area if you have placed a destination flag, or toward the back lines of the party if you have not. The Hero will attack called targets and any target in combat with the party, but only if doing so does not force that Hero to leave the guarded area.Avoid Combat: The Hero never attacks and attempts to avoid enemies when attacked.
A
B
C
A CB
Targeting Allies
Press P to open (or close) a list showing the current Health of the characters, Heroes, and henchmen in your group. Some allies are important enough to the story that they’ll be on the list as well. Target an allied character by clicking that character’s bar. You can target the closest one by pressing V.After targeting an ally, hit the Spacebar to start running toward that character. This tactic is useful when you need to help someone with a touch spell or other short-range spell. Once the fight is over, the method works as a follow command; when you catch up with your ally, you’ll stop running.You’ll probably be too busy to trade during a fight, but once it’s over, you might want to exchange items (especially since each piece of loot is assigned to one character). Once you’ve targeted an ally, click the Trade button to start your transaction.
Calling Your Target Some organized teams fight more effectively by calling out targets. To declare your intentions in a fight, target your enemy (by left-clicking on the name, using the Tab key, or pressing C), then hold down the Ctrl key while you start your attack (either by clicking on the enemy or pressing the Spacebar.) As soon as you attack while holding Ctrl, your character sends a message to the team: “I’m attacking [enemy’s name]!” You’ll also see a small crosshair next to your name on the Party menu. Any character who left-clicks that crosshair or presses T targets the exact same foe with an “assist” on the attack. Some henchmen who have applicable attacks will also leap into the fray, assisting you against the target you’ve called out (unless you’ve given them commands not to attack; see below). Focusing multiple attacks on the same target is often an effective strategy. Many groups assign a single player character to call out attacks, whether that’s a ranged attacker who “pulls” in an enemy from far away or a melee character with heavy armor who rushes in first to draw multiple attacks (“aggro” a mob). By calling out targets, you can concentrate firepower on a named boss monster or single out a group’s support staff, such as a healer lending support to a larger group. Calling targets can also work especially well in PvP, particularly when multiple attackers can “spike” maximum damage on the same enemy.
11� 11�
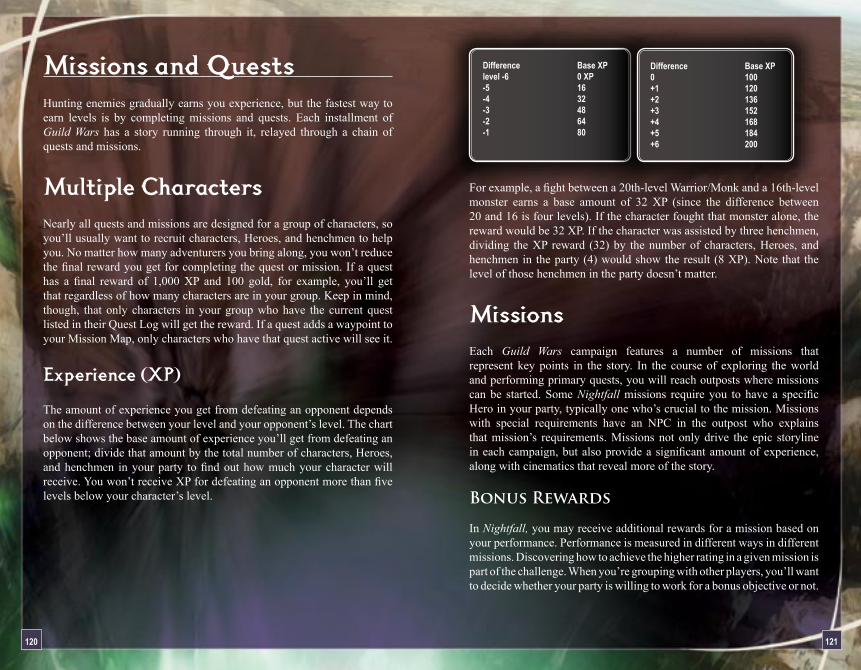
Difference Base XP level -� 0 XP -� 1� -4 �� -� 4� -� �4 -1 �0
Difference Base XP 0 100 +1 1�0 +� 1�� +� 1�� +4 1�� +� 1�4 +� �00
For example, a fight between a 20th-level Warrior/Monk and a 16th-level monster earns a base amount of 32 XP (since the difference between 20 and 16 is four levels). If the character fought that monster alone, the reward would be 32 XP. If the character was assisted by three henchmen, dividing the XP reward (32) by the number of characters, Heroes, and henchmen in the party (4) would show the result (8 XP). Note that the level of those henchmen in the party doesn’t matter.
MissionsEach Guild Wars campaign features a number of missions that represent key points in the story. In the course of exploring the world and performing primary quests, you will reach outposts where missions can be started. Some Nightfall missions require you to have a specific Hero in your party, typically one who’s crucial to the mission. Missions with special requirements have an NPC in the outpost who explains that mission’s requirements. Missions not only drive the epic storyline in each campaign, but also provide a significant amount of experience, along with cinematics that reveal more of the story. Bonus Rewards In Nightfall, you may receive additional rewards for a mission based on your performance. Performance is measured in different ways in different missions. Discovering how to achieve the higher rating in a given mission is part of the challenge. When you’re grouping with other players, you’ll want to decide whether your party is willing to work for a bonus objective or not.
Missions and QuestsHunting enemies gradually earns you experience, but the fastest way to earn levels is by completing missions and quests. Each installment of Guild Wars has a story running through it, relayed through a chain of quests and missions.
Multiple CharactersNearly all quests and missions are designed for a group of characters, so you’ll usually want to recruit characters, Heroes, and henchmen to help you. No matter how many adventurers you bring along, you won’t reduce the final reward you get for completing the quest or mission. If a quest has a final reward of 1,000 XP and 100 gold, for example, you’ll get that regardless of how many characters are in your group. Keep in mind, though, that only characters in your group who have the current quest listed in their Quest Log will get the reward. If a quest adds a waypoint to your Mission Map, only characters who have that quest active will see it.
Experience (XP) The amount of experience you get from defeating an opponent depends on the difference between your level and your opponent’s level. The chart below shows the base amount of experience you’ll get from defeating an opponent; divide that amount by the total number of characters, Heroes, and henchmen in your party to find out how much your character will receive. You won’t receive XP for defeating an opponent more than five levels below your character’s level.
1�0 1�1
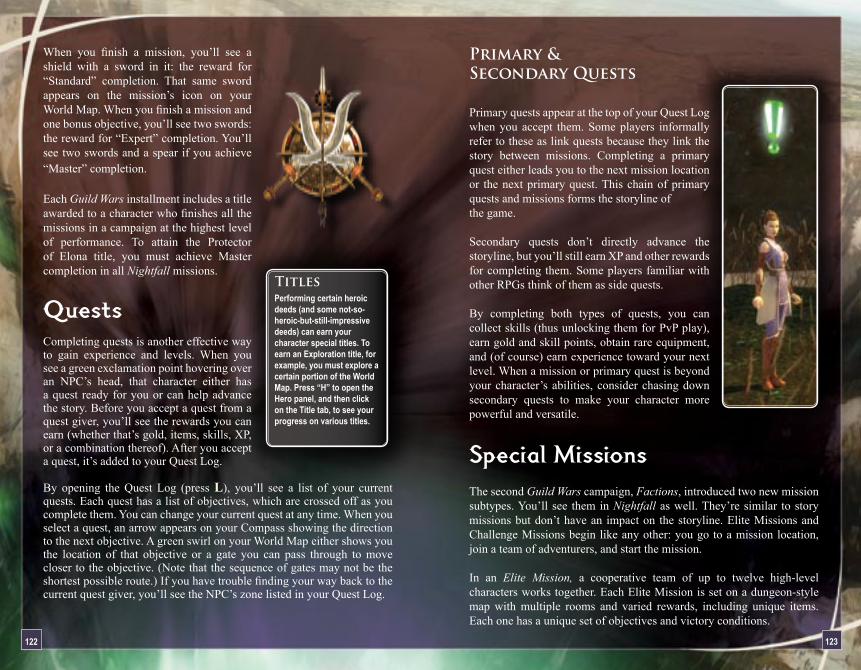
Primary & Secondary Quests
Primary quests appear at the top of your Quest Log when you accept them. Some players informally refer to these as link quests because they link the story between missions. Completing a primary quest either leads you to the next mission location or the next primary quest. This chain of primary quests and missions forms the storyline of the game.
Secondary quests don’t directly advance the storyline, but you’ll still earn XP and other rewards for completing them. Some players familiar with other RPGs think of them as side quests.
By completing both types of quests, you can collect skills (thus unlocking them for PvP play), earn gold and skill points, obtain rare equipment, and (of course) earn experience toward your next level. When a mission or primary quest is beyond your character’s abilities, consider chasing down secondary quests to make your character more powerful and versatile.
Special MissionsThe second Guild Wars campaign, Factions, introduced two new mission subtypes. You’ll see them in Nightfall as well. They’re similar to story missions but don’t have an impact on the storyline. Elite Missions and Challenge Missions begin like any other: you go to a mission location, join a team of adventurers, and start the mission.
In an Elite Mission, a cooperative team of up to twelve high-level characters works together. Each Elite Mission is set on a dungeon-style map with multiple rooms and varied rewards, including unique items. Each one has a unique set of objectives and victory conditions.
TitlesPerforming certain heroic deeds (and some not-so-heroic-but-still-impressive deeds) can earn your character special titles. To earn an Exploration title, for example, you must explore a certain portion of the World Map. Press “H” to open the Hero panel, and then click on the Title tab, to see your progress on various titles.
When you finish a mission, you’ll see a shield with a sword in it: the reward for “Standard” completion. That same sword appears on the mission’s icon on your World Map. When you finish a mission and one bonus objective, you’ll see two swords: the reward for “Expert” completion. You’ll see two swords and a spear if you achieve “Master” completion.
Each Guild Wars installment includes a title awarded to a character who finishes all the missions in a campaign at the highest level of performance. To attain the Protector of Elona title, you must achieve Master completion in all Nightfall missions.
QuestsCompleting quests is another effective way to gain experience and levels. When you see a green exclamation point hovering over an NPC’s head, that character either has a quest ready for you or can help advance the story. Before you accept a quest from a quest giver, you’ll see the rewards you can earn (whether that’s gold, items, skills, XP, or a combination thereof). After you accept a quest, it’s added to your Quest Log.
By opening the Quest Log (press L), you’ll see a list of your current quests. Each quest has a list of objectives, which are crossed off as you complete them. You can change your current quest at any time. When you select a quest, an arrow appears on your Compass showing the direction to the next objective. A green swirl on your World Map either shows you the location of that objective or a gate you can pass through to move closer to the objective. (Note that the sequence of gates may not be the shortest possible route.) If you have trouble finding your way back to the current quest giver, you’ll see the NPC’s zone listed in your Quest Log.
1�� 1��
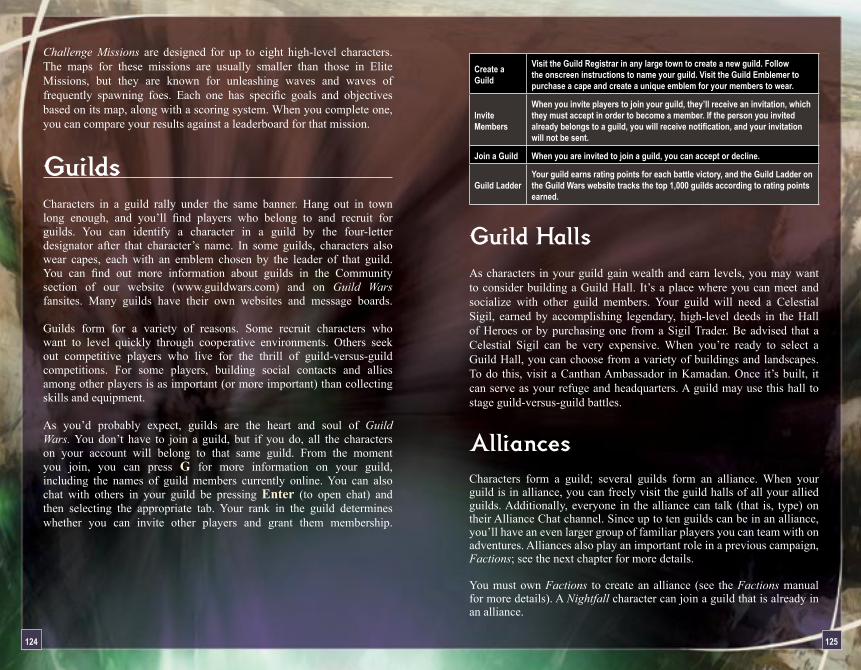
Create a Guild
Visit the Guild Registrar in any large town to create a new guild. Follow the onscreen instructions to name your guild. Visit the Guild Emblemer to purchase a cape and create a unique emblem for your members to wear.
Invite Members
When you invite players to join your guild, they’ll receive an invitation, which they must accept in order to become a member. If the person you invited already belongs to a guild, you will receive notification, and your invitation will not be sent.
Join a Guild When you are invited to join a guild, you can accept or decline.
Guild LadderYour guild earns rating points for each battle victory, and the Guild Ladder on the Guild Wars website tracks the top 1,000 guilds according to rating points earned.
Guild HallsAs characters in your guild gain wealth and earn levels, you may want to consider building a Guild Hall. It’s a place where you can meet and socialize with other guild members. Your guild will need a Celestial Sigil, earned by accomplishing legendary, high-level deeds in the Hall of Heroes or by purchasing one from a Sigil Trader. Be advised that a Celestial Sigil can be very expensive. When you’re ready to select a Guild Hall, you can choose from a variety of buildings and landscapes. To do this, visit a Canthan Ambassador in Kamadan. Once it’s built, it can serve as your refuge and headquarters. A guild may use this hall to stage guild-versus-guild battles.
AlliancesCharacters form a guild; several guilds form an alliance. When your guild is in alliance, you can freely visit the guild halls of all your allied guilds. Additionally, everyone in the alliance can talk (that is, type) on their Alliance Chat channel. Since up to ten guilds can be in an alliance, you’ll have an even larger group of familiar players you can team with on adventures. Alliances also play an important role in a previous campaign, Factions; see the next chapter for more details.
You must own Factions to create an alliance (see the Factions manual for more details). A Nightfall character can join a guild that is already in an alliance.
Challenge Missions are designed for up to eight high-level characters. The maps for these missions are usually smaller than those in Elite Missions, but they are known for unleashing waves and waves of frequently spawning foes. Each one has specific goals and objectives based on its map, along with a scoring system. When you complete one, you can compare your results against a leaderboard for that mission.
GuildsCharacters in a guild rally under the same banner. Hang out in town long enough, and you’ll find players who belong to and recruit for guilds. You can identify a character in a guild by the four-letter designator after that character’s name. In some guilds, characters also wear capes, each with an emblem chosen by the leader of that guild. You can find out more information about guilds in the Community section of our website (www.guildwars.com) and on Guild Wars fansites. Many guilds have their own websites and message boards. Guilds form for a variety of reasons. Some recruit characters who want to level quickly through cooperative environments. Others seek out competitive players who live for the thrill of guild-versus-guild competitions. For some players, building social contacts and allies among other players is as important (or more important) than collecting skills and equipment.
As you’d probably expect, guilds are the heart and soul of Guild Wars. You don’t have to join a guild, but if you do, all the characters on your account will belong to that same guild. From the moment you join, you can press G for more information on your guild, including the names of guild members currently online. You can also chat with others in your guild be pressing Enter (to open chat) and then selecting the appropriate tab. Your rank in the guild determines whether you can invite other players and grant them membership.
1�4 1��
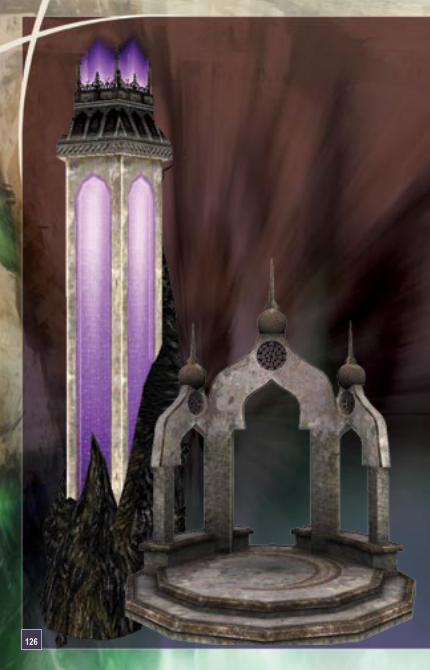
1��
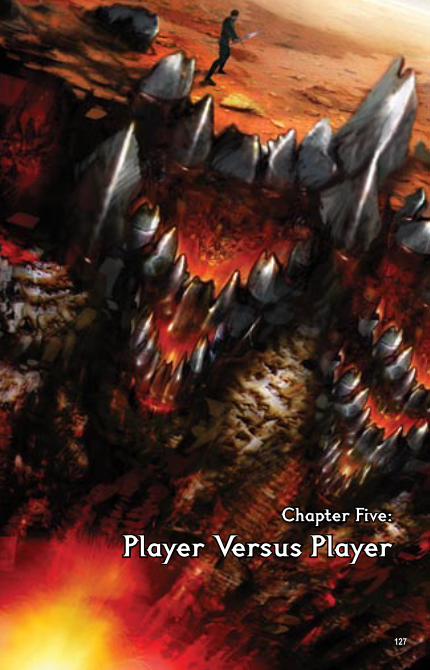
Chapter Five:
Player Versus Player
1��
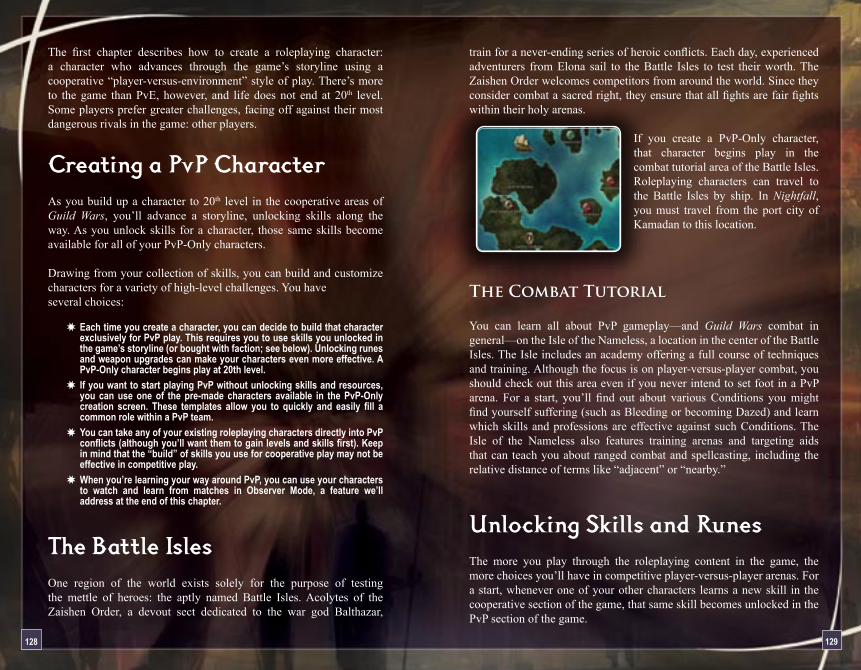
1�� 1��
train for a never-ending series of heroic conflicts. Each day, experienced adventurers from Elona sail to the Battle Isles to test their worth. The Zaishen Order welcomes competitors from around the world. Since they consider combat a sacred right, they ensure that all fights are fair fights within their holy arenas.
If you create a PvP-Only character, that character begins play in the combat tutorial area of the Battle Isles. Roleplaying characters can travel to the Battle Isles by ship. In Nightfall, you must travel from the port city of Kamadan to this location.
The Combat Tutorial
You can learn all about PvP gameplay—and Guild Wars combat in general—on the Isle of the Nameless, a location in the center of the Battle Isles. The Isle includes an academy offering a full course of techniques and training. Although the focus is on player-versus-player combat, you should check out this area even if you never intend to set foot in a PvP arena. For a start, you’ll find out about various Conditions you might find yourself suffering (such as Bleeding or becoming Dazed) and learn which skills and professions are effective against such Conditions. The Isle of the Nameless also features training arenas and targeting aids that can teach you about ranged combat and spellcasting, including the relative distance of terms like “adjacent” or “nearby.”
Unlocking Skills and RunesThe more you play through the roleplaying content in the game, the more choices you’ll have in competitive player-versus-player arenas. For a start, whenever one of your other characters learns a new skill in the cooperative section of the game, that same skill becomes unlocked in the PvP section of the game.
The first chapter describes how to create a roleplaying character: a character who advances through the game’s storyline using a cooperative “player-versus-environment” style of play. There’s more to the game than PvE, however, and life does not end at 20th level. Some players prefer greater challenges, facing off against their most dangerous rivals in the game: other players.
Creating a PvP CharacterAs you build up a character to 20th level in the cooperative areas of Guild Wars, you’ll advance a storyline, unlocking skills along the way. As you unlock skills for a character, those same skills become available for all of your PvP-Only characters.
Drawing from your collection of skills, you can build and customize characters for a variety of high-level challenges. You have several choices:
Each time you create a character, you can decide to build that character exclusively for PvP play. This requires you to use skills you unlocked in the game’s storyline (or bought with faction; see below). Unlocking runes and weapon upgrades can make your characters even more effective. A PvP-Only character begins play at 20th level.If you want to start playing PvP without unlocking skills and resources, you can use one of the pre-made characters available in the PvP-Only creation screen. These templates allow you to quickly and easily fill a common role within a PvP team.You can take any of your existing roleplaying characters directly into PvP conflicts (although you’ll want them to gain levels and skills first). Keep in mind that the “build” of skills you use for cooperative play may not be effective in competitive play.When you’re learning your way around PvP, you can use your characters to watch and learn from matches in Observer Mode, a feature we’ll address at the end of this chapter.
The Battle IslesOne region of the world exists solely for the purpose of testing the mettle of heroes: the aptly named Battle Isles. Acolytes of the Zaishen Order, a devout sect dedicated to the war god Balthazar,
Arenas
Most arenas can be found on the Battle Isles or accessed through a guild hall. Some are found in more remote locations.
Random Arena: On the Battle Isles, the Random Arena is a great place to find PvP action any time, particularly for new players. These matches don’t require you to form a party. When you enter an arena, the arena automatically creates a random team from the pool of available players. After you win five consecutive matches in Random Arenas, you’ll unlock the Team Arena. If you win ten consecutive matches, your team will be pitted against players from Team Arenas.
Team Arena: In this arena, you can form a party of four characters and face off against a randomly selected team. Each time, the battleground and rules of the match are determined randomly. You’ll see a quick prompt of the rules before the match begins. After you win five consecutive matches in Team Arenas, you’ll unlock the Heroes’ Ascent arena.
Heroes’ Ascent: Form a party and face off against a randomly selected team in tournament play. The three types of battles—Annihilation, Capture the Relic, or King of the Hill—are described at the end of this chapter. Heroes’ Ascent includes a series of maps. Each time you win, you advance to the next map; if you lose, you’re sent back to the staging area for Heroes’ Ascent.
In addition to faction, a character who wins in the Heroes’ Ascent receives fame. A character who accumulates enough fame eventually increases in rank, which can be displayed as a title under the character’s name.
Hall of Heroes: The final map in Heroes’ Ascent is the Hall of Heroes. One team defends it against all challengers. A team that can seize the hall and defend it against four more teams wins the “favor of the gods.” For more detail on the benefits of this reward, see the Guild Wars website.
Zaishen Challenge: You must finish the combat tutorial on the Isle of the Nameless to unlock this arena. Assemble a team of four adventurers for a series of PvP battles against computer-controlled enemies. Each battle features a different set of professions and requires a different strategy. By finishing five matches against NPCs in the Zaishen Challenge arena, you’ll unlock greater challenges in the Zaishen Elite arena.
While you’re playing the PvE section of the game, you’ll also want to keep an eye out for weapon components. Some magic weapons have specialized components that grant bonuses to your character. When you identify a weapon component in the cooperative game (using an Identification Kit), you unlock those same components for use in the competitive game.
After you loot armor from foes you’ve defeated in the cooperative game, you can identify that item to see if it has a rune (using an Identification Kit). Runes you’ve identified in the cooperative game are also unlocked for the competitive game.
Balthazar’s FactionYou can improve your PvP characters by winning matches in arenas. When you’re on a team that eliminates opponents and wins competitions, each character on that team earns faction. (Press H for a current tally of your character’s faction.) Priests of Balthazar on the Battle Isles can unlock skills and runes for you in exchange for faction. When you unlock a skill or rune in this way, all PvP characters you create from that point on can use that skill or item. Existing PvP characters can immediately use an unlocked skill, but to use an upgrade or rune, you’ll have to create a new PvP-Only character.
Roleplaying characters who come to the Battle Isles from the cooperative area of the game can also buy skills and runes from these same merchants. They can’t use them, but buying them with faction unlocks them for all your PvP-Only characters.
PvP CombatPvP battles consist of two or more teams, each with a differing number of adventurers (usually groups of four or eight) battling for supremacy. Depending on the type of conflict, you may be able to work with allies from your guild, form a pick-up group of other online players, or recruit henchmen. You can participate in many different types of conflicts, including Arenas, Guild Battles, Tournaments, and the Heroes’ Ascent.
1�0 1�1
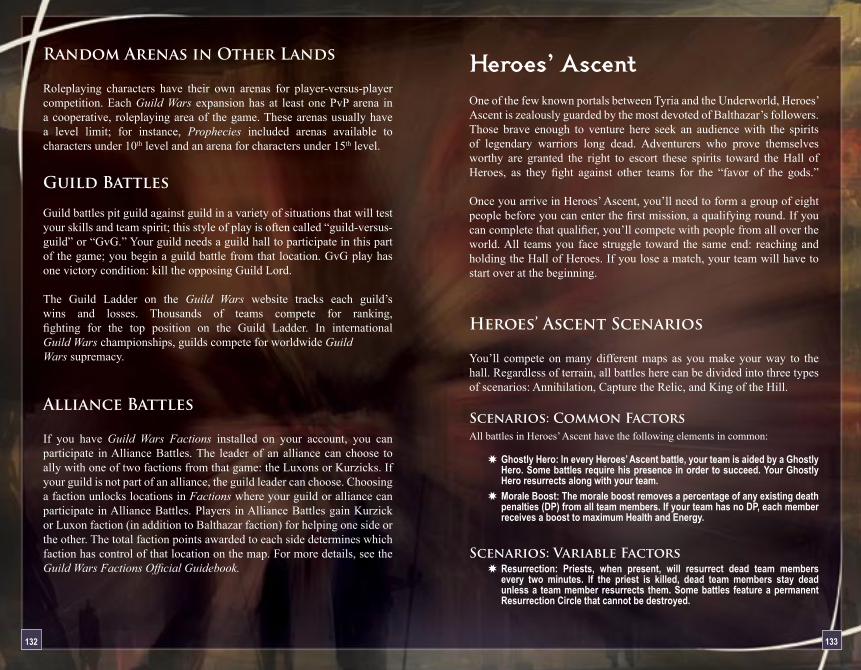
Heroes’ AscentOne of the few known portals between Tyria and the Underworld, Heroes’ Ascent is zealously guarded by the most devoted of Balthazar’s followers. Those brave enough to venture here seek an audience with the spirits of legendary warriors long dead. Adventurers who prove themselves worthy are granted the right to escort these spirits toward the Hall of Heroes, as they fight against other teams for the “favor of the gods.” Once you arrive in Heroes’ Ascent, you’ll need to form a group of eight people before you can enter the first mission, a qualifying round. If you can complete that qualifier, you’ll compete with people from all over the world. All teams you face struggle toward the same end: reaching and holding the Hall of Heroes. If you lose a match, your team will have to start over at the beginning.
Heroes’ Ascent Scenarios You’ll compete on many different maps as you make your way to the hall. Regardless of terrain, all battles here can be divided into three types of scenarios: Annihilation, Capture the Relic, and King of the Hill.
Scenarios: Common FactorsAll battles in Heroes’ Ascent have the following elements in common:
Ghostly Hero: In every Heroes’ Ascent battle, your team is aided by a Ghostly Hero. Some battles require his presence in order to succeed. Your Ghostly Hero resurrects along with your team.Morale Boost: The morale boost removes a percentage of any existing death penalties (DP) from all team members. If your team has no DP, each member receives a boost to maximum Health and Energy.
Scenarios: Variable FactorsResurrection: Priests, when present, will resurrect dead team members every two minutes. If the priest is killed, dead team members stay dead unless a team member resurrects them. Some battles feature a permanent Resurrection Circle that cannot be destroyed.
Random Arenas in Other Lands
Roleplaying characters have their own arenas for player-versus-player competition. Each Guild Wars expansion has at least one PvP arena in a cooperative, roleplaying area of the game. These arenas usually have a level limit; for instance, Prophecies included arenas available to characters under 10th level and an arena for characters under 15th level.
Guild Battles
Guild battles pit guild against guild in a variety of situations that will test your skills and team spirit; this style of play is often called “guild-versus-guild” or “GvG.” Your guild needs a guild hall to participate in this part of the game; you begin a guild battle from that location. GvG play has one victory condition: kill the opposing Guild Lord. The Guild Ladder on the Guild Wars website tracks each guild’s wins and losses. Thousands of teams compete for ranking, fighting for the top position on the Guild Ladder. In international Guild Wars championships, guilds compete for worldwide Guild Wars supremacy.
Alliance Battles
If you have Guild Wars Factions installed on your account, you can participate in Alliance Battles. The leader of an alliance can choose to ally with one of two factions from that game: the Luxons or Kurzicks. If your guild is not part of an alliance, the guild leader can choose. Choosing a faction unlocks locations in Factions where your guild or alliance can participate in Alliance Battles. Players in Alliance Battles gain Kurzick or Luxon faction (in addition to Balthazar faction) for helping one side or the other. The total faction points awarded to each side determines which faction has control of that location on the map. For more details, see the Guild Wars Factions Official Guidebook.
1�� 1��
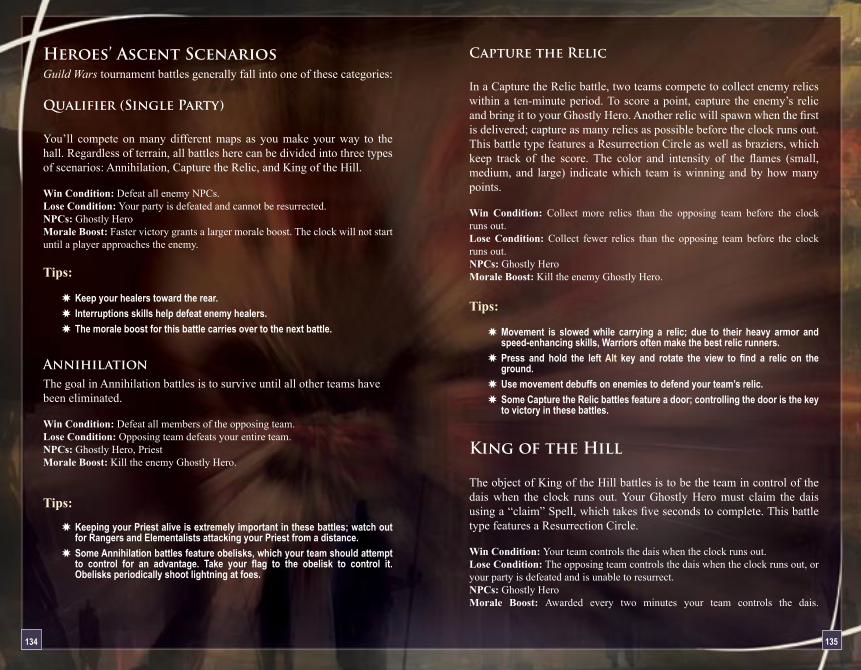
Capture the Relic
In a Capture the Relic battle, two teams compete to collect enemy relics within a ten-minute period. To score a point, capture the enemy’s relic and bring it to your Ghostly Hero. Another relic will spawn when the first is delivered; capture as many relics as possible before the clock runs out. This battle type features a Resurrection Circle as well as braziers, which keep track of the score. The color and intensity of the flames (small, medium, and large) indicate which team is winning and by how many points.
Win Condition: Collect more relics than the opposing team before the clock runs out.Lose Condition: Collect fewer relics than the opposing team before the clock runs out.NPCs: Ghostly HeroMorale Boost: Kill the enemy Ghostly Hero.
Tips:
Movement is slowed while carrying a relic; due to their heavy armor and speed-enhancing skills, Warriors often make the best relic runners. Press and hold the left Alt key and rotate the view to find a relic on the ground.Use movement debuffs on enemies to defend your team’s relic. Some Capture the Relic battles feature a door; controlling the door is the key to victory in these battles.
King of the Hill
The object of King of the Hill battles is to be the team in control of the dais when the clock runs out. Your Ghostly Hero must claim the dais using a “claim” Spell, which takes five seconds to complete. This battle type features a Resurrection Circle.
Win Condition: Your team controls the dais when the clock runs out.Lose Condition: The opposing team controls the dais when the clock runs out, or your party is defeated and is unable to resurrect.NPCs: Ghostly HeroMorale Boost: Awarded every two minutes your team controls the dais.
Heroes’ Ascent ScenariosGuild Wars tournament battles generally fall into one of these categories:
Qualifier (Single Party)
You’ll compete on many different maps as you make your way to the hall. Regardless of terrain, all battles here can be divided into three types of scenarios: Annihilation, Capture the Relic, and King of the Hill.
Win Condition: Defeat all enemy NPCs. Lose Condition: Your party is defeated and cannot be resurrected.NPCs: Ghostly HeroMorale Boost: Faster victory grants a larger morale boost. The clock will not start until a player approaches the enemy.
Tips:
Keep your healers toward the rear.Interruptions skills help defeat enemy healers. The morale boost for this battle carries over to the next battle.
AnnihilationThe goal in Annihilation battles is to survive until all other teams havebeen eliminated.
Win Condition: Defeat all members of the opposing team.Lose Condition: Opposing team defeats your entire team.NPCs: Ghostly Hero, PriestMorale Boost: Kill the enemy Ghostly Hero.
Tips:
Keeping your Priest alive is extremely important in these battles; watch out for Rangers and Elementalists attacking your Priest from a distance.Some Annihilation battles feature obelisks, which your team should attempt to control for an advantage. Take your flag to the obelisk to control it. Obelisks periodically shoot lightning at foes.
1�4 1��

Observer Mode PvP is fiercely competitive, but it’s also a spectator sport. Guild Wars includes an Observer mode you can use to watch PvP play. As a spectator, you can check out PvP maps before you try them, scope out the competition to pick up new strategies, and watch your friends battle to victory.
You can choose Observer mode from the Main Menu (or by pressing B) to check out a guild battle or guild tournament going on in a PvP arena. To leave Observer mode, use the menu, press B again, or press M to se ordinary map travel (which will take you back to the character you’re playing).
Using Observer Mode:
You can only use Observer mode in towns and outposts.Press U while in Observer mode to open or close the map overlay.Matches are made available for observation 15 minutes after the match starts. If you are the first one to view the match it will play back from the beginning. Any observer who joins after the first person will enter Observer mode as the match is in progress. Later observers may miss the beginning of the match, but will be able to view it simultaneously alongside all other observers present.The overhead view centers on a random player when you enter Observer mode. You can switch your focus to another character by left-clicking on that character. You can also change your view by left-clicking on a character’s icon on the observation map. You can use Tab to cycle through visible players.If you wish to observe without centering your view on a single character, find one of the small camera icons on the map and click on it. Your view will move to that point. Turn off the Auto-Camera feature (uncheck the box in the upper right corner of the screen) to take over from Observer mode. Auto-Camera is on by default and will from camera to camera (and sometimes from player to player) to let you follow the action with ease. Press O while in Observer mode to see the score window, which tracks the Health and morale of each team throughout the game.While in Observer mode, you can chat with other observers using Observers Chat. Players in the match will not be able to see observer comments at any time.
1�� 1��
1�� 1��
Leah Eckstrom
Chuck Jackman Ben Kirsch Mori Marchany Elijah Miller Nate Robinson Ryan Scott Johann Tang Mike Zadorojny
Web & Visual DesignRon Critchfield Samuel Bragg AJ Thompson Reagan Wright
ContractorsAndrio Abero Michael Hrádek
Dqniel Kaufman Lamplighter Studios
Weston Tracy Brian Jones
GuidebookAlpha TestersAdam Badger Nicolas Carpenter
Po-Ching Chen Debbie Curie Mark Currie Lois Haupt Tony Jones Jake King Rebecca Lane
Andrea Luciano
Dave Marshall Dennis McCollum Jonas Nordlund Andrew Patrick Andre Roux Tomas Schober Michael Thompson John Turtle
Ronald Wappel
ArenaNetExecutive ProducersMike O’Brien Jeff Strain Patrick Wyatt
DesignersJames Phinney Isaiah Cartwright Darrin Claypool
Emily Diehl Michael Ferguson
Eric Flannum Kevin Gadd Jeff Grubb John Hargrove
Stephen Hwang Colin Johanson Curtis Johnson Albert Liao Andrew McLeod
Kevin Millard Ben Miller Joe Mullenix Linsey Murdock Mike O’Brien Jonathan Peters Brian Porter Jonathan Sharp
Ree Soesbee John Stumme
140 141
Environment ArtistsDave Beetlestone Win Arayaphong Tirzah Bauer Ely Cannon Jesse Christensen
Justin Fawcett Tami Foote Josh Foreman
Peter Fries Jens Hauch Jason Jones James McMillan
ProgrammersBrett Vickers Jim Scott Brenton Anderson James Boer Stephen Clarke-
Willson Shana Cooke John Corpening Brandon Dillon Kevin Ehmry Brad Hallisey Joe Kimmes Lewis Mohr Mike O’Brien Umesh Patel Eric Rane Chae Seong Lim Nicholas Shaffner
Braeden Shosa Austin Spafford Jeff Strain Denis Suhanov
Patrick Wyatt Mark Young John Zipperer
WritersStacie Magelssen Brian Campbell
Sean Ferguson Cory Herndon Caitlin Kittredge Will McDermott Bobby Stein
CinematicsPerry Cucinotta Kirill Federspiel Daniel Jennings
ProducersJay Adams Shawn Sharp
Business TeamJenny Bendel Lisa LaFay Steve Shepard Kevin Simons
CommunityGaile Gray Natasha Hoover
Andrew Patrick
ITPeter Petrucci Steve Becker Erin Brooks Trey Valenta
LocalizationAdam Vance Mehdi Mousavi Zheren “Jason” Yu Yuhong Wang
Organized PlayMichael Gills
Quality AssuranceDavid Stiner Meg Adams Kim Chase
ArtistsDaniel Dociu Scott Albaugh Richard Anderson
Matthew Barrett Aaron Coberly Rebecca Coffman Dan Cole Kevin Dalziel Horia Dociu David Dunniway
Brant Fitzgerald Eli Hanselman Katharine Hargrove
Levi Hopkins Trevor Howell Susan Jessup Wei-Che (Jason) Juan
Jaime Jones Chelsea Kibler
Eric Klokstad Kekaipo’inalu Kotaki
Darren Lamb Tonya Lyle Scott Mayhew
Matthew Medina Kristen Perry Hai Phan Bobby Pontillas
Heron Prior Delly Sartika Jason Stokes Barry Sundt Xia Taptara-
kunekane
Matthew Tate Chris Turnham Christian Venturini
Billy Wardlaw Jason Wiggin Doug Williams

NC EuropeCorporateGeoff Heath
Business DevelopmentManagementMark Heath
DevelopmentThomas Bidaux Diane Lagrange
Strategic DevelopmentSean Kang Paha Schulz
Sales & MarketingMax Brown David Blundell
Véronique Lallier Sarah Mason Dirk Metzger Sarah Rogers Becky Rose Marcus Whitney
ProductionAllan Fowler David Clements
PublishingSébastien Vidal
PlayNCEric Emanuel
LocalizationDavid Bonin Anna André Cinzia Barrella
Foucauld Escaillet
Ismael Fernandez
Fabio Gurini
Angelika Hell Karine Humbert
Cintia Izquierdo Camille Kaczmarek Nick Schaefer
Quality AssuranceSam Watts
Game ServicesStephen Reid
Content & CommunityJen Bolton Loic Claveau Martin Kerstein
Alex Weekes Kieran Weir Mark Wilkin
FinancePaul Bone Roni Sou
Human ResourcesJane Brown Jason Wilson
Office ManagementMaggie O’Reilly Will Renville
Design & Web DevelopmentAegir Hallmundur Mathew Keller Tom Kiss Marek Lenik
IT & OperationsStuart Wright Eugene Lee
John Marshall
Jenny O’Neil Jett Tattersall
BillingJean-Marc Rouchouse Caroline Jany Maddalena Cipriani
Tina Müller Gaëlle Daam Julia Irler Tim Saxon
Live OperationsNiall Callaghan Mona Quintanilla
Bob Watson
Customer SupportRene Reichert Al Aldridge Volker Boenigk
Karl Buckley Ken Charlton Alastair Dodd Nathalie Dutel Alexander Ebel Markus Fried Marjorie Guillen-
Lemaire
Ediz Güler Bernhard Heyka
Gordon Maaβ Lusia Mari Sam Maxted Didier Montaron
Tia Paraurahi Manuel Prüter Dennis Schütte Emmanuel Servais Kevin Taylor Nick Walker Toby Wilcox
NCsoft Interactive
CEORobert Garriott
CFO Victoria Richardson
Marketing & SalesDorothy Ferguson Mandy Van Ackeren
Toree Alessi Lisa Bell Greg Latson
Lisa Mandile Kellee McKeever
David Swofford
Public RelationsDavid Swofford Janna Bureson Mike Crouch Opal Lertutai
OperationsPeter Jarvis Neal Buckmaster
LegalMatt Esber
Creative ServicesHoss Fatemi Andy Hunter Jessi Knox Marshall Karen Reynoso
Quality AssuranceMichael Craighead James Ash Leah Bowers
Dan Campbell Dane Caruthers Lindsay Collier Christina Cromartie Jeff Daily Chris Doerr Heidi Dozier Michael Dupler
Nathan Emmott JoAnna Frazar Bob Green Chris Hager Aaron Jayjack Neal Johnson Tim Johnson Martin Knapick Edward Knapp Brian Knox Dennis Liggio
Michael McDonnell Curtis O’Neal Athena Peters Stefan Ramirez Cody Russell Jonathan Shelus Tosh Toida Steven Tonkin Stefan Trefil
Andrew Wagner Alaric Weigle
Customer ServiceChris Freeman Chris Allen Michael Augustine Bethany Baldwin Nick Bellamy Michael Chirieleison Amy Crews Trollis Crider Michael Delio John Garcia Donovan Kennedy
Michael Lafond Reneé Lasswell Hayden Linder Leslie Lomeli Marissa McWaters John Rabon Lance Schibi Margaret Sheehan Amanda Slade Patrick Wagn
Game SupportWill Leverett Jeff Lewis Sean Neil Dylan Servantes
Knowledge BaseAdministrationMike Zupan Julie Engleking Robert ChiKeith Quinn
142 143
GM/CSJer Wang Tony Chen
Ping Hsien George Huang Tad Huang Yuan Juin Jean Li Chen Wen
System OperationCooper Chen
NCRC(NCsoft China R&D)Tommy Lee Gao Liang Bokki ChaeGong Jia Chen Liu De HuiXiao Nian Yi Qiang Jiang Wei Zhang Yu Jin Zi Zhou
Omni Interactive Audio
Alistair Hirst Chase Combs Lisa Elliott Cobb
Matt Ragan Robert Ridihalgh Tom Smurdon Daylon Walden
Hubris Studios
Todd ElhartYasmine Elhart
Artistry Entertainment
Jeremy Soule Julian Soule
Voice Casting & Production
Blindlight, LLC.
Casting DirectorDawn Hershey, C.S.A.
ProductionAlexandra Dorris Lev Chapelsky Dave Lieber Jan Sarah SinkWes Gleason
Voice DirectionDean Orion
Recording EngineerJ. David Atherton
Voice ActorsJulianne Buescher Ron Canada Robin Atkin Downes Paul Eiding Barbara Goodson Hakeem Kazim Josh Keaton Nolan North Amanda Philipson April Stewart Keith Szarabaijka Kari Wahlgren Victor R. Wexler Simbi Khali Williams
NC SeoulCEOTack Jin Kim
GW Business TeamWoo Ju Cho Kyung Mi An
Hyun Jong Jung
Yeo Eun Kim Han Joo Lee
GW GM TeamKwang Soo Chun Dong Joon Kim
In Goo Kim
Jae Hwan Kim
Jin Soo Kim
Seok Jun Kim
Tae Wook Kim
Eun Jung Lee Hui Jeong Yang
Hui Jin Yang
GW QA TeamJin Seop Kim Jun Il Hwang Ho Jeon Jung A Kang
Se Yong Kim Gil Jin Lee In Gyu Park
Yena Sohn
L10N TeamJune Kim Kyewon Jeon
Paul Lee
Visual ServicesCinematicsSung Jun AhnBong Sub ChaSeung Goo KangJeong Il Kim
Sang Hoon KimDae Hee Lee
Jun Ho LeeSeo Jeong LeeSun Hee LeeJae Gil LimJong Wook OhJung Hoon ParkDa Woom Song
Web Producing TeamEun Young Jung Woo Jin Jeon
Young Mi Lee
DocumentationR&D TeamEu gene Kim In Sung Cho Rae Sang Jung Bo Kyung Kim A Jung Park
NC JapanCEOTaek Hun Kim
GW Game Operation TeamNana Kikuchi
Yuki Kimura Yuki Kokubo Rutsuko Nakamura
Makoto Ono Yoshitaka Seita
Takashi Yamano Shigekazu Yoshioka
GW Online Promotion TeamJC Kim Ryosuke Toyoda
GW Sales TeamTakayuki Kanemoto Mari Koshimizu
GW Net-Cafe TeamJun Kasahara Kousuke Maeda Kiyoshi Wabo
GW System TeamCI Kim Songhyun Lee SJ Won SM Yun
GW Web TeamYS Lee Pineapple Yom Jun Goo Youn
GW Game Service TeamRanko Fukui Susumu Mizukoshi
NCsoftTaiwan
CEOJung Hwan Kim
MarketingSean S. Kim Micky Chen Lulu Chung Elsa Hsu Jo Huang Betty Lee Eva Lu Minglun Wu
QA/LocJohn Chen Lawrence Cheng
Peggy Chu Bill Lee
144 145
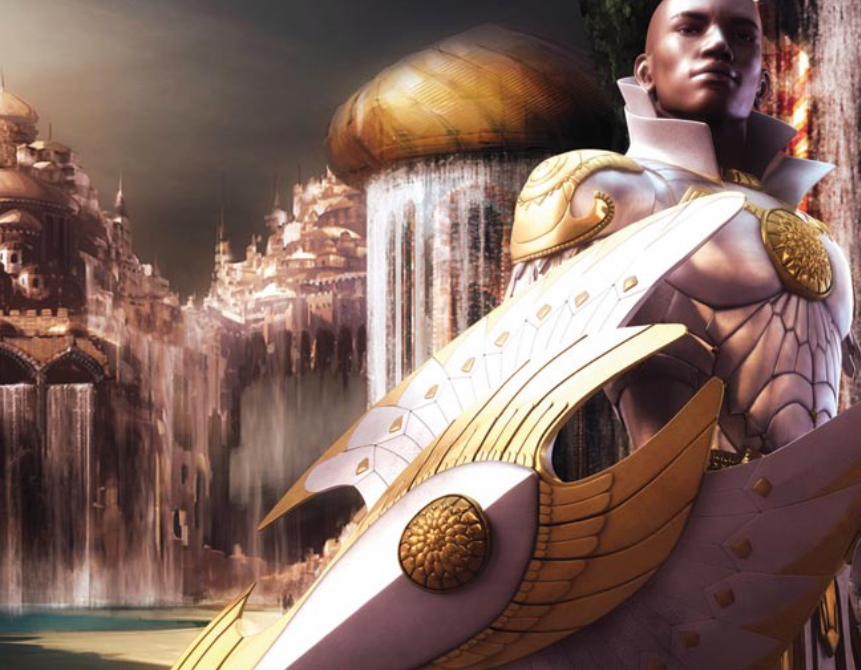
14� 14�
www.guildwars.comGame Experience May Change During Online Play