PHOTOGRAPHYvmc12photography.weebly.com/.../8/10782225/wildlife... · Wildlife and nature...
8
WILDLIFE AND NATURE PHOTOGRAPHY
Transcript of PHOTOGRAPHYvmc12photography.weebly.com/.../8/10782225/wildlife... · Wildlife and nature...
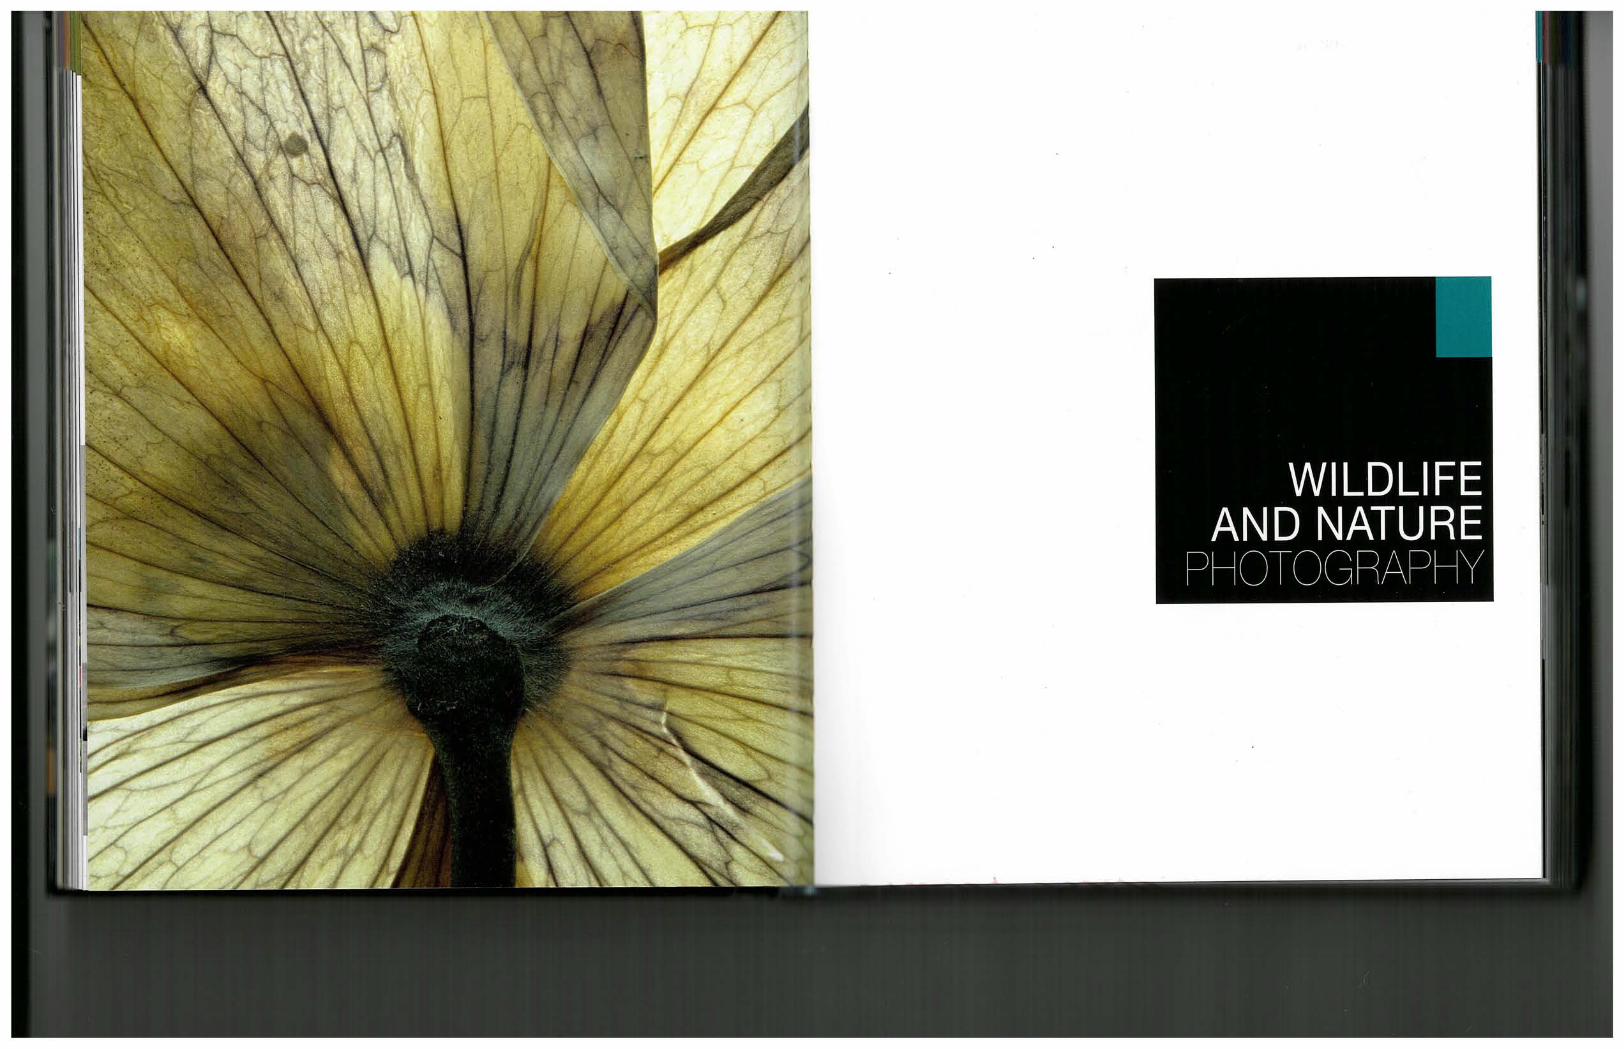
WILDLIFE AND NATURE
PHOTOGRAPHY
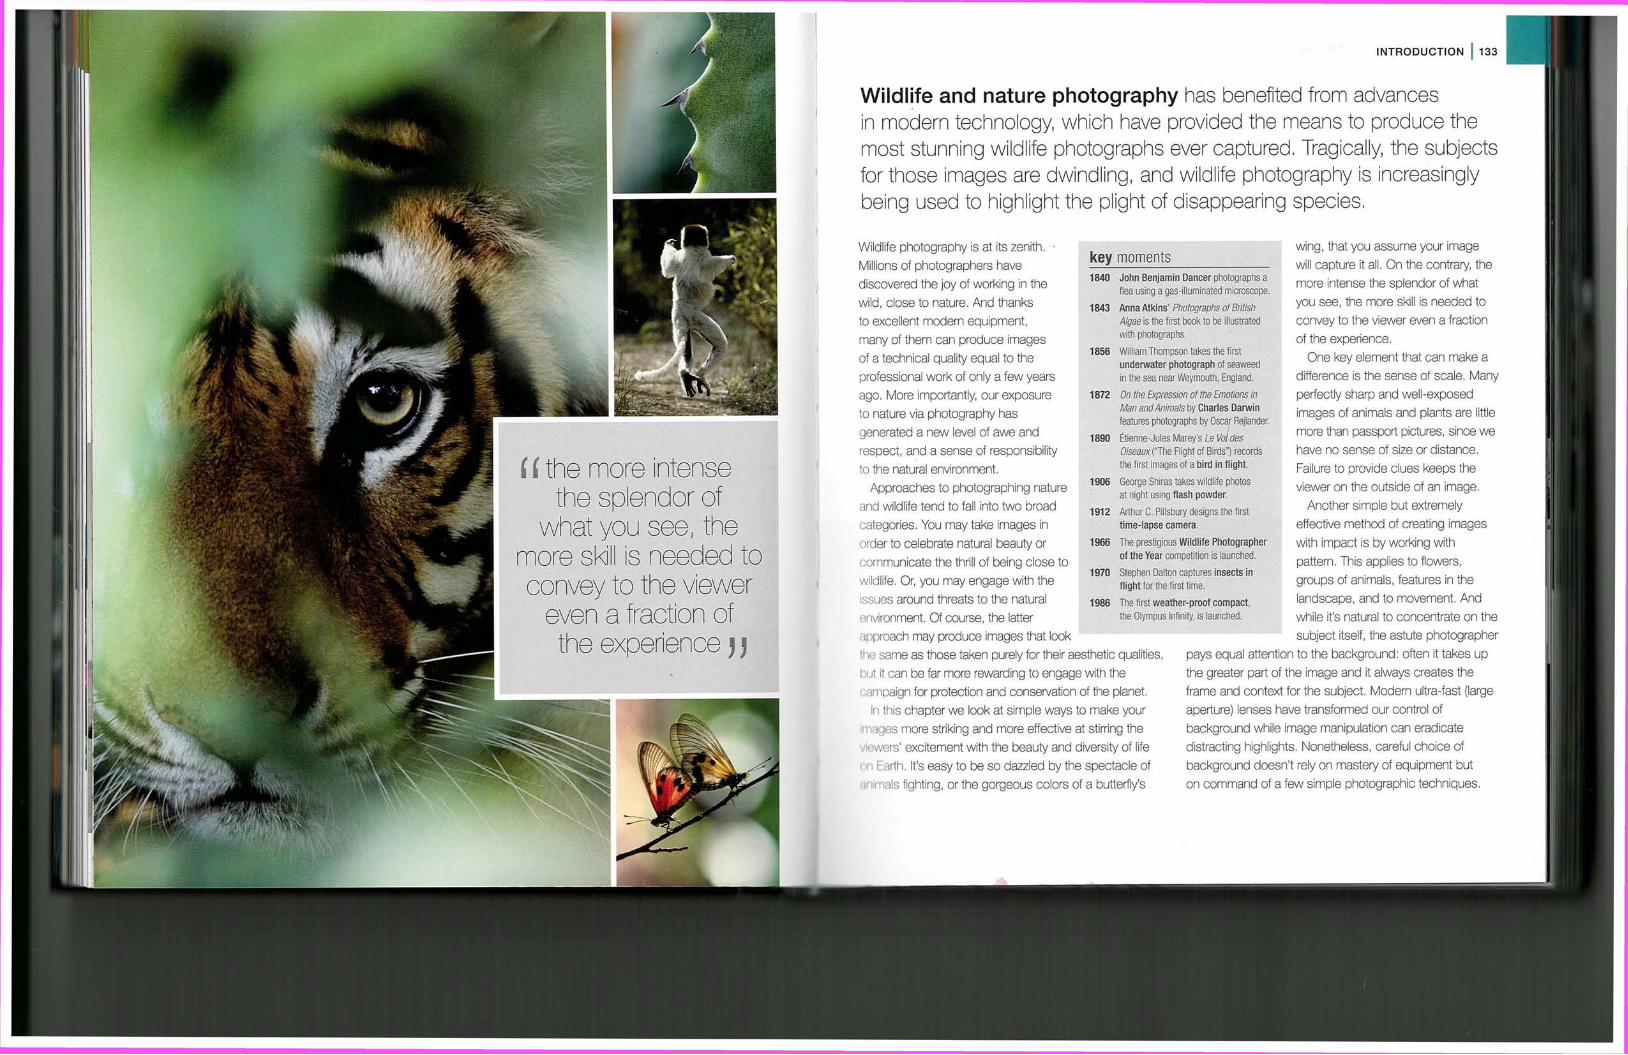
I i the more intense the splendor of
what you see, the more skill is needed to convey to the viewer
even a fraction of the experience j j
INTRODUCTION | 133
Wildlife and nature photography has benefited from advances in modern technology, which have provided the means to produce the most stunning wildlife photographs ever captured. Tragically, the subjects for those images are dwindling, and wildlife photography is increasingly being used to highlight the plight of disappearing species.
key m o m e n t s Wildlife photography is at its zenith. •
Millions of photographers have
discovered the joy of working in the
wild, close to nature. And thanks
to excellent modem equipment,
many of them can produce images
of a technical quality equal to the
professional work of only a few years
ago. More importantly, our exposure
to nature via photography has
generated a new level of awe and
respect, and a sense of responsibility
to the natural environment.
Approaches to photographing nature
and wildlife tend to fall into two broad
categories. You may take images in
order to celebrate natural beauty or
(immunicate the thrill of being close to
wildlife. Or, you may engage with the
issues around threats to the natural
i ;i ivironment. Of course, the latter
. i| jproach may produce images that look
: ;ame as those taken purely for their aesthetic qualities
i >i it it can be far more rewarding to engage with the
. impaign for protection and conservation of the planet.
In this chapter we look at simple ways to make your
: ](;s more striking and more effective at stirring the
vi ;rs' excitement with the beauty and diversity of life
ulti. l is easy to be so dazzled by the spectacle of
ils fighting, or the gorgeous colors of a butterfly's
1840
1843
1856
1872
1890
1906
1912
1966
1970
1986
John Benjamin Dancer photographs a
flea using a gas-illuminated microscope.
Anna Atkins' Photographs of British
Algae is the first book to be illustrated
with photographs.
William Thompson takes the first
underwater photograph of seaweed
in the sea near Weymouth, England.
On the Expression of the Emotions in
Man and Animals by Charles Darwin
features photographs by Oscar Rejlander.
Etienne-Jules Marey's Le Vol des
Oiseaux ("The Flight of Birds") records
the first images of a bird in flight.
George Shiras takes wildlife photos
at night using flash powder.
Arthur C. Pillsbury designs the first
time-lapse camera.
The prestigious Wildlife Photographer
of the Year competition is launched.
Stephen Dalton captures insects in
flight for the first time.
The first weather-proof compact,
the Olympus Infinity, is launched.
wing, that you assume your image
will capture it all. On the contrary, the
more intense the splendor of what
you see, the more skill is needed to
convey to the viewer even a fraction
of the experience.
One key element that can make a
difference is the sense of scale. Many
perfectly sharp and well-exposed
images of animals and plants are little
more than passport pictures, since we
have no sense of size or distance.
Failure to provide clues keeps the
viewer on the outside of an image.
Another simple but extremely
effective method of creating images
with impact is by working with
pattern. This applies to flowers,
groups of animals, features in the
landscape, and to movement. And
while it's natural to concentrate on the
subject itself, the astute photographer
pays equal attention to the background: often it takes up
the greater part of the image and it always creates the
frame and context for the subject. Modern ultra-fast (large
aperture) lenses have transformed our control of
background while image manipulation can eradicate
distracting highlights. Nonetheless, careful choice of
background doesn't rely on mastery of equipment but
on command of a few simple photographic techniques.
tutorial: from scale to pattern One of the miracles of nature is how it offers eye-catching visual banquets at every scale: from sub-microscopic insect parts, to millions of birds, or herds of wildebeest massing over hundreds of square miles. Capturing that sense of scale effectively can turn an average shot into something breathtaking.
amazing scale Unlike the majority of other photographic subjects,
our choice of viewpoint—and therefore our control of
perspective—is limited with wildlife. For the most part,
we are restricted to a flat projection because we have to
photograph from a distance, either for our own safety or
to avoid disturbing the subject. We can seldom get close
enough to obtain intimate or dynamic perspectives.
What this means for our photography is that we need
other ways to give variety to the depiction or articulation of
space in our images. One approach is to work with scale.
The fundamental ideas here are that an object overlapping
another must be closer to us, and that if there are two
objects of similar size, the one in the image that appears
smaller must be further away. The overlapping "rule"
enables us to show depth with small changes of scale
while the larger variation in size helps the image to imply
correspondingly larger spaces.
keeping your distance By working with scale, you can overcome a common
frustration in wildlife photography, which is not being able
to get close enough. After all, it is only from a distance
that you can show patterns of movement or groupings.
And it only takes six flamingoes to form a line: all you
have to do is wait for your subjects to get on with what
they normally do. For example, flamingoes often feed in
leisurely fashion several in a line: you can have a pretty
good idea where they're going (and it's often the same
route each day) and plan for when they will simply
walk, on cue, into frame.
The further you are from your subject or the smaller it
appears, the greater the number of animals you'll need for
an effective pattern. That is why the reserves of the African
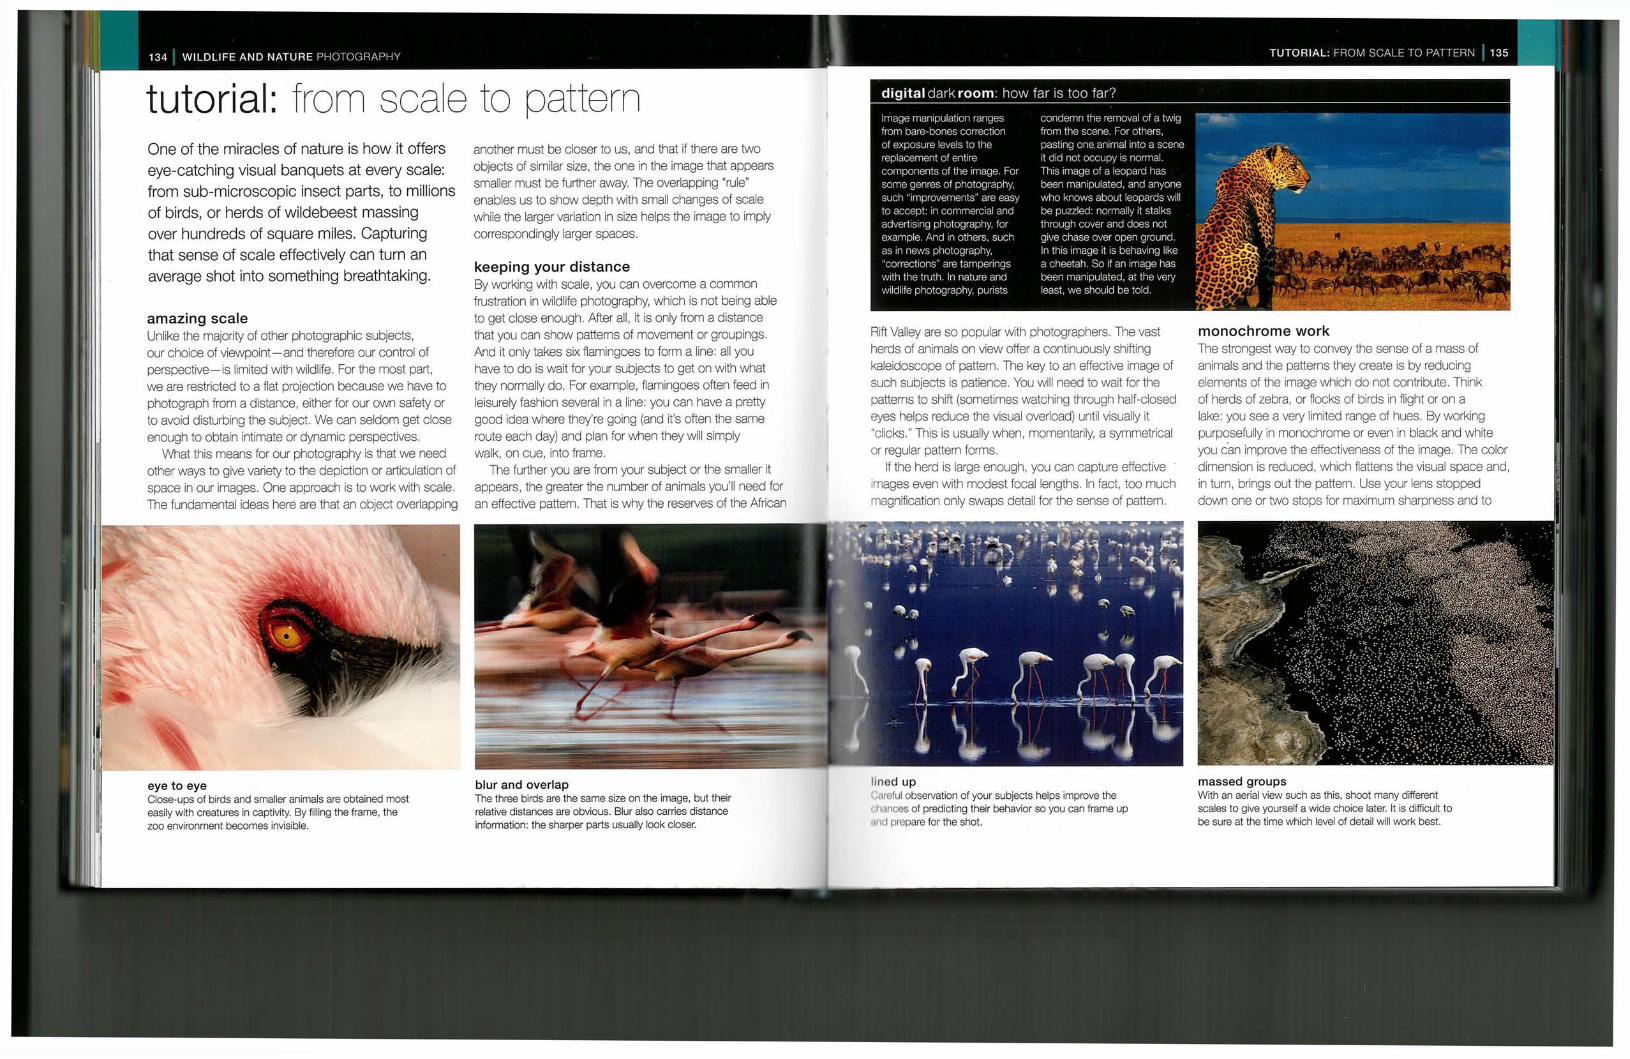
eye to eye Close-ups of birds and smaller animals are obtained most easily with creatures in captivity. By filling the frame, the zoo environment becomes invisible.
blur and overlap The three birds are the same size on the image, but their relative distances are obvious. Blur also carries distance information: the sharper parts usually look closer.
TUTORIAL: FROM SCALE TO PATTERN | 135 I
digital dark room: how far is too far?
Image manipulation ranges from bare-bones correction of exposure levels to the replacement of entire components of the image. For some genres of photography, such "improvements" are easy to accept: in commercial and advertising photography, for example. And in others, such as in news photography, "corrections" are tamperings with the truth. In nature and wildlife photography, purists
condemn the removal of a twig from the scene. For others, pasting one. animal into a scene it did not occupy is normal. This image of a leopard has been manipulated, and anyone who knows about leopards will be puzzled: normally it stalks through cover and does not give chase over open ground. In this image it is behaving like a cheetah. So if an image has been manipulated, at the very least, we should be told.
Rift Valley are so popular with photographers. The vast
herds of animals on view offer a continuously shifting
kaleidoscope of pattern. The key to an effective image of
such subjects is patience. You will need to wait for the
patterns to shift (sometimes watching through half-closed
eyes helps reduce the visual overload) until visually it
"clicks." This is usually when, momentarily, a symmetrical
or regular pattern forms.
If the herd is large enough, you can capture effective
images even with modest focal lengths. In fact, too much
magnification only swaps detail for the sense of pattern.
monochrome work The strongest way to convey the sense of a mass of
animals and the patterns they create is by reducing
elements of the image which do not contribute. Think
of herds of zebra, or flocks of birds in flight or on a
lake: you see a very limited range of hues. By working
purposefully in monochrome or even in black and white
you can improve the effectiveness of the image. The color
dimension is reduced, which flattens the visual space and,
in turn, brings out the pattern. Use your lens stopped
down one or two stops for maximum sharpness and to
lined up . iroful observation of your subjects helps improve the
• dances of predicting their behavior so you can frame up .11 id prepare for the shot.
massed groups With an aerial view such as this, shoot many different scales to give yourself a wide choice later. It is difficult to be sure at the time which level of detail will work best.
give even illumination. Working in monochrome enables
us to make use of abstract shapes and patterns. The
abstraction can become an enjoyable visual puzzle,
encouraging the viewer to study the image in order to
make sense of it and identify the animal. In addition,
abstraction allows the viewer to explore different aspects
of the animal; if you don't show the usual identifiable
features you offer something that is purely artistic.
Successful animal abstracts balance an absence of
distractions with the presence of strong shapes or lively
rhythmic patterns. The removal of distractions may stretch
from working in black and white to obscuring unwanted
details with mist, water-spray, or dust (see opposite). More
subtle distractions include variations in sharpness, such
as when the viewer sees blur where clarity is expected
then the blur functions as a distraction. For example, if the
stripes on a zebra appear soft—from falling out of depth
of field or from movement—they interfere with the clarity
of the pattern and distract the viewer. Highlights can be
another source of distraction; that's why abstracts work
best under flat or dull lighting conditions.
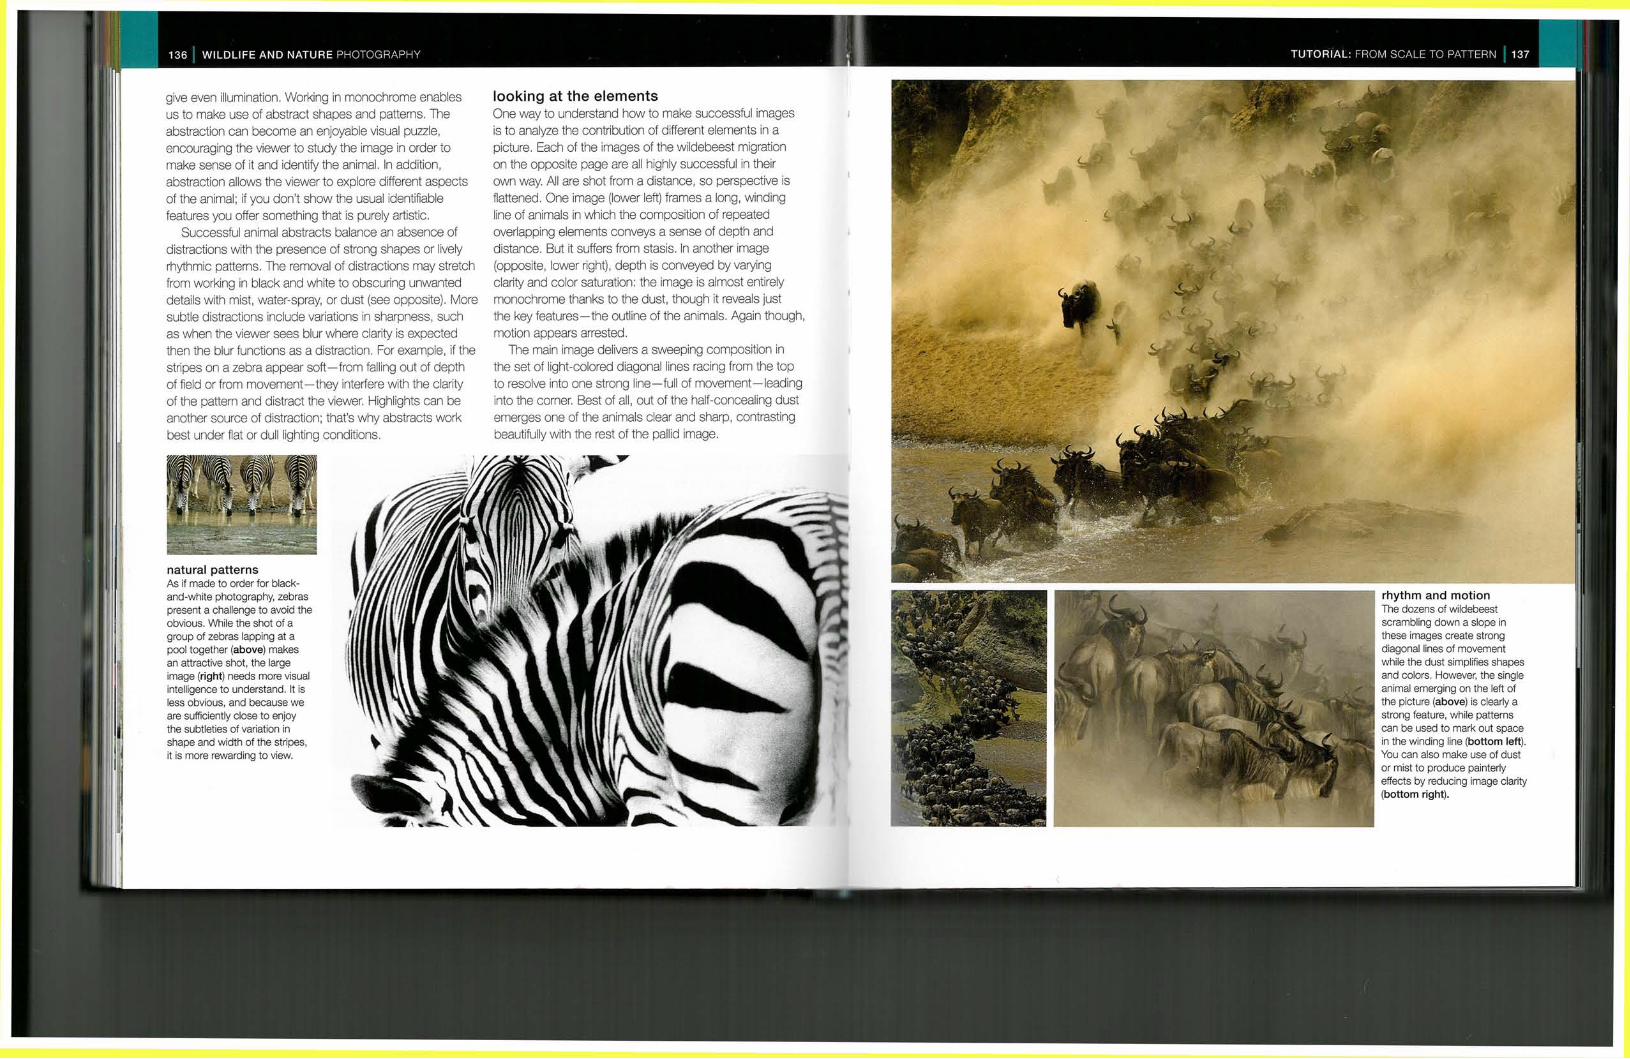
looking at the elements One way to understand how to make successful images
is to analyze the contribution of different elements in a
picture. Each of the images of the wildebeest migration
on the opposite page are all highly successful in their
own way. All are shot from a distance, so perspective is
flattened. One image (lower left) frames a long, winding
line of animals in which the composition of repeated
overlapping elements conveys a sense of depth and
distance. But it suffers from stasis. In another image
(opposite, lower right), depth is conveyed by varying
clarity and color saturation: the image is almost entirely
monochrome thanks to the dust, though it reveals just
the key features—the outline of the animals. Again though
motion appears arrested.
The main image delivers a sweeping composition in
the set of light-colored diagonal lines racing from the top
to resolve into one strong line—full of movement—leading
into the corner. Best of all, out of the half-concealing dust
emerges one of the animals clear and sharp, contrasting
beautifully with the rest of the pallid image.
natural p a t t e r n s As if made to order for black-and-white photography, zebras present a challenge to avoid the obvious. While the shot of a group of zebras lapping at a pool together (above) makes an attractive shot, the large image (right) needs more visual intelligence to understand. It is less obvious, and because we are sufficiently close to enjoy the subtleties of variation in shape and width of the stripes, it is more rewarding to view.
T U T O R I A L : FROM SCALE TO PATTERN 137
rhythm a n d mot ion The dozens of wildebeest scrambling down a slope in these images create strong diagonal lines of movement while the dust simplifies shapes and colors. However, the single animal emerging on the left of the picture (above) is clearly a strong feature, while patterns can be used to mark out space in the winding line (bottom left). You can also make use of dust or mist to produce painterly effects by reducing image clarity (bottom right).
tutorial: miniature worlds Nature offers glorious riches at every scale. Even the tiniest plants and animals can lead us into fascinating new worlds. And, as the smallest scale is outside the scope of everyday experience, it appears new and intriguing, though it lies at our feet, unnoticed when we pass it everyday.
a p p e a l of t h e o r d i n a r y Many of us dream of a wildlife safari unaware that rewarding nature photography can be found nearer to home. An overgrown suburban back yard may lack the glamour of exotic lands, but getting close to the subject means that the rest of the environment doesn't matter, for what is out of shot is out of sight.
Much of this miniature world lies at ground level. A camera with a tilting screen, so that you can hold it low down but still look at the LCD screen, makes this type of photography more comfortable. Set the mid-range of focal lengths to provide the working distance you need; the longest focal lengths hamper close-up focusing.
t h e g i f t o f l i gh t There is less wind low to the ground so your subject is unlikely to be blown around. You can stop movement in the subject by using flash. This also takes out more of the
focus on technique: photomicrography
moving magic Motion blur is best shot against a dark background, which brings out even pale colors, and it is most effective when accompanied by some strong shapes.
background by throwing it into darkness. For the best results, use a flash-unit that can be set to one side of the subject, or placed very close to the lens. Specialized macro-photography flash-units allow you to vary the position of the units and balance their effects.
If you don't have flash, you must wait for the light to come to you. On a morning after a night of light drizzle the uncut grass will glisten with hundreds of beads of light. A morning light often illuminates a spider's web to perfection: move around it to find the right angle. Experiment with different focal lengths from the same
The ultimate miniature subject may measure only a fraction of a millimeter and be visible only under a microscope. Thanks to the inexpensive optics now available, the microscopic world is open to amateur photographers and naturalists. If you want to make a different kind of image from the billions that populate photo-sharing sites, purchase a microscope with an adaptor for your camera. Suitable
subjects are no further away than your nearest pond, or park. Many specimens (1) don't need preparation though they will need to be killed if active, or you can work with still objects such as microscopic plant life or spores. Remember to light your subject too. For views that look through the specimen (2) a little simple laboratory preparation by setting the subject onto a glass slide, will make it translucent.
TUTORIAL: MINIATURE WORLDS 153
jsimr.r/' , '-'0
• •••• • ••••••
HI A V
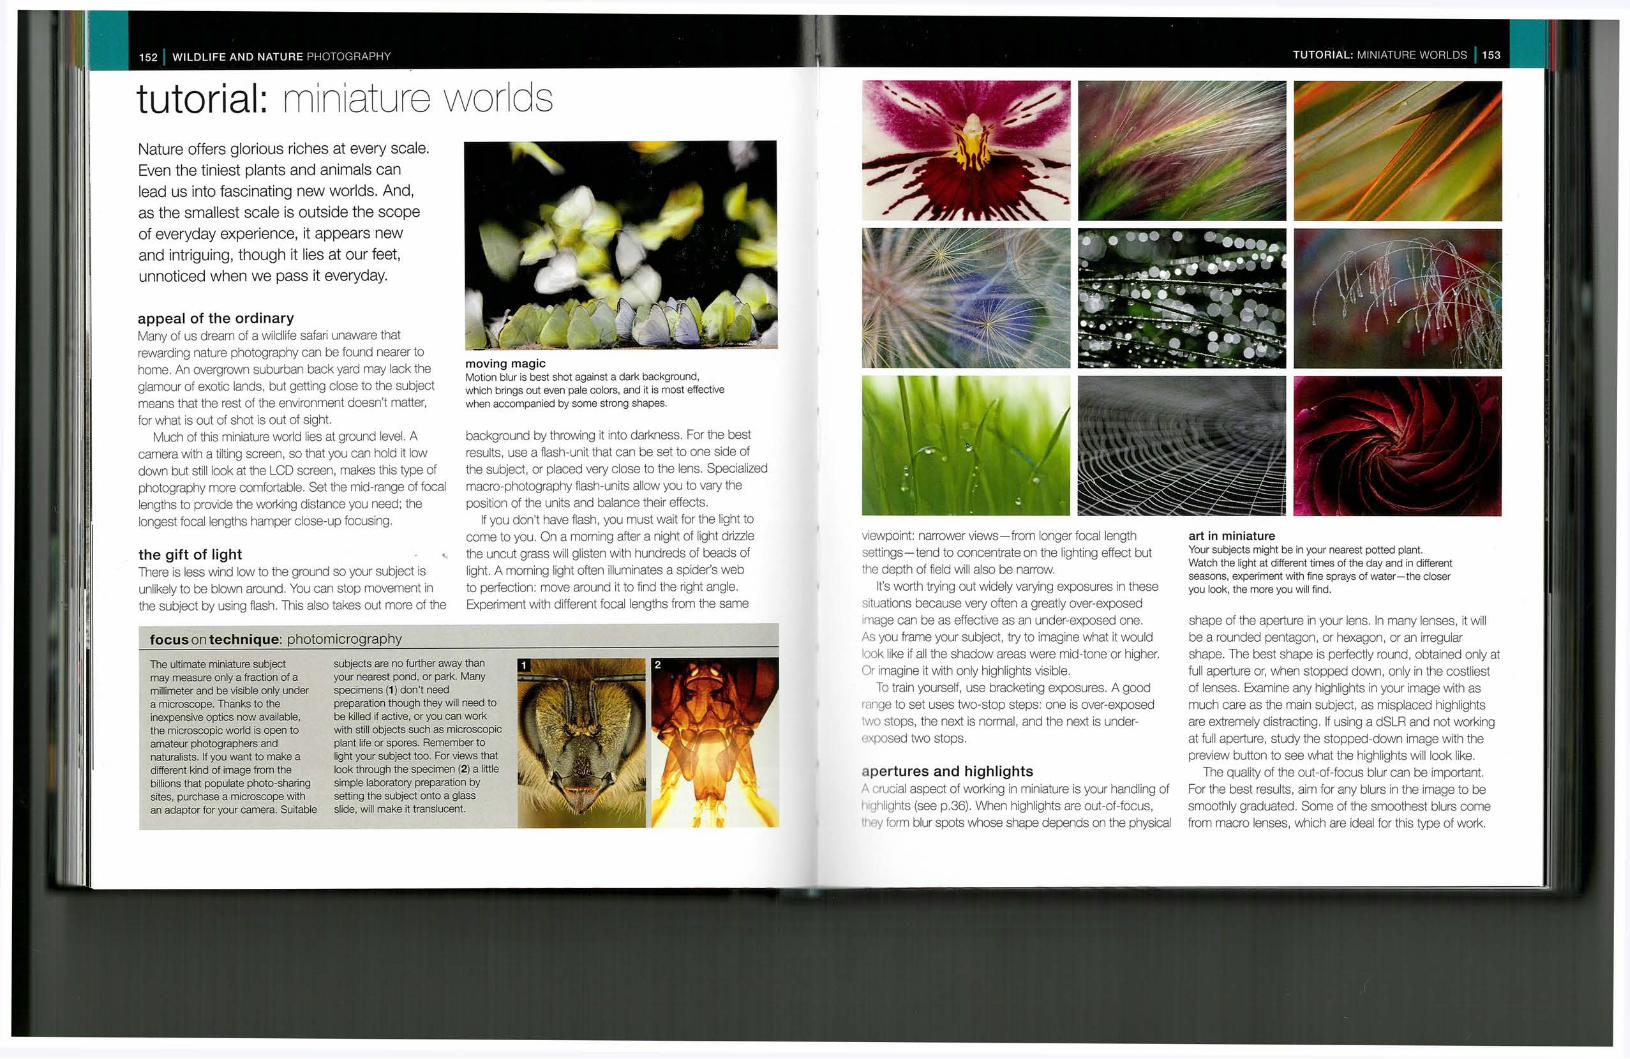
viewpoint: narrower views—from longer focal length settings—tend to concentrate on the lighting effect but the depth of field will also be narrow.
It's worth trying out widely varying exposures in these situations because very often a greatly over-exposed image can be as effective as an under-exposed one. As you frame your subject, try to imagine what it would look like if all the shadow areas were mid-tone or higher. Or imagine it with only highlights visible.
To train yourself, use bracketing exposures. A good innge to set uses two-stop steps: one is over-exposed two stops, the next is normal, and the next is underexposed two stops.
a p e r t u r e s a n d h i g h l i g h t s A crucial aspect of working in miniature is your handling of
flights (see p.36). When highlights are out-of-focus, •' y form blur spots whose shape depends on the physical
art in miniature Your subjects might be in your nearest potted plant. Watch the light at different times of the day and in different seasons, experiment with fine sprays of water—the closer you look, the more you will find.
shape of the aperture in your lens. In many lenses, it will be a rounded pentagon, or hexagon, or an irregular shape. The best shape is perfectly round, obtained only at full aperture or, when stopped down, only in the costliest of lenses. Examine any highlights in your image with as much care as the main subject, as misplaced highlights are extremely distracting. If using a dSLR and not working at full aperture, study the stopped-down image with the preview button to see what the highlights will look like.
The quality of the out-of-focus blur can be important. For the best results, aim for any blurs in the image to be smoothly graduated. Some of the smoothest blurs come from macro lenses, which are ideal for this type of work.