PeopleTools 8.51 PeopleBook: Integration Broker Testing
138
PeopleTools 8.51 PeopleBook: Integration Broker Testing Utilities and Tools August 2010
Transcript of PeopleTools 8.51 PeopleBook: Integration Broker Testing
PeopleTools 8.51 PeopleBook: Integration Broker Testing Utilities and Tools
August 2010

PeopleTools 8.51 PeopleBook: Integration Broker Testing Utilities and ToolsSKU pt8.51tibt-b0810
Copyright © 1988, 2010, Oracle and/or its affiliates. All rights reserved.
Trademark Notice
Oracle is a registered trademark of Oracle Corporation and/or its affiliates. Other names may be trademarks of their respective owners.
License Restrictions Warranty/Consequential Damages Disclaimer
This software and related documentation are provided under a license agreement containing restrictions on use and disclosure and are protected by intellectual property laws. Except as expressly permitted in your license agreement or allowed by law, you may not use, copy, reproduce, translate, broadcast, modify, license, transmit, distribute, exhibit, perform, publish or display any part, in any form, or by any means. Reverse engineering, disassembly, or decompilation of this software, unless required by law for interoperability, is prohibited.
Warranty Disclaimer
The information contained herein is subject to change without notice and is not warranted to be error-free. If you find any errors, please report them to us in writing.
Restricted Rights Notice
If this software or related documentation is delivered to the U.S. Government or anyone licensing it on behalf of the U.S.Government, the following notice is applicable:
U.S. GOVERNMENT RIGHTS
Programs, software, databases, and related documentation and technical data delivered to U.S. Government customers are "commercial computer software" or "commercial technical data" pursuant to the applicable Federal Acquisition Regulation and agency-specific supplemental regulations. As such, the use, duplication, disclosure, modification, and adaptation shall be subject to the restrictions and license terms set forth in the applicable Government contract, and, to the extent applicable by the terms of the Government contract, the additional rights set forth in FAR 52.227-19, Commercial Computer Software License (December 2007). Oracle USA, Inc., 500 Oracle Parkway, Redwood City, CA 94065.
Hazardous Applications Notice
This software is developed for general use in a variety of information management applications. It is not developed or intended for use in any inherently dangerous applications, including applications which may create a risk of personal injury. If you use this software in dangerous applications, then you shall be responsible to take all appropriate fail-safe, backup, redundancy and other measures to ensure the safe use of this software. Oracle Corporation and its affiliates disclaim any liability for any damages caused by use of this software in dangerous applications.
Third Party Content, Products, and Services Disclaimer
This software and documentation may provide access to or information on content, products and services from third parties. Oracle Corporation and its affiliates are not responsible for and expressly disclaim all warranties of any kind with respect to third party content, products and services. Oracle Corporation and its affiliates will not be responsible for any loss, costs, or damages incurred due to your access to or use of third party content, products or services.
Copyright © 1988, 2010, Oracle and/or its affiliates. All Rights Reserved. iii
Contents
Preface
PeopleSoft Integration Broker Testing Utilities and Tools Preface ......................................................... ix
PeopleSoft Integration Broker Testing Utilities and Tools ............................................................................ ixPeopleBooks and the PeopleSoft Online Library ........................................................................................... ix
Chapter 1
Getting Started with PeopleSoft Integration Testing Utilities and Tools ................................................. 1
PeopleSoft Integration Testing Utilities and Tools Overview ......................................................................... 1PeopleSoft Integration Testing Utilities and Tools Implementation ............................................................... 2
Chapter 2
Using the Send Master Utility ...................................................................................................................... 5
Understanding Send Master ............................................................................................................................. 5Starting Send Master ....................................................................................................................................... 6
Starting Send Master from the Integration Broker SDK ........................................................................... 6Starting the Stand-Alone Version of Send Master .................................................................................... 6Starting Send Master in Pre-PeopleTools 8.48 Mode ............................................................................... 7
Navigating in Send Master .............................................................................................................................. 7Using Send Master Menus ....................................................................................................................... 7Using the Project Work Space ................................................................................................................. 8Using the Send Master Batch Work Space ............................................................................................ 11
Setting Display Preferences .......................................................................................................................... 13Setting the Display Font, Size and Color ................................................................................................ 14Setting the Background Color ................................................................................................................ 14Setting Word-Wrapping Options ........................................................................................................... 15
Setting HTTP Proxy and Keystore Options .................................................................................................. 15Setting Batch Processing Options .......................................................................................................... 17
Creating Send Master Projects ...................................................................................................................... 18Understanding Send Master Project Types ............................................................................................ 18Creating Send Master Projects ............................................................................................................... 20
Entering Header Information in Send Master Projects ................................................................................. 21Adding Input Files to Projects ...................................................................................................................... 22Using Input File Projects .............................................................................................................................. 23

Contents
iv Copyright © 1988, 2010, Oracle and/or its affiliates. All Rights Reserved.
Creating Input File Project Types .......................................................................................................... 23Adding Header Information to Input File Projects .................................................................................. 23Creating and Adding Input Files to Input File Projects ......................................................................... 24Posting Input File Projects to Web Servers ............................................................................................ 24
Using Integration Broker Projects ................................................................................................................. 24Understanding Integration Broker Project Types ................................................................................... 25Understanding Input Information for Integration Broker Projects ......................................................... 25Creating Integration Broker Project Types ............................................................................................ 30Adding PeopleSoft Header Information to Integration Broker Projects ................................................ 30Adding Input Files to Integration Broker Projects ................................................................................. 31Specifying Connector Information for Integration Broker Projects ....................................................... 31Posting Integration Broker Projects ....................................................................................................... 33Viewing Output from Integration Broker Projects ................................................................................. 33
Using EIP Testing Projects ........................................................................................................................... 33Creating EIP Testing Project Types ....................................................................................................... 33Specifying File Input and File Output Directories ................................................................................. 34Overriding Requesting and Destination Nodes ...................................................................................... 34Posting EIP Testing Projects .................................................................................................................. 34Viewing Output from EIP Testing Projects ........................................................................................... 34Using the Batch Project Executor .......................................................................................................... 35
Using JMS Projects ....................................................................................................................................... 36Understanding JMS Projects .................................................................................................................. 36Understanding Input Information for JMS Projects ............................................................................... 37Creating JMS Project Types ................................................................................................................... 38Adding Header Information to JMS Projects ......................................................................................... 38Adding Input Files to JMS Projects ....................................................................................................... 39Posting JMS Projects .............................................................................................................................. 39Viewing Output from JMS Projects ....................................................................................................... 39
Working With Groups of Projects ................................................................................................................. 39Creating Groups of Projects ................................................................................................................... 39Managing Groups of Projects ................................................................................................................. 40Testing Groups of Projects ..................................................................................................................... 41Viewing Test Output .............................................................................................................................. 41Sharing Projects and Groups .................................................................................................................. 42
Using Send Master to Ping Remote Nodes ................................................................................................... 43Viewing Send Master Processing Performance Statistics ............................................................................. 43
Enabling the Send Master Statistics Feature ........................................................................................... 44Accessing Send Master Processing Statistics .......................................................................................... 44Interpreting Send Master Processing Statistics ...................................................................................... 44Statistics Example ................................................................................................................................... 45
Using Send Master to Export Request Service Operations ........................................................................... 46Exporting Request Service Operations ................................................................................................... 46
Allocating Additional Memory to Accommodate Posting Large Files ........................................................ 47

Contents
Copyright © 1988, 2010, Oracle and/or its affiliates. All Rights Reserved. v
Chapter 3
Using the Simple Post Utility ..................................................................................................................... 49
Understanding the Simple Post Utility .......................................................................................................... 49Prerequisites .................................................................................................................................................. 49
Software Requirements .......................................................................................................................... 49Setting Environment Variables .............................................................................................................. 49
Accessing the Simple Post Class .................................................................................................................. 50Using the Simple Post Class ......................................................................................................................... 50
Usage ....................................................................................................................................................... 50Syntax ...................................................................................................................................................... 50Parameters ............................................................................................................................................... 51
Using the Simple Post Utility Using a Java API ........................................................................................... 53Constructing a Java File Containing Simple Post Parameters ................................................................ 53Compiling the Java File ........................................................................................................................... 55Running the Test Program ...................................................................................................................... 55
Posting Third-Party XML Messages to the Integration Gateway ................................................................. 55Posting XML Messages to the Integration Gateway ............................................................................... 55Simple Post Submission Examples ......................................................................................................... 56
Pinging Remote Nodes ................................................................................................................................. 56Increasing the Java Heap Size to Accommodate Posting Large Files .......................................................... 57
Understanding Increasing the Java Heap Size ....................................................................................... 57Increasing the Java Heap Size on Oracle WebLogic Web Servers ........................................................ 57Increasing the Java Heap Size on IBM WebSphere Web Servers ......................................................... 58
Chapter 4
Using Automated Integration Point Testing ............................................................................................. 59
Understanding Automated Integration Point Testing .................................................................................... 59Process Overview ................................................................................................................................... 59Uses for Automated Integration Point Testing ....................................................................................... 60
Understanding Tools Used in Automated Integration Point Testing ............................................................ 62Integration Point Data Repository .......................................................................................................... 62EIP Gateway Manager ........................................................................................................................... 63Integration Gateway Properties File ....................................................................................................... 63Integration Point Test Service Operation Transaction Properties File ................................................... 64Send Master ............................................................................................................................................ 65Message Export Command Line Tool ................................................................................................... 66Hash Key Generator Command Line Tool ............................................................................................ 68Node Map Properties File ...................................................................................................................... 68
Recording Service Operation Transactions ................................................................................................... 69

Contents
vi Copyright © 1988, 2010, Oracle and/or its affiliates. All Rights Reserved.
Playing Back Service Operation Transactions .............................................................................................. 71Inbound Playback ................................................................................................................................... 71Outbound Playback ................................................................................................................................ 71
Chapter 5
Using the Transformation Test Utility ...................................................................................................... 75
Understanding the Transformation Test Utility ............................................................................................. 75Prerequisites ................................................................................................................................................... 75Running the Transformation Test Utility ...................................................................................................... 75Running the Sample Transformation Test Project ......................................................................................... 77
Chapter 6
Using the Handler Tester Utility ............................................................................................................... 79
Understanding the Handler Tester Utility ..................................................................................................... 79Integration Events to Test Using the Handler Tester .............................................................................. 80Testing Application Engine Handlers ..................................................................................................... 80Testing Bulk Load Handlers ................................................................................................................... 80Process Overview .................................................................................................................................... 80Common Elements Used in This Chapter ............................................................................................... 80
Accessing the Handler Tester Utility ............................................................................................................ 81Selecting Service Operations and Service Operation Versions .................................................................... 82
Selecting Service Operations .................................................................................................................. 83Selecting Handlers to Test ............................................................................................................................ 83Populating Message Data .............................................................................................................................. 83
Understanding Populating Message Data ............................................................................................... 84Using Operation Transaction Data from the Application Database ........................................................ 84Manually Entering Field Values ............................................................................................................ 86Manually Entering XML Data ................................................................................................................ 87Uploading XML Data from Files ............................................................................................................ 88Populating Rowset-Based Message Parts in Container Messages .......................................................... 90
Saving Test Data ........................................................................................................................................... 91Saving Data Located in Tree Views ........................................................................................................ 92Saving Manually-Entered XML Data ..................................................................................................... 92
Cloning and Deleting Record Structures ...................................................................................................... 92Cloning Record Structures ...................................................................................................................... 92Deleting Record Structures ..................................................................................................................... 93
Specifying Target Connectors and Target Connector Properties .................................................................. 93Specifying Target Connectors ................................................................................................................. 93Specifying Connector Properties ............................................................................................................. 94
Running Handler Tests and Viewing Test Results ....................................................................................... 94

Contents
Copyright © 1988, 2010, Oracle and/or its affiliates. All Rights Reserved. vii
Executing Handler Tests ......................................................................................................................... 94Viewing Test Results .............................................................................................................................. 95
Clearing Test Data ........................................................................................................................................ 96Clearing Rowset-Based Message Data ................................................................................................... 96Clearing Nonrowset-Based Message Data .............................................................................................. 97
Chapter 7
Using the Schema Tester Utility ................................................................................................................ 99
Understanding the Schema Tester Utility ..................................................................................................... 99Prerequisites .................................................................................................................................................. 99Accessing the Schema Tester Utility ............................................................................................................ 99Validating Messages Against Message Schemas During Development ..................................................... 100
Chapter 8
Using the Generate SOAP Template Utility ............................................................................................ 103
Understanding the Generate SOAP Template Utility .................................................................................. 103Prerequisites .......................................................................................................................................... 103
Accessing the Generate SOAP Template Utility ......................................................................................... 103Generating SOAP Templates ....................................................................................................................... 104Viewing the Generated Soap Template ....................................................................................................... 105Invoking Service Operations from the Generate SOAP Template Utility ................................................... 106
Chapter 9
Using the Service Operation Tester Utility .............................................................................................. 109
Understanding the Service Operation Tester Utility .................................................................................... 109Prerequisites for Using the Service Operation Tester Utility ...................................................................... 109
Common Elements Used in This Chapter ............................................................................................. 110Accessing the Service Operation Tester Utility ........................................................................................... 110Selecting Service Operations to Test ........................................................................................................... 111Specifying Future-Dated Asynchronous Service Operations ...................................................................... 112Populating Message Data ............................................................................................................................. 112
Understanding Populating Message Data ............................................................................................. 113Manually Entering XML to Populate Message Data ............................................................................ 113Uploading XML Data from Files to Populate Message Data ............................................................... 113Manually Entering Field Values to Populate Message Data ................................................................. 115Assigning PSCAMA Record Values and Audit Actions to Records .................................................... 117
Populating Rowset-Based Message Parts in Container Messages ............................................................... 117Saving Message Data ................................................................................................................................... 119

Contents
viii Copyright © 1988, 2010, Oracle and/or its affiliates. All Rights Reserved.
Saving Data Located in Tree Views ...................................................................................................... 119Saving Manually-Entered XML Data ................................................................................................... 120
Cloning and Deleting Record Structures .................................................................................................... 120Cloning Record Structures .................................................................................................................... 120Deleting Record Structures ................................................................................................................... 121
Overriding Target Connector Properties ..................................................................................................... 121Specifying Target Connectors ............................................................................................................... 121Specifying Connector Properties ........................................................................................................... 122
Invoking Test Service Operations ................................................................................................................ 123Viewing Test Service Operation Results ..................................................................................................... 123
Viewing Results in the Return Message/Results Section ...................................................................... 123Viewing Results in the Returned IB Info Page ..................................................................................... 123
Clearing Service Operation Test Data ......................................................................................................... 124Clearing Rowset-Based Message Data ................................................................................................. 124Clearing Nonrowset-Based Message Data ............................................................................................ 124
Index ............................................................................................................................................................ 125

Copyright © 1988, 2010, Oracle and/or its affiliates. All Rights Reserved. ix
PeopleSoft Integration Broker Testing Utilities and Tools Preface
This preface provides a general overview of the contents discussed in the PeopleSoft Integration Broker Testing Utilities and Tools PeopleBook.
PeopleSoft Integration Broker Testing Utilities and Tools
This PeopleBook describes how to use the following utilities and tools that are used in conjunction with PeopleSoft Integration Broker:
• Send Master utility.
• Simple Post utility.
• Automated integration point testing tools.
• Transformation Test Utility.
• Handler Tester utility.
• Schema Tester utility.
• Generate SOAP Template utility.
• Service Operation Tester utility.
PeopleBooks and the PeopleSoft Online Library
A companion PeopleBook called PeopleBooks and the PeopleSoft Online Library contains general information, including:
• Understanding the PeopleSoft online library and related documentation.
• How to send PeopleSoft documentation comments and suggestions to Oracle.
• How to access hosted PeopleBooks, downloadable HTML PeopleBooks, and downloadable PDF PeopleBooks as well as documentation updates.
• Understanding PeopleBook structure.
• Typographical conventions and visual cues used in PeopleBooks.
• ISO country codes and currency codes.
• PeopleBooks that are common across multiple applications.
• Common elements used in PeopleBooks.

Preface
x Copyright © 1988, 2010, Oracle and/or its affiliates. All Rights Reserved.
• Navigating the PeopleBooks interface and searching the PeopleSoft online library.
• Displaying and printing screen shots and graphics in PeopleBooks.
• How to manage the locally installed PeopleSoft online library, including web site folders.
• Understanding documentation integration and how to integrate customized documentation into the library.
• Application abbreviations found in application fields.
You can find this companion PeopleBook in your PeopleSoft online library.

Copyright © 1988, 2010, Oracle and/or its affiliates. All Rights Reserved. 1
Chapter 1
Getting Started with PeopleSoft Integration Testing Utilities and Tools
This chapter discusses implementing utilities and tools for testing integrations.
PeopleSoft Integration Testing Utilities and Tools Overview
This PeopleBook describes the following integration testing utilities and tools:
Send Master utility The Send Master utility enables you to test PeopleSoft Integration Broker messaging interactions with PeopleSoft and third-party web servers, application servers, and integration gateways. It can test listening connector functionality, target connector functionality, connector introspection and transactions.
Send Master enables you to post any data format, including the PeopleSoft Multipurpose Internet Mail Extensions (MIME) message format, to web and application servers over HTTP and HTTPS. You can also use Send Master to simultaneously test groups of different types of messages, as well as to stress test your system.
Send Master also enables you to perform Get functions and ping application messaging gateways and third-party servers.
Simple Post utility The Simple Post utility enables you to use shell scripts or a Java API to post XML messages from third-party systems to the integration gateway. The utility wraps the incoming messages in the PeopleSoft XML wrapper format and posts them to the HTTP listening connector.
The Simple Post utility reads ASCII, UTF-8 and UTF-16 file formats for incoming messages and converts them to UTF-8 format to send to the integrationgateway.

Getting Started with PeopleSoft Integration Testing Utilities and Tools Chapter 1
2 Copyright © 1988, 2010, Oracle and/or its affiliates. All Rights Reserved.
Integration point test automation tools
PeopleSoft provides a means for automated integration point testing. You can useautomated integration point testing to unit test, perform cross-application business process testing, or regression test integration points.
Automated integration point testing is suitable for testing integration points between different PeopleSoft systems, between PeopleSoft systems and third-party systems, and between PeopleSoft systems and open interfaces.
You can use automated integration point testing with the following PeopleSoft integration technologies:
• Service operations, including synchronous and asynchronous.
• Component interfaces.
• Flat files.
• Staging tables.
Handler Tester utility The Handler Tester enables you to test handlers by populating a service operationand executing the handler.
Transformation Test utility
PeopleSoft Integration Broker provides the Transform Test utility, which you canuse to test Application Engine transform programs without sending messages andwith minimal development effort.
Schema Tester utility The Schema Tester utility enables you to validate rowset-based and nonrowset-based messages in a service operation to determine if the messages adhere to defined message schemas.
Generate SOAP Template utility
The Generate SOAP Template allows you to generate a SOAP template for any service for which WSDL has been generated.
Service Operation Tester utility
The Service Operation Tester utility enables you to invoke a service operation.
PeopleSoft Integration Testing Utilities and Tools Implementation
The utilities and tools discussed in this PeopleBook are automatically installed with PeopleTools. Review the information provided in this section for additional requirements, prerequisites and considerations.
Implementing the Send Master Utility
To use the Send Master utility you should have an basic understanding PeopleSoft Integration Broker fundamentals, including:
• Integration gateway functionality.
• Target and listening connectors.

Chapter 1 Getting Started with PeopleSoft Integration Testing Utilities and Tools
Copyright © 1988, 2010, Oracle and/or its affiliates. All Rights Reserved. 3
• Integration messaging formats.
• Extensible Markup Language (XML).
• Multipurpose Internet Mail Extensions (MIME).
Prior to using the Send Master utility, verify that the following are set up:
• Integration gateway, including security and logging settings.
• Integration metadata, including:
• Messages.
• Nodes.
• Services.
• Service operations.
Implementing the Simple Post Utility
To use the Simple Post utility, you should understand the same Integration Broker fundamentals that are described in the previous section, Implementing the Send Master Utility. You should also verify that the integration gateway is set up, as well as integration metadata.
Implementing the Handler Tester
To use the handler tester, you will need to have handlers created and defined for the service operation.
Implementing the Transformation Test Utility
PeopleSoft provides a sample project, called PT_IBTRANSFORM_TEST, which you can use to run a sampletest using the utility. You can also use the utility to test transformation programs that you have developed.
Implementing the Schema Tester Utility
To use the Schema Tester Utility the following items must exist:
• A message schema against which to test a message.
The message schema can be built when you create the message or you can use the Message Schema Builder to build message schemas.
• A message in XML format to test against a schema.
In addition, to test a schema you must specify the integration gateway must be configured and the default application server must be configured.
Implementing the Generate SOAP Template Utility
To use the Generate SOAP Template Utility the following items must exist:
• Message schemas for all messages used in the service operation.

Getting Started with PeopleSoft Integration Testing Utilities and Tools Chapter 1
4 Copyright © 1988, 2010, Oracle and/or its affiliates. All Rights Reserved.
• The service operation contains an any-to-local routing.
• The WSDL for the service operation has been written to the WSDL Repository using Provide Web Services.
Implementing the Service Operation Tester Utility
To use the Service Operation Tester utility you must have a service operation created.
Other Sources of Information
In addition to implementation considerations presented in this section, take advantage of all PeopleSoft sources of information, including the installation guides, release notes, and PeopleBooks, including:
• PeopleTools 8.51 PeopleBook: PeopleSoft Integration Broker
• PeopleTools 8.51 PeopleBook: PeopleSoft Integration Broker Administration
• PeopleTools 8.51 PeopleBook: Integration Broker Service Operations Monitor
See Also
"PeopleSoft Integration Broker Testing Utilities and Tools Preface," page ix
PeopleTools 8.51 PeopleBook: Getting Started with Enterprise PeopleTools, "Getting Started with EnterprisePeopleTools Preface"

Copyright © 1988, 2010, Oracle and/or its affiliates. All Rights Reserved. 5
Chapter 2
Using the Send Master Utility
This chapter discusses the Send Master utility and describes how to:
• Start Send Master.
• Navigate in Send Master.
• Set display preferences.
• Set HTTP proxy and keystore options.
• Create Send Master projects.
• Enter header information in Send Master projects.
• Add input files to projects.
• Use input file projects.
• Use Integration Broker projects.
• Use EIP Test (Batch EIP) projects.
• Use JMS projects.
• Work with groups of projects.
• Ping remote nodes.
• View processing performance statistics.
• Export request messages for viewing.
• Allocate additional memory to accommodate posting large files.
Understanding Send Master
The Send Master utility enables you to test PeopleSoft Integration Broker service operation interactions with PeopleSoft and third-party web servers, application servers, and integration gateways. It can test listening connector functionality, target connector functionality, connector introspection and transactions.
Send Master enables you to post any data format, including the PeopleSoft Multipurpose Internet Mail Extensions (MIME) message format, to web and application servers over HTTP and HTTPS. You can also use Send Master to simultaneously test groups of different types of service operations, as well as stress test your system.

Using the Send Master Utility Chapter 2
6 Copyright © 1988, 2010, Oracle and/or its affiliates. All Rights Reserved.
Send Master also enables you to perform Get functions and to ping application messaging gateways and third-party servers.
Send Master is installed with the PeopleSoft Pure Internet Architecture on Windows and UNIX systems and is delivered as part of the Integration Broker Connector SDK. Send Master is also delivered as a Windows stand-alone batch file. The stand alone version enables you to use the utility without having to install an integration gateway.
Starting Send Master
You can start Send Master from the Integration Broker SDK or as a stand-alone version.
Note. The starting size of Send Master is 50 megabytes (MB) and Send Master starts showing issues with startup if other heavy processes like Oracle, eclipse or JDeveloper are running.
Starting Send Master from the Integration Broker SDK
The location of Send Master in the Integration Broker SDK depends on the on web server:
• For Oracle WebLogic the location is <PIA_HOME>\webserv\<DOMAIN>\<BIN>.
• For IBM WebSphere the location is <PIA_HOME>\webserv|<BIN>.
The name of the Send Master startup script on Windows is StartSendMaster.bat; the name of the script on UNIX is StartSendMaster.sh.
Starting the Stand-Alone Version of Send Master
The standalone version of Send Master is located in the <PS_HOME>\Sendmaster folder, and is named StartSendMaster.bat. If you attempt to launch the batch file and Send Master does not open, you most likely need to set PS_HOME in the environment variables on your machine.
To set PS_HOME in the environment variables:
1. Close any DOS windows that might be open.
2. Right-click My Computer and click Properties.
The System Properties dialog appears.
3. Click the Advanced tab.
4. In the Environment Variables section, click Environment Variables.
5. In the User variables for <user name> section, click New.
A New User Variable dialog box appears.
6. In the Variable Name field enter PS_HOME.
7. In the Variable Value field, enter the path to your <PS_HOME> directory (for example, c:\PT850).

Chapter 2 Using the Send Master Utility
Copyright © 1988, 2010, Oracle and/or its affiliates. All Rights Reserved. 7
8. Click OK.
The PS_HOME variable name and value appears in the User variables for <user name> section.
9. Click OK again and navigate to the standalone version of Send Master and double-click the StartSendMaster.bat file.
Starting Send Master in Pre-PeopleTools 8.48 Mode
PeopleSoft Integration Broker introduced its services-oriented architecture in PeopleTools 8.48.
You can use Send Master to test integrations created with the pre-PeopleTools 8.48 framework (PeopleTools 8.47 and earlier releases). To set Send Master for PeopleTools releases prior to PeopleTools 8.48, launch StartSendMaster.bat from the command line with 847 as the argument.
For example:
StartSendMaster.bat 847
Navigating in Send Master
Send Master features drop-down menus that you use to create, save and delete projects, and to change your user and display preferences. It also features Project and Batch Processing work spaces where you specify project parameters, view output, and so on.
You can navigate in Send Master using:
• Send Master menus.
• The Project work space.
• The Send Master Batch work space.
Using Send Master Menus
Send Master features two menus. This table describes the menus:
Menu Menu Option Shortcut Action
File New Project Alt + N Creates a new projects.
File Save Project Alt + S Saves the current project.
File Delete Project Alt + D Deletes the current project.

Using the Send Master Utility Chapter 2
8 Copyright © 1988, 2010, Oracle and/or its affiliates. All Rights Reserved.
Menu Menu Option Shortcut Action
File Batch Processing Alt + B Opens the Batch Processing work space.
File Preferences Alt + P Opens the Preferences dialog box, from which you can:
• Change user preferences.
• Specify proxy and keystore information.
• Specify the output directory and preferences for batch processing output.
File Export IBRequest Alt + E Exports a service operation request to a file.
File Exit Ctrl + E Closes Send Master.
Help About Send Master… None Displays Send Master version information.
Using the Project Work Space
When you open Send Master, the system displays the Project work space. You use the Project work space to define, modify, and test a Send Master project.

Chapter 2 Using the Send Master Utility
Copyright © 1988, 2010, Oracle and/or its affiliates. All Rights Reserved. 9
Project work space
The Send Master Project work space features the Project Definitions section, the Input Information section, and the Output Information section. No fields or buttons are enabled until you define or select a project.
Project Definition Section
Use the Project Definition section to add and define a new Send Master project. The information that you specify in this section includes the web server URL used in conjunction with Post and Get methods to work with service operations.
Input Information Section
Depending on the type of task that you are performing with Send Master, the Input Information section enables you to create and format MIME messages, as well as specify input files, destination nodes and more.

Using the Send Master Utility Chapter 2
10 Copyright © 1988, 2010, Oracle and/or its affiliates. All Rights Reserved.
You need to know the service operation format that the connectors, application servers, and so forth are expecting, and then incorporate the appropriate tags and components into the service operation transaction content. For example, to communicate with PeopleSoft systems, you must specify the service operation name with the version and requesting node.
This section features a toolbar with the following buttons:
Click the Open File button to open an existing file and display it in the Input Information area.
Click the Save File button to save the contents displayed in the Input Informationarea, using a filename and location that you specify.
Click the Save File As button to save the currently displayed file, using another name, location, or both, that you specify.
Click the Refresh the Current File button to reload and display the last saved version of the current file.
Click the Remove File Reference button to delete the contents of the Input Information area.
Click the If Valid XML, Format button to format the code displayed in the section to make it more readable. This button is valid only if the file displayed is an XML file.
Output Information Section
The Output Information section displays information that the system returns when you perform a GET or POST on a web server.
When you work with MIME messages, you can use the provided View drop-down list and choose whether to view the entire raw message response, message metadata, or individual sections of the response.
When you work with message types other than MIME, you can view the raw message response only.
This section features a toolbar with the following buttons:
Click the View Header Information button to display the HTTP headers returned during a POST or GET.
Click the Save Output button to save the information in the Output Information section using a filename and location that you specify.
Click the If Valid XML, Format button to format the code displayed in the section to make it more readable. This button is valid only if the file displayed is an XML file.
Click the Clear Output button to delete the contents of the Output Information area.

Chapter 2 Using the Send Master Utility
Copyright © 1988, 2010, Oracle and/or its affiliates. All Rights Reserved. 11
Using the Send Master Batch Work Space
The Send Master Batch work space enables you to test groups of projects, as well as stress test a project or group of projects. You can access the Batch Processing work space by starting Send Master, opening an EIP Testing (Batch EIP) project and selecting File, Batch Processing.
Batch Processing work space
The Batch Processing work space features these sections:
• Group Definition
• Group Projects
• Completed Projects Output
• Output Information

Using the Send Master Utility Chapter 2
12 Copyright © 1988, 2010, Oracle and/or its affiliates. All Rights Reserved.
Group Definitions Section
You use the Group Definitions section to create, select, or delete a group of projects. You can also use this section to specify whether to run the projects in the group all at once, in sequence, or at intervals that you specify.
This section features these two buttons:
Click the Start Projects button to start processing the defined group.
Click the Stop Projects button to stop processing the defined groups.
Group Projects Section
You use the Group Projects section to add, remove, and arrange projects in a group. For each project that you add to a group, you can select the method to invoke, such as GET or POST. You can also specify the number of times to run each project, and specify whether to run project instances all at once, in sequence, or at defined intervals.
This section features a toolbar with the following buttons:
Click the Add a New Project button to add a project to the group.
Click the Delete Selected Project button to delete the selected project from the group.
Click the Update Selected Project button to update the selected project with changes and modifications that were made to it since it was added to the group.
Click the Move Selected Project Up button to move the selected project up in the order sequence of projects in the group.
Click the Move Selected Project Down button to move the selected project down in the order sequence of projects in the group.
Completed Projects Output Section
The Completed Projects Output section provides processing information about each project in a group, including the number of project instances processed, total time to process all project instances, the average amount of time to process a project instance, and more.
This section features a toolbar with the following buttons:

Chapter 2 Using the Send Master Utility
Copyright © 1988, 2010, Oracle and/or its affiliates. All Rights Reserved. 13
Click the Export Results to File button to display a text file that contains processing information about the completed project, such as the number of service operations processed, the total time to process the service operations, the average time to process a service operation, and so forth.
Click the Clear Results button to clear the contents currently displayed.
Output Information Section
The Output Information section displays information that the system returns when you perform a Get or Post on a web server.
When you work with MIME messages, you can use the View drop-down list to view the entire raw message response, message metadata, or individual sections of the response.
When you are working with message types other than MIME, you can view the raw message response only.
This section features a toolbar with the following buttons:
Click the View Header Information button to display only the contents within theheader tags of the selected message.
Click the Save Output button to save the contents of the Output Information area,using a filename and location that you specify.
Click the If Valid XML, Format button to format the code displayed in the section to make the contents more readable. This button is valid only if the file displayed is an XML file.
Click the Clear Output button to delete the contents of the Output Information area.
Setting Display Preferences
You can set these display preferences for Send Master:
• Display font, size, and color.
• Background color.
• Word-wrapping options.
To set display preferences, use the Display tab of the Preferences dialog box. To access this box, select File, Preference and click the Display tab.

Using the Send Master Utility Chapter 2
14 Copyright © 1988, 2010, Oracle and/or its affiliates. All Rights Reserved.
Display tab of the Preferences dialog box
Setting the Display Font, Size and Color
To set the display font, size and color:
1. Access the Preferences dialog box and click the Display tab.
2. Set the display font, size and color.
• To set the display font, in the Fonts section, from the Font drop-down list, select a font style.
• To set the font size, in the field next to the font style, enter a font size.
• To set the text color, in the Text Color field, click the color block.
The Choose the Text Color box appears, from which you can select a color for the font.
3. Click OK to save the changes.
Setting the Background Color
This section describes how to set the background color of Send Master work spaces and sections.
To set the background color:
1. Access the Preferences dialog box and click the Display tab.

Chapter 2 Using the Send Master Utility
Copyright © 1988, 2010, Oracle and/or its affiliates. All Rights Reserved. 15
2. In the Font section, in the Background Color field, click the color block.
The Choose the Text Background Color box appears, from which you can select a background color and click OK.
3. Click OK to save the changes.
Setting Word-Wrapping Options
You can enable or disable word wrapping in Send Master input and output sections.
To set word-wrapping options:
1. Access the Preferences dialog box and click the Display tab.
2. In the Word Wrap section, enable or disable word wrapping.
• To enable word wrapping in input windows, select Input Text Windows.
• To enable word wrapping in output windows, select the Output Text Windows.
3. Click OK to save the changes.
Setting HTTP Proxy and Keystore Options
You can set up HTTP proxy and keystore options for use with Send Master. You set these options on the HTTP tab of the Preferences dialog box. To access the dialog box, select File, Preferences.

Using the Send Master Utility Chapter 2
16 Copyright © 1988, 2010, Oracle and/or its affiliates. All Rights Reserved.
HTTP tab of the Preferences dialog box
Specifying HTTP Proxy Settings
To specify HTTP proxy settings for Send Master:
1. Access the Preferences dialog box and click the HTTP tab.
2. In the Proxy section of the dialog box, specify the following information:
a. In the Host field enter the name of the proxy host.
b. In the Port field, enter the appropriate port number.
3. Click the OK button.
Specifying Keystore Settings
To specify keystore settings for Send Master:
1. Access the Preferences dialog box and click the HTTP tab.
2. In the Keystore section of the dialog box, specify the following information:
a. In the Certificate Alias field, enter the certificate alias.
b. In the Certificate Password field, enter the encrypted certificate password.
c. In the Keystore File field, click the folder icon to specify a keystore file.
d. In the Keystore Password field, enter the encrypted password for the keystore.

Chapter 2 Using the Send Master Utility
Copyright © 1988, 2010, Oracle and/or its affiliates. All Rights Reserved. 17
3. Click the OK button.
Setting Batch Processing Options
You use the Batch Processing tab to set output directory options related to the projects with which you work in the Batch work space.
Batch Processing tab of the Preferences dialog box
Directory Specify the output directory for Batch project results.
Create if not found Select this check box to create the directory specified in the Directory field if it does not exist.
Overwrite files Select this check box to overwrite files of the same name in the output directory.
Delete directory before each run
Select this check box to delete the contents of the directory before you run each batch project.
Delete directory on exit Select this check box to delete the contents of the directory each time that you exit the Batch work space.

Using the Send Master Utility Chapter 2
18 Copyright © 1988, 2010, Oracle and/or its affiliates. All Rights Reserved.
Creating Send Master Projects
To test service operation and connector processing using Send Master, you use Send Master projects. A Send Master project is a collection of service operation components, values and parameters that defines what you want to test and how you want to test it.
Understanding Send Master Project Types
This table describes Send Master project types.
Input File The Input File project type enables you to test servers that are expecting XML data over HTTP(S).
Integration Broker (MIME)
The Integration Broker (MIME) project type enables you to test servers that are expecting MIME data over HTTP or HTTPS. Use this project type to test service operation and connector processing using the PeopleSoft listening connector and for integrations with systems that expect MIME data.
This project type is referred to as the Integration Broker (MIME) project type throughout this chapter.
Integration Broker (XML)
The Integration Broker (XML) project type enables you to test servers that expectXML data in PeopleSoft format over HTTP or HTTPS. Use this project type to test service operation and connector processing using the HTTP listening connector and for integrations with systems that expect IBRequest XML— formatted data.
This project type is referred to as the Integration Broker (XML) project type throughout this chapter.
EIP Testing (Batch EIP) The EIP Testing (Batch EIP) project type enables you to test batches of service operations from a file directory that you specify for automation testing, and enables you to test different transaction values.
This project type is referred to as the EIP Testing project type throughout this chapter.
JMS Project The JMS Project project type enables you to test and post synchronous and asynchronous service operations to JMS queues or topics.
This project type is referred to as the JMS project type throughout this chapter.
The following table describes the type of project to use based on the type of communication that you want to test.

Chapter 2 Using the Send Master Utility
Copyright © 1988, 2010, Oracle and/or its affiliates. All Rights Reserved. 19
Project Type Usage
Input File Use this project type to:
• Use the Get method to ensure that URLs are valid.
• Send non-PeopleSoft-formatted XML or MIME messages to web servers.
• Test SOAP messages with the HTTP listening connector or PeopleSoft Service listening connector.
• Test inbound and outbound transformations by posting non-XML data into PeopleSoft software.
• Test integration points with PeopleSoft 8.1x systems as well as those systems that do not adhere to the PeopleSoft message format.
Integration Broker (MIME) Use this project type to:
• Test PeopleSoft Integration Broker.
After you create service operations, you can quicklyadd a few required fields and test the integration point. Instead of setting up another PeopleSoft system, you can interact with Send Master to shorten development time.
• Test handlers.
For example, you can test OnRequest, OnSend and so forth.
• Test target connectors on the integration gateway, including specifying connector overrides.
For example, you can test an integration that needs to perform normal Integration Broker processing, but also output the file to disk. You can override thetarget connector and test the file creation process.
• Test attachments.
Integration Broker (XML) Use this project type to:
• Mimic an external system to test service operation processing using the HTTP listening connector.
• Export data into the PeopleSoft XML IBRequest format to provide samples of data that PeopleSoft Integration Broker expects in request service operations.

Using the Send Master Utility Chapter 2
20 Copyright © 1988, 2010, Oracle and/or its affiliates. All Rights Reserved.
Project Type Usage
EIP Testing You can use this project type to send a directory of MIME-formatted messages into PeopleSoft Integration Broker. This project type enables you to override requesting and destination nodes without having to alter every service operation.
JMS Use this project type to POST service operations to a JMS queue. This project type does not use the HTTP protocol, so no URL is provided.
Creating Send Master Projects
To create a Send Master project:
1. Launch Send Master.
2. Select File, New Project.
3. In the Project Name field, enter a name for the project.
4. From the Project Type drop-down list, select one of the following options:
• Input File
• Integration Broker (MIME)
• Integration Broker (XML)
• EIP Testing (Batch EIP)
• JMS Project
5. Click the OK button.
The system populates the Input Information section with various tabs, based on the project type that you selected.
6. In the Server URL field, enter the server URL of the server with which to communicate.
Note. This field is not used for JMS projects.
7. In the Time Out field, enter a timeout value.
The timeout value determines the amount of time Send Master attempts to process a service operation. If the request does not complete in the time specified, processing stops. Usual timeout is about 60 seconds. The default is 0 (zero), meaning there is no timeout.
8. In the Headers box, enter pertinent HTTP header information for the service operation.
9. Select File, Save Project.

Chapter 2 Using the Send Master Utility
Copyright © 1988, 2010, Oracle and/or its affiliates. All Rights Reserved. 21
The project name appears in the Project field and the type of the project appears in parentheses next to the project name. The content of the work space varies, based on the project type selected.
See Also
Chapter 2, "Using the Send Master Utility," Using Integration Broker Projects, page 24
Chapter 2, "Using the Send Master Utility," Using Input File Projects, page 23
Chapter 2, "Using the Send Master Utility," Using EIP Testing Projects, page 33
Chapter 2, "Using the Send Master Utility," Using JMS Projects, page 36
Entering Header Information in Send Master Projects
Send Master enables you to specify HTTP, IBInfo, and connector headers. These headers are used in association with the following project types:
• Input File
• Integration Broker (MIME)
• Integration Broker (XML
• JMS Project
Use the information in the following table as a guide for entering header information in Send Master.
Header Type Project Type Location Description
HTTP header • Input File
• Integration Broker (XML)
Note. An HTTP header field is present when working with EIP Testingprojects; however it is usually not used because you are using the PeopleSoft listening connector.
Project Definition section, Headers box.
Provides HTTP protocol header information about the service operation at the server level and relates to how you are sending an entire service operation. You can specify cookies, content-type, encoding, sending program information, andso forth.

Using the Send Master Utility Chapter 2
22 Copyright © 1988, 2010, Oracle and/or its affiliates. All Rights Reserved.
Header Type Project Type Location Description
Connector header Integration Broker (MIME)
Input Information section,Connector tab.
Provides required and optional headers that connectors need to pass information and process service operation requests. You can specifyinformation such as service operation compression, encoding, and so forth.
You can specify connector header information only while editing connector information in an Integration Broker (MIME) project type.
IBInfo header • Integration Broker (MIME)
• Integration Broker (XML)
Input Information section,Header Information, and Additional Header Cont. tabs.
Contains information that is required to route service operations through PeopleSoft Integration Broker, including service operation name, operationtype, requesting node, and so on.
Adding Input Files to Projects
The information in this section applies to all project types except for the EIP Testing project type.
When working with EIP Testing projects, you specify file input and file output directories.
See Chapter 2, "Using the Send Master Utility," Specifying File Input and File Output Directories, page 34.
To add an input file to a project:
1. In the Input Information section, click the Input File tab (if necessary).
2. (Optional.) Select Base64 encode/compress to enable base64 encoding and compression.
This option is not available when working with JMS projects.
3. (Optional.) Select Non Repudiation to enable nonrepudiation.
This option is not available when working with JMS projects.
Chapter 2 Using the Send Master Utility
Copyright © 1988, 2010, Oracle and/or its affiliates. All Rights Reserved. 23
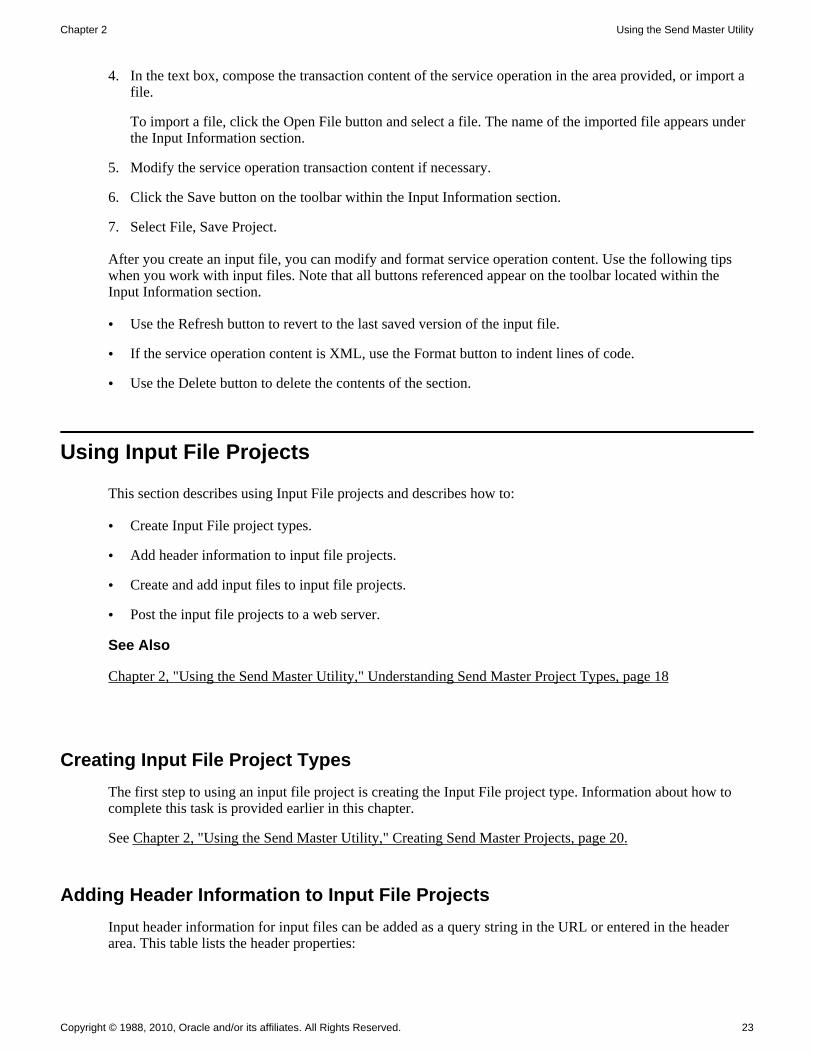
4. In the text box, compose the transaction content of the service operation in the area provided, or import a file.
To import a file, click the Open File button and select a file. The name of the imported file appears under the Input Information section.
5. Modify the service operation transaction content if necessary.
6. Click the Save button on the toolbar within the Input Information section.
7. Select File, Save Project.
After you create an input file, you can modify and format service operation content. Use the following tips when you work with input files. Note that all buttons referenced appear on the toolbar located within the Input Information section.
• Use the Refresh button to revert to the last saved version of the input file.
• If the service operation content is XML, use the Format button to indent lines of code.
• Use the Delete button to delete the contents of the section.
Using Input File Projects
This section describes using Input File projects and describes how to:
• Create Input File project types.
• Add header information to input file projects.
• Create and add input files to input file projects.
• Post the input file projects to a web server.
See Also
Chapter 2, "Using the Send Master Utility," Understanding Send Master Project Types, page 18
Creating Input File Project Types
The first step to using an input file project is creating the Input File project type. Information about how to complete this task is provided earlier in this chapter.
See Chapter 2, "Using the Send Master Utility," Creating Send Master Projects, page 20.
Adding Header Information to Input File Projects
Input header information for input files can be added as a query string in the URL or entered in the header area. This table lists the header properties:

Using the Send Master Utility Chapter 2
24 Copyright © 1988, 2010, Oracle and/or its affiliates. All Rights Reserved.
Header Label Description
From: Required. Identifies the node sending the service operation.
To: Optional. Identifies the receiving node.
If this header is not entered, it defaults to the default application server specified on the gateway.
OperationName: Required. Identifies the external service operation, including version. This must match the external operation in the routing definition.
OperationType: Required. Identifies the operation type sync,async, or ping.
OrigTimeStamp: Optional. Identifies a timestamp for this service operation.
SOAPAction: Optional. Identifies a SOAP action for this service operation.
NonRepudiation Optional. Identifies if nonrepudiation is enabled (True or False).
content-type: Identifies the content type for the service operation.
Creating and Adding Input Files to Input File Projects
Information about creating and adding an input file to a project is provided earlier in this chapter.
See Chapter 2, "Using the Send Master Utility," Adding Input Files to Projects, page 22.
Posting Input File Projects to Web Servers
After you create the Input File project type, add the input file to the project, and then click the Post button to post the file to the server.
Any server response to the service operation that you post appears in the Output Information section.
Using Integration Broker Projects
This section provides an overview of Integration Broker project types, and describes how to:
• Create Integration Broker project types (MIME and XML).
• Add header information to the project.
• Add an input file to the project.

Chapter 2 Using the Send Master Utility
Copyright © 1988, 2010, Oracle and/or its affiliates. All Rights Reserved. 25
• Specify connector information for the project.
• Specify attachments for the project.
• Post the project data to a web server.
Understanding Integration Broker Project Types
You can create two types of Integration Broker projects—an Integration Broker MIME project or an Integration Broker XML project.
When you create Integration Broker MIME projects, you use the Input Information section of the work space to supply Send Master with information to build the IBInfo section of the service operation. In addition, you also use the section to specify connector information, add cookie information, specify destination nodes, and so on. PeopleSoft Integration Broker uses the information to build the MIME structure in service operations that are required to communicate with the PeopleSoft listening connector.
For Integration Broker XML projects, Integration Broker uses the information to build the IBRequest.
See Also
Chapter 2, "Using the Send Master Utility," Understanding Send Master Project Types, page 18
Understanding Input Information for Integration Broker Projects
This section discusses the options you can define when working with Integration Broker MIME and Integration Broker XML project types.
Header Information Tab
Use the Header Information tab to create service operation headers. This table describes the controls on the tab:
Requesting Node Identifies the name of the node that is making the request.
Ext Operation Name Identifies the service operation and version. This matches the External Operation on the routing definition parameters page.
Operation Type Identifies the operation type. Values are:
• Sync: Specifies that the service operation you are testing is synchronous.
• Async: Specifies that the service operation you are testing is asynchronous.
• Ping: Tests the application server to make sure it is available and accepting requests.

Using the Send Master Utility Chapter 2
26 Copyright © 1988, 2010, Oracle and/or its affiliates. All Rights Reserved.
App Serv Domain (Optional.) Identifies the application server and domain that will receive the service operation.
Password (Optional.) Identifies the password as entered in the node definition, if password authentication is used.
Originating Node (Optional.) Identifies the name of the node that started the process.
Originating Process (Optional.) Identifies the name of the process where the publish event originated. For example, a service operation published from the Inventory definitions page would have a process name of INVENTORY DEFIN.
Originating User (Optional.) Identifies the user ID login from where the service operation was initially generated.
Queue (Optional.) Identifies the name of the queue expecting the service operation.
Sub Queue (Optional.) Identifies subprocesses for the queue.
Visited Nodes (Integration Broker MIME project type only)
(Optional.) Identifies nodes through which the service operation has passed. Separate the values by semicolons.
Visited nodes enable you to mimic visited node information populated when sending PeopleSoft service operations through PeopleSoft Integration Broker.
Destination Node (Optional.) Identifies destination node for the service operation.
Final Destination Node (Optional.) Identifies the final destination node. Use this option when working with a hub configuration.
Transaction ID (Optional.) Identifies a transaction ID for this service operation.
External Message ID (Optional.) A unique ID to eliminate duplicate service operations from being delivered to PeopleSoft Integration Broker. The maximum length is 70 characters.
Conversation ID (Optional.) Identifies a conversation ID for this service operation.
Headers Cont. Tab
You can work with the following controls on this tab.
Note. This tab appears only when you are working with Integration Broker MIME projects.
Cookies (Optional.) Identifies cookies that the server might require. Use semicolons to separate multiple cookies.

Chapter 2 Using the Send Master Utility
Copyright © 1988, 2010, Oracle and/or its affiliates. All Rights Reserved. 27
Gather Statistics Select this check box to gather statistics about system performance when posting service operations using Send Master.
See Chapter 2, "Using the Send Master Utility," Using Send Master to Export Request Service Operations, page 46.
Input File Tab
Use this tab to add input files. You can also use this tab to apply nonrepudiation, and base64 encoding and compression. This section describes the controls featured on this tab. Controls that appear on this tab that are not described in this section are documented earlier in this chapter.
See Chapter 2, "Using the Send Master Utility," Navigating in Send Master, page 7.
This table describes the controls on the Input File tab:
Base 64 Encode/ Compress
(Optional.) Select this check box to apply base64 encoding and compression to the service operation.
Non-repudiation (Optional.) Select this check box to apply nonrepudiation to the service operation.
Connector Tab
This tab appears only when you are working with the Integration Broker MIME project type.

Using the Send Master Utility Chapter 2
28 Copyright © 1988, 2010, Oracle and/or its affiliates. All Rights Reserved.
Connector tab
The Connector tab enables you to perform connector introspection on the integration gateway so you can select from all target connectors loaded on the integration gateway. No fields or controls are active on this tabuntil you enter connector data and select a target connector.
After you select a target connector, you can select specific target connector properties to use and define those property values. In addition, you can specify and define headers and fields that a selected connector needs to be able to pass information and invoke service operation requests.
Note. Header properties with which you work on this tab correspond to properties with the property IDHeaders in PeopleSoft Pure Internet Architecture. Field properties with which you work on this tab correspond to any property ID other than Header in PeopleSoft Pure Internet Architecture.
This table describes the controls on the Connector tab:
Click the Load Introspection Data button to load all target connectors that are currently installed on the integration gateway.
Chapter 2 Using the Send Master Utility
Copyright © 1988, 2010, Oracle and/or its affiliates. All Rights Reserved. 29
Click the Refresh button to apply and make available in Send Master any changes that you make to target connector properties on the integration gateway.
Connector Select a connector from the drop-down list.
The default is <None>.
You must first click the Load Introspection Data button for any connectors to appear in the list.
Remote URL Enter a URL to redirect service operations to a different URL that is specified in the Server URL field in the Project Definitions section.
Headers Box This area displays the headers, and the current values assigned to them, that you have selected for the target connector.
Fields Box This area displays the fields, and the current values assigned to them, that you have selected for the target connector.
Value Enter the value for the selected header or field.
Click the Update Selected Header/Field Value in List button to apply the value inthe Value field to the selected field or header in the Headers box or the Fields box.
Click the Delete button to delete the header or field that is selected in the Headersbox or the Fields box.
Value Default header and field values appear in this field.
Enter the desired value for the selected header or field in the Headers box or the Fields box.
Click the Add Selected Header/Field and Value button to add the header in the Header field and its default value to the Headers box, or to add the field in the Field field and its default value to the Fields box.
Click the Add All Required Headers/Fields and Their Default Values button to add all of the required headers or fields for the selected target connector and theirdefault values to the Headers box or the Fields box.
Header Use the Header drop-down list to select a value from all defined headers for the selected target connector.
When you select a header from the list, its default value, if one exists, appears in the Value field.
The Header drop-down list appears only when you work with the Headers subtab.

Using the Send Master Utility Chapter 2
30 Copyright © 1988, 2010, Oracle and/or its affiliates. All Rights Reserved.
Field Use the Field drop-down list to select a value from all defined fields for the selected target connector.
When you select a field from the list, its default value, if one exists, appears in the Value field.
The Field drop-down list appears only when you work with the Fields subtab.
Value The Value field displays the default value, if one exists, for any selected header or field.
Use the drop-down list to view and select header and field values.
After you select a value in the list, click the Add Header button or the Add Field button to change the value in the value text box, or reenter the value that you want to apply in the box.
Attachment Sec tab
Use this tab to test attachments. This table describes the controls on the Attachment Sec tab:
Content ID Identifies the content ID for the attachment.
Content Url Identifies the content URL for the attachment.
Content Encoding Identifies the encoding used in the attachment.
Content Base Identifies the base property for the attachment.
Content Location Identifies the content location for the attachment.
Content Disposition Identifies the disposition of the attachment.
Content Language Identifies the language for the attachment.
Content Disposition Identifies the disposition of the attachment.
Creating Integration Broker Project Types
The first step to using an Integration Broker project is creating the Integration Broker project type. Information about how to complete this task is provided earlier in this chapter.
See Chapter 2, "Using the Send Master Utility," Creating Send Master Projects, page 20.
Adding PeopleSoft Header Information to Integration Broker Projects
To add PeopleSoft header information to the project:
1. In the Input Information section, select the Header Information tab, if it is not already selected:

Chapter 2 Using the Send Master Utility
Copyright © 1988, 2010, Oracle and/or its affiliates. All Rights Reserved. 31
2. Complete the following required fields:
• Requesting Node
• External Operation Name
• Operation Type
3. Enter values in any of the remaining optional fields as appropriate for your project.
4. (Optional.) Click the Headers Cont. tab to add cookie information or to gather messaging statistics.
See Also
Chapter 2, "Using the Send Master Utility," Entering Header Information in Send Master Projects, page 21
Adding Input Files to Integration Broker Projects
Information about creating and adding an input file to a project is provided earlier in this chapter.
See Chapter 2, "Using the Send Master Utility," Adding Input Files to Projects, page 22.
Specifying Connector Information for Integration Broker Projects
This section discusses how to specify connector information for Integration Broker MIME projects.
To specify connector information for a project, use the Connector tab in the Input Information section of the Project work space. No fields or controls are active on the tab until you introspect target connector data and select a target connector with which to work.
As noted earlier in this section, header properties with which you work on the Connector tab correspond to properties with the property IDHeaders in the PeopleSoft Pure Internet Architecture. Field properties with which you work on this tab correspond to any property ID other than Header in the PeopleSoft Pure Internet Architecture.
Selecting Target Connectors
To select a target connector:
1. From an open Integration Broker MIME project, in the Input Information section, click the Connector tab.
2. Click the Load Introspection Data button.
3. From the Connector drop-down list, select a connector.
4. (Optional.) In the Remote URL field, enter a URL to redirect the service operation to a different URL than that specified in the Server URL field in the Project Definitions section.
Adding Connector Header Properties
To add connector headers properties:

Using the Send Master Utility Chapter 2
32 Copyright © 1988, 2010, Oracle and/or its affiliates. All Rights Reserved.
1. Click the Headers subtab under the Remote URL field.
2. To add all required header properties for the selected connector, click the Add All Required Headers and Their Default Values button.
All required header properties and their default values, if they exist, appear in the Headers box.
3. To add more header properties:
a. In the Connector Header section, from the Header drop-down list, select a header property and click the Add Selected Header and Default Value button.
When you select a header property from the list, its default value, if any, appears in the Value field. Click the Value drop-down list to view all possible values for the property.
b. Click the Add Selected Header and Default Value button to add the property.
The header property and its default value, if any, appear in the Headers box.
4. To change the value of a header property:
a. In the Headers box, select the header property whose value you want to change.
b. In the Value field, enter the new value to assign.
Use the Value drop-down list in the Connector Headers section to view possible values and verify the format to enter.
c. Click the Update Selected Value in List button to apply the new value.
5. To delete a header property, in the Headers box, select the property to delete and click the Delete button.
6. Save the project.
Adding Connector Field Properties
To add connector field properties:
1. Click the Fields subtab under the Remote URL field.
2. To add all required field properties for the connector, click the Add All Required Fields and Their DefaultValues button.
All required field properties and their default values, if they exist, appear in the Fields box.
3. To add more field properties:
a. In the Connector Fields section, from the Field drop-down list, select a field property, and click the Add Selected Fields and Default Value button.
When you select a property from the drop-down list, its default value, if any, appears in the Value field. Click the Value drop-down list to view all possible values for the property.
b. Click the Add Selected Field and Default Value button to add the property.
The field property and its default value, if one exists, appears in the Fields box.
Chapter 2 Using the Send Master Utility
Copyright © 1988, 2010, Oracle and/or its affiliates. All Rights Reserved. 33
4. To change the value of a field property:
a. In the Fields box, select the field property whose value you want to change.
b. In the Value field, enter the new value.
Use the Value drop-down list in the Connector Fields section to view possible values and verify the format to enter.
c. Click the Update Selected Value in List button to apply the new value.
5. To delete a field property, in the Fields box, select the property to delete and click the Delete button.
6. Save the project.
Posting Integration Broker Projects
To post Integration Broker MIME or Integration Broker XML projects to web servers, click the Post button.
Viewing Output from Integration Broker Projects
When you POST a service operation using the Integration Broker project type, the system generates a MIME response message. If you POST data to a PeopleSoft listening connector, the MIME response message appears in the Output Information section of the Project work space.
Using EIP Testing Projects
This section describes how to:
• Create EIP Testing projects.
• Specify file input and output directories.
• Override requesting and destination nodes.
• Start batch processing.
• Use the Batch Project Executor Command Line Tool
Creating EIP Testing Project Types
The first step to using an EIP Testing project is creating the EIP Testing (Batch EIP) project type. To create a project, select File, New Project. Information about creating projects is provided earlier in this chapter.
See Chapter 2, "Using the Send Master Utility," Creating Send Master Projects, page 20.
Using the Send Master Utility Chapter 2
34 Copyright © 1988, 2010, Oracle and/or its affiliates. All Rights Reserved.
Specifying File Input and File Output Directories
To add input files to this project type, you specify the directory location where the files reside.
To specify input files for EIP Testing projects:
1. In the Input Information section, in the Input Directory field, select the location of the input files.
2. In the Output Directory field, select the location where the output files should be written.
3. (Optional.) Select Create If Not Found to create the input and output directories, if they do not exist.
4. (Optional.) Select Overwrite File to direct Send Master to overwrite any output files that exist with the same names.
5. Select File, Save Project.
See Also
Chapter 4, "Using Automated Integration Point Testing," Integration Point Data Repository, page 62
Overriding Requesting and Destination Nodes
Send Master reads the request and destination node information from the input files. However, you can override the node information:
To override the requesting and destination node information specified in the input files:
1. Open an EIP Testing project.
2. In the Input Information section, in the Optional Overrides section, enter a new requesting node name in the Requesting Node field.
3. To override the destination node , in the Optional Overrides section, enter a new destination node name inthe Destination Node field.
4. Select File, Save Project.
Posting EIP Testing Projects
To post the files in an EIP Testing project, open the project and click the Post button.
Viewing Output from EIP Testing Projects
To view the output from EIP Testing projects, navigate to the output directory that you specified on the Headers tab in the Input Information section. You can also view output in Send Master in the Output Information section of the Project work space.

Chapter 2 Using the Send Master Utility
Copyright © 1988, 2010, Oracle and/or its affiliates. All Rights Reserved. 35
Using the Batch Project Executor
The Batch Project Executor enables you to use the functionality of the EIP Testing project type from a command line tool. This section discusses the Batch Project Executor tool, including its:
• Usage
• Syntax
• Parameters
Usage
The standard usage of the Batch Project Executor command line tool is:
BatchProjectExecutor [-options]
Syntax
The syntax for executing a batch project is:
BatchProjectExecutor -in "C:\temp\input" -out"C:\temp\output" -url "http://localhost/PSIGW/PeopleSoftListeningConnector" -result "C:\temp\output\result.txt"
Parameters
The following table describes the parameters you can pass to the Batch Project Executor.
Parameter Description
-in Certification directory that contains the raw request files.
-out Output directory to store all of the response files.
-url Server URL to send all of the requests to during processing.
-result Name of the file that will contain the results during batch execution. The contents of this file will be represented as XML.
-ow (Optional.) Overwrite files if they already exist.
-cd (Optional.) Create the output directory if not found.
-rn (Optional.) Override the requesting node found in the IBInfo section.

Using the Send Master Utility Chapter 2
36 Copyright © 1988, 2010, Oracle and/or its affiliates. All Rights Reserved.
Parameter Description
-dn (Optional.) Override the destination node found in the IBInfo section.
-? -help (Optional.) Show the Help menu.
Sample Output
The following example shows successful output:
<?xml version="1.0"?><success> <request elapse="1.953 (s)" end="02:33:55.177" filename= "20030519T130405.request" id="" start="02:33:53.224" success="true"/><request elapse="0.201 (s)" end="02:33:55.408" filename="20030519T150417.request" id="" start="02:33:55.207" success="true"/> <request elapse="0.220 (s)" end="02:33:55.638" filename="20030520T150406. request" id="" start="02:33:55.418" success="true"/> <request elapse="0.190 (s)" end="02:33:55.828" filename= "20030519T150406.request" id="" start="02:33:55.638" success="false"> <![CDATA[Error communicating with server: Connection refused: connect]]> </request></success>
The following example shows a failure:
<?xml version="1.0"?><failure> <![CDATA[Error while initializing: Invalid output directory: C:\temp\output]]>
Using JMS Projects
This section discusses how to:
• Create JMS projects.
• Add header information to JMS projects.
• Add input files to JMS projects.
• Post JMS projects to queues.
Understanding JMS Projects
You can use Send Master to create JMS project types and test posting synchronous and asynchronous service operations to JMS queues.

Chapter 2 Using the Send Master Utility
Copyright © 1988, 2010, Oracle and/or its affiliates. All Rights Reserved. 37
Before you attempt to post service operations to an JMS queue, verify that the following Java Archive (JAR) files are installed, and that you have added them to the CLASSPATH in the StartSendMaster.bat file or the StartSendMaster.sh file. These files are installed as part of the MQSeries installation.
• com.ibm.mq.iiop.jar
• com.ibm.mq.jar
• com.ibm.mqbind.jar
• com.ibm.mqjms.jar
• fscontext.jar
• jms.jar
• jndi.jar
• providerutil.jar
See the IBM MQSeries documentation.
Corresponding files for other JMS Servers will be installed by respective JMS Server installations.
Understanding Input Information for JMS Projects
This section discusses the options you can define when working with a JMS project type.
Headers Tab
Use the Headers tab to specify header information for JMS service operations. The following table describes elements on this tab:
JMS Provider Indicates the name of the JMS provider. Valid options are:
• MQSeries (default)
• WebLogic
JMS Queue Indicates the queue to which the service operations will post.
JMS Factory Indicates the factory to which the queue in the JMS Queue field belongs.
JMS URL Indicates the LDAP directory or local file system address.
JMS User (Optional.) Indicates the name of the JMS user.
JMS Password (Optional.) Indicates the name of the JMS user's password.
Requesting Node Indicates the name of the requesting node.
Operation Name Indicates the name of the service operation.

Using the Send Master Utility Chapter 2
38 Copyright © 1988, 2010, Oracle and/or its affiliates. All Rights Reserved.
Operation Type Indicates the service operation type. Valid service operation types are:
• Async (asynchronous)
• Sync (synchronous)
Node Password (Optional.) Indicates the requesting node password if applicable.
Destination Nodes Indicates the name of the destination node. Use a semicolon to separate multiple destination nodes.
Final Destination Node Indicates the name of the final destination node.
Queue Select this radio button to post to a queue.
Topic Select this radio button to post to a topic.
Creating JMS Project Types
The first step to using a JMS project is creating the JMS project type. To create a project, from the Send Master menu, select File, New Project. Information about how to complete this task is provided earlier in this chapter.
See Chapter 2, "Using the Send Master Utility," Creating Send Master Projects, page 18.
Adding Header Information to JMS Projects
To add header information to the project:
1. In the Input Information section, select the Header Information tab if it is not already selected:
2. Select or enter values for the following required fields:
• JMS Provider
• JMS Queue
• JMS Factory
• JMS URL
• Requesting Node
• Operation Name
• Operation Type
3. Enter values in any of the remaining optional fields as appropriate for your project.
4. Select File, Save Project.

Chapter 2 Using the Send Master Utility
Copyright © 1988, 2010, Oracle and/or its affiliates. All Rights Reserved. 39
Adding Input Files to JMS Projects
Information about creating and adding an input file to a project is provided earlier in this chapter.
See Chapter 2, "Using the Send Master Utility," Adding Input Files to Projects, page 22.
Posting JMS Projects
To post a JMS project to a queue, click the Post button.
Viewing Output from JMS Projects
If you are working with a synchronous service operation, the Output Information area displays response information from the target system. If you are working with an asynchronous service operation, no response information is received.
Working With Groups of Projects
This section describes how to:
• Create groups of projects.
• Manage groups of projects.
• Test groups of projects.
• View test output.
• Share projects and groups.
Creating Groups of Projects
To create a group of projects:
1. Launch Send Master and select File, Batch Processing.
2. Select File, New Group.
3. Enter a name for the new group.

Using the Send Master Utility Chapter 2
40 Copyright © 1988, 2010, Oracle and/or its affiliates. All Rights Reserved.
4. Define the project group:
a. From the Run In drop-down list, select one of the following options to determine how the projects in the group run.
Parallel Run all projects in the group at the same time.
Succession Run projects in the group in succession.
Time Lapse Run projects in the group in the interval that you specify in the Delay field.
b. (Optional.) In the Override URL field, enter a URL to override the one specified in the Server URL field in the Project work space.
5. Add projects to the group.
a. In the Group Projects section, from the Projects drop-down list, select a project.
b. Click the Add a new project button to add the project to the group.
c. From the Method drop-down list, select an HTTP method.
d. In the Amount field, enter the number of instances of the project to include in the group.
e. From the Run In drop-down list, select one of the following options to specify how the projects run among themselves.
Parallel Run all instances of the project at the same time. The limited availability of open ports and other system resources requires you to determine the optimal number of projects to run at a single time. Start with 10 projects and slowly add projects to determine how many concurrent requests the system can process.
Succession Run instances of the project in succession.
Time Lapse Run instances of the project in the interval that you specify in the Delay field.
f. Repeat steps a through to add additional projects to the group.
6. Select File, Save Group.
Managing Groups of Projects
You might occasionally need to revise projects that you have added to a group. The following information will help you manage groups of projects:
• To change the order of a project in a group, in the Group Projects section, use the arrow buttons to move the project.
• To temporarily inactivate a project in a group, in the Project Settings section, select Inactive.

Chapter 2 Using the Send Master Utility
Copyright © 1988, 2010, Oracle and/or its affiliates. All Rights Reserved. 41
• To remove a project from a group, in the Group Projects section, select its file and click the Delete button.
Testing Groups of Projects
After you have created a group of projects, you can test them.
To test a groups of projects:
1. Open Send Master and select File, Batch Processing.
2. In the Group Definitions section, from the Group drop-down list, select the group to test.
The projects in the group appear in the Group Projects section.
3. Make any needed adjustments to the group, such as changing the order of projects in the group, specifyinginactive or active projects, and so forth.
4. Click the Start Projects button to run the test of projects in the group.
Viewing Test Output
After you run a test on a group of projects, you can view processing information and response information forany project in the group.
Viewing Processing Information
After you run a group of projects, the Completed Projects Output section displays all of the projects in the group and the instances for each project in a hierarchical tree format. To expand and collapse a project folder,click the icon to the left of the folder.
When you expand a project folder, the instances for the project appear as shown in the following graphic.
Output for the Introspection Test project
Each page icon represents a project instance. The number in parentheses represents the time needed to process the project instance.

Using the Send Master Utility Chapter 2
42 Copyright © 1988, 2010, Oracle and/or its affiliates. All Rights Reserved.
To view detailed processing information about the entire group of projects, select a project, click the Export the Results to File button, and save the contents as a text file. You can then open the text file and view information, such as the total number of project instances in the group, the total time to process all project instances, processing start and end times, and so on. The following example shows the type of output you can view using the Export feature.
Count : 5
Round-trip times Total : 0.961 (s) Minimum : 0.180 (s) [2] Maximum : 0.200 (s) [3] Average : 0.192 (s) Process per second : 5.203
[1] Request : 0.191 (s) [start = 10:19:20.095, end = 10:19:20.286] Response : 200 - OK [2] Request : 0.180 (s) [start = 10:19:20.296, end = 10:19:20.476] Response : 200 - OK [3] Request : 0.200 (s) [start = 10:19:20.486, end = 10:19:20.686] Response : 200 - OK [4] Request : 0.190 (s) [start = 10:19:20.696, end = 10:19:20.886] Response : 200 - OK [5] Request : 0.200 (s) [start = 10:19:21.017, end = 10:19:21.217] Response : 200 - OK
Viewing Response Information for a Project Instance
Send Master enables you to view response information for any project instance in a group of projects.
To view response information for a project instance:
1. Select a project instance in the Completed Projects Output section.
2. Click a project instance.
Response information appears in the Output Information section.
Sharing Projects and Groups
When you create projects and groups, the system stores all data in the Send Master properties file. The location of this file depends on the web server.
• For Oracle WebLogic the location is <PIA_HOME>\webserv\<DOMAIN>\applications\peoplesoft\PSIGW.war\WEB-INF\classes\com\peoplesoft\pt\sendmaster\sendmasterproperties.xml.
• For IBM WebSphere the location is <PIA_HOME>\websev\<DOMAIN>\<BIN>
This file is not created until you use Send Master.

Chapter 2 Using the Send Master Utility
Copyright © 1988, 2010, Oracle and/or its affiliates. All Rights Reserved. 43
You can share and reuse projects and groups that you or others have created for other versions of Send Masteror that have been used on other workstations. You do so by copying the sendmasterproperties.xml file into theSend Master directory. You must rename or delete the existing properties file before you copy the new file into the directory.
After you copy the sendmasterproperties.xml file into the Send Master directory, you can access the project and groups in the normal manner, by accessing them from the Project drop-down list in the Project work space, or from the Group drop-down list in the Batch Processing work space.
Using Send Master to Ping Remote Nodes
To ping a remote node from the Send Master, you post an example service operation to the node's application server using an Integration Broker (MIME) or Integration Broker (XML) project that specifies a ping service operation type. You then use the Post button to post the service operation to the application server.
The following table describes the type of response returned based on project type.
Project Type Response
Integration Broker (MIME) The system returns a MIME response message in the Output Information section of the Project work space.
If you post data to a PeopleSoft listening connector, the MIME response appears in the Output Information section of the Project work space. A message with the content <StatusCode>0</StatusCode> indicates that the ping was successful.
Integration Broker (XML) The system returns an HTTP response of 404 with data in the response in the Output Information section of the Project work space.
You can also use Service Operations Monitor and the Simple Post utility to ping remote nodes.
See Also
Chapter 3, "Using the Simple Post Utility," Pinging Remote Nodes, page 56
PeopleTools 8.51 PeopleBook: Integration Broker Service Operations Monitor, "Pausing, Testing, and Pinging Nodes"
Viewing Send Master Processing Performance Statistics
When working with Integration Broker MIME projects, you can gather processing performance statistics.

Using the Send Master Utility Chapter 2
44 Copyright © 1988, 2010, Oracle and/or its affiliates. All Rights Reserved.
Enabling the Send Master Statistics Feature
To enable the Send Master processing performance feature, select Gather Statistics on the Headers Cont. tab.
Accessing Send Master Processing Statistics
When the Gather Statistics feature is enabled, Send Master returns processing statistics in the Output Information section after a Post.
To access statistics information , from the View drop-down list, select Meta Data and then click the If Valid XML, Format button.
The data is contained in the following tag:
<IBProfileInformation>
Interpreting Send Master Processing Statistics
Send Master returns statistics relating to processing on the application server and gateway, as well as response processing.
Note. All values returned are expressed in milliseconds.
This table describes the statistics that Send Master returns related to processing on the application server.
Statistic Description
TransformInbound Time to process any inbound transformations.
OnRoutePeopleCode Time to execute OnRoute PeopleCode.
OnRequestPeopleCode Time to execute OnRequest PeopleCode.
TransformOutbound Time to process any outbound transformations.
DataBase Time for processing on the database.
AppServerSendTime Time to send the request to the application server. This value is not applicable in Send Master, because Send Master (not the application) is sending the request.
AppServerRecvTime Processing time on the application server.
This table describes the statistics that Send Master returns related to processing on the integration gateway.
Statistics Description
Connector Time that processing took place on the connector.

Chapter 2 Using the Send Master Utility
Copyright © 1988, 2010, Oracle and/or its affiliates. All Rights Reserved. 45
Statistics Description
Transform Time to perform gateway transformations.
GatewayTime Processing time on the integration gateway.
This table describes the statistics that Send Master returns related to processing the response service operation.
Statistics Description
Transform Time to perform transformation on the response.
GatewayTime Total time for processing the response on the integration gateway.
Statistics Example
The following example shows a sample of statistics that Send Master returns.

Using the Send Master Utility Chapter 2
46 Copyright © 1988, 2010, Oracle and/or its affiliates. All Rights Reserved.
<?xml version="1.0"?><IBInfo> <TransactionID> <![CDATA[QE_UNDERDOG.QE_SALES_ORDER_SYNC_CHNL.af21859e-f5e7-11d7- b7f0-88b716eecd9a]]> </TransactionID> <Status> <StatusCode>0</StatusCode> <MsgSet>158</MsgSet> <MsgID>10000</MsgID> </Status> <ContentSections> <ContentSection> <ID>ContentSection0</ID> <NonRepudiation>N</NonRepudiation> <Headers> <version> <![CDATA[VERSION_1]]> </version> </Headers> </ContentSection> </ContentSections> <IBProfileInformation> <keyword><AppServer></keyword> <keyword><TransformInbound>0</TransformInbound></keyword> <keyword><OnRoutePeopleCode>0</OnRoutePeopleCode></keyword> <keyword><OnRequestPeopleCode>0</OnRequestPeopleCode></keyword> <keyword><TransformOutbound>0</TransformOutbound></keyword> <keyword><DataBase>0</DataBase></keyword> <keyword><AppServerSendTime>0</AppServerSendTime></keyword> <keyword><AppServerRecvTime>0</AppServerRecvTime></keyword> <keyword></AppServer></keyword> <keyword><GatewayRequest></keyword> <keyword><Connector>24844</Connector></keyword> <keyword><Transform>0</Transform></keyword> <keyword><GatewayTime>651</GatewayTime></keyword> <keyword></GatewayRequest></keyword> <keyword><GatewayResponse></keyword> <keyword><Transform>0</Transform></keyword> <keyword><GatewayTime>211</GatewayTime></keyword> <keyword></GatewayResponse></keyword> <keyword></IBProfileInformation></keyword>
</IBInfo>
Using Send Master to Export Request Service Operations
This section describes how to export request service operations. When working with Integration Broker MIME or Integration Broker XML project types, you can use Send Master to export a request service operation to a text file to examine the raw data that gets sent during a transaction.
Exporting Request Service Operations
To export a request service operation:
1. Open an Integration Broker MIME project or an Integration Broker XML project.

Chapter 2 Using the Send Master Utility
Copyright © 1988, 2010, Oracle and/or its affiliates. All Rights Reserved. 47
2. Select File, Export IBRequest .
A Save dialog box appears.
3. Enter the location to save the file.
You can also view the raw data for a service operation in the integration gateway message log.
Allocating Additional Memory to Accommodate Posting Large Files
When posting files that are 5 megabytes (MB) or larger to the integration gateway, you should allocate additional random access memory (RAM) in Send Master to accommodate larger file sizes.
If Send Master does not have enough memory for a task, an "out of memory" error can occur.
To allocate additional RAM in Send Master:
1. Close Send Master.
2. Open StartSendMaster.bat (in Windows) or StartSendMaster.sh (in UNIX).
3. Add the –XmxZZm parameter, where ZZ equals the amount of RAM, in megabytes, to allocate.
4. Save the file.
5. Reopen Send Master.
For example, the value – Xmx128m indicates to allocate 128 MB of RAM. The following example shows how to add the parameter in the StartSendMaster.bat file:
cd "applications\peoplesoft\PSIGW.war\WEB-INF\classes\com\peoplesoft\pt\sendmaster\"java -Xmx128m -classpath "c:\ptdvl\webserv\peoplesoft\applications\peoplesoft\PSIGW.war\WEB-INF\lib\xalan.jar;c:\ptdvl\webserv\peoplesoft\applications\peoplesoft\PSIGW.war\WEB-INF\lib\xerces.jar;c:\ptdvl\webserv\peoplesoft\applications\peoplesoft\PSIGW.war\WEB-INF\classes;c:\ptdvl\webserv\peoplesoft\applications\peoplesoft\PSIGW.war\WEB-INF\lib\mail.jar;c:\ptdvl\webserv\peoplesoft\applications\peoplesoft\PSIGW.war\WEB-INF\lib\activation.jar;c:\ptdvl\webserv\peoplesoft\applications\peoplesoft\PSIGW.war\WEB-INF\lib\jmq.jar;c:\ptdvl\webserv\peoplesoft\applications\peoplesoft\PSIGW.war\WEB-INF\lib\jms.jar;c:\ptdvl\webserv\peoplesoft\applications\peoplesoft\PSIGW.war\WEB-INF\lib\jndi.jar" com.peoplesoft.pt.sendmaster.SendMaster
You can increase the amount of memory in Send Master to any value you that you want, as long as your machine has the RAM to support the value that you choose.

Copyright © 1988, 2010, Oracle and/or its affiliates. All Rights Reserved. 49
Chapter 3
Using the Simple Post Utility
This chapter discusses using the Simple Post utility to post third-party messages to integration gateways, and discusses how to:
• Access the Simple Post utility.
• Use the Simple Post class.
• Use the Simple Post utility using a Java API.
• Post third-party XML messages to the integration gateway.
• Ping remote nodes.
• Increase the Java heap size to accommodate posting large files.
Understanding the Simple Post Utility
The Simple Post utility enables you to use shell scripts or a Java API to post XML messages from third-party systems to the integration gateway. The utility wraps the incoming messages in the PeopleSoft XML wrapper format and posts them to the HTTP listening connector.
The Simple Post utility reads ASCII, UTF-8 and UTF-16 file formats for incoming messages and converts them to UTF-8 to send to the integration gateway.
Prerequisites
This section describes the prerequisites for using the Simple Post utility.
Software Requirements
To use the utility you must have the Java Runtime Environment (JRE) installed.
Setting Environment Variables
To use the Simple Post utility, must perform one of the following actions:
• Modify the CLASSPATH to include the location of the Simple Post utility.
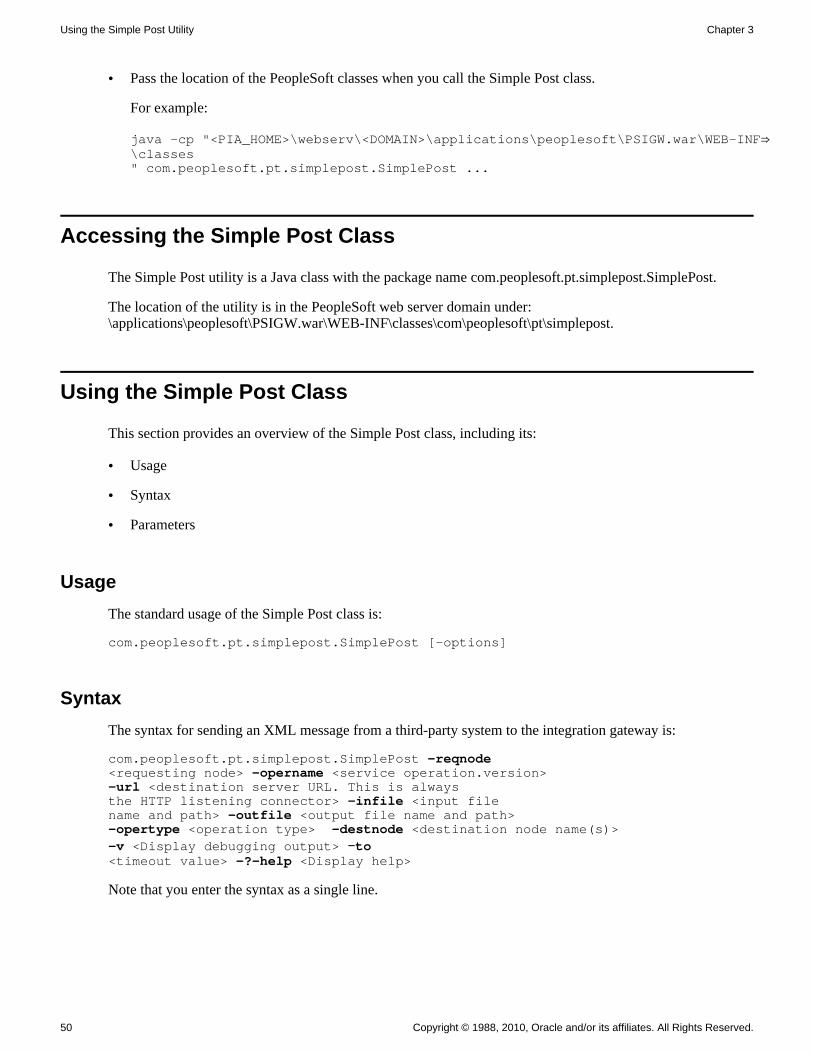
Using the Simple Post Utility Chapter 3
50 Copyright © 1988, 2010, Oracle and/or its affiliates. All Rights Reserved.
• Pass the location of the PeopleSoft classes when you call the Simple Post class.
For example:
java -cp "<PIA_HOME>\webserv\<DOMAIN>\applications\peoplesoft\PSIGW.war\WEB-INF⇒\classes" com.peoplesoft.pt.simplepost.SimplePost ...
Accessing the Simple Post Class
The Simple Post utility is a Java class with the package name com.peoplesoft.pt.simplepost.SimplePost.
The location of the utility is in the PeopleSoft web server domain under: \applications\peoplesoft\PSIGW.war\WEB-INF\classes\com\peoplesoft\pt\simplepost.
Using the Simple Post Class
This section provides an overview of the Simple Post class, including its:
• Usage
• Syntax
• Parameters
Usage
The standard usage of the Simple Post class is:
com.peoplesoft.pt.simplepost.SimplePost [-options]
Syntax
The syntax for sending an XML message from a third-party system to the integration gateway is:
com.peoplesoft.pt.simplepost.SimplePost -reqnode <requesting node> -opername <service operation.version> -url <destination server URL. This is always the HTTP listening connector> -infile <input file name and path> -outfile <output file name and path> -opertype <operation type> -destnode <destination node name(s)>-v <Display debugging output> −to <timeout value> -?-help <Display help>
Note that you enter the syntax as a single line.

Chapter 3 Using the Simple Post Utility
Copyright © 1988, 2010, Oracle and/or its affiliates. All Rights Reserved. 51
Parameters
The Simple Post utility parameters that you can pass are described in the following table.
Parameter Description
-reqnode Identifies the requesting node name.
-opername Identifies the service operation and service operation version that you are sending.
For example: ADD_PO.v1
-msgname Identifies the name of the message that you are sending.
This parameter is not used in PeopleTools 8.48 and higher releases.
-url Identifies the destination server URL.
-infile Identifies the path and file name to send.
The root node must be name of the message. For example, if the name of the message is SYNC_TEST, the root node of the XML input file must be <SYNC_TEST>.
-outfile Identifies the path and filename where the utility generates the response from the server.
-opertype (Optional.) Identifies the service operation type. Values are:
• sync: The service operation is synchronous.
• async: The service operation is asynchronous.
• ping: Tests the application server to make sure it is available and accepting requests.
-msgtype (Optional.) Identifies the message type. Values are:
• sync: The message is synchronous.
• async: The message is asynchronous.
• ping: Tests the application server to make sure it is available and accepting requests.
This parameter is not used in PeopleTools 8.48 and higher releases.

Using the Simple Post Utility Chapter 3
52 Copyright © 1988, 2010, Oracle and/or its affiliates. All Rights Reserved.
Parameter Description
-msgver (Optional.) Identifies the version number to apply to the message.
For example, VERSION_1.
This parameter is not used in PeopleTools 8.48 and higher releases.
-destnode (Optional.) Identifies the destination node name.
-v (Optional.) Displays any debugging output.
-en (Optional.) Compresses and base64-encodes the data.
When this command line option is located on the Simple Post call, the logic compresses and base64-encodes the data, places it into the Data node, and then adds the required headers into the request.
-to (Optional.) Identifies the timeout value.
This integer value determines the amount of time, in seconds, that the Simple Post class will wait for a response from the server.
-pwd (Optional.) Identifies the password for the destination node.
This parameter is optional, unless the destination node requires a password.
-ou (Optional.) Identifies the ID of the originating user.
-on (Optional.) Identifies the name of the originating node.
-op (Optional.) Identifies the name of the originating process.
-sq (Optional.) Identifies the subqueue.
-sc (Optional.) Identifies the subchannel.
This parameter is not used in PeopleTools 8.48 and higher releases.
-fdn (Optional.) Identifies the name of the final destination node.
-emid (Optional.) Applies a unique external message ID to a message to ensure no duplicate messages are sent to PeopleSoft Integration Broker.
The ID cannot exceed 70 characters.

Chapter 3 Using the Simple Post Utility
Copyright © 1988, 2010, Oracle and/or its affiliates. All Rights Reserved. 53
Parameter Description
-nr (Optional.) Specifies whether to turn on nonrepudiation. The valid values are:
• Y: Turn on nonrepudiation.
• N: Turn off nonrepudiation. (Default)
-h (Optional.) Specifies an HTTP header.
For example:
SOAPAction: QE_SYNC_MSG.v1
There can be one:many –h parameter invocations. For example:
com.peoplesoft.pt.simplepost.SimplePost -reqnode⇒ QE_UNDERDOG -opername QE_SYNC_MSG.v1 -url "http:⇒//jfranco040303/PSIGW/HttpListeningConnector" -⇒infile "C:UserMy DocumentsQE_SYNC_MSGQE_SYNC_⇒MSG.xml" -outfile "C:Documents and Settings⇒Desktopout.txt" -h "SOAPAction: QE_SYNC_MSG.v1" -h⇒ "test2:Joe_User"
Note. When Simple Post encounters an HTTP header name of SOAPAction, the content of the input file is not wrapped into IBRequest XML format and no IBInfo data is built. The IBInfo data, such as service operation name, requesting node, requesting node password, destination node, and so on, can be pulled from the SOAPAction field.
-?-help (Optional.) Displays a list of the Simple Post utility parameters.
Using the Simple Post Utility Using a Java API
You can use the Simple Post utility using a Java API.
This section provides code examples that demonstrate how to:
• Construct a Java file containing Simple Post parameters.
• Compile the Java file.
• Run the test program.
Constructing a Java File Containing Simple Post Parameters
The following example shows a submission via a Java API:

Using the Simple Post Utility Chapter 3
54 Copyright © 1988, 2010, Oracle and/or its affiliates. All Rights Reserved.
// Import the SimplePost APIimport com.peoplesoft.pt.simplepost.SimplePost;
/** Test class to use SimplePost functionality */public class TestSimplePost {
/** Constructor */ public TestSimplePost() {}
public static void main (String argv []) {
// Create the SimplePost object SimplePost mainSPObj = new SimplePost();
// Turn on printouts mainSPObj.setVerbose(true);
// Use this function to see the output stream, // defaulted to System.out // mainSPObj.setOutputPrintStream(<PrintStream>);
// Turn on Encoding for 8.51 mainSPObj.setEncoding(true);
// SET THE REQUIRED DATA
// Requesting Node mainSPObj.setRequestingNode("QE_UNDERDOG");
// Operation Name mainSPObj.setMessageName("QE_SYNC_MSG.v1");
// Server URL, must be the HttpListeningConnector or a //connector that can accept an IBRequest XML message mainSPObj.setServerURL("http://localhost/PSIGW/ HttpListeningConnector");
// Input file name, root node name must be the name of the message mainSPObj.setInputFileName("c:\\temp\\ QE_SYNC_MSG.xml");
/* // Optional data mainSPObj.setMessageType(MESSAGE_TYPE_SYNC); mainSPObj.setDestinationNode("QE_LOCAL"); mainSPObj.setTimeOut(2.5); mainSPObj.setPassword(""); mainSPObj.setOriginatingUser(""); mainSPObj.setOriginatingNode(""); mainSPObj.setOriginatingProcess(""); mainSPObj.setSubChannel(""); mainSPObj.setFinalDestinationNode(""); */
// Post the data boolean returnValue = mainSPObj.post();
// Check the return value if (!returnValue) {
// False, printout the error message System.out.println(mainSPObj.getMessage());
} else {

Chapter 3 Using the Simple Post Utility
Copyright © 1988, 2010, Oracle and/or its affiliates. All Rights Reserved. 55
// Success!
// Printout the return code and server message System.out.println("\n" + mainSPObj.getResponseCode() + " - " + mainSPObj.getResponseMessage());
// Printout the headers System.out.print("\n" + mainSPObj.getResponseHeaders() + "\n");
// Printout the data System.out.print("\n" + mainSPObj.getResponseData()); } }}
Compiling the Java File
The following example shows a command line for compiling the Java file. In this example, the Java file nameis TestSimplePost.java:
javac -classpath "C:\PT8.51\webserv\ps\applications\peoplesoft\PSIGW.war\WEB-INF\classes;." TestSimplePost.java
Running the Test Program
The following example shows how to invoke the test program.
java -classpath "C:\PT8.51\webserv\ps\applications\peoplesoft\PSIGW.war\WEB-INF⇒\classes;." TestSimplePost
Posting Third-Party XML Messages to the Integration Gateway
This section discusses how to use the Simple Post utility to post XML messages from third-party systems to the integration gateway.
Posting XML Messages to the Integration Gateway
To post a third-party XML message to the integration gateway:
1. Access the Simple Post utility.
In the Windows environment, open a Windows command prompt, and then navigate to the utility as described earlier in this section.
In the UNIX environment, open a terminal window or shell window, and then navigate to the utility location, as described earlier in this section.

Using the Simple Post Utility Chapter 3
56 Copyright © 1988, 2010, Oracle and/or its affiliates. All Rights Reserved.
2. Enter the following command, followed by parameter name and value pairs.
java com.peoplesoft.pt.simplepost.SimplePost
You must enter parameter name and value pairs for:
• -reqnode
• -opername
• -url
• -infile
• -outfile
3. Press ENTER.
Simple Post Submission Examples
The following is a Windows-based submission example:
java com.peoplesoft.pt.simplepost.SimplePost -reqnode KACNODE -opername QE_F18_ASYNC.v1 -url http://intgateway01/PSIGW/HttpListeningConnector -infile C:\temp\QE_F18_ASYNC.xml -outfile C:\temp\out.xml -opertype async -destnode UNDERDOG -v
The following is a UNIX-based submission example:
java com.peoplesoft.pt.simplepost.SimplePost -reqnode KACNODE -opername QE_F18_ASYNC -urlhttp://intgateway01/PSIGW/HttpListeningConnector -infile /temp/QE_F18_ASYNC.xml -outfile /temp/out.xml -opertype async -destnode UNDERDOG -v
Pinging Remote Nodes
You can use the Simple Post utility to ping remote nodes. The following is an example of a Simple Post command line ping. Notice that -msgtype parameter is set to ping:
java com.peoplesoft.pt.simplepost.SimplePost -reqnode JRHOME -opername JR_COUNTRY_MSG -infile c:\temp\pingin.xml -outfile c:\temp\pingout.txt -opertype ping -url http://jrunstad040102/PSIGW/HttpListeningConnector
This example is the result of a successful ping, pingout.txt:
<?xml version="1.0"?><IBResponse type = "success"> <DefaultTitle>Integration Broker Response</DefaultTitle> <StatusCode>0</StatusCode> <TransactionID>null</TransactionID></IBResponse>

Chapter 3 Using the Simple Post Utility
Copyright © 1988, 2010, Oracle and/or its affiliates. All Rights Reserved. 57
Increasing the Java Heap Size to Accommodate Posting Large Files
This section provides an overview of increasing the Java heap size, and describes how to:
• Increase the Java heap size on Oracle WebLogic web servers.
• Increase the Java heap size on IBM WebSphere web servers.
Understanding Increasing the Java Heap Size
When posting files that are five megabytes (MB) or larger to the integration gateway, you should increase the Java heap size in the Simple Post Utility to handle larger file sizes. If the Simple Post Utility does not have enough memory for a task, the system might generate an "Out of Memory" error.
You can increase the heap size to any value that you want, as long as your machine has the random access memory (RAM) to support the value that you choose.
The steps to increase the JVM heap size depend on the web server.
Increasing the Java Heap Size on Oracle WebLogic Web Servers
When using an Oracle WebLogic web server, you increase the JVM heap size in the setenv.cmd file.
To increase the Java heap size on an Oracle WebLogic web server:
1. Use a text editor to open the setenv.cmd file.
The file is located via the following path: <PIA_HOME>\webserv\peoplesoft\bin.
2. Locate the SET JAVA_OPTIONS parameter.
3. Change or add the –XmxZZm parameter, where ZZ equals the amount of RAM, in MB, to allocate.
The following example shows the parameter set to a maximum of 128 MB.
SET JAVA_OPTIONS=-hotspot -ms1m -mx128m
4. Save the changes.
When you run the Simple Post utility, you must specify the maximum Java heap size that you specified here. For example, if you set the JAVA_OPTIONS parameter in the setenv.cmd file to 128 MB, when invoking theSimple Post utility you must add the following argument to the command line:
-Xmx128m

Using the Simple Post Utility Chapter 3
58 Copyright © 1988, 2010, Oracle and/or its affiliates. All Rights Reserved.
Increasing the Java Heap Size on IBM WebSphere Web Servers
If your web server is an IBM WebSphere server, the JVM heap size is most likely set to a minimum heap sizeof 64 MB and a maximum size of 256 MB. Setting the JVM heap size to a larger minimum value (preferably one that equals the maximum value) avoids a compromise in performance incurred by dynamically growing the JVM and improves predictability; it also reduces the frequency for JVM garbage collection.
PeopleSoft recommends that if you use IBM WebSphere, you increase the JVM minimum heap size to 256 MB.
To increase the Java heap size on an IBM WebSphere web server:
1. Stop and restart the web server using the following commands:
• Stop the web server: WAS_HOME/bin> stopServer.bat(sh) <serverName>
• Start the web server: WAS_HOME/bin> startServer.bat(sh) <serverName>
2. Open the Admin console at http://<machine-name>:9090/admin, where 9090 refers to the default Admin console port.
3. Log in to the system as any user.
4. Expand Servers, Application Servers, server, Process Definition, Java Virtual Machine.
5. Enter values for Initial Heap and Max Heap.
6. Save the configuration and log out.
7. Restart the web server.

Copyright © 1988, 2010, Oracle and/or its affiliates. All Rights Reserved. 59
Chapter 4
Using Automated Integration Point Testing
This chapter discusses:
• Uses for automated integration point testing.
• The processes for automated integration point testing.
• Tools used for automated integration point testing.
• Setting up systems for automated integration point testing.
• Recording service operation transactions.
• Playing back service operation transactions.
Understanding Automated Integration Point Testing
PeopleSoft provides a means for automated integration point testing. You can perform automated integration point testing as a means to unit test, perform cross-application business process testing, or regression test integration points.
Automated integration point testing is suitable for testing integration points between PeopleSoft systems, PeopleSoft systems and third-party systems, and PeopleSoft systems and open interfaces.
You can use automated integration point testing with the following PeopleSoft integration technologies:
• Service operations.
• Component interfaces.
• Flat files.
• Staging tables.
Process Overview
The automated integration point testing process entails:
1. Recording service operation transactions.
2. Exporting service operation transactions.

Using Automated Integration Point Testing Chapter 4
60 Copyright © 1988, 2010, Oracle and/or its affiliates. All Rights Reserved.
3. Playing back service operation transactions.
4. Managing testing results.
Recording Service Operations
When you use integration point test automation, PeopleSoft Integration Broker records service operation details as they traverse between PeopleSoft applications, as well as between PeopleSoft and third-party applications. This enables you to test integration when these systems are not available, and then play back the service operations at a later time to mimic integrating with the systems.
For synchronous transactions, PeopleSoft Integration Broker saves request and response service operation transactions as flat files, one file per service operation transaction, in an integration point repository. For asynchronous transactions, PeopleSoft Integration Broker only saves requests.
Exporting Service Operations
PeopleSoft Integration Broker provides an export process that persists recorded request and response data as files to disk. After you export files, you can add them to your integration point certification repository.
To carry out the export process, you use the Message Export command line tool.
Playing Back Service Operations
Service operation transaction playback consists of outbound and inbound playback.
Outbound playback refers to testing from the source system when the target is not available. Inbound playback refers to testing the target system when the source is not available. In either case, you can use Send Master or the Batch Project Executor to act at the source system.
Managing Testing Results
The integration point test tool writes service operation transactions as files in directories to an integration point test data repository. After testing is complete, these directories of service operation transaction data need to be managed in a repository for subsequent use.
Uses for Automated Integration Point Testing
You can use automated integration point testing for the following levels of testing:
• Unit testing during integration point development.
• Cross-application business process testing.
• Regression testing.

Chapter 4 Using Automated Integration Point Testing
Copyright © 1988, 2010, Oracle and/or its affiliates. All Rights Reserved. 61
Unit Testing Integration Points
Unit testing occurs during integration point development, prior to cross-application business process testing. The components of an integration point that you can test include sending service operations, handlers, transformations, and content-based routing logic. You can also test business logic in a component that will behave differently when accessed from a component interface than when accessed through a PeopleSoft Pure Internet Architecture page.
The process for unit testing integration points is:
1. Build integration points prior to cross-business business-process testing.
2. Generate test data for the integration point test process.
3. Use the integration point test automation tools to test the integration point.
4. Validate results by reviewing the Service Operations Monitor for both inbound and outbound service operation transactions. You can further verify inbound playback results by viewing the tables involved in the integration.
5. Validate dependent processes by running a process that depends on the data being integrated.
6. Submit 'bad' service operation transactions to test error handling.
7. Submit service operation transactions in bulk to volume test the integration point.
Cross-Application Business Process Testing
Business process testing involves testing integration points in one application against a target application and version for which it was designed. As an example, you could test integration points between two PeopleSoft applications.
The steps for cross-application business-process testing are:
1. Set up multiple product lines in one test environment.
2. Manually enter data on PeopleSoft Pure Internet Architecture pages, or use an automated tool for doing so.
PeopleSoft Integration Broker records the integration point service operation transactions.
3. Run dependent processes on each side to validate the data.
Note. For full synchronous service operations testing, running dependent processes might not be practical,due to the large number of transactions involved. You can open the table records to verify that the data that you expect is present, or use an automated database table compare tool.
4. Consolidate service operation transaction data into a test repository for later use.
Regression Testing
Regression occurs after cross-application business process testing. You can minimize the need for regression testing by requiring users to test their code changes with the data captured during testing. This enables you to test published interfaces in other applications against changes to integration points in the application.

Using Automated Integration Point Testing Chapter 4
62 Copyright © 1988, 2010, Oracle and/or its affiliates. All Rights Reserved.
The process for regression testing is:
• Play back service operation transactions recorded during testing to test integration points.
• Run dependent processes to validate results.
Understanding Tools Used in Automated Integration Point Testing
This section describes tools that are used in automated integration point testing.
Integration Point Data Repository
PeopleSoft Integration Broker builds the following integration point test data repository structure during the export process.
You specify the top-level directory for the repository in the integration gateway properties file using the ig.EIPInputDirectory property.
Warning! Do not alter this directory structure. This structure is required for outbound playback. If you alter this structure, PeopleSoft Integration Broker cannot locate response files.
Integration point test data repository structure
The following graphic shows what the structure might look like in Microsoft Windows Explorer using actual data.

Chapter 4 Using Automated Integration Point Testing
Copyright © 1988, 2010, Oracle and/or its affiliates. All Rights Reserved. 63
Sample integration point test data repository structure in Microsoft Windows Explorer
EIP Gateway Manager
When a synchronous request is received during testing, the gateway manager performs a lookup in the cacheddata gathered from the integration point test service operation transaction property file. If the system finds a match is found, the request XPaths are traversed to build the appropriate hash that can then be used to locate the corresponding response located within the integration point certification repository. The system loads the response file and passes it back to the requestor.
For asynchronous requests, the gateway manager generates an acknowledgement as the response and passes itback to the requestor.
In addition to returning the appropriate response files during outbound playback, the gateway manager logs request and response files. When the appropriate flag is set in the integration gateway properties file, the gateway manager logs the files into the defined output directory. Response and request file have the followingnaming convention.
<time stamp>.<request or response>
For example:
220030519T150406.832.request
Integration Gateway Properties File
The integration gateway properties file contains an EIPTestTool Properties section, in which you set the following information for integration point test automation:
Property Description
ig.gatewayManagerClass=com.peoplesoft.pt.
integrationgateway.eiptesttool.EIPTestTool
GatewayManager
Indicates the class name of the gateway manager to use during processing.
ig.EIPLoopBack Determines if the integration gateway should be in record or playback mode.
Set this property equal to True for outbound playback, and set it equal to False for recording.
The default value is True.

Using Automated Integration Point Testing Chapter 4
64 Copyright © 1988, 2010, Oracle and/or its affiliates. All Rights Reserved.
Property Description
ig.EIPOutputDirectory Indicates the directory to store request and response files during recording. The default value is c:\temp\output.
You must set this property for recording service operation transactions.
Setting this property is optional for playback.
ig.EIPMsgProp.count Indicates the number of integration point test service operation transaction properties files that are in use for test automation. The default value is 0 (zero).
ig.EIPInputDirectory Indicates the location of the integration point test data repository that stores request and response data. The default value is c:\temp\input.
ig.EIPMsgProp.N.propFile Indicates the name and location of an integration point service operation transaction properties file.
N denotes the index number for this property. The index starts at 1 and incrementally advances to the number specified by the ig.EIPMsgProp.count property.
ig.EIPMsgProp.N.inputDirectory Indicates the input directory path for request or response datain situations for which an integration point service operation transaction property file uses a directory structure other than the default certification directory.
Use this property to override the ig.EIPInputDirectory property.
ig.EIPNodeMap Indicates the location and name of the node map file to use during outbound playback ("loop back") testing.
Note. All file paths in the integration gateway property file for EIP test tools must use backslashes in the file path.
See Also
PeopleTools 8.51 PeopleBook: PeopleSoft Integration Broker Administration, "Managing Integration Gateways," Using the integrationGateway.properties File
Integration Point Test Service Operation Transaction Properties File
Integration point test service operation transaction property files are XML files that contain synchronous integration point definitions broken down by product or sub-product. These files are used during message export and outbound playback.
Note. Integration point test service operation transaction properties files are required for synchronous service operation transactions only.

Chapter 4 Using Automated Integration Point Testing
Copyright © 1988, 2010, Oracle and/or its affiliates. All Rights Reserved. 65
One integration point test service operation transaction properties file must exist for each product line or sub-product.
Integration point testing metadata is not contained in a single file, because it does not scale well and because this information needs to be cached and accessed quickly.
Each integration point entry is keyed by requesting node, destination node, and service operation.version.
You specify the location of the file in the integration gateway properties file using the ig.EIPMsgProp.N.propFile property.
The integration point test service operation transaction properties file contains the following properties for synchronous integration points:
• Requesting node.
• Destination node.
• Service operation name.
• XPaths to fields in the request to be used as the unique key.
Leave this blank to use the entire contents as the hash key.
• Description.
The following example shows the contents of a sample integration point test service operation transaction properties file.
<?xml version="1.0"?><eips> <eip messagename="QE_SALES_ORDER_SYNC.VERSION_1" destinationnode="QE_LOCAL"> <descr> <![CDATA[Outbound Synchronous QE_SALES_ORDER_SYNC from QE_LOCAL⇒ to QE_IBTGT]]> </descr> <xpath>MsgData/Transaction/QE_SALES_ORDER/QE_ACCT_ID</xpath> </eip></eips>
Send Master
The Send Master utility features an EIP Testing (Batch EIP) project type that enables you to test batches of MIME messages from a directory, and also allows you to test different transaction values.
In addition to using the Send Master graphical user interface, you can also initiate automated testing through aBatch Project Executor command line tool.
See Also
Chapter 2, "Using the Send Master Utility," Using EIP Testing Projects, page 33

Using Automated Integration Point Testing Chapter 4
66 Copyright © 1988, 2010, Oracle and/or its affiliates. All Rights Reserved.
Message Export Command Line Tool
The Message Export command line tool is a batch file that extracts transaction data from request and responsedata, and creates a hierarchical structure of source, service operation, and destination directories in the integration point test data repository.
The Message Export command line tool is located in the PeopleSoft web server domain: MessageExport.bat.
Usage
The standard usage of the Message Export tool is:
MessageExport [-options]
Classpath
The classpath for the Message Export is created in the MessageExport.bat file during installation.
Syntax
The syntax for using the Message Export tool is:
MessageExport -in "C:/temp/input" -out "C:/temp/output" -eip "c:\temp\eip\eip_prop\eip_crossnode_sync.xml" -result "C:/temp/output/result.txt"
Note. Use forward slashes in the directory path structure.
Parameters
The Message Export parameters that you can pass are described in the following table.
Parameter Description
-in Indicates the input directory, used during recording, that contains all of the request and response files generated from the EIP gateway manager.
-out Indicates the location of the directory for the integration point test data repository.
-eip Indicates the list of integration point service operation transaction property files, separated by semicolons.
This parameter is not required for asynchronous integration points.
-result Indicates the name of the file that contains the results of the export process. The contentsof this file is represented as XML.
-ow (Optional.) Overwrites files if they already exist.
-cd (Optional.) Creates the output directory if PeopleSoft Integration Broker does not find it.

Chapter 4 Using Automated Integration Point Testing
Copyright © 1988, 2010, Oracle and/or its affiliates. All Rights Reserved. 67
Parameter Description
-rn (Optional.) Specifies the requesting node. You can specify one value only.
All other requesting node values in the input directory will be ignored.
-dn (Optional.) Specifies the destination node. You can specify one value only.
All other destination node values in the input directory will be ignored.
-mn (Optional.) Specifies the service operation name, including version. You can specify onevalue only.
The system ignores all other service operation names in the input directory.
For releases prior to PeopleTools 8.48 this is the message name.
-mv (Optional.) This parameter is only used with PeopleTools releases prior to PeopleTools 8.48.
Specifies the message version for the message name that you specified. You can specify one value only.
The system ignores all other message versions for the selected message name in the input directory.
-? -help (Optional.) Displays the Help menu.
Output
If an export is successful, the contents of the output file resembles the following contents.
<?xml version="1.0"?><success> <file path="C:\TEMP\eip\export_in\20051128T041615.545.request" rawfilepath="C:\TEMP\eip\export_out\QE_LOCAL\QE_SALES_ORDER_SYNC. VERSION_1\V999\QE_IBTGT\20051128T041615.545_48.request" success="true" transdatafilepath="C:\TEMP\eip\export_out\QE_LOCAL\ QE_SALES_ORDER_SYNC.VERSION_1\V999\QE_IBTGT\request\1.xml"/> <file path="C:\TEMP\eip\export_in\20051128T041615.545.response" rawfilepath="C:\TEMP\eip\export_out\QE_LOCAL\QE_SALES_ORDER_SYNC. VERSION_1\V999\QE_IBTGT\20051128T041615.545_48.response" success="true" transdatafilepath="C:\TEMP\eip\export_out\QE_LOCAL\ QE_SALES_ORDER_SYNC.VERSION_1\V999\QE_IBTGT\response\1.xml"/></success>
If an export is not successful, the contents of the output file resembles the following contents:
<?xml version="1.0"?><failure> <![CDATA[Invalid output directory: C:\Documents and Settings\Jfranco\ Desktop\export]]></failure>

Using Automated Integration Point Testing Chapter 4
68 Copyright © 1988, 2010, Oracle and/or its affiliates. All Rights Reserved.
Hash Key Generator Command Line Tool
When you use the Message Export tool, PeopleSoft Integration Broker generates unique request and response pairs, and creates a unique hash key ID for the generated pair. The hash key is used by the integration gateway during playback to ensure that proper correlation occurs between the request and response files.
If you bypass the export process and manually add files for testing, or if you carry out testing when the target or source systems are not available to properly record information, you must generate a hash key. The Hash Key Generator is a command line tool that enables you to generate a hash key.
The Message Export command line tool is located in the PeopleSoft web server domain: HashKeyGenerator.bat.
Usage
The standard usage for the Hash Key Generator is:
HashKeyGenerator [-options]
Syntax
The syntax for using the Hash Key Generator is:
HashKeyGenerator -in "C:\temp\input.txt
HashKeyGenerator -v 214 "John Doe" PeopleSoft
HaskKeyGenerator -v Sally 1234 -t
Parameters
The Hash Key Generator parameters you can pass are described in the following table.
Parameter Description
-in Indicates the file name to be used as the hash value. When working with non-XML files, the entire value must be hashed.
-t Prepends a timestamp value to the returned hash value. will prepend a timestamp value.
-v Indicates values to use as the hash key. When the system encounters this parameter, PeopleSoft Integration Broker uses all values specified in the hash keyuntil it encounters the next "-" option.
-? -help (Optional.) Displays the Help menu.
Node Map Properties File
A Node Map properties file is an XML file that enables you to associate renamed or custom node names with actual shipped application node names. This enables you to use unique node names during testing.

Chapter 4 Using Automated Integration Point Testing
Copyright © 1988, 2010, Oracle and/or its affiliates. All Rights Reserved. 69
The system uses this file during outbound playback.
You create this file and specify the shipped application node names and all custom node names in use for a specific node. You must specify the file name and location in the integration gateway properties file, using the ig.EIPNodeMap property.
The following example shows a node map properties file.
<?xml version="1.0"?><nodemap> <map name="PSFT_HR"> <node name="HRTST01"/> <node name="HRTST02"/> <node name="HRTST03"/> </map> <map name="PSFT_CRM"> <node name="CRMTST01"/> <node name="CRMTST02"/> <node name="CRMTST03"/> </map></nodemap>
In the highlighted portion of the example, the map name PSFT_HR corresponds to a delivered application node. The node names HRTST01,HRTST02 and HRTST03 correspond to custom nodes names that are in use.
Recording Service Operation Transactions
To record service operation transactions and to allow PeopleSoft Integration Broker to capture the exact structure of each integration point as they pass between the systems, you must ensure that all PeopleSoft systems involved in the integration are configured and running.

Using Automated Integration Point Testing Chapter 4
70 Copyright © 1988, 2010, Oracle and/or its affiliates. All Rights Reserved.
1. Set the following properties in the EIPTestTool Properties section in the integration gateway properties file:
a. Set the gateway manager class to EIP Gateway Manager. To do so, remove the comment from the following line:
ig.gatewayManagerClass=com.peoplesoft.pt.integrationgateway.eiptesttool.EIPTestToolGatewayManager
b. Set loop back to False. To do so, remove the comment from the following line:
ig.EIPLoopBack=True
Change the parameter value to False.
c. Set the log output directory. To do so, remove the comment from the following line:
ig.EIPOutputDirectory=c:\temp\output
You can change the directory location as appropriate.
d. For synchronous service operation transactions, define the number of integration point test service operation transaction properties in use for the test, and specify the necessary number of entries for the integration point test service operation transaction properties file. To do so, remove the comment fromthe following line:
ig.EIPMsgProp.count
Set this property equal to the number of integration point test service operation transaction properties files in use for the test. For example:
ig.EIPMsgProp.count=3
You must also specify the location of the integration point test service operation transaction propertiesfiles for each file directory in use for testing. The number of files that you specify should equal the value that you specified for the ig.EIPMsgProp.count property.
To specify the integration point test service operation transaction files for the test, remove the comment from the following line:
ig.EIPMsgPropN.propFile
Enter the name and location of each integration point test service operation transaction properties file in use for the test.
For example:
ig.EIPMsgProp1.propFile=c:\temp\File_1.xml
2. Launch the necessary processes on the source system to invoke integration points with the target system.
To verify that recording took place, navigate to the log output directory that you specified in the previous step. The persisted request and response files use the following naming conventions.
<time stamp>.<request>
<time stamp>.<response>
Chapter 4 Using Automated Integration Point Testing
Copyright © 1988, 2010, Oracle and/or its affiliates. All Rights Reserved. 71
Playing Back Service Operation Transactions
Playing back service operation transactions enables you to continue service operation transaction testing as if the external system is operational.
Inbound service operation transaction playback enables you to simulate inbound asynchronous and synchronous service operation transaction processing. Outbound playback enables you to simulate outbound asynchronous and synchronous service operation transaction processing.
This section describes how to perform:
• Inbound playback.
• Outbound playback.
Inbound Playback
To perform inbound playback:
1. In the EIPTestTool properties section of the integration gateway properties file, set the gateway manager class to EIP Gateway Manager. To do so, remove the comment from the following line:
ig.gatewayManagerClass=com.peoplesoft.pt.integrationgateway.eiptesttool.EIPTestToolGatewayManager
2. Purge all service operation transaction data in the system or the data that is specific to the integration point test.
3. Create and run a Send Master project of type EIP Testing (EIP Batch) for each service operation transaction type that you want to test.
4. Run the message export process on the response directory populated during testing.
5. Compare the transaction data returned by the export process to the data that is stored in the integration point test data repository.
See Also
Chapter 2, "Using the Send Master Utility," Using EIP Testing Projects, page 33
Chapter 4, "Using Automated Integration Point Testing," Message Export Command Line Tool, page 66
Outbound Playback
To perform outbound playback:

Using Automated Integration Point Testing Chapter 4
72 Copyright © 1988, 2010, Oracle and/or its affiliates. All Rights Reserved.
1. Set the following properties in the EIPTestTool Properties section in the integration gateway properties file:
a. Set the gateway manager class to EIP Gateway Manager: to do so, remove the comment from the following line:
ig.gatewayManagerClass=com.peoplesoft.pt.integrationgateway.eiptesttool.EIPTestToolGatewayManager
b. Set loop back to True; to do so, remove the comment from the following line:
ig.EIPLoopBack=True
Change the parameter value to True, if necessary.
c. Set the location of the input file directory; to do so, remove the comment from the following line and set the value equal to the location of the directory.
ig.EIPInputDirectory=
d. (Optional.) Set the log output directory; to do so, remove the comment from the following line:
ig.EIPOutputDirectory=c:/temp/output
You can change the directory location as appropriate.
e. For synchronous service operation transactions, define the number of integration point test service operation transaction properties in use for the test, and specify the necessary number of entries for the integration point test service operation transaction properties file; to do so, remove the comment from the following line:
ig.EIPMsgProp.count
Set this property equal to the number of integration point test service operation transaction properties files in use for the test. For example:
ig.EIPMsgProp.count=1
You must also specify the location of the integration point test service operation transaction propertiesfiles for each file directory in use for testing. The number of files that you specify should equal the value that you specified for the ig.EIPMsgProp.count property.
To specify the integration point test service operation transaction files for the test, remove the comment from the following line:
ig.EIPMsgPropN.propFile
Enter the name and location of each integration point test service operation transaction properties file in use for the test.
For example:
ig.EIPMsgProp1.propFile=c:\temp\File_1.xml
2. Launch the necessary processes on the source system to invoke integration points with the target system.
3. Run the message export process on the log output directory used during testing to pull back the transaction data for use in data comparison.

Chapter 4 Using Automated Integration Point Testing
Copyright © 1988, 2010, Oracle and/or its affiliates. All Rights Reserved. 73
4. View the integration gateway logs or Service Operations Monitor to verify that the inbound requests are valid and that PeopleSoft Integration Broker sends the proper responses from the repository.
5. Compare the transaction data returned by the export process to the data that is stored in the integration point test data repository to view expected versus actual results.
You can accomplish this by manually reviewing the database tables or by using an automated database table compare tool.
See Also
Chapter 4, "Using Automated Integration Point Testing," Message Export Command Line Tool, page 66


Copyright © 1988, 2010, Oracle and/or its affiliates. All Rights Reserved. 75
Chapter 5
Using the Transformation Test Utility
This chapter provides an overview of the Transformation Test utility, and discusses how to:
• Run the Transformation Test utility.
• Run the sample transformation test project.
Understanding the Transformation Test Utility
PeopleSoft Integration Broker provides the Transformation Test utility, which you can use to test Application Engine transform programs without sending messages, and with minimal development effort. You use the Transformation Test component (IB_TRANSFORM_TEST) to access the utility.
The runtime Integration Broker messaging environment requires several development and administration activities to invoke an Application Engine transform program. At a minimum, you must define a queue, a service operation, sending PeopleCode, service operation handler, and routing including parameters for the transform program. However, because of its minimal requirements, the Transformation Test utility simplifies the process of testing and debugging your transform programs.
Prerequisites
If your transform program does not use codesets for data translation, you need only to develop the program and provide an XML DOM-compliant file that contains sample message data to be transformed.
If your transform program uses codesets, you must also define two nodes, their codeset groups, codesets, and codeset values that are invoked by the program.
Running the Transformation Test Utility
Select PeopleTools, Integration Broker, Service Utilities, Transformation Test to access the Transformation Test page (IB_TRANSFORM_PAGE).

Using the Transformation Test Utility Chapter 5
76 Copyright © 1988, 2010, Oracle and/or its affiliates. All Rights Reserved.
Transformation Test page
Note. The project name you specify identifies the test you're applying, and is for your reference only. It has no significance outside of this utility.
Program Name Select the name of the Application Engine transform program that you want to test.
Source Node Enter the name of the node whose codeset group defines the structure of the inputdata. This field is used for codeset-based data translation.
Dest Node Enter the name of the node whose codeset group defines the structure of the output data. This field is used for codeset-based data translation.
File Name Enter the full path and name of the sample input message file.
This is the path on the application server machine or a path that can be accessed from the application server.
The file name may consist of up to 254 characters.
Transform Click to apply the transform program to the sample input message.
Message Text This field displays the output of the transform program.
Note. For the current release, even if you do not use codesets, you still must enter values for the Source Node and Dest Node fields. You don't need to define any nodes; just enter a string that qualifies as a valid node name (for example "ANYNODE").

Chapter 5 Using the Transformation Test Utility
Copyright © 1988, 2010, Oracle and/or its affiliates. All Rights Reserved. 77
Running the Sample Transformation Test Project
PeopleSoft provides a sample project called PT_IBTRANSFORM_TEST that you can use to run a sample test with the Transformation Test utility.
To run the sample test:
1. Select PeopleTools, Integration Broker, Utilities, Transform Utility.
2. Select the PT_IBTRANSFORM_TEST project.
3. In the File Name field, modify the value with your PS_HOME directory where indicated.
Enter Your PS_HOME Path Here\sdk\pstransform\samples\TRANSFORMTST.xml
4. Click the Transform button.
The test is successful when the following code appears in the Message Text box.
<?xml version="1.0"?><Success>Hello World!</Success>


Copyright © 1988, 2010, Oracle and/or its affiliates. All Rights Reserved. 79
Chapter 6
Using the Handler Tester Utility
This chapter provides an overview of the Handler Tester utility and discusses how to:
• Accessing the Handler Tester utility.
• Select service operations.
• Select handler to test.
• Populate message data.
• Save message test data.
• Clone and delete record structures.
• Override target connector properties
• Run handler tests.
• View handler test results.
• Clear test data.
Understanding the Handler Tester Utility
The Handler Tester allows you to test handlers defined for rowset-based and nonrowset-based service operations from within the PeopleSoft Pure Internet Architecture. You can test handlers without setting up a routing, without having pub/sub booted on your application server, and without impacting other developer activity on the system.
To use the Handler Tester utility you should have a solid knowledge of Integration Broker messaging, as wellas a knowledge of programming integration events and interpreting event results.
Warning! When you use the Handler Tester any PeopleCode associated with the handler is executed and production data is affected accordingly.
Consider the following points when using the Handler Tester utility:
• The Handler Tester does not function with messages formatted with multiple level 0 records.
• The Handler Tester does not re-initiate global variables between tests.

Using the Handler Tester Utility Chapter 6
80 Copyright © 1988, 2010, Oracle and/or its affiliates. All Rights Reserved.
Integration Events to Test Using the Handler Tester
You can test the following integration events using the Handler Tester:
• OnSend.
• OnRequest.
• OnRouteReceive.
• OnRouteSend.
• OnAckReceive.
• OnNotify.
Testing Application Engine Handlers
You can test application engine handlers only when the data used for the test is transaction data from the application database. (This is the DB Operation Transaction option when populating data.)
Otherwise the application handler will fail due to no transaction ID being available to the application engine program.
Testing Bulk Load Handlers
You cannot use the Handler Tester Utility to test bulk load handlers.
Process Overview
To test integration events using the Handler Tester:
1. Select the service operation and version to use in the test.
2. Select the handler type and handler name to test.
3. Populate the message with data.
4. Run the test.
In addition to providing procedures for each step in the process, this chapter also describes how to save message data, clone and delete record structures, override connector properties, and view test results.
Common Elements Used in This Chapter
Service Operation The service operation to use for the test.

Chapter 6 Using the Handler Tester Utility
Copyright © 1988, 2010, Oracle and/or its affiliates. All Rights Reserved. 81
Default Version The Handler Tester tests the default version of a service operation. If you are testing a non default version, the transform version page will be displayed.
Handler Type Click the drop-down list to select a handler type to test. The list displays only those handler types currently defined for the selected service operation.
The options can include:
• OnSend.
• OnRequest.
• OnRouteReceive.
• OnRouteSend.
• OnAckReceive.
• OnNotify.
Handler Name Click the drop-down list to select an handler name to test. The list displays only those handler names currently defined for the selected service operation and handler type.
Use DB Operation Transaction
Use this button to populate the input message with an existing database transaction.
Provide XML Click the button to input XML or upload XML data from a file.
New Tree Structure Click the button to clear the record and field values in the tree structure.
Convert Tree to XML Click the button to convert data stored in the tree structure into XML format.
IB Info Values Click the link to override target connector properties.
Execute Event Click the button to execute the selected event.
View Returned IB Info Values
Displays the IBInfo values that were returned from the test.
Returned Message/Result
The returned message or results from the test. Displays when you click the Execute Event button.
Accessing the Handler Tester Utility
The Handler Tester utility is located in the Handler Tester component (IB_EVENTTESTER).
Use the Handler Tester page (IB_EVENTTESTER) to perform handler tests. To access the Handler Tester page, select PeopleTools, Integration Broker, Service Utilities, Handler Tester. The following example shows the Handler Tester page:
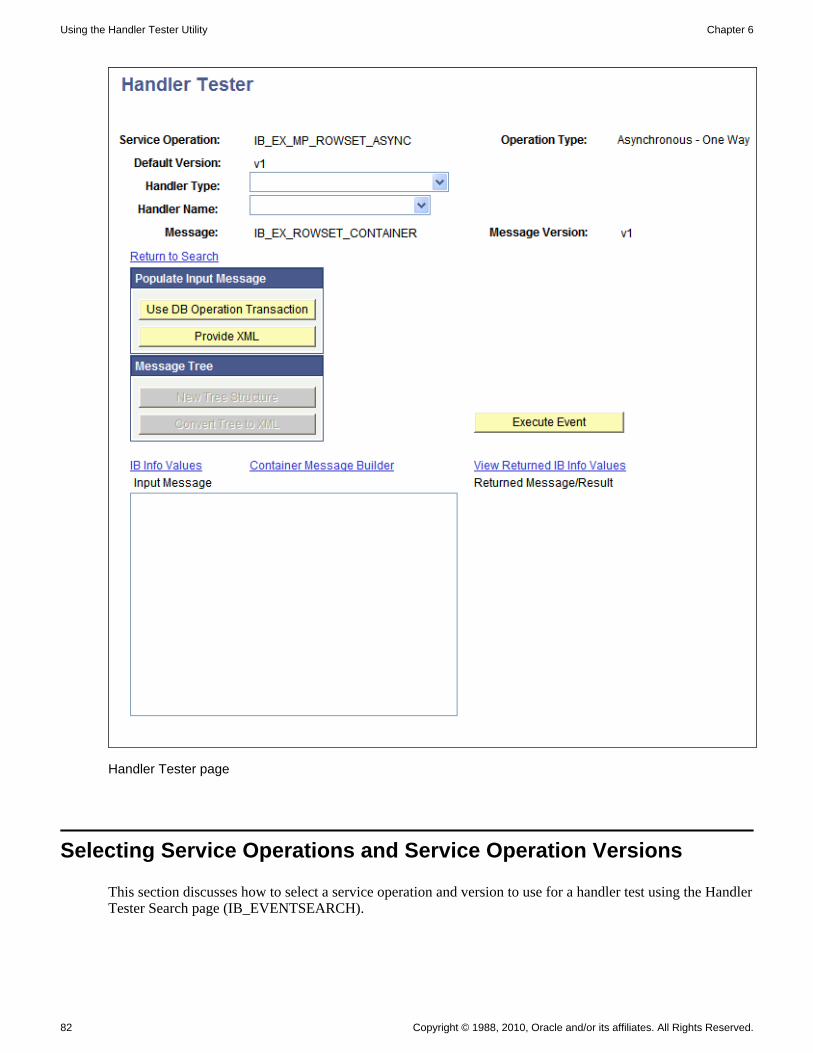
Using the Handler Tester Utility Chapter 6
82 Copyright © 1988, 2010, Oracle and/or its affiliates. All Rights Reserved.
Handler Tester page
Selecting Service Operations and Service Operation Versions
This section discusses how to select a service operation and version to use for a handler test using the HandlerTester Search page (IB_EVENTSEARCH).

Chapter 6 Using the Handler Tester Utility
Copyright © 1988, 2010, Oracle and/or its affiliates. All Rights Reserved. 83
Selecting Service Operations
To select a service operation for the test:
1. Access the Handler Tester Search page (PeopleTools, Integration Broker, Service Utilities, Handler Tester).
2. In the search dialog box enter a search criteria in the Service Name field, click the Lookup button, and select a service definition.
3. Click the Search button and select the service operation.
Note. Service Operation security does not control what appears in the grid. All Service Operations are shown that match the search criteria.
Select the service operation and version to test.
If a non-default version is selected, the handler tester page will display a transform button.
When you select a rowset-based message, the structure of the message appears in tree-format at the bottom ofthe page. The records and fields contain no values until you populate the message with data.
When you select a nonrowset-based message, an Input Message text box displays. Use this box to populate the message definition with data by typing it in or by uploading from a file.
Selecting Handlers to Test
To select an event to test:
1. On the Handler Tester page, from the Handler Type drop-down list box, select a handler type.
Only handler types defined on the service operation display in the drop-down list.
The Message and Message Version fields are populated with the message definitions on the service operation.
2. From the Handler Name drop-down list box, select the handler to test.
Only handler names defined on the service operation display in the drop-down list.
Populating Message Data
This section discusses the methods to populate message data in the Handler Tester utility.
Note. The Handler Tester does not function with messages formatted with multiple level 0 records.
Note. If you select a multi-segmented message from the database, only the first segment is retrieved.

Using the Handler Tester Utility Chapter 6
84 Copyright © 1988, 2010, Oracle and/or its affiliates. All Rights Reserved.
This section discusses how to:
• Use operation transaction data from the application database.
• Manually enter field values.
• Manually enter XML data.
• Upload XML data from files.
• Populate rowset-based message parts in container messages.
Understanding Populating Message Data
You can load message data into a message definition from the following four sources.
1. Operation transaction data from the application database.
2. Field values that you enter manually, including PSCAMA record values and audit actions.
3. XML that you directly input into the utility.
4. XML that you upload from a file.
Using Operation Transaction Data from the Application Database
This section discusses how to use operation transaction data from transactions stored in the application database.
You can use this method to populate rowset-based and nonrowset-based message definitions.
Note. Only those transactions for which the user has been granted security for the service operation are allowed.
To populate message data using transaction data from the application database, you use the Select Database Transaction page (IB_EVENTSEARCH_SEC). The following example shows the page:
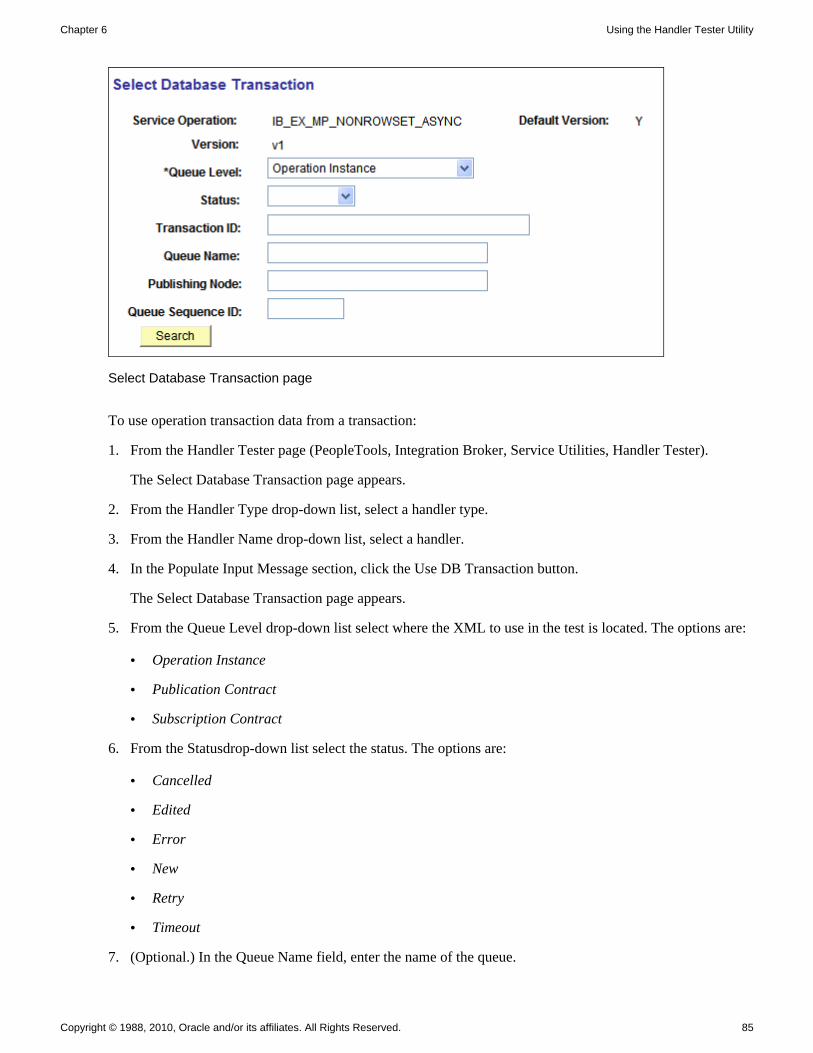
Chapter 6 Using the Handler Tester Utility
Copyright © 1988, 2010, Oracle and/or its affiliates. All Rights Reserved. 85
Select Database Transaction page
To use operation transaction data from a transaction:
1. From the Handler Tester page (PeopleTools, Integration Broker, Service Utilities, Handler Tester).
The Select Database Transaction page appears.
2. From the Handler Type drop-down list, select a handler type.
3. From the Handler Name drop-down list, select a handler.
4. In the Populate Input Message section, click the Use DB Transaction button.
The Select Database Transaction page appears.
5. From the Queue Level drop-down list select where the XML to use in the test is located. The options are:
• Operation Instance
• Publication Contract
• Subscription Contract
6. From the Statusdrop-down list select the status. The options are:
• Cancelled
• Edited
• Error
• New
• Retry
• Timeout
7. (Optional.) In the Queue Name field, enter the name of the queue.

Using the Handler Tester Utility Chapter 6
86 Copyright © 1988, 2010, Oracle and/or its affiliates. All Rights Reserved.
8. (Optional.) In the Publishing Node field, enter the name of the publishing node.
9. (Optional.) In the Queue Sequence ID field, enter the sequence ID.
10. Click the Search button to view the available transactions.
11. Click the Actionslink for the transaction to use.
If this is a rowset-based message, the message tree will be populated from the transaction you selected. If this is a non rowset-based message, the XML will be populated.
Manually Entering Field Values
This section discusses how to:
• Manually enter message definition field values.
• Assign PSCAMA record values and audit actions to Level 0 records.
• Assign PSCAMA audit actions to Level 1 and greater records.
Understanding Manually Entering Field Values
After you specify a service operation and version for a rowset-based message, the Handler Tester displays themessage definition record and field structure in a tree format.
You can populate the message definition by manually entering values for fields.
In addition you can specify PSCAMA record values and audit actions for Level 0 records, as well as PSCAMA audit actions for Level 1 and greater records.
Manually Entering Message Definition Field Values
To manually enter field values:
1. Access the Handler Tester page (PeopleTools, Integration Broker, Service Utilities, Handler Tester).
2. In the tree structure for the message definition, single-click on field name to populate.
A dialog box for the field opens that displays field length and field type information as a guide for entering values.
3. Enter a value for the field.
4. Click the OK button.
Values you enter display after the field name in the tree view. The tree shows the first 30 characters of an entered value; however, the entire field value is stored.
Assigning PSCAMA Values and Audit Actions to Level 0 Records
To assign PSCAMA values and audit actions to Level 0 records:
1. Access the Handler Tester page (PeopleTools, Integration Broker, Service Utilities, Handler Tester).

Chapter 6 Using the Handler Tester Utility
Copyright © 1988, 2010, Oracle and/or its affiliates. All Rights Reserved. 87
2. Populate the service operation with a rowset-based message.
See Chapter 6, "Using the Handler Tester Utility," Populating Message Data, page 83.
3. In the tree view, click the Level 0 record.
The Select an Action page appears.
4. Click the Assign PSCAMA arrow to expand the section.
5. Enter PSCAMA values as appropriate.
Descriptions of the PSCAMA field values and audit actions are described in the PeopleSoft Integration Broker PeopleBook.
See PeopleTools 8.51 PeopleBook: PeopleSoft Integration Broker, "Understanding Supported Message Structures," PSCAMA.
6. Click the OK button.
Assigning PSCAMA Audit Actions to Level 1 and Greater Records
To assign PSCAMA audit actions to Level 1 and greater records:
1. Access the Handler Tester page (PeopleTools, Integration Broker, Service Utilities, Handler Tester).
2. Populate the service operation with a rowset-based message.
See Chapter 6, "Using the Handler Tester Utility," Populating Message Data, page 83.
3. In the tree view, click a Level 1 or greater record.
The Select an Action page appears.
4. Click the Assign PSCAMA arrow to expand the section.
5. From the Action field drop-down list, section the appropriate audit action.
Descriptions of PSCAMA audit actions are described in the PeopleSoft Integration Broker PeopleBook.
See PeopleTools 8.51 PeopleBook: PeopleSoft Integration Broker, "Understanding Supported Message Structures," PSCAMA.
6. Click the OK button.
See Also
Chapter 6, "Using the Handler Tester Utility," Saving Test Data, page 91
Manually Entering XML Data
This section describes how to:
• Manually enter XML data into rowset-based message definitions.

Using the Handler Tester Utility Chapter 6
88 Copyright © 1988, 2010, Oracle and/or its affiliates. All Rights Reserved.
• Manually enter XML data into nonrowset-based message definitions.
Manually Entering XML Data into Rowset-Based Message Definitions
When you manually enter XML data into a rowset-based message, the tree view is not available. To work with message data in the tree view, you must populate the data using operation transaction data from the application database or manually populate field values.
To manually populate a rowset-based message definition:
1. On the Handler Tester page, click the Provide XML button.
The Enter XML page displays.
2. In the XML text box enter XML to populate the message definition.
3. Click the OK button.
The Handler Tester page appears and the XML you entered displays in the Input Message box.
Manually Entering XML Data into Nonrowset-Based Message Definitions
To manually populate a nonrowset-based message definition, on the Handler Tester page, enter XML directlyinto the Input Message box.
Note that you can also click the Provided XML button and enter XML in the XML text box for a nonrowset-based message definition.
Uploading XML Data from Files
This section describes how to upload XML data from files to populate rowset-based and nonrowset-based message definitions.
Prerequisites for Uploading XML Data from Files
To successfully upload files into the Handler Tester the following environment variables must be set:
• PS_FILEDIR
• PS_SERVDIR
Note. PS_SERVDIR is set when you run PSAdmin. Before running PSAdmin, set the PS_SERVDIR environment variable.
This section describes how to set the PS_FILEDIR variable in Windows and UNIX environments.
To set the PS_FILEDIR variable in Windows:
1. Close any open DOS windows.
2. On your desktop, right-click the My Computer icon and click Properties.
The System Properties dialog appears.

Chapter 6 Using the Handler Tester Utility
Copyright © 1988, 2010, Oracle and/or its affiliates. All Rights Reserved. 89
3. Click the Advanced tab.
4. In the Environment Variables section, click the Environment Variables button. The Environment Variables dialog box appears.
5. In the User variables for <user name> section, click New.
A New User Variable dialog box displays.
6. In the Variable Name field enter PS_FILEDIR.
7. In the Variable Value field, enter c:\<path>.
The path you specify is the location from where the system will upload files.
8. Click OK to exit the Environment Variables dialog box.
9. Click OK again to exit the System Properties dialog box.
To set the PS_FILEDIR variable in UNIX use one of the following commands as appropriate for your UNIX environment:
• export PS_FILEDIR = <PS_HOME>/file
• setenv PS_FILEDIR = <PS_HOME>/file
The path you specify is the location from where the system will upload files.
Note. Use the same procedure to set PS_SERVDIR.
Uploading XML Files
To upload XML data from a file to populate message definition data:
1. Access the Enter XML page.
2. From the File Encoding drop-down list, select the file encoding of the file you are uploading. The options are:
• Non-encoded.
• UTF-8.
• UTF-16.
3. Click the Upload XML from File button.
4. Click the Browse button to locate the XML file to upload.
5. Click the Upload button.
6. Click the OK button to return to the Handler Tester page to run the event.

Using the Handler Tester Utility Chapter 6
90 Copyright © 1988, 2010, Oracle and/or its affiliates. All Rights Reserved.
Populating Rowset-Based Message Parts in Container Messages
The Handler Tester utility enables you to populate rowset-based message parts in container messages.
When you select a container message with which to work in the Handler Tester utility, a Container Message Builder link appears on the Handler Tester page. The following example shows the Handler Tester page with a service operation select that contains a container message that contains rowset-based message parts:
The Container Message Builder link appearing on the Handler Tester page.

Chapter 6 Using the Handler Tester Utility
Copyright © 1988, 2010, Oracle and/or its affiliates. All Rights Reserved. 91
The example shows that the service operation IB_EX_MP_ROWSET_SYNC is selected to test. The service operation contains the message IB_EX_ROWSET_CONTAINER, which is a container message comprised ofrowset-based message parts.
When you select the Container Message Builder link, the Container Message Page (IB_MSGCONTAINER) appears, as shown in the following example:
Container Message Builder page
The example shows the first message part contained in the message container, IB_EX_ROWSET_PART1.V1. At the bottom of the page is the familiar tree structure for building out rowset-based messages. You use the same pages as you would to build out any rowset-based message.
Use the backward and forward arrows to navigate to the different message parts in the message.
In between the navigation arrows, the system displays the part on which you are working, and the total number of parts in the container message. This example shows that the Container Message Builder page is displaying message part one and that a total of two parts comprise the container message.
The procedures for creating and modifying rowset-based messages is described in detail elsewhere in PeopleBooks.
See PeopleTools 8.51 PeopleBook: PeopleSoft Integration Broker, "Managing Messages," Managing Rowset-Based Messages.
Saving Test Data
This section discusses how to:
• Save data located in the tree view.
• Save manually-entered XML data.

Using the Handler Tester Utility Chapter 6
92 Copyright © 1988, 2010, Oracle and/or its affiliates. All Rights Reserved.
Saving Data Located in Tree Views
To save test data loaded or entered into a tree view:
1. From the Handler Tester page, click the Convert Tree to XML button.
The Handler Tester converts the data to XML format and displays it in the Input Message window.
2. Cut and paste the XML into an editor or your choice and save the file.
You can later import the data back into the Handler Tester by uploading the XML file back into the utility.
Note. You can also use this method to create and save a test message to use with other integration testing utilities such as Send Master.
Saving Manually-Entered XML Data
To save XML test data that you have manually entered into the utility:
1. From the Handler Tester page, cut or copy the XML data in the Input Message box and copy it into an editor or your choice.
2. Save the file.
You can later import the data back into the Handler Tester by uploading the XML file back into the utility.
Cloning and Deleting Record Structures
This section discusses how to:
• Clone record structures.
• Delete record structures.
Cloning Record Structures
In some cases, you will want to add additional nodes to a record/field tree structure.
For example, if you are testing a purchase order, the records in the tree might be ORDER_HEADER and ORDER_LINE. If you want to test with two or more lines, you can click the first occurrence of the record name ORDER_LINE to duplicate that portion of the tree and all child records and nodes.
To clone a record structure:
1. On the Handler Tester page in the tree view, single-click the record to clone.
The Select An Action dialog box appears.
2. Select Clone Record Structure.
Chapter 6 Using the Handler Tester Utility
Copyright © 1988, 2010, Oracle and/or its affiliates. All Rights Reserved. 93
3. Click the OK button.
The original record is duplicated, along with child nodes and all entered field values. If you clone a record in error, single-click the record again and delete the record structure.
Deleting Record Structures
To delete a record structure:
1. On the Handler Tester page in the tree view, single-click the record to delete.
2. Select Delete Record Structure.
3. Click the OK button.
Specifying Target Connectors and Target Connector Properties
This section discusses how to:
• Specify target connectors.
• Specify target connector properties.
Specifying Target Connectors
You can specify a target connector and target connector properties you have defined at the connector, node and routing definition level when you run event tests.
For example, suppose that there are different query string arguments that would normally come into the system in the URL of an HTTP Get. The PeopleCode that handles the incoming service operation would haveto obtain the query string arguments from the message's IB Info object. In the Handler Tester, the user would supply these values on this page.
To select a target connector:
1. Click the IB Info Values link.
2. In the Connector Property Defaults section, select the target connector. The options are:
• Connector. Click the Lookup button and select the connector ID.
• Node. Click the Lookup button and select the node.
• Routing. Click the Lookup button and select the routing from which to load connector properties.
3. Click the Load Connector Properties button.
Properties you have defined display in the bottom portion of the page.

Using the Handler Tester Utility Chapter 6
94 Copyright © 1988, 2010, Oracle and/or its affiliates. All Rights Reserved.
Specifying Connector Properties
After you load the defined connector properties you can modify and add new values for testing purposes.
Connector properties you add or modify here do not override the properties you may have defined at the gateway, or node levels. However, when you run a handler test, the PeopleCode runs based on the values you define here and the Handler Tester writes the results to the database—and all PeopleCode database changes are permanent.
You can modify and add values for the following items:
Connector Name Specify the proper name of the target connector to invoke to send the message.
Connector Class Name Specify the class name of the target connector to invoke.
Remote Framework URL
Specify the URL (as a string) to which to send a message. This value overrides the server URL.
Path Info Specific to incoming HTTP requests. This is the path information extracted from the request.
Cookies Specific to incoming HTTP requests. This is cookie string found when the request was received by the HTTP listening connector.
App Server Domain Enter the name of the application server domain to use.
Synch Server Timeout Specify the timeout period (in seconds) for a transaction at runtime. The default synchronous timeout period is 300 (five minutes).
Property Name/Value/Property Type
Add or modify connector property names, values and types.
Name/Value Add or modify parameter names and values to send to the target system in the URL, if the external system can use query string parameters as input.
Running Handler Tests and Viewing Test Results
This section discusses how to:
• Execute event tests.
• View test results.
Executing Handler Tests
After you have set up the integration metadata and selected the handler to test, you can run the handler test.

Chapter 6 Using the Handler Tester Utility
Copyright © 1988, 2010, Oracle and/or its affiliates. All Rights Reserved. 95
To run a handler test, on the Handler Tester page, click the Execute Event button.
Viewing Test Results
The Handler Tester returns test results on the Returned Message/Result section of the Handler Tester page and in the Returned IB Info page.
Viewing Results in the Return Message/Results Section
The following table lists the results the Handler Tester returns in the Return Message/Results section on the Handler Tester page:
Event Returns Return Value
OnNotify String The return values are:
• Done.
• Exit(1).
OnSend Message Structure Tree or XML
OnRequest Message structure or string If OnRequest code runs to completion, the message structure or tree is returned.
If there is a user thrown exception, an exception stringis returned.
OnRouteReceive Boolean The return values are:
• Inbound message is accepted.
• Inbound message is rejected.
OnRouteSend String The return values are:
• Outbound message target node list is accepted.
• Outbound message target node list is rejected.
• Outbound message sent to the following node(s) — <node_name>, <node_name>, <node_name>
OnAckReceive String The return values are:
• Error.
• Done.
• Retry.
Component Interface type on a synchronous service operation
Message Structure Tree or XML.

Using the Handler Tester Utility Chapter 6
96 Copyright © 1988, 2010, Oracle and/or its affiliates. All Rights Reserved.
Event Returns Return Value
Component Interface type on an asynchronous service operation
String String returned by the handler.
Deprecated PeopleCode handler On Request
Message Structure Tree or XML.
Deprecated PeopleCode handler OnNotify
String The return values are:
• Done.
• Exit(1).
A reply message displays for the OnRequest and OnSend events. If the reply message is rowset-based, it displays in a tree format to the right of the Input Message section. If the returned message is nonrowset-based,a display-only edit box will display with its contents.
Viewing Results in the Returned IB Info Page
If you specified target connector properties, you can view returned IBInfo information. To do so, on the Handler Tester page, click the View Returned IB Info Values link.
Depending on the input values for an event test and the PeopleCode content, some or all of the fields contain test data.
The fields on that display on this page are described earlier in this chapter.
See Chapter 6, "Using the Handler Tester Utility," Specifying Target Connectors and Target Connector Properties, page 93.
Clearing Test Data
This section describes how to:
• Clear rowset-based message data.
• Clear nonrowset-based message data.
Clearing Rowset-Based Message Data
To clear rowset-based message data:
1. Access the Handler Tester page.
2. Click the New Tree Structure button.
All values for the input message are cleared from the message definition, and you can repopulate it as desired.

Chapter 6 Using the Handler Tester Utility
Copyright © 1988, 2010, Oracle and/or its affiliates. All Rights Reserved. 97
Clearing Nonrowset-Based Message Data
To clear nonrowset-based message data:
1. Access the Handler Tester page.
2. In the Input Message box, delete the XML.
You can repopulate the message definition as desired.


Copyright © 1988, 2010, Oracle and/or its affiliates. All Rights Reserved. 99
Chapter 7
Using the Schema Tester Utility
This chapter provides an overview of the Schema Tester utility, prerequisites for using the utility and discusses how to:
• Access the Schema Tester utility.
• Validate messages against message schemas during development.
Understanding the Schema Tester Utility
The Service Schema Validation Utility enables you to validate rowset-based and nonrowset-based messages against message schemas during development to determine if messages adhere to defined message schemas.
Prerequisites
To use the Schema Tester Utility the following items must exist:
• A message schema against which to test a message.
The message schema can be built when you create the message or you can use the Message Schema Builder to build message schemas.
• A message in XML format to test against a schema.
In addition, to test a schema you must specify the integration gateway must be configured and the default application server must be configured.
Accessing the Schema Tester Utility
The Schema Tester utility is located in the Schema Tester component (IB_SCHEMATESTER).
To access the Schema Tester utility page (IB_SCHEMATESTER), select PeopleTools, Integration Broker, Service Utilities, Schema Tester.

Using the Schema Tester Utility Chapter 7
100 Copyright © 1988, 2010, Oracle and/or its affiliates. All Rights Reserved.
Schema Tester page
Validating Messages Against Message Schemas During Development
To validate a message against a message schema:
1. Select PeopleTools, Integration Broker, Service Utilities, Schema Tester.
2. To select a message, in the Message field, click the Lookup button and select a message.
3. To select a message version , in the Version field, click the Lookup button and select a message version.
4. From the File Encoding drop-down list, select the file encoding of the file you are uploading. The options are:
• Non-encoded.
• UTF-8.
• UTF-16.

Chapter 7 Using the Schema Tester Utility
Copyright © 1988, 2010, Oracle and/or its affiliates. All Rights Reserved. 101
5. Load an XML message to test into the Schema Tester.
• To load a message from a file, click the Upload XML from File button and select the message. The message displays in the Input XML text box.
• In the Input XML text box, manually enter the message data.
6. Click the Validate button to validate the message against the message schema defined for the message definition.
The results of the validation display in the results area of the page.


Copyright © 1988, 2010, Oracle and/or its affiliates. All Rights Reserved. 103
Chapter 8
Using the Generate SOAP Template Utility
This chapter provides an overview of the Generate SOAP Template utility, prerequisites for using the utility and discusses how to:
• Access the Generate SOAP Template utility.
• Generate a SOAP template.
• Invoke service operations from the Generate SOAP Template utility.
Understanding the Generate SOAP Template Utility
The Generate SOAP Template utility enables you to create a SOAP template for any service for which WSDL has been generated. This template consists of example request, response and fault shapes, that can be used in the Handler Tester utility, the Transformation Tester utility or the Send Master utility to test SOAP messages.
You can also use the utility to invoke a test service operation.
Prerequisites
To use the Generate SOAP Template Utility the following items must exist:
• Message schemas for all messages used in the service operation.
• The service operation contains an any-to-local routing.
• The WSDL for the service operation has been written to the WSDL Repository using Provide Web Services.
See Also
PeopleTools 8.51 PeopleBook: PeopleSoft Integration Broker, "Providing Services," Providing Services
Accessing the Generate SOAP Template Utility
The Generate SOAP Template utility is located in the Generate SOAP Template component (IB_TESTSOAP).

Using the Generate SOAP Template Utility Chapter 8
104 Copyright © 1988, 2010, Oracle and/or its affiliates. All Rights Reserved.
To access the Generate SOAP Template utility page (IB_TESTSERVICE), select PeopleTools, Integration Broker, Service Utilities, Generate SOAP Template.
You can also access this page from a push button after providing a web service using the Provide Web Service wizard.
See PeopleTools 8.51 PeopleBook: PeopleSoft Integration Broker, "Providing Services."
Generate SOAP Template page
Generating SOAP Templates
To generate a SOAP template:
1. Access the Generate SOAP Template page (PeopleTools, Integration Broker, Service Utilities, Generate SOAP Template).
The Generate SOAP Template page appears.
2. Click the name of the service operation for which to generate a SOAP template.
The system generates the SOAP template and displays it in the SOAP Message Template page.

Chapter 8 Using the Generate SOAP Template Utility
Copyright © 1988, 2010, Oracle and/or its affiliates. All Rights Reserved. 105
Viewing the Generated Soap Template
The generated SOAP template appears on the SOAP Message Template page (IB_TESTSOAP).
The system generates request, response and fault templates.
Hidden comments in the template provide detailed metadata information including rules, restrictions and extensions. Use the View With Comments push button to display comments for the generated template, and the View Without Comments push button to hide the comments.
The following example shows the SOAP Message Template page:
SOAP Message Template page

Using the Generate SOAP Template Utility Chapter 8
106 Copyright © 1988, 2010, Oracle and/or its affiliates. All Rights Reserved.
Note. The generated SOAP messages can be copied and saved in a file for testing.
Invoking Service Operations from the Generate SOAP Template Utility
After you have generated the SOAP templates for the request message and response message (if any), you caninvoke the service operation.
When you click the Invoke Operation button on the SOAP Message Template page, the SOAP Tester page appears, as shown in the following example.
SOAP Tester page
When the SOAP Tester page first appears two fields are populated, the SOAP Address and the SOAP RequestMessage fields. The system populates the SOAP address from the service information contained in the WSDL. The SOAP request message is the same as what the system generated on the SOAP Message Template page.
After the page is displayed, you can change any values as needed in the SOAP request message.

Chapter 8 Using the Generate SOAP Template Utility
Copyright © 1988, 2010, Oracle and/or its affiliates. All Rights Reserved. 107
Note that the auto-generated SOAP request message contains data that is valid with respect to type (a number for a 'number' field) but may not be valid for that particular request. For example, a key field may be populated with a valid string, but that string value might not actually correspond to a valid entry in the database. It is your responsibility to check the request to ensure that the data makes sense and make any necessary modification.
After you submit the request, the system displays the response in the SOAP Response Message section of the page. The response may either be a valid response or a SOAP fault.
To invoke a service operation from the Generate SOAP Template utility:
1. Using the Generate SOAP Template utility, generate a SOAP message
See Chapter 8, "Using the Generate SOAP Template Utility," Generating SOAP Templates, page 104.
2. On the SOAP Message Template page, click the Invoke Service Operation button.
The SOAP Tester page appears.
3. Review the information in the SOAP Address and SOAP Request Message fields.
Make any necessary modifications.
4. Click the Send Message button.
The system invokes the service operation.
The system invokes the service operation and populates the response in the SOAP Message Response section of the page.


Copyright © 1988, 2010, Oracle and/or its affiliates. All Rights Reserved. 109
Chapter 9
Using the Service Operation Tester Utility
This chapter discusses how to:
• Access the Service Operation Tester
• Select a service operation to test.
• Populate message data.
• Save message test data.
• Clone and delete record structures.
• Override target connector properties
• Invoke test service operation.
• View test service operation results.
• Clear service operation test data.
Understanding the Service Operation Tester Utility
The Service Operation Tester utility enables you test service operations and invoke the following service operation types using the utility:
• Asynchronous One-Way.
• Asynchronous Request/Response.
• Asynchronous-to-Synchronous.
• Synchronous.
You can use the utility to populate messages contained within a service operation,
Prerequisites for Using the Service Operation Tester Utility
Before you can use the Service Operation Tester Utility you create a service operation and save it in the database.

Using the Service Operation Tester Utility Chapter 9
110 Copyright © 1988, 2010, Oracle and/or its affiliates. All Rights Reserved.
Common Elements Used in This Chapter
Convert Tree to XML Click the button to convert data stored in the tree structure into XML format.
Default Version The Service Operation Tester tests the default version of a service operation. If you are testing a non-default version, the transform version page will be displayed.
Future-Dated Publication
Check the box to test future-dated asynchronous service operations.
IB Info Values Click the link to override target connector properties.
Invoke Operation Click the button to invoke the service operation.
Message Version The version of the request message.
New Tree Structure Click the button to clear the record and field values in the tree structure.
Operation Type Displays the operation type of the selected service operation.
See PeopleTools 8.51 PeopleBook: PeopleSoft Integration Broker, "Managing Service Operations," Service Operation Types.
Provide XML Click the button to input XML or upload XML data from a file.
Returned Message/Result
The returned message or results from the test. Displays when you click the Execute Event button.
Return to Search Click the link to return to the Operation Tester Search page and search for an operation to test.
Service The service that contains the service operation to use for the test.
Service Operation The service operation to use for the test.
Use DB Operation Transaction
Use this button to populate the input message with an existing database transaction.
View Returned IB Info Values
Displays the IBInfo values that were returned from the test.
Accessing the Service Operation Tester Utility
To access the Service Operation Tester utility, select PeopleTools, Integration Broker, Service Utilities, Service Operation Tester. The following graphic shows the Service Operation Tester utility:

Chapter 9 Using the Service Operation Tester Utility
Copyright © 1988, 2010, Oracle and/or its affiliates. All Rights Reserved. 111
Service Operation Tester utility
Selecting Service Operations to Test
To select a service operation to test:
1. Access the Service Operation page (PeopleTools, Integration Broker, Service Utilities, Service Operation Tester).
The Operation Tester Search page appears.

Using the Service Operation Tester Utility Chapter 9
112 Copyright © 1988, 2010, Oracle and/or its affiliates. All Rights Reserved.
2. Select a service operation by performing one of the following:
• Click the Search button to display a list of all service operations defined in the database. Click the name of the service operation to test. The Service Operation Tester page appears.
• In the Service field, enter all or part of the name of the service that contains the service operation to test. Click the Lookup button. A list of all services in the database that match the search criteria you entered display.
If you enter nothing in the Service field and click the Lookup button, a list of all services in the database appears.
Click the name of a service that contains the service operation to test. Click the Search button to display all service operations that belong to the service.
Click the name of the service operation to test. The Service Operation Tester page appears.
• In the Service Operation field, enter all or part of the name of the service operation to test. Click the Lookup. A list of all service operations in the database that match the search criteria you entered display.
If you enter nothing in the Service Operation field and click the Lookup button, a list of all service operations in the database appears.
Click the name of the service operation to test. Click the Search button to display all service operations that contain the search string you entered.
Click the name of the service operation to test. The Service Operation Tester page appears.
Specifying Future-Dated Asynchronous Service Operations
The Service Operation Tester utility enables you to test future-dated asynchronous service operations.
If you select an asynchronous service operation, a Future Dated Publication box appears on the Service Operation page.
Check the Future Dated Publication box if the service operation you want to test is future-dated.
Populating Message Data
This section describes how to populate message data in the Service Operation Tester utility. This section discusses how to:
• Manually enter XML to populate message data.
• Upload XML from files to populate message data.
• Manually enter field values to populate message data, including PSCAMA record values and audit actions.
• Populate rowset-based message parts in container messages.
Chapter 9 Using the Service Operation Tester Utility
Copyright © 1988, 2010, Oracle and/or its affiliates. All Rights Reserved. 113
Understanding Populating Message Data
You can load message data into a message definition from the following sources.
1. XML that manually enter.
2. XML that you upload from a file.
3. Field values that you manually enter, including PSCAMA record values and audit actions.
Manually Entering XML to Populate Message Data
This section describes how to:
• Manually enter XML data into rowset-based message definitions.
• Manually enter XML data into nonrowset-based message definitions.
Manually Entering XML Data into Rowset-Based Message Definitions
When you manually enter XML data into a rowset-based message, the tree view is not available. To work with message data in the tree view, you must manually populate field values.
To manually populate a rowset-based message definition:
1. Access the Enter XML page. (Select PeopleTools, Integration Broker, Service Utilities. Click the Provide XML button.
2. In the XML text box enter XML to populate the message definition.
3. Click the OK button.
The Service Operation page appears and the XML you entered displays in the Input Message box.
Manually Entering XML Data into Nonrowset-Based Message Definitions
To manually populate a nonrowset-based message definition, on the Service Operation page, enter XML directly into the Input Message box.
To access the Input Message box, select PeopleTools, Integration Broker, Service Utilities, Service OperationTester.
Note that you can also click the Provided XML button and enter XML in the XML text box for a nonrowset-based message definition.
Uploading XML Data from Files to Populate Message Data
This section describes how to upload XML data from files to populate rowset-based and nonrowset-based message definitions.

Using the Service Operation Tester Utility Chapter 9
114 Copyright © 1988, 2010, Oracle and/or its affiliates. All Rights Reserved.
Prerequisites for Uploading XML Data from Files
To successfully upload files into the Handler Tester the following environment variables must be set:
• PS_FILEDIR
• PS_SERVDIR
Note. PS_SERVDIR is set when you run PSAdmin. Before running PSAdmin, set the PS_SERVDIR environment variable.
This section describes how to set the PS_FILEDIR variable in Windows and UNIX environments.
To set the PS_FILEDIR variable in Windows:
1. Close any open DOS windows.
2. On your desktop, right-click the My Computer icon and click Properties.
The System Properties dialog appears.
3. Click the Advanced tab.
4. In the Environment Variables section, click the Environment Variables button. The Environment Variables dialog box appears.
5. In the User variables for <user name> section, click New.
A New User Variable dialog box displays.
6. In the Variable Name field enter PS_FILEDIR.
7. In the Variable Value field, enter c:\<path>.
The path you specify is the location from where the system will upload files.
8. Click OK to exit the Environment Variables dialog box.
9. Click OK again to exit the System Properties dialog box.
To set the PS_FILEDIR variable in UNIX use one of the following commands as appropriate for your UNIX environment:
• export PS_FILEDIR = <PS_HOME>/file
• setenv PS_FILEDIR = <PS_HOME>/file
The path you specify is the location from where the system will upload files.
Note. Use the same procedure to set PS_SERVDIR.
Uploading XML Data from Files
To upload XML data from a file to populate message definition data:

Chapter 9 Using the Service Operation Tester Utility
Copyright © 1988, 2010, Oracle and/or its affiliates. All Rights Reserved. 115
1. Access the Enter XML page. (PeopleTools, Integration Broker, Service Utilities, Service Operation Tester. Click the Provide XML button.
2. From the File Encoding drop-down list, select the file encoding of the file you are uploading. The options are:
• Non-encoded.
• UTF-8.
• UTF-16.
3. Click the Upload XML from File button.
4. Click the Browse button to locate the XML file to upload.
5. Click the Upload button.
6. Click the OK button to return to the Service Operation page.
Manually Entering Field Values to Populate Message Data
This section discusses how to:
• Manually enter message definition field values.
• Assign PSCAMA record values and audit actions to Level 0 records.
• Assign PSCAMA audit actions to Level 1 and greater records.
Understanding Manually Entering Field Values
After you specify a service operation and version for a rowset-based message, the Handler Tester displays themessage definition record and field structure in a tree format.
You can populate the message definition by manually entering values for fields.
In addition you can specify PSCAMA record values and audit actions for Level 0 records, as well as PSCAMA audit actions for Level 1 and greater records.
Manually Entering Message Definition Field Values
To manually enter field value data:
1. Access the Service Operation page (PeopleTools, Integration Broker, Service Utilities, Service Operation Tester).
2. In the tree structure for the message definition, single-click on field name to populate.
A dialog box for the field opens that displays field length and field type information as a guide for entering values.
3. Enter a value for the field.
4. Click the OK button.

Using the Service Operation Tester Utility Chapter 9
116 Copyright © 1988, 2010, Oracle and/or its affiliates. All Rights Reserved.
Values you enter display after the field name in the tree view. The tree shows the first 30 characters of an entered value; however, the entire field value is stored.
See Chapter 9, "Using the Service Operation Tester Utility," Saving Message Data, page 119.
Assigning PSCAMA Values and Audit Actions to Level 0 Records
To assign PSCAMA values and audit actions to Level 0 records:
1. Access the Service Operation page (PeopleTools, Integration Broker, Service Utilities, Service Operation Tester).
2. Populate the service operation with a rowset-based message.
See Chapter 9, "Using the Service Operation Tester Utility," Populating Message Data, page 112.
3. In the tree view, click the Level 0 record.
The Select an Action page appears.
4. Click the Assign PSCAMA arrow to expand the section.
5. Enter PSCAMA values as appropriate.
Descriptions of the PSCAMA field values and audit actions are described in the PeopleSoft Integration Broker PeopleBook.
See PeopleTools 8.51 PeopleBook: PeopleSoft Integration Broker, "Understanding Supported Message Structures," PSCAMA.
6. Click the OK button.
Assigning PSCAMA Audit Actions to Level 1 and Greater Records
To assign PSCAMA audit actions to Level 1 and greater records:
1. Access the Service Operation page (PeopleTools, Integration Broker, Service Utilities, Service Operation Tester).
2. Populate the service operation with a rowset-based message.
See Chapter 9, "Using the Service Operation Tester Utility," Populating Message Data, page 112.
3. In the tree view, click a Level 1 or greater record.
The Select an Action page appears.
4. Click the Assign PSCAMA arrow to expand the section.
5. From the Action field, section the appropriate audit action.
Descriptions of PSCAMA audit actions are described in the PeopleSoft Integration Broker PeopleBook.
See PeopleTools 8.51 PeopleBook: PeopleSoft Integration Broker, "Understanding Supported Message Structures," PSCAMA.
6. Click the OK button.

Chapter 9 Using the Service Operation Tester Utility
Copyright © 1988, 2010, Oracle and/or its affiliates. All Rights Reserved. 117
Assigning PSCAMA Record Values and Audit Actions to Records
This section discusses how to:
• Assign PSCAMA values and audit actions to Level 0 records
• Assign PSCAMA audit actions to Level 1 and greater records
Understanding Assigning PSCAMA Record Values and Audit Actions
For service operations that contain rowset-based messages, the Service Operation Tester enables you to populate PSCAMA record values at Level 0 and PSCAMA audit action options at every other level of the rowset, based on the message definition.
Populating Rowset-Based Message Parts in Container Messages
The Service Operation Tester utility enables you to populate rowset-based message parts in container messages.
When you select a container message with which to work in the utility, a Container Message Builder link appears on the Service Operation Tester page. The following example shows the Service Operation page witha service operation select that contains a container message that contains rowset-based message parts:

Using the Service Operation Tester Utility Chapter 9
118 Copyright © 1988, 2010, Oracle and/or its affiliates. All Rights Reserved.
The Container Message Builder link appearing on the Service Operation page.
The example shows that the service operation IB_EX_MP_ROWSET_SYNC is selected to test. The service operation contains the message IB_EX_ROWSET_CONTAINER, which is a container message comprised of rowset-based message parts.
When you select the Container Message Builder link, the Container Message Page (IB_MSGCONTAINER) appears, as shown in the following example:
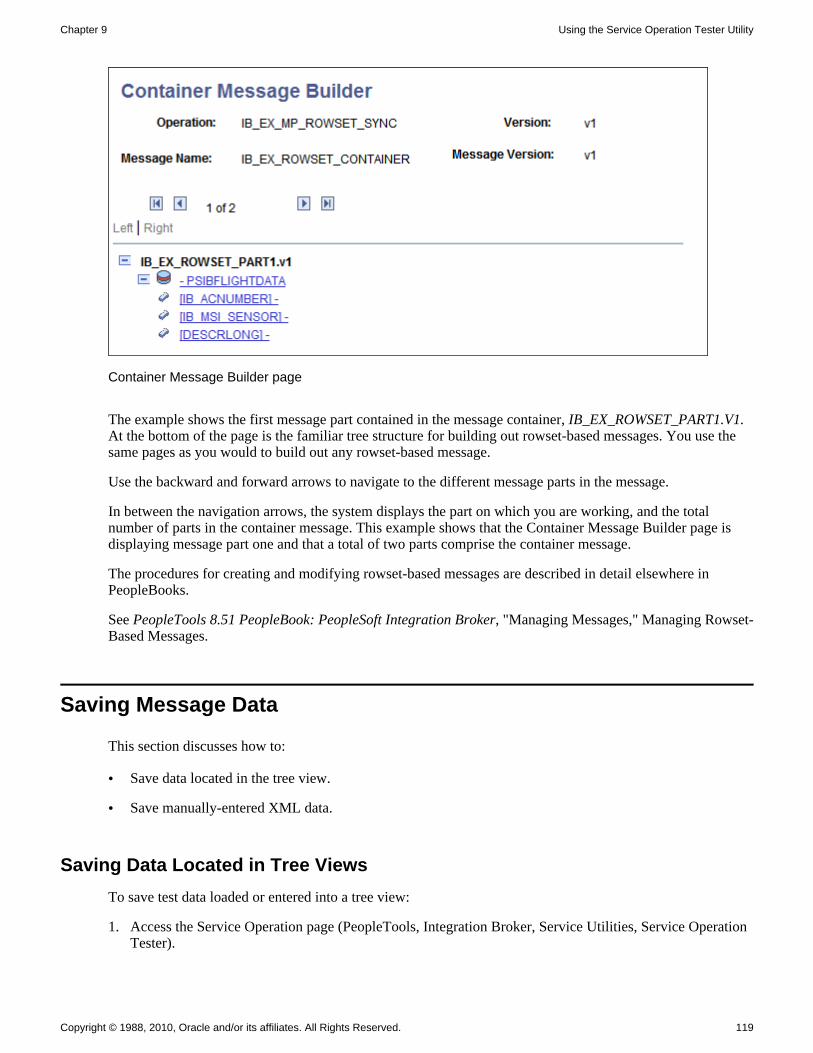
Chapter 9 Using the Service Operation Tester Utility
Copyright © 1988, 2010, Oracle and/or its affiliates. All Rights Reserved. 119
Container Message Builder page
The example shows the first message part contained in the message container, IB_EX_ROWSET_PART1.V1. At the bottom of the page is the familiar tree structure for building out rowset-based messages. You use the same pages as you would to build out any rowset-based message.
Use the backward and forward arrows to navigate to the different message parts in the message.
In between the navigation arrows, the system displays the part on which you are working, and the total number of parts in the container message. This example shows that the Container Message Builder page is displaying message part one and that a total of two parts comprise the container message.
The procedures for creating and modifying rowset-based messages are described in detail elsewhere in PeopleBooks.
See PeopleTools 8.51 PeopleBook: PeopleSoft Integration Broker, "Managing Messages," Managing Rowset-Based Messages.
Saving Message Data
This section discusses how to:
• Save data located in the tree view.
• Save manually-entered XML data.
Saving Data Located in Tree Views
To save test data loaded or entered into a tree view:
1. Access the Service Operation page (PeopleTools, Integration Broker, Service Utilities, Service Operation Tester).

Using the Service Operation Tester Utility Chapter 9
120 Copyright © 1988, 2010, Oracle and/or its affiliates. All Rights Reserved.
2. Click the Convert Tree to XML button.
The Service Operation Tester converts the data to XML format and displays it in the Input Message window.
3. Cut and paste the XML into an editor or your choice and save the file.
You can later import the data back into the Service Operation Tester by uploading the XML file back into the utility.
Note. You can also use this method to create and save a test message to use with other integration testing utilities such as Send Master.
See Chapter 9, "Using the Service Operation Tester Utility," Uploading XML Data from Files to Populate Message Data, page 113 and Chapter 2, "Using the Send Master Utility," page 5.
Saving Manually-Entered XML Data
To save XML test data that you have manually entered into the utility:
1. Access the Service Operation page (PeopleTools, Integration Broker, Service Utilities, Service Operation Tester).
2. Cut or copy the XML data in the Input Message box and copy it into an editor or your choice.
3. Save the file.
You can later import the data back into the Service Operation Tester by uploading the XML file back into the utility.
Cloning and Deleting Record Structures
This section discusses how to:
• Clone record structures.
• Delete record structures.
Cloning Record Structures
In some cases, you will want to add additional nodes to a record/field tree structure.
For example, if you are testing a purchase order, the records in the tree might be ORDER_HEADER and ORDER_LINE. If you want to test with two or more lines, you can click the first occurrence of the record name ORDER_LINE to duplicate that portion of the tree and all child records and nodes.
To clone a record structure:
1. Access the Service Operation page (PeopleTools, Integration Broker, Service Utilities, Service Operation Tester).
Chapter 9 Using the Service Operation Tester Utility
Copyright © 1988, 2010, Oracle and/or its affiliates. All Rights Reserved. 121
2. In the tree view, single-click the record to clone.
The Select An Action dialog box appears.
3. Select Clone Record Structure.
4. Click the OK button.
The original record is duplicated, along with child nodes and all entered field values. If you clone a record in error, single-click the record again and delete the record structure.
Deleting Record Structures
To delete a record structure:
1. Access the Service Operation page (PeopleTools, Integration Broker, Service Utilities, Service Operation Tester).
2. In the tree view, single-click the record to delete.
3. Select Delete Record Structure.
4. Click the OK button.
Overriding Target Connector Properties
This section discusses how to:
• Specify target connectors.
• Specify target connector properties.
Specifying Target Connectors
You can specify a target connector and target connector properties you have defined at the connector, node and routing definition level when you test service operations.
For example, suppose that there are different query string arguments that would normally come into the system in the URL of an HTTP Get. The PeopleCode that handles the incoming service operation would haveto obtain the query string arguments from the message's IB Info object. In the Service Operation Tester, you can supply these values on the IB Info page.
To select a target connector:
1. Access the Service Operation page (PeopleTools, Integration Broker, Service Utilities, Service Operation Tester).
2. Click the IB Info Values link.
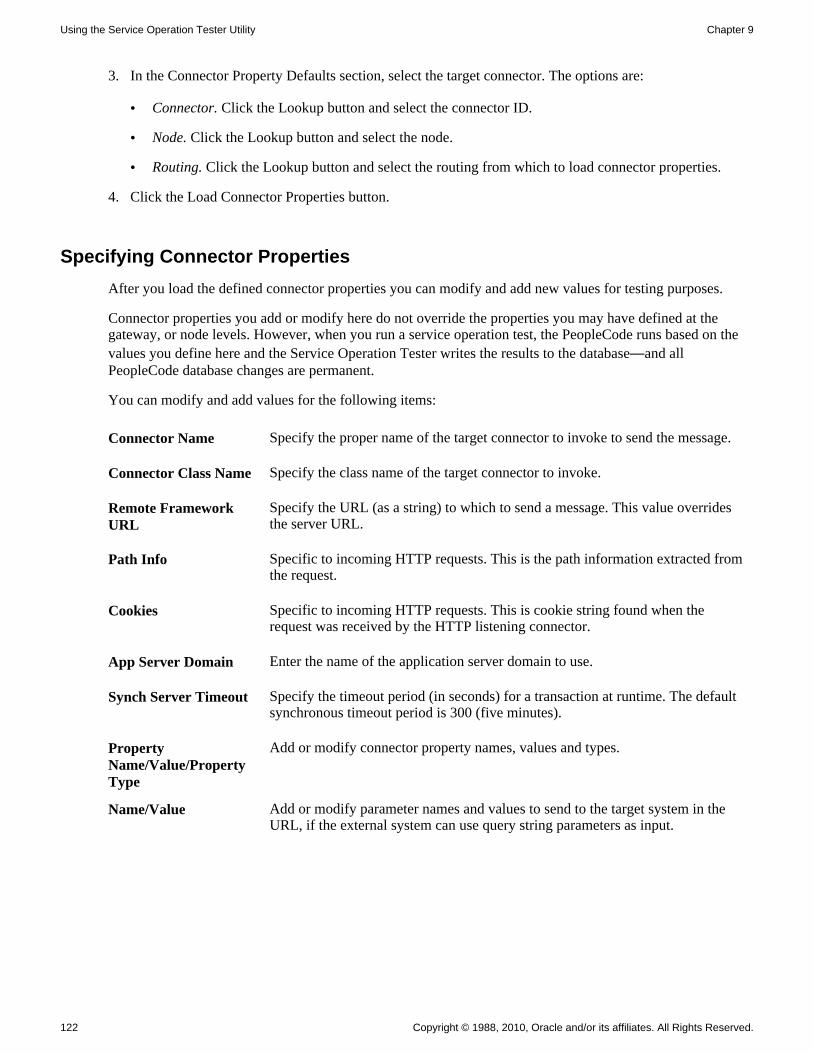
Using the Service Operation Tester Utility Chapter 9
122 Copyright © 1988, 2010, Oracle and/or its affiliates. All Rights Reserved.
3. In the Connector Property Defaults section, select the target connector. The options are:
• Connector. Click the Lookup button and select the connector ID.
• Node. Click the Lookup button and select the node.
• Routing. Click the Lookup button and select the routing from which to load connector properties.
4. Click the Load Connector Properties button.
Specifying Connector Properties
After you load the defined connector properties you can modify and add new values for testing purposes.
Connector properties you add or modify here do not override the properties you may have defined at the gateway, or node levels. However, when you run a service operation test, the PeopleCode runs based on the values you define here and the Service Operation Tester writes the results to the database—and all PeopleCode database changes are permanent.
You can modify and add values for the following items:
Connector Name Specify the proper name of the target connector to invoke to send the message.
Connector Class Name Specify the class name of the target connector to invoke.
Remote Framework URL
Specify the URL (as a string) to which to send a message. This value overrides the server URL.
Path Info Specific to incoming HTTP requests. This is the path information extracted from the request.
Cookies Specific to incoming HTTP requests. This is cookie string found when the request was received by the HTTP listening connector.
App Server Domain Enter the name of the application server domain to use.
Synch Server Timeout Specify the timeout period (in seconds) for a transaction at runtime. The default synchronous timeout period is 300 (five minutes).
Property Name/Value/Property Type
Add or modify connector property names, values and types.
Name/Value Add or modify parameter names and values to send to the target system in the URL, if the external system can use query string parameters as input.

Chapter 9 Using the Service Operation Tester Utility
Copyright © 1988, 2010, Oracle and/or its affiliates. All Rights Reserved. 123
Invoking Test Service Operations
After you have selected the service operation to test and have set up the integration metadata, you can invoke the test service operation.
When you invoke an asynchronous service operation type, for example, asynchronous one-way, asynchronous request-response, or asynchronous-to-synchronous, the system invokes the service operation using the Publish method.
When you invoke a synchronous service operation type, the system invokes the service operation using the SyncRequest method.
To invoke a service operation in the Service Operation Tester:
1. Access the Service Operation page (PeopleTools, Integration Broker, Service Utilities, Service Operation Tester).
2. Click the Invoke Operation button.
Viewing Test Service Operation Results
The Service Operation Tester returns test results in the Returned Message/Result section of the Service Operation page and in the Returned IB Info page.
Viewing Results in the Return Message/Results Section
When you click the Invoke Operation button, the Service Operation Tester invokes the service operation.
If the test is success the system displays a message that the service operation was published and also provides a transaction ID. The following example show a typical message the system displays when a service operation is successfully invoked:
Published. Transaction ID - fb779f7c-51bc-11dc-9567-c6308e318606.
If an error occurs during the invocation, an error message will display in the Return Message/Results section.
Viewing Results in the Returned IB Info Page
If you specified target connector properties, you can view returned IBInfo information. To do so, on the Service Operation page, click the View Returned IB Info Values link.
Depending on the input values for an event test and the PeopleCode content, some or all of the fields contain test data.
The fields on that display on this page are described earlier in this chapter.
See Chapter 9, "Using the Service Operation Tester Utility," Overriding Target Connector Properties, page 121.
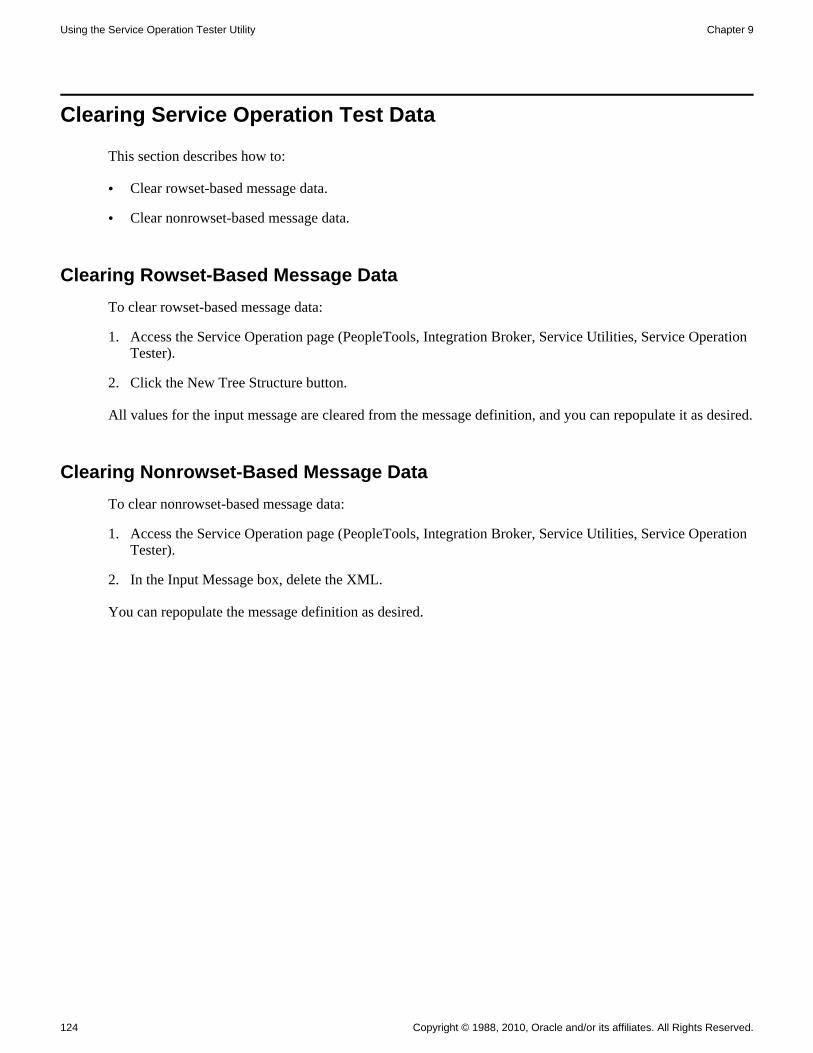
Using the Service Operation Tester Utility Chapter 9
124 Copyright © 1988, 2010, Oracle and/or its affiliates. All Rights Reserved.
Clearing Service Operation Test Data
This section describes how to:
• Clear rowset-based message data.
• Clear nonrowset-based message data.
Clearing Rowset-Based Message Data
To clear rowset-based message data:
1. Access the Service Operation page (PeopleTools, Integration Broker, Service Utilities, Service Operation Tester).
2. Click the New Tree Structure button.
All values for the input message are cleared from the message definition, and you can repopulate it as desired.
Clearing Nonrowset-Based Message Data
To clear nonrowset-based message data:
1. Access the Service Operation page (PeopleTools, Integration Broker, Service Utilities, Service Operation Tester).
2. In the Input Message box, delete the XML.
You can repopulate the message definition as desired.

Index
Copyright © 1988, 2010, Oracle and/or its affiliates. All Rights Reserved. 125
Aasynchronous transactions
integration point testing 60authentication
Integration Broker projects 26
Bbatch EIP projects
Batch Project Executor 35creating the project type 33integration point testing
See Also integration point testingoverriding requesting/destination nodes 34posting 34specifying file input/output directories 34understanding 18using 20, 33viewing output 34
batch operations creating project groups 39Message Export tool 66setting options for projects 17testing project groups 41
Batch Project Executor 35, 65
Ccertificates
specifying keystore settings 16classes
Simple Post 50colors (Send Master) 13compression
applying via projects 27connectors
entering header information 22specifying information for MIME projects 31testing processing 5
connector SDK starting Send Master 6
cookies identifying server-required 26
Ddebugging
transform programs 75
Eenvironment variables
Simple Post Utility 49errors
Send Master out-of-memory error 47Simple Post Utility out-of-memory error 57
event tester 79accessing 81cloning record structures 92deleting record structures 92specifying target connector properties 93specifying target connectors 93
external message IDs Integration Broker projects 26Simple Post Utility 52
Ggateway manager
integration point testing 63
Hhandler tester
clearing test data 96populating message data 83running event tests 94saving test data 91selecting handler to test 83selecting service operations 82selecting service operation versions 82understanding 79viewing test results 94
Hash Key Generator tool 68headers
adding connector header properties for MIME projects 31
defining for Integration Broker projects 25defining for JMS projects 37defining for MIME projects 26entering connector header information 22entering information in projects 21HTTP See Also HTTP headers
HTTP entering header information in projects 21setting proxy options 15
HTTP listening connectors testing 19
HTTPS communication testing servers 18
IIBInfo
entering information in projects 21using in projects 22
inbound messaging playing back service operation transactions
Index
126 Copyright © 1988, 2010, Oracle and/or its affiliates. All Rights Reserved.
71input file projects
creating/adding input files 24creating the project type 23entering HTTP header information 21posting to web servers 24understanding 18using 19, 23
Integration Broker projects See Also Integration Broker projects
Integration Broker projects adding input files 27, 31creating the project type 30defining headers 25, 30exporting request service operations 46MIME See Also MIME projectspinging remote nodes 43posting to web servers 33understanding 18, 25using 24viewing output 33XML See Also XML projects
integration events testing 79
integration gateway posting third-party messages 55
integrationGateway.properties integration point testing 63
integration point batch EIP projects See Also batch EIP projectsdata repository 62gateway manager 63testing 59test service operation transaction properties
file 64integration point testing 59
batch EIP projects See Also batch EIP projectsBatch Project Executor 65cross-application business process testing 61EIP gateway manager 63exporting/playing back/recording service
operation transactions 60Hash Key Generator tool 68integration point data repository 62integration point test service operation
transaction properties file 64managing testing results 60Message Export tool 66playing back service operation transactions 71recording service operation transactions 69regression testing 61setting gateway properties 63tools used for 62understanding 59understanding node map properties file 68unit testing integration points 61uses for 60
introspection performing via projects 27
JJAR files
posting service operations to JMS queues 36Java
increasing JVM heap size 57
runtime environment (JRE) 49using Simple Post via Java API 53
Java Runtime Environment (JRE) 49JMS
defining properties for JMS service operations 37
projects See Also JMS projectstesting service operation posting 36
JMS Project understanding 18
JMS projects adding input files 39creating the project type 38defining headers 37, 38posting to queues 39understanding 36using 20, 36viewing output 39
JMS providers selecting for JMS service operations 37
JRE 49
Kkeystore
setting Send Master options 15
Mmenus
Send Master 7Message Export tool 66message schemas
schema tester utility 99validating during development 100
messaging simulating processing 71testing processing 5third-party See Also third-party messaging
MIME projects See Also MIME projectssending a directory of MIME-formatted
messages 20testing MIME messages
See Also batch EIP projectsviewing project information for MIME
messages 10, 13MIME projects
defining headers 26entering connector header information 22exporting request service operations 46performing connector introspection 27pinging remote nodes 43specifying connector information 31understanding 18using 19using processing performance statistics 43
Nnodes
defining for Integration Broker projects 25

Index
Copyright © 1988, 2010, Oracle and/or its affiliates. All Rights Reserved. 127
defining for JMS service operations 37overriding requesting/destination 20, 34pinging 43, 56understanding node map properties file 68
nonrepudiation applying via projects 27
Ooutbound service operation transactions
playing back service operation transactions 71
Out of Memory error Send Master 47Simple Post Utility 57
Ppasswords
setting for Integration Broker projects 26setting for JMS projects 37
PeopleCode testing messaging 19
performance issues gathering system statistics via Send Master
27increasing JVM heap size 58using processing statistics for MIME projects
43viewing Send Master statistics 43
pinging application server 25remote nodes 43, 56
Preferences dialog box Batch Processing tab 17Display tab 13HTTP tab 15
projects adding input files 22batch EIP See Also batch EIP projectscreating 20creating/managing/testing groups 39entering header information 21input file See Also input file projectsIntegration Broker
See Also Integration Broker projectsJMS See Also JMS projectsMIME See Also MIME projectssharing 42understanding 18using project work space 8viewing response information 42viewing test output 41XML See Also XML projects
Qqueues
posting JMS projects 36, 39
Rrequest service operations
exporting 46providing sample data 19
Sschema tester utility 99
accessing 99prerequisites 99understanding 99validating messages during development 100
Send Master allocating RAM 47creating project groups 39enabling/disabling word wrapping 15exporting request service operations 46managing project groups 40navigating 7Out of Memory error 47pinging remote nodes 43posting large files 47projects See Also projectsproperties file 42setting batch processing options 17setting display preferences 13setting HTTP proxy and keystore options 15sharing projects and groups 42starting 6testing project groups 41understanding 5using batch work space 11using processing performance statistics for
MIME projects 43using project work space 8viewing response information 42viewing test output 41
Send Master projects See projectsservice operation tester
cloning record structures 120deleting record structures 120populating data in 112specifying target connector properties 121specifying target connectors 121
service operation tester utility selecting service operations to test 111
Simple Post Utility accessing/using the simple post class 50allocating RAM 57Out of Memory error 57pinging remote nodes 56posting large files 57posting third-party messages to gateway 55prerequisites 49setting environment variables 49understanding 49using via Java API 53
SOAP testing messages 19
synchronous messaging integration point test service operation
transaction properties file 64playing back service operation transactions
71

Index
128 Copyright © 1988, 2010, Oracle and/or its affiliates. All Rights Reserved.
synchronous transactions integration point testing 60
Ttarget connectors
performing introspection 27selecting for MIME projects 31testing 19
testing HTTP listening connector 19Integration Broker 19integration points 19, 59messaging PeopleCode 19project groups 41service operation/connector processing
See Also Send Masterservice operation posting to JMS queues 36Simple Post Utility 55SOAP messages 19target connectors 19transformations 19transform programs 75URLs 19viewing output for project tests 41
third-party messaging See Also third-party messaging
third-party messaging posting messages to gateway 55understanding the Simple Post Utility 49
timeouts setting for message processing (Send Master)
20transformations
debugging transform programs 75interpreting Send Master processing statistics
44testing transformations 19testing transform programs 75Transform Test Utility 75
Transform page 75Transform Test Utility 75
UURLs
validating 19
Vvalidation
validating URLs 19
WWebLogic
increasing JVM heap size 57web servers
increasing JVM heap size 57
posting input file projects 24posting Integration Broker projects 33
WebSphere increasing JVM heap size 58
work spaces Send Master batch 11Send Master project 8, 14
XXML
posting third-party messages to gateway 55projects See Also XML projects
XML projects exporting request service operations 46HTTP headers 21pinging remote nodes 43understanding 18using 19