PeopleSoft 101 - University of Alberta · PeopleSoft applications use an Oracle database to store...
82
UNIVERSITY OF ALBERTA PeopleSoft HCM PeopleSoft 101 Prepared by: HR Operations Created on 7/10/2017 3:16:00 PM
Transcript of PeopleSoft 101 - University of Alberta · PeopleSoft applications use an Oracle database to store...

UNIVERSITY OF ALBERTA
PeopleSoft HCM
PeopleSoft 101
Prepared by: HR Operations
Created on 7/10/2017 3:16:00 PM

Training Guide
PeopleSoft 101
Copyright © 2017 University of Alberta All rights reserved. The information contained in this manual is proprietary and confidential to the University of Alberta. No part of this manual may be reproduced or transmitted in any form or by any means, electronic or mechanical, including photocopying, recording, or by any information storage and retrieval system, without express written permission from the University of Alberta. Every effort has been made to make this manual as complete and as accurate as possible. The University of Alberta shall accept neither liability nor responsibility to any person or entity with respect to any loss or damages in connection with or arising from the information contained in this manual. The names of software products referred to in this manual are claimed as trademarks or registered trademarks of their respective companies.

Training Guide PeopleSoft 101
Page 1
Table of Contents PeopleSoft 101 .............................................................................................................. 1
What is PeopleSoft? .................................................................................................. 3 PeopleSoft at the U of A ........................................................................................... 4 PeopleSoft Modules and Areas of Responsibility ..................................................... 9
PeopleSoft Access and Navigation ........................................................................ 14 Obtaining Access to PeopleSoft ............................................................................. 15 Signing In to PeopleSoft ......................................................................................... 20 Navigating PeopleSoft - Common Features ............................................................ 26 Understanding the Favorites Menu ......................................................................... 39
Searching and Retrieving Data in PeopleSoft ......................................................... 53 Using a Search to Retrieve Data ............................................................................ 55
Peoplesoft Reporting ............................................................................................... 60 Running a PeopleSoft Query .................................................................................. 61
Creating a New Run Control ID .............................................................................. 69 PeopleSoft 101

Training Guide
PeopleSoft 101
Page 2
PeopleSoft 101
Audience
All University of Alberta employees using PeopleSoft regardless of which application being used.
Overview
This session will provide an introduction to the three PeopleSoft applications used to manage finances, human resources, and student administration at the University of Alberta. You will learn how the applications are used at the U of A and their relationship to each other, be able to perform basic navigation functions, use standard data retrieval tools common to all applications, and understand PeopleSoft reporting at a high level.
This session is intended to provide the foundation upon which you can build your PeopleSoft knowledge and skills in the business context of your specific job.
(All references to U of A in this training guide refer to the University of Alberta)
Objectives
This module will cover:
What is PeopleSoft and How it is used at the U of A
PeopleSoft Access and Navigation
PeopleSoft Reporting
Related Reference Material
All related reference material is stored on the Learning Reference Materials (http://www.hrs.ualberta.ca/Learning/LearningPeopleSoft/LearningSupportMaterials) web page within the Human Resource Services website.
Reference Material may include Training Guides, Quick Reference Guides, and Other Documentation.

Training Guide PeopleSoft 101
Page 3
What is PeopleSoft?

Training Guide
PeopleSoft 101
Page 4
What is PeopleSoft?
Overview
This section will provide an understanding of the three PeopleSoft applications used by the University of Alberta, how the applications are used and their relationship to each other.
Objectives
Upon completion of this section you will have a general understanding of:
The 3 PeopleSoft Applications used at the U of A
The Relationship between the PeopleSoft Applications
The PeopleSoft Modules and Areas of Responsibility
Related Reference Material
All related reference material is stored on the Learning Resource Materials (http://www.hrs.ualberta.ca/Learning/LearningPeopleSoft/LearningSupportMaterials) web page within the Human Resource Services website.
Reference Material may include Training Guides, Quick Reference Guides, and Other Documentation.
PeopleSoft at the U of A
PeopleSoft at the U of A
In this topic you will be introduced to the three PeopleSoft applications used to manage finances, human resources, and student administration at the University of Alberta.

Training Guide PeopleSoft 101
Page 5
To Begin the Online Tutorial:
Click the button located in the top left of the screen and follow the instructions provided.
Procedure
Step Action
1. PeopleSoft is a web-based application designed to help users perform, track, validate, and verify specific tasks or transactions using delivered tools.

Training Guide
PeopleSoft 101
Page 6
Step Action
2. The University of Alberta is currently using three PeopleSoft applications: Campus Solutions (CS) Used to track information regarding student administration, e.g. course enrollment, course planning and scheduling, and undergraduate award management. Human Capital Management (HCM) Used to track employee information, e.g. pay, benefits. Financials Used to track financial transactions, e.g. expenditures, revenues.
Step Action
3. PeopleSoft sometimes shares data between applications and modules. This sharing of data among the applications eliminates redundant data entry and allows enhanced data availability and reporting capabilities.
Training Guide PeopleSoft 101
Page 7
Step Action
4. For example, one commonly shared table is the Personal Data Table containing a Person ID. Person ID’s are created in Campus Solutions and share the Personal Data Table with Human Capital Management in real time. This means that information added and saved within Campus Solutions will immediately be available in Human Capital Management to view. The Financials application also uses the Personal Data Table. However in this case, the data is updated nightly via a file that is extracted from Human Capital Management and Campus Solutions and then loaded into Financials.
5. Entering data in one application may impact the other applications. Therefore it is important to follow all processes correctly to ensure the integrity of the data.

Training Guide
PeopleSoft 101
Page 8
Step Action
6. PeopleSoft applications use an Oracle database to store data. Oracle is a Relational Database, which means that similar types of data are stored in tables that can be linked to each other for cross-referencing. Each table contains rows and columns. Rows represent a unique collection of data and the columns specify attributes related to the row. In order to retrieve information, the software uses specific keys or fields that are common on each table to pull information together. As a rule, these fields should be a static type of data. For example, a person’s name is more static than their address.
Step Action
7. The tables shown provides an example as to how a Relational Database works. The Personal Data Table and the Address Table have the Employee ID. Therefore oracle can pull relevant information from both of these tables such as the Employee's Name and Address that are linked to the Employee ID.

Training Guide PeopleSoft 101
Page 9
Step Action
8. Menu Labels Some of the menu items in the PeopleSoft applications may have different labels but the underlying data comes from the same source. For example, in Human Capital Management, information related to a job (e.g. person ID, department, active status) is located under the heading Workforce Administration; whereas in Financials, portions of this information exist under the heading Employee Profile.
9. Continue on to the next topic to learn more about the modules used with the PeopleSoft Applications and the key areas responsible for these modules.
10. Congratulations! You have completed the training on how PeopleSoft is used at the University of Alberta. End of Procedure.
PeopleSoft Modules and Areas of Responsibility
PeopleSoft Modules and Areas of Responsibility
In this topic you will be introduced to the modules used within the PeopleSoft applications and the key areas that are responsible for maintaining the integrity of PeopleSoft Data, ensuring processes and procedures are being followed correctly, and providing support for networks and database availability.
To Begin the Online Tutorial:
Click the button located in the top left of the screen and follow the instructions provided.
Procedure

Training Guide
PeopleSoft 101
Page 10
Step Action
1. PeopleSoft Modules PeopleSoft applications are very large and complex so their various programs and processes have been organized into modules. These modules are comprised of organized business activities and programs to handle specific tasks within each application.
Step Action
2. The diagram provided illustrates each PeopleSoft application and its related modules currently in use at the University of Alberta. For details on the various modules, refer to Appendix B – PS Modules Explained at the end of the Learning Guide. WA - Need to determine where these details should reside.

Training Guide PeopleSoft 101
Page 11
Step Action
3. Areas of Responsibility The availability and reliability of data in PeopleSoft is critical to daily operations on campus. Key areas have been defined and are responsible for maintaining the integrity of the data, ensuring processes and procedures are being followed correctly, and for providing support for networks and database availability.
4. PeopleSoft Financials Financial Services (FS): Responsible for overall financial transactions. Manages the integrity of all PeopleSoft Financials modules, financial reports, chart of accounts, and inter-module balances. Supply Management Services (SMS): Responsible for the procurement of goods or services and the payment of supplier invoices. Research Services Office (RSO): Responsible for processing research applications and awards and for managing research projects and institutional awards.

Training Guide
PeopleSoft 101
Page 12
Step Action
5. Human Capital Management (HCM) Human Resource Services (HRS): Responsible for managing payroll, benefits and pension transactions, employee history, and time and leave tracking.
6. Campus Solutions Office of the Registrar and Student Awards (RO): Responsible for managing the University’s student record system, recruiting students, processing applications and evaluating credentials, and for maintaining an accurate and complete record of each student's academic progress. This area is also responsible for administering, promoting and disbursing scholarships, creating timetables and exam schedules, and for providing official transcripts and certification of these records. Faculty of Grad Studies and Research (FGSR): Responsible for managing the University’s graduate student records system, recruiting students, processing applications and evaluating credentials, and for maintaining an accurate and complete record of each graduate student's academic progress.

Training Guide PeopleSoft 101
Page 13
Step Action
7. Support, Technical, and Infrastructure Responsibilities Information Services and Technology (IST): Provides Helpdesk service and accepts requests for support for the three PeopleSoft applications via e-mail or phone. Note: IST does not respond to business process related issues. Enterprise Applications (unit inside IST): Responsible for managing the central University-wide administrative systems, primarily PeopleSoft applications. Enterprise Applications is also responsible for managing, coordinating, and monitoring the efforts of service providers and new development vendors in the delivery of production support and development projects. Tata Consultancy Services (TCS): Provides PeopleSoft application services that include application functional and technical support, common table configuration maintenance, application security administration, batch process support, enhancement development, and tax updates. IBM Global Services: Provides infrastructure services that include database administration support, batch monitoring, and infrastructure support, e.g. servers, networks, fire walls, storage systems, back-ups. Faculties and Departments: All PeopleSoft users in faculties and departments on campus are responsible for the integrity of the data in the Financials, HCM, and CS applications.
8. Questions regarding PeopleSoft may be directed to: IST Helpdesk: [email protected] IST Website Live Chat: http://ist.ualberta.ca/ IST Phone: 780-492-9400 (press option 3)

Training Guide
PeopleSoft 101
Page 14
Step Action
9. PeopleSoft Security Access Access to PeopleSoft applications and modules must be requested. Authorized approvers are staff within departments who are designated as signing authorities for those requesting PeopleSoft access. They must complete and submit a form to Enterprise Applications requesting security access for Financials and Campus Solutions. An alternative method to get security access for Human Capital Management is for users with specific roles (assigned within a department or faculty) to request access via a security eForm (online electronic form).
10. Departmental security in Human Capital Management (HCM) and Campus Solutions (CS) limits the data that a user may view, update, or change. It is important to note that if you have access to both HCM and CS, your menus will show both applications.
11. Congratulations! You have completed the training on how PeopleSoft is used at the University of Alberta. End of Procedure.
PeopleSoft Access and Navigation

Training Guide PeopleSoft 101
Page 15
PeopleSoft Access and Navigation
Overview
This section will provide an understanding of what is needed to access any of the three Peoplesoft applications, how to sign in, and the basic tools and features common to all three PeopleSoft applications. This includes an introduction to the general display areas, navigation, data retrieval, data review and data entry.
Objectives
Upon completion of this section you will have a general understanding of:
How to Obtain Access to PeopleSoft Applications
How to Sign In and Sign Out of PeopleSoft
Common Navigational Features in PeopleSoft
How to Search and Retrieve Data from PeopleSoft
Related Reference Material
All related reference material is stored on the Learning Resource Materials (http://www.hrs.ualberta.ca/Learning/LearningPeopleSoft/LearningSupportMaterials) web page within the Human Resource Services website.
Reference Material may include Training Guides, Quick Reference Guides, and Other Documentation.
Obtaining Access to PeopleSoft

Training Guide
PeopleSoft 101
Page 16
Obtaining Access to PeopleSoft
Overview
This section will provide information regarding what is required to obtain access to the PeopleSoft applications and where to go to get this access. As well, you will be presented with information pertaining to system availability.
Objectives
Upon completion of this section you will have a general understanding of:
How to obtain access to PeopleSoft
When you can access PeopleSoft
Getting Access to PeopleSoft
To get access to any of the PeopleSoft applications you need to:
1. Have a U of A Campus Computing ID (CCID)
2. Complete and submit the appropriate Request for Administrative Applications Access form(s)
At the University of Alberta, the Information Services and Technology (IST) - Enterprise Applications group is responsible for managing the institution’s administrative systems, which is primarily PeopleSoft applications (Human Capital Management, Financial and Campus Solutions).
< Scroll Down >
Campus Computing ID (CCID)
IST holds the authority to issue Campus Computing ID’s (CCID) which grants user access to the University’s computing systems and facilities. The CCID along with a user-unique password are both critical aspects of maintaining the integrity of the University’s computing environment.
All staff members are assigned a Campus Computing ID (CCID) that provides access to a variety of University services including PeopleSoft. This CCID ensures only legitimate users of PeopleSoft are able to access the applications.

Training Guide PeopleSoft 101
Page 17
Administrative Applications Access Forms
Each application is a security based structure and access is granted through Authorized Approvers setup in each unit. Therefore, in order to get access to any of the PeopleSoft applications, the appropriate Request for Administrative Applications Access form is required to be completed and submitted.
A summary of the PeopleSoft related Security Forms is provided below. The primary security form for each of the PeopleSoft applications is highlighted for you.
Form Name PeopleSoft Application Use
Authorized Approver Signature Form
ALL Use this form to assign 1Authorized Approvers for a specified list of department IDs.
This includes a change in the Dean, Director or Chair.
Authorized Approver Signature Addendum
ALL Use this form to add and remove authorized approvers from an existing group of authorized approvers for a specified list of department IDs.
This form is not used when there has been a change in the Dean, Director or Chair; this type of change requires the Authorized Approver Signature form.
PeopleSoft Financials Proxy Assignments Access Request
FIN Use this form to add and/or modify an individual as the assigned stand-in (proxy) for a budget owner who is absent.2
PeopleSoft Financials/SupplyNet Subdelegate Assignments Access Request
FIN Use this form to assign, update, remove, or suspend (temporary leave) a sub-delegate from the research project team to approve online purchase requisitions.
Sub-delegation applies to research projects active in fund codes 330, 530, 531, 535 and 540 only.
AdAstra Access Request None Use this form to add and remove access to Ad Astra (central room booking application).

Training Guide
PeopleSoft 101
Page 18
Form Name PeopleSoft Application Use
PeopleSoft Financials/SupplyNet Access Request
FIN Use this form to request access to one or more of the following roles: General User Inquiry, General User Inquiry and Reporting, Billing Invoice Entry, AP Journal Voucher Entry, Department Purchase Requisition Entry, eTRAC administrator.
This form is also used to remove all access to PeopleSoft Financials or to remove individual roles for a specified person.
PeopleSoft Campus Solutions Access
CS Use this form to request departmental access to PeopleSoft Campus Solutions
PeopleSoft Delete Access Request
ALL Use this form to remove all PeopleSoft access for the specified person.3
PeopleSoft Travel & Expenses Independent Reviewer Access Request
FIN Use this form to assign or remove a users access to perform independent review of research Travel & Expense claims for specified department IDs.
PeopleSoft eTRAC Access Request
FIN Use this form to request or remove access to view financial information for specified research projects in eTRAC.
PeopleSoft Human Capital Management (HCM) Access Request
HCM Use this form to request departmental access to PeopleSoft HCM for inquiry and reporting of HR information for specified department IDs. Access may also be granted for time/leave entry on behalf of employees and to adjust /transfer historical salary and benefit expenses from one combination code to another.
This form is also used to remove all access to PeopleSoft HCM or access to individual roles and department IDs for a specified person.
PeopleSoft Human Capital Management (HCM) Proxy Assignments Access Request
HCM Use this form to add and/or modify proxy/delegations for an approver who is absent.4

Training Guide PeopleSoft 101
Page 19
Form Name PeopleSoft Application Use
FIN = Finanace; CS = Campus Solutions; HCM = Human Capital Management
1Authorized Approvers are given the authority to submit PeopleSoft security forms for people (staff, guests, pre-hires) in the specified list of department IDs. Authorized approvers may also receive the CCID/passwords for people (staff, guests, pre-hires) in the specified department IDs.
2PeopleSoft Financials Proxy Assignments Access: This access allows the assigned stand-in to approve travel & expense claims, travel advances and online purchase requisitions on behalf of the budget owner of the specified department or project.
3PeopleSoft Delete Access Request: This form is used when a person with PeopleSoft access is moving to a new department or leaving the University.
4PeopleSoft Human Capital Management (HCM) Proxy Assignments Access Request: Access as a proxy/delegate enables the individual to approve payable time and/or leaves on beahalf of the approver.
The above forms can be found on the Information Services and Technology (IST) (http://ist.ualberta.ca/) website.
Navigation path: Services & Technology > Enterprise Applications > Enterprise Solutions > Administrative Applications Access > PeopleSoft Security Forms (https://ist.ualberta.ca/services/enterprise-applications/enterprise-solutions#dexp_tab_item_251145597)
The completed form should be sent to PeopleSoft Security Forms ([email protected]), using the E-mail or fax number indicated on the form.
HCM access can also be granted using the online Security eForm available to Authorized Approvers in PeopleSoft HCM. A link to the PeopleSoft HCM database is available on the IST website under PeopleSoft (https://ist.ualberta.ca/services/enterprise-applications/enterprise-solutions#access) Security Forms (https://ist.ualberta.ca/services/enterprise-applications/enterprise-solutions#access)section.
SupplyNet access can also be granted using the online Secuirty eForm available in the SupplyNet Security Forms (https://ist.ualberta.ca/services/enterprise-applications/enterprise-solutions#access).
System Availability
PeopleSoft processes batch (a series of programs) at the end of each day, month, and year. In order to accommodate this process, there are established hours of availability for the PeopleSoft applications. Information regarding PeopleSoft availability is provided within the Information Services and Technology (IST) (http://ist.ualberta.ca/) website.

Training Guide
PeopleSoft 101
Page 20
Navigation path: Services & Technology > Enterprise Applications > Enterprise Solutions > Administrative Applications Access > Access Information > PeopleSoft Systems Availability (https://ist.ualberta.ca/sites/default/files/Hours%20of%20Availability%20IST%20Web%20Version%20-%20June%201%202011.pdf)
System Time-Outs
PeopleSoft has defined time-out sessions that detect if a session has been inactive for the predetermined amount of time. Prior to the application logging off the user, a warning message will be displayed indicating the session is about to be timed out. Click the Okay button to extend the session. If the session has timed out, the sign-on process must be completed again. Following is a list of the current application time-outs:
Bear Tracks 30 Minutes
Human Capital Management (HCM) 40 Minutes
Campus Solutions (CS) 40 Minutes
Financials 40 Minutes
Signing In to PeopleSoft
Signing In to PeopleSoft
In this topic you will learn how to sign in to PeopleSoft as well as how to properly sign out.
To Begin the Online Tutorial:
Click the button located in the top left of the screen and follow the instructions provided.
Procedure Navigation Path: [email protected] > Services & Technology > Enterprise Applications > Enterprise Solutions

Training Guide PeopleSoft 101
Page 21
Step Action
1. Signing In to PeopleSoft There are multiple ways to get to the three PeopleSoft Applications. Links to specific PeopleSoft Applications are provided throughout the various University websites.
2. However, all three PeopleSoft applications can be accessed using the Information Services & Technology Website. This tutorial will walk you through this specific Navigation Path.
3. First you will need to open the IST Website by entering the web address 'https://[email protected]/' into the address bar of your internet browser.
Step Action
4. Once you have opened the IST Website, Click the Services & Technology link.

Training Guide
PeopleSoft 101
Page 22
Step Action
5. Click the Enterprise Applications link.
6. Under the Enterprise Solutions sections you will find the list of links to each of the three PeopleSoft Applications. • Campus Solutions • Financials • Human Resource Management (HCM)

Training Guide PeopleSoft 101
Page 23
Step Action
7. For example purposes, Click the HCM link.

Training Guide
PeopleSoft 101
Page 24
Step Action
8. In the CCID field enter Your CCID'. For example purposes enter "Student".
9. Press [Tab].
10. Enter your password into the Password field. Enter "UOFA".

Training Guide PeopleSoft 101
Page 25
Step Action
11. Click the LOGIN button.
12. The Home Page of the PeopleSoft Application you selected will appear. In this example the Human Capital Management Home Page is shown.
13. Signing Out of PeopleSoft There is only one way to Properly Sign Out of PeopleSoft.
14. NEVER click the 'X' to sign out of PeopleSoft. This will technically leave the session active in PeopleSoft and may be a potential security risk.

Training Guide
PeopleSoft 101
Page 26
Step Action
15. To properly sign out of PeopleSoft, go to the top right corner and Click the Sign out link.
16. If you have signed out properly the Logged Out page will appear. You can now close out of your web browser.
17. Congratulations! You have completed the training on how To Sign In to PeopleSoft. End of Procedure.
Navigating PeopleSoft - Common Features
Common PeopleSoft Navigational Features
There are some basic tools and features common to all three applications that enable navigation. In this topic you will learn about the following common navigational features used within all PeopleSoft applications
Favorites Menu Main Menu/ Navigation menu Breadcrumbs Universal Navigation Header Navigation Collections
Training Guide PeopleSoft 101
Page 27
To Begin the Online Tutorial:
Click the button located in the top left of the screen and follow the instructions provided.
Procedure
Step Action
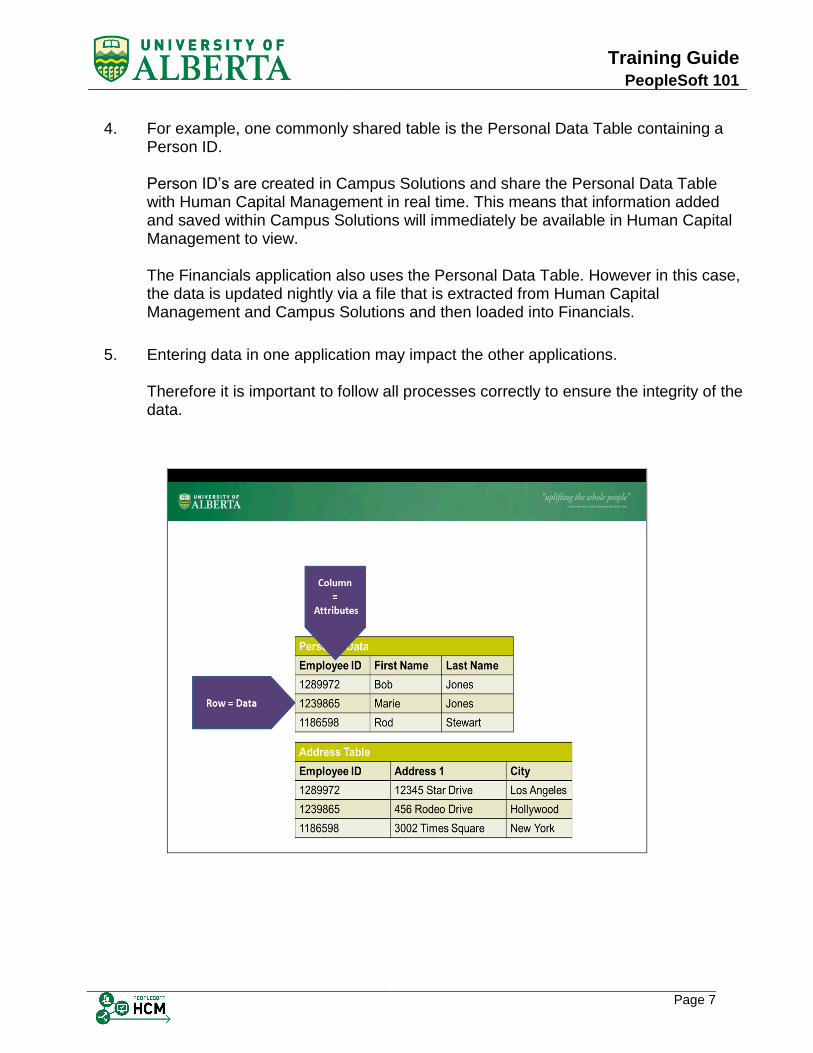
1. When you initialy sign in to a PeopleSoft application you are taken to your Home Page.

Training Guide
PeopleSoft 101
Page 28
Step Action
2. Within your Home Page you will see four primary navigation areas: • Favorites Menu • Main Menu / Navigation Menu • Universal Navigation Header • Navigation Collection
3. It is important to note that the first 3 Navigation areas, Favorites, Main Menu and Universal Navigation Header, are static. This means that you will always be able to view and use these navigation features on any page within any of the PeopleSoft applications.
4. Favorites Menu Located in the top left corner of the screen is the Favorites Menu. This menu is used to save navigation time by book-marking frequently used pages. Click the Favorites dropdown button to activate the menu.

Training Guide PeopleSoft 101
Page 29
Step Action
5. Under the Favorites Menu is the Recently Used header. This displays a list of the last 5 pages you accessed. You can click on the page name listed to navigate directly to that page.
6. Also within the Favorites Menu is the My Favorites Header. Under this header you can: • View and Access your Favorites list • Add to your Favorites list • Edit your Favorites list This list is used to quickly navigate to pages you use on a regular basis. Further details on how to use your "My Favorites" feature is provided in a topic of it's own.
7. Main Menu / Navigation Menu The Main Menu is located in the top left of the screen, beside the Favorites Menuu. It consists of a hierarchy of menu items used to access PeopleSoft folders and pages. Click the Main Menu dropdown button to activate the menu.

Training Guide
PeopleSoft 101
Page 30
Step Action
8. The menu items available within the Main Menu will vary for each employee. This access is based on the PeopleSoft Department security you have been given and the job you do.
9. Additional menu items are displayed depending on the hierarchy of the item you selected.

Training Guide PeopleSoft 101
Page 31
Step Action
10. A yellow Folder icon indicates additional options available.

Training Guide
PeopleSoft 101
Page 32
Step Action
11. A Page icon indicates a direct link to a page.
12. In the example provided, the PeopleSoft HCM Application is being used. Keep in mind that the functionality being demonstrated applies to ALL PeopleSoft applications.
13. To demonstrate how the folder menu items work, Click the Self Service list item.
Step Action
14. More items are displayed until you reach the lowest level of the menu structure. Click the Time Reporting list item.
15. Click the Report Time list item.

Training Guide PeopleSoft 101
Page 33
Step Action
16. The lowest level of the menu has a Page icon on the left.
17. In this example, the Timesheet menu is the lowest level under the Report Time folder. When you click on this menu item you will be taken directly to that page. Click the Timesheet list item.

Training Guide
PeopleSoft 101
Page 34
Step Action
18. Menu Breadcrumb In this example the Timesheet page is displayed from the PeopleSoft HCM application. At the top of the page you will find the Menu Breadcrumb. The main feature of menu breadcrumbs is to keep track of where you are by displaying the path taken.
19. You can also use breadcrumbs as a quick navigation to move between pages within the system. For example, to navigate to the Benefits Summary page use the breadcrumb on the page and Click the Self Service link.
20. The menu navigation list related to the Self Service breadcrumb link will appear. Click the Benefits list item.

Training Guide PeopleSoft 101
Page 35
Step Action
21. Click the Benefits Summary list item.
Training Guide
PeopleSoft 101
Page 36
Step Action
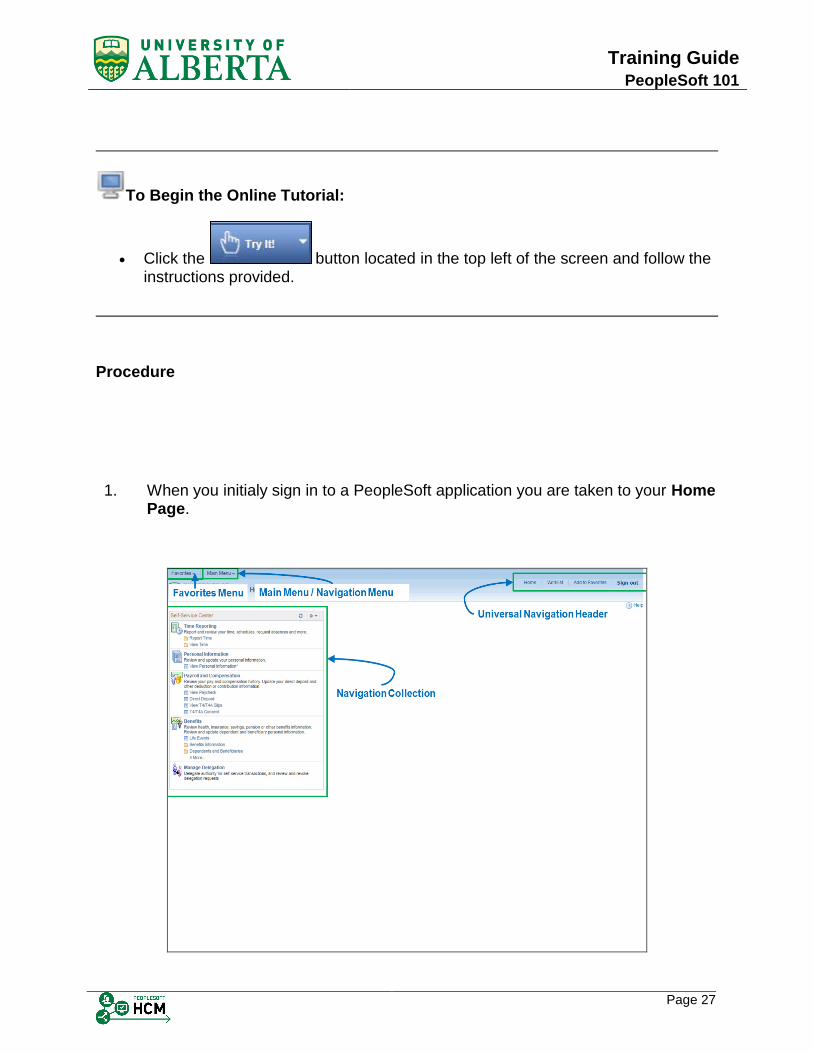
22. The Benefits Summary page appears and the Breadcrumb at the top of the page has changed to reflect the navigation path.
23. Universal Navigation Header In the top right corner of your page is the Universal Navigation Header. The universal navigation header is available at any point in the application and contains hyperlinks such as: • Home • Worklist • Add to Favorites • Sign Out

Training Guide PeopleSoft 101
Page 37
Step Action
24. The Home link returns you to your Home Page which is the page you see after you initially sign in to PeopleSoft. Click the Home link.
25. In this example you are returned to the PeopleSoft HCM Home Page.
26. The Worklist link is available in all PeopleSoft Applications but is currently not being used at the UofA.
27. The next link within the Universal Navigation Header is the Add to Favorites. This link works the exact same way as the Add to Favorites option under the Favorites Menu. This is just another way for you to access this feature.
28. The last link provided in the Universal Navigation Header area is the Sign Out link. Details on using this link are provided within the Signing In To PeopleSoft topic.

Training Guide
PeopleSoft 101
Page 38
Step Action
29. Navigation Collections The last main navigation feature is Navigation Collections. Depending on the PeopleSoft Application you sign in to, you may have Navigation Collections setup on your Home Page. PeopleSoft provides the ability to group links to pages. The grouping of these links are called a Navigation Collection. The links in a navigation collection provide an alternate method of accessing PeopleSoft content.
Training Guide PeopleSoft 101
Page 39
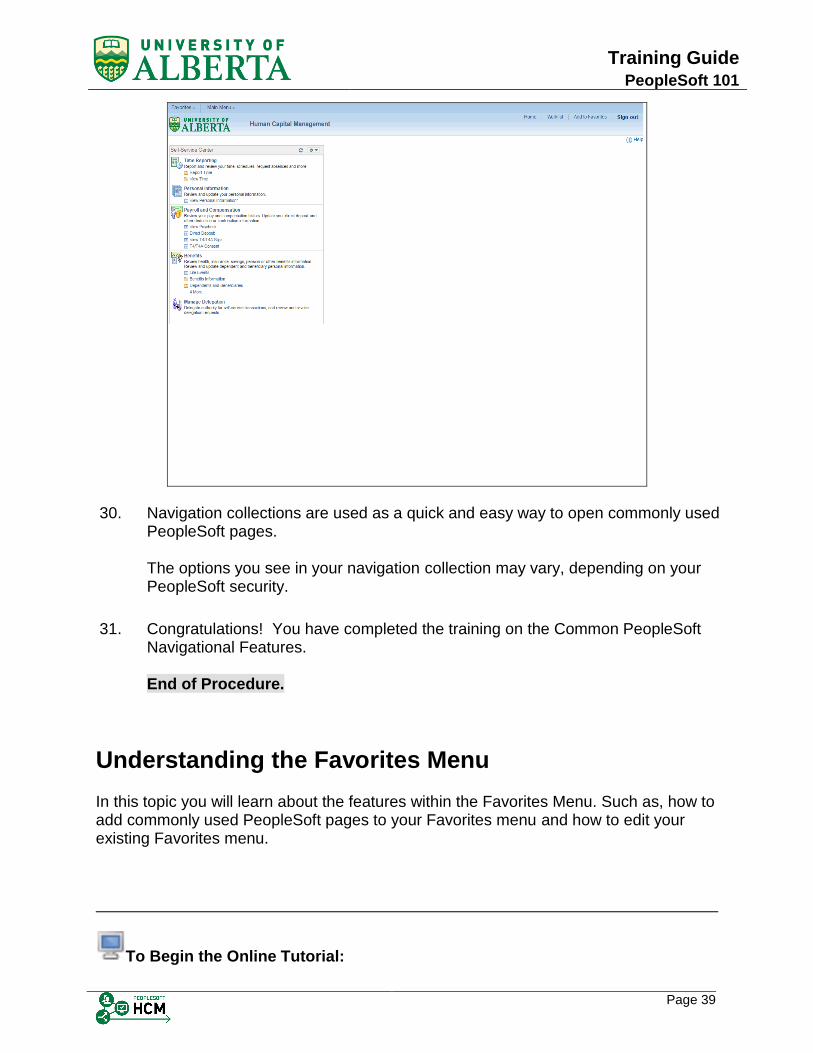
Step Action
30. Navigation collections are used as a quick and easy way to open commonly used PeopleSoft pages. The options you see in your navigation collection may vary, depending on your PeopleSoft security.
31. Congratulations! You have completed the training on the Common PeopleSoft Navigational Features. End of Procedure.
Understanding the Favorites Menu
Understanding the Favorites Menu
In this topic you will learn about the features within the Favorites Menu. Such as, how to add commonly used PeopleSoft pages to your Favorites menu and how to edit your existing Favorites menu.
To Begin the Online Tutorial:

Training Guide
PeopleSoft 101
Page 40
Click the button located in the top left of the screen and follow the instructions provided.
Procedure
Step Action
1. Favorites Menu As mentioned in the PeopleSoft Navigation - Common Features topic, the Favorites Menu is used to save navigation time by book-marking frequently used pages. Click the Favorites dropdown button to activate the menu.
2. Within the Favorites Menu dropdown list you can view, edit and access your list of Favorite pages under the My Favorites sub-header. This topic will provide details on how to: • Add to Favorites • View and Use your Favorites List • Edit Favorites
3. Your Favorites list is specific to you and no one else and is not automatically created. You are in control of this list and therefore you need to build it. You don't need to build your favorites list all at once. As you use the different pages within PeopleSoft you can determine which pages you want in your list and build it as you go.

Training Guide PeopleSoft 101
Page 41
Step Action
4. Add to Favorites There are 4 steps to add to your favorites list. Step 1. Navigate to the page you want to add to your favorites list. Step 2. Click on the Add To Favorites Tool Step 3. Enter a Unique Description for your list item Step 4. Click OK to Save
5. STEP 1: Navigate To The Page Before you can use the Add to Favorites tool you need to open or go to the PeopleSoft page that you want to add to your list. In this example the PeopleSoft HCM application is used and the Query Viewepage is going to be added to the Favorites list. Click the Main Menu dropdown button to activate the menu.
6. Click the Reporting Tools option.
7. Click the Query option.
8. Click the Query Viewer option.
9. STEP 2: Click on the Add to Favorites tool. When you are at the page you want, there are two places that the Add To Favorites tool can be accessed.

Training Guide
PeopleSoft 101
Page 42
Step Action
10. First way is using the Favorites Menu. Click the Favorites dropdown button to activate the menu.
11. Click the Add to Favorites list item.
12. STEP 3: Enter a Unique Description or Name for the page. In the Description field enter "Example - Query Viewer".
13. STEP 4: Click OK to Save Click the OK button.
14. Click the OK button.

Training Guide PeopleSoft 101
Page 43
Step Action
15. The other way to get to the Add To Favorites tool is through the Universal Navigation Header. Click the Add to Favorites link.
16. After clicking on the link, you would follow the exact same steps as mentioned before. Because this page has already been added to the favorites list, Click the Cancel button.
17. To make sure that your page saved to your favorites list, Click the Favorites dropdown button to activate the menu.
18. The page you just added should appear under the My Favorites Header after the Add To Favorites and Edit Favorites tools.
19. For demonstration purposes return to the Home page. Click the Home link.

Training Guide
PeopleSoft 101
Page 44
Step Action
20. Viewing & Using Your Favorites List To view your Favorites list, click the Favorites dropdown button to activate the menu.
21. Your list of favorites will appear under the My Favorites header.
22. Your Favorites list is used to quickly navigate to these specific pages. For example purposes, Click the Job Data list item.
23. As soon as you click on the list item you are taken to that page. In this example, you are taken to the Job Data page.

Training Guide PeopleSoft 101
Page 45
Step Action
24. Even if you have a page open you can still use your favorites list to navigate to another page. For example purposes, while the Job Data page is open, click the Favorites dropdown button to activate the menu.
25. Click the View GL Funding* list item.
26. The GL Funding Search/Inquiry page will open up.

Training Guide
PeopleSoft 101
Page 46
Step Action
27. For demonstration purposes return to the Home page. Click the Home link.

Training Guide PeopleSoft 101
Page 47
Step Action
28. Editing Your Favorites List Within every PeopleSoft application you have the ability to edit your Favorites list as long as it has already been built. Click the Favorites button.
29. Click the Edit Favorites menu.
30. In the Edit Favorites page you can customize and edit your Favorites list. You can ... • Change the order in which your Favorites appear in your list • Edit/change the name of a Favorite • Remove a Favorite from your list • Change the sorting sequence
31. Changing the Order of Your Favorites List To rearrange the order of your favorites, use the Sequence Number column fields and enter numerical values, where "1" is the first item to appear in your list.

Training Guide
PeopleSoft 101
Page 48
Step Action
32. For example purposes you will be rearranging the existing list as follows. ○ Job Data ○ ChartField Speedtypes ○ ChartField Values ○ View GL Funding* ○ Example - Query Viewer
Step Action
33. In the Job Data row enter "1" into the Sequence number field.
34. In the ChartField Speedtypes row enter "2" into the Sequence number field.
35. In the ChartField Values row enter "3" into the Sequence number field.
36. In the View GL Funding* row enter "4" into the Sequence number field.
37. In the Example - Query Viewer row enter "5" into the Sequence number field.

Training Guide PeopleSoft 101
Page 49
Step Action
38. Once you are done entering the sequential numbers, Click the Save button.
39. The Favorites list items are rearranged into the new sequential order.
40. Editing/Changing the Name of a Favorite You can also change the name of your list item. In this example you will be changing the 'WA - Query Viewer' list item to read as 'Viewing Queries'.

Training Guide
PeopleSoft 101
Page 50
Step Action
41. Click in the Appropriate Favorite field.
42. In the Favorite field enter "Viewing Queries".
43. Click the Save button.
44. The name has now been changed.
45. Removing a Favorite In the Edit Favorites page you can also delete a favorite from your list. In this example the View GL Finding* page is to be removed from the list.

Training Guide PeopleSoft 101
Page 51
Step Action
46. On the far right hand side of the grid there is a delete button for each row. In the row for the View GL Funding* favorite, Click the Delete row button.
47. Confirm that you want to delete the selected row. Click the OK button.
48. The entire row is removed from the list. Notice that the Sequence Number fields remain the same. Even though the number 4 is missing from the sequence, the system will still keep the sequential order.
49. Changing the Sorting Sequence You can also personalize your favorites list further by changing the sorting sequence.
50. For example purposes, change the sorting sequence to descending order. Click the Personalize link.
51. The Column Order section provides a list of columns you can sort by. The Sort Order section allows you to specify the sort order for the available columns. The system auto defaults to sort the columns in ascending order.
52. To change the sort order of a column, highlight the Column name under the Column Order Section. For example purposes, Click the Sequence number list item.

Training Guide
PeopleSoft 101
Page 52
Step Action
53. Click the Add To Sort button.
54. The Column name you highlighted should appear in the Sort Order section. Ensure the column name is highlighted in the Sort Order section and Click the Descending option.
55. To see how this change will affect your Favorites list, Click the Preview button.
56. The grid at the bottom of the page displays how your Favorites list will appear under the Favorites Menu.
57. To save the changes, Click the OK button.
58. You will be returned to the Edit Favorites page. After all of your edits have been completed, Click the Save button.
59. Return to your Home page. Click the Home link.
Training Guide PeopleSoft 101
Page 53
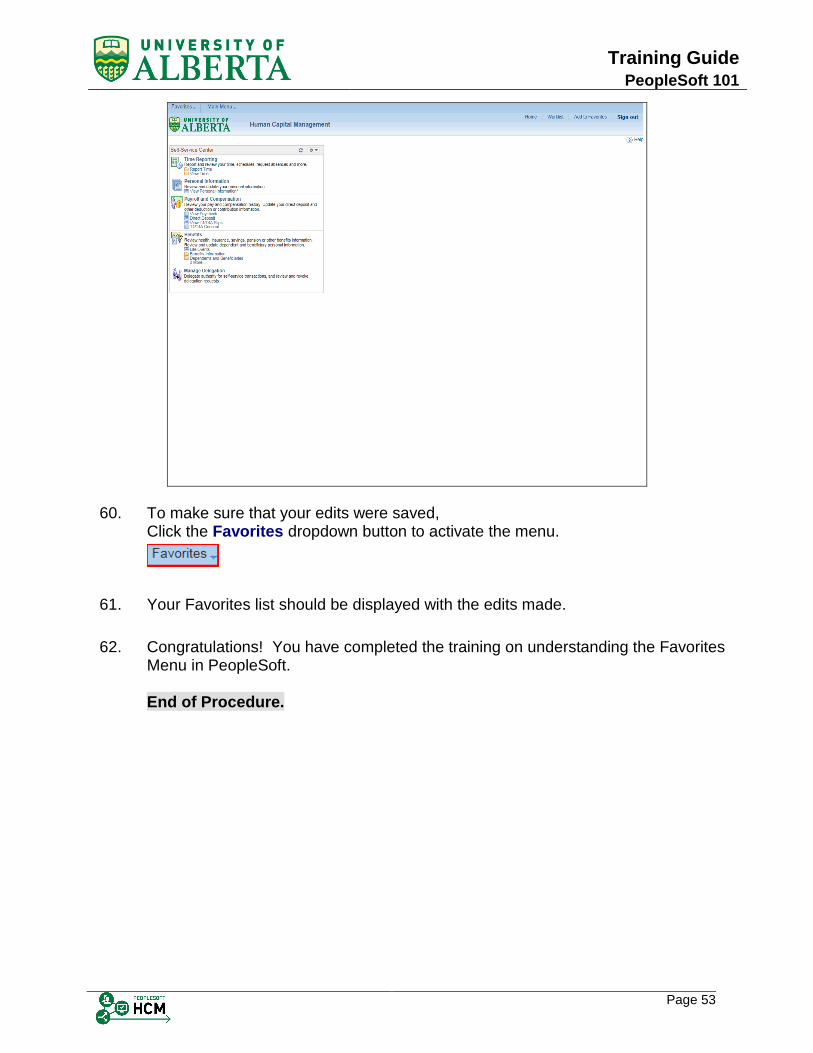
Step Action
60. To make sure that your edits were saved, Click the Favorites dropdown button to activate the menu.
61. Your Favorites list should be displayed with the edits made.
62. Congratulations! You have completed the training on understanding the Favorites Menu in PeopleSoft. End of Procedure.
Searching and Retrieving Data in PeopleSoft

Training Guide
PeopleSoft 101
Page 54
Searching and Retrieving Data in PeopleSoft
Overview
PeopleSoft offers a number of features to assist in selecting, reviewing, or entering data. In this section you will learn about the general tools used to help retrieve information from PeopleSoft.
Objectives
Upon completion of this section you will have a general understanding of:
Common Retrieveal and Data Entry Tools
Using a Search to Retrieve Data
Related Reference Material
All related reference material is stored on the Learning Reference Materials (http://www.hrs.ualberta.ca/Learning/LearningPeopleSoft/LearningSupportMaterials) web page within the Human Resource Services website.
Reference Material may include Training Guides, Quick Reference Guides, and Other Documentation.
Common Retrieval and Data Entry Tools
The most common retrieval and data entry tools you will see are listed below.
Feature Visual Use
Calendar
To select a date from a calendar rather than enter the date manually.

Training Guide PeopleSoft 101
Page 55
Feature Visual Use
Drop-down
To select data from a choice of pre-defined values for a field.
Lookup
To obtain a list of valid values for a field. The retrieved list will vary depending on the field to which it applies and your security access.
Scroll Bar
To view additional rows that do not fit on the grid.
Using a Search to Retrieve Data
Using a Search to Retrieve Data
In this topic you will learn how to use the search tool to retrieve data or review information stored within PeopleSoft.
To Begin the Online Tutorial:
Click the button located in the top left of the screen and follow the instructions provided.
Procedure
Step Action
1. A search in PeopleSoft generally starts from a Find an Existing Value tab (commonly referred to as a search page).

Training Guide
PeopleSoft 101
Page 56
Step Action
2. Every search page will have a Search Criteria area. The information you enter in the search criteria will help search for and retrieve the information you are looking for.
3. The fields provided within the Search Criteria area are considered to be Key Fields that are common on the tables, behind the scenes, that the system is looking at to gather your information.
4. The Search Criteria area also provides the option to select a Search String Operand for each Key Field.
Step Action
5. The search string operand provides more flexibility in conducting your search by restricting or defining your search criteria fiurther. It allows you to look for a combination of letters or numbers in specific search fields. For example purposes, click the button to the right of the begins with field for the Empl ID: Key Field.

Training Guide PeopleSoft 101
Page 57
Step Action
6. Within the Drop-down list you will find the options available that apply to the Key Field you are in. An example of how to use these options is provided later in this tutorial. As well, a full description of each of the search string operands is provided under the Additional Reference Material link called 'PeopleSoft Search String Operands'. WA - Insert link to doc on website
7. You can enter your search criteria into one or a number of the fields. The more information provided in the search criteria, the more specific your search results will be.
8. You can perform two types of searches in PeopleSoft. An Advanced search provides more than one key field with a number of options for search string operands. Most pages are defaulted to the advanced search type.
9. A Basic search provides only one key field and the corresponding search string operand is set for you. Click the Basic Search link.
10. Provided is an example of a Basic search type. Generally the one Key Field in a Basic search is the first field listed in the Advanced search.
11. To demonstrate the search feature, the Advanced search type will be used. Click the Advanced Search link.
12. In this example you are looking for the Job Record for an employee. You know that the Employee ID starts with 144 and that the last name is Fa.

Training Guide
PeopleSoft 101
Page 58
Step Action
13. Because you only know the first part of the Employee ID you can use the Search String Operand 'begins with'. Click the button to the right of the Empl ID Search String Operand field.
14. Click the begins with list item.
15. Enter the known information into the Empl ID field. Enter "144".
16. Now to add the last name to the search criteria. Click the button to the right of the Last Name Search String Operand field.
17. Click the = list item.
18. Enter the known information into the Last Name field. Enter "Fa".
19. Click the button.
20. Your Search Results are displayed in the grid. In this example there are two employees that fit the search criteria that was entered.

Training Guide PeopleSoft 101
Page 59
Step Action
21. Before continuing with another search it is recommended to clear your Search Criteria. This practice will ensure that your search is looking for exactly what you want. Click the Clear button.
22. Once your previous Search Criteria is cleared from the Key Fields, you can continue with your next search.
23. Instead of entering data or a portion of data in the key fields you can use wildcard characters to search in PeopleSoft. The two commonly used wildcard characters are: • ' % ' (percent symbol) To match one or more characters. • ' _ ' (underscore) To match any single character.
24. Again, all features and functions covered within this topic applies to all PeopleSoft Applications. The only differrence is the data and information.

Training Guide
PeopleSoft 101
Page 60
Step Action
25. Congratulations! You have completed the training on how to use a search to retrieve data in PeopleSoft. End of Procedure.
Peoplesoft Reporting

Training Guide PeopleSoft 101
Page 61
PeopleSoft Reporting
Overview
This section will provide an understanding of the basic functions and features used when reporting in PeopleSoft.
Objectives
Upon completion of this section you will have a general understanding of:
Running a PeopleSoft Query
Creating a New Run Control ID
Round Bullet; Arial; 12 font; 6pt space
Related Reference Material
All related reference material is stored on the Learning Reference Materials (http://www.hrs.ualberta.ca/Learning/LearningPeopleSoft/LearningSupportMaterials) web page within the Human Resource Services website.
Reference Material may include Training Guides, Quick Reference Guides, and Other Documentation.
Running a PeopleSoft Query
Running a PeopleSoft Query
PeopleSoft Query enables you to run one-time or scheduled queries by selecting specific fields from specified record(s).
Queries are generally used to extract information at a transactional or detail level.
For example,
To obtain a list of Terminated Employees; or To obtain Job information for hourly employees

Training Guide
PeopleSoft 101
Page 62
The output can be displayed on the screen (Run to HTML) or downloaded into Excel and manipulated as needed.
In this topic you will learn the basics of how to run a PeopleSoft Query.
To Begin the Online Tutorial:
Click the button located in the top left of the screen and follow the instructions provided.
Procedure Navigation Path: Main Menu > Reporting Tools > Query > Query Viewer
Step Action
1. Click the Main Menu button.
2. Click the Reporting Tools menu.
3. Click the Query menu.
4. Click the Query Viewer menu.
5. To view an existing query by Query Name, enter the Query name into the begins with field. For example purposes, enter "ZTL_DIST_TERMINATIONS".

Training Guide PeopleSoft 101
Page 63
Step Action
6. Click the Search button.
7. A list of queries matching the search criteria is displayed. There are multiple outputs a query can be run to. • HTML - view results online • Excel - view results in a spreadsheet

Training Guide
PeopleSoft 101
Page 64
Step Action
8. Run Query to HTML To view the query results online, click the HTML link.
9. Select or enter the Effective Date (from) For example purposes, click the Choose a date (Alt+5) button.
10. Click the button to the right of the Month field.
11. Click the January list item.
12. Click the 1 link.

Training Guide PeopleSoft 101
Page 65
Step Action
13. Select or enter the Effective Date (to) For example purposes, click the Choose a date (Alt+5) button.
14. For example purposes Click the Current Date link.
15. Click the View Results button.
Step Action
16. The results of the query are displayed online.

Training Guide
PeopleSoft 101
Page 66
Step Action
17. Run Query to Excel Click the Excel link.

Training Guide PeopleSoft 101
Page 67
Step Action
18. Enter or select the dates to run the query for. Click the View Results button.
Training Guide
PeopleSoft 101
Page 68
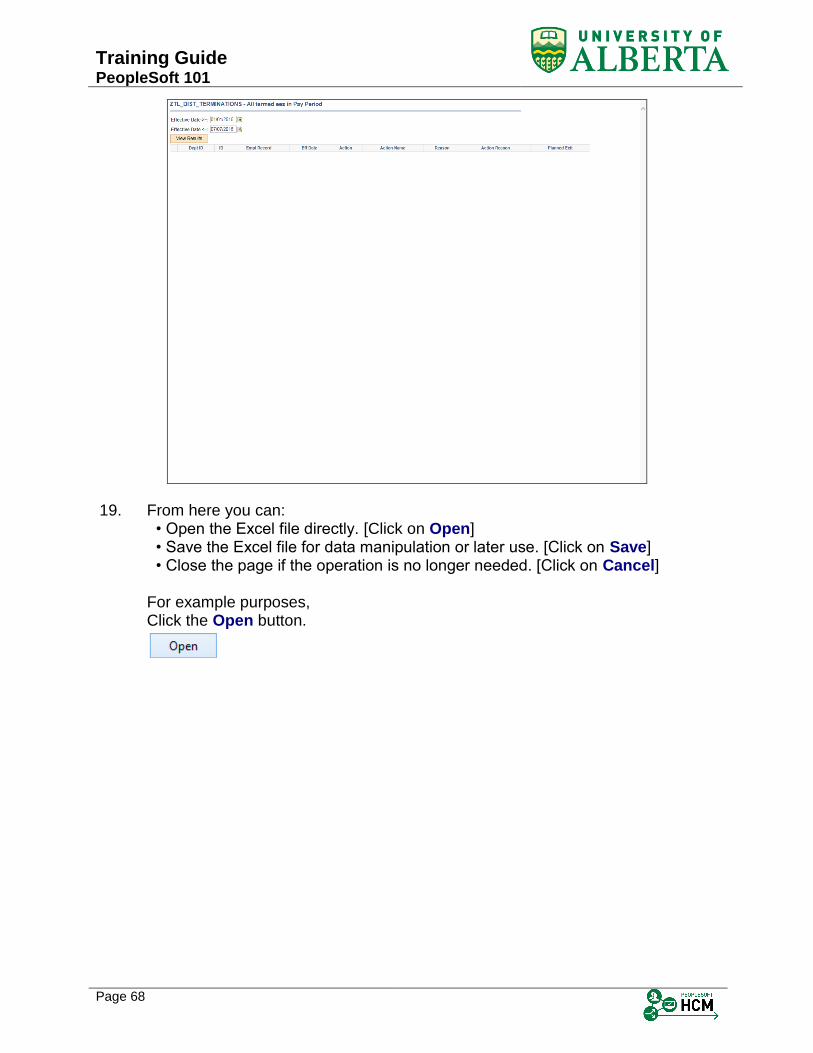
Step Action
19. From here you can: • Open the Excel file directly. [Click on Open] • Save the Excel file for data manipulation or later use. [Click on Save] • Close the page if the operation is no longer needed. [Click on Cancel] For example purposes, Click the Open button.

Training Guide PeopleSoft 101
Page 69
Step Action
20. Your results are displayed in an Excel spreadsheet. Press [Enter].
21. Congratulations! You have completed the training on Running a PeopleSoft Query. End of Procedure.
Creating a New Run Control ID
Creating a New Run Control ID
Every Operational Report you run will require a Run Control ID. A Run Control ID refers to a custom naming convention for each report. Run Control IDs are used to identify the specific options used to run a type of report.
You will need to assign a name to each type of report you run. When naming a run control ID, keep in mind that you will need to be able to recognize one run control name from another.
By creating your own individual Run Controls you can save time when running infrequently used reports. The only change you may be required to make is in the date range.
Naming Conventions

Training Guide
PeopleSoft 101
Page 70
There are several ways to name your Run Control.
Some naming recommendations are:
AdHoc, Daily, Weekly, Monthly, Qtr, or YR to identify run frequency
Staff_Detail
Leave_Balance
Employee_Performance_History
Salary_Report
Biweekly_Time sheets
Run Control IDs
can not contain
any spaces. Use the
underscore "_"
between words
instead.
To Begin the Online Tutorial:
Click the button located in the top left of the screen and follow the instructions provided.
Procedure Navigation Path: Main Menu > HR Operational Reports* > Absences, Time and Labor* > Leave Balance*

Training Guide PeopleSoft 101
Page 71
Step Action
1. Navigate to any HR Operational Report. To demonstrate how to create a new Run Control ID the Leave Balance report will be used.
Step Action
2. Once you have opened the report page, Click the Add a New Value tab.

Training Guide
PeopleSoft 101
Page 72
Step Action
3. In the Run Control ID field enter "LEAVE_BALANCE".
4. Click the Add button.
5. Identifying the report options is up to the individual running the report.

Training Guide PeopleSoft 101
Page 73
Step Action
6. The following is an example of how to select and save different data selections for the Leave Balance report. Click the Department(s) option.

Training Guide
PeopleSoft 101
Page 74
Step Action
7. Click the Department Range(s) option.
8. Click the Look up Plan Type (Alt+5) graphic.
9. Find and select the appropriate Plan Type. For example purposes, Click the 50 - General Illness list item.
10. Click the Add a new row at row 1 (Alt+7) button.
11. Click the Look up Plan Type (Alt+5) graphic.

Training Guide PeopleSoft 101
Page 75
Step Action
12. Find and select the appropriate Plan Type. For example purposes, Click the 51 - Vacation list item.
13. Click the Add a new row at row 2 (Alt+7) button.
14. Click the Look up Plan Type (Alt+5) graphic.
15. Find and select the appropriate Plan Type. For example purposes, Click the 52 - Casual Illness list item.
16. Click in the Dept ID From field.

Training Guide
PeopleSoft 101
Page 76
Step Action
17. Click the Run button.
18. The Report Format and Distribution will default to Web delivery in a PDF format. When you choose web, the report will show up under My Reports on your Manager Dashboard.
19. You can choose to change formats. The CSV option will return an Excel format which you can sort and save.

Training Guide PeopleSoft 101
Page 77
Step Action
20. Click the CSV list item.
21. Having a report sent to your email inbox is another alternative. When you choose this option however, the report will not show up under My Reports on your Manager Dashboard.
22. Click the OK button.

Training Guide
PeopleSoft 101
Page 78
Step Action
23. Click the Process Monitor link.

Training Guide PeopleSoft 101
Page 79
Step Action
24. The Process Monitor shows the status of the report generation. By clicking the Refresh button, it will update the run status. Click the Refresh button.
25. When the Run Status shows Success and the Distribution Status shows Posted, the report is ready for review.
Step Action
26. To navigate back to the Main Menu, in the top right of the page, Click the Home button.
27. From the Main Menu navigate to the Report Manager to retrieve your report. Navigation Path: Main Menu > Reporting Tools > Report Manager Click the Main Menu button.

Training Guide
PeopleSoft 101
Page 80
Step Action
28. Click the Reporting Tools menu.
29. Click the Report Manager menu.
Step Action
30. Click on the report link. For example purposes, Click the ZHRE087 link.
31. Depending on the type of report requested, it will open in a new window.
32. Congratulations! You have completed the training on Creating a New Run Control ID. End of Procedure.