PARTNER ACS R5.0 Remote Administration R5.0 Getting...
32
PARTNER ® ACS R5.0 Remote Administration R5.0 Getting Started 518-456-166 Issue 3 March 2002
Transcript of PARTNER ACS R5.0 Remote Administration R5.0 Getting...
PARTNER® ACS R5.0 Remote Administration R5.0
Getting Started
518-456-166Issue 3March 2002
NoticeEvery effort has been made to ensure that the information in this Getting Started is complete and accurate at the time of printing. Information, however, is subject to change.
Your Responsibility for Your System’s SecurityToll fraud is the unauthorized use of your telecommunications system by an unauthorized party—for example, persons other than your company’s employees, agents, subcontractors, or persons working on your company’s behalf. Note that there may be a risk of toll fraud associated with your telecommunications system, and, if toll fraud occurs, it can result in substantial additional charges for your telecommunications services.
The System Manager is responsible for the security of your system, such as programming and configuring your equipment to prevent unauthorized use. The System Manager is also responsible for reading all installation, instruction, and system administration documents provided with this product in order to fully understand the features that can introduce risk of toll fraud and the steps that can be taken to reduce that risk. Avaya Inc. does not warrant that this product is immune from or will prevent unauthorized use of common-carrier telecommunication services or facilities accessed through or connected to it. Avaya Inc. will not be responsible for any charges that result from such unauthorized use. For important information regarding your system and toll fraud, see the PARTNER Customer Support Document.
0
TrademarksPARTNER is a registered trademark of Avaya Inc. Microsoft, Windows, and Windows NT are registered trademarks of Microsoft Corporation.Pentium is a registered trademark of Intel Corporation.
Ordering Information
Customer SupportIf you need assistance when programming or using your system, contact your local Authorized Dealer or call the Avaya Customer Care Center at 1 800 628-2888. Consultation charges may apply.
Fraud InterventionIf you suspect you are being victimized by toll fraud and you need technical support or assistance, call the Avaya Customer Care Center at 1 800 628-2888.
Copyright © 2002, Avaya Inc. Document 518-456-166All Rights Reserved Issue 3Printed in USA March 2002
Call: Avaya Publications Center
Voice 1 800 457-1235 International Voice 317 322-6791
Fax 1 800 457-1764 International Fax 317 322-6699
Write: Avaya Publications Center
2855 North Franklin Road
Indianapolis, IN 46219-1385
Order: Document No. 518-456-166
Issue 3, March 2002
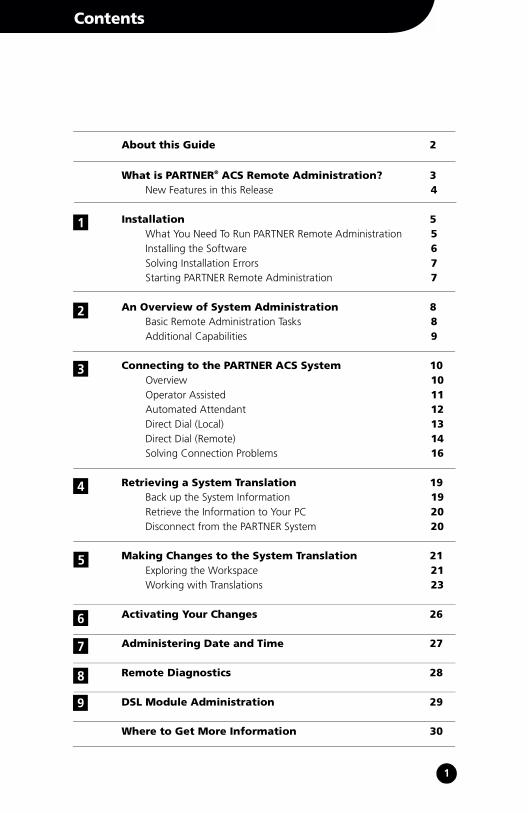
Contents
About this Guide 2
What is PARTNER® ACS Remote Administration? 3New Features in this Release 4
Installation 5What You Need To Run PARTNER Remote Administration 5Installing the Software 6Solving Installation Errors 7Starting PARTNER Remote Administration 7
An Overview of System Administration 8Basic Remote Administration Tasks 8Additional Capabilities 9
Connecting to the PARTNER ACS System 10Overview 10Operator Assisted 11Automated Attendant 12Direct Dial (Local) 13Direct Dial (Remote) 14Solving Connection Problems 16
Retrieving a System Translation 19Back up the System Information 19Retrieve the Information to Your PC 20Disconnect from the PARTNER System 20
Making Changes to the System Translation 21Exploring the Workspace 21Working with Translations 23
Activating Your Changes 26
Administering Date and Time 27
Remote Diagnostics 28
DSL Module Administration 29
Where to Get More Information 30
1
2
3
4
5
6
7
9
8
1
About this Guide
This guide is your key to PARTNER®
ACS R5.0 Remote Administration.
Use this guide to learn:
• What the program can do
• How to install the software
• How to connect to a PARTNER system
• The basics of the administration process
• What you can do with Remote Diagnostics
• Where to find additional information
2 Ab o u t t h i s G u i d e

What is PARTNER® ACS Remote Administration?
PARTNER ACS Remote Administration gives you the ability to manage a PARTNER ACS R5, R4, or R3 system from your PC. Among the many features it contains are ones that let you:
And PARTNER Remote Administration gives you the ability to retrieve diagnostic
information from your PARTNER ACS system, allowing you to:
All these features are accessed through a graphical interface that is easy to learn and use. And though the name says “Remote,” you can also use it to manage a PARTNER system locally. You can even choose to work offline and activate your changes when it’s convenient.
• Program the system (for example, assign outside lines)
• Program extensions (for example, program an autodial button on any extension)
• Back up and restore these and many other settings
• View the type of modules installed on the PARTNER system
• Retrieve reports on system events such as errors and reboots
• Identify the current version of your software
• Identify the PCMCIA cards installed in the PARTNER ACS module
Please note these important points:
� PARTNER Remote Administration only works with PARTNER ACS Release 3.0 and later.
� If you have a version of PARTNER ACS Remote Administration on your PC, you must
uninstall it before installing this software.
� If you have PassageWay Administration for PARTNER software on your PC, you must
uninstall it before installing this software. PARTNER Remote Administration replaces
the old software.
� To help ensure the security of the PARTNER system, you cannot create or change the
remote administration password with this software. This must be done on the system
itself. (See page 18 for instructions on how to do this.)
3Wh at i s PAR T N E R ® A C S R e m o t e A d m i n i s t r a t i o n ?
Installation
1
In addition to supporting all system programming and remote administration features already available in PARTNER Remote Administration Release 4.0 on your PC, PARTNER Remote Administration Release 5.0 supports the following features and capabilities:
• PARTNER ACS R5, PARTNER ACS R4, and PARTNER ACS R3 SupportRelease 5.0 provides the capability to program PARTNER ACS R5 systems, PARTNER ACS R4 systems, and PARTNER ACS R3 systems.
• 1600 DSL Module AdministrationRelease 5.0 provides the capability to administer the DSL features of the 1600 DSL module. For information on performing DSL-specific administration of the 1600 DSL module, refer to the PARTNER Advanced Communication System 1600 Module User’s Guide or the online help.
• Enhanced Remote DiagnosticsRelease 5.0 provides the capability to
• identify and display details about the new 012 ETR module in the board inventory view
• identify PCMCIA cards installed in the ACS module and display details associated with each type of card in the board inventory view
• identify and display details about the 362EC module in the board inventory view
NEW FEATURES IN THIS RELEASE
4 I n s t a l l a t i o n
SE
CT
IO
N
1
Installation
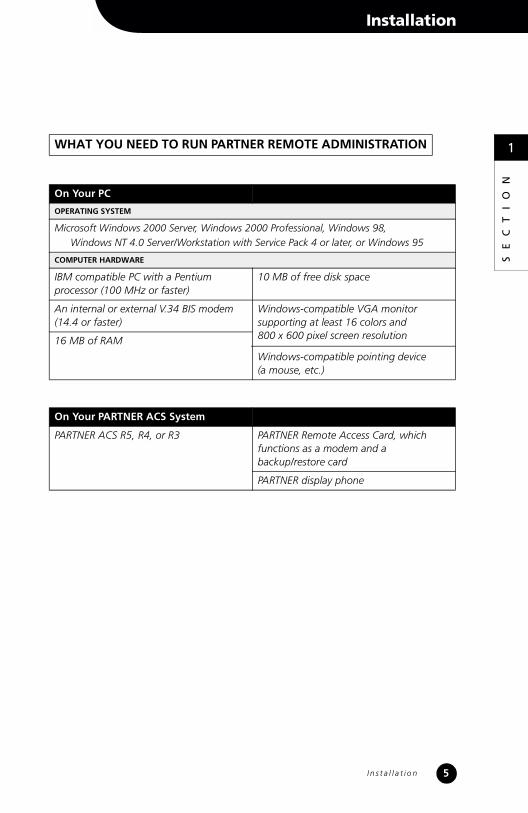
WHAT YOU NEED TO RUN PARTNER REMOTE ADMINISTRATION
On Your PC
OPERATING SYSTEM
Microsoft Windows 2000 Server, Windows 2000 Professional, Windows 98, Windows NT 4.0 Server/Workstation with Service Pack 4 or later, or Windows 95
COMPUTER HARDWARE
IBM compatible PC with a Pentiumprocessor (100 MHz or faster)
10 MB of free disk space
An internal or external V.34 BIS modem (14.4 or faster)
Windows-compatible VGA monitor supporting at least 16 colors and 800 x 600 pixel screen resolution
Windows-compatible pointing device (a mouse, etc.)
16 MB of RAM
On Your PARTNER ACS System
PARTNER ACS R5, R4, or R3 PARTNER Remote Access Card, which functions as a modem and a backup/restore card
PARTNER display phone
5I n s t a l l a t i o n
SE
CT
IO
N
1
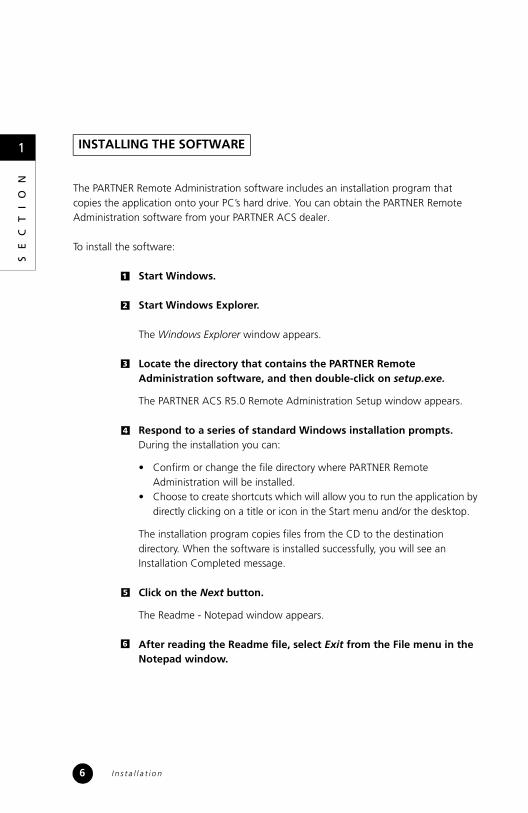
The PARTNER Remote Administration software includes an installation program that copies the application onto your PC’s hard drive. You can obtain the PARTNER Remote Administration software from your PARTNER ACS dealer.
To install the software:
Start Windows.
Start Windows Explorer.
The Windows Explorer window appears.
Locate the directory that contains the PARTNER Remote Administration software, and then double-click on setup.exe.
The PARTNER ACS R5.0 Remote Administration Setup window appears.
Respond to a series of standard Windows installation prompts. During the installation you can:
• Confirm or change the file directory where PARTNER Remote Administration will be installed.
• Choose to create shortcuts which will allow you to run the application by directly clicking on a title or icon in the Start menu and/or the desktop.
The installation program copies files from the CD to the destination directory. When the software is installed successfully, you will see an Installation Completed message.
Click on the Next button.
The Readme - Notepad window appears.
After reading the Readme file, select Exit from the File menu in the Notepad window.
INSTALLING THE SOFTWARE
5
6
1
2
3
4
6 I n s t a l l a t i o n
SE
CT
IO
N
1
An Overview of System Administration
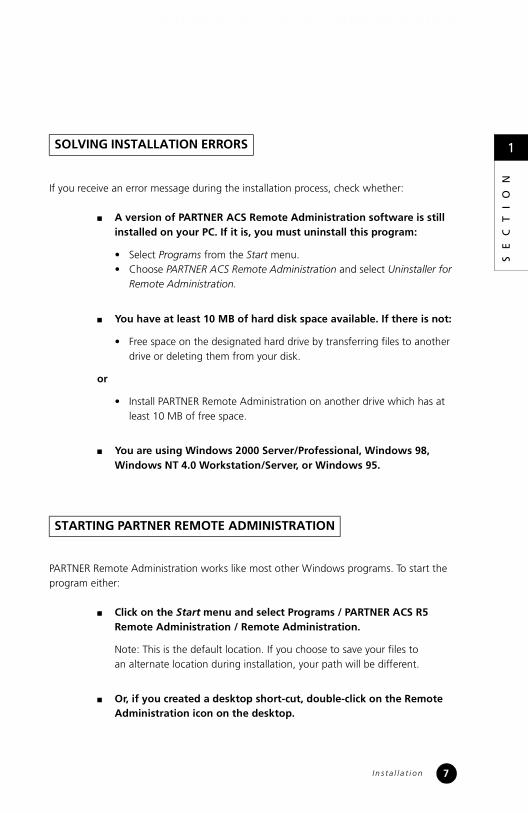
If you receive an error message during the installation process, check whether:
� A version of PARTNER ACS Remote Administration software is still installed on your PC. If it is, you must uninstall this program:
• Select Programs from the Start menu.• Choose PARTNER ACS Remote Administration and select Uninstaller for
Remote Administration.
� You have at least 10 MB of hard disk space available. If there is not:
• Free space on the designated hard drive by transferring files to another drive or deleting them from your disk.
or
• Install PARTNER Remote Administration on another drive which has at least 10 MB of free space.
� You are using Windows 2000 Server/Professional, Windows 98, Windows NT 4.0 Workstation/Server, or Windows 95.
PARTNER Remote Administration works like most other Windows programs. To start the program either:
� Click on the Start menu and select Programs / PARTNER ACS R5 Remote Administration / Remote Administration.
Note: This is the default location. If you choose to save your files toan alternate location during installation, your path will be different.
� Or, if you created a desktop short-cut, double-click on the Remote Administration icon on the desktop.
SOLVING INSTALLATION ERRORS
STARTING PARTNER REMOTE ADMINISTRATION
7I n s t a l l a t i o n
SE
CT
IO
N
2
An Overview of System Administration
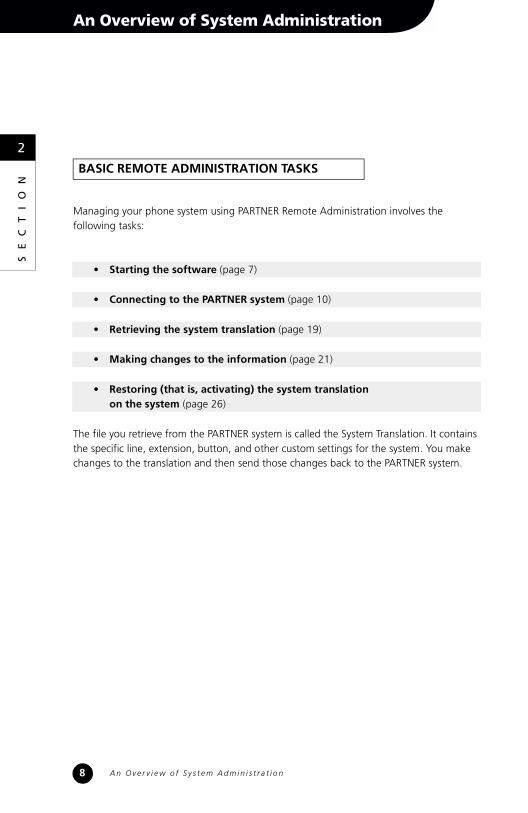
Managing your phone system using PARTNER Remote Administration involves the following tasks:
The file you retrieve from the PARTNER system is called the System Translation. It contains the specific line, extension, button, and other custom settings for the system. You make changes to the translation and then send those changes back to the PARTNER system.
BASIC REMOTE ADMINISTRATION TASKS
• Starting the software (page 7)
• Connecting to the PARTNER system (page 10)
• Retrieving the system translation (page 19)
• Making changes to the information (page 21)
• Restoring (that is, activating) the system translation on the system (page 26)
8 A n Ov e r v i e w o f S y s t e m A d m i n i s t r a t i o n
SE
CT
IO
N
2
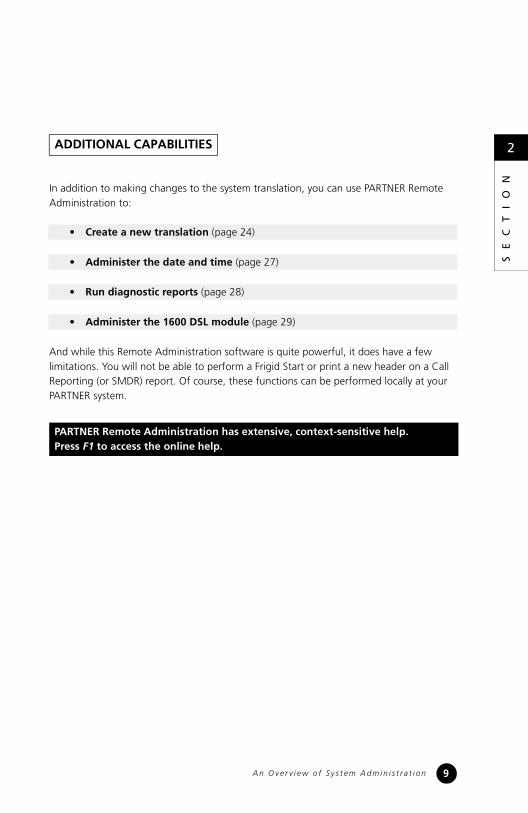
In addition to making changes to the system translation, you can use PARTNER Remote Administration to:
And while this Remote Administration software is quite powerful, it does have a few limitations. You will not be able to perform a Frigid Start or print a new header on a Call Reporting (or SMDR) report. Of course, these functions can be performed locally at your PARTNER system.
ADDITIONAL CAPABILITIES
• Create a new translation (page 24)
• Administer the date and time (page 27)
• Run diagnostic reports (page 28)
• Administer the 1600 DSL module (page 29)
PARTNER Remote Administration has extensive, context-sensitive help. Press F1 to access the online help.
9A n O v e r v i e w o f S y s t e m A d m i n i s t r a t i o n
SE
CT
IO
N
3
Connecting to the PARTNER ACS System
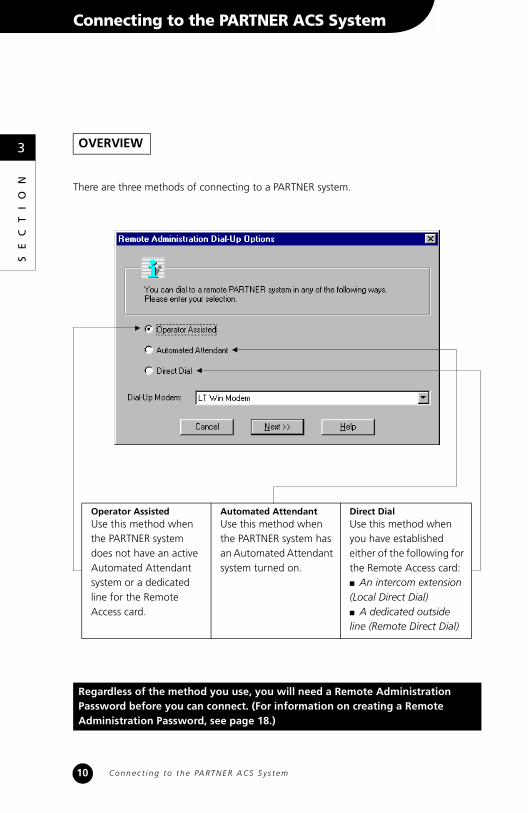
There are three methods of connecting to a PARTNER system.
OVERVIEW
Operator AssistedUse this method when the PARTNER system does not have an active Automated Attendant system or a dedicated line for the Remote Access card.
Automated AttendantUse this method when the PARTNER system has an Automated Attendant system turned on.
Direct Dial Use this method when you have established either of the following for the Remote Access card:� An intercom extension (Local Direct Dial) � A dedicated outside line (Remote Direct Dial)
Regardless of the method you use, you will need a Remote Administration Password before you can connect. (For information on creating a Remote Administration Password, see page 18.)
10 C o n n e c t i n g t o t h e PA RT N E R A C S S y s t e m
SE
CT
IO
N
3
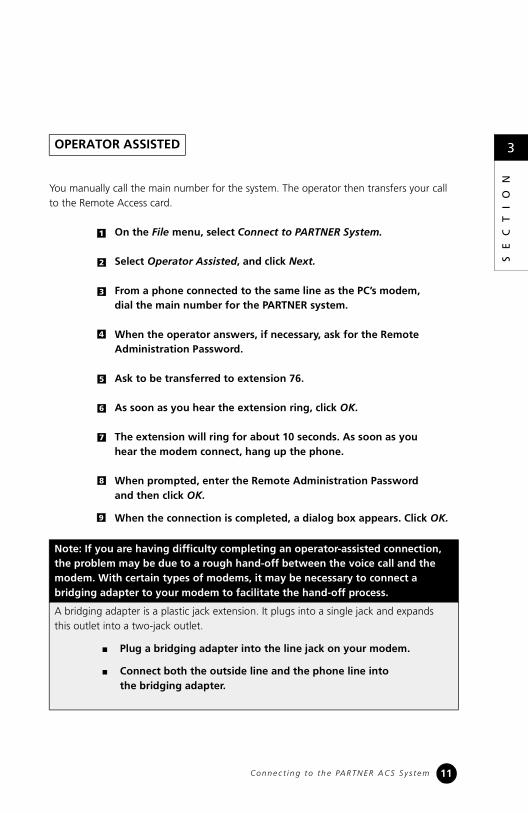
You manually call the main number for the system. The operator then transfers your call to the Remote Access card.
On the File menu, select Connect to PARTNER System.
Select Operator Assisted, and click Next.
From a phone connected to the same line as the PC’s modem, dial the main number for the PARTNER system.
When the operator answers, if necessary, ask for the Remote Administration Password.
Ask to be transferred to extension 76.
As soon as you hear the extension ring, click OK.
The extension will ring for about 10 seconds. As soon as youhear the modem connect, hang up the phone.
When prompted, enter the Remote Administration Password and then click OK.
When the connection is completed, a dialog box appears. Click OK.
OPERATOR ASSISTED
Note: If you are having difficulty completing an operator-assisted connection, the problem may be due to a rough hand-off between the voice call and the modem. With certain types of modems, it may be necessary to connect a bridging adapter to your modem to facilitate the hand-off process.
A bridging adapter is a plastic jack extension. It plugs into a single jack and expands this outlet into a two-jack outlet.
� Plug a bridging adapter into the line jack on your modem.
� Connect both the outside line and the phone line into the bridging adapter.
1
2
3
5
4
6
7
8
9
11C o n n e c t i n g t o t h e PAR T N E R A C S S y s t e m
SE
CT
IO
N
3
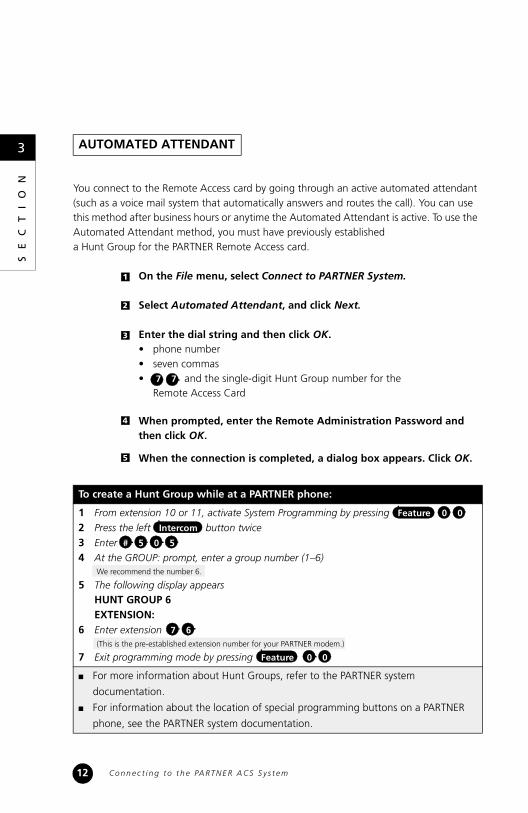
You connect to the Remote Access card by going through an active automated attendant (such as a voice mail system that automatically answers and routes the call). You can use this method after business hours or anytime the Automated Attendant is active. To use the Automated Attendant method, you must have previously established a Hunt Group for the PARTNER Remote Access card.
On the File menu, select Connect to PARTNER System.
Select Automated Attendant, and click Next.
Enter the dial string and then click OK.• phone number • seven commas • 7 7 and the single-digit Hunt Group number for the
Remote Access Card
When prompted, enter the Remote Administration Password and then click OK.
When the connection is completed, a dialog box appears. Click OK.
AUTOMATED ATTENDANT
To create a Hunt Group while at a PARTNER phone:
1 From extension 10 or 11, activate System Programming by pressing Feature 0 0
2 Press the left Intercom button twice
3 Enter # 5 0 5
4 At the GROUP: prompt, enter a group number (1–6) We recommend the number 6.
5 The following display appearsHUNT GROUP 6EXTENSION:
6 Enter extension 7 6 (This is the pre-established extension number for your PARTNER modem.)
7 Exit programming mode by pressing Feature 0 0
� For more information about Hunt Groups, refer to the PARTNER system
documentation.
� For information about the location of special programming buttons on a PARTNER
phone, see the PARTNER system documentation.
1
2
3
4
5
12 C o n n e c t i n g t o t h e PA RT N E R A C S S y s t e m
SE
CT
IO
N
3
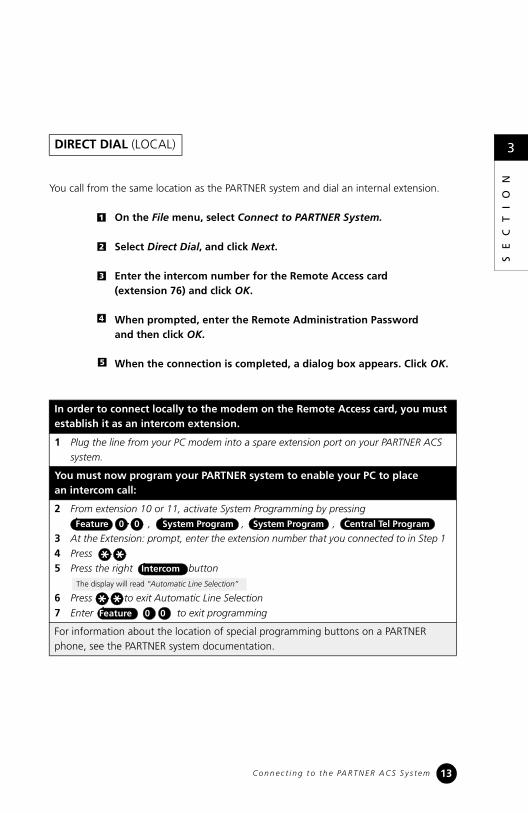
You call from the same location as the PARTNER system and dial an internal extension.
On the File menu, select Connect to PARTNER System.
Select Direct Dial, and click Next.
Enter the intercom number for the Remote Access card (extension 76) and click OK.
When prompted, enter the Remote Administration Password and then click OK.
When the connection is completed, a dialog box appears. Click OK.
DIRECT DIAL (LOCAL)
In order to connect locally to the modem on the Remote Access card, you must establish it as an intercom extension.
1 Plug the line from your PC modem into a spare extension port on your PARTNER ACS system.
You must now program your PARTNER system to enable your PC to place an intercom call:
2 From extension 10 or 11, activate System Programming by pressing Feature 0 0 , System Program , System Program , Central Tel Program
3 At the Extension: prompt, enter the extension number that you connected to in Step 1
4 Press 5 Press the right Intercom button
The display will read “Automatic Line Selection”
6 Press to exit Automatic Line Selection
7 Enter Feature 0 0 to exit programming
For information about the location of special programming buttons on a PARTNER phone, see the PARTNER system documentation.
1
2
3
4
5
13C o n n e c t i n g t o t h e PA R T N E R A C S S y s t e m
SE
CT
IO
N
3
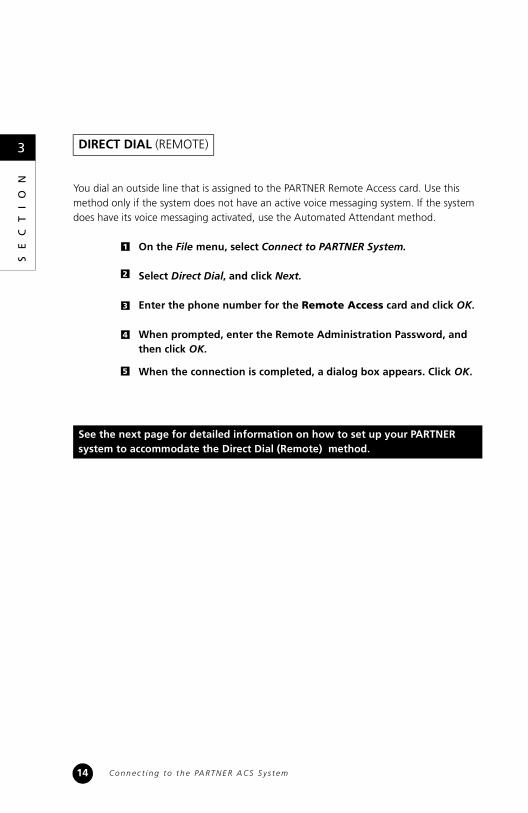
You dial an outside line that is assigned to the PARTNER Remote Access card. Use this method only if the system does not have an active voice messaging system. If the system does have its voice messaging activated, use the Automated Attendant method.
On the File menu, select Connect to PARTNER System.
Select Direct Dial, and click Next.
Enter the phone number for the Remote Access card and click OK.
When prompted, enter the Remote Administration Password, and then click OK.
When the connection is completed, a dialog box appears. Click OK.
DIRECT DIAL (REMOTE)
See the next page for detailed information on how to set up your PARTNER system to accommodate the Direct Dial (Remote) method.
1
2
3
4
5
14 C o n n e c t i n g t o t h e PA RT N E R A C S S y s t e m
SE
CT
IO
N
3
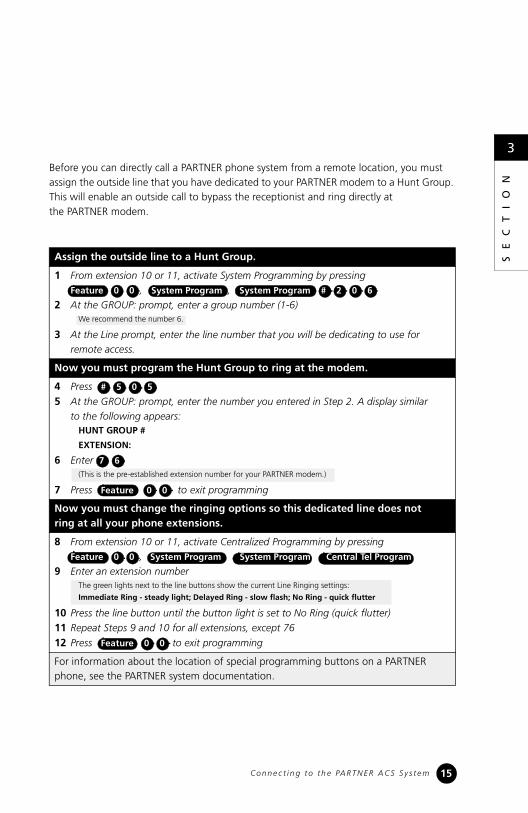
Before you can directly call a PARTNER phone system from a remote location, you must assign the outside line that you have dedicated to your PARTNER modem to a Hunt Group. This will enable an outside call to bypass the receptionist and ring directly at the PARTNER modem.Assign the outside line to a Hunt Group.
1 From extension 10 or 11, activate System Programming by pressing Feature 0 0 , System Program , System Program # 2 0 6
2 At the GROUP: prompt, enter a group number (1-6) We recommend the number 6.
3 At the Line prompt, enter the line number that you will be dedicating to use for remote access.
Now you must program the Hunt Group to ring at the modem.
4 Press # 5 0 5
5 At the GROUP: prompt, enter the number you entered in Step 2. A display similar to the following appears:
HUNT GROUP #
EXTENSION:
6 Enter 7 6 (This is the pre-established extension number for your PARTNER modem.)
7 Press Feature 0 0 to exit programming
Now you must change the ringing options so this dedicated line does not ring at all your phone extensions.
8 From extension 10 or 11, activate Centralized Programming by pressing Feature 0 0 , System Program , System Program Central Tel Program
9 Enter an extension numberThe green lights next to the line buttons show the current Line Ringing settings:
Immediate Ring - steady light; Delayed Ring - slow flash; No Ring - quick flutter
10 Press the line button until the button light is set to No Ring (quick flutter)11 Repeat Steps 9 and 10 for all extensions, except 76
12 Press Feature 0 0 to exit programming
For information about the location of special programming buttons on a PARTNER phone, see the PARTNER system documentation.
15C o n n e c t i n g t o t h e PAR T N E R A C S S y s t e m

SE
CT
IO
N
3
PARTNER Remote Administration automatically recognizes your modem, identifying its configuration as well as the port it is connected to. If you encounter problems using your modem or have trouble connecting:
Check that the modem on your PC is working properly by dialing into another system (such as an online service) that you know you can connect with.
Follow the steps that you have used to successfully complete the connection in the past.
• If the modem call is completed successfully (i.e., you achieve access to the desired system), then you have confirmed that the modem is working properly. However, you should also test your modem by using the “Windows Phone Dialer,” as explained in the next bullet item.
If the modem call is not completed successfully, then the problem could lie with the modem itself. (See #2 below.)
• You can test your modem by using the Windows Phone Dialer.
Start Windows Phone Dialer and make a call to any telephone number. (Refer to Windows Help to make a call with Phone Dialer.)
The computer will try to dial that number. If the computer can access a dial-tone and dial the number, you know that your modem is working properly. (See #3 on the next page.)
Check your modem configuration in your Windows system.
• Click on the My Computer icon on your desktop, select Control Panel,and then double-click on the Modems icon (Windows NT, 98, and 95) or the Phone and Modems Options icon (Windows 2000).
• Access the modem information for your system. (Refer to Windows Help to access the modem information.)
• Verify that the modem information displayed corresponds to the modem you are using.
SOLVING CONNECTION PROBLEMS
1
2
16 C o n n e c t i n g t o t h e PA RT N E R A C S S y s t e m
SE
CT
IO
N
3
Retrieving a System Translation
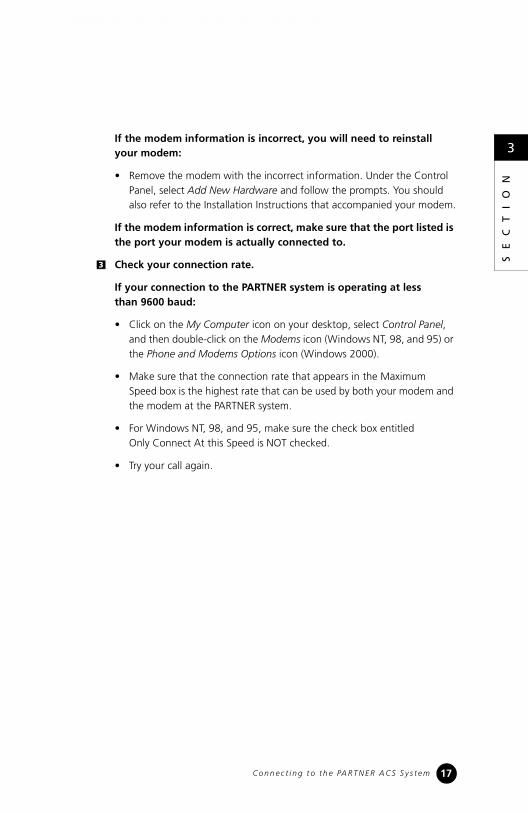
If the modem information is incorrect, you will need to reinstall your modem:
• Remove the modem with the incorrect information. Under the Control Panel, select Add New Hardware and follow the prompts. You should also refer to the Installation Instructions that accompanied your modem.
If the modem information is correct, make sure that the port listed is the port your modem is actually connected to.
Check your connection rate.
If your connection to the PARTNER system is operating at less than 9600 baud:
• Click on the My Computer icon on your desktop, select Control Panel, and then double-click on the Modems icon (Windows NT, 98, and 95) or the Phone and Modems Options icon (Windows 2000).
• Make sure that the connection rate that appears in the Maximum Speed box is the highest rate that can be used by both your modem and the modem at the PARTNER system.
• For Windows NT, 98, and 95, make sure the check box entitled Only Connect At this Speed is NOT checked.
• Try your call again.
3
17C o n n e c t i n g t o t h e PA R T N E R A C S S y s t e m

SE
CT
IO
N
3
Creating a Remote Administration PasswordFor security purposes, the Remote Administration Password is different from the system Password. The Remote Administration Password can only be created on the PARTNER system and must exist before you can connect.
Using a PARTNER display phone:
1 From extension 10 or 11, activate System Programming by pressing Feature 0 0
2 Press System Program
3 Press System Program # 7 3 0
4 Enter a password up to 8 alphanumeric characters in length (there is no default pass-word). Each character is established by entering two digits. (See the Character Code Table (5-3) on page 5-131 of the Programming and Use manual for additional details.)
5 To save the password, press the Enter key. The display shows “Remote Password” confirming that the password was saved. (Warning: If you exit without pressing Enter , your new password will not be saved.)
For information about the location of special programming buttons on a PARTNER phone, see the PARTNER system documentation.
18 C o n n e c t i n g t o t h e PA RT N E R A C S S y s t e m

SE
CT
IO
N
4
Retrieving a System Translation
Before you can modify your system translation, you must retrieve the current system
translation from your PARTNER system. This involves the following steps:
After connecting to the system, you must back up the system information before making any changes.
On the Administration menu, select Retrieve System Information.
Click Remote Backup. If you want to also retrieve this system information, click Retrieve System Translations. If you want to also retrieve maintenance information for the PARTNER system, click Retrieve Maintenance Data.
Click Next.
If you selected Retrieve System Translations and/or Retrieve Maintenance Data, a dialog box will appear. Select the file or enter a new name, and then click Save. You will repeat this step if you are retrieving both the current translation and the maintenance information. When the retrieve is complete, a dialog box will appear. Click OK.
The system translation is copied to the Remote Access card on the PARTNER system. (System translation is the technical term for the programming information.)
A backup usually takes about fifteen seconds.
• Backing up the system information
• Retrieving the system information to your PC
• Disconnecting from the PARTNER system (optional)
BACK UP THE SYSTEM INFORMATION
1
2
3
4
19R e t r i e v i n g a S y s t e m Tr a n s l a t i o n
SE
CT
IO
N
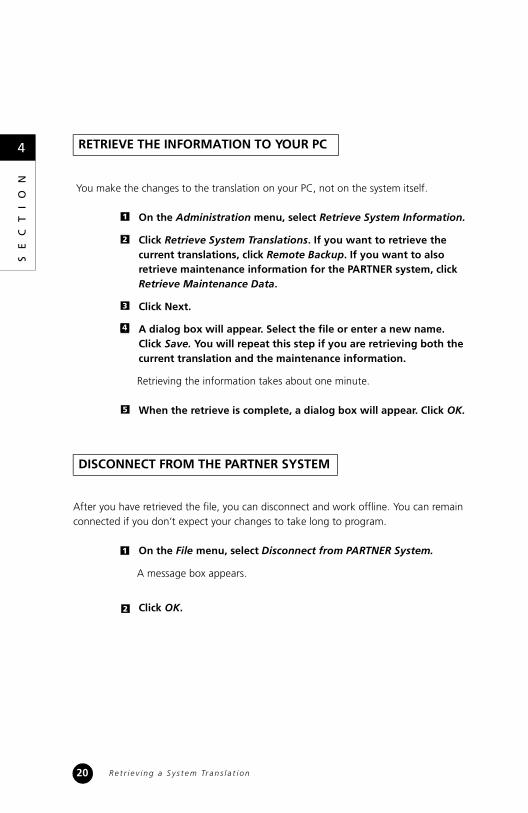
You make the changes to the translation on your PC, not on the system itself.
On the Administration menu, select Retrieve System Information.
Click Retrieve System Translations. If you want to retrieve the current translations, click Remote Backup. If you want to also retrieve maintenance information for the PARTNER system, click Retrieve Maintenance Data.
Click Next.
A dialog box will appear. Select the file or enter a new name. Click Save. You will repeat this step if you are retrieving both the current translation and the maintenance information.
Retrieving the information takes about one minute.
When the retrieve is complete, a dialog box will appear. Click OK.
After you have retrieved the file, you can disconnect and work offline. You can remain connected if you don’t expect your changes to take long to program.
On the File menu, select Disconnect from PARTNER System.
A message box appears.
Click OK.
RETRIEVE THE INFORMATION TO YOUR PC
DISCONNECT FROM THE PARTNER SYSTEM
1
2
3
4
1
2
4
5
c
4
20 R e t r i e v i n g a S y s t e m Tr a n s l a t i o n

SE
CT
IO
N
When you first start PARTNER Remote Administration, you will be prompted to specify whether you want to create a file for a PARTNER ACS R5 system, a PARTNER ACS R4 system, or a PARTNER ACS R3 system. An untitled file will appear on your PC’s screen, indicating the PARTNER ACS release (that is, R5, R4, or R3). This is the workspace where you will perform all your administration actions such as programming and editing existing translations as well as creating new translations.
The workspace contains six major windows. Within each window are additional sub-sections where you make changes to specific functions.
You do not need to be connected to the PARTNER system to change the system translations. After you have retrieved system information to your PC, you can disconnect from the PARTNER system and work off-line. If you do this, you will then need to save your changes into another file and reconnect to restore them.
EXPLORING THE WORKSPACE
Making Changes to the System Translation
21Ma k i n g C h a n g e s t o t h e S y s t e m Tr a n s l a t i o n
5
SE
CT
IO
N
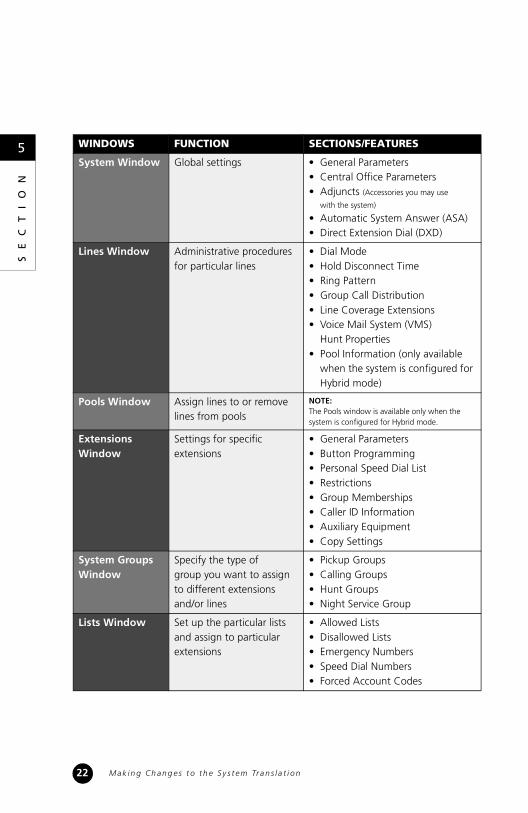
WINDOWS FUNCTION SECTIONS/FEATURES
System Window Global settings • General Parameters• Central Office Parameters• Adjuncts (Accessories you may use
with the system)
• Automatic System Answer (ASA)• Direct Extension Dial (DXD)
Lines Window Administrative procedures for particular lines
• Dial Mode• Hold Disconnect Time• Ring Pattern• Group Call Distribution• Line Coverage Extensions• Voice Mail System (VMS)
Hunt Properties• Pool Information (only available
when the system is configured for Hybrid mode)
Pools Window Assign lines to or remove lines from pools
NOTE:The Pools window is available only when the system is configured for Hybrid mode.
Extensions Window
Settings for specific extensions
• General Parameters• Button Programming• Personal Speed Dial List • Restrictions• Group Memberships• Caller ID Information• Auxiliary Equipment• Copy Settings
System Groups Window
Specify the type of group you want to assign to different extensions and/or lines
• Pickup Groups• Calling Groups• Hunt Groups• Night Service Group
Lists Window Set up the particular lists and assign to particular extensions
• Allowed Lists• Disallowed Lists• Emergency Numbers• Speed Dial Numbers• Forced Account Codes
5
22 M a k in g C h a n g e s t o t h e S y s t e m Tr a n s l a t i o n

SE
CT
IO
N
Within the workspace environment, you can:
The translation automatically appears in your workspace as a read-only file when the retrieve is complete.
Make your changes.
After you have completed your changes, save the file with a new name.
Send and restore the translation in the file with the new name to your PARTNER system to activate the changes.
WORKING WITH TRANSLATIONS
• Edit a translation you have just retrieved
• Edit a translation stored on your PC
• Create a new or custom translation
The changes you make to a file do not take effect on your PARTNER system until you send the information back to the PARTNER system and restore the translation.
To edit a translation you have just retrieved
1
2
3
23Ma k i n g C h a n g e s t o t h e S y s t e m Tr a n s l a t i o n
5
SE
CT
IO
N
On the File menu, select Open.
Locate the file and click Open.
Edit the file.
Save the file.
Send and restore the translation to your PARTNER system toactivate the changes.
If you are administering a new PARTNER system or several PARTNER systems, you can create a translation to be used on any or all of them. For example, a travel agency might have programming needs similar to other travel agencies. In such cases, it could be helpful to create files that are templates for such businesses (such as “Travel.xmg”). This template could be used as a starting point for other travel agencies, saving you time and providing your customer with a tested and useful profile.
On the File menu select New.
Select the PARTNER system version, and then click OK.
Verify the PARTNER system version you selected, and then click OK.
Establish the profile by making changes to the untitled workspace.
Save the changes by saving the file with a unique name.
Use this translation as a template for other systems with similar requirements.
Send and restore the translation to the PARTNER system(s).
To edit a translation you already saved
After making changes to a translation, be sure to save them.
To create a new translation
1
2
3
4
2
3
4
5
1
5
6
Activating Your Changes
5
24 M a k in g C h a n g e s t o t h e S y s t e m Tr a n s l a t i o n

SE
CT
IO
N
You can print the translations to a text file that you can view and print with any word processing software. By default, the text file is saved in the Administration subdirectory.
Open the file you want to print.
On the File menu, select Print to File.
Enter the name for the text file you want to create, and then click Save.
Select the system translation information you want to print to the text file.
Click OK.
If you’re having problems with a PARTNER system, you can use Remote Administration to replace a problematic translation with a known working translation.
Select a known working translation (a file previously saved on your PC).
Send it back to the PARTNER system.
Restore that translation on the system.
You can also use PARTNER Remote Administration to review system problems. See “Remote Diagnostics” on page 28.
To print a translation to a text file
Troubleshooting translation problems
1
2
3
4
5
2
1
3
Administering Date and Time
25M a k in g C h a n g e s t o t h e S y s t e m Tr a n s l a t i o n
5
SE
CT
IO
N
After you have made changes to a translation and saved the file, you can send the changes to the PARTNER system and activate them. PARTNER Remote Administration refers to the activation process as a “restore”.
Be sure you are connected to the PARTNER system.
• On the File menu, select Connect to PARTNER System.
On the Administration menu, select Send System Information.
Select the file you want to send and click Open.
Sending the information takes about one minute.
On the Administration menu, select Restore System Translations.
A message box appears. Activating the changes takes about fifteen seconds.
Click OK.
After the “Restore” process is complete, you will automatically be disconnected from the PARTNER system. A message box appears.
Click OK.
Send your changes to the system
Restore the changes
When you restore the translation, the PARTNER system will be out of service for several seconds. Any calls in progress will be terminated. You may want to restore a translation after business hours.
1
2
3
1
2
3
Activating Your Changes
6
26 A c t i v a t i n g Yo u r C h a n g e s
SE
CT
IO
N
Administering Date and Time
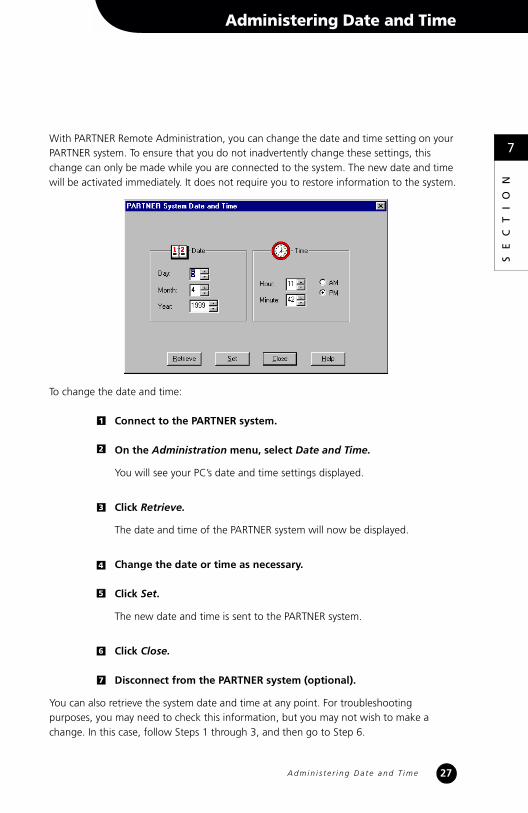
With PARTNER Remote Administration, you can change the date and time setting on your PARTNER system. To ensure that you do not inadvertently change these settings, this change can only be made while you are connected to the system. The new date and time will be activated immediately. It does not require you to restore information to the system.
To change the date and time:
Connect to the PARTNER system.
On the Administration menu, select Date and Time.
You will see your PC’s date and time settings displayed.
Click Retrieve.
The date and time of the PARTNER system will now be displayed.
Change the date or time as necessary.
Click Set.
The new date and time is sent to the PARTNER system.
Click Close.
Disconnect from the PARTNER system (optional).
You can also retrieve the system date and time at any point. For troubleshooting purposes, you may need to check this information, but you may not wish to make a change. In this case, follow Steps 1 through 3, and then go to Step 6.
1
2
3
4
5
6
7
27A d m i n i s t e r i n g D a t e a n d T i m e
7
28
SE
CT
IO
NRemote Diagnostics
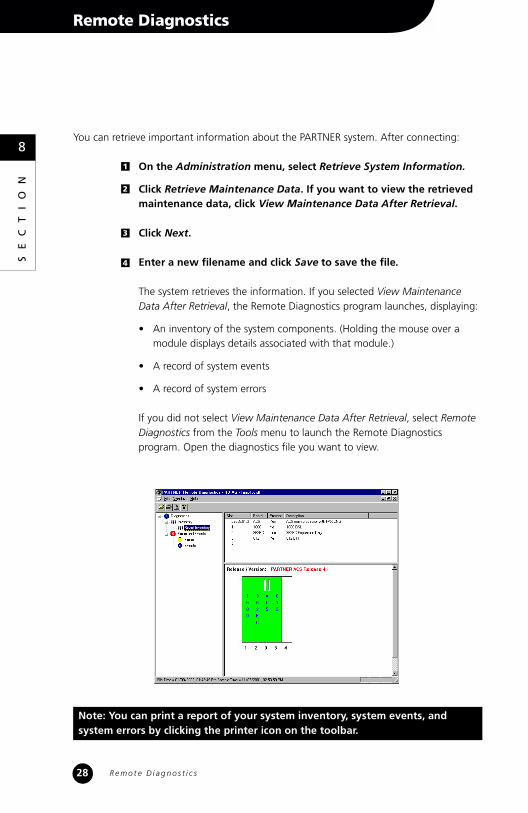
You can retrieve important information about the PARTNER system. After connecting:
On the Administration menu, select Retrieve System Information.
Click Retrieve Maintenance Data. If you want to view the retrieved maintenance data, click View Maintenance Data After Retrieval.
Click Next.
Enter a new filename and click Save to save the file.
The system retrieves the information. If you selected View Maintenance Data After Retrieval, the Remote Diagnostics program launches, displaying:
• An inventory of the system components. (Holding the mouse over a module displays details associated with that module.)
• A record of system events
• A record of system errors
If you did not select View Maintenance Data After Retrieval, select Remote Diagnostics from the Tools menu to launch the Remote Diagnostics program. Open the diagnostics file you want to view.
Note: You can print a report of your system inventory, system events, and system errors by clicking the printer icon on the toolbar.
1
2
3
4
R e m o t e D i a g n o s t i c s
8
SE
CT
IO
N
With PARTNER Remote Administration, you can administer the DSL features of the 1600 DSL module. To administer the DSL module:
Connect to the PARTNER system.
On the Administration menu, select DSL Administration.
The PARTNER DSL Administration window appears.
Press any key.
The Enter Login ID prompt appears.
Enter your login (for example, Supervisor) and press the ENTER key.
The Enter Password prompt appears.
Enter your password (if necessary) and press the ENTER key.
The Main Menu appears.
You can now administer the DSL module. For information on administering the 1600 DSL module, refer to the PARTNER Advanced Communication System 1600 Module User’s Guide or the online help.
1
2
3
4
5
DSL Module Administration
29W h e r e t o G e t M o r e I n f o r m a t i o n
9
Where to Get More Information
• PARTNER Remote Administration contains an integrated Help file that can provide you with detailed information on all of the program’s features. Press F1 for context-sensitive help.
• For more information on PARTNER administration, you can refer to the PARTNER ACS documentation.
• For additional technical support, you can contact your local Authorized Dealer or you can call Avaya Technical Support at 1 800 628-2888. In the continental U.S., Avaya provides a toll-free customer hotline 24 hours a day. Consultation charges may apply.
30