Pages 09 Basics - Educational Technology …etc.usf.edu/te_mac/movies/pdf/pages09.pdfhave to resize...
13
The Pages Interface 1. Toolbar: includes buttons that are shortcuts for some of the commands in the Pages menus. 2. Format Bar: allows you to quickly change the settings for the currently selected object. 3. Page Thumbnails: shows thumbnails of the pages in your document. 4. Document Canvas: this is the main work area in Pages, where you will add text, images and other content. 5. Inspector: the pane where most Pages settings are found. 6. Status Bar: provides information about your document (such as the word count) and includes the zoom and navigation options. Pages ’09 Basics Created by Luis Perez Page 1 of 13 Last Update: August 5, 2009 Pages ’09 Basics Website: http://etc.usf.edu/te/ Pages ʼ09 is the word processing and page layout application included in iWork ʼ09. Pages includes many professionally designed templates that allow you to quickly create a docu- ment by replacing placeholder text and images with your own. Pages integrates well with other iLife and iWork applications. You can use the Media Browser to add images from iPhoto, music from iTunes and Garageband, and movies from iMovie. Pages also includes powerful image editing and drawing features, as well as the ability to create visually appeal- ing data tables and 2D and 3D charts. When youʼre finished editing, you can export your Pages document into a variety of formats including HTML, PDF, and Microsoft Word. 1 2 3 4 5 6
-
Upload
truongkhuong -
Category
Documents
-
view
215 -
download
2
Transcript of Pages 09 Basics - Educational Technology …etc.usf.edu/te_mac/movies/pdf/pages09.pdfhave to resize...
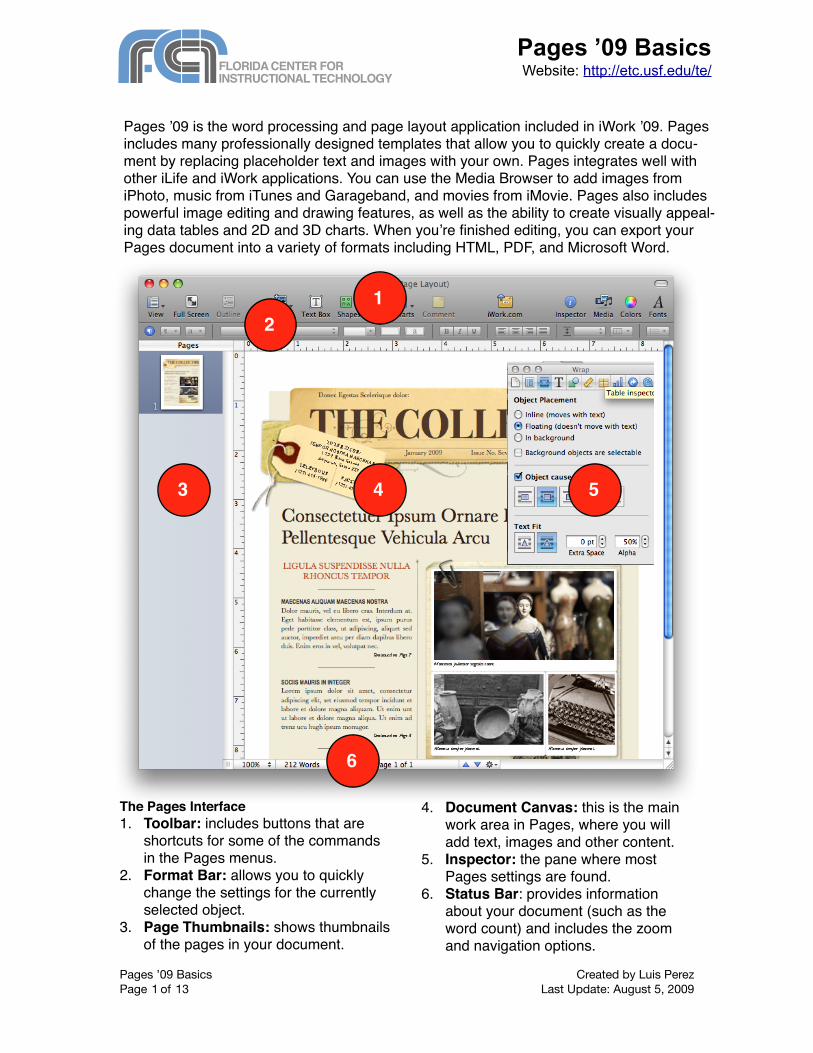
The Pages Interface1. Toolbar: includes buttons that are
shortcuts for some of the commands in the Pages menus.
2. Format Bar: allows you to quickly change the settings for the currently selected object.
3. Page Thumbnails: shows thumbnails of the pages in your document.
4. Document Canvas: this is the main work area in Pages, where you will add text, images and other content.
5. Inspector: the pane where most Pages settings are found.
6. Status Bar: provides information about your document (such as the word count) and includes the zoom and navigation options.
Pages ’09 Basics Created by Luis Perez Page 1 of 13 Last Update: August 5, 2009
Pages ’09 BasicsWebsite: http://etc.usf.edu/te/
Pages ʼ09 is the word processing and page layout application included in iWork ʼ09. Pages includes many professionally designed templates that allow you to quickly create a docu-ment by replacing placeholder text and images with your own. Pages integrates well with other iLife and iWork applications. You can use the Media Browser to add images from iPhoto, music from iTunes and Garageband, and movies from iMovie. Pages also includes powerful image editing and drawing features, as well as the ability to create visually appeal-ing data tables and 2D and 3D charts. When youʼre finished editing, you can export your Pages document into a variety of formats including HTML, PDF, and Microsoft Word.
12
3 4 5
6

Creating a New Document When you launch Pages, the Template Chooser should open to let you select a template for your new document (if the Template Chooser does not open, choose File > New).
Pages ʼ09 supports two different types of templates: Word Processing and Page Layout. Word Processing templates are intended for linear, text-heavy documents, while Page Layout templates are for documents that will include a lot of images and other objects in a non-linear layout.
To create a new document using the Template Chooser:1. Select a template category from the
column on the left. 2. Click on a thumbnail on the right side of
the Template Chooser window to select a template. If a template includes more than one page layout, you can preview those layouts by hovering over the templateʼs thumbnail and dragging to the left or right with your mouse. Use the slider at the bottom of the Theme Chooser to adjust the size of the thumbnails so you can fit more of them in the window.
3. Once youʼve selected a template, click on the Choose button.
4. Save your document by selecting File > Save As, entering a file name, and clicking on Save.
Importing From Microsoft WordTo import a document created in Microsoft Word:1. Choose File > Open (or click on Open an
Existing File in the Template Chooser).2. Navigate to the location where you have
saved your Word document and select it..3. Click on Open. Pages will then import the
Word document.
You can also open a Word document by dragging it from a Finder window to the Pages icon in the Dock. You may see a warnings popup window if Pages encounters any formatting it cannot convert in your Microsoft Word document. You can click on the Review button to see a list of these warnings.
Adding Pages and Sections Each Pages template includes different page types you can add to your current document. To add a template page after the current page, select Insert > Pages followed by the page type you want to use (in Page Layout mode) or Insert > Sections (in Word Processing mode). You can also use the Pages or Sections button in the toolbar.
Views and NavigationTo change the view of your document, use the zoom controls in the lower left corner. Using these controls, you can:• Zoom in or zoom out by using the
popup menu and selecting a zoom level.
• Display one page at a time or facing pages (One Up or Two Up).
• Scale the document to the size of the window by selecting Fit Width, or display only a single page by selecting Fit Page.
To view the layout of your document, select View > Show Layout. This will show you the different areas of your document, such as the header, footer, and columns. To view the marks for spaces, paragraph breaks and other formatting, select View > Show Invisibles.
To navigate Pages documents:• Use the scroll bar on the right to scroll
through your document.• Use the Next and Previous buttons found in
the status bar at the bottom of the screen. Click on the Action button (the gear icon) to change how you navigate your document. For example, you can choose Paragraph Style > Heading 1 to move through your document using first level headings.
• Display thumbnails of your documentʼs pages by selecting View > Page Thumbnails, then click on a thumbnail to go to a page.
• Click on the Page Number indicator on the status bar and enter a page number to go directly to that page.
Pages ’09 Basics Created by Luis Perez Page 2 of 13 Last Update: August 5, 2009

Full Screen and Outline ViewsPages ʼ09 includes a new Full Screen view to help you focus on your writing by hiding the toolbars and other interface elements.
To switch to the Full Screen view, click on the Full Screen button on the toolbar. To navigate to other pages of your document, move your cursor to the left edge of the screen and click on a page thumbnail. To exit the Full Screen view, press the Escape key on your keyboard.
Pages ʼ09 also includes an integrated outline view for word processing documents. To switch between the outline and document views, click on the Outline button on the toolbar.
The following options are available for working with your outline:• To add a new topic or subtopic at the
current level, press the Return key on your keyboard to move to a new line and begin typing.
• To change a topic into a subtopic, press the Tab key on your keyboard. This will indent the topic and make it into a subtopic. You can indent subtopics up to nine levels by pressing Tab or clicking on the Promote and Demote buttons on the Format Bar.
• To expand or collapse all of the subtopics under a topic, double-click on the Outline control for that topic.
• To choose how many levels of the outline are displayed, use the Levels menu on the Format Bar.
• If the text for your topics is too long and you only want to see the first line of each topic, click on the “Show only first line” button on the Format Bar
• To rearrange topics and subtopics, click and drag on the Outline controls. Drag an Outline control up or down to reorder topics within the same level, or drag left or right to promote or demote topics or subtopics to a different level. When you move a topic, all of its subtopics move with it.
Margins and Page Setup Before you start adding text, images, and other objects to to your document, you may want to set up your page so that you can see
exactly how your document will look when you print it. To set page margins, use the Document Inspector:1. Click on the Inspector button on
the toolbar. 2. Select the Document Inspector.3. Make sure the Document pane is selected
in the Document Inspector.4. In the Document Margins section, enter
the page margins you want to use. You can also enter margins for the header and footer of each page.
5. If you plan to print and bind your document, you can set inside and outside margins by choosing the Facing Pages checkbox.
The Document Inspector also lets you change your page setup, which includes the paper size and the orientation:1. Click on the Page Setup button in the
Document Inspector.2. Select a paper size using the drop-down
menu in the middle of the pop-up window.3. To select a page orientation,
click on one of the Orientation buttons at the bottom of the window.
4. If you need to scale your page down, enter a percentage in the Scale text field.
5. Once youʼve set your options, click on OK.
Tabs and IndentsTabs can be used to align text in your document, while indents can be used to mark the beginning of a paragraph or to set off long quotes.To add a tab stop using the rulers:1. Select View > Show Rulers to display the
rulers.2. Click on the ruler in the area where you
want to add a tab stop. 3. To change the tab type, control-click on a
tab stop and select a different tab type. You can also change the tab type in the Text inspector.
4. To remove a tab stop, drag it off the ruler.
To add a paragraph indent:1. Click somewhere inside the paragraph.2. Open the Text Inspector and select the
Tabs pane.
Pages ’09 Basics Created by Luis Perez Page 3 of 13 Last Update: August 5, 2009

3. Enter a value for each type of indent (First Line, Left, and Right). To set off a long quote, enter the same value in both the Left and Right fields. To indent the first line, enter a value in only the First Line field. To create a hanging indent, enter a value in only the Left field.
GuidesPages helps you align objects using smart guides, which are only displayed whenever an image or other object aligns with the center or edge of another object. These smart guides are enabled by default. If you donʼt see smart guides, you can turn them on as follows:1. Select Pages > Preferences.2. Click on the Rulers tab.3. Check the boxes next to “Show guides at
object center” and “Show guides at object edges.” Click on the color well to change the color of your guides from the default, which is blue. Guides will not be visible when you print your document.
You can also create more permanent guides to help you align images, shapes, and other elements in your document. To create guides: 1. Choose View > Show Rulers.2. Place the pointer on a ruler and drag into
the canvas. A blue guide will be displayed as you drag.
3. Drag the blue guide to where you want it. If you drag away from the top ruler you will create a vertical guide, while if you drag away from the left ruler you will create a horizontal guide. To remove a guide, drag it off the page.
Working with Text Most Pages templates include placeholder text to show you exactly how your text will be formatted and where it will appear. To edit placeholder text in Pages, click to select the placeholder text and then type your own text to replace it. The text you type will keep the same style and formatting as the placeholder text.
There are several ways to format text in Pages:• To change the appearance of text, open the
Inspector and select the Text Inspector. In this window, you can use the buttons and
sliders to change the alignment, color, and spacing of your text.
• To change the font and style, click on the Fonts button on the toolbar and select a font family, font typeface, and size using the different columns. The buttons at the top of this window will allow you to add underlining, a shadow, or other styling to your text.
• Pages ʼ09 includes a Format Bar which is context sensitive. The options on the Format Bar will allow you to quickly change most of the attributes of your text without having to open the Text Inspector or the Fonts window. To display the format bar, choose View > Show Format Bar. You may have to resize the Pages window to see all of the buttons in the Format Bar.
ListsTo add a list:1. Place the cursor in the line where you
want to start your list.2. Select a list type using the List
button in the Format Bar or the Bullets and Numbering pulldown menu in the List tab of the Text Inspector.
3. A new list item will be created each time you press Return. To create a line break without creating a new list item hold down the Shift key on your keyboard as you press Return.
4. To end the list, press Return twice so that you end up with a blank line.
StylesStyles provide a way to consistently format your headings, paragraphs, and lists. There are three types of styles in Pages: • Paragraph: these apply to one or more line
of text followed by a carriage return.• Character: these can be used with an
individual word or even a single letter.• List: these format how your bulleted or
numbered lists are displayed. These can be easily applied by clicking on the List button on the Format Bar and selecting a list style.
To apply a style, select the text you want to style, click on one of the Style buttons on the toolbar and select a style. The button on the left is for paragraph styles and the button on the right is for character styles.
Pages ’09 Basics Created by Luis Perez Page 4 of 13 Last Update: August 5, 2009

The Styles drawer is used for managing the styles used in a document. To open the Styles drawer, click on the blue icon to the left of the Style buttons on the toolbar.
The drawer has three sections: paragraph, character, and list. If you do not see the character or list sections, click on one of the buttons in the lower right corner of the drawer to display them.
To create a new style using the Styles drawer:1. Select some text in your Pages
document.2. Apply the desired formatting for the new
style to the selected text.3. Open the Styles drawer, click on the Add
(+) button at the bottom of the drawer and select the type of the style you wish to create (paragraph, character or list).
4. Enter a name for the new style, make sure “Apply this new style on creation” is selected and click on OK.
To redefine an existing style:1. Select some text in your Pages document
and make the desired formatting changes.2. Open the Styles drawer. The style applied
to the selected text will be highlighted and it will have a red triangle to the right of its name.
3. Click on the red triangle and choose “Redefine Style from Selection.” The formatting changes youʼve made to the selected text will be applied to all instances of the style throughout the Pages document.
Adding LinksYou can add links to web pages or email addresses, or use bookmarks to create links within a document. To add a hyperlink: 1. Select the text, shape, image, or movie
you want to turn into a hyperlink. 2. Open the Link inspector.
3. Select "Enable as a hyperlink."4. Select Webpage or Email Message using
the drop-down menu. 5. Enter the URL of the web page you want
to open when you click on the link.
If you selected Email Message, enter the recipientʼs address and a subject line.
To create a bookmark:1. Select the text you want to use as the
bookmark.2. Open the Hyperlink Inspector and select
the Bookmark tab.3. Click on the Add (+) button at the bottom.
To link to the bookmark from another section of the document, select the desired link text, open the Hyperlink Inspector and select Bookmark from the Link To drop-down menu. Select the bookmark you want to link to using the Name drop-down menu.
Page LayoutYou can vary the layout of your pages using different types of breaks:• Page break: will continue your text on the
next page.• Column break: will continue your text at the
top of the next column.• Layout break: can be used to start a
different layout with different margins, columns, etc.
• Section break: creates a new section with a different header, footer, and page numbering.
To add a break, select the type of break you want to add at the top of the Insert menu. To delete a break, place your cursor after the break and then press Delete on your keyboard. You may need to display the formatting codes by selecting View > Show Invisibles.
To add columns to a layout:1. Add a layout break before the text you
want to be in columns by selecting Insert > Layout Break.
2. Place the cursor after the break.3. Select the number of columns
using the Columns button in the Format bar.
To resume your layout without columns:1. Insert another layout break when you
reach the end of the text you want to be in columns.
2. Place the cursor after the layout break.
Pages ’09 Basics Created by Luis Perez Page 5 of 13 Last Update: August 5, 2009

3. Select 1 Column using the Columns button in the Format bar.
The Layout Inspector includes options for changing a layoutʼs column widths and margins (by default the columns are of equal width).
In the Section tab, you can set different page numbering for individual sections of your document, or choose to display different headers and footers in a section of your document.
Pages ʼ09 allows you to link text boxes out of sequence when you are in Page Layout mode. To create a link between two text boxes that are not in sequence: 1. Click on the first text box to reveal a
link indicator (a blue square with an arrow on it) in the lower right corner.
2. Click on the link indicator so that a plus sign appears on your cursor.
3. Click in the text box where you want the text to continue. The two text boxes will be linked with a blue line.
4. To remove the link, click on the small blue square at the end of the blue line and drag it off the text box.
Headers and FootersHeaders and footers can be used to display information such as page numbering and the date at the bottom of each page. To insert a header or footer:1. Select View > Show Layout to display a
box at the top and bottom of the page. This is where the header and footer are displayed.
2. Enter text for the header and footer as you would enter any other text.
3. Use the Insert menu to add one of the following formatted text fields which are updated automatically by Pages as you make changes:• Auto Page Numbers: use the options in
the popup window to choose the position of the page number (Header or Footer), the alignment, and the Format. You can set the page numbers to display in the entire document or only in the current section.
• Page Number: inserts the current page number. To change the format, control-click on the page number and choose a different format.
• Page Count: inserts the total number of pages.
• Date and Time: to choose a different date and time format, control-click or right-click on the date and time and choose Edit Date & Time, then choose a different format using the pulldown menu. To always display the current date and time, check the box next to “Automatically update on open.” When youʼre done click anywhere in your document to close the popup window.
• File name: inserts the file name of the document.
Document StatisticsThe word count for your current document is shown on the status bar, to the right of the zoom menu. The word count will change whenever you make a selection to show you the number of words selected out of the total words in the document. To view more document statistics, double-click on the word count on the Status Bar to open the Info pane of the Document Inspector. You will then see the number of pages, sections, graphics and characters.
Table of ContentsIf youʼre working on a long document, a table of contents would be useful for your readers. Pages can automatically create the table of contents for you, but you must use consistent styling for headings throughout your document. To add a table of contents:1. Select the TOC pane in the Document
Inspector.2. Check the boxes next to the styles, such
as headings and subheadings, you want to appear in the table of contents.
3. Select the box in the #ʼs column if you want the page number to be displayed for any of the styles you selected.
4. Place your cursor where you want the table of contents to begin and select Insert > Table of Contents
5. To update the table of contents after you make changes to your headings and subheadings, go back into the Inspector
Pages ’09 Basics Created by Luis Perez Page 6 of 13 Last Update: August 5, 2009

and click on the Update Now button in the Document Inspector.
6. To make the page number links to each heading, select this option at the bottom of the TOC pane of the Document Inspector.
Footnotes and EndnotesTo add footnotes or endnotes (you canʼt have both in Pages):1. Open the Document pane of the
Document Inspector.2. Choose Use Footnotes or Use Document
Endnotes from the drop-down menu. You can also choose Use Section Endnotes if you have your document split into sections.
3. Choose a numbering format.4. Place the insertion point where you want
to add a new footnote or endnote.5. Select Insert > Footnote or Insert >
Endnote (or Insert > Section Endnote).6. The insertion point will move to the
bottom of the page, the end of the document, or the end of a section.
7. Type in your footnote or endnote text.
Adding ImagesThere are several ways to add images to a Pages document:• Drag and drop an image from a Finder
window. • Click on the Media button in the
toolbar, select iPhoto from the pulldown menu, and choose an image from your iPhoto library or from one of your iPhoto albums.
• From the Insert menu, select Choose and navigate to the location of your image file on your computer.
Once you have added the image, you can drag it to a different location or use the handles that appear around it to resize it (hold down the Shift key before you resize an image to constrain its proportions).
The Graphic Inspector can be used to customize the appearance of an image:
• Check the box next to Shadow to add a drop shadow. Use the controls to change the angle, offset, and set other options for the drop shadow.
• Check the box next to Reflection to create a reflection effect. Use the slider to change the opacity of the reflection.
• Use the opacity slider to increase the level of transparency in the image.
The Metrics Inspector also has options that apply to images:
• Use the flip buttons to flip the image vertically or horizontally.
• Use the Angle wheel to rotate your image.
Pages allows you to edit your images without having to open iPhoto:1. Select the image you want to edit and
choose View > Show Adjust Image.2. Use the sliders to change the overall
brightness and contrast, or fix the colors in your image.
3. The histogram at the bottom of the window displays tonal information for your image. Use the Exposure slider to change the mid-tones in your image. To work with the shadows or highlights individually, use the markers below the histogram.
4. Drag in from the left to make the shadows more pronounced (and make the image darker), or from the right to bring out the highlights (and make the image brighter).
5. To perform an automatic adjustment, click on the Auto Levels button. If youʼre not
Pages ’09 Basics Created by Luis Perez Page 7 of 13 Last Update: August 5, 2009
happy with the results, click on Reset Image to start over.
WrappingWhen you add an image or other object, it can be added inline or fixed on the page. The difference between the two is that inline objects move along with the text as you type, whereas fixed objects are fixed on the page and can have the text wrap around them. Fixed objects can be dragged to any location on the page, but inline objects cannot.
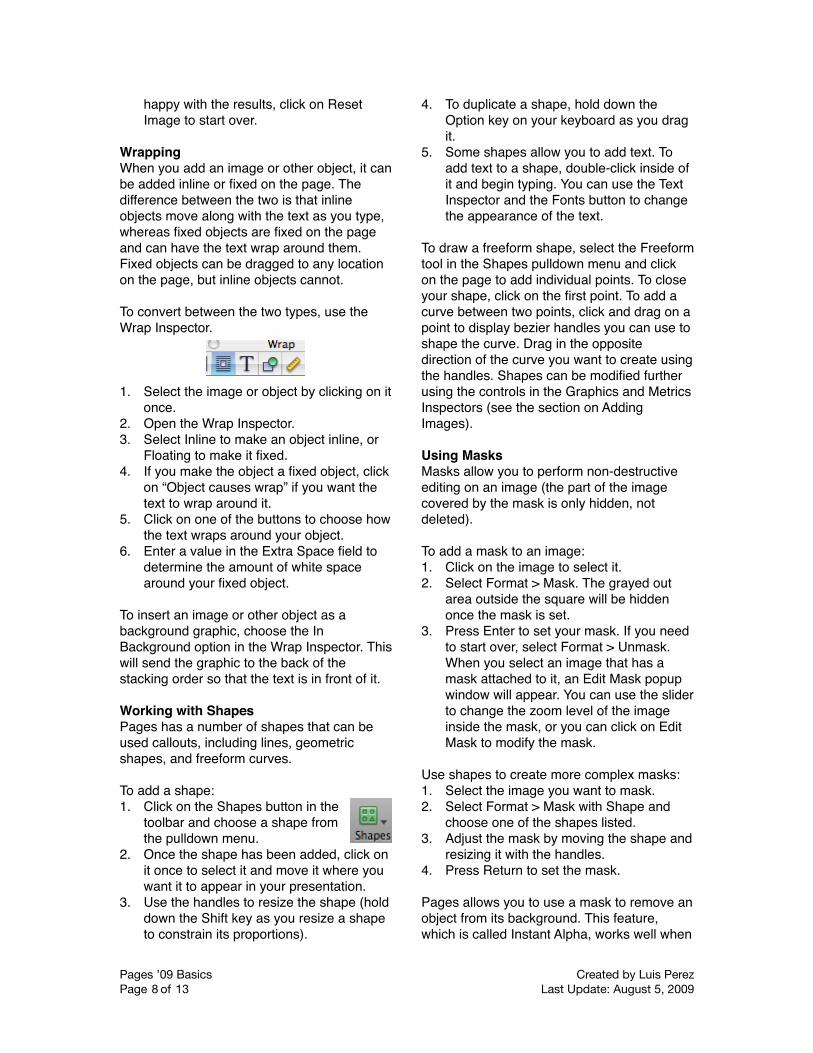
To convert between the two types, use the Wrap Inspector.
1. Select the image or object by clicking on it once.
2. Open the Wrap Inspector.3. Select Inline to make an object inline, or
Floating to make it fixed.4. If you make the object a fixed object, click
on “Object causes wrap” if you want the text to wrap around it.
5. Click on one of the buttons to choose how the text wraps around your object.
6. Enter a value in the Extra Space field to determine the amount of white space around your fixed object.
To insert an image or other object as a background graphic, choose the In Background option in the Wrap Inspector. This will send the graphic to the back of the stacking order so that the text is in front of it.
Working with ShapesPages has a number of shapes that can be used callouts, including lines, geometric shapes, and freeform curves.
To add a shape:1. Click on the Shapes button in the
toolbar and choose a shape from the pulldown menu.
2. Once the shape has been added, click on it once to select it and move it where you want it to appear in your presentation.
3. Use the handles to resize the shape (hold down the Shift key as you resize a shape to constrain its proportions).
4. To duplicate a shape, hold down the Option key on your keyboard as you drag it.
5. Some shapes allow you to add text. To add text to a shape, double-click inside of it and begin typing. You can use the Text Inspector and the Fonts button to change the appearance of the text.
To draw a freeform shape, select the Freeform tool in the Shapes pulldown menu and click on the page to add individual points. To close your shape, click on the first point. To add a curve between two points, click and drag on a point to display bezier handles you can use to shape the curve. Drag in the opposite direction of the curve you want to create using the handles. Shapes can be modified further using the controls in the Graphics and Metrics Inspectors (see the section on Adding Images).
Using MasksMasks allow you to perform non-destructive editing on an image (the part of the image covered by the mask is only hidden, not deleted).
To add a mask to an image:1. Click on the image to select it.2. Select Format > Mask. The grayed out
area outside the square will be hidden once the mask is set.
3. Press Enter to set your mask. If you need to start over, select Format > Unmask. When you select an image that has a mask attached to it, an Edit Mask popup window will appear. You can use the slider to change the zoom level of the image inside the mask, or you can click on Edit Mask to modify the mask.
Use shapes to create more complex masks:1. Select the image you want to mask.2. Select Format > Mask with Shape and
choose one of the shapes listed.3. Adjust the mask by moving the shape and
resizing it with the handles.4. Press Return to set the mask.
Pages allows you to use a mask to remove an object from its background. This feature, which is called Instant Alpha, works well when
Pages ’09 Basics Created by Luis Perez Page 8 of 13 Last Update: August 5, 2009

the object is on a solid background. To use Instant Alpha:1. Choose the image you want to modify.2. Select Format > Instant Alpha.3. Click on the color you want to make
transparent with the mask. As you drag, the area that will be made transparent will grow. You can also click and drag multiple times to select other areas of the image you want to make transparent.
4. When youʼre finished, press the Return key on your keyboard.
Connection LinesConnection lines join two shapes or other objects. These lines can be used to add labels that move along with the images or shapes. To add a connection line:1. Select the two shapes you want to
connect.2. Choose Insert > Connection Line.3. To edit the connection line, click on it once
to select it and then use the controls on the Format Bar to change the line type, line thickness, color and other options. You can also add endpoints.
Adding Media FilesYou can add movies and music to your documents to make them more interactive:1. Click on the Media button on the
toolbar. 2. To add a movie, select the Movies
tab at the top of the dialog box. To add an audio file, select Audio.
3. The area below the tabs will show different collections you can click on to see files saved on your computer. Once you select a collection, you will see a list of the files it contains. Movies will display as thumbnails, while audio files will be listed with additional information such as the duration and artist name.
4. To preview any of the files, click on the Play button at the bottom of the window.
5. Once you find the file you want to use, drag it into the document canvas until you see a green plus sign and release your mouse to add it to the document.
6. Use the handles to resize the movie preview if youʼre adding a movie, or drag to move it to a different location on the canvas. If you are adding a sound file, you will see a speaker icon. To play the
media file, the person viewing the document has to double-click on the movie preview or the speaker icon. To stop the file from playing they have to click outside of it. You may want to include a caption next to the movie preview or speaker icon with these instructions.
7. Open the QuickTime Inspector (last button on the right when you open the Inspector) to set additional options.
8. The slider at the top can be used to change the poster frame (the preview image displayed before the movie plays in your document). A slider for adjusting the volume is also available.
Tables Tables are useful for organizing and summarizing information. Pages includes support for formulas in tables. To add a table in Pages:1. Click on the Table button in the
toolbar (or choose Insert > Table).2. Use the handles to resize the
table.3. Drag the table to position it where you
want it on the slide.4. Double-click on a table cell and start
typing. Press tab or use the arrow keys to move to other cells.
Another way to add a table is by drawing it on the document canvas. To draw a table:1. Press the Option key as you click on
Table in the toolbar. The pointer changes to crosshairs.
2. Drag on the document canvas while holding down your mouse to draw the table.
3. Use the Table pane in the Table Inspector to change the number of rows and columns.
To format the text in a table cell, click on the cell to select it (it will have a blue outline around it) and use the options in the Format Bar.
Pages ’09 Basics Created by Luis Perez Page 9 of 13 Last Update: August 5, 2009

The Table pane of the Table Inspector can be used to make the following modifications to a table:• add header columns, header rows or footer
rows by clicking on one of the Header and Footer buttons and selecting the number of columns or rows.
• edit rows and columns: this is a pulldown menu with options for adding and removing rows and columns, sorting the contents of cells, and splitting and joining cells.
• change cell borders and backgrounds• use alternating colors for rows to make data
easier to view The Format tab of the Table Inspector also has the following options for working with numeric values:• format cells as currency, date and time, etc.• determine the number of decimal places to
display when number is chosen as the format and the style for negative numbers (for example, you can display them in red)
• apply conditional formatting so that cells matching specific criteria show up in a different color
• apply formulas by using the Function pulldown menu (these formulas allow you to find the average of the values in a range of cells, find the min or max value, or perform a sum or count). The same options can be accessed by choosing Insert > Function from the menu bar.
The last option in the pulldown menu allows you to open a Formula Editor where you can perform more advanced calculations using cell references. To reference a specific cell, you will need to use the letter of the column and the number of the row (for example, the first cell in a table is A1, the second cell in the first row is A2, and so on). The formula has to begin with the equals sign and you can use two cell references separated by a colon to indicate a range (A1:A3, etc.).
The cells in your formula will be highlighted as you enter the cell references in the Formula Editor. When youʼre finished entering your formula, click on the green check mark.
ChartsTo add a chart:1. Click on the Charts button on the
toolbar and select a chart type or select Insert > Chart.
2. Use the handles to resize the chart or drag on it to reposition it on the document canvas.
3. Open the Chart Inspector and click on Edit Data to open the Chart Data Editor.The Chart Editor will already have some placeholder data entered for you. Click on each cell to edit it and enter your own data.
4. To change the chart type, use the pulldown menu to the left of the Edit Data button in the Chart Inspector.
5. To create a 3D chart, select a 3D chart type and then use the options in the 3D Scene area to set options such as lighting direction and chart depth. You can use the arrows in the Chart Inspector or on the 3D Chart popup window to rotate the chart.
Pages ʼ09 includes mixed chart types that allow you to easily overlay two data sets on top of each other for comparison. Using the Series Type option in the Series tab of the Chart Inspector, you can give each series a different visual treatment (line, column or area) to help distinguish between the two series. Another new feature is the ability to show a trend line. To show a trend line:1. Select the chart by clicking on it once in
the document canvas.2. Open the Chart Inspector and click on
Advanced in the Series pane.3. Select a trend line type from the pulldown
menu in the Trendline tab.
Mail MergeMail Merge allows you to create a document with text placeholders that can be replaced with contact information from either Address Book or a Numbers spreadsheet. This feature is helpful when you want to reuse a form letter with several contacts.
Pages ’09 Basics Created by Luis Perez Page 10 of 13 Last Update: August 5, 2009

Address Book fields are already included in many Pages templates. There are two types of Address Book fields in Pages:• Sender field: displays information about
you. This information is automatically added by Pages from the My Card vCard in Address Book.
• Recipient field: displays information about each individual contact who will receive a copy of the document.
To add a contact to a recipient field:1. Open Address Book and select the All
group to view all of your contacts.2. Drag a contact from the Name column in
Address Book into Pages until it is over a Recipient field.
3. When the cursor is over the recipient field, it will change to a green plus sign. Release your mouse and the contactʼs information will replace the placeholder text in the recipient field.
4. If you need to edit any of the information in the recipient field, click on it and type the text you want to use in its place.
5. Once you have personalized the document with your contact information, save a copy of the document by selecting File > Save As and giving the document a new name.
The mail merge feature can be used with multiple contacts:1. Select a group in Address Book and drag
it into a Recipient field in Pages (or choose several contacts within a group by Command-clicking on them and dragging them into a Recipient field.)
2. A dialog box will open. Select New Document from the pulldown menu if you want to save a copy of the document with a section for each contact, or “Send to Printer” if you just want to print a copy for each contact without saving the merged document.
3. Click on Merge.
To use Mail Merge with a Numbers spreadsheet:1. Create a new document in Pages and
insert text placeholders for each merge field that will be filled in with information from the Numbers spreadsheet.
2. Open the Link Inspector in Pages and click on the Merge tab.
3. Click on Choose and select Numbers Document in the popup window.
4. Locate the Numbers document with the contact information you want to use in the merged document and click on Open.
5. Select the desired table in the Numbers document and click on OK.
6. Select the first text placeholder in your Pages document and click on the Add (+) button at the bottom of the Link Inspector and select Add Merge Field. The text you have selected in your Pages document should be added as a Merge Field. If the field under Target Name does not match the desired merge field in your Numbers document, select a different merge field using the pulldown menu.
7. When youʼre finished setting up your merge fields, select Edit > Merge.
8. Under “Merge to”, select New Document. This will save the merged version as a new Pages document.
9. Click on Merge.
Spell Check Pages can check your spelling automatically as you type your text. To enable this feature, select Edit > Spelling > Check Spelling as You Type. Any word that is not spelled correctly will appear with a dashed red line below it. To correct it, control-click on it and select from one of the suggestions offered by Pages, or type in the correct text if you know it.
To check the spelling of a document manually, select Edit > Spelling > Check Spelling. Pages will highlight the first misspelled word it finds. You can control-click on it to get suggestions, or you can type in the correct text if you know it. To continue to the next word, select Edit > Spelling > Check Spelling again (or use the keyboard shortcut: Command + ;).
CommentsComments can be used to provide feedback to students. To add a comment:1. Select the words or object to which the
comment will apply.2. Click the Comment button in the
toolbar.3. Type in your comment in the
comment bubble.Pages ’09 Basics Created by Luis Perez Page 11 of 13 Last Update: August 5, 2009

4. To delete a comment, click on the X in the upper right corner of the comment box.
5. To display and hide comments, select View > Show Comments, or View > Hide Comments. You can print your document with its comments by printing it while the comments are visible.
Change TrackingPages facilitates collaboration by tracking the changes made to a document. To enable change tracking, select Edit > Track Changes. Any changes made to the document after this feature is turned on will appear in change bubbles on the margin of your document.
You can click on the check mark to accept changes, or on the X to reject them. You can also accept and reject changes using the Accept and Reject buttons on the Tracking toolbar that appears once you enable change tracking. To accept or reject all changes in a document, click on the options button (the last button on the right of the toolbar) and choose the appropriate option. To stop tracking changes, click on the options button and select Turn Off Tracking. SearchingTo search for all occurrences of a word or phrase in your document:1. Display the search sidebar by clicking on
the View button on the Toolbar and selecting Search.
2. Type the word or phrase you want to search for in the search field.
3. To view an item in the search results on the page where it appears, click the item in the search sidebar. The page will be displayed with the word or phrase highlighted.
4. To view a list of recent searches, click on the disclosure triangle in the search field and make a selection from Recent Searches.
5. To perform a case sensitive search, click on the disclosure triangle and choose Match Case.
Pages also includes a search and replace feature that can save you a lot of time when you need to change the same word or phrase throughout a long document. To use search and replace:1. Select Edit > Find > Find, and make sure
the Simple tab is selected in the Find & Replace window.
2. Enter the word or phrase to be replaced in the Find text box, then enter the replacement word or phrase in the Replace text box.
3. Click on Next to find the first occurrence of the word or phrase in your document. The word or phrase will be highlighted.
4. Click on Replace to replace only the current occurrence of the word or phrase, or on Replace & Find to replace the currently selected occurrence and find the next one.
5. To replace all occurrences of the word or phrase in your document automatically, click on Replace All. Pages will perform the operation and indicate how many items were replaced.
For more advanced search options, click on the Advanced tab of the Find & Replace window.
Password ProtectionTo add a password to a Pages document:1. Open the Document Inspector and check
the box next to “Require password to open” at the bottom of the Inspector.
2. Enter the desired password and click on Set Password. You can add a password hint as well.
3. The Password Assistant can help you select a strong password for added security. To open the Password Assistant, click on the key icon at the top of the Set Password window.
Printing and SharingTo print a Pages document:1. Choose File > Print (or press Command +
P on your keyboard).2. Select a printer using the drop-down
menu at the top of the window.3. Make sure Copies and Pages is selected
in the third drop-down menu (this is the default).
Pages ’09 Basics Created by Luis Perez Page 12 of 13 Last Update: August 5, 2009

4. Enter the number of copies you want to print in the Copies field.
5. Select All if you want to print the entire document. If you want to print a range of pages, choose From and enter the starting and ending page numbers in the corresponding fields.
6. Click on Print.
Pages supports many formats for exporting, including PDF, Microsoft Word, and HTML web pages. To export a Pages document:1. Select Share > Export.2. Choose a format using the icons at the
top of the dialog box. If you choose PDF, you can use a drop-down menu to select the image quality. Under security you can require a password to open the document. By checking the box next to “Copy content from the document” you can prevent other people from copying your content.
3. Click on Next and enter a file name in the next screen, then click on Export.
iWork.comiWork.com is a new service from Apple that allows you to share Pages documents and other iWork documents over the Web. Each document uploaded to iWork.com has its own web page where other people can view it, provide feedback by adding comments, or download the original version of the document to open it with Pages on their computers. iWork.com is a free service that is currently in public beta.
To share a Pages document using iWork.com:1. Choose Share > Share via iWork.com.2. Enter your Apple ID and Password and
click on Sign In.3. Invite others to view your Pages
document by entering their email addresses and a short message.
4. Check the boxes next to “Leave Comments” and “Download the document” if you want to allow these actions when the document is viewed on iWork.com.
5. Click on Show Advanced to specify which file formats (PDF, Word, or Pages ʼ08 and ʼ09) will be provided for downloading.
6. Click on Share. Your document will be uploaded to iWork.com in the background.
Once the document has been uploaded, a message will be sent to each person youʼve invited with a link to access the document on the Web. The documentʼs web page will include navigation links at the top. Clicking on Show Navigator will display page thumbnails on the left side of the page for added navigation.
The visitors to your documentʼs web page can leave a comment by selecting any piece of text, image or other object and clicking on the Add Comment button at the top of the page. To leave general comments they can add notes by entering their text in the Document Notes area of the page and clicking on Post Note.
To download the presentation, they can click on the Download button and select from the list of formats you have made available (each download link will also include the file size of the document to let them know how big it is).
To manage your iWork.com documents, click on Share > Show Shared Documents in Pages. This will open the Shared Documents page where you will see a list of shared documents along with the date they were published, their type and file size. To open a shared document in your web browser, click on the name of the document. To stop sharing a document, click on the Delete link to the right of the documentʼs name.
Pages TemplatesiWork Community (http://www.iworkcommunity.com/) has free templates for Pages. To install a new template:
1. Download a template from iWork Community as a zip file.
2. Double-click on the zip file and copy the folder included in it.
3. Go to your home folder and locate the Library/Application Support/iWork/Pages/Templates/My Templates folder.
4. Paste the folder you copied in step 2 into the My Templates folder.
5. Open the Template Chooser. You will see a new section called My Templates where any installed templates will be listed.
Pages ’09 Basics Created by Luis Perez Page 13 of 13 Last Update: August 5, 2009