Package Deployer - Cloudhouse · Exit Codes ... to help determine the cause of error. Prerequisites...
11
A: Ugli Campus, 56 Wood Lane London, W12 7SB VAT Number GB 162 2024 53 T: +44 (0)203 51 51 505 E: [email protected] www.cloudhouse.com Cloudhouse Technologies Ltd Registered in England. Reg. Number 07360219 Package Deployer 28/11/2016 Version 1.6
Transcript of Package Deployer - Cloudhouse · Exit Codes ... to help determine the cause of error. Prerequisites...
A: Ugli Campus, 56 Wood Lane London, W12 7SB VAT Number GB 162 2024 53
T: +44 (0)203 51 51 505 E: [email protected] www.cloudhouse.com
Cloudhouse Technologies Ltd Registered in England. Reg. Number 07360219
Package Deployer
28/11/2016
Version 1.6
Package Deployer
Version 1.6 2 of 11
28/11/2016 Public
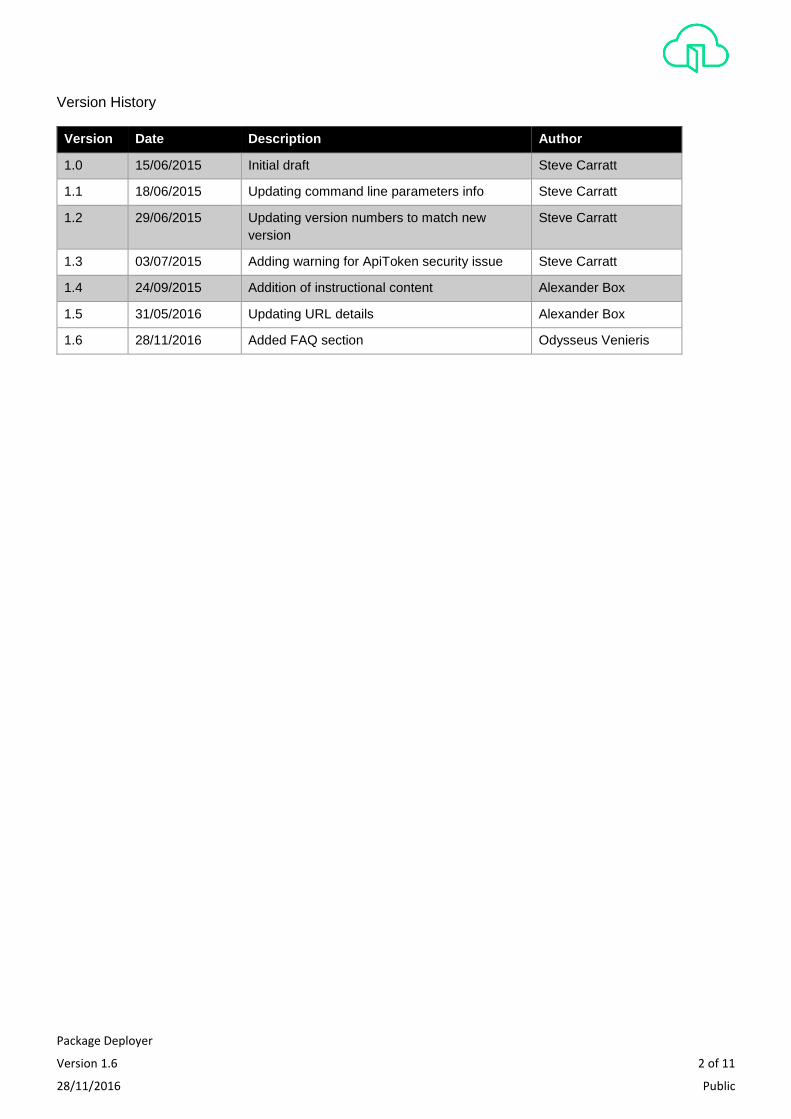
Version History
Version Date Description Author
1.0 15/06/2015 Initial draft Steve Carratt
1.1 18/06/2015 Updating command line parameters info Steve Carratt
1.2 29/06/2015 Updating version numbers to match new
version
Steve Carratt
1.3 03/07/2015 Adding warning for ApiToken security issue Steve Carratt
1.4 24/09/2015 Addition of instructional content Alexander Box
1.5 31/05/2016 Updating URL details Alexander Box
1.6 28/11/2016 Added FAQ section Odysseus Venieris
Package Deployer
Version 1.6 3 of 11
28/11/2016 Public
Table of Contents
Introduction ................................................................................................................................................ 4
Prerequisites .............................................................................................................................................. 4
2.1 Hardware requirements ................................................................................................................. 4
2.2 Software requirements .................................................................................................................. 4
Required Parameters ................................................................................................................................ 4
3.1 Obtaining the AppName from the Portal .................................................................................... 4
3.2 Obtaining the UserApiToken from the Portal ............................................................................ 5
3.3 Obtaining the AppStoreName from the Portal .......................................................................... 5
Example Usage .......................................................................................................................................... 5
Optional Parameters ................................................................................................................................. 6
Exit Codes ................................................................................................................................................... 6
Example Using SCCM to Push an Application ..................................................................................... 6
7.1 Create a New Application.............................................................................................................. 6
7.1.1 Create Application Wizard ................................................................................................................ 6
7.2 Deploying an Application.............................................................................................................. 9
7.2.1 Creating the Users/ Groups for deployment .................................................................................. 9
7.2.2 Deploying the Application ................................................................................................................. 9
7.2.3 User Acceptance Testing ................................................................................................................. 9
8 FAQ……………………………………………………………………………………………………………...9
Package Deployer
Version 1.6 4 of 11
28/11/2016 Public
Introduction
The purpose of this document is to provide Administrators with the information necessary to understand how Package
Deployer is able to push applications to users. An example is provided of using System Center Configuration Manager
to deploy applications.
Package Deployer is the Cloudhouse component that is used by existing on premise deployments tools to push
applications across a corporate network to an end-user’s desktop. The executable requests the launcher from the
App Store using REST APIs and performs the install in silent mode.
The Launcher controls the creation of users’ shortcuts, associated registry keys and package files needed for the
running of the app if they don’t exist, but it does not actually run the app, it just sets up the environment so the app
and shortcuts are available for the users.
The Package Deployer will wait until the Launcher and Cloudloader have finished deploying the package before it
exits with a code to indicate the result of the deployment. If any errors are encountered, then the logs can be used
to help determine the cause of error.
Prerequisites
2.1 Hardware requirements
There are no hardware requirements for Package Deployer.
2.2 Software requirements
- .NET Framework version 4.0 or higher
- A tool for software deployment such as: Group Policy, SCCM, PDQDeploy, LanDesk, Altiris etc is required in order to follow the below procedures.
Required Parameters
Parameter Description
AppName Name of the application that needs to be deployed
UserApiToken Security token to call AppStore web services
AppStoreName Target App Store
3.1 Obtaining the AppName from the Portal
To obtain the AppName of an application delivered by Applications Anywhere, open a browser and enter the
provided Portal URL:
https://geprod.cloudhouse.com/
1. Login using your Portal Administrator user name and password,
2. Click on the App Assignment tab, this will display a list of Available Apps & Assigned Apps. The AppName is the name of the App in the field “App”, see below.

Package Deployer
Version 1.6 5 of 11
28/11/2016 Public
3.2 Obtaining the UserApiToken from the Portal
1. Once logged into the Portal, click on the User Tab, this will display a list of users with various columns,
2. Click on Show (in the column Api Token), this will display a pop-up box with the required details. See
below.
3.3 Obtaining the AppStoreName from the Portal
This is the name of URL of the Portal where the Apps are located, e.g. https://geprod.cloudhouse.com/
Example Usage
PackageDeployer.exe /AppName <AppName> /UserApiToken <Token> /AppStoreName geprod.cloudhouse.com
NOTE: the parameter AppStoreName should not be prepended with http or https.
Package Deployer
Version 1.6 6 of 11
28/11/2016 Public
Optional Parameters
Parameter Description
SilentOff When this switch is present, the Launcher and Cloudloader UI will be shown
Run When this switch is present the application will be run after deployment
DefaultLog Enables logging for all components:
Package Deployer, Launcher, Cloudloader, App Monitor and AAV
? Prints help on all command parameters
Exit Codes
Code Meaning
0 Success
1 Unspecified Error
2 Launcher Error
3 Cloudloader Error
NOTE: Error logs can be found in the Package Deployer working directory.
Example Using SCCM to Push an Application
7.1 Create a New Application
To push an application to a large number of users.
1. Login to the SCCM.
2. Click on the Applications menu from the left hand side.
3. Right click Application in the Software Library.
4. Click Create Application.
7.1.1 Create Application Wizard
Complete the Application Wizard to create an Application using Packager Deploy for chosen application and
not the .msi file.
1. From the General screen, click the radio button marked: Manually specify the application information.
2. Click Next.
3. In the Name field, enter the name of the application.
4. If there are any comments about the application, enter these in the Administrator Comments field.
5. Use the Publisher field to enter the relevant details.
Package Deployer
Version 1.6 7 of 11
28/11/2016 Public
6. The Software Version field can be used to enter the Software version.
7. Optional Reference can be used to enter any additional referencing information.
8. Click Select to define Administrative categories
9. Click Next
10. From the Application Catalog screen, next to Icon, click Browse if you wish to change the Application icon
11. Click Next
12. Click Add, this will display the Create Deployment Type Wizard
13. Click the dropdown menu for Type
14. Click Script Installer
15. Click Next
16. Enter the name of the Application in the Name field
17. Click Next, this will load the Content screen
18. Click Browse to display the Select Folder screen, to tell the system where to find the PackageDeployer
application
19. Once the location has been selected, click Select Folder
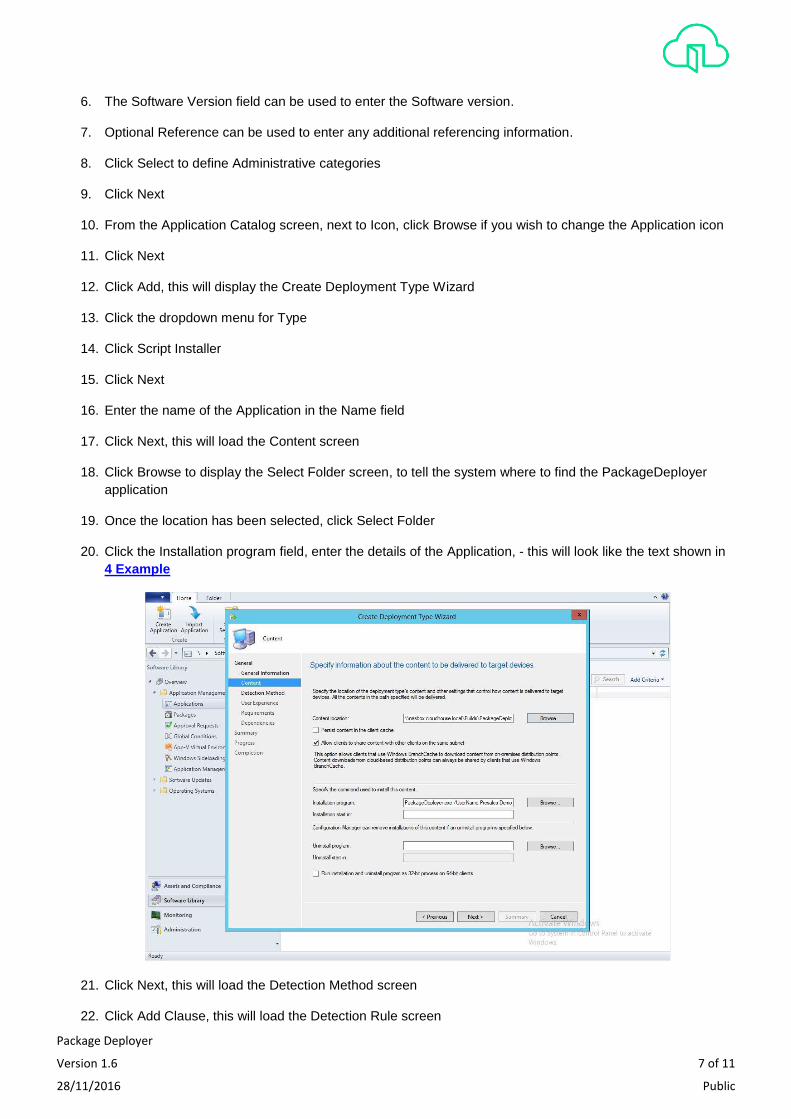
20. Click the Installation program field, enter the details of the Application, - this will look like the text shown in
4 Example
21. Click Next, this will load the Detection Method screen
22. Click Add Clause, this will load the Detection Rule screen
Package Deployer
Version 1.6 8 of 11
28/11/2016 Public
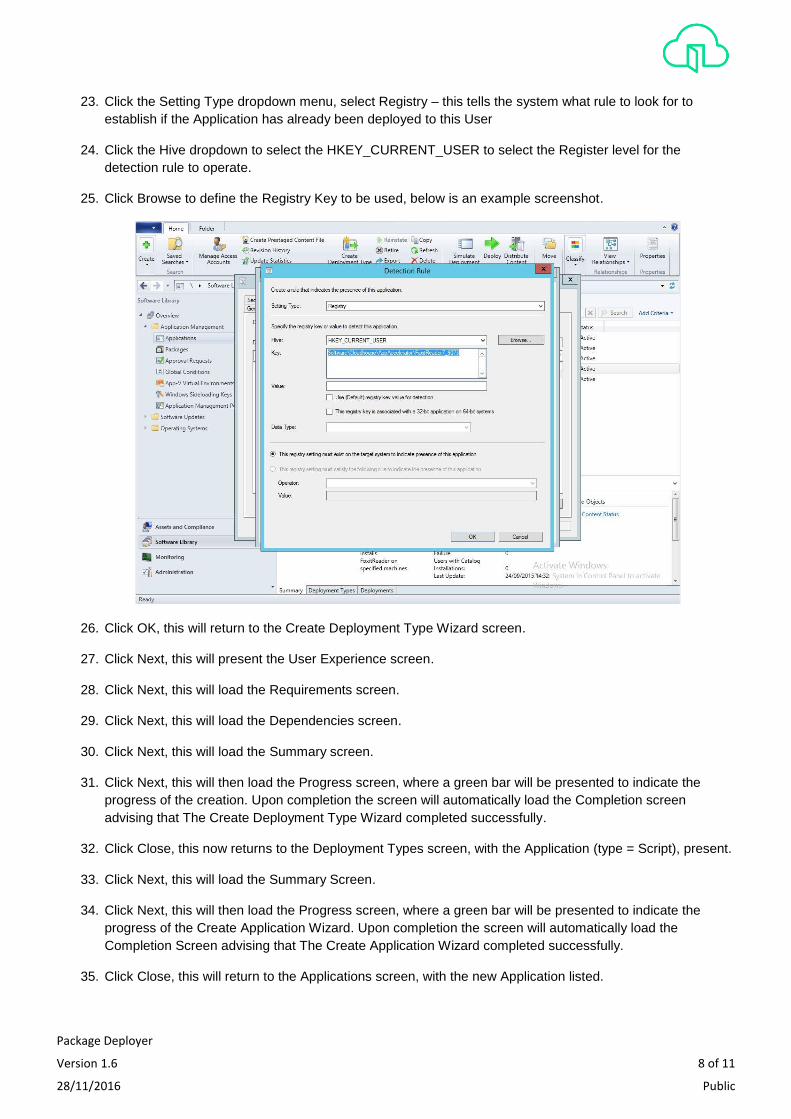
23. Click the Setting Type dropdown menu, select Registry – this tells the system what rule to look for to
establish if the Application has already been deployed to this User
24. Click the Hive dropdown to select the HKEY_CURRENT_USER to select the Register level for the
detection rule to operate.
25. Click Browse to define the Registry Key to be used, below is an example screenshot.
26. Click OK, this will return to the Create Deployment Type Wizard screen.
27. Click Next, this will present the User Experience screen.
28. Click Next, this will load the Requirements screen.
29. Click Next, this will load the Dependencies screen.
30. Click Next, this will load the Summary screen.
31. Click Next, this will then load the Progress screen, where a green bar will be presented to indicate the
progress of the creation. Upon completion the screen will automatically load the Completion screen
advising that The Create Deployment Type Wizard completed successfully.
32. Click Close, this now returns to the Deployment Types screen, with the Application (type = Script), present.
33. Click Next, this will load the Summary Screen.
34. Click Next, this will then load the Progress screen, where a green bar will be presented to indicate the
progress of the Create Application Wizard. Upon completion the screen will automatically load the
Completion Screen advising that The Create Application Wizard completed successfully.
35. Click Close, this will return to the Applications screen, with the new Application listed.
Package Deployer
Version 1.6 9 of 11
28/11/2016 Public
7.2 Deploying an Application
Once the Application has been successfully created, it will appear in the list under the Applications menu in the Software Library. The next process is to then push the software to the user(s). As mentioned previously, for productivity and efficiency it is advised to “push” the deployment using groups as opposed to individual users.
7.2.1 Creating the Users/ Groups for deployment
Select the Users/ Groups to receive the push application from SCCM.
7.2.2 Deploying the Application
Having created the user(s)/ groups to receive the push applications, the system is now ready to deploy the Application from the Deploy Software Wizard.
7.2.2.1 Deploy Software Wizard
Having selected deploy, the screen will now present a Deploy Software Wizard in order to “push” the application to the desired user base. Select the User(s)/ Groups to deploy to, using the default settings until reaching the Deployment setting screen. Click the Purpose dropdown and select Required.
Continue with the default settings, using the Summary screen to review settings, click Next to move to the Progress page. Once the progress has completed the screen will automatically move onto the Completion screen, again this will present a summary of the successful deployment.
7.2.3 User Acceptance Testing
The final stage of the deployment is to login as the user to then access the installed Application, once the Application has successfully deployed, at next login users will be presented with the option to open the Application. The below steps document the process for an end user to commence using the deployed Application.
Once the user is logged in, click the Start Menu and select Microsoft System Center. This will load the Software Centre Application, and an Information Balloon will display at the bottom right corner of the screen to advise Downloading and Installing Software. Click Installation Status to view progress details of the Install.
Once complete, Click the Start Menu and from the menu you will now be presented with the deployed Application in the Start Menu, it will also appear as a shortcut on the desktop screen. The Application has successfully been installed and is ready to be used.
FAQ
Do I have to run the Package Deployer for every user?
No. When deploying Centricity Business Virtual Access to a shared or multi-user environment (Terminal
Server/Citrix), it’s possible to enable all users of the environment to access and use the application, using per-
machine deployment.
Your Portal administrator can enable Machine Deployment upon request. When this feature is in use, the CBVA
deployment must be performed with Administrative privileges. Also, the process of pushing out CBVA using the
Package Deployer through SCCM or other software deployment tools, remains unchanged.
With Machine Deployment, a CBVA shortcut icon will be placed on Public Desktop, which can be accessed by all
users on the computer. Newly created users will inherit the icon as well.
Package Deployer
Version 1.6 10 of 11
28/11/2016 Public
How do I setup Remote Desktop Connection settings to start CBVA upon connecting to the Terminal
Server?
NOTE: In this section, it is assumed that CBVA has been deployed to the Terminal Server using Package Deployer
and Machine Deployment.
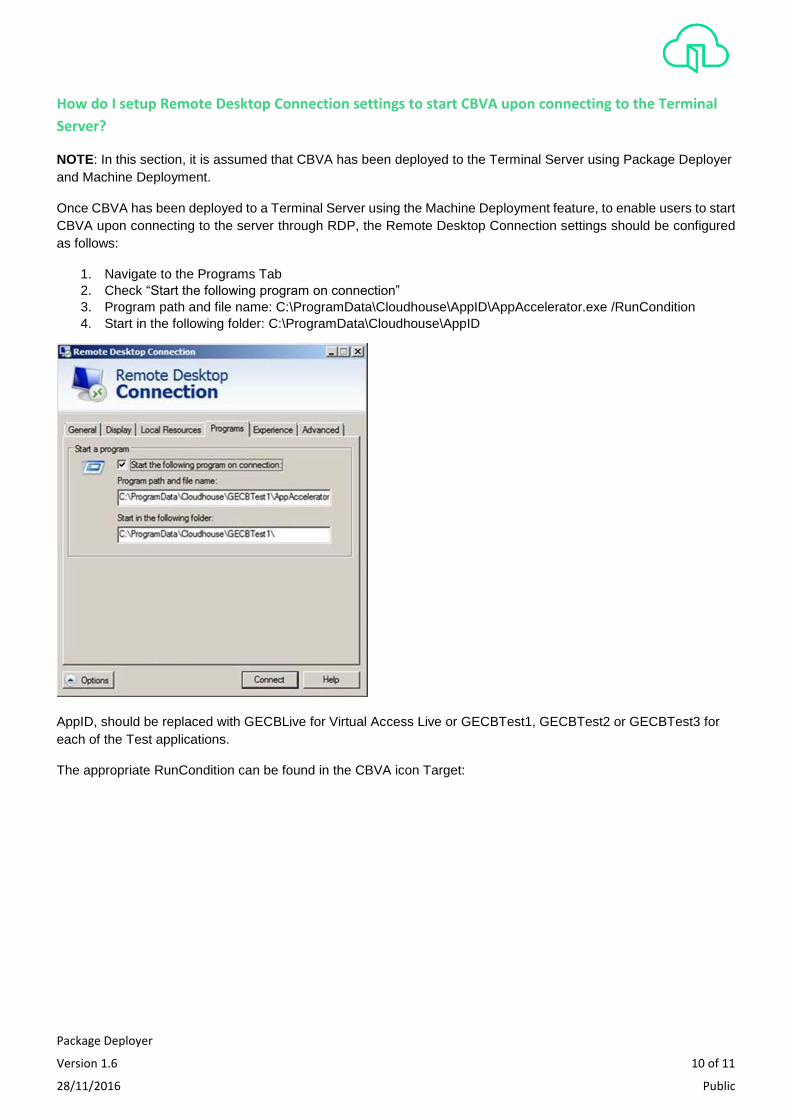
Once CBVA has been deployed to a Terminal Server using the Machine Deployment feature, to enable users to start
CBVA upon connecting to the server through RDP, the Remote Desktop Connection settings should be configured
as follows:
1. Navigate to the Programs Tab
2. Check “Start the following program on connection”
3. Program path and file name: C:\ProgramData\Cloudhouse\AppID\AppAccelerator.exe /RunCondition
4. Start in the following folder: C:\ProgramData\Cloudhouse\AppID
AppID, should be replaced with GECBLive for Virtual Access Live or GECBTest1, GECBTest2 or GECBTest3 for
each of the Test applications.
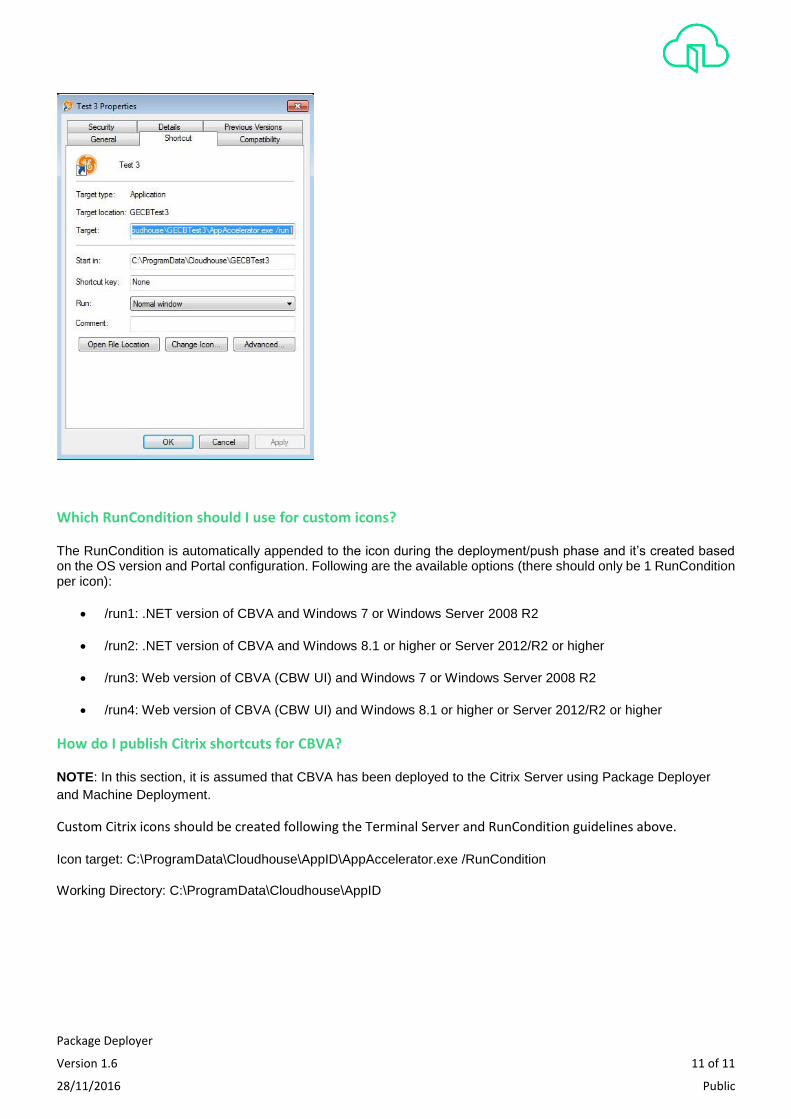
The appropriate RunCondition can be found in the CBVA icon Target:
Package Deployer
Version 1.6 11 of 11
28/11/2016 Public
Which RunCondition should I use for custom icons?
The RunCondition is automatically appended to the icon during the deployment/push phase and it’s created based on the OS version and Portal configuration. Following are the available options (there should only be 1 RunCondition per icon):
/run1: .NET version of CBVA and Windows 7 or Windows Server 2008 R2
/run2: .NET version of CBVA and Windows 8.1 or higher or Server 2012/R2 or higher
/run3: Web version of CBVA (CBW UI) and Windows 7 or Windows Server 2008 R2
/run4: Web version of CBVA (CBW UI) and Windows 8.1 or higher or Server 2012/R2 or higher
How do I publish Citrix shortcuts for CBVA?
NOTE: In this section, it is assumed that CBVA has been deployed to the Citrix Server using Package Deployer
and Machine Deployment.
Custom Citrix icons should be created following the Terminal Server and RunCondition guidelines above.
Icon target: C:\ProgramData\Cloudhouse\AppID\AppAccelerator.exe /RunCondition
Working Directory: C:\ProgramData\Cloudhouse\AppID