Original Operation Instructions Blast Chillers & Freezers · Original Operation Instructions Blast...
8
00-556499 Jan 2013 Issue 1 Original Operation Instructions Blast Chillers & Freezers BCT & BCFT Cabinets, MBCT & MBFT Modular Models with FC1-11 Touchpad Controller Foster Refrigerator a Division of ITW Ltd Oldmedow Road, King’s Lynn, Norfolk, PE30 4JU UK Tel: +44 (0) 843 216 8800 Fax: +44 (0) 843 216 4700 Email: [email protected] UK Website: www.fosterrefrigerator.co.uk ISO 14001 ISO 9001
Transcript of Original Operation Instructions Blast Chillers & Freezers · Original Operation Instructions Blast...

00-556499 Jan 2013 Issue 1
Original Operation Instructions
Blast Chillers & Freezers
BCT & BCFT Cabinets, MBCT & MBFT Modular Models
with FC1-11 Touchpad Controller
Foster Refrigerator a Division of ITW Ltd
Oldmedow Road, King’s Lynn,
Norfolk, PE30 4JU
UK Tel: +44 (0) 843 216 8800 Fax: +44 (0) 843 216 4700
Email: [email protected] UK Website: www.fosterrefrigerator.co.uk
ISO 14001 ISO 9001

GB
General Electrical Safety Foster Refrigerator recommends that the equipment is electrically connected via a Residual Current Device; such as a Residual Current Circuit Breaker (RCCB) type socket, or through a Residual Current Circuit Breaker with Overload Protection (RCBO) supplied circuit. Disposal Requirements If not disposed of properly all refrigerators have components that can be harmful to the environment. All old refrigerators must be disposed of by appropriately registered and licensed waste contractors, and in accordance with national laws and regulations. Start-Up and Operation (For Modular units please refer to the separate Install & Erection Instructions) After unpacking, clean and allow the cabinet to stand for 2 hours before turning on (cleaning directions supplied within this manual). Ensure the cabinet is situated where neither hot nor cold air sources will affect its performance. Make sure that a minimum clearance of 150mm around the cabinet is available for ventilation and effective operation. There is no minimum clearance for above the cabinets. Connect the unit to a suitable mains power outlet and turn the supply on. Do not plug or unplug the unit with wet hands. Initialisation screen After power is applied to the unit the controller display will show the initialisation screen. This will only show for a few minutes stating both ‘Booting’ and then displaying the software version at the bottom of the screen. When the controller has completed initialisation the screen will revert to the ‘Home Screen’
Home Screen This is shown after initialisation and when no programmes are running. From this page a cycle can be launched. Select the cycle type by pressing the relevant cycle button and then press ‘Start’. This page also shows the date, time and current air temperature and allows access to the ‘Settings Home Page’ and ‘Information’ function.
Touchpad Icons
Cycle Description Time Elapsed
Chill Cycle Symbol Air (T1) Temperature
Day & Current Time
Cycle Progress Bar
Detail Information
Surround Signal
Stop Button Information Button
(Some icons or switches are only visible during adjustment, when activated by parameters or through
operation/manual selection).
Important Note to the Installer: If you are not the user please pass this document on to them as it contains important guidelines on operation, loading, cleaning and general maintenance and should be kept for reference.
GB
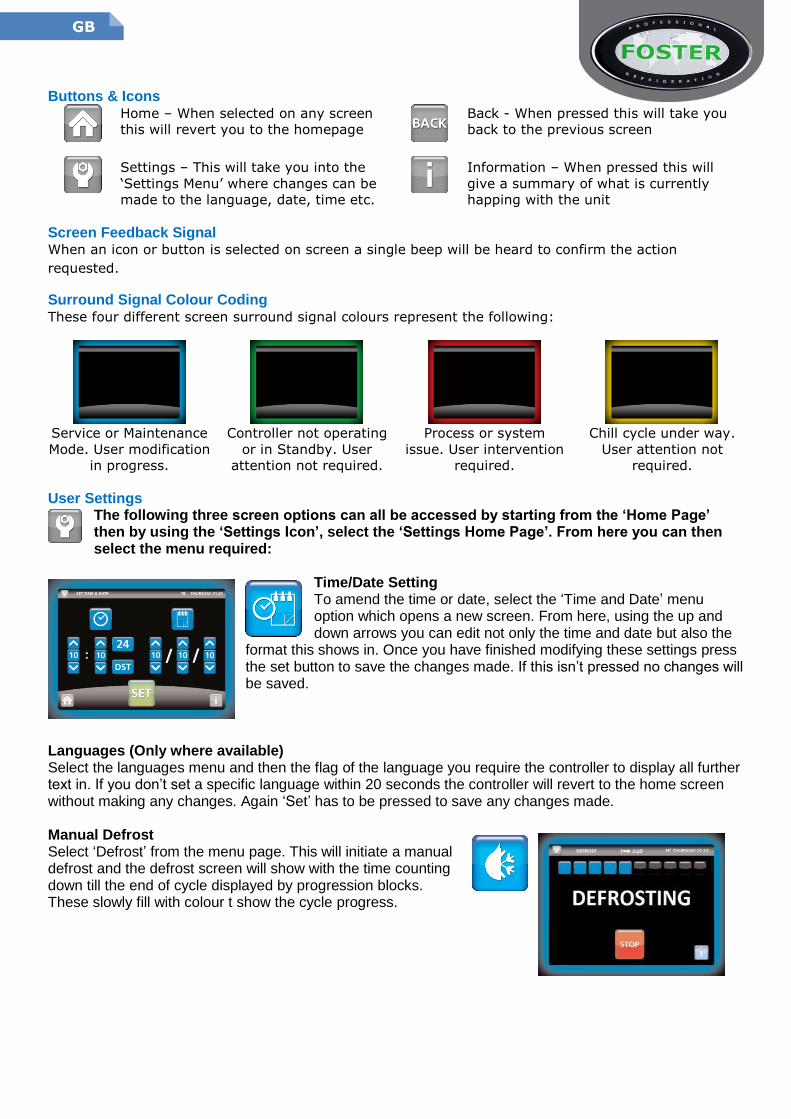
Buttons & Icons
Home – When selected on any screen
this will revert you to the homepage
Back - When pressed this will take you
back to the previous screen
Settings – This will take you into the
‘Settings Menu’ where changes can be
made to the language, date, time etc.
Information – When pressed this will
give a summary of what is currently
happing with the unit
Screen Feedback Signal When an icon or button is selected on screen a single beep will be heard to confirm the action
requested.
Surround Signal Colour Coding These four different screen surround signal colours represent the following:
Service or Maintenance
Mode. User modification
in progress.
Controller not operating
or in Standby. User
attention not required.
Process or system
issue. User intervention
required.
Chill cycle under way.
User attention not
required.
User Settings
The following three screen options can all be accessed by starting from the ‘Home Page’ then by using the ‘Settings Icon’, select the ‘Settings Home Page’. From here you can then select the menu required:
Time/Date Setting To amend the time or date, select the ‘Time and Date’ menu option which opens a new screen. From here, using the up and down arrows you can edit not only the time and date but also the
format this shows in. Once you have finished modifying these settings press the set button to save the changes made. If this isn’t pressed no changes will be saved.
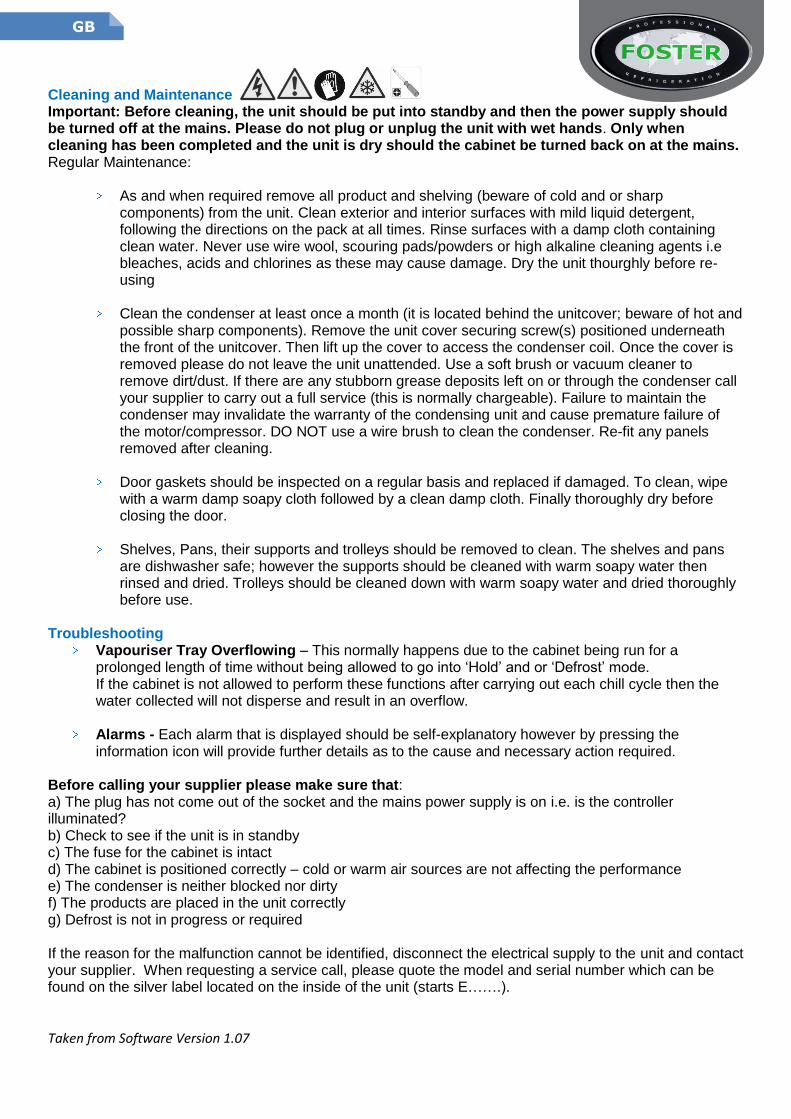
Languages (Only where available) Select the languages menu and then the flag of the language you require the controller to display all further text in. If you don’t set a specific language within 20 seconds the controller will revert to the home screen without making any changes. Again ‘Set’ has to be pressed to save any changes made. Manual Defrost Select ‘Defrost’ from the menu page. This will initiate a manual defrost and the defrost screen will show with the time counting down till the end of cycle displayed by progression blocks. These slowly fill with colour t show the cycle progress.

GB
Stopping Cycles or Silencing Audible Alarms To stop a cycle press and hold the ‘Stop’ button shown on screen until the three progression boxes fill with red. On releasing the button the cycle will have stopped and the screen will revert to the home page. Likewise stop an audible alarm, press the mute button and the alarm will silence. As long as the alarm isn’t detrimental to the cycle the process will continue but a red alarm bell will flash alongside the home page icon until acknowledged. By pressing this alarm bell icon the controller will navigate to the alarms history menu, showing when and what alarm was silenced. This warning will show in the alarms history if it requires no further attention
or in the active list if the unit requires an engineer. Both these alarms will stay in the history until an engineer deletes them. Press the Home icon to revert to the cycle screen. Information Screens
On each screen you will see . When pressed this will be able to give a brief description of what the function you are currently viewing does.
To exit this information screen press or leave for 20 seconds. Information screens while in a chill cycle differ slightly as they also show the current relay statuses, probe states and temperatures and also the digital input information.
Castors/ Legs All models are fitted as standard with swivel castors. Ensure during installation the unit is level, if not the door may not close correctly. Adjust castors levels by inserting spacers under the appropriate castor and the base of the unit. As an alternative adjustable legs can be fitted on all cabinet models. Ramp - For BCCFTRI 1 Fit the ramp into the retaining slots.
Vapouriser Tray – BCCFT1 & BCCFTRI1 Fit electrically operated condensate vapouriser tray to the external rear wall of the BCCFTRI1 using the screws provided. For the BCCFT1 slide the tray into the retainers beneath the cabinet. Alternatively connect drain pipe direct to the main drain via use of a ‘bolt on’ tundish.
BCCFTRI1 Doors Narrow site access may require door removal. It is necessary to remove the unit compartment cover to gain access to the door hinge.
Remove unit compartment cover
Remove the locknut from the bottom hinge bracket (fig 1)
Remove the M5 hex screw from the top hinge bracket and push down on the spring loaded cartridge top.(fig 2)
The door is then free to be pulled clear of the top hinge bracket and then lifted clear of the bottom hinge bracket. Shelves, Pans, Trolleys and Supports Neither pans, trolleys nor shelves are supplied with any unit, but theses can be purchased sepeartely. Pan/Tray Supports are fitted as standard to all cabinets. Loading and Airflow Evenly distribute loads on shelves & pans making sure that no more than the total weight capacity denoted by the model size is divided equally throughout the unit. Ensure the air can circulate around/through the stored product.
Fig 1 Fig 2

GB
Basic Do’s & Don’ts of Blast Chilling Different foods give up their heat at different rates and therefore there are certain factors that need to be considered when determining chill or freeze time, and which programme should be used. A 10kg meat joint will not have the same chilling requirements as 10kg of patisseries product.
Density, water content, and fat content all affect the time required to achieve temperature. Delicacy of the foods’ structure and surface must be taken into account when selecting the
programme required. Weight loadings and the thickness of product should not be exceeded. Foster recommends a
maximum loading of 3.75kg per gastronorm 1/1 container. Large joints of meat will not chill within the standard guidelines. In this situation, guidelines
recommended that joints are either portioned before chilling or chilled as quickly as possible. Product that is hotter than the recommended starting temperature will obviously take longer to
chill. It is recommended that foods are not covered or lidded, as this will extend the time required.
Use of deep containers will also extend the chilling time. It is essential that good airflow passes over the product to facilitate even and consistent chilling.
Foil should not be used to cover food if possible. Always check the food product before and after with a hand held temperature probe and record
it. Do not overfill containers (recommended depth is 25mm) and keep food evenly spread. Allow food to rest after cooking – especially meat to ensure the quality and texture of the end
product. Guidelines recommended that food is rested and cooled for 30 minutes before blast chilling.
Do not overload the Blast Chiller as this will mean the required temperature will not be achieved in time.
Always clean and sanitise the fitted core probe before use. Decant hot liquids into manageable size gastronorm containers Pre-chilling the unit is recommended to improve the cooling time. If in doubt, use the probe to ensure safe temperatures are achieved.
Guide to Blast Chilling
Food Type Includes Blast Chill
Programme Time to
Chill (Mins) Time to Shock Freeze (Mins)
Meat Beef, pork, lamb, poultry & mince
Hard 40 – 90 60 – 240
Fish Fried, poached or baked – haddock, plaice, salmon, cod fillets etc.
Soft 30 – 90 60 – 240
Prepared Dishes Stews & casseroles, lasagne, risotto, shepherd’s pie etc.
Hard 50 – 90 90 – 240
Vegetable & Pulses Stewed or roasted veg, rice & potatoes etc.
Soft 30 – 90 60 – 240
Fruit Stewed & cooked fruits. Soft 60 – 90 60 – 240
Bakery Cakes. Hard 30 – 90 70 – 240
Delicate Bakery Pastries. Hard 60 – 90 50 – 240
Desserts Fruit based desserts & egg based flans.
Soft 30 – 90 70 – 240
Other Desserts Sponge puddings & dense desserts such as cheesecake.
Hard 30 – 90 70 – 240
(Note: All times listed should be used as a guide only, and will depend on type, size & quantity).
GB
Cleaning and Maintenance Important: Before cleaning, the unit should be put into standby and then the power supply should be turned off at the mains. Please do not plug or unplug the unit with wet hands. Only when cleaning has been completed and the unit is dry should the cabinet be turned back on at the mains. Regular Maintenance:
As and when required remove all product and shelving (beware of cold and or sharp components) from the unit. Clean exterior and interior surfaces with mild liquid detergent, following the directions on the pack at all times. Rinse surfaces with a damp cloth containing clean water. Never use wire wool, scouring pads/powders or high alkaline cleaning agents i.e bleaches, acids and chlorines as these may cause damage. Dry the unit thourghly before re-using
Clean the condenser at least once a month (it is located behind the unitcover; beware of hot and possible sharp components). Remove the unit cover securing screw(s) positioned underneath the front of the unitcover. Then lift up the cover to access the condenser coil. Once the cover is removed please do not leave the unit unattended. Use a soft brush or vacuum cleaner to remove dirt/dust. If there are any stubborn grease deposits left on or through the condenser call your supplier to carry out a full service (this is normally chargeable). Failure to maintain the condenser may invalidate the warranty of the condensing unit and cause premature failure of the motor/compressor. DO NOT use a wire brush to clean the condenser. Re-fit any panels removed after cleaning.
Door gaskets should be inspected on a regular basis and replaced if damaged. To clean, wipe
with a warm damp soapy cloth followed by a clean damp cloth. Finally thoroughly dry before closing the door.
Shelves, Pans, their supports and trolleys should be removed to clean. The shelves and pans
are dishwasher safe; however the supports should be cleaned with warm soapy water then rinsed and dried. Trolleys should be cleaned down with warm soapy water and dried thoroughly before use.
Troubleshooting
Vapouriser Tray Overflowing – This normally happens due to the cabinet being run for a prolonged length of time without being allowed to go into ‘Hold’ and or ‘Defrost’ mode. If the cabinet is not allowed to perform these functions after carrying out each chill cycle then the water collected will not disperse and result in an overflow.
Alarms - Each alarm that is displayed should be self-explanatory however by pressing the
information icon will provide further details as to the cause and necessary action required. Before calling your supplier please make sure that: a) The plug has not come out of the socket and the mains power supply is on i.e. is the controller illuminated? b) Check to see if the unit is in standby c) The fuse for the cabinet is intact d) The cabinet is positioned correctly – cold or warm air sources are not affecting the performance e) The condenser is neither blocked nor dirty f) The products are placed in the unit correctly g) Defrost is not in progress or required If the reason for the malfunction cannot be identified, disconnect the electrical supply to the unit and contact your supplier. When requesting a service call, please quote the model and serial number which can be found on the silver label located on the inside of the unit (starts E…….).
Taken from Software Version 1.07

GB
> Page Left Blank Intentionally <

FOSTER REFRIGERATOR (a division of ITW Ltd.)
Oldmedow Road, King’s Lynn, Norfolk. PE30 4JU United Kingdom
GB DECLARATION OF CONFORMITY D ÜBEREINSTIMMUNGSERKLÄRUNG DK OVERENSSTEMMELSES - ERKLÆRING
E DECLARACIÓN DE CONFORMIDAD
F DECLARATION DE CONFORMITE FIN VAATIMUSTENMUKAISUUSVAKUUTUS GR ΔΗΛΩΣΗ ΙΙΡΟΔΙΑΓΡΑΦΗΣ I DICHIARAZIONE DI CONFORMITA’ NL CONFORMITEIT’S VERKLARING P DECLARAÇÃO DE CONFORMIDADE
PL DEKLARACJA ZGODNOŚCI CE S GARANTI
GB We declare the following equipment: D Man erklärt, daß folgendes Gerät mit den nachstehend aufgefürten Europäischen DK Man erklærer, at det følgende apparatur:
E Se declara que el siguiente equipo:
F Nous déclarons que les appareils suivants: FIN Täten vakuutamme, että seuraava laite: GR Δηλωνεται οτι η παρεβουσα συσκευη:
I Si dichiara che la seguente apparecchiatura: NL De volgende machines: P Se declara que a seguente maquina:
PL Deklarujemy że następujące urządzenie: S Härmed udertygas att följande apparatur:
GB comply with the following European Directives: D richtlinien übereinstimmt: DK er I overensstemmelse med de følgende europæiske direktivers forskrifter:
E es en conformidad a cuanto establecen las siguientes Normas Europeas:
F sont conformes aux Directives Européennes: FIN vastaa seuraavien Euroopan yhteisön direktiivien vaatimuksia: GR τηρει τις προδιαγραφες των εξης Ευροπαϊκων Оδηγων:
I è conforme a quanto prescritto dale seguenti Direttive Europee: NL conform met de Europeese Wetgeving: P è feita siguendo as prescrições das siguentes diretinas eu:
PL Spelnia wymogi następujących Dyrektyw Europejskich: S ä normriktig och utformad enligt fölande Europeiska direktiv:
GB and have been designed, realised and controlled according to the following regulations: D das Gerät ist folgenden Normen gemäß entworfen, angfertigt und geprüft worden: DK er blevet projekteret, realiseret og kontrolleret i følge neden for beskrevne normer:
E y estuvo proyectado, realizado y controdado segùn las siguentes normas:
F et ont été conçus, réalisés et contrôlés suivant les norms: FIN ja että se on suunniteltu, valmistettu ja tarkistettu seuraavien säännösten mukaisesti: GR και σχεδιαστηκε, καταστευαστηκε και ελεγχτηκε: I ed è stata progettata, realizzatta e controllata second le seguenti norme: NL die volgens de volgende normen warden gecontrueerd, uitgevoerd en gecontroleerd: P e foi projectada, realizada e controlada Segundo as siguentes normas:
PL Oraz że zostala zaprojektowana, wyprodukowana I skontrolowana zgodnie z nastęepującymi przepisami:
S projekerad, realiserad och kontrollerad enligt föliande normregler:
On behalf of Foster Refrigerator:
C.M. Playford (Market & Development Director) January 2013
2006/42 EC (Machinery Directive)
2004/108 EC (EMC Directive)
REG.1935/2004 EC (Food Equipment Directive)
2006/95 EC (Low Voltage Directive)
2002/95 EC (RoHS / WEEE Directive)
97/23 EC (Pressure Equipment Directive)
CEI EN 61000-1 … 4 (EMC Test Standards)
CEI EN 60335-1 / 2-89 (Electrical Appliance Standards)
CEI EN 60204-1 (Electrical Machinery Standard)
UNI EN 378-1 (Refrigeration System / Test Standards)
UNI EN ISO 13857 (Safety Distance Standard)
UNI EN ISO 12100-2 (Machinery Safety Standard)
UNI EN ISO 12100-1 (Design Safety Standard)
BCT11, BCFT11, BCT21, BCFT21, BCT36, BCFT36, BCT51, BCFT51, RBCT20-60, RBCT20-60R, BCCFTRI-1, MBCT75, MBCT75W, MBCFT75, MBCFT75W, MBCT100, MBCT100W, MBCFT100, MBCFT100W, MBCT150, MBCT150W, MBCFT150, MBCFT150W, MBCT250, MBCT250W, MBCFT250, MBCFT250W