Oracle Process Manufacturing - Oracle Help Center •Contents Oracle Process Manufacturing...
210
Oracle ® Process Manufacturing Implementation Guide Release11.0 PartNo.A69954-01
Transcript of Oracle Process Manufacturing - Oracle Help Center •Contents Oracle Process Manufacturing...

Oracle®ProcessManufacturing
ImplementationGuide
Release11.0
PartNo.A69954-01

Oracle® Process Manufacturing Implementation Guide
Part No. A69954-01
Copyright © 1999, Oracle Corporation. All rights reserved.
Primary Authors: Michele-Andrea Fields
Contributors: Christy Pischedda, Sudha Seshadri
The Programs (which include both the software and documentation) contain proprietaryinformation of Oracle Corporation; they are provided under a license agreement containingrestrictions on use and disclosure and are also protected by copyright, patent and otherintellectual property law. Reverse engineering of the Programs is prohibited.
The information contained in this document is subject to change without notice. If you findany problems in the documentation, please report them to us in writing. Oracle Corporationdoes not warrant that this document is error free. No part of this document may bereproduced or transmitted in any form or by any means, electronic or mechanical, for anypurpose, without the express written permission of Oracle Corporation.
If this Program is delivered to a U.S. Government Agency of the Department of Defense,then it is delivered with Restricted Rights and the following legend is applicable:
Restricted Rights Legend Programs delivered subject to the DOD FAR Supplement are'commercial computer software' and use, duplication and disclosure of the Programs shall besubject to the licensing restrictions set forth in the applicable Oracle license agreement.Otherwise, Programs delivered subject to the Federal Acquisition Regulations are 'restrictedcomputer software' and use, duplication and disclosure of the Programs shall be subject tothe restrictions in FAR 52.227-14, Rights in Data -- General, including Alternate III (June1987). Oracle Corporation, 500 Oracle Parkway, Redwood City, CA 94065.
The Programs are not intended for use in any nuclear, aviation, mass transit, medical,or other inherently dangerous applications. It shall be licensee's responsibility to takeall appropriate fail-safe, back up, redundancy and other measures to ensure the safeuse of such applications if the Programs are used for such purposes, and Oracledisclaims liability for any damages caused by such use of the Programs.
Oracle is a registered trademark of Oracle Corporation. All other product or company namesmentioned are used for identification purposes only and may be trademarks of theirrespective owners.

Oracle Process Manufacturing Implementation Guide Contents •••• i
Contents
Send Us Your Comments 1
Reader's Comment Form...............................................................................................1
Implementation Guide Preface 3
Implementation Guide Welcome..................................................................................3About Implementation Guide .......................................................................................3
Audience for Implementation Guide ...............................................................3Conventions ..................................................................................................................5Do Not Use Database Tools to Modify Oracle Applications Data ..............................7Information Sources Related Implementation Guide ...................................................7
Online Documentation.....................................................................................7Other Information Sources ..............................................................................8
Other Sources..............................................................................................................10Training .........................................................................................................10
About Oracle...............................................................................................................10Thank You..................................................................................................................11
AOL System Administration 13
Before Using OPM .....................................................................................................13Implementation..............................................................................................13Creating Users ...............................................................................................14Creating Responsibilities...............................................................................14Implement Function Security.........................................................................14Create Additional Users.................................................................................15Setting Up Printers.........................................................................................15Specifying Your Site-Level and Application-Level Profile Options ............16Defining Concurrent Managers .....................................................................17Defining Request Sets ...................................................................................18Setting Up An AuditTrail ..............................................................................18Modifying Language Prompts .......................................................................18Modifying Territory LOV Values .................................................................18
Maintenance Functions...............................................................................................19Defining a Request Security Group...............................................................19Setting Up Descriptive Flexfields..................................................................19Overview of Oracle Applications Help for HTML .......................................20
ii •••• Contents Oracle Process Manufacturing Implementation Guide
Oracle Financials Integration Implementation 23
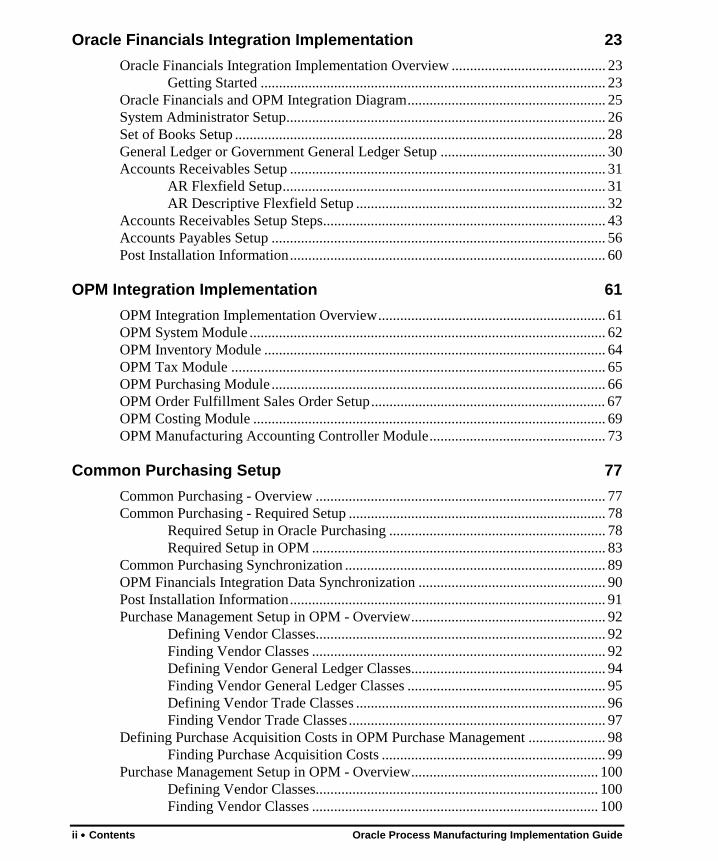
Oracle Financials Integration Implementation Overview.......................................... 23Getting Started .............................................................................................. 23
Oracle Financials and OPM Integration Diagram...................................................... 25System Administrator Setup....................................................................................... 26Set of Books Setup..................................................................................................... 28General Ledger or Government General Ledger Setup ............................................. 30Accounts Receivables Setup...................................................................................... 31
AR Flexfield Setup........................................................................................ 31AR Descriptive Flexfield Setup.................................................................... 32
Accounts Receivables Setup Steps............................................................................. 43Accounts Payables Setup........................................................................................... 56Post Installation Information...................................................................................... 60
OPM Integration Implementation 61
OPM Integration Implementation Overview.............................................................. 61OPM System Module................................................................................................. 62OPM Inventory Module ............................................................................................. 64OPM Tax Module ...................................................................................................... 65OPM Purchasing Module........................................................................................... 66OPM Order Fulfillment Sales Order Setup................................................................ 67OPM Costing Module ................................................................................................ 69OPM Manufacturing Accounting Controller Module................................................ 73
Common Purchasing Setup 77
Common Purchasing - Overview............................................................................... 77Common Purchasing - Required Setup...................................................................... 78
Required Setup in Oracle Purchasing ........................................................... 78Required Setup in OPM................................................................................ 83
Common Purchasing Synchronization....................................................................... 89OPM Financials Integration Data Synchronization ................................................... 90Post Installation Information...................................................................................... 91Purchase Management Setup in OPM - Overview..................................................... 92
Defining Vendor Classes............................................................................... 92Finding Vendor Classes ................................................................................ 92Defining Vendor General Ledger Classes..................................................... 94Finding Vendor General Ledger Classes ...................................................... 95Defining Vendor Trade Classes .................................................................... 96Finding Vendor Trade Classes...................................................................... 97
Defining Purchase Acquisition Costs in OPM Purchase Management ..................... 98Finding Purchase Acquisition Costs ............................................................. 99
Purchase Management Setup in OPM - Overview................................................... 100Defining Vendor Classes............................................................................. 100Finding Vendor Classes .............................................................................. 100

Oracle Process Manufacturing Implementation Guide Contents •••• iii
Defining Vendor General Ledger Classes...................................................102Finding Vendor General Ledger Classes.....................................................103Defining Vendor Trade Classes...................................................................104Finding Vendor Trade Classes ....................................................................105
Defining Purchase Acquisition Costs in OPM Purchase Management....................106Finding Purchase Acquisition Costs............................................................107
OPM System Setup 109
Editing Document Types ..........................................................................................109Find Document Types..................................................................................110
Editing Document Ordering......................................................................................111Find Document Ordering.............................................................................113
Editing Geography Codes.........................................................................................114Find Geography Codes ................................................................................114
Editing HR Organizations.........................................................................................116Editing Organizations ...............................................................................................118
Find Organizations.......................................................................................119Editing Paragraphs....................................................................................................122Editing Reason Codes...............................................................................................124
Find Reason Codes ......................................................................................125Editing Session Parameters.......................................................................................128Editing Text Tokens .................................................................................................129
Find Text Tokens.........................................................................................130Editing Units of Measure..........................................................................................131
Find Units of Measure.................................................................................133Editing Unit of Measure Types ................................................................................135
Find Unit of Measure Types........................................................................135Editing User Organizations.......................................................................................137Editing User Planning Classes..................................................................................138Special Menu............................................................................................................139
Edit Text ......................................................................................................139Address Edit ................................................................................................139
Purge and Archive 141
Purge and Archive ....................................................................................................141Find Purge Types.........................................................................................144Archive/Purge Process.................................................................................145
Purge Inquiry ............................................................................................................146Purge Setup...............................................................................................................148
Find Purge Types.........................................................................................149Purge Tables ................................................................................................150
OPM Lookups 151
OPM Lookup Form...................................................................................................151

iv •••• Contents Oracle Process Manufacturing Implementation Guide
Profile Options 153
Profile Options Overview......................................................................................... 153CM$AC_ERRORS_LIMIT......................................................................... 153CM$RU_ERRORS_LIMIT......................................................................... 153CM$USE_COSTING_EFF_ONLY ............................................................ 154CM$MAX_ITERATION_LIMIT ............................................................... 154FM$BYPROD_ACTIVE ............................................................................ 154FM$DEFAULT_RELEASE_TYPE ........................................................... 155FM$SCRAP_FACTOR_TYPE................................................................... 155FM$YIELD_TYPE ..................................................................................... 155GL$ORAFIN_DATE_RANGE .................................................................. 156GL$POST_DEFAULT_LOT...................................................................... 156GL$USE_GEMMS_REV_ACCT............................................................... 156GL$USE_SHIP_UM................................................................................... 157GL$FINANCIAL_PACKAGE ................................................................... 157GL$VEND_DELIMITER........................................................................... 157GL$CUST_DELIMITER............................................................................ 158IC$ALLOC_HORIZON.............................................................................. 158IC$ALLOC_METHOD............................................................................... 159IC$ALLOC_TYPE...................................................................................... 159IC$ALLOWNEGINV ................................................................................. 159IC$DEFAULT_LOCT ................................................................................ 160IC$DEFAULT_LOT................................................................................... 160IC$EPSILON............................................................................................... 160IC$EXPTLCHECK..................................................................................... 161IC$LOT_QTY ............................................................................................. 161IC$MOVE_CHECK_ALLOC .................................................................... 161IC$MOVEDIFFSTAT................................................................................. 162IC$SHELF_DAYS ...................................................................................... 162LM$DENSITY ............................................................................................ 162LM$EFF_ON_UPLOAD............................................................................ 163LM$UOM_MASS_TYPE........................................................................... 163LM$UOM_VOLUME_TYPE .................................................................... 163OP$BACKORDER ..................................................................................... 164OP$CHK_NOT_SUCCESS........................................................................ 164OP$CUST_HLD ......................................................................................... 164OP$CUST_LIMIT_EXCEED..................................................................... 165OP$DEFPRICE_UM................................................................................... 165OP$GEMMSTAX ....................................................................................... 165OP$HOLDREAS_CODE............................................................................ 166OP$HOURS_PER_DAY ............................................................................ 166OP$INVCHK .............................................................................................. 166OP$NO_EXCHG_RTE............................................................................... 167OP$ONE_TIME_SHIPTO.......................................................................... 167OP$ORD_LIMIT_EXCEED....................................................................... 167

Oracle Process Manufacturing Implementation Guide Contents •••• v
OP$PARTIAL_ALLOC..............................................................................168OP$PRICE_DATE ......................................................................................168OP$PRICEFIELD........................................................................................168OP$PRICEUM_IND....................................................................................169OP$SHIPPER_CODE..................................................................................169OP$SHIPUOM ............................................................................................169OP$SHIP_MTHD........................................................................................170OP$SHIPVOL_UM.....................................................................................170OP$TAX_STATUS.....................................................................................170OP$USE_AUTO_ALLOC ..........................................................................171ORAFIN_INT..............................................................................................171PI$PIPH_REASON_CODE.........................................................................171PM$ALLOW_CREATE_INPUT................................................................172PM$ALLOW_CREATE_OUTPUT............................................................172PM$AUTO_REL_ALLOC_ONLY.............................................................172PM$CHECK_INV_RELEASE ...................................................................173PM$CHECK_INV_SAVE...........................................................................173PM$CHECK_LOT_STATUS .....................................................................173PM$COPY_FM_TEXT...............................................................................174PM$USE_AUTO_ALLOC..........................................................................174PO$DEFER_ACCT_MAP ..........................................................................174PO$RECV_CLOSE.....................................................................................175PO$REORDER............................................................................................175PO$SHIPUOM ............................................................................................175QC$EXACTSPECMATCH........................................................................176QC$DISPLAYSPEC....................................................................................176SY$3DEF_DTIME ......................................................................................176SY$ADDR_LEN.........................................................................................177SY$ALL ......................................................................................................177SY$DEFAULT_CURR ...............................................................................177SY$DEFAULT_DAYS_MAX ....................................................................178SY$DEFAULT_FISCAL_IND ...................................................................178SY$DEFAULT_LANG...............................................................................178SY$DEFAULT_QUEUE_NO.....................................................................179SY$DELTA_DAYS_MAX .........................................................................179SY$EFF_MAX_DATE ...............................................................................179SY$EFF_MIN_DATE.................................................................................180SY$ESS_INSTALLED ...............................................................................180SY$ESS_USER ...........................................................................................181SY$INTRASTAT ........................................................................................181SY$INTRASTAT_UM................................................................................181SY$MAX_DATE ........................................................................................182SY$MIN_DATE..........................................................................................182SY$MONA1 ................................................................................................182SY$MONA10 ..............................................................................................183

vi •••• Contents Oracle Process Manufacturing Implementation Guide
SY$MONA11.............................................................................................. 183SY$MONA12.............................................................................................. 183SY$MONA2................................................................................................ 184SY$MONA3................................................................................................ 184SY$MONA4................................................................................................ 184SY$MONA5................................................................................................ 185SY$MONA6................................................................................................ 185SY$MONA7................................................................................................ 185SY$MONA8................................................................................................ 186SY$MONA9................................................................................................ 186SY$NEW..................................................................................................... 186SY$NOW.................................................................................................... 187SY$OF_UOM_TRIM_CHAR .................................................................... 187SY$QC_GRADE......................................................................................... 188SY$UOM_HOURS ..................................................................................... 188SY$ZERODATE......................................................................................... 188SY$DEFAULT_LAB_TYPE...................................................................... 189SY$DEFAULT_ORGN.............................................................................. 189SY$DEFAULT_SCHEDULE..................................................................... 189TX$AUTOTAXOE..................................................................................... 190WF$EXPIRY_INTERVAL......................................................................... 190WF$RETEST_INTERVAL ........................................................................ 190
Appendixes 191
Navigation Paths ...................................................................................................... 191
Glossary 193
Index 195

Oracle Process Manufacturing Implementation Guide Send Us Your Comments • 1
Send Us Your Comments
Reader's Comment FormName of Document: Oracle® Process Manufacturing Implementation GuidePart No. A69954-01
Oracle Corporation welcomes your comments and suggestions on the quality and usefulnessof this publication. Your input is an important part of the information used for revision.
•= Did you find any errors?
•= Is the information clearly presented?
•= Do you need more information? If so, where?
•= Are the examples correct? Do you need more examples?
•= What features did you like most about this manual?
If you find any errors or have any other suggestions for improvement, please indicate thetopic, chapter, and page number below:
___________________________________________________________________________
___________________________________________________________________________
___________________________________________________________________________
___________________________________________________________________________
___________________________________________________________________________
___________________________________________________________________________
___________________________________________________________________________
___________________________________________________________________________
___________________________________________________________________________
___________________________________________________________________________

2 • Send Us Your Comments Oracle Process Manufacturing Implementation Guide
If you would like a reply, please give your name, address, and telephone number below:
___________________________________________________________________________
___________________________________________________________________________
___________________________________________________________________________
___________________________________________________________________________
Please send your comments to:
Oracle CorporationOracle Process Manufacturing Documentation500 Oracle ParkwayRedwood City, CA 94065U.S.A.Fax: (415) 506-7200
Thank you for helping us improve our documentation.

Oracle Process Manufacturing Implementation Guide Implementation Guide Preface • 3
Implementation Guide Preface
Implementation Guide WelcomeWelcome to the Oracle Process Manufacturing Implementation Guide.
This user’s guide includes the information you need to work with OracleProcess Manufacturing (OPM) Implementation Guide effectively.
This preface explains howthis user’s guide is organized and introducesother sources of information that can help you.
About Implementation GuideThis guide contains overviews as well as task and reference informationabout OPM Implementation Guide. This guide includes the followingchapters:
•= AOL System Administration
•= Oracle Financials Integration Implementation
•= OPM Integration Implementation
•= Common Purchasing Setup
•= OPM System Setup
•= Purge and Archive
•= OPM Lookups
•= Profile Options
•= Appendixes
Audience for Implementation GuideThis guide assumes that you have a working knowledge of your businessarea’s processes and tools. It also assumes that you are familiar withOPM Implementation Guide. If you have never used ImplementationGuide, we suggest you attend one or more of the Oracle ProcessManufacturing training classes available through World Wide Education.For more information about OPM Implementation Guide and Oracletraining see Other Information Sources.

4 • Implementation Guide Preface Oracle Process Manufacturing Implementation Guide
This guide also assumes that you are familiar with the OracleApplications graphical user interface. To learn more about OracleApplications graphical user interface, read the Oracle ApplicationsUser’s Guide.

Oracle Process Manufacturing Implementation Guide Implementation Guide Preface • 5
ConventionsBolded Text
Buttons, fields, keys, menus, and selections are bolded in proceduresonly. For example: To access the next form click OK. Otherwise,references to these features appear in regular type.
Additional Menu Options
Only nonstandard menu options are discussed. Standard menu bar options(such as Save) are not discussed. These standard options are described inthe Oracle Applications User’s Guide. Only menu options unique to theuse of the specific form are discussed.
Field References
References to fields within procedures are in bold type. References withinthe body of this guide appear in regular type.
Keyboard Mapping
Some keyboards have an Enter key, while some have Return key. Allreferences to this key appear as Enter.
Required Fields
The word "Required" appears as the last word in the field descriptions ofall required fields. When the field is required contingent on the entry inanother field, or only in specific situations, "Required if..." is the lastsentence of the field description.
Fields Reserved for Future Use
Fields with no current processing implications are referenced by thestatement, "This field is not currently used" or "Reserved for future use"is shown. Do not use these fields for your own reference data, becausethere are plans to link future functionality to these fields. Fields intendedfor informational use only are referenced by the statement, "This field isfor informational purposes only".
Pending/Completed Transactions
Discussions about processing transactions that use the words 'pending'and 'completed' refer to the status of a transaction. Pending andcompleted do not refer to the database tables that are updated as a resultof transactions (for example, some completed transactions are stored inthe Pending Transactions table).

6 • Implementation Guide Preface Oracle Process Manufacturing Implementation Guide
Procedures
Each chapter contains a procedure with numbered steps. Any actionswhich are subordinate to a step are assigned letters.
Note : You can customize your Oracle Application, therefore, allprocedures are suggestive only. Navigate to forms and betweenresponsibilities in a way that works best for your particular setup. Alsonote that fields may appear on your screen in a different order than theyare discussed in this guide.
Oracle Process Manufacturing Glossaries
A module-specific glossary is included.
Use of Word "Character"
The word "character" means an alphanumeric character. Characters thatare numeric or alphabetic only are referenced specifically.
Note : Depending on your system security profile, you may not haveaccess to all of the forms and functions described in this guide. If you donot see a menu option described in this guide, and you want access to it,contact your System Administrator.

Oracle Process Manufacturing Implementation Guide Implementation Guide Preface • 7
Do Not Use Database Tools to Modify OracleApplications Data
Because Oracle Applications tables are interrelated, any change youmake using Oracle Applications can update many tables at once. If youmodify the Oracle Applications data using anything other than OracleApplications, you could change a rowin one table without makingcorresponding changes in related tables. If your tables are synchronizedwith each other, you risk retrieving erroneous information and receivingunpredictable results throughout Oracle Applications.
When you use Oracle Applications to modify your data, OracleApplications automatically checks that your changes are valid. OracleApplications also track who changes information. If you enterinformation into database tables using database tools, you could storeinvalid information. You also lose the ability to track who has changedyour information because SQL*Plus and other database tools do not keepa record of changes.
Consequently, we strongly recommend that you never use SQL*Plus orany other tool to modify Oracle Applications data unless otherwiseinstructed by Oracle Support Services.
Information Sources Related Implementation GuideYou can choose from many sources of information, includingdocumentation, training, and support services, to increase yourknowledge and understanding Implementation Guide.
Online DocumentationAll Oracle Applications documentation is available online on CD-ROM,except for technical reference manuals.
All user’s guides are available in HTML and paper. Technical referencemanuals are available in paper only. Other documentation is available inpaper and sometimes PDF format.
The content of the documentation remains the same from format toformat. Slight formatting differences could occur due to publicationstandards, but such differences do not affect content. For example, pagenumbers are included in paper, but are not included in HTML.
The HTML documentation is available from all Oracle Applicationswindows. Each windowis programmed to start your web browser andopen a specific, context-sensitive section. Once any section of the HTMLdocumentation is open, you can navigate freely throughout all OracleApplications documentation. The HTML documentation also ships withOracle Information Navigator (if your national language supports thistool) which enables you to search for words and phrases throughout thedocumentation set.

8 • Implementation Guide Preface Oracle Process Manufacturing Implementation Guide
Other Information SourcesOPM Implementation Guide shares business and setup information withother Oracle products. The following Oracle Applications guides mightbe useful when you are setting up and using OPM Implementation Guide.
•= Oracle Applications User’s Guide
= This guide explains howto enter data, query, run reports, andnavigate using the graphical user interface (GUI) available withthis release. This guide also includes information on setting userprofiles, as well as running and reviewing reports and concurrentprocesses.
•= Oracle Applications Flexfields Guide
= This guide provides flexfields planning, setup and referenceinformation for the implementation team, as well as for usersresponsible for the ongoing maintenance of Oracle Applicationsproduct data. This manual also provides information on creatingcustom reports on flexfields data.
•= Oracle Workflow
= This guide provides information about the Oracle Workflowproduct. It provides guidance and assistance for automating androuting information of any type according to business rules.
•= Oracle Applications System Administrators Guide
= This guide provides planning and reference information for theOracle Applications System administrator. It containsinformation on howto define security, customize menus andonline help text, and manage processing.
Oracle Process Manufacturing GuidesThe following is a list of the documentation in each product group ofOPM release 11.0.
System Administration and Technical Reference
•= Implementation Guide
•= Oracle Process Manufacturing Technical Reference Manuals
OPM Inventory Control
•= Oracle Process Manufacturing Inventory Management User'sGuide
•= Oracle Process Manufacturing Physical Inventory User's Guide
•= Oracle Process Manufacturing EC Intrastat User's Guide
OPM Process Execution
•= Oracle Process Manufacturing Production Management User'sGuide
•= Oracle Process Manufacturing Process Operations ControlUser's Guide

Oracle Process Manufacturing Implementation Guide Implementation Guide Preface • 9
OPM Product Development
•= Oracle Process Manufacturing Formula Management User'sGuide
•= Oracle Process Manufacturing Laboratory Management User'sGuide
•= Oracle Process Manufacturing Quality Management User'sGuide
OPM Logistics
•= Oracle Process Manufacturing Order Fulfillment User's Guide
•= Oracle Process Manufacturing Purchasing User's Guide
OPM Process Planning
•= Oracle Process Manufacturing Forecasting User's Guide
•= Oracle Process Manufacturing Capacity Planning User's Guide
•= Oracle Process Manufacturing MPS/MRP User's Guide
OPM Financials
•= Oracle Process Manufacturing Cost Management User's Guide
•= Oracle Process Manufacturing Manufacturing AccountingController User's Guide
•= Oracle Process Manufacturing Accounting Setup User's Guide
•= Oracle Process Manufacturing and Oracle FinancialsIntegration
•= Oracle Process Manufacturing and Oracle FinancialsImplementation Guide
=
10 • Implementation Guide Preface Oracle Process Manufacturing Implementation Guide
Other Sources
TrainingWe offer a complete set of formal training courses to help you and yourstaff master OPM Implementation Guide and reach full productivityquickly. We organize these courses into functional learning paths, so youtake only those courses appropriate to your job’s area of responsibility.
You have a choice of educational environments. You can attend coursesoffered by Oracle Education Services at any one of our many EducationCenters, or you can arrange for our trainers to teach at your facility. Inaddition, Oracle training professionals can tailor standard courses ordevelop custom courses to meet your needs. For example, you may wantto use your organization structure, terminology, and data as examples in acustomized training session delivered at your own facility.
About OracleOracle Corporation develops and markets an integrated line of softwareproducts for database management, applications development, decisionsupport, and office automation, as well as Oracle Applications, anintegrated suite of more than 45 software modules for financialmanagement, supply chain management, manufacturing, project systems,human resources, sales and service management.
Oracle products are available for mainframes, minicomputers, personalcomputers, network computers and personal digital assistants, allowingorganizations to integrate different computers, different operatingsystems, different networks, and even different database managementsystems, into a single, unified computing and information resource.

Oracle Process Manufacturing Implementation Guide Implementation Guide Preface • 11
Oracle is the world’s leading supplier of software for informationmanagement, and the world’s second largest software company. Oracleoffers its database, tools, and applications products, along with relatedconsulting, education and support services in over 140 countries aroundthe world.
Thank YouThank you for choosing Oracle Process Manufacturing ImplementationGuide and this user’s guide.
We value your comments and feedback. At the beginning of this guideis aReader’s Comment Form you can use to explain what you like or dislikeabout Oracle Process Manufacturing Implementation Guide or user’sguide. Mail your comments to the following address or call us directly at(650) 506-7000.
Oracle Applications Documentation ManagerOracle Corporation500 Oracle ParkwayRedwood Shores, CA 94065U.S.A.

12 • Implementation Guide Preface Oracle Process Manufacturing Implementation Guide

Oracle Process Manufacturing Implementation Guide AOL System Administration • 13
AOL System Administration
Before Using OPMA number of administrative functions need to be done before you can useOPM. These are found in the System Administrator responsibility.
ImplementationThis Setup Checklist is an outline of the steps that need to be taken beforethe system is ready to use. This does not include the CommonPurchasing or Oracle Financials integrations.
Detailed information about each step can be found in the OracleApplications System Administrator’s Guide.
After you log on to Oracle System Administrator, complete the followingsteps to set up your Oracle Applications:
1. Create an Oracle Applications User to Complete Setting Up(Required)
2. Create NewResponsibilities (Optional)
3. Implement Function Security (Optional)
4. Create Additional Users (Required)
5. Set Up Your Printers (Required)
6. Specify Your Site–level and Application–level Profile Options(Required with Defaults)
7. Define Your Concurrent Managers (Optional)
8. Define Report Sets (Optional)
9. Set Up AuditTrail (Optional)
10. Modify Language Prompts (Optional)
11. Modify Territory LOV Values (Optional)

14 • AOL System Administration Oracle Process Manufacturing Implementation Guide
Creating UsersYou allowa newuser to sign–on to Oracle Applications by defining anapplication user. An application user has a username and a password.You define an initial password, then the first time the application usersigns on, they must enter a new(secret) password.
When you define an application user, you assign to the user one or moreresponsibilities. If you assign only one responsibility, the user, aftersigning on, immediately enters an application.
If you assign two or more responsibilities, the user, after signing on, seesa windowlisting available responsibilities.
Creating ResponsibilitiesA responsibility in Oracle Applications is a level of authority thatdetermines howmuch of an application’s functionality a user can use,what requests and concurrent programs the user can run, and whichapplications’ data those requests and concurrent programs can access.
Oracle Applications provides a set of predefined responsibilities that youcan use. You can also define your own responsibilities if the onesprovided do not meet your needs.
You associate each responsibility with a data group, request group, and amenu. The data group defines the pairing of application and ORACLEusername. The ORACLE username determines the database tables andtable privileges accessible by your responsibility. The request grouppermits the user with this responsibility to run requests, request sets, orconcurrent programs from the Submit Request form.
Select a predefined menu. A menu provides access to applicationfunctions through a hierarchical arrangement of functions and menus offunctions
Use the Responsibilities windowto define a newresponsibility. You canthen assign your newresponsibility to a user using the Users window.
Implement Function SecurityFunction security is the mechanism by which user access to applicationsfunctionality is controlled.
Use the Responsibilities form to limit a responsibility’s functionality byexcluding menus and functions.
Or
Use the Menus form to create newmenus that point to functions you wantto make available to a responsibility.

Oracle Process Manufacturing Implementation Guide AOL System Administration • 15
Create Additional UsersYou should use the procedure outlined in Step 1 to create additionalapplication users. When you define a newuser, you assign one or moreresponsibilities and a password that the user changes after the initiallogon. You can use the LOV in the Responsibility field to get a list of thestandard responsibilities for each application you specify. You can assignmultiple responsibilities to a user.
Setting Up PrintersOracle Applications reports are generated by Oracle Reports. Acompleted report is sent to the operating system by the concurrentmanager, which issues an operating system print command, or calls acustom print program that issues an operating system print command.
Oracle Reports and report generation
Page break, carriage return, line feed, text bold on/off, and text underlineon/off instructions within the output file are defined by values in an SRWdriver file.
Page break, carriage return, and line feed instructions that are issuedbefore the output file is to be printed or after the output file is printedmust be entered in an Oracle Applications printer driver’s initialization orreset strings, which are defined by the Printer Drivers form.
SRW Drivers and Oracle Applications Printer Drivers
When the report is not to be printed (number of copies = 0 and the targetprinter field is blank), Oracle Reports uses the SRW driver named by theprint style in the Print Styles form.
When the report is to be printed (number of copies > 0) Oracle Reportsuses the SRW driver named by the Oracle Applications printer driver inthe Printer Drivers form.
The dimensions of a report are determined by the columns and rowsvalues in the print style, defined using the Print Styles form. These valuesoverride the width and height values in an SRW driver file.
Concurrent Manager Issues or Calls a Print Command
When a report is completed, the concurrent manager prepends aninitialization string to the output file. The initialization string is definedusing the Printer Drivers form.
The concurrent manager appends an reset string to the output file. Thereset string is defined using the Printer Drivers form.
An Oracle Applications printer driver is typically executed in one of twomethods, by issuing a print command or calling or print program.
When the printer driver method is Command, the concurrent manager canissue an operating system print command and arguments, entered in theArguments field of the Printer Drivers form.

16 • AOL System Administration Oracle Process Manufacturing Implementation Guide
When the printer driver method is Program, the concurrent manager cancall a custom print program, named (along with its path) in the Namefield of the Printer Drivers form. Arguments to the program may beentered in the form’s Arguments field.
Concurrent Manager can provide values for arguments
The concurrent manager may provide values for four arguments to anoperating system print command or custom print program:
•= the name of the file to be printed
•= the operating system name of the target printer
•= the title of the file, which appears on a header page if it isprinted
•= the number of copies to be printed
Specifying Your Site-Level and Application-Level ProfileOptions
A user profile is a set of changeable options that affect the way yourapplication looks and behaves. As System Administrator, you controlhowOracle Applications operate by setting user profile options to thevalues you want. You can set user profile options at four different levels:site, application, responsibility, and user.
Setting User Profile Options
As System Administrator, you use the System Profile Values windowtoset profile options for your user community. If you change a user profileoption value, your change takes effect as soon as your users log on againor change responsibilities.
When you set a user profile, you provide Oracle Applications withstandard information (such as printer) that describes a user,responsibility, application, or site. You can set values for user profileoptions at each profile level.
Site Option settings pertain to all users at an installationsite.
Application Option settings pertain to all users of any responsibilityassociated with the application.
Responsibility Option settings pertain to all users currently signed onunder the responsibility.
User Option settings pertain to an individual user, identifiedby their application username.
The values you set at each level provide run–timevalues for each user’s profile options. An option’s run–time value becomes the highest–level setting for thatoption.

Oracle Process Manufacturing Implementation Guide AOL System Administration • 17
When a profile option may be set at more than one level, site has thelowest priority, superseded by application, then responsibility, with userhaving the highest priority. For example, a value entered at the site levelmay be overridden by values entered at any other level. A value enteredat the user level has the highest priority, and overrides values entered atany other level.
For example, for a given user, assume the printer option is set only at thesite and responsibility levels. When the user logs on, the printer optionassumes the value set at the responsibility level, since it is the highest–level setting for the option.
Suggestion: As System Administrator, you should set site–level optionvalues before specifying profile options at the other three levels after theinstallation of Oracle Applications. The options specified at the site–levelwork as defaults until the same options are specified at the other levels.
Application users may use the Personal Profile Values windowto settheir own personal profile options at the user level. Not all profile optionsare visible to users, and some profile options, while visible, may not beupdated by end users.
Defining Concurrent ManagersA concurrent program is an executable file that runs simultaneously withother concurrent programs and with online operations, fully utilizing yourhardware capacity. Typically, a concurrent program is a long–running,data–intensive task, such as posting a journal or generating a report.
Request Groups and Request Sets
Reports and concurrent programs can be assembled into request groupsand request sets.
•= A request group is a collection of reports or concurrentprograms. A System Administrator defines report groups inorder to control user access to reports and concurrent programs.Only a System Administrator can create a request group.
•= Request sets define run and print options, and possibly,parameter values, for a collection of reports or concurrentprogram. End users and System Administrators can definerequest sets. A System Administrator has request set privilegesbeyond those of an end user.
Standard Request Submission and Request Groups
Standard Request Submission is an Oracle Applications feature thatallows you to select and run all your reports and other concurrentprograms from a single, standard form. The standard submission form iscalled Submit Request, although it can be customized to display adifferent title.

18 • AOL System Administration Oracle Process Manufacturing Implementation Guide
•= The reports and concurrent programs that may be selected fromthe Submit Request form belong to a request security group,which is a request group assigned to a responsibility.
•= The reports and concurrent programs that may be selected froma customized Submit Request form belong to a request groupthat uses a code.
In summary, request groups can be used to control access to reports andconcurrent programs in two ways; according to a user’s responsibility, oraccording to a customized standard submission (Submit Request) form.
Limiting Active Requests by User
As System Administrator you can limit the number of requests that maybe active (status of Running) for an individual user. This ensures that auser cannot monopolize the request queue. For example, if a user with anActive Request Limit of 5 submits 20 requests, only 5 requests will berun at the same time. The remaining requests will be run when thenumber of active requests for the user drops below5. Use the ProfileOptions windowto set the Concurrent: Active Request Limit profile. Toset a global limit for all users, set this option at the site level. You canthen modify limits for individual users by setting this profile option at theUser level.
Defining Request SetsA request set is a group of reports or programs which you submit withone request. To define and maintain request sets, use the Request Setsform. Your users can also define their own report sets.
Setting Up An AuditTrailIf you want to keep track of the changes made to your data by applicationusers, you should set up AuditTrail for the relevant tables. DefiningAuditTrail for your site involves defining Audit Groups, which aregroups of tables and columns for which you intend to track changes. Youthen define Audit Installations to instruct AuditTrail which ORACLE IDsyou want to audit. Finally, you run the Audit Trail Update Tables Report,which allows your AuditTrail definitions to take effect.
Modifying Language PromptsIf you want to modify the field name displayed in the Translationswindow, you should change the Description value for the language youwant to modify in the Languages window.
Modifying Territory LOV ValuesIf you want to modify the territory value displayed in LOVs, you shouldchange the Description value for the territory you want to modify in theTerritories window.

Oracle Process Manufacturing Implementation Guide AOL System Administration • 19
Maintenance FunctionsThe following procedures are either optional or can be done later in animplementation.
Defining a Request Security GroupYou use request security to specify the reports, request sets, andconcurrent programs that your users can run from a standard submissionform, such as the Submit Request form.
To set up request security, you define a request group using the RequestGroups form. Using the Responsibilities form, you assign the requestgroup to a responsibility. The request group is then referred to as arequest security group.
You can define a request group to contain single requests, request sets, orall the requests and request sets in an application. If you choose toinclude all the requests and requests sets in an application, the user hasautomatic access to any newrequests and request sets (without owners) inthe future.
A request security group can contain requests and request sets fromdifferent applications.
Setting Up Descriptive FlexfieldsA flexfield is a field made up of sub–fields, or segments. A flexfieldappears on your form as a pop–up windowthat contains a prompt foreach segment. Each segment has a name and a set of valid values. Thereare two types of flexfields: key flexfields and descriptive flexfields.OPM uses Descriptive Flexfields.
Descriptive flexfields provide customizable ”expansion space” on yourforms. You can use descriptive flexfields to track additional information,important and unique to your business, that would not otherwise becaptured by the form. Descriptive flexfields can be context sensitive,where the information your application stores depends on other valuesyour users enter in other parts of the form.
A descriptive flexfield appears on a form as a single–character, unnamedfield enclosed in brackets. Just like in a key flexfield, a pop–up windowappears when you move your cursor into a customized descriptiveflexfield. And like a key flexfield, the pop–up windowhas as many fieldsas your organization needs.
Each field or segment in a descriptive flexfield has a prompt, just likeordinary fields, and can have a set of valid values. Your organization candefine dependencies among the segments or customize a descriptiveflexfield to display context–sensitive segments, so that different segmentsor additional pop–up windows appear depending on the values you enterin other fields or segments.
For more detailed information on flexfields, see the Oracle ApplicationsFlexfield Guide.

20 • AOL System Administration Oracle Process Manufacturing Implementation Guide
Overview of Oracle Applications Help for HTMLThe Web–enabled Oracle Applications use a Web browser such asNetscape Navigator V4.0 or Internet Explorer V3.0 to display onlinehelp. When you choose an item from the Help menu, you viewthe helpyou requested in an independent browser window. You can use thebuttons provided by the browser to navigate to help topics you havealready viewed in your current help session, or use the next and previousbuttons within the help windowto navigate through the documentationfollowing a predetermined path. You can exit from the help windowatany time.
In general, there are three Help directories for each Oracle Applicationsproduct. The first of these directories, called a product help directory,contains the vast bulk of online help for a single Oracle Applicationsproduct. For example, a product help directory contains concept modulesto help you understand the concepts underlying a particular OracleApplications product. It also contains task modules that describe theusage of a product’s forms and reports. To help you find the informationyou need, each product help directory also contains a contents page withlinks to all the concept and task modules contained in that directory.
The second help directory provided for each Oracle Applications productis a release notes help directory that describes what is newin the currentrelease of the product. You link to release notes help from the contentspage of the product help.
The third directory is a custom help directory for each product. Apredefined link to a custom help file is encoded on the contents page ofeach set of product help files.
Each Oracle Application is delivered with a "dummy" custom help filelocated in the custom help directory. You can replace this dummy filewith a file containing your own custom help. Then you can link from thestandard product help file to your own custom help.

Oracle Process Manufacturing Implementation Guide AOL System Administration • 21
Help Directory Names
The naming convention for Oracle Applications help directories is basedon the application short name of the product. For example, theapplication short name for Oracle General Ledger is GL, and so all ofOracle General Ledger’s help directory names begin with GL. Thefollowing table describes the naming convention for the three types ofhelp directories.
Directory Name Naming Convention ExampleBased on GL
Help <application_short_name> GL
Release Notes <application_short_name>NEW GLNEW
Custom <application_short_name>CUST GLCUST
Library Help File
There is a single help file, LIBRARY.HTM, that serves as the mastertable of contents for all the product help files. You can viewthis libraryhelp file from the Help menu, or by pressing the Library button fromwithin any Oracle Applications help window. From the library help file,you can link to the contents page for any Oracle Applications product.
Help File Directories
If you are installing help on a PC, all .HTM and .GIF files, includingproduct help files, release note help files, custom help files, and thelibrary help file, are located in the subdirectoryC:\APPS10\AU10\DOCS\<language>.

22 • AOL System Administration Oracle Process Manufacturing Implementation Guide

Oracle Process Manufacturing Implementation Guide Oracle Financials Integration Implementation • 23
Oracle Financials IntegrationImplementation
Oracle Financials Integration ImplementationOverview
This section lists the implementation steps for System Administration, Setof Books, General Ledger (GL), Accounts Payable (AP), and AccountsReceivable (AR) modules. Refer to the respective module's User's Guidefor more details on the Implementation steps. If there is an integrationspecific instruction for the step, then it appears under the step and path.Otherwise, just the step is shown. The intent of this section is to highlightdependencies between Oracle Financials and Oracle ProcessManufacturing (OPM). It is not to rephrase or replace respective module'sUser's Guide.
All codes that will be synchronized with OPM must be entered intoFinancials in uppercase, otherwise they can only be used in OPM bypulling them off a lookup. You cannot enter lowercase into any OPMapplications. Also, the control characters, such as apostrophe, doublequotes, and colon (special characters) may not be used. For example, Setof Books names cannot contain an apostrophe.
Getting StartedThe following list provides the recommended order for installing andimplementing your integration software for Oracle Financials 11.0.1 andOPM 11.0. To ensure a smooth implementation of the integration, followthis order:
1. Installation of Oracle Financials 11.0.1. Refer to one of thefollowing Installation Manuals:
•= Oracle Applications Installation Manual for UNIX, Release11
•= Oracle Applications Upgrade Preparation Manual forUNIX, Release 11
2. Installation of OPM 11.0. Refer to one of the followingInstallation Instructions:

24 • Oracle Financials Integration Implementation Oracle Process Manufacturing Implementation Guide
•= OPM Installation Instructions for Unix
•= OPM Installation Instructions for Windows
•= OPM Patch Installation Instructions
Note: The order for installing Oracle Financials 11 or OPM 11.0 isirrelevant. Either application can be installed first.
1. Installation of the Integration Software for Release 4.1. Refer tothe OPM Installation Instructions for OPM FinancialsIntegration.
2. Implementation of Multiple Organizations Setup. If you areimplementing the multiple organizations setup, then refer toMultiple Organizations in Oracle Applications Release 11manual.For Step 2, Define Sets of Books, refer to the Set of BooksSetup topics in this manual for integration dependencies. ForStep 11, Implement the Application Products, refer to theSystem Administration Setup, General Ledger (GL) Setup,Accounts Payable (AP) Setup, and Accounts Receivable (AR)Setup topics in this manual for integration dependencies.
3. OPM 11.0 and Oracle Financials 11 Integration Implementation.Refer to this manual for integration dependencies.

Oracle Process Manufacturing Implementation Guide Oracle Financials Integration Implementation • 25
Oracle Financials and OPM Integration DiagramThis diagram represents the modules and functions involved in theOPM/Financials interface. It illustrates, at a high level, howFinancialsand OPM integrate processes and data flows. OPM modules appears onthe left and Financials modules appears on the right.
InventoryManagement
General Ledger
ProductionManagement
AccountsReceivable
Accounts Payable
Order FulfillmentManagement
Fixed Assets
Purchasing
OPM Modules Oracle Financials Modules
AdjustmentsMovements
PO MatchingInvoicingPayments
Fixed AssetManagement
InvoicingCash Receipt
Order EntryShippingPricing & TaxCredit Checking
ReleaseCertifyClose
Transaction EntryPostings
DR/CR MemoInventoryAdjustment
MoveAdjust
Receipt Accrual
InvoicingPayments
Depreciation
Adjustment
BatchProcess
ShipmentsInvoicingCash Receipts
POReceiving
Integrated Process and Data Flows

26 • Oracle Financials Integration Implementation Oracle Process Manufacturing Implementation Guide
System Administrator SetupStep 1. Create an Oracle Applications User to Complete Setting Up(Required)Navigator: Security>User>Define
Create “GEMMS” user in Financials
Note: All OPM and Application users are created in ApplicationsSystem Administration and they need not be created in both Applicationsand OPM.
Step 2. Create New Responsibilities (Optional)
Step 3. Implement Function Security (Optional)
Step 4. Create Additional Users (Required)
Step 5. Set Up Your Printers (Required)
Step 6. Specify Your Site-level and Application-level ProfileOptions (Required with Defaults)Navigator: Profile>System
Establish the following profile options for the OPM and Financialsintegration:
Profile Option Level Value
INV: Item Master Flexfield Site System Items
INV: Default Primary Unit of Measure Site <primary uom value>
INV: Default Primary Unit of Measure Oracle Inventory Application <primary uom value>
INV: Default Item Status Site Active

Oracle Process Manufacturing Implementation Guide Oracle Financials Integration Implementation • 27
When setting up INV: Default Item Status, if you are unable to select avalue, then do the following steps:
1. Change Responsibility to Application Developer.
2. Select Profile.
3. Query on Name as INV_STATUS_DEFAULT.
4. Change the SQL Validation Order By clause to Order By 1.
5. Save the form.
6. Change responsibility to System Administrator and set the INV:Default Item Status to Active.
Step 7. Define Your Concurrent Managers (Optional)
Step 8. Define Report Sets (Optional)
Step 9. Set Up AuditTrail (Optional)
Step 10. Modify Language Prompts (Optional)
Step 11. Modify Territory LOV Values (Optional)

28 • Oracle Financials Integration Implementation Oracle Process Manufacturing Implementation Guide
Set of Books SetupStep 1. Define Your Chart of Accounts (Accounting Flexfields)(Required)
1. Define Accounting Flexfield Value Sets
Navigator: Setup>Financials>Flexfields>Validation>Sets
The Maximum Size field is the only information defined here which isimportant to OPM. Make note of these segment lengths since OPMManufacturing Accounting Controller Fiscal Policy segment lengths mustmatch these lengths and the Oracle Segment Name in the FlexfieldSegments screen MUST NOT EXCEED these lengths.
Click and enable the Uppercase Only flag.
Set Validation Type to Independent.
2. Define Accounting Flexfield Segments
Navigator: Setup>Financials>Flexfields>Key>Segments
In OPM, the segments are mapped to the Accounting Unit and theAccount. Flexfield segments that identify the business unit are mapped tothe Accounting Unit and are the left most segments. For example,Company, Organization, and Warehouse would be identified as anAccounting Unit. Flexfield segments that identify accounting informationare mapped to the Account. For example, the natural account, sub-account, and project code would be identified as an Account. An easyway to distinguish between an Accounting Unit and an Account is bythinking of the Accounting Unit as the “where” and the Account portionas the “what” of the segment string. Additionally, segments in OPM areof fixed length. For example, if a segment has a length of 4, the entry inOPM for that segment must always be 4 characters.
In the Structure portion of the form, click and enable the AllowDynamicInserts flag. The Financials segment separator equates to the OPMManufacturing Accounting Controller Fiscal Policy segment delimiter.These must match.
In the Segments form, the Oracle Segment Name must match the OPMManufacturing Accounting Controller Fiscal Policy segment Short Name.The number of characters in the Oracle Segment Name cannot be greaterthan the length of the segment because in OPM, the length of the ShortName cannot exceed the length of the segment. For instance, if the lengthof the segment is 4, the segment name cannot be greater than 4.
Step 2. Define Your Accounting Flexfield Combinations(Optional)
Step 3. Define Your Calendar Period Types (Required withDefaults)
Step 4. Define Your Calendar Periods (Required)
Step 5. Define Your Transactions Calendar (ADB) (Optional)
Step 6. Define Your Currencies (Required with Defaults)

Oracle Process Manufacturing Implementation Guide Oracle Financials Integration Implementation • 29
Navigator: Setup>Currencies>Define
The Currencies cannot exceed 4 characters since they are passed to OPMvia a trigger.
Step 7. Define Set of Books (Required)
Navigator: Setup>Financials>Books>Define
The Set of Books Name cannot contain special characters which are '(single quote), : (colon), and" (double quotes).
Step 8. Assign Set of Books to a Responsibility (Required)
Step 9. Define Daily Conversion Rate Types (Required withDefaults)
Navigator: Setup>Currencies>Rates>Types
The Conversion Rate Types are automatically saved to OPM via atrigger.
Enter Name in uppercase if not numeric.
Name cannot exceed 4 characters and Description must not exceed 70characters.
Step 10. Define Your Rates (Optional)
Navigator: Setup>Currencies>Rates>Daily
These are automatically saved to OPM via a trigger.
If your implementation is using multi-currency for Sales OrderProcessing, then daily conversion rates must exist for the ship dates onthe OPM Sales Order.

30 • Oracle Financials Integration Implementation Oracle Process Manufacturing Implementation Guide
General Ledger or Government General Ledger SetupStep 1. Define your Set of Books (Required)
Step 2. Define Journal Entry Sources (Required WithDefaults)
Navigator: Setup>Journal>Sources
Relating to the integration, nothing needs to be entered here. The twocharacter source codes (CM, IC, OP, PO, and PM) are created duringinstallation. These newsources are used when importing data from OPM.
Step 3. Define Journal Entry Categories (Required withDefaults)
Navigator: Setup>Journal>Categories
The 4 character categories for OPM Subevents are created duringinstallation. Nothing needs to be entered here.
Step 4. Define Suspense Accounts (Optional)
Step 5. Define Intercompany Accounts (Optional)
Step 6. Define Summary Accounts (Optional)
Step 7. Define Statistical Units of Measure (Optional)
Navigator: Setup>Accounts>Units
To track statistical information from OPM to GL, the statistical amounton the transaction is converted to the statistical unit of measure on the GLaccount if established here. If the primary unit of measure on thetransaction in OPM differs from this account UOM, then ensures that aUOM conversion exists in OPM between the transaction UOM and theaccount UOM. Otherwise, the quantities posted to this account will bethe net of different UOMs.
Step 8. Define Historical Rates (Optional)
Step 9. Define Document Sequences (Optional)
Step 10. Set up Automatic Posting (Optional)
Step 11. Define Additional Encumbrance Types (Optional)
Step 12. Define System Controls (Required With Defaults)
Step 13. Define Budgetary Control Groups (Optional)
Step 14. Set Profile Options (Required)
Step 15. Open and Close Accounting Periods (Required)
Oracle Process Manufacturing Implementation Guide Oracle Financials Integration Implementation • 31
Accounts Receivables Setup
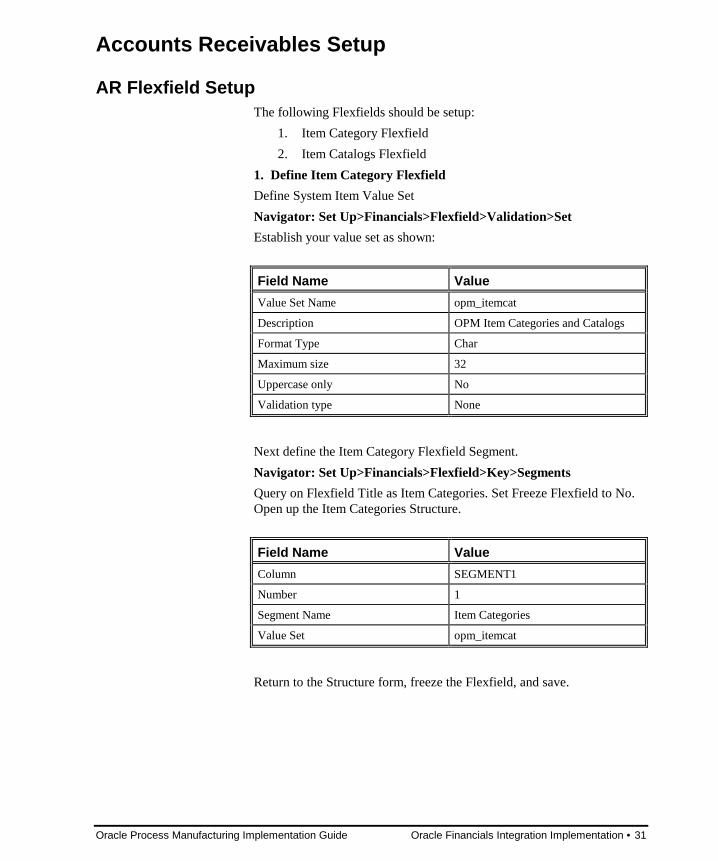
AR Flexfield SetupThe following Flexfields should be setup:
1. Item Category Flexfield
2. Item Catalogs Flexfield
1. Define Item Category Flexfield
Define System Item Value Set
Navigator: Set Up>Financials>Flexfield>Validation>Set
Establish your value set as shown:
Field Name Value
Value Set Name opm_itemcat
Description OPM Item Categories and Catalogs
Format Type Char
Maximum size 32
Uppercase only No
Validation type None
Next define the Item Category Flexfield Segment.
Navigator: Set Up>Financials>Flexfield>Key>Segments
Query on Flexfield Title as Item Categories. Set Freeze Flexfield to No.Open up the Item Categories Structure.
Field Name Value
Column SEGMENT1
Number 1
Segment Name Item Categories
Value Set opm_itemcat
Return to the Structure form, freeze the Flexfield, and save.

32 • Oracle Financials Integration Implementation Oracle Process Manufacturing Implementation Guide
2. Define Item Catalogs Flexfield
Query on Flexfield Title as Item Catalogs. Set Freeze Flexfield Definitionto No. Open up the Item Categories Flexfield.
Field Name Value
Column SEGMENT1
Number 1
Segment Name Item Catalogs
Value Set opm_itemcat
Return to the Structure form, freeze the Flexfield, and save.
AR Descriptive Flexfield SetupSetup Descriptive Flexfields for the following:
1. Line Transaction Flexfield for AutoInvoicing
2. Customer for Customer Entry
3. Transaction Type for Debit/Credit Memo Inventory Adjustment
1. Define Your Transaction Flexfield Structure
Navigator: Set Up>Financials>Flexfield>Descriptive>Segments
Setup the Line Transaction Flexfield forINTERFACE_LINE_ATTRIBUTE1 throughINTERFACE_LINE_ATTRIBUTE8. These descriptive flexfields mustbe established to allowAutoInvoicing to operate properly.
Query on Title as Line Transaction Flexfield.
Field Name Value
Title Line Transaction Flexfield
Application Oracle Receivables
Freeze Flexfield No
Prompt Context Value
Value Required No
Default Value (blank)
Override Allowed Yes
Reference Field (blank)
Enter the following data in Context Field Value:
Field Name Value
Code GEMMS OP
Name & Description GEMMS Order Processing

Oracle Process Manufacturing Implementation Guide Oracle Financials Integration Implementation • 33
Position the cursor on the GEMMS OP line and select the Segments andOpen buttons and add the following seven records.
Field Name* Value Value
Name Line Id Orgn Code
Description Line Id Organization
Enabled Yes Yes
Column INTERFACE_LINE_ATTRIBUTE1 INTERFACE_LINE_ATTRIBUTE2
Number 1 2
Value Set (blank) (blank)
Value Set Desc. (blank) (blank)
Required No No
Display Size 30 4
Description Size 50 50
* If a Field Name is not listed, use the defaults.
Field Name* Value Value
Name Ship No. Line No.
Description Shipment No. Line Number
Enabled Yes Yes
Column INTERFACE_LINE_ATTRIBUTE3 INTERFACE_LINE_ATTRIBUTE4
Number 3 4
Value Set (blank) (blank)
Value Set Desc. (blank) (blank)
Required No No
Display Size 30 6
Description Size 50 50
If a Field Name is not listed, use the defaults.

34 • Oracle Financials Integration Implementation Oracle Process Manufacturing Implementation Guide
•=
Field Name* Value Value
Name Line Type Invoice line number
Description Line type Invoice line number
Enabled Yes Yes
Column INTERFACE_LINE_ATTRIBUTE5 INTERFACE_LINE_ATTRIBUTE6
Number 5 6
Value Set (blank) (blank)
Value Set Desc. (blank) (blank)
Required No No
Display Size 30 6
Description Size 50 50
* If a Field Name is not listed, use the defaults.
Field Name* Value Value
This last column should only be addedif you plan on having comments onyour Sales Order lines. If you do notplan on having comments on yourSales Order lines, then the Sales Orderwill be rejected coming into AR. Werecommend you do not add this columnunless comments are the norm.
Name Line charge id Line Comments
Description Line charge id Line Comments
Enabled Yes Yes
Column INTERFACE_LINE_ATTRIBUTE7 INTERFACE_LINE_ATTRIBUTE8
Number 7 8
Value Set (blank) (blank)
Value Set Desc. (blank) (blank)
Required No No
Display Size 6 30
Description Size 50 50
* If a Field Name is not listed, use the defaults.
After saving this last screen return to the First Form, freeze the Flexfieldand save.

Oracle Process Manufacturing Implementation Guide Oracle Financials Integration Implementation • 35
2. Define your Customer Descriptive Flexfield Setups
The following Descriptive Flexfields will be added to the CustomerForms:
•= Tax Calculation Code
•= Tax Location Code
•= Customer GL Class
•= Customer Price Class
•= Ship From Warehouse
••••= Freight Bill Method
Establish the following six value sets:
Navigator: Setup>Financials>Flexfields>Validation>Sets
Field Name* Value Value
Value Set Name opm_taxcalc_code opm_taxloc_code
Description OPM Tax Calculation Code OPM Tax Location Code
Format Type Char Char
Maximum Size 4 10
Uppercase Only (A-Z) Yes Yes
Validation Type Table Table
Edit Information
Table Application Oracle Receivables Oracle Receivables
Table Name tx_calc_mst tx_tloc_cds
Allow Parent Values No No
Table Columns Value taxcalc_code taxloc_code
Type Varchar2 Varchar2
Size 4 10
Table Columns Meaning taxcalc_desc taxloc_desc
Type Varchar2 Varchar2
Size 70 70
Where/order by (blank) (blank)
Additional columns (blank) (blank)
* If a Field Name is not listed, use the defaults.

36 • Oracle Financials Integration Implementation Oracle Process Manufacturing Implementation Guide
Field Name Value Value
Value Set Name opm_custgl_class opm_custprice_class
Description OPM Customer GL Class OPM Customer Price Class
Format Type Char Char
Maximum Size 8 8
Uppercase Only (A-Z) Yes Yes
Validation Type Table Table
Edit Information
Table Application Oracle Receivables Oracle Receivables
Table Name op_cgld_cls op_cprc_cls
Allow Parent Values No No
Table Columns Value custgl_class custprice_class
Type Varchar2 Varchar2
Size 8 8
Table Columns Meaning custgl_class_desc custprice_desc
Type Varchar2 Varchar2
Size 70 70
Where/Order by (blank) (blank)
Additional columns (blank) (blank)

Oracle Process Manufacturing Implementation Guide Oracle Financials Integration Implementation • 37
Field Name Values Values
Value Set Name opm_ship_whse opm_frght_bill_mthd
Description OPM Ship From Warehouse OPM Freight Bill Method
Format Type Char Char
Maximum Size 8 25
Uppercase Only (A-Z) Yes Yes
Validation Type Table Table
Edit Information
Table Application Oracle Receivables Oracle Receivables
Table Name ic_whse_mst op_frgt_mth
Allow Parent Values No No
Table Columns Value whse_code of_frtbill_mthd
Type Varchar2 Varchar2
Size 4 25
Table Columns Meaning whse_name frtbill_desc
Type Varchar2 Varchar2
Size 40 40
Where/Order by (blank) (blank)
Additional Column (blank) (blank)
Add the Customer GL Class, the Tax Location Code, the Tax CalculationCode, and the Customer Price Class to the Customer Information form.
Navigator: Setup>Financials>Flexfield>Descriptive>Segments
Query on Title as Customer Information.
Field Name Value
Title Customer Information
Application Oracle Receivables
Freeze Flexfield Def No
Prompt Context Value
Value Req No
Default Value (blank)
Override Allowed No
Reference (blank)

38 • Oracle Financials Integration Implementation Oracle Process Manufacturing Implementation Guide
Select the Segments and Open buttons and add the following fourrecords:
Field Name Value Value Value Value
Name Cust GL Class Tax Loc Code Tax Calc Code Cust Price Cls
Description Customer GL Class Tax Location Code Tax Calculation Code Customer Price Class
Enable Yes Yes Yes Yes
Column ATTRIBUTE1 ATTRIBUTE2 ATTRIBUTE3 ATTRIBUTE4
Number 1 2 3 4
Display Yes Yes Yes Yes
Value Set opm_custgl_class opm_taxloc_code opm_taxcalc_code opm_custprice_class
Default Type (blank) (blank) (blank) (blank)
Required No No No No
Range (blank) (blank) (blank) (blank)
Add the Ship From Warehouse and Freight Bill Method to the CustomerAddress Form.
Navigator: Setup>Financials>Flexfield>Descriptive>Segments
Query on Title as Address Information.
Field Name Value
Freeze Flexfield Def No
Prompt Context Value
Value Req No
Default Value (blank)
Override Allowed No
Reference Field (blank)
Select the Segments and Open buttons and add the following two records:
Field Name Value Value
Name Freight Bill Method Ship From Warehouse
Description Freight Bill Method Ship From Warehouse
Enabled Yes Yes
Column ATTRIBUTE1 ATTRIBUTE2
Number 1 2
Display Yes Yes

Oracle Process Manufacturing Implementation Guide Oracle Financials Integration Implementation • 39
Field Name Value Value
Value Set opm_frght_bill_mthd opm_ship_whse
Default Type (blank) (blank)
Required No No
Range (blank) (blank)
Freeze Flexfield Definition and save.
3. Define Transaction Type and Invoice Line InformationDescriptive Flexfield for AR Credit/Debit Memo InventoryAdjustment
An AR credit/debit memo produces an inventory adjustment in OPMupon running the Data Synchronization process in OPM. Thisfunctionality applies to memos created in Accounts Receivable and notAccounts Payable. Debit memos will create negative inventoryadjustments and credit memos will create positive inventory adjustments.
Define the Value Sets
Navigator: Setup>Financials>Flexfield>Validation>Sets
Field Name* Value
Value Set Name opm_affects_inventory
Description Credit Memo Affects Inventory
Format Type Char
Maximum Size 8
Uppercase Only (A-Z) Yes
Right Justify Zero Fill No
Validation Type Independent
* If a Field Name is not listed, use the defaults.
Define Validation Values
Navigator: Setup>Financials>Flexfield>Validation>Values
Query on the opm_affects_inventory value set. Add the following values:
Field Name Value Value
Value NO YES
Description Credit Memo does not AffectInventory
Credit Memo Affects Inventory

40 • Oracle Financials Integration Implementation Oracle Process Manufacturing Implementation Guide
Add the Descriptive Flexfield to the Transaction Types Form
Navigator: Setup>Financials>Flexfield>Descriptive>Segments
Query on Title as Transaction Type Information.
Field Name Value
Freeze Flexfield Def No
Prompt Context Value
Value Required No
Default Value (blank)
Override Allowed No
Reference Field (blank)
Select the Segments and Open buttons and add the following record:
Field Name Value
Name Memo Affects Inventory
Description Defines whether a Memo AffectsInventory
Enabled Yes
Column ATTRIBUTE10
Number 1
Display Yes
Value Set opm_affects_inventory
Default Type Constant
Default Value No
Required Yes
Range (blank)
Display Size 3
Freeze the Flexfield and save.

Oracle Process Manufacturing Implementation Guide Oracle Financials Integration Implementation • 41
Create Invoice Line Information Descriptive Flexfields.
Define the Value Sets
Navigator: Setup>Financials>Flexfield>Validation>Sets
Field Name Value Value Value
Value Set Name opm_orgns opm_locations opm_reasons
Description OPM Organizations OPM Item Locations OPM Reason Codes
Format Type Char Char Char
Maximum Size 8 90 4
Uppercase Only (A-Z) Yes Yes Yes
Right Justify Zero Fill No No No
Min Value (blank) (blank) (blank)
Max Value (blank) (blank) (blank)
Validation Type Table Table Table
Edit Information
Table Application (blank) (blank) (blank)
Table Name SY_ORGN_MST IC_ITEM_LOCT_VW SY_REAS_CDS
Table Columns Value ORGN_CODE LOC_CODE REASON_CODE
Type Varchar2 Varchar2 Varchar2
Size 4 90 4
Table Columns Meaning ORGN_NAME LOCATION (blank)
Type Varchar2 Varchar2 (blank)
Size 40 16 (blank)
Where/Order by (blank) where:tlin_lines.inventory_item_id=ora_item_id
(blank)
Additional Columns (blank) (blank) (blank)
Add the Descriptive Flexfields to the Invoice Line Information Form
Navigator: Setup>Financials>Flexfields>Descriptive>Segments
Query on Title as Invoice Line Information.
Field Name Value
Freeze Flexfield Definition No
Prompt Value Context Value
Value Required No
Default Value (blank)
Override Allowed Yes
Reference Field (blank)
Select the Segments and Open buttons, and add the following data:

42 • Oracle Financials Integration Implementation Oracle Process Manufacturing Implementation Guide
Field Name Value Value Value
Name Reason Organization Location
Description OPM Reason Code Entry OPM Organization OPM Item Location
Enabled Yes Yes Yes
Column ATTRIBUTE8 ATTRIBUTE9 ATTRIBUTE10
Number 1 2 3
Display Yes Yes Yes
Value Set opm_reasons opm_orgns opm_locations
Default Type Constant (blank) (blank)
Default Value DMG (blank) (blank)
Required No No No
Range (blank) (blank) (blank)
Freeze the Flexfield and save.

Oracle Process Manufacturing Implementation Guide Oracle Financials Integration Implementation • 43
Accounts Receivables Setup Steps
Step 1. Define Your Set of Books (Required)
Step 2. Decide How to Use the Account Generator (Required)
Step 3. Define Your System Item Flexfield Structure(Required)
Items are entered in OPM Inventory module and are automatically savedto AR via a trigger.
Step 4. Define Your Organizations (Required)
Navigator: Set Up>System>Organizations>Organization
Define an inventory organization for storing OPM items by bringing upthe Setup Business Group Organization (seed data in AR) and performingthe following:
Add Inventory Organization as an Organization Classification. Place thecursor on this Inventory Organization, and select Others.
Note: Setup Business Group should not be defined as an Operating Unitand assigned to an OPM Fiscal Policy company. If you do that, the OPMData Synchronization will not function.
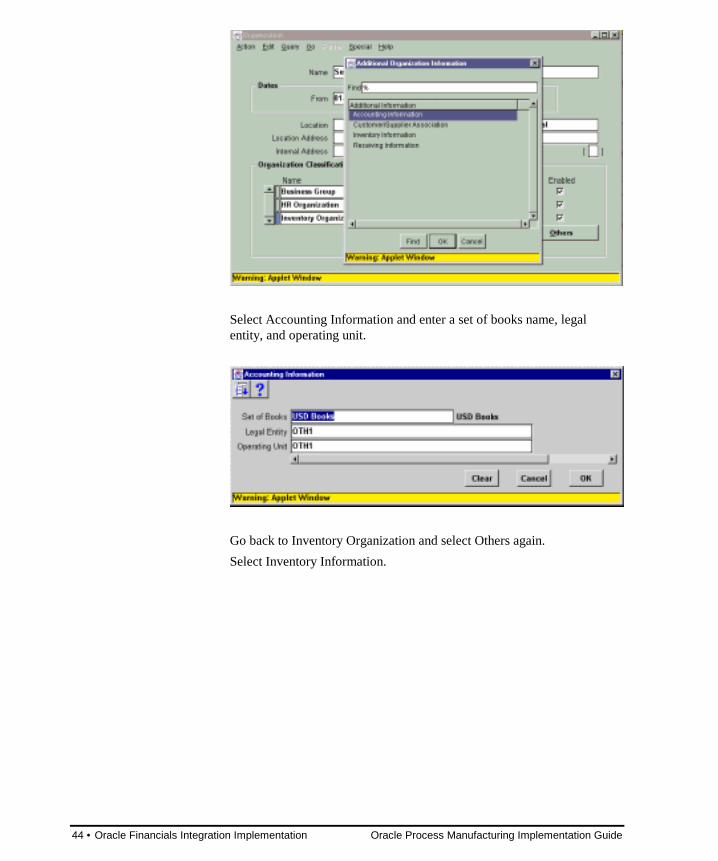
44 • Oracle Financials Integration Implementation Oracle Process Manufacturing Implementation Guide
Select Accounting Information and enter a set of books name, legalentity, and operating unit.
Go back to Inventory Organization and select Others again.
Select Inventory Information.

Oracle Process Manufacturing Implementation Guide Oracle Financials Integration Implementation • 45
Establish an Organization Code even if it does not exist in OPM. TheOrganization Code can only be a 3 character value. Set the Item MasterOrganization to Setup Business Group.
Under Costing Information, enter the Expense Account and CostingMethod.
Under Other Accounts, enter the Purchase Price Variance, Invoice PriceVariance, Inventory AP Accrual, Sales, and Cost of Goods SoldAccounts.
Under the remaining selections, enter necessary information to save theform.
Notes:
1. For the OPM Financials Integration, the Setup Business Group is theonly Inventory Organization that you can use.
2. When you try to open the Inventory Parameters form, if you get anerror “Function Not Available” then followthese steps to resolve theerror:1. Change Responsibility to System Administrator.2. Navigate to Application>Menu.3. Query Menu as AR_NAVIGATE_GUI.4. Create a newmenu Sequence (Seq) where Navigator Prompt andSubmenu fields are blank.5. Specify Function as Organization Parameters. This grants accessto this function.

46 • Oracle Financials Integration Implementation Oracle Process Manufacturing Implementation Guide
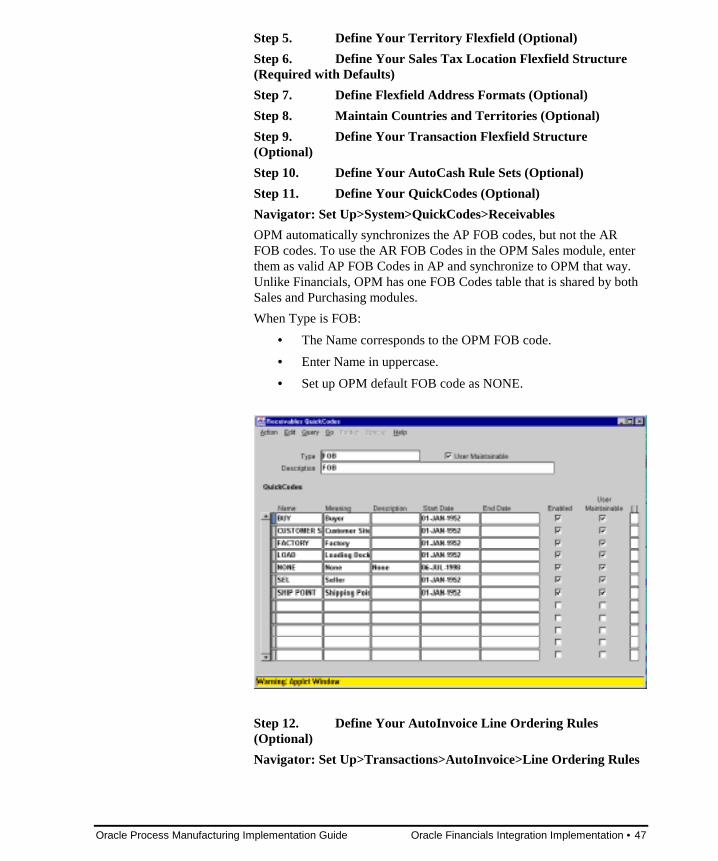
Oracle Process Manufacturing Implementation Guide Oracle Financials Integration Implementation • 47
Step 5. Define Your Territory Flexfield (Optional)
Step 6. Define Your Sales Tax Location Flexfield Structure(Required with Defaults)
Step 7. Define Flexfield Address Formats (Optional)
Step 8. Maintain Countries and Territories (Optional)
Step 9. Define Your Transaction Flexfield Structure(Optional)
Step 10. Define Your AutoCash Rule Sets (Optional)
Step 11. Define Your QuickCodes (Optional)
Navigator: Set Up>System>QuickCodes>Receivables
OPM automatically synchronizes the AP FOB codes, but not the ARFOB codes. To use the AR FOB Codes in the OPM Sales module, enterthem as valid AP FOB Codes in AP and synchronize to OPM that way.Unlike Financials, OPM has one FOB Codes table that is shared by bothSales and Purchasing modules.
When Type is FOB:
•= The Name corresponds to the OPM FOB code.
•= Enter Name in uppercase.
•= Set up OPM default FOB code as NONE.
Step 12. Define Your AutoInvoice Line Ordering Rules(Optional)
Navigator: Set Up>Transactions>AutoInvoice>Line Ordering Rules

48 • Oracle Financials Integration Implementation Oracle Process Manufacturing Implementation Guide
Setup a Line Ordering rule where Name is INVOICE LINE ORDER.Add an Order By where Sequence is 1, Transaction Attribute isINTERFACE_LINE_ATTRIBUTE6, and Type is Ascending.
Optionally, you can Order By the following:
•= The organization is INTERFACE_LINE_ATTRIBUTE2.
•= The shipment number is INTERFACE_LINE_ATTRIBUTE3.
•= The line number is INTERFACE_LINE_ATTRIBUTE4
•= The line type is INTERFACE_LINE_ATTRIBUTE5
•= The invoice line number is INTERFACE_LINE_ATTRIBUTE6
•= The line charge id is INTERFACE_LINE_ATTRIBUTE7
•= The line comments is INTERFACE_LINE_ATTRIBUTE8
Step 13. Define Your AutoInvoice Grouping Rules (Optional)
Step 14. Define Your System Options (Required)
Step 15. Define your Payment Terms (Required with Defaults)
Navigator: Set Up>Transactions>Payment Terms
Only the AP Terms are synchronized to OPM. To use the AR Termscodes in the OPM Sales module, enter them as AP Terms Codes andsynchronize them to OPM that way. OPM has one Terms Code table thatis shared by both the Sales and Purchasing modules.
Enter the Name in uppercase.
Step 16. Define Your Accounting Rules (Optional)
Step 17. Open Your Accounting Periods (Required)
Step 18. Define Your AutoAccounting (Required)
Navigator: Set Up>Transactions>AutoAccounting
In AutoAccounting setup, all Account Types must be established toextract the balancing segment (for example, company segment) from theTransaction Types table. Since the Transaction Type will be at least thecompany of the OPM invoice coming into AR, the multi-companymapping can be achieved by setting up Transaction Types for eachcompany (See the Define Transaction Types step for more information).Enter Transaction Type as the Table Name for at least balancing segmentof each Account Type.
Note: There is an option to define Invoice Revenue accounts by ItemGL Class in OPM. First, set the OPM System constant value forGL$USE_GEMMS_REV_ACCT to 1. Second, setup the SAL accounttitle on the Account Mapping form in OPM Manufacturing AccountingController module by Item GL Class.

Oracle Process Manufacturing Implementation Guide Oracle Financials Integration Implementation • 49
Step 19. Set Up Cash Basis Accounting (Optional)

50 • Oracle Financials Integration Implementation Oracle Process Manufacturing Implementation Guide
Step 20. Define Your Transaction Types (Required withDefaults)
Navigator: Set Up>Transactions>Transaction Type
Establish Transaction Types in AR for all possible values of the OPMselection criteria defined in GL$TRANS_TYPE_MAP. This constant, inthe OPM system module, specifies howa Transaction Type is created onan AR Update Invoice. The following are the five values allowed, but arenot mandatory:
Values Description
ORGN Shipping Organization from OPM Sales Order.
WHSE “From Warehouse” on the Order line.
CSTCLS Customer GL Class for the Bill to Customer on the Sales Order.
SHPCLS Customer GL Class for the Ship to Customer on the Sales Order.
ITMCLS Item GL Class
In the GL$TRANS_TYPE_MAP constant, more than one value can bespecified by separating the selections by commas. Additionally, theselections are always preceded by the Company of the Sales Order. If thisconstant is not defined, then the Transaction Type is the Company of theSales Order. When OPM Data Synch AR Update is run, ReleasedShipments are converted to Invoices. On each Invoice, a TransactionType is derived from the GL$TRANS_TYPE_MAP constant where eachvalue is separated by a period (.).
The AR Transaction Type Name should be the same as the OPMCompany Code plus your GL$TRANS_TYPE_MAP mapping stringvalues separated by periods (.). The balancing segment of the accountsentered on the Transaction Type should be equivalent to the Company.Since it was specified in AutoAccounting that the balancing segmentmust come from the transaction type of an Invoice and the transactiontype contains the company of the Invoice, the multi-company mappingcan be achieved within a set of books. Additionally, the Tax Calculationflag on this screen should be set to NO since taxes are computed in OPMand passed to AR during AutoInvoicing.
For example, if GL$TRANS_TYPE_MAP string is ORGN, WHSE andthere is one Company (that is, 1), two Organizations (that is, 0100 and0200), and two Warehouses (that is, C10, C20) then there should be fourtransaction types defined in AR as follows:
Warehouse C10 Warehouse C20
Organization 0100 1.0100.C10 1.0100.C20
Organization 0200 1.0200.C10 1.0200.C20

Oracle Process Manufacturing Implementation Guide Oracle Financials Integration Implementation • 51
Step 21. Define Your Transaction Sources (Required)
Navigator: Set Up>Transactions>Sources
Verify that the GEMMS source is present to identify the imported OPMInvoices and establish the attributes for integration. This is automaticallysetup during the Integration Installation.
Automatic Invoice Numbering Yes
Transaction Type Value
Allow Sales Credit No
Batch numbering No
Sold to customer Id
Bill customer Id
Bill to address Id
Bill to contact Id
Ship to customer Id
Ship to address Value
Ship to contact Id
Payment Method Rule Value
Customer Bank Account Value
Invoicing Rule Value
Accounting Rule Value
Accounting Flexfield Segment
Derive Date Yes
Payment Terms Value
Revenue Account Allocation Percent
52 • Oracle Financials Integration Implementation Oracle Process Manufacturing Implementation Guide
Memo Reason Value
Agreement Value
Memo Line Rule Value
Sales Territory Segment
Inventory Item Segment
Unit of Measure Id
FOB Point Code
Freight Carrier Code
Related Document Number
Step 22. Define Your Collectors (Required with Defaults)
Step 23. Define Your Adjustment Approval Limits (Required)
Step 24. Define Your Remittance Banks (Required)
Step 25. Define Your Distribution Sets (Optional)
Step 26. Define Your Receivables Activities (Required)
Step 27. Define Your Receipt Classes (Required)
Step 28. Define Your Payment Methods (Required)
Step 29. Define Your Receipt Sources (Required)
Step 30. Define Your Aging Buckets (Required with Defaults)
Step 31. Define Your Statement Cycles (Optional)
Step 32. Define Your Statement Messages (Optional)
Step 33. Define Your Dunning Letters (Optional)
Step 34. Define Your Dunning Letter Sets (Optional)
Step 35. Define Your Territories (Optional)
Step 36. Define Your Salespeople (Required with Defaults)
Navigator: Set Up>Transactions>Salespersons
Enter the sales reps to be used in the OPM Sales module. The Territoriesare optional and do not need to be defined to save this screen.
•= Enter Salesperson Name in uppercase.
•= Salesperson name cannot exceed 40 characters.
•= Territories are optional.
•= Salesperson numbers should be unique across all Sets of Books(auto-numbering is suggested).
Step 37. Define Your Profile Options (Required)
Navigator: Set Up>Profile>System

Oracle Process Manufacturing Implementation Guide Oracle Financials Integration Implementation • 53
Profile Option Level Value
OE: Item Validation Organization Site Setup Business Group
OE: Item Flexfield Site System Items
Step 38. Define Your Tax Codes and Rates (Required)
Navigator: Set Up>Tax>Codes
Taxes are computed within the OPM Sales Order Processing and passedwith an Invoice to AR via AutoInvoicing, but the tax authority sent to ARmust be defined in AR.
The Tax Code must equal the Tax Authority in the OPM Tax Module,must be entered in uppercase, and must not exceed 32 characters.
The Tax Rate % must be equal to the OPM Tax Authority Base percent.
Click and enable Ad hoc, Inclusive Tax, and AllowInclusive OverrideFlags for the Sales Tax Type and the VAT Tax type.
Step 39. Define Your Customer Profile Classes (Required withDefaults)
Navigator: Customers>Profile Classes
Click and enable the Credit Check flag if you want OPM Sales OrderEntry to perform credit checking for a given Customer. Click and enablethe Override Terms flag to change the Payment Terms on OPM SalesOrders. All Customers or Customer Profile Classes where you do notenable the Override Terms flag must have a valid Payment Terms code,otherwise you will not be allowed to enter or change the Terms Code onthe OPM Sales Order. It is recommended that you enable the OverrideTerms flag for all Profiles and always define a Payment Terms in eachProfile.
In the Profile Class Amount region, establish one set of limits in any onecurrency. Ensure that an exchange exists between this currency and thebase currency. Enter the total Credit Limit and Order Credit Limit. OPMcredit checking in Sales Order Entry compares the Customer Credit Limitto the on-screen Order Amount plus the Open AR balance plus all otherOpen OPM Sales Orders. It also compares the Order Credit Limit to theon-screen Order Amount.
Step 40. Define Your Customers (Required)
Navigator: Customers>Standard
The AR Customer Number plus the Location (established in the BusinessPurposes choice box on the Customer Address form) becomes theCustomer number for OPM Sales Order Processing. Therefore, there is aunique Customer in OPM for each Customer/Location combination inAR. The format will be Customer Number-Location. The interfacecreates OPM Customers where Location Usage is Ship To and Bill To.All other Usage Types in AR are ignored.

54 • Oracle Financials Integration Implementation Oracle Process Manufacturing Implementation Guide
•= Enter AR Customer Number in uppercase if not numeric.
•= AR Customer Number must not exceed 16 characters.
•= Enter AR Customer Business Purpose Location in uppercase ifnot numeric.
•= AR Customer Name is used to create the OPM Customer Name.
•= AR State field must not exceed 4 characters.
•= The Customer Currency is the Location Primary Bank AccountCurrency. Only one Primary Bank Account can be established,otherwise the Base Currency becomes the Customer Currency.
•= Payment Terms may not default from the Customer Profile,therefore payment terms should be defined on the CustomerForm.
The following is an example of howCustomers are mapped to OPM.
Customers are entered and maintained in AR:
Receivables Customer
Name Oracle Redwood Shores
Number ORACLERS
Within AR, designate the Business Purpose for each address entered. Thesynchronization will pass to OPM only the Bill To and Ship To usagetypes. All other usage types are ignored for the purposes ofsynchronization.
Receivables Business Purpose 1 2
Usage Bill To Ship To
Location VALHALLA REDWOODSHORES
In this example, two records will be passed to OPM. Duringsynchronization two OPM Customers (one marked as Bill to - yes, theother as Ship to - yes) are created for use in the OPM Sales Module. TheCustomer number in OPM is the concatenation of the AR CustomerNumber - Business Purpose fields, where dash (-) is the separator.
Note: The value dash (-) for the GL$CUST_DELIMITER constant canbe changed on the OPM Constants form in the System module.

Oracle Process Manufacturing Implementation Guide Oracle Financials Integration Implementation • 55
This is shown in the following example:
OPM Customer
Number ORACLERS-VALHALLA
Name Oracle Redwood Shores
Bill To Yes
Ship To No
OPM Customer
Number ORACLERS-REDWOOD SHORES
Name Oracle Redwood Shores
Bill To No
Ship To Yes
Step 41. Define Your Remit-To Addresses (Required)
Step 42. Define Your Customer Relationships (Optional)
Step 43. Define Your Customer Banks (Optional)
Step 44. Define Your Lockboxes (Optional)
Step 45. Define Your Transmission Format (Optional)
Step 46. Define Your Receipt Programs (Optional)
Step 47. Define Your Unit of Measure Classes (Optional)
Navigator: Set Up>System>UOM>Classes
UOM Classes are entered in OPM and automatically synchronized to AR.
Step 48. Define Your Unit of Measure (Required with Defaults)
Navigator: Setup>System>UOM
UOM are entered in OPM and automatically synchronized to AR.
Step 49. Define Your Standard Memo Lines (Optional)
Memo Line Name should be equivalent to the OPM Charge Code in theOrder Fulfillment module. The Standard Memo Line must be of type“Line” or “Charges.” This enables Sales Order Charges to be recognizedon an AR Invoice.
Step 50. Define Your Item Tax Rate Exceptions (Optional)
Step 51. Define Your Tax Exemptions (Optional)
Step 52. Define Your Document Sequences (Optional)

56 • Oracle Financials Integration Implementation Oracle Process Manufacturing Implementation Guide
Accounts Payables Setup
Step 1. Install or upgrade Payables (Required)
Step 2. Create application user sign-ons and passwords(Required)
Step 3. Define your Chart of Accounts (Required)
Step 4. Define your Accounting Period Types and AccountingCalendar Periods (Required)
Step 5. Enable Currencies that you plan to use (Optional)
Step 6. Define a Set of Books (Required)
Step 7. Assign your Set of Books to a Responsibility(Required)
Step 8. To enter foreign currency transactions, defineadditional Rate Types, and enter your Daily Rates (Optional)
Step 9. Choose a Primary Set of Books (Required)
Step 10. Use the Application Developer responsibility to set theGL Set of Books ID profile option to Updateable (Required)
Step 11. Use the System Administrator responsibility to set theGL Set of Books Name profile option. If you are performing a singleset of books installation, set the option for the Oracle Payablesapplication. If you are performing a multiple set of booksinstallation, set the option for each unique combination oforganization and responsibility (Required)
Step 12. Define Payment Terms (Required)
Navigator: Setup>Invoices>Payment Terms
If you are using AR, enter your AR Terms Codes along with your APTerms Codes, so they can be synchronized with OPM.
•= Enter Payment Term in uppercase if not numeric.
•= Payment Term cannot exceed 15 characters.
•= Description cannot exceed 40 characters.
•= Use the % Due, % Discount, and Days columns only to establishTerms Code.

Oracle Process Manufacturing Implementation Guide Oracle Financials Integration Implementation • 57
Step 13. Define Your Purchase Order Matching Tolerances(Optional)
Step 14. If you plan to use automatic withholding tax, defineTax Authority type suppliers. (You must do this before defining taxnames and tax groups.) (Conditionally Required)
Step 15. Define Tax Names, and if you use automatic tax,define withholding Tax Groups (Optional)
Step 16. Define Invoice Approval Codes (Required WithDefaults)
Step 17. Define Distribution Sets (Optional)
Step 18. Define Payables Quickcodes (Required With Default)
Navigator: Setup>Quickcodes>Payables
Create FOB type Quickcodes. This corresponds to OPM Sales FOBcodes used on OPM Purchase Orders and Sales Orders. The FreightTerms type is automatically populated from OPM Sales Freight BillMethods via an OPM trigger.
•= Enter the AR FOB codes in this form to be synchronized withOPM. The FOB code must also be entered in AR.
•= Enter the FOB code in uppercase.
•= Define the OPM default FOB code of NONE.
58 • Oracle Financials Integration Implementation Oracle Process Manufacturing Implementation Guide
Step 19. If you want to use Automatic Interest Calculation,define Payment Interest Rates (Optional)
Step 20. If you want to use Payables to enter employee expensereports, create templates for entering expense reports (Optional)
Step 21. If you use Payables to enter employees in yourorganization, enter employee QuickCodes (Optional)
Step 22. Enter Locations (Required)
Navigator: Employees>Locations
When you define Warehouses in OPM, they are automaticallysynchronized with Locations in AP via a trigger.
Step 23. Enter Employees (Conditionally Required)
Navigator: Employees>Enter Employees
Define Employees for every Buyer used in OPM Purchasing sinceFinancials requires a Buyer to be an employee. Establish the defaultBuyer as an Employee.
•= Define a Buyer as an Employee first.
•= Employee’s Last Name must match the OPM Buyer Code.
•= Enter the Last Name in uppercase and it must not exceed 35characters.
•= Define a default Buyer with the Last Name of NONE as anEmployee.
Step 24. Define one or more reporting entities for yourorganization for income tax reporting (Conditionally Required)
Step 25. Define additional United States 1099 Income Taxregions (Conditionally Required with Defaults)
Step 26. If Oracle Inventory or Oracle Purchasing is installed,you must define at least one Inventory Organization before definingFinancials Options (Conditionally Required)
Step 27. Define Financials options (Required)
Step 28. Define Payables options (Required)
Step 29. Define Payment Programs (Required with Defaults)
Step 30. Define any additional Payment Formats (Optional)
Step 31. Update country and territory information and assignflexible address formats (Optional)
Step 32. Define Bank Accounts (Required)
Step 33. Open Your Accounting Periods (Required)
Step 34. Define Request Sets (Optional)
Step 35. Define the format for the Expense Distribution DetailReport, and define the format for the Invoice Aging Report(Optional)
Step 36. Set up Print Styles and Drivers for the SupplierMailing Labels Report (Optional)

Oracle Process Manufacturing Implementation Guide Oracle Financials Integration Implementation • 59
Step 37. Define special calendars for key indicators, recurringinvoices, and withholding tax (Optional)
Step 38. Implement Budgetary Control in General Ledger(Optional)
Step 39. Implement Sequential Voucher Numbering (Optional)
Step 40. Define Descriptive Flexfields (Optional)
Note: For details on Vendor entry, refer to the Common Purchasingtopic.

60 • Oracle Financials Integration Implementation Oracle Process Manufacturing Implementation Guide
Post Installation InformationYou must complete the following steps for customizations.
Update your CUSTOM.pll file:
1. If you have made customizations, merge the differences in the$AU_TOP/resource/CUSTOM.pld and the TMCUSTOM.pldfiles.
2. Compile the modified custom.pld.
3. Compile the modified custom.pll.
OR
4. If you have not made customizations, execute the followingsteps:
$ cp TMCUSTOM.pll $AU_TOP/resource/CUSTOM.pll$ cp TMCUSTOM.plx $AU_TOP/resource/CUSTOM.plx
Oracle Process Manufacturing Implementation Guide OPM Integration Implementation • 61
OPM Integration Implementation
OPM Integration Implementation OverviewFollowing are OPM setup steps that are related to the integration. Referto the module user's guides for more details about the implementation ofthese modules.

62 • OPM Integration Implementation Oracle Process Manufacturing Implementation Guide
OPM System ModuleRefer to the System Administration manual for more details. Belowarethe steps relating to the integration.
Step 1. OPM Systems > OPM System Setup > Tax LocationCodes
Set up Location Codes to use on the Organization form.
Step 2. OPM Systems > OPM System Setup > Organization
Create Companies and Organizations in OPM. A Company is tied to aFinancials Set of Books and an Operating Unit through OPMManufacturing Accounting Controller Fiscal Policy form. An OperatingUnit is valid for a Multi-Organization setup only.
Note: Applications HR Organization is nowrequired on the form.
Step 3. OPM Systems > OPM System Setup > UOM Types
Enter UOM types in OPM. These are automatically synchronized toFinancials.
Step 4. OPM Systems > OPM System Setup > Unit ofMeasure
Enter UOM codes into OPM. These are automatically synchronized withFinancials applications under the Setup Business Group InventoryOrganization. The first UOM entered for each UOM type will be theBase Unit.
While OPM permits a 4 character Unit of Measure (UOM) code,Financials UOM codes are 3 characters. In Financials, the UOM code ismandatory and must be unique. As a result, the Profile option allows youto specify which character (1-4) of an OPM UOM should be trimmedduring synchronization to Financials. The OPM System constantSY$OF_UOM_TRIM_CHAR is delivered preset to 3. This indicates thatthe third character of the OPM four character UOM will be trimmed. Ifyou want to change this, indicate the appropriate character on the ProfileOptions form. For example, if you specify the value 2, then the UOMGALN will appear in Financials as GLN. If you indicate a number otherthan 1-4, then the third character is automatically trimmed.
Step 5. OPM Systems > OPM System Setup > Reason Code
Reason codes tie to Inventory Transactions throughout OPM and can beused for MAC Account Mapping. Define codes here to be used byInventory Adjustments, Movements, Production Transactions andPurchasing Receipts.
Step 6. OPM Systems > OPM System Setup > UserOrganization
Assign Organizations to your Users.

Oracle Process Manufacturing Implementation Guide OPM Integration Implementation • 63
Note: Establish your Operator Code in OPM System Administrationsecurity user define form. Then assign the organization to your operatorcode.
Step 7. OPM Systems > OPM System Setup > DocumentOrder
Setup the Document Ordering in OPM for those modules you areimplementing.

64 • OPM Integration Implementation Oracle Process Manufacturing Implementation Guide
OPM Inventory ModuleRefer to the Inventory Management manual for more details. Belowarethe steps relating to the integration.
Step 1. OPM Inventory > OPM Inventory Control > Setup >Inventory Calendar
The calendars must be synchronized with the Costing and GL Calendars.
Step 2. OPM Inventory > OPM Inventory Control > Setup >Warehouse
An OPM Warehouse equates to an AP Location. When the Warehouse issaved, it will automatically be created as a Location in FinancialsAccounts Payable. Ensure that these Warehouses are tied to anOrganization that is the intended Financial Company.
Note: The account distribution on OPM Purchase Orders will not beaccurate unless the Warehouse specified on the Purchase Order is tied toan Organization owned by the same Company as the Company tied to thePurchase Order.
Step 3. OPM Inventory > OPM Inventory Control > Setup >Classes/Types > General Ledger (Item GL Class) (Optional)
Create Item GL Classes for use in Account Mapping for Multi-Companyimplementations. The AR AutoInvoicing Transaction Type may containthe GL Class for Multi-Company sites.
Note: Account mapping currently uses Item GL Class established on theitem master. It ignores the Item GL class found on the Object > Inventory> Warehouse Rules form.
Step 4. OPM Inventory > OPM Inventory Control > Setup >Item Master
Items are entered in OPM and automatically saved to AR via an Itemtrigger. Tie items to Item GL Classes to be used for Account Mapping inthe Manufacturing Accounting Controller module (if used).
For maintenance, services, or MRO items to be used in purchasing (MROprocessing), establish at least one item code here with Non_inventory flagset to Yes. This allows the you to change the description in PO Entry andreceive quantities of this item. This flag also automatically changes theGL Account Distribution on the Purchase Order line to substitute theEXP Account Title for the INV account title for the PO Receiving sub-event.

Oracle Process Manufacturing Implementation Guide OPM Integration Implementation • 65
OPM Tax ModuleIn order for OPM to calculate Tax on Sales Orders and pass Taxinformation to AR, the Tax module needs to be implemented. Belowarethe steps relating to the integration. Refer to the Tax manual for moredetails.
Step 1. OPM Logistics > Order Fulfillment > Setup > Tax >Location Code
There must be at least a default code to use for OPM organizations, evenif you do not calculate any taxes (for example, NONE) and is alsoattached to a customer in the AR Setup.
Step 2. OPM Inventory Control > Setup > Classes/Types >Tax Association
Define Tax Classes and tie Items to these classes on this form. Onesimple example would be a class called Taxable where all taxable itemswere listed.
Step 3. OPM Logistics > Order Fulfillment > Setup > Tax >Tax Authority
Establish appropriate Tax Authorities with effective dates and rates. TheTax Authority can be used for Account Mapping within theManufacturing Accounting Controller module to accrue the liability todifferent account numbers (if needed). This must be equal to the AR TaxCode to be recognized on an AR Invoice coming from OPM. The BasePercent (%) must be equal to the AR Tax Code Tax Rate Percent.
Step 4. OPM Logistics > Order Fulfillment > Setup > Tax >Tax Calculation
Define the rules which will be applied when OPM calculates taxes. Thisis also attached to a customer in AR customer setup.
Step 5. OPM Logistics > Order Fulfillment > Setup > Tax >Location Association
Establish the Tax Authorities to be used for calculation purposes whenselling product from one Tax Location code to another Tax Locationcode.
Step 6. Verify the Profile Option Values
To activate OPM tax calculations, verify the values for the followingProfile Options.
Profile Options Values
OP$GEMMSTAX 1
TX$AUTOTAXOE 1
TX$MAX_TAX_AUTH any number > 0

66 • OPM Integration Implementation Oracle Process Manufacturing Implementation Guide
OPM Purchasing ModuleRefer to the Purchase Order Management manual for more details. Beloware the steps relating to the integration.
Step 1. OPM Logistics > Purchase Management > Setup >Vendor GL Class
Setup Vendor GL Classes to be used for Account Mapping. This can betied to an Accounts Payable Supplier via a Vendor GL Class Descriptionflexfield in Supplier entry. The lookup for this field (Quickpick) isvalidated against the OPM Vendor GL Class table, “po_vdgl_cls”.
Step 2. OPM Logistics > Purchase Management > Setup >Acquisition Cost
Currently the Acquisition Cost Code amount entered on the PO Linedetail is on a per unit sold basis.
The Acquisition Cost Indicator impacts the way in which theManufacturing Accounting Controller GL Mapping logic creates GLentries at Purchase Order Receipt time.
You can select the Not Included option to indicate that the AcquisitionCosts are NOT included in the cost of the item. Thus, the AcquisitionCosts (for example, freight or insurance) are expensed. Each AcquisitionCost code may be booked to its own EXP account.
Select the Included option to indicate that the Acquisition Costs areincluded in the cost of the item. Therefore, the Acquisition Cost isincluded in the material cost or INV account, rather than the EXPaccount.
Note: Each Acquisition Cost may be defined as included or not includedin the cost of purchased items. At Purchase Order entry time you mayoverride the setting made on the Purchasing Acquisition Cost form.
Step 3. Object > Purchasing > Vendor Association
After Vendors are established in AP and synchronized into OPM, the shipto/bill to relationships are automatically established in OPM.

Oracle Process Manufacturing Implementation Guide OPM Integration Implementation • 67
OPM Order Fulfillment Sales Order SetupRefer to the Order Fulfillment manual for more details. Beloware thesteps relating to the integration.
Step 1. OPM Logistics > Order Fulfillment > Setup >Classes/Codes > Hold Reason Codes
There are four different Hold Reason codes being used for creditchecking in OPM. Therefore, there are four Profile options added to theSystem module. They come pre-loaded with default values for the HoldReason attached to each condition. Although the Hold Reason codes arepre-loaded, you can change the descriptions and flags on the HoldReasons form or change the values on the Profile options form to agreewith the other Sales Hold Reason codes you already have established:
Description of Hold Reason Code Profile Options Hold Reason Codes
Credit Hold OP$CUST_HLD CRDH
Credit Check Failed OP$CHK_NOT_SUCCESS CRFL
Credit Limit Per Order Exceeded OP$ORD_LIMIT_EXCEED OLEX
Total Credit Limit Exceeded OP$CUST_LIMIT_EXCEED CLEX
There will be no Hold Reason code assigned to Sales Orders which passcredit checking. If you use the AR application to track open customerbalances and generate invoices, customer credit checking can be invoked.The customer open balance is maintained in the customer’s currency. InOPM the open Sales Order balance is incremented when you save a SalesOrder and decremented when the Sales Order Shipment Lines arereleased. The release makes the Shipment eligible for invoice by AR andis assumed to be an Open Receivable at this point.
A function to recalculate customer open balances is useful if a currencyexchange rate was missing between the order billing currency andcustomer currency. If you save an order and the exchange rate is missing,a message indicates this. It also indicates you should enter the exchangerate in OPM and then recalculate the open order balance. If you run theOpen Balance Update and OPM still cannot find an exchange rate, then areport indicates the missing rate. Credit Checking uses this open customerbalance. The following situations are invoked for customer creditchecking upon saving an OPM Sales Order.
Credit Check passes if Open Receivables plus Open Customer SalesOrder Balance are less than, or equal to, the Credit Limit (plus the limittolerance)
Credit Check fails if Open Receivables plus Open Customer Sales OrderBalance are more than the Credit Limit (plus the limit tolerance)
68 • OPM Integration Implementation Oracle Process Manufacturing Implementation Guide
Note: If a released shipment does not become an invoice immediately,then the value will not be considered as an open accounts receivable itemfor the credit check and it will not be reflected in the Customer OpenBalance. If there are multi-currency sales orders, you should recomputethe customer open balance for all customers using the Updated CustomerBalance option in the Order Fulfillment module.
Step 2. OPM Logistics > Order Fulfillment > Setup >Customer > Customer Associations
After Customers are entered into AR and synchronized with OPM, theassociation between Bill to and Ship to Customers are automaticallyestablished in OPM. These are the same as the Customer relationshipsthat were established in AR Customer setup.
Step 3. OPM Logistics > Order Fulfillment > Setup >Customer > Customer GL Classes
This field allows you to logically group your Customers into sets whichcan be referenced to aid in establishing your Account Mapping.
Step 4. OPM Logistics > Order Fulfillment > Setup >Customer > Customer Price Class
These classes, tied to AR Customers, can trigger pricing in OPM Sales.
Step 5. OPM Logistics > Order Fulfillment > Report > Run
This is a submit report request option. This function will recompute theCustomer Open Balance and notify the user of missing exchange rates ifthey exist.
Step 6. OPM Logistics > Order Fulfillment > Setup >Shipping > Carriers
These Carriers are automatically saved to AR Freight Carriers via atrigger. They are saved in the Setup Business Group InventoryOrganization.
Step 7. OPM Logistics > Order Fulfillment > Setup >Shipping > Freight Bill Methods
Create default Freight Bill Method of NONE. This is saved as AR FreightTerms via an OPM Trigger.
Step 8. OPM Logistics > Order Fulfillment > Setup > >Pricing > Charges
The Charge Code must be equivalent to the AR Standard Memo LinesName in order for a Sales Order Charge to be recognized on an ARInvoice.

Oracle Process Manufacturing Implementation Guide OPM Integration Implementation • 69
OPM Costing ModuleRefer to the Cost Management manual for more details. Beloware thesteps relating to the integration.
Step 1. OPM Financials > Cost Management > Setup > CostCalendar
For a Company, the Cost Calendar must be in synch with the InventoryCalendar.
Step 2. OPM Product Development > Formula Mgmt >Formulas or OPM Product Development > Formula Mgmt >Routings
Establish Formulas and Routings to be used by Costing. See OPMFormula Management documentation for details. Be aware of scalingindicators on items and operations, allocation percentages on productsand your costing effectivity rules.
Step 3. OPM Process Planning > Capacity Planning > Setup >Resources
Define your Resources with appropriate UOM, Component Class andCost Analysis code.
Step 4. OPM Product Development > Formula Mgmt >Effectivities
Verify the appropriate Effectivities are set up for Costing if you haveproduced items (for example, items used in formulas and routings).
Note: The effective date range for this formula must cover the entirecosting period of your rollup. This is critical. Be aware that the formdefaults to a start date on all effectivities of “today” which would not beappropriate for costing.
A correct example of this is:
Formula Effectivity Calendar Period (YR)
Beginning Date 01/01/97 01/01/97
Ending Date 01/01/99 12/31/97
An incorrect example of this is:
The example belowhas a problem. Since the first 20 days of the calendarperiod are not covered by the formula effectivity, the cost rollup will notfind a valid formula to use.
Formula Effectivity Calendar Period (YR)
Beginning Date 01/21/97 01/01/97
Ending Date 12/31/97 12/31/97

70 • OPM Integration Implementation Oracle Process Manufacturing Implementation Guide
If necessary, copy production formulas into costing versions and definethe appropriate effectivity for your costing organization or create yourown costing versions with effectivities.
Be sure to identify the product allocation % for any co-products on yourformulas. The allocation % for any individual formula must equal 100%.Be aware that this indicator is at the detail level on formulas in both theFormula and Laboratory modules. By highlighting an item (whetherproduct, ingredient, or by-product) and choosing the AdditionalInformation option, you can verify any allocation or scaling optionsselected. Similarly there is a scaling indicator on the operations includedin a routing. Again, this indicator is found by highlighting the operationwithin the routing, and then selecting Additional Information.
Notes:
1. If there is no formula use = 2 (costing) effectivity established, thenOPM will use a production formula for the cost rollup.
2. If routing costs will be used, verify that the appropriate routing andversion number are attached to the costing effectivity record.
Step 5. OPM Financials > Cost Management > Setup >Analysis Codes
There must be at least one Analysis Code established.
Step 6. OPM Financials > Cost Management > Setup >Method Codes
A method for Standard Costing needs to be defined (for example, STND)if you want to use Standard Costs and book Purchase Price Variances.The cost type indicator should be Standard Costing (that is, using CostRollup). It should be set to Actual Cost for the Cost Method for the newActual Costing process.
Step 7. OPM Financials > Cost Management > Setup >Component Classes
Buckets for reporting segments or categories of product cost are definedhere. There must be at least one component class. Typically classes couldinclude different ones for material cost, overhead, and direct labor.
Inventory values to be used in PO transactions as well as other inventorytransactions in OPM need to be defined in a single component class (thatis, Material). They can be segregated in the GL by creating Item GLClasses (that is, rawpackage) that are assigned to each item. Then theAccount Selection Priority can be established in the OPM ManufacturingAccounting Controller module to send each Item GL Class InventoryTransaction to a different GL Account Number.

Oracle Process Manufacturing Implementation Guide OPM Integration Implementation • 71
Note: The Usage indicator can be either Cost Details, Burden Details,FM Route, Allocation Details, or Standard Cost Adjustment. Therefore,you need a different component class for entered cost details, routingcosts and burden costs.
Note: Before setting up Cost Details, establish Company BaseCurrencies on the MAC Fiscal Policy form for each company.
Step 8. OPM Financials > Cost Management > Cost Details
If you are using Standard Cost, enter the unit cost of rawmaterials to beused by the Cost Rollup.
Step 9. OPM Financials > Cost Management > ResourceCosts
Establish the per unit (for example, per HR) cost of each Resource usedby your Costing model. This is the nominal cost for that Resource.
Step 10. OPM Financials > Cost Management > Burden Details
Establish burden details if needed.
Step 11. OPM Financials > Cost Management > Setup >Standard Costs > Source Warehouses
Establish a default here (for example, blank item cost class and blankitem) if using Standard Costing. However, specific records may berequired by your implementation.
Step 12. OPM Financials > Cost Management > Setup >Standard Costs > Target Warehouses
There must be a default established here (that is, blank item class andblank item) as a minimum. You can establish only one Target Warehousefor your Organization. However, you can then copy your costs to anotherWarehouse or Organization.
Step 13. OPM Financials > Cost Management > StandardCosts > Cost Rollup or OPM Financials > Cost Management >Actual Costs > Actual Cost Rollup
Perform the Rollup for the period for Standard Cost or run the ActualCost process.
Step 14. OPM Financials > Cost Management > StandardCosts > Cost Rollup > Special > View Error Messages or OPMFinancials > Cost Management > Actual Costs > Actual Cost Rollup> Special > View Error Messages
Verify there were no major errors on the cost calculations. The first line(OPTS) will always display here showing the selection criteria used tostart the rollup.
Step 15. OPM Financials > Mfg Acctg Controller > CostUpdate

72 • OPM Integration Implementation Oracle Process Manufacturing Implementation Guide
Perform the Cost Update to create Item GL Cost Records forManufacturing Accounting Controller to use and pass to the GL. If anupdate is not performed, the inventory will be valued at zero cost.
Notes :
1. If you selected to calculate PPV on PO transactions and you have notupdated the item costs, then the entire value of that inventory will beshown as an entry to the PPV account with zero going to the INVaccount.
2. You can update the same item in the same period a second time aslong as it was not a Final cost update.

Oracle Process Manufacturing Implementation Guide OPM Integration Implementation • 73
OPM Manufacturing Accounting Controller ModuleRefer to the Manufacturing Accounting Controller manual for moredetails. Beloware the steps relating to the integration.
Step 1. OPM Financials > Mfg Acctg Controller > Setup >Ledgers
Setup one ledger in order for OPM to operate properly.
Step 2. OPM Financials > Mfg Acctg Controller > Setup >Fiscal Policies
Fields on this form allowthe user to define for each OPM Companywhich Set of Books and Operating Units will be used for mapping andintegration. This allows multiple OPM Companies to share a single Set ofBooks and Operating Unit.
The functional currency in GL must be entered as the OPM basecurrency.
The segment delimiter defined here must match the segment separator(that is, -) used in GL.
Step 3. OPM Financials > Mfg Acctg Controller > Setup >Fiscal Policies > Special > Assign Sources
The CM, IC, OP, PM and PO sources must be tied to the Company if onewants to have Financial implications for these sources. If not, only enterthe sources of interest. Source CM is used for Inventory CostRevaluation.
Step 4. OPM Financials > Mfg Acctg Controller > Setup >Fiscal Policies > Special > Setup Segments
•= The Type field indicates whether the segment is mapped to theOPM Accounting Unit or the Account Map.
•= The Length must match the GL Accounting Flexfield Segmentlength.
•= The Short Name must match the GL Accounting FlexfieldSegment Name.
•= The total length of all accounting unit segments inclusive ofsegment delimiters cannot exceed 240.
•= The total length of all account segments inclusive of segmentdelimiters cannot exceed 240.
•= The total of the two groupings (Accounting Unit and Account)cannot exceed 480.

74 • OPM Integration Implementation Oracle Process Manufacturing Implementation Guide
Step 5. OPM Financials > Mfg Acctg Controller > Setup >Events > Event Fiscal Policies
•= There has to be at least one record for each Company that hasthe Source and Event blank.
•= When first implementing, set Summarize flag to 'Do Not SumSub-events for Journal Vouchers' until all transactions have beenfully tested.
•= Set up the record for Source: PO, Event: RCPT
Calculate PPV
•= Book INV at Standard Cost (PPV). With this option the systemwill book the material price variance in OPM. This is created bybooking the debit to the INV account using the updated cost andthe credit to AAP at estimated purchase order price. Thedifference is booked to the PPV account.
•= Book INV at PO Unit Cost (no PPV). There is no material pricevariance using this option. The estimated purchase order price isused for both the debit to INV account and the credit to AAPaccount.
Account Titles Flag = 0 Flag = 1
INV $1.00 $1.10
AAP ($1.10) ($1.10)
PPV $.10 --
Book Expenses
Expense Booked at Receipt Indicator.
This option allows users to defer booking of expenses to invoice entrytime in AP. If you select option Booked at Invoice Entry Time option, theexpense and accounts payable accounts are booked at invoice entry time.This option books the expenses NOT at the receipt time, but rather bookswithin the Oracle Accounts Payable system at invoice entry time. If youselect Expenses are Booked at Receipt, expenses and an accrual will bebooked at purchase order receipt time. This option books the expenses atpurchase order receipt time.
Acquisition Costs
Acquisition Costs are Booked with Separate Accruals.
To help identify howthe flag should be set, ask the client the followingquestion: Do acquisition costs such as freight have separate AccrualAccounts from the item AP account?
If Yes, it indicates that the acquisition cost has its own accrual account.This option allows users to control the accrued acquisition account. Youmay book the accrual to the AAP account or a separate accruedacquisition account (for example, accrued freight or accrued insurance).
Oracle Process Manufacturing Implementation Guide OPM Integration Implementation • 75
The valid options are:
•= Acquisition Cost Accruals are added to the same account as thatselected to the purchased item’s AAP account.
•= Acquisition Cost Accruals may be unique for each acquisitioncost code.
Step 6. OPM Financials > Mfg Acctg Controller > Setup >Mappings > Accounts > Selection Priorities
The form defines which criteria will be used and the order of their use forAccount Mapping. If the attributes used for Account Mapping need to bechanged, nowis the time. Otherwise, skip this step to accept the defaults.
Step 7. OPM Financials > Mfg Acctg Controller > Setup >Mappings > Ledgers
Establish one default record, where the Organization is blank.
Step 8. OPM Financials > Mfg Acctg Controller > Setup >Sub-Events > Account Titles
This report shows all the journal templates that are created by eachSubevent. Print this out before mapping.
Step 9. OPM Financials > Mfg Acctg Controller > Setup >Mappings > Account Units
For each Company, a default record must be established (for example, theOrganization and Warehouse must be intentionally left blank). Additionalmappings for specific Organizations and Warehouses may be added.
Note: When entering the Accounting Unit, the segments are validatedagainst the GL Segment Values. However, cross validation of the codecombination is not done. A segment by segment validation is done.
Step 10. OPM Financials > Mfg Acctg Controller > Mappings> Accounts > Account Mappings
For every OPM company and Account Title the default account mappingmust be entered.
Note: When entering the Account, the segments are validated against theGL Segment Values. However, cross validation of the code combinationis not done. A segment by segment validation is done.
Step 11. OPM Financials > Mfg Acctg Controller > Reports >Standard > Run
Click on Request Name field and use the List of Values to viewthereports list. Select Account Mapping report from the list. This reportshows all the mapping records you just established. Use it to auditmapping input.

76 • OPM Integration Implementation Oracle Process Manufacturing Implementation Guide
Step 12. OPM Financials > Mfg Acctg Controller > Setup >Mappings > Test Mapping
Test your Account and Accounting unit mappings. Verify that theAccount Mapping established is appropriate. Emulate a transaction inOPM using this form and verify what Accounts are selected.
Step 13. OPM Financials > Mfg Acctg Controller > SubsidiaryLedger > Special > Test Subsidiary Ledger Update
In order to test the Subledger in Test Update mode, you must first havesome transactions established in OPM (for example, enter a PO Receipt,Sales Order Shipment, Inventory Adjustment, and so on.). Then run thetransaction posting in test mode to ensure that your mapping defaults andcosts are established and that your mapping is correct. This shows thefinancial implications of transactions before they are written to theSubsidiary Ledger. The Test Subledger can be re-run as many times asrequired.
Step 14. OPM Financials > Mfg Acctg Controller > SubsidiaryLedger > Special > View Error Messages
If there are errors in the Subsidiary Ledger Test Update program, then theerrors can be viewed in this form.
Step 15. OPM Financials > Mfg Acctg Controller > SubsidiaryLedger > Special > Subsidiary Ledger Update
This creates the actual journal entries to be passed to GL.
Step 16. OPM Financials > Mfg Acctg Controller > SubsidiaryLedger > Special > Purge Subsidiary Ledger
Security should restrict access to this option. The Subledger is used bythe drill downs from GL to the original OPM detailed transaction history.If you purge these records, the information for the drill downs may belost.

Oracle Process Manufacturing Implementation Guide Common Purchasing Setup • 77
Common Purchasing Setup
Common Purchasing - OverviewCommon Purchasing integrates OPM Purchase Management and OraclePurchasing to provide an integrated solution for Process Manufacturing.Purchase orders are entered in Oracle Purchasing and received in OPM.Then, the receipts entered in OPM are sent to Oracle Purchasing.Standard receipts, quick receipts, stock receipts, and returns are enteredin OPM Purchase Management. When standard receipts, quick receipts,and returns are saved, automatic concurrent processes update thepurchase order quantities in Oracle Purchasing.
Once purchase orders are entered in Oracle Purchasing and approved, thedata is automatically synchronized to OPM Purchase Management viaconcurrent processes. The only time that you would manually run asynchronization is to correct data in a purchase order that has failedsynchronization or to update receiving information on the purchase order.
Purchasing general ledger accounts default on the purchase order inOracle Purchasing; they are only used for matching in Accounts Payable.General ledger entries are made using the account mapping in OPM.These accounts are created on the purchase order synchronized to OPMPurchase Management when purchase orders are approved. Items aremapped to inventory accounts and acquisition costs are mapped toexpense or inventory accounts.

78 • Common Purchasing Setup Oracle Process Manufacturing Implementation Guide
Common Purchasing - Required SetupReviewthis chapter thoroughly before setting up Oracle Purchasing. Youmust adhere to the set up requirements listed here for CommonPurchasing to work.
You must set up OPM Purchase Management, Oracle Purchasing, andOPM and Oracle Financials Integration before using CommonPurchasing.
You must set up the information listed for each module in OracleApplications and OPM before you can successfully create andsynchronize POs between Oracle Purchasing and OPM PurchaseManagement.
Required Setup in Oracle PurchasingYou must set up the standard information for Oracle Purchasingaccording to the Oracle Purchasing User's Guide, "Setting Up" chapter.The instructions listed beloware Common Purchasing-specific; theysupplement the Oracle Purchasing User's Guide, but do not replace it. Inaddition, the step numbers used belowcorrespond to the step numberslisted in the Oracle Purchasing User's Guide, "Setting Up" chapter.
Note: Enter all codes that are synchronized with OPM into OracleApplications in uppercase, otherwise they can only be used in OPM byselecting them from a lookup. You cannot use lowercase in any OPMapplications.
Step 3 - Define Currencies
Currencies cannot exceed 4 characters because they are saved to OPMvia a trigger.

Oracle Process Manufacturing Implementation Guide Common Purchasing Setup • 79
Step 3 - Define Exchange Rates and Exchange Rate Types
Enter exchange rates and exchange rate types in Oracle GL. They aresaved to OPM via a trigger.
••••= Enter conversion rate types in uppercase if not numeric.
••••= Conversion rates cannot exceed 4 characters and exchange ratetype descriptions cannot not exceed 70 characters because theyare passed to OPM.
•= If your implementation is using multi-currency for Sales OrderProcessing, then daily conversion rates must exist for the shipdates on the OPM Sales Order.
Step 4 - Set up Organizations
Define one inventory organization for Oracle Purchasing by bringing upthe Setup Business Group Organization. This is seed data in OracleApplications. Designate this organization as an Inventory Organization.
Step 12 - Define Locations
Enter additional locations for receiving MRO or expense items only.Warehouses that you store items in are entered in OPM and saved as billto and ship to locations in Oracle Purchasing via a trigger.
Step 13A - Define Payment Terms
Enter payment terms in Oracle Accounts Payable. They are synchronizedto OPM Purchase Management via OPM Financials Integration Datasynchronization.
•= Payment terms codes can be up to 15 characters.
•= Descriptions can be up to 40 characters.
•= Use the % Due, % Discount, and Days columns only to establishthe payment terms code.
Step 15 - Set up Lookups and Classes for FOB Codes
Enter the Oracle Accounts Payable FOB Codes. OPM synchronizes onlythe AP FOB Codes. FOB codes correspond to the OPM OrderFulfillment FOB codes used on purchase orders and sales orders. See the"Defining Lookup Codes" topic in the Oracle Purchasing User's Guidefor detailed information.
Step 17 - Set up the Vendor GL Class Descriptive FlexfieldValidation Set (Optional)
Add the Vendor GL Class descriptive flexfield to the Vendor Site screen.Enter up to 8 characters in uppercase. This field is required if Vendor GLClass is used in Account Mapping in OPM. Otherwise, it is optional. Forexisting AP installs, verify that Attribute 1 is not being used for any otherdescriptive flexfields for the Vendor Form and the Vendor Site form.

80 • Common Purchasing Setup Oracle Process Manufacturing Implementation Guide
Field Name Value
Value Set Name vend_glclass
Description Vendor GL Class
Format Type Char
Maximum Size 8
Uppercase only (A-Z) Yes
Validation Type Table
Field Name Value
Table Application Oracle Payables
Table Name po_vgld_cls
Table Columns Value vendgl_class
Type Char
Size 8
Table Columns Meaning vendgl_class_desc
Type Varchar2
Size 70
Define the Descriptive Flexfield Segments for Vendor GL Class. Thisdescriptive flexfield must be assigned to ATTRIBUTE1. If you alreadyhave a descriptive flexfield assigned to ATTRIBUTE1, it must be movedto another open attribute in the table. Query on the title Vendor Sites todisplay the descriptive flexfiled for Vendor GL Class.
Field Name Value
Application Oracle Purchasing
Title Vendor Sites
Freeze Flexfield Definition No
Prompt Context
Value Required No
Default (blank)
Override Allowed No
Reference Field (blank)
Select Segments and Open, and then enter the following information:

Oracle Process Manufacturing Implementation Guide Common Purchasing Setup • 81
Field Name Value
Name GL Class
Description Vendor GL Class
Enable Yes
Column ATTRIBUTE1
Number 1
Displayed Yes
Value Set vend_glclass
Description Vendor GL Class
Default Type (blank)
Default Value (blank)
Required Yes (optional)
Security Enabled No
Range (blank)
Display Size 8
Description Size 50
Freeze the flexfield and save it.
Step 20 - Define Items
Enter MRO items only. Production items are entered in OPM Inventorymanagement and saved to the Oracle Applications item master via atrigger.
Step 25 - Define Suppliers
Define vendors in Oracle AP or Purchasing. The combined suppliernumber and supplier site name are saved as the vendor number in OPMPurchase Management via Data Synchronization.
Note: The OPM system profile value GL$VEND_DELIMITER is set to- as the default. The default separator is for the supplier and supplier sitename combination. You can change the value as long as the separator hasnot already been used in synchronization.
•= The supplier name equals the OPM vendor name.
•= The supplier name can be up to 40 characters.
•= The suppler number can be up to 16 characters.
•= If the number is alphanumeric, be sure to use uppercase.
•= The supplier number, hyphen or other delimiter , site namecombination can be up to 32 characters.
•= The AP supplier site name can be up to 15 characters.

82 • Common Purchasing Setup Oracle Process Manufacturing Implementation Guide
•= The OPM vendor default currency equals the AP corporatesupplier invoice currency.
•= The pay site equals the OPM pay to vendor.
•= The purchasing site equals the OPM ship to vendor.
•= The state and country code (not the description) are verifiedagainst the OPM geography code, sy_geog_mst. The state andcountry code are maintained in the same column insy_geog_mst.
•= The state code can be up to 4 characters.
•= The postal code can be up to 16 characters.
•= If you are using vendor GL class in the OPM ManufacturingAccounting Controller account mapping, you must enter avendor GL class descriptive flexfield to the Vendor Site form inOracle Accounts Payable or Purchasing. See the OPMFinancials Integration Implementation Guide for detailedinformation.
•= OPM only synchronizes suppliers with a supplier type vendor orwith a blank vendor type.
.

Oracle Process Manufacturing Implementation Guide Common Purchasing Setup • 83
Required Setup in OPMYou must set up the information listed for each module in OPM. See theuser's guides listed for each OPM module for detailed information onsetting up the required items.
OPM System AdministrationSee the OPM Implementation User's Guide for detailed information onsetting up:
Document Ordering
Document ordering for purchase orders (PORD type documents) andblanket purchase orders (PBPO type documents) must be set to manual inOPM. Purchase orders and planned purchase orders are numbered whenthey are created in Oracle Purchasing. Setting purchase order and plannedpurchase order document numbering to manual in OPM retains theiroriginal numbering when they are synchronized with OPM PurchaseManagement.
If you choose automatic document ordering for receipts and returns,specify the length of the document numbers, the starting number andwhether the numbers have leading zeroes.
You must define document ordering for the following document typesbefore they can be used in Purchase Management:
•= PORD - Purchase Orders (manual only)
•= PBPO - Blanket Purchase Orders (manual only)
= (called planned purchase orders in Oracle Purchasing)
•= RECV - Receipts (manual or automatic)
•= RTRN - Returns (manual or automatic)
Organizations
Define the OPM organizations that purchase goods. Multiple OPMorganizations can be mapped to a single operating unit in OraclePurchasing.
Reason Codes
Define codes to indicate why actions were taken. These reason codes areused in OPM Receiving and Returns.

84 • Common Purchasing Setup Oracle Process Manufacturing Implementation Guide
Units of Measure
Define categories of units of measure such as mass, volume, or count.Units of measure are automatically synchronized with OracleApplications via a trigger. The first UOM entered for each UOM type isthe Base Unit of Measure.
Note: While OPM uses 4-character Unit of Measure (UOM) codes,Oracle Applications use 3- character UOMs. Use the OPM system profilevalue SY$OF_UOM_TRIM_CHAR to specify which character to trimfrom the OPM UOM during OPM GL Synchronization . The default is 3;however, you can specify any character from 1 through 4.
Unit of Measure Types
Define categories of units of measure such as mass, volume, or count.Unit of measure types are automatically synchronized with OracleApplications via a trigger.
System Profile Values
The following system profile values are used in Common Purchasing.You must ensure that you have set them up as described below. See theOPM Implementation User's Guide for detailed information on systemprofile values.
System Profile Value Setting
GL$FINANCIAL_PACKAGE ORAFIN
GL$VEND_DELIMITER Default separator for the supplier andsupplier site name combination is -.You can change the value as long asthe separator has not already beenused in synchronization.
IC$_DEFAULT_LOCT Enter a default location code.
PO$SHIPUOM LB
PO$DEFER_ACCT_MAP 0
PO$RECV_CLOSE 1.0
PO$REORDER 0
SY$DEFAULT_ORGN Enter a default organization.
SY$OF_UOM_TRIM_CHAR Default is 3. Can enter any numberfrom 1-4 to trim the 4-character UOMname to 3 characters to fit OracleApplications UOM codes. 1-4indicates which character of the 4 digitOPM codes are trimmed.
SY$ZERODATE Default is 01-JAN-1970.
Oracle Process Manufacturing Implementation Guide Common Purchasing Setup • 85
OPM Inventory ManagementSee the OPM Inventory Management User's Guide for detailedinformation on setting up:
Inventory Calendar
Set up inventory calendars for all of your companies before you canprocess any transactions in Purchase Management. You can only processpurchase orders, receipts, and returns that are validated against theappropriate open inventory periods. Transactions cannot be written toclosed periods. The inventory calendar affects Purchase Management inthe following ways:
•= You can create purchase orders only if the agreed or promiseddelivery date falls within an open inventory period.
•= You can create, void, or adjust receipts if the date received onthe original inventory transactions falls within an open period. Ifthe receiving date on the original transaction falls within an openperiod, then that date is used. If not, the current date is written tothe date received on the inventory transaction.
•= You can only process returns if the return date falls within anopen inventory period.
Items
Production items are saved to the Oracle Applications Item Master via atrigger. Purchasing defaults can be modified in Oracle Applications.Define the characteristics of the items that will be purchased, such as:
•= Whether the item uses single or dual unit of measure controlled.
•= The item's primary unit of measure.
•= The item's secondary unit of measure if dual unit of measurecontrolled.
•= Whether the item is lot controlled.
•= Whether the item is sublot controlled.
•= Whether the item is location controlled.

86 • Common Purchasing Setup Oracle Process Manufacturing Implementation Guide
Item/Lot Unit of Measure Conversions
Item/Lot Unit of Measure Conversions are saved to the OracleApplications via a trigger. Define unit of measure conversions topurchase or receive items in different unit of measure types from theirprimary unit of measure types or to apply dual unit of measure controlwith different unit of measure types.
The secondary quantity on a purchase order in Oracle Purchasing iscalculated using only item-level conversions. The secondary quantity andUOM are displayed in descriptive flexfields on the purchase order line.
Although unit of measure conversions within UOM types are set upglobally in the System module, conversions across UOM types must beset up at the item, lot, or sublot level. For example, the conversion frompounds to gallons (mass to volume) is different for water than for ethanolbecause they have different densities.
See the OPM Implementation Guide for detailed information about UOMentry and conversion.
Lot/Sublot Control
Use lot control for items that differ from lot to lot in properties that areimportant to measure such as items that require grade or lot status control.In addition, use lot control to track which lots of an ingredient were usedto make a product, or which products a certain lot was used in.
If you use lot control, you can further divide lots by using sublot control.
When you enter a receipt for an item that is lot controlled, you mustindicate which lots were received to allocate them properly.
Location Control
Define your items and warehouses as location controlled to control youritems by location within a warehouse.
When you enter a receipt for an item that is location controlled, you mustindicate which locations were received to allocate them properly.
Warehouses
Define the warehouses that you store items in. Warehouses are saved asbill to and ship to locations in Oracle Purchasing via a trigger.

Oracle Process Manufacturing Implementation Guide Common Purchasing Setup • 87
OPM Purchase ManagementSee the "Purchase Management Setup in OPM" chapter in this user'sguide for detailed information on setting up:
Vendor Class Codes
Identify the class codes that you use to group vendors with similarcharacteristics and requirements.
Vendor GL Class Codes
Identify the general ledger class codes that you use to group vendors thatshare the same account mapping requirements.
Vendor Trade Class Codes
Identify the vendor trade class codes that you use to group vendors thatshare the same trade requirements.
Purchase Acquisition Costs
Identify the codes for additional costs associated with purchase ordershipments such as taxes, duty, and freight.
OPM Order FulfillmentSee the OPM Order Fulfillment User's Guide for detailed information onsetting up:
Freight Bill Methods
Identify howto bill for freight charges. Freight bill methods are saved asfreight terms in Oracle Accounts Payable via a trigger.
Carriers (Shippers)
Identify who physically ships goods. Carriers are saved as freight carriersin Oracle Purchasing via a trigger.
Optional Setup in Order FulfillmentIf you want to use the following Order Fulfillment-related codes, set themup before using Purchase Management. See the OPM Order FulfillmentUser's Guide and the online help topics for the appropriate forms.
Shipping Methods
Identify howthe goods are shipped such as by air or freight.
Ports
Identify embarkation and debarkation ports.

88 • Common Purchasing Setup Oracle Process Manufacturing Implementation Guide
Optional Setup in Cost ManagementIf you want to use the following Cost Management -related codes, setthem up before using Purchase Management. See the OPM CostManagement User's Guide and the online help topics for the appropriateforms.
Component Classes
Define component classes in OPM Cost Management. You can then enterthese component classes on acquisition costs for costing purposes.
Analysis Codes
Define analysis codes in OPM Cost Management. You can then enterthese analysis codes on acquisition costs for costing purposes.

Oracle Process Manufacturing Implementation Guide Common Purchasing Setup • 89
Common Purchasing SynchronizationConcurrent programs are installed automatically with the installationscripts. The Document Approval Manager must be installed and runningfor the synchronization between Oracle Purchasing and OPM PurchaseManagement to occur successfully.
During the synchronization process, OPM validates the following fieldson the purchase order sent from Oracle Purchasing:
•= Organization Code
•= To Warehouse
•= Pay Vendor
•= Ship Vendor
•= Item
•= Billing Currency
•= Order Unit of Measure 1
•= Order Unit of Measure 2
•= Item Unit of Measure
•= Price Unit of Measure
•= Shipper Code
•= Freight Bill Method
•= Terms Code
•= QC Grade
90 • Common Purchasing Setup Oracle Process Manufacturing Implementation Guide
OPM Financials Integration Data SynchronizationRun the OPM Financials Integration Data Synchronization when youmake changes to the following fields to synchronize them with OPM:
•= Vendors
•= Vendor Associations
•= AP FOB Codes
•= AP Terms Codes

Oracle Process Manufacturing Implementation Guide Common Purchasing Setup • 91
Post Installation InformationYou must complete the following steps to enable the Acquisition CostEntry form in Oracle Purchasing.
First, to update your CUSTOM.pll file:
1. If you have made customizations, merge the differences in the$AU_TOP/resource/CUSTOM.pld and the TMCUSTOM.pldfiles.
2. Compile the modified custom.pld.
3. Compile the modified custom.pll.
OR
4. If you have not made customizations, execute the followingsteps:
$ cp TMCUSTOM.pll $AU_TOP/resource/CUSTOM.pll$ cp TMCUSTOM.plx $AU_TOP/resource/CUSTOM.plx
Next, to set up the form:
1. Select the Oracle Applications Application Developerresponsibility. You may have to set up this responsibility if itdoes not already exist.
2. Navigate to the Application Forms form and verify thatGMLACQCE exists. If it does not, you must add it.
•= In the Form column, enter GMLACQCE.
•= In the Application column, enter Oracle ProcessManufacturing.
•= In the User Form Name column, enter OPM CommonPurchasing Acquisition Cost Line Entry.
3. Save the form.
4. Navigate to the Form Functions form and verify thatGMLACQCE_F exists. If it does not, you must add it.
•= In the Function column, enter GMLACQCE_F.
•= In the User Function Name column, enter OPM CommonPurchasing Cost Line Entry.
•= In the Type column, enter FORM.
5. Save the form.
•= Navigate to the Menus form and query thePO_SUPERUSER_GUI menu. Verify that the OPMCommon Purchasing Cost Line Entry function exists on theMenus form. If it does not, you must add it.
•= In the Function column, enter OPM Common PurchasingCost Line Entry.
6. Save the form.

92 • Common Purchasing Setup Oracle Process Manufacturing Implementation Guide
Purchase Management Setup in OPM - OverviewVendor class codes, vendor general ledger class codes, and vendor tradeclass codes, and purchase acquisition costs are defined in OPM PurchaseManagement Setup.
Defining Vendor ClassesUse the Vendor Classes form to define the class codes that you use togroup vendors with similar characteristics and requirements.
Defining Vendor Classes - ProcedureTo enter vendor classes:
1. Navigate to the Vendor Classes form.
2. Complete the fields as described in the Vendor Classes Form -Fields topic.
3. Save the form.
Vendor Classes Form - FieldsThe fields describe the Vendor Classes form in detail.
Class
Enter the vendor class code. A vendor class is a category of vendors thatshare similar requirements. Required.
Description
Enter the description for the vendor class. Required.
Finding Vendor ClassesUse the Find Vendor Classes form to locate vendor classes that matchyour criteria.
There are several options for locating a record and populating a form.The List of Values option displays a dialog box with the appropriaterecords. The Query Find option displays a separate block called the Findform where you enter your search criteria.

Oracle Process Manufacturing Implementation Guide Common Purchasing Setup • 93
Finding Vendor Classes - ProcedureTo find vendor classes:
1. Navigate to the Vendor Classes form.
2. Choose Find from the Query menu.
3. Complete the appropriate fields as described on the Find VendorClasses Form - Fields topic.
4. Click Find . The vendor classes that meet your criteria aredisplayed on the Vendor Classes form.
Find Vendor Classes Form - FieldsThe fields describe the Find Vendor Classes form in detail.
Vendor Class
Enter the vendor class code.
Marked for Deletion
•= Select Yes to display vendor classes that are marked fordeletion.
•= Select No if you do not want to display vendor classes that aremarked for deletion.

94 • Common Purchasing Setup Oracle Process Manufacturing Implementation Guide
Defining Vendor General Ledger ClassesUse the Vendor General Ledger (GL) Classes form to define vendorgeneral ledger class codes that you use to group vendors that share thesame account mapping requirements.
Defining Vendor General Ledger Classes - ProcedureTo enter vendor general ledger (GL) classes:
1. Navigate to the Vendor General Ledger (GL) Classesform.
2. Complete the fields as described in the Vendor General LedgerClasses Form -Fields topic.
3. Save the form.
Vendor General Ledger Classes Form - FieldsThe fields describe the Vendor General Ledger Classes form in detail.
Vendor Class
Enter a vendor general ledger class. A vendor general ledger class is acategory of vendors with the same account mapping requirements.
Description
Enter the description for the vendor general ledger class.
Oracle Process Manufacturing Implementation Guide Common Purchasing Setup • 95
Finding Vendor General Ledger ClassesUse the Find Vendor General Ledger Classes form to locate vendorgeneral ledger classes that match your criteria.
There are several options for locating a record and populating a form.The List of Values option displays a dialog box with the appropriaterecords. The Query Find option displays a separate block called the Findform where you enter your search criteria.
Finding Vendor General Ledger Classes - ProcedureTo find vendor general ledger classes:
1. Navigate to the Vendor GL Classes form.
2. Choose Find from the Query menu.
3. Complete the appropriate fields as described on the Find VendorGL Classes Form - Fields topic.
4. Click Find . The vendor general ledger classes that meet yourcriteria are displayed on the Vendor GL Classes form.
Find Vendor GL Classes Form - FieldsThe fields describe the Find Vendor General Ledger Classes form indetail.
Vendor Class
Enter the vendor general ledger class code.
Marked for Deletion
•= Select Yes to display vendor general ledger classes that aremarked for deletion.
•= Select No if you do not want to display vendor general ledgerclasses that are marked for deletion.

96 • Common Purchasing Setup Oracle Process Manufacturing Implementation Guide
Defining Vendor Trade ClassesUse the Vendor Trade Classes form to define vendor trade class codesthat you use to group vendors that share the same trade requirements.
Defining Vendor Trade Classes - ProcedureTo enter vendor trade classes:
1. Navigate to the Vendor Trade Classes form.
2. Complete the fields as described in the Vendor Trade ClassesForm -Fields topic.
3. Save the form.
Vendor Classes Form - FieldsThe fields describe the Vendor Classes form in detail.
Class
Enter a vendor trade class. A vendor trade class is a category of vendorswith the same trade requirements.
Description
Enter the description for the trade class.
Oracle Process Manufacturing Implementation Guide Common Purchasing Setup • 97
Finding Vendor Trade ClassesUse the Find Vendor Trade Classes form to locate vendor trade classesthat match your criteria.
There are several options for locating a record and populating a form.The List of Values option displays a dialog box with the appropriaterecords. The Query Find option displays a separate block called the Findform where you enter your search criteria.
Finding Vendor Trade Classes - ProcedureTo find vendor trade classes:
1. Navigate to the Vendor Trade Classes form.
2. Choose Find from the Query menu.
3. Complete the appropriate fields as described on the Find VendorTrade Classes Form - Fields topic.
4. Click Find . The vendor trade classes that meet your criteria aredisplayed on the Vendor Trades Classes form.
Find Vendor Trade Classes Form - FieldsThe fields describe the Find Vendor Trade Classes form in detail.
Vendor Class
Enter the vendor trade class code.
Marked for Deletion
•= Select Yes to display vendor trade classes that are marked fordeletion.
•= Select No if you do not want to display vendor trade classes thatare marked for deletion.

98 • Common Purchasing Setup Oracle Process Manufacturing Implementation Guide
Defining Purchase Acquisition Costs in OPMPurchase Management
Use the Purchase Acquisition Costs form to define codes for additionalcosts associated with a purchase order shipment such as taxes, duty, andfreight in OPM Purchase Management.
Defining Purchase Acquisition Costs in OPM - ProcedureTo define purchase acquisition costs:
1. Navigate to the Purchase Acquisition Costs form.
2. Complete the fields as described in the Purchase AcquisitionCosts Form in OPM - Fields topic.
3. Save the form.
Purchase Acquisition Costs Form in OPM - FieldsThe fields describe the Purchase Acquisition Costs form in detail.
Cost Code
Enter the code for the type of acquisition cost you are entering.
Description
Enter the cost description for the cost code.
Component Class
Enter the code for the component class for this cost.
Analysis Code
Enter the cost analysis code associated with this cost. Analysis codes areused to group cost categories.
Acquisition Cost Indicator
•= Select Included to charge the acquisition costs to an inventoryaccount.
•= Select Not Included to charge the acquisition costs to an expenseaccount.

Oracle Process Manufacturing Implementation Guide Common Purchasing Setup • 99
Finding Purchase Acquisition CostsUse the Find Purchase Acquisition Costs form to locate acquisition costcodes that match your criteria.
There are several options for locating a record and populating a form.The List of Values option displays a dialog box with the appropriaterecords. The Query Find option displays a separate block called the Findform where you enter your search criteria.
Finding Purchase Acquisition Costs - ProcedureTo find acquisition cost codes:
1. Navigate to the Purchase Acquisition Costs form.
2. Choose Find from the Query menu.
3. Complete the appropriate fields as described on Find PurchaseAcquisition Costs Form - Fields topic.
4. Click Find . The first acquisition cost that meets your criteria isdisplayed on the Purchase Acquisition Costs form. Press PgDnto vieweach additional record.
Find Purchase Acquisition Costs Form - FieldsThe fields describe the Find Purchase Acquisition Costs form in detail.
Cost Code
Enter the acquisition cost code.
Component Class
Enter the code for the component class associated with this cost.
Analysis Code
Enter the cost analysis code associated with this cost.
Acquisition Cost Indicator
•= Select Included to display acquisition costs that are charged toan inventory account.
•= Select Not Included to display the acquisition costs that arecharged to an expense account.
Marked for Deletion
•= Select Yes to display acquisition costs that are marked fordeletion.
•= Select No if you do not want to display acquisition costs that aremarked for deletion.

100 • Common Purchasing Setup Oracle Process Manufacturing Implementation Guide
Purchase Management Setup in OPM - OverviewVendor class codes, vendor general ledger class codes, and vendor tradeclass codes, and purchase acquisition costs are defined in OPM PurchaseManagement Setup.
Defining Vendor ClassesUse the Vendor Classes form to define the class codes that you use togroup vendors with similar characteristics and requirements.
Defining Vendor Classes - ProcedureTo enter vendor classes:
1. Navigate to the Vendor Classes form.
2. Complete the fields as described in the Vendor Classes Form -Fields topic.
3. Save the form.
Vendor Classes Form - FieldsThe fields describe the Vendor Classes form in detail.
Class
Enter the vendor class code. A vendor class is a category of vendors thatshare similar requirements. Required.
Description
Enter the description for the vendor class. Required.
Finding Vendor ClassesUse the Find Vendor Classes form to locate vendor classes that matchyour criteria.
There are several options for locating a record and populating a form.The List of Values option displays a dialog box with the appropriaterecords. The Query Find option displays a separate block called the Findform where you enter your search criteria.

Oracle Process Manufacturing Implementation Guide Common Purchasing Setup • 101
Finding Vendor Classes - ProcedureTo find vendor classes:
1. Navigate to the Vendor Classes form.
2. Choose Find from the Query menu.
3. Complete the appropriate fields as described on the Find VendorClasses Form - Fields topic.
4. Click Find . The vendor classes that meet your criteria aredisplayed on the Vendor Classes form.
Find Vendor Classes Form - FieldsThe fields describe the Find Vendor Classes form in detail.
Vendor Class
Enter the vendor class code.
Marked for Deletion
•= Select Yes to display vendor classes that are marked fordeletion.
•= Select No if you do not want to display vendor classes that aremarked for deletion.

102 • Common Purchasing Setup Oracle Process Manufacturing Implementation Guide
Defining Vendor General Ledger ClassesUse the Vendor General Ledger (GL) Classes form to define vendorgeneral ledger class codes that you use to group vendors that share thesame account mapping requirements.
Defining Vendor General Ledger Classes - ProcedureTo enter vendor general ledger (GL) classes:
1. Navigate to the Vendor General Ledger (GL) Classesform.
2. Complete the fields as described in the Vendor General LedgerClasses Form -Fields topic.
3. Save the form.
Vendor General Ledger Classes Form - FieldsThe fields describe the Vendor General Ledger Classes form in detail.
Vendor Class
Enter a vendor general ledger class. A vendor general ledger class is acategory of vendors with the same account mapping requirements.
Description
Enter the description for the vendor general ledger class.

Oracle Process Manufacturing Implementation Guide Common Purchasing Setup • 103
Finding Vendor General Ledger ClassesUse the Find Vendor General Ledger Classes form to locate vendorgeneral ledger classes that match your criteria.
There are several options for locating a record and populating a form.The List of Values option displays a dialog box with the appropriaterecords. The Query Find option displays a separate block called the Findform where you enter your search criteria.
Finding Vendor General Ledger Classes - ProcedureTo find vendor general ledger classes:
1. Navigate to the Vendor GL Classes form.
2. Choose Find from the Query menu.
3. Complete the appropriate fields as described on the Find VendorGL Classes Form - Fields topic.
4. Click Find . The vendor general ledger classes that meet yourcriteria are displayed on the Vendor GL Classes form.
Find Vendor GL Classes Form - FieldsThe fields describe the Find Vendor General Ledger Classes form indetail.
Vendor Class
Enter the vendor general ledger class code.
Marked for Deletion
•= Select Yes to display vendor general ledger classes that aremarked for deletion.
•= Select No if you do not want to display vendor general ledgerclasses that are marked for deletion.

104 • Common Purchasing Setup Oracle Process Manufacturing Implementation Guide
Defining Vendor Trade ClassesUse the Vendor Trade Classes form to define vendor trade class codesthat you use to group vendors that share the same trade requirements.
Defining Vendor Trade Classes - ProcedureTo enter vendor trade classes:
1. Navigate to the Vendor Trade Classes form.
2. Complete the fields as described in the Vendor Trade ClassesForm -Fields topic.
3. Save the form.
Vendor Classes Form - FieldsThe fields describe the Vendor Classes form in detail.
Class
Enter a vendor trade class. A vendor trade class is a category of vendorswith the same trade requirements.
Description
Enter the description for the trade class.

Oracle Process Manufacturing Implementation Guide Common Purchasing Setup • 105
Finding Vendor Trade ClassesUse the Find Vendor Trade Classes form to locate vendor trade classesthat match your criteria.
There are several options for locating a record and populating a form.The List of Values option displays a dialog box with the appropriaterecords. The Query Find option displays a separate block called the Findform where you enter your search criteria.
Finding Vendor Trade Classes - ProcedureTo find vendor trade classes:
1. Navigate to the Vendor Trade Classes form.
2. Choose Find from the Query menu.
3. Complete the appropriate fields as described on the Find VendorTrade Classes Form - Fields topic.
4. Click Find . The vendor trade classes that meet your criteria aredisplayed on the Vendor Trades Classes form.
Find Vendor Trade Classes Form - FieldsThe fields describe the Find Vendor Trade Classes form in detail.
Vendor Class
Enter the vendor trade class code.
Marked for Deletion
•= Select Yes to display vendor trade classes that are marked fordeletion.
•= Select No if you do not want to display vendor trade classes thatare marked for deletion.

106 • Common Purchasing Setup Oracle Process Manufacturing Implementation Guide
Defining Purchase Acquisition Costs in OPMPurchase Management
Use the Purchase Acquisition Costs form to define codes for additionalcosts associated with a purchase order shipment such as taxes, duty, andfreight in OPM Purchase Management.
Defining Purchase Acquisition Costs in OPM - ProcedureTo define purchase acquisition costs:
1. Navigate to the Purchase Acquisition Costs form.
2. Complete the fields as described in the Purchase AcquisitionCosts Form in OPM - Fields topic.
3. Save the form.
Purchase Acquisition Costs Form in OPM - FieldsThe fields describe the Purchase Acquisition Costs form in detail.
Cost Code
Enter the code for the type of acquisition cost you are entering.
Description
Enter the cost description for the cost code.
Component Class
Enter the code for the component class for this cost.
Analysis Code
Enter the cost analysis code associated with this cost. Analysis codes areused to group cost categories.
Acquisition Cost Indicator
•= Select Included to charge the acquisition costs to an inventoryaccount.
•= Select Not Included to charge the acquisition costs to an expenseaccount.
Oracle Process Manufacturing Implementation Guide Common Purchasing Setup • 107
Finding Purchase Acquisition CostsUse the Find Purchase Acquisition Costs form to locate acquisition costcodes that match your criteria.
There are several options for locating a record and populating a form.The List of Values option displays a dialog box with the appropriaterecords. The Query Find option displays a separate block called the Findform where you enter your search criteria.
Finding Purchase Acquisition Costs - ProcedureTo find acquisition cost codes:
1. Navigate to the Purchase Acquisition Costs form.
2. Choose Find from the Query menu.
3. Complete the appropriate fields as described on Find PurchaseAcquisition Costs Form - Fields topic.
4. Click Find . The first acquisition cost that meets your criteria isdisplayed on the Purchase Acquisition Costs form. Press PgDnto vieweach additional record.
Find Purchase Acquisition Costs Form - FieldsThe fields describe the Find Purchase Acquisition Costs form in detail.
Cost Code
Enter the acquisition cost code.
Component Class
Enter the code for the component class associated with this cost.
Analysis Code
Enter the cost analysis code associated with this cost.
Acquisition Cost Indicator
•= Select Included to display acquisition costs that are charged toan inventory account.
•= Select Not Included to display the acquisition costs that arecharged to an expense account.
Marked for Deletion
•= Select Yes to display acquisition costs that are marked fordeletion.
•= Select No if you do not want to display acquisition costs that aremarked for deletion.

108 • Common Purchasing Setup Oracle Process Manufacturing Implementation Guide

Oracle Process Manufacturing Implementation Guide OPM System Setup • 109
OPM System Setup
Editing Document TypesDocuments are used to categorize transaction activity that is generatedfrom many OPM functions including inventory, sales, purchasing,production, etc. OPM documents are categorized by type, each recordingdifferent kinds of information related to different transactions. Documenttypes and organizations must be defined before you can define documentordering.
Use the Document Types form to add and maintain document types.Examples of document types include the following:
•= PORD - Purchase orders
•= OPSO - Sales orders
•= JRNL - Inventory Quantities
Note: Do not modify the document types supplied with OPM. You canadd and maintain newdocument types, but do not change the supplieddocument types.
Document Types - Procedure1. Navigate to the Document Types form.
2. Complete the fields as described in the Document Type - Fieldstopic.
3. Save the form.
Document Types - Fields
Type
Displays the code, maximum four characters, that identifies thisdocument type.
Description
Displays the text, maximum 40 characters, that describes this documenttype.

110 • OPM System Setup Oracle Process Manufacturing Implementation Guide
English Description
Displays additional text, maximum 40 characters, that describes thisdocument type.
Find Document TypesThere are several options for locating a record and populating the form.The List of Values option displays a dialog box with the appropriaterecords. The Query Enter option uses actual form as the location whereyou enter the search criteria. The Query Find option displays a separateblock, called the Find form, where you enter your search criteria.
Find Document Types - Procedure1. Choose Find from the Query menu. The Find Document
Types box appears.
2. Complete one or any combination of fields as described in theFind Document Types - Fields topic.
3. Click Find .
Find Document Types - Fields
Type
Displays the code, maximum four characters, that identifies thisdocument type.
Description
Displays the text, maximum 40 characters, that describes this documenttype.
English Description
Displays additional text, maximum 40 characters, that describes thisdocument type.
Mark for Deletion
Blank = Do not use marked for deletion filter when finding records.
Yes = Displays data that is in the database, but is already marked to bepurged.
No = Displays data that is not marked for purge.

Oracle Process Manufacturing Implementation Guide OPM System Setup • 111
Editing Document OrderingUse the Document Ordering form to determine the document numberassignment for each type of document. A Document is an online form thatcreates a financial, inventory, or resource transaction. Different documentnumbers are assigned for each document type and organization. Alldocument numbers are prefaced with an organization code; therefore,multiple organizations can use the same number ranges and still uniquelyidentify their documents.
Numbers can be assigned to documents manually or automatically.
•= If you use automatic number assignment, OPM assigns numbersto documents sequentially. However, do the following:
•= Initiate the document numbering sequence by assigning anumber that is smaller in value by 1 than the desired startingdocument number.
•= Define the maximum number of digits for the number,which cannot exceed 10 digits (or six digits if integratedwith Oracle Financials).
•= Determine whether the number is padded with leadingzeroes or blanks. Zeros are recommended forreporting/query purposes.
•= If you use manual number assignment, assign the documentnumbers. Manual number assignment is useful when you areusing pre-printed forms or when document numbers aregenerated by another system.
Note: Define a number assignment on the Document Order form for thedocument type JRNL to interact with the Inventory Quantities form. Allinventory quantity documents use the numbering scheme defined for thedocument type JRNL.
Pay careful attention to the initial number assignment. Altering numberassignment parameters after documents are saved may cause problemswith the order in which documents are listed on reports and lookups.

112 • OPM System Setup Oracle Process Manufacturing Implementation Guide
Document Ordering - Procedure1. Navigate to the Document Ordering form.
2. Complete the fields as described in the Document Ordering -Fields topic.
3. Save the form.
Document Ordering - Fields
Document Type
Enter the code, which was defined on the Document Type form, thatidentifies the document type for which you want to define this documentnumbering system. (Required)
Organization
Enter the code, which was defined on the Organizations form, thatidentifies the organization for which you want to define this documentnumbering system. Transactions generated from your documents will beassociated with the Organization chosen here. (Required)
Assignment Type
Determines whether you assign document numbers manually orautomatically for this document type and organization. (Required)
Manual = Manual number assignment (allows alphanumeric characters)
Automatic = Automatic number assignment (numeric only)
Last Assigned
This field is displayed when you enter Automatic as the Assign Typevalue. A document number may or may not be displayed depending uponwhether you have already established document ordering:
•= If you are assigning a document number for the first time, enterthe document number that is smaller in value by 1 than thedesired starting document number. For example, if you wantpurchase orders to begin with document number 200, enter 199in this field.
•= If you have already assigned a document number, the lastnumber assigned to this document type and organization isdisplayed.
Format Size
Enter the maximum number of digits for this document type andorganization. You can enter any positive number between 1 and 10. Forexample, if you will assign purchase order numbers 1 to 999, enter thevalue 3.
If you are integrating with Oracle Financials, the maximum size is 6.

Oracle Process Manufacturing Implementation Guide OPM System Setup • 113
Find Document OrderingThere are several options for locating a record and populating the form.The List of Values option displays a dialog box with the appropriaterecords. The Query Enter option uses actual form as the location whereyou enter the search criteria. The Query Find option displays a separateblock, called the Find form, where you enter your search criteria.
Find Document Ordering - Procedure1. Choose Find from the Query menu. The Find Document
Ordering box appears.
2. Complete one or any combination of fields as described in theFind Document Ordering - Fields topic.
3. Click Find .
Find Document Ordering - Fields
Document Type
Enter the code, which was defined on the Document Type form, thatidentifies the document type for which you want to define this documentnumbering system.
Organization
Enter the code, which was defined on the Organizations form, thatidentifies the organization for which you want to define this documentnumbering system.
Assignment Type
Determines whether you assign document numbers manually orautomatically for this document type and organization.
Manual = Manual number assignment (allows alphanumeric characters)
Automatic = Automatic number assignment (numeric only)
Mark for Deletion
Blank = Do not use marked for deletion filter when finding records.
Yes = Displays data that is in the database, but is already marked to bepurged.
No = Displays data that is not marked for purge.

114 • OPM System Setup Oracle Process Manufacturing Implementation Guide
Editing Geography CodesUse the Geography Code form to add and maintain user-definedgeography codes. Geography codes are used to reference geographicalareas on purchase orders, customer receipts, and other documents thatcontain addresses.
Geography Code - Procedure1. Navigate to the Geography Code form.
2. Complete the fields as described in the Geography Code - Fieldstopic.
3. Save the form.
Geography Code - Fields
Type
Defines the type of Geography Code. The options are:
•= Country
•= State
•= Province
•= County
Code
Displays the code that identifies the geographical area; for example, NYfor NewYork.
Description
Displays the text that describes the geography code.
Find Geography CodesThere are several options for locating a record and populating the form.The List of Values option displays a dialog box with the appropriaterecords. The Query Enter option uses actual form as the location whereyou enter the search criteria. The Query Find option displays a separateblock, called the Find form, where you enter your search criteria.
Find Geography Codes - Procedure1. Choose Find from the Query menu. The Find Geography
Codes box appears.
2. Complete one or any combination of fields as described in theFind Geography Codes - Fields topic.
3. Click Find .

Oracle Process Manufacturing Implementation Guide OPM System Setup • 115
Find Document Types - Fields
Type
Defines the type of Geography Code. The options are:
•= Country
•= State
•= Province
•= County
Code
Displays the code that identifies the geographical area; for example, NYfor NewYork.
Description
Displays the text that describes the geography code.
Mark for Deletion
Blank = Do not use marked for deletion filter when finding records.
Yes = Displays data that is in the database, but is already marked to bepurged.
No = Displays data that is not marked for purge.

116 • OPM System Setup Oracle Process Manufacturing Implementation Guide
Editing HR OrganizationsFind Organizations - Procedure
1. Navigate to the Find Organizations form.
2. Complete the fields as described in the Find Organizations -Fields topic.
3. Click Find . The HR Organizations form is displayed.
Find Organizations - Fields
Name
Enter a name that is unique within the Business Group. All Oracleapplications you install share the information entered in the Organizationwindow. Therefore organization names must be unique within a BusinessGroup, and Business Group names must be unique across yourapplications network.
Type
Enter an organization type.
Location
Select a location to record the site address, if one exists. You can alsoenter an internal address to add more details such as a floor or officenumber.
Organization Classifications
Name
Enter the name of the Organization Classification
Enabled, Disabled, Either
Select whether the Organization Classification is enabled for the HROrganization, disabled for the HR Organization, or either.
HR Organizations - Procedure1. Complete the fields as described in the Organizations - Fields
topic.
2. Save the form.
HR Organizations - Fields
Dates
Enter a From date early enough for any historical information you mustenter. You cannot assign an employee to an organization before the startdate of the organization.
If you enter a To date, that will be the last date for the organization. Ifthe To is left blank, then the organization does not have an end date.

Oracle Process Manufacturing Implementation Guide OPM System Setup • 117
Location
Select a location to record the site address, if one exists. You can alsoenter an internal address to add more details such as a floor or officenumber.
Internal or External
Select Internal or External. You cannot assign people to an externalorganization.
Examples of external organizations that may require entry are benefitscarriers, Workers Compensation insurance carriers, organizationsemployees name as beneficiaries of certain employee benefits, andorganizations that are recipients of third party payments from employees'pay.
Location Address
Enter an appropriate address for the selected location. When this field isentered, a dialog box will appear where an address can be entered.
Internal Address
Enter an appropriate address.
Name
Enter the name of an organization classification.
Enabled
Select the box to enable to classification.
Others
If you click the Others button, a dialog box will appear listing moreinformation that can be entered about the organization. Refer to theOracle HR Manual for detailed information.

118 • OPM System Setup Oracle Process Manufacturing Implementation Guide
Editing OrganizationsOrganizations are entities to which you can assign resources, warehouses,General Ledger accounts, and other cross-module items. When youdefine an organization, specify whether it is a company, a plant, or both.A company is a legal entity that must maintain a balanced set of books. Aplant is an organization that manufactures goods.
Both companies and plants are classified as organizations in OPM.
You can set up "parent" organizations with multiple "child"organizations. Child organizations can have independent resources andwarehouses that are accounted for on the parent general ledger; you must,however, set up the parent organization before the child organizations.You can also create independent organizations. Organizational setupaccommodates multi-company accounting.
Organizational Hierarchies
In setting up an organization, you must specify the organization's parentorganization. In this way, organizational hierarchies can be constructed.For example, a company may have several subsidiary companies, andeach company may have several plants.
Organizations - Procedures1. Navigate to the Organizations form.
2. Complete the fields as described in the Organizations - Fieldstopic.
3. Save the form.
Organizations - Fields
Organization
Enter a unique code to identify the organization, for example, 100.
If you are defining an organization that you will associate with a parentcompany, you may want to enter a code that relates the organization tothe parent company. If this is an organization under 100, enter 101.
The code entered will be used to identify documents printed for thisorganization.
Name
Displays descriptive information, such as the company or plant name, forthe organization you are defining.
Oracle Process Manufacturing Implementation Guide OPM System Setup • 119
HR Organization
Displays the associated HR Organization. Once you associate an HROrganization, you cannot use it again to associate to a differentOrganization.
Parent
Parent organization is one level above a given organization on theorganizational hierarchy. If the given organization is at the top of theorganizational hierarchy, enter its organization code.
Company
Displays a unique code to identify the Oracle Financials company. If theorganization is a company, enter its organization code. If the organizationis not a company, enter the organization code of the company to whichthe organization reports.
Plant
Determines whether the organization is a manufacturing plant.
Non Manufacturing Plant = Organization is not a manufacturing plant
Manufacturing Plant = Organization is a manufacturing plant
Process Operation Control
Determine whether Process Operations Control (POC) data (Routinginformation) will be collected.
Data Not Collected = POC data will not be collected
Data Collected = POC data will be collected
Tax Location
Displays the tax location code for the organization.
The tax location code is set up on the Tax Location Code form; however,you can enter the default value "NONE" until you set up tax information.
This field is only required if the system constant OP$GEMMSTAX is setto a value of 1.
Find OrganizationsThere are several options for locating a record and populating the form.The List of Values option displays a dialog box with the appropriaterecords. The Query Enter option uses actual form as the location whereyou enter the search criteria. The Query Find option displays a separateblock, called the Find form, where you enter your search criteria.

120 • OPM System Setup Oracle Process Manufacturing Implementation Guide
Find Organizations - Procedure1. Choose Find from the Query menu. The Find Organizations
box appears.
2. Complete one or any combination of fields as described in theFind Organizations - Fields topic.
3. Click Find .
Find Organizations - Fields
Organization
Enter a unique code to identify the organization, for example, 100.
If you are defining an organization that you will associate with a parentcompany, you may want to enter a code that relates the organization tothe parent company. If this is an organization under 100, enter 101.
The code entered will be used to identify documents printed for thisorganization.
HR Organization
Displays the associated HR Organization. Once you associate an HROrganization, you cannot use it again to associate to a differentOrganization.
Parent
Parent organization is one level above a given organization on theorganizational hierarchy. If the given organization is at the top of theorganizational hierarchy, enter its organization code.
Company
Displays a unique code to identify the company. If the organization is acompany, enter its organization code. If the organization is not acompany, enter the organization code of the company to which theorganization reports.
Plant
Determines whether the organization is a manufacturing plant.
Non Manufacturing Plant = Organization is not a manufacturing plant
Manufacturing Plant = Organization is a manufacturing plant
Tax Location
Displays the tax location code for the organization.
The tax location code is set up on the Tax Location Code form; however,you can enter the default value "NONE" until you set up tax information.
This field is only required if the system constant OP$GEMMSTAX is setto a value of 1.

Oracle Process Manufacturing Implementation Guide OPM System Setup • 121
Mark for Deletion
Blank = Do not use marked for deletion filter when finding records.
Yes = Displays data that is in the database, but is already marked to bepurged.
No = Displays data that is not marked for purge.

122 • OPM System Setup Oracle Process Manufacturing Implementation Guide
Editing ParagraphsParagraphs in OPM are structures that are used to store and categorizetext. OPM is installed with one default paragraph per database table, theGeneral Text paragraph. When you select Edit Text and access the TextEditor form, by default, the edited text is put into this General Textparagraph.
The Paragraphs form allows you to specify different paragraphs that canbe associated with tables. After selecting Edit Text, a list of validparagraphs displays in the Text Paragraph Selection form, even if theonly available paragraph code is General Text. You must choose one toproceed.
Paragraph codes control whether text prints on hardcopy documents suchas orders or shipping forms or what language your text is stored in. Thedefault General Text paragraph is set up as display only, but it can bechanged to enable printing.
Most OPM forms enable you to associate text with the document orrecord with which you are working. To add or update text, select EditText from the Special pulldown menu, choose the Paragraph which youwant to associate the text with, and access the Text Editor form. Theentered text can be displayed on-line and can be printed on hard copies ofdocuments.
Take, for example, purchase orders. If you are creating or editing apurchase order header on the Purchase Orders form, you can select EditText from the Special pulldown menu and add the text that will beassociated with the document. If you are creating or editing purchaseorder lines on the Purchase Order Lines form, you can add text to eachline, which is associated with each line of the document. The text you addis associated only with the purchase order line that was highlighted whenyou selected Edit Text.
When you invoke the Text Editor, the entered text is associated only withthe paragraph code and record on which you are working. For example, ifyou enter text for a line in an order using the General Text paragraph, thattext is associated only with that line on that order.
Note: Paragraph codes are linked to specific database tables when theyare set up; therefore, you will not see the same list of paragraphs fromevery OPM form.
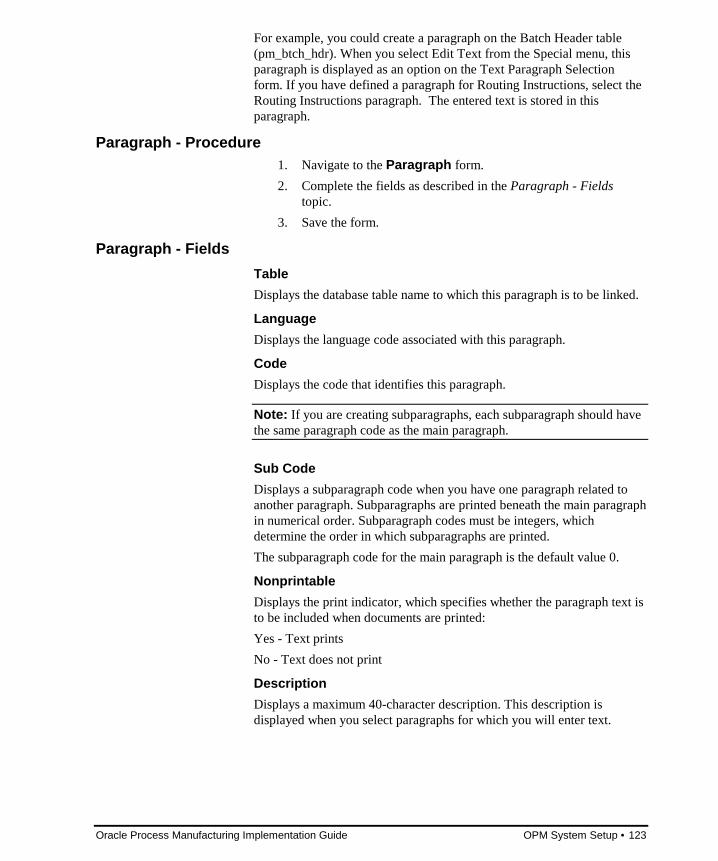
Oracle Process Manufacturing Implementation Guide OPM System Setup • 123
For example, you could create a paragraph on the Batch Header table(pm_btch_hdr). When you select Edit Text from the Special menu, thisparagraph is displayed as an option on the Text Paragraph Selectionform. If you have defined a paragraph for Routing Instructions, select theRouting Instructions paragraph. The entered text is stored in thisparagraph.
Paragraph - Procedure1. Navigate to the Paragraph form.
2. Complete the fields as described in the Paragraph - Fieldstopic.
3. Save the form.
Paragraph - Fields
Table
Displays the database table name to which this paragraph is to be linked.
Language
Displays the language code associated with this paragraph.
Code
Displays the code that identifies this paragraph.
Note: If you are creating subparagraphs, each subparagraph should havethe same paragraph code as the main paragraph.
Sub Code
Displays a subparagraph code when you have one paragraph related toanother paragraph. Subparagraphs are printed beneath the main paragraphin numerical order. Subparagraph codes must be integers, whichdetermine the order in which subparagraphs are printed.
The subparagraph code for the main paragraph is the default value 0.
Nonprintable
Displays the print indicator, which specifies whether the paragraph text isto be included when documents are printed:
Yes - Text prints
No - Text does not print
Description
Displays a maximum 40-character description. This description isdisplayed when you select paragraphs for which you will enter text.

124 • OPM System Setup Oracle Process Manufacturing Implementation Guide
Editing Reason CodesReason codes provide information on increases or decreases in inventory.They are used to flag transactions and attach reasons to them. Alltransactions entered though the Inventory Quantities form, must have areason code associated with it. Other OPM forms require Reason Codesas well.
For example, you may have a batch of product that cannot be shippedbecause the color is wrong. Should this be a common occurrence, youmay want to set up a reason code which would readily identify suchsituations.
Reason Code - Procedure1. Navigate to the Reason Codes form.
2. Complete the fields as described in the Reason Code - Fieldstopic.
3. Save the form.
Reason Code - Fields
Code
Displays the code, maximum four characters, that identifies this reason.
Type
Indicates the effect on inventory quantity associated with this reasoncode.
Increases & Decreases = Allowincreases and decreases to inventory.Reason codes for movement of inventory between warehouses must havethis Reason Type because there is a decrease in inventory at onewarehouse and an increase at another.
Increases = Allowonly increases to inventory.
Decreases = Allowonly decreases to inventory.
Flow
Indicates the type of stock movement with which the reason code isassociated. The corresponding inventory adjustment that results fromstock movement may be related to the following: an inflowof goods, asin a purchase; an outflowof goods, as in a sale; the usage of goods,consumption; and to other miscellaneous reasons, for example, spillage.
Outflows
Usages
Inflows
Exclude
Consider the following scenarios. To correct errors made in recordingconsumption, you may want to set up reason codes for adjustments toinventory quantity.

Oracle Process Manufacturing Implementation Guide OPM System Setup • 125
For example, if too little were recorded consumed, inventory would haveto be adjusted downward. You could use the following reason codeparameters:
Reason type = Decreases, which allows for a decrease to inventory
Flowtype = Usages, which indicates usage
If too much were recorded consumed, inventory would have to beadjusted upward. You could use the following reason code parameters:
Reason type = Increases, which allows for an increase to inventory
Flowtype = Usages, which indicates usage
Description
Displays the text, maximum 40 characters, which describes this reasoncode. This description is displayed on forms where this reason code isused.
Comment
Displays comments, maximum 70 characters, for this reason code. Thesecomments are printed on reports, but are not displayed on documentswhere this reason code is used.
Authorization
Reserved for future use.
Find Reason CodesThere are several options for locating a record and populating the form.The List of Values option displays a dialog box with the appropriaterecords. The Query Enter option uses actual form as the location whereyou enter the search criteria. The Query Find option displays a separateblock, called the Find form, where you enter your search criteria.
Find Reason Codes - Procedure1. Choose Find from the Query menu. The Find Reason
Codes box appears.
2. Complete one or any combination of fields as described in theFind Reason Codes - Fields topic.
3. Click Find .
Find Reason Codes - Fields
Code
Displays the code, maximum four characters, that identifies this reason.

126 • OPM System Setup Oracle Process Manufacturing Implementation Guide
Type
Indicates the effect on inventory quantity associated with this reasoncode.
Increases & Decreases = Allowincreases and decreases to inventory.Reason codes for movement of inventory between warehouses must havethis Reason Type because there is a decrease in inventory at onewarehouse and an increase at another.
Increases = Allowonly increases to inventory.
Decreases = Allowonly decreases to inventory.
Flow
Indicates the type of stock movement with which the reason code isassociated. The corresponding inventory adjustment that results fromstock movement may be related to the following: an inflowof goods, asin a purchase; an outflowof goods, as in a sale; the usage of goods,consumption; and to other miscellaneous reasons, for example, spillage.
Outflows
Usages
Inflows
Exclude
Consider the following scenarios. To correct errors made in recordingconsumption, you may want to set up reason codes for adjustments toinventory quantity.
For example, if too little were recorded consumed, inventory would haveto be adjusted downward. You could use the following reason codeparameters:
Reason type = Decreases, which allows for a decrease to inventory
Flowtype = Usages, which indicates usage
If too much were recorded consumed, inventory would have to beadjusted upward. You could use the following reason code parameters:
Reason type = Increases, which allows for an increase to inventory
Flowtype = Usages, which indicates usage
Description
Displays the text, maximum 40 characters, which describes this reasoncode. This description is displayed on forms where this reason code isused.
Comment
Displays comments, maximum 70 characters, for this reason code. Thesecomments are printed on reports, but are not displayed on documentswhere this reason code is used.

Oracle Process Manufacturing Implementation Guide OPM System Setup • 127
Authorization
Reserved for future use.
Mark for Deletion
Blank = Do not use marked for deletion filter when finding records.
Yes = Displays data that is in the database, but is already marked to bepurged.
No = Displays data that is not marked for purge.

128 • OPM System Setup Oracle Process Manufacturing Implementation Guide
Editing Session ParametersIn addition to providing current system session information, the SessionParameters form enables you to change your default organization anddefault schedule simply by selecting the newentry using the List ofValues and clicking OK. You can specify whether you want the change toaffect only the current session or all sessions until the defaultorganization value may be changed again.
Note: OPM will only allowyou to choose an organization for which youare authorized to specify as defined through the User Organizations form.See the Assigning Organizations to User topic for details.
Session Parameters - Procedure1. Navigate to the Session Parameters form.
2. Complete the fields as described in the Session Parameters -Fields topic.
3. Save the form.
Session Parameters - Fields
Session Number
A unique session ID, created automatically on a per session, per userbasis.
Time
Displays the logon date and time.
Database Manager
Displays the RDBMS name Oracle.
Database
Displays the database name Oracle.
Username
Displays the user and user name of the current session’s user.
Organization
Enter the code for the organization that is to be the default organization.This code must be one for which you are authorized to select as specifiedthrough the User Organizations form.
Company
Displays the Company code associated with the default Organization.
Schedule
Enter the default schedule for this session.

Oracle Process Manufacturing Implementation Guide OPM System Setup • 129
Editing Text TokensText tokens are codes or short descriptions that represent longerdescriptions or messages. These tokens are set up on the Text Tokenform.
After selecting Edit Text from the Special pulldown menu and invokingthe Text Editor, specify a token instead of typing the full description ofthe text by entering a token preceded by a period. Upon clicking the<Tab> key, the token is converted to the text it represents.
For example, you might set up a text token called Fragile that representsthe text: Fragile, Handle with Care. Whenever you want to include theseinstructions on a document, you can type Fragile on the Text Editor formrather than typing the message text. You can also invoke the LOVfunction to select a text token. After choosing from the LOV, click<Tab>.
To record the text that will be printed when you enter the token, selectEdit from the Special pulldown menu and enter the text on the TextEditor form.
Text Tokens - Procedure1. Navigate to the Text Tokens form.
2. Complete the fields as described in the Text Tokens - Fieldstopic.
3. Save the form.
Text Tokens - Fields
Token
Enter the code or a short description, of up to 40 characters, for this texttoken. This token is the value that is entered on the Text Editor formpreceded by a period.
Language
Enter the code for the language in which you want the text to be printed.Language codes are set up on the Languages form.
Description
Enter a short description for this text token. This is not the text thatreplaces the token. Instead, this description appears on lookups. To createthe text that you want to replace the token, select Edit Text from theSpecial pulldown menu.
Special > Edit Text
In order to create the text that you want to replace the token, select EditText from the Special pulldown menu. For more details on using the EditText option, refer to the Special Menu topic.

130 • OPM System Setup Oracle Process Manufacturing Implementation Guide
Find Text TokensThere are several options for locating a record and populating the form.The List of Values option displays a dialog box with the appropriaterecords. The Query Enter option uses actual form as the location whereyou enter the search criteria. The Query Find option displays a separateblock, called the Find form, where you enter your search criteria.
Find Text Tokens- Procedure1. Choose Find from the Query menu. The Find Text Tokens
box appears.
2. Complete one or any combination of fields as described in theFind Text Tokens - Fields topic.
3. Click Find .
Find Text Tokens - Fields
Token
Enter the code or a short description, of up to 40 characters, for this texttoken. This token is the value that is entered on the Text Editor formpreceded by a period.
Language
Enter the code for the language in which you want the text to be printed.Language codes are set up on the Languages form.
Description
Enter a short description for this text token. This is not the text thatreplaces the token. Instead, this description appears on lookups. To createthe text that you want to replace the token, select Edit Text from theSpecial pulldown menu.

Oracle Process Manufacturing Implementation Guide OPM System Setup • 131
Editing Units of MeasureThe Unit of Measure form is used to add and maintain Units of Measure(UOM) definitions. A UOM definition consists of a UOM code, adescription, a type, and the conversions between the reference UOM andall other UOMs of the same type.
Before you can maintain, purchase, or sell inventory, you must define theUOMs against which the item quantities are measured.
Note: The order in which you set up UOMs is of utmost importance. Thefirst UOM value that you define for a given UOM type becomes thereference against which all other UOMs of the same UOM type arebased. All subsequent UOMs defined for the specified UOM type requireconversion against this reference UOM.
All conversions specified on the Units of Measure form are conversionsbetween the same UOM types. Conversions across UOM types must bedefined individually for each item on the Item Lot/Sublot Std Conversionform.
After setting up UOM types, set up the actual UOM values on the Unit ofMeasure form. The first UOM that you set up for each UOM typebecomes the reference UOM, also called base or standard UOM, for thattype. All other UOMs of this type are defined in relation to the referenceUOM.
For example, should you set up L (liters) as the first UOM for the UOMtype VOL (volume), you have to define each newvolume UOM in termsof liters; therefore, if the newvolume is GAL (gallons), it must be definedin relation to liters. As such, you would specify a two-way conversionbetween GAL (gallons) and L (liters) and L (liters) and GAL (gallons) inthe Conversion column.
The two-way conversion equation is as follows:
•= One unit of "new" UOM = X unit of "reference" UOM
•= One unit of "reference" UOM = X unit of "new" UOM
The factor between the newly entered UOM, in this example GAL(gallons), and the reference UOM, L (liters) , and vice versa, is entered inthe Conversion Factor column. You only need to enter the conversionfactor going “one way”; the other conversion factor will be automaticallycalculated.
Note: Altering the UOM conversion once inventory has been createdwill corrupt inventory balances.

132 • OPM System Setup Oracle Process Manufacturing Implementation Guide
Note: All conversions specified on the Unit of Measure form areconversions between the same UOM types. For example, for a VOL(volume) UOM type with a reference UOM of L(liter), you might havetwo-way conversions between GAL(gallons) and L(liters), ML(milliliters)and L(liters), OZ(fluid ounces) and L(liters), and so on.
Conversions across UOM types, for example MASS(mass) toVOL(volume) type conversions involving LB(pounds) to L(liters), mustbe defined individually for each item on the Item Lot/Sublot StdConversion form. See the Item Conversions topic. Keep in mind, thereference UOM for a particular UOM type is the measure against which aconversion is based even when the conversion is across UOM types. Inkeeping with the example, L(liter) would still be the reference UOM forthe VOL(volume) UOM type.
The newUOM is available to the session in which you entered the UOMand to all users beginning OPM sessions after you enter it. If you changea conversion, the change does not take effect in the current session. Youmust log out of OPM and then log in again. Note that this is notrecommended.
Units of Measure - Procedure1. Navigate to the Units of Measure form.
2. Complete the fields as described in the Units of Measure -Fields topic.
3. Save the form.
Units of Measure - Fields
UOM Code
Enter the maximum-four character code for this UOM. This code shouldbe a logical abbreviation for the UOM it represents; for example, thecode "GL" logically represents gallon as a UOM.
This field is restricted to a three character code if you are integrated withOracle Financials.
Description
Enter a full description, maximum 40 characters, that details the UOM;for example, enter "Box of 5000", or "Fluid ounces (British)".
UOM Type
Enter the code for the UOM type; for example, if you specified a UOMcode of gallon, you might enter a UOM type of volume. The UOM typecode must first be set up on the UOM Type form. See the Set Up UOMTypes topic.

Oracle Process Manufacturing Implementation Guide OPM System Setup • 133
Reference UOM
Automatically populated with the first UOM value defined for thespecified UOM type. For example, if you set up liters as the first UOMfor the UOM type VOL(volume), the UOM code and description forL(liters) are displayed in the Reference UOM field.
All UOMs of a particular type are defined in relation to the referenceUOM.
Conversion
This column is automatically populated with the Unit of Measure Codesyou are converting between. It will display the "new" UOM from whichyou are converting and the "reference" UOM to which you areconverting.
The two-way conversion equation is as follows:
•= One unit of "new" UOM = X unit of "reference" UOM
•= One unit of "reference" UOM = X unit of "new" UOM
Conversion Factor
This column consists of the following two fields, one of which must bemanually populated with a conversion factor value:
•= Enter the reference conversion factor value that corresponds tothe number of reference UOMs that can be divided into thisUOM. For example, if the UOM you are adding or editing is"Dozen" and the reference UOM is "Each," enter the value 12 asthe standard reference conversion factor. This value representsthe number of reference UOMs in one of these UOMs.
•= Enter the reverse reference conversion factor value thatcorresponds to the number of this UOM that can be divided intothe reference UOM. For example, if the reference UOM is"Each" and the UOM you are adding or editing is "Dozen,"enter the value 0.083333333 as the reverse reference conversionfactor. This value represents the number of this UOM in onereference UOM.
When you manually enter a value into one field, the other field isautomatically populated with the "inverse" conversion value.
Find Units of MeasureThere are several options for locating a record and populating the form.The List of Values option displays a dialog box with the appropriaterecords. The Query Enter option uses actual form as the location whereyou enter the search criteria. The Query Find option displays a separateblock, called the Find form, where you enter your search criteria.

134 • OPM System Setup Oracle Process Manufacturing Implementation Guide
Find Units of Measure - Procedure1. Choose Find from the Query menu. The Find Units of
Measure box appears.
2. Complete one or any combination of fields as described in theFind Units of Measure - Fields topic.
3. Click Find .
Find Units of Measure - Fields
UOM Code
Enter the maximum-four character code for this UOM. This code shouldbe a logical abbreviation for the UOM it represents; for example, thecode "GL" logically represents gallon as a UOM.
Description
Enter a full description, maximum 40 characters, that details the UOM;for example, enter "Box of 5000", or "Fluid ounces (British)".
UOM Type
Enter the code for the UOM type; for example, if you specified a UOMcode of gallon, you might enter a UOM type of volume. The UOM typecode must first be set up on the UOM Type form. See the Set Up UOMTypes topic.
Mark for Deletion
Blank = Do not use marked for deletion filter when finding records.
Yes = Displays data that is in the database, but is already marked to bepurged.
No = Displays data that is not marked for purge.

Oracle Process Manufacturing Implementation Guide OPM System Setup • 135
Editing Unit of Measure TypesThe first step in setting up Units of Measure is to define UOM types onthe UOM Type form. UOM types are used to classify UOM groups thatmeasure particular physical characteristics. For example, before you canadd gallon as a UOM, volume must be set up as a UOM type. Examplesof UOM types include volume, mass, length, and count.
UOM Type - Procedure1. Navigate to the Unit of Measure Types form.
2. Complete the fields as described in the UOM Type - Fieldstopic.
3. Save the form.
UOM Type - Fields
Type
Enter up to a 10 character UOM type code.
Description
Enter a maximum 40 character description for this UOM type.
Find Unit of Measure TypesThere are several options for locating a record and populating the form.The List of Values option displays a dialog box with the appropriaterecords. The Query Enter option uses actual form as the location whereyou enter the search criteria. The Query Find option displays a separateblock, called the Find form, where you enter your search criteria.
Find Unit of Measure Types - Procedure1. Choose Find from the Query menu. The Find Units of
Measure Types box appears.
2. Complete one or any combination of fields as described in theFind Units of Measure Types - Fields topic.
3. Click Find .
Find Unit of Measure Types - Fields
Type
Enter up to a 10 character UOM type code.
Description
Enter a maximum 40 character description for this UOM type.

136 • OPM System Setup Oracle Process Manufacturing Implementation Guide
Marked for Deletion
Blank = Do not use marked for deletion filter when finding records.
Yes = Displays data that is in the database, but is already marked to bepurged.
No = Displays data that is not marked for purge.

Oracle Process Manufacturing Implementation Guide OPM System Setup • 137
Editing User OrganizationsThe default organization for each user is defined through Oracle SystemAdministration Personal Profiles and associating an OPM OrganizationCode under the User Value column to the profile optionGEMMS_DEFAULT_ORGN. Use the User Organizations form toassign any number of organizations to a user. Once assigned, a user canonly work with an organization from among these authorizedorganizations.
User Organizations - Procedure1. Select the User Organizations form.
2. Complete the fields as described in the User Organizations -Fields topic.
3. Save the form.
User Organizations - Fields
Username
Enter the username for whom the organizations are assigned.
Code
Displays the code for the organization that is authorized for selection bythis user.
Description
Displays the description of the organization that is authorized forselection by this user.

138 • OPM System Setup Oracle Process Manufacturing Implementation Guide
Editing User Planning ClassesThe User Planning Classes form allows you to associate planning classeswith users. Once these associations are made, an applications user will beable to run OPM reports based on the Planning Classes the user hasaccess to.
The default planning class for each user is defined through the OracleApplications System Administration Personal Profiles and associating aplanning class under the User Value column to the profile optionGEMMS_DEFAULT_SCHEDULE.
Note: User Planning Classes are required for generating MRP and MPSreports. Refer to the Oracle Process Manufacturing MRP/MPS manualfor additional information on howUser Planning Classes are defined andused.
User Planning Classes - Procedure1. Navigate to the User Planning Classes form.
2. Complete the fields as described in the User Planning Classes -Fields topic.
3. Save the form.
User Planning Classes - Fields
User
Select a user through the Find… or Query functions. A user name will bedisplayed, as well as the user name description.
Class
Displays the code for the planning class that the user is associated with.
Description
Displays the description of the planning class that the user is associatedwith.

Oracle Process Manufacturing Implementation Guide OPM System Setup • 139
Special MenuFrom the Special menu, there are options that can be used to editinformation. The Edit Text and Address Edit options, if available, willedit both the text in the text token, or allowyou to change all of theaddress information for the selected user.
Edit TextIf there is only one line of text to be edited, the Text Edit form willappear. If there is more than one line that can be edited, the Select TextParagraph form will appear first.
Edit Text - Procedure1. Navigate to the Edit Text option.
2. If the Select Text Paragraph form is displayed, select a line,and click Edit Text . If not, the Text Edit form will bedisplayed.
3. Complete the fields as described in the Edit Text - Fields topic.
4. Click OK.
Edit Text - Fields
Language
Displays the language code for the text.
Table Name
Displays the table name that the text is stored in.
Description
Displays a description of the text.
Text
Enter the appropriate text.
Address EditIf the forms you are using has the Address Edit option, you can changethe address information for the selected user.
Address Edit - Procedure1. Navigate to the Address Edit form.
2. Complete the fields as described in the Address Edit - Fieldstopic.
3. Click OK.

140 • OPM System Setup Oracle Process Manufacturing Implementation Guide
Address Edit - Procedure
Name
Displays the name of the selected organization or entity that has anaddress associated with it.
Line 1
Displays address line 1.
Line 2
Displays address line 2.
Line 3
Displays address line 3.
Line 4
Displays address line 4.
City
Displays the city. This is user-defined on this form and not validated.
State
Displays the code and description for the state. The State is definedthrough the Geography Codes form. There is an LOV defined for thefield against the SY_GEOG_TBL, specific to its geography type.
Country
Displays the code and description for the country. The Country isdefined through the Geography Codes form. There is an LOV defined forthe field against the SY_GEOG_TBL, specific to its geography type.
Postal
Displays the postal code.
Province
Displays the code and description for the province. The Province isdefined through the Geography Codes form. There is an LOV defined forthe field against the SY_GEOG_TBL, specific to its geography type.
County
Displays the code and description for the county. The County is definedthrough the Geography Codes form. There is an LOV defined for thefield against the SY_GEOG_TBL, specific to its geography type.

Oracle Process Manufacturing Implementation Guide Purge and Archive • 141
Purge and Archive
Purge and ArchiveUse the Purge and Archive form to enter criteria for and execute a givenpurge. The purge can be one of the predefined OPM purges, or a custompurge defined by your System Administrator.
For the base OPM product, purge and archive functionality exists only fora pre-defined set of tables and transaction data. They are:
Purge Name Description
APRD Selects all Production batch records and the associateddetail transaction and text records
AOPS Selects all Sales order and Shipment records and theassociated detail transaction and text records
APOR Selects all PO, Receipt, and Return records and theassociated detail transaction and text records
AJNL Selects all Inventory Journal records and the associateddetail transaction and text records
PROD Removes all Production batch records and theassociated detail transaction and text records
OPSO Removes all Sales order and Shipment records and theassociated detail transaction and text records
PORD Removes all PO, Receipt, and Return records and theassociated detail transaction and text records
JRNL Removes all Inventory Journal records and theassociated detail transaction and text records

142 • Purge and Archive Oracle Process Manufacturing Implementation Guide
Purge and Archive - Procedure1. Navigate to the Purge and Archive form.
2. Complete the fields as described in the Purge and Archive -Fields topic.
3. Save the Purge and Archive form. The Purge Id is assigned.Refer to the Purge and Archive - Fields topic for a descriptionof the Purge Id.
Purge and Archive - Fields
Purge Type
Enter value that specifies the category of all records associated with thePurge. This value was originally entered on the Purge Setup form.
There are eight standard purges. See above table for the names anddescriptions of these purges.
Purge ID
A unique ID assigned to this purge. Allows you to query or retrieve thepurge. Auto generated upon saving this form.
This unique ID is not created through OPM document ordering.
Purge Status
Status of this purge. Auto generated.
0 = Defined, not yet run
1 = Archive in progress
2 = Archived Successfully
3 = Purge in progress
4 = Purge Completed Successfully
-1 = Archive Process Failed
-3 = Purge Process Failed
Comment
Enter supporting information that provides additional information on thepurge.
Description
Enter the description of the archive or purge you are running.

Oracle Process Manufacturing Implementation Guide Purge and Archive • 143
Criteria Values (Dynamic Criteria Fields)
Each standard purge has eight criteria. These criteria are:
•= Latest creation date
•= Last document number
•= Latest modification date
•= Last organization code
•= Earliest creation date
•= First document number
•= Earliest modification date
•= First organization code
Each criteria field is required. Following are examples of proper dataformatting:
•= Date criteria must followthis format: dd-mon-yyyy hh.mm.ss
•= Document range must fill in the Pad characters (e.g. 00010rather than 10)
•= Ranges of organizations must contain real organization codes.For example, it is valid to enter FBP1 to FBP9 (where FBP1 andFBP9 are valid organization codes). However, it is not valid toenter A to Z
The following fields are updated following a purge or archive, and are forquery only.
Row Details - Archived
The total archived. Auto generated.
Row Details - Deleted
The total rows deleted. Auto generated.
Row Details - Purged
The total rows purged. Auto generated.
Note : All criteria values must be entered and the purge engine willvalidate all the values at run time.
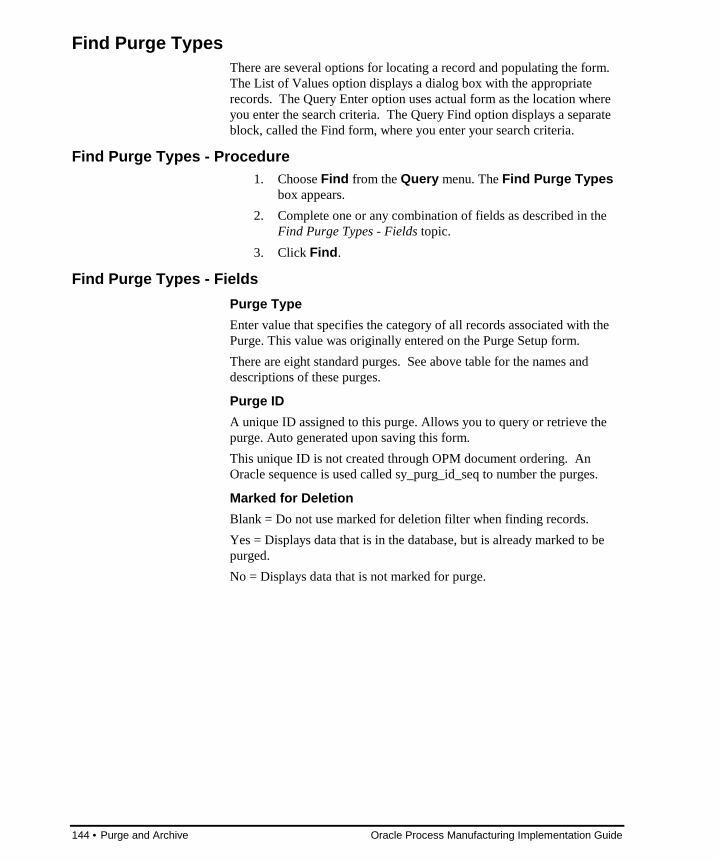
144 • Purge and Archive Oracle Process Manufacturing Implementation Guide
Find Purge TypesThere are several options for locating a record and populating the form.The List of Values option displays a dialog box with the appropriaterecords. The Query Enter option uses actual form as the location whereyou enter the search criteria. The Query Find option displays a separateblock, called the Find form, where you enter your search criteria.
Find Purge Types - Procedure1. Choose Find from the Query menu. The Find Purge Types
box appears.
2. Complete one or any combination of fields as described in theFind Purge Types - Fields topic.
3. Click Find .
Find Purge Types - Fields
Purge Type
Enter value that specifies the category of all records associated with thePurge. This value was originally entered on the Purge Setup form.
There are eight standard purges. See above table for the names anddescriptions of these purges.
Purge ID
A unique ID assigned to this purge. Allows you to query or retrieve thepurge. Auto generated upon saving this form.
This unique ID is not created through OPM document ordering. AnOracle sequence is used called sy_purg_id_seq to number the purges.
Marked for Deletion
Blank = Do not use marked for deletion filter when finding records.
Yes = Displays data that is in the database, but is already marked to bepurged.
No = Displays data that is not marked for purge.

Oracle Process Manufacturing Implementation Guide Purge and Archive • 145
Archive/Purge ProcessAfter the purge criteria is specified on the Purge and Archive form andsaved, initiate an archive of data or purge your archive tables.
Archive/Purge Dialog Box - Procedures1. Navigate to either the Archive Process or Purge Process
form.
2. Complete the fields as described in the Archive/Purge DialogBox - Fields topic.
Archive/Purge Dialog Box - Fields
Purge Date
Enter the date and time that the purge is to be executed. This field is onlydisplayed when the Queue field is populated with a value of QUEUE1.

146 • Purge and Archive Oracle Process Manufacturing Implementation Guide
Purge InquiryUse the Purge Inquiry form to viewthe status of purges. The status of thepurge appears in descending order from the most recently submittedpurge to the oldest submitted purge. Purge status information is stored intable sy_purg_mst.
Purge Inquiry - Procedure1. Navigate to the Purge Inquiry form.
2. Enter the Purge Type to viewall of the associated archives andpurges.
Purge Inquiry - Fields
Purge Type
Enter the purge name. This could be one of the standard predefinedpurges (APRD, AOPS, APOR, AJNL, PORD, OPSP, PORD, JRNL)or a custom purge name.
Description
The description for this purge type is displayed.
Number
Populated with the Purge ID value that was generated on the Purge &Archive form.
Start
Populated with the date and time values, which specify when the purgebegan or is scheduled to begin.
Elapsed (Hours)
Populated with the elapsed time, in hours, for the purge listed.
Status
Populated with the values that specify the progress of the purge process.The displayed values include the following:
0= Defined, not yet run
1= Archive in progress
2= Archived Successfully
3= Purge in progress
4= Purge Completed Successfully
-1 = Unsuccessful Archive
-3 = Unsuccessful purge
Archived
Indicates the total number of rows archived for this run (copied intoArchive tables).

Oracle Process Manufacturing Implementation Guide Purge and Archive • 147
Deleted
Indicates the total number of rows deleted for this run (removed from livetables and put into Archive tables).
Purged
Indicates the total number of rows Purged for this run (dropped from thedatabase).
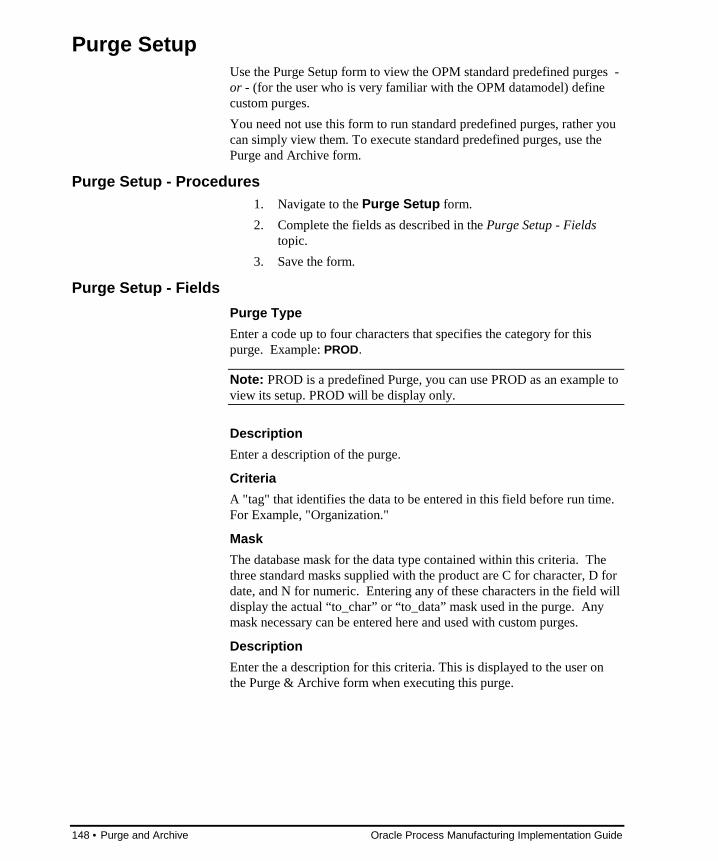
148 • Purge and Archive Oracle Process Manufacturing Implementation Guide
Purge SetupUse the Purge Setup form to viewthe OPM standard predefined purges -or - (for the user who is very familiar with the OPM datamodel) definecustom purges.
You need not use this form to run standard predefined purges, rather youcan simply viewthem. To execute standard predefined purges, use thePurge and Archive form.
Purge Setup - Procedures1. Navigate to the Purge Setup form.
2. Complete the fields as described in the Purge Setup - Fieldstopic.
3. Save the form.
Purge Setup - Fields
Purge Type
Enter a code up to four characters that specifies the category for thispurge. Example: PROD.
Note: PROD is a predefined Purge, you can use PROD as an example toviewits setup. PROD will be display only.
Description
Enter a description of the purge.
Criteria
A "tag" that identifies the data to be entered in this field before run time.For Example, "Organization."
Mask
The database mask for the data type contained within this criteria. Thethree standard masks supplied with the product are C for character, D fordate, and N for numeric. Entering any of these characters in the field willdisplay the actual “to_char” or “to_data” mask used in the purge. Anymask necessary can be entered here and used with custom purges.
Description
Enter the a description for this criteria. This is displayed to the user onthe Purge & Archive form when executing this purge.

Oracle Process Manufacturing Implementation Guide Purge and Archive • 149
Find Purge TypesThere are several options for locating a record and populating the form.The List of Values option displays a dialog box with the appropriaterecords. The Query Enter option uses actual form as the location whereyou enter the search criteria. The Query Find option displays a separateblock, called the Find form, where you enter your search criteria.
Find Purge Types - Procedure1. Choose Find from the Query menu. The Find Purge Types
box appears.
2. Complete one or any combination of fields as described in theFind Purge Types - Fields topic.
3. Click Find .
Find Purge Types - Fields
Purge Type
Enter a code up to four characters that specifies the category for thispurge. Example: PROD.
Note: PROD is a predefined Purge, you can use PROD as an example toviewits setup. PROD will be display only.
Marked for Deletion
Blank = Do not use marked for deletion filter when finding records.
Yes = Displays data that is in the database, but is already marked to bepurged.
No = Displays data that is not marked for purge.

150 • Purge and Archive Oracle Process Manufacturing Implementation Guide
Purge TablesThe Purge Tables form is displayed when selected from the Specialpulldown menu when the Purge Setup form is displayed.
Purge Tables - Procedure1. Navigate to the Purge Tables form from the Special pulldown
menu
2. Complete the Purge Setup form as described in the Purge Tables- Fields topic.
3. Save the form.
Purge Tables - Fields
Purge Type
Enter a code up to four characters that specifies the category for thispurge. Example: PROD.
Note: PROD is a predefined Purge, you can use PROD as an example toviewits setup. PROD will be display only.
Description
Enter a description of the purge.
Name
Enter the name of the Table.
Action
Enter the action to be taken. An action can either be to Keep the data inthe Table or to Delete the data in the Table.

Oracle Process Manufacturing Implementation Guide OPM Lookups • 151
OPM Lookups
OPM Lookup FormThe OPM Lookup form allows you to add to the values that are found ina particular lookup, or List of Values (LOV). The available LOVs areonly the ones that are seen on the OPM Lookup form.
OPM Lookup - Procedures1. Navigate to the OPM Lookup form.
2. Complete the fields as described in the OPM Lookup - Fieldstopic.
3. Save the form.
OPM Lookup - Fields
Type
Enter the names that will appear in the lookup.
Application
Enter the name of the OPM application that contains the column forwhich you are defining valid values.
Description
Enter the text that describes the category which is defined by the lookupname in the Type field.
Language
Enter the language for the lookup display. The default language forEnglish is US.
Code
Enter the values for the lookup. These can be either numeric oralphanumeric.
Meaning
Enter the meaning of the value.
Description
Enter a description of the lookup.

152 • OPM Lookups Oracle Process Manufacturing Implementation Guide
From/To
Enter the dates that the lookup is effective From and To. If you do notenter a To date, the lookup will not expire.
Enabled
Select whether the lookup is currently enabled or not.

Oracle Process Manufacturing Implementation Guide Profile Options • 153
Profile Options
Profile Options OverviewThis section contains a comprehensive list of all the Profile Options forOPM. Each profile option details the default value sent with the system,any valid options for that profile option, a description of the option, andthe recommended change levels.
CM$AC_ERRORS_LIMITDefault
1000
Options
Any valid number
Description
Defines the number of AC Process generated errors at which the systemwill abort.
Recommended Change Levels
Site, Applications, Responsibility, User
CM$RU_ERRORS_LIMITDefault
1000
Options
Any valid number
Description
Defines the number of Rollup generated errors at which the system willabort.
Recommended Change Levels
Site, Applications, Responsibility, User
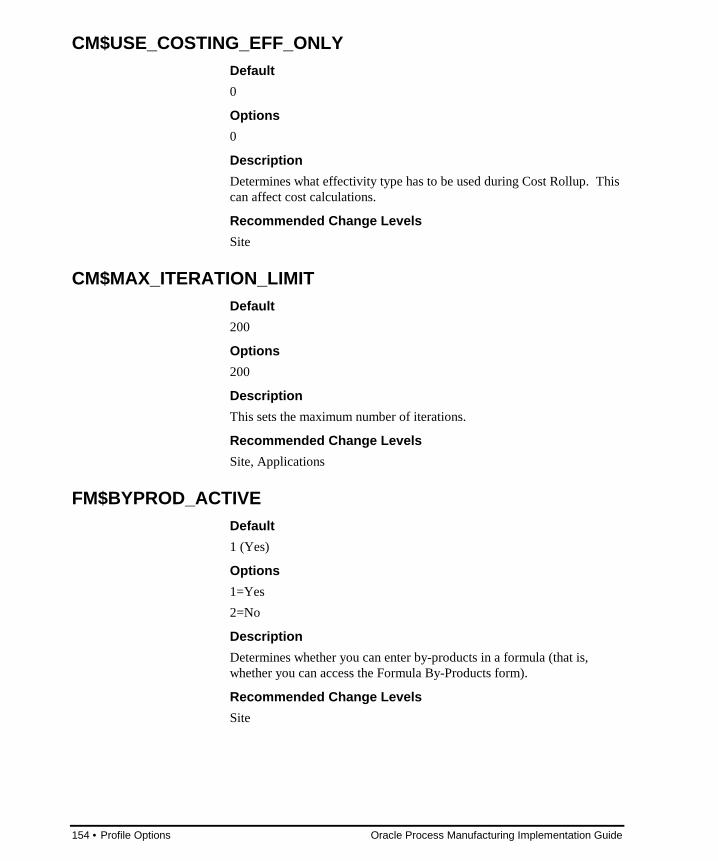
154 • Profile Options Oracle Process Manufacturing Implementation Guide
CM$USE_COSTING_EFF_ONLYDefault
0
Options
0
Description
Determines what effectivity type has to be used during Cost Rollup. Thiscan affect cost calculations.
Recommended Change Levels
Site
CM$MAX_ITERATION_LIMITDefault
200
Options
200
Description
This sets the maximum number of iterations.
Recommended Change Levels
Site, Applications
FM$BYPROD_ACTIVEDefault
1 (Yes)
Options
1=Yes
2=No
Description
Determines whether you can enter by-products in a formula (that is,whether you can access the Formula By-Products form).
Recommended Change Levels
Site
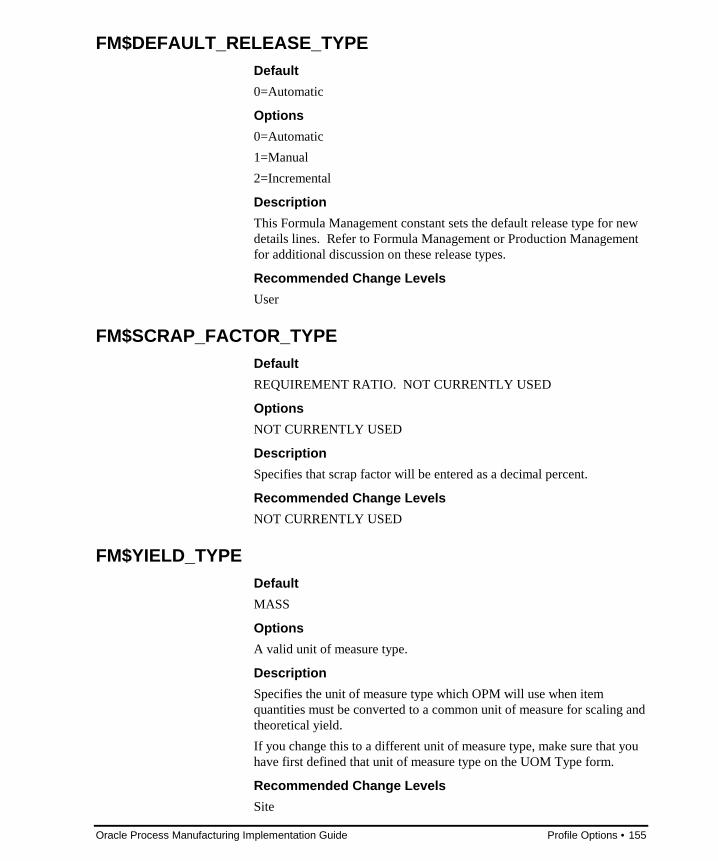
Oracle Process Manufacturing Implementation Guide Profile Options • 155
FM$DEFAULT_RELEASE_TYPEDefault
0=Automatic
Options
0=Automatic
1=Manual
2=Incremental
Description
This Formula Management constant sets the default release type for newdetails lines. Refer to Formula Management or Production Managementfor additional discussion on these release types.
Recommended Change Levels
User
FM$SCRAP_FACTOR_TYPEDefault
REQUIREMENT RATIO. NOT CURRENTLY USED
Options
NOT CURRENTLY USED
Description
Specifies that scrap factor will be entered as a decimal percent.
Recommended Change Levels
NOT CURRENTLY USED
FM$YIELD_TYPEDefault
MASS
Options
A valid unit of measure type.
Description
Specifies the unit of measure type which OPM will use when itemquantities must be converted to a common unit of measure for scaling andtheoretical yield.
If you change this to a different unit of measure type, make sure that youhave first defined that unit of measure type on the UOM Type form.
Recommended Change Levels
Site

156 • Profile Options Oracle Process Manufacturing Implementation Guide
GL$ORAFIN_DATE_RANGEDefault
730
Options
A valid date range
Description
Sets the ORAFIN date range.
Recommended Change Levels
Site, Applications, Responsibility
GL$POST_DEFAULT_LOTDefault
0
Options
0
Description
Switch for posting default lots to subledger.
Recommended Change Levels
Site, Applications, Responsibility
GL$USE_GEMMS_REV_ACCTDefault
1
Options
0 -= No
1 = Yes
Description
User OPM Revenue Account.
Recommended Change Levels
Site

Oracle Process Manufacturing Implementation Guide Profile Options • 157
GL$USE_SHIP_UMDefault
1
Options
0 -= No
1 = Yes
Description
Use Ship UM for Invoice creation of OF.
Recommended Change Levels
Site
GL$FINANCIAL_PACKAGEDefault
ORAFIN
Options
ORAFIN
Description
If you are an Oracle OPM/Oracle Financials user, this constant must beset to 'ORAFIN.' If another value is entered or if a value is not entered,then the Oracle OPM integration with Oracle Financials will not operateproperly.
Recommended Change Levels
Site
GL$VEND_DELIMITERDefault
Hyphen, (-)
Options
Hyphen, (-)
Description
This constant is used to determine the concatenation character forconcatenating Vendor No. and Vendor Site for Vendor Synchronization.For example, let's assume that the Oracle Financials Vendor No. is equalto DLX and Vendor Site is equal to NY. And in Oracle OPM,GL$VEND_DELIMITER is equal to '-'. In this example, the OracleOPM Vendor No. is equal to DLX-NY.

158 • Profile Options Oracle Process Manufacturing Implementation Guide
Note : Once the GL$VEND_DELIMITER constant is defined andvendors are synchronized, this constant value should not be changed.
Recommended Change Levels
Site
GL$CUST_DELIMITERDefault
Hyphen, (-)
Options
Hyphen, (-)
Description
This constant is used to determine the concatenation character forconcatenating Customer No. and Customer Location for CustomerSynchronization. For example, let's assume that the Oracle FinancialsCustomer No. is equal to DLX and Customer Location is equal to NY.And in Oracle OPM, GL$CUST_DELIMITER is equal to '-'. In thisexample, the Oracle OPM Customer No. is equal to DLX-NY.
Note : Once the GL$CUST_DELIMITER constant is defined andcustomers are synchronized, this constant value should not be changed.
Recommended Change Levels
Site
IC$ALLOC_HORIZONDefault
0 (No)
Options
Numeric value in days
Description
For items with an allocation class, but no allocation parameters for theallocation class/warehouse combination, this specifies the number of dayswithin which an ingredient must be scheduled to be consumed in orderfor auto-allocation to be attempted. If the ingredient is not scheduled tobe consumed within this number of days, the system will not attemptauto-allocation.
Recommended Change Levels

Oracle Process Manufacturing Implementation Guide Profile Options • 159
IC$ALLOC_METHODDefault
0 (FIFO)
Options
0 = FIFO
1 = FEFO
Description
For items with an allocation class, but no allocation parameters for theallocation class/warehouse combination, this specifies the allocationmethod, either First In, First Out (FIFO) or First Expired, First Out(FEFO).
Recommended Change Levels
IC$ALLOC_TYPEDefault
0 (User-Initiated)
Options
0 = User-Initiated
1 = Automatic
Description
For items with an allocation class, but no allocation parameters for theallocation class/warehouse combination, this specifies whether auto-allocation will be fully automatic (occur when a batch is first saved) oruser-initiated (user must initiate auto-allocation from a menu option).
Recommended Change Levels
IC$ALLOWNEGINVDefault
0 (No)
Options
0=No
1=Yes
2= Yes, with warning

160 • Profile Options Oracle Process Manufacturing Implementation Guide
Description
Switch that controls whether or not negative inventory quantities can bedriven on the Inventory Quantities form.
Recommended Change Levels
IC$DEFAULT_LOCTDefault
NONE
Options
Any valid character string
Description
Specifies the character string used for the default location.
Recommended Change Levels
IC$DEFAULT_LOTDefault
DEFAULTLOT
Options
Any valid character string
Description
Specifies the character string used for the default lot.
Recommended Change Levels
IC$EPSILONDefault
.0001
Options
Numeric value
Description
Decimal precision filter.
Recommended Change Levels

Oracle Process Manufacturing Implementation Guide Profile Options • 161
IC$EXPTLCHECKDefault
0 (No)
Options
0=No
1=Yes
Description
Ref integ behavior when changing an item to experimental.
Recommended Change Levels
IC$LOT_QTYDefault
0 (Multiple lots)
Options
0=Multiple lots
1=single lot
Description
For items with an allocation class, but no allocation parameters for theallocation class/warehouse combination, this specifies whether auto-allocation must fill the entire requirement from one lot, or whethermultiple lots can be allocated.
Recommended Change Levels
IC$MOVE_CHECK_ALLOCDefault
0 (No)
Options
0=Do not display message
1=Display message
Description
Specifies whether a warning will be displayed when moving inventorythat is allocated to a batch, sales order, or shipment.
Recommended Change Levels

162 • Profile Options Oracle Process Manufacturing Implementation Guide
IC$MOVEDIFFSTATDefault
0 (No)
Options
0-NOT ALLOWED - A lot cannot be moved into a location in which thelot already exists with a different status.
1- ALLOWED - A lot may be moved into a warehouse/location in whichthe lot also exists and has a different status. The entire quantity takes onthe status of the lot in the destination location.
2 - NOT ALLOWED with exception - A lot may not be moved into alocation in which the lot exists with a different status. The exception iswhen the onhand quantity at the destination location is 0. In this case, theinventory retains the status from the source location.
Description
Controls the movement of material between locations of different lotstatus.
Recommended Change Levels
IC$SHELF_DAYSDefault
0
Options
Numeric value
Description
For items with an allocation class, but no allocation parameters for theallocation class/warehouse combination, this specifies the number of daysfrom the planned consumption date that a lot must be unexpired to beconsidered for auto-allocation. A lot that will expire within this numberdays will not be considered for auto-allocation.
Recommended Change Levels
LM$DENSITYDefault
DENSITY
Options
N/A

Oracle Process Manufacturing Implementation Guide Profile Options • 163
Description
Sets the literal that displays for the density technical parameter.
Recommended Change Levels
Site
LM$EFF_ON_UPLOADDefault
1
Options
0=Not displayed
1=Displayed
Description
Controls whether the Maintain Effectivities form automatically displayswhen you upload a formula from Laboratory Management to FormulaManagement.
Recommended Change Levels
User
LM$UOM_MASS_TYPEDefault
MASS
Options
A valid unit of measure type.
Description
Specifies the unit of measure type from which the unit of measure for thedensity parameter will be taken
If you change this to a different unit of measure type, you must firstdefine that type on the UOM Type form.
Recommended Change Levels
Site
LM$UOM_VOLUME_TYPEDefault
VOL
Options
VOL

164 • Profile Options Oracle Process Manufacturing Implementation Guide
Description
Not currently used.
Recommended Change Levels
Note currently used.
OP$BACKORDERDefault
BACKORDER
Options
BACKORDER
Description
Label used in Shipping History screen in Sales > Shipping. Indicates thata shipping line is a backorder.
Recommended Change Levels
OP$CHK_NOT_SUCCESSDefault
FAIL
Options
FAIL
Description
Hold reason code assigned to order during Oracle Financials CreditChecking if the credit check is not successful.
Could validate against table op_hold_cds.
Recommended Change Levels
OP$CUST_HLDDefault
CRHD
Options
CRHD
Description
Hold reason code assigned to order during Oracle Financials CreditChecking if customer is on credit hold.
Could validate against table op_hold_cds.

Oracle Process Manufacturing Implementation Guide Profile Options • 165
Recommended Change Levels
OP$CUST_LIMIT_EXCEEDDefault
CLEX
Options
CLEX
Description
Hold reason code assigned to order line during Oracle Financials CreditChecking if the customer's credit limit has been exceeded.
Could validate against table op_hold_cds.
Recommended Change Levels
OP$DEFPRICE_UMDefault
KG
Options
KG
Description
Default unit of measure for calculating total order quantity for pricing(totalord ind = 1).
Could validate against table sy_uoms_mst.
Recommended Change Levels
OP$GEMMSTAXDefault
0
Options
0 = Don't calculate taxes using OPM tax tables
1 = Calculate taxes using the OPM tax tables
Description
Switch to turn on OPM tax calculation.

166 • Profile Options Oracle Process Manufacturing Implementation Guide
Recommended Change Levels
OP$HOLDREAS_CODEDefault
NONE
Options
Four alphanumeric characters, defined on Hold Reasons form in tableop_hold_cds.
Description
Default hold reason code given to order and order lines for a neworder.Could be validated against op_hold_cds.
Recommended Change Levels
OP$HOURS_PER_DAYDefault
8
Options
Integer between 1 and 8.
Description
Default number of hours in a production day. Used to calculateproduction lead times for use in calculating the scheduled ship date (inViewDates option off of Task menu).
Recommended Change Levels
OP$INVCHKDefault
1 (Check inventory)
Options
0 = Inventory Shortage Checking is not performed in Order Entry
1 = Inventory Shortage Checking is performed in Order Entry
Description
Switch to turn on Inventory Shortage Checking in order entry.
Recommended Change Levels

Oracle Process Manufacturing Implementation Guide Profile Options • 167
OP$NO_EXCHG_RTEDefault
ERNF
Options
ERNF
Description
Hold reason code assigned to order during Oracle Financials CreditChecking if no exchange rate was found during the Credit Check.
Could validate against table op_hold_cds.
Recommended Change Levels
OP$ONE_TIME_SHIPTODefault
0
Options
0 = Address changes done in Shipping are not brought over to Oracle AR
1 = Address change done in Shipping is brought over to Oracle AR
Description
Use the shipment address for invoicing
Recommended Change Levels
OP$ORD_LIMIT_EXCEEDDefault
OLEX
Options
OLEX
Description
Hold reason code assigned to order during Oracle Financials CreditChecking if the order limit has been exceeded.
Could validate against table op_hold_cds.
Recommended Change Levels

168 • Profile Options Oracle Process Manufacturing Implementation Guide
OP$PARTIAL_ALLOCDefault
1
Options
0 = automatic allocation will only allocate the entire order quantity
1 = automatic inventory allocation can allocate a quantity less than theorder quantity, if available inventory is less than the order quantity.
Description
Switch used as default in OP Automatic Inventory Allocation. Thisswitch is used if no item specific allocation rules are established.
Recommended Change Levels
OP$PRICE_DATEDefault
1
Options
0=Use order date from sales order header
1=Use the scheduled shipdate from the sales order line item
Description
Date to control pricing.
Recommended Change Levels
OP$PRICEFIELDDefault
0
Options
0 = Compute Order or Line Value using Base Price
1 = Compute Order or Line Value using List Price
Description
Controls use of base or list price during calculation of total order value.
Recommended Change Levels

Oracle Process Manufacturing Implementation Guide Profile Options • 169
OP$PRICEUM_INDDefault
0
Options
0 = Let price _ um on the order line = order um 1 (maintain unit price onorder in order um 1)
1 = Let price _ um on the order line = pricelist um (maintain unit price onthe order in pricelist uom)
Description
Controls whether net price is calculated in the order unit of measure orthe price list unit of measure.
Recommended Change Levels
OP$SHIPPER_CODEDefault
NONE
Options
Four alphanumeric characters, defined on the Shipping Code form(Object > Sales > Shipper) from table op_ship_mst.
Description
Default Carrier Code assigned to the order header and order lines for aneworder.
Recommended Change Levels
OP$SHIPUOMDefault
LB (pounds)
Options
Unit code defined on Unit of Measure form (Object>System>Unit ofMeasure) in table sy_uoms_mst.
Description
Unit of measure for Shipping Weight. The shipping weight will becalculated in this unit of measure. Shipping weight uom is not editablefor an individual order.

170 • Profile Options Oracle Process Manufacturing Implementation Guide
Recommended Change Levels
OP$SHIP_MTHDDefault
NONE
Options
Four alphanumeric characters, defined on the Shipping Method form intable op_ship_mth.
Description
Default Shipping Method assigned to the order header and order lines fora neworder.
Recommended Change Levels
OP$SHIPVOL_UMDefault
L (liters)
Options
Unit code defined on Unit of Measure form (Object > System > Unit ofMeasure) in table sy_uoms_mst.
Description
Default unit of measure for shipping volume.
Recommended Change Levels
OP$TAX_STATUSDefault
TAXA
Options
TAXA
Description
Default tax status.
Could be validated against tx_taxa_sts
Recommended Change Levels

Oracle Process Manufacturing Implementation Guide Profile Options • 171
OP$USE_AUTO_ALLOCDefault
0
Options
0 = Automatic inventory allocation is not active
1 = Automatic inventory allocation occurs only in Order Entry during the'Save'
2 = Automatic inventory allocation occurs only in Shipping during the'Save'
3 = Automatic inventory allocation will occur in both Order Entry andShipping during the 'Save' (in Shipping, automatic allocation will occuronly on those lines which have not been allocated in Order Entry)
Description
Switch which determines operation of Automatic Inventory Allocation inOrder Entry and Shipping.
Recommended Change Levels
ORAFIN_INTDefault
ORAFIN
Options
ORAFIN
Description
NOT CURRENTLY USED
Recommended Change Levels
PI$PIPH_REASON_CODEDefault
POST
Options
POST
Description
Default Reason Code for Physical Count Entry.
Recommended Change Levels

172 • Profile Options Oracle Process Manufacturing Implementation Guide
PM$ALLOW_CREATE_INPUTDefault
1 (Yes)
Options
0=No
1=Yes
Description
Controls whether you can create batches from the Batch Input form. Ifyou set this to "1", the Create Batch/FPO dialog box will display if youenter a newbatch number on the Batch Input form (for manual documentnumbering) or if you leave the Batch field blank (for automatic documentnumbering).
Recommended Change Levels
PM$ALLOW_CREATE_OUTPUTDefault
1 (Yes)
Options
0=No
1=Yes
Description
Controls whether you can create batches from the Batch Output form. Ifyou set this to "1", the Create Batch/FPO dialog box will display if youenter a newbatch number on the Batch Output form (for manualdocument numbering) or if you leave the Batch field blank (for automaticdocument numbering).
Recommended Change Levels
PM$AUTO_REL_ALLOC_ONLYDefault
0
Options
0 = actual quantity set to planned quantity
1 = actual quantity set to allocated quantity

Oracle Process Manufacturing Implementation Guide Profile Options • 173
Description
For auto-release ingredients, this specifies whether the actual quantitywill be set to the planned quantity or the allocated quantity (if theallocated quantity is less than the planned) when you release a batch.
Recommended Change Levels
PM$CHECK_INV_RELEASEDefault
1 (Yes)
Options
0=No
1=Yes
Description
Controls whether inventory shortage checking is performed automaticallywhen a batch is released.
Recommended Change Levels
PM$CHECK_INV_SAVEDefault
1 (Yes)
Options
0=No
1=Yes
Description
Controls whether inventory shortage checking is performed automaticallywhen a batch is saved.
Recommended Change Levels
PM$CHECK_LOT_STATUSDefault
1
Options
0 = No
1 = Yes
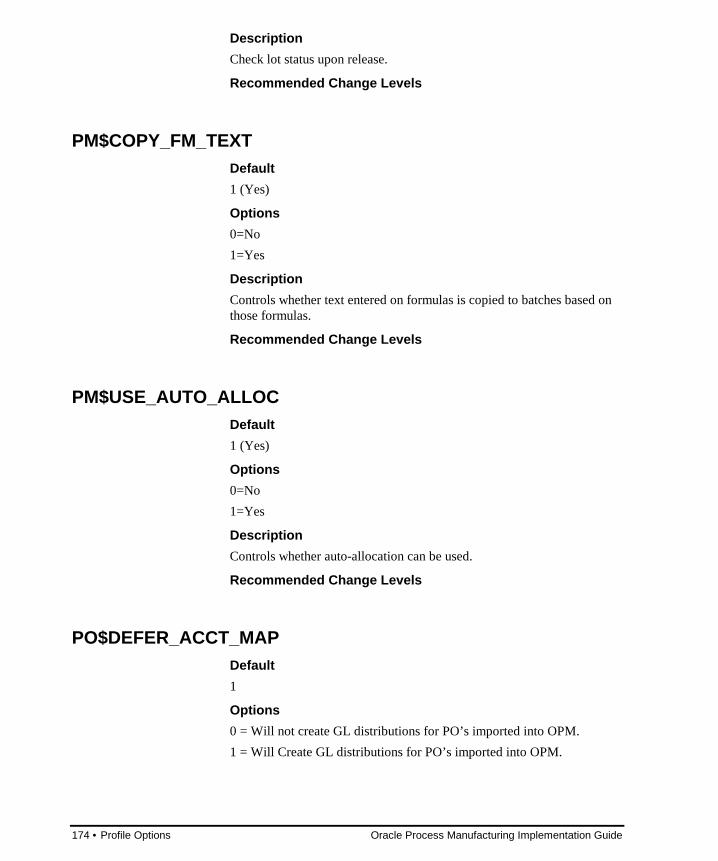
174 • Profile Options Oracle Process Manufacturing Implementation Guide
Description
Check lot status upon release.
Recommended Change Levels
PM$COPY_FM_TEXTDefault
1 (Yes)
Options
0=No
1=Yes
Description
Controls whether text entered on formulas is copied to batches based onthose formulas.
Recommended Change Levels
PM$USE_AUTO_ALLOCDefault
1 (Yes)
Options
0=No
1=Yes
Description
Controls whether auto-allocation can be used.
Recommended Change Levels
PO$DEFER_ACCT_MAPDefault
1
Options
0 = Will not create GL distributions for PO’s imported into OPM.
1 = Will Create GL distributions for PO’s imported into OPM.
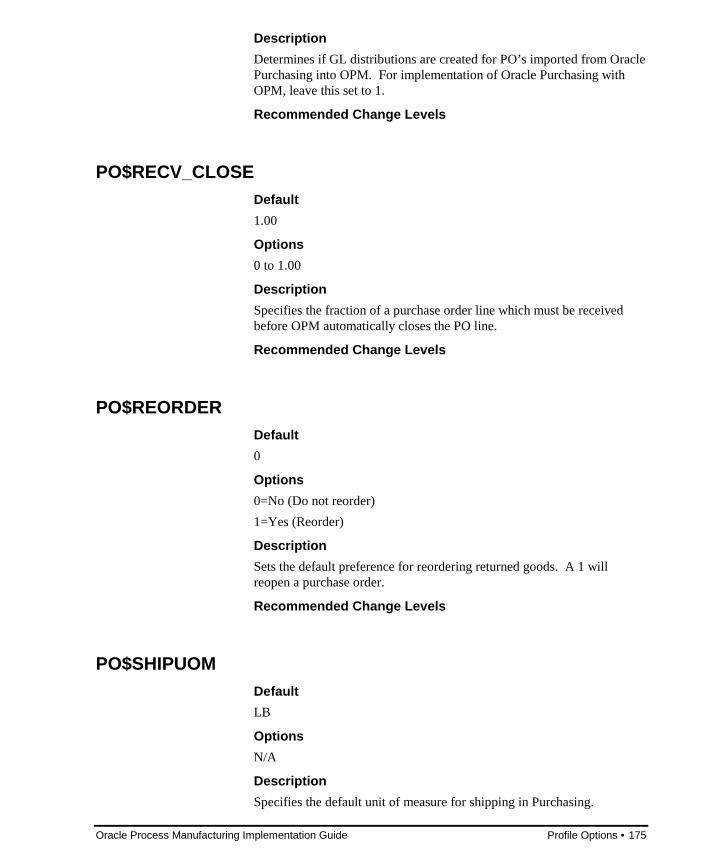
Oracle Process Manufacturing Implementation Guide Profile Options • 175
Description
Determines if GL distributions are created for PO’s imported from OraclePurchasing into OPM. For implementation of Oracle Purchasing withOPM, leave this set to 1.
Recommended Change Levels
PO$RECV_CLOSEDefault
1.00
Options
0 to 1.00
Description
Specifies the fraction of a purchase order line which must be receivedbefore OPM automatically closes the PO line.
Recommended Change Levels
PO$REORDERDefault
0
Options
0=No (Do not reorder)
1=Yes (Reorder)
Description
Sets the default preference for reordering returned goods. A 1 willreopen a purchase order.
Recommended Change Levels
PO$SHIPUOMDefault
LB
Options
N/A
Description
Specifies the default unit of measure for shipping in Purchasing.

176 • Profile Options Oracle Process Manufacturing Implementation Guide
The unit of measure you specify in this variable must also be set up on theUnit of Measure form.
Recommended Change Levels
QC$EXACTSPECMATCHDefault
0 (No)
Options
0 = No
1 = Yes
Description
Determines whether sample results must exactly match the requiredspecifications. (For future use.)
Recommended Change Levels
User
QC$DISPLAYSPECDefault
1 (Yes)
Options
0 = No
1 = Yes
Description
Determines whether target specifications are displayed on the resultsentry form during results entry. (For future use.)
Recommended Change Levels
User
SY$3DEF_DTIMEDefault
%0d-%3m-%4y %0h:%0m:%0s
Options
%0d-%3m-%4y %0h:%0m:%0s
Description
This is the default date/time format upon which the code is dependent.

Oracle Process Manufacturing Implementation Guide Profile Options • 177
Recommended Change Levels
Site
SY$ADDR_LENDefault
30
Options
An integer between 1 and 70.
Description
Specifies the address line length.
Recommended Change Levels
Site, Application, Responsibility, User
SY$ALLDefault
ALL
Options
ALL
Description
This value is used in a table to denote all rows in a table.
Recommended Change Levels
None
SY$DEFAULT_CURRDefault
USD
Options
Any currency code defined in Oracle OPM.
Description
Specifies the default currency value used during cost rollups.
Recommended Change Levels
Site, Application, Responsibility, User

178 • Profile Options Oracle Process Manufacturing Implementation Guide
SY$DEFAULT_DAYS_MAXDefault
Not applicable.
Options
Not applicable.
Description
Not currently used.
Recommended Change Levels
Site, Application, Responsibility, User
SY$DEFAULT_FISCAL_INDDefault
0
Options
0=Do not check that the cost calendar setup matches the fiscal calendarsetup
1=Check that the cost calendar setup matches the fiscal calendar setup
This indicator can be changed on the Cost Calendar form.
Description
Specifies the default value for the Fiscal Indicator field of the CostCalendar form.
Note: If you are an Oracle Financials customer, always set the indicatorto 0. The fiscal calendar is in the Oracle Financials tables, not in theOracle OPM tables. As such, Oracle OPM is unable to locate the fiscalcalendar to determine whether the setup matches the cost calendar setup.
Recommended Change Levels
Site, Application, Responsibility, User
SY$DEFAULT_LANGDefault
ENG
Options
Any language code defined in Oracle OPM.
Description
Specifies the default language that is used when accessing messages andlabels from the sy_mesg_tbl and sy_labl_tbl tables respectively.

Oracle Process Manufacturing Implementation Guide Profile Options • 179
Note: The language code specified in SY$LANG_CODE is also used bythe code when accessing messages and labels from their respective tables.
This should be loaded from tran.ini.
Recommended Change Levels
Site, Application, Responsibility, User
SY$DEFAULT_QUEUE_NODefault
QUEUE1
Options
QUEUE1 - Run the batch job at the specified day and time.
NOW - Run the batch job immediately.
Description
Specifies the default day and time in which batch processing jobs, such asMRP, cost rollups, and purges, are to be run. Must be defined on theBatch Queue Control form.
Recommended Change Levels
Not currently used
SY$DELTA_DAYS_MAXDefault
9999.999
Options
A specific number of days.
Description
Specifies the default and maximum constraint outer fence value when anouter fence is not defined on the Warehouse Rules, Production Rules andWarehouse Transfer Rules forms and specifies the default and maximumhorizon and outer fence value on the MPS Schedule parameters form.
Recommended Change Levels
Site, Application, Responsibility, User
SY$EFF_MAX_DATEDefault
01/01/2000
01:01:01
Options

180 • Profile Options Oracle Process Manufacturing Implementation Guide
Any valid date and time that is valid for the current operating system.
Description
Specifies the formula effectivity default end date. This value defines theend of the date range.
Recommended Change Levels
Site
SY$EFF_MIN_DATEDefault
01/01/1990
01:01:01
Options
Any valid date and time that is valid for the current operating system.
Description
Specifies the formula effectivity default start date. This value defines thestart of the date range.
Recommended Change Levels
Site
SY$ESS_INSTALLEDDefault
0
Options
1=Integrated
0=Not Integrated
Description
Indicate if IMI's ESS software is integrated with Oracle OPM for theCPG solution. If IMI's ESS software is integrated, then the value of thisconstant is set to '1.' If IMI's ESS software is not integrated, then thevalue of this constant is set to '0.' The default value is '0.'
Recommended Change Levels

Oracle Process Manufacturing Implementation Guide Profile Options • 181
SY$ESS_USERDefault
Not currently used
Options
Not currently used
Description
Not currently used
Recommended Change Levels
SY$INTRASTATDefault
0
Options
0 = Not using Intrastat
1 = Using Intrastat
Description
This defines if the system is using Intrastat or not.
Recommended Change Levels
SY$INTRASTAT_UMDefault
KG
Options
KG
Description
This is the default Unit of Measure used by Intrastat.
Recommended Change Levels

182 • Profile Options Oracle Process Manufacturing Implementation Guide
SY$MAX_DATEDefault
12/31/10 0:00
Options
Any valid date and time that is valid for the current operating system.
Description
This defines the default maximum date/time code used for datecalculations.
Recommended Change Levels
Site
SY$MIN_DATEDefault
1/2/70 0:00
Options
Any valid date and time that is valid for the current operating system.
Description
This defines the default minimum date/time code used for datecalculations.
Recommended Change Levels
Site
SY$MONA1Default
Jan
Options
Jan
Description
This defines the three-character month abbreviation for January.
Recommended Change Levels
Site

Oracle Process Manufacturing Implementation Guide Profile Options • 183
SY$MONA10Default
Oct
Options
Oct
Description
This defines the three-character month abbreviation for October.
Recommended Change Levels
Site
SY$MONA11Default
Nov
Options
Nov
Description
This defines the three-character month abbreviation for November.
Recommended Change Levels
Site
SY$MONA12Default
Dec
Options
Dec
Description
This defines the three-character month abbreviation for December.
Recommended Change Levels
Site

184 • Profile Options Oracle Process Manufacturing Implementation Guide
SY$MONA2Default
Feb
Options
Feb
Description
This defines the three-character month abbreviation for February.
Recommended Change Levels
Site
SY$MONA3Default
Mar
Options
Mar
Description
This defines the three-character month abbreviation for March.
Recommended Change Levels
Site
SY$MONA4Default
Apr
Options
Apr
Description
This defines the three-character month abbreviation for April.
Recommended Change Levels
Site

Oracle Process Manufacturing Implementation Guide Profile Options • 185
SY$MONA5Default
May
Options
May
Description
This defines the three-character month abbreviation for May.
Recommended Change Levels
Site
SY$MONA6Default
Jun
Options
Jun
Description
This defines the three-character month abbreviation for June.
Recommended Change Levels
Site
SY$MONA7Default
Jul
Options
Jul
Description
This defines the three-character month abbreviation for July.
Recommended Change Levels
Site

186 • Profile Options Oracle Process Manufacturing Implementation Guide
SY$MONA8Default
Aug
Options
Aug
Description
This defines the three-character month abbreviation for August.
Recommended Change Levels
Site
SY$MONA9Default
Sep
Options
Sep
Description
This defines the three-character month abbreviation for September.
Recommended Change Levels
Site
SY$NEWDefault
NEW
Options
NEW
Description
This defines a name to indicate that you are creating a newdocument,such as a batch or a purge.
Recommended Change Levels
Site

Oracle Process Manufacturing Implementation Guide Profile Options • 187
SY$NOWDefault
NOW
Options
Any valid batch queue.
Description
Specifies the default string value that indicates to the system that a batchprocessing job is to be run immediately.
When the SY$NOW value is input in proper case format to the Start Datefield of forms in MRP, cost rollup, actual costing and subledgerprocessing, the value is displayed on the screen and the batch processstarts running immediately.
Recommended Change Levels
Not currently used
SY$OF_UOM_TRIM_CHARDefault
3
Options
1=Trim first character of OPM UOM
2=Trim second character of OPM UOM
3=Default - Trim third character of OPM UOM
4=Trim fourth character of OPM UOM
Description
Specifies the numerical value that represents the position from which oneOracle OPM unit of measure (UOM) character is to be extracted tobecome the trimmed ORACLE Financials UOM value.
In Oracle OPM, a UOM can have a maximum of 4 characters. InORACLE Financials, however, the same UOM code can only be 3characters.
For example, if the SY$OF_UOM_TRIM_CHAR is 2, then the OracleOPM UOM of GALN is trimmed in ORACLE Financials to GLN.
Recommended Change Levels
Site, Application, Responsibility, User

188 • Profile Options Oracle Process Manufacturing Implementation Guide
SY$QC_GRADEDefault
Options
Description
Default QC Grade
Recommended Change Levels
Site
SY$UOM_HOURSDefault
HR
Options
HR
Description
Specifies the default unit of measure that is expressed as a gradation oftime. Whenever time is allotted for resources the unit of time must beconverted to this unit of measure.
Recommended Change Levels
None
SY$ZERODATEDefault
1-Jan-70
Options
Any valid date and time that is valid for the current operating system.
Description
This defines a date that is always one day less than the SY$MIN_DATE.
Recommended Change Levels
Site

Oracle Process Manufacturing Implementation Guide Profile Options • 189
SY$DEFAULT_LAB_TYPEDefault
LAB
Options
Any valid laboratory type defined in the OPM Laboratory Managementmodule.
Description
Establishes the default laboratory for newproduct development.
Recommended Change Levels
Site, Application, Responsibility, User
SY$DEFAULT_ORGNDefault
HQ
Options
Any valid organization
Description
This is the default organization for the current session of OPM.
Recommended Change Levels
Site, Application, Responsibility, User
SY$DEFAULT_SCHEDULEDefault
SCHD
Options
Any valid schedule defined in Master Production Schedule module.
Description
Establishes the default MPS/MRP schedule.
Recommended Change Levels
Site, Application, Responsibility, User
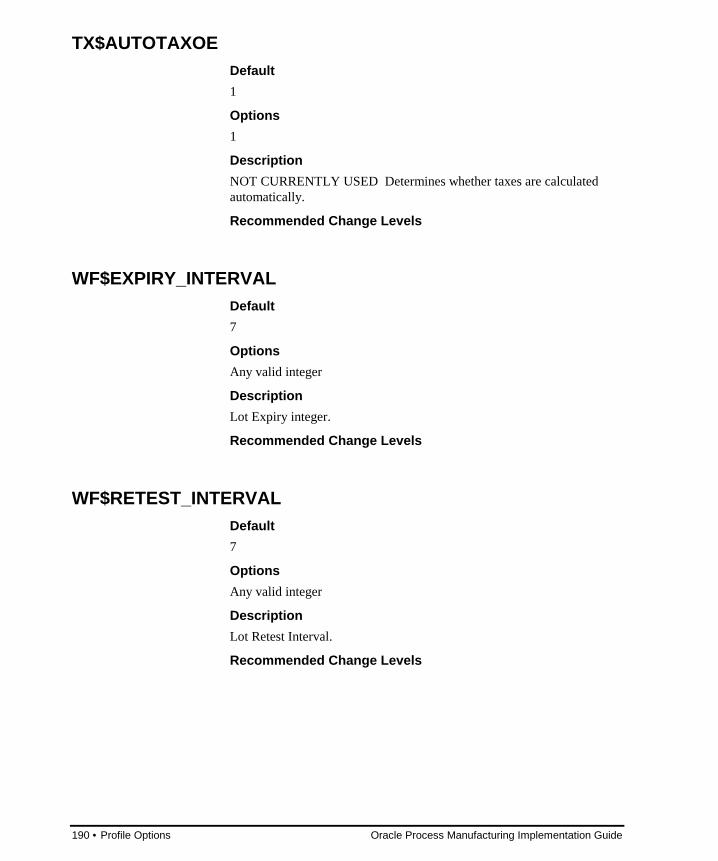
190 • Profile Options Oracle Process Manufacturing Implementation Guide
TX$AUTOTAXOEDefault
1
Options
1
Description
NOT CURRENTLY USED Determines whether taxes are calculatedautomatically.
Recommended Change Levels
WF$EXPIRY_INTERVALDefault
7
Options
Any valid integer
Description
Lot Expiry integer.
Recommended Change Levels
WF$RETEST_INTERVALDefault
7
Options
Any valid integer
Description
Lot Retest Interval.
Recommended Change Levels

Oracle Process Manufacturing Implementation Guide Appendixes • 191
Appendixes
Navigation PathsThis table of navigator paths is organized alphabetically by form name.
Form Path
Document Ordering OPM Systems > OPM System Setup>Document Ordering
Document Types OPM Systems > OPM System Setup >Document Types
Geography Codes OPM Systems > OPM System Setup >Geography Codes
HR Organizations OPM Systems > OPM System Setup >HR Organizations
Organizations OPM Systems > OPM System Setup >Organizations
Paragraphs OPM Systems > OPM System Setup >Paragraphs
Reason Codes OPM Systems > OPM System Setup >Reason Codes
Session Parameters OPM Systems > OPM System Setup >Session Parameters
Text Tokens OPM Systems > OPM System Setup >Text Tokens
Units of Measure OPM Systems > OPM System Setup >Units of Measure
Units of Measure Types OPM Systems > OPM System Setup >Units of Measure Types
User Organizations OPM Systems > OPM System Setup >User Organizations
User Planning Classes OPM Systems > OPM System Setup >User Planning Classes
OPM Lookups OPM Systems > OPM System Setup >OPM Lookups
Purge Setup OPM Systems > OPM Purge and

192 • Appendixes Oracle Process Manufacturing Implementation Guide
Form PathArchive > Purge Setup
Purge Tables OPM Systems > OPM Purge andArchive > Purge Setup > Special >Purge Tables
Purge and Archive OPM Systems > OPM Purge andArchive > Purge and Archive
Archive Process OPM Systems > OPM Purge andArchive > Purge and Archive >Special > Archive Process
Purge Process OPM Systems > OPM Purge andArchive > Purge and Archive >Special > Purge Process
Purge Inquiry OPM Systems > OPM Purge andArchive > Purge Inquiry

Oracle Process Manufacturing Implementation Guide Glossary •••• 193
Glossary
User Organizations
The default organization for each user is defined through Oracle SystemAdministration Personal Profiles and associating an OPM OrganizationCode under the User Value column to the profile optionGEMMS_DEFAULT_ORGN.
Units of Measure
A UOM definition consists of a UOM code, a description, a type, and theconversions between the reference UOM and all other UOMs of the sametype.
Text Tokens
Text tokens are codes or short descriptions that represent longerdescriptions or messages.
Reason Codes
Reason codes provide information on increases or decreases in inventory.
Paragraphs
Paragraphs in OPM are structures that are used to store and categorizetext. OPM is installed with one default paragraph per database table, theGeneral Text paragraph.
Organizations
Organizations are entities to which you can assign resources, warehouses,General Ledger accounts, and other cross-module items.
Assignment Type
Determines whether you assign document numbers manually orautomatically for this document type and organization.
Document Types
Documents are used to categorize transaction activity that is generatedfrom many OPM functions including inventory, sales, purchasing,production, etc.

194 •••• Glossary Oracle Process Manufacturing Implementation Guide
Purge and Archive
Provides for the archiving ands removal of old data from the OPMdatabase.

Oracle Process Manufacturing Implementation Guide Index •••• 195
Index
.
.GIF files 21
.HTM files 21
Aaccess permissions 14, 18account mapping 77Accounts Payables Setup 56Accounts Receivable Descriptive
Flexfield Setup 32Accounts Receivable Flexfield Setup
31Accounts Receivables Setup 31Accounts Receivables Setup Steps
43Acquisition Cost Entry form 60, 91Active Request Limit 18additional user 13Address Edit options 139administration issues 83application level 13Applications Forms form 91Archive Process form 145Assign Type value 112associating responsibilities 14Audit Groups 18Audit Installations 18AuditTrail 18AuditTrail Update Tables Report 18AutoAccounting 48automatic document ordering 83
Ccarriage return, reports 15Checklist 13child organizations 118CM$AC_ERRORS_LIMIT 153
CM$MAX_ITERATION_LIMIT154
CM$RU_ERRORS_LIMIT 153CM$USE_COSTING_EFF_ONLY
154codes, paragraph 122common purchasing
general information 77companies, defined 118Concurrent Manager 13
arguments, print command 16defining programs 17defining request groups 17defining request sets 17report request, using 15
concurrent programs 18Constants 54context sensitive Flexfields 19controlling functionality 14Conversion Factor, UOM 133conversion, UOM 131converting units of measure 131county code 140creating
additional users 13, 15new menus 14responsibilities 13, 14text tokens 129
Credit/Debit Memo InventoryAdjustment DescriptiveFlexfields 39
custom help 20custom help directory 20custom purge 141CUSTOM.p11 file 60, 91Customer Descriptive Flexfield
Define 35

196 •••• Index Oracle Process Manufacturing Implementation Guide
Ddata collection, Process Operations
Control 119database mask 148database table 14, 122date format 143Define Customer Descriptive
Flexfield 35Define Item Catalogs Flexfield 32Define Item Category Flexfield 31Define Transaction Flexfield
Structure 32defining
application users 14Audit Groups 18Audit Installations 18AuditTrail 18password, initial 14purchase acquisition costs 98, 106Report Sets 13Request Security Group 19Request Sets 18responsibilities 14unit of measure 131vendor general ledger classes 92,
94, 100, 102vendor general trade classes 96,
104Description value 18Descriptive Flexfields 19
context sensitive 19Oracle Applications Flexfield
Guide 19prompts 19
digits, allowed in documentnumbering 112
directory, product help 20document numbering
automatic 111manual assignment 111
document numbering, digits, allowedin 112
Document Ordering form 111, 112document ordering, automatic 83document type
caution 109JRNL 109OPSO 109PORD 109
Document Types form 109documents 111documents, types 109driver file, SWR 15
EEdit Text option 139editing
document ordering 111document types 109geography codes 114HR Organizations 116paragraphs 122planning classes, user 138session parameters 128unit of measure 131unit of measure types 135
FFind Vendor Trade Classes form 97,
105finding
document ordering 113document types 110geography codes 114Organizations 120purchase acquisition costs 99, 107purge types 144, 149reason codes 125text tokens 130unit of measure types 135units of measure 133vendor classes 92, 100vendor general ledger classes 95,
103vendor trade classes 97, 105
FlexfieldDefining Customer Descriptive 35Defining Invoice Line Information
Descriptive 39Defining Transaction Structure 32Defining Transaction Type 39Item Catalog 31Item category 31
Flexfields, Descriptive 19flow type, inventory 125FM$BYPROD_ACTIVE 154FM$DEFAULT_RELEASE_TYPE
155FM$SCRAP_FACTOR_TYPE 155FM$YIELD_TYPE 155Form Functions form 91function security 14Function Security, implementing 13

Oracle Process Manufacturing Implementation Guide Index •••• 197
GGEMMS_DEFAULT_ORGN 137GEMMS_DEFAULT_SCHEDULE
138general ledger accounts 77General Ledger Setup 30general text paragraph 122generating a report 15Geography Code form 114GL$CUST_DELIMITER 158GL$FINANCIAL_PACKAGE 157GL$ORAFIN_DATE_RANGE 156GL$POST_DEFAULT_LOT 156GL$USE_GEMMS_REV_ACCT
156GL$USE_SHIP_UM 157GL$VEND_DELIMITER 157Government General Ledger Setup
See General Ledger Setup
HHelp 21
Oracle Applications 20web-based 20
help directory 20customization 20release notes 20
help directory names 21help, customizing 20hierarchies, organizational 118HTML Help 20
IIC$ALLOC_HORIZON 158IC$ALLOC_METHOD 159IC$ALLOC_TYPE 159IC$ALLOWNEGINV 159IC$DEFAULT_LOCT 160IC$DEFAULT_LOT 160IC$EPSILON 160IC$EXPTLCHECK 161IC$LOT_QTY 161IC$MOVE_CHECK_ALLOC 161IC$MOVEDIFFSTAT 162IC$SHELF_DAYS 162inflows 126inflows, inventory 124initialization string, Printer Drivers
form 15Integration Implementation
Overview 23
Internet Explorer V3.0, using toaccess help 20
inventory adjustment 124Inventory Quantities form 124Inventory Quantities form,
interaction 111inventory, increases and decreases to
124Invoice Line Information Descriptive
FlexfieldDefine 39
Item Catalog FlexfieldDefine 32
Item category FlexfieldDefine 31
JJRNL document type 109, 111
Llanguage prompts, modifying 18language, modifying prompts 13language, setup 13LIBRARY.HTM help file 21limiting user requests 18line feed, reports 15List of Values, Territory 13LM$DENSITY 162LM$EFF_ON_UPLOAD 163LM$UOM_MASS_TYPE 163LM$UOM_VOLUME_TYPE 163lookups 151LOV 13, 151LOV Values, Territory 18
Mmaintenance functions 19mapping, accounts 77mask types
C - character 148D - date 148N - numeric 148
mass units 131master table of contents, help 21menu structure 14menu, predefined 14menus
excluding functions 14excluding user access 14
Menus form 14, 91

198 •••• Index Oracle Process Manufacturing Implementation Guide
multiple reponsibility assignment 15
Nnaming conventions, in help
directory 21Netscape Navigator V4.0, using to
access help 20nonprintable text 123number assignment parameters,
altering 111
OOP$BACKORDER 164OP$CHK_NOT_SUCCESS 67, 164OP$CUST_HLD 67, 164OP$CUST_LIMIT_EXCEED 67,
165OP$DEFPRICE_UM 165OP$GEMMSTAX 65, 119, 165OP$HOLDREAS_CODE 166OP$HOURS_PER_DAY 166OP$INVCHK 166OP$NO_EXCHG_RTE 167OP$ONE_TIME_SHIPTO 167OP$ORD_LIMIT_EXCEED 67, 167OP$PARTIAL_ALLOC 168OP$PRICE_DATE 168OP$PRICEFIELD 168OP$PRICEUM_IND 169OP$SHIP_MTHD 170OP$SHIPPER_CODE 169OP$SHIPUOM 169OP$SHIPVOL_UM 170OP$TAX_STATUS 170OP$USE_AUTO_ALLOC 171OPM Costing Module Setup 69OPM Inventory Module Setup 64OPM Lookup form 151OPM Manufacturing Accounting
Controller Module Setup 73OPM Purchasing Module Setup 66OPM Sales Order Module Setup 67OPM System Module Setup 62OPM Tax Module Setup 65OPSO document type 109Oracle Applications 78Oracle Applications User, creation
13Oracle Financials and GEMMS
Integration Diagram 25Oracle Financials Integration 78
Implementation Overview 23
ORACLE IDs 18Oracle Purchasing 78Oracle Reports 15ORAFIN_INT 171Organization Code 137organization hierarchy 118organizations
associating with a parent company118
classifications 116companies 118defined 118manufacturing plant 119nonmanufacturing plant 119plants 118
outflows 126outflows, inventory 124Overview
Oracle Financials IntegrationImplementation 23
Ppage break, reports 15paragraph codes 122Paragraph form 123Paragraphs form 122parent organizations 118permission, access 14permissions
concurrent programs 14request sets 14requests 14
Personal Profile Values 17Personal Profiles 137PI$PIPH_REASON_CODE 171plants 118PM$ALLOW_CREATE_INPUT
172PM$ALLOW_CREATE_OUTPUT
172PM$AUTO_REL_ALLOC_ONLY
172PM$CHECK_INV_RELEASE 173PM$CHECK_INV_SAVE 173PM$CHECK_LOT_STATUS 173PM$COPY_FM_TEXT 174PM$USE_AUTO_ALLOC 174pm_btch_hdr 123PO$DEFER_ACCT_MAP 174PO$RECV_CLOSE 175PO$REORDER 175PO$SHIPUOM 175PORD document type 109postal code 140

Oracle Process Manufacturing Implementation Guide Index •••• 199
predefined purges 148prerequisites
administrative functions 13Checklist setup 13
Primary Set of Books 56print command, calling 15print style 15Print Styles form 15printer driver method
Command 15Program 16
Printer Drivers form 15Arguments field, using 16initialization string 15
printingPrinter Drivers form 15program call 15
printing reports 15privileges
applications 14tables 14
Process Operations Control datacollection 119
product help directory 20Profile Options 13, 16
application 16priority rule set 17responsibility 16site 16user 16
Profile Values 16options 17Personal 17
profile, user 16province, geography code 140Purchase Acquisition Costs form 98,
106purchase order
synchronization 78Purchase Order Lines form 122Purchase Orders form 122Purchase Price Variance Constant
74Purge and Archive form 141, 142purge criteria
earliest creation date 143earliest modification date 143first document number 143first organization code 143last document number 143last organization code 143latest creation date 143latest modification date 143
Purge Inquiry form 146purge name
AJNL 141
AOPS 141APOR 141APRD 141JRNL 141OPSO 141PORD 141PROD 141
Purge Process form 145Purge Setup form 148, 150purge status 142
archive in progress 146archived successfully 146defined, not yet run 146purge completed successfully 146purge in progress 146unsuccessful archive 146unsuccessful purge 146
Purge Tables form 150purges
customized 141predefined 148
QQC$DISPLAYSPEC 176QC$EXACTSPECMATCH 176
RRDBMS name 128Reason Codes form 124reason type, inventory 125reference UOM 131, 133Release Notes 21release notes help directory 20report sets, defining 18reports 15, 18
columns/rows 15copies, number of 15dimensions 15width/height override 15
request group 14, 17, 18Request Groups form 19Request Security Group 19Request Sets 18reset string, Printer Drivers form 15Responsibilities 13
creating 14Responsibilities form 14, 19Responsibilities window 14responsibilities, assigning multiple
15responsibility associations 14

200 •••• Index Oracle Process Manufacturing Implementation Guide
Routing information, data collection119
Ssecurity 13
Active Request Limit 18AuditTrail setup 18function 14limiting active requests 18password 14
Session Parameters form 128Set of Books Setup 28Setting up
Accounts Payables 56Accounts Receivables 31, 43Accounts Receivables Descriptive
Flexfield 32Accounts Receivables Flexfield 31General Ledger 30OPM Costing Module 69OPM Inventory Module 64OPM Manufacturing Accounting
Controller Module 73OPM Purchasing Module 66OPM Sales Order Module 67OPM System Module 62OPM Tax Module 65Set of Books 28System Administration 26
setting user profile options 16setup
audit trail 13AuditTrail 18Checklist 13Common Purchasing module 78Descriptive Flexfields 19documents 109language 13OPM Inventory Management 85OPM Purchase Management 87optional, in related modules 87, 88Order Fulfillment 87printers 13profile options, suggestion 17Profile Values 84purchase management 92, 100purge 148site 13synchronization issues 89vendor class codes 92, 100vendor general ledger class codes
92, 100vendor information 92, 100vendor trade class codes 92, 100
sign on, security 14site specification 13Special menu 139Special pulldown menu 129standard predefined purges 148Standard Request Submission 17status, of purges 142stock movement 124storing and categorizing text 122structure, organizational 118Submit Request form 14, 17, 18, 19subparagraph code 123subparagraphs 123SWR driver file 15SY$3DEF_DTIME 176SY$ADDR_LEN 177SY$ALL 177SY$DEFAULT_CURR 177SY$DEFAULT_DAYS_MAX 178SY$DEFAULT_FISCAL_IND 178SY$DEFAULT_LAB_TYPE 189SY$DEFAULT_LANG 178SY$DEFAULT_ORGN 189SY$DEFAULT_QUEUE_NO 179SY$DEFAULT_SCHEDULE 189SY$DELTA_DAYS_MAX 179SY$EFF_MAX_DATE 179SY$EFF_MIN_DATE 180SY$ESS_INSTALLED 180SY$ESS_USER 181SY$INTRASTAT 181SY$INTRASTAT_UM 181SY$MAX_DATE 182SY$MIN_DATE 182SY$MONA1 182SY$MONA10 183SY$MONA11 183SY$MONA12 183SY$MONA2 184SY$MONA3 184SY$MONA4 184SY$MONA5 185SY$MONA6 185SY$MONA7 185SY$MONA8 186SY$MONA9 186SY$NEW 186SY$NOW 187SY$OF_UOM_TRIM_CHAR 62,
187SY$QC_GRADE 188SY$UOM_HOURS 188SY$ZERODATE 188SY_GEOG_TBL 140synchronization
common purchasing 77

Oracle Process Manufacturing Implementation Guide Index •••• 201
general ledger data 90purchase orders 78
System Administrator Setup 26System Administrator, role 16, 17System Profile Values 84
Ttable of contents, master, for help 21target printer, selecting 15task modules 20tax location code 119Territories window. 18Territory LOV Values 18Territory, List of Values 13text editor 129Text Editor form 122, 129Text Paragraph Selection form 122text style, reports 15Text Token form 129text tokens 129text, associating with a document
122text, storing and categorizing 122to_char mask 148to_data mask 148Transaction Flexfield Structure
Define 32transactions, documenting 109Translations window 18TX$AUTOTAXOE 65, 190TX$MAX_TAX_AUTH 65
UUnit of Measure 62, 131Unit of Measure form 131UOM 131
conversion 131types 132, 135
UOM Type form 135usages 126usages, inventory 124user organization, editing 137User Organizations form 137User Planning Classes form 138user profile 16user responsibilities 15user, creation 13, 14users, adding additional 13
Vvendor classes 92, 100Vendor Classes form 92, 100Vendor General Ledger Classes form
94, 102Vendor Trade Classes form 96, 104volume units 131
WWeb-based browser help 20weight units 131WF$EXPIRY_INTERVAL 190WF$RETEST_INTERVAL 190

202 •••• Index Oracle Process Manufacturing Implementation Guide