12 ZXG10 BSS(V2.95)OperationManual(PerformanceMeasurementCou
Upload
trinhkhuongCategory
view
220download
2
1
Operation Manual:
Lazy Daze Beneteau 42’

2
Welcome Note
Hello and welcome to Rob Swain Sailing School and your Beneteau 42 “ Lazy Daze”. Inside this manual you should find directions and instruction for everything you will need to know in order to operate you vessel safely and efficeiently. Please take the time to read through this manual before you head out and feel free to ask any of our staff questions about the boat or manual. Here at RSSS we want you to have the most comfortable and safe experience as possible. We hope you have a great trip and enjoy these beaultifull cruising grounds. Should you have any problems while aboard please don’t hesitate to contact us. Kind regards and fair winds, The RSSS Staff Office number – (284) 494 0432 {Mon – Sun, 9-‐5} Emergency number – (284) 540 3380 or (284) 540 1108

3
Table of Contents
Yacht Specs .............................................................................................................................................. 4 Boat Equipment ..................................................................................................................................... 4
Safety ......................................................................................................................................................... 5 Life Saving Signals ................................................................................................................................. 6
Heads ......................................................................................................................................................... 9
Showers ................................................................................................................................................. 10 Electrical Panel ................................................................................................................................... 11
Batteries ................................................................................................................................................ 12 Bilge Pumps ......................................................................................................................................... 14
Refrigeration ....................................................................................................................................... 15
Mechanical ........................................................................................................................................... 16 Propane and Stove ............................................................................................................................. 17
Fresh Water System .......................................................................................................................... 18
Instruments ......................................................................................................................................... 19 Equipment ............................................................................................................................................ 21
Maneuvers ............................................................................................................................................ 23 Reefing Guidelines ............................................................................................................................. 25
Troubleshooting ................................................................................................................................. 25
4
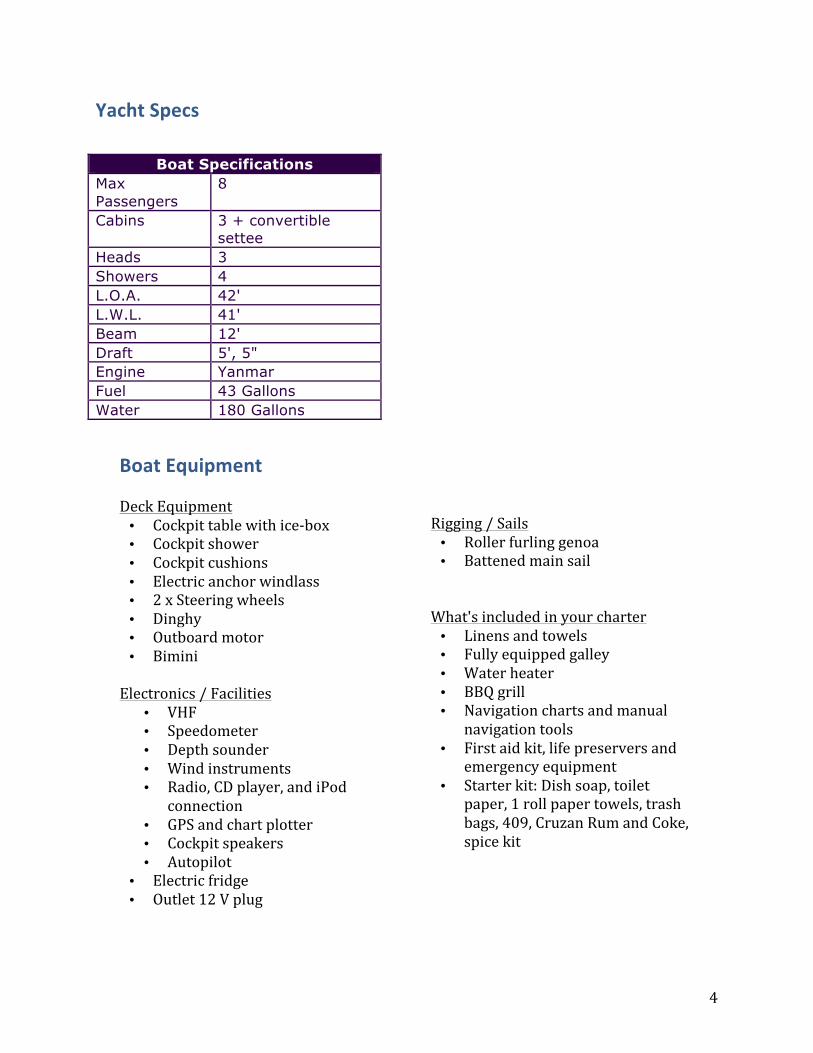
Yacht Specs
Boat Specifications Max Passengers
8
Cabins 3 + convertible settee
Heads 3 Showers 4 L.O.A. 42' L.W.L. 41' Beam 12' Draft 5', 5" Engine Yanmar Fuel 43 Gallons Water 180 Gallons
Boat Equipment Deck Equipment • Cockpit table with ice-‐box • Cockpit shower • Cockpit cushions • Electric anchor windlass • 2 x Steering wheels • Dinghy • Outboard motor • Bimini
Electronics / Facilities
• VHF • Speedometer • Depth sounder • Wind instruments • Radio, CD player, and iPod
connection • GPS and chart plotter • Cockpit speakers • Autopilot
Rigging / Sails • Roller furling genoa • Battened main sail What's included in your charter • Linens and towels • Fully equipped galley • Water heater • BBQ grill • Navigation charts and manual
navigation tools • First aid kit, life preservers and
emergency equipment • Starter kit: Dish soap, toilet
paper, 1 roll paper towels, trash bags, 409, Cruzan Rum and Coke, spice kit
• Electric fridge • Outlet 12 V plug

5
Safety All of the Rob Swain Sailing School boats undergo regular safety checks and strictly adhere to the BVI Blue Code Safety Requirments. - Your Life-‐Jackets are located in the aft lazzerets
- Please see instuctions on life raft for operation, do not pull cord until life raft
is free from obstructions and the boat, then it is ready to inflate. The life raft will do so automatically.
- First Aid Kit and Flare Box are located under the seat at navigation station
- Your safety equipment is located in the Starboard Cockpit Locker.
-‐ Thermal Protective Blanket -‐ Jump Lead -‐ Emergancy VHF Antennae -‐ Second Anchor
-‐ For Emergancy Radio Operations see yellow warning sticker procedure -‐ Fire Safety Equipment Location -‐ Fire buckets in Starboard cockpit locker -‐ Fire blanket in galley -‐ Fire extinguishers beneath Nav table and in both aft cabins -‐ Engine controls – Refer to boat operations manual for operation instruction
-‐ If you experience bad weather we recomend you navigate to a near-‐by port of refuge by referring to charts and cruising guide. If in need of advice or assistance call Swain Sailing Office.

6
Life Saving Signals Fire Safety Your fire blanket is located above the galley sink for use In the event of a stove/pan fire.
- Pull down hard on black straps - Place blanket over fire and smother flames - Let it sit over pan for extended time, even if the fire appears to be
extinguished, exposing hot stove or pan to oxygen could result in reignition
3 fire extinghishers are located on your vessel. Located on the side of your navigation station and one located in each aft cabin. When using fire extinguisher’s follow the P.A.S.S rule - Pull the pin - Aim at the base of the fire - Squeeze the handle - Spray/spread along the base of the fire

7
Foreward cabine fire extinguisher
Port cabine fire extinguisher
Starboard cabin fire extinguisher

8
In the event of an engine fire, your companionway stairs is fitted with a small plastic hatch through which you should extinguish a fire through, rather than lifting the stairs thus feeding the fire additional oxygen.

9
Heads Usage It is very important for your comfort and hygenic safety onboard that you use heads according to the following procedures.
- Prime the head ensuring there is some water in the bowl. - Use the head ensuring nothing goes into the head other that what you have
digested and a very minimal amount of paper. - To clear the head pump 20 times ensuring the water in the bowl becomes
clear. - Change the flush setting to dry and pump out any water leaving the head dry
for the next person. - Whenever at the dock be sure to use shoreside facilities so as to keep our
marinas and anchorages clean.
10
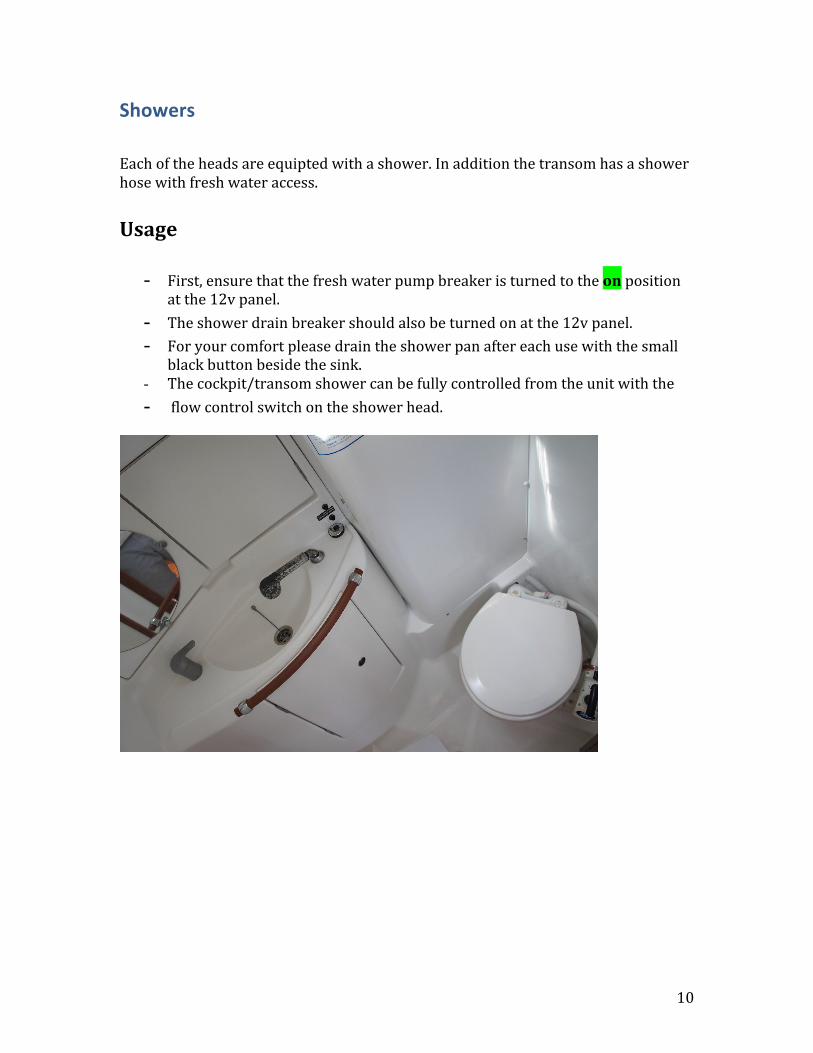
Showers Each of the heads are equipted with a shower. In addition the transom has a shower hose with fresh water access. Usage - First, ensure that the fresh water pump breaker is turned to the on position
at the 12v panel. - The shower drain breaker should also be turned on at the 12v panel. - For your comfort please drain the shower pan after each use with the small
black button beside the sink. - The cockpit/transom shower can be fully controlled from the unit with the - flow control switch on the shower head.

11
Electrical Panel 12 Volt Panel
110 Volt Panel - Battery charger - Water heater - 220AC Outlets - Water Heater
First column Second Column Navigation Water Pressure Mooring Lights Bilge Pump Steaming Light Fridge Unit Deck Light Confort Cabin Lights Central Navigation Saloon Light VHF Instrument Lights
Spare 1
12v DC Outlets Spare 2

12
Batteries Your yacht is not equipped with a generator. Therefore anytime you use electricity on the boat you will need to charge you batteries to replenish energy used. Our engineers suggest that you charge the batteries for 3-‐4 hours daily, usually two hours in the morning and two hours in the evening works well.
q Start your engine according to manual starting procedures. q Hold in the the red button on the center of the throttle lever. q Increase RPM to 1500 (engine not in gear) in order to charge efficiently.
Battery switches and windlass breaker
- Battery switchs (Aft port cabin) - Windlass breaker switch

13
Your inverter converts DC power into AC power. When on shore power the AC plugs around the boat will be powered.
q Plug the connection into the 12DC outlet on your electrical panel q Switch on the 12DC switch q Turn on the inverter q Plug in your device and charge

14
Bilge Pumps
q Your boat is equipped with an automatic bilge pump. It is wired ditrectly to your batteries and cannot be switched off from your electrical panel. When it is in use a green led will light up on the 12v panel. You can also force the bilge pump on from the bilge pump breaker if your float switch fails.
q You also have a manual bilge pump which can be operated from behind the poat side steering wheel.

15
Refrigeration Your yacht is equipped with one large refrigerator. In order to ensure proper refridgeration please follow these guidelines:
q Suppliment your refrigerator with a block of ice and a bag of ice cubes at the start of your charter.
q Pack the fridge in the reverse order of which you think you will use your food.
q When opening the fridge try to take out everything you will need for that meal at the same time.
q Use the drain button to empty any melted ice daily. If you follow these steps not only will your food stay better refridgerated but your batteries will do less work to keep the refrigerator cool.

16
Mechanical Engine start procedure - Ensure throttle is in neutal position - Turn key one click clockwise until alarm sounds - Turn key another click clockwise until engine starts - Ensure water is coming out of the exhaust
To stop the engine - Ensure throttle is in nutral position - Push stop button until engine stops, DO NOT turn the key to off position until
engine is stopped. - An alarm will sound - Turn key counterclockwise to upright position as in the photo below
Daily Engine checks - Check belt for damage and ensure it is tight (should turn no more than 90
degree’s) - Check oil level. Dipstick is located on the left hand side of the engine. The
level should be at least halfway between the two level marks. If not, use spare oil located in your navagations table’s seat. To add oil open orange fill-‐cap on top of engine. Be carefull not to overfill.
- Check coolant level. If low please top up. Spare coolant is also located in navigation seat
At the first sign of engine trouble please call RSSS for assistance.

17
Propane and Stove The propane locker is located on the port side of the transom. Do not change propane tank when BBQ is lit.
Usage - Turn on the gas soloniod switch on your instrument panel. There is also a
second soloniod switch located on the right-‐hand side of the stove, this should be in the up position.
- Light your match, then push in the stove’s knob and trun 90 degrees counterclockwise.
- Light the burner and hold down knob for 15 seconds to ensure the whole burner is ignited
- To turn of the stove, turn off one of the soloniod switches. After solenoid has been switched off allow remaining gas in lines to completely burn off. After the burner has gone out return the stove knob to the off position and turn of fthe second soleniod switch.
If you suspect a gas leak do not use any of the electrical systems on board including the bilge-‐pump.

18
Fresh Water System - Lazy Daze has two water tank with a capacity of 180 gallons. Try to conserve
your water usage or expect to re-‐fill at some point during your charter. The water tank switch valves are shown below. Only have one open at a time to prevent air lock.

19
Instruments VHF - Ensure radio is switched on and at a high volume. - Ensure that it is set on the hi setting unless you are calling a vessel that is
very near. - Turn squelch up until you hear a hissing noise and then down just enough for
it to stop. - Select channel for calling. - Hold down switch on handset while talking and release when not.
Usefull channels 16 – For hailing another vessel and distress calls only 68 – Marinas and Yacht Clubs – for reservations etc… 06/09 – Non commercial ship to ship 05 -‐ weather In the event that you are involved in a incident that is not life threatening please contact the RSSS office immdeiately on 494-‐0432 or 540-‐3380. Please report as much information possible so that we can best assist you.
20
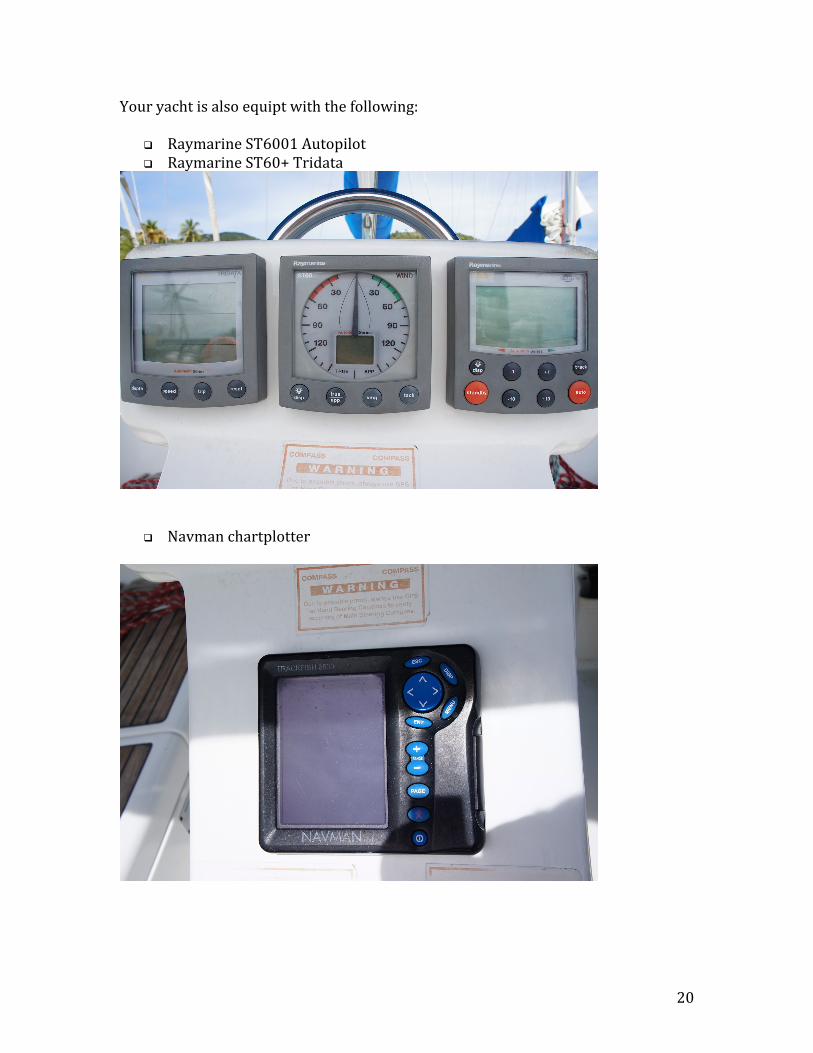
Your yacht is also equipt with the following:
q Raymarine ST6001 Autopilot q Raymarine ST60+ Tridata
q Navman chartplotter
21
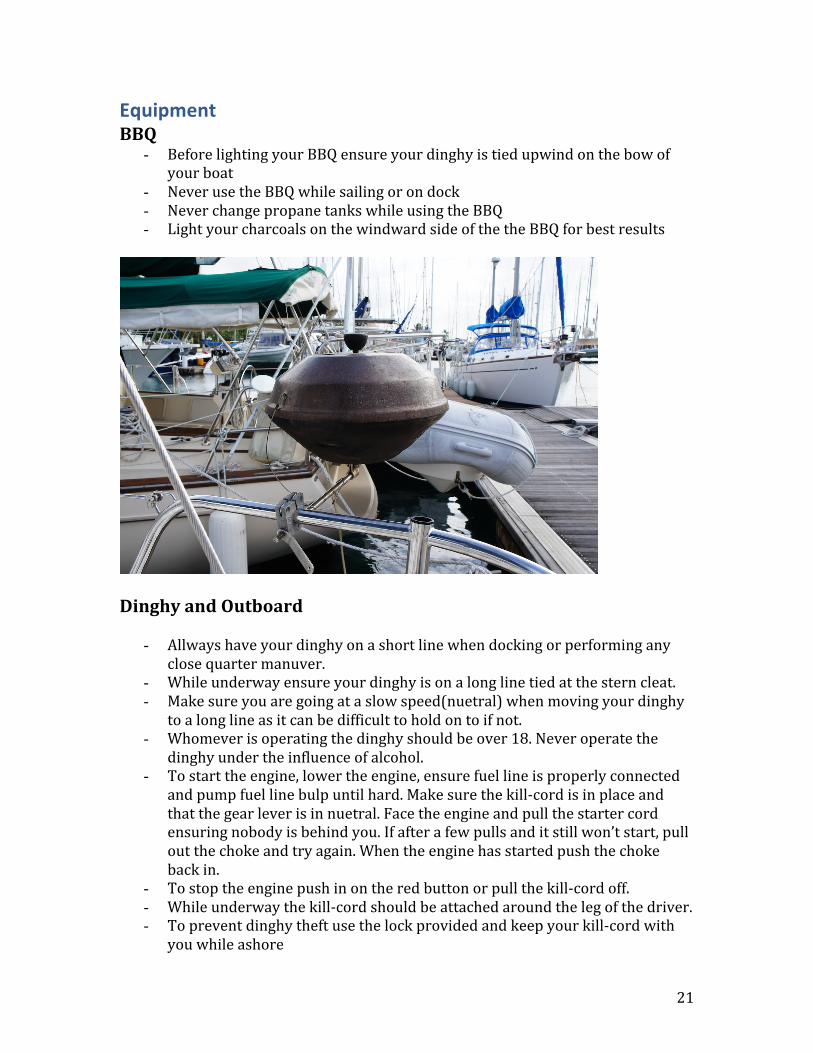
Equipment BBQ - Before lighting your BBQ ensure your dinghy is tied upwind on the bow of
your boat - Never use the BBQ while sailing or on dock - Never change propane tanks while using the BBQ - Light your charcoals on the windward side of the the BBQ for best results
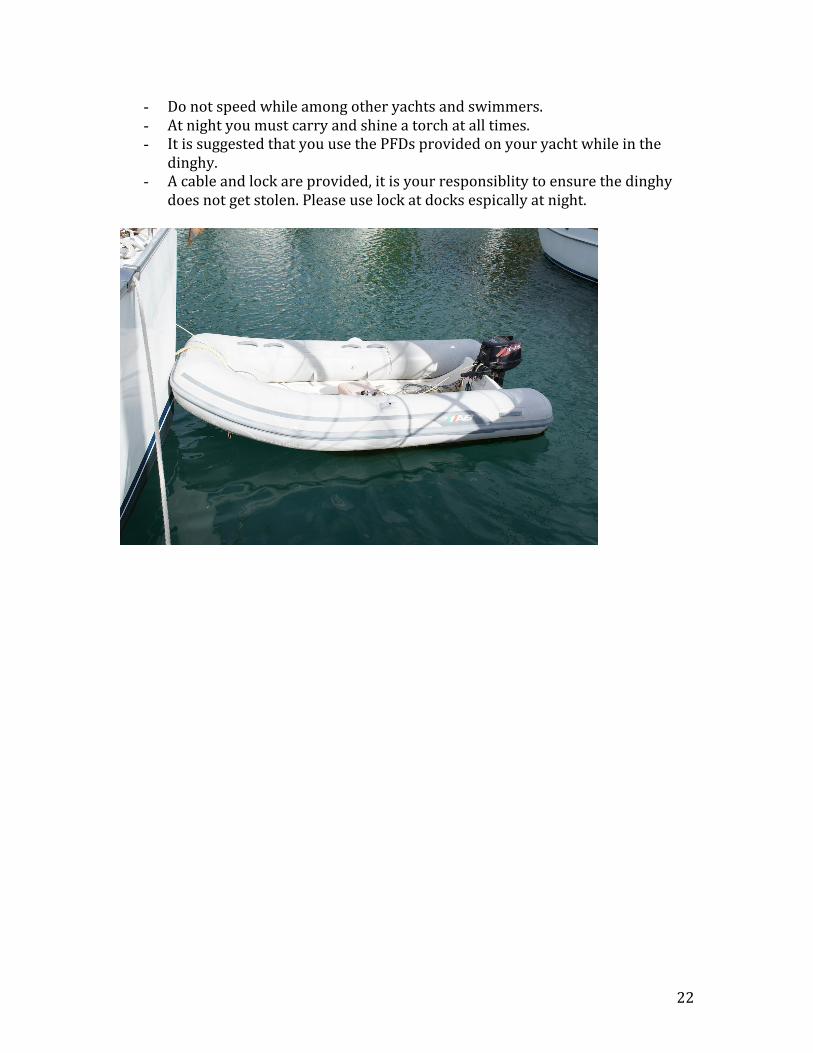
Dinghy and Outboard - Allways have your dinghy on a short line when docking or performing any
close quarter manuver. - While underway ensure your dinghy is on a long line tied at the stern cleat. - Make sure you are going at a slow speed(nuetral) when moving your dinghy
to a long line as it can be difficult to hold on to if not. - Whomever is operating the dinghy should be over 18. Never operate the
dinghy under the influence of alcohol. - To start the engine, lower the engine, ensure fuel line is properly connected
and pump fuel line bulp until hard. Make sure the kill-‐cord is in place and that the gear lever is in nuetral. Face the engine and pull the starter cord ensuring nobody is behind you. If after a few pulls and it still won’t start, pull out the choke and try again. When the engine has started push the choke back in.
- To stop the engine push in on the red button or pull the kill-‐cord off. - While underway the kill-‐cord should be attached around the leg of the driver. - To prevent dinghy theft use the lock provided and keep your kill-‐cord with
you while ashore
22
- Do not speed while among other yachts and swimmers. - At night you must carry and shine a torch at all times. - It is suggested that you use the PFDs provided on your yacht while in the
dinghy. - A cable and lock are provided, it is your responsiblity to ensure the dinghy
does not get stolen. Please use lock at docks espically at night.

23
Maneuvers Mooring - Bring dinghy on to short line - Consult cruising guide - Prepare two mooring lines - Each one bowlined to either bow cleats - The person on the bow is in charge of the boat speed and direction using
visual commands to the helm - Motor to mooring from downwind only fast enough to ensure steerage is
maintained - When the person on the bow feels you have sufficient speed to coast to a stop
at the mooring ball they instruct the helmsman to engage nuetral. Try not to have to use reverse
- Mooring pendent is hooked using boat hook and brought onboard under the bow-‐pulpit and secured to one of your mooring lines.
- That mooring line goes through the eye of the pendant and cleat hitched back on to the same cleat it is bowlined to
- You are now secure - You can now pass your second line through the eye of the pendant and back
to its respective cleat. - Each line should be the same length and just long enough to avoid chaffing on
the bow. Leaving the mooring - Again, ensure dinghy is on a short line - Start engine - Release one of your mooring lines - When boat swings in the dirction you wish to go release your second line - Only start to motor away when helmsman can see the mooring ball
24
Anchoring - 7 to 1 recomended scope - Bring dinghy onto short line - Prepare anchor - Anchor locker door secure, safety line off, anchor tipped over bow - Locate good drop spot (consult cruising guide) - Allow person on bow to point you to target - Allow the boat to come to a stop and drop anchor - Initially drop half of expected rode - Windlass pays out 2ft per second - Boat will turn broadside to wind as she makes way to leeward - When acnchor catches the stern will kick downwind - Pay out another 10 seconds of rode - Continue sequence untill you feel you have reached sufficent scope - When boat has settled head to wind engage reverse in low rev”s - Sight your on land transits - If transits are still holding after one minute throttle up to medium rpm 1500 - After another minute increase rpm to 2000 rpm and wait another minute - The boat should stay in the same place throughout this process - The anchor is secure. Slide snubber hook over anchor’s chain forward of bow
roller - Secure other end to bow cleat - Pay out a little more chain until snubber line is holding all the strain
Leaving Anchor - Again, ensure dinghy is on a short line - Rev engine in nuetral to 1500rpm - Remove snubber line - Pull up anchor untill you hear windlass start to strain or untill chain no
longer has any sag. - Let the chain drop again under its weight pulling the boat forward - Continue untill all the chain is retrieved and anchor is free - Communicate to the driver when the anchor is up - Driver goes back in to nuetral position and engages forward and motors
away - Secure anchor
25
Reefing Guidelines
The following is RSSS’ suggest wind strenghts for reefing - Reef 1 at 12-‐15 knots - Reef 2 at 15+ knots - Use only partial jib after 20 knots
Troubleshooting The following is a short list of common bareboat issues. For more complicated issues please contact RSSS and let out engineers do the work. Problem: Stove won’t light Solution 1: Ensure soloniod switch is turned on Solution 2: Ensure propane tank valve is open Problem: Toilet won’t prime Solution: Pump in wet bowl setting very fast to bleed air