Operating instructions Radio Funky -...
12
SIMPLY CLEVER Radio Funky Operating instructions
Transcript of Operating instructions Radio Funky -...

www.skoda-auto.com
Funky: CitigoRádio anglicky 05.2013S00.5610.98.201ST 012 095 CR
SIMPLY CLEVER
Radio FunkyOperating instructions
Structure of this Owner's Manual(explanations)
This Owner's Manual has been systematically designed to make it easy for you tosearch for and obtain the information you require.
At the beginning of this manual you will find a table of contents where all the top-ics are arranged sequentially.
Direction indicationsAll direction indications such as “left”, “right”, “front”, “rear”, relate to the directionof travel of the vehicle.
Explanation of symbols Denotes the end of a section.
Denotes the continuation of a section on the next page.
® Denotes a registered trademark.
Notes
WARNING
The most important notes are marked with WARNING. These WARNING notesdraw your attention to a serious risk of accident or injury.
CAUTION
A CAUTION note alerts you to the possibility of damage to your vehicle (e.g. dam-age to the gearbox), or points out general risks of an accident.
Note
A normal Note draws your attention to important information about the operationof your vehicle.

Table of Contents
General information
Important information 2
Device specification and operation 3
MENU mode 4
Radio
Using the system 5
CD player
Using the system 6
External sources
Using the system 8
1Table of Contents
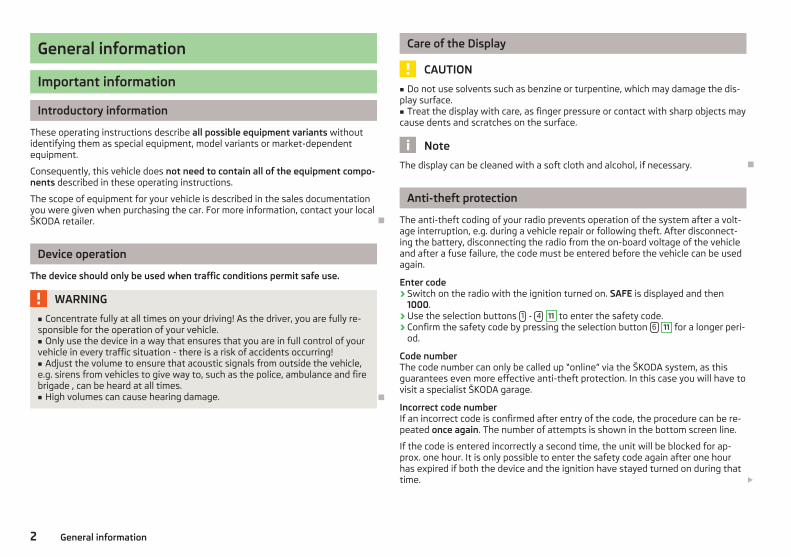
General information
Important information
Introductory information
These operating instructions describe all possible equipment variants withoutidentifying them as special equipment, model variants or market-dependentequipment.
Consequently, this vehicle does not need to contain all of the equipment compo-nents described in these operating instructions.
The scope of equipment for your vehicle is described in the sales documentationyou were given when purchasing the car. For more information, contact your localŠKODA retailer.
Device operation
The device should only be used when traffic conditions permit safe use.
WARNING
■ Concentrate fully at all times on your driving! As the driver, you are fully re-sponsible for the operation of your vehicle.■ Only use the device in a way that ensures that you are in full control of yourvehicle in every traffic situation - there is a risk of accidents occurring!■ Adjust the volume to ensure that acoustic signals from outside the vehicle,e.g. sirens from vehicles to give way to, such as the police, ambulance and firebrigade , can be heard at all times.■ High volumes can cause hearing damage.
Care of the Display
CAUTION
■ Do not use solvents such as benzine or turpentine, which may damage the dis-play surface.■ Treat the display with care, as finger pressure or contact with sharp objects maycause dents and scratches on the surface.
Note
The display can be cleaned with a soft cloth and alcohol, if necessary.
Anti-theft protection
The anti-theft coding of your radio prevents operation of the system after a volt-age interruption, e.g. during a vehicle repair or following theft. After disconnect-ing the battery, disconnecting the radio from the on-board voltage of the vehicleand after a fuse failure, the code must be entered before the vehicle can be usedagain.
Enter code› Switch on the radio with the ignition turned on. SAFE is displayed and then
1000.› Use the selection buttons 1 - 4 11 to enter the safety code.› Confirm the safety code by pressing the selection button 6 11 for a longer peri-
od.
Code numberThe code number can only be called up “online” via the ŠKODA system, as thisguarantees even more effective anti-theft protection. In this case you will have tovisit a specialist ŠKODA garage.
Incorrect code numberIf an incorrect code is confirmed after entry of the code, the procedure can be re-peated once again. The number of attempts is shown in the bottom screen line.
If the code is entered incorrectly a second time, the unit will be blocked for ap-prox. one hour. It is only possible to enter the safety code again after one hourhas expired if both the device and the ignition have stayed turned on during thattime.
2 General information

If two invalid attempts are then made again, the unit will be blocked again for anhour.
The cycle - two attempts, blocked for an hour - will continue to apply.
Note
The code is normally stored in the instrument cluster. This ensures that it is auto-matically decoded (convenience coding). Manual input of the code is normally notnecessary.
Device specification and operation
Equipment overview
Fig. 1 Equipment overview
- On/off knob› for switching the equipment on and off (press)› for volume adjustment of audio source currently being played (turn)Settings knob› for activating the Scan function› for settings in the individual modesRADIO - Radio operationMEDIA - MEDIA operationTP - switches traffic programme on/off
1
2
3
4
5
MENU - Setting of the special functions and - buttons for moving forwards/backwards› RADIO-Mode - for the selection of the stations from the preset list.› MEDIA-Mode - for the selection of the previous or following track.› MENU-Mode - for setting the setpoints of special functionsCD case - Eject a CD - Sound settingsFunction keys› Save and select radio stations› Enter codeAUX input - Attach an external audio source
Switching the unit on and off
› To switch the device on and off, press setting button 1 .
After switching on the unit, the last audio source that was active before switch-ing off will be played.
If the device is switched on and the ignition key is removed, the unit switches offautomatically.
If your vehicle is fitted with the KESSY system, the unit will switch off automati-cally after the engine is turned off and the door opened. If the door is opened be-fore turning off the engine, the unit will not switch off until the vehicle has beenlocked.
When the ignition is switched off, the system switches off automatically after ap-prox. half an hour (discharge protection of the vehicle battery).
Volume setting
› To increase the volume, turn button 1 clockwise.› To decrease the volume, turn button 1 counter-clockwise.
The change to the volume appears in the unit display.
If the volume is reduced to 0, the speakers are muted. The following symbol willappear in the display .
6
7
8
9
10
11
12
3General information

CAUTION
High volumes can cause hearing damage.
Sound settings
By pressing the button again select the setting desired.
■ TRE - Treble setting■ BAS - Bass setting■ BAL - setting of the volume ratio between the left and the right side■ FAD - setting of the volume ratio between the front and the rear
MENU mode
SCN (scan) function
Press menu button 2 or the MENU button and then the function button SCN .
The auto-play function starts and plays each station in the current frequencyband for about five seconds.
Press the menu button 2 or the function button SCN again to stop automaticplaying of the radio station you are currently listening to.
Function AS
Press the MENU button and then the function button AS .
An automatic station finding is started during which the 6 stations with thestrongest signal in the memory level FM1 and/or AM1 are stored.
Setting special functions
Press the MENU button and then the function button SET .
■ SKM (SEEK MODE) - automatic station finding■ ALL - stops the station finding at all available stations■ PRESET - stops the station finding only at the stored stations
■ VOL - reduces the volume when turning on
■ GALA - speed-sensitive volume adjustment■ DIS - sets the display backlight■ PHONE - outputs telephone calls via the onboard loudspeakers■ PDC - sets the reduction of the volume when the park distance control is active■ PDC VOL ATTENU 0 - no volume limit■ PDC VOL ATTENU 1 - medium level volume limit■ PDC VOL ATTENU 2 - low level volume limit■ PDC VOL ATTENU 3 - mute
■ AUX - sets the input sensitivity of an external source■ OFF - switches off■ AUX VOL LEVEL 1 - high level, used in particular for notebooks■ AUX VOL LEVEL 2 - medium level, used for cassette or CD players■ AUX VOL LEVEL 3 - low level, used for MP3 player
Note
Each setting change is stored by changing to another menu point.
4 General information

Radio
Using the system
Radio mode
Your radio is equipped with FM and AM wavebands.
In the FM1/FM2 and AM1/AM2 ranges, there are 6 memory spaces each available;in order to change, press the RADIO button briefly.
Manual searchSet the desired radio station by turning knob 2 of the menu.
Automatic station findingThe radio searches for the next radio station in the selected waveband by press-ing the button or briefly.
Save radio stationSet the desired radio station and press and hold the corresponding function but-ton 11 until a beep is heard.
Note
■ Certain radio stations transmit additional text information - designated as radiotext. RDS (Radio Data System) used to transmit program IDs and additional serv-ices, thus enabling automatic station tracking, for example. If reception is suffi-ciently satisfactory, RDS-enabled radio stations will display the station name in-stead of the station frequency.
Traffic information function TP
Pressing the TP button - switches the traffic.programme on/off.
The “TP” display in combination with a station name (e.g. in the station or presetlist), indicates a traffic programme station.
Irrespective of which radio station you are listening to, an additional receiver partin the unit ensures that a traffic programme station can always be received aslong as the traffic programme function is switched on. During media mode, theunit always searches for an available traffic program station in the background.
The availability of traffic programme monitoring is indicated by the letters “TP” atthe top right of the screen.
If no traffic programme station can be received because, for example, radio recep-tion is interrupted in general, instead of “TP”, “NO TP” will be displayed.
5Radio

CD player
Using the system
Information on how to use a CD
Audio-CDs (CD-A) and MP3-CDs can be played in the internal drive.
Inserting the CDInsert a CD, with the printed side facing up, into the CD slot 8 until it is automati-cally drawn in.
The play function will start automatically.
Taking out the CDPress the button – the CD is ejected.
If the “ejected” CD is not taken out within 10 seconds, it will be retracted again forsafety reasons.
Buttons on the unit for controlling the current audio sourcesThe arrow buttons on unit or will always affect the currently heard audiosource, irrespective of the current menu used.
- pressing this briefly changes over to the beginning of the current title orchapter, repeated pressing changes over to the beginning of the previous title orchapter.
- pressing this briefly changes over to the beginning of the next title or chap-ter, repeated pressing changes over to the beginning of the next title or chapter.
Changing between the audio sourcesPress the MEDIA button to select the audio source: CD (internal CD drive) or AUX.
WARNING
The CD-player is a laser product. On the manufacturing date, this unit wasclassified as a class 1 laser product in accordance with the national/interna-tional standards DIN EN 60825-1: 2008-05 and DHHS Rules 21 CFR, Sub-chapter J. The laser used in this class 1 laser product is so weak that there isno risk of danger when operated correctly. This product is designed such thatthe laser is restricted to the inside of the unit. However, the installed lasercould be classified in a higher class were the housing to be removed. For thisreason, never remove the housing of the unit.
CAUTION
■ Never insert CDs with the designation “into the internal drive. Do not insert indrives without a drawer ” or use Eco Discs.■ After pressing the button there is a time delay of a few seconds before theCD is ejected. During this time the lock in front of the CD slot is open.■ Be sure to wait until the CD has been fully ejected before you try to insert a newCD. Otherwise you can damage the drive inside the unit.■ If the CD is mechanically damaged or incorrectly or not fully inserted, “ERROR /CHECK CD” is initially shown on the display. Check the CD and insert it again cor-rectly and completely into the drive. If “ERROR / CHECK CD” is displayed again,then a visit to a ŠKODA specialist is required.■ If the inside temperature of the unit is too high, no CDs will be accepted. Theunit switches into the last active operating mode.■ Never use liquids such as gasoline, paint thinner or record cleaner to clean thesurface of the CD - this may cause damage.■ Never expose the CD to direct sun light!■ Only write on the CD with appropriate writing tools.■ Do not affix anything to the CD!
Note
■ Uneven road surfaces and strong vibrations may cause the CD to jump.■ In cold weather or after rain showers, moisture (condensate) may deposit in theunit. This can effect the CD jump or impair the play function. In that case, wait un-til the moisture has dissipated.■ If a CD is dirty, never clean it in a circular motion, but rather from the inside out.Use a soft, lint-free cloth. For heavy stains, we recommend that you clean the CDwith a commercially available CD cleaner and allow it to dry.■ It is possible that CDs protected by copyright and home-made CD-R and CD-RWwill not be played back at all or only in certain circumstances.
6 CD player

■ Please also note the additional information for MP3 mode .■ The national copyright laws that apply in your country must be observed.■ The CD-player does not contain parts that need to be serviced or repaired. Inthe case of a defective CD player, visit a ŠKODA specialist garage.
Operating the CD player
Press the MEDIA button and then the function key CD (Internal CD drive)or AUX » page 8, Advice for dealing with external sources.
■ CD - changes over to an inserted CD■ SCN - plays all the titles of the current media source for approximately 10 sec-
onds. The auto-play feature can also be started or stopped by briefly pressingthe menu button 2 .■ SCAN CD - plays a track of a CD■ SCAN FOLDER - plays a track in the selected folder
■ MIX - plays all tracks in the current audio source in random order■ MIX OFF - the function of the menu is switched off;■ MIX CD - plays the tracks on a CD in random order■ MIX FOLDER - plays the tracks in the selected folder in random order■ PLS MIX - play play-list (folder of selected tracks from individual folders,
which is stored on the CD) in random order. Is only displayed when a play-listis created for the replayed CD.
■ - scrolls up in the folders■ - scrolls down in the folders■ INF - by pressing the INF function button again, additional information about
MP3 files can be selected in the display■ TITLE - name of the track■ ARTIST - name of the performer■ ALBUM - name of the album■ FILE - file■ FOLDER - folder
■ AUX - switch to an external source connected via the AUX-IN multimedia in-put » page 8, Advice for dealing with external sources
General information for MP3 operation
Requirements for the MP3 data and data carrier› CD-ROM, CD-R, CD-RW with a capacity of 650 MB and 700 MB.› The CDs must correspond to the ISO 9660 Level 2 standard as well as the Joliet
data system (single and multi-session).
› Data names must be no longer than 64 characters.› The list structure is restricted to a depth of 8 list levels.› The name of the artist, the album and the title of the MP3 file being played can
be shown, providing this information is available as an ID3 tag » page 7, Operat-ing the CD player. The list and data name will be displayed if there is no ID3 tag.
› WMA data (Windows Media Audio) can also be played even if the copyright isadditionally protected by the DRM procedure (Digital Rights Management). SuchWMA data is not supported by the unit.
Bit rate (data flow per time unit)› The system supports MP3 data with bit rates of 32 to 320 KB/s as well as MP3
data with variable bit rates.› The indicated playing time data with variable bit rates is not reliable.
7CD player
External sources
Using the system
Advice for dealing with external sources
An external source connected to the AUX-IN input can be played in the car overthe radio speakers.
External audio sources cannot be operated via the radio.
When operating the radio, a different audio source can be selected at any time. Aslong as the external audio source is not switched off, it always remains active inthe background.
See the owner's manual of the specific manufacturer for operating the externalaudio source.
Conditions for successful connectionTo connect external audio sources via the AUX-IN input a 3,5 mm standard jackplug is needed. If the external audio source does not have this jack plug, anadapter needs to be used (such as an external source to the USB input).
› Only USB devices with the specification 2.0 can be connected.› The version of the file allocation table FAT (File Allocation Table) of the connec-
ted device must be FAT16 ( <2 GB) or FAT32 (> 2 GB).› In order to replay from a unit with a hard disk (HDD) which includes a large data
volume, it can lead to a time delay when reading in the overview of the musicdata.
› In order to replay from a unit, which includes a complicated folder structure, itcan lead to a time delay when reading in the overview of the music data.
› The folder structure in the connected unit must not exceed a depth of 8 levels.One folder must not contain more than 1000 data.
› A USB extension cable or USB distributor (HUB) must not be used to connectthe unit.
AdapterWe recommend that you purchase an adapter for connecting the USB devices, thedevices with Mini USB output or an iPod, at an authorised ŠKODA Service Partner.
Adjust the play function volume of the external audio sourceThe play volume of the external audio source can be adjusted via the volume con-trol on the radio 1 .
Depending on the connected audio source, the output volume on the external au-dio source can be changed.
You can also change the input sensitivity of the external audio source, in order toadapt the play volume of the external audio source to that of the other audiosources or to avoid distortions » page 4, Setting special functions.
WARNING
■ Never place external sources on the dashboard. These could be thrown intothe passenger compartment during sudden driving manoeuvres, injuring theoccupants.■ Never place external sources close to the airbags. These could be thrown in-to the passenger compartment when the airbags are deployed, injuring theoccupants.■ Never hold external sources in your hand or on your knees while driving.These could be thrown into the passenger compartment during sudden driv-ing manoeuvres, injuring the occupants.■ Always route the connection cable for the external source such that it doesnot restrict you when driving.
CAUTION
The AUX-IN input must only be used for audio sources!
Note
■ See the owner's manual of the specific manufacturer for instructions on operat-ing the external source.■ If an external audio source is connected via AUX-IN, which is equipped with anadapter for external power supply, it can occur that the audio signal is interrup-ted. This depends on the quality of the adapter which is used.
AUX input
The input for an external audio source AUX-IN is located on the device 12 .
› The AUX-IN jack is activated by pressing the MEDIA button and by pressing theAUX function button.
The play function starts automatically after connecting the source.
External audio sources connected to the AUX-IN input cannot be operated fromyour radio.
8 External sources

ŠKODA AUTO a.s. pursues a policy of constantly developing radio and navigationsystems. Please understand therefore that the form and technical aspects of theradios and navigation systems may change at any time. The details of the appear-ance, dimensions and functions of the radio and navigation systems were correctat the time of publication. It is therefore not possible for legal claims to be madebased on the data, illustrations and descriptions contained in this Owner's Man-ual.
Reprinting, reproduction or translation, either in whole or in part, is not permittedwithout the written consent of ŠKODA AUTO a.s.
ŠKODA AUTO a.s. expressly reserves all rights relating to copyright laws.
Subject to change.
Issued by: ŠKODA AUTO a.s.
© ŠKODA AUTO a.s. 2013

www.skoda-auto.com
Funky: CitigoRádio anglicky 05.2013S00.5610.98.201ST 012 095 CR
SIMPLY CLEVER
Radio FunkyOperating instructions