ONE WEEK MOLECULAR BIOLOGY WORKSHOP 2015
41
1 DAY LAB - EXPERIMENT ONE WEEK MOLECULAR BIOLOGY WORKSHOP 2015 (FEB 16 – 20, 2015) Prepared by David Ng With contributions from Li-Juan Sun Loida J. Escote-Carlson Jim Kronstad John Carlson Vindhya Amarasinghe Advanced Molecular Biology Laboratory Michael Smith Laboratories University of British Columbia All materials protected under the Creative Commons License (BY-SA). Any revenue procured from this workshop goes directly to our OUTREACH programs. For more information, on what these programs entail, please go to bioteach.ubc.ca
Transcript of ONE WEEK MOLECULAR BIOLOGY WORKSHOP 2015

1
DAY LAB - EXPERIMENT
ONE WEEK MOLECULAR BIOLOGY WORKSHOP 2015 (FEB 16 – 20, 2015) Prepared by David Ng With contributions from Li-Juan Sun Loida J. Escote-Carlson Jim Kronstad John Carlson Vindhya Amarasinghe Advanced Molecular Biology Laboratory Michael Smith Laboratories University of British Columbia All materials protected under the Creative Commons License (BY-SA). Any revenue procured from this workshop goes directly to our OUTREACH programs. For more information, on what these programs entail, please go to bioteach.ubc.ca
2
DAY 1-5 SCHEDULE 1 WEEK FLOWCHART: p8 DAY 1: am/pm: LAB A: DNA fingerprint assay (polymerase chain reaction)........... pm: LAB B1: Digests and Agarose gels p14 DAY 2: am: LAB B2: Purification kits, CIP and ligation..................................... pm: LAB B3: Transformation procedures. pm: LAB D1: 2D protein gels (strip hydration)………………………….. p20 DAY 3: am/pm: LAB C1: Total RNA prep................................................................ LAB C2: Reverse Transcriptase + qPCR. am: LAB B4: Look at plates and set up cultures................................... pm: LAB D2: 2D protein gels (IEF focusing) pm: LAB E1: SDS PAGE gels (pouring gels)........................................ p28 DAY 4: am: LAB B5: Mini Plasmid preparations................................................ pm: LAB D3: 2D protein gels (2nd dimension) pm: LAB E2: SDS PAGE gels (Running and transfer of proteins)........ p39 DAY 5 am: SPECIAL LECTURE BLOCK …………………………….. pm: LAB E3: Western blot analysis.
3
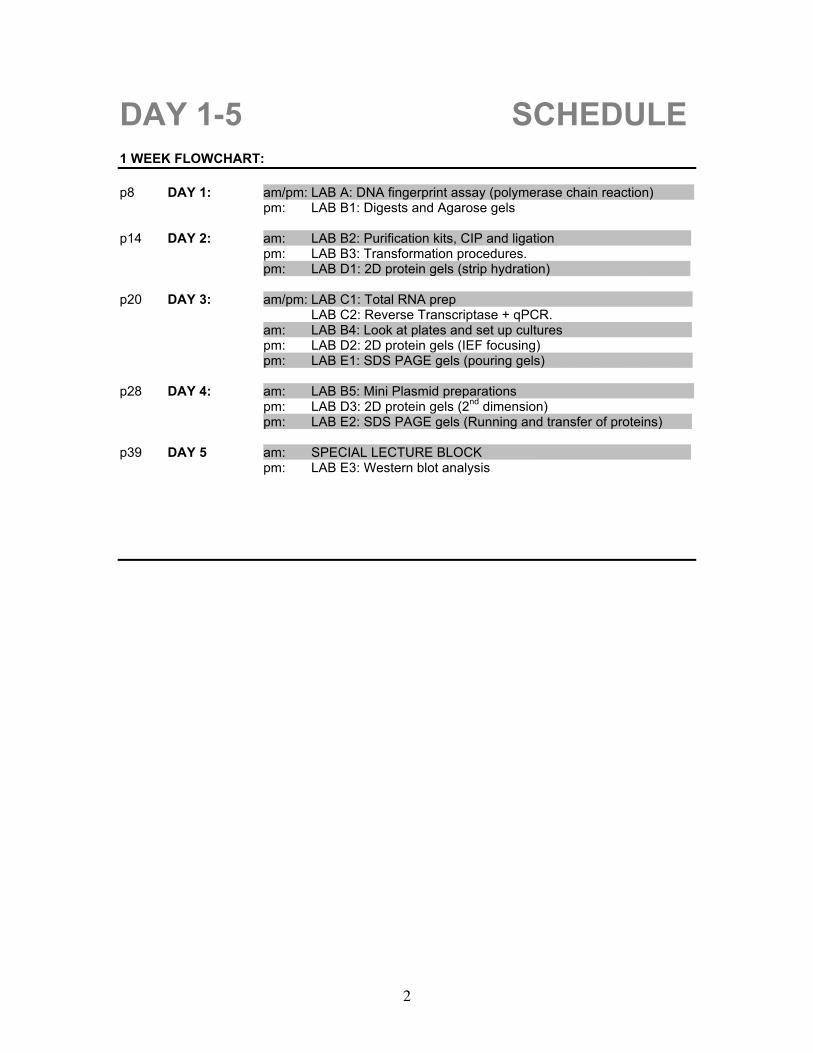
DAY 1-5 STREAMS CONTENTS BY STREAM: LAB A: POLYMERASE CHAIN REACTION. LAB B: CLONING TECHNIQUES (INCLUDING RESTRICTION DIGESTS,
PURIFICATION KITS, CIP ASSAYS, LIGATIONS, TRANSFORMATION, PLASMID PREPS)
LAB C: RNA WORK: ISOLATION/PURIFICATION AND REVERSE
TRANSCRIPTASE ASSAY. REAL TIME PCR. LAB D: 2D PROTEIN GEL ELECTROPHORESIS
LAB E: DETECTION OF PROTEIN EXPRESSION FROM CLONED GENES BY WESTERN BLOTTING. + FRIDAY AM LECTURE BLOCK COVERING HIGH THROUGHPUT TECHNIQUES – NEXT GEN SEQUENCING, SNP ANALYSIS, ARRAYS, ETC
4
PRE-LAB SAFETY SAFETY REGULATIONS: 1 No eating, drinking, or smoking in the laboratory. 2 All accidents must be reported to the instructor. 3 Lab coats must be worn while in the lab during experiments. No open-toe
sandals and bare feet are allowed. 4 EXTREME CAUTION: must be taken when handling the following hazardous
chemicals/materials in the lab:
1. Phenol and chloroform (Trizol reagent). Leakproof gloves must be worn! Phenol-chloroform extractions should be done in the fumehood, and wastes must be disposed of in designated containers only.
2. Ultraviolet (UV) transilluminators. Shields/Doors must be worn/closed
before turning on any UV light source. Exposure must be kept to a minimal. 3. Live cultures: Contaminated wastes must be disposed of into biohazard
waste containers only. Non-disposable wares used for cultures must be placed in designated trays for autoclaving.
4. Sharps (needles, broken glass, Pasteur pipets, etc). Disposal must be
into designated containers only. Do not recap needles. 5 Make sure all gas burners and hot plates are turned off after use. Do not
spray alcohol to disinfect the biosafety hood while the gas burner is on. 6 All nondisposable nonbiohazard glasswares must be rinsed at the sink before
leaving in soaking trays. 7 Take gloves off from hands before touching any fixtures in the lab (i.e.
telephones, door knobs, common equipment unless designated otherwise, books, etc) whether or not you think the gloves are clean.
8 Wash hands thoroughly before leaving the laboratory.
5
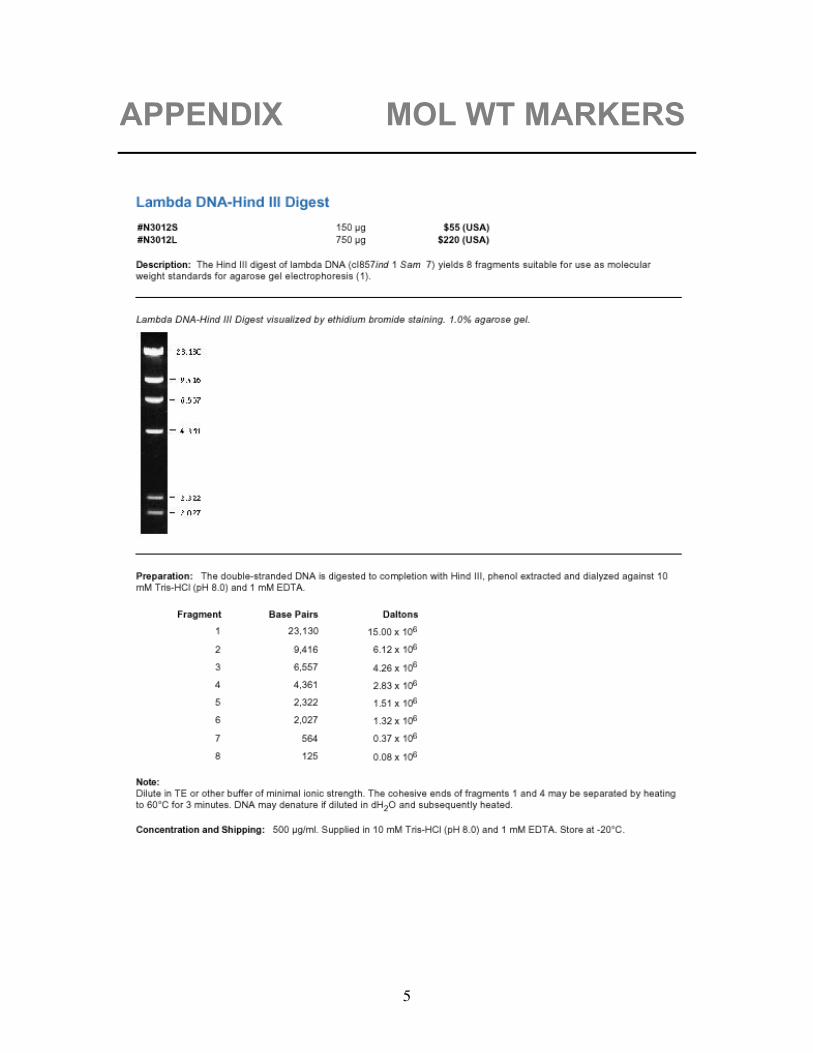
APPENDIX MOL WT MARKERS

6
APPENDIX MOL WT MARKERS

7
APPENDIX MOL WT MARKERS

8
DAY 1 LAB A - PCR
LAB A: POLYMERASE CHAIN REACTION A SIMPLE FINGERPRINT ASSAY USING POLYMERASE CHAIN REACTION We’ll start the workshop with a simplified polymerase chain reaction (PCR) experiment. Specifics of our experiment as well as theoretical information will be provided through the lectures. Briefly, PCR is a powerful genetic technique that allows researchers to amplify DNA sequences of interest. This amplification allows better and easier genetic characterization and can be used for a variety of tasks including those in the context of genetic disease diagnosis, maternity/paternity tests, DNA forensics, or simply in the production of large amounts of DNA fragments for further study. As well, PCR is often the first step in a generalized workflow of experiments, where a researcher wishes to obtain a DNA sequence of interest, which is then further characterized by placement in a carefully chosen vector. *In our lab A, we’ll be using primers designed to seek out a specific Alu insertion that resides in the Chromosome 8, TPA-25 locus. More details will be shown in class. PROCEDURE (WORKING INDIVIDUALLY): 1. Obtain a 5ml saline solution pod, twist cap off, and squeeze saline into your mouth. Swish around your cheek area for about 30 seconds. Discard the empty tube that contained the saline solution. 2. Spit out your sample solution into a disposable paper cup. 3. Pour your sample solution from the paper cup into a 10.0ml tube and close cap tightly (label tube with your initials – pens are in the bench drawers). 4. Spin sample at medium speed (1500rpm) for 10 minutes in the swinging bucket BECKMAN centrifuge. NOTE: the class will do this together. 5A. Assuming you have a tight (and not loose) pellet, you can carefully pour off supernatant (liquid on top) into your paper cup. Discard this fluid down one of the sinks in the back of the room, whilst the empty cup can go into a biohazard discard container. Note that you will now have a tube with only your pellet (cheek cells) and probably a little bit of fluid as well (that’s o.k.). Go to step 6. 5B. If you do have a loose pellet, you will have to transfer it over to a new microcentrifuge tube. Using a plastic pipette, suck up as much pellet/cells as possible while trying your best not to take up too much fluid.
9
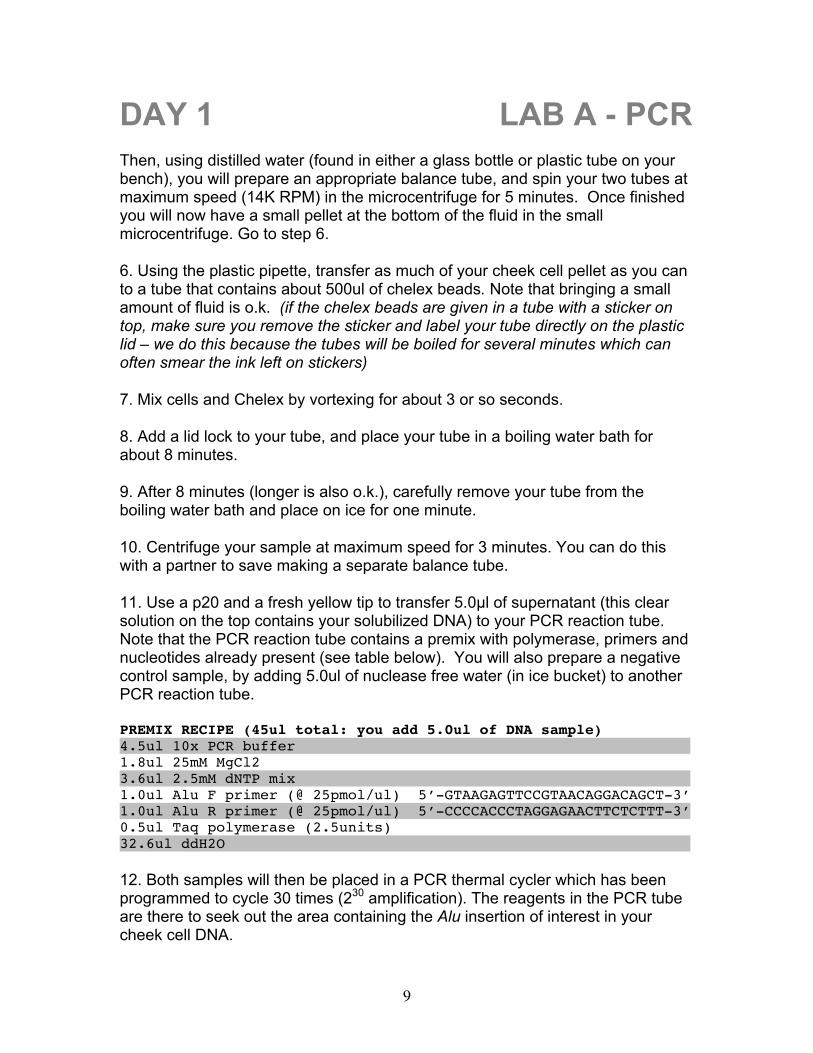
DAY 1 LAB A - PCR Then, using distilled water (found in either a glass bottle or plastic tube on your bench), you will prepare an appropriate balance tube, and spin your two tubes at maximum speed (14K RPM) in the microcentrifuge for 5 minutes. Once finished you will now have a small pellet at the bottom of the fluid in the small microcentrifuge. Go to step 6. 6. Using the plastic pipette, transfer as much of your cheek cell pellet as you can to a tube that contains about 500ul of chelex beads. Note that bringing a small amount of fluid is o.k. (if the chelex beads are given in a tube with a sticker on top, make sure you remove the sticker and label your tube directly on the plastic lid – we do this because the tubes will be boiled for several minutes which can often smear the ink left on stickers) 7. Mix cells and Chelex by vortexing for about 3 or so seconds. 8. Add a lid lock to your tube, and place your tube in a boiling water bath for about 8 minutes. 9. After 8 minutes (longer is also o.k.), carefully remove your tube from the boiling water bath and place on ice for one minute. 10. Centrifuge your sample at maximum speed for 3 minutes. You can do this with a partner to save making a separate balance tube. 11. Use a p20 and a fresh yellow tip to transfer 5.0µl of supernatant (this clear solution on the top contains your solubilized DNA) to your PCR reaction tube. Note that the PCR reaction tube contains a premix with polymerase, primers and nucleotides already present (see table below). You will also prepare a negative control sample, by adding 5.0ul of nuclease free water (in ice bucket) to another PCR reaction tube. PREMIX RECIPE (45ul total: you add 5.0ul of DNA sample) 4.5ul 10x PCR buffer............................................. 1.8ul 25mM MgCl2 3.6ul 2.5mM dNTP mix............................................. 1.0ul Alu F primer (@ 25pmol/ul) 5’-GTAAGAGTTCCGTAACAGGACAGCT-3’ 1.0ul Alu R primer (@ 25pmol/ul) 5’-CCCCACCCTAGGAGAACTTCTCTTT-3’ 0.5ul Taq polymerase (2.5units) 32.6ul ddH2O..................................................... 12. Both samples will then be placed in a PCR thermal cycler which has been programmed to cycle 30 times (230 amplification). The reagents in the PCR tube are there to seek out the area containing the Alu insertion of interest in your cheek cell DNA.

10
DAY 1 LAB A - PCR PCR PROGRAM STEP 1: TEMP=94.0C TIME=03:00.................................... STEP 2: 94.0C 01:00 STEP 3: 58.0C 00:30.................................... STEP 4: 72.0C 00:30 STEP 5: GOTO 2 REPEAT 30X........................................ STEP 6: 72.0C 05:00 STEP 7 4.0C HOLD. ................................... 13. After the PCR reaction is completed (~2 hours), the samples will then have 10ul of DNA LOADING BUFFER added each, and then loaded on a pre-prepared 2.0% agarose gel for visualization (there will be a short demo for gel loading - you will load 20ul).

11
DAY 1 LAB B - CLONING
LAB B: CLONING TECHNIQUES CLONING OF GENOMIC DNA RESTRICTION FRAGMENTS: PREPARATION OF FRAGMENTS, DEPHOSPHORYLATION OF VECTOR, AND LIGATION STEPS. Cloning in molecular biology is a loosely used colloquialism implying techniques that generate specific recombinant DNA molecules intended for a variety of uses. For instance: a) To obtain large quantities of specific DNA sequences for use in studying gene structure and gene regulation, DNA/protein sequence determination b) To prepare DNA sequences to facilitate the production of large quantities of proteins like growth hormones, cell surface receptors, enzymes, etc, for research or commercial use. c) To modify the host cell’s/organism’s genotype or phenotype. In Lab B, we will prepare fragments by digesting lambda genomic DNA with HindIII (a restriction endonuclease). The fragments produced will represent our “insert.” We will also prepare a cut vector by digesting the pUC18 plasmid with Hind III. With these two samples, we will attempt to ligate our “inserts” into our “cut vector.” The presence of successful ligations will be detected by transforming bacteria with our ligation mixture. Essentially only successful ligations (re-circularized plasmid, or re-circularized plasmid plus insert) will allow colonies to form upon transformation. *We will purify our samples using the ChargeSwitch procedure, based primarily on pKa manipulation of a linker built on a magnetic bead . It is important to note that there are other kit systems (silica bead based, phenol/chloroform based) that work well to clean plasmid / insert DNA. These will also be covered and used in the workshop. *On the first day of the workshop, we will perform the digest, as well as perform a visual check of our digestion samples by running agarose gels. We will then continue with the rest of the experiment on the second, third and fourth days.

12
DAY 1 LAB B1 – DIGESTS/GELS
LAB B1: DIGESTS AND AGAROSE GELS PROCEDURE (WORKING IN PAIRS): 1. You will have two microcentrifuge tubes that contain the DNA to be digested. (one with a plasmid called pUC18, and one with lambda genomic DNA to be cut up for our inserts). Each tube has 20ul of DNA sample. 2. Add the various restriction digestion components to the pUC18 and lambda tubes as outlined in the table below. Upon addition of all components, you may want to spin the tubes briefly to ensure all fluid are at the bottom (called a buzz spin). Note that after preparation, each tube will have a final volume of 50ul. TUBE (w DNA) H2O 10x REACT#2 HindIII ...... .. pUC18 (20ul) +23 +5ul +2ul lambda (20ul) +23 +5ul +2ul. ..... 3. Incubate tubes in the 37oC waterbath for a minimum of 1 hour. 4. Now, you will need to prepare one 0.8% agarose gel (per 2 pairs), which you will use to run and visualize your digests. *While the DNA samples are incubating with restriction enzymes, prepare the agarose gel and electrophoresis setup (There will be a quick run through of the equipment used). You will pour a 0.8% agarose gel – this is a weight per volume measurement. We’ll have pre-weighed 0.8g of agarose in a 250ml Erlenmeyer flask. You will need to add 100mls of 1x TBE buffer and swirl gently to re-suspend the agarose. Microwave the mixture on high power until it boils and the agarose is completely dissolved (see o/h slide for specific microwave times). Look for the occurence of “chunkies” and “wisps” in your mixture. The dissolving step is a fine line between boiling your sample enough to dissolve all of your material, but not boiling it too much so that liquid starts to evaporate and significantly change volume. Allow the solution to cool to 55/60oC by incubating in a 55 or 65oC waterbath for about 10 minutes. Then add the appropriate amount (10ul) of SYBR stain. WARNING: Do not handle SYBR without wearing gloves and avoid spills. *While the agarose is cooling off, prepare the gel casting setup. (This will be demonstrated) *Pour the cooled agarose into the apparatus – don’t forget the comb! Watch for leaks! If there is a leak, a quick trick is to put ice in the offending buffer chamber. The gel will take approximately 20 minutes to set. We will be using it before leaving today. * Note that SYBR is especially light sensitive. Therefore, we may be covering the gel with foil containers, etc to protect it from too much light exposure.

13
DAY 1 LAB B1 – DIGESTS/GELS 5. Take out your two digests from the 37C waterbath. From each tube, you will remove and transfer 2ul of each sample into two new microcentrifuge tubes. These represent small samples of your pUC18 and lambda DNA for checking on the gel. Note that the other 48ul will be left to digest overnight. 6. To each of these “gel checking” samples, you will add 8ul of distilled water and 2ul of DNA loading buffer (blue stuff). This will bring the two “gel checking” samples to a total volume of 12ul. NOTE: we are using the agarose gel as a visual check to compare and contrast your DNA samples (after digestion) with some control uncut DNA samples (before digestion). The control uncut samples will be in your ice bucket, and includes 10ul of control pUC18, 10ul control lambda, both blue in colour, to be loaded with your digests. In other words, you will be loading 4 samples – two that you prepared and two that are provided in your ice bucket. 7. Load your two “gel check” samples (load all 12ul of each), with your uncut pUC18 and uncut lambda controls (load all 10ul of each). We will be running these gels for about 45minutes at 100V, and then visualizing with our gel doc system (this will be demonstrated) 8. If you haven’t already done so, don’t forget to return the rest of your digest samples (i.e. the remaining 48ul) to the 37C waterbath. Tomorrow, you will be continuing LAB B by performing a nucleic acid purification using the Chargeswitch procedure.
14
DAY 2 LAB B2 - CHARGESWITCH
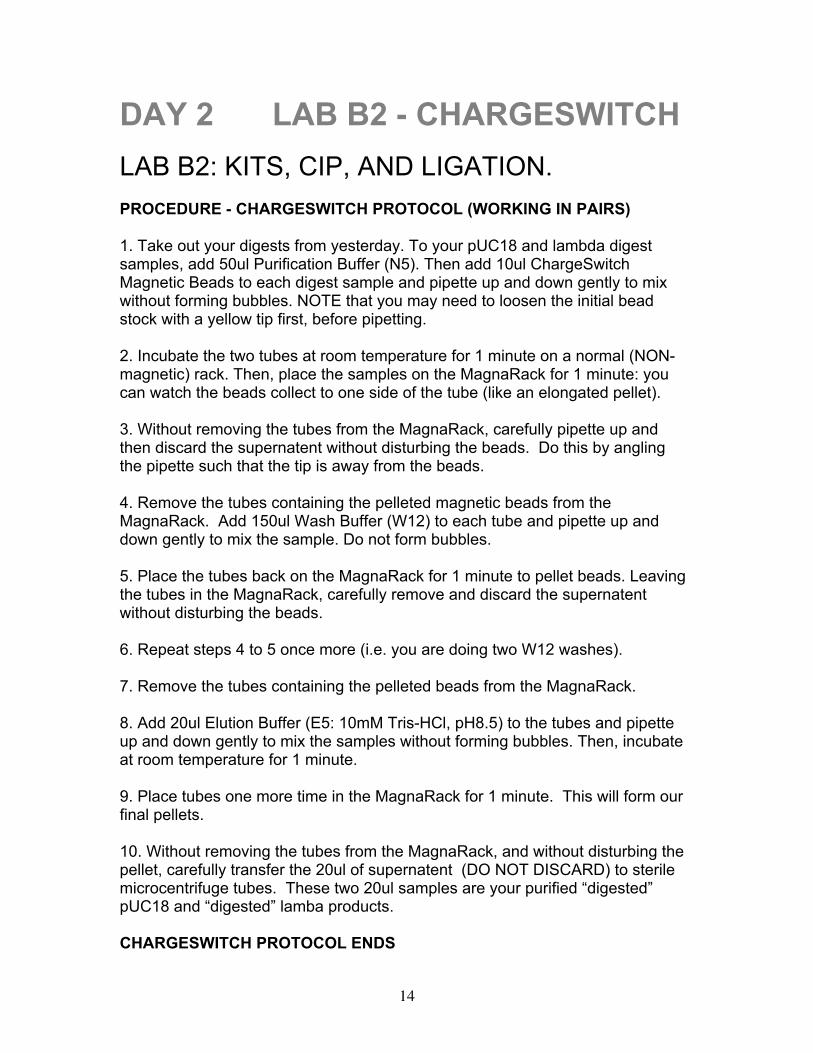
LAB B2: KITS, CIP, AND LIGATION. PROCEDURE - CHARGESWITCH PROTOCOL (WORKING IN PAIRS) 1. Take out your digests from yesterday. To your pUC18 and lambda digest samples, add 50ul Purification Buffer (N5). Then add 10ul ChargeSwitch Magnetic Beads to each digest sample and pipette up and down gently to mix without forming bubbles. NOTE that you may need to loosen the initial bead stock with a yellow tip first, before pipetting. 2. Incubate the two tubes at room temperature for 1 minute on a normal (NON-magnetic) rack. Then, place the samples on the MagnaRack for 1 minute: you can watch the beads collect to one side of the tube (like an elongated pellet). 3. Without removing the tubes from the MagnaRack, carefully pipette up and then discard the supernatent without disturbing the beads. Do this by angling the pipette such that the tip is away from the beads. 4. Remove the tubes containing the pelleted magnetic beads from the MagnaRack. Add 150ul Wash Buffer (W12) to each tube and pipette up and down gently to mix the sample. Do not form bubbles. 5. Place the tubes back on the MagnaRack for 1 minute to pellet beads. Leaving the tubes in the MagnaRack, carefully remove and discard the supernatent without disturbing the beads. 6. Repeat steps 4 to 5 once more (i.e. you are doing two W12 washes). 7. Remove the tubes containing the pelleted beads from the MagnaRack. 8. Add 20ul Elution Buffer (E5: 10mM Tris-HCl, pH8.5) to the tubes and pipette up and down gently to mix the samples without forming bubbles. Then, incubate at room temperature for 1 minute. 9. Place tubes one more time in the MagnaRack for 1 minute. This will form our final pellets. 10. Without removing the tubes from the MagnaRack, and without disturbing the pellet, carefully transfer the 20ul of supernatent (DO NOT DISCARD) to sterile microcentrifuge tubes. These two 20ul samples are your purified “digested” pUC18 and “digested” lamba products. CHARGESWITCH PROTOCOL ENDS

15
DAY 2 LAB B2 – CIP/LIGATE 11. Set aside the purified lamba digest in your ice bucket (you won’t need this until the ligation – step 16). 12. With your purified digested pUC18 sample, transfer 4ul into another microcentrifuge tube (THIS IS IMPORTANT: this is sample that you will use as a control in the ligation – step 16. This will be your digested “non-CIP pUC18” sample). NOTE: CIP is short for Calf Intestinal Phosphatase – the enzyme responsible for dephosphorylating your DNA. 13. With the remaining 16ul of your “purified digested pUC18,” begin a dephosphorylation assay: To the pUC18 sample, add 5ul of 10x CIP buffer, 28ul of sterile dH2O, and 1ul of 0.1U/ul CIP (calf intestinal phosphatase) 14. Incubate your CIP PUC18 sample in the 37oC waterbath for a minimum of 1 hour. 15. After incubation, purify the CIP’d/dephosphorylated plasmid by ChargeSwitch procedure as before (step 1). 16. O.K. a quick check of what you have for your ligations... You should have purified dephosphorylated pUC18 (from step 15). You should have purified lambda DNA fragments (from step 11), and you should have purified pUC18 that has not been dephosphorylated (from step 12). 17. Label five tubes A to E. To each tube, add the various ligation components as follows (numbers are in ul units). NOTE: make sure all components are mixed at the bottom of the tube or “buzz spinned” before adding the ligase.
A B C D E nonCIP’d pUC18 (step 12) 1 1 0 0 0 CIP’d pUC18 (step 15) 0 0 2 2 0 lambda DNA (step 11) 0 5 5 5 0 control pUC18 + CIP (ice bucket) 0 0 0 0 3 control lambda DNA (ice bucket) 0 0 0 0 4 5x ligase buffer 2 2 2 2 2 dH2O 6 1 0 0 0 T4 DNA ligase* 1 1 1 1 1 NOTE: ligations C and D are duplicates. Control samples are from a previous class and may not be of great quality. * add last. 18. Incubate a minimum of 30 minutes at room temperature.
16
DAY 2 LAB B3 – TRANSFORMATION LAB B3 – TRANSFORMATION PROCEDURES TRANSFORMATION OF COMPETENT CELLS Here, we will take a look at two methods of introducing DNA into bacterial cells (Heat shock and Electroporation). Both are in routine use with various advantages and disadvantages between them. *Heat Shock competent cells are very delicate. Be VERY gentle when handling them, and always ALWAYS keep them on ice unless instructed otherwise. *The two transformation procedures have different types of competent cells. It is absolutely crucial that you do NOT mix them up. Heat shock competent cells are labeled “M,” and electroporation competent cells are labeled “E.” PROCEDURE (WORKING IN PAIRS) 1. Prepare 9 fresh microcentrifuge tubes and label them from A(t), B(t), C(t) to I(t) (the “t” is short for transformation) – these will be the tubes where the heat shock transformation reactions will take place. Keep them on ice. 2. Heat Shock competent cells (labeled “M”) will be brought out, placed in your ice buckets, and allowed to thaw slowly. When thawed, carefully transfer 20ul of competent cells to each of your 9 transformation tubes. Be very gentle – as mentioned above, heat shock competent cells are notoriously delicate. To tubes A(t) to E(t), add 5ul of the A to E ligation mixes (from step 17, p15);.................. To tube F(t), add 5ul (0.05ng total) of BRL pUC19 control DNA; To tube G(t), add 5ul (0.5ng total) of undigested pUC18 control; .................................. To tube H(t), add 1ul unligated cut pUC18 (the purified nonCIP pUC18 that was saved from earlier in p15, step 12); To tube I(t), add 5ul sterile distilled H2O. .......................................................................... 3 Leave the cell/DNA mixtures on ice for 30 minutes. Check to see that there is SOC media in the 37oC waterbath (being prewarmed). When first group reaches this stage, there will be a demonstration on how to use the electroporator/set up cuvettes.
The following procedure is as recommended for use with our BIORAD electroporator. Electroporation will be done using only the DNA from our tube D ligation. This way, we can ensure the presence of white colonies in future steps.
17
DAY 2 LAB B3 – TRANSFORMATION - Thaw the “E” cells on ice. Place a microcentrifuge tube and a 0.1 cm cuvette on ice. - In the cold microfuge tube mix 40 ul of the “E” cell suspension with 2ul of DNA (from ligation mix D). Pipette up and down gently and incubate on ice for 1 minute. - Set the MicroPulser to “Ecl” (short for e.coli). - Transfer the mixture of cells and DNA to a cold electroporation cuvette and tap the suspension to the bottom. Place the cuvette in the chamber slide. Push the slide into the chamber until the cuvette is seated between the contacts in the base of the chamber. Pulse once. - Remove the cuvette from the chamber and immediately add 1 ml of prewarmed SOC medium to the cuvette. Quickly but gently resuspend the cells. (Delaying this transfer by 1 minute causes a 3 fold drop in transformation. This decline continues to a 20- fold drop by 10 minutes). - Transfer the cell suspension to a microfuge tube and incubate in a shaking incubator (in prep room) at 37oC for 1 hour.
4. (NOW back to your 9 heat shock tubes) After the ice incubation step, you will need to heat shock your 9 samples for 60 seconds in the 42oC waterbath. Be careful not go significantly over this 60 seconds, and do not agitate cells! 5. Immediately transfer your heat shocked tubes to ice. Then add 480ul of the prewarmed SOC media to each tube. Do not mix further. 6. Incubate in a shaking 37oC incubator for about 1hr (this will roughly coincide with your electroporated samples). 7. At the end of the incubation, you will now have a total of 10 tubes to take care of (nine of which were heat shocked, and one of which was electroporated). 8. For your heat-shocked samples, Vortex each sample, and aliquot 100ul of the contents of each tube onto correspondingly labelled LB agar plates containing 100ug/ml ampicillin and 40ug/ml X-gal. You will spread plate your sample using disposable “hockey sticks” (This will be quickly demonstrated). 9. For your electroporated sample: vortex, and aliquot 5ul onto an appropriately labeled LB plate containing ampicillin and X-gal. 10. Incubate all 10 plates overnight at 37oC in an inverted position (agar side up).

18
DAY 2 LAB D1 – STRIP HYDRATION
LAB D - 2D POLYACRYLAMIDE GEL ELECTROPHORESIS In this lab, we will be performing a 2-D PAGE analysis using BioRad’s ReadyPrep kit. The ReadyPrep 2-D starter kit was designed as a single-use kit to familiarize first-time users with the utilization of the Bio-Rad PROTEAN IEF cell and ReadyStrip IPG strips, a very common smaller scale 2D system that provides steps to enhance reproducibility, one of the most important aspects of 2 dimensional data. We will be generating a gel that looks at e.coli lysates. *Essentially, each bench of four will be responsible for running 2 IPG strips, one for use to separate in the second dimension, and the other to stain immediately after the isoelectric focusing step. Due to time considerations, and various steps involved, this procedure will span over three days.
LAB D1 - “IPG STRIP REHYDRATION” PROCEDURE (WORKING IN PAIRS) 1. You will pipette 125ul of the reconstituted E. coli protein sample as a line along the back edge of channel #1. This is equivalent to 169ug of total protein loaded. The line of sample should extend along the whole length of the channel except for about 1 cm at each end. Take care not to introduce any bubbles which may interfere with the even distribution of sample in the strip (See Figure 1. Sample loading of rehydration/equilibration trays).
Fig. 1. Sample loading of rehydration/equilibration trays. Pipet the sample along the back edge of the tray channel except for about 1 cm at each end. Note the even distribution of the sample along the edge of the channel. The figure shows the last of six samples being pipeted in the tray.
19
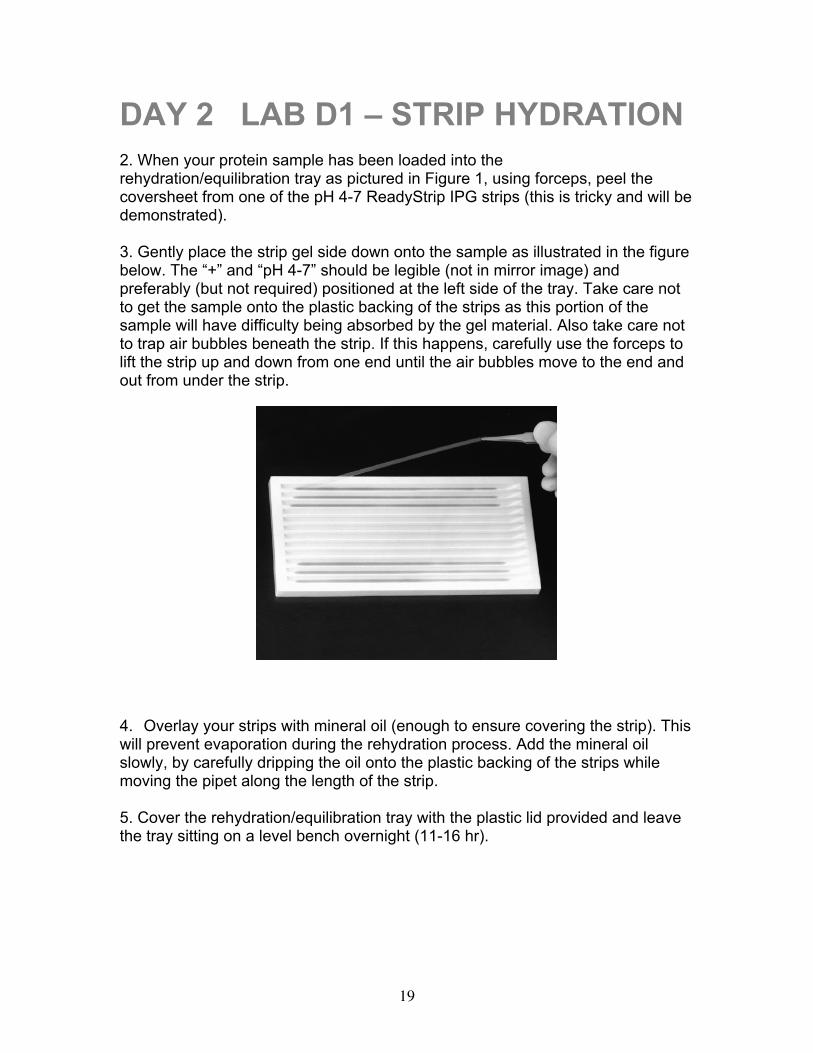
DAY 2 LAB D1 – STRIP HYDRATION 2. When your protein sample has been loaded into the rehydration/equilibration tray as pictured in Figure 1, using forceps, peel the coversheet from one of the pH 4-7 ReadyStrip IPG strips (this is tricky and will be demonstrated). 3. Gently place the strip gel side down onto the sample as illustrated in the figure below. The “+” and “pH 4-7” should be legible (not in mirror image) and preferably (but not required) positioned at the left side of the tray. Take care not to get the sample onto the plastic backing of the strips as this portion of the sample will have difficulty being absorbed by the gel material. Also take care not to trap air bubbles beneath the strip. If this happens, carefully use the forceps to lift the strip up and down from one end until the air bubbles move to the end and out from under the strip.
4. Overlay your strips with mineral oil (enough to ensure covering the strip). This will prevent evaporation during the rehydration process. Add the mineral oil slowly, by carefully dripping the oil onto the plastic backing of the strips while moving the pipet along the length of the strip. 5. Cover the rehydration/equilibration tray with the plastic lid provided and leave the tray sitting on a level bench overnight (11-16 hr).
20
DAY 3 LAB D2 – IEF
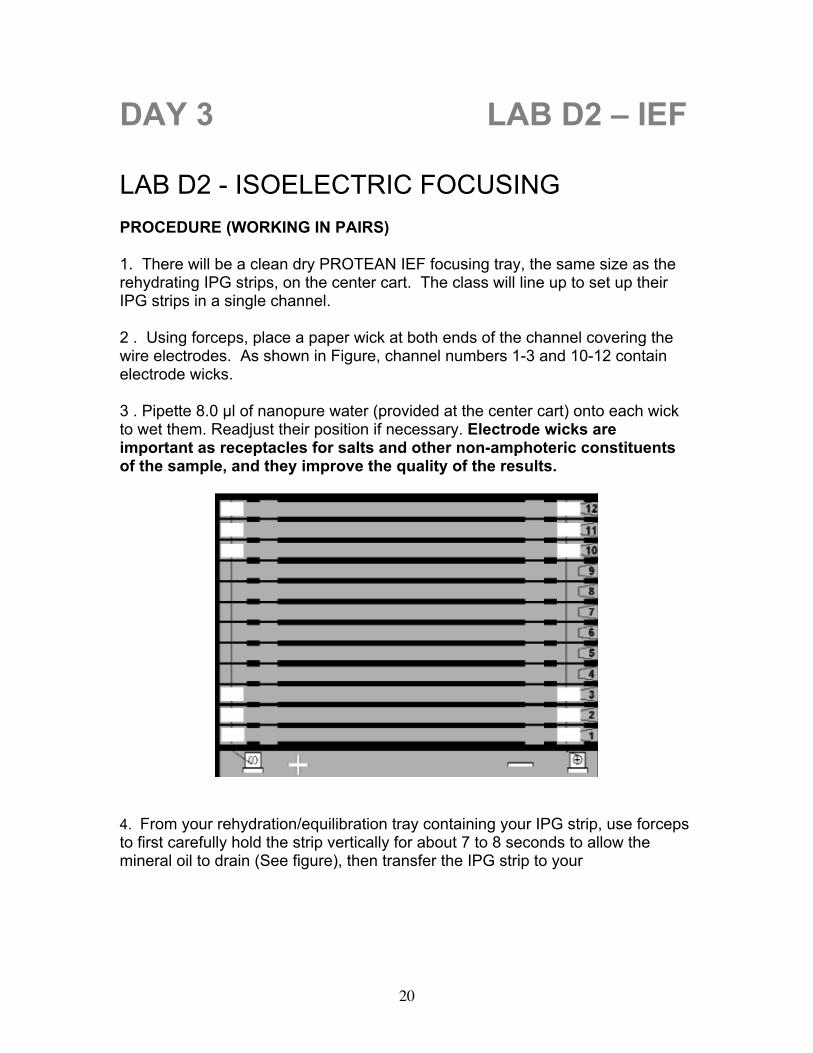
LAB D2 - ISOELECTRIC FOCUSING PROCEDURE (WORKING IN PAIRS) 1. There will be a clean dry PROTEAN IEF focusing tray, the same size as the rehydrating IPG strips, on the center cart. The class will line up to set up their IPG strips in a single channel. 2 . Using forceps, place a paper wick at both ends of the channel covering the wire electrodes. As shown in Figure, channel numbers 1-3 and 10-12 contain electrode wicks. 3 . Pipette 8.0 µl of nanopure water (provided at the center cart) onto each wick to wet them. Readjust their position if necessary. Electrode wicks are important as receptacles for salts and other non-amphoteric constituents of the sample, and they improve the quality of the results.
4. From your rehydration/equilibration tray containing your IPG strip, use forceps to first carefully hold the strip vertically for about 7 to 8 seconds to allow the mineral oil to drain (See figure), then transfer the IPG strip to your

21
DAY 3 LAB D2 – IEF corresponding channel in the IEF focusing tray. Here, make sure the IPG is placed gel side down (pH4-7 is not mirror imaged), and also make sure the IPG strip is placed so that the “+” sign is also positioned at the end of the tray marked with the “+” sign. (See Figure Below).
Draining the oil Placing ReadyStrip Gel down
5. Check for, and if applicable remove, any trapped air bubbles beneath the strips. Cover each IPG strip with fresh mineral oil. 6. When all IPG strips have been loaded, place the lid onto the IEF tray. Now, place the focusing tray into the PROTEAN IEF cell and close the cover. 7. Program the PROTEAN IEF cell using the appropriate 3-step protocol in Table below . For all strip lengths, use the default cell temperature of 20ºC, with a maximum current of 50 µA/strip and No Rehydration. 8. Press START to initiate the electrophoresis run. This will take approximately 8 hours.
Voltage Time Volt-Hours Ramp Step 1 250 20 min ----- Linear.... Step 2 4,000 2 hr ----- Linear Step 3 4,000 ----- 10,000 V-hr Rapid Total 5 hr 14,000 V-hr 9. After the run has finished (this may be after you’ve already left for the day), the cassette will be taken out, covered in saran wrap and placed in the -80C freezer for storage until tomorrow.

22
DAY 3 LAB C1 – RNA PREP LAB C – RNA WORK. In this procedure, you will obtain a purified total RNA prep (from your cheek cells) using the commercially available Trizol reagent. We will then reverse transcribed an actin mRNA for PCR quantitation using BioRad’s chemistry and MyiQ real time thermal cycler (RT-PCR/qPCR). *As will be highlighted in class, RNA is extremely sensitive to degradation. Make a special effort to be as aseptic as possible. This will involve a number of different measures including: wearing gloves all the time and change them regularly; using special nuclease free solutions; using appropriate nuclease free plastic wear (tubes and filtered tips) * Note that the TRIZOL procedure is derived from phenol/chloroform type methodologies (another very common nucleic acid purification technique).
LAB C1 – TOTAL RNA PREP PROCEDURE (WORKING IN PAIRS) 1. You will perform a cheek cell rinse using the saline solution, cup, and 1500rpm centrifugation spin (the same as the one done on monday’s PCR class, p8). 2. Our aim is to have enough tight pellets in the class, so that each pair has one tight pellet to work with. Carefully decant the supernatent without disturbing the pellet. After the supernatent has been removed, flick the bottom of the tube gently to loosen up the pellet – this will help in the resuspension of the pellet in the next step. 3. Add 1ml of Trizol reagent to your pellet and mix by carefully pipetting up and down for a minimum of 20 times with your p1000 – do this slowly to avoid uptake of TRIZOL into the barrel of the pipetteman. NOTE: Trizol contains phenol so take care! Incubate at room temperature for 5 minutes. Transfer your sample to a microcentrifuge tube, and then add 200ul of chloroform. Vortex for 15seconds and incubate again at room temperature for about 3 minutes. NOTE that your pellet will not “dissolve” into TRIZOL – we are just aiming for re-suspension. 4. Centrifuge at 12000rpm at 4oC for 15 minutes. NOTE: after the centrifugation step, you will notice two phases of liquid. The upper phase is aqueous and contains your RNA prep. The lower phase is the organic phase – you don’t want any of this to be transferred to your next step.
23
DAY 3 LAB C1+C2 – RT PCR 5. Transfer the upper phase to a fresh microcentrifuge tube. Take care not to disturb the interface when retrieving the aqueous phase. Note that it is at this step and thereafter that special care regarding RNAse free methodologies is utilized (including handling, and use of RNAse free materials, etc). 6. Precipitate the RNA by adding 500ul of ice cold isopropanol (isopropyl alcohol); mixing by inversion; and incubation on ice for 3 minutes. 7. Centrifuge at 12000rpm for 10 minutes at 4oC. Carefully discard the supernatent. Wash the pellet with 1ml of DEPC treated (RNAse free) 75% ethanol and spin again at 12000rpm for 5 minutes. NOTE that it is common to not be able to see the pellet at this step. Regardless, make a mental note of where the pellet “would” be, by remembering how you load your tube in the centrifuge. 8. Discard the supernatent and air dry the pellet for approximately 10 minutes (this step is actually to evaporate excess ethanol). Dissolve the pellet in 100ul of DEPC treated (RNAse/nuclease free) distilled water. Using the NanoDrop reader, you will assess yield and purity of your RNA (this will be demonstrated)
LAB C2 – REVERSE TRANSCRIPTASE AND RT-PCR 9. Using BioRad’s iScript cDNA synthesis kit, each group will set up a reverse transcriptase reaction using the following table. Note that the iScript reaction mix contains oligo dT primers. TABLE:....................................................... iScript Reaction/Reverse Transcriptase Mix 10ul RNA template (from step 8) 10ul........
10. Each sample will then be loaded into the MyiQ thermal cycler, where the assay will be performed under the following parameters: 5 minutes at 25C............................................. 30 minutes at 42C 5 minutes at 85C............................................. (hold at 4C) 11. Once the reverse transcriptase portion is finished, we can then set up our real time PCR reactions. Roughly, we will use the below reaction set up but also utilizing a two fold serial dilution over a row of 8 tubes - specific details will be announced in class.

24
DAY 3 LAB C2 – RT PCR Component Volume per reaction iQ SYBR Green Supermix +......................................... Primer Mix (100 nM–500 nM) 13.0 ul.................... Reverse Transcriptase sample 10.0 µl Total Volume 23.0 µl.................... NOTE: we are using a final concentration for each primer of 250 nM. The recommended amount of primer based on the MyiQ Supermix is 100 - 500 nM of each primer. NOTE: We have chosen a beta-actin primer set, that should amplify out a 61bp fragment. We have also selected a primer set that is prone to amplifying out a larger genomic contaminant sequence. Sequence of primers are as follows: F-Primer: 5’- cccagcacaatgaagatcaa -3’ R-Primer: 5’- cgatccacacggagtacttg -3’ 12. Once set up, load your strip tube samples into the MyiQ cycler programmed in the following manner: STEP 1 95C 3 minutes “hot start load”.......... STEP 2 95C 20 seconds Denaturation STEP 3 55C 30 seconds Annealing................. STEP 4 72C 20 seconds Elongation STEP 5 repeat steps 2 – 4 (x 50)....................... STEP 6 72C 1 minutes Final Elongation STEP 7 50C 30 seconds........................... MELT FUNCTION +1oC/30 seconds for 45oC Note: There will be a demo on setting up the software on the MyiQ system, as well as an opportunity to look at the software and analyze the data tomorrow.
25
DAY 3 LAB B4 – CULTURES
LAB B4 – LOOK AT PLATES AND SET UP CULTURES PROCEDURE (WORKING IN PAIRS) 1. Look at your plates and note the colonies. Data will be discussed in class. 2. Some of these colonies will be picked for plasmid characterization. Note 6 whites (from any plate of your choice) and one blue colony. Use these colonies to each inoculate 3mls of LB broth + 50ug/ml ampicillin with a single colony of transformed bacteria. NOTE: this is a total of 7 cultures. You may use the sterile toothpicks offered, by dipping the end of the toothpick into the colony and then throwing the entire toothpick into the broth. 3. Grow the culture overnight on the roller drum inside the 37oC incubator. Remember to label the tubes and balance them properly in the tube roller apparatus.

26
DAY 3 LAB E – PAGE/BLOT
LAB E – SDS PAGE AND WESTERN BLOT DETECTION OF PROTEIN EXPRESSION FROM CLONED GENES BY WESTERN BLOTTING Proteins will be fractionated by electrophoresis in denaturing discontinuous polyacrylamide gels (Laemmli, 1970, Nature. 227: 680-685), blotted onto a membrane by an electrotransfer procedure, and probed with a specific antibody to the protein of interest. The detection procedure in this case is a two-step process using a primary antibody which is unlabeled and specific to the protein of interest, and a labeled secondary antibody which binds to the constant regions of the primary antibody. The secondary antibody that will be used for this exercise is enzyme-conjugated and will be detected by incubation with a chromogenic substrate. *Essentially, your bench will be running two polyacrylamide gels (each pair will be responsible for one gel) with the intent of performing a western blot on one of them. The samples that you will be running are four different bacterial cultures, three of which contain a variant of the pGEX-2T vector. The vector is designed for the expression of recombinant fusion proteins. Here, one is able to express a protein of interest that includes an additional protein domain at its N-terminal side. In this case, the protein domain is called glutathione-S-transferase (or GST for short). The purpose of this additional domain is to allow your fusion protein to be purified easily by affinity chromatography. Presently, the GST system is one of the most popular fusion systems. *The four bacterial cultures that you will be working with are as follows: i. pGEX-2T alone. This will express the GST domain protein by itself. (~26kDa) ii. pGEX-2T LCK. This will express a GST / wildtype LCK fusion protein (~85kDa) iii. pGEX-2T N32. This will express a GST-LCK construct that contains amino acids –8 to 234 of p56lck (actually contains the N-terminal, the SH3 and SH2 domain of lck). p56lck is a tyrosine kinase by the way. iv. A negative control (no pGEX vector, labeled NEG) *You will be using a relatively nasty neurotoxin, acrylamide. Please be careful and make special care to wear safety goggles, gloves and your labcoat.

27
DAY 3 LAB E1 – POUR SDS PAGE
LAB E1 – POURING SDS PAGE GELS PROCEDURE (WORKING IN PAIRS) Gel Part: 1. You will first pour a polyacrylamide gel using the BioRad Mini Protean system. There will be a quick demo on how to set up the apparatus. 2. When you have set up the apparatus and are ready to pour the resolving gel section, you will need to prepare a 10ml solution of the resolving gel using the following recipe (good for one 12% gel): 5.0mls resolving buffer 4.0mls 30% acrylamide/0.8% bis-acrylamide........................ 1.0ml water 100ul 10% ammonium persulfate.................................... 6.5ul TEMED Don’t forget to add the TEMED and ammonium persulfate last, and just prior to gel pouring. 3. The resolving gel will be poured approximately 1cm below the well line (this will make more sense after viewing the demonstration). Immediately after this step, you will need to pour an overlay using the water saturated butanol. 4. After approximately 10minutes, the resolving gel should be polymerized enough to allow you to continue pouring the stacking gel. Prepare a 5ml solution of the stacking gel using the following recipe (good for one gel): 4.5ml stack buffer 0.5ml 30% acrylamide/0.8% bis-acyrlamide......................... 25ul 10% ammonium persulfate 5.0ul TEMED...................................................... Again, don’t forget to add the TEMED and ammonium persulfate last! 5. Pour the stacking gel to the brim of the gel cassette and carefully place the comb into the cassette. Do not worry about the slight overflow of acrylamide. The stack will need about 1hr to polymerize fully. Because of workshop scheduling, we will polymerize overnight for use tomorrow afternoon. To prevent overdrying of the gel, we will saran wrap the gel set ups with a wet paper towel (to be demonstrated in class).
28
DAY 4 LAB B5 – MINIPREPS
LAB B5 – MINI PLASMID PREPARATIONS MINI PLASMID PREPARATIONS USING THE QIAprep SPIN MINIPREP KIT Here, we will isolate plasmids obtained from our colonies to see what plasmid/insert molecules we have. This particular procedure is one of several methodologies to differentiate plasmid DNA from other nucleic acid species. *This kit is essentially a revamp version of a common plasmid prep procedure is known as the alkaline lysis procedure. Many kit based assays rely on this particular chemistry which will be discussed in class. *In our case, this kit also incorporates a silica bead based affinity chromato-graphy methodology. PROCEDURE (WORKING IN PAIRS) 0. At some point during this procedure, several of your group members can work together to prepare a 0.8% Agarose gel. (See page 12 for instructions - don't forget the stain). We need one gel per two pairs. 1. Remove cultures from the 37C incubator and vortex each culture thoroughly. Transfer 1ml of each mixed culture into a clean microcentrifuge tube. The rest of the culture can be left on the bench or discarded. 2. Spin the cells down for 30 seconds at maximum speed in the microcentrifuge (don’t forget to prepare a balance). Remove all of the supernatent by using your pipetteman. Do a quick vortex of your dry bacterial pellet (this will loosen it for easier resuspension in the next step) 3. Resuspend the pelleted bacterial cells in 250ul Buffer P1 (make sure this buffer is well mixed before use as some of its components may precipitate and settle to the bottom of the tube). The bacteria should be resuspended completely by vortexing or pipetting up and down until no cell clumps remain. 4. Add 250ul Buffer P2 (make sure this buffer is also well mixed before use) and then invert the tubes 4 to 6 times. Do not vortex, as this will result in shearing of genomic DNA. If necessary, continue inverting the tubes until the solutions become viscous and slightly clear. Do not allow the lysis reaction to proceed for more than 5 min. Mixing should result in a homogeneously blue-ish colored suspension, although the colour change can vary in intensity.

29
DAY 4 LAB B5 – MINIPREPS 5. Add 350ul Buffer N3 and mix immediately and thoroughly by inverting the tubes another 4-6 times. To avoid localized precipitation, mix the solution thoroughly and immediately after addition of Buffer N3. The solutions will become cloudy and all traces of blue in the suspension should disappear. 6. Centrifuge your samples for 10 minutes at maximum speed (14K RPM) in a microcentrifuge. Compact white pellets will form, with clear supernatents on top – NOTE that you want the supernatent, so do not accidently discard! 7. Apply the supernatants from step 6 onto a QIAprep spin columns using your pipetteman. Make sure, you place your spin column inside a flowthrough collector (will be shown in class). Centrifuge at maximum speed for 1 minute. Discard the flow-through liquid (but will keep using the container). 8. Wash QIAprep spin column by adding 0.75 ml Buffer PE and centrifuge for 1 minute with flow through container. 9. Discard the flow-through (but not the container), and centrifuge (w/ empty flowthrough) for additional 1 min to remove residual wash buffer. Residual ethanol from Buffer PE may inhibit subsequent enzymatic reactions. 10. Place the QIA prep columns in clean 1.5 ml microcentrifuge tubes. To elute the DNA off the column, add 50ul Buffer EB to the center of each QIAprep spin column, let stand for 1 min, and centrifuge for 1 min (lids should be all “in” or all “out” – “out” usually ensures no breakage of lids). Your collected eluent is your purified “plasmid prep.” 11. With your plasmid samples, you will obtain yield and purity value using the NanoDrop reader (see below). Based on these values, calculate an approximate volume of plasmid needed to ensure having about 50 to 100ng of DNA per digest. How to use Nanodrop Lite: FIRST: blank the machine with a buffer alone sample. (This will be done for you)
i. Select assay type from Home screen (dsDNA, ssDNA, RNA, or Protein). ii. Establish a blank (2 ul nuclease free water or EB) onto the bottom
pedestal, lower the arm and press Blank. iii. When measurement is complete, raise the arm and wipe the water from
both upper and lower pedestals using a dry Kimwipes. iv. Redo step 3 to confirm blank measurement.
SECOND: Measuring a Sample (this, you will do). Note: for now, we will take one representative reading for each pair, instead of assessing all 7 samples.
30
DAY 4 LAB B5 – MINIPREPS
i. Pipette 2 ul of sample onto the lower pedestal and press Measure. ii. For dsDNA, on screen, you will get a reading for A260, A260/A280 and
DNA concentration. iii. Press Print to print your data. iv. Always wipe the upper and lower pedestals after each measurement.
12. You will now set up 7 restriction digests with the following recipe for each digest: X**ul dH2O 2ul 10X FastDigest Buffer...................................... X**ul plasmid prep 1ul HindIII (10U/ul) Fermentas FastDigest brandd............... **based on calculated amounts. Water is to be added to bring reaction to a total 20ul volume. 13. Incubate digests for >20 minutes in a 37oC waterbath. NOTE: a common procedure for conducting large numbers of restriction digests is the preparation of a "cocktail" mixture. In our case, if you are adding the same amount of plasmid in each sample, you can prepare one main solution containing 8 times (since we have 7 samples) the amount of everything except the DNA. (i.e. 8x needed volume of water, 16ul of the 10x Buffer, 8.0ul of HindIII). This way, to your DNA you can just adda specific volume of this "cocktail" mix to all your samples. If you are performing digests where you have 18 or 36 samples to deal with, this method can save you a lot of pipetting time. 14. After the digest incubation, add 4ul of DNA loading buffer to each tube and load all 7 samples - along with a lambda HindIII marker - to your agarose gel. Run gel at 100V for approximately 1 - 2 hours. Visualize and photograph gel.

31
DAY 4 LAB D3 – 2ND DIMENSION
LAB D3 – IPG STAINING & 2ND DIMENSION IPG STAINING (1 IPG STRIP, GROUP OF 4) 1. When the IEF run has been completed, Transfer one of the IPG strips to a clean, dry piece of blotting filter paper with the gel side facing up. 2. Thoroughly wet a second filter paper of the same size with nanopure water. Carefully lay the wet filter paper onto the IPG strip. Press firmly over the entire length of the strips. Do NOT squish the gels. When finished, carefully “peel” back the top filter paper. This blotting step removes mineral oil on the surface of the IPG, thereby reducing background staining and generally improving the staining of the IPG strips. 3. Transfer the IPG strip to a staining tray containing approximately 50 ml of Bio-Safe Coomassie stain or Bio-Rad’s IEF stain. 4. Place the tray onto a rocking platform or orbital shaker for >1 hour. EQUILIBRATIONS OF IPG STRIP (1 IPG STRIP, GROUP OF 4) 5. When the IEF run has been completed, Transfer one of the IPG strips to a clean channel of a loading tray. 6. Add 2.5ml of Equilibration Buffer I to the channel containing your IPG strip. NOTE that this buffer will be placed on the center cart, and will be shared by the class. 7. Place the tray on an orbital shaker and gently shake for 10 minutes. Select a slow shaker speed to prevent the buffer from sloshing out of the tray. 8. During the incubation in Equilibration Buffer I, Li-Juan will complete the preparation of Equilibration Buffer II. Here, she will add the contents of one bottle of iodoacetamide to each bottle of equilibration buffer II, and stir until the iodoacetamide is fully dissolved. 9. At the end of the 10 minute incubation, discard the used equilibration buffer I by carefully decanting the liquid from the tray. Decanting is best carried out by positioning the tray vertically, so that the liquid pours out. Take care not to pour out the liquid too quickly at first, as the strips may slide out of the tray. When most of the liquid has been decanted, “flick” the tray a couple times to remove the last few drops of equilibration buffer I.
32
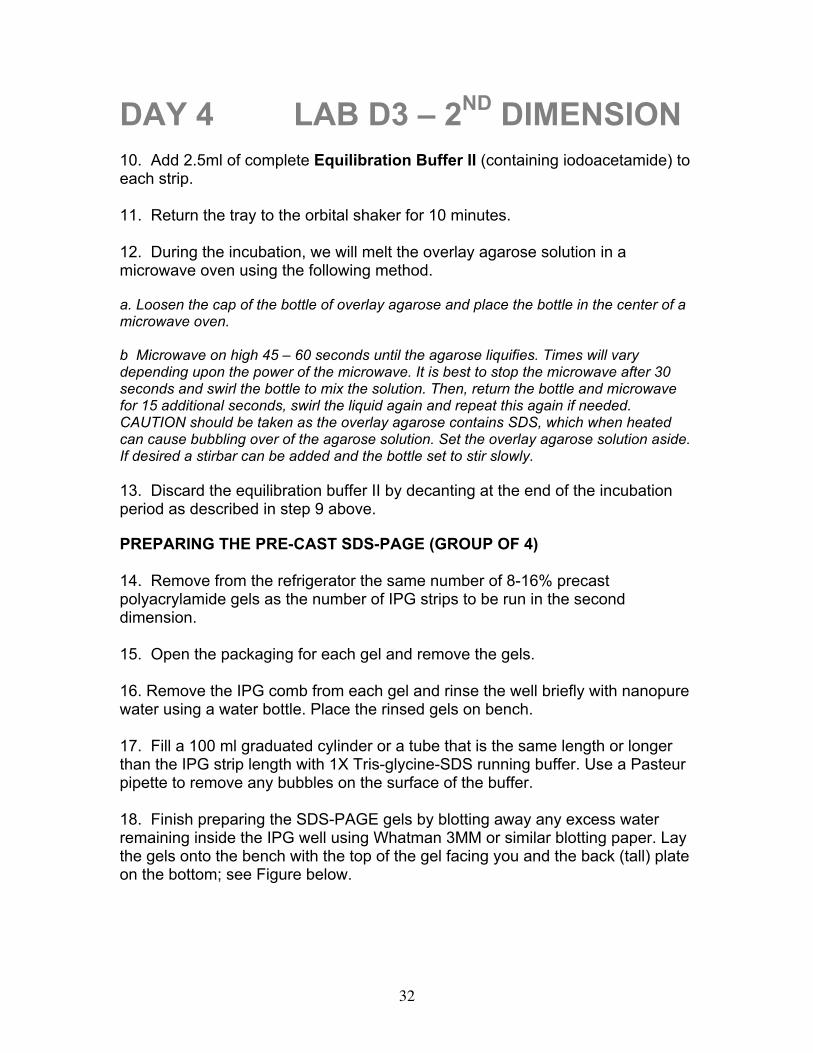
DAY 4 LAB D3 – 2ND DIMENSION 10. Add 2.5ml of complete Equilibration Buffer II (containing iodoacetamide) to each strip. 11. Return the tray to the orbital shaker for 10 minutes. 12. During the incubation, we will melt the overlay agarose solution in a microwave oven using the following method. a. Loosen the cap of the bottle of overlay agarose and place the bottle in the center of a microwave oven. b Microwave on high 45 – 60 seconds until the agarose liquifies. Times will vary depending upon the power of the microwave. It is best to stop the microwave after 30 seconds and swirl the bottle to mix the solution. Then, return the bottle and microwave for 15 additional seconds, swirl the liquid again and repeat this again if needed. CAUTION should be taken as the overlay agarose contains SDS, which when heated can cause bubbling over of the agarose solution. Set the overlay agarose solution aside. If desired a stirbar can be added and the bottle set to stir slowly. 13. Discard the equilibration buffer II by decanting at the end of the incubation period as described in step 9 above. PREPARING THE PRE-CAST SDS-PAGE (GROUP OF 4) 14. Remove from the refrigerator the same number of 8-16% precast polyacrylamide gels as the number of IPG strips to be run in the second dimension. 15. Open the packaging for each gel and remove the gels. 16. Remove the IPG comb from each gel and rinse the well briefly with nanopure water using a water bottle. Place the rinsed gels on bench. 17. Fill a 100 ml graduated cylinder or a tube that is the same length or longer than the IPG strip length with 1X Tris-glycine-SDS running buffer. Use a Pasteur pipette to remove any bubbles on the surface of the buffer. 18. Finish preparing the SDS-PAGE gels by blotting away any excess water remaining inside the IPG well using Whatman 3MM or similar blotting paper. Lay the gels onto the bench with the top of the gel facing you and the back (tall) plate on the bottom; see Figure below.
33
DAY 4 LAB D3 – 2ND DIMENSION
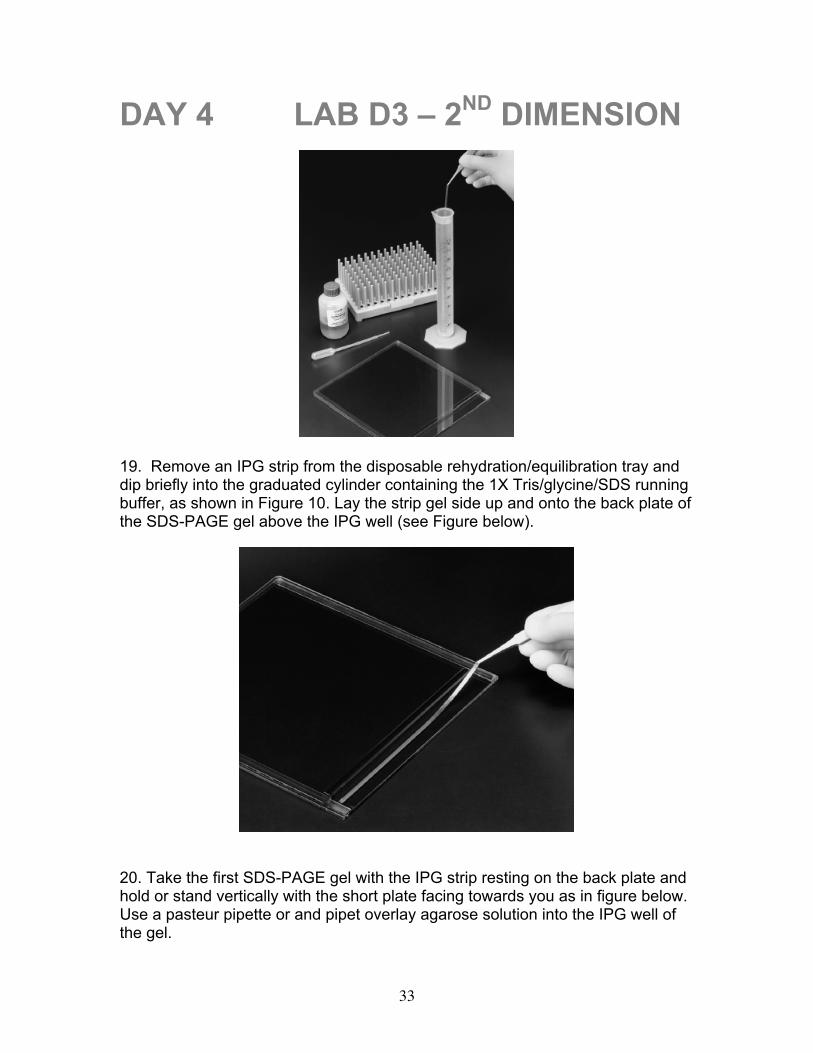
19. Remove an IPG strip from the disposable rehydration/equilibration tray and dip briefly into the graduated cylinder containing the 1X Tris/glycine/SDS running buffer, as shown in Figure 10. Lay the strip gel side up and onto the back plate of the SDS-PAGE gel above the IPG well (see Figure below).
20. Take the first SDS-PAGE gel with the IPG strip resting on the back plate and hold or stand vertically with the short plate facing towards you as in figure below. Use a pasteur pipette or and pipet overlay agarose solution into the IPG well of the gel.

34
DAY 4 LAB D3 – 2ND DIMENSION
21. Using the forceps, carefully push the strip into the well as shown in Figure below, taking care not to trap any air bubbles beneath the strip. When pushing the IPG strips with the forceps be certain the forceps are pushing on the plastic backing to the strip and not the gel matrix.
22. Stand the gel(s) vertically by placing them in the gel box or in a test tube rack. Allow the agarose to solidify for 5 minutes before proceeding. 23. Mount the gel into the gel box per the instructions provided with the apparatus.

35
DAY 4 LAB D3 – 2ND DIMENSION 24. Fill the reservoirs with 1X Tris/glycine/SDS running buffer and begin the electrophoresis. The electrophoresis run conditions for this particular SDS-PAGE format is 200V constant voltage, which will take ~40 minutes. The migration of the Bromophenol Blue, present in the overlay agarose solution, is used to monitor the progress of the electrophoresis.
STAINING THE 2D GEL (GROUP OF 4) 25. Fill a staining tray with nanopure water for your gel run and set aside. 26. At the conclusion of the SDS-PAGE, open each gel cassette and place each gel into a tray with water. 27. Wash the gels 3 times for 5 minutes each. Add fresh water for each wash. 28. Add enough Bio-Safe stain to completely cover each gel. This is about 50ml of the stain. 29. Place each gel on a rocker or orbital shaker and shake for at least 60 minutes. The gels can be left in the stain overnight if desired. 30. Discard the stain and wash the gels twice for 15-30 minutes with water. Longer water washes may be needed to remove remaining background. The gels can be stored in water for several days. We will take photos using our gel doc tomorrow.

36
DAY 4 LAB E2 – RUN SDS PAGE
LAB E2 – RUNNING AND TRANSFER OF PROTEINS PROCEDURE (WORKING IN PAIRS): 1. Take your protein gels out from the fridge. We will be running bacterial samples in them today. Use the below instructions for sample preparation. a) You will have four microcentrifuge tubes labeled “NEG”, “GST”, “N32” and “LCK.” In each tube is 50ul of the aforementioned bacterial culture. b) To each tube, add 25ul of a 3x sample buffer (blue stuff) to each tube. Now, take your four samples and your prestain standards (“STD” tube, already coloured), and boil them for a minimum of 8 minutes. 2. Whilst your samples are boiling, prepare the gel running set up (this will be demonstrated), such that (with the electrophoresis buffer) the upper buffer chamber is full, and the lower buffer chamber is filled up at least an inch over the bottom of the gel. 3. You are now ready to load your samples. You can load using your p20 pipetteman and yellow tips (you can also use the thin drawn-out tips provided). In general, place the tip directly into the well and slowly push the liquid out, taking care not to introduce bubbles. You can even use the same tip throughout the loading procedure if you rinse the tip out in the upper buffer chamber between samples. Essentially the following lane order is a guideline and applies to both gels (remember that per bench one will be stained for total protein, and the other will be used for western analysis).
(both gels good)* (only one gel good)* lane 1 standard (10ul) standard (10ul)...
2 NEG (10ul) NEG (20ul) 3 NEG (20ul) GST (20ul)... 4 GST (10ul) N32 (20ul) 5 GST (20ul) LCK (20ul)... 6 N32 (10ul) standard (10ul) 7 N32 (20ul) NEG (20ul)... 8 LCK (10ul) GST (20ul) 9 LCK (20ul) N32 (20ul)... 10 blank LCK (20ul)
*lanes are dependant on the number of good gels produced per group of 4 students. If both gels are in good order, then use the first column for each gel. If only one gel is good, then use the second column, and the gel will be cut into two after the run.

37
DAY 4 LAB E2 – STAIN/TRANSFER 4. Put the lid on the gel apparatus (stay colour coordinated) and set voltage to 100V. The gel will probably take about 1 1/2 hours to run. You want to stop it when the dye has reached (but not past) the bottom of the gel. At this point, one of your gels will be used to begin the transfer procedure, while the other will be stained in the following manner. - carefully place the acrylamide gel into a plastic container filled with dH2O. Let the gel incubate, rocking for 5 minutes. Remove the water, and repeat two more times. After the last water discard, use a paper towel to dab away excess water from the container (do not touch the gel as it may rip!). Add the BioSafe Coomassie Blue stain to immerse the gel and leave to stain on the rocker overnight. TRANSFER PART (GROUP OF 4) 6. When you set up your transfer you need to think a little. Basically, you want the proteins in your gel to migrate onto the PVDF membrane. Sounds simple, but inevitably you may one day accidently mix things up, and your proteins will run away into the buffer. 7. Remember, your proteins are coated with SDS so they are essentially negatively charged. Therefore, they will move towards the positive electrode, away from the negative electrode. We will be using Biorad’s Midi Transfer Pack (Single Midi Gel or Two Mini Gels) Setup. There will be a DEMO on how to do this, as the system has been designed so that you should not make placement mistakes. 8. Below is the text from the Biorad instructional booklet (which for the record is very confusing to read!)
“The packaging for the midi transfer pack has a tray containing the two ion reservoir stacks. These are placed on top of each other in the tray.
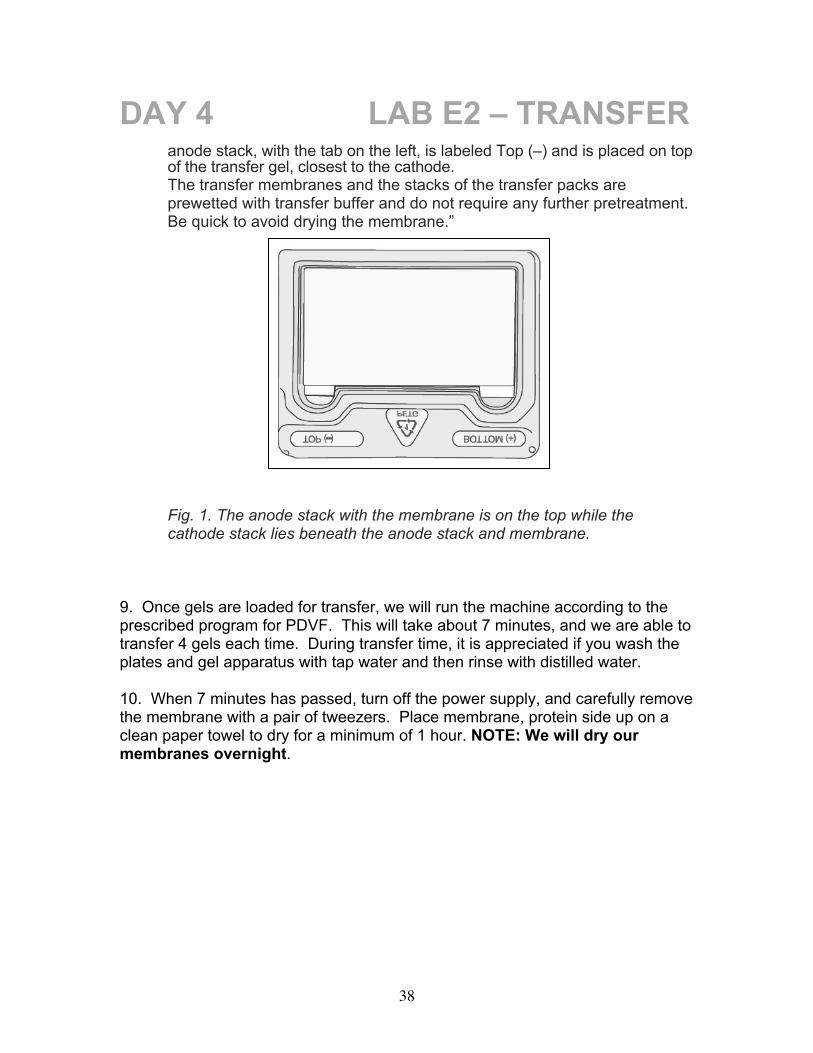
The ion reservoir stack on the top has a tab on the right side and is for the anode (+’ve charge). This stack is layered with the transfer membrane. The ion reservoir stack for the cathode (-‘ve charge) is located below the membrane/anode stack and has a tab on the left side (Figure 1). Use the finger wells and tabs to access the appropriate stack and lift it from the tray.
The text above the finger wells signifies the stack location in the cassette. The top stack and membrane, with the tab on the right, is labeled Bottom (+) and is placed on the anode in the cassette base. The stack below the
38
DAY 4 LAB E2 – TRANSFER
anode stack, with the tab on the left, is labeled Top (–) and is placed on top of the transfer gel, closest to the cathode. The transfer membranes and the stacks of the transfer packs are prewetted with transfer buffer and do not require any further pretreatment. Be quick to avoid drying the membrane.”
Fig. 1. The anode stack with the membrane is on the top while the cathode stack lies beneath the anode stack and membrane.
9. Once gels are loaded for transfer, we will run the machine according to the prescribed program for PDVF. This will take about 7 minutes, and we are able to transfer 4 gels each time. During transfer time, it is appreciated if you wash the plates and gel apparatus with tap water and then rinse with distilled water. 10. When 7 minutes has passed, turn off the power supply, and carefully remove the membrane with a pair of tweezers. Place membrane, protein side up on a clean paper towel to dry for a minimum of 1 hour. NOTE: We will dry our membranes overnight.
39
DAY 5 LAB E3 – WESTERN BLOT
LAB C3 – WESTERN BLOT ANALYSIS PROCEDURE (GROUP OF 4) (Quick Method devised by Millipore for use with Immobulon P membrane). 1. After drying your membrane, add your primary antibody solution (10mls of anti-LCK SH3 domain rabbit antisera at 1/2500 dilution in TBS+Tween20 and 5% BSA – Note that we may be using a different antibody: if so, we will announce details in class) to your membrane in a clean plastic container. Mix solution around so that the membrane is completely immersed. Place on shaker for about 1 hour. You may find that your membrane looks like its half wet and half dry – this is normal so don’t fret. 2. Pour back the antibody solution into the 15ml FALCON tube. This antibody solution can probably be used 3 more times. Wash your membrane by addition of TBS+Tween to just cover the membrane. Shake by hand for about 10 seconds and dump the solution into the sink. Do this a total of 3 times. 3. Add your secondary antibody solution to your membrane (10ml Goat anti-rabbit IgG heavy and light chains w/ alkaline phosphatase conjugate @ 1/5000 dilution in TBS+Tween20 + 5% BSA). Incubate on shaker for about 30minutes. 4. Pour back secondary antibody solution back into 15ml tube. Wash membrane as above for at least 8 washes. Wash once in buffer that does not have Tween20 detergent (we will use TBS). Your membrane is now ready for substrate detection protocol which will be outlined in class (we will be using the ASBI-Fast Red system).
40
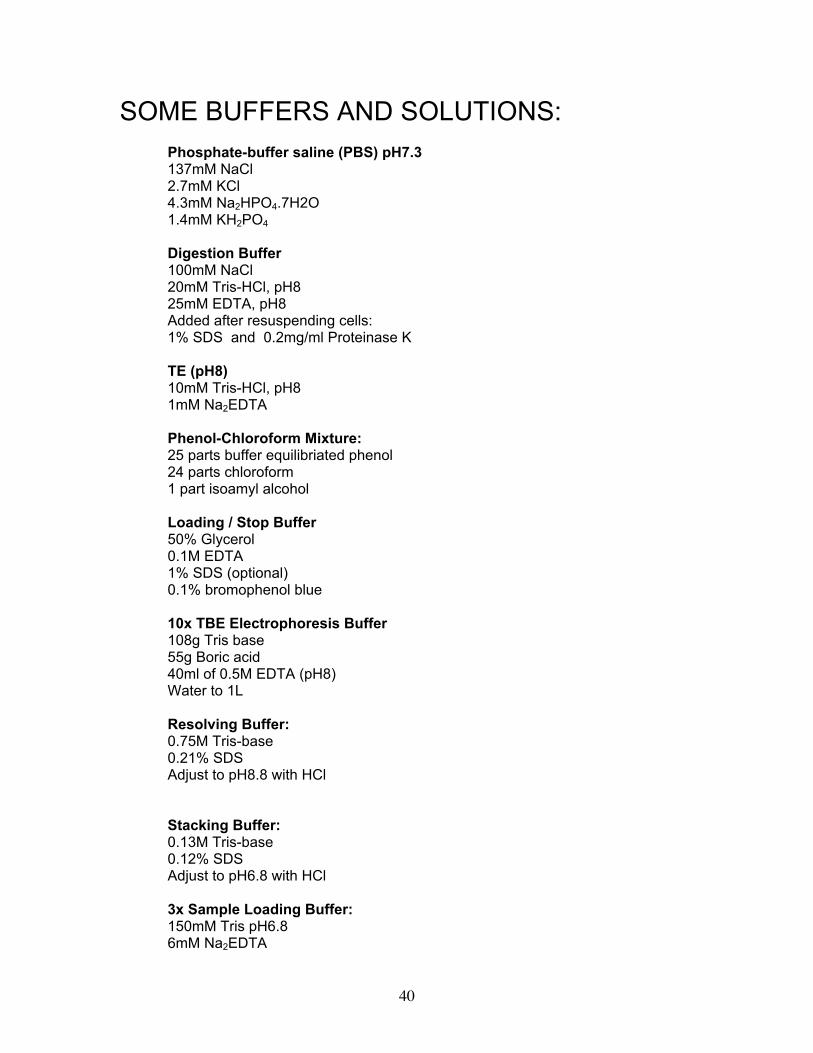
SOME BUFFERS AND SOLUTIONS: Phosphate-buffer saline (PBS) pH7.3
137mM NaCl 2.7mM KCl 4.3mM Na2HPO4.7H2O 1.4mM KH2PO4 Digestion Buffer 100mM NaCl 20mM Tris-HCl, pH8 25mM EDTA, pH8 Added after resuspending cells: 1% SDS and 0.2mg/ml Proteinase K TE (pH8) 10mM Tris-HCl, pH8 1mM Na2EDTA Phenol-Chloroform Mixture: 25 parts buffer equilibriated phenol 24 parts chloroform 1 part isoamyl alcohol
Loading / Stop Buffer
50% Glycerol 0.1M EDTA 1% SDS (optional) 0.1% bromophenol blue 10x TBE Electrophoresis Buffer 108g Tris base 55g Boric acid 40ml of 0.5M EDTA (pH8) Water to 1L
Resolving Buffer: 0.75M Tris-base 0.21% SDS Adjust to pH8.8 with HCl
Stacking Buffer: 0.13M Tris-base 0.12% SDS Adjust to pH6.8 with HCl 3x Sample Loading Buffer: 150mM Tris pH6.8 6mM Na2EDTA
41
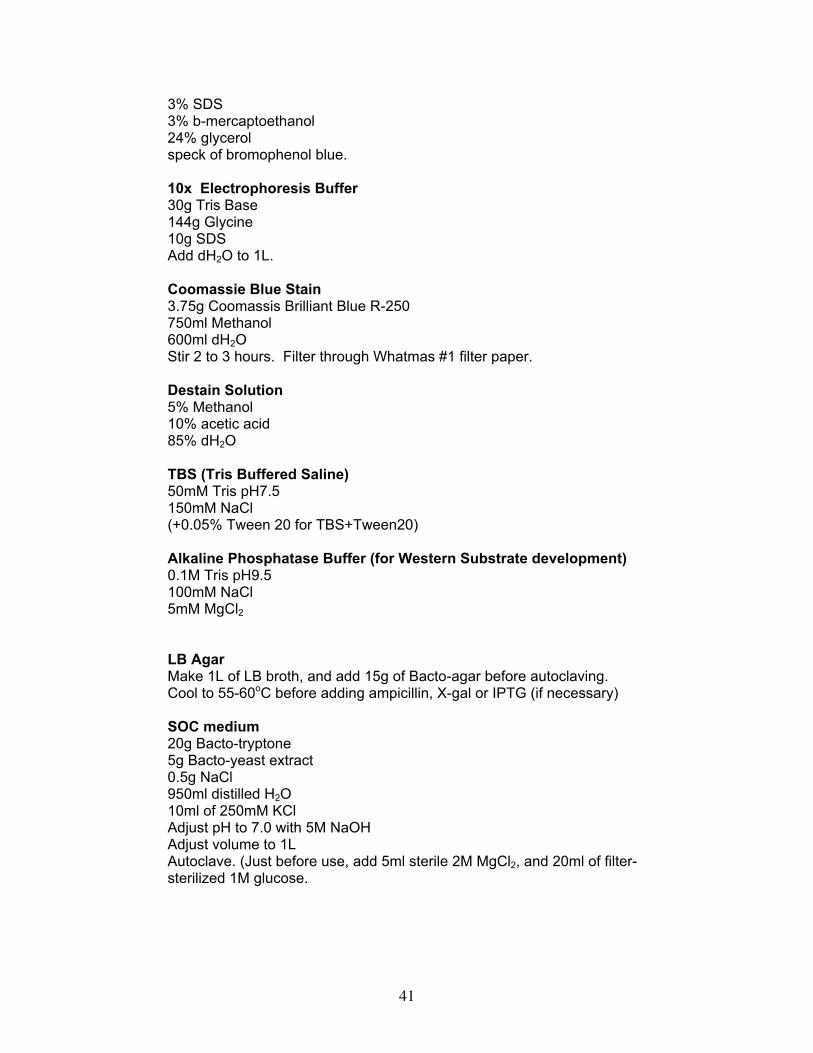
3% SDS 3% b-mercaptoethanol 24% glycerol speck of bromophenol blue. 10x Electrophoresis Buffer 30g Tris Base 144g Glycine 10g SDS Add dH2O to 1L. Coomassie Blue Stain 3.75g Coomassis Brilliant Blue R-250 750ml Methanol 600ml dH2O Stir 2 to 3 hours. Filter through Whatmas #1 filter paper. Destain Solution 5% Methanol 10% acetic acid 85% dH2O TBS (Tris Buffered Saline) 50mM Tris pH7.5 150mM NaCl (+0.05% Tween 20 for TBS+Tween20) Alkaline Phosphatase Buffer (for Western Substrate development) 0.1M Tris pH9.5 100mM NaCl 5mM MgCl2
LB Agar Make 1L of LB broth, and add 15g of Bacto-agar before autoclaving. Cool to 55-60oC before adding ampicillin, X-gal or IPTG (if necessary) SOC medium 20g Bacto-tryptone 5g Bacto-yeast extract 0.5g NaCl 950ml distilled H2O 10ml of 250mM KCl Adjust pH to 7.0 with 5M NaOH Adjust volume to 1L
Autoclave. (Just before use, add 5ml sterile 2M MgCl2, and 20ml of filter-sterilized 1M glucose.