OMNET++ AND MIXIM FRAMEWORK - FBK CREATE-NET · What is OMNeT++? OMNeT++ is a component-based,...
64
OMNET++ AND MIXIM FRAMEWORK SLIDES FROM PROFESSOR KYOUNG-DON (KD) KANG SOURCES: WWW.CS.BINGHAMTON.EDU/~KANG/TEACHING/CS526/ Introduction 1
Transcript of OMNET++ AND MIXIM FRAMEWORK - FBK CREATE-NET · What is OMNeT++? OMNeT++ is a component-based,...

OMNET++
AND
MIXIM FRAMEWORK
SLIDES FROM PROFESSOR KYOUNG-DON (KD) KANG
SOURCES: WWW.CS.BINGHAMTON.EDU/~KANG/TEACHING/CS526/
Introduction
1

Which network simulator use?
What is it and which version? (Wireless, Wire, Specific
technologies LTE, simulator version, technology standard)
Who develop it? (University, research center, project UE,
companies)
Who can use? (students, researchers, companies)
How do I get it? (open source? $$ ? )
How do I use it? (Linux, Mac OS, Windows, command line, graphic
interface)
How do I add to it? (C, C++, Java)
Documentation (Manual, examples, videos)
Bug-Fixing and publications (Mailing list, conferences, papers)

What is OMNeT++?
OMNeT++ is a component-based, modular and open-architecture discrete event network simulator.
OMNeT++ represents a framework approach
Instead of containing explicit and hardwired support for computer networks or other areas, it provides an infrastructure for writing such simulations
Specific application areas are catered by various simulation models and frameworks, most of them open source.
These models are developed completely independently of OMNeT++, and follow their own release cycles.

OMNET++ Frameworks
Partial list of OMNeT++-based network simulators and simulation frameworks:
Mobility Framework -- for mobile and wireless simulations
INET Framework -- for wired and wireless TCP/IP based simulations
Castalia -- for wireless sensor networks
MiXiM -- for mobile and wireless simulations
More specialized, OMNeT++-based simulators:
OverSim -- for overlay and peer-to-peer networks (INET-based)
NesCT -- for TinyOS simulations
Consensus Positif and MAC Simulator -- for sensor networks
SimSANs -- for storage area networks
CDNSim -- for content distribution networks
ACID SimTools -- for simulation of concurrency control, atomic commit processing and recovery protocols
X-Simulator -- for testing synchronization protocols
FIELDBUS -- for simulation of control networks (fieldbuses)
PAWiS -- Power Aware Wireless Sensor Networks Simulation Framework

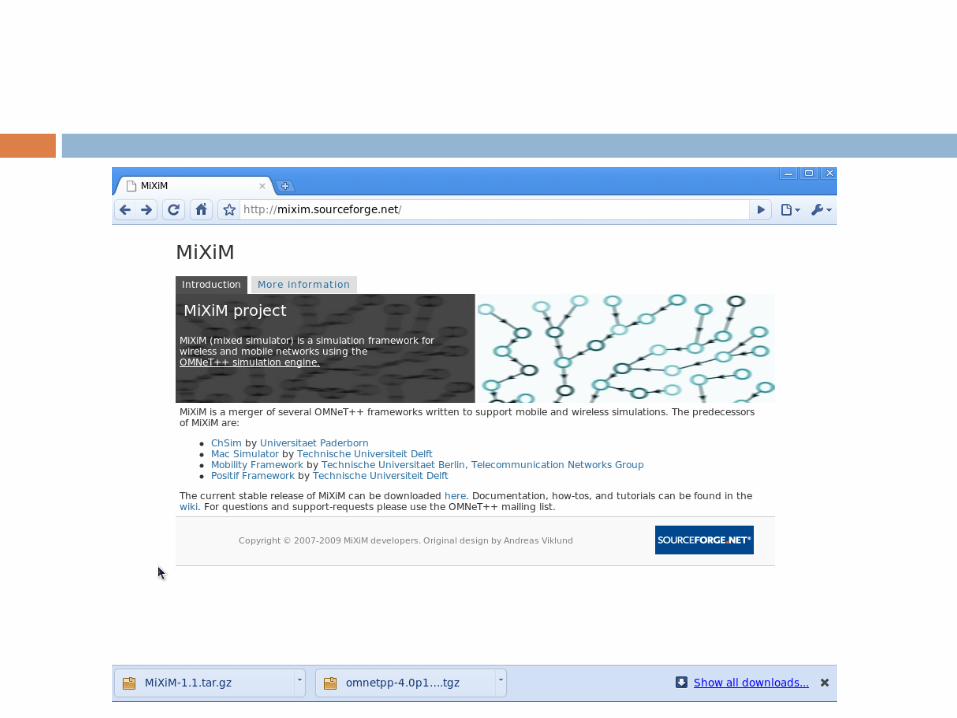
What is MiXiM?
MiXiM project
MiXiM (mixed simulator) is a simulation framework for wireless and mobile networks using the OMNeT++ simulation engine
MiXiM is a merger of several OMNeT++ frameworks written to support mobile and wireless simulations
The predecessors of MiXiM are:
ChSim by Universitaet Paderborn
Mac Simulator by Technische Universiteit Delft
Mobility Framework by Technische Universitaet Berlin, Telecommunication Networks Group
Positif Framework by Technische Universiteit Delft
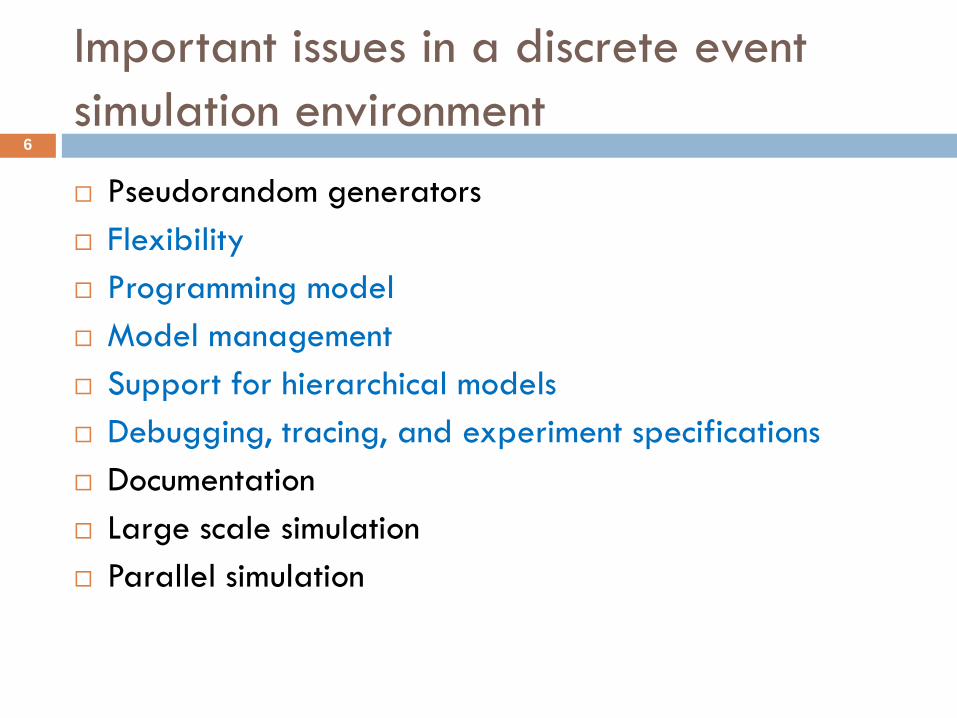
Important issues in a discrete event
simulation environment 6
Pseudorandom generators
Flexibility
Programming model
Model management
Support for hierarchical models
Debugging, tracing, and experiment specifications
Documentation
Large scale simulation
Parallel simulation

Flexibility 7
Core framework for discrete event simulation.
Different add-ons for specific purposes.
Fully implemented in C++.
Functionality added by deriving classes following
specified rules.
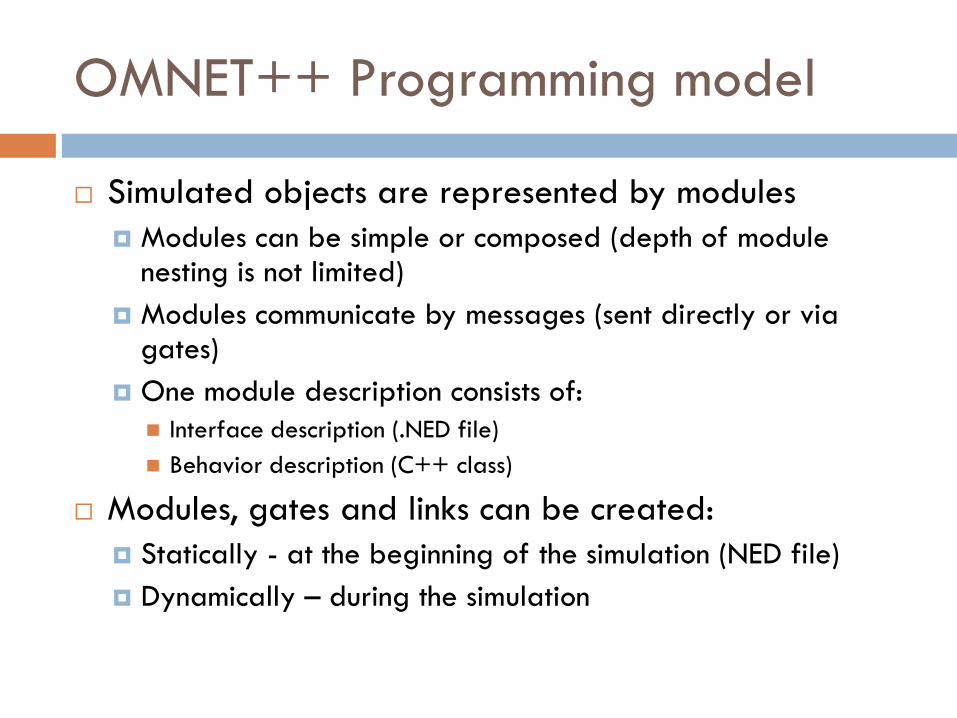
OMNET++ Programming model
Simulated objects are represented by modules
Modules can be simple or composed (depth of module nesting is not limited)
Modules communicate by messages (sent directly or via gates)
One module description consists of:
Interface description (.NED file)
Behavior description (C++ class)
Modules, gates and links can be created:
Statically - at the beginning of the simulation (NED file)
Dynamically – during the simulation

Hierarchical models
Node
Application Network Nic
MAC Phy
Decider
Analog Model
Network interface
card, a compound
module consisting of a
simple module MAC
and a compound
module Phy

Model management 10
Clear separation among simulation kernel and
developed models.
Easiness of packaging developed modules for
reuse.
No need for patching the simulation kernel to install
a model.
Build models and combine
like LEGO blocks

Debugging and tracking
Support is offered for: Recording data vectors and scalars in output files
Random numbers (also from several distributions) with different starting seeds
Tracing and debugging aids (displaying info about the module’s activity, snapshots, breakpoints)
Simulations are easy to configure using .ini file
Batch execution of the same simulation for different parameters is also included
Simulations may be run in two modes:
Command line: Minimum I/O, high performance.
Interactive GUI: Tcl/Tk windowing, allows view what’s happening and modify parameters at run-time.

Simulation Model building 12
for (int i=0;i<10;i++) {
}
...
[General]
network=test_disk
[Parameters]
...
Model
structure
Add behavior
Set up parameters
Compile
Run
Analyze
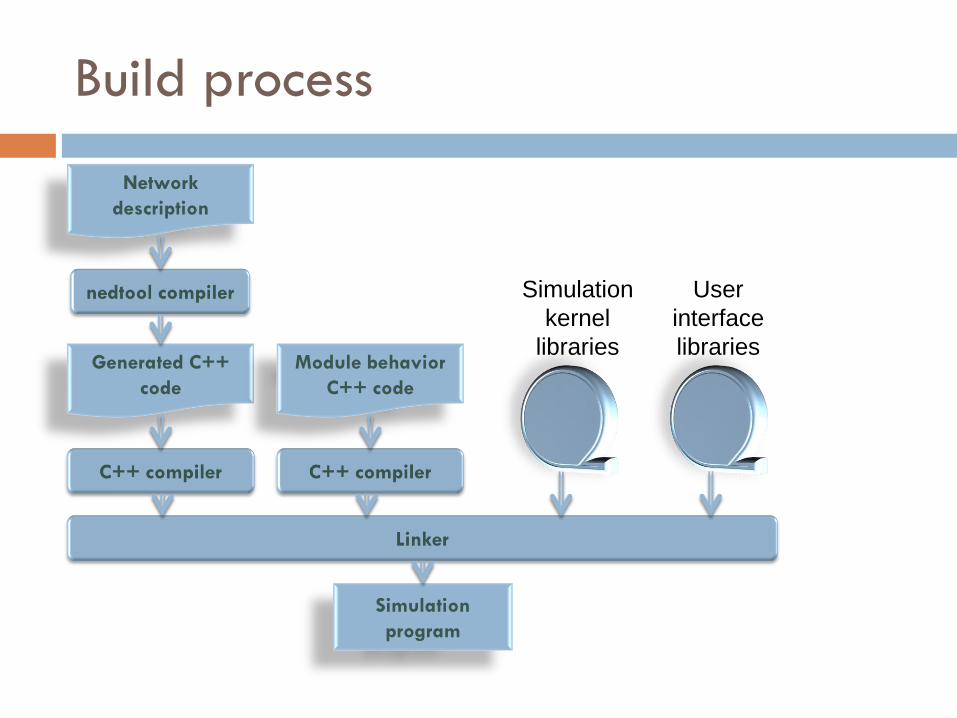
Build process
Network
description
Generated C++
code
Module behavior
C++ code
Simulation
kernel
libraries
User
interface
libraries
Simulation
program

NED Overview
The topology of a model is specified using the NED
language.
Edit it with GNED or other text editor.

Components of a NED description
Import directives
Channel definitions
Simple and compound module definitions
Network definitions
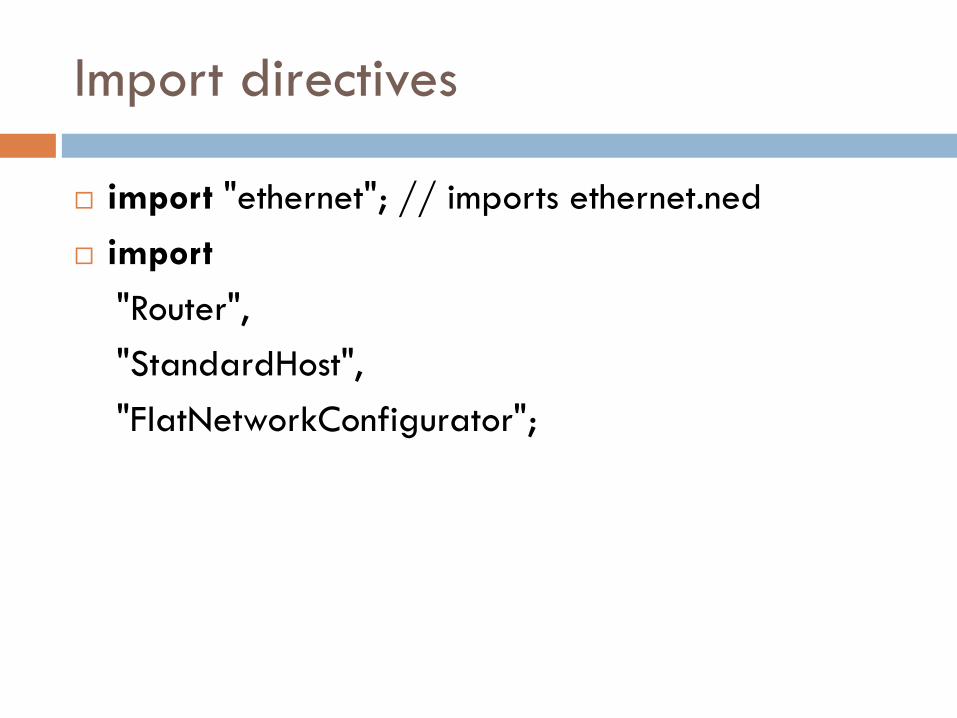
Import directives
import "ethernet"; // imports ethernet.ned
import
"Router",
"StandardHost",
"FlatNetworkConfigurator";

Channel definitions
channel LeasedLine
delay 0.0018 // sec
error 1e-8
datarate 128000 // bit/sec
endchannel

Simple module definitions
simple TrafficGen
parameters:
interarrivalTime,
numOfMessages : const, address : string;
gates:
in: fromPort, fromHigherLayer;
out: toPort, toHigherLayer;
endsimple
Application Layer
TrafficGen
MAC Layer

Compound module definitions
module CompoundModule
parameters: //...
gates: //...
submodules: //...
connections: //...
endmodule

Compound module definitions -
submodules
module CompoundModule
//...
submodules:
submodule1: ModuleType1
parameters: //...
gatesizes: //...
submodule2: ModuleType2
parameters: //...
gatesizes: //...
endmodule

Assigning values to submodule parameters
module CompoundModule
parameters:
param1: numeric,
param2: numeric,
useParam1: bool;
submodules:
submodule1: Node
parameters:
p1 = 10,
p2 = param1+param2,
p3 = useParam1==true ? param1 : param2;
//...
endmodule
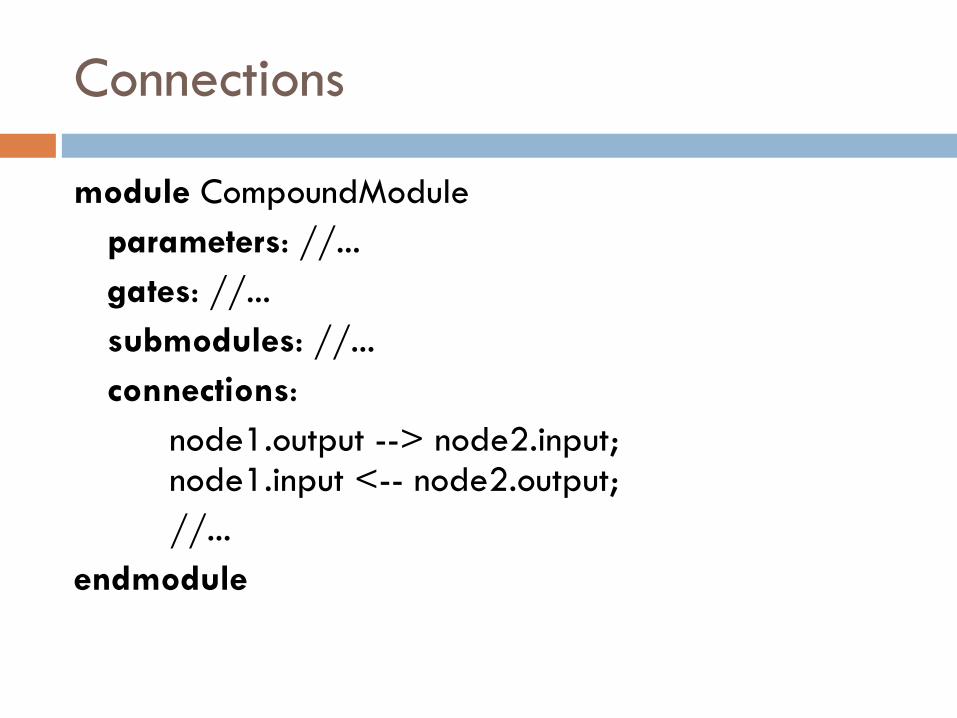
Connections
module CompoundModule
parameters: //...
gates: //...
submodules: //...
connections:
node1.output --> node2.input; node1.input <-- node2.output;
//...
endmodule
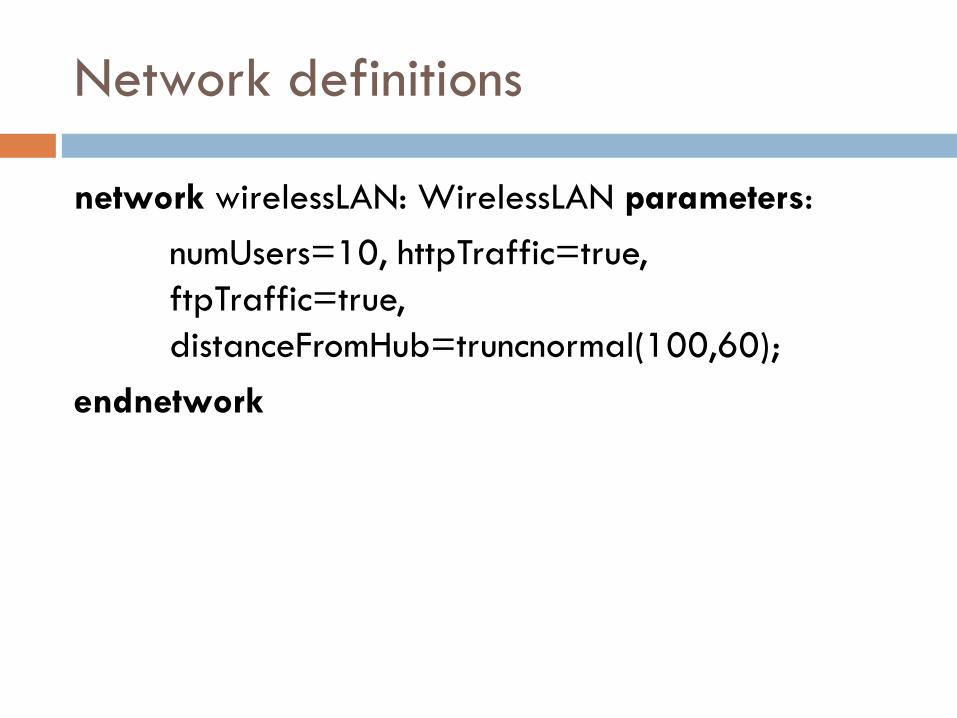
Network definitions
network wirelessLAN: WirelessLAN parameters:
numUsers=10, httpTraffic=true,
ftpTraffic=true,
distanceFromHub=truncnormal(100,60);
endnetwork

Simulation Model
//
// Ethernet CSMA/CD MAC
//
simple EtherMAC {
parameters: string address; // others omitted for brevity
gates:
input phyIn; // to physical layer or the network
output phyOut; // to physical layer or the network
input llcIn; // to EtherLLC or higher layer
output llcOut; // to EtherLLC or higher layer
}
Modules can be connected with each other via gates and combined to
form compound modules. Connections are created within a single level of module
hierarchy: a submodule can be connected with another, or with the containing
compound module. Every simulation model is an instance of a compound module
type. This level (components and topology) is dealt with in NED files

Simulation Model
// // Host with an Ethernet interface // module EtherStation { parameters: ... gates: ... input in; // connect to switch/hub, etc output out; submodules: app: EtherTrafficGen; llc: EtherLLC; mac: EtherMAC; connections: app.out --> llc.hlIn; app.in <-- llc.hlOut; llc.macIn <-- mac.llcOut; llc.macOout --> mac.llcIn; mac.phyIn <-- in; mac.phyOut --> out; }
Simple modules which,
like EtherMAC, don't have further
submodules and are backed up with
C++ code that provides their active
behavior, are declared with the
simple keyword; compound modules
are declared with
the module keyword. To simulate an
Ethernet LAN, you'd create a
compound module EtherLAN and
announce that it can run by itself with
the network keyword:
network EtherLAN {
submodules: EtherStation;
…
}
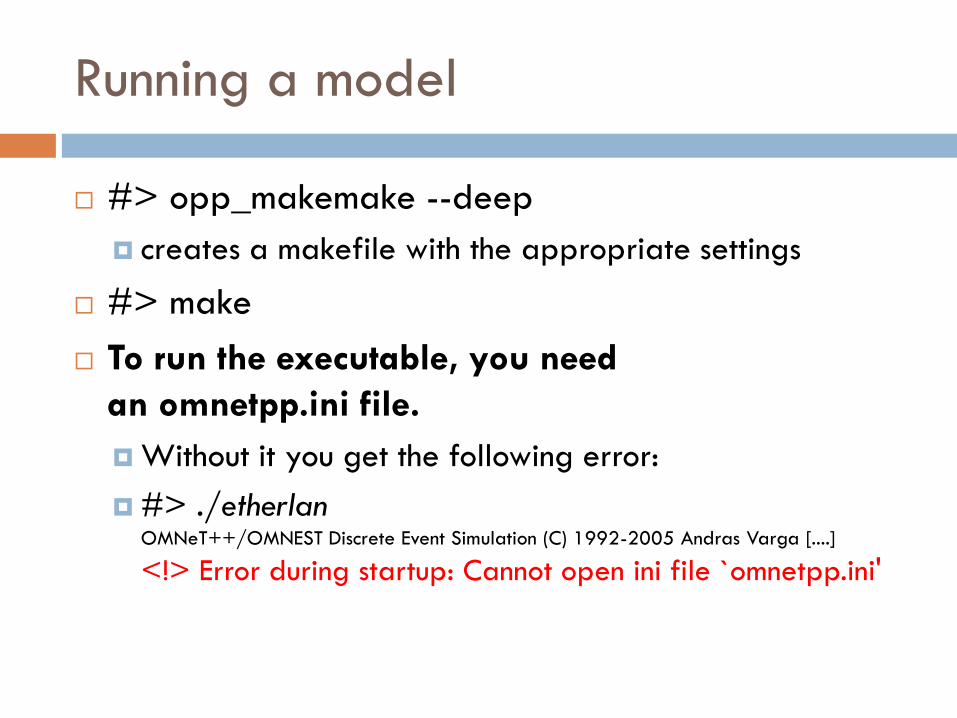
Running a model
#> opp_makemake --deep
creates a makefile with the appropriate settings
#> make
To run the executable, you need
an omnetpp.ini file.
Without it you get the following error:
#> ./etherlan OMNeT++/OMNEST Discrete Event Simulation (C) 1992-2005 Andras Varga [....]
<!> Error during startup: Cannot open ini file `omnetpp.ini'

Running a model (omnetpp.ini)
[General]
network = etherLAN
*.numStations = 20
**.frameLength = normal(200,1400)
**.station[0].numFramesToSend = 5000
**.station[1-5].numFramesToSend = 1000
**.station[*].numFramesToSend = 0
One function of the ini file is to tell which network to simulate. You can also specify
in there which NED files to load dynamically, assign module parameters, specify
how long the simulation should run, what seeds to use for random number
generation, how much results to collect, set up several experiments with different
parameter settings, etc.

Why use separate NED and ini files?
NED files define the topology of network/modules
It is a part of the model description
Ini files define
Simulation parameters
Results to collect
Random seeds
This separation allows to change parameters without modifying the model
E.g. no need to recompile, experiments can be executed as a batch

Output of a simulation
The simulation may write output vector and output scalar files
omnetpp.vec and omnetpp.sca
The capability to record simulation results has to be explicitly programmed into the simple modules
An output vector file contains several output vectors
series of pairs timestamp, value
They can store things like:
queue length over time, end-to-end delay of received packets, packet drops or channel throughput
You can configure output vectors from omnetpp.ini
you can enable or disable recording individual output vectors, or limit recording to a certain simulation time interval
Output vectors capture behaviour over time
Output scalar files contain summary statistics
number of packets sent, number of packet drops, average end-to-end delay of received packets, peak throughput
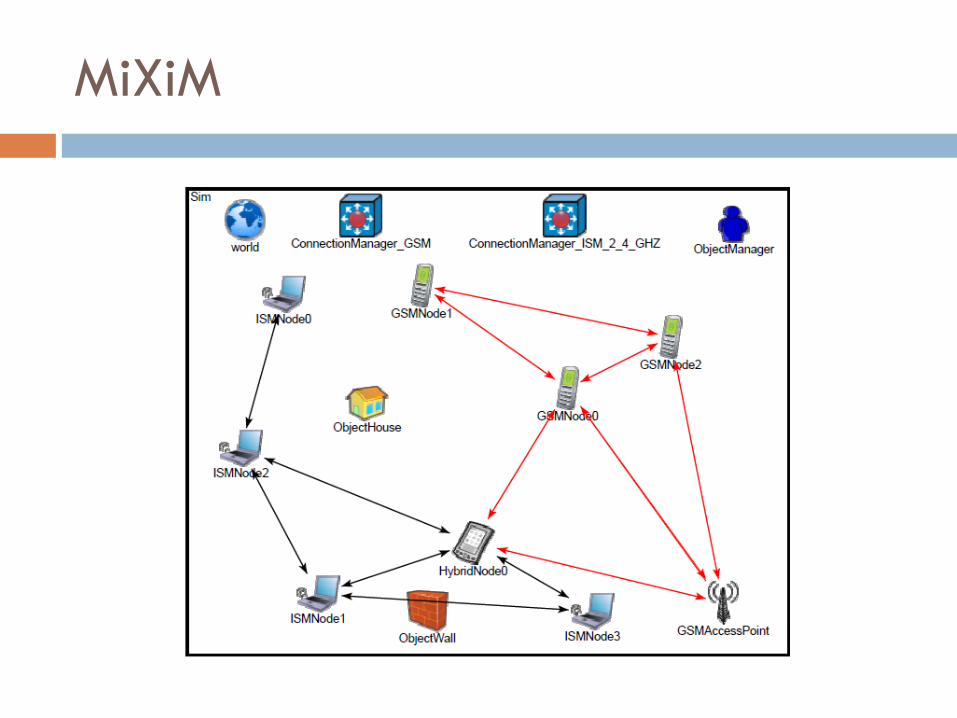
MiXiM

MiXiM
World utility module provides global parameters of the environment (size, 2D or 3D)
Objects are used to model the environment
ObjectHouse, ObjectWall
Objects influence radio signals and the mobility of other objects
ObjectManager decides which objects are interfering
ConnectionManager dynamically manages connections between objects
Signal quality based on interference
Signal quality based on mobility

Node Modules
Application, network, MAC, and
physical layers
MAC and physical layers are grouped
into a single Nic module
A node with multiple Nic modules can
be defined
A laptop with bluetooth, GSM, and
802.11 radios can be modeled

Node Modules
Mobility module is responsible for the movements of
an object
Battery module used for modeling the energy
reserve of nodes
Communication, processing, mobility related energy
consumption can be modeled
Utility module is used for easy statistical data
collection and inter-modular data passing (location,
energy level etc.)

Connection Modeling
In wireless simulations the channel connecting two nodes is the air
A broadcast medium that can not be represented with a single connection
Theoretically a signal sent out by a node affects all other nodes in the simulation
Since the signal is attenuated by the channel, as the distance to the source is increased the interference becomes negligible
MiXiM sends all simultaneous signals to the connected nodes to let them decide on the final signal quality
Maximal interference distance decides on the connectivity
Definition of connection:
All nodes that are not connected, definitely do not interfere with each other

Utility module
Modules can publish observed parameters to the
blackboard, a globally accessible service
Other modules can subscribe to these published
parameters to implement different data analysis
methods for gathering results
Dynamic parameters like location of a node or the
energy levels can also be published so that other
modules can change their behaviors accordingly

Example
BaseNetwork.ned
contains the simulation network
BaseHost.ned
contains the compound module defining the hosts for the network
BaseNic.ned
contains the compound module defining the network interface card of the hosts
config.xml
contains configuration for the physical layers decider and analogue models
omnetpp.ini
contains configuration for the simulation
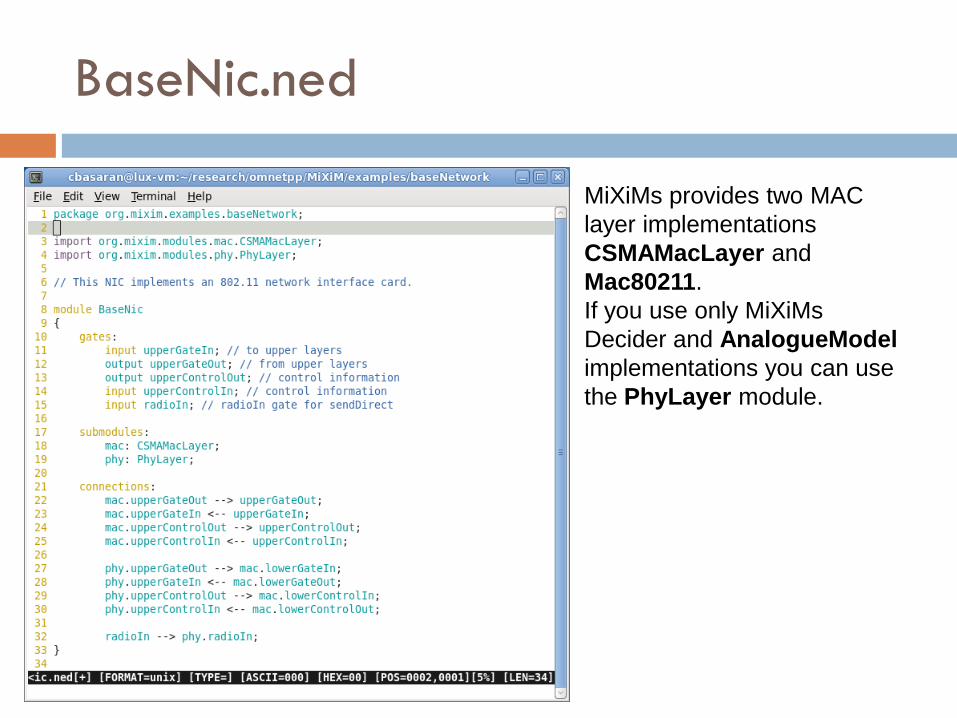
BaseNic.ned
MiXiMs provides two MAC
layer implementations
CSMAMacLayer and
Mac80211.
If you use only MiXiMs
Decider and AnalogueModel
implementations you can use
the PhyLayer module.

BaseNode.ned
BaseUtility is a mandatory module
BaseArp is used for address
resolution
IBaseMobility is a mandatory module
which defines current position and the
movement pattern of the node.
IBaseApplLayer, IBaseNetwLayer
and BaseNic define the network stack
of this host.
IBaseApplLayer is the module for the
application layer to use. You can
implement you own by sub classing
MiXiMs "BaseApplLayer".
INetwLayer is the module for the
network layer to use. Sub-class your
own network layer from MiXiMs
BaseNetwLayer.

BaseNetwork.ned
Path inside MiXiM directory
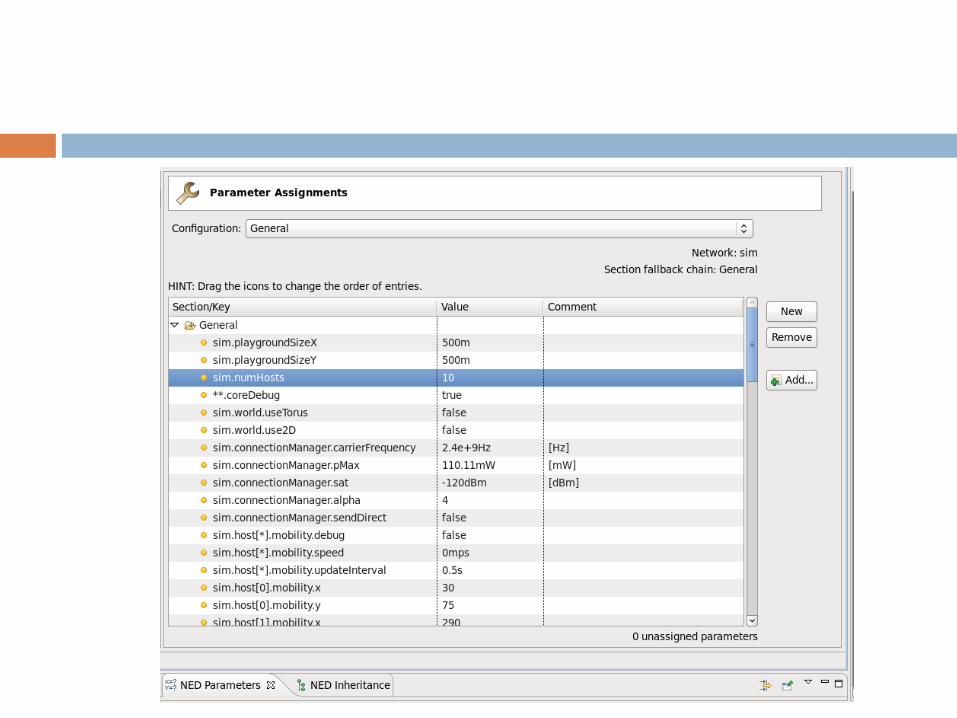
Module parameters
ConnectionManager
checks if any two hosts can hear each other
updates their connections accordingly.
If two hosts are connected, they can receive
something from each other
BaseWorldUtility
contains global utility methods and parameters
node[numNodes]: BaseNode
defines the hosts/nodes of our simulation.
The baseNetwork example
defines a network and an
application layer on top of a
NIC
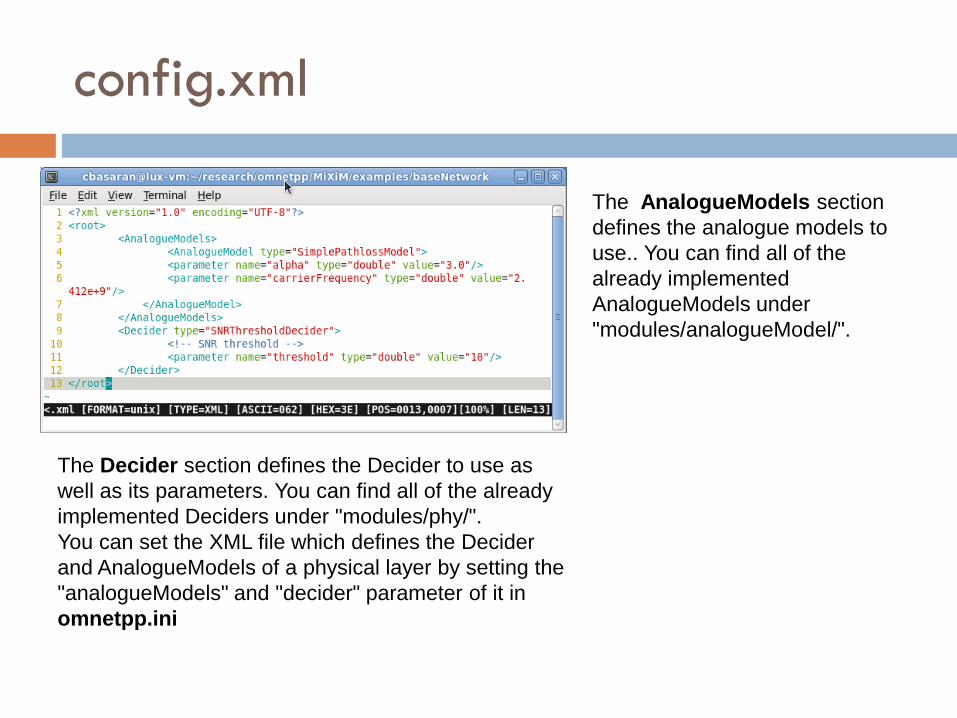
config.xml
The Decider section defines the Decider to use as
well as its parameters. You can find all of the already
implemented Deciders under "modules/phy/".
You can set the XML file which defines the Decider
and AnalogueModels of a physical layer by setting the
"analogueModels" and "decider" parameter of it in
omnetpp.ini
The AnalogueModels section
defines the analogue models to
use.. You can find all of the
already implemented
AnalogueModels under
"modules/analogueModel/".

omnet.ini

Example II
The MAC layer we want to implement will only
implement the basic sending and receiving process
Since implementing a Mac layers requires a lot
message handling and state changing, it needs a lot
of rather boring glue code, so we will only explain
the interesting parts of the code

Tasks of the MAC layer
Define start, duration, TX power mapping and bit-rate
mapping of the Signal:
BaseMacLayer provides the convenience method
“createSignal()” for simple signals
Takes start, duration, TX power and bit-rate as parameters
Returns a new Signal with a mapping representing the
passed (constant) TX power and the passed (constant) bit-
rate
To define non constant TX power and / or bit-rate over time
one will have to set the Mappings of the Signal manually.

Tasks of the MAC layer
Channel sensing:
“getChannelState()” - phy module method for instantaneous channel sensing.
Control message of kind “MacToPhyInterface::CHANNEL_SENSE_REQUEST” sent to phy module
Requests the phy to sense the channel over a period of time
Takes a timeout and a sense mode value
UNTIL_TIMEOUT: is used to sense for the specified amount of time.
UNTIL_IDLE: is used to sense until the channel is idle or until the timeout.
UNTIL_BUSY: is used to sense until the channel is busy or until the timeout.
both methods return a “ChannelState” object with an idle flag and the current RSSI value
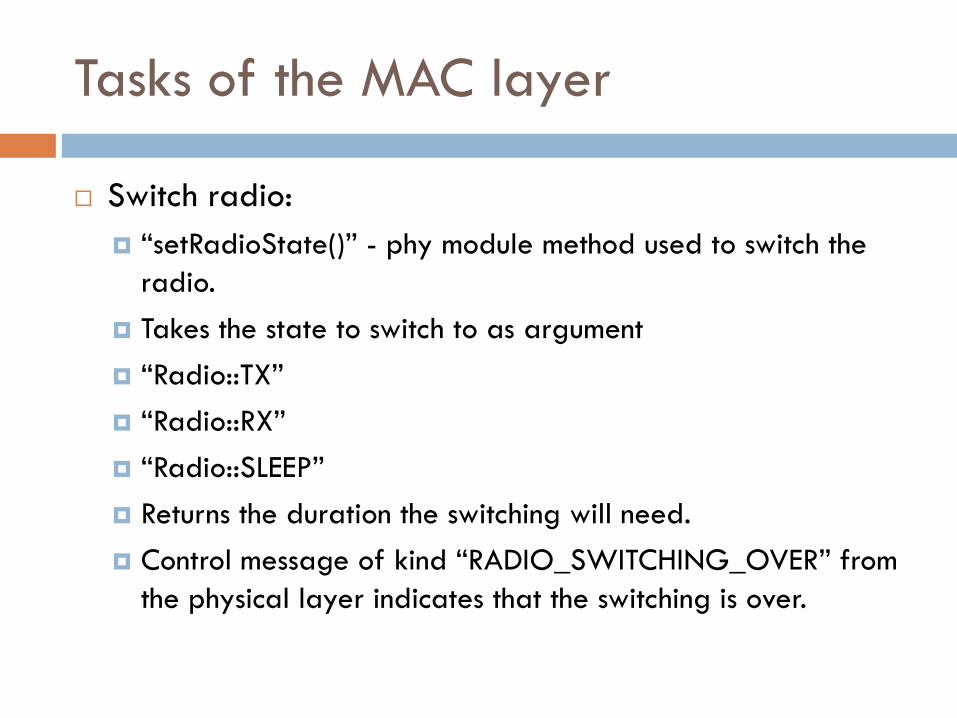
Tasks of the MAC layer
Switch radio:
“setRadioState()” - phy module method used to switch the
radio.
Takes the state to switch to as argument
“Radio::TX”
“Radio::RX”
“Radio::SLEEP”
Returns the duration the switching will need.
Control message of kind “RADIO_SWITCHING_OVER” from
the physical layer indicates that the switching is over.

Write your own MAC layer
class MyMacLayer : public BaseMacLayer
{
protected: cPacket* packetToSend;
enum MacState{ RX, CS, TX };
int macState;
ChannelSenseRequest* chSense;
}
"packetToSend" stores the packet from the upper layer we currently want to send down to the channel.
"macState" will store the current state our MAC layer is in
"chSense" hold a "UNTIL_IDLE"-channel sense request which we will use to wait for the channel to turn idle.

Writing your own MAC layer
• During initialization we set the initial state of our MAC layer to receiving and
we initialize or "UNTIL_IDLE"-request.
• The first parameter to the constructor is the name for our message and the
second is the kind, which has to be
"MacToPhyInterface::CHANNEL_SENSE_REQUEST" for every
ChannelSenseRequest.
• We further set the mode and the timeout (in seconds) of our request.
Writing your own MAC layer
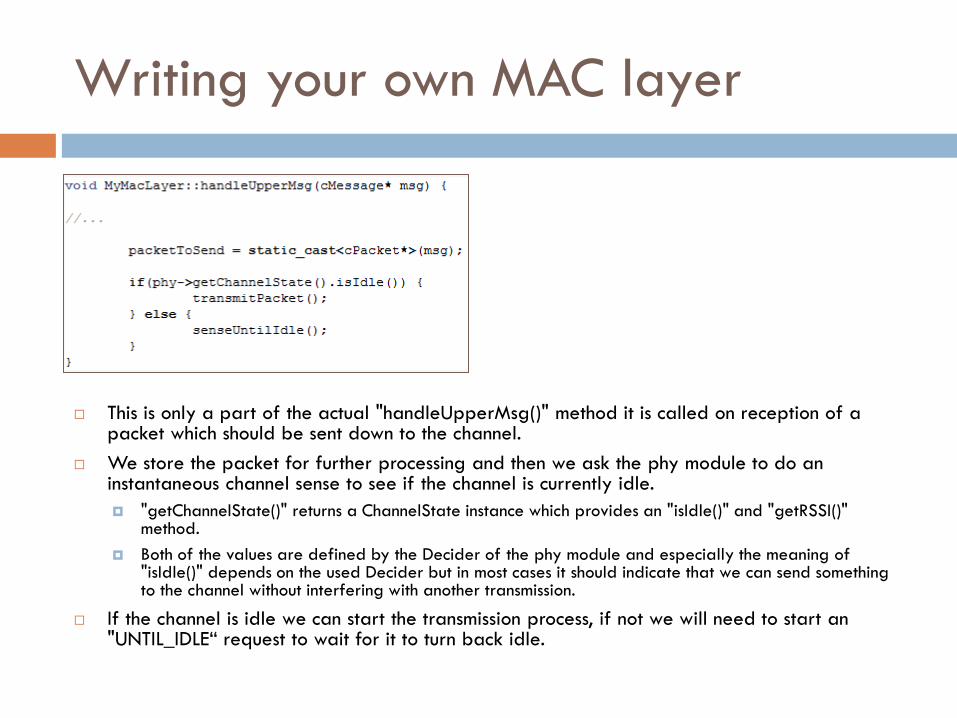
This is only a part of the actual "handleUpperMsg()" method it is called on reception of a packet which should be sent down to the channel.
We store the packet for further processing and then we ask the phy module to do an instantaneous channel sense to see if the channel is currently idle.
"getChannelState()" returns a ChannelState instance which provides an "isIdle()" and "getRSSI()" method.
Both of the values are defined by the Decider of the phy module and especially the meaning of "isIdle()" depends on the used Decider but in most cases it should indicate that we can send something to the channel without interfering with another transmission.
If the channel is idle we can start the transmission process, if not we will need to start an "UNTIL_IDLE“ request to wait for it to turn back idle.

Writing your own MAC layer
We set the MAC layers state to carrier sensing and send our "UNTIL_IDLE“ request over the control channel down to the phy module.
The phy module will hand it to its Decider and when the Decider says that the channel is idle again or the timeout is reached it will set the "ChannelState“ member of the request and send it back up to our MAC layer.

Writing your own MAC layer
The ChannelSenseRequest we get back from the phy module will be the same which we sent down but with the result of the sensing stored in its "ChannelState" member. If the result says that the channel is back idle we can start the transmission process, which is done in "transmitpacket()":

Writing your own MAC layer
As soon as the switching process is over the phy module will send us a message of kind "RADIO_SWITCHING_OVER" over the control channel. As soon as the radio is in TX mode we can start sending the packet to the channel which we do in "handleRadioSwitchedToTX()“
Here the packet we got from the upper layer is encapsulated into a MacPkt and then sent down to the physical layer which will send it to the channel. During encapsulation the Signal for the packet is created and attached to it
We see that we do not yet start transmitting the packet because we have to switch the radio to TX mode first. We do this by calling the phy modules "setRadioState()" method
The method will return the time the switching process is over. The time it takes to switch from one radio state to another can be set as parameters of the phy module.

Writing your own MAC layer
The actual encapsulation is handled by BaseMacLayers "encapsMsg()" method. Our MAC layer is only responsible for creating and attaching the Signal. Since we will use a constant bit-rate and sending power for the whole transmission we can use the "createSignal()" method provided by BaseMacLayer. It takes the start and the length of the signal to create as well as its sending power and bit-rate. The method then creates a constant mapping for the power and bit-rate, stores them in a new Signal and returns it to us. If you want to use a more complex power or bitrate mapping you'll have to create the signal and the Mappings by yourself. You can take a look at the implementation of the "createSignal()" method to see how this basically works.
The Signal then is added to the MacPkts control info.
Note: Since the MAC layer has to create the Signal it has to know the whole length of the packet, including the phy header (if there is one). The phy module itself does not change the length of the packet sent to it.

Writing your own MAC layer
After the transmission of the packet is over the phy module will send us a message of kind "TX_OVER" over the control channel. When this happens our MAC layer has to switch the radio back to RX state
phy->setRadioState(Radio::RX);
Again the phy module will send us a "RADIO_SWITCHING_OVER" message as soon the switching process is over which we handle in "handleRadioSwitchedToRX()":
Now the whole transmission process is over and our MAC layer goes back to receiving state

Links and readings
http://mixim.sourceforge.net
http://www.omnetpp.org/
“The OMNeT++ discrete event simulation system”, Varga A. Proceedings
of the European Simulation Multiconference (ESM 2001), Prague, Czech
Republic, 6–9 June 2001
“Comparison of OMNET++ and other simulator for WSN simulation”,
Xiaodong Xian; Weiren Shi; He Huang Industrial Electronics and
Applications, 2008. ICIEA 2008. 3rd IEEE Conference on
“Simulating wireless and mobile networks in OMNeT++ the MiXiM
vision”, Proceedings of the 1st international conference on Simulation
tools and techniques for communications, networks and systems
Marseille, France, 2008
Questions?

OMNET++
AND
MIXIM FRAMEWORK
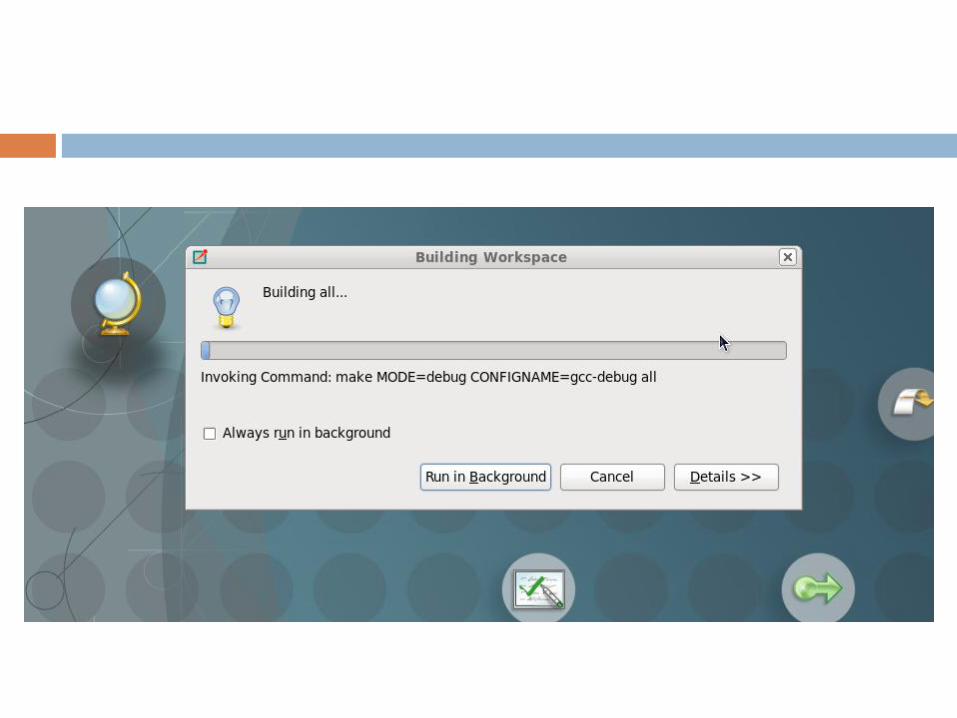
Installation
56