OLLI online registration - University of Cincinnati Content/how to... · REGISTRATION for classes...
22
OLLI online registration A tutorial on how to register for classes at OLLI
Transcript of OLLI online registration - University of Cincinnati Content/how to... · REGISTRATION for classes...
OLLI online registrationA tutorial on how to register for classes at OLLI
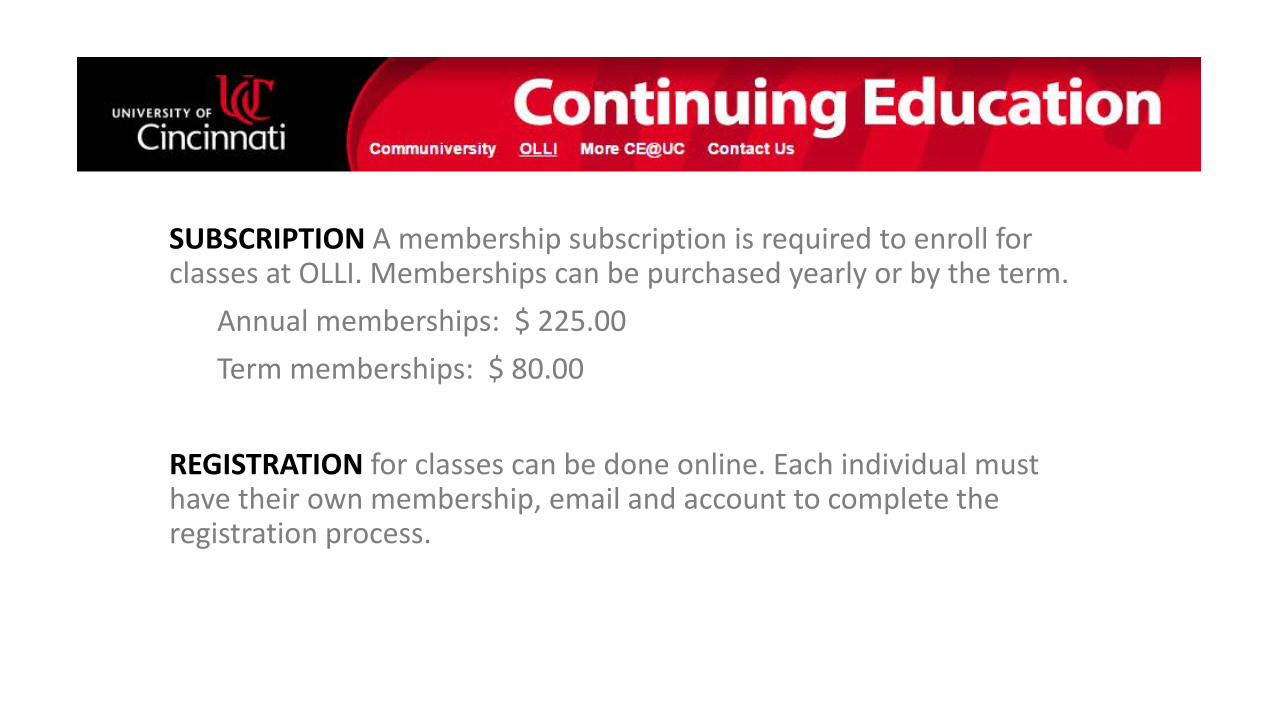
SUBSCRIPTION A membership subscription is required to enroll for classes at OLLI. Memberships can be purchased yearly or by the term.
Annual memberships: $ 225.00Term memberships: $ 80.00
REGISTRATION for classes can be done online. Each individual must have their own membership, email and account to complete the registration process.
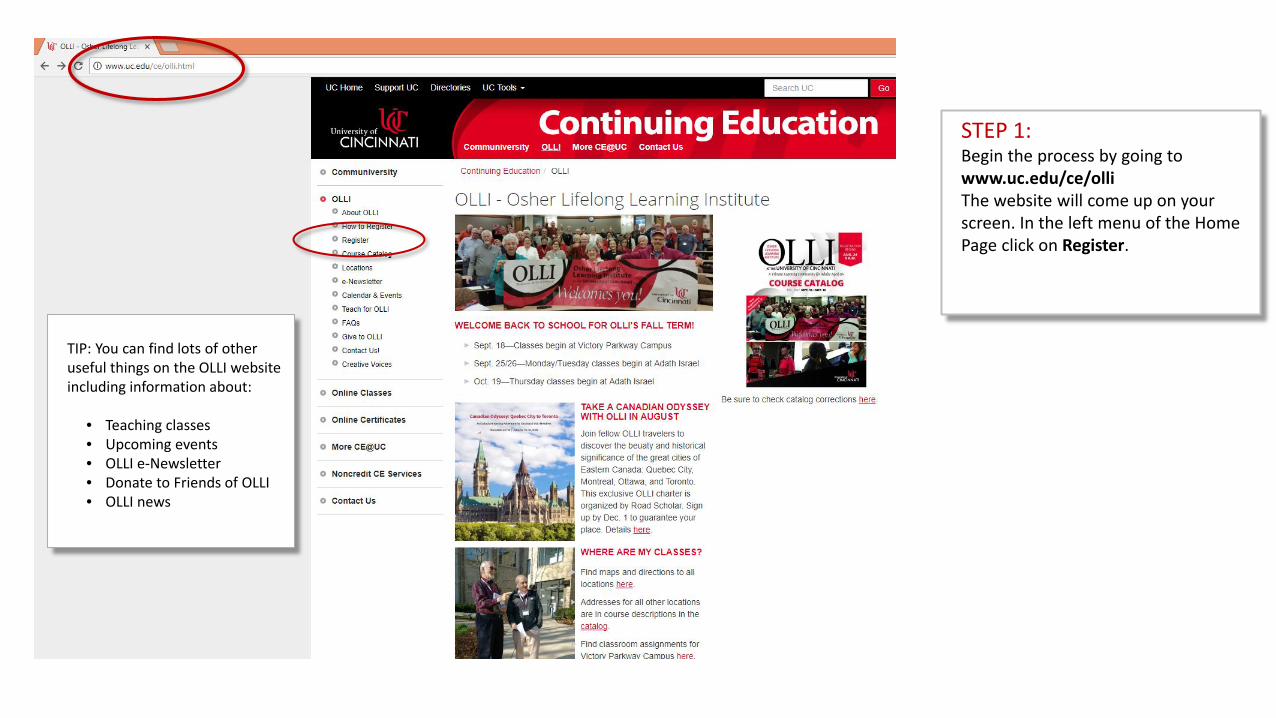
TIP: You can find lots of other useful things on the OLLI website including information about:
• Teaching classes • Upcoming events • OLLI e-Newsletter • Donate to Friends of OLLI• OLLI news
STEP 1: Begin the process by going to www.uc.edu/ce/olliThe website will come up on your screen. In the left menu of the Home Page click on Register.
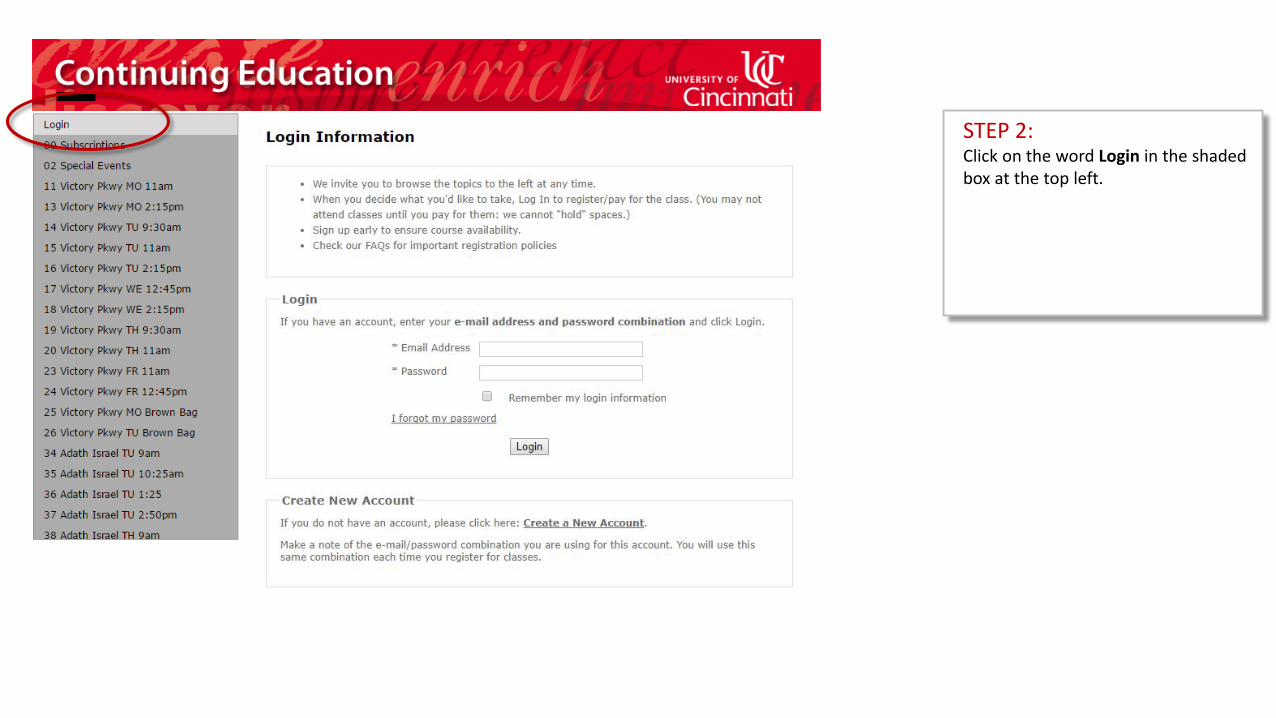
STEP 2: Click on the word Login in the shaded box at the top left.
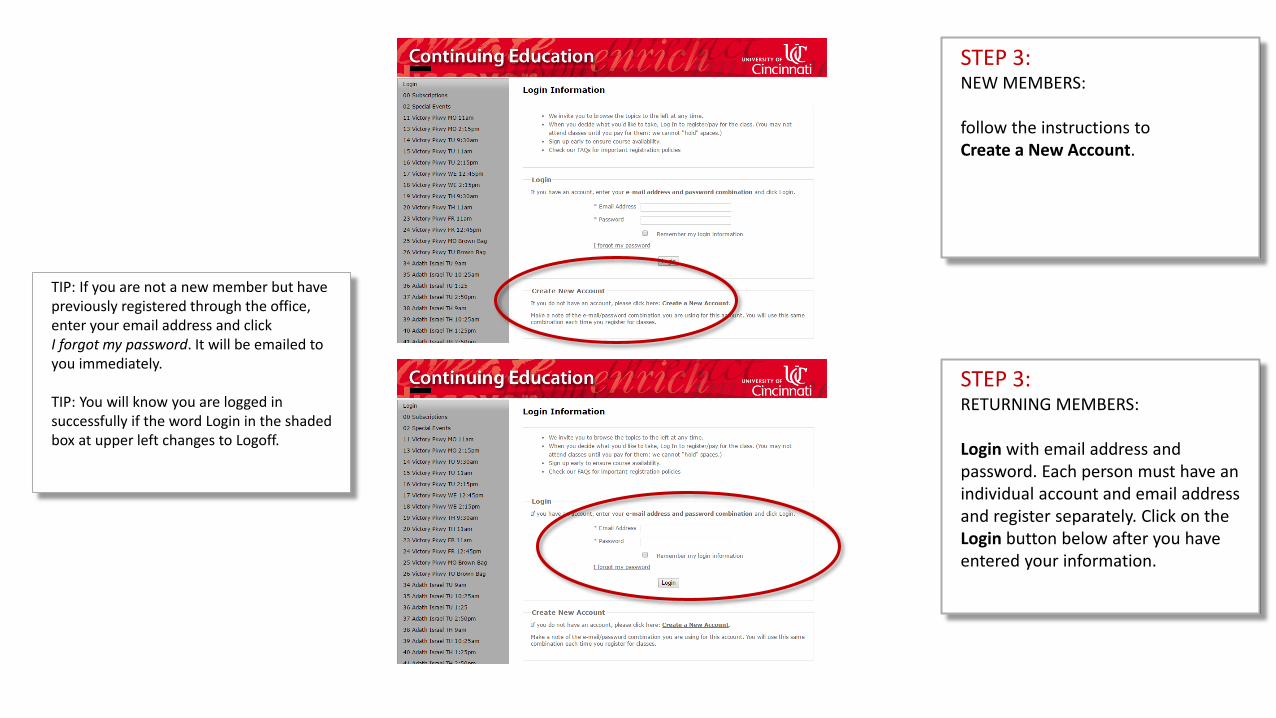
STEP 3: NEW MEMBERS:
follow the instructions to Create a New Account.
TIP: If you are not a new member but have previously registered through the office, enter your email address and click I forgot my password. It will be emailed to you immediately.
TIP: You will know you are logged in successfully if the word Login in the shaded box at upper left changes to Logoff.
STEP 3: RETURNING MEMBERS:
Login with email address and password. Each person must have an individual account and email address and register separately. Click on the Login button below after you have entered your information.
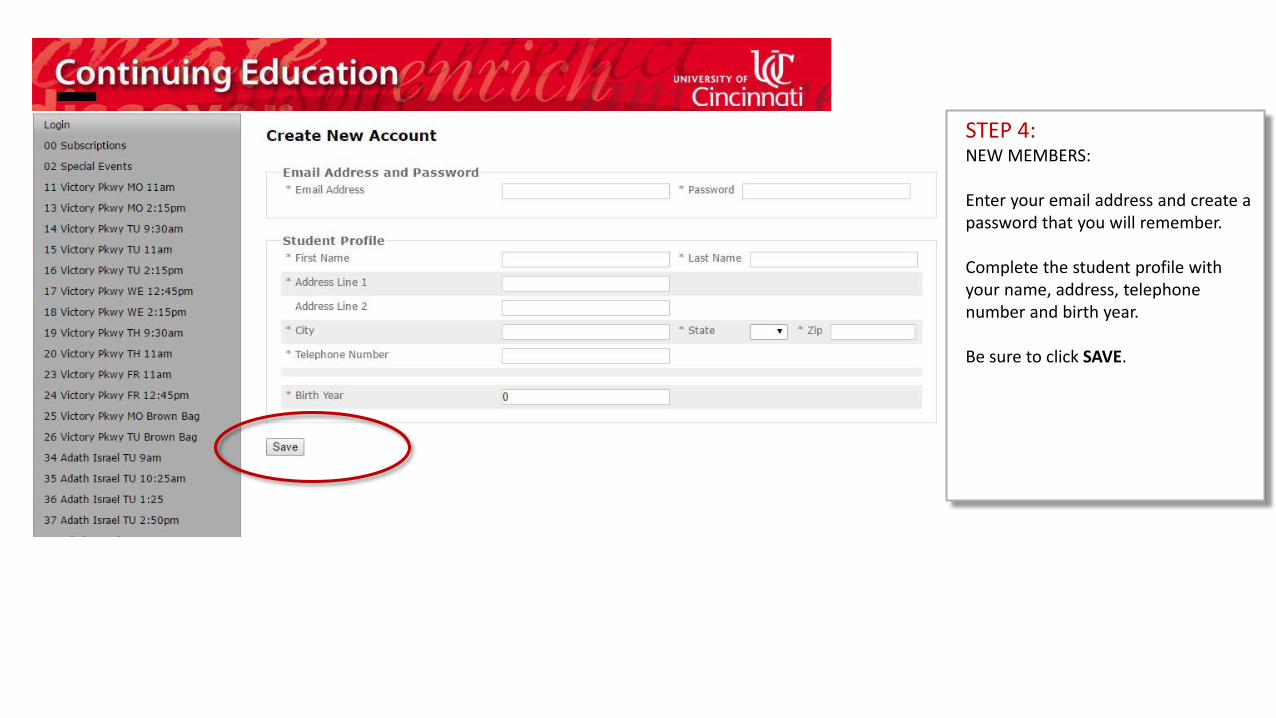
STEP 4: NEW MEMBERS:
Enter your email address and create a password that you will remember.
Complete the student profile with your name, address, telephone number and birth year.
Be sure to click SAVE.
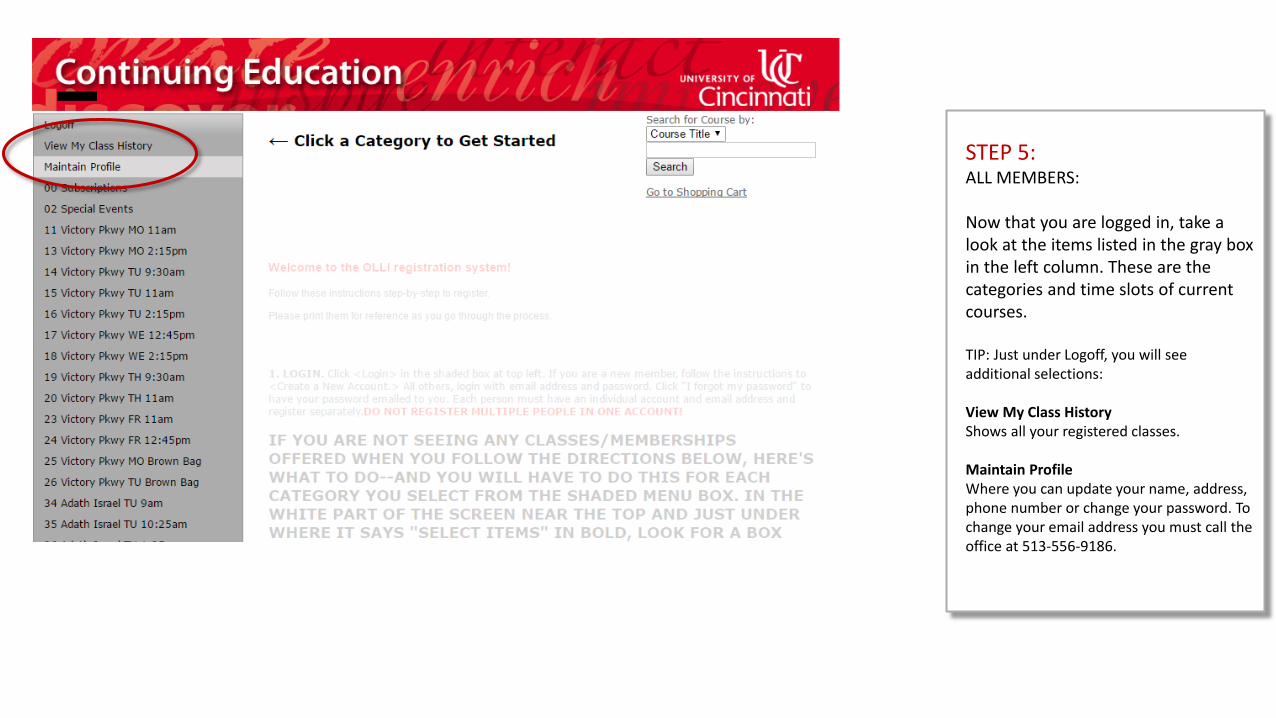
STEP 5: ALL MEMBERS:
Now that you are logged in, take a look at the items listed in the gray box in the left column. These are the categories and time slots of current courses.
TIP: Just under Logoff, you will see additional selections:
View My Class History Shows all your registered classes.
Maintain ProfileWhere you can update your name, address,phone number or change your password. To change your email address you must call the office at 513-556-9186.
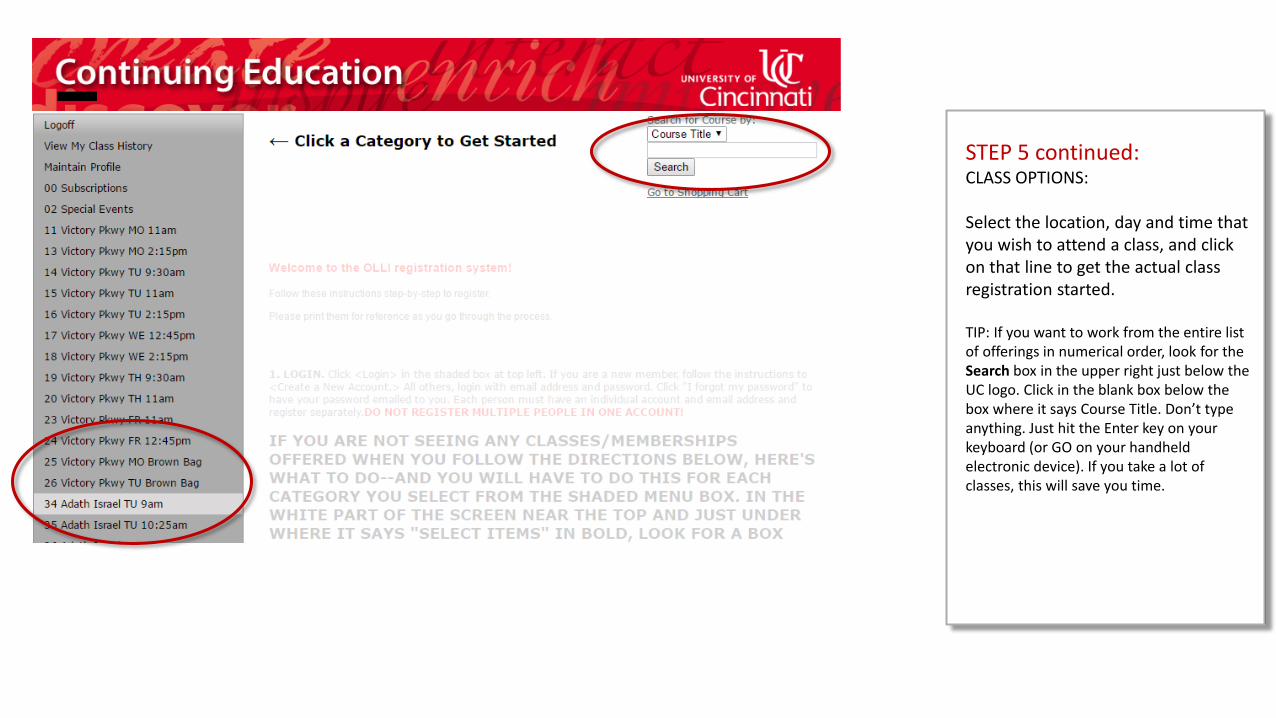
STEP 5 continued: CLASS OPTIONS:
Select the location, day and time that you wish to attend a class, and click on that line to get the actual class registration started.
TIP: If you want to work from the entire list of offerings in numerical order, look for the Search box in the upper right just below the UC logo. Click in the blank box below the box where it says Course Title. Don’t type anything. Just hit the Enter key on your keyboard (or GO on your handheld electronic device). If you take a lot of classes, this will save you time.
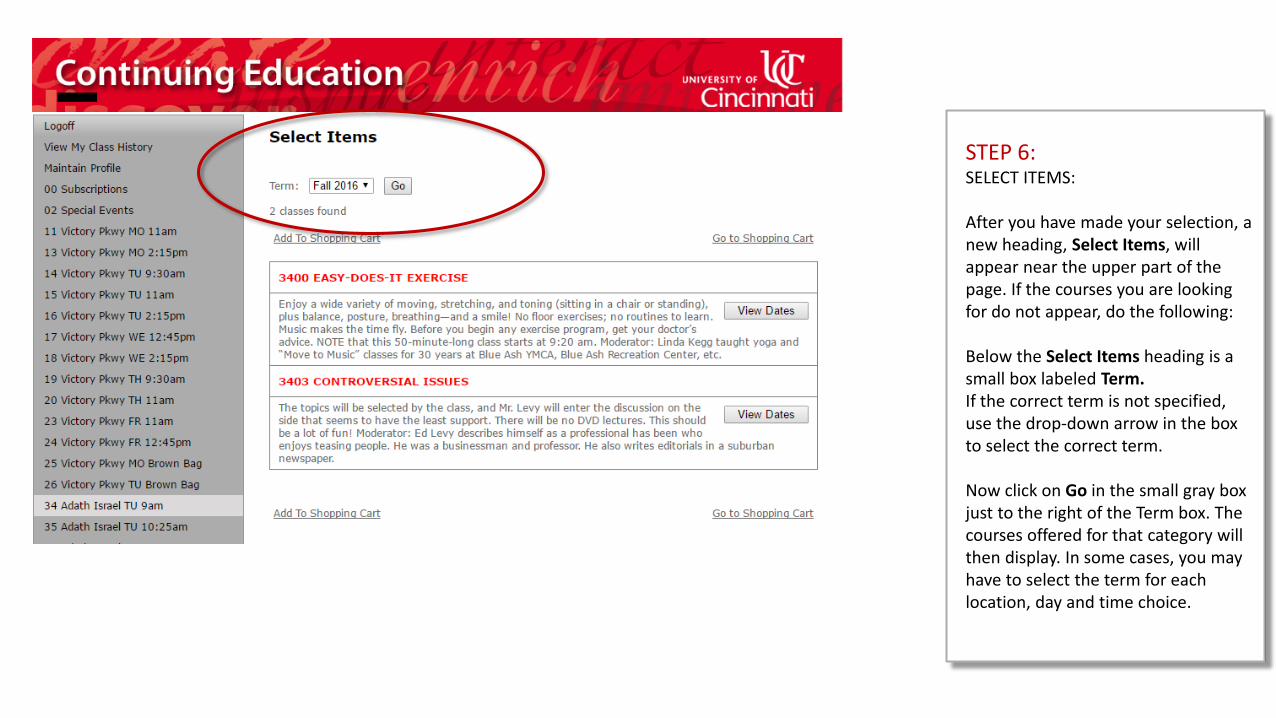
STEP 6: SELECT ITEMS:
After you have made your selection, a new heading, Select Items, will appear near the upper part of the page. If the courses you are looking for do not appear, do the following:
Below the Select Items heading is a small box labeled Term.If the correct term is not specified, use the drop-down arrow in the box to select the correct term.
Now click on Go in the small gray box just to the right of the Term box. The courses offered for that category will then display. In some cases, you may have to select the term for each location, day and time choice.

STEP 6 continued: Course selections for the location, day and time should appear on the page. Decide in which class you would like to participate and click on View Dates.
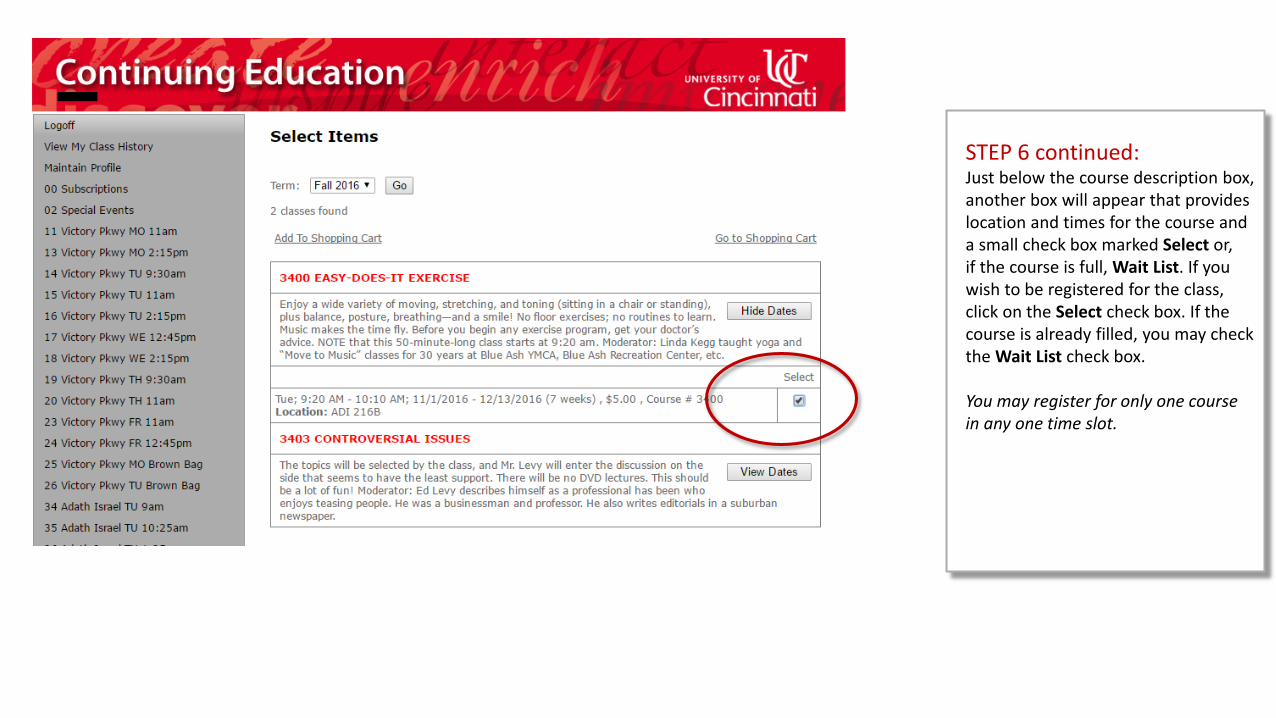
STEP 6 continued: Just below the course description box, another box will appear that provides location and times for the course and a small check box marked Select or, if the course is full, Wait List. If you wish to be registered for the class, click on the Select check box. If the course is already filled, you may check the Wait List check box.
You may register for only one course in any one time slot.
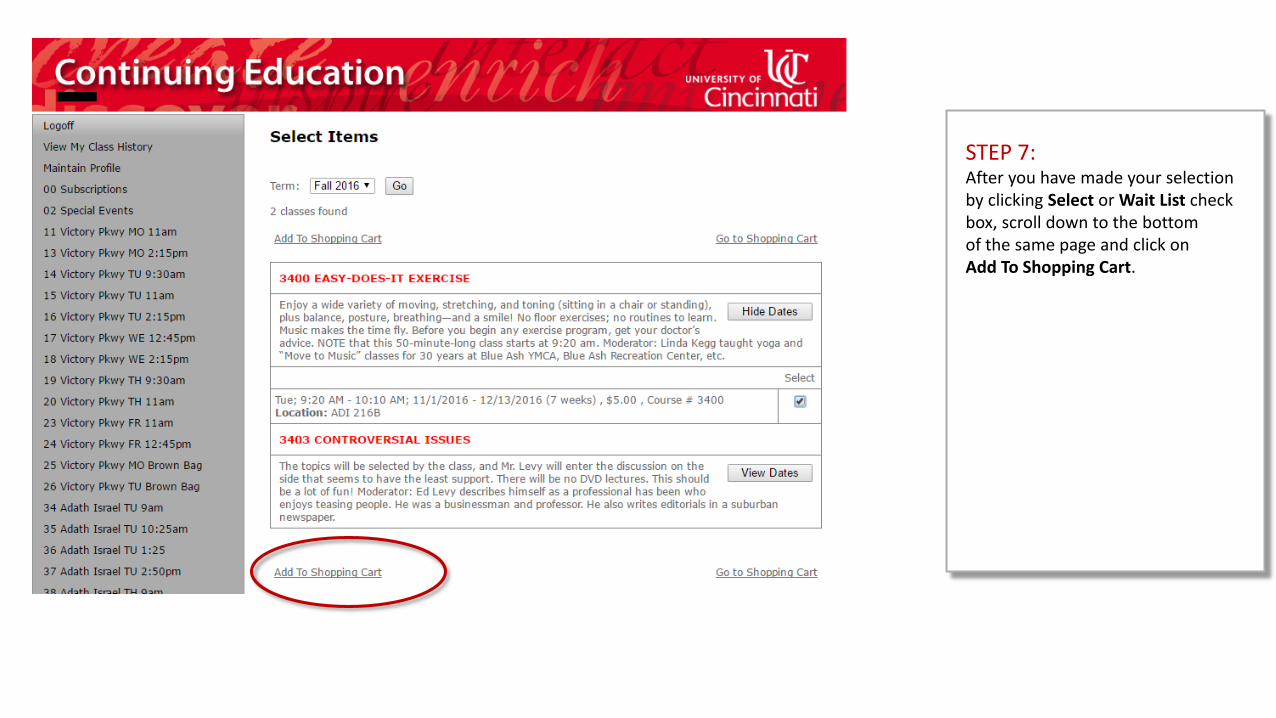
STEP 7: After you have made your selection by clicking Select or Wait List check box, scroll down to the bottom of the same page and click on Add To Shopping Cart.
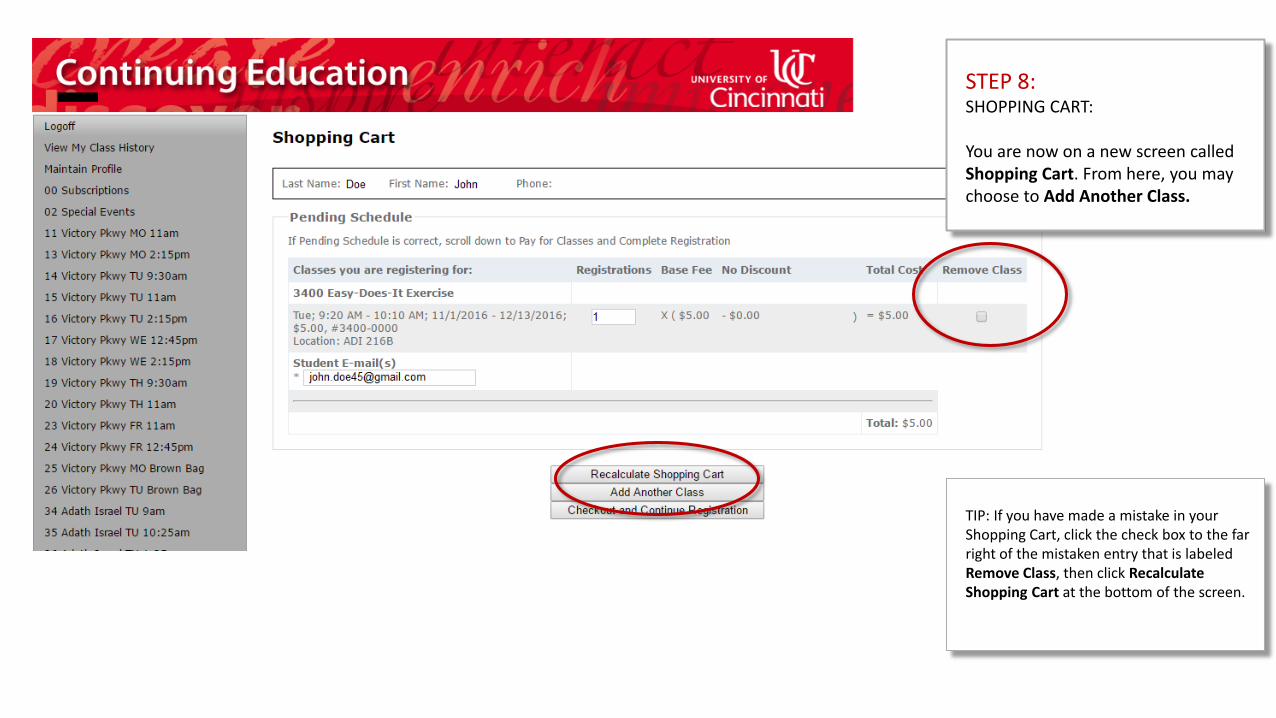
STEP 8: SHOPPING CART:
You are now on a new screen called Shopping Cart. From here, you may choose to Add Another Class.
TIP: If you have made a mistake in your Shopping Cart, click the check box to the far right of the mistaken entry that is labeled Remove Class, then click Recalculate Shopping Cart at the bottom of the screen.
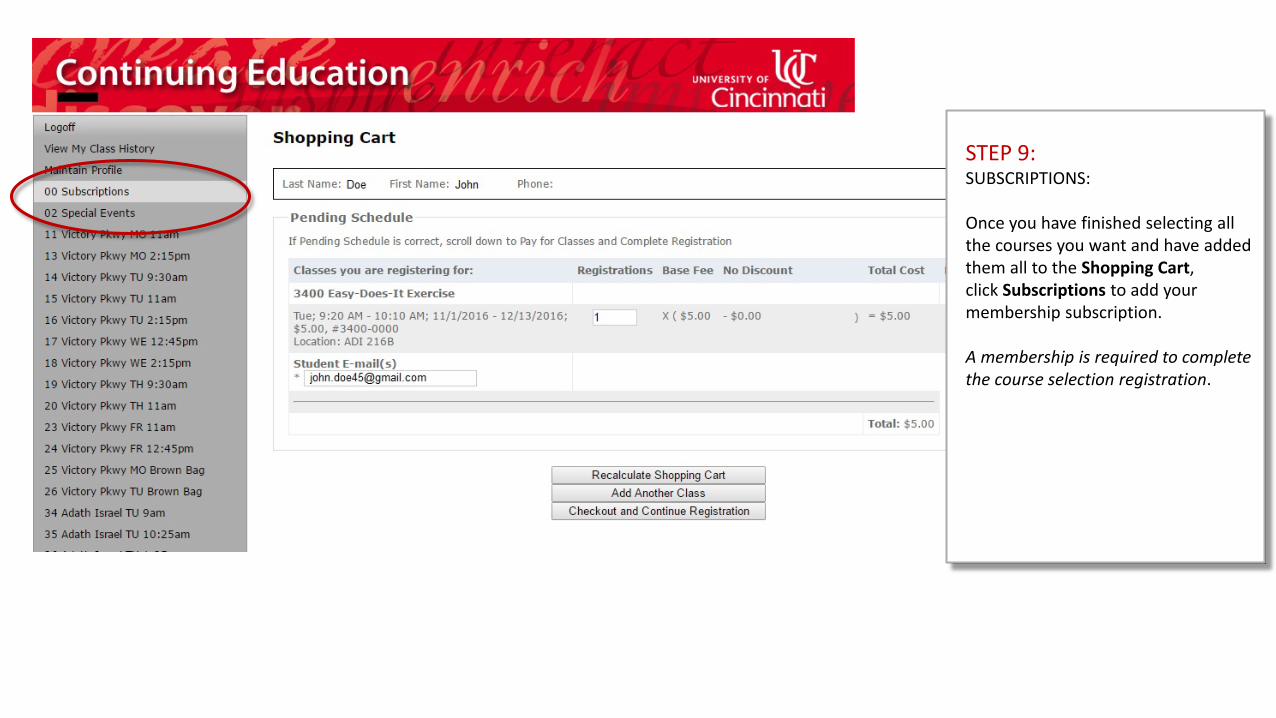
STEP 9: SUBSCRIPTIONS:
Once you have finished selecting all the courses you want and have added them all to the Shopping Cart, click Subscriptions to add your membership subscription.
A membership is required to complete the course selection registration.
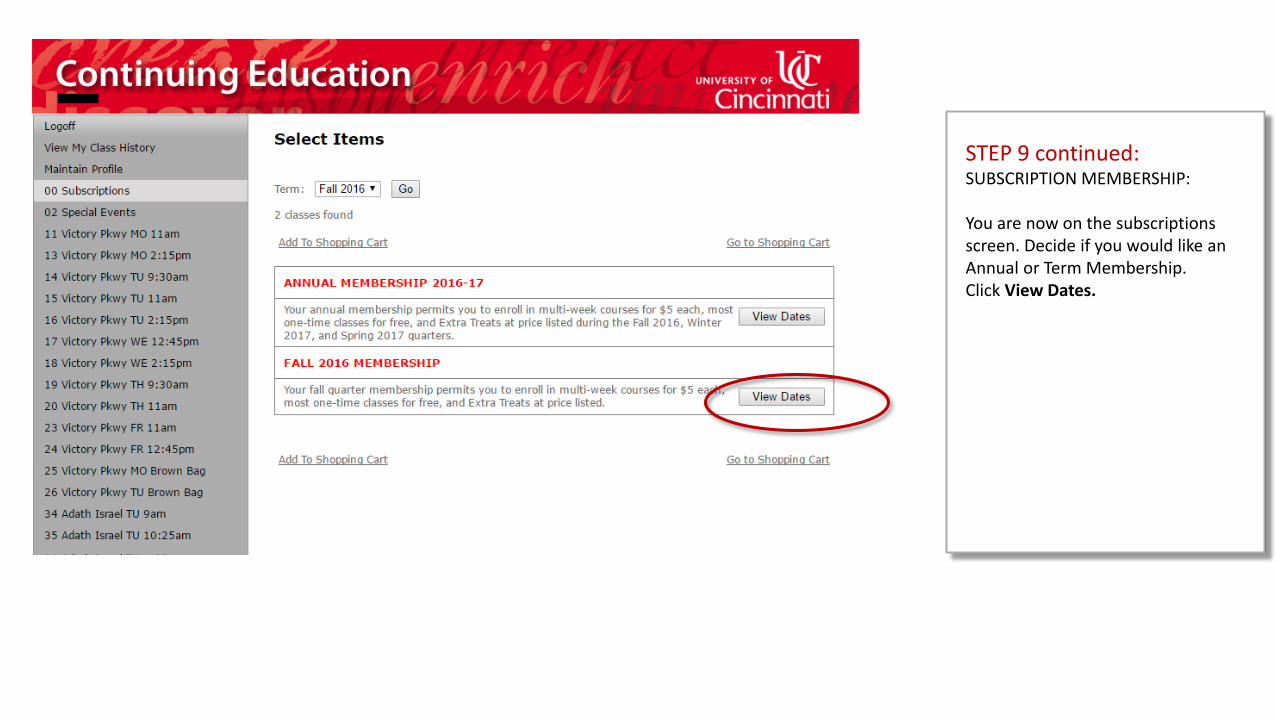
STEP 9 continued: SUBSCRIPTION MEMBERSHIP:
You are now on the subscriptions screen. Decide if you would like an Annual or Term Membership. Click View Dates.

STEP 9 continued: SUBSCRIPTION MEMBERSHIP:
Click the Select checkbox for the appropriate membership type.
Remember to click Add to Shopping Cart.
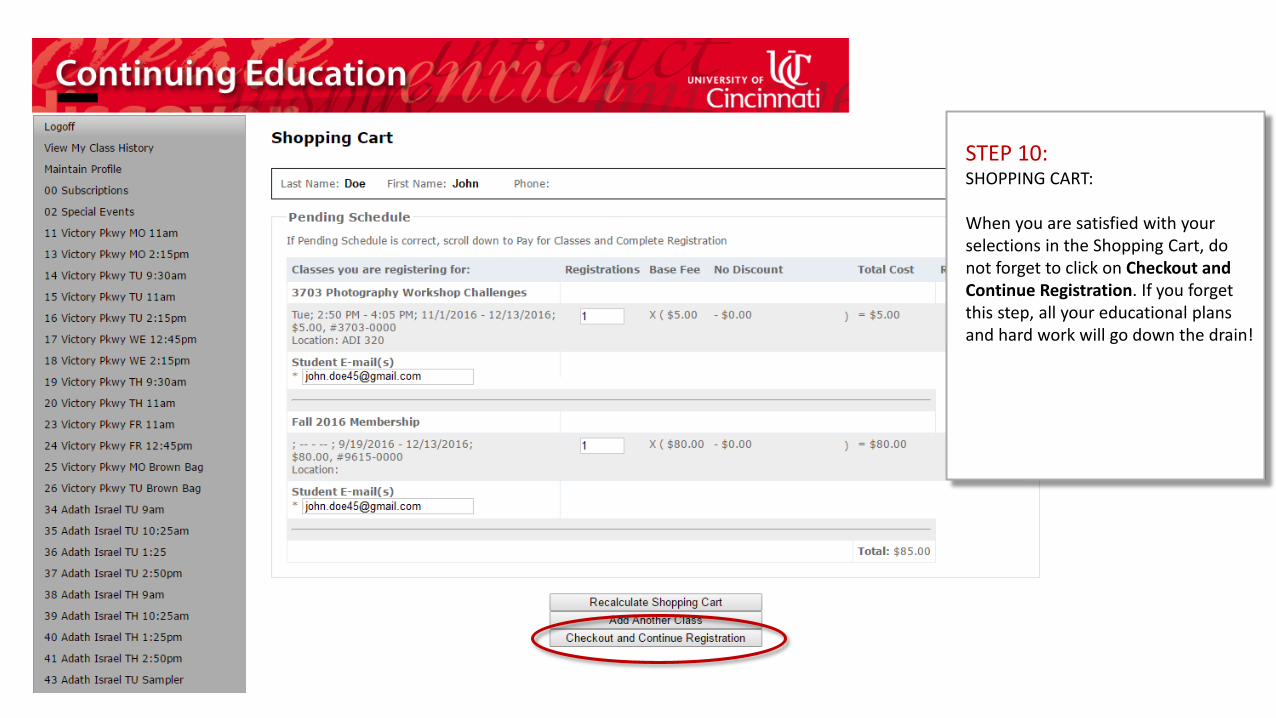
STEP 10: SHOPPING CART:
When you are satisfied with your selections in the Shopping Cart, do not forget to click on Checkout and Continue Registration. If you forget this step, all your educational plans and hard work will go down the drain!
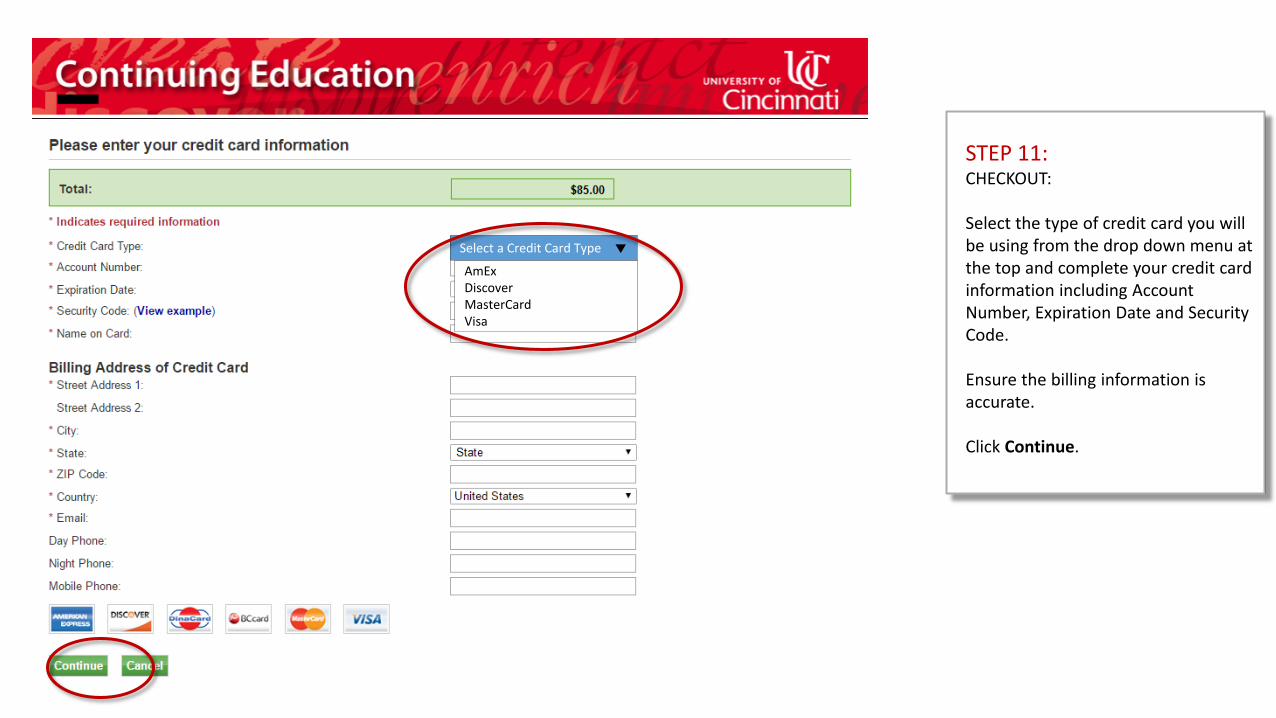
STEP 11: CHECKOUT:
Select the type of credit card you will be using from the drop down menu at the top and complete your credit card information including Account Number, Expiration Date and Security Code.
Ensure the billing information is accurate.
Click Continue.
AmExDiscoverMasterCardVisa
Select a Credit Card Type
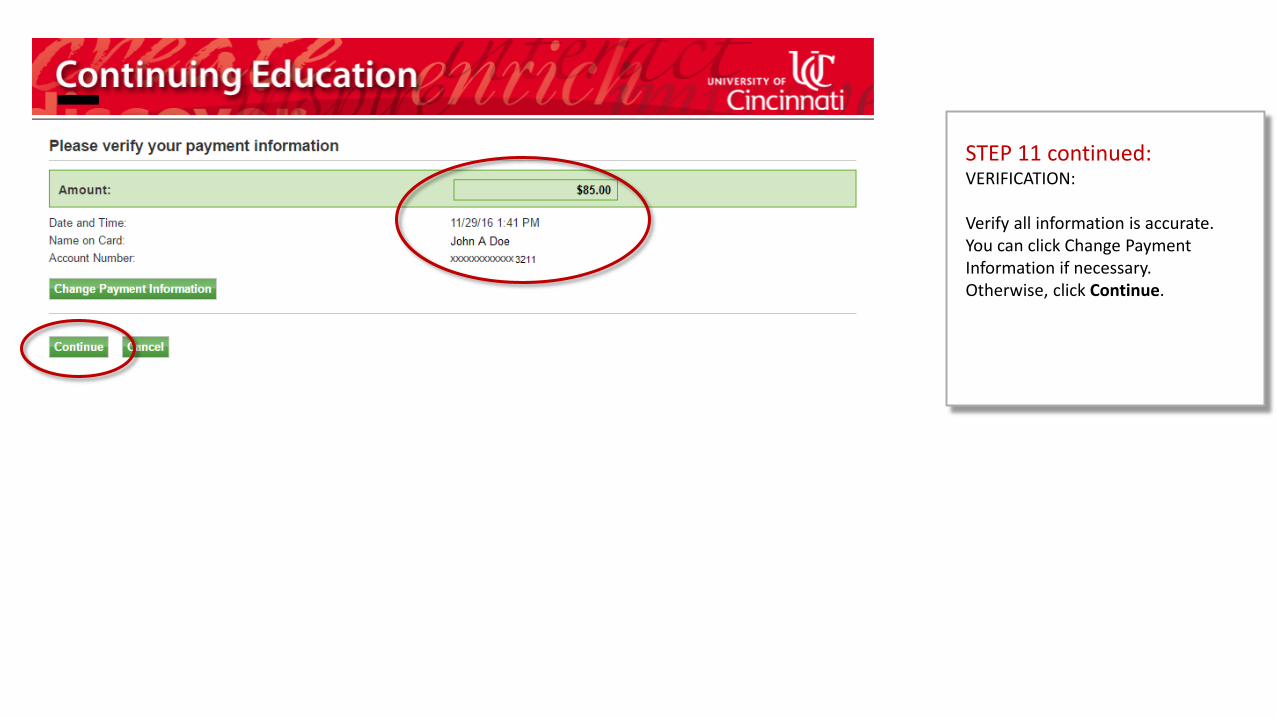
STEP 11 continued: VERIFICATION:
Verify all information is accurate.You can click Change Payment Information if necessary.Otherwise, click Continue.
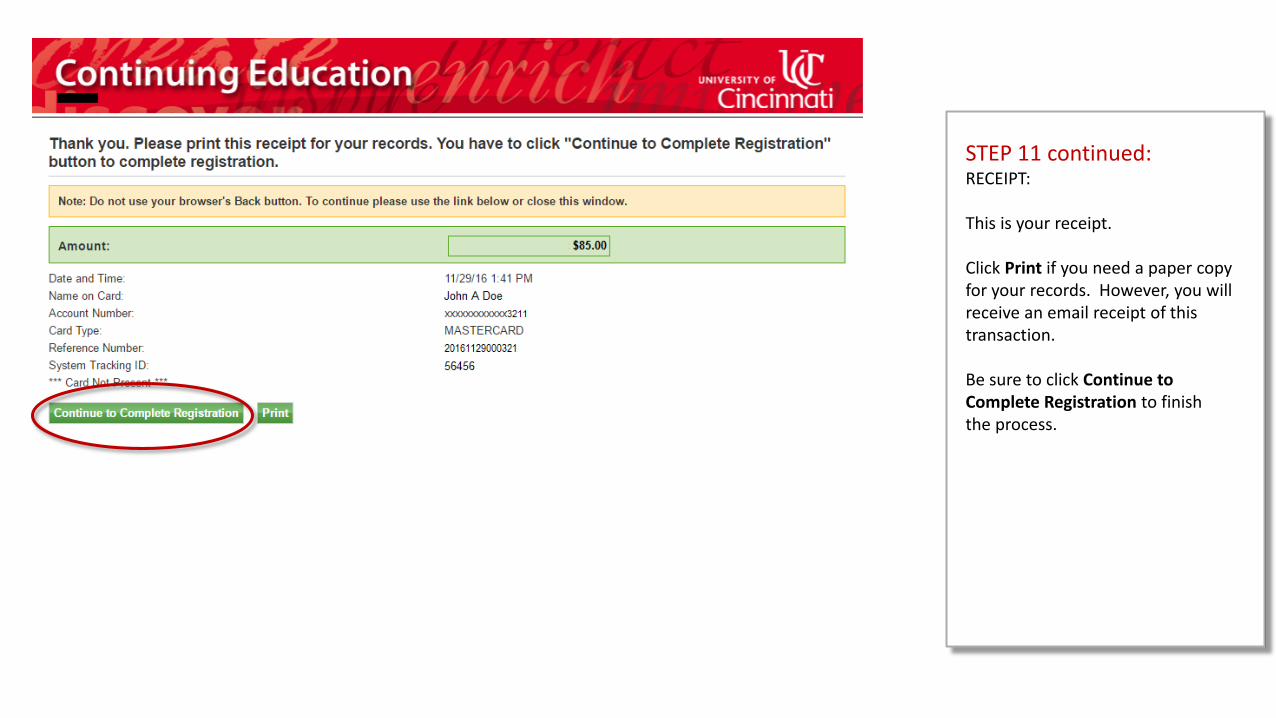
STEP 11 continued: RECEIPT:
This is your receipt.
Click Print if you need a paper copy for your records. However, you will receive an email receipt of this transaction.
Be sure to click Continue to Complete Registration to finish the process.
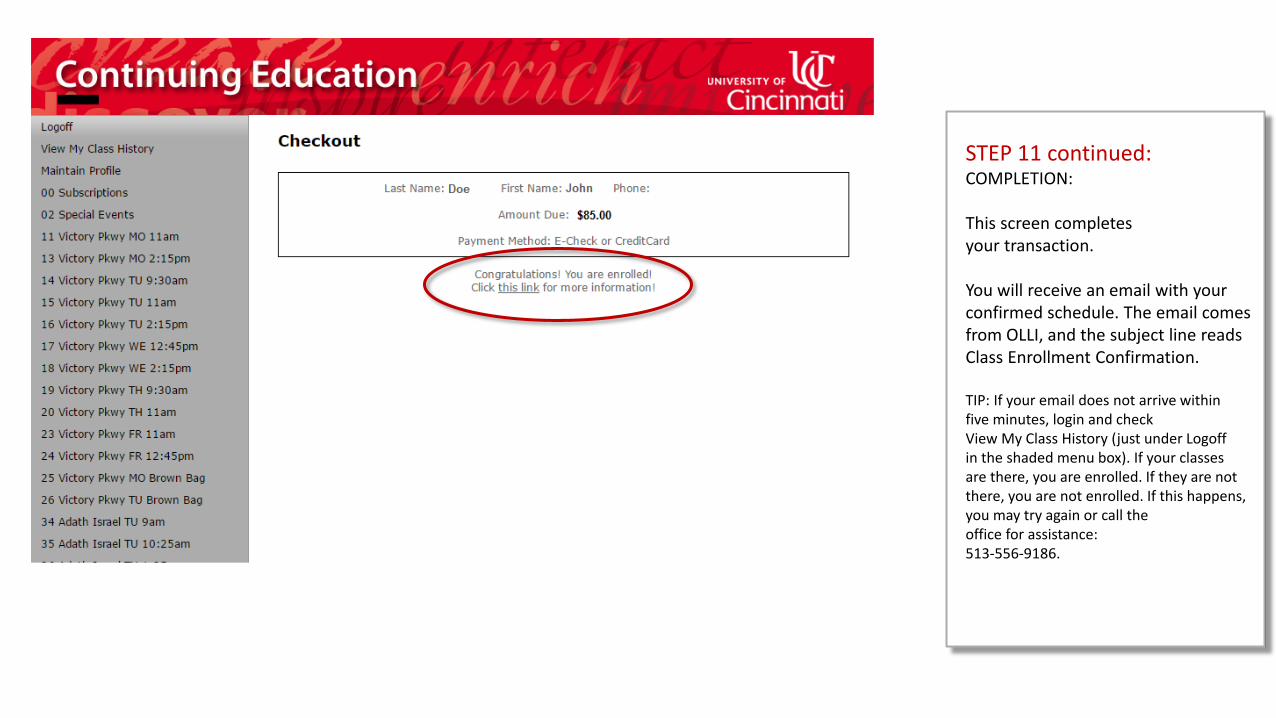
STEP 11 continued: COMPLETION:
This screen completes your transaction.
You will receive an email with your confirmed schedule. The email comes from OLLI, and the subject line reads Class Enrollment Confirmation.
TIP: If your email does not arrive within five minutes, login and check View My Class History (just under Logoff in the shaded menu box). If your classes are there, you are enrolled. If they are not there, you are not enrolled. If this happens, you may try again or call the office for assistance: 513-556-9186.
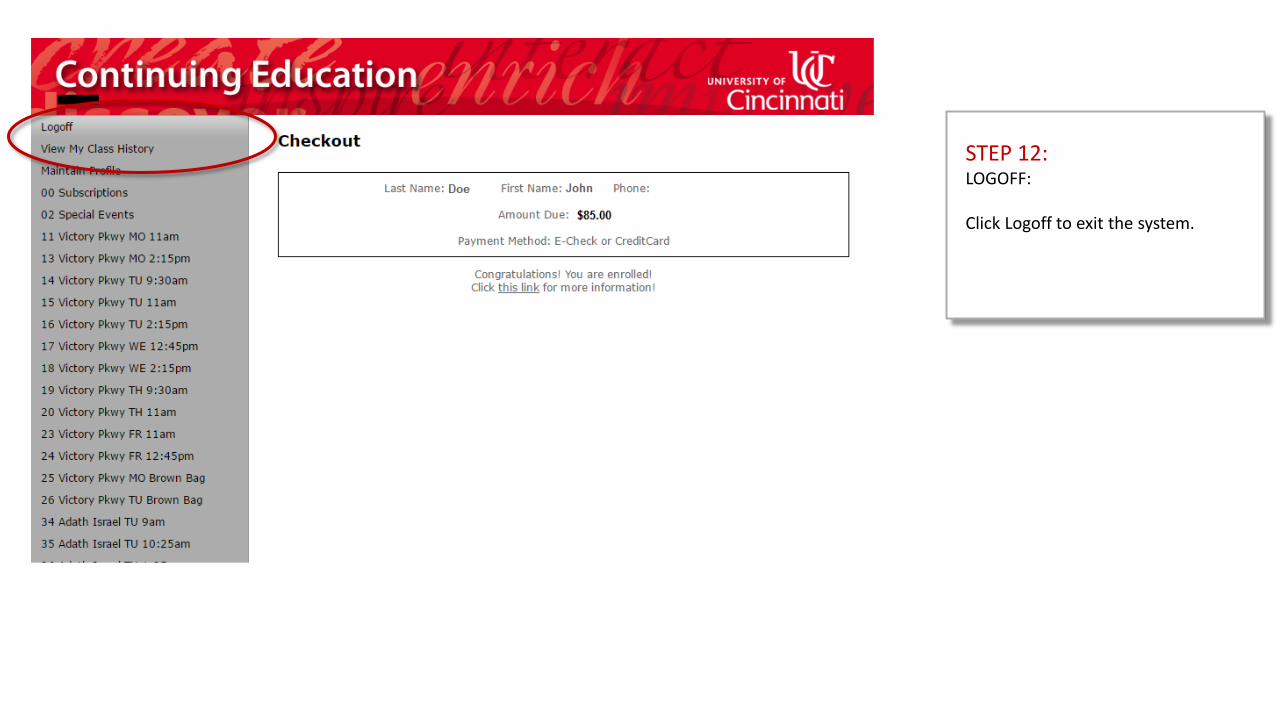
STEP 12: LOGOFF:
Click Logoff to exit the system.