NYLT 2011 Syllabus
428
-
Upload
dan-soszynski -
Category
Documents
-
view
3.666 -
download
5
Transcript of NYLT 2011 Syllabus


NatioNal Youth leadership traiNiNg
Staff GuideStaff development Guide
SYllaBuS

34490ISBN 978-0-8395-4490-6©2011 Boy Scouts of America2011 Printing
2011 Revisions to This SyllabusThe following changes have been made to the National Youth Leadership Training syllabus for the 2010 edition.
staff guide
• Languagewaschangedthroughouttoreflecttheinvolvementofmale and female Venturers as well as Boy Scouts.
staff development guide
• Languagewaschangedthroughouttoreflecttheinvolvementofmale and female Venturers as well as Boy Scouts.
syllabus
• Languagewaschangedthroughouttoreflecttheinvolvementofmale and female Venturers as well as Boy Scouts.

N a t i o N a l Y o u t h l e a d e r s h i p t r a i N i N g
iii
Contents
staff guide
Golden Compass Point: Staff and Course Culture 1
The Name Change 2
Including Venturing 2
Course Overview 6
Course Preparation and Staff Training 9
Council Staff Adviser 11
NYLT Course Director 11
Budget and Fees 11
NYLT Planning Calendar 11
Staff Recruitment 15
Staff Organization 17
Staff Position Descriptions 17
Youth Staff Position Descriptions 19
Promoting the Course 21
NYLT Participant Age and Rank Requirements 21
Enabling Your Participants’ Success 22
Recognition 22
staff development guide
Syllabus and Training Schedule Distribution 2
Staff Orientation Meeting 4
First Staff Training Weekend 8
The Trainer’s EDGE 15
Second Staff Training Weekend 21
Third Staff Training Weekend 25
Precourse Setup 31
Equipment 31
day one
Schedule for Day One (Sunday) 1
Registration, Orientation Trail, and Campsite Setup 2
Opening Assembly 9
Communicating Well (Part One) 14
Finding Your Vision (Part One) 20
Who, Me? Game 28
Opening Night Campfire 30

N a t i o N a l Y o u t h l e a d e r s h i p t r a i N i N g
iv
day two
Schedule for Day Two (Monday) 1
Breakfast Questions 2
Course Assembly 3
Setting Your Goals 8
Team Meeting 18
Preparing Your Plans 22
Model Leadership Council Meeting 29
Team Lunch Planning Challenge 36
Model Course Meeting 38
Building Pioneering Projects 49
Scouts’ Worship Service 50
Movie Night 54
day three
Schedule for Day Three (Tuesday) 1
Breakfast Questions 2
Course Assembly 3
Developing Your Team 7
Solving Problems 15
Problem-Solving Round-Robin 22
Leadership Council Meeting 31
Course Meeting 36
The Leading EDGE 42
Team Games 52
Team Meeting 54
Lego® Challenge/Realistic First Aid 56
day Four
Schedule for Day Four (Wednesday) 1
Breakfast Questions 2
Course Assembly 3
The Teaching EDGE 7
Team Activity 15
Resolving Conflict 19
Leadership Council Meeting 27

N a t i o N a l Y o u t h l e a d e r s h i p t r a i N i N g
v
Course Meeting 32
Geocaching Game 39
Team Meeting 45
Making Ethical Decisions 47
Team Campfires 55
day Five
Schedule for Day Five (Thursday) 1
Breakfast Questions 2
Course Assembly 3
Leading Yourself 7
Leadership Council Meeting 13
Team Meeting 18
Valuing People 20
Outpost Camp Departure Course Assembly 28
Outpost Camp 30
day six
Schedule for Day Six (Friday) 1
Outpost Camp Morning and Return 2
Course Assembly 3
Finding Your Vision (Part Two) 8
Leadership Council Meeting 15
Team Meeting 19
Communicating Well (Part Two) 21
Team Presentations: The Quest for the Meaning of Leadership 32
Camp Breakdown/Feast Preparation 33
Feast 34
Closing Campfire—Creating a Future 35
appendix
Staff Guide
NYLT logos A-3
Optional Weekend Schedule A-4
Example Quartermaster’s Duties A-11
Quartermaster’s Supplies/Materials List A-12

N a t i o N a l Y o u t h l e a d e r s h i p t r a i N i N g
vi
*Sample Menus A-13
Sample NAYLE Invitation Letter A-14
NAYLE flyer A-15
Staff Development Guide
EDGE Connections Chart A-16
*How to Take Notes A-22
*NYLT Memory Tips A-23
Course Director’s Pledge A-24
Day One
*Campfire Program Planner A-25
Campfire Program Planner for NYLT Instructional Campfire A-27
*Communication Skills Checklist A-28
*Daily Campsite Inspection Checklist A-29
*Developing a Team Vision Work Sheet A-30
*Developing Your Team Work Sheet A-31
*Leadership Compass A-32
Who, Me? Game Cards A-33
*Overview of the Week A-39
*Team Duty Roster A-43
*Sample Team Duty Roster A-44
*Schedule of Events for Day One (Sunday) A-46
Day Two
*Checklist for Ethical Decision Making A-47
*Conflict Resolution Checklist A-48
*Day Two Course Meeting Plan A-49
*Day Two Team Meeting Agenda A-50
*Emergency Response Plan A-51
*Figure-of-Eight Lashing Instructions A-52
Historic American Flag Presentation: 46-Star Flag A-54
Historic American Flag Presentation: Continental Flag A-55
Historic American Flag Presentation: Flag of 1777 (Betsy Ross Flag) A-56
Historic American Flag Presentation: Serapis Flag A-57
Historic American Flag Presentation: Star-Spangled Banner A-58
*Day Two Leadership Council Meeting Agenda A-59
*Suggested item for Participant Notebooks

N a t i o N a l Y o u t h l e a d e r s h i p t r a i N i N g
vii
*Planning a Scouts’ Worship Service A-60
*Planning Tool Work Sheet A-61
*Preparing Your Plans Work Sheet A-62
*Sample Course Meeting Plan Work Sheet A-63
*Schedule of Events for Day Two (Monday) A-64
*Service and Program Team Assignments A-65
*Setting Your Goals Work Sheet A-66
*SMART Goals Work Sheet A-67
Day Three
*Duties of a Patrol Leader A-69
*The Teaching EDGE A-70
*Troop and Crew Leadership Hints A-71
*Schedule of Events for Day Three (Tuesday) A-72
Day Four
*Conflict Resolution Checklist A-73
*Decision-Making Tools A-74
*Making Ethical Decisions A-75
*Schedule of Events for Day Four (Wednesday) A-76
Day Five
*Leading Yourself Work Sheet A-77
*Schedule of Events for Day Five (Thursday) A-78
Day Six
*Communicating Well Work Sheet A-79
*Developing a Personal Vision Work Sheet A-80
*Schedule of Events for Day Six (Friday) A-82
*NYLT Recognition Request A-83
*Valuing Others Work Sheet A-85
*Suggested item for Participant Notebooks


N a t i o N a l Y o u t h l e a d e r s h i p t r a i N i N g
staff guide-1
National Youth leadership training staff guideNational Youth Leadership Training is an exciting, action-packed program designed to provide all 13- to 20-year-old youth members of the Boy Scouts of America with leadership skills and experience they can use in their home units and in other situations demanding leadership of self and others.
For many years, junior leader training (JLT) was an important part of the leader-ship training continuum of BSA local councils throughout America. In 2003 and 2004, a task force of leadership experts and hundreds of Scouts in pilot courses across the nation reviewed and tested every aspect of this NYLT syllabus, which incorporates the latest leadership ideas and presents fresh, vital, and meaningful training for today’s youth.
In 2010, the program was updated to include Venturers in addition to Boy Scouts. This new version provides solutions for some of the issues that an inclusive NYLT may pose and is the standard NYLT course for 2011. Why are we making this change?
Read the BSA Vision Statement: The Boy Scouts of America will prepare every eligible youth in America to become a responsible, participating citizen and leader who is guided by the Scout Oath and Scout Law.
Above all, remember: The mission of the Boy Scouts of America is to prepare young people to make ethical and moral choices over their lifetimes by instilling in them the values of the Scout Oath and Scout Law.
Golden Compass Point: Staff and Course Culture
In all NYLT courses—in ALL of our leadership courses—culture is key to success. Look at the vision and mission statements of the BSA. Our mission is to prepare young people; our vision is to prepare every eligible youth in America to become the best leader he or she can be. The color of a green or a tan shirt is irrelevant— all the youth in each of our programs deserve as much age-appropriate, quality leadership training as possible.
The Youth Training Continuum
Youth leadership training is a three-phase training experience, and a common thread will connect all three phases. The first phase begins in the unit with the senior youth and adult leader con-ducting Introduction to Leadership Skills for Troops or Crews. Phase two is NYLT conducted by the local council, and the third phase is National Advanced Youth Leadership Experience (NAYLE), a coed program as of 2010. Kodiak is an optional trek-based experiential course based on the leadership skills of Introduction to Leadership Skills for Troops or Crews. Kodiak is not required for NYLT or NAYLE.

N a t i o N a l Y o u t h l e a d e r s h i p t r a i N i N g
staff guide-2
The entire staff must embrace the culture of servant leadership, with a view to success for all. This is especially critical as we roll out the new version of NYLT. Staff members selected must embrace change and look to success. As before, all staff, male and female, Boy Scouts, Venturers, and adults, are chosen to be of the highest quality, each of whom will deliver an outstanding NYLT program to our youth.
You will see that the core content of NYLT is essentially unchanged, but the lan-guage and format have been modified to provide a program that is inclusive of both Boy Scouting and Venturing needs and models. Some people fear that this will somehow weaken the NYLT course content, but this is not the case. This will actually strengthen the Boy Scout model, as each relevant section will be high-lighted to demonstrate how this should be at work in the home unit. This was not called out directly in the current NYLT program—although it is assumed that the NYLT model would be compared to the home unit—but it is now. For example, the leadership council will be introduced with an explanation of how this models a patrol leaders’ council for a troop and an officers’ meeting for a crew.
The other additions are the logistical pieces to consider when running a coed program. These can be modified to suit the needs of your camp as long as Youth Protection guidelines are met. Do what works for you.
Including Venturing
Beginning in 2011, each council will offer NYLT courses that are open to both males and females, and all courses will use the new 2011 syllabus. This syllabus must be used in its entirety; it cannot be modified to pick and choose from the new terms or sessions.
This manual offers carefully considered guidance on accomplishing this transition in a respectful, considerate, and effective manner. A careful reading will reveal numerous small changes, and some more significant ones as well. This careful read-ing will be even more important for those who are already familiar with the past course as it is easy to miss small changes when you have the past model in mind.
New Names for staff positions
Because NYLT now serves both Boy Scouts and Venturers, it is important that the course is presented in a manner that places both programs on an equal footing. The format is no longer formally based on the Boy Scout troop as a model; it now suits any leadership team. For this reason, the names for staff positions of responsibility have been changed. This may require a short-term effort for the new titles to flow easily, but it is essential that the new names be used.
In addition, we firmly believe that the senior youth staff members are as responsi-ble for the outcome of the staff development and overall course results as the adult staff. Too often we have seen a split in the past “boy” and “adult” teams. It is time that we all realize we are one team with a common vision of success and that the efforts of our youth staff are fully recognized. As such, we have renamed the senior youth leaders as assistant course directors. The senior patrol leader becomes the assis-tant course director of youth operations (he or she will simply be referred to as course leader in much of the syllabus). Assistant senior patrol leaders will be assistant course directors for youth program and youth service. The Scoutmaster becomes the course director; assistant Scoutmasters hold assistant course director titles along with the senior youth; and a troop guide becomes a team guide or guide.
N a t i o N a l Y o u t h l e a d e r s h i p t r a i N i N g
staff guide-3
The NYLT troop becomes the NYLT unit (or course in certain cases), and a patrol is renamed a team. This is the same format used at the BSA’s national office and is common to many business settings.
Remember—it is not what you call the position that is important! The key is the leadership content.
staff Makeup Because Venturers are now part of the course, every effort must be made to ensure that Venturers, both male and female, are represented on the course. It is also required that at least one adult leader be female. The critical decision for fill-ing any role is who is best suited, not what their gender is. Remember the NYLT culture!
team Makeup We strongly recommend mixing males and females in the same team. The initial impulse might be to have male-only teams and female-only teams. All the experience with coed training, camps, Philmont treks, and more shows that when males and females are mixed in a team, the behavior, standards, and ultimate performance of that team is much higher than single-gender groups. Experience also shows that mixing Venturers with Boy Scouts leads to very good outcomes for both programs!
Teams should be made up of youth similar in age to one another so they are divided roughly into teams of younger youth, older youth, and those in between. By no means should the 13-year-old boy be put with the 20-year-old girl or the 17-year-old boy. Organizing teams so there is not a large range of ages (more than two to three years’ difference) can maximize the learning potential and leadership experience of all NYLT participants by giving team members equal footing with one another. Maximizing geographic, cultural, program, and gender diversity in each patrol will enhance the ability of each team to observe and understand the team dynamics and encourage higher levels of team maturity.
Remember that NYLT is a leadership course, not an outdoor skills course. Because Venturing has no advancement that requires outdoor skills training, and Venturing crews may focus on almost any hobby, interest, or activity, Venturing crew members (male or female) may have little or no outdoor skills. In truth, many crew members, especially those in a more high-adventure focused crew, will likely be proficient in these skills. This makes it essential for NYLT teams to be mixed in ability and for the team aspect of the course to be highlighted.
Youth protection
Any time 32 to 48 teenage youth come together for an intensive six-day learning experience, there is a potential for problems. As with all Scouting programs, being prepared is the key to minimizing these problems and to addressing them effectively when they do occur. It provides us an opportunity to model appropri-ate ways for teens to interact. The BSA teaches us to manage risk, and this is no different. A zero tolerance policy for any infractions should be communicated and enforced, just as it is with other potential problem issues such as drugs or alcohol.
During the NYLT staff orientation session, youth and adult staff will take the Venturing version of Youth Protection training together. As part of this training, a qualified leader should lead a discussion on the problems that could occur on the course and how they should be dealt with, using real examples from past expe-rience where possible. Adult staff should refrain from active participation as much as possible to ensure maximum participation by the youth members. Often young

N a t i o N a l Y o u t h l e a d e r s h i p t r a i N i N g
staff guide-4
people will withdraw when adults begin to speak, allowing them to dominate the discussions. It is essential that this does not occur—and that youth staff is fully invested in and takes ownership for ensuring that the course is safe and appropriate for all participants. This process will be repeated with the participants and will lead to the development of a code of conduct for the course.
Stress to the staff that NO harassment or hazing will be allowed by anyone or at any time. The BSA policy on hazing and harassment is as follows: “The Boy Scouts of America prohibits language or behavior that belittles or puts down members of the opposite sex, unwelcome advances, racial slurs, chastisement for religious or other beliefs, or any other actions or comments that are derogatory of people. Any form of hazing, initiations, ridicule, or inappropriate teasing is prohibited.”
the Buddy system
For mixed groups with an odd number of male or female staff or participants, the buddy system must be a group of three instead of a group of two and a single
From the Guide to Safe Scouting, Leadership Requirements for Trips and Outings:
1. Coed overnight activities, even those including parent and child, require male and female adult leaders, both of whom must be 21 years of age or older, and one of whom must be a registered member of the BSA.
6. Safety rule of four: No fewer than four individuals (always with the minimum of two adults) go on any backcountry expedition or campout.
7. Male and female leaders must have separate sleeping facilities. Married couples may share the same quarters if appropriate facilities are available.
8. Male and female youth participants will not share the same sleeping facility. (Note: This means separate TENTS, not separate campsites, and separate rooms, not separate buildings.)
9. Single-room or dormitory-type accommodations for Scouting units: Adults and youth of the same gender may occupy dormitory or single-room accommodations, provided there is a minimum of two adults and four youth. A minimum of one of the adults is required to be Youth Protection–trained. Adults must establish separation barriers or privacy zones such as a temporary blanket or sheet walls to keep their sleeping area and dressing area separated from the youth area.
11. If separate shower and latrine facilities are not available, separate times for male and female use should be scheduled and posted for showers. The buddy system should be used for latrines by having one person wait outside the entrance, or provide “Occupied” and “Unoccupied” signs and/or inside door latches.
Adult leaders need to respect the privacy of youth members in situations where the youth are changing clothes or taking showers, and intrude only to the extent that health and safety require. Adults also need to protect their own privacy in similar situations.
Reference: Tours and Expeditions, No. 33737; Guide to Safe Scouting

N a t i o N a l Y o u t h l e a d e r s h i p t r a i N i N g
staff guide-5
(this is sometimes called the truddy system) and must be enforced for both staff and participants.
Camping logistics
One of the important details necessary to ensuring a successful course is appro-priate attention to the camping arrangements. Experience has shown that this is not as hard as some might expect. The following points summarize the necessary steps to accomplish this.
In any given campsite, teams should arrange tents so all males are in one area of the campsite and all females are in another area of the campsite. There is no prescribed distance. Periodic discreet visits by the staff to the team sites are appropriate. In a course that is predominantly male or predominantly female, i.e., only one or two of the minority in each team, all of the minority may camp in one area away from the team sites. Team members will meet up with their minority members early each morning and drop them off late each evening, allowing the minority members to spend as much as possible of each day with the team. Campsites may still be used for presentations, meal prep, etc., during the day—but not every team member will have his or her tent at that same site. Remember the truddy system. A final possibility is that all male participants sleep in one area and all female participants sleep in another area, with the team being together during the day. The same rules apply for staff.
Remember, youth are more likely to misbehave when they feel you do not trust them. Lay out the rules and expectations early and clearly, along with the reason and consequences if any rules are broken.
shower and toilet Facilities
If shower facilities must be shared, hours for youth and adult females and youth and adult males must be posted. Solutions include shower times, clearly labeled signage of who is using the facility, and separate facilities.
If toilet facilities need to be shared, appropriate male/female protocols must be developed and followed, such as using male/female flip signs. Latching doors should also be provided, as it is all too easy to forget to read the sign.
Youth and adult staff should be consulted on the restroom facilities and logistics to ensure nothing is being overlooked that might make them feel uncomfortable.
outpost Camp
The locations of each team’s overnight campsite must be determined in advance. The teams that contain female participants will be placed next to each other. Adult tents may be near these teams, preferably out of sight but not out of ear-shot. The teams need not even know the adults are there. Each team will have an emergency plan and know where to get help fast if necessary. The staff may wish to quietly walk among the teams during the night to ensure everything is OK and “on course,” just as many courses do now for younger participants.
Course Overview NYLT is a six-day course. Content is delivered in an outdoor setting with an emphasis on immediate application of learning in a fun environment. Interconnecting concepts and work processes are introduced early, built upon, and aided by the use of mnemonics (memory aids), which allows participants to understand and employ the leadership skills much faster.

N a t i o N a l Y o u t h l e a d e r s h i p t r a i N i N g
staff guide-6
Elements like demonstrating the Teaching EDGE by finding waypoints with a GPS make learning fun for staff and participants alike.
The skills of visualizing success, setting goals to accomplish that vision, and developing a plan to get there are core to the leader’s role. Other key course elements include leading yourself, communicating, developing a team, apply-ing a leadership style that fits the team’s stage of development, and teaching skills to others. Sessions on problem-solving, making ethical decisions, and valuing people are added as elements of a leader’s toolbox.
The six-day course schedule parallels the program month of a typical Scouting unit. Three model unit meetings, a group leadership meeting in the round followed by daily leadership team operating sessions, and an instructional campfire are coupled with Explanation, Demonstration, and Guided practice to create an Enabled, produc-tive unit program. Throughout the week, the course director models his or her role in delivering that program in an adult-led, youth-run unit.
The NYLT syllabus integrates the best of modern leadership theory with the traditional strengths of the Scouting experience. Through activities, presentations, challenges, discussions, and audiovisual support, NYLT participants will be engaged in a unified approach to leadership that will give them the skills and confidence to lead well. Through a wide range of activities, events, games, and adventures, NYLT participants will work and play together as they put into action the best that Scouting has to offer.
a Month in the life of a unit
An NYLT course is set up to represent an activity cycle in the life of a typical Scouting unit. This might be a month in the life of a troop or a series of meetings leading to an activity in a Venturing crew. The first three full days of the course represent the planning stages, complete with leadership council meetings, unit meetings, and planning for a larger event. Participants use the full range of BSA resources for planning and conducting meetings that are interesting, lively, and relevant—a skill they can incorporate with great effect when they return to their home units. NYLT participants put their preparations to the test with an NYLT Outpost Camp symbolizing the big event that culminates a typical unit’s activity cycle program.
the stages of team development
During an NYLT course, participants find themselves going through the four stages of team development—Forming, Storming, Norming, and Performing—that all groups experience when brought together for a purpose. Their challenges heighten the team development process, enabling them to use their awareness of the stages to build a highly effective team that can reach its full potential. Along the way they also enjoy Scouting fellowship and fun.
leadership requires Vision, goals, and planning
NYLT participants discover that leading themselves and leading others requires a vision—a picture of future success. Each team will develop a team vision for the course, and each individual will prepare his or her own vision. A constant refrain of NYLT is “If you can see it, you can be it.” Through presentations and positive experiences in goal setting, planning, and problem solving, participants learn how to set a clear course toward realizing their team and individual visions, and then how to put themselves in the center of those pictures of future success.

N a t i o N a l Y o u t h l e a d e r s h i p t r a i N i N g
staff guide-7
a toolbox of leadership skills
Several NYLT presentations are designed to give participants a toolbox of effective leadership skills they can make their own. Added to the idea of developing a vision, the skills in the toolbox form the NYLT Memory Tips—a short list that encompasses the key course concepts:
Vision—Goals—Planning: Creating a Positive Future Success
SMART Goals: Specific, Measurable, Attainable, Relevant, Timely
Planning and Problem-Solving Tool: What, How, When, Who
Assessment Tool: SSC—Start, Stop, Continue
Teaching EDGE: Explain, Demonstrate, Guide, Enable
Stages of Team Development: Forming, Storming, Norming, Performing
Leading EDGE: Explain, Demonstrate, Guide, Enable
Conflict Resolution Tool: EAR—Express, Address, Resolve
Making Ethical Decisions: Right vs. Wrong, Right vs. Right, Trivial
Communication: MaSeR—Message, Sender, Receiver
Valuing People: ROPE—Reach out, Organize, Practice, Experience
Consistent leadership Modeling
The youth and adult staff members of an NYLT course are charged with provid-ing participants with the best possible opportunity to learn effective leadership skills in a setting where the highest ideals of Scouting shine through. Essential to that effort is the fact that staff members use NYLT leadership skills and philoso-phies themselves, which provides them with an extremely effective means of sharing skills and leading teams. It also models the skills and leadership ideals that the NYLT program seeks to convey.
Team Stage Development Phase Leadership Behavior That Is Best for That Stage
Forming High enthusiasm, Explaining low skills
Storming Low enthusiasm, Demonstrating low skills
Norming Rising enthusiasm, Guiding growing skills
Performing High enthusiasm, Enabling high skills
NYLT Culture
The youth and adults serving as NYLT staff members model appropriate leadership skills in everything they do, creating a rich learning environment for the youth they are serving and for themselves. Servant leadership is an important NYLT leadership attitude, and it is critical that the staff model a focus on course participants and not on themselves. Great leaders seek to serve others.

N a t i o N a l Y o u t h l e a d e r s h i p t r a i N i N g
staff guide-8
scouting ideals Every NYLT course operates according to the Scouting ideals of Boy Scouting and Venturing. Each participant and staff member is welcomed, appreciated, and valued. There is no room for hazing, sexual innuendos, or any other activities that do not add to a positive learning experience for everyone.
have Fun! Leadership, fun, challenge, adventure—NYLT offers all of those and much more. The NYLT program can be a centerpiece of a council’s youth training opportunities, providing local units with outstanding youth leaders and giving participants the tools and leadership ideals that will serve them well in whatever they do.
This staff guide provides the course director and staff with the essential tools needed to teach and learn leadership. Each presenter is charged with making the sessions fun and entertaining, especially by bringing the material to life by relating experiences that fit the topic.

N a t i o N a l Y o u t h l e a d e r s h i p t r a i N i N g
staff guide-9
Course preparation and staff trainingConducting a National Youth Leadership Training course takes a great deal of planning, plenty of inspiration, and the enthusiastic participation of many dedicated people. The rewards for participants, staff, and the Scouting movement are tremendous.
NYLT courses are the council’s responsibility and are usually overseen by its leadership training committee. Any council that does not offer a coed NYLT course should seriously consider making one a part of its service to youth.
National standards for NYLT have been developed in concert with area training chairs. The structure will be similar to the process in place for Wood Badge courses. All courses need to comply with the following.
■ The local traditional names were phased out for 2009 courses; all courses should be known as NYLT. Joint names (i.e., Brownsea NYLT) are not to be used. This is to avoid confusion with non-standard names so youth and adults alike understand they have taken NYLT (as opposed to Pine Tree, Golden Acorn, Bristlecone, or whatever standalone variant was used in the past).
■ Trainer’s EDGE replaced the Trainers Development Course in 2009. As a part of staff development, all youth and adult NYLT staff need to complete the new Trainer’s EDGE within three years of the coming NYLT course.
■ “Course director” is the preferred term versus “Scoutmaster.” The term “Scoutmaster” will be dropped.
■ A Course Director’s Pledge is included in the revised syllabus.
■ Participation in annual region/area NYLT conferences is encouraged for professional staff advisers and is required for course directors in the year of their course for any of the staff to be recognized with Wood Badge beads.
National Standards

N a t i o N a l Y o u t h l e a d e r s h i p t r a i N i N g
staff guide-10
■ NYLT courses will have 30 to 48 participants. Courses with larger or smaller participant populations should be discussed with the area training chair.
■ Standard course staff recognition (belt buckle) is earned by all staff members. The staff buckle was made available for 2009 courses.
■ The culture of NYLT will be one of servant leadership versus staff elite. This should be considered when ordering course wear, including eliminating staff-only items.
■ The syllabus must be adhered to in its entirety.
NYlt Wood Badge Bead requirements
In its early years, the “Wood Badge” was a training recognition used for more than one specific course. Recognizing that we are in the business of developing youth leaders, this recognition has been authorized for NYLT adult staff. Regions may authorize the awarding of Wood Badge beads for NYLT volunteers who have met the following requirements:
Three Beads for NYLT1. Course director of his or her course attended the Regional NYLT Course
Director Conference within 12 months of the course.
2. Completed a Wood Badge for the 21st Century course and earned beads.
3. Attended a Trainer’s Edge course within three years of the NYLT course.
4. Staffed an NYLT course as a course director or assistant course director.
Four Beads for NYLT1. Served as a troop guide for a Wood Badge for the 21st Century course.
2. Completed a Regional NYLT Course Director Conference in its entirety within 12 months of NYLT service as course director.
3. Attended a Trainer’s EDGE course within three years of the NYLT course.
4. Served as a course director for an NYLT course.
There is NO exception for previous service or CDC attendance. In order to permit the third bead recognition for the rest of his or her staff, the NYLT course must be qualified/certified by the course director attending the NYLT Course Director Conference, must adhere to national standards, and must follow the syllabus in its entirety.
The recognition, as in Wood Badge, assumes full service (all days) on the course and participation in the required course staff development sessions. Staff who only show up for a portion of a course do not warrant beads.
Many councils find it practical to operate their NYLT course at a council resident camp. Courses may take place at any time of the year, but they are most often scheduled to occur just before or after the normal camp season. Of course, a weeklong training course needs to conform to resident camp standards. By hosting an NYLT course before summer camp and opening it to those who will serve on the camp staff, a council can provide its camp staff members with the most effective leadership training the BSA has to offer.

N a t i o N a l Y o u t h l e a d e r s h i p t r a i N i N g
staff guide-11
Preparing for an NYLT course begins with
■ Appointing a council staff adviser
■ Recruiting an NYLT course director
■ Establishing a course budget
■ Developing a planning calendar
■ The course director attending a regional/area NYLT Conference
Council Staff Adviser
The council Scout executive appoints a member of the council professional staff to serve as the NYLT staff adviser, whose duties include serving as liaison with the council service center, the camp, and suppliers, and helping enable the council leadership training committee to select an appropriate course director.
NYLT Course Director
The course director for an NYLT course is recruited by the council leadership training committee with the advisement of the council staff adviser and the approval of the council Scout executive. The course director should have recent success leading a regular Scout unit and should be committed to using the current NYLT syllabus to train the youth and adult staff and to present the NYLT course. The course director and all other adult leaders should set a positive example of proper uniforming and physical fitness.
Budget and Fees The council leadership training committee, course director, and NYLT council staff adviser work together to prepare an NYLT course budget and to determine the participant fees. All funds and financial details should be handled in accordance with the local council’s standard accounting procedures.
NYLT Planning Calendar
Preparations for an NYLT course should begin a year in advance. This sample calendar shows the major steps to be accomplished and the time frame for completing them.
360 days before the course: The council leadership training committee confirms the course dates and location and places the course on the council calendar.
300 days before the course: Recruit the NYLT course director.
240 days before the course: Recruit the NYLT assistant course directors.
230 days before the course: The course director and assistant course directors meet to review the course syllabus, refine the budget, prepare the promotion plan, and begin recruiting and selecting the adult and youth staff.
210 days before the course: The council leadership training committee approves the course budget and determines the participant attendance fee.
210 days before the course: Those appointed by the council leadership training committee prepare the plans and promotional materials to advertise the course.
180 days before the course: Continue recruiting youth staff.
180 days before the course: Mail course promotion materials to the leaders of local units, asking them to encourage the qualified youth in their units to attend NYLT training. The NYLT course director, assistant course directors, and council staff members are prepared to respond to questions from potential NYLT participants and their leaders.

N a t i o N a l Y o u t h l e a d e r s h i p t r a i N i N g
staff guide-12
120 days before the course: Send additional promotional materials to the head of each chartered organization and the chairperson of each unit committee.
120 days before the course: Conduct staff orientation for NYLT adult and youth staff members.
120 days before the course: The promotion team begins making personal contact with units. The promotion team consists of the adults and youth teaching the course, district training teams, and any others asked to help promote the course.
120 days before the course: The NYLT quartermaster and other adult staff prepare equipment lists, determine the course menus, and order provisions.
90 days before the course: Conduct the first staff training weekend (led by the NYLT course director, other adult staff, and the course leader).
60 days before the course:
■ Conduct the second staff training weekend (led by the NYLT course director, other adult staff, and the course leader).
■ Check course registration. If registration has not reached the appropriate levels, follow up with uncommitted units.
■ Begin printing course materials. Items to be produced include printouts of certain sessions of the National Youth Leadership Training DVD and the contents of the NYLT Participant Notebooks.
30 days before the course:
■ Conduct the third staff training weekend (led by the NYLT course director, other adult staff, and the course leader).
■ The quartermaster and other staff ensure that printing of course materials is completed and the equipment and supplies have been delivered to the course location.
30 days before the course: The staff arrives to make final preparations for the course.
0 days: The course opens.
+7 days: The course closes.
Participants will often prepare their own meals during an NYLT course. The staff and quartermasters should plan menus that are simple, nourishing, and easy to cook, and should provide the teams with instructions for preparing the dishes. (Recipes can be included in the NYLT Participant Notebook so the recipes can be taken home and used by the local unit.)Remember that cooking is not a part of the leadership experience of this course. Keep the menus simple and easy to prepare and clean up.
Sample menus can be found in the appendix.

N a t i o N a l Y o u t h l e a d e r s h i p t r a i N i N g
staff guide-13
30 days after the course closes:
■ The staff wraps up financial matters, ensures that equipment has been returned and/or stored, and sends any remaining letters of thanks to those who helped make the course possible.
■ The course director submits his report to the council leadership training committee.
This sample calendar should be adjusted to fit the needs of local council courses.

N a t i o N a l Y o u t h l e a d e r s h i p t r a i N i N g

N a t i o N a l Y o u t h l e a d e r s h i p t r a i N i N g
staff guide-15
staff recruitmentSelecting qualified staff is vital to the success of every National Youth Leadership Training course. Recruiters should seek out potential staff members who possess enthusiasm, reliability, and a strong dedication to Scouting. Make a special effort to have diversity, including program and gender diversity.
The course director recruits adults to serve as assistant course directors. Together, they recruit the youth staff. Minimum requirements for youth staff members include:
■ Be at least age 14.
■ Have held positions of leadership in their home unit.
■ Have been an NYLT course participant or have completed the NAYLE bridge course if they are new Venturing staff who have not had an opportunity to take NYLT.
In order to keep NYLT fresh, half of the staff should be made up of youth who have not served on an NYLT staff before. The course director and assistants can serve for two years but then should step aside and allow others the chance to take advantage of all the learning and leadership opportunities of being NYLT adult leaders.
Upon being chosen to serve on the NYLT staff, each youth staff member will be sent a staff application to be completed and approved by his or her parents and unit leader. There is no nationally used application form; councils are to design a form to fit their unique needs.

N a t i o N a l Y o u t h l e a d e r s h i p t r a i N i N g
staff guide-16
Councils with longstanding NYLT courses may find that some adult and youth leaders are deeply tied to old local traditions and outdated syllabus elements. Those individuals may have attitudes about their own roles as NYLT leaders that are in conflict with the philosophy of servant leader-ship that is essential to conducting modern NYLT courses. Change can feel threatening to them. Often with the best of intentions, they may resist implementation of some or all of the new NYLT syllabus.
Councils should be proactive in helping those youth and adults under-stand that the new syllabus, while different from earlier versions, has the same goal of enabling each NYLT participant to become a more effective leader. It may help if those resistant to change can observe the new syllabus in action at an NYLT course conducted by another council or if they can observe portions of their own council’s courses.
If a former staff member is still unwilling to buy into the new syllabus fully and enthusiastically, the solution may be to thank that person for his former service, find him a more appropriate role in the council, and make room for fresh adults or youth to take his position on the NYLT staff.

N a t i o N a l Y o u t h l e a d e r s h i p t r a i N i N g
staff guide-17
staff organizationThe minimum adult staff roster for an NYLT course consists of:
■ Course director
■ Two or more assistant course directors (The quartermaster staff may be consid-ered assistant course directors if they work with youth and fulfill a significant role on staff. NYLT courses run at local council camps using camp staff may not offer a significant enough contribution by the quartermaster staff to warrant awarding Wood Badge beads. If this is the case, these volunteers should not be called assistant course directors.)
The minimum youth staff roster for an NYLT troop includes:
■ Assistant course director of youth operations (formerly senior patrol leader; key course leader)
■ Assistant course director for program
■ Assistant course director for service
■ Youth quartermasters (if youth are used in the quartermaster role)
■ Team guides (one assigned to each team)
NYLT courses that include a large number of participants—enough for more than four teams, for example—can include additional staff as the course director deems necessary. Teams should not consist of more than six to eight youth.
If recruitment indicates an interest in NYLT that far exceeds the capacity of a planned course (more than six teams can become difficult to manage), the council may consider scheduling a second NYLT course at a later date or developing a second course that can run a course concurrent with, but separate from, the first course.
Adult Staff Position DescriptionsCourse director
The NYLT course director should have the same qualities of leadership as any good unit leader. The Selecting Quality Leaders brochure, No. 522-981, lists some of these qualities and gives helpful hints on recruiting quality leaders for an NYLT course.
The course director must be currently registered as a BSA adult leader and at least 21 years old. He or she should have had recent experience as the Scoutmaster of a troop or Advisor for a crew, and should be familiar with council programs. Because the basic purpose of the NYLT course is to teach leadership skills, the course director should have completed a Wood Badge course, ideally Wood Badge for the 21st Century.
Duties include:
■ Working directly with the council-appointed NYLT staff adviser
■ Recruiting quality adult and youth staff members
■ Conducting staff training before the course
■ Helping the staff develop a vision for the course, and the goals and plans to fulfill that vision

N a t i o N a l Y o u t h l e a d e r s h i p t r a i N i N g
staff guide-18
■ Being well-versed on all core content sessions in order to act as a resource as well as a role model to participants
■ Conducting the course as outlined in this manual
■ Serving as coach and mentor to the youth leader and other NYLT youth staff
■ Working closely with assistant course directors and other adult staff to ensure their effectiveness in completing their staff assignments
■ Modeling the core learning and leadership messages of the NYLT syllabus
■ Recruiting youth participants
Duties include:
■ Serving as backups for the course director
■ Sharing in the administration of the NYLT course
■ Working with the management of the commissary, equipment, and course supplies
■ Participating in staff training sessions
■ Modeling the core learning and leadership messages of the NYLT syllabus
■ Handling any issues that arise that could detract the course director from the primary role of guiding and coaching the course leader and other youth staff
■ Receiving, storing, and issuing course equipment and supplies
■ Receiving, storing, and issuing food supplies
■ Providing support for staff training
■ Helping facilitate the Team Lunch Planning Challenge on Day Two of the NYLT course
■ Recruiting youth participants
assistant Course directors duties
One of the course director’s most important roles is to attend all assem-blies, course meetings, and teaching sessions of an NYLT course in order to stay abreast of course developments and to be available to coach and mentor the NYLT youth leader and other youth staff members. He or she must be able to rely on the assistant course directors to handle any administrative matters that would divert attention from primary duties.
Assistant course directors may be asked to assume responsibilities and take ownership of certain areas of the course. However, each assistant course director must model all of the core learning and leadership messages.

N a t i o N a l Y o u t h l e a d e r s h i p t r a i N i N g
staff guide-19
Youth Staff Position Descriptions
assistant Course director of Youth operations (Course leader)
As in any unit, the assistant course director of youth operations, hereafter referred to as the course leader, is the key leader of an NYLT course. She or he is empowered by the NYLT course director to run the course with the help of the rest of the youth staff and the NYLT team leaders.
Duties include:
■ Running course meetings, events, and activities
■ Chairing meetings of the leadership council
■ Delegating duties and responsibilities to other members of the NYLT youth staff
■ Assisting the course director with staff training
■ Modeling the core learning and leadership messages of the NYLT syllabus
■ Recruiting youth participants
■ Being well-versed on all core content sessions
assistant Course directors for Youth program and service (assistant Course leaders)
The assistant course leaders are prepared to fulfill the duties of the course leader if she or he is unavailable at some point during a course. One assistant course director will take responsibility for program matters; another will accept respon-sibility for service.
Duties of the assistant course director for program include:
■ Providing mentoring and coaching to each day’s program team
■ Overseeing the preparation of campfires
■ Supporting NYLT presenters with preparations for sessions, meetings, and activities, and ensuring they are prepared
■ Overseeing audiovisual support for NYLT sessions
■ Modeling the core learning and leadership messages of the NYLT syllabus
■ Completing other assignments as determined by the course leader
■ Recruiting youth participants
Duties of the assistant course director for service include:
■ Providing mentoring and coaching for each day’s service team
■ Overseeing preparations of the model campsite on the Orientation Trail (Day One of the NYLT course)
■ Conducting daily campsite inspections and guiding teams in complying with the Daily Campsite Inspection Checklist

N a t i o N a l Y o u t h l e a d e r s h i p t r a i N i N g
staff guide-20
■ Teaching the daily service teams to police and clean up course areas with a Leave No Trace ethic
■ Managing presentations of the daily Baden-Powell Team streamers
■ Completing other assignments as determined by the course leader
■ Recruiting youth participants
team guides The role of a team guide is similar to that of the troop guide in a regular Scout troop. In addition, NYLT team guides are key to facilitating the NYLT syllabus and advancing each team’s development.
Duties include:
■ Serving the team to which he or she is assigned
■ Coaching and mentoring each day’s team leader
■ Presenting selected sessions and activities of the NYLT course
■ Modeling the core learning and leadership messages of the NYLT syllabus
■ Completing other assignments as determined by the course leader
■ Recruiting youth participants
■ Being well-versed on all core content sessions

N a t i o N a l Y o u t h l e a d e r s h i p t r a i N i N g
staff guide-21
promoting the CourseThe NYLT staff, local council, and district leadership training committees are charged with getting out the word about an upcoming National Youth Leadership Training course. A key to successful promotion is personal contact with each local unit leader to point out the advantages of NYLT for the unit’s youth leaders and for youth who soon may serve in these positions. Units may be encouraged to pay the course fees for these youth leaders—an investment that will be repaid many times over in the quality of leadership skills that youth who have completed NYLT can bring to their home units.
NYLT Participant Age and Rank Requirements
An NYLT course is ideal for training unit leaders. It can also be a valuable experience for other older Scouts and Venturers.
In order to attend an NYLT course, a youth must have the following qualifications by the beginning of the course:
■ Boy Scouts and Varsity Scouts must be 13 years of age and fall within the maximum age allowance for their program registration. They must be a First Class Scout and have completed Introduction to Leadership Skills for Troops.
■ Venturers must be at least 14 and fall within the maximum age allowance for their program. They must have completed Crew Officer Orientation and Introduction to Leadership Skills for Crews.
■ Councils now open up their NYLT courses to Varsity teams and Venturing crews. Coed options must be available so that all youth registered in these programs have equal access.
■ Have a unit leader recommendation.
Unit leaders should not allow exceptions to age and rank requirements. Experience has shown that Scouts younger than 13 often lack the physical and emotional maturity to benefit fully from the NYLT experience.

N a t i o N a l Y o u t h l e a d e r s h i p t r a i N i N g
staff guide-22
enabling Your participants’ successApplication of the skills learned at NYLT is usually based heavily on the environment of the home unit. The last E in the Leading EDGE for the NYLT course director is Enabling. The key to Enabling is to help create a positive envi-ronment for application of NYLT skills in the home unit. The participants’ suc-cess in this area will be determined by the involvement of the course director in the elements of this course.
It is suggested that you consider the following:
■ Offer a course synopsis to participants’ home unit leaders.
■ Invite the home unit leaders to the course orientation meeting.
■ Invite the home unit leaders to the closing feast and Creating Your Future closing session.
■ Establish a follow-up system to receive feedback on the participants’ application of NYLT skills.
The national recognition for completion of an NYLT course is an NYLT patch, certificate, and a belt buckle.
Councils may supplement recognitions with other local traditional items. The NYLT logo is in the appendix.
Many NYLT courses have created a process for the participants to take the teaching from their NYLT experience back home to the unit by encouraging them to write a simple commitment or statement of goals to take home. This is allowed but is not required for any participant to “graduate” or to wear any recognition for having attended NYLT.
Recognition

N a t i o N a l Y o u t h l e a d e r s h i p t r a i N i N gN a t i o N a l Y o u t h l e a d e r s h i p t r a i N i N g
NYLT Staff Development Guide 1
NYLT Staff Development Guide
The purpose of staff training is to help the youth and adult staff of a National Youth Leadership Training course reach the Performing stage of team development and to enable each staff member to carry out his or her responsibilities for the course with competence, confidence, and enthusiasm.
Developing the NYLT staff is a primary responsibility of your local council. This staff development guide is designed to allow your staff to develop an understanding that training is not just learning to present. Following this staff development guide allows you to develop the entire staff that will conduct the course.
The Trainer’s EDGE is a prerequisite for NYLT trainers. It is a council-level course for all trainers that can be run with adult and youth participants or just with an NYLT staff. It will supplement the staff development process. Its purpose is to provide the opportunity to practice the platform skills of a good presenter. NYLT culture calls for a course director to own his or her own staff’s development and to develop the entire staff as a team, and so some component of Trainer’s EDGE will be redone by each NYLT staff as a team. While it is not necessary to redo the entire Trainer’s EDGE course for staff members who have attended within the last three years, it is needed for each staff member to practice his or her presentations to the current NYLT staff or a subset thereof.
Staff training has six specific objectives:
■ To set the tone and standards for the course■ To give staff the confidence and knowledge to conduct an NYLT course■ To provide staff with a clear understanding of team and personal development
and how those elements relate to being a leader■ To guide the youth staff through stages of team development■ To allow adult and youth staff to practice modeling the core learning and leader-
ship messages of the NYLT syllabus
■ To create an environment of Scouting fellowship and fun guided by the Scout Oath, the Scout Law, the Venturing Oath, and the Outdoor Code
The NYLT course is the Boy Scouts of America’s most effective means of providing its members with the skills, attitudes, and confidence to serve as leaders in many settings, including being youth staff members of future NYLT courses. Most impor-tantly, youth participants who employ the skills learned during NYLT will strengthen their home units.
Trainer’s EDGE
Consisting of an orientation meeting and three weekend sessions, NYLT staff training provides a compressed version of the key learning points of a full course. As staff members develop a vision for the course and establish the goals to achieve that vision, they will learn about and experience the stages of team development. They will become accustomed to using the skills of effective com-munication and put into practice the principles of the Teaching EDGE, the Leading EDGE, conflict resolution, and all the other NYLT concepts that will ensure effective course leadership by every member of the youth staff.

N a t i o N a l Y o u t h l e a d e r s h i p t r a i N i N g
2 NYLT Staff Development Guide
Some youth selected to serve on the staff of an NYLT course will have had the experience of being NYLT participants. Other staff candidates may be new to NYLT. Staff training can serve as a refresher for those familiar with the syllabus and as an introduction for those who are not. It also provides an environment of cooperation and contribution that allows the NYLT adult and youth staff to prepare the details of the course and come up with solutions for any problems they may foresee.
Syllabus and Training Schedule DistributionAs soon as selected staff members have accepted the offer to serve, send each one the following materials:
■ A copy of the National Youth Leadership Training syllabus
■ A copy of the NYLT Participant Notebook (the notebook participants will receive the first day of the NYLT course)
■ The schedule for NYLT staff training sessions
■ The schedule for the NYLT course
Encourage staff members to study the syllabus and note areas that are unclear so that their questions can be addressed during staff training.
Ask each person to compile a list of the sessions he or she would like to present and to arrange the list in order of preference.
Remind staff members to bring their notes, the NYLT syllabus, and the NYLT Participant Notebook to the staff orientation meeting.
additional items to Be Covered during staff training
NYLT course directors should cover the following items during staff training meetings:
■ Assign responsibility for introducing speakers.
■ Set guidelines for using the commissary—since you do not allow food while participants are there, model this from the beginning with staff development. The commissary is not a gathering place for off-hours during the day.

N a t i o N a l Y o u t h l e a d e r s h i p t r a i N i N g
NYLT Staff Development Guide 3
■ Staff should impress upon participants by word and deed the importance of clean campsites.
■ Observe camp courtesy.
■ Wear uniforms properly and make sure the participants do, too.
■ Reinforce course movements—when the course moves, participants and staff move as a unit!
■ Staff should be extremely conscious of using appropriate language. Staff is always the role model.
NYlt training schedule
The key events of training are the four times that youth and adult staff members gather:
120 days before the course—Staff orientation meeting
90 days before the course—First staff development weekend
60 days before the course—Second staff development weekend
30 days before the course—Third staff development weekend
Each staff member should verify that he or she can attend all meetings, staff training sessions, and the entire NYLT course and that the appropriate time and effort are devoted to fulfill his or her responsibilities. Staff members should alert the course director of any scheduling conflicts so that they can be addressed well in advance of the course.
Note: You might find it helpful to include an extra staff development session or weekend or to expand the orientation or second staff development to make sure that the youth and adult staff fully under-stand and have the necessary presentation skills to bring life to the content. Additional time will also allow you to put the staff through the exercise of developing and presenting a staff definition of leader-ship or a definition of what it means to train leaders. The goal and spirit of staff development is to enable the staff to arrive in the Performing stage with the least amount of time investment.

N a t i o N a l Y o u t h l e a d e r s h i p t r a i N i N g
4 NYLT Staff Development Guide
Staff Orientation Meeting
120 days Before the Course
The staff orientation meeting is designed to set the tone for staff training and the upcoming NYLT course. It is an opportunity for the adult and youth staff members to get to know one another and for the staff team to begin forming. Staff members will develop their vision of success for the NYLT course and will begin using the skills of effective communication as they share information with one another.
Time Activity9:00 a.m. Opening and staff introductions
9:30 a.m. Overview of National Youth Leadership Training
10:30 a.m. Communicating Well (Part One)
Noon Lunch
1:00 p.m. Finding Your Vision (Part One)
2:00 p.m. Developing Your Team (followed by a break)
3:00 p.m. The Leading EDGE
4:00 p.m. Discussion of sessions, planning for next staff development, and discussion of how the sessions apply to NYLT

N a t i o N a l Y o u t h l e a d e r s h i p t r a i N i N g
NYLT Staff Development Guide 5
The staff orientation meeting is timed to take no more than one day. It can be held anywhere in the council and should be planned to include lunch for all who attend.
Notes on selected activities of the staff orientation Meeting
Opening and Staff Introductions—course director and course leader
■ Welcome everyone warmly.
■ Model the introductions of the Day One course assembly.
Overview of National Youth Leadership Training—course director
■ Let staff know that an important part of NYLT is sharing information. There are no secrets among staff members, and no information is withheld from participants. You will do all you can to make staff aware of everything about the course, begin-ning with this overview.
■ Provide staff with the big picture of the upcoming NYLT course, using the Course Overview section that begins on page 1 of the Staff Guide.
Communicating Well (Part One)—assistant course director for program (or other assigned youth staff)
■ Present the session on Communicating Well (Part One) (found in Day One of the syllabus), adapted where necessary for staff training.
■ During the session, distribute copies of the Communication Skills Checklist.
■ Encourage staff members to practice good communication skills throughout staff training and the NYLT course and to use the Communication Skills Checklist to help improve their own skills and those of other staff members.
Many portions of NYLT staff training draw directly from sessions, events, and activities of the NYLT course syllabus. Using the syllabus as a guide for staff training will allow presenters to Explain key elements of the course, Demonstrate them, and Guide youth staff members in prac-ticing those elements in ways that will Enable them to use and present them on their own during the NYLT course.

N a t i o N a l Y o u t h l e a d e r s h i p t r a i N i N g
6 NYLT Staff Development Guide
Finding Your Vision (Part One)—assigned staff
■ Present the session on Finding Your Vision (Part One) (found in the NYLT syllabus, Day One), adapted where necessary for staff training.
■ To demonstrate finding a vision, the course director can share his or her vision for the program (found in the NYLT syllabus, Day One, Opening Assembly).
■ For the team vision challenge, ask the youth staff to develop a picture of what their success as a staff will look like at the end of the NYLT course. Have them refine and write out their team vision. (Make copies of the team vision to distrib-ute when the staff returns for the first staff training weekend.)
■ During the presentation, point out effective ways to use the course slides and video clips from the National Youth Leadership Training DVD.
Developing Your Team—assigned staff
■ Present the Developing Your Team session (found in the NYLT syllabus, Day Three), adapted where necessary for staff training.
■ Discuss with the staff how the staff itself and the teams they will guide during the course will undergo the stages of team development. Point out that the staff itself is in the Forming stage, complete with excitement about the upcoming course as well as some lack of skills in the new content and presenting. Explain that each day the staff and the teams will take time out to analyze where they are in the stages of team development.
This is essentially a dress rehearsal of the presentations. The sessions on Communicating Well, Finding Your Vision, Developing Your Team, and the Leading EDGE™ must be practiced by their presenters before the staff orientation meeting. Since many attendees are new to NYLT staff training, the presenters of these sessions must be either veteran youth staff who have made these presentations at a previous NYLT course or adult staff who have fully prepared the presentations in advance of the staff orienta-tion meeting.
In either case, this is an opportunity for presenters to deliver these sessions in ways that demonstrate the use of effective communication skills and presentation tech-niques. Youth staff can then model their own presentations to be as effective as those they have witnessed.
For the NYLT course itself, presentation of these sessions will be assigned to members of the youth staff.

N a t i o N a l Y o u t h l e a d e r s h i p t r a i N i N g
NYLT Staff Development Guide 7
The Leading EDGE—assigned staff
■ Present the Leading EDGE session (found in the NYLT syllabus, Day Three), adapted where necessary for staff training.
■ Discuss with the staff how the mnemonic EDGE—Explain, Demonstrate, Guide, Enable—is at the heart of other skills that the staff will learn and teach, especially the Teaching EDGE. Discuss how each leadership style will be modeled and demonstrated by the staff during the course (and the course leader and course director with the staff during staff development).
Planning Session and Assignments—course director and course leader
■ Use the remaining time of the staff orientation meeting to lay the groundwork for the upcoming staff training weekends and to attend to any other matters of the moment.
■ Begin making assignments for staff to present NYLT sessions. At a minimum, assign those sessions that will be presented during the first staff training weekend.
■ Pass out the NYLT memory tips card or page from the appendix. Encourage the staff to become familiar with each item so they can PRACTICE and model each one as they learn more about the tools.
Closing—course leader and course director
Thank everyone for attending and encourage them to use the coming month to study the syllabus and to practice any presentations they have been assigned.
The course director can conclude the meeting with a Course Director’s Minute. (For a guide, see the NYLT syllabus, Day One, Opening Assembly, “Course Director’s Minute.”)

N a t i o N a l Y o u t h l e a d e r s h i p t r a i N i N g
8 NYLT Staff Development Guide
First Staff Training Weekend
90 days Before the Course
Friday (First staff training Weekend)
saturday (First staff training Weekend)
Time Activity7:00 p.m. Opening and overview of the weekend
7:30 p.m. Review syllabus sessions Communicating Well, Finding Your Vision, and Developing Your Team
8:30 p.m. Review syllabus session Setting Your Goals
9:30 p.m. NYLT Staff Vision—review/cracker barrel
10:30 p.m. Lights out
Time Activity7:30 a.m. Breakfast and cleanup
9:00 a.m. Review syllabus session The Teaching EDGE
10:00 a.m. Geocache Wide Game preparations and practice
11:00 a.m. The Trainer’s EDGE staff development presentation
Noon Lunch and cleanup
1:00 p.m. Prepare presentations
2:00 p.m. Model leadership council meeting preparations and practice
3:00 p.m. Course meetings preparations and practice
4:30 p.m. Activity preparations (determined by course director and course leader)
5:30 p.m. Dinner and cleanup
7:00 p.m. Opening campfire planning and practice; review of staff quest
9:00 p.m. Developing guidelines for course conduct
9:30 p.m. Who, Me? Game and cracker barrel
10:30 p.m. Lights out

N a t i o N a l Y o u t h l e a d e r s h i p t r a i N i N g
NYLT Staff Development Guide 9
sunday (First staff training Weekend)
Notes on selected activities of the First staff training Weekend
Opening and Overview of the Weekend—course leader
■ Greet attendees and welcome them to the first weekend of NYLT staff training.
■ Invite the course director to add his or her own words of welcome.
■ Distribute copies of the schedule for the weekend and briefly discuss how events will unfold.
Review Communicating Well (Part One); Finding Your Vision (Part One); and Developing Your Team—assigned staff
This review can be conducted by the staff members who presented these sessions during the staff orientation meeting.
Communicating Well:
■ Remind the staff that communicating well is a key to the success of the upcoming NYLT course.
■ Distribute fresh copies of the Communication Skills Checklist and review its contents.
■ Ask staff to use the checklist to provide productive Start, Stop, Continue feedback throughout the weekend as people practice making presentations.
Finding Your Vision:
■ Remind staff that for a team and for individuals, vision is the picture of future success. Goals are the steps for fulfilling a vision, and planning is the process of figuring out how to attain goals.
■ Ask the course director to summarize the vision for the course he or she presented during the staff orientation meeting.
■ Distribute and review copies of the team vision developed by staff members during the staff orientation meeting.
Time Activity7:00 a.m. Breakfast and cleanup
8:00 a.m. Scouts’ worship service
8:30 a.m. Continue course preparations
10:00 a.m. Evaluate the weekend using SSC
10:30 a.m. Assignments and questions
11:00 a.m. Closing

N a t i o N a l Y o u t h l e a d e r s h i p t r a i N i N g
10 NYLT Staff Development Guide
Developing Your Team:
■ Remind the staff of the four stages of team development. As a team works to realize its team vision, it will go through the four stages of team development. So will the staff as it works to realize the vision outlined by the course director and in smaller working groups. Teams will have a similar experience, and the staff as well as the teams themselves will be asked to assess what stage of development each team is experiencing as the course progresses.
■ Staff members can use Start, Stop, Continue and the Communication Skills Checklist to help the presenter improve his presentation skills.
Setting Your Goals—Preparing Your Plans sessions—assigned staff
■ Present the Setting Your Goals—Preparing Your Plans sessions (syllabus, Day Two), adapted where necessary for staff training.
■ At the conclusion of the session, ask staff for positive Start, Stop, Continue evaluation of the presenter’s presentation skills, using the Communication Skills Checklist. Include input on the use of audiovisual support.
Developing Guidelines for Course Conduct
■ Staff and participants, in many cases coed, will be living, working, and playing in close quarters during the seven days of the course (and for the staff, during training as well) in an intensive group learning experience. The purpose for having staff and participants develop guidelines for course conduct is to force them to think about what is correct behavior for them to model on this course, to discuss it together, and to develop guidelines for good conduct together, making it more likely for them to take ownership of these guidelines and to adopt them as their own.
■ Conducting this activity during staff training serves to better prepare staff for group interaction during training as well as to prepare them for teaching this session with the participants during the course.
■ During the course, the session will be conducted by the team guides within their teams. During staff training, the session should be presented by the youth leader or one of the assistant leaders.
■ Present the Developing Guidelines for Course Conduct session (syllabus, Day One), adapted where necessary for staff training.
Who, Me? Game and Cracker Barrel
■ The Who, Me? Game is a tool for building trust and understanding. It is especially effective for enabling communication and strengthening relationships among team members. That is as true for staff members as it is for NYLT course participants. It also is an early introduction to valuing people.
■ Divide the staff into team-sized groups and allow each group to play the Who, Me? Game. Provide cracker barrel snacks for the teams to enjoy while playing the game.
The Teaching EDGE—assigned staff
■ A critical element of an NYLT course is that the staff use and model the Teaching EDGE whenever they are teaching a skill. Course participants will have

N a t i o N a l Y o u t h l e a d e r s h i p t r a i N i N g
NYLT Staff Development Guide 11
witnessed the use of the Teaching EDGE numerous times before this session describes it in full. While the Leading EDGE describes behaviors, the Teaching EDGE describes a process for transferring skills.
■ Present the Teaching EDGE session (syllabus, Day Four), adapted where necessary for staff training.
■ During the course, the session will be presented by team guides in team settings. During staff training, the session can be presented by one well-rehearsed team guide. The intent is both to convey the content of the session and to provide clear direction on how the session can be presented. To that end, adult staff can pro-vide coaching and mentoring to help the presenter and the rest of the staff make the most of the learning experience.
Geocaching Game—Preparations and Practice—Assigned staff
■ Geocaching Game preparation and practice will allow staff to build on the Teaching EDGE session and to get outside and enjoy a physical activity.
■ Preparations can include laying out the Geocaching game course, using GPS receivers, and running through some of the course challenges. (For more on the Geocaching Game, see the NYLT syllabus, Day Four.)
Preparing Your Training Session—Assigned staff
Preparing Your SessionAll staff should have taken Trainer’s EDGE. Use this time to hone and practice the skills learned at the Trainer’s EDGE course. Each presentation should be practiced by each presenter before the start of the course. Below is a brief summary of some of the skills needed for an effective presentation.
Get an Overview of the Session■ Review the session’s learning objectives and make sure your plan covers each
learning objective during the session.
■ Review the EDGE Connections Chart (appendix) to get a feel for how the course elements tie together. Use the Teaching EDGE—Explain, Demonstrate, Guide, Enable. Know which parts of EDGE you are covering in each session. Sometimes Guide and Enable will come later in the day or even later in the week. Explain what the key points are up front; Demonstrate how to do it and why it is important to learn; Guide participants to be able to do it them-selves, perhaps through questions and discussion; and Enable by making sure the participants have a chance to try it themselves so they can learn by doing. That’s the Scouting method of training.
■ Do a quick read of the training guide to highlight all the session activities. Even highlight the questions you will ask that they should be able to answer.
■ Picture the participants succeeding at the activities and answering all the questions with enthusiasm. That is your vision of success. Everything you do and say as a trainer should help you achieve that vision for the participants.
N a t i o N a l Y o u t h l e a d e r s h i p t r a i N i N g
12 NYLT Staff Development Guide
Prepare to Train■ Read the suggested materials and highlight key points or prepare an outline of
what participants need to succeed at the activities.
■ Compare your outline or highlights to the activities and learning objectives. Did you provide the participants with just enough so they could succeed? Are your media elements in the right order?
■ Personalize your presentation. Use your own experiences or common experi-ences (perhaps something from a popular movie almost everyone has seen) to underscore the key elements of the session. It may take several weeks to prac-tice what you are teaching in real life so you can share personal experience to help the participants better understand the skills and concepts.
■ Write in your notes the time allotted for each section of the training. It will take lots of practice to stay within the time allocations.
■ Use the questions in the syllabus as much as possible. These are designed to help the participants think about the topic so they can learn it and remember it in their heads after the training is over.
Prepare Your Media■ Consider the media you will use—slides, flip charts, white boards, etc. The
media should help the learners know what they are expected to learn in this session, remember or visualize key concepts or techniques, and recall what was just covered. The slides are there as a guide and resource for you.
■ Use pictures or illustrations to make key points. Pictures can represent what you are saying or can provide a visual example. You also can use graphs, charts, or models to organize the concepts or process you are teaching. Don’t be fooled by slides—words on a slide are not the same as an illustration or picture.
■ Don’t let your pictures be so elaborate that they take attention away from what you are saying. Also, presentation software offers lots of fancy transitions, sounds, and animation that can distract the learners. Aim for simplicity. If you practice with live participants you can test your illustrations to assure that they help and do not distract from the learning.
Practice■ Practice your training session until you have it well in mind. Some trainers like to
use a tape recorder (or even a video recorder) so they can hear themselves. Others like to train with a few people who can provide them with real responses. Practice any exercises that are five minutes or longer with a group of people to assure you can give clear instructions and that the participants act the way you expect them to act.
■ The goal is to talk with the participants naturally—that is, looking at your outline only occasionally. Never read a presentation word for word from the syllabus, and don’t try to memorize it word for word. Be yourself as you help the learners achieve the learning objectives.

N a t i o N a l Y o u t h l e a d e r s h i p t r a i N i N g
NYLT Staff Development Guide 13
■ Make sure your posture and body language are inviting learning.
■ Be prepared, and know the topic. Practice sharing your own experiences on this topic in a short, interesting way. Then relax and focus on caring about your par-ticipants. If you are prepared, practice what you are teaching, and care about your learners, you can provide a great training session.
Practice the Three P’s
prepare Your presentation
Size up your audience, considering the sort of people they are and what they probably know and want to learn about the subject. Write down the purpose of the presentation (or review the learning objectives) and decide on the ideas that should be covered. Research the subject, taking brief notes. Talk with others who know the subject and make notes of their ideas. Then outline your presentation, including only the most important points—usually the fewer, the better—and put them in a logical order.
praCtiCe Your presentation
Rehearse your presentation until you have it well in mind. Write in your notes the time allotted to major points—it will help you stay within the time limits. Put your outline in final form so that it will not be cluttered with discarded ideas. Try to be ready for extemporaneous speaking, with an occasional look at your outline. Also, it helps to take a few deep breaths before you begin.
persoNaliZe Your presentation
Let each person feel you are talking to him or her. Look at the audience as individuals, not as a group. If you are nervous, find a friendly face in the audience and direct your remarks to that person for the first few minutes. Watch the group’s reaction as you go along. Stay close to their interests. Use thought-provoking questions to help stimulate everyone’s thinking. Participants’ answers will give you feedback on whether they understand what you are saying. Remember, all staff should practice any presentation for which he or she is responsible.
Things to Do During Training■ Pace yourself. Stay within time limits. Stay on the topic. If discussion drifts
off-topic, it is your responsibility to snatch it back and put it back on track where you know you want it to go—toward the key learning points!
■ Wrap it up. Summarize the subject by restating the main ideas and their importance. Give listeners a chance to ask questions.
■ Remember to look at the participants in the audience as individuals, not a big group.

N a t i o N a l Y o u t h l e a d e r s h i p t r a i N i N g
14 NYLT Staff Development Guide
Feedback■ Ask staff members for Start, Stop, Continue feedback to improve training
skills for both the trainer and those who are participating. If staff can recog-nize behaviors and skills that should be started, stopped, or continued, they will improve their own awareness and be more likely to be better trainers themselves.
■ Ask staff to review the Communication Skills Checklist to encourage trainer improvement.

N a t i o N a l Y o u t h l e a d e r s h i p t r a i N i N g
NYLT Staff Development Guide 15
We are going to talk about five ways you can use body language to help learning occur. They are:
1. Understand that training is not presenting.
2. Connect with the learners/participants using your eyes, ears, and mouth.
3. Use your arms and hands for effective training.
4. Use your position.
5. Use media to make your point.
Along with way, stop and give the learners a chance to try the techniques being taught. We are using the Teaching EDGE—Explain, Demonstrate, Guide, Enable.
1. Understand that training is not presenting.Training is different than presenting. In presenting, the speaker has all the knowl-edge and the listeners are supposed to absorb the information. In school, you may have been taught to present. In training, the speaker not only presents information but does so in a way to ensure learning occurs. The key ingredient is care for the learner/participant. Training causes learning to happen in the head of the learners/participants.
So, how do you get the learners to learn? There are three key things you as a trainer can do:
■ Know the subject very well. If you know your subject, you help the learners to understand.
■ Show respect for your learners by being organized. Make sure videos and other training materials are ready, and handouts are prepared and easy to get to. Remember the Scout motto: “Be Prepared.”
■ Have an attitude of caring. This is using your position—your body language—to show that you are open and care about the learners. You want to make sure that they get something from the training session.
The Trainer’s EDGE™ Staff Development Session
This session should be provided as a handout for all staff and briefly reviewed. Again, all staff should have recently been through the Trainer’s EDGE, so a brief recap is sufficient.

N a t i o N a l Y o u t h l e a d e r s h i p t r a i N i N g
16 NYLT Staff Development Guide
Be aware of your posture. You want to project a neutral, open stance. Stand upright, two feet on the ground, hands at your side. It is harder than it looks—but it shows the learners that you are open.
Let’s try it now: Stand upright, hands at your side. (The presenter should demonstrate the open stance.) Don’t put your hands in your pockets, or shift from side to side. If you put your hands in front of you, you create a barrier between you and the learner. Don’t put your hands behind your back—you don’t want to project yourself as the commandant, or the person in control.
Use your body to communicate an open, caring message to the learner.
2. Connect with the learners/participants using your eyes, ears, and mouth.Trainers are going to make eye contact with participants. You should look at a participant as you say each phrase or sentence, catching the learner in the eye. When you look them in the eye, you also are getting feedback. If you find this hard to do, then focus on a spot on the forehead or just above the head.
Focus on one learner at a time and then move to another. The learners will feel that you care. Focus on one and then the next and the next.
Let’s give this a try. Let’s break up into groups of six to eight people and each take a turn saying something simple, like the Scout Oath or Scout Law. Focus on one participant at a time, one phrase per participant.
When the exercise is over, the presenter explains that another way to use the eyes is to collect feedback.
Communication is a two-way activity, and while you use your eyes to project out, you also use them to gather information. Is the audience paying attention? Is anyone taking notes? Do they need to take notes? Are they talking? If so, are they talking because they are excited? Do the learners need a break? Do they need a change of pace? You as a trainer need to get feedback and respond.
Just as you use your eyes to get feedback, you can also use your ears to gauge the learners’ comprehension and attention.
Ask questions. Ask if there are any questions. When questions are asked, listen closely to what the learner is saying.
Repeat the question. This does two things: It allows the others to hear the question, and it clarifies your understanding of what the learner was asking.

N a t i o N a l Y o u t h l e a d e r s h i p t r a i N i N g
NYLT Staff Development Guide 17
Who will answer the question? Sometimes it will be the trainers. But can’t the learners also provide the answer? You may want to ask if anyone knows the answer.
If it is a point covered earlier, you can ask the learners if anyone remembers what was said. That will demonstrate if the learners actually comprehend the message.
Using your mouth is important, too. When training a group, imagine there is a wall behind the last row of learners, and that there is a person behind that wall. You need to talk loud enough for all of your learners to hear—including that imaginary person behind the wall.
You also need to vary your tone. If you are monotone—if you use little inflec-tion—you risk putting your learners to sleep. You should practice your presenta-tion in front of a mirror or record it on tape and listen to your tone.
Remember, you have been given two eyes, two ears, and one mouth. Use them proportionally.
3. Use your arms and hands for effective training.Some people talk with their hands, constantly moving them. Constant move-ment of hands can be like white noise—learners tune it out. Instead, use your hands to emphasize points rather than create a blanket of white noise.
Be careful about hammering into your hand to make a point. Can you imagine a 20-minute talk of having every little point hammered on? The learners will feel hammered, too.
Use your hands purposefully. Use of your hands can drive up the energy in the room.
When using your hands, think about the full range of motion. (Instructor dem-onstrates by holding hands out in full extension in front, from hands together arcing outward to arms extended and from hands down to hands up like a touchdown signal.) Use the whole space. Don’t talk with your elbows in at your sides and hands out. (Instructor demonstrates.)
If you get a chance, watch yourself on a videotape.
Also be aware of what is in your hands. If you are holding a pen, make sure you do not click it nervously. Don’t cause distractions for your learners. Put the pen down.
It is OK to use notes—just don’t hold them in front of you. Look at them, then put them by your side or put them down.
As I said, using your hands helps drives up the energy in a training room. But how do you manage that energy? What happens when the energy in the room is high—when people want to talk or when they are raising their hands to comment?

N a t i o N a l Y o u t h l e a d e r s h i p t r a i N i N g
18 NYLT Staff Development Guide
Use the same hands that help drive the energy.
When you use your hands, hold your arm out with the hand open and palm up. It is open, welcoming. Scan the room, using your eyes to find who has a ques-tion. (Presenter demonstrates.)
What happens if five people raise their hands? Use your hands to direct the ver-bal traffic. (The trainer demonstrates by holding one arm out, palm up, to recog-nize a questioner while using the other hand, palm out, in a stop-signlike motion to hold off the other questioners.) Your hand is open to the one to speak while the holding hand recognizes but delays the others. When you are ready, turn your stop sign into a welcoming, palm-up hand to recognize the next learner.
If no one answers your question, don’t call on people by name. It is threatening.
Also, don’t point. That is threatening, too. Use the open hand.
4. Use your position.No, we are not talking about using your position as the leader. We are talking about how you use your body during a training session—your position relative to the learners.
Most of us are often full of energy when we are training. Sometimes we pace back and forth. That can be distracting to the learners. Instead, channel that energy into your voice, using your eyes and ears to gather feedback from the learners.
Movement should be purposeful. Move to get something to show, or toward the flip chart for emphasis. Or, move toward a participant to show attention. Don’t forget to walk backward to get back to a teaching position. It is not as easy as you think. Practice it sometime before you try it.
Practice using your position to manage the classroom. Let’s say there is a group of learners who are chatting or otherwise not paying attention and disrupting. Walk up to them and simply put out your hand—palm down, not in their face—perhaps on the table or table level. Often, they will stop talking. If they don’t, turn your back to them. During a break, you might want to privately ask if they can help you so the participants can hear. You may have an adult talk to them.
Let’s try this: Have a small group sit to the side and chat while someone talks, perhaps reciting the Scout Oath or Scout Law. Use the tactic mentioned above.
5. Use media to make your point.What is media? Why do we use media? For excitement, to generate interest, for better understanding. All of those are appropriate answers.
When you want the learners to focus on the media, move closer to it. If you want your learners to quit focusing on it, walk away from it. This works for all media—from flip charts to video.

N a t i o N a l Y o u t h l e a d e r s h i p t r a i N i N g
NYLT Staff Development Guide 19
Model Leadership Council Meeting Preparations and Practice—course director, course leader
■ The first leadership council meeting of an NYLT course is a model presented in the round—that is, with the rest of the NYLT course observing the proceedings. A youth staff member acting as narrator explains key points of the meeting to the observers.
■ Discuss the importance of leadership council meetings in an NYLT course and review the agendas of all the daily meetings. Ensure that staff members understand their roles for each leadership council meeting. (See the NYLT syllabus, days Two, Three, Four, Five, and Six.)
■ Practice the model leadership council meeting. (See the NYLT syllabus, Day Two.)
■ Staff members can use Start, Stop, Continue and the Communication Skills Checklist to help those involved in the model leadership council meeting improve their presentation skills.
Course Meetings Preparations and Practice—course director, course leader
■ Discuss the importance of the NYLT course meetings as explained at the beginning of this manual. Emphasize that each meeting is a well-planned meeting modeled on the BSA’s seven-step troop meeting plan from the Boy Scout program. Venturers can also use this format for a well-run meeting.
■ Review the meeting plans and ensure that each staff member understands his or her part in each course meeting. (The meeting plans can be found in the appendix, days Two, Three, and Four.)
■ Give special attention to the Day Two meeting and the roles of a narrator, course leader, and other staff members in modeling an effective course meeting.
■ Enliven the course meeting practice by engaging staff in the interteam activities of the three course meetings.
■ Emphasize the importance of using the Teaching EDGE throughout the course meetings.
Often, presenters misuse media. They use it to help them remember what to say. Instead, media should be used to help the learners know where we are, where we are going, and what to remember.
You should know your material—remember our earlier point. Being organized shows the learner you care. When you know your material, the media is for the learner and not the presenter.
Remember to use the Trainer’s EDGE: Explain, Demonstrate, Guide, Enable. Go out and practice your training skills.

N a t i o N a l Y o u t h l e a d e r s h i p t r a i N i N g
20 NYLT Staff Development Guide
Activity Preparation
Use this time for staff to continue work on elements of the course meetings or to prepare other program activities determined by the course director and course leader.
Opening Campfire Planning and Practice—course leader, course director, assistant course directors for program and service
■ Discuss the format and possibilities of the opening night campfire and explain the importance of it being instructional as well as enjoyable and inspirational. (See the NYLT syllabus, Day One, Opening Campfire.)
■ Using the opening campfire described in the syllabus and the Campfire Program Planner, guide the staff through the initial planning of the opening campfire. Draw on their ideas and ingenuity to provide content and freshness to the event.
■ Explain the use of the Quest for the Meaning of Leadership (as described in the NYLT syllabus, Opening Campfire). Challenge staff members to develop their own presentation of the meaning of leadership that will be presented as a model at the opening campfire.
Continue Course Preparations—course director, course leader
Staff can use this time to continue their work on course preparations as determined by the course director and course leader.
Closing—course leader, course director
Thank everyone for attending and encourage them to use the coming month to study the syllabus and to practice any presentations they have been assigned.

N a t i o N a l Y o u t h l e a d e r s h i p t r a i N i N gN a t i o N a l Y o u t h l e a d e r s h i p t r a i N i N g
NYLT Staff Development Guide 21
N a t i o N a l Y o u t h l e a d e r s h i p t r a i N i N g
Second Staff Training Weekend
60 days Before the Course
Friday (second staff training Weekend)
saturday (second staff training Weekend)
Time Activity7:30 p.m. Opening and overview of the weekend
8:00 p.m. Review the vision, The Teaching EDGE, team development, and The Leading EDGE
8:30 p.m. Quest for the Meaning of Leadership preparation
10:00 p.m. Cracker barrel
10:30 p.m. Lights out
Time Activity7:00 a.m. Breakfast and cleanup
8:00 a.m. Solving Problems
9:00 a.m. Set up and practice Problem Solving Round-Robin
10:30 a.m. Valuing People
11:00 a.m. Practice presentations
Noon Lunch and cleanup
1:00 p.m. Resolving Conflict
2:00 p.m. Set up and practice team games/realistic first aid
3:30 p.m. Making Ethical Decisions
4:00 p.m. Evaluate the weekend using SSC
4:15 p.m. Assignments and questions
4:45 p.m. Closing
Unlike the first and third staff training weekends, which extend from Friday evening until midday Sunday, the second staff training weekend concludes on Saturday afternoon.

N a t i o N a l Y o u t h l e a d e r s h i p t r a i N i N g
22 NYLT Staff Development Guide
Notes on selected activities of the second staff training Weekend
Opening and Overview of the Weekend—course leader
■ Greet attendees and welcome them to the second weekend of NYLT staff training.
■ Invite the course director to add his or her own words of welcome.
■ Distribute copies of the schedule for the weekend and briefly discuss how events will unfold.
Review The Teaching EDGE, Team Development, and The Leading EDGE— assigned staff
■ This review can be conducted by the staff members who presented these sessions during the first staff training weekend.
■ Remind staff of the importance of communicating effectively throughout training and the NYLT course.
Quest for the Meaning of Leadership Preparation—course leader
■ Guide staff members in completing their definition of the meaning of leadership.
■ Based on their definition, staff will develop and practice their presentation of the meaning of leadership, to be included in the NYLT course opening campfire.
Solving Problems—assigned team guide
■ Present the session on Solving Problems (found in the NYLT syllabus, Day Three), adapted where necessary for staff training.
■ This is a session presented in team sites by team guides. The presenter at staff training can be one of those team guides.
■ Divide the staff into team-sized groups for the Blind Tent Pitch and other activities of the session.
■ Staff members can use Start, Stop, Continue and the Communication Skills Checklist to help presenters improve their presentation skills.
Problem Solving Round-Robin Setup and Practice—assigned staff
■ Encourage staff members to practice the roles of presenters and of participants. Provide Start, Stop, Continue input to improve the effectiveness of those present-ing the challenges.
■ Have fun. Taking part in the round-robin provides an energetic activity break from other presentations and meetings.
Valuing People—assigned staff
■ Present the session on Valuing People (found in the NYLT syllabus, Day Five).
■ This session is your best opportunity to discuss the value of diversity in a unit and how to effectively work as a team. Pay special attention to participants’ sensitivities (real and perceived) to diversity issues.

N a t i o N a l Y o u t h l e a d e r s h i p t r a i N i N g
NYLT Staff Development Guide 23
Practice Presentations
Staff members can use this time to practice presentations they will be making during the NYLT course. The course leader can help the staff divide into small groups so that each presenter will have an audience to provide feedback using Start, Stop, Continue and the Communication Skills Checklist. As time permits, those serving as audience members can take their turns as presenters.
Resolving Conflict—assigned staff
■ Present the session on Resolving Conflict (found in the NYLT syllabus, Day Four), adapted where necessary for staff training.
■ This session includes a number of role-plays. Give extra attention to the presenta-tion of the role-plays to ensure that they are effectively done.
■ Staff members can use Start, Stop, Continue and the Communication Skills Checklist to help presenters improve their presentation skills.
■ Remind staff that NYLT teams inevitably will go through the Storming stage as they progress. Individuals may find themselves in that stage, too. During an NYLT course there can be other conflicts arising from any number of sources.
■ Of the leadership tools that staff members take into an NYLT course, resolving conflict may be one of the most important. Encourage the staff to continue studying the Resolving Conflict session and to practice using EAR as a means of resolving conflicts in any setting.
Set Up and Practice Team Games—Realistic First Aid—assigned staff
■ Set up and practice Team Games (found in the NYLT syllabus, Day Three).
■ Use the games as a physically active break for staff members.
■ In addition to preparing the games for presentation at the NYLT course, encourage staff members to strive toward the same goals as the NYLT participants will have when they play the games:
—Have fun.
—Use the skills of problem solving, the Teaching EDGE, and the Leading EDGE.
—Create greater team unity.
■ Lead staff through the process of developing realistic first-aid wounds, and create your emergency scenario.
■ Use the Teaching EDGE to guide the staff through this skill and emphasize the importance of staff members using the EDGE process during the course.
Making Ethical Decisions—assigned staff
■ Present the session on Making Ethical Decisions (found in the NYLT syllabus, Day Four), adapted where necessary for staff training.
■ Discuss the format of the team campfires that will follow the NYLT course session on Making Ethical Decisions.

N a t i o N a l Y o u t h l e a d e r s h i p t r a i N i N g
24 NYLT Staff Development Guide
■ Explore these guidelines for the team campfires:
—The team campfires following this session will continue the exploration of ethical decision making. The team guide of each team will offer some scenarios to spark discussion of choosing the right course of action. Team members also will have opportunities to bring up and discuss ethical situations they have themselves witnessed or experienced.
—Adult NYLT staff do not attend the team campfires. The discussions about eth-ics that take place among team members can take on a different and often more open tone when youth are discussing issues among themselves without adults listening in. Team guides will represent the NYLT staff at the campfires.
■ Staff members can use Start, Stop, Continue and the Communication Skills Checklist to help presenters improve their presentation skills.
Closing—course leader, course director
■ Thank everyone for attending and encourage them to use the coming month to study the syllabus and to practice any presentations they have been assigned.
■ The course director can conclude the meeting with a Course Director’s Minute based on the Who, Me? Game. (For a guide, see the NYLT syllabus, Day Two, Course Assembly, “Course Director’s Minute.” Adapt it to the time frame of this NYLT staff training weekend.)

N a t i o N a l Y o u t h l e a d e r s h i p t r a i N i N gN a t i o N a l Y o u t h l e a d e r s h i p t r a i N i N g
NYLT Staff Development Guide 25
Third Staff Training Weekend
30 days Before the Course
Friday (third staff training Weekend)
saturday (third staff training Weekend)
Time Activity7:30 p.m. Opening and overview of the weekend
8:00 p.m. Communicating Well (Part Two)
9:00 p.m. Cracker barrel
10:30 p.m. Lights out
Time Activity7:00 a.m. Breakfast and cleanup
8:00 a.m. Course assemblies and course meetings
9:30 a.m. Schedule run-through
10:30 a.m. Presentations practice
Noon Lunch and cleanup
1:00 p.m. Presentations practice
2:30 p.m. Hike to sites of Outpost Camps
4:00 p.m. Program preparations
5:30 p.m. Dinner and cleanup
6:30 p.m. Leading Yourself identity game
7:00 p.m. Finding Your Vision (Part Two)
8:00 p.m. Opening campfire rehearsal
9:30 p.m. Cracker barrel
10:30 p.m. Lights out

N a t i o N a l Y o u t h l e a d e r s h i p t r a i N i N g
26 NYLT Staff Development Guide
sunday (third staff training Weekend)
Notes on selected activities of the third staff training Weekend
Opening and Overview of the Weekend—course leader
■ Greet attendees and welcome them to the third weekend of NYLT staff training.
■ Invite the course director to add his or her own words of welcome.
■ Distribute copies of the schedule for the weekend and briefly discuss how events will unfold.
Communicating Well (Part Two)—assigned staff
■ Present the session on Communicating Well (Part Two) (found in the NYLT syllabus, Day Six), adapted where necessary for staff training.
■ Staff members can use Start, Stop, Continue and the Communication Skills Checklist to help presenters improve their presentation skills.
■ This session is an opportunity to further the discussion of using good communi-cation skills that was begun during the Day One session on Communicating Well. It is also a chance to review the core information from the sessions on the Teaching EDGE, the Leading EDGE, and Resolving Conflict.
Course Assemblies—course leader
■ Guide the staff through their roles for the daily course assemblies. (See the NYLT syllabus for course assembly guidelines for each day of the NYLT course.)
■ Ideally this practice can occur at the site where the course assemblies will take place during the NYLT course.
Time Activity7:00 a.m. Breakfast and cleanup
8:00 a.m. Scouts’ worship service
9:00 a.m. Orientation Trail preparations
10:00 a.m. Closing session practice
11:00 a.m. Final assignments, evaluations, discussions
Noon Closing
The third staff training weekend is designed to be more flexible than the training that precedes it. Three blocks of time designated for presentation preparation can be used at the discretion of the course director and course leader for any aspects of the course they feel the staff should address.

N a t i o N a l Y o u t h l e a d e r s h i p t r a i N i N g
NYLT Staff Development Guide 27
■ Discuss with staff their roles as leaders serving others. In everything they do, from the NYLT course assembly each morning until lights out at night, they are to model the best leadership behavior.
■ Clarify the extent and purpose of spirit activities at course assemblies.
■ Discuss behaviors of concern including hazing, bullying, teasing, and any inap-propriate NYLT traditions passed down from earlier years. Seek out strategies to prevent them from occurring during the upcoming NYLT course and to bring them to a halt if they do appear.
■ Describe the responsibilities of the assistant course director for program and the assistant course director for service and how they will carry out those duties.
■ Discuss the importance of the staff service team.
Schedule Run-through and the Connections Chart—course director
■ Review the daily schedule for the NYLT course. Discuss the staff members responsible for each session and event on the schedule, and be sure everyone knows what he will be doing and how to prepare for his role.
■ Distribute copies of the EDGE Connections Chart (appendix). Use it to discuss ways that sessions and activities are designed to complement one another and to move the course smoothly through a process of learning and experiencing leadership.
Presentation Practice (Part One)
■ By this point of staff training, all presentation responsibilities should have been assigned. Staff members know who is presenting each of the sessions and who is in charge of various parts of the course meetings, team activities, and other events of the course.
■ The time set aside for presentation practice should be used by the youth and adult staff members to refine the ways those responsibilities will be carried out. Where appropriate, staff members may continue to practice the actual presenta-tions for which they have accepted responsibility.
■ The course leader and course director can be proactive in assigning staff mem-bers to practice certain presentations, to act as audience members for presenters, or to meet as groups to work out the presentations of certain course elements (for example, practicing the course meeting skills instruction for the Day Three course meeting—teaching the use of backpacking stoves—and rehearsing effec-tive ways to manage the interteam activity of that same meeting).
Staff Service Team
Staff members have the responsibility of cleaning staff latrines/showers, staff campsites, and other staff-use areas. As fellow members of the course, staff members roll up their sleeves and take care of their own areas rather than expecting someone else to do it for them.

N a t i o N a l Y o u t h l e a d e r s h i p t r a i N i N g
28 NYLT Staff Development Guide
Presentation Practice (Part Two)
Continue with the practice begun during the hour before lunch.
Outpost Camp Hike
Hiking to the sites that teams will use for their Outpost Camps can serve a number of purposes:
■ Gives the NYLT staff a physically active break from other course preparations.
■ Allows staff to see and better understand the challenges teams will face as they prepare for and conduct their Outpost Camps.
■ Invites adult and youth staff to discuss the best ways to shape the preparations for the Outpost Camp to enhance the experience for NYLT participants. This includes planning for coed camping sites.
■ Provides an opportunity for the staff to prepare the Outpost Camp emergency response plan. (For more on the plan, see the NYLT syllabus, Day Five, Leadership Council Meeting.)
■ In preparing for the teams to use a GPS receiver to find their campsites, staff can determine the GPS waypoints and write the directional instructions for each team member.
Presentation Practice (Part Three)
Conclude the practice begun earlier in the day.
The Leading Yourself Identity Game—assigned staff
■ Use effective communications skills to instruct and organize staff members for the Leading Yourself identity game (found in the NYLT syllabus, Day Five, Leading Yourself).
■ The game allows meeting attendees a physically active break from sessions and discussions.
■ As opportunities arise, point out some of the techniques for setting up a game and conducting it productively.
■ Debrief the Leading Yourself identity game.
— Ask participants what they liked about the game. (It was fun, active, different . . .)
— Ask what they learned about playing the game successfully. Bring out this idea: “You’ve got to know whether you’re a hawk, a snake, or a coyote. Once you know that, then you can use what you know about yourself to decide what you’re going to do—whether you’re going to run for safety or try to tag the other team.”
— Apply that idea to leading yourself: “Being a hawk, a coyote, or a snake is the simplest of qualities to know about yourself. We all have our own sets of strengths and ways of doing things. We each have experiences that helped make us be who we are today and are influenced by our parents, teachers, religious leaders, friends, and neighbors. We also have the freedom to choose much of who we will be. What guidelines we choose to follow. For example, everyone here pledges himself to follow the Scout Oath, the Venturing Oath, and the Scout Law.

N a t i o N a l Y o u t h l e a d e r s h i p t r a i N i N g
NYLT Staff Development Guide 29
“Understanding as much as we can about who we are is a basic part of leadership.”
Finding Your Vision (Part Two)—assigned staff
■ Present the session on Finding Your Vision (Part Two) (found in the NYLT syllabus, Day Six), adapted where necessary for staff training.
■ This session advances the subject of developing a personal vision and also reviews the key points of the sessions on Finding Your Vision, Setting Your Goals, and Preparing Your Plans.
■ Staff members can use Start, Stop, Continue and the Communication Skills Checklist to help presenters improve their presentation skills.
Opening Campfire Rehearsal
This rehearsal serves both to prepare the staff for the opening campfire of the NYLT course and to offer the staff members an evening of fun and fellowship as they enjoy their time together around the campfire. While it needs to be productive in terms of refining the opening campfire program, it also can be conducted in a relaxed manner that begins to bring a sense of completion to NYLT staff training.
Orientation Trail Preparations—course leader, assigned staff
■ The Orientation Trail is a very important part of an NYLT course. It sets the tone for new participants, provides them with essential information about the course, begins their formation as teams, and allows staff to model appropriate and effective methods of leadership and the use of the Teaching EDGE.
■ The inclusion of the Orientation Trail preparations at this point in staff training should be an indication that the major elements of the course have been pre-sented and practiced and that what remains are matters of how best to greet incoming NYLT course participants, form them as teams, and give them the basics of camp life that will serve them through the coming week.
■ The course leader reviews with the staff the printed material explaining the Orientation Trail and its operation (see the NYLT syllabus, Day One).
■ Assign staff the responsibilities for all aspects of preparing and conducting the Orientation Trail.
■ Review and practice using the Daily Campsite Inspection Checklist. Review how it will be used during the course to ensure that staff and team campsites are kept clean and orderly.
Closing Session Practice—course leader, course director, assigned staff
■ Present the closing session (found in the NYLT syllabus, Day Six), adapted where necessary for staff training.
N a t i o N a l Y o u t h l e a d e r s h i p t r a i N i N g
30 NYLT Staff Development Guide
■ Practicing the closing session at this point serves both to prepare the session for the NYLT course and to bring NYLT staff training to a meaningful completion.
■ If presentations or meal times run shorter than planned, course guides should keep teams engaged in developing their definition of leadership.
Final Assignments, Evaluations, Discussions—course leader, course director
This is an opportunity for staff members to tie up loose ends, find answers to ques-tions, clarify assignments, and make final plans for the upcoming NYLT course. The agenda should be set by the course leader and the course director but should be open to contributions and queries from all staff members.
Closing—course leader, course director
■ Thank everyone for attending and encourage them to use the coming month to study the syllabus and to practice any presentations they have been assigned.
■ The course director can conclude the meeting with a Course Director’s Minute intended to recognize the staff members for their tremendous contributions to Scouting, to assure them that their efforts have real meaning, and to encourage them to continue preparations in the time remaining until the course begins.

N a t i o N a l Y o u t h l e a d e r s h i p t r a i N i N gN a t i o N a l Y o u t h l e a d e r s h i p t r a i N i N g
NYLT Staff Development Guide 31
Precourse Setup
three days Before the Course
The schedule of events for the three days of precourse setup will be determined by the course director, course leader, and other staff members. They should have a clear idea of what needs to be done, both in preparing facilities and in further practice and rehearsal of sessions, activities, meetings, and other course events.
At a minimum, areas to be addressed by the youth and adult staff include:
■ Site set up
■ Commissary organized
■ Program equipment and materials prepared
■ Audiovisual equipment and DVD presentations ready to go
■ Opening day details arranged (registration, medical review, etc.)
■ Presentations and meetings fully prepared and rehearsed
■ Orientation Trail developed
■ Model campsite prepared
■ Opening campfire and closing session well-prepared
■ Daily schedules and assignments reviewed
■ Agendas prepared for meetings of the course, leadership council, and teams
EquipmentCouncils should develop a suggested personal equipment list specific to their camp. The equipment needed for the various projects is listed in the appendix. A master equipment list should be prepared based on the needs of your council and then broken down by days to be sure materials are available when and where needed.
Effective preparations for an NYLT course are seldom noticed when everything runs smoothly. Preparation slipups, however, can cause great confusion. Everybody usually can understand and cope with unforeseeable complications, but they can’t understand why there is no pepper in the commissary or how somebody could have forgotten the extension cord for the AV projector. It is the little things that are often the most important.
A secret of good planning is living the experience in advance. Now is the time to think your way through the course—day by day—and live it in advance. Then you’ll know what you need, where you’ll need it, how you’ll use it, how the youth will like it, and what you’ll do with it when you’re done.

N a t i o N a l Y o u t h l e a d e r s h i p t r a i N i N g
32 NYLT Staff Development Guide
supplies
Large quantities of paper and a number of simple office supplies are required for an NYLT course. All materials for distribution to participants are provided in the appendix in printer-ready form. The council service center can recommend the best and least expensive method of producing these materials. Be sure the reproductions are good quality.
Worship service
During communication with NYLT participants in advance of the course, determine whether the religious obligations of each participant can be met by the Scouts’ worship service on Day Two. When that is not the case, involve those participants and their families in making arrangements for them to attend a service of their own faith.
uniforms
NYLT staff and participants should have both their Boy Scout or Venturer field uni-forms and activity uniforms as clothing for a course. The course director and course leader will determine the uniform appropriate for each NYLT activity. (Field uniforms are normally worn for course assemblies, evening meals, and evening activities.)
Since the course supports the local roles of Venturers and Boy Scouts, NYLT staff and participants should wear the uniforms of their home units. Temporary emblems of offices held during the course can be pinned to the uniform or worn as armbands. Some councils also may make available special uniform items—NYLT neckerchiefs, T-shirts, and/or hats, for example—to be used as part of the official uniform during an NYLT course.
Uniforms worn by youth and adult staff should follow the same standards as those of participants. Staff may elect to wear identical staff hats.
precourse Communication
The council should send each participant a letter acknowledging his acceptance to the NYLT course, with information on dates and equipment needed.
To model servant leadership, a staff member should phone each participant before the course to give the Scout an opportunity to discuss his questions or concerns. If teams have been organized before the precourse period, the phone call can be made by the team guide.
NYlt participant Notebooks
Upon arrival at the course, each participant will be issued a notebook with a basic set of course materials. (These materials are found in the appendix.) Be sure all materials to be distributed at the course are three-hole punched.
Each participant who attends will do so as a representative of his or her home unit and will wear the field uniform and insignia of his or her home unit.

N a t i o N a l Y o u t h l e a d e r s h i p t r a i N i N g
day one-1
schedule for day one (sunday)
Time Activity Notes Responsible Location12:00 p.m. Registration begins Staff To be determined by
course leadership
1:00 p.m. Orientation Trail Camp health and safety, model campsite
To be determined by course leadership
2:00 p.m. Campsite setup Teams, team guides Team sites
3:00 p.m. Opening assembly Welcome Course director/course leader
Course assembly area
3:30 p.m. Communicating Well (Part One)
Course leader/ team guides
Course site with team breakouts
4:15 p.m. Finding Your Vision (Part One)
Assigned staff Course site
5:15 p.m. Team meal preparation, dinner, and cleanup; finish team campsite setup
Duty roster Team campsite
7:00 p.m. Flag ceremony (Course does not gather.) Staff Course assembly area
7:15 p.m. Who, Me? Game and cracker barrel
Team guides Team sites
8:00 p.m. Development of Guidelines for Course Conduct
Team activity in course setting
8:45 p.m. Opening night campfire Demonstration of campfire as a program and communication element
Assigned staff Campfire ring
9:30 p.m. Silent return to team sites
Team sites
10:00 p.m. Lights out Team leader Team sites
An optional worship service may be scheduled prior to registration.
Course events and activitiesTeam events and activities
Content sessions and their connecting activities

N a t i o N a l Y o u t h l e a d e r s h i p t r a i N i N g
day one-2
Cont
ent S
essi
ons
day one: registration, orientation trail, and Campsite setup
180 minutes
Staff
Course assembly area, model campsite, team sites
As a result of these activities, participants will be able to
■ Form teams that will stay together throughout the course.
■ Meet the team guides assigned to their teams.
■ Locate the course facilities, meeting places, team campsites, and other relevant landmarks.
■ Understand the standards and methods to ensure health and good hygiene, and the emergency response procedures in place during the course.
■ Use the model campsite explanation and demonstration as they set up their own campsites and test them against the Daily Campsite Inspection Checklist.
This is a Compass Point. Scattered throughout the National Youth Leadership Training syllabus, Compass Points offer hints on how best to present material, reminders of important concepts, and suggestions for enriching the NYLT course for participants and staff. To find Compass Points quickly, just look for the Compass Point icon.
time allowed
responsible
location
learning objectives

N a t i o N a l Y o u t h l e a d e r s h i p t r a i N i N g
day one-3
Content Sessions Content Sessions
■ For each participant, a schedule of events for Day One and an overview of the week’s activities (appendix)
■ Completed team duty rosters for each team (appendix)
■ For each team, one blank team flag attached to a 6-foot pole (These should be 3-by-2-foot squares of cloth that correspond to each team’s identifying color if colors are used.)
■ For each participant, a Participant Notebook (created with resources found in appendix and other council resources)
■ Copies of the Daily Campsite Inspection Checklist (appendix)
■ For each participant, a Leadership Memory Tips card
The face of the Leadership Memory Tips card is divided into four quad-
rants, each representing one phase of team development and marked with the identifying characteristics of that phase:
Forming: High enthusiasm, low skills
Storming: Low enthusiasm, low skills
Norming: Rising enthusiasm, growing skills
Performing: High enthusiasm, high skills
The back of the card lists memory tips for the course:
■ Vision—Goals—Planning—Creating a positive future■ SMART Goals—Specific, Measurable, Attainable, Relevant, Timely■ Planning and Problem-Solving Tool—What, How, When, Who■ Assessment Tool—SSC—Start, Stop, Continue■ Teaching EDGE—Explain, Demonstrate, Guide, Enable■ Stages of Team Development—Forming, Storming,
Norming, Performing■ Leading EDGE—Explain, Demonstrate, Guide, Enable■ Conflict Resolution Tool—EAR—Express, Address, Resolve■ Making Ethical Decisions—Right vs. Wrong, Right vs. Right, Trivial■ Communication—MaSeR—Message, Sender, Receiver■ Valuing People—ROPE—Reach Out, Organize, Practice, Experience
It is important that NYLT participants be fully informed about all aspects of the course and why the syllabus is unfolding as it is. Providing arriving participants with a schedule of events for Day One and an overview of the week can help put them at ease about upcoming events, and serves as an indication that NYLT is an open program without secrets.
Daily schedules for Day One and Day Two are included in the NYLT Participant Notebooks. From then on, the schedule for each day is given out at the previous day’s leadership council meeting.
Materials Needed

N a t i o N a l Y o u t h l e a d e r s h i p t r a i N i N g
day one-4
Cont
ent S
essi
ons
Orientation, team formation, and team campsite setup will be facilitated by the youth staff members serving as team guides. The course leader, assistant course directors of program and service, and adult staff will be on hand and may, if appropriate, provide coaching for the team guides.
All staff members will set a positive tone for the beginning of the course. To the greatest degree possible, staff members should make participants feel that they are welcome, that they belong, and that they are about to begin a worthwhile experience.
Qualified, effective staff members will be familiar with the concepts and content presented throughout the course. At this point, they should recognize that the new teams are in the Forming phase of team development. Team guides and other staff members can model the appropriate leadership style for that phase—Explain—by being directive and by providing all the information and materials participants require in order to succeed.
Registration
As participants arrive for the beginning of the course, staff members will greet them warmly, ensure that they sign in and have completed all necessary paper-work, and give each participant an NYLT Participant Notebook.
Team FormationThe course director and course leader will determine the membership of each team prior to the course. Teams should reflect sensitivity to the following criteria:
■ Age similarities
■ Range of Scouting skills and rank
■ Geographic, cultural, program, and gender diversity
Teams should be made up of youth similar in age to one another so they are divided roughly into teams of younger youth, older youth, and those in between. Organizing teams so there is not a large range of ages (more than two to three years’ difference) can maximize the learning potential and leadership experience of all NYLT participants by giving team members equal footing with one another. Maximizing geographic, cultural, program, and gender diversity in each team will enhance the ability of each team to observe and understand the team dynamics, and encourage higher levels of team maturity.
delivery Method
Staff members should model the Teaching EDGE during the Orientation Trail and campsite setup. As they Explain, Demonstrate, Guide, and Enable, they will find that their teaching efforts will be very successful.
While participants will not yet be exploring the Teaching EDGE, staff members can take the opportunity to tell participants, “Keep an eye on how we teach things today. Later in the course, we will help you learn how to teach this way, too.”
Presentation Procedure

N a t i o N a l Y o u t h l e a d e r s h i p t r a i N i N g
day one-5
Content Sessions
As participants complete their paperwork and learn to which team they will belong, they will move to the team gathering area to join their team guide, who will be holding the team flag corresponding with the team color. While teams initially will be identified by color—the Red Team, the Blue Team, etc.—partici-pants may take the initiative later in the course to give their teams new names.
As an alternative, some courses may choose to have their youth staff name the teams prior to the arrival of the participants. Some courses add a theme for each year to add to the fun, and name teams accordingly.
When all members of a team have been registered, the team guide will begin the new team on its journey along the Orientation Trail.
Orientation TrailAlong the Orientation Trail, staff members will familiarize participants with their surroundings and explain camp policies. As well as pointing out other points of interest along the trail, team guides and team members should
■ Identify course facilities, meeting places, living quarters, the quartermaster center, and other relevant landmarks.
■ Review Youth Protection policies, including no one-on-one, or male-female contact and the use of the buddy and truddy systems.
■ Review emergency response procedures, explaining the appropriate means for summoning help in case of injury or illness, highlighting fire prevention issues, and discussing any of the area’s hazard zones.
■ Observe a model campsite. This could be a staff campsite that has been arranged to include a cooking area typical of those the teams will be using.
■ Review safe food handling and storage, as well as guidelines for protecting provisions from animals.
During the Orientation Trail, team guides should emphasize to team members the importance of proper hygiene in the bathroom facilities and before any food handling. Staff members can be on hand to demonstrate the soap and water hand-washing stations at latrines and the model team campsite, and to demonstrate the use and locations of waterless hand cleansers.
ENVIRONMENTAL CONCERNS
Team guides should highlight environmental concerns that may affect participants during the course. These might include:
■ Water. Encourage participants to carry their own water bottles and to drink from them frequently to avoid dehydration.
Team guides can encourage team members to decorate their flags as the course progresses. The quartermaster can make available a selection of colored markers, fabric scraps, glue, and other flag decoration materials that teams can add to items they collect on their own.

N a t i o N a l Y o u t h l e a d e r s h i p t r a i N i N g
day one-6
Cont
ent S
essi
ons
■ Sun protection. Remind participants to use sunscreen, wear hats and protec-tive clothing, and stay in the shade during the hottest part of the day.
■ Insect protection. Encourage participants to use insect repellent and wear protective clothing.
■ Poisonous plants. Ensure that participants can identify and avoid poison ivy, nettles, and other poisonous plants in the region.
DUTY ROSTERS
Each team guide will provide his team with a duty roster listing daily assignments, including team leader and assistant team leader. Sample duty rosters can be found in the appendix.
THE TEAM MODEL CAMPSITE
Before participants arrive, the staff should prepare a model campsite that demon-strates everything expected of the team campsites. Staff may use their own campsite, but only if it is basically identical to team campsites the participants will develop and use.
The model campsite should include a fully equipped dishwashing station to use while Explaining and Demonstrating the group dishwashing system. Sanitation is a top priority in camp.
DAILY CAMPSITE INSPECTION CHECkLIST
The team guide should explain that each participant will assess the model campsite using the Daily Campsite Inspection Checklist. People often absorb information better when they have something to do as they are learning, and the checklist encourages their full engagement while examining the campsite.
The team guide can explain that in a home unit, leaders are elected to serve for about six months, and that each leader selects his assistant leader. Because the six-day NYLT course represents a single activity cycle (a sequence of unit meetings leading up to a major activity) in the life of a unit, the responsibilities of being team leader and assistant team leader will change each day so everyone in the team will have a chance to serve in each position.
The Teaching EDGE encourages instructors to Explain, Demonstrate, Guide, and Enable. Team guides should use the Teaching EDGE to help prepare team members to set up their campsites and operate them well throughout the course. The model campsite on the Orientation Trail will allow staff members to Explain and Demonstrate what will be expected from the teams.
During the team campsite setup, the team guides can Guide teams to do the setup themselves, and Enable them with the gear, tools, and tents to do it right.

N a t i o N a l Y o u t h l e a d e r s h i p t r a i N i N g
day one-7
Content Sessions
The checklist addresses matters of health, hygiene, and safety. It does not include measurements of standards that do not advance the NYLT learning experience (e.g., no emphasis on gateways, elaborate campsite improvements, etc.). The goal is to ensure team campsites that are maintained in a clean, healthy, efficient manner.
DAILY CAMPSITE INSPECTIONS
The team guide will explain that an NYLT staff member will examine each team site each day and measure it against the standards on the same Daily Campsite Inspection Checklist the participants used to evaluate the model campsite. In most cases, the inspection will be conducted by the assistant course director for service. He or she may be accompanied by the team guide.
The first inspection will take place after the evening meal cleanup on Day One. Ideally, each team campsite will begin the course fully compliant with the items on the Daily Campsite Inspection Checklist, and as a reward each team will receive a daily Baden-Powell Team streamer at the Day Two course assembly.
Here’s what the Scoutmaster Handbook says about camp cleanup:
“Scouts in charge of cleanup can accelerate the process by placing a pot of water on the stove or campfire to heat while the patrol is eating. As the meal ends, the Scouts can set out a pot of hot water containing biodegradable soap, a second pot with hot rinse water containing a few drops of sanitizing agent such as bleach, and a pot of cold water for a final rinse. If each Scout washes his own dishes and a pot or a cooking utensil, the work will be done quickly and no one will have to spend a long time at it.”
Team guides are not appropriate staff members to conduct the campsite inspections of the participants; they are too involved in team life to be objective inspectors.
Before a course begins, adult and youth staff members on the leadership council should review the Daily Campsite Inspection Checklist. Changes can be made to the checklist to adapt to local situations, but whatever its final form, the checklist should promote camp hygiene. All items on the checklist should lead toward making a team campsite livable, well-run, and environmentally sound. There should be no busywork items (that is, no gateways or pioneering projects). Lastly, all the items on the checklist should make sense to NYLT team members and should be attainable with a reasonable amount of daily effort.

N a t i o N a l Y o u t h l e a d e r s h i p t r a i N i N g
day one-8
Cont
ent S
essi
ons
Team Campsite Inspection ExerciseUsing a Daily Campsite Inspection Checklist, members of each team will conduct an inspection of the model campsite. The team guide can Demonstrate the means by which inspections will be conducted and Guide team members in conducting the inspection on their own.
Team Campsite SetupAs each team completes the Orientation Trail and arrives at its campsite, its team guide will provide the materials and support needed to set up the team campsite.
The team guides can be directive in their leadership, offering as much guidance to participants as they need, but also enabling participants to try out skills on their own and figure out solutions—setting up tents and tarps, for example. When team guides do offer skills instruction, they can draw on the skills of the Teaching EDGE for effective means of conveying the information.
Team guides can use the Leadership Compass to determine the stage of their teams—Forming, Storming, Norming, Performing—and to choose the most appropriate leadership style from the Leading EDGE—Explaining, Demonstrating, Guiding, Enabling. In most cases, teams at this point in the NYLT course will be in the Forming stage and will benefit from the Explaining style of leadership.
Upon the completion of campsite setup, the team guide will accompany the team to the location of the first course assembly. Each team should bring its flag to the assembly.
N a t i o N a l Y o u t h l e a d e r s h i p t r a i N i N g
day one-9
Course Events
day one: opening assemblytime allowed 30 minutes
responsible Course director, course leader
location Course assembly area
learning objectives
As a result of these activities, participants will be able to
■ Gather for Day One of the course.
■ Along with the staff, feel welcomed and valued.
■ Affirm that the NYLT course operates according to the Scout Oath, the Venturing Oath, and the Scout Law.
■ Participate in or attend the installation ceremony for the course’s course leader, assistant course director for program, assistant course director for service, and the Day One team leaders and assistant team leaders.
■ View youth staff as supporters, guides, and mentors.
■ Discuss key parts of a good course assembly.
■ Recognize good communication skills.
recommended Facility layout
Before a National Youth Leadership Training course begins, staff members should designate the place that will serve as the course assembly area. It should have flagpoles for displaying an American flag and a course flag. NYLT staff also may choose to display one historic American flag during each day of the course.
In most cases, course assemblies will take place at an outdoor setting, though indoor areas of sufficient size (a dining hall, for example) can be adapted to accommodate the activities. Indoors, flags can be presented on staffs with floor stands or can be displayed on a wall.
On Day One, the staff will conduct the flag ceremony before participants arrive.
delivery Method
The Day One course assembly serves as the participants’ formal introduction to the course. They will become acquainted with the course and course director and will witness the installation of the course’s course leader and assistant course director for program and assistant course director for service.
Presentation Procedure
Introduction
When the teams arrive at the assembly area, the team guides should arrange them in an appropriate formation. The course director uses the Scout sign to bring the assembly to order, then addresses the course.

N a t i o N a l Y o u t h l e a d e r s h i p t r a i N i N g
day one-10
Cour
se E
vent
s
The course director will
■ Welcome participants to NYLT and express his or her pleasure in having everyone there.
■ Introduce himself or herself as the course director of this NYLT course, then introduce the course leader, including his or her hometown and Scouting experience.
■ Introduce the assistant course leaders.
■ Install the course leader and assistant course director for program and assistant course director for service.
Staff members should model effective communication skills whenever addressing the course.
■ Speak in a clear, confident voice.■ Be aware of body language and position.■ Make eye contact with listeners.
Installation of Course Leader, Assistant Course Director for Program, and Assistant Course Director for Service The course director begins the installation. He or she should
■ Invite the course leader, assistant course director for program, and assistant course director for service to come forward to be installed.
■ Ask them to gather around the course flagpole, placing their left hands on the pole.
■ Instruct them to give the Scout or Venturing sign and repeat, “I promise to do my best to be worthy of this office for the sake of my fellow Scouts and in the world brotherhood of Scouting.”
■ Welcome them as the course’s new course leader, assistant course director for program, and assistant course director for service.
■ Turn the meeting over to the course leader.
Installation of Team Leaders and Assistant Team Leaders
The sample team duty roster included in each NYLT Participant Notebook indicates which team members will serve as team leader and assistant team leader each day of the course. Before the course assembly begins, team guides should point out this information to the Day One team lead-ers and assistant team leaders so they will be ready to be installed and to begin providing leadership to their teams.

N a t i o N a l Y o u t h l e a d e r s h i p t r a i N i N g
day one-11
Course Events
The course leader begins the installation. He or she should
■ Welcome members of the NYLT course.
■ Invite the new team leaders and assistant team leaders to come forward to be installed.
■ Ask the new team leaders to gather around the course flagpole, placing their left hands on the pole. New assistant team leaders stand behind their team leaders, each placing their left hand on their team leader’s right shoulder.
■ Instruct them all to give the Scout or Venturing sign and repeat, “I promise to do my best to be worthy of this office for the sake of my fellow Scouts in my team and course and in the world brotherhood of Scouting.”
■ Welcome them as the course’s new team leaders and assistant team leaders.
At this point the course director thanks the course leader and congratulates the new team leaders and assistant team leaders. He or she asks if the participants have noticed that until now, the course leader had been leading the assembly just as the senior patrol leader of a troop or president of a crew would. That is the way it should be in a troop or crew, with members of the leadership team (patrol leaders’ council or crew officers) taking charge and the unit’s adult leaders staying in the background to coach and mentor.
The course director explains that the Boy Scouts of America encourages the youth-led unit. Youth are given all the information and resources they need to run the unit themselves. Adult leaders are there to provide support, coaching, and mentoring.
The NYLT course will run that way as well. Adult leaders will be supportive and are always available to provide guidance whenever youth staff or team members need it. Most of the time, though, adult team leaders will be on the sidelines, allowing the youth leaders of the staff to carry out their duties and make things happen.
The course director then shares his or her vision for the coming week. The following is one example.

N a t i o N a l Y o u t h l e a d e r s h i p t r a i N i N g
day one-12
Cour
se E
vent
s
Course Director’s VisionI want to share with you my vision for this course. A vision is a picture of what future success looks like. If we can see it, we can be it.
My vision is that our course will be a model of how every Boy Scout troop and Venturing crew can succeed. In the best tradition of Scouting, this will be a youth-run course. My vision of what success looks like has three parts.
First, as course director I see myself fulfilling my responsibility for the safety of everyone and the general direction of the troop’s program. I see the course operating according to the Scout Oath, the Venturing Oath, and the Scout Law, and following the guidance of the National Council. Scouting has no room for hazing, bullying, or other inappropriate behavior. We are all here to help one another have the best possible experience. Our principles can guide us in that direction throughout the course.
Second, I see the adult leaders giving responsibility for leading the course to the course leader and the course’s other youth leaders. We will always be available to coach and mentor them, but as much as possible I see us staying on the sidelines while the course leader and other youth leaders plan and carry out a great program. We will not hide that coaching and mentoring. In fact, now and then we will ask you to watch us doing it so you will know how it can work in your home units.
Third, my vision of success includes everyone on the staff, both youth and adult, seeing themselves as here to help each of you learn as much as you can and enjoy the fellowship of other Scouts. We are here for you. I see us doing all we can to make it possible for you to get the most out of the NYLT experience.
The course director introduces the course leader as the course’s youth leader, then turns over the troop assembly to him or her.
Staff and Participant IntroductionsThe course leader explains to the course that communicating well is a key skill of leadership. Throughout the course, staff members will be modeling effective means of communicating. As they communicate, staff members and participants should make a point to use these communication skills.
■ Good, clear voice projection
■ Body language, including positioning
■ Eye contact with the audience
■ A firm, confident handshake
The course leader asks each staff member to step forward and, with good communication skills, introduces them to the troop, tells where each is from, and describes the staff role each has accepted for the course.

N a t i o N a l Y o u t h l e a d e r s h i p t r a i N i N g
day one-13
Course Events
When appropriate, the course leader can provide encouragement and guidance, pointing out communication skills a staff member is using well, suggesting another approach a staff member might try to improve his introduction, etc. The idea is to offer the best possible communication models and to model a safe, comfortable learning environment in which suggestions for improvement can be offered, accepted, and experienced by staff and participants alike.
The course leader asks each NYLT participant to introduce himself or herself as the course director makes his way around the group. Each participant can tell where he or she is from and give the name of his or her home unit. Participants should do their best to use the same good communication skills they have seen modeled by the staff.
This is an opportunity for participants to practice communicating with an adult. It is also a chance for the course director to shake hands with every participant and give a couple of words of personal welcome.
Notice that this exercise in making introductions allows staff to model the Teaching EDGE. The course leader Explains some methods to be used for communicating well. Staff members Demonstrate those methods as they introduce themselves. The course leader Guides participants through the process of using those methods as they introduce themselves. That, in turn, Enables participants to use good communication methods in the future.
The course leader then invites the course director to share a Course Director’s Minute with the troop.
The course leader brings the assembly to a close by directing the team guides to accompany their teams to the site of the Communicating Well (Part One) presentations.

N a t i o N a l Y o u t h l e a d e r s h i p t r a i N i N g
day one-14
Cont
ent S
essi
ons
day one: Communicating Well (part one)time allowed 45 minutes
Format Course presentation with team breakout activities
responsible Course leader and team guides
location Course meeting area with team breakout areas
learning objectives
As a result of these activities, participants will be able to
■ Build on the communication ideas introduced during the course assembly.
■ Understand that the skills of communicating well are not just for presenta-tions, but can be used whenever one is sharing ideas.
■ See, discuss, and practice some of the basic skills of communicating effectively using built-in tools—eyes, ears, mouth, feet, and hands.
Materials Needed
■ Communication Skills Checklist (one copy in each Participant Notebook; see appendix)
■ National Youth Leadership Training DVD, DVD player or computer with DVD capability, projector, and screen
Presentation Procedure
The course leader begins by welcoming everyone to this session and inviting participants to make themselves comfortable and position themselves so they can clearly see the projection screen.
The presenter opens the presentation with a discussion.
The presenter should be familiar with the information presented in Communicating Well (Part Two). The communication skills presented in that session will be added to those presented here.
Ask participants: Why are you here?
Answers might include some of the following.
■ We’re here to learn about leadership.
■ We’re here to have fun.
■ We’re here to enjoy being with other Scouts.
■ We’re here for a week of great adventures.
Participants are at NYLT for all those reasons and many more. The central focus of the week is exploring what leadership means and how it works, discovering the tools of leadership, and discussing how to lead teams and lead ourselves.

N a t i o N a l Y o u t h l e a d e r s h i p t r a i N i N g
day one-15
Content Sessions
Most importantly, the focus of this week is strengthening the leadership abilities of every participant.
There are many ways to discover the meaning of leadership. One good way to begin is to ask successful leaders to give their thoughts on what leadership means to them.
Show video clip “Day One—An Introduction to Leadership” (from the National Youth Leadership Training DVD), which begins with Ken Rollins discussing leadership.
After the video clip, the presenter leads a debriefing.
It is interesting to hear a number of successful leaders talk about leadership. They each have clear ideas on the meaning of leadership, and each explanation has something special about it.
Something that those leaders have in common is good communication skills. In fact, they probably all would agree that one of the most important tools of lead-ership is the ability to communicate well.
Ask: What is communicating?
Accept a variety of answers. Give positive responses to those who participate. Tell participants that most of their responses are on target—it’s all about sharing ideas. That is another way of saying communicating.
Show the “Communicating Well” video on the NYLT DVD. Watch it just for fun before the presentation is made.
You will have an opportunity to view the video again on Day Six, with discussion breaks.
Communicating well is high on the list of skills a leader must have. A leader must communicate vision, goals, values, expectations, and much more. Each participant has already done some important communicating during this course.
Ask for some examples of communicating participants have done so far today. Possible answers include:
■ Interactions. They have spoken with others in their new team. Getting acquainted requires communicating.
■ Speaking. In the course assembly, each participant introduced himself or herself and told where he or she is from. That was verbal communication.
■ Body language. Shaking hands with the course director was another way of communicating a message.
Show slide 1-1, Communicating Well.

N a t i o N a l Y o u t h l e a d e r s h i p t r a i N i N g
day one-16
Cont
ent S
essi
ons
NYLT focuses on building strong communication skills all week, starting with the basics—how we look, how we sound, how we move.
Remember that this session is about how to communicate, not simply how to present.
Neutral PositionExplain that the discussion up to this point has been presented in a leader’s neutral position—standing comfortably with arms at the sides, with awareness of using the feet, hands, mouth, ears, and eyes as communication tools.
While explaining the points of neutral position, demonstrate each one while walking among the group. The same approach can be used with other elements of the Communicating Well session—each principle can be clearly demonstrated as its explanation is offered.
Feet. Notice where you stand in relation to your audience. What if the sun is out? (The presenter moves so that the sun is behind the audience, not shining in their eyes or in his. On a hot day, the presenter could seek out shade for the audience.)
Can you move as you speak? Sure. That causes people to pay attention to where you are. Do not pace, though. Make each movement have a purpose.
If listeners do not seem not fully engaged—their attention has drifted or they have become interested in something else—try moving toward them. That can cause listeners to reconnect. Disruptive people usually will quiet down if the presenter walks toward them while keeping eye contact with the rest of the group.
Hands. Hands are powerful tools for communicating. Presenters should use their hands and arms to emphasize ideas and control the flow of a discussion. Move the entire arm, not just from the elbow. Make large gestures rather than small, tight ones. Keep hands out where they can be used. There is no hand communi-cation when the hands are jammed into pockets.
An openhanded gesture toward audience members invites them in. (Use the ges-ture while asking a participant, “What do you think?”) That is much more effec-tive than pointing at someone or not gesturing at all. An open hand, palm up, encourages people to contribute ideas.
If someone in an audience is interrupting or talking too much, gesture with palm down or hold up a finger as if to say, “Wait a minute; I’ll get to you next.” This is a way to direct the verbal traffic.
Show slide 1-4, Neutral Position.
Show slide 1-5, Feet.
Show slide 1-6, Hands.
Show slide 1-3, Introduction.
N a t i o N a l Y o u t h l e a d e r s h i p t r a i N i N g
day one-17
Content Sessions
Be careful with constant arm and hand movement during presentations; its effect is as distracting as constant background noise. Use the hands with purpose to emphasize a point or to direct verbal traffic, and when not gesturing, keep hands and arms straight down at the sides. Photographers tell people not to cross their arms in front of their bodies because the V shape that it creates can divert viewers’ attention.
Also avoid crossing the arms in front of the chest, which sets up a barrier between speaker and audience, and conveys a closed-off attitude.
Mouth. What you say is important, but so is how you say it.
Project your voice. Speak clearly and loudly enough for the person in the back of the room to hear clearly.
Remember to vary the pitch of your voice. (The presenter can exaggerate this a bit in his own speech pattern.) It adds color to your voice. (The presenter switches to a monotone voice) Otherwise, everything sounds the same and flat and will put your listeners to sleep . . . zzzz!
Eyes. A leader’s eyes can lock in the listeners. We communicate emotion and share energy with our eyes. Our eyes connect us.
As long as the presenter is speaking, he makes eye contact with different people . . . (presenter slightly exaggerates eye contact) you, and then you, and then you. . . . When making a point, look directly at one person for an entire phrase or thought—about three seconds—before moving on to make eye contact with someone else. As you communicate, eventually make contact with every person.
Ears. How would a leader use his ears as a tool for communicating? Can anyone tell me? I’m listening. . . .
Sharing ideas is a two-way process. Feedback—hearing what someone else has to say—is a valuable part of communication. Speakers use their ears and eyes to keep track of how others are responding to what they say. Are the listeners paying attention? Do they seem bored? Are they tired or hungry or ready to move on to a new topic? Do they need a bio break—that is, a chance to use the restroom and get a drink of water? Paying attention to listeners’ responses can help the speaker adjust the communication to fit the listeners’ needs.
Posture. Feet, hands, mouth, eyes, and ears are all important for communicating. So is overall posture, or a speaker’s neutral position—standing straight and tall, making eye contact, appearing confident.
How many eyes do you have? (Two.) Ears? (Two.) Feet? (Two.) Hands? (Two.) Mouths? (One.) Use them in that proportion—listening more than talking, being aware of all the body language you can use.
Tell participants: My ears and eyes tell me that I have talked enough for the moment and it is time for you to become active partners in this communication. I am turning over the presentation to your team guides so that you can break out into teams and practice these communication skills yourselves.
Show slide 1-7, Mouth.
Show slide 1-8, Eyes.
Show slide 1-9, Ears.
Show slide 1-10, Posture.

N a t i o N a l Y o u t h l e a d e r s h i p t r a i N i N g
day one-18
Cont
ent S
essi
ons
Communication Skills PracticeThe team guides help break the course into teams for this exercise.
The team guide explains that participants will take turns practicing effective communication skills by making a short presentation to the team. The content of the presentation is not important for this exercise—in fact, it will be simply reciting the alphabet. What matters is using as many communication skills as possible.
Team guides begin the exercise by standing in front of the group and, demonstrating effective communication skills, reciting the alphabet. Next, they ask several team members to stand in front of the group and repeat the exercise, concentrating on using effective communication skills.
Asking participants to recite the alphabet provides content everyone knows without thinking, which allows presenters and observers to con-centrate on their communication skills.
As each participant finishes their presentation of the alphabet, the team guide can lead a short debriefing of that person’s use of communication skills. First, ask the participant to explain how he or she used the neutral position, feet, hands, mouth, eyes, and ears. Encourage the participant to say at least one positive thing about his or her method. Next, ask team members to provide good feedback on the person’s use of communication skills.
Notice that this session uses the Teaching EDGE. The presenter has Explained the basics of communicating effectively. The team guide Demonstrates effective communicating as he or she recites the alphabet. He or she then Guides participants as they practice communication skills by presenting the alphabet themselves. They will be Enabled to use these communication skills throughout and after the course.
Leaders can repeat the exercise of presenting the alphabet, perhaps working on specific checklist items—paying close attention to the use of eye contact during one round, then focusing on the use of hands.
After several team members have made the alphabet presentation and practiced their communication skills, invite several other participants to stand in front of the group, count out loud to 10, then introduce a member of the team to the rest of the group. Their challenge is to use good communication skills throughout.
As each team member practices his or her communication skills, the team guide encourages them to evaluate themselves using the Communication Skills Checklist and invites the rest of the patrol to offer positive feedback.

N a t i o N a l Y o u t h l e a d e r s h i p t r a i N i N g
day one-19
Content Sessions
Use the two exercises—reciting the alphabet along with counting and making an introduction—to allow each team member to stand in front of the group and practice communicating well.
At the end of the team exercise, the team guides help the teams reassemble into a course. The course leader congratulates the participants for their willingness to take part in the practice of communication skills and notes that such practice is a lifelong challenge for leaders.
SummaryThe presenter closes with a summary of the session.
Communicating is such an important part of leading well that you will want to give lots of thought and lots of practice to good ways that you can get your ideas across.
Good communication skills are important whenever ideas are shared, not just when a presenter is in front of a group. Throughout the course, participants can watch staff members using good communication skills whenever they are shar-ing ideas. Staff also might have suggestions for participants about ways to improve their ability to lead by communicating well.
Point out one more important communication skill:
Plan when to stop. know when to stop talking.
Tell participants: Let me demonstrate that skill right now by thanking you for your attention and congratulating you on your willingness to try something new.
Take a five-minute team huddle. Have team members determine five things that they have in common and one thing about each of them that is unique.
Show slide 1-11, Summary.
Show slide 1-12, One More Skill.

N a t i o N a l Y o u t h l e a d e r s h i p t r a i N i N g
day one-20
Cont
ent S
essi
ons
day one: Finding Your Vision (part one)
time allowed 50 minutes
Format Course presentation with team breakouts
responsible Assigned staff
location Course site
learning objectives
As a result of these activities, participants will be able to
■ Define vision as what future success looks like.
■ Help their teams prepare and communicate a team vision to be realized during the course.
■ Begin thinking about the personal vision they will develop by the end of the course.
Materials Needed
■ National Youth Leadership Training DVD, DVD player or computer with DVD capability, projector, and screen
■ Pens, colored pencils, crayons, and five or six sheets of flip chart paper for each team
■ Developing a Team Vision work sheet (one copy in each Participant Notebook; see appendix)
■ Flip chart or white board
Presentation Procedure
Preparation
Staff members involved in this session should prepare and write down a National Youth Leadership Training staff vision of success that shows where they see themselves as a staff at the end of the course.
While all sessions of the course are important, this session is critical to each participant’s NYLT experience. Presenters should take full responsi-bility for conveying the content of this session well and take great satis-faction in giving participants a strong boost forward as the course begins to unfold.
What Is a Vision?The presenter reminds participants that today’s topic has been communication. One of the most important ideas leaders can communicate is where they want the team to go. It is hard to lead if you do not have a destination in mind.
Tell participants: Take this course, for example. We are at the beginning of a weeklong journey. Let me ask you a question. When we reach the last day of this course, what will success look like to you?
Show slide 1-12, Finding Your Vision.

N a t i o N a l Y o u t h l e a d e r s h i p t r a i N i N g
day one-21
Content Sessions
Entertain answers. Participants might see themselves as better leaders or as having more skills. They may imagine themselves with new friendships, or with fresh ideas to take back to their home units.
Each participant’s answer is a vision. The word vision comes from the word visual . . . to see. In a vision, you can see yourself doing something, being something.
Vision is what future success looks like.
To put it another way:
If you can see it, you can be it.
Tell participants:
Dream big. Dream about what is possible. Share the vision.
As American poet Carl Sandburg wrote, “Nothing happens unless first a dream.”
An important part of developing a vision is being able to describe it. The dream comes first, followed by the words. Words can paint a picture of the future and help turn a dream into a vision that can be communicated. When a dream can be shared, the picture of future success is real.
Show video clip 1-16, Finding Your Vision (Part One), which begins with John F. Kennedy’s “Ask Not . . . .” speech.
Explore the VisionThe presenter discusses with the group the visions of each person presented in the video. Participants are encouraged to describe the vision in a concise, clear way—that is, to use their words to paint a picture of what future success looked like for the people in the video.
For each of these people, ask participants: What was his or her vision? What made it big? What gave it the shape of a picture of success?
■ Steve Fossett
■ Lance Armstrong
■ Wendy Lawrence
■ A. J. Foyt IV
The presenter should guide the discussion toward what each of these individuals pictured as future success—not goals or plans to get there, but rather a vision of where the person saw himself or herself in the future.
Lance Armstrong’s story is one example of how to explore one of these visions. The American cyclist had won the world road racing championship and other major races. Then he was diagnosed with cancer and underwent surgery and chemotherapy that left him so weak he could barely pedal a bicycle around a parking lot. His personal vision was to again be the best cyclist he could. He was driven to succeed. He had a vision of what his own future success looked like—he saw himself back at the top of his sport. He visualized it.
Show slide 1-13, What Is a Vision.
Show slide 1-14, Vision.
Show slide 1-15, Vision: Dream Big.
Show slide 1-17, Vision: For each . . . .

N a t i o N a l Y o u t h l e a d e r s h i p t r a i N i N g
day one-22
Cont
ent S
essi
ons
Because he could see himself succeeding, he was able to figure out the steps he needed to take to get back in shape, to begin competing again, and then to win seven consecutive Tours de France. He succeeded because he had a vision of what his own future success looked like. Because he could see it, he could be it.
Point out to the group that each of them can have a vision, too—a picture of what future success looks like. If you can see it, you can be it.
Exploring the Power of VisionA vision is a picture of where you want to be. When you can see your destina-tion—when you can envision it—you can take the steps to reach it.
Here is an example of a personal vision:
I see myself as a first-rate kayaker.
The presenter can use his own personal vision as an example. It should conform with the definition of a vision and should be both challenging and ultimately reachable.
A vision does not say, “I want to do something,” or “I’d like to do something.” A vision says, “In the future, I clearly see myself in this picture of success.” You can see yourself doing it—running a kayak through white water, winning an award for your skill.
The Shared Vision of a TeamThe presenter tells the group that many of the examples so far have been individ-uals’ visions. Now we want to make the transition from personal visions to team visions, which work the same way. A team vision is what future success looks like for a group of people. If the team members can picture themselves succeeding, they can work together to put themselves into that picture. If they can see it, they can be it.
Ask participants for other examples, and share these:
■ A coach offering the team a vision of themselves with a better winning record than they had achieved the previous season.
■ A band director helping musicians see themselves performing a complicated program at a future concert.
■ A Scout troop or Venturing crew seeing themselves backpacking at Philmont next year, or setting out from the BSA’s Florida National High Adventure Sea Base.
■ A mountain guide painting a picture of future success for a team of climbers getting ready to start out on a wilderness expedition.
Remind the group that during the course assembly earlier in the day, the course director shared his vision for the NYLT course. Ask participants to share one or more of the points of the course director’s vision.
Show slide 1-18, Exploring the
Power of Vision.
Show slide 1-19, Shared Vision of a Team.
Show slide 1-20, Shared Vision.

N a t i o N a l Y o u t h l e a d e r s h i p t r a i N i N g
day one-23
Content Sessions
Use the participants’ responses to restate the course director’s vision:
1. Our NYLT course will be a model of how every Scouting unit can succeed.
2. In the best tradition of Scouting, this will be a youth-run course that operates according to the Scout Oath and Scout Law, the Venturing Oath, and the Outdoor Code.
3. We are all here to help each of you learn as much as you can and enjoy the fellowship of other Scouts.
Discuss how the course director’s vision fits the definition of a vision:
It is a picture of what future success looks like.
We can see it. That means we can be it.
Teams can be as small as a Scout patrol or as large as a nation. A leader who has a vision for those he or she is leading, and is passionate about that vision, can help people see what they can be and then help them make that picture of future success a reality.
Let’s look at some leaders who have had very large visions and have helped their groups find success.
Show video clip 1-21, Shared Vision, which begins with “The shared vision of a team works the same way as a vision for an individual . . . .”
Each of the people in the video had a clear vision for a group of people he was leading:
ken Rollins at Dell. What was his team vision? What made it big? What gave it the shape of a picture of success?
Dr. Martin Luther king Jr. What was his team vision? What made it big? What gave it the shape of a picture of success?
John F. kennedy. What was his team vision? What made it big? What gave it the shape of a picture of success?
Robert Baden-Powell. What was his team vision? What made it big? What gave it the shape of a picture of success?
The ChallengeThe presenter asks each team to develop a shared vision of success for the team to reach at the end of this NYLT course, and to use that vision throughout the course as team members seek to achieve all they can as a team.
Explain that members of each team are to:
1. Brainstorm about what they want to achieve as a team during the week.
2. Bring together all their ideas to form a vision of team success.
3. Communicate their vision to others.
Each team will have five or six sheets of flip chart paper and a number of different colored markers.
Show slide 1-22, The Challenge.

N a t i o N a l Y o u t h l e a d e r s h i p t r a i N i N g
day one-24
Cont
ent S
essi
ons
BRAINSTORMING
Brainstorm with your team to finish this sentence in as many positive ways as you can:
“On the last day of this NYLT course, we see ourselves_______________________.”
Some questions that can help guide the team in shaping its vision include:
■ What will be a measure of success for our team by the end of this course?
■ By the end of the course, how will our team act?
■ What is it that already makes our team unique? Can we build on that as a strength?
■ When it comes to our team, what values do we all share? Does our vision of the future address those shared values?
Teams can use the flip chart pages to write down ideas, draw pictures, scribble notes, make diagrams—anything that helps push along the creative process. Because the pages are large and have no lines, team members should not feel limited in the ways they use the pages or in the ideas that come up while brainstorming.
The team guide must be present as the team members work toward a team vision. His or her role is to provide guidance and mentoring when it is appropriate.
The team guide should make sure that all team members understand what brainstorming is. Write the following rules at the top of the first flip chart page as a reminder:
■ Everyone participates.■ All ideas are good ideas and should be written down.■ Build on each other’s ideas; piggyback on ideas.■ Quantity of ideas is important.
The team guides can coach and support their teams as members brainstorm, but they should stay in the background unless the team gets stuck. The team guide can suggest, “How would this fit into your picture of success?” and then drop into the discussion one or more of the following:
■ Daily Baden-Powell Team streamer■ Outpost Camp■ Improved leadership skills■ New friendships■ Better ability to communicate■ Team flag■ Team spirit■ Dealing with the weather■ Meal preparation
If team members are still struggling, the team guide can encourage them to begin drawing pictures of themselves and their camp as they will appear in a week. That can help break open the discussion and get ideas flowing.

N a t i o N a l Y o u t h l e a d e r s h i p t r a i N i N g
day one-25
Content Sessions
BRINGING IT TOGETHER
After about 10 minutes (the presenter can judge the time by the energy with which teams are brainstorming), ask teams to move to the next step—writing down their visions.
Remind participants that vision is not a grocery list of brainstormed items. Those items are the ingredients of a clear picture of success.
Explain the challenge to participants:
Use the results of your brainstorming session to choose and develop a vision of success for your team. The team’s vision should be shared by everyone in that team. Write down your team’s vision in words. You have eight minutes to achieve this task.
COMMUNICATE THE SHARED VISION
The presenter invites members of each team to share their written and drawn visions with the rest of the course.
Encourage participants to keep their written visions in their NYLT Participant Notebooks where they can refer to them throughout the course.
An effective way for team members to choose a vision from a number of choices is multivoting. As the options are discussed, each person is allowed to cast three votes. He or she may cast them all for a single option or spread them out among two or three options. The result of the balloting will be a good representation of the group’s preferences.
Team guides should again be with their teams in supportive, nondirective roles. If a team becomes stalled or discouraged, the team guide can offer direction by helping the members see the ideas they brainstormed as the raw material of their vision.
Team guides also can encourage teams to make their visions bigger. If a team says, “We want to have a clean campsite,” encourage them to push beyond that and visualize themselves in a larger picture of success. Having a clean campsite is a step toward what larger picture of team success? (An example of a bigger vision would be receiving the Baden-Powell Team award.)
The act of drawing and writing down a final version of the team’s vision is very important. Writing a vision requires team members to think through their ideas carefully and to compress their thoughts about the future into a concise statement of vision.
Helpful guidelines include:
■ Create an ideal picture of where you want your team to be in the future.
■ Your vision statement should be clear and concise.■ Your vision should be inspiring to your team. You want this picture
of success to become real. If you can see it, you can be it.■ It does not have to be perfect.

N a t i o N a l Y o u t h l e a d e r s h i p t r a i N i N g
day one-26
Cont
ent S
essi
ons
A staff member should write down each team’s vision as that team is presenting it. The team visions will be revisited on Day Two during the Setting Your Goals session, and on Day Six during the Finding Your Vision (Part Two) session.
Summary The presenter explains the key points to remember from this session:
■ Vision is what future success looks like.
■ If you can see it, you can be it.
The presenter concludes the session by encouraging teams to keep their team vision statements handy throughout the NYLT course and to use their vision statements as encouragement to keep moving toward the picture of future success they have established for themselves.
Explain that Day Two’s Setting Your Goals session will help participants discover the steps needed to fulfill their visions, and that the Preparing Your Plans session will provide them with the tools to develop action steps for reaching their goals.
Show slide 1-23, Summary.

N a t i o N a l Y o u t h l e a d e r s h i p t r a i N i N g
day one-27
Team Events
day one: dinner QuestionsOne or more staff members will join each team for the evening meal on Day One. This is a good opportunity for participants and staff to get to know each other a little better. In addition, staff members can learn quite a bit about the team and can encourage team members to think about a few key issues raised during the first day.
To make the most of discussion opportunities, keep the following questions in mind:
■ Has anything unexpected happened today?
■ There was a lot of talk today about vision. What does success look like for your team?
■ What is your team vision? Can you see it? Is it big enough?
The dinner questions are not meant to be a quiz or a list to be read. Instead, enjoy sharing a meal with a team and drop the questions into the conversation as a natural part of the discussion. Additional questions that relate to specifics of the course or the specifics of that team’s learning curve are encouraged.

N a t i o N a l Y o u t h l e a d e r s h i p t r a i N i N g
day one-28
Cont
ent S
essi
ons
day one: Who, Me? gametime allowed 45 minutes
Format Team activity in the course setting
responsible Team guides
location Team breakout areas
learning objectives
The Who, Me? Game is a tool for building trust and understanding. It is especially effective for enabling communication and strengthening relationships among team members. By playing the game, course participants will be able to
■ Increase the common ground they share with fellow team members.
■ Highlight some of the diversity existing among members of the team.
■ Develop a greater sense of trust with others in the group.
■ Better understand their own beliefs.
Materials Needed
Each team will require the following:
■ A Who, Me? Game board. The board is similar to those used for well-known children’s board games and is the board that is used for the Wood Badge Who-Me game, No. 34887. Flanked by Scouting images, a trail of variously colored blue, gold, and green spaces loops around the board.
■ Cards with questions broken down into three categories—blue (easy), gold (more thoughtful), and green (serious) (see appendix)
■ One die (half a set of dice)
■ Place markers (different colored buttons, beads, etc.)—one for each participant
Photocopy the game questions from the NYLT appendix, print them on the correct color of card stock, then cut apart to create the game cards.
delivery Method
The team guide facilitates the game, ensuring that all team members feel comfortable in participating fully.
Presentation Procedure
Game Rules and Board Setup
With the team guide’s assistance, team members review the rules of the Who, Me? Game, set up the board, and play out the game.

N a t i o N a l Y o u t h l e a d e r s h i p t r a i N i N g
day one-29
Content Sessions
RULES OF THE WHO, ME? GAME
1. Each player chooses a place marker and puts it on the start square.
2. Place the cards face down, close to the playing area.
3. To determine who goes first, each player rolls the die. The highest role is the first player. Play then rotates clockwise.
4. The first player rolls the die and moves his place marker that number of spaces, then draws a card from the color-coded pile that matches the space his place marker occupies. For example, if he lands on a blue square, he should draw a blue card. He reads the card silently.
5. The person who draws the card can choose whether to do what the card indicates.
■ If the player fulfills the expectations of the card, he may leave his place marker on that space.
■ If he chooses not to play the card, he must return his place marker to the square he was on before drawing that card.
Some cards include an “ask each member of the group” question. Each mem-ber can decide whether to answer or to pass. That decision will not affect the locations of the place markers on the board.
6. The next player then takes a turn.
7. The first person to reach “home” wins.

N a t i o N a l Y o u t h l e a d e r s h i p t r a i N i N g
day one-30
Cont
ent S
essi
ons
day one: developing guidelines for Course Conducttime allowed 30 minutes
Format Team activity in the team setting
responsible Team guides
location Team breakout area
learning objectives
The purpose of this activity is for the participants to develop a code of conduct for the course that is their own and for which they will take ownership.
Materials Needed
Flip chart and marking pen for each team.
Presentation Procedure
The team guide facilitates the process of the team putting together a set of rules—a code of conduct—for personal behavior during the course.
During this course, between 30 and 48 youth will be coming together for six days in an intensive group learning experience. They will be camping together, preparing meals together, eating together, playing together, role-playing together, and learn-ing together. Developing rules together is a team-building exercise in itself. The rules that come out of this process will be the participants’ own. They are more likely to take ownership of them. They are more likely to conduct themselves according to this code. They are more likely to use peer pressure to bring a partici-pant’s behavior that is at variance with the code back into conformity.
Each team should begin with a brainstorming session, coming up with as many rules as they can think of. One member of the team should be designated as the scribe to write down all the suggestions. After five minutes or so, the suggestions should be edited down to the top 10 rules. These should then be written on a clean flip chart page.
The teams should then be brought back together and a spokesman for each team asked to share the suggested rules their team came up with. The assistant course director for program can copy these down on a fresh flip chart page. Many of the teams will have come up with the same rules, so there will likely be 10 to 15 distinct rules for the code of conduct. These can then be rewritten by the course director or other designated member of the staff for presentation the following morning during the morning flag assembly.

N a t i o N a l Y o u t h l e a d e r s h i p t r a i N i N g
day one-31
Content Sessions
The code of conduct resulting from this process should be posted in a common area where it will be seen regularly by everyone.
Typical rules might include:
■ No hazing or putdowns.
■ No fighting.
■ No swearing.
■ Pay attention during presentations.
■ Participate actively during presentations.
■ No sexually suggestive behavior.
■ No romantic touching.
■ No smoking or use of alcohol or drugs.
■ Do your best.

N a t i o N a l Y o u t h l e a d e r s h i p t r a i N i N g
day one-32
Cont
ent S
essi
ons
day one: opening Night Campfire
time allowed 60 minutes
responsible Assigned staff
location Campfire ring
learning objectives
By participating in the opening night campfire, participants will
■ Experience a model for running a successful campfire. It should be well-planned, interesting, and no longer than necessary.
■ Practice additional effective communication skills.
■ Explore ways to present an appropriate, enjoyable campfire.
■ Receive the course director’s challenge that each team develop its Quest for the Meaning of Leadership.
■ See an exemplary presentation by the NYLT youth staff of their Quest for the Meaning of Teaching Leadership.
■ Have fun.
Materials Needed
Campfire Program Planner, No. 33696A. (Staff will have copies to assist them in preparing for the instructional campfire. A copy of the form is in the appendix and in each NYLT Participant Notebook.)
recommended Facility layout
A campfire setting is ideal, but the program can be conducted in any group set-ting large enough to accommodate all participants and staff comfortably. Where fire building is appropriate, a wood fire can provide atmosphere for the occasion. However, a fire is not essential to the success of the session.
delivery Method
A youth staff member assumes the dual roles of session instructor and master of ceremonies. The role may be filled by the course leader, assistant course directors for program and service, or another youth staff member skilled in leading campfires.
The instructional presentation at the beginning of the campfire provides guide-lines for effective campfire programs. The instructor then becomes a master of ceremonies, introducing staff members whose songs, skits, ceremonies, and other offerings illustrate important concepts of appropriate campfire programs.
As with any good campfire, the staff members who will be involved should make their plans well in advance of the program. The session instructor/master of ceremonies should already know what will be included in the instructional portion of the program. Staff members can then settle on the songs, skits, stories, and other offerings they will present to support key portions of the instructional message.

N a t i o N a l Y o u t h l e a d e r s h i p t r a i N i N g
day one-33
Content Sessions
Presentation Procedure
Lighting the Campfire
The master of ceremonies explains how the fire lighting is being conducted, not-ing both the method used and the intended effects.
Even a method as simple as using matches to ignite the tinder can have elements of showmanship that will make an impression on the audience and set the tone for the program.
Construct the fire lay early, while the wood and tinder are dry, and cover it with a tarp to protect it from dampness until time for the program.
To make a fire appear to start spontaneously, burn a small candle, care-fully screened from view, on a little board beneath the fire lay but off to the side of the tinder. Run a string, also hidden from view, from the board to the back edge of the campfire area. To start the fire, use the string to pull the board and lighted candle under the tinder.
The same effect can be achieved electrically with a bundle of matches under the tinder. The match heads are touching resistance wire of an extension cord attached to a hotshot battery or an automobile battery. Closing a hidden switch causes the fire to appear to ignite spontaneously.
For “fire from the sky,” stretch a wire from high in a tree down to the fire lay, taking care not to extend the wire over the seats of any members of the audience. Tape several Fourth of July sparklers to an arrow, then light them and roll the arrow on a pulley wheel or spool down the wire to the fire lay.
Always have a backup lighting method ready in case your trick lighting does not work. A runner with a torch is a good alternative.
OpeningThe master of ceremonies welcomes everyone and lets the audience know that this campfire is a little different than any they have experienced. It is an opening for the NYLT course. As an instructional campfire, it will also teach youth leaders how to ensure the success of campfires they have with their home units.
Explain that campfires are fun and that they can be much more. They can offer entertainment, fellowship, and education. Campfires are a chance to practice leadership skills. A campfire can be an ideal time to share inspirational messages.
PlanningThe master of ceremonies explains that for a campfire program to be effective, it must be well-planned and practiced ahead of time.
NYLT Participant Notebooks have copies of a Campfire Program Planner that might be just what participants need for future campfires. If not, they can develop their own campfire program planner.

N a t i o N a l Y o u t h l e a d e r s h i p t r a i N i N g
day one-34
Cont
ent S
essi
ons
A good rule of thumb for planning campfire programs is to follow the fire. Early in the evening when the flames are lively, the program can be lively, too, involving everyone in songs, cheers, and skits. As the fire dies down, the program also can become quieter and deeper, with the most important messages coming near the end.
An effective campfire is built on four S’s:
■ Showmanship
■ Songs
■ Skits
■ Stories
ShowmanshipShowmanship is the use of good communication skills to put sparkle and life into a gathering. Speaking well, using good body language, eye contact—all the skills discussed in today’s Communicating Well session come together to make an effective program.
While the opening ceremony is showmanship that sets the tone of the whole program, the end of a campfire is usually quiet and inspirational. The most important messages come as the embers of the fire are dying down, often includ-ing a Course Director’s Minute and an inspirational song.
In between the opening and the closing, there will be plenty of opportunities for showmanship to add sparkle to the program through songs, skits, and stories.
The master of ceremonies then invites NYLT staff members to conduct the evening flag ceremony.
The showmanship discussed and displayed during the campfire can be applied to presentations of any sort, both within and beyond Scouting. The NYLT syllabus provides the skeleton, but good showmanship by pre-senters helps add the spice that makes the course lively and interesting.
SongsThere are many different types of songs that are appropriate for campfires: Scout songs, quiet songs, inspirational songs, songs that require audience action. Showmanship can help involve everyone in the singing.
The master of ceremonies invites one or more NYLT staff members to come forward and model good ways to lead songs.
SkitsCampfire skits can be fun and carry a message. There are plenty of ideas for skits in Troop Program Resources, in other BSA literature, and in many books of camp-fire skills. While these sources are good, even better are the Scouts’ imaginations. Original skits can be tailor-made to fit local situations and recent events, and can be extremely entertaining.

N a t i o N a l Y o u t h l e a d e r s h i p t r a i N i N g
day one-35
Content Sessions
APPROPRIATE SkITS
Skits, stories, and songs should never embarrass or demean anyone or any group of people. A good test of appropriateness is to hold the skit up against the Scout Law. Any skit that is not friendly, courteous, and kind has no place in a campfire program.
There are several gray areas that are best simply to avoid, including the following topics and ones like them:
■ Underwear
■ Toilet paper
■ Water
■ Inside jokes
■ Use of alcohol, drugs, or tobacco
■ Cross-gender impersonation
If an inappropriate presentation makes it onto the stage, the master of ceremo-nies should step in. Here’s one way to handle the situation:
INAPPROPRIATE SkIT ROLE-PLAY
(Setting: Two NYLT staff members come on stage, each carrying a box.)
First staff member: Have you got the underwear, toilet paper, alcohol, drugs, and tobacco for our skit?
Second staff member: You bet! Have you got the water, some inside jokes, and dresses for us to wear?
Master of ceremonies: Excuse me for interrupting, but we need to ask you to stop this skit. The material you are using is not suitable for our campfire. Participants, please return to your places. (He turns and addresses the audience.) We have a responsibility to help evaluate our choices and determine whether they are in keeping with Scouting’s ideals and values. This skit had the potential of offending people and would not have contributed to building character or citizenship.
In Scouting, we offer plenty of freedom for our members to express themselves. However, if through lack of wisdom or understanding we do something that is not wise, Scouting also offers guidance to help everyone understand what is appropriate.
We all can gain from this experience tonight in a positive manner. And now, on with the program.
(The master of ceremonies can then lead a song to get everyone back into the mood of the campfire or can simply introduce the next performance.)
An important aspect of this role-play is that the master of ceremonies is a youth staff member. The prohibition against inappropriate campfire presentations is coming not from adults, but rather from a peer.

N a t i o N a l Y o u t h l e a d e r s h i p t r a i N i N g
day one-36
Cont
ent S
essi
ons
The master of ceremonies then invites one or more NYLT staff members to come forward and present examples of appropriate skits.
StoriesStorytelling is an art that almost anyone can acquire with practice. All you need is a good imagination, an appreciation of good stories, good communication skills, and a bit of showmanship.
The campfire stories generally fall into five types:
■ Ghost
■ Humorous
■ Adventure
■ Hero (inspirational)
■ Miscellaneous (general interest)
Ghost Stories. This is the most-asked-for type of campfire story, but one that must be handled with care. Never try to scare an audience too badly with a ghost story. We want young people to feel at home in the woods. A ghastly story or disturbing descriptions can mar that experience for youth.
Adventure Stories. Perhaps the best of all campfire stories are adventure tales that stir the imagination. The adventure can be true or fictional, or perhaps a tall tale somewhere in between. A youth can describe an overnight adventure; a leader can relate some event of importance from his past; a storyteller can retell the tales of explorers, heroes, scoundrels, or other real and imaginary characters.
Humorous Stories. American folklore is filled with fine and funny stories that lend themselves to being told or read around a campfire. Mark Twain’s books and the stories of O. Henry, Robert Service, Bret Harte, and dozens of other American writers provide plenty of material.
Inspirational Stories. A story that inspires young people can be a very effective addition to a campfire program. There is no reason that an inspirational story cannot also have humorous elements or be an adventure tale. Look to the maga-zines published by the Boy Scouts of America for stories, past and present, about inspiring individuals who have had a Scouting background.
The High-Point Story. A campfire program should build toward a climax, an event that will top off the evening and make it a thing to remember. The high point of the program need not be elaborate, but it must be good. Among the possibilities are
■ An old-timer telling of adventure in far-off places
■ A Scout telling of a jamboree experience, or tales of the Philmont trails
■ A storyteller spinning a ghostly yarn

N a t i o N a l Y o u t h l e a d e r s h i p t r a i N i N g
day one-37
Content Sessions
■ The Scout leader speaking for a quiet minute
■ Someone telling the Baden-Powell story or the story of another important figure in Scouting or in local history
The master of ceremonies invites one or more NYLT staff to come forward and model good ways to tell a story.
The Quest for the Meaning of LeadershipThe master of ceremonies explains that a campfire can be an opportunity to share important information. He then invites the course director to come forward.
The course director challenges the teams to develop their presentations of the Quest for the Meaning of Leadership.
For example, he might say:
“This has been a busy day for everyone, and we have accomplished a great deal. We have had a very good beginning to this National Youth Leadership Training course, and I look forward to a terrific experience for everyone in the days to come.
“There are many pieces to an NYLT course—lots of presentations, activities, and adventures. While each one is important, I want us all to keep in mind the bigger picture. What we are setting out on this week is a quest—a Quest for the Meaning of Leadership.
“Leadership means different things to different people. In the days to come, each team will be exploring leadership in many ways. The staff will be exploring leadership, too.
“To help us make the most of this experience, I want to challenge you this week to a search, a quest . . . a Quest for the Meaning of Leadership.
“Each day your understanding of leadership is going to change. You will add new information with every presentation. As you practice leadership yourselves, you will learn a great deal about what works and what is not effective. As you watch the staff modeling different leadership styles, you will see the best that NYLT leadership has to offer.
“To help us all make the most of this quest, I’m challenging each team to develop a presentation that shares their understanding of the meaning of leader-ship. The presentation can be a skit, a song, a piece of writing, even something you construct. Each team will deliver its presentation on the last day of this NYLT course.
“Daily planning and working on the presentation throughout the course will encourage team members to agree on how their team will proceed, and to add each day’s learning to their presentation. The quartermaster will make available a variety of materials for teams to use in their presentations, if you need them.
“Each team member is expected to contribute to his team’s success during the development of the presentation. The final product should clearly reflect the combined efforts of many individual talents.

N a t i o N a l Y o u t h l e a d e r s h i p t r a i N i N g
day one-38
Cont
ent S
essi
ons
“The Quest for the Meaning of Leadership is the great adventure of the coming days. It’s going to be fun, challenging, and full of new ideas. We are all in this together, and I’m looking forward to seeing what you all discover along the way.
“To set the tone for the quest, the staff has prepared a presentation of their own. Their quest has been a little different than yours will be. Theirs is the Quest for the Meaning of Teaching Leadership—their vision of successfully presenting the leadership concepts of the NYLT course.”
The course director then invites NYLT staff to come forward and offer their presentation of the Quest for the Meaning of Teaching Leadership.
The staff’s presentation of their quest must be a good example of what will be expected of the teams when they make their presentations later in the course. The staff presentation should be well-planned and interesting, and should offer real content.
Campfire ClosingThe master of ceremonies tells participants that they have reached that time of the program when the fire is burning low and the hour is late. The presentation has been built on the four S’s of good program planning: showmanship, songs, skits, and stories. Participants will have had a great time, and perhaps received some seeds for thought and for long-term memories.
The master of ceremonies then calls on the course director: “We’re going to use one more story to bring our campfire to a close. For the story, let’s use a Course Director’s Minute.”
The course director presents the Course Director’s Minute:
“There is something magical about watching a flame. It can be a campfire, a candle, a lantern—the dancing light of fire draws us in and causes us to go a little deeper with our thoughts.
“What is a flame? What makes it possible? Three ingredients—heat, air, fuel.
“If I leave out any of those three, what happens? Without heat, the flame goes out. Without air, the fire is snuffed. Without fuel, the fire is starved.
“There is a fire that burns inside of each one of you, too. It is the fire of leader-ship. It is a flame that each of you can feel warming you. What do you need to kindle that flame of leadership, to build it from kindling and tinder into a strong, steady fire?
“As our campfire concludes, I want you to return silently to your campsites. Think about why you are attending this NYLT course. Dedicate yourself to making the most of the days that lie ahead. Stoke the fire of leadership burning in your soul. Let it grow and spread and light up your world.”
The master of ceremonies reminds everyone that the course director has requested that they return in silence to their campsites and give thought to the great adven-tures of the NYLT course that lie ahead.
Wish them a good night and ask the team guides to lead the teams to their camps.

N a t i o N a l Y o u t h l e a d e r s h i p t r a i N i N g
day two-1
Course events and activitiesTeam events and activities
Content sessions and their connecting activities
Time Activity Notes Responsible Location6:30 a.m. Arise, team breakfast,
and cleanup.Duty roster Team site
8:00 a.m. Course assembly Flag ceremony Course leader and staff Course assembly area
8:45 a.m. Setting Your Goals Assigned staff Course site
9:45 a.m. Team meeting Team leader Team breakouts at course site
10:15 a.m. Preparing Your Plans Planning for lunch and pioneering projects
Team guides Team breakouts at course site
11:30 a.m. Model leadership council meeting
Course leader Course site
12:15 p.m. Team Lunch Planning Challenge
Built on the menu from the morning’s planning session
Team leader Team site
1:30 p.m. Model course meeting Leave No Trace instruc-tional skill relates to the Outpost Camp and pioneering projects.
Course leader, course director and other assigned staff
Course site
3:00 p.m. Building Pioneering Projects
Progression of the morning’s planning session
Large outdoor site
5:00 p.m. Meal preparation Duty roster Team site
5:30 p.m. Dinner and cleanup Team leader Team site
7:15 p.m. Flag ceremony Program team Course assembly area
7:30 p.m. Scouts’ Worship Service Conducted with explanation. Ties into Leading Yourself.
Staff Chapel
8:00 p.m. Movie Night (with cracker barrel)
Fellowship and relaxation (“Apollo 13”)
Staff Course site
10:00 p.m. Lights out
schedule for day two (Monday)
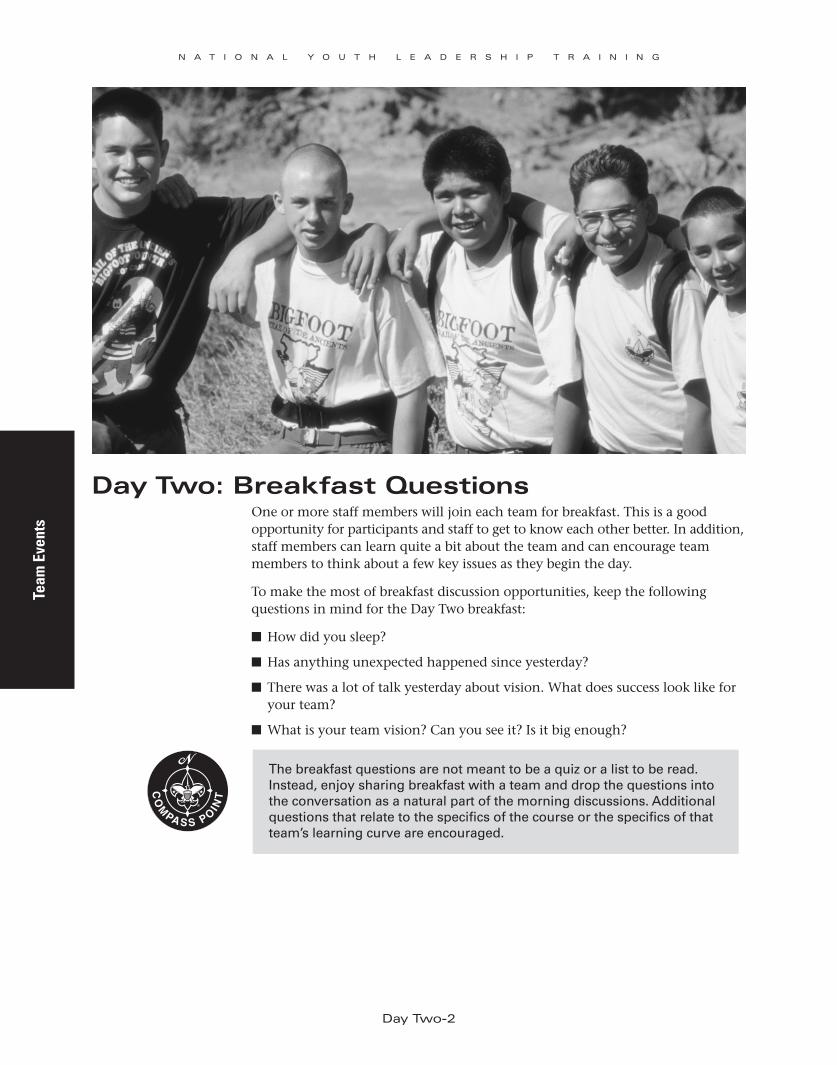
N a t i o N a l Y o u t h l e a d e r s h i p t r a i N i N g
day two-2
Team
Eve
nts
day two: Breakfast QuestionsOne or more staff members will join each team for breakfast. This is a good opportunity for participants and staff to get to know each other better. In addition, staff members can learn quite a bit about the team and can encourage team members to think about a few key issues as they begin the day.
To make the most of breakfast discussion opportunities, keep the following questions in mind for the Day Two breakfast:
■ How did you sleep?
■ Has anything unexpected happened since yesterday?
■ There was a lot of talk yesterday about vision. What does success look like for your team?
■ What is your team vision? Can you see it? Is it big enough?
The breakfast questions are not meant to be a quiz or a list to be read. Instead, enjoy sharing breakfast with a team and drop the questions into the conversation as a natural part of the morning discussions. Additional questions that relate to the specifics of the course or the specifics of that team’s learning curve are encouraged.

N a t i o N a l Y o u t h l e a d e r s h i p t r a i N i N g
day two-3
Course Events
day two: Course assembly
time allowed 30 minutes
responsible Course leader and staff
location Course assembly area
learning objectives
As a result of these activities, participants will be able to
■ Gather for Day Two of the National Youth Leadership Training course.
■ Feel welcomed and valued (staff too).
■ Reaffirm that the NYLT course operates according to the Scouting ideals.
■ Participate in a flag ceremony presented by the program team.
■ Participate in the installation ceremony for new team leaders and assistant team leaders.
■ View youth staff as supporters, guides, and mentors to course participants.
■ Discuss key parts of a good course assembly.
■ Recognize good communication skills.
Materials Needed
■ American flag
■ Course flag
■ Historic American flag
recommended Facility layout
Before an NYLT course begins, staff members should designate the place that will serve as the course assembly area. In most cases, this will involve an outdoor set-ting, though indoor areas of sufficient size (a dining hall, for example) can be adapted to accommodate the course assembly. (Indoors, flags can be presented on staffs with floor stands or can be displayed on a wall.)
Presentation Procedure
OpeningThe team guides lead the teams to the assembly area and arrange them in an appropriate formation.
The course leader uses the Scout sign to bring the assembly to order, then welcomes participants to Day Two of NYLT and expresses pleasure in having everyone there. He or she explains that Day Two symbolizes the first week of the month for a normal Scouting unit. There will be a variety of presentations and activities during the day, and a course meeting.
Note: It is appropriate for Scouts to make the Scout sign from their program. During assemblies throughout the week, the staff can alternate between the Scout Oath, the Venturing Oath, and the Scout Law as part of the ceremony. Venturers can use the full hand salute for flag ceremonies.

N a t i o N a l Y o u t h l e a d e r s h i p t r a i N i N g
day two-4
Cour
se E
vent
s
Flag CeremonyOn Day One, the staff will have conducted its own flag ceremony prior to the arrival and registration of course participants. The flag ceremony at the Day Two course assembly will be the first one observed by the NYLT participants.
This is an opportunity for staff members to conduct a model flag cere-mony. The assistant course director for program or another staff member can narrate the flag ceremony—explaining to the course why certain portions of the ceremony are conducted as they are and why planning and practice are important to conducting an effective flag ceremony.
The ceremony begins as the course leader asks the staff color guard to present the colors and raise the American flag. Instruct NYLT course members to use the Scout salute while the flag is being raised.
Invite selected staff members to display the historic flag for the day and explain its significance.
The historic flags to be used for the NYLT course are the same as those presented during Wood Badge courses. Scripts for historic flag presenta-tions, also the same as included in Wood Badge courses, can be found in the appendix.
Instruct the staff color guard to raise the historic flag and the NYLT course flag.
Ask the group to recite the Scout Oath and Scout Law. (Note: Alternate the Scout Oath with the Venturing Oath on different days. Also, alternate use of the Scout sign and the Venturing sign as appropriate.)
Dismiss the color guard.
AnnouncementsThe course leader offers any announcements important for conducting the day’s sessions and events.
New Team Leader and Assistant Team Leader InstallationThe course leader asks the Day One team leaders to introduce the Day Two team leaders to the course, then the Day One assistant team leaders to introduce the Day Two assistant team leaders. Encourage those making the introductions to use effective communication skills.
As introductions are being made, the course leader can provide positive reinforcement by commenting on one or two communication skills being used well—hand gestures, clear voice, eye contact with the group, etc.
With the Teaching EDGE in mind, the Day One session on Communicat-ing Well provided opportunities for staff to explain good communication skills. In their own presentations, staff members have been demonstrat-ing these skills. Pointing out the participants’ use of good skills is a way of guiding them and enabling them to use the skills in many situations.

N a t i o N a l Y o u t h l e a d e r s h i p t r a i N i N g
day two-5
Course Events
Team leader and assistant team leader assignments for each day of the NYLT course are located in the Team Duty Roster included in each copy of the NYLT Participant Notebook.
The course leader begins the installation. He should
■ Invite the new team leaders and assistant team leaders to come forward to be installed.
■ Ask the new team leaders to gather around the course flagpole, placing their left hands on the pole. New assistant team leaders stand behind their team leaders, each placing a left hand on the team leader’s right shoulder.
■ Instruct them all to give the Scout or Venturing sign and repeat, “I promise to do my best to be worthy of this office for the sake of my fellow Scouts in my team and for others in this course, and in the world brotherhood of Scouting.”
■ Welcome them as the course’s new team leaders and assistant team leaders.
Program and Service Team Emblem ExchangeThe assistant course directors for program and service briefly explain the duties of the program team and the service team.
The duties of the teams may differ from other days of the course. Adjust the explanations to reflect the needs of this day of the NYLT program.
Program Team (sample assignments)
• Conducttheflagceremonyatcourseassembly.
• Preparethecoursemeetingarea.
• Performotherdutiesasassignedattheleadershipcouncilmeeting.
Service Team (sample assignments)
• Policethecoursemeetingarea.(NYLTisaLeaveNoTraceprogram.)
• Maintaintheparticipantlatrinesandshowers.
• Performotherdutiesasassignedattheleadershipcouncilmeeting.
Ask the leaders of the day’s program team and service team to come forward to receive a symbol of their team responsibilities for the day. The emblem for the service team might be a broom or camp shovel, while that for the program team could be a flag.
The exchange of symbols for the program team and service team should not overshadow the installation of the day’s team leaders and assistant team leaders. Bestowing the emblems for the program and service teams can be done in good fun, but with the understanding that these team duties are secondary to the roles of team leadership.

N a t i o N a l Y o u t h l e a d e r s h i p t r a i N i N g
day two-6
Cour
se E
vent
s
In some settings, a service team is not needed. This syllabus assumes that a service team is needed. If you do not have a service team, skip that section whenever a service team is mentioned. Learning will not be impacted.
STAFF SERVICE TEAM
Explain to participants that staff members have the responsibility of cleaning staff latrines and showers, staff campsites, and other staff-use areas. As fellow members of the course, staff members roll up their sleeves and take care of their own areas rather than expecting someone else to do it for them.
Baden-Powell Team Streamer PresentationsThe course leader presents the Baden-Powell Team streamer awards based on the previous day’s campsite evaluation. Point out that the BSA encourages teams to compete against a standard that all can achieve (in this case the standard of the Daily Campsite Inspection Checklist) rather than against one another. When it comes to the Baden-Powell Team streamer awards, every team can be a winner.
For guidelines on the daily campsite inspection and for presentations of the Baden-Powell Team streamers, see Day One—Registration, Orientation, and Camp Setup.
Using the Daily Campsite Inspection Checklist as a guide, the assistant course director for service in charge of the service team makes the evalu-ation of the team campsites. (This may occur while team members are at evening sessions of the NYLT course.) Team guides can encourage the teams to use the same form to check their campsites as they com-plete their cleanup after the evening meal. If a team is having difficulty following through with all the items on the checklist, its team guide can use the Teaching EDGE to help the team learn how to manage campsite cleanup in an efficient and orderly manner.
Each team can tie its Baden-Powell Team streamer for the day onto the pole used to display its team flag. Every team will have the opportunity to add another B-P streamer each day of the NYLT course.
Course Leader’s Presentation of the Code of ConductThe course leader presents the summary of the code of conduct developed by the teams the night before.
“Last night you worked together to develop rules for us to abide by during this training course. We brought the teams together and consolidated the rules into a code of conduct for this course.”
Have another staff member hold up the code of conduct.
“These are the rules you developed for this course. This is your code; these are your rules. They are good rules. Respect them. Endeavor to follow them during the course and afterward, too. If you see others violating them, remind them.
N a t i o N a l Y o u t h l e a d e r s h i p t r a i N i N g
day two-7
Course Events
You are part of a team. Members of teams work together to accomplish goals. Let’s work together to make this a great course.”
Course Director’s MinuteThe course director presents the Course Director’s Minute for Day Two:
“Last night you all played the Who, Me? Game. I’m sure you learned something new about each of the members of your team. Perhaps you learned something new about yourself, too.
“Getting to know other people and getting to know ourselves is an interesting process. When you ask yourself, ‘Who am I?’ there are lots of possible answers.
“If you were to ask me that question, I could say that at work I’m a ________. In my job, I do these things_______.
“When I put on my uniform, who am I? Yes, a course director. A Scout.
“Here’s a question for you to think about. Who are you? Not what do you do, but what’s in your heart?
“You are here at NYLT because of a commitment—a commitment to be a good leader. Nurture that. Let it grow. When you ask yourself, ‘Who am I?’ be sure your answer includes Scouting ideals. Ask yourself, ‘Am I setting the right example in everything I do?’
ConclusionThe course leader thanks the course director and brings the course assembly to a close by directing the team leaders to accompany their teams to the site of the Setting Your Goals presentation.

N a t i o N a l Y o u t h l e a d e r s h i p t r a i N i N g
day two-8
Cont
ent S
essi
ons
day two: setting Your goals
time allowed 60 minutes
Format Course presentation with team breakout sessions
responsible Assigned staff
location Course site
learning objectives
As a result of these activities, participants will be able to
■ Explain what a goal is.
■ Describe and use the SMART Goals tool.
■ Write personal and team goals that pass the SMART Goals test.
■ Help determine the goals that will allow their team members to fulfill the vision of success they have developed for their team.
Materials Needed
■ National Youth Leadership Training DVD, DVD player or computer with DVD capability, projector, and screen
■ Copies of the SMART Goals testing tool (appendix, Participant Notebooks)
■ Flip chart prepared with enlarged SMART Goals work sheet
Note: Each team should bring the work sheets they used during the Finding Your Vision (Part One) session on Day One of the course.
Presentation Procedure
PreparationStaff presenters are invited to have several of their own personal and team goals in mind that they can volunteer during the presentation to energize discussions and to signal to participants that staff members place enough importance on this subject to use these goal-setting skills themselves.
The course director should be present at all sessions presented in a course setting. During sessions occurring in team sites, the course director can circulate among the teams. His or her role is to be on the sidelines ready to coach and mentor the troop’s youth leaders as they conduct the course.
By being present at sessions, the course director will gain an essential understanding of the progress of the course as it unfolds throughout the week.

N a t i o N a l Y o u t h l e a d e r s h i p t r a i N i N g
day two-9
Content Sessions
Opening DiscussionThe presenter reviews the definition of a vision.
■ Vision is what success looks like.
■ It’s a picture of where you want to be in the future.
■ “If you can see it, you can be it.”
■ To be of use, vision needs to be big. It has to be elephant-sized.
Here’s an old Boys’ Life Think and Grin joke:
Question: “How do you eat an elephant?” Answer: “One bite at a time!”
How do you fulfill a vision? One goal at a time.
If vision is the elephant, goals are the bites that allow you to eat the elephant.
The presenter clarifies the key ideas. Goals are the steps you complete to fulfill a vision. They are the bite-sized pieces of the vision you can accomplish one at a time. Fulfilling a vision might require just a few goals or it might take many.
The presenter gives the following example of goals leading to a vision. A moun-taineering team could have a vision to make it to the top of Mount Everest this year. To reach this vision, the team breaks up the trek to the top into four inter-mediate base camps—each camp farther up the slope than the previous one. These become goals to be achieved that will increase their chance of fulfilling their vision—reaching the top.
There are many ways to think of goals—as the rungs on a ladder, as small foot-steps of a long journey, as the way to eat an elephant one bite at a time. Goals are objectives you can accomplish right away.
Setting goals—and then reaching them—is the pathway to fulfilling a vision. That’s the way to eat an elephant—one bite at a time.
INTRODUCE THE VIDEO CLIP
Let’s take a look at some leaders who set goals to help them realize their visions of success.
Show video clip 2-6, Setting Your Goals (Part One), which begins with “The key to reaching your personal vision . . . .”
The presenter summarizes the video, explaining that vision is what success looks like. It’s the vision of mountain climbers seeing themselves reaching the top of Everest. Vision is the elephant. How do you eat an elephant? One bite at a time. How to you realize a vision? One goal at a time.
Show slide 2-1, Setting Your Goals; then
slide 2-2, Vision—Review.
Show slide 2-3, Eating an Elephant.
Show slide 2-4, Goals.
Show slide 2-5, Goals: Goals are like . . . .

N a t i o N a l Y o u t h l e a d e r s h i p t r a i N i N g
day two-10
Cont
ent S
essi
ons
Ask participants: What was the vision and what were some of the goals of the people in the video? Look for the following responses:
Mark Shin
Vision—Sees himself designing running shoes
Some of his goals—
■ Major in mathematics.
■ Work in an athletic equipment store.
■ Coach school track teams.
Lance Armstrong
Vision—Saw himself as a world-class cyclist
One of his goals—
■ Qualify for the U.S. Olympic cycling team.
Diane Atkins
Vision—Saw herself as an accountant
One of her goals—
■ Join the military as a way of getting her education provided while she earned a living.
Jim Lovell
Vision—Saw himself as an astronaut
One of his goals—
■ After his training, become one of the first astronaut pilots.
NASA
Vision—To put a man on the moon, fulfilling the vision for America provided by John F. Kennedy
Some of NASA’s goals—
■ Develop space travel with one astronaut per flight, test the rockets, and grow the technology (Mercury program).
■ Continue developing space travel with two astronauts per flight, develop more technology, and conduct a walk in space (Gemini program).
■ Continue developing space travel with three astronauts per flight, land on the moon, and explore the lunar surface with the lunar rover (Apollo program).

N a t i o N a l Y o u t h l e a d e r s h i p t r a i N i N g
day two-11
Content Sessions
The presenter explains that vision is the big picture of future success—astronauts standing on the moon, a cyclist winning a world-class race, a student becoming a successful accountant, an athlete designing running shoes.
Goals are the steps that move us toward our vision.
Vision is the elephant. Goals are the bites of the elephant.
How do you realize a vision? One goal at a time.
The best goals are SMART Goals.
Introduce SMART GoalsShow video clip 2-8, Setting Your Goals (Part Two), which begins with “How do you reach your goals? You do it by setting SMART Goals.”
President John F. Kennedy had a dream—a vision—of putting a man on the moon by the end of the 1960s.
Can you tell me how many Apollo missions there were before an astronaut stepped on the moon? (There were 11.)
Who was the first Eagle Scout and the first man to step on the moon? (Neil Armstrong)
Did they just build a rocket, have an astronaut climb in, and then launch it to the moon?
No, they were smart about how they set their goals. Goals that are SMART will lead you in the direction you want to go.
Each of the letters in SMART stands for an important test of a goal: Specific, Measurable, Attainable, Relevant, and Timely.
SPECIFIC
Specific means clear and understandable. A goal needs to be specific. Everyone needs to know exactly what’s involved.
Take the team that has a vision of climbing Mount Everest. They have set goals to establish four camps, each one higher up the mountain. Is this specific enough? Discuss participants’ responses of why or why not.
How can they make it more specific? Elicit responses and discuss the results. Be sure to cover the following possible responses:
■ Map out location of each camp.
■ Calculate number of trips vs. sherpas they need to supply each successive camp up the slope.
■ How much food, fuel, etc., do they need at each camp? Note that everything goes through the first camp.
Show slide 2-7, Setting Your Goals.
Show slide 2-9, SMART Goals.
N a t i o N a l Y o u t h l e a d e r s h i p t r a i N i N g
day two-12
Cont
ent S
essi
ons
■ Who will make the final trek to the summit? Who will stay at each base camp?
■ How will they communicate between camps?
■ How many tents do they need?
Is their goal now clear? Yes.
MEASURABLE
How do you know if you’re done? You need a way to measure your goal so that you know when you have completed it.
How would the climbers know if they are done? When will they know if the camp is established? Elicit responses and discuss, including the following possible answers:
■ All the tents are up.
■ Everyone who is supposed to be at the camp is there.
■ All the supplies made it up from the camp below.
■ Communication is established.
ATTAINABLE
Attainable means it can be done. “I see myself as a famous rock star” might be a goal of yours, but it is unlikely to be fully realized—or is it? Is it a vision or a goal? It’s a vision! It’s big, it’s a dream!
A goal can be challenging, but you should be able to see how you can reach it. It needs to be relevant—a step along the way to your vision. “I want to play the guitar really well.” That’s a much more attainable goal, one that fits the SMART Goals test and is necessary to be a famous rock star.
Let’s go back to the team set on reaching the top of Mount Everest. Is their goal of establishing the four base camps attainable? How do you know? (Elicit a short discussion before going on.)
Each person brings his or her own set of skills, strengths, and ideas to accom-plishing each goal along the path to reaching a vision.
The members of the Mount Everest team are all eager to have their expedition be a success, and they all have agreed that one of the goals on the way to fulfilling their vision is to establish the four camps. Some team members are better at breaking the trail up the slope, others at hauling heavy loads, others at pitching tents so they will stand up to severe weather. Everyone draws on their own strengths to help reach the team’s goals.

N a t i o N a l Y o u t h l e a d e r s h i p t r a i N i N g
day two-13
Content Sessions
RELEVANT
Relevant begs the question, Why are you doing it? Discuss how the goal of establishing the four base camps is relevant to the overall vision of reaching the top of Mount Everest.
All goals need to be related to achieving the vision, no matter how large or how small, whether they are short-term goals or long-term goals. If the goal is not connected to reaching the vision, why are you doing it?
TIMELY
Completing goals needs to happen within a certain amount of time. Otherwise, you can get stuck pursuing one goal and not move forward toward your vision. As you lay out goals, predict how long each will take. If one is going to require a great deal of time, it might be wise to break it into several smaller goals. Instead of trying to eat the elephant with huge mouthfuls, you are cutting it up into manageable bites.
On Mount Everest, a window of good weather lasts about a month each spring. Climbers must carefully plan the time it will take to establish each of their four camps and still have enough time to reach the summit, even if there are delays because of storms or other unexpected problems.
SUMMARY
The vision of getting to the summit of Mount Everest is a dream the climbers have. To reach it, they must work together and be smart about the goals they set. They must be (have them say it out loud with you): Specific (clear, understandable), Measurable (you know when you are done), Attainable (you can do it), Relevant (why you are doing it), Timely (done when it is needed).
The course leader asks participants to turn in their NYLT Participant Notebooks to the SMART Goals work sheet (also in appendix).

N a t i o N a l Y o u t h l e a d e r s h i p t r a i N i N g
day two-14
Cont
ent S
essi
ons
sMart goals Work sheetGoals are steps toward fulfilling a vision. They are they bites that enable you to eat the elephant.
To be effective, a goal should pass the SMART Goals test. Use the space below to write ways in which a goal you are testing fulfills each requirement of a SMART Goal. (If you need more space, use the back of this page or additional sheets of paper.)
specific
The goal is specific in these ways:
Measurable
The goal is measurable in these ways:
attainable
The goal is attainable in these ways:
relevant
The goal is relevant to the vision in these ways:
timely
The goal is timely in these ways:

N a t i o N a l Y o u t h l e a d e r s h i p t r a i N i N g
day two-15
Content Sessions
SMART Goals/Not SMART Goals The presenter tells participants of a vision to be a physician helping people in urban neighborhoods. There are lots of goals that are the stepping stones toward realizing this vision.
Discuss whether each of these goals is a SMART Goal that really will result in progress toward the vision. Use the SMART Goals work sheet to help explain each decision.
■ To pay for medical school, I’m going to win the state lottery.
■ Next semester I’m enrolling in the college prep chemistry and biology classes at my high school.
■ One evening a week I’m volunteering as an aide at a health clinic near my house.
■ I’m going to read some books about some medical stuff.
■ I have an appointment next week with my school guidance counselor to talk about courses I should take to get ready for college.
■ I’m going to watch lots of medical shows on television.
■ My parents are helping me plan to visit a medical school during my winter break this year.
■ I have looked at advancement opportunities that can help me reach my goal of the highest achievement in my program.
■ I’m going to buy my own stethoscope and teach myself how to use it.
Setting Individual GoalsGoals are essential for teams to fulfill their visions. Goals are important for peo-ple to realize personal visions, too.
The presenter tells participants that many of them have had a vision of success that includes becoming an Eagle Scout or earning the Silver Award. That’s a mighty big elephant—those awards can’t be earned overnight. What are some of the goals that would lead a Second Class Scout or new Venturer toward fulfilling that vision of achieving the most that Scouting has to offer?
On a flip chart, write down suggestions from the participants. To keep the discussion moving, add these:
■ Pass the First Class swimming requirement at camp this summer.
■ Go to NAYLE next summer.
■ Take part in 10 campouts a year.
■ Attend a high-adventure camp next summer.
Show slide 2-10, SMART Goals or
Weak Goals.
Show slide 2-11, Personal Goals.

N a t i o N a l Y o u t h l e a d e r s h i p t r a i N i N g
day two-16
Cont
ent S
essi
ons
Explain that those all seem like fine goals. But are they SMART Goals?
In these examples, “Attend a high-adventure camp next summer” is not a SMART Goal. It will certainly be a great experience, but it does not lead directly to fulfilling the vision of becoming an Eagle Scout.
Let’s look at some of the goals of that Second Class Scout who sees becoming an Eagle Scout as part of his vision of success. Are they SMART Goals?
On the flip chart, return to the goals suggested by participants and staff. Depending on how much time you want to spend, lead the group in applying the SMART Goals test. For example, “Pass the First Class swimming requirement at camp this summer.”
Specific—Yes. The First Class swimming requirement is very specific.
Measurable—Yes. The measure of success will be completing the swimming requirement to the satisfaction of the Scout camp aquatics staff.
Attainable—Yes. This is an attainable goal, though the Scout might need to take some lessons at a local pool and will need to practice a few times a week before going to Scout camp.
Relevant—Yes. It is a goal that will help fulfill the vision of becoming an Eagle Scout.
Timely—Yes. The goal can be completed this summer at Scout camp.
If time permits, apply the SMART Goals test to other goals that apply to the Venturing program. If there is a suggested goal that does not pass the SMART Goals test, help participants figure out how to revise the goal to make it worthy.
Team Goal-Setting ExerciseDuring the Finding Your Vision (Part One) session, each NYLT team used a work sheet to develop a vision of team success. Have the team guides break the partici-pants into teams to begin the following exercise.
1. Refine the team vision to make sure it is a vision and not merely a goal.
2. Ask team members to review the statement of vision they developed for themselves, then write down five goals to achieve as a means of fulfilling their vision.
3. Ask one or more teams to offer both their statement of vision and the goals they have identified as some of the steps that will move them closer to fulfilling that vision. Write the statement and the goals on the flip chart.
4. Invite the team to explain how they applied the SMART Goals test to each of their goals and what they discovered along the way. If any of the goals will benefit from revision, help team members work through the process until their goals fit the SMART Goals format.

N a t i o N a l Y o u t h l e a d e r s h i p t r a i N i N g
day two-17
Content Sessions
5. Provide feedback from staff and from other participants on the team’s use of the SMART Goals test—but not a judgment of the goals. The intent of this exercise is to help people learn to use the SMART Goals tool correctly.
Organizing GoalsWe can’t complete every goal at the same time. There has to be some order in how we address them. Furthermore, some goals can be achieved in a short amount of time, while others are long-term goals that may require a number of smaller steps to complete.
Organizing goals and figuring out how to achieve them in the most effective way requires planning. We’ll cover some effective ways to do just that in the NYLT session on planning, and then we’ll have all the pieces of the Vision—Goals—Planning tool.
Vision—What success looks like.
Goals—The accomplishments leading to fulfilling the vision.
Planning—How we will achieve each goal.
SummaryWrap up this session by asking participants to
■ Explain what a goal is.
■ Describe the SMART Goals goal-setting tool.
Remind them that
■ Goals are the steps that lead toward fulfilling a vision.
■ Having SMART Goals makes reaching that vision much more likely.
Close with this thought: You can choose to be adrift on a boat with no rudder, or you can build the rudder and get where you want to go.
Show slide 2-12, Organizing Goals.
Show slide 2-13, Vision—Goals—Planning.
Show slide 2-14, Summary.
N a t i o N a l Y o u t h l e a d e r s h i p t r a i N i N g
day two-18
Team
Eve
nts
day two: team Meeting
time allowed 30 minutes
responsible Team leader
location Team site or a breakout area
learning objectives
As a result of these activities, participants will be able to
■ Describe the purpose of the team meeting.
■ Describe how a team meeting should be run.
■ Know the team leader’s responsibilities and the team members’ responsibilities.
■ Use the Start, Stop, Continue tool to evaluate team performance.
Materials Needed
■ Team meeting agenda for each participant (appendix)
recommended Facility layout
The team guide will determine the location of the first team meeting. The team will decide where subsequent team meetings will occur. In most cases, team meetings will take place in or near the team’s campsite.
As with meetings of the NYLT course and the leadership council, every team meeting during an NYLT course should be organized in a manner that provides an ideal example of such a session. Participants should be able to take the models of the team meetings they see at NYLT and use them to organize effective team meetings in their home units.
delivery Method
The team leaders are the facilitators of the meetings of their teams. The leadership style each team leader uses is up to that person; the hands-on experience of leading is every bit as valuable as the progress made by a team during any particular meeting.

N a t i o N a l Y o u t h l e a d e r s h i p t r a i N i N g
day two-19
Team Events
Guidelines for Team GuidesTeam leaders are the facilitators of team meetings, not the team guides. These meetings provide important opportunities for NYLT participants to gain hands-on experience as leaders. At times they may struggle, wander off course, or be shy about taking charge; that is often part of the learning process. Team guides should allow each team leader time and space to gain the most from the experience, but also should be ready to make suggestions and give direction to and through the team leader in a manner that does not overshadow the team leaders but enhances their chances for success.
Team meetings also are a good opportunity for individuals to practice skills introduced in Day One’s Communicating Well session. Again, you can make suggestions to the team leader, preferably before the meeting, to encourage the use of good communication skills.
Day Two Team MeetingTeam guides play a significant support role to explain and demonstrate the way to conduct a good team meeting. Team guides also will demon-strate the Start, Stop, Continue evaluation tool and guide the teams as they use the tool to evaluate their team progress. The Start, Stop, Continue tool will be fully explored in the planning that follows the team meetings.
Day Three Team MeetingTeam guides will make a judgment call on their degree of involvement, basing their decisions on the team’s development and on the ability and performance of the Day Two team leaders.
Day Four Team MeetingTeam guides may attend team meetings but ideally will not take part in any significant way.
Days Five and Six Team MeetingsTeam guides do not attend these team meetings.
Each team meeting should follow a written agenda. Building on the following model, the agenda for today’s team meeting can be adjusted by the team leader prior to the meeting to fulfill the needs of the team.
Presentation Procedure
N a t i o N a l Y o u t h l e a d e r s h i p t r a i N i N g
day two-20
Team
Eve
nts
Team Meeting AgendaDay Two
1. Welcome—Team guide
2. Meeting agenda—Team guide
3. Team leader responsibilities—Team guide
4. Team duty roster—Team leader
5. Evaluation using Start, Stop, Continue (SSC)—Explained by the team guide; evaluation led by the team leader, with team guide’s support
6. Closing—Team leader
As a team guide, use the Teaching EDGE (Explain, Demonstrate, Guide, Enable) to help your team become skilled at conducting team meetings.
You can also use the Leadership Compass to determine your team’s stage of team development (Forming, Storming, Norming, Performing). That evaluation can help you decide on the most appropriate style of leadership. On Day Two of a typical NYLT course, most teams will still be in the Forming stage and will respond best to leadership that is directive, supportive, and encouraging.
WelcomeUsing good communication skills, the team guides help team members feel welcome.
Explain the reason for team meetings. If you wish, use the following quotes. You can read them or write them out and have other team members read them to increase their involvement.
“The patrol method is not a way to operate a Boy Scout troop, it is the only way. Unless the patrol method is in operation you don’t really have a Boy Scout troop.” —Robert Baden-Powell, Scouting’s founder
“A patrol meeting is an opportunity for you to lead a group of Scouts as they conduct the business of their patrol. It is also a chance for everyone in a patrol to learn new skills, plan future activities, and have fun with friends.” —From the Patrol Leader Handbook
Meeting AgendaThe team guide explains what is involved in an effective team meeting.
Begin by passing out copies of the team meeting agenda. Demonstrate team meeting leadership by modeling good communication skills and by sticking with the agenda of the meeting.

N a t i o N a l Y o u t h l e a d e r s h i p t r a i N i N g
day two-21
Team Events
Team Leader ResponsibilitiesExplain that among a team leader’s responsibilities are these:
■ To take a leading role in planning and conducting team meetings and activities
■ To encourage team members to complete advancement requirements
■ To represent the team as a member of the leadership council, taking ideas from the team to the council meetings, speaking on behalf of the team, and then clearly communicating the council’s decisions to members of the team
■ To set a good example by living up to the Scouting ideals
Evaluation Using Start, Stop, Continue The team guide will coach the team leader to conduct the Start, Stop, Continue evaluation of the team’s duty roster and daily campsite evaluation.
Explain that the session on planning will explore an evaluation tool called Start, Stop, Continue:
Start—“What should we be doing that will make things better?”
Stop—“What should we stop doing because it isn’t helping?”
Continue—“What is our strength and is working well that we want to continue doing?”
The team can begin using Start, Stop, Continue right now.
DAILY CAMPSITE INSPECTION CHECkLIST EVALUATION
Ask the team leader to take charge of the meeting and go over the team’s Daily Campsite Inspection Checklist. For each item, discuss with team members what they can Start, Stop, Continue in order to fulfill the expectations of the checklist.
TEAM DUTY ROSTER EVALUATION
Guide the team leader in applying the Start, Stop, Continue evaluation tool to the team’s duty roster. This is a good opportunity to iron out any difficulties with the roster. The team guide can encourage team members to keep the discussion positive and constructive even if the team is moving from the Forming stage of team development into the Storming stage. Encourage the team leader to address issues rather than to let them go unresolved.
ClosingWith coaching from the team guide, the team leader asks if team members have any other issues to discuss or questions. Then, the team leader thanks team members for their participation and brings the meeting to a close.

N a t i o N a l Y o u t h l e a d e r s h i p t r a i N i N g
day two-22
Cont
ent S
essi
ons
day two: preparing Your plans
time allowed 75 minutes
Format Course presentation with team breakout sessions
responsible Team guides
location Team breakouts at course site
learning objectives
As a result of these activities, participants will be able to
■ Understand the value of planning as a step in reaching goals and fulfilling visions.
■ Plan an event or activity using the What, How, When, Who Planning Tool.
■ Set priorities by categorizing tasks.
■ Use planning to help manage time.
■ Determine a next step when a plan does not deliver the desired outcome.
Materials Needed
■ Copies of the Planning Tool Work Sheet (appendix)
■ One copy of the Team Lunch Planning Challenge for each team (Adjust the sample form in this session to match the supplies available from the NYLT course quartermaster.)
■ Troop Program Features, Volumes I, II, and III
■ Course Meeting Plan work sheet (NYLT Participant Notebooks)
Presentation Procedure
Review these concepts:
■ Vision is what future success looks like. “If you can see it, you can be it.”
■ Goals are the means of fulfilling a vision. “Vision is the elephant. Goals are the elephant’s bite-sized pieces.”
Add one more:
■ Planning is a means of efficiently reaching goals.
We’ve been talking about the team of mountain climbers wanting to reach the summit of Mount Everest. That is their vision. They can see themselves standing on the top.
Among the goals they’ve established to realize their vision is the establishment of four camps at ever higher points on the mountain. Those are SMART Goals that will get the climbers a long way toward fulfilling their vision.
Show slide 2-15, Preparing Your Plans, then
show slide 2-16, Vision—Goals—Planning.
Show slide 2-17, Planning.
N a t i o N a l Y o u t h l e a d e r s h i p t r a i N i N g
day two-23
Content Sessions
Now it’s time for them to do some serious planning. What will they need to plan in order to establish the first high camp? Sample answers include what to carry up there, how to set up camp, when to go, who will do each task, etc.
The presenter also can point out the importance of planning troop meet-ings. Guidance for the What, How, When, and Who of team meetings can be found in Troop Program Features, Volumes I, II, and III. One or more copies of each should be made available so that NYLT participants can inspect them during their free time and become familiar with their contents. The intent will be to show NYLT participants that these documents exist and will be available to them to inspect at any time during the NYLT course. Be sure to point out that while this is a tool used by a troop, a similar planning tool can and should be used when planning a Venturing meeting.
The What, How, When, Who Planning ToolExplain that big goals can require that lots of things get done. Planning helps you make sure you haven’t forgotten anything and that everything is completed in an efficient way.
We’re going to look at a very good planning tool you can use to organize your planning. You’ll want to pay attention, because we’re going to challenge each team to plan its lunch. If you plan it well, you’ll have a terrific meal. If your plans aren’t very good, well, good luck.
A simple, effective planning tool is the What, How, When, Who Planning Tool.
Perhaps your team vision includes having a very successful Outpost Camp later this week. One of the goals could be enjoying a terrific camp meal cooked over backpacking stoves. Let’s talk our way through using the planning tool by planning an Outpost Camp meal.
Hand out copies of the Planning Tool Work Sheet. Participants can insert these in their NYLT Participant Notebooks.
To illustrate the following exercise, use a flip chart version of the planning tool, prepared before the presentation. Fill in the boxes during the discus-sion, just as you would a normal-sized planning tool.
Demonstrate how to use the planning tool.
Ask participants, “What steps do we need to complete to be prepared for the meal?” Expect answers like, “Ask everybody what they want to eat,” “Look in my Boy Scout Handbook,” “Figure out the menu,” “Go to the store.”
Choose a task that is likely to happen earlier than half the tasks, for example, “Figure out the menu,” and write that response in the WHAT column.
Ask: “How do you do this?” Note the participants’ answers. On a separate sheet, write down participants’ responses.
Show slide 2-18, Planning Tool.

N a t i o N a l Y o u t h l e a d e r s h i p t r a i N i N g
day two-24
Cont
ent S
essi
ons
In the HOW column of the first sheet, record the steps for one method of HOW. Choose a method that most participants can relate to. For example:
■ Talk to team members about what they want.
■ Select dishes to prepare.
■ Find the recipes.
■ List the ingredients.
■ Determine ingredient amounts.
Ask: “WHEN do you need to figure out the menu?” On the Planning Tool Work Sheet, record at least one “before” item and one “after” item in the WHEN column. Some examples:
■ “After we know where we’re camping.”
■ “Before we go to the grocery store.”
Now that we have the columns filled out, how much time will the task require? (Listen to examples. Help participants determine a reasonable amount of time for the task.)
Explain that once you have figured out HOW to do something and WHEN to do it, we can go back to the WHAT column and add whatever is missing.
Ask: “What’s left? There’s one more slot in the Planning Tool Work Sheet, and that’s deciding WHO will be responsible for each of the steps in our plan. Some responsibilities are big ones—‘The Big R,’—and some aren’t so important— ‘the little r.’ Once your name is written down in the WHO column, though, the responsibility is yours.”
To review, ask participants what they think is the value in making a plan. Listen to a variety of answers. Reinforce the idea that planning increases the chance that you will get to the desired outcome or goal.
If we didn’t plan, what might go wrong?
PLANNING TOOL ExERCISE
Tell participants: You each have one of these Planning Tool Work Sheets. When do you think you’ll use this tool? How many of you think you will use this tool before you leave this week? How many of you think you will use this tool today?
The value of these questions is in getting the learner to say that they will use the tool. Psychologists will tell you that people are more likely to do something if they have stated out loud or in writing that they will do it.

N a t i o N a l Y o u t h l e a d e r s h i p t r a i N i N g
day two-25
Content Sessions
TEAM LUNCH PLANNING CHALLENGE
The presenter of the challenge could be the quartermaster or an assistant course director.
Enable participants to use the What, How, When, Who Planning Tool by intro-ducing the Team Lunch Planning Challenge. Each team must use the planning tool to come up with a thorough plan for the upcoming lunch. The plan must be fully developed to determine the menu, the ingredients and amounts needed, any utensils or other kitchen items that will be required, and how the lunch project will be carried out.
The challenge can be shaped to fit the supplies the quartermaster has on hand. For example:
Sample Team Lunch Planning Challenge
(Staff may adjust this document before the session in order to match the supplies available from the quartermaster.)
Team lunch today will include sandwiches, fruit, a beverage, and dessert.
Your challenge is to use the What, How, When, Who Planning Tool to fully plan your team’s lunch.
Planning steps to use:
■ What—Everything you need for the meal, including all food ingredi-ents and utensils
■ How—The process you will use to get everything from the quartermas-ter and to prepare the meal
■ When—The order of events for gathering what you need, fixing lunch, and cleaning up
■ Who—Assigning tasks so that someone takes responsibility for each portion of the plan
When you have completed your plans, give the quartermaster your written request for ingredients, utensils, and anything else your team will need to prepare lunch.
The quartermaster will follow the requests exactly, adding nothing and leaving nothing out. (Where necessary, substitutions will be made but will stay in the spirit of the request. For example, if a team asks for corned beef but the quartermaster has only sliced ham, the quartermaster will provide ham in place of beef.)
Following the model leadership council meeting, teams may pick up from the quartermaster all the items on their request lists and then will follow their plans to prepare and enjoy lunch.
Team guides should allow their teams to work on their own as much as possible but should be ready to help guide participants to use the What, How, When, Who Planning Tool as they prepare for the Team Lunch Planning Challenge.
N a t i o N a l Y o u t h l e a d e r s h i p t r a i N i N g
day two-26
Cont
ent S
essi
ons
The Start, Stop, Continue Evaluation ToolExplain that during the team meetings that took place before this session, the team guides helped the teams use the Start, Stop, Continue evaluation tool to judge how things are going and how improvements can be made. That is a very effective way to improve performance of any sort. It’s the evaluation tool we will be using throughout this NYLT course.
This concept was introduced as an evaluation tool during the team meet-ing that precedes this session, but it has not been explained in detail. It is in this session that Start, Stop, Continue is more fully explored. It will be used and emphasized throughout the rest of the training course as the tool of choice whenever evaluation is appropriate.
Let’s look at the three parts of Start, Stop, Continue:
Start—“What should we be doing that will make things better?”
Stop—“What should we stop doing because it isn’t helping?”
Continue—“What is our strength and is working well that we want to continue doing?”
The Start, Stop, Continue tool is to be used to provide constructive ways to improve. It is two positives with a negative sandwiched in between.
Ask participants where they might use Start, Stop, Continue. Look for answers like school, Scouting, home, work, etc.
DEMONSTRATE USING START, STOP, CONTINUE
Remind participants of the neutral position used for communicating well. It focuses on the speaker’s feet, hands, mouth, eyes, and ears.
Ask participants to offer you some feedback on the presentation skills you have used in this session. Encourage them to use Start, Stop, Continue as their evaluation tool.
You may need to encourage participants to engage in this exercise, as they might be shy about offering evaluation. One way to keep the discussion moving is to work through the neutral position point by point: “Let’s take feet. Where I am standing, how I am moving around. What can I start doing to make my body position more effective? Anything I should stop doing? What’s working well that I can continue to do?”
Continue, asking participants to apply Start, Stop, Continue to your use of hands, mouth, eyes, and ears.
Another way to energize the exercise is to have staff members in the audience (team guides, for example) offer constructive evaluation using Start, Stop, Continue. That can get the ball rolling and allow the presenter to call on NYLT participants for additional comments.
Show slide 2-19, Start, Stop, Continue Tool.

N a t i o N a l Y o u t h l e a d e r s h i p t r a i N i N g
day two-27
Content Sessions
Guide teams as they use Start, Stop, Continue to help them achieve goals leading to their team vision. Start, Stop, Continue can be a powerful tool for helping teams reach goals that lead toward their team vision.
Use the vision of one or more teams as an example. Ask for ideas from the teams. A discussion might go like this:
The team vision is to be the best team at NYLT. One goal is to have a terrific campsite.
Start—Start picking up the campsite. Pitch in to help each other complete camp chores.
Stop—Stop storing the cooking equipment on the ground. Stop leaving the food box open so mice can get in.
Continue—Continue keeping our tents neat. Keep having fun. Keep our spirits high.
Planning a Unit MeetingRemind participants that planning is important for reaching goals of all sorts. The goal of having a good unit meeting can be reached only if that meeting is planned.
Explain that the BSA provides units with some powerful versions of planning tools to help a leadership council plan great meetings.
Show participants the three volumes of Troop Program Features. Let the partici-pants know where they can find these volumes and invite them to inspect the volumes at any time during the NYLT course. Again, remind the group that tools from one program can certainly be used by the other. The goal is to provide the best program possible for both troops and crews.
Show participants the Course Meeting Plan work sheet found in their NYLT Participant Notebooks.
Explain that the course meetings during the NYLT course were planned using these materials. Course leaders will explain the process during those meetings. After the NYLT course, participants can work with adult and youth leaders to use the same materials for planning the meetings of their home units.
SummaryWhy plan? Planning is essential for reaching your goals. Goals are steps to fulfilling your vision.
Planning is a means of efficiently reaching goals.
Goals are the steps leading toward fulfilling a vision.
Vision is what future success looks like.
Show slide 2-20, Summary.
This exercise also reviews key points from Day One’s Communicating Well session.

N a t i o N a l Y o u t h l e a d e r s h i p t r a i N i N g
day two-28
Cont
ent S
essi
ons
To accomplish goals, you must have good planning.
The What, How, When, Who Planning Tool organizes reaching a goal into four parts:
■ What has to be done
■ How to do it
■ When to do it
■ Who will do it
Start, Stop, Continue is a tool for testing the effectiveness of your plans. It can be used whenever evaluation is appropriate.
Tools for planning work only if you use them. The success of the team lunches and of other team efforts during the NYLT course will be determined largely by the effectiveness of the planning that takes place ahead of time.

N a t i o N a l Y o u t h l e a d e r s h i p t r a i N i N g
day two-29
Course Events
day two: Model leadership Council Meetingtime allowed 45 minutes
Format A model leadership council meeting presented in the round—that is, with the rest of the course observing the proceedings. A youth staff member acting as narrator explains key points of the meeting to the observers.
responsible Course leader
location Course site
learning objectives
As a result of these activities, participants will be able to
■ Describe the purpose of the leadership council.
■ Discuss how a leadership council meeting should be run.
■ Understand the roles and responsibilities of those who attend leadership council meetings.
■ See an example of a youth-led unit in action.
Materials Needed
■ Leadership council meeting agenda (NYLT Participant Notebooks, appendix)
■ Course meeting plans for Day Two and Day Three (NYLT Participant Notebooks, appendix)
■ A roster listing the service team and program team assignments for the duration of the course (NYLT Participant Notebooks, appendix)
recommended Facility layout
The meeting place should be prepared with a table and seating for the team lead-ers and the course leader. In a camp setting, this may be a picnic table. Ideally, the site will be the same location for all leadership council meetings throughout the course. However, the attendance by the entire course as observers may make it necessary for this leadership council meeting to be held at a site that will com-fortably accommodate everyone.
Place a chair for the course director to the side and a little behind that of the course leader. The course director will be serving as a coach and mentor to the course leader, but will not be conducting the meeting. Surrounding these chairs is seating for the rest of the course participants and staff attending the meeting only as observers.

N a t i o N a l Y o u t h l e a d e r s h i p t r a i N i N g
day two-30
Cour
se E
vent
s
delivery Method
The Day Two leadership council meeting occurs in the round, that is, attended by team leaders and other course leaders and observed by all other course partici-pants and youth staff. The in-the-round setting provides an opportunity to model an ideal leadership council meeting.
The leadership council meeting is conducted by the course leader, who will model appropriate leadership behavior within the setting of the meeting.
As the meeting unfolds, a narrator explains to the NYLT participants what is going on and how it fits into the larger scheme of a successful unit program. The narrator should be a youth staff member who fully understands the leadership council meeting process and is able to explain it well to others. He should have a strong voice and stand outside of the circle of the leadership council.
Presentation Procedure
Leadership council meetings are a key tool unit leaders can use to develop youth-led units by coaching, guiding, and supporting youth leaders and by giving them the responsibility and freedom to lead.
Each NYLT participant and staff member will have an NYLT Participant Notebook containing core information that will be useful throughout the course—duty rosters, equipment lists, daily schedules, meeting agendas, etc. Blank pages in the notebooks provide space for team leaders to write down ideas from meetings. The notebooks are given out during the Day One Registration, Orientation Trail, and Camp Setup session. Participants should bring their notebooks with them to all sessions of the NYLT course.
Leadership Council Meeting AgendaDay Two
■ Welcome and introductions■ Purpose of the meeting—what we need to accomplish■ Reports on the progress being made by each team■ Announcements■ Program team and service team assignments■ Closing■ Course director’s observations
Welcome and IntroductionsThe course leader welcomes everyone and acknowledges the presence of the rest of the NYLT course participants and staff. He or she explains the importance of this in-the-round meeting:
■ It is an opportunity for everyone to see an efficient meeting format that can be used effectively with team leaders or with any other group gathering— a school committee, a work team, etc. Ask them to look for similarities to the patrol leaders’ council in their home troop or to an officers’ meeting in their home crew.
N a t i o N a l Y o u t h l e a d e r s h i p t r a i N i N g
day two-31
Course Events
■ It allows everyone to better understand what will be expected of team leaders throughout the remainder of the course.
Explain that they will see the real thing, and the narrator will explain the signifi-cance of what they are seeing.
The narrator welcomes the NYLT participants and introduces those persons who will be active participants in leadership council meetings—primarily the team leaders and the course leader.
Explain that the team leaders have come prepared to represent their teams in the leadership council discussions and decisions. Explain that this is a model patrol leaders’ council for the Boy Scouts in the audience and is a format that can be used by crew officers when holding their planning sessions with activity chairs.
As with most sessions of an NYLT course, the presenters of the model leadership council meeting convey information by using the Teaching EDGE (Explain, Demonstrate, Guide, Enable). The narrator explains a por-tion of a meeting, then members of the leadership council demonstrate an effective way to conduct that meeting section. As NYLT participants take part in leadership council meetings later in the course, youth and adult staff will guide them to succeed. Ideally, the NYLT experience will enable participants to conduct effective leadership council meetings when they return to their home units.
Pre-Meeting Discussion
The narrator explains that the course director and course leader often visit for a few minutes before the beginning of a leadership council meeting. They go over the agenda and make sure everything is in order. The adult leader’s role is to ensure the youth staff understands the agenda and can implement it. Once the meeting begins, though, the course leader is in charge and the course director stays on the sidelines. The course director might coach and guide the course leader now and then, but in an adult-led, youth-run unit, the unit‘s youth staff is in charge.
One of the unit leader’s roles in a youth-led unit is to help Scouts realize how far they are progressing and developing as good leaders, even if they have not yet reached the vision they have set for themselves. The course director helps the course leader set the direction of leadership council meetings so the program of the unit is consistent with the values of Scouting.
The course leader and course director enact a brief pre-meeting discussion to show how the agenda is reviewed. The course director lends support and encouragement to the course leader.
At the end of the pre-meeting discussion, the course leader calls the leadership council meeting to order, welcomes everyone, and asks each person in attendance to introduce themselves and state their current responsibilities with the NYLT course.

N a t i o N a l Y o u t h l e a d e r s h i p t r a i N i N g
day two-32
Cour
se E
vent
s
Purpose of the MeetingThe course leader directs the attention of the leadership council to the written agenda. Note that the purpose of this meeting will be to:
■ Check on the progress of the teams.
■ Assign the duties of the program team and service team.
■ Use Start, Stop, Continue as our evaluation tool.
■ Use good communication skills to share ideas.
The narrator explains that a good meeting in any program (not just in the BSA) always starts with an agenda. This means that the meeting leader has put thought and preparation into the meeting so it can be efficient and effective.
Everyone attending a meeting should be prepared to take notes so they can communicate with their team members about the meeting. In order to take notes, always come prepared with a pencil or pen.
Reports on the Progress of Each Team
The narrator explains that the course leader runs the leadership council meetings, but that does not mean he or she does all the talking. This is a time for the course leader to listen and gather information about how the course is running.
The course leader demonstrates by asking each team to use Start, Stop, Continue as a tool for giving a constructive report of the team:
Start—What can they begin doing to improve their teams?
Stop—What can they stop doing that is not working well?
Continue—What should they continue doing that is a strength and is working well?
Remind team leaders that each team should be thinking about its presentation of the Quest for the Meaning of Leadership. Briefly review the challenge offered by the course director at the campfire on Day One, and stress the importance of beginning work on the presentation early in the NYLT course.

N a t i o N a l Y o u t h l e a d e r s h i p t r a i N i N g
day two-33
Course Events
Excerpts from the course director’s challenge to the teams to set out on a Quest for the Meaning of Leadership:
“Leadership means many things to different people. In the days to come, each team will be exploring leadership in many ways. To help us make the most of this experience, I want to challenge you this week to a Quest for the Meaning of Leadership.
“Each day your understanding of leadership is going to change. You will add new information with every presentation. As you practice leadership yourselves, you will learn a great deal about what works and what isn’t very effective. As you watch the staff modeling different leadership styles, you will see the best that NYLT leadership has to offer.
“I’m challenging each team to develop a presentation that shares its understanding of the meaning of leadership. The presentation can be a skit, a song, a piece of writing, even something you construct. Each team will deliver its presentation on the last day of this NYLT course.
“Daily planning and working on the presentation throughout the course will encourage team members to come to agreements on how their team will proceed, and to add each day’s learning to their presentation. The quartermaster will make available a variety of materials for teams to use in their presentations, if you need them.
“All team members are expected to contribute to the success of their teams during the development of the presentation. The final product should clearly reflect the combined efforts of many individual talents.”
AnnouncementsThe course leader makes any announcements relevant to the group. Explain that team leaders have a responsibility to convey to their teams information from the meetings of the leadership council. Note the time and location for the next meeting of the leadership council.
The narrator explains that Scouts who are not attending a leadership council meeting are depending on their team leader to give them the information just shared here. This is a big responsibility.
Program Team and Service Team AssignmentsThe course leader asks the assistant course director for program to take the floor.
The assistant course directors explain the duties of the program team.
Remind those leaders of the Day Two service and program teams that they should review what they will be doing and use their planning skills to figure out an effective way to fulfill their responsibilities. Tell them that planning skills will be taught later, but that you are confident each of them has some skill in planning already; after all, they planned to attend NYLT.

N a t i o N a l Y o u t h l e a d e r s h i p t r a i N i N g
day two-34
Cour
se E
vent
s
Program Team (sample assignments)
■ Course assembly—Conduct the flag ceremony for the next day.
■ Course meeting—Prepare the meeting area.
■ Course meeting—Conduct the preopening activity. (The team should be provided with a printed sheet of instructions for organizing and conducting the activity. If materials are needed, the quartermaster should make those available.)
Service Team (sample assignments)
■ Put the course meeting area in order. (NYLT is a Leave No Trace program.)
■ Maintain participant latrines and showers.
Staff Service Team
The course leader will make it clear to NYLT participants that staff members have the responsibility of cleaning staff latrines and showers, staff campsites, and other areas for staff use. As equal members of the NYLT troop, staff members roll up their sleeves and take care of their own areas rather than expecting someone else to do it for them.
Summary
The narrator explains that it is important to repeat or summarize the pro-ceedings to assure that everyone heard the primary messages and can ask clarifying questions if a team leader realizes he or she may have misunder-stood something. It is the team leader’s responsibility to get clarification.
The course leader then takes a few moments for a brief overview of the proceedings:
■ Summarize the key points covered during the meeting.
■ Remind the team leaders what they are expected to do and when they are expected to do it.
■ Stress the importance of performing at the highest levels, using the Scouting ideals as their guides.
Course Director’s Observations
The narrator points out that it has been the course leader, not the course director, who has been leading the leadership council meeting.
Restate the course director’s role as a coach and mentor to the course leader and other members of the leadership council. A Scouting unit should be youth-run. Adult leaders should do all they can to allow youth members of the unit to take responsibility for ensuring its success, and they should take an active role in developing the youth leadership team.

N a t i o N a l Y o u t h l e a d e r s h i p t r a i N i N g
day two-35
Course Events
The course director briefly discusses the importance of a leadership council meeting to the operation of a Scouting unit.
Compliment the Scouts, as appropriate, for behavior that you observed during the meeting that was especially consistent with the Scout Oath, Scout Law, Scout motto, or Venturing Code. (For example, the course leader was prepared for the meeting, or team leaders were respectful of one another during a difficult discussion.)
ClosingThe narrator asks members of the audience if they have any questions about what they just observed.
If there is time, ask how many of them practice a similar format for their home unit version of a leadership council (patrol leaders’ council or officers’ meeting). It is important to end meetings on time rather than allow them to drag on.
The course leader thanks everyone for their participation in the leadership council meeting, answers any questions from members of the leadership council, then adjourns the meeting.

N a t i o N a l Y o u t h l e a d e r s h i p t r a i N i N g
day two-36
Cont
ent S
essi
ons
day two: team lunch planning Challengetime allowed 1 hour, 15 minutes
Format Team meal preparation based on plans made during the session on Preparing Your Plans
responsible Team leader
location Team site
learning objectives
As a result of these activities, participants will be able to make plans and then use them to reach a goal.
■ Each team will receive the menu items on the list they submitted to the NYLT quartermaster at the conclusion of the Preparing Your Plans session.
■ Teams will need exactly the utensils and other culinary gear they included in their plan. (These may be items they retrieve from their team campsite kitchens.)
Presentation Procedure
Conducting the ChallengeDuring the Preparing Your Plans session, teams were challenged to plan their lunches. They submitted their lists of ingredients to the NYLT quartermaster who, during the course meeting after the session, assembled the ingredients requested by each team.
The teams can now pick up their ingredients and whatever else they requested, then prepare and enjoy lunch. If they have forgotten to plan any aspect of the lunch (a missing ingredient or utensil, etc.), they are to solve the problem as best they can using only the resources at hand.
Materials Needed

N a t i o N a l Y o u t h l e a d e r s h i p t r a i N i N g
day two-37
Content Sessions
Members of the quartermaster staff play a key role in the success of the Lunch Planning Challenge. They should attend the Preparing Your Plans session on the morning of Day Two in order to fully understand the nature of the challenge and the importance it has for the participants in the course.
A goal of this challenge is to help teams learn the importance of thorough planning. Another goal is for them to have a successful lunch experience as an outgrowth of their planning.
Using the Teaching EDGE (Explain, Demonstrate, Guide, Enable), present-ers of the Preparing Your Plans session will have explained methods participants can use to develop plans. They also will have demonstrated how planning can be accomplished.
The quartermaster staff can greatly help in guiding teams as they practice the planning process on their own. When teams present their requests, provide only those items the teams request. Where necessary, make substitutions in the spirit of the original request (for example, if a team asks for a lunch meat not in the commissary, the quartermaster staff can provide the lunch meat that is on hand).
Some teams are likely to discover that their plans are incomplete and they have forgotten to ask for certain items. If they come back and request other items, the quartermaster staff should provide the items they need.
Throughout the Lunch Planning Challenge, keep in mind the larger goal of using the Teaching EDGE to improve each participant’s ability to plan, and the event is sure to be a success.

N a t i o N a l Y o u t h l e a d e r s h i p t r a i N i N g
day two-38
Cour
se E
vent
s
day two: Model Course Meeting
time allowed 90 minutes
Format The NYLT syllabus is structured to represent the experience of a Scouting unit moving through a month of meetings and activities. The meetings that occur during the first three days are similar to those a unit would schedule over a time period of three weeks. The final week of a unit’s month correlates to the Outpost Camp that participants embark upon during the final days of the NYLT course—an exciting activity that is an outgrowth of the learning and planning that occurred during the first three meetings.
responsible Course leader, course director, and other assigned staff
location Course site
learning objectives
As a result of these activities, participants will be able to
■ Conduct a well-prepared unit meeting built on the seven-step unit meeting plan.
■ Discuss the impact of goal setting.
■ Use the Teaching EDGE to teach a skill.
■ Conduct an interteam activity based on the Teaching EDGE.
Materials Needed
■ Photographs of possible pioneering projects (one set for each team)
■ Three spars and ropes for lashing
■ Figure-of-eight lashing instructions (appendix and NYLT Participant Notebooks)
Presentation Procedure
The course meeting is conducted by the course leader, who will model appropriate leadership behavior within the setting of the meeting.
As the meeting unfolds, a narrator explains to the NYLT participants what is going on and how it fits into the larger scheme of a successful unit program. The narrator should be a youth staff member who fully understands the unit meeting process and is able to explain it well to others.
All youth and adult course leaders should be present at course meetings. Those who do not have specific roles in the proceedings of the meeting still will be available as coaches and mentors to the youth staff conducting the meeting and to NYLT participants.

N a t i o N a l Y o u t h l e a d e r s h i p t r a i N i N g
day two-39
Course Events
The role of the course meeting narrator is similar to that of the narrator explaining key points of the Day Two leadership council meeting.
The narrator for the course meeting should be a different youth staff member than the one who narrated the leadership council meeting. That will give a fresh voice to the course meeting narration and will allow each of the narrators to focus their energies fully on preparing for a single presentation.
As with most sessions of an NYLT course, the presenters of the model course meeting convey information by using the Teaching EDGE (Explain, Demonstrate, Guide, Enable). The narrator Explains a portion of a meet-ing, then the course’s youth leaders Demonstrate effective ways to con-duct that meeting section. As NYLT participants take part in course meetings later in the course, youth and adult staff will Guide them to succeed. Ideally, the NYLT experience will Enable participants to conduct effective unit meetings when they return to their home units.
Session Introduction
The narrator welcomes everyone to the course meeting. Let them know that, as was the case with the leadership council meeting, important parts of the course meeting will be pointed out and explained by a narrator and that you are that narrator.
Tell participants that NYLT represents one month in the life of a Scouting unit. There will be a course meeting each day for three days—the first three weeks of a month. The fourth week will be represented by the Outpost Camp—the big event that a unit works toward the rest of the month.
This first meeting is a model course meeting. NYLT participants will take part in course activities but also will be an audience watching how a good course meeting is put together and conducted. It is fine to tell them that we are using the Boy Scout troop meeting model. There is no equivalent form for Venturing crews, but that does not matter—point out that the steps are universal. They simply need to apply the principles to their Venturing crew meetings, as appropriate. Smaller crews, just as is true with small troops, may not have enough members for an efficient “interteam” part of the meeting, but should know that this part of the meeting plan exists for times when a larger group is present.
There are seven steps to a good unit meeting.
Seven-Step Unit Meeting Plan
1. Preopening
2. Opening
3. Skills instruction
4. Team meetings
5. Interteam activity
6. Closing—Course Director’s Minute
7. After the meeting

N a t i o N a l Y o u t h l e a d e r s h i p t r a i N i N g
day two-40
Cour
se E
vent
s
Ask participants to turn in their NYLT Participant Notebooks to the Day Two Course Meeting Plan. Explain that every good unit meeting follows a plan like this.
Point out that the troop meeting plan, with lots of great ideas of activities to bring meetings to life, can be found in the BSA publication Troop Program Features, which was mentioned during the session on Preparing Your Plans.
Show participants a copy of Troop Program Features. Let them know where the copy will be kept during the NYLT course, and invite them to take a closer look at it in their free time. Again, remind the Venturers that this can be a useful tool to them as well, without detraction from the Venturing program. They can use it as desired in their home units.
Add this thought: “You can develop a terrific plan, but if you don’t follow it, not much will happen.”
The patrol leaders’ council uses Troop Program Features to plan troop meetings. Ideally, the course director checks with the course leader 48 hours before a course meeting to make sure everything is ready. These are important steps that should not be skipped.
The troop meeting plan has been described in some detail, and this basic model will continue to be used in team meeting plans throughout the course. In practice, not all units use this exact model; for example, a crew meeting might not always have a skills instruction component or an interteam activity. However, this model can be used in any unit and is worth practicing.

N a t i o N a l Y o u t h l e a d e r s h i p t r a i N i N g
day two-41
Course Events
Day TwoCourse MeeTing Plan
aCTiviTy DesCriPTion run By TiMe ToTal TiMe
Preopening Team leaders 20 min. 20 min.
opening ceremony Scouting ideals Program team 5 min. 25 min.
skills instruction Lashings Team guides 25 min. 50 min.
Team meetings Planning the pioneering project Team guides 25 min. 75 min.
interteam activity Lashing challenge Team guides 25 min. 100 min.
Closing Course Director’s Minute Course director 5 min. 105 min.
after the meeting Debrief, plan ahead Leadership council and council director
N a t i o N a l Y o u t h l e a d e r s h i p t r a i N i N g
day two-42
Cour
se E
vent
s
Preopening
The narrator explains that the preopening is the first step of a good course or unit meeting. It might be a game or skill activity that Scouts can join in as they arrive. While that is going on, the course leader, team leaders, and course director quickly go over the plan for the meeting and make sure everything is in order.
The course leader, team leaders, and course director demonstrate by enacting a brief pre-meeting discussion to show how the course meeting agenda is reviewed. They gather in the middle of the assembly area where all participants can see and hear them.
Because the teams are newly formed, the team guides will represent the teams during this preopening.
The course leader checks with the team guides to see who has responsibility for the main parts of the upcoming course meeting—the opening, the skills instruction, the team meetings, and the interteam activity.
Ask if each team guide has the resources the team needs to carry out its portion of the meeting.
Ask the course director if there is anything else requiring attention before the opening of the course meeting.
During the preopening, the course director provides coaching for the course leader but allows him to lead the preopening. He or she suggests one or two points the course leader might consider. (Do the participants have plenty of water with them? What’s the backup plan for the outdoor activities if the weather turns bad?)
Give a few words of encouragement and express confidence that the course’s youth leaders are ready for the meeting to begin.
The narrator explains that in a regular unit meeting, this discussion among the unit’s youth leaders would take place while the rest of the unit members are involved in the preopening activity.
During preparations for the NYLT course, staff should select a preopening activity from Troop Program Features. Showing participants the exact source of the activity can encourage them to use Troop Program Features with their home troops. If possible, find an example that has equal relevance to a crew.
The youth staff member in charge of the preopening activity conducts a brief preopening activity from Troop Program Features.

N a t i o N a l Y o u t h l e a d e r s h i p t r a i N i N g
day two-43
Course Events
Opening Ceremony
The narrator explains that the second step of the seven-step unit meeting plan is the opening. It is the official beginning of the meeting. It sets the tone of the meeting with a flag ceremony (if there has not already been one that day) and the reciting of the Scouting ideals.
The course leader demonstrates by inviting course members to make the Venturing sign and recite the Venturing Oath.
Ask if there are announcements or other contributions from participants and staff.
Skills Instruction
The narrator explains that the third of the seven steps of a successful unit meeting is skills instruction. The skills being taught should fit into other activities the unit is doing during the month. A unit that is going on a kayaking trip, for example, might use skills instruction to help team members learn how to stow camping gear into a kayak, or how to maintain a kayak after a journey.
This afternoon, the teams of our NYLT course will be building pioneering projects. The skills instruction portion of this course meeting focuses on a lashing that might be useful in completing those projects.
The course leader demonstrates by asking the team guides to conduct the skills instruction portion of the course meeting.
The rope used for skills instruction should be real rope, not twine or string. Rope that is too light or flimsy is hard for Scouts to use effectively and makes learning difficult.
The team guide of each team will serve as the team’s instructor for this Scouting skill.
Before the NYLT course begins, team guides should practice making a tri-pod with the figure-of-eight lashing until they know it very well. They must be able to demonstrate the lashing without using the handout.
Using good communication skills, tell your team that you are going to teach everyone how to lash together a tripod using the figure-of-eight lashing.
While team guides are teaching a lashing method, they are also modeling how to teach. All teaching should be done using the Teaching EDGE—Explain, Demonstrate, Guide, and Enable.

N a t i o N a l Y o u t h l e a d e r s h i p t r a i N i N g
day two-44
Cour
se E
vent
s
The team guides explain what the figure-of-eight lashing is and how it can be used.
Describe the steps you are going to use to make the lashing and form the tripod.
Demonstrate the steps for making the lashing:
Step 1—Lay the three spars alongside each other, butt to butt, tip to tip.
Step 2—Apply the lashing to the three tips, placing the lashing 12 to 18 inches from the tip ends.
Step 3—Start the lashing with a clove hitch around one of the outside spars.
Step 4—Wrap the short end of the rope around the standing part of the rope as you start the wrapping turns.
Step 5—Make six or more loose wrapping turns over and under the spars.
Step 6—Make two or three frapping turns between each pair of spars.
Step 7—Finish the lashing with a clove hitch.
Step 8—Set up the tripod by spreading apart the butt ends of the spars into the shape of an equilateral triangle.
Team guides should emphasize the following points:
■ Make the wrapping turns loose. Otherwise you will not be able to open the tripod.
■ The completed tripod can be reinforced by lashing additional spars from one tripod leg to the next near the butt ends. This is an important step if the tripod is to hold weight.
Refer participants to the handout illustrating the steps for making the lashing. Encourage them to use the illustrations as guides while practic-ing how to make the figure-of-eight lashing.
The team guide asks several team members to come forward. Provide each with spars and rope and ask each of them to tie the lashing. Observe their progress, guide them when they need assistance, and offer suggestions. Whenever possible, use the Start, Stop, Continue evaluation tool as your means of providing suggestions.
After the volunteers are done with their lashings, take a few moments to evaluate the quality of their tripods. Ask others in the team for Start, Stop, Continue input.
For example, the team guide might tell the volunteers to start making the wraps of the lashing looser so that it is easier to open up the tripod. They might want to stop leaving loose ends of the rope dangling. They might want to continue all the steps they got right—continue placing the spars tip to butt, continue using clove hitches to begin and end the lashing, etc.

N a t i o N a l Y o u t h l e a d e r s h i p t r a i N i N g
day two-45
Course Events
Guide all the team members as they tie the lashing themselves.
Enable the team members—empower them, believe in them, and give them the time and materials they need to practice the lashing until it becomes second nature for each of them. You will be there if they have questions or need help acquiring more materials, but you are sending them off to use the skill on their own in any situations where they will find the skill useful.
Team Meetings
The narrator explains that the fourth of seven steps of an effective unit meeting is the opportunity for each of the teams to hold a team meeting.
The team meetings often are devoted to activities that prepare the team for upcoming unit events.
The course leader asks the team leaders to take charge of their teams. Much of the afternoon will be devoted to team pioneering projects. NYLT participants can devote the current team meeting to planning. Each team will have the opportunity to plan and build one of a number of possible pioneering projects—a tower, monkey bridge, etc.
Distribute copies of the pioneering project photographs. Tell the teams that they are welcome to build any one of these projects, or to construct a project of their own design.
Distributing photographs rather than diagrams will give teams a general idea of various pioneering structures, but will not give them a blueprint for their construction. The idea is to open up the possibilities for teams to work out their own designs and the solutions to the questions of lengths of materials to use and lashings that will hold everything together.
Each team is required to write out their plan using the What, How, When, Who Planning Tool.
The course leader, quartermaster, and other staff will be available to answer questions from the teams about the availability of materials, locations for construction, and appropriateness of project design.
The team guide stays on the sidelines of the team meeting but is always ready to guide the team leader and provide coaching and support to all team members.

N a t i o N a l Y o u t h l e a d e r s h i p t r a i N i N g
day two-46
Cour
se E
vent
s
Interteam Activity
The narrator explains that the interteam activity is the fifth of the seven steps of an effective unit meeting.
This part of the meeting allows all the teams to interact with one another in a competition or in a cooperative effort. The activity could be a game that tests the skills participants are learning for an upcoming activity— a race by each team to set up a tent properly, for example, or for team members to tie a set of knots correctly.
The course leader asks the team guides to explain and conduct the interteam activity—the lashing challenge.
LASHING CHALLENGE
Teams line up on one side of the activity area. On the other side is a set of lashing materials for each team—three staves and enough rope to make a tripod lashing.
At the command to go, two team members run to the materials and use a figure-of-eight lashing to form a tripod. The team guide for that team will be nearby to offer verbal guidance if a pair of team members is having particular dif-ficulty with the lashing.
As soon as the team guide for the team declares the lashing correctly tied and the tripod formed, the pair of team members runs back to their team and tags the next pair.
The second pair runs to the tripod, disassembles it, coils the rope, and places the materials neatly on the ground. The moment that is done, the team guide signals to the pair that they can return to their team.
The next pair runs to the materials and again uses the lashing to form a tripod. The game continues until all members of the team have had a chance to be those who tie the lashing and those who untie it.
Closing—Course Director’s Minute
The narrator explains that the sixth step of a good unit meeting is the closing.
Until now, the meeting has been run by the youth leaders of the course. The course director has been on the sidelines, ready to assist the youth leaders if they require some help, but has allowed them to lead the meeting to the fullest extent possible.
The closing is the course director’s chance to step forward with a few meaningful words for the unit.
For example, a Course Director’s Minute for this meeting might build on the idea of a compass.

N a t i o N a l Y o u t h l e a d e r s h i p t r a i N i N g
day two-47
Course Events
The course director demonstrates a Course Director’s Minute. Draw out a compass:
“A compass is a valuable tool in the outdoors. It can keep us pointed in the right direction even if we are going through territory that is new to us. It can help us find our way.
(Puts the compass away.)
“But what happens if you keep your compass in your pocket and never look at it? What good is it for guiding you? It’s not helpful at all, is it? If your compass is to be helpful in showing you the way, you need to get it out and use it.
(Bring the compass back.)
“The same is true of the Scout Oath and Venturing Oath. They are the compasses that can guide us through life. But they’re no good if we ignore them. They are of no use if we simply recite them at the beginnings of meetings and then don’t use them regularly to check our direction and make sure we’re always headed in the right direction.”
After the Meeting
The narrator explains that the seventh and final step of a unit meeting is a standup meeting of the leadership council. It is informal and brief enough to be conducted with members of the leadership council standing in a circle.
The point of the standup meeting is for the course leader to lead the rest of the leadership council in a quick review of the meeting that has just ended and to make sure that everyone is ready for the unit’s next activity or meeting.
The course leader invites members of the leadership council to gather for the standup leadership council meeting. (In this case, the leadership council will include the course leader, assistant course directors for program and service, the course’s team leaders, and the team guides assigned to the teams.)
Review the just-concluded meeting, using Start, Stop, Continue to evaluate the proceedings.
Go over assignments for the next course meeting, and be sure everyone knows their role.
Close the standup meeting with words of praise and positive reinforcement.
Thank the group for a job well-done. Adjourn.

N a t i o N a l Y o u t h l e a d e r s h i p t r a i N i N g
day two-48
Cour
se E
vent
s
The narrator reminds participants that:
■ A good unit meeting follows the seven-step unit meeting plan.
Lastly, the course leader can thank all of the course members for their participa-tion in the model course meeting, and dismiss them.

N a t i o N a l Y o u t h l e a d e r s h i p t r a i N i N g
day two-49
Content Sessions
day two: Building pioneering projects
time allowed 120 minutes
Format Teams use the plans they developed during the course meeting to build pioneering projects.
location Large outdoor site
learning objectives
As a result of these activities, participants will be able to
■ Practice using planning skills as a team.
■ Develop teamwork skills.
■ Have a great time.
Materials Needed
Note: The pioneering project should be selected during staff training, with enough sturdy wooden poles of various sizes gathered to allow each team to construct a full-sized pioneering project.
■ Various lengths of rope
Councils still in the process of developing a cache of building materials may use Scout staves for the construction of model pioneering projects.
Conducting the ChallengePioneering projects provide teams with opportunities to practice setting goals, planning, and team development as well as to have lots of fun.
The challenge of planning and building a pioneering project is set out in the Day Two course meeting. At that time each team was given photographs of a variety of possible pioneering projects. They were to select a project they wanted to build (or design one of their own), then use the What, How, When, Who Planning Tool to determine the best way to achieve the goal of a completed project.
Teams will find plenty of challenge in the pioneering project activity, and problems for them to confront are almost certain to arise naturally.
Staff should not impose additional difficulties to the challenge, but rather should provide teams with all the materials they need, offer encourage-ment and coaching when it is appropriate, and enable teams to succeed by using their own skill and initiative.
Presentation Procedure

N a t i o N a l Y o u t h l e a d e r s h i p t r a i N i N g
day two-50
Cont
ent S
essi
ons
day two: scouts’ Worship service
time allowed 50 minutes
Format The Scouts’ worship service has two parts:
■ Explain—The instructional portion. A discussion of issues surrounding religious observances in Scouting settings and guidelines for developing meaningful worship services.
■ Demonstrate—The model service. Staff members conduct a worship service with songs, readings, and other presentations that illustrate the instructional concepts.
responsible Staff
location Chapel
learning objectives
By the end of this session, participants will
■ Have experienced an appropriate Scouts’ worship service.
■ Be able to plan a Scouts’ worship service.
■ Be able to discuss the importance of religious services for a unit.
Materials Needed
Photocopies of selected hymns, responsive readings, unison prayers, etc. (These can be placed in the NYLT Participant Notebooks ahead of time.)
recommended Facility layout
A quiet setting where all participants can be comfortably seated as they take part in the proceedings.
Presentation Procedure
Instructional PresentationThe session facilitator can lead a discussion of key issues surrounding religious observance in Scouting. The nature of the discussion will vary with different courses depending on the backgrounds and information needs of the partici-pants. Among the issues that may be covered are these:
WHY INCLUDE RELIGIOUS SERVICES IN SCOUTING?
The BSA’s Charter and Bylaws recognize the religious element in the training of its members, but it is absolutely nonsectarian in its attitude toward that religious training. Religious instruction is ultimately the responsibility of the home and the religious institution.

N a t i o N a l Y o u t h l e a d e r s h i p t r a i N i N g
day two-51
Content Sessions
From the BSA’s Charter and Bylaws:
The Boy Scouts of America maintains that no member can grow into the best kind of citizen without recognizing an obligation to God.
From the Boy Scout Handbook, 11th edition:
A Scout is REVERENT. A Scout is reverent toward God. He is faithful in his religious duties. He respects the beliefs of others.
Wonders all around us remind us of our faith in God. We find it in the tiny secrets of creation and the great mysteries of the universe. It exists in the kind-ness of people and in the teachings of our families and religious leaders. We show our reverence by living our lives according to the ideals of our beliefs.
Throughout your life you will encounter people expressing their reverence in many different ways. The Constitution of the United States guarantees each of us complete freedom to believe and worship as we wish without fear of punish-ment. It is your duty to respect and defend the rights of others to their religious beliefs even when they differ from your own.
WHAT IS A SCOUTS’ WORSHIP SERVICE?
The explanation provided by Baden-Powell is as valid today as when he wrote it:
. . . I think the Scouts’ [worship service] should be open to all denominations, and car-ried on in such manner as to offend none. There should not be any special form, but it should abound in the right spirit, and should be conducted not from any ecclesiastical point of view, but from that of the boy. . . . We do not want a kind of imposed church parade, but a voluntary uplifting of their hearts by the boys in thanksgiving for the joys of life, and a desire on their part to seek inspiration and strength for greater love and ser-vice for others.
—Baden-Powell Printed in The Scouter November 1928
BASIC CONCEPTS FOR PLANNING A SCOUTS’ WORSHIP SERVICE
Choose a setting that lends itself to the occasion and promotes reverence—a grove of trees, a site with a view of a lake, pond, or brook, etc. For small groups, sitting in a circle can be a very effective arrangement.
Everything must be in good taste. The service should be planned, timed, and rehearsed (generally 30 minutes maximum).
It should go without saying that those attending a Scouts’ worship service will be courteous, kind, and reverent. Participants should respect the rights and feelings of others even if their beliefs and religious practices differ from their own.

N a t i o N a l Y o u t h l e a d e r s h i p t r a i N i N g
day two-52
Cont
ent S
essi
ons
Cont
ent S
essi
ons
Everyone in attendance should have opportunities to participate, if they wish, through responsive readings, silent and group prayer, singing, etc.
Not all religions will find this format acceptable. Youth and adult troop leaders must be sensitive to the beliefs of all who are coming to an NYLT course and adjust the content and presentation of the Scouts’ worship service appropriately.
RECOGNIzING DIVERSITY IN A SCOUTS’ WORSHIP SERVICE
Scouts practice many faiths. When there is a mix of faiths represented by partici-pants involved in a Scouting outing, ask all Scouts to participate in the planning of a Scouts’ worship service and to assist in leading the service.
Because different faiths observe different religious practices and have a variety of holy days, it is not always possible to conduct an interfaith service in a time frame that fully recognizes their individual religious obligations. This should be acknowledged and discussed ahead of time so that opportunities can be built into the schedule to allow for all Scouts to meet their religious obligations.
A multifaith, or interfaith, Scouts’ worship service is a service that all Scouts and Scouters may attend. Therefore, much attention must be paid to recognizing the universality of beliefs in God and reverence. With that in mind, perhaps the most appropriate opening for a Scouts’ worship service is, “Prepare yourself for prayer in your usual custom.”
Encourage Scouts and Scouters to participate in religious services. Let them know ahead of time the nature of a service so that they can decide if it is appropriate for them to attend.
SummaryWhenever possible, BSA outings and activities should include opportunities for members to meet their religious obligations. Encourage Scouts and Scouters to participate. Even the opportunity to share the uniqueness of various faiths, beliefs, and philosophies with other members may be educational and meaning-ful. Planning and carrying out religious activities can be as simple or complex as the planners choose to make them.
Care must be taken to support and respect all the faiths represented in the group. If services for each faith are not possible, then an interfaith, nonsectarian service is recommended. Scouting leaders can be positive in their religious influence while honoring the beliefs of others.
N a t i o N a l Y o u t h l e a d e r s h i p t r a i N i N g
day two-53
Content Sessions
Scouts’ Worship ServiceAt this point, the Scouts’ worship service can shift from instruction to example as staff members offer a brief service that follows the guidelines set out above. There are many formats for Scouts’ worship services. For example:
Scouts’ Worship Service
1. Call to worship
2. Hymns or songs
3. Scriptures or readings from a variety of religious or inspirational sources
4. Responsive reading
5. Personal prayer
6. Group prayer
7. Inspirational reading or message
8. Offering (World Friendship Fund)
9. An act of friendship
10. Benediction or closing

N a t i o N a l Y o u t h l e a d e r s h i p t r a i N i N g
day two-54
Cont
ent S
essi
ons
day two: Movie Nighttime allowed 120 minutes
Format A relaxed setting for watching and then discussing a movie
responsible Staff
leaders Course leader, team leaders
learning objectives
By the end of this session, participants will
■ Expand their views on the concepts of Finding Your Vision, Setting Your Goals, and Preparing Your Plans.
■ Develop fellowship among NYLT participants.
Materials Needed
■ The movie “Apollo 13,” a VCR/DVD player, and a TV/projector screen
■ Cracker barrel refreshments
Conducting Movie NightMovie night is designed to be social, educational, and enjoyable. It combines the refreshments of the cracker barrel with viewing of a movie that connects with themes of the NYLT course.
A presenter—perhaps the course leader—can introduce the film and at its conclusion lead a discussion to draw out important points in the movie that relate to the NYLT course.
Before the movie begins, the presenter welcomes everyone and invites them to enjoy the movie and the cracker barrel refreshments.
As they watch the film, the presenter encourages participants to look for exam-ples of Vision—Goals—Planning.
At the conclusion of the film, the presenter leads a brief discussion of the film to bring out some of the key points relating to NYLT. He begins by exploring ways that Vision—Goals—Planning were presented in the story.
Questions that might open up further discussion include:
■ What challenges faced the team when its membership changed? How did team members deal with those challenges?
■ What steps did the team use to solve problems? Are there similarities with the ways the teams solved problems during today’s lunch challenge and the pio-neering project challenge?
■ What roles did family and friends play in the efforts of the Apollo team?
■ What role did faith play in the story?
■ Who were the leaders?

N a t i o N a l Y o u t h l e a d e r s h i p t r a i N i N g
day three-1
schedule for day three (tuesday)
Time Activity Notes Responsible Location6:30 a.m. Arise, breakfast,
and cleanup.Duty roster Team site
7:45 a.m. Course Assembly Flag ceremony Course leader and staff
Course assembly area
8:00 a.m. Developing Your Team Experienced youth staff presenter
Team site
9:30 a.m. Solving Problems Presentation on methods for problem solving
Team guides Large outdoor area
10:15 a.m. Problem Solving Round-Robin
Perhaps outdoor skills–oriented challenges
Team guides
11:30 a.m. Leadership Council Meeting
Course leader Leadership council site
12:15 p.m. Lunch and cleanup Duty roster Team site
1:00 p.m. Course meeting Backpacking stoves/Leave No Trace
Assigned staff Course site
2:30 p.m. The Leading EDGE Staff Course site
3:30 p.m. Team Games Active event. Builds on team development, problem solving
Assigned staff Large outdoor area
4:00 p.m. Team Meeting Team leaders Team site
4:45 p.m. Meal preparation Duty roster Team site
6:00 p.m. Dinner and cleanup Conducted with explanation. Ties into Leading Yourself.
Duty roster Team site
7:15 p.m. Flag ceremony Fellowship and relaxation (“Apollo 13”)
Program team
7:30 p.m. Lego® Challenge/ Realistic First Aid
Assigned staff, team guides
Team sites
10:00 p.m. Lights out
Course events and activitiesTeam events and activities
Content sessions and their connecting activities

N a t i o N a l Y o u t h l e a d e r s h i p t r a i N i N g
day three-2
Team
Eve
nts
day three: Breakfast QuestionsOne or more staff members will join each team for breakfast. This is a good opportunity for participants and staff to get to know each other a little better. In addition, staff members can learn quite a bit about the team and can encourage team members to think about a few key issues as they begin the day.
To make the most of breakfast discussion opportunities, keep the following questions in mind for the Day Three breakfast:
■ How did you sleep?
■ Has anything unexpected happened since yesterday?
■ Tell me about your team vision.
■ What goals and planning steps have you identified that will help you reach your vision by the end of the NYLT course?
■ How have you used Troop Program Features for planning home unit meetings? Are you interested in giving them a try when you get back home?
The breakfast questions are not meant to be a quiz or a list to be read. Instead, enjoy sharing breakfast with a team and drop the questions into the conversation as a natural part of the morning discussions. Additional questions that relate to the specifics of the course or the specifics of that team’s learning curve are encouraged.

N a t i o N a l Y o u t h l e a d e r s h i p t r a i N i N g
day three-3
Course Events
day three: Course assemblytime allowed 30 minutes
responsible Course leader and staff
location Course assembly area
learning objectives
By the end of this session, participants will
■ Have gathered for Day Three of the National Youth Leadership Training course.
■ Feel welcomed and valued (staff too).
■ Reaffirm that the NYLT course operates according to the Scout Oath, the Venturing Oath, and the Scout Law.
■ View or participate in a flag ceremony presented by the program team.
■ View or participate in the installation ceremony for new team leaders and assistant team leaders.
■ View youth staff as supporters, guides, and mentors to course participants.
■ Be able to discuss key parts of a good assembly.
■ Be able to recognize good communication skills.
recommended Facility layout
Before an NYLT course begins, staff members should designate the place that will serve as the course assembly area. In most cases, this will involve an outdoor setting, though indoor areas of sufficient size (a dining hall, for example) can be adapted to accommodate the course assembly. (Indoors, flags can be presented on staffs with floor stands or can be displayed on a wall.)
Presentation Procedure
OpeningThe team leaders lead their teams to the assembly area and arrange them in an appropriate formation.
The course leader takes charge of the meeting, using the Scout or Venturing sign to bring the assembly to order. He welcomes participants to Day Three of NYLT and expresses pleasure in having everyone there.
Explain that Day Three symbolizes the second week of the month for a normal Boy Scout troop. There will be a variety of presentations and activities during the day, as well as a course meeting.
Flag CeremonyInstruct NYLT course members to use the Scout or Venturing salute while the flag is being raised. Ask the program team of the day to present the colors and raise the American flag, then invite the program team to display the historic flag for the day and explain its significance.

N a t i o N a l Y o u t h l e a d e r s h i p t r a i N i N g
day three-4
Cour
se E
vent
s
The historic flags to be used for the NYLT course are the same as those presented during Wood Badge courses. Scripts for historic flag presenta-tions, also the same as included in Wood Badge courses, can be found in the appendix for Day Two.
Instruct the program team color guard to raise the historic flag and the NYLT course flag.
Flag ceremonies should incorporate both the Venturing and Boy Scout signs and oaths in a meaningful way. For example, the Scout sign may be raised and the Scout Oath recited at one ceremony, and the Venturing sign and Oath used at the next.
Dismiss the color guard.
AnnouncementsOffer any announcements important for conducting the day’s sessions and events.
New Team Leader and Assistant Team Leader InstallationThe course leader asks the Day Two team leaders to introduce the Day Three team leaders to the participants, then the Day Two assistant team leaders to introduce the Day Three assistant team leaders. Encourage those making the introductions to use effective communication skills.
As introductions are being made, the course leader can provide positive reinforcement by commenting on one or two communication skills being used well—hand gestures, clear voice, eye contact with the group, etc.
Team leader and assistant team leader assignments for each day of the NYLT course can be found in the Sample Team Duty Roster included in each copy of the NYLT Participant Notebook.
The course leader begins the installation. He or she should
■ Invite the new team leaders and assistant team leaders to come forward to be installed.
■ Ask the new team leaders to gather around the course flagpole, placing their left hands on the pole. New assistant team leaders stand behind their team leaders, each placing his or her left hand on the team leader’s right shoulder.
■ Instruct them all to give the Scout or Venturing sign and repeat, “I promise to do my best to be worthy of this office for the sake of my fellow Scouts in my team and course and in the world brotherhood of Scouting.”
■ Welcome them as the course’s new team leaders and assistant team leaders.

N a t i o N a l Y o u t h l e a d e r s h i p t r a i N i N g
day three-5
Course Events
Program and Service Team Emblem ExchangeThe assistant course directors briefly review the duties of the program team and the service team.
The duties of the teams may differ from other days of the course. Adjust the explanations to reflect the needs of this day of the NYLT program.
Program Team (sample assignments)
■ Coordinate the course assembly and flag ceremony.
■ Prepare the course meeting area.
■ Complete other duties as assigned at the leadership council meeting.
Service Team (sample assignments)
■ Put the course meeting area in order after meetings. (NYLT is a Leave No Trace program.)
■ Maintain the participant latrines and showers.
■ Complete other duties as assigned at the leadership council meeting.
Ask the leaders of the day’s program team and service team to come forward to receive a symbol of their team responsibilities for the day. The emblem for the service team might be a broom or camp shovel, while that for the program team could be a flag.
The exchange of symbols for the program team and service team should not overshadow the installation of the day’s team leaders and assistant team leaders. Bestowing the emblems for the program and service teams can be done in good fun, but with the understanding that these team duties are secondary to the roles of team leadership.
STAFF SERVICE TEAM
Explain to participants that staff members have the responsibility of cleaning staff latrines and showers, staff campsites, and other staff-use areas. As fellow members of the course, staff members roll up their sleeves and take care of their own areas rather than expecting someone else to do it for them.
Baden-Powell Team Streamer PresentationsThe course leader presents the Baden-Powell Team streamer awards based on the previous day’s campsite evaluation. Point out that the Boy Scouts of America encourages teams to compete against a standard that all can achieve (in this case the standard of the Daily Campsite Inspection Checklist) rather than against one another. When it comes to the Baden-Powell Team streamer awards, every team can be a winner.

N a t i o N a l Y o u t h l e a d e r s h i p t r a i N i N g
day three-6
Cour
se E
vent
s
For guidelines on the daily campsite inspection and for presentations of the Baden-Powell Team streamers, see Day One—Registration, Orientation, and Camp Setup.
Using the Daily Campsite Inspection Checklist as a guide, the assistant course director in charge of the service team makes the evaluation of the team campsites. (This may occur while team members are at evening sessions of the NYLT course.) Team guides can encourage the teams to use the same form to check their campsites as they complete their cleanup after the evening meal. If a team is having difficulty following through with all the items on the checklist, its team guide can use the Teaching EDGE to help the team learn how to manage campsite cleanup in an efficient and orderly manner.
Each team can tie its Baden-Powell Team streamer for the day onto the pole used to display its team flag. Every patrol will have the opportunity to add another B-P Team streamer each day of the NYLT course.
Course Director’s MinuteThe course director presents his Course Director’s Minute for Day Three:
“Here’s a question for you. How many fingers are there in the Scout sign?
“Many people say three—the three big fingers. But, of course, the thumb and little finger have roles to play, as well. In fact, it’s the thumb and little finger that are out in front, representing the unity of Scouting worldwide. Without them, you can’t really make the Scout sign.
“A diversity of fingers makes up the Scout sign. They are all different. We value them for the ways in which they are like one another, and also for the ways in which they differ. Five fingers, each of them unique, all of them working together toward the common goal of forming the Scout sign. And the same five diverse fingers can also be used to form the Venturing sign, a little bit similar and a little bit different.
“You’ll spend much of today exploring team development and acting together as members of a team. A great strength of your team, and of all groups—our schools, our churches, even our nation—is the diversity that members bring.
“As you go through today’s sessions, keep in mind the Scout sign and the diversity that makes it possible.”
ConclusionThe course leader thanks the course director and brings the course assembly to a close.

N a t i o N a l Y o u t h l e a d e r s h i p t r a i N i N g
day three-7
Content Sessions
day three: developing Your team
time allowed 90 minutes
Format Course presentation
responsible Assigned staff
location Course site
learning objectives
At the end of this session, each participant should be able to
■ See that a team is a group of people working toward the same goals and vision.
■ Describe the phases that any team will experience as members move toward achieving a goal or learning a new skill.
■ Discuss how knowledge of the four phases can enhance the ability to lead a team.
■ Understand the importance of celebrating success when a team reaches a point when it must disband or when its membership will change significantly.
Materials Needed
■ National Youth Leadership Training DVD, DVD player or computer with DVD capability, projector, and screen
■ Flip chart and markers
■ A poster of the NYLT Leadership Compass
■ Personal NYLT Leadership Compasses (Each participant will have been given the compass along with a Participant Notebook during registration and orien-tation on Day One.)
Presentation Procedure
Opening ActivityThe presenter starts with a short activity/exercise/icebreaker game. In addition to having fun, an intention of this session’s opening activity is to put teams in the Forming phase. The skills involved should be new to everyone. Enthusiasm will be high but skills will be low. With luck, some teams may also experience Storming, and perhaps even Norming and Performing. Two possible activities:
All Aboard
Objective: To have the entire team aboard a 2-foot square of cardboard for at least 10 seconds. No person may touch the ground around the square.

N a t i o N a l Y o u t h l e a d e r s h i p t r a i N i N g
day three-8
Cont
ent S
essi
ons
Nitro Transport
Objective: Each team must move a can of radioactive nitro (an orange juice can full of water) from point A to point B (a distance of about 25 to 30 feet) by lifting the can on a small board (12 inches square) with eight 6-foot ropes. (It will be similar in appearance to an octopus.)
See initiative games in Troop Program Resources for additional games.
Opening DiscussionAfter the games, the presenter asks: How did it go? Did you succeed with the chal-lenge? Could you have done it alone?
Many would call that a team activity. We talk a lot in Scouting about teamwork.
WHAT IS A TEAM?
Ask the group for examples of teams (sports teams, academic teams, church teams, Scout patrols…). What makes them teams rather than just groups of people? Entertain answers, leading the group to the idea that: A team is a group of people who share a common vision. They work together to complete goals that will help them realize their shared vision. They support and depend on one another.
TEAM VISION—GOALS—PLANNING
Let’s revisit a couple of very important ideas.
Ask: What is a vision? Vision is what success looks like. (“If you can see it, you can be it.” A vision can be big, like an elephant.)
Ask: What are goals? Goals are the steps leading to realizing a vision. (The bites of the elephant.)
Ask: What is planning? Planning is a means of efficiently reaching goals. (Where we get the silverware to handle the bites to eat the elephant.)
A team is a group of people who share a common vision. Together they work toward goals that help them fulfill their vision. Together, they use planning to reach their goals.
A good team example is a Scout patrol or Venturing crew.
Show slide 3-2, What Is a Team.
Show slide 3-1, Developing Your Team.

N a t i o N a l Y o u t h l e a d e r s h i p t r a i N i N g
day three-9
Content Sessions
TEAMS AND SCOUTING
When Baden-Powell started Scouting, he was thinking teamwork all the way. Here’s what he had to say:
“The patrol method is not a way to operate a Boy Scout troop, it is the only way. Unless the patrol method is in operation you don’t really have a Boy Scout troop.”
Baden-Powell’s point was that it is imperative to teach team leadership by allow-ing the youth to learn to lead. Any Scouting unit is built upon teams. A Boy Scout patrol is a team. A Venturing crew is a team. Each team has a vision. Its members work toward goals in which they all believe.
Being in an NYLT team is a good way to learn how a team operates and how it can succeed. You can also use what you learn here in any team setting— for example, in your school, neighborhood, family, and place of worship.
Stages of Team DevelopmentOne of the most valuable things to know about teams is that they progress through stages. It’s happening to your NYLT team right now.
Recognize which stage a team is in—whether it’s a patrol or some other team—and you will have a much better idea of how to move it forward. You can be a far more effective member of the team.
Introduce the NYLT Leadership Compass. Every participant should have an NYLT compass with him. The face of the card is divided into four quadrants, each represent- ing one team development phase. Each quadrant is also marked with the identifying characteristics of that phase:
Forming: High enthusiasm/low skills
Storming: Low enthusiasm/low skills
Norming: Rising enthusiasm/growing skills
Performing: High enthusiasm/high skills
Show slide 3-3, Teams and Scouting.

N a t i o N a l Y o u t h l e a d e r s h i p t r a i N i N g
day three-10
Cont
ent S
essi
ons
The development of a team occurs in a series of stages:
■ Forming
■ Storming
■ Norming
■ Performing
Let’s look at these stages as a team experiences them.
FORMING
What was it like when you first arrived at NYLT and were put into a team? How did you feel? How did people respond to each other?
Entertain answers and lead the discussion toward these ideas:
■ You were just starting out. You were probably eager to be a part of the group, but weren’t sure yet what was expected of you. You had just gotten here and didn’t have time yet to master many of the skills of NYLT.
■ Motivation in your team was probably high.
■ Skills at being an NYLT team were probably low.
Offer a sports team and/or an orchestra example:
What about a high school sports team at the beginning of training for the season? Most of the starters from last year have graduated, so the team is pretty new. Everybody has high hopes for the season—motivation is high. Team mem-bers are still getting used to working together, though, and they’ve only had a couple of practices. So far, skills are low. That sports team is in the Forming stage.
A school orchestra that is just forming will be somewhat disorganized. No one has learned the music yet and no one is accustomed to working with others in the orchestra. Everyone is excited about getting busy, but they have a long way to go before they are ready for a public performance.
Show slide 3-4, Team Stages, and continue
through video clip 3-5, Developing Your
Team (Part One), which discusses the stages
of team development.
Forming Storming Norming Performing
Goal Goal Goal Goal
Team
Dev
elo
pm
ent
Show slide 3-6, Forming.

N a t i o N a l Y o u t h l e a d e r s h i p t r a i N i N g
day three-11
Content Sessions
Ask: In the movie “Apollo 13,” when was the team in the Forming stage?
Every newly formed team goes through the Forming stage. Every team, even one that has been together a long time, goes through Forming when its members set off to learn a new skill or reach a new goal.
STORMING
Have any teams here had any arguments? Maybe over who’s going to do the dishes or how the dining fly is supposed to be set up? Is everybody getting along perfectly, or is there some friction? Tell me what’s happened in your teams that has been a little stormy.
Briefly entertain some stories from the teams.
Being together as a team can get stormy sometimes. It’s a normal part of team development. Perhaps your team is going through a stormy time right now.
Storming is the second phase of team development. It’s almost always going to happen. You’ve been together as a team long enough to realize how much is left to do. Motivation in your team has probably dropped from when you first formed. Skills at being a team are probably still not what you need to function smoothly.
Offer a sports team and/or an orchestra example:
Take a look at our high school sports team. The first game is against a veteran team, and the home team loses. How are they going to feel in the locker room? (Discouraged, frustrated, upset, angry.) It could be pretty stormy in there, and at the practices the following week. Players might blame each other for the poor game they had. They could be disappointed in themselves. The enthusiasm they had when they were just forming is gone, and everybody knows there’s lots of hard work ahead to get better.
The same is true with the orchestra. The pieces the orchestra hopes to play for the big concert are harder than anyone expected, and the musicians are becoming discouraged about learning the music. There is some grumbling among orchestra members, and some wonder if the group should choose different music.
Ask: In the movie “Apollo 13,” when was the team in the Storming stage? How do you know?
Storming is part of the process of a team developing and getting better. Every newly formed team, after it has been together a while, goes through Storming. Every team, even one that has been together a long time, goes through Storming as they are learning a new skill or working to reach a new goal.
Show slide 3-7, Storming.

N a t i o N a l Y o u t h l e a d e r s h i p t r a i N i N g
day three-12
Cont
ent S
essi
ons
NORMING
Do any of you feel as though your teams are getting pretty good at a skill? How about your experience with the pioneering projects yesterday?
Briefly entertain some team stories, keeping them on the subject of how they worked together to succeed.
You started out the first day by Forming. You may have hit rocky times when your team was Storming, and maybe you still are doing some of that. But you’re proba-bly also beginning to experience the Norming phase of team development. It comes from the word normal—everybody working together, your skills a match for the work to be done. You know there are lots of challenges still to be over-come, and there is more to learn. Skills are high, but team members can be some-what discouraged by how much they know is left to accomplish.
Norming is the third phase of team development. It’s almost always going to happen.
You’ve been together as a NYLT team long enough that your skills are growing and you are becoming better at working together. Motivation and enthusiasm are growing, but you still look ahead and see there is much to do and much to learn.
Offer a sports team and/or orchestra example:
Let’s look at our high school team again. They formed, they went through some rough times, and they did a lot of storming. They kept at it, though, with lots of support and direction from their coach. They got better in practice, and they managed to beat an opponent in a game. How are they going to feel in the locker room after the game? And how will they feel about themselves at practice the following week?
Their enthusiasm and motivation are going to be higher, but they still know there are tough games ahead. They still have skills to learn—new plays, better execution—and lots of hard work left to do. They are getting used to the ways they will practice and prepare for games, and they know what they have to do in order to move forward.
The same is true with the orchestra. As their skill rises, so does their enthusiasm. They are coming to understand the music they are learning and are starting to play together as small ensembles within the orchestra. Their trust in the director is growing, and they all have bought into the director’s way of doing things.
Ask: In the movie “Apollo 13,” when is a team in the Norming stage? How do you know?
Norming is part of the process of a team developing and getting better. Every newly formed team that is progressing will reach the Norming phase. Every team, even one that has been together a long time, goes through Norming as they are learning a new skill or working to reach a new goal.
As teams develop, they can go back and forth between Storming and Norming. Team members who are beginning to work well together may run into difficulties that send them back to the Storming stage, at least for a while. That’s all part of the process of team building. When you know it can happen, you can work through it and keep moving ahead.
Show slide 3-8, Norming.

N a t i o N a l Y o u t h l e a d e r s h i p t r a i N i N g
day three-13
Content Sessions
PERFORMING
Do any of you belong to really successful teams in your home units? What is it about them that makes them run so smoothly and achieve so much?
Briefly entertain several team success stories.
Those teams you are describing have reached the stage called Performing. Team members are resolving difficulties and finding effective ways to get things done. They are confident in their ability to perform tasks and to overcome obstacles. They have a sense of pride in belonging to a successful team, and they enjoy working together. The trust and respect they have for one another is high. They are Performing.
Performing is the fourth phase of team development. A team has developed the skills they need to achieve the goals that challenge them. They are working together well. Motivation and enthusiasm are high. The team is eager to push ahead and achieve all they can.
Offer a sports team and/or an orchestra example:
Our high school sports team is deep into the season. They are winning some games and losing some, but they are playing at a high level of skill. They have learned their positions well and enjoy the weekly challenge of taking on another team. Their enthusiasm is high, and they are excited about their ability to play up to their potential.
How are they going to feel in the locker room after a game? And how will they feel about themselves at practice the following week?
For the orchestra, the big performance shows that the musicians have mastered the music and are enthused about the concert. The director knows everyone is able to do his part with minimal guidance. Not only will the concert go well, members of the orchestra are looking forward to begin preparing new music for the next concert.
Ask: In the movie “Apollo 13,” when is a team in the Performing stage? How do you know?
Performing is part of the process of a team developing and getting better. Every newly formed team that is progressing should strive to reach the Performing phase. Every team, even one that has been together a long time, strives toward the Performing phase as they are learning a new skill or working to reach a new goal.
Note that when a team in the Performing phase starts down the trail toward a fresh goal, sets out to learn a new skill, or has significant changes in its member-ship, that team will no longer be in the Performing phase. For that new goal, skill, or membership, the team will begin again with Forming, then progress through Storming and Norming phases, even if briefly, before finding themselves back at Performing.
Show slide 3-9, Performing.

N a t i o N a l Y o u t h l e a d e r s h i p t r a i N i N g
day three-14
Cont
ent S
essi
ons
When a Team Breaks UpThere may come a time when a team is disbanded or dramatically reorganized. A number of Scouts in a regular patrol may become old enough to leave the patrol and take other troop leadership roles. Venturing crew members may go off to college. New members might join the unit, and that will change the team.
If you are part of a team that is ending or becoming something else, be sure to celebrate the many successes that all of you have enjoyed during your time together. Then be ready for whatever new team you have joined to begin with the Forming stage and progress from there.
Show slide 3-10, and lead participants through the multiple-choice scenarios of Forming, Storming, Norming, Performing and the summary, illustrated by the Scouts hiking.
Show video clip 3-11, Developing Your Team (Part Two).
Give each team a large NYLT Leadership Compass like the one used in front of the group during the presentation. Ask the teams to display the large compass in their team sites and use it as a reminder of the stages of team development.
Ask teams which stage of team development they were experiencing during the orientation of the NYLT course, while they were setting up camp, and during the Team Lunch Planning Challenge. (Continue with other selected moments during the course.)
Stress the value of recognizing a team’s development stage as a tool for understanding why people are acting as they are and how they can move forward effectively.
SummaryScout patrols, Venturing crews, youth groups, athletic teams, orchestras, school groups—in fact, all teams—go through four stages of development. Whenever people set out to reach goals and realize a vision, they will experience the phases of team development.
The team’s levels of skill, motivation, and enthusiasm are clues that can be used to identify its current stage of development. By recognizing the stage of a team’s development, you can be more effective as a member of that team and as a force in helping it move to the next stage.
The NYLT compass is a strong reminder of the stages. As we continue through this NYLT course, use the compass and what you have learned in this session to identify the development stages of your team. You can use that knowledge to help your team progress.
Show slide 3-12, Summary.

N a t i o N a l Y o u t h l e a d e r s h i p t r a i N i N g
day three-15
Content Sessions
day three: solving problems
time allowed 45 minutes
Format Team presentations in team sites or other areas where one team will not interfere with the activities of another
responsible Team guides
location Large outdoor area
learning objectives
At the end of this session, each participant should be able to
■ Discuss the similarities between planning and problem solving.
■ Apply the What, How, When, Who Planning Tool to solving a problem.
Materials Needed
■ Flip chart and pens
■ Blindfolds and a tent for the opening group activity
■ Printouts of slides for this session (one set for each team)
Presentation Procedure
Opening Group ActivityDivide the group into teams. Explain the problem-solving challenge of the Blind Tent Pitch.
While blindfolded, members of the team will properly pitch a tent. Each team is provided with a tent complete with poles and stakes. Each team member is pro-vided with a blindfold.
Encourage teams to think about the challenge in terms of Vision— Goals—Planning:
■ The vision of the challenge—the picture of future success—is the tent properly pitched.
■ Each team can take a minute or two to figure out the goals that will fulfill that vision—getting the poles ready, stretching out the tent, placing the stakes, etc.
■ Each team can then make plans to complete the goals. What needs to be done, how will it be accomplished, when will the steps be completed, and who will take responsibility for each step?
Team guides can help blindfold members of their teams. At the starting signal, all team members do their best to solve the problem of pitching a tent without being able to see what they are doing.
Plan ahead so that there is plenty of unobstructed space for the Blind Tent Pitch. Monitor the activity closely to ensure the safety of all participants.

N a t i o N a l Y o u t h l e a d e r s h i p t r a i N i N g
day three-16
Cont
ent S
essi
ons
DEBRIEF THE OPENING PROBLEM-SOLVING CHALLENGE
At the end of the Blind Tent Pitch, ask each team to evaluate its problem-solving skills by applying the SSC evaluation tool—Start, Stop, Continue. (In order to improve their performance, what should they start doing? What should they stop doing? If they were to do the challenge again, what should they continue to do?)
Take down the tent so it will be ready for the team to repeat the problem-solving challenge later in the session. If staff members other than the team guides are in attendance, they can be asked ahead of time to strike and repack the tent. If there are no extra people available to help out, ask team members to take a few moments to take down the tent and repack it. Do not tell them that they will be pitching it again.
How Things Get DoneEngage participants in a brief review of the progression of Finding Your Vision, Setting Your Goals, and Preparing Your Plans. (Each of these concepts has been addressed in a session earlier in the NYLT course.)
Ask: What is vision? Vision is what future success looks like. (The elephant. The tent completely pitched.)
Ask: What are goals? Goals are the steps leading toward fulfilling a vision. (The bites of the elephant. The steps to be completed to pitch the tent.)
Ask: What is planning? Planning is a means of efficiently reaching goals. (Finding the fork, knife, and ketchup to eat the bites of the elephant. Deciding how to complete the steps of pitching the tent.)
Ask participants to talk briefly about the planning tool they used for the Team Lunch Planning Challenge and the Pioneering Project Challenge. They had divided a piece of paper into four columns, one for each part of developing a plan. What were the steps?
■ Decide WHAT has to be done.
■ Decide HOW to do it.
■ Decide WHEN to do it.
■ Decide WHO will do it.
■ And then DO it.
Introduce the Idea of Problem SolvingWhat happens when things don’t go according to the plan? What does an individual or a group do when roadblocks slow progress toward a goal? Lead the group to this answer:
Problem solving is what you must do when your plan no longer works.
Show slide 3-14, How Things Get Done.
Show slide 3-15, Planning Tool.
Show slide 3-13, Solving Problems.
Show slide 3-16, Problem Solving.

N a t i o N a l Y o u t h l e a d e r s h i p t r a i N i N g
day three-17
Content Sessions
ExAMINE THE WHAT, HOW, WHEN, WHO OF PROBLEM SOLVING
What you need is a fresh plan that takes into account the new reality of your situation. But it is a plan, all the same. You can use the same planning tool for planning a solution to a problem as you use for developing any plan.
1. Figure out WHAT is causing the problem.
What is the problem? Describe it as accurately and completely as possible. The better you understand the problem, the more quickly and efficiently you can solve it.
2. Figure out HOW to solve the problem.
Consider all the ways your team might be able to solve the problem, and then choose the best. Give careful thought to materials you will need and additional information you might require.
3. Figure out WHEN to solve the problem.
Determine the order of the steps that must be taken to reach a solution. Some steps might need to be completed before others can be started. Sequence usually is very important. Sometimes doing the most important steps first will solve the problem and allow a team to move ahead quickly.
4. Figure out WHO will take responsibility.
There may be many steps in solving a problem. Who will own each step? Even if there are only a few steps, having someone taking responsibility for each one will ensure it gets done.
PIONEERING ExAMPLE
Ask teams to think back to their efforts to construct a pioneering project the previous day. They had set out with a goal in mind (constructing the project) and then had developed a plan to reach that goal. Did anything not go according to plan? If so, what did they do about it?
Entertain answers. They might be ideal for exploring the idea of problem solving.
What would team members have done if, partway through the construction of the project, they discovered they didn’t have enough rope to complete the project as they had planned it?
Entertain answers. There may be some good ones. Add these solutions:
■ Redesign the project so it requires less rope.
■ Borrow rope from another patrol.
■ Take down the patrol dining fly and use that rope for the project.
■ Use belts, shoestrings, strips of T-shirts, and anything else the patrol could improvise to take the place of the rope.
Highlight similarities between planning and problem solving.
Show slide 3-17, Problem Solving: You can use. . . .

N a t i o N a l Y o u t h l e a d e r s h i p t r a i N i N g
day three-18
Cont
ent S
essi
ons
One way to think of problem solving is that it involves planning when the facts have changed. You have new information that no longer fits the original plan.
Getting things done, whether with an original plan or when problems are arising quickly, always involves What, How, When, and Who.
Revisit the Opening Group ActivityRepeat the team challenge of pitching a tent while blindfolded. This time, include the following steps:
■ Three minutes—Use the What, How, When, Who Planning Tool to solve the problem of setting up the tent even though no one will be able to see.
■ Five minutes—Put the solution in action as blindfolded patrol members pitch the tent.
Finding SolutionsThe What, How, When, and Who we use for planning can also be very effective tools to use for problem solving, especially if you have a good idea of the actions you need to take.
What the problem is will often be obvious. Not enough rope. We forgot to get bread for our lunch. We’re lost.
How to solve the problem may not be so obvious. What if you don’t know how to solve a problem? What do you do then?
There are many ways that teams can make decisions. Among the many useful decision-making tools are:
■ Brainstorming
■ Consensus
■ Multivoting
■ Parking lot
BRAINSTORMING
Brainstorming allows for the free flow of ideas. A team can get lots of ideas out on the table before evaluating any of them. As team members bounce thoughts off one another, the combined result can be greater than any of the individual contributions.
■ Encourage everyone to participate. Their ideas are valuable.
■ Think in unconventional ways—that is, consider solutions beyond the obvious. Encourage this kind of input by agreeing at the outset not to be critical of the ideas of others.
■ Piggyback ideas. One person’s thoughts can build on the ideas of others.
■ Write down everyone’s suggestions. Don’t make a judgment on them—simply record them where they can be seen and can spark other ideas.
Show slide 3-18, Planning and
Problem Solving.
Show slide 3-19, Decision-Making Tools.
Show slide 3-20, Brainstorming.

N a t i o N a l Y o u t h l e a d e r s h i p t r a i N i N g
day three-19
Content Sessions
■ Consider how similar problems have been solved in the past, both by the team and by others. There is no need to reinvent the wheel every time.
■ Encourage everyone to participate.
CONSENSUS
Consensus occurs when a discussion leads to agreement without resorting to a vote. The team discusses different solutions to see if they fit the vision of what success looks like. Team members trust each other and agree to support the group decisions.
MULTIVOTING
When presented with many options, team members can use multivoting to cut down a list to a manageable size.
Each team member has a number of votes equal to one-third of the number of choices. (For example, if you are deciding among nine options, each team mem-ber gets three votes.) Each person can place all his votes on one choice or spread his votes among two or more choices. Based on the vote tally, the team can reduce the number of choices to several or even a single one.
PARkING LOT
Team discussions can lead to lots of good ideas that aren’t directly related to solving the problem that needs to be solved right now. The person leading the discussion can make a note of each good suggestion, then put that idea in the parking lot. Team members feel as though all of their suggestions are being considered, just not right now. It also helps a team hold onto fresh ideas whose time has not yet arrived.
Team Problem-Solving PracticeGive each team three minutes to consider the following problem. Ask them to write down their solution using the What, How, When, Who tool. When they report their solution to the rest of the course, members of each team should also explain the methods they used to come up with a solution—brainstorming, consensus, multivoting, parking lot, etc.
Debrief the team problem-solving practice by asking the leader of each team to use good communication skills as they report to the troop the results of their team’s efforts to solve the problem.
PROBLEM NO. 1
You and your team get disoriented on cross-country a hike and aren’t sure where you are. You’ve got a compass and a map. What do you do?
Show slide 3-21, Consensus.
Show slide 3-22, Multivoting.
Show slide 3-23, Parking Lot.

N a t i o N a l Y o u t h l e a d e r s h i p t r a i N i N g
day three-20
Cont
ent S
essi
ons
PROBLEM NO. 2
Just as you reach your Outpost Camp, it starts to rain. Everyone is hungry and it’s going to get dark soon. What do you do?
During the debriefings of the problem-solving practice, focus on the use of the What, How, When, Who tool rather than Start, Stop, Continue. That will keep the emphasis of this session on a step-by-step method for solv-ing problems.
Emergency Problem SolvingEmergency problem solving can occur when a team must come up with a plan very quickly. For example: You are on a mountain trail hiking with your team. Your plan is to reach the lake and camp overnight. It is late afternoon and you are 5 miles from the nearest road when a member of your team trips over a rock and takes a bad fall. You examine him and find he has injured his ankle, perhaps has even broken it. What do you do?
The person who fell and broke his ankle is lying in a cold stream. The team leader may need to make a quick call. Even though there is little or no time for discussion, the problem-solving process is the same.
The team leader (or the person with the best first-aid skills) directs the rest of the team, telling them:
■ What the problem is. (The injured person must be moved out of the stream. To prevent further injury, the team must stabilize his or her ankle during the move.)
■ How the problem will be solved. (Some team members will stabilize the ankle while others lift the victim to safety.)
■ When each step will be done. (First, prepare the place to put the victim. Second, stabilize the ankle. Third, get ready to move him. Fourth, move the victim to safety. Fifth, begin first-aid treatment.)
■ Who is responsible for each step. (“Bill, you get your foam pad out of your pack and spread it on the ground right there. Terry and Michele, you support his leg and foot so that his ankle doesn’t move. The rest of you space yourselves along either side of his body and get a firm grip on his clothing. Tell me when you are ready. When I count to three, everybody lift together and move him to the foam pad. I want everybody to lift with their legs, not their backs. Any questions?”)
Show slide 3-24, Emergency
Problem Solving.

N a t i o N a l Y o u t h l e a d e r s h i p t r a i N i N g
day three-21
Content Sessions
Leader ResponsibilitiesIn emergency problem solving, a leader directing a team toward a solution should try to stay a step back from the action. The leader needs to maintain an understanding of the big picture. If the leader gets involved in one step—for instance, stabilizing the injured person’s ankle—he or she is no longer free to view and direct everything else that is happening.
Advanced first-aid training reminds team leaders to “Don’t just do something . . . Stand there!” That will allow a leader in an emergency situation to stay focused on providing the leadership the situation requires.
PROBLEM-SOLVING ROUND-ROBIN
Conclude this session by describing the Problem-Solving Round-Robin that is about to begin. Whatever the challenge (or series of challenges), it should involve participation by everyone in a team to come up with a solution and then to make it happen. Teams should be encouraged to use the What, How, When, Who tool to guide them through the problem-solving process.
Show slide 3-26, Summary.
Show slide 3-25, Leader Responsibilities.
N a t i o N a l Y o u t h l e a d e r s h i p t r a i N i N g
day three-22
Cont
ent S
essi
ons
day three: problem-solving round-robin
time allowed 75 minutes
responsible ■ Youth staff (presenting the problem-solving challenges)
■ Team leaders (providing leadership as their teams tackle the challenges)
location To be determined
learning objectives
By the end of this session, participants will be able to
■ Put into action the principles they have learned about planning and problem solving.
■ Practice teamwork, including identifying their teams’ stage of development.
■ Have fun, especially as a team.
Materials Needed
Every activity in the round-robin has its own requirements for materials. See the descriptions below.
Each event of the round-robin requires enough space for participants to engage in the activities without feeling cramped, though the sites should be close enough to one another for teams to move quickly from one event to the next.
Staff members will take responsibility for setting up the events well in advance of the round-robin and for ensuring that all the materials are on hand. They should have the assistance of the quartermaster and the assistant course director assigned to this duty.
delivery Method
The round-robin is made up of the same number of events as there are teams in the course. Teams rotate through the events, spending 10 minutes at each station. A youth staff member at each station will use effective communication skills to explain the problem-solving situation and provide team members with the materials they need. When appropriate, they will offer additional guidance to allow teams to complete an event. They also will monitor activities to ensure that activities are conducted in a safe manner. Staff members should use Start, Stop, Continue to manage the safety and appropriateness of each team’s progress. NYLT staff members have the authority to stop any activity they feel is unsafe or inappropriate.
Wherever needed, NYLT staff will serve as spotters.
A staff member acts as timekeeper, sounding an alert at the end of each 10-minute segment that patrols should move on to the next events.
Presentation Procedure
At each station, a staff member presents a team with a problem to be solved. Team members will use a systematic problem-solving process to come up with a solution, and then will test their plan by putting it in action.
recommended Facility layout
N a t i o N a l Y o u t h l e a d e r s h i p t r a i N i N g
day three-23
Content Sessions
Each event of the Problem-Solving Round-Robin has its own presentation procedure. See the descriptions below for details.
Each NYLT staff member involved in overseeing the round-robin events should have a good understanding of the material presented during the problem-solving presentation that precedes the round-robin. As teams take part in the events, staff can offer guidance in the form of problem-solving techniques drawn from the earlier presentation.
Staff should continue to role-model good communication techniques from both Communicating Well presentations.
TrolleyThe Trolley is a traditional Scouting challenge course problem that requires the utmost in teamwork for a team to succeed.
EQUIPMENT
■ Two 2-by-6-inch boards, each 10 to 12 feet long and each having 21⁄2– to 3-foot lengths of rope attached to it at 1-foot intervals
PREPARATIONS BY THE INSTRUCTOR
1. Mark the start and finish points of the trolley course.
2. Inspect the condition of boards and ropes.
3. Place the trolley at the starting point.
THE PROBLEM AND OBJECTIVES
While standing with one foot on each of the two boards that make up the trolley, team members grasp ropes attached to each board and then synchronize their movements to propel the trolley the length of a prescribed course. Teams must follow these rules:
1. Once the trolley begins to move, participants may not touch the ground.
2. A time penalty will be assessed whenever a participant steps off the trolley.
3. Trolley sections may not be placed end-to-end or on top of each other.
TASkS OF THE INSTRUCTOR
1. Explain the problem and objectives to each team. Clarify the rules before the team begins its problem solving.
2. Monitor the activities of each team.
3. After a team completes this task, encourage them to use SSC (Start, Stop, Continue) to discuss the strengths and weaknesses of their problem-solving methods and to consider other ways they might have achieved their goal. Stress using the What, How, When, Who Planning Tool and the problem- solving techniques of brainstorming, multivoting, and consensus.

N a t i o N a l Y o u t h l e a d e r s h i p t r a i N i N g
day three-24
Cont
ent S
essi
ons
SAFETY PRECAUTIONS TO CONSIDER
Use a smooth, level area for this problem.
VARIATIONS ON THE ORIGINAL PROBLEM
Challenge teams to traverse the trolley course backwards.
Stepping Domes
EQUIPMENT
■ A set of 24 to 48 hard plastic domes, about 8 inches in diameter and 31⁄2 inches high (Provide about six domes for every three participants.)
PREPARATIONS BY THE INSTRUCTOR
Place the domes on level ground and position them a comfortable stepping distance apart.
THE PROBLEM AND OBJECTIVES
Each participant steps across a series of hard plastic domes without touching the ground or floor. The idea is to teach participants how to balance and to learn some of the basic moves for climbing. This is a great indoor activity for a rainy day.
Start by having each participant in turn step across a series of five to seven domes. When participants have demonstrated success, space the domes a little farther apart. Next, lay the domes out in a zigzag pattern, causing participants to shift their weight from one foot to the other. Then place a tennis ball or other easily grasped object near one of the domes so that participants must squat down while maintaining balance on the domes. Finally, place a more difficult item to grasp a little farther away from the domes so that participants must reach for it while maintaining balance on the domes.
TASkS OF THE INSTRUCTOR
1. Inspect each dome to make sure it is not cracked. Stand on each one to ensure that it will hold up under full weight.
2. After a team completes this task, encourage them to use SSC (Start, Stop, Continue) to discuss the strengths and weaknesses of their problem-solving methods and to consider other ways they might have achieved their goal. Stress using the What, How, When, Who Planning Tool and the problem- solving techniques of brainstorming, multivoting, and consensus.
SAFETY PRECAUTIONS TO CONSIDER
1. Clear the area of obstructions.
2. Have participants test to see that their footwear will not easily slip while stepping on the domes.
N a t i o N a l Y o u t h l e a d e r s h i p t r a i N i N g
day three-25
Content Sessions
3. Use spotters as needed.
4. Avoid muddy or damp areas that could cause players to slip and fall.
VARIATIONS ON THE ORIGINAL PROBLEM
1. Have participants begin from opposite directions and cross in the middle of the domes series.
2. Allow participants to help one another across the domes.
3. Set up several series of domes with varying difficulty, and let the group choose its challenge.
Brownsea Island TurnaroundA team on Brownsea Island is asked to help conserve the area by rotating its campsite. Because of the small size of Brownsea, the most appropriate solution is to flip over the entire island.
EQUIPMENT
■ A durable tarp, retired tent fly, drop cloth, or sheet of plastic approximately 5 by 5 feet in size.
PREPARATIONS BY THE INSTRUCTOR
Spread Brownsea Island (the tarp) flat on the ground in an area free of obstructions.
THE PROBLEM AND OBJECTIVES
The entire team stands on Brownsea Island. Without stepping into the “water” surrounding the island, team members must figure out a way to flip over the island and spread it out again so that they can stand comfortably on the other side. Teams must follow these rules:
1. All team members must remain on Brownsea Island for the duration of the challenge.
2. No participant may be lifted above shoulder height.
TASkS OF THE INSTRUCTOR
1. Explain the problem and objectives to each team. Clarify the rules before the team begins its problem solving.
2. Monitor the activities of each team.
3. After a team completes this task, encourage them to use SSC (Start, Stop, Continue) to discuss the strengths and weaknesses of their problem-solving methods and to consider other ways they might have achieved their goal. Stress using the What, How, When, Who Planning Tool and the problem- solving techniques of brainstorming, multivoting, and consensus.

N a t i o N a l Y o u t h l e a d e r s h i p t r a i N i N g
day three-26
Cont
ent S
essi
ons
SAFETY PRECAUTIONS TO CONSIDER
“Brownsea Island” should be placed on smooth ground in an area free of obstructions.
Wiggle Woggle
EQUIPMENT
■ Metal ring, approximately 11⁄2 inches in diameter (Large key rings work well.)
■ Eight lengths of parachute cord or other light line, approximately 10 feet each
■ Balls of assorted sizes (golf ball, tennis ball, baseball, softball, soccer ball)
■ Bucket or large metal can
PREPARATIONS BY THE INSTRUCTOR
Prepare the Wiggle Woggle by using bowline knots to tie the ends of the cords to the metal ring (one cord for each member of the team). Lay the ring in the center of the activity area and arrange the cords on the ground as if they were the spokes of a wheel.
Place one of the balls on top of the Wiggle Woggle. (Some experimentation by staff ahead of time should make it clear which size ball will provide teams with the most appropriate degree of challenge. Larger balls probably will be more difficult to manage than those that are smaller.)
Determine the course over which teams must carry the ball, and set out the bucket or can that will serve as the goal.
THE PROBLEM AND THE OBJECTIVES
The task for each team is to use the Wiggle Woggle to move the ball from the starting point to a prescribed destination, then drop the ball into the bucket or can. The following rules must be followed:
1. Each team member must maintain a grasp on the end of one of the Wiggle Woggle cords.
2. Other than their hold on the ends of the cords, team members can have no other contact with the cords, the woggle, or the ball.
TASkS OF THE INSTRUCTOR
1. Explain the problem and objectives to each team. Clarify the rules before the team begins its problem solving.
2. Monitor the activities of each team.
3. After a team completes this task, encourage them to use SSC (Start, Stop, Continue) to discuss the strengths and weaknesses of their problem-solving methods and to consider other ways they might have achieved their goal. Stress using the What, How, When, Who Planning Tool and the problem- solving techniques of brainstorming, multivoting, and consensus.

N a t i o N a l Y o u t h l e a d e r s h i p t r a i N i N g
day three-27
Content Sessions
SAFETY PRECAUTIONS TO CONSIDER
None
VARIATIONS ON THE ORIGINAL PROBLEM
Changes in the size of the ball and in the placement of the goal can dramatically alter the difficulty of this problem. Consider having teams move the ball uphill, between two trees, or to a goal that is placed against a wall.
Mafeking Message Machine
EQUIPMENT
■ 10 to 12 “message tubes” (Form the tubes by cutting PVC tubing into lengths of 18 to 24 inches. The tubing should have a diameter of at least 2 inches—large enough for golf balls to roll easily through it. Add variety by attaching PVC elbow joints to one or both ends of several of the message tubes.)
■ Golf balls
PREPARATIONS BY THE INSTRUCTOR
1. Determine the starting point and destination of the message.
2. Pile the message tubes near the starting point.
THE PROBLEM AND THE OBJECTIVES
The team members are serving under the command of Baden-Powell during the siege of Mafeking. In his usual clever way, B-P has concealed a highly sensitive message inside of a golf ball and has asked the team to deliver it to a certain location. Using the message tubes, the team members are challenged to form a Mafeking Message Machine to convey the message to its destination.
The instructor starts the message (the golf ball) on its way by placing it in the end of the message tube held by one of the participants. Team members must then arrange themselves in such a way that they can roll the message from one tube to the next until it arrives at its goal. They do so according to the following rules:
1. Team members cannot touch the ball. (That would leave telltale fingerprints.)
2. A team member who has the ball inside a message tube cannot move his feet until the ball has passed into another message tube.
3. The ball must remain hidden in the message tubes. (The Boers are watching with their binoculars.)
4. At no time can the ball touch the ground. (Nobody but Baden-Powell knows why—it’s just a rule.)

N a t i o N a l Y o u t h l e a d e r s h i p t r a i N i N g
day three-28
Cont
ent S
essi
ons
TASkS OF THE INSTRUCTOR
1. Explain the problem and objectives to each team. Clarify the rules before the team begins its problem solving.
2. Monitor the activities of each team.
3. After a team completes this task, encourage them to use SSC (Start, Stop, Continue) to discuss the strengths and weaknesses of their problem-solving methods and to consider other ways they might have achieved their goal. Stress using the What, How, When, Who Planning Tool and the problem-solving techniques of brainstorming, multivoting, and consensus.
SAFETY PRECAUTIONS TO CONSIDER
None
VARIATIONS ON THE ORIGINAL PROBLEM
The problem can be made more difficult by placing the destination of the message uphill from its spot of origin. Teams also will find the problem more difficult if they must solve it in silence.
Nail Biter’s Nightmare
EQUIPMENT
■ Two dozen large nails
■ A piece of wood, about 4 by 6 inches, with a large nail set upright in the center
PREPARATIONS BY THE INSTRUCTOR
On a level, roomy workspace, set out the wood with the upright nail and, beside it, the pile of large nails. A sturdy picnic table is an ideal location for this activity.
THE PROBLEM AND THE OBJECTIVES
The problem is very simple—arrange as many large nails as possible on the head of the upright nail. In doing so, participants must follow these rules:
1. The large nails can touch only the upright nail and/or one another.
2. The large nails may not touch the board.
TASkS OF THE INSTRUCTOR
1. Explain the problem and objectives to each team. Clarify the rules before the team begins its problem-solving.
2. Monitor the activities of each team.
3. After a team completes this task, encourage them to use SSC (Start, Stop, Continue) to discuss the strengths and weaknesses of their problem-solving methods and to consider other ways they might have achieved their goal. Stress using the What, How, When, Who Planning Tool and the problem- solving techniques of brainstorming, multivoting, and consensus.

N a t i o N a l Y o u t h l e a d e r s h i p t r a i N i N g
day three-29
Content Sessions
SAFETY PRECAUTIONS TO CONSIDER
None
VARIATIONS ON THE ORIGINAL PROBLEM
The original problem is sufficiently difficult. There are, however, a surprising number of variations in workable solutions.
Spider Web
EQUIPMENT
■ A grid-shaped web made of parachute cord stretched between two trees, posts, or other stationary standards. The web can be of any width (10 feet is a good size) and must be no more than 5 feet high. The openings in the grid are of various sizes; each of them must be large enough for a person to pass through. Openings should be of varying sizes.
PREPARATIONS BY THE INSTRUCTOR
Set up the web. This is the most complicated preparation of any of the stations that will be used during the Problem-Solving Round-Robin. All of the station instructors can cooperate to build the web before the session and to test it for durability and the appropriateness of the challenge.
THE PROBLEM AND THE OBJECTIVES
On a hike, the team finds its way blocked by the spider web. Team members must cooperate to get all of the team to the other side of the web. While doing so, participants must follow these rules:
1. No one can touch the web.
2. Each opening in the web can be used only once for passage. After a participant has gone through an opening, no one else can use the same opening.
3. If any participant is lifted off the ground by other team members, that partici-pant must be protected from falling.
TASkS OF THE INSTRUCTOR
1. Explain the problem and objectives to each team. Clarify the rules before the team begins its problem solving.
2. Monitor the activities of each team. Act as a spotter to help protect any participant lifted off the ground.
3. After a team completes this task, encourage them to use SSC (Start, Stop, Continue) to discuss the strengths and weaknesses of their problem-solving methods and to consider other ways they might have achieved their goal. Stress using the What, How, When, Who Planning Tool and the problem-solving techniques of brainstorming, multivoting, and consensus.
N a t i o N a l Y o u t h l e a d e r s h i p t r a i N i N g
day three-30
Cont
ent S
essi
ons
SAFETY PRECAUTIONS TO CONSIDER
Team members must plan their moves through the web so that any participants who are lifted to pass through openings higher on the web can do so safely.
VARIATIONS ON THE ORIGINAL PROBLEM
Invite teams to remain silent while addressing the problem.
Human Knot
EQUIPMENT
None
PREPARATIONS BY THE INSTRUCTOR
Select a flat area free of obstructions.
THE PROBLEM AND THE OBJECTIVES
Team members stand in a tight circle. They reach into the center of the circle with both hands and, with each hand, grasp the hand of another team member, thus forming a human knot.
Maintaining their grasps, participants untie the knot by moving over, under, and around one another. The utmost of cooperation will be required for participants to visualize the moves that must occur and then to carry them out.
TASkS OF THE INSTRUCTOR
1. Explain the problem and objectives to each team. Clarify the rules before the team begins its problem solving.
2. Monitor the activities of each team.
3. A team sometimes forms a knot that cannot be fully untied or reaches a point where it is physically impossible to continue a particular solution. In either case, the instructor may change the grasp of one or several participants or may restart the challenge by having the team form a new human knot.
4. After a team completes this task, encourage them to use SSC (Start, Stop, Continue) to discuss the strengths and weaknesses of their problem-solving methods and to consider other ways they might have achieved their goal. Stress using the What, How, When, Who Planning Tool and the problem- solving techniques of brainstorming, multivoting, and consensus.
SAFETY PRECAUTIONS TO CONSIDER
Participants must move deliberately to minimize possibility of injury.
VARIATIONS ON THE ORIGINAL PROBLEM
The original problem is sufficiently difficult.
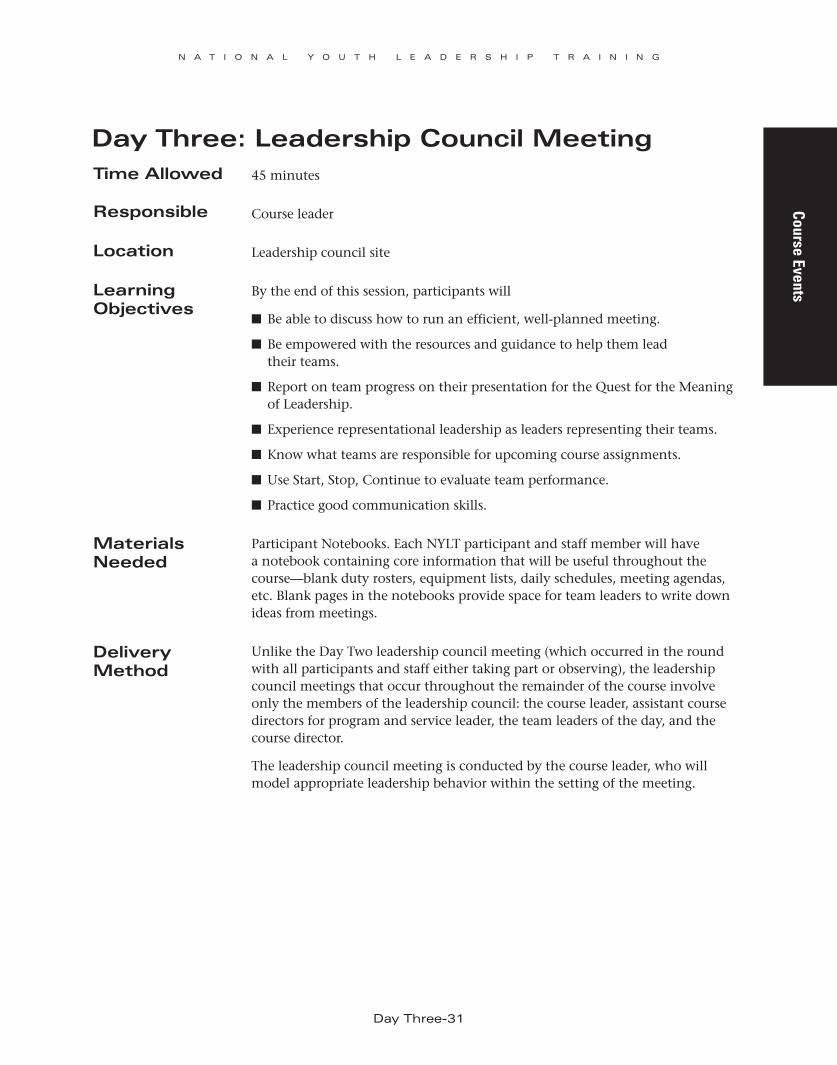
N a t i o N a l Y o u t h l e a d e r s h i p t r a i N i N g
day three-31
Course Events
day three: leadership Council Meetingtime allowed 45 minutes
responsible Course leader
location Leadership council site
learning objectives
By the end of this session, participants will
■ Be able to discuss how to run an efficient, well-planned meeting.
■ Be empowered with the resources and guidance to help them lead their teams.
■ Report on team progress on their presentation for the Quest for the Meaning of Leadership.
■ Experience representational leadership as leaders representing their teams.
■ Know what teams are responsible for upcoming course assignments.
■ Use Start, Stop, Continue to evaluate team performance.
■ Practice good communication skills.
Materials Needed
Participant Notebooks. Each NYLT participant and staff member will have a notebook containing core information that will be useful throughout the course—blank duty rosters, equipment lists, daily schedules, meeting agendas, etc. Blank pages in the notebooks provide space for team leaders to write down ideas from meetings.
delivery Method
Unlike the Day Two leadership council meeting (which occurred in the round with all participants and staff either taking part or observing), the leadership council meetings that occur throughout the remainder of the course involve only the members of the leadership council: the course leader, assistant course directors for program and service leader, the team leaders of the day, and the course director.
The leadership council meeting is conducted by the course leader, who will model appropriate leadership behavior within the setting of the meeting.

N a t i o N a l Y o u t h l e a d e r s h i p t r a i N i N g
day three-32
Cour
se E
vent
s
Leadership Council Meeting AgendaDay Three
■ Welcome and introductions■ Purpose of the meeting—what we need to accomplish■ Reports on the progress being made by each team■ Assignments for the upcoming course meeting (leading team planning
for the Outpost Camp)■ Program team and service team assignments■ Announcements■ Closing■ Course director’s observations
Welcome and IntroductionsThe course leader takes charge of the meeting, introduces those persons attend-ing the leadership council meeting, and welcomes everyone.
Purpose of the MeetingDirect the attention of the leadership council to the written agenda. Note that the purpose of this meeting will be to:
■ Hear reports on the progress being made by each team.
■ Make assignments for the upcoming course meeting (leading team planning for the Outpost Camp).
■ Make program team and service team assignments
Throughout the meeting, participants will use good communication skills to share ideas.
Reports on the Progress of Each TeamThe course leader asks each team leader to report on his or her team’s progress so far. Encourage team leaders to make their reports as constructive evaluations using SSC:
Start—What can they begin doing to improve their teams?
Stop—What can they stop doing that is not working well?
Continue—What can they continue doing that is a strength and is working well?
Encourage each team leader to use the Leadership Compass to determine the current stage of development of his or her team (Forming, Storming, Norming, Performing).
Remind team leaders that each team should be thinking about its presentation of the Quest for the Meaning of Leadership. Briefly review the challenge (offered by the course director at the campfire on Day One), and stress the importance of continuing to work on the presentation throughout the course.

N a t i o N a l Y o u t h l e a d e r s h i p t r a i N i N g
day three-33
Course Events
Assignments for the Upcoming Course Meeting The team meetings that take place during the Day Three course meeting will focus on planning for the Outpost Camp.
The course leader will give each team leader a checklist of things to be done before the teams set out for the Outpost Camp.
During the team meetings, each team leader will lead his or her team in using the What, How, When, Who Planning Tool to determine how the team will reach the goal of being ready for the Outpost Camp.
The checklist will vary, depending on the nature of the Outpost Camp. (On Day Three, teams will plan their Outpost Camp menus. On Day Four, they will plan the group and personal gear for the Outpost Camp.)
In general, the checklist can include these items to be planned:
■ Menu planning—Knowing what provisions are available, the team can decide what meals to prepare, how to fix them, and what ingredients are required. Planning should include how ingredients will be repackaged, carried, and stored.
■ Personal equipment—A list of what each person will need.
■ Group equipment—A list of gear the team will carry.
Teams will have Day Three and Day Four to get everything planned and done before setting out for the Outpost Camp. The process also will reinforce the use of the skills covered in the sessions on planning and problem solving.
Program Team and Service Team Assignments The course leader asks the assistant course directors for program and service to take the floor.
The assistant course directors remind the leaders of the Day Three service and program teams that they should review what they will be doing and use their planning skills to figure out an effective way to fulfill their responsibilities. Use Start, Stop, Continue for any evaluations.
Program Team (sample assignments)
■ Course assembly—Conduct the flag ceremony for the next day.
■ Course meeting—Prepare the meeting area.
■ Course meeting—Conduct the preopening activity. (The team should be provided with a printed sheet of instructions for organizing and conducting the activity. If materials are needed, the quartermaster should make those available.)

N a t i o N a l Y o u t h l e a d e r s h i p t r a i N i N g
day three-34
Cour
se E
vent
s
Service Team (sample assignments)
■ Police the course meeting area. (NYLT is a Leave No Trace program.)
■ Maintain participant latrines and showers.
STAFF SERVICE TEAM
The assistant course director for service will again make it clear to the leadership council that staff members have the responsibility of cleaning staff latrines/show-ers, staff campsites, and other areas for staff use. Staff members set a good exam-ple by rolling up their sleeves and taking care of their own areas rather than expecting someone else to do it for them.
AnnouncementsThe course leader makes any announcements relevant to the group.
Explain that team leaders have a responsibility to convey to their teams information from the meetings of the leadership council.
He notes the time and location for the next meeting of the leadership council.
SummaryThe course leader summarizes the key points covered during the meeting, addresses any questions the team leaders might have, and stresses the importance of performing at the highest levels, using the Scout Oath, the Venturing Oath, and the Scout Law as their guides.
Course Director’s ObservationsThe course director thanks all present for their participation and encourages them to continue performing at the highest levels.
The course leader adjourns the meeting but invites the group to stay a moment to observe the post-meeting debrief with the course director.
After the MeetingThe course director and course leader meet for a couple of minutes to review the meeting. Using Start, Stop, Continue, they discuss what went well during the meeting and what can be improved the next time the leadership council gathers.

N a t i o N a l Y o u t h l e a d e r s h i p t r a i N i N g
day three-35
Course Events
day three: Course Meeting
time allowed 90 minutes
Format The NYLT syllabus is structured to represent the experience of a Scouting unit moving through a month of meetings and activities. The meetings that occur during the first three days are similar to those a unit would schedule over a time period of three weeks. The final week of a unit’s month correlates to the big event that participants embark upon during the final days of the NYLT course—an exciting activity that is an outgrowth of the learning and planning that occurred during the first three meetings.
learning objectives
By the end of this session, participants will
■ Be able to conduct a well-prepared course meeting built on the seven-step troop meeting plan.
■ Build and/or practice skills needed for the upcoming Outpost Camp.
■ Continue preparations, as a team, for the Outpost Camp.
■ Practice good communication skills.
■ Practice Leave No Trace skills needed for Outpost Camp.
■ Practice SSC as part of the seven-step unit meeting plan (leadership council only).
■ Have fun.
Presentation Procedure
Preopening
The course leader reminds course members that there are seven steps to a good unit meeting:
Seven-Step Unit Meeting Plan
1. Preopening
2. Opening
3. Skills instruction
4. Team meetings
5. Interteam activity
6. Closing
7. After the meeting
During the preopening, the course director and course leader will discuss the upcoming meeting to ensure that everything is in order. The course director should model good coaching and mentoring skills.
Conduct this visit in full view and hearing of the NYLT participants so that they understand that this is a regular and important part of every unit meeting.

N a t i o N a l Y o u t h l e a d e r s h i p t r a i N i N g
day three-36
Cour
se E
vent
s
Day ThreeCourse MeeTing Plan
aCTiviTy DesCriPTion run By TiMe ToTal TiMe
Preopening Leadership council 5 min. 5 min.
opening ceremony Scout Oath, Venturing Oath, and Scout Law
Program team 5 min. 10 min.
skills instruction Backpacking stoves Team guides 25 min. 35 min.
Team meetings Menu planning for Outpost Camp Team leaders 20 min. 55 min.
interteam activity Backpacking stove challenge Team guides 25 min. 80 min.
Closing Course Director’s Minute Course director 5 min. 85 min.
after the meeting Debrief, planning ahead Leadership council and council director

N a t i o N a l Y o u t h l e a d e r s h i p t r a i N i N g
day three-37
Course Events
Ask the team leaders, team guides, course director, and assistant course directors for program and service to join you for the preopening.
Check in with the team leaders and team guides to see who has responsibility for the main parts of the upcoming course meeting—the opening, the skills instruc-tion, the team meetings, and the interteam activity.
Ask if everyone has the resources needed to carry out his or her portion of the meeting.
Ask the course director if there is anything else requiring attention before the opening of the course meeting.
Opening CeremonyNote: This is another variation to highlight both the Scout Oath and the Venturing Oath within the week.
The course leader invites Venturers to stand respectfully while Boy Scouts make the Scout sign and recite the Scout Oath. The course leader invites Boy Scouts to stand respectfully while Venturers make the Venturing sign and recite the Venturing Oath. The course leader invites all participants to make their program’s sign and recite the Scout Law.
Ask if there are announcements or other contributions from participants and staff.
Skills Instruction
Unit meetings at home may have different levels of instruction for mem-bers who are at different levels of learning.
The course leader asks the team guides and/or other skills instructors to conduct the skills instruction portion of the troop meeting.
Skills instruction for the Day Three troop meeting will involve correctly handling and using backpacking stoves and fuel.
The skills instruction on backpacking stoves is built on the BSA’s Second Class and Venturing Ranger requirements:
Second Class 2e—Discuss when it is appropriate to use a cooking fire and a lightweight stove. Discuss the safety procedures for using both.
Second Class 2f—Demonstrate how to light a fire and a lightweight stove.
See the Boy Scout Handbook, Venturer/Ranger Handbook, Scoutmaster Handbook, and Guide to Safe Scouting for the BSA’s stance on the use of backpacking stoves. Propane stoves are not encouraged or appropriate.

N a t i o N a l Y o u t h l e a d e r s h i p t r a i N i N g
day three-38
Cour
se E
vent
s
PREPARATIONS
Each team guide will need the following:
■ A backpacking stove of the sort to be used on the Outpost Camp
■ Fuel in an appropriate container
■ A means of lighting the stove
Team guides should practice together ahead of time to be sure that:
■ Stoves are in good working order.■ All team guides can teach others about stove use in ways that model
effective teaching methods.■ Everyone understands and can teach the safety issues associated with
using camping stoves (keeping the stoves on the ground, using only pots of the correct size for the stove, etc.).
■ Each stove will have one staff member to monitor its use.
PROCEDURE
Using the Teaching EDGE, the team guide Explains how to handle, pack, and use a backpacking stove, then Demonstrates those skills. Next, he Guides team members in handling and using the backpacking stove themselves. The goal is that every team will be Enabled to use stoves safely during their Outpost Camp.
Team MeetingsThe course leader asks the team leaders to take charge of their teams. The team meeting should cover planning menus for the Outpost Camp.
Menu planning can draw on the skills developed during the Day Two Preparing Your Plans session and the Day Two Team Lunch Planning Challenge.
The course quartermaster can prepare a menu-planning work sheet that explains what is available for Outpost Camp menus. With the work sheet for guidance, teams can develop their menus, recipes, and ingredient lists for the Outpost Camp. The quartermaster also can clarify where and how teams can draw provisions for the Outpost Camp, and the means teams can use to repackage menu ingredients for carrying on the trail and securing in camp.
Note: At the Day Three and Day Four leadership council meetings, team leaders are given checklists to guide their planning for the Outpost Camp and are directed to use the checklists and the What, How, When, Who Planning Tool to lead their teams in making their Outpost Camp plans.

N a t i o N a l Y o u t h l e a d e r s h i p t r a i N i N g
day three-39
Course Events
Checklists will vary from one NYLT course to another, depending upon the nature of the Outpost Camp. Sample checklists will include:
■ Personal equipment
■ Group equipment
■ Menu planning
■ Food procurement and repackaging
If the checklists are detailed in what must be accomplished, teams will have Day Three to plan menus and Day Four to plan their personal and group equipment and to get everything ready for the Outpost Camp. The exercise also will reinforce the use of the skills covered in the Preparing Your Plans and Solving Problems sessions.
The team guide stays on the sidelines of the team meeting. He or she is ready to support the team leader and provide coaching if needed, but otherwise is not involved in the meeting.
Interteam ActivityThe course leader explains and conducts the interteam activity: Fire and Water.
The challenge: Transport 1 quart of water over a distance and then correctly use a backpacking stove to bring the water to a boil.
Materials for each team:
■ One backpacking stove
■ One 2-quart cook pot
■ Water source (stream, lake, hose, buckets filled with water, etc.) some distance from the starting point
■ A variety of nontraditional water-carrying devices, such as measuring cups, balloons, newspapers (can be rolled into cones), large coffee cans with numer-ous holes punched in them
Procedure: Before starting, all teams are given four minutes to plan the best approach to the following problem. They must choose only one of the water- carrying devices to transport a quart of water from the water source to the cook pot. (The cook pot and stove must stay in the start area for each team.) The team must then bring the pot of water to a boil.
A team can be awarded extra credit for clearly using the What, How, When, Who Planning Tool.
A team can lose credit for any action deemed unsafe regarding stove handling and use.

N a t i o N a l Y o u t h l e a d e r s h i p t r a i N i N g
day three-40
Cont
ent S
essi
ons
The challenge should encourage teams to use their planning skills to devise the most efficient solution. They may divide up responsibilities, having several people light and manage the stove while others transport the water. They’ll need to come to agreement on what water-carrying device to use and how to conduct the transporting.
The team guide will monitor the stove use of his team, using Start, Stop, Continue to ensure that the stove is always used in a safe manner.
Closing—Course Director’s MinuteThe course director offers a Course Director’s Minute.
“Some Scouts were on a long backpacking trip in a national park. Their permit to be in the park allowed them to camp only in designated sites that the park rangers had determined would minimize environmental damage caused by backcountry travelers.
“Late one afternoon the Scouts came to a beautiful mountain meadow a mile from the campsite that had been assigned to them for the night. They were tired and for a moment they were tempted to set up their tents in the meadow. After all, nobody would know that’s where they had camped. The damage they caused would probably be only some trampled plants and compacted soil that most peo-ple wouldn’t even notice.
“But the Scouts decided to hike on to their designated campsite, leaving the meadow untouched.
“Many of our choices in life are like that. We think nobody is watching us, but in fact we are looking right into a mirror whenever we make a decision. We are watching ourselves.”
After the Meeting At the conclusion of the Course Director’s Minute, the course director reminds the course members that the seventh step of a successful course meeting is after the meeting.
The course director then invites the members of the leadership council to join him for the stand-up leadership council meeting. In this case, the leadership council will comprise the course leader, assistant course directors for program and service, the course’s team leaders, and the team guides assigned to the teams.
The course leader leads the leadership council in reviewing the just-concluded meeting, using Start, Stop, Continue to evaluate the proceedings.
Go over any assignments for the next day’s course meeting.
Thank the group for a job well-done, and adjourn.

N a t i o N a l Y o u t h l e a d e r s h i p t r a i N i N g
day three-41
Content Sessions
day three: the leading edgetime allowed 60 minutes
Format Course presentation and team activities/discussions
responsible Assigned staff
location Course site
learning objectives
At the end of this session, each participant should be able to
■ Discuss ways the Scout Oath, the Venturing Oath, and the Scout Law provide an ethical foundation for leadership.
■ Explain what is meant by servant leadership, and talk about the benefits of that idea of leading.
■ Describe the four leadership approaches included in the Leading EDGE, and tell which approach is most appropriate for each phase of team development.
Materials Needed
■ Duties of a Patrol Leader (from the Patrol Leader Handbook). A copy for each participant is included in the NYLT Participant Notebooks.
■ Responsibilities of a Venturing Officer (from the Venturer/Ranger Handbook). A copy for each participant is included in the NYLT Participant Notebooks.
■ Posters or flip chart pages clearly in view at the front of the session area:
—Duties of a Patrol Leader and Venturing Officer
—Scout Oath
—Scout Law
—Venturing Oath
■ Leadership Compass with quadrants marked Forming, Storming, Norming, Performing
Presentation Procedure
Opening ExerciseLead the group in a game of Simon Says (three to five minutes).
Opening DiscussionAsk: What do the letters NYLT stand for? (National Youth Leadership Training)
The word in the center of NYLT is also at the heart of this course—Leadership.
Ask: In the game Simon Says, do you believe that Simon is a leader? (show of hands) Do you think Simon is a GOOD leader? (show of hands—hopefully very few) Have you ever seen a person in a leadership position act like Simon?
In your crew, troop, or patrol, what’s it like when the leader acts like Simon? (Accept several answers from the group.)
Show slide 3-27, The Leading EDGE.

N a t i o N a l Y o u t h l e a d e r s h i p t r a i N i N g
day three-42
Cont
ent S
essi
ons
Show slide 3-28, Patrol Leader Duties:
Represent . . .; and 3-29, Patrol Leader
Duties: Attend . . . .
Have each team turn to the Duties of a Patrol Leader as described in the Patrol Leader Handbook and Responsibilities of a Venturing Officer as described in the Venturer/Ranger Handbook. (Each participant can find a copy of the duties in his or her Participant Notebook. At the front of the assembly area where everyone can see it, the session leader can also reveal a poster with the duties listed.)
Ask the teams to take two minutes to discuss among themselves which of the duties of a team leader encourage the leaders to act like Simon in the Simon Says game.
Duties of a Patrol Leader—From the Patrol Leader Handbook
■ Represent your patrol at all patrol leaders’ council meetings and the annual program planning conference.
■ Keep patrol members informed of decisions made by the patrol leaders’ council.
■ Take a key role in planning, leading, and encouraging patrol meetings and activities.
■ Help the patrol prepare to participate in all troop activities.■ Learn about the abilities of other patrol members. Fully involve
them in patrol and troop activities by assigning them specific tasks and responsibilities.
■ Attend youth leader training and continue to work on advancement.■ Encourage patrol members to complete their own advance-
ment requirements.■ Set a good example to your patrol by having a positive attitude,
wearing the Scout uniform, showing patrol spirit, and expecting the best from yourself and others.
■ Devote the time necessary to be an effective leader.■ Work with others in the troop to make the troop go.■ Live by the Scout Oath and Scout Law.
Also discuss the Responsibilities of a Venturing Officer as described in the Venturer/Ranger Handbook.
Ask: How many of the duties did you find that encouraged the Simon Says type of leadership? (Some teams might find one or two that they think are like Simon Says. Listen, but don’t respond positively or negatively.)
Now go back over the list and tell me how many of the duties are for the good of the team leader only and not the team members. (Entertain answers. A case might be made that “Attend youth leader training and continue to work on advance-ment” is leader-centered, though the session instructor can point out that a team leader who attends NYLT and who continues to learn Scouting skills through his or her own advancement is going to be better equipped to serve the needs of those in his or her unit. If someone suggests that “Live by the Scout Oath and Scout Law” is a duty with more benefit for the leader than for members of his patrol, note that on the flip chart but put it off to the side—in the parking lot. Explain that you’ll get back to that discussion in just a moment.)
Make this key point: Almost all of these duties, and perhaps every one of them, puts the members first and the leader second.

N a t i o N a l Y o u t h l e a d e r s h i p t r a i N i N g
day three-43
Content Sessions
As you discuss the language, emphasize the importance of the words by underlining or otherwise highlighting the following italicized words on the Duties of a Patrol Leader and Venturing Officer poster.
Support the key point this way: Look at the language in the list of duties. As a patrol leader you will:
■ Represent your group . . . .
■ Help members . . . .
■ Learn about . . . other members . . . .
■ Encourage members . . . .
■ Set a good example . . . .
■ Work with others . . . .
Stir discussion with these misleading questions: “But isn’t a leader supposed to be the boss? Doesn’t a leader just tell people what to do and then expect them to do it? If people aren’t doing what the leader wants, can’t the leader just yell at them?” (Expect some interesting answers, perhaps even some agreement. You might point out that it can be simple to just demand that people do it your way, and it might even be satisfying to yell at them now and then. The problem is, that kind of leadership doesn’t get you very far.)
Others-First LeadershipMake this point: The most effective leaders put those they are leading first.
Instead of thinking of themselves as the bosses, really good leaders see them-selves as serving those they lead. They are always looking for ways to make their experience better, to help them learn new skills and succeed in reaching goals, and to take on as much responsibility as they are able.
The leader is serving the needs of those he or she leads.
Ask: What are the advantages for a leader who uses others-first leadership? (Likely answers: “I can share responsibilities.” “I won’t have to work as hard.” “I can see others succeed.” “I won’t have to yell.”)
Ask: As a team member, what would it be like to have a leader who uses others-first leadership? (Entertain answers. Expect “I have more freedom.” “I would get to do more.” “I would have more responsibilities.” “No yelling.”)
Leadership and CharacterShow a flip chart page or poster with the following statement and Scout Oath, Venturing Oath, and Scout Law. Read the statement aloud.
“Successful leadership is based on the values defined by Scout Oath, Venturing Oath, and Scout Law.”
Show slide 3-30, Servant Leadership.
Show slide 3-31, Leadership and Character.

N a t i o N a l Y o u t h l e a d e r s h i p t r a i N i N g
day three-44
Cont
ent S
essi
ons
For this discussion, there should be a poster with the Scout Oath, a poster with the Venturing Oath, and another poster with the Scout Law clearly visible to the session participants.
Explain: I believe that the Scout Oath, the Venturing Oath, and the Scout Law encourage each of us to be others-first leaders. We hear all the time in Scouting that leadership in our organization is based on the values of the Scout Oath, the Venturing Oath, and the Scout Law. Let’s take a look at what that really means.
Ask: What part of the Scout Oath or the Venturing Oath is a benefit only for the person who takes the Oath? Accept several responses. Some might say that keeping physically fit and mentally awake benefits only the Scout. You might point out that a good leader needs to be ready to take advantage of leadership situations. He stays in shape so he can keep up with his patrol on the trail. He learns all he can so he has skills to help his patrol achieve its goals.
Explain that the Scout Oath and the Venturing Oath are totally consistent with the concept of others-first leadership.
Ask each participant to write down the Scout Law.
Now examine each point of the Scout Law. Does the point encourage you to help others? If so, write “HO” beside the characteristic. (Write “HO” by each word.)
Now look at each point of the Scout Law again. Does each point also benefit you? If so, write “ME” by the characteristic.
Explain: Most points of the Scout Law, if not ALL of them, benefit both you and others. Good leadership works that way, too. Everyone benefits. It’s a win-win situation.
Much BSA literature proclaims that leadership should be ethically based. The Scout Oath, the Venturing Oath, and the Scout Law provide that ethi-cal foundation. By examining the Oaths and Law from the point of view of leadership, participants can see the degree to which that is true and the importance of keeping the Oaths and Law in mind as they make leadership decisions.
Good leadership is using your knowledge and your character to bring others closer to achieving a shared vision. Good leadership is others-first leadership.
As leaders, we have to make choices. We have the Scout Oath, the Venturing Oath, and the Scout Law to guide us, as well as the example of many people we know whose character we admire and whose qualities we want to have in our own lives. That is our foundation for effective leadership choices.
If our model of leadership is the others-first model and our leadership choices are guided by the Scout Oath, the Venturing Oath, and the Scout Law and the example of exemplary people, we still need a few tools to be effective leaders. One such tool is the Leading EDGE.
Show slide 3-33, Scout Law.
Show slide 3-32, Scout Oath.

N a t i o N a l Y o u t h l e a d e r s h i p t r a i N i N g
day three-45
Content Sessions
Leadership Tools: The Leading EDGEEffective leaders nearly always have more than one leadership style. A key to good leadership is to match the style of leadership to the people and the situation.
A powerful tool for choosing the right leadership style is the Leading EDGE. The letters EDGE stand for Explain, Demonstrate, Guide, Enable.
The Leading EDGE acronym describes the behavior of a leader as the team moves through the model. The EDGE acronym is used to describe a process for skills transfer.
This morning during the discussion on Developing Your Team, we talked about the four stages teams go through—Forming, Storming, Norming, Performing.
A team responds best to leadership tailored to the stage the team is experiencing at the moment.
Let’s take a quick review of the phases of development for teams and see what kind of leadership works best for each stage.
Show video clip 3-35, The Leading EDGE (Part One), which begins, “There is a big difference between being the leader and being the boss.”
Use the large Leadership Compass at the front of the room as a visual aid, pointing out the quadrants representing the stages of team development.
TEAM STAGE: FORMING (HIGH ENTHUSIASM, LOW SkILLS)
If the team is in the Forming stage, the members will likely exhibit high enthusi-asm and motivation for doing something new, though their skills are low.
What style of leadership would you use for a group that is Forming? (Answer: Explain)
An effective leader of a group that is Forming will do lots of careful Explaining to help a patrol understand exactly what the leader expects them to do and how to do it.
Example: Ask participants to think back to the first day of the NYLT course. As one of their leaders, the team guide did lots of clear, careful explaining to help them learn how to set up their camp and to get through the first day’s activities. His or her choice of leadership was the right one for that stage of the team’s development.
TEAM STAGE: STORMING (LOW ENTHUSIASM, LOW SkILLS)
A team that is in the Storming stage will likely exhibit less enthusiasm and motivation for doing something new. Their skills are still low.
Show slide 3-34, The Leading EDGE.
Show slide 3-36, The Leading EDGE: Team Development
Stage—Best Leadership Approach.
N a t i o N a l Y o u t h l e a d e r s h i p t r a i N i N g
day three-46
Cont
ent S
essi
ons
What style of leadership would you use for a group that is Storming? (Answer: Demonstrate)
An effective leader will continue to make things clear by Demonstrating to the team how to succeed.
Example: Did team members have any disagreements yesterday during the Team Lunch Planning Challenge or the building the pioneering projects? Have any teams had arguments about doing dishes and cleaning up their campsites? Those could be indications your team is in the Storming stage. Your team guide and team leader find success by Demonstrating—showing how something is to be done and also modeling the kind of behavior expected of all team members.
TEAM STAGE: NORMING (RISING ENTHUSIASM, GROWING SkILLS)
If the team is in the Norming stage, the members will likely exhibit growing enthusiasm and motivation for doing something new. Their skills are growing, too.
So which leading style would you use? (Answer: Guide)
Leaders of teams in the Norming stage can find success with a Guiding style of leadership—giving team members lots of freedom to act on their own, but being ready to coach and guide when a little help is needed.
Example: In many ways your team is working together smoothly. Perhaps you’ve figured out food preparations and are enjoying great meals that are fun to pre-pare. Those could be indications your team is reaching the Norming stage.
Your team guide is in the campsite while meal preparation is taking place, but he is busy with other duties and allows you to proceed on your own. Now and then your guide checks in to give encouragement to the cooks and, if they need it, to offer some helpful hints that will Guide them toward success.
TEAM STAGE: PERFORMING (HIGH ENTHUSIASM, HIGH SkILLS)
If the team is in the Performing stage, the members will likely exhibit high enthu-siasm and motivation for doing something new, and their skills are high as well.
Which leading style would you use? (Answer: Enable)
A leader Enables team members to make decisions on their own and to keep moving ahead. A leader can help the team evaluate future progress by using SSC—Start, Stop, Continue.
Example: Perhaps you’ve been in a team in your home unit that had been together a while and become a team where everyone knew what to do and how to make the team’s plans sure successes. Your leader gave you lots of encourage-ment and made sure you had all the materials and resources you required, but mostly stayed out of your way and let you and the rest of your team perform with a high level of skill and organization. Your leader was Enabling you to make the most of opportunities.

N a t i o N a l Y o u t h l e a d e r s h i p t r a i N i N g
day three-47
Content Sessions
GOING BACkWARD
As it develops, a team does not always move smoothly from one stage to the next. It also does not always move forward, and will sometimes find itself back at an earlier stage of development.
Leaders should be aware that when an experienced patrol starts to learn a new skill or sets out toward a new goal, the team will be back in the Forming stage.
A team that runs into roadblocks along the way also may slip backward one or two stages. A team that has become skilled at backpacking—the Performing stage—discovers they don’t have enough fuel to cook their meals the last two days of a trip. Angry with one another and frustrated, team members can slip back to the Storming stage.
A good leader will adjust his or her leadership style to match the current development stage. The leader of a team that is Storming will Demonstrate problem-solving ways to move forward to the Norming stage. He or she can also Demonstrate appropriate behavior for team members to model, even though the situation they are in might be tough.
Demonstrating the Leading EDGEShow video clip 3-38, The Leading EDGE, an interactive exercise that begins with “Let’s put what we’ve learned into practice . . . .”
In courses where the video can be shown, the scenarios presented on the DVD will provide plenty of material for a lively discussion of the Leading EDGE.
If video support is not available, staff members can role-play some or all of the following scenarios to illustrate various styles of leadership and to stimulate discussion of the effectiveness of different leadership approaches. The group can also discuss how character-based leadership was used, as reflected in the Scout Oath, the Venturing Oath, and the Scout Law.
ExPLAINING STYLE OF LEADERSHIP
“Jim, you, Sue, and Brad will need to go to the dining hall at exactly 4 p.m. to pick up our food for dinner. Are you good with that?”
Ask: What style was used here? (Explain) How can you tell? (Very exact directions with lots of detail.) Would this be a good style to use with a newer member? (Yes.) With an older member? (No, though someone might point out that age does not matter if someone is inexperienced or new to the group and its culture.)
DEMONSTRATING STYLE OF LEADERSHIP
“Let’s hold up on our hike for a minute. I’d recommend we all take a moment to drink some water. No one wants to get dehydrated. (Take a drink yourself.) I noticed a while back that some of you were pulling the leaves off the branches as you pushed the branch out of your way on the path. We’re a Leave No Trace kind of group. That means no one should be able to tell we’d been by here. I’ve been
Show slide 3-37, The Leading EDGE:
When a team starts to learn a new skill . . . .
N a t i o N a l Y o u t h l e a d e r s h i p t r a i N i N g
day three-48
Cont
ent S
essi
ons
taught to push the branches down, gently, so the branch doesn’t break, but also so it doesn’t bounce back into the face of the person behind me.” (Optional— younger member: “Yeah! I saw you doing that. Now I understand why you were doing it that way. Cool!”)
Ask: What style was used here? (Demonstrate) How can you tell? (Described what he does and role models the behavior.) Would this be a good style to use with a newer member? (Yes.) With an older member? (Yes, especially if the older member is new to hiking.)
GUIDING STYLE OF LEADERSHIP
“Jack, we set up camp as a group on our last trip. I noticed you did a nice job. I think you can set up your tent by yourself this time. Pick out a good site and pitch your tent. If you need some help, I’ll be over here with the new guys.”
Ask: What style was used here? (Guide) How can you tell? (Indicates confidence in Jack’s growing skill, gives him a few reminders, and offers his assistance if called upon.) Would this be a good style to use with a newer member? (Yes, assuming they are doing well in this skill area.) With an older member? (Yes, if the member is still learning this skill, but not if he or she is highly skilled in this area.)
ENABLING STYLE OF LEADERSHIP
“Mary, you’ve really got your first-aid skills down. I’d like to have you go through the first-aid class with Ted and Joan and give them some pointers on tying ban-dages and splints.”
Ask: What style was used here? (Enable) How can you tell? (Expressed confidence in Mary’s skill, gave her an opportunity to share her skills and deepen them through teaching others.) Would this be a good style to use with a newer mem-ber? (Yes, if Mary were really good. But chances are that Mary is still learning and not fully skilled.) With an older member? (Yes.)
Leadership Hints
GENERAL
Discuss the following ideas with session participants. Draw on their experience as team members and as leaders to illustrate the importance of each of these points.
Avoid creating an us-versus-them environment. Seek out areas on which you can agree and build from there. Explore ways that everyone succeeds.
Offer a vision of success based on the team’s shared values. The unit’s annual program plan is a blueprint for exciting activities and outdoor adventures. Use it to focus members’ energies and enthusiasm. The Scout Oath, the Venturing Oath, and the Scout Law are expressions of the BSA’s values. Rely on them to help the entire team pull together to do what they all believe in.
Show slide 3-39, Leadership Hints.

N a t i o N a l Y o u t h l e a d e r s h i p t r a i N i N g
day three-49
Content Sessions
Acknowledge differences; respect and value others. Look for ways to draw on individual strengths of members to the advantage of the entire unit. Help all team members feel that they have something important to contribute to the success of the group. They do.
Recognize that there are many different ways to get things done. Most problems have many solutions. Once the team agrees upon one, provided it is an ethical choice, go along with the group choice, even if it is different from the choice you personally would have made. As a leader, it’s your responsibility to help focus the full energy of a group on making that solution work.
Make meetings count. Get outdoors and have adventures. Working through the leadership council, develop an exciting program plan, then carry it out.
Overcoming Disappointments Now and then a patrol, troop, or crew may become discouraged. Perhaps members are discovering the reality of the challenges facing them. A campout or other planned activity that didn’t go very well may cause some members to become frustrated. Has this ever happened to any of you? (Allow discussion, then give the following advice.)
You will be tested as a leader when the spirits of your members are down. When that happens, draw upon your abilities to communicate clearly, listen actively, and encourage open discussions.
Recognize accomplishments and offer encouragement and reassurance to those who are making efforts to achieve.
Try to identify the stages of team development of patrols, teams, small groups, and of the entire troop or crew, and use that information as a guide for determining which styles of leadership to use.
SSC—Start, Stop, Continue—can be an effective tool for you to discover what is at the root of team members’ discontent, and for helping them find their own solutions to a discouraging situation.
Celebrating SuccessExplain that patrols in your troop and members of your crew will achieve significant milestones, or even complete their time together as a tight-knit group. Members of the crew may be moving on to college, for example, and members of a new-Scout patrol may have reached a level of experience and advancement to be ready to join the regular patrols of the troop. What do you do in your unit when significant milestones are reached? (Allow discussion, then give the following advice.)
Whatever the case, celebrate the many accomplishments that members have enjoyed during their time together. Documenting patrol, troop, or crew histories with a scrapbook or photo album can be an enjoyable way to create an overview of all that the members have accomplished. It’s important and satisfying to know we’ve accomplished something. We get a sense of closure that helps us have confidence when we face the next challenge.
Show slide 3-40, Overcoming
Disappointments.
Show slide 3-41, Celebrating Success.

N a t i o N a l Y o u t h l e a d e r s h i p t r a i N i N g
day three-50
Cont
ent S
essi
ons
SummaryImportant aspects of leadership to remember are these:
■ Effective leadership is based on the Scout Oath, the Venturing Oath, and the Scout Law.
■ An effective leader is an others-first leader, putting others ahead of himself or herself.
■ Everyone has his or her own style of leadership. Proven tools of leadership can help you improve your style.
■ Among the most powerful leadership tools is the Leading EDGE. That stands for Explain, Demonstrate, Guide, and Enable. Each approach is useful for a certain stage in the development of any team.
Show slide 3-42, Summary.

N a t i o N a l Y o u t h l e a d e r s h i p t r a i N i N g
day three-51
Content Sessions
day three: team gamestime allowed 30 minutes
Format Course activity
responsible Assigned staff
learning objectives
By the end of this session, participants will
■ Have fun.
■ Use the skills of problem-solving, leadership, and team development.
■ Create greater team unity.
Presentation Procedure
Dragon TailsMembers of each team line up in single file. Each puts his or her hands on the shoulders of the person in front of them. The last team member hangs a bandana or other flag from his or her belt. The object of the game is for the first person in each team (the one whose hands are free) to grab the bandanas from the belts of the last persons in the other teams.
Kim’s Game In this classic Scouting game, youth staff will have prepared a number of items, arranged them on a board that can be displayed upright, and covered the board with a cloth. (The items, 15 to 20 in number, might be camping oriented—a pocketknife, a tent stake, a camp mug, a piece of firewood, etc. All items should be large enough to be seen by anyone in the course when they are gathered around for the game.)
Teams seat themselves in front of the covered board. At a signal, the cloth is removed and everyone has 60 seconds to study the items. They may not speak or make any notes.
At the end of the minute, the items are again covered. The teams can move some distance from one another to ensure some privacy, then will work together to write down a team list of all the items they can remember.
T-shirt Relay GameTeams line up in single file. The first person in each team puts on an extra-large T-shirt. At a signal to start the game, the person in the T-shirt turns to the person behind them. They grasp each other’s hands and hang on tightly. Other members of the team then maneuver the T-shirt off the first person, down their arms, and over the joined hands to the arms of the second person, and then pull the T-shirt onto the second person.

N a t i o N a l Y o u t h l e a d e r s h i p t r a i N i N g
day three-52
Team
Eve
nts
When the T-shirt is completely on the second person, he releases his grasp of the hands of the first person, then turns to a third patrol member and tightly grasps both of his hands. The team transfers the T-shirt from the second person to the third person, the second and third persons maintaining their grasp of each other’s hands throughout the transfer process.
The game continues until the T-shirt has transferred to every team member and the last person in the team is wearing the shirt. Team games can be expanded if time allows.
NYLT staff may have other games they want to offer during this session. Any game included in the Team Games session should meet certain criteria. It should:
■ Challenge teams to use the skills of problem-solving, leadership, and team development.
■ Offer every team member the opportunity to participate fully.■ Give all teams equal opportunities to succeed.

N a t i o N a l Y o u t h l e a d e r s h i p t r a i N i N g
day three-53
Team Events
day three: team Meetingtime allowed 45 minutes
responsible Team leader
location Team site or some other location where the session of one team will not interfere with the activities of other teams.
learning objectives
By the end of this session, participants should be able to
■ Describe the purpose of the team meeting.
■ Describe how a team meeting should be run.
■ Know what the team leader is responsible for doing and what team members are responsible for doing.
■ Use the Start, Stop, Continue tool to evaluate team performance.
As with meetings of the NYLT course and the leadership council, every team meeting during an NYLT course should be organized in a manner that provides an ideal example of such a session. Participants should be able to take the models of the team meetings they see at NYLT and use them to organize effective meetings in their home units.
Materials Needed
Team meeting agenda. Each team meeting should follow a written agenda. Building on the following model, the agenda for today’s team meeting can be adjusted by the team leader prior to the meeting to fulfill the needs of his team.
recommended Facility layout
The team guide will determine the location of the first team meeting. The team will decide where subsequent team meetings will occur. In most cases, team meetings will take place in or near the team’s campsite.
delivery Method
The team leaders are the facilitators of the meetings of their teams. The leadership style each team leader uses is up to that person; the hands-on experience of leading is every bit as valuable as the progress made by a team during any particular meeting.

N a t i o N a l Y o u t h l e a d e r s h i p t r a i N i N g
day three-54
Presentation Procedure
Model Team Meeting AgendaDay Three
■ Welcome—Team leader■ Meeting agenda— Team leader■ Evaluate team progress using Start, Stop, Continue
Start—“What should we be doing that will make things better?”
Stop—“What should we stop doing because it isn’t helping?”
Continue—“What is a strength and is working well that we want to continue doing?”
(Include evaluation of the team’s progress with the Daily Campsite Inspection Checklist and the duty roster.)
■ Using the NYLT Leadership Compass, determine the team’s current stage of development (Forming, Storming, Norming, Performing). Discuss ways the team can move ahead toward the next development stage.
■ Continue work on the team’s Quest for the Meaning of Leader- ship presentation.
■ Adjourn.
Team guides may attend team meetings, but ideally will not take part in any significant way.
Team
Eve
nts

N a t i o N a l Y o u t h l e a d e r s h i p t r a i N i N g
day three-55
Content Sessions
day three: lego® Challenge/realistic First aidtime allowed 120 minutes
Format Course activity with team breakouts.
1. The session begins with the Lego® Challenge conducted by the teams.
2. As the debrief of the challenge is coming to an end, NYLT youth staff hurry into the meeting area with an “injured” person, made up with realistic first-aid techniques to appear convincing. They follow correct first-aid procedures to stabilize the “victim” and to summon medical help.
3. The debrief that follows highlights the importance of the risk management planning that will take place on Day Four in preparation for the hike to the Outpost Camp.
4. The remainder of the session will be devoted to team guides using the Teaching EDGE to help participants learn and practice using realistic first-aid methods— a skill they can use with their home units.
responsible Assigned staff, team guides
learning objectives
The purpose of this session is to
■ Reinforce learning the skills of communicating, planning, problem solving, and team building.
■ Establish an awareness of the importance of risk management as a preparation for the Outpost Camp.
■ Teach a skill that participants can share with their home units.
Materials Needed
■ Plastic construction block toys
■ Realistic first-aid materials
preparations Youth staff facilitating the Lego® Challenge will have made the two models that will be used for the team exercise, taking care to keep them out of sight. Each model should be made of no more than a dozen Lego® pieces. Each team should have at least the same number and kind of Lego® pieces as are present in each of the models.
Youth staff involved in the mock emergency will have made up the “victim” with realistic first-aid wounds and will have rehearsed their presentation of the emergency and the correct first-aid responses to demonstrate. (Response to the emergency should conform with methods described in the Boy Scout Handbook, Venturer/Ranger Handbook, and First Aid merit badge pamphlet.)

N a t i o N a l Y o u t h l e a d e r s h i p t r a i N i N g
day three-56
Cont
ent S
essi
ons
Team guides will have practiced making realistic first-aid wounds, will be able to teach the skill effectively, and will have in mind a number of possible injuries to suggest to their teams.
Youth staff also should be aware that during the mock emergency they will be modeling teamwork and leadership as well as emergency response.
Lego® ChallengeThe session leader asks each team leader to come to a nearby location out of sight of the rest of the participants and study an object constructed of no more than a dozen Legos®. Tell the team leaders they will be giving verbal instructions to their teams to build replicas of the Lego® model. They may look at the model but are not allowed to touch it. They are not to draw or write anything down.
Reassemble the group and give each team a bag containing Lego® pieces. Ask the team leaders to lead their teams in reproducing the Lego® model. Team leaders may offer verbal instructions only. They may not touch the Legos® or in any way assist except with verbal comments.
Repeat the process with another different Lego® model. This time invite a differ-ent member of the team to see the original model and to lead the team in repro-ducing the Lego® model. Again, those leading their teams may offer only verbal instructions. Encourage teams to use their experience building the first Lego® model to improve upon both the describing of the model to be reproduced and the listening required to use that information efficiently.
CHALLENGE DISCUSSION
Debrief the participants on their experience with the Lego® activity.
What made their efforts a success? What role did good communication play? If there were difficulties communicating, why did that occur and what solutions might have been used?
First-Aid Emergency Interruption
The emergency will appear more realistic if no adult is present.
At the very end of the Lego® Challenge debriefing, NYLT youth staff interrupt the session to announce that someone has been injured near the course gathering area, or (depending on the chosen injuries) someone is needed to assist an “injured” person into the gathering area or carry them in on a litter. The “victim” has been made up using realistic first aid to have one or more specific “injuries.” The injuries should be of the sort that can be treated using the level of first-aid training expected of First Class Scouts.
Modeling good leadership and teamwork, the youth staff play out the scenario of stabilizing the “victim,” treating the wounds, and summoning medical help.

N a t i o N a l Y o u t h l e a d e r s h i p t r a i N i N g
day three-57
Content Sessions
At the end of the exercise, the NYLT staff involved debrief the role-play. Through discussion with NYLT participants, they should explain the emergency situation and describe the appropriate first-aid response to that emergency. They should also point out how the youth staff worked as a team and ways in which leader-ship was provided during the emergency.
Realistic First AidTeam guides lead the teams through the process of developing realistic-looking first-aid wounds for use in first-aid training scenarios.
Throughout this activity, use the Teaching EDGE as your guide.
Note: To facilitate this activity efficiently, the course leader should set a time limit for each team to finish developing and applying realistic injuries—perhaps 45 minutes. Leave time at the end of the session for everyone to see all of the realistic first-aid wounds and for a good debriefing of the activity.
Explain: Tell your team how the NYLT youth staff developed the realistic injuries exhibited by the “victim” in the mock emergency.
Demonstrate: The realistic injuries displayed during the mock emergency serve as a demonstration of completed realistic wounds.
As you explain the process and materials for making realistic wounds, demon-strate by developing a simple wound that utilizes the basic techniques involved in making a realistic wound.
Guide: Guide the entire team (or as groups of two or three team members, depending on the resources available and size of the team) in selecting wounds to replicate and then applying those injuries to one or more NYLT participants.
Enable: Encourage team members to return to their home units with these skills and use them for setting up mock emergencies that will enhance the first-aid training of other members.
DebriefWhen all teams have had sufficient time to learn and practice the skills of making realistic first-aid injuries, the session leader asks each team to present their “victim,” describe the methods used to develop the “injuries,” and discuss the appropriate first-aid responses to those injuries.
Thank everyone for their cooperation and involvement, and encourage them to do all they can to make sure their first-aid injuries are all of the fake kind rather than real.

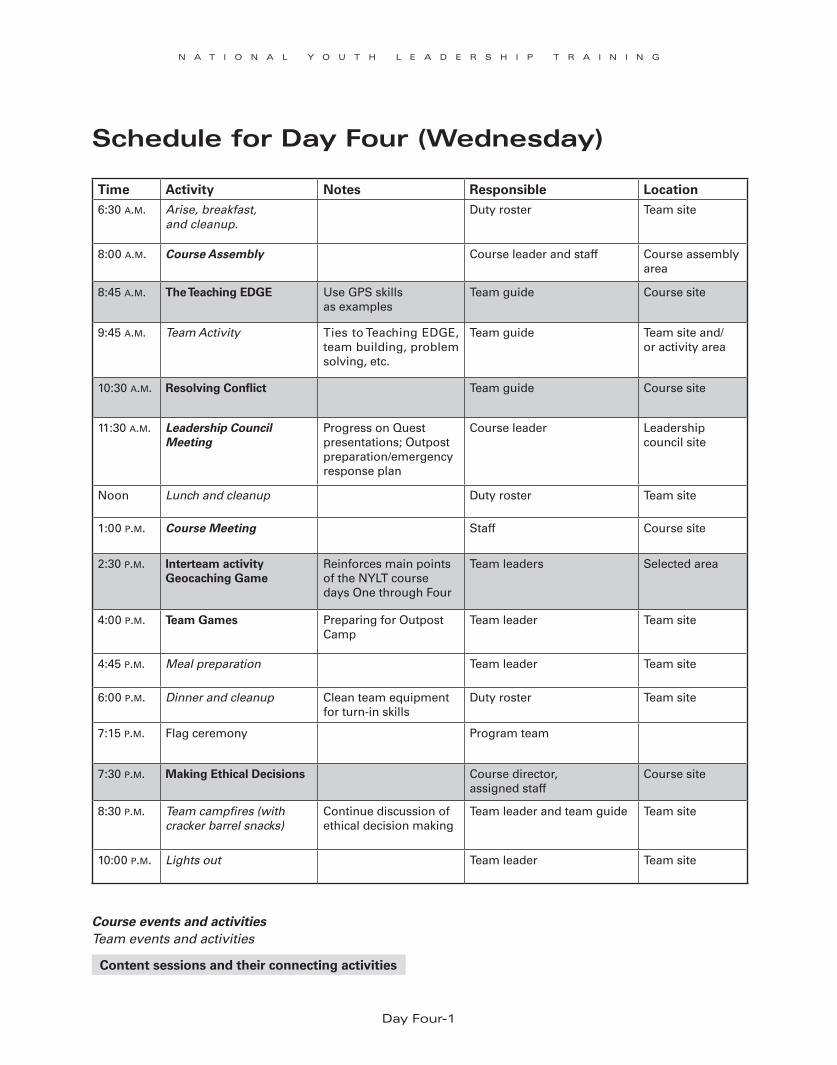
N a t i o N a l Y o u t h l e a d e r s h i p t r a i N i N g
day Four-1
schedule for day Four (Wednesday)
Course events and activitiesTeam events and activities
Time Activity Notes Responsible Location6:30 a.m. Arise, breakfast,
and cleanup.Duty roster Team site
8:00 a.m. Course Assembly Course leader and staff Course assembly area
8:45 a.m. The Teaching EDGE Use GPS skills as examples
Team guide Course site
9:45 a.m. Team Activity Ties to Teaching EDGE, team building, problem solving, etc.
Team guide Team site and/ or activity area
10:30 a.m. Resolving Conflict Team guide Course site
11:30 a.m. Leadership Council Meeting
Progress on Quest presentations; Outpost preparation/emergency response plan
Course leader Leadership council site
Noon Lunch and cleanup Duty roster Team site
1:00 p.m. Course Meeting Staff Course site
2:30 p.m. Interteam activity Geocaching Game
Reinforces main points of the NYLT course days One through Four
Team leaders Selected area
4:00 p.m. Team Games Preparing for Outpost Camp
Team leader Team site
4:45 p.m. Meal preparation Team leader Team site
6:00 p.m. Dinner and cleanup Clean team equipment for turn-in skills
Duty roster Team site
7:15 p.m. Flag ceremony Program team
7:30 p.m. Making Ethical Decisions Course director, assigned staff
Course site
8:30 p.m. Team campfires (with cracker barrel snacks)
Continue discussion of ethical decision making
Team leader and team guide Team site
10:00 p.m. Lights out Team leader Team site
Content sessions and their connecting activities

N a t i o N a l Y o u t h l e a d e r s h i p t r a i N i N g
day Four-2
Team
Eve
nts
day Four: Breakfast QuestionsOne or more staff members will join each team for breakfast. This is a good opportunity for participants and staff to get to know each other a little better. In addition, staff members can learn quite a bit about the team and can encourage team members to think about a few key issues as they begin the day.
To make the most of breakfast discussion opportunities, keep the following questions in mind for the Day Four breakfast:
■ How did you sleep?
■ Has anything unexpected happened since yesterday?
■ What stage is your team in? How did you come to that conclusion?
■ What is your team vision? What are your goals for reaching that vision?
■ What is your biggest obstacle to reaching that vision?
■ Why is leading yourself important?
The breakfast questions are not meant to be a quiz or a list to be read. Instead, enjoy sharing breakfast with a team and drop the questions into the conversation as a natural part of the morning discussions. Additional questions that relate to the specifics of the course or the specifics of that team are encouraged.

N a t i o N a l Y o u t h l e a d e r s h i p t r a i N i N g
day Four-3
Course Events
day Four: Course assembly
time allowed 45 minutes
responsible Course leader and staff
location Course assembly area
learning objectives
By the end of this session, participants will
■ Gather for Day Four of the NYLT course.
■ Feel welcomed and valued (staff too).
■ Reaffirm that the NYLT course operates according to the Scout Oath, the Venturing Oath, and the Scout Law.
■ View or participate in a flag ceremony presented by the program team.
■ Participate or view the installation ceremony for new team leaders and assistant team leaders.
■ View youth staff as supporters, guides, and mentors to course participants.
■ Be able to discuss key parts of a good course assembly.
■ Be able to recognize good communication skills.
Materials Needed
■ American flag
■ NYLT flag
■ Historic American flag
recommended Facility layout
Before an NYLT course begins, staff members should designate the place that will serve as the course assembly area. In most cases, this will involve an outdoor setting, though indoor areas of sufficient size (a dining hall, for example) can be adapted to accommodate the course assembly. (Indoors, flags can be presented on staffs with floor stands or can be displayed on a wall.)
Presentation Procedure
Opening
Team leaders lead the teams to the assembly area and arrange them in an appropriate formation.
The course leader uses the Boy Scout or Venturing sign as appropriate to bring the assembly to order and welcomes participants to Day Four of NYLT. Express your pleasure in having everyone there. Explain that Day Four symbolizes the third meeting of a normal planning period for a typical Scouting unit. There will be a variety of presentations and activities during the day, and a typical unit meeting.

N a t i o N a l Y o u t h l e a d e r s h i p t r a i N i N g
day Four-4
Cour
se E
vent
s
Flag CeremonyThe course leader asks the program team of the day to present the colors and raise the American flag. Instruct NYLT course members to use the Boy Scout or Venturing salute (as appropriate to their home unit and the uniform they are wearing) while the flag is being raised. Invite the program team to display the historic flag for the day and explain its significance.
The historic flags to be used for the NYLT course are the same as those presented during Wood Badge courses. Scripts for historic flag presenta-tions, also the same as included in Wood Badge courses, can be found in the appendix.
Instruct the staff color guard to raise the historic flag and the NYLT course flag.
Ask the course members to make the appropriate sign and recite the Scout Oath, the Scout Law, the Venturing Oath, and the Outdoor Code.
Dismiss the color guard.
AnnouncementsThe course leader offers any announcements important for conducting the day’s sessions and events.
New Team Leader/Assistant Team Leader InstallationThe course leader asks the Day Three team leaders to introduce the Day Four team leaders to the course, then the Day Three assistant team leaders to introduce the Day Four assistant team leaders. Encourage those making the introductions to use effective communication skills.
As introductions are being made, the course leader can provide positive reinforcement by commenting on one or two communication skills being used well—hand gestures, clear voice, eye contact with the group, etc.
The course leader begins the installation. He or she should
■ Invite the new team leaders and assistant team leaders to come forward to be installed.
■ Ask the new team leaders to gather around the course flagpole, placing their left hands on the pole. New assistant team leaders stand behind their team leaders, each placing a left hand on the team leader’s right shoulder.
Team leader and assistant team leader assignments for each day of the NYLT course can be found in the Sample Team Duty Roster included in each copy of the NYLT Participant Notebook.

N a t i o N a l Y o u t h l e a d e r s h i p t r a i N i N g
day Four-5
Course Events
■ Instruct them all to give the appropriate Scout sign and repeat, “I promise to do my best to be worthy of this office for the sake of my fellow Scouts and the world brotherhood of Scouting.”
■ Welcome them as the course’s new team leaders and assistant team leaders.
Program and Service Team Emblem ExchangeThe assistant course directors briefly explain the duties of the program team and the service team.
The duties of the teams may differ from other days of the course. Adjust the explanations to reflect the needs of this day of the NYLT program.
Program Team (sample assignments)
■ Conduct course assembly and flag ceremony.
■ Prepare the course meeting area.
■ Complete other duties as assigned at the leadership council meeting.
Service Team (sample assignments)
■ Police the course meeting area. (NYLT is a Leave No Trace program.)
■ Maintain the participant latrines and showers.
■ Complete other duties as assigned at the leadership council meeting.
Ask the leaders of the day’s program team and service team to come forward to receive a symbol of their team responsibilities for the day. The emblem for the service team might be a broom or camp shovel, while that for the program team could be a flag.
The exchange of symbols for the program team and service team should not overshadow the installation of the day’s team leaders and assistant team leaders. Bestowing the emblems for the program and service teams can be done in good fun, but with the understanding that these team duties are secondary to the roles of team leadership.
STAFF SERVICE TEAM
Explain to participants that staff members have the responsibility of cleaning staff latrines and showers, staff campsites, and other staff-use areas. As fellow members of the course, staff members roll up their sleeves and take care of their own areas rather than expecting someone else to do it for them.
Baden-Powell Team Streamer PresentationsThe course leader presents the Baden-Powell Team streamer awards based on the previous day’s campsite evaluation. Point out that the Boy Scouts of America encourages teams to compete against a standard that all can achieve (in this case

N a t i o N a l Y o u t h l e a d e r s h i p t r a i N i N g
day Four-6
Cont
ent S
essi
ons
the standard of the Daily Campsite Inspection Checklist) rather than against one another. When it comes to the Baden-Powell Team streamer awards, every team can be a winner.
For guidelines on the daily campsite inspection and for presentations of the Baden-Powell Team streamers, see Day One—Registration, Orientation, and Camp Setup.
Using the Daily Campsite Inspection Checklist as a guide, the assistant course director in charge of the service team makes the evaluation of the team campsites. (This may occur while team members are at evening sessions of the NYLT course.) Team guides can encourage the teams to use the same form to check their campsites as they complete their cleanup after the evening meal. If a team is having difficulty following through with all the items on the checklist, its team guide can use the Teaching EDGE to help the team learn how to manage campsite cleanup in an efficient and orderly manner.
Each team can tie its Baden-Powell Team streamer for the day onto the pole used to display its team flag. Every team will have the opportunity to add another B-P streamer each day of the NYLT course.
Course Director’s MinuteThe course director takes a moment to welcome participants and to encourage them to do their best through the exciting events of the coming day. Select a topic from Troop Program Resources that appropriately fits the mood.
The course leader thanks the course director and brings the course assembly to a close.

N a t i o N a l Y o u t h l e a d e r s h i p t r a i N i N g
day Four-7
Content Sessions
day Four: the teaching edge
The session on the Teaching EDGE and the Geocaching Game later on Day Four can be conducted with GPS receivers and/or with compasses. The attraction of GPS receivers is that it is a newer technology for many partici-pants and thus presents an opportunity to learn and use a new set of skills.
time allowed 60 minutes
Format Team presentation
responsible Team guide
location Team site or some other location where the session of one team will not interfere with the activities of other teams. Each location should be suitable for locating waypoints with a global positioning system receiver.
learning objectives
At the end of this session, each participant should be able to
■ List and describe the four steps of the Teaching EDGE.
■ Recognize the importance of using effective communication skills as tools for teaching.
■ Discuss using different methods of teaching/leading depending on a team’s stage of development.
■ Use a GPS receiver to find a destination.
Materials Needed
■ GPS receivers (at least one per team)
■ Written in easily visible format on individual sheets of paper, the latitude and longitude of four or five waypoint locations within a few minutes’ walking distance of the team presentation area
■ Printed Teaching EDGE slides from the National Youth Leadership Training DVD—one set for each team
■ Communication Skills Checklist (appendix; Participant Notebooks)
delivery Method
During the NYLT staff training that precedes an NYLT course, team guides should become familiar with the GPS receivers they will be using during this session. All receivers are operated in basically the same way, but different models differ in the ways they are programmed for use. The instructional manual for each GPS model can be an invaluable aid in mastering—and then teaching— the use of that particular receiver.

N a t i o N a l Y o u t h l e a d e r s h i p t r a i N i N g
day Four-8
Cont
ent S
essi
ons
Before the NYLT course begins, each team guide should determine the sample waypoints that will be used during the presentation of the Teaching EDGE session. To double-check the accuracy of the waypoint information (and as a way for all presenters to improve their GPS skills), invite the team guides of the other teams to use their GPS receivers to locate those waypoints.
An enjoyable means of practicing GPS use is to log onto Internet Web sites featuring coordinates for finding geocaches in one’s neighborhood or hometown.
The Teaching EDGE session reminds NYLT participants that repetition is a key to mastering a skill. Before an NYLT course begins, team guides should put in enough practice time with GPS receivers to feel comfortable teaching the skill to others.
Team guides should keep in mind several facts concerning GPS receivers.
■ The accuracy of a GPS receiver varies according to the number of satellites within its range. In general, a receiver can bring a user within a 50-foot radius of a waypoint.
■ GPS receivers must be set to use the same units as the specified coordinates.
■ Deep valleys, ravines, and other confining terrain may block some satellite signals and make a GPS receiver less accurate than when it is in more open territory.
■ In some areas, it may be advisable to provide a compass in addition to a GPS receiver, or even to substitute a compass for it, but you should use a GPS receiver if at all possible.
Presentation Procedure
Introduction
Explain that later in the day the teams will take part in a Geocaching Game.
Geo is the root of the word geography. It comes from the Greek word for earth. A cache is something stowed. In this case, something hidden.
To do well in the geocache challenge, teams will use a number of Scouting skills. One will be following instructions to find locations.
As a preparation for the Geocaching Game, this session will go over the steps for finding locations with a GPS receiver.
Note to presenters: You are teaching the team how to use a GPS receiver, but more importantly you are teaching them how to teach. In teaching GPS skills, use the Teaching EDGE—Explain, Demonstrate, Guide, Enable. Use your best communication skills to get your message across.
Show slide 4-1, The Teaching Edge;
then slide 4-2, Introduction.

N a t i o N a l Y o u t h l e a d e r s h i p t r a i N i N g
day Four-9
Content Sessions
Presenters describe how a GPS receiver works.
For explanations of latitude and longitude, as well as illustrations that can be used as visual aids during this NYLT presentation, see the Boy Scout Handbook, the Venturer/Ranger Handbook, and the Fieldbook. Another good visual aid is an inflatable globe that includes lines of latitude and longitude.
1. Briefly discuss the concept of latitude and longitude.
Lines of latitude are numbered from the equator to each of the poles. Lines of longitude are numbered from the prime meridian—the line of longitude running through the Royal Observatory at Greenwich, England.
Every location on Earth can be identified by the grid formed by lines of latitude and longitude. Lines of latitude and longitude are numbered by degrees, min-utes, and seconds.
Locations are sometimes cited in decimal units. For example, the location of the BSA’s national office is
32 degrees, 53.145 minutes North
96 degrees, 58.203 minutes West
In this case, the units are degrees and decimal minutes (dd, mm.mmm).
2. Show the GPS receiver.
Explain the idea that the receiver picks up signals from a system of satellites. The receiver can calculate the distances of the signals from the satellites and determine the latitude and longitude of the receiver at that moment. It also can be used to lead the way to any location programmed into the receiver.
Demonstrate how to use a GPS receiver to determine the current location. Explain each step very clearly using your best communication skills.
Next, demonstrate how to program the GPS receiver with a destination. (In GPS usage, this is called a waypoint.) For example, you could use the location of the BSA national office. The GPS receiver should provide the direction of travel to reach the waypoint, and also an accurate measurement of the distance between your current location and the waypoint.
Guide team members in using a GPS receiver to determine their current location. Provide team members with a waypoint approximately 100 yards from their cur-rent location. (It’s a good idea to have the waypoint location written in large numbers on a poster or sheet of paper.) Guide them through the process of pro-gramming the waypoint into their GPS receivers and then using the receivers to lead them to the location.
When you are satisfied that those you are teaching have mastered the skill to the degree that they can do it on their own, Enable team members to continue with little further input from you. Let them know that in order to truly own the skill, they need to practice it many times. You will be there if they have questions or need help, but to the greatest degree possible you are enabling them to use the skill on their own.

N a t i o N a l Y o u t h l e a d e r s h i p t r a i N i N g
day Four-10
Cont
ent S
essi
ons
Transition to the Teaching EDGEAsk the group to offer some observation on the methods you used to teach them how to use a GPS receiver.
Explain that you went about it with four very clear steps:
■ First, you Explained how to do the skill.
■ Second, you Demonstrated how to do the skill.
■ Third, you Guided others to do the skill, providing ongoing feedback.
■ Fourth, you Enabled others to use the skill, providing them with the time, materials, and opportunity to use the skill successfully.
Explain, Demonstrate, Guide, Enable . . . . The first letters of those words spell EDGE. This teaching method is called the Teaching EDGE. Write this on the flip chart or reveal a chart with it already written.
NYLT AND THE TEACHING EDGE
Explain that everyone at NYLT who has taught something during this NYLT course has used the Teaching EDGE. For example, the Orientation Trail was set up to teach using the Teaching EDGE. Instructors at course assemblies used the Teaching EDGE to teach lashings and the use of backpacking stoves. The Teaching EDGE has been everywhere in the NYLT course.
Let’s take a closer look.
Explore the Teaching EDGEEmphasize this important point:
The Teaching EDGE is how we teach every skill during an NYLT course. It is also the method for you to use when you are teaching skills in your home unit and outside of Scouting whenever you are called upon to teach something.
Discuss Explain, Demonstrate, Guide, Enable with the group. Ask them to share their ideas on the importance of each step of the Teaching EDGE:
■ Explaining is important because . . .
It clarifies the subject for the learner AND for the instructor. That’s why I began teaching GPS use by explaining how the GPS receiver works.
■ Demonstrating is important because . . .
It allows learners to see as well as hear how something is done. They can follow the process from beginning to end. That’s why I showed you the steps in finding your current location using the GPS receiver.
■ Guiding is important because . . .
It allows learners to learn by doing. It allows the instructor to see how well learn-ers are grasping the skill. That’s why I had you use the GPS receiver to determine your location while I coached you through the process.
Show slide 4-3, The Teaching EDGE.

N a t i o N a l Y o u t h l e a d e r s h i p t r a i N i N g
day Four-11
Content Sessions
■ Enabling is important because . . . .
It allows learners to use the skills themselves. It also encourages repetition—an important part of mastering a skill. That’s why I encouraged you to keep using the GPS receiver even though I had stepped into the background. I wanted you to keep practicing until you really owned the skill.
Talk briefly about the importance of repetition.
No one learned to play a piece on a musical instrument by playing it just once. No athletic team practiced only once before the first game of a season.
Repeating a skill helps make it real for a learner. He gains possession of it. It becomes his own. With enough repetition, you can learn a skill well enough to teach it to others—a clear sign that you really have mastered the information.
Communication SkillsTeaching is communicating. You’re sharing information. You’re moving ideas from inside your head to inside the heads of others.
Good communication skills go a long way in making teaching possible.
Ask participants to point out a few of the communication skills you have been using to teach this session on the Teaching EDGE. If you wish, you can ask them for a brief evaluation of your communications skills, using Start, Stop, Continue. The point here is to make participants aware of the power of communication skills in teaching effectively.
With the participation of team members, review the Communication Skills Checklist from their Participant Notebooks.
Presenting the Stages of Skill DevelopmentRemind participants that in an earlier session they discussed the four stages a team goes through as team members are learning a skill or working toward a goal.
Ask the group to give a brief explanation of the four stages. If they are able to do that, great. If they stumble over some of the details, help them along so that you can quickly get the information about the stages of team development into the discussion:
■ Forming
■ Storming
■ Norming
■ Performing
Explain that an individual learning a skill goes through those stages, too.
Show slide 4-4, Communication Skills.
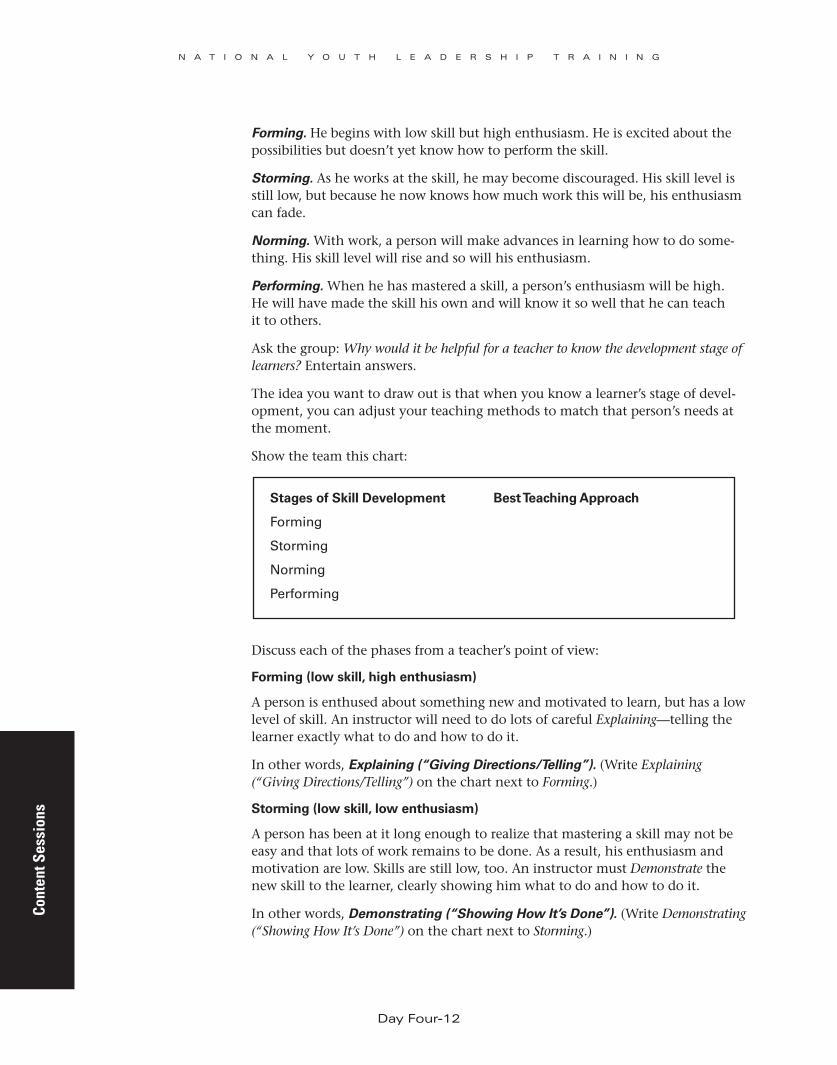
N a t i o N a l Y o u t h l e a d e r s h i p t r a i N i N g
day Four-12
Cont
ent S
essi
ons
Forming. He begins with low skill but high enthusiasm. He is excited about the possibilities but doesn’t yet know how to perform the skill.
Storming. As he works at the skill, he may become discouraged. His skill level is still low, but because he now knows how much work this will be, his enthusiasm can fade.
Norming. With work, a person will make advances in learning how to do some-thing. His skill level will rise and so will his enthusiasm.
Performing. When he has mastered a skill, a person’s enthusiasm will be high. He will have made the skill his own and will know it so well that he can teach it to others.
Ask the group: Why would it be helpful for a teacher to know the development stage of learners? Entertain answers.
The idea you want to draw out is that when you know a learner’s stage of devel-opment, you can adjust your teaching methods to match that person’s needs at the moment.
Show the team this chart:
Stages of Skill Development Best Teaching Approach
Forming
Storming
Norming
Performing
Discuss each of the phases from a teacher’s point of view:
Forming (low skill, high enthusiasm)
A person is enthused about something new and motivated to learn, but has a low level of skill. An instructor will need to do lots of careful Explaining—telling the learner exactly what to do and how to do it.
In other words, Explaining (“Giving Directions/Telling”). (Write Explaining (“Giving Directions/Telling”) on the chart next to Forming.)
Storming (low skill, low enthusiasm)
A person has been at it long enough to realize that mastering a skill may not be easy and that lots of work remains to be done. As a result, his enthusiasm and motivation are low. Skills are still low, too. An instructor must Demonstrate the new skill to the learner, clearly showing him what to do and how to do it.
In other words, Demonstrating (“Showing How It’s Done”). (Write Demonstrating (“Showing How It’s Done”) on the chart next to Storming.)

N a t i o N a l Y o u t h l e a d e r s h i p t r a i N i N g
day Four-13
Content Sessions
Norming (increasing skill, growing enthusiasm)
As a learner keeps at it, his level of skill will rise. He realizes he is making prog-ress, and so motivation and enthusiasm will rise, too. An instructor will need to Guide the person—giving him more freedom to figure out things on his own, supporting him with encouragement, and helping him move closer to the goal.
In other words, Guiding (“Coaching and Confirming”). (Write Guiding (“Coaching and Confirming”) on the chart next to Norming.)
Performing (high skill, high enthusiasm)
Skills are high and so is enthusiasm and motivation. A learner has reached the point where he can act independently and be very productive. An instructor can offer him plenty of freedom to make decisions on his own and to keep moving ahead. The instructor can help the person evaluate future progress using SSC—Start, Stop, Continue.
In other words, Enabling (“Supporting Doing It On Their Own”). (Write Enabling (“Supporting Doing It On Their Own”) on the chart next to Performing.)
The completed chart will look like this:
Stages of Skill Development Best Teaching Approach
Forming Explaining (“Giving Directions/Telling”)
Storming Demonstrating (“Showing How It’s Done”)
Norming Guiding (“Coaching and Confirming”)
Performing Enabling (“Supporting Doing It On Their Own”)
Point out that when a person starts to learn a new skill or sets out toward a new goal, he or she will be back in the Forming stage. Sometimes people who have moved all the way to Norming or even Performing may run into roadblocks and have failures, slipping back to Storming. That’s part of the process. With experience, they will be better able to flow back and forth from one stage to another. Their experience can help them move forward more quickly to more productive stages.
An instructor will want to adjust his or her approach to match the current skill development stage for the people he or she is teaching.
SummaryExplain how you used the Teaching EDGE throughout this session. In teaching the skills:
You Explained what you were teaching.
You Demonstrated it.
Show slide 4-5, Stages and Approaches.
Show slide 4-6, Summary.

N a t i o N a l Y o u t h l e a d e r s h i p t r a i N i N g
day Four-14
Cont
ent S
essi
ons
You Guided others in doing it.
You Enabled those you are teaching to begin using these skills on their own.
Point out that you also used the Teaching EDGE to help the team understand the skill of effective teaching. Use specific moments from the session to illustrate your use of the Teaching EDGE.
Close by emphasizing that whenever participants are in teaching and leadership situations, the Teaching EDGE will get them through.
Looking AheadExplain that team members can use the morning team activity that follows to practice the skills they have just learned. Through repetition, they will be enabled to use the skill well. They also can practice using the Teaching EDGE by teaching the skill of using the GPS receiver.

N a t i o N a l Y o u t h l e a d e r s h i p t r a i N i N g
day Four-15
Team Events
day Four: team activitytime allowed 45 minutes
responsible Team guide
location Team site and/or activity area
learning objectives
As a result of this activity, each participant will
■ Demonstrate the skills to be used during the afternoon Geocaching Game.
■ Demonstrate the Teaching EDGE by teaching skills to someone else.
Materials Needed
■ GPS receivers used during the session on the Teaching EDGE that preceded the morning team activity.
■ Orienteering Work Sheet. One prepared for each team. (See the instructions in Preparation, below.)
Presentation Procedure
Preparation
FOR GPS RECEIVER PRACTICE
Prepare ahead of time an Orienteering Work Sheet with waypoints that can be used by team members to sharpen their skills with GPS receivers. Since each team will be conducting this activity from its own campsite (or some other area they can use as their own), each team guide should prepare his team’s Orienteering Work Sheet with waypoints that can be used at his team’s location. Preparing the work sheet also will help ensure that each team guide has a mastery of the skills he or she will present during the session on the Teaching EDGE.
1. The GPS reading for the big oak tree next to the dining fly is _______.
2. What landmark is located at GPS waypoint ______?
FOR MEASURING BY PACING
Prepare ahead of time a course for determining one’s pace. On open ground, place a marker at the starting point (a tent stake works well, as can a large stone). From the starting point, measure 100 feet and mark the finish line. (Team guides can use measuring tapes, 100-foot lengths of cord, a measuring wheel, or some other device to get an accurate measurement.) The space between the starting point and finish line should be fairly level and free of obstructions.
ProcedureThis activity flows out of the Teaching EDGE session that precedes it. As partici-pants discovered during the Teaching EDGE session, truly learning a skill requires practice. It is through repetition that one becomes fully enabled to use a skill and comfortable enough with that skill to be able to teach it to others.

N a t i o N a l Y o u t h l e a d e r s h i p t r a i N i N g
day Four-16
Team
Eve
nts
A convenient way to conduct this activity is to divide the team in two.
Using the Orienteering Work Sheet, half the team can continue practicing with their GPS receivers the skills learned during the session on the Teaching EDGE. The other half of the team can review the skill of measuring distances by pacing, then practice using the Teaching EDGE to share that skill with others.
The team guide probably will be more focused on the participants involved with the pacing exercise. However, he or she should also monitor the activities of participants practicing with GPS receivers and be ready to do a little coaching and encouraging (Guiding) as a means of enabling those team members to succeed.
With the measuring by pacing group, the team guide explains that everyone will explore the skills of measuring by pacing and of using the Teaching EDGE to teach that skill to others.
Model the Teaching EDGE as you teach measuring by pacing. As you do so, invite participants to identify and discuss the methods you are using to teach the skill.
Explain what it is you intend to teach and how the skill can best be done.
Measuring by pacing is a valuable skill when traveling in the backcountry, while orienteering, and for the simple day-to-day need of knowing how far it is from point A to point B. One way to discover the length of your pace is to walk a 100-foot course at a normal stride, counting your steps as you go. Divide the number of steps into 100 and you’ll know how much ground you cover with every step. For example:
50 steps = 2 feet per step
40 steps = 2.5 feet per step
33 steps = 3 feet per step
Ask participants to describe what you have just done in terms of the Teaching EDGE—that is, how you have used Explaining as the first step in teaching a skill.
Demonstrate the skill you want participants to learn.
Show how to walk the measuring course while counting your steps, then how to divide the number of steps into 100 to determine the length of each step.
Ask participants to describe what you have just done in terms of the Teaching EDGE—that is, how you have used Demonstrating as the second step in teaching a skill.
Guide others in doing the skill themselves.
Ask participants to walk the course, count their steps, and figure out the length of their steps. Provide support and guidance when they need it.
Ask participants to describe what you have just done in terms of the Teaching EDGE—that is, how you have used Guiding as the third step in teaching a skill.

N a t i o N a l Y o u t h l e a d e r s h i p t r a i N i N g
day Four-17
Team Events
Enable others to use the skill.
Point out several destinations and ask participants to use their new skill to deter-mine the distance to each landmark. (Choose goals of varying but reasonable distances—somewhere in the range of 25 feet to 200 feet. Provide encouragement and coaching, as needed.)
Ask participants to describe what you have just done in terms of the Teaching EDGE—that is, how you have used Enabling as the fourth step in teaching a skill.
Using the Teaching EDGEWhen the groups have had plenty of time to complete their first exercise, the team guide reunites the two halves of the team.
Tell them that in presenting the Teaching EDGE, you have Explained what the Teaching EDGE is. With the GPS receivers, and with the measuring by pacing, you have Demonstrated how to use the Teaching EDGE. Now you want to Guide team members to use the Teaching EDGE to teach a skill to others. Lots of practice in many different settings will Enable them to use the Teaching EDGE whenever they want to teach a skill to someone else.
Ask each team member who has been practicing measuring distances to pair up with a team member who was practicing with GPS receivers.
The distance measurers are to teach the skill of measuring distances by pacing to their partners. They are to use the Teaching EDGE throughout—Explaining, Demonstrating, Guiding, Enabling.
The team guide’s role will be to Guide the team members who are teaching— providing them with support and coaching, if needed, to help them succeed in using the Teaching EDGE.
Reverse the RolesThe team guide asks team members to stay in pairs but to reverse their roles. The participant who was using the Teaching EDGE to teach measuring by pacing becomes the learner as the other participant of each pair teaches the use of a GPS receiver to find a location.
The participants who are now in the role of teachers will have had the advantage of extra practice with this activity. Those who are learning also might be competent in the use of these navigational tools, but the real point of this exercise is to allow participants to practice using the Teaching EDGE. The learners should do their best to provide a good experience for the participants teaching the skills.
The teaching participants should use the Teaching EDGE throughout—Explaining, Demonstrating, Guiding, Enabling.
Once again, the team guide’s role will be to Guide the team members who are teaching—providing them with support and coaching, if needed, to help them succeed.

N a t i o N a l Y o u t h l e a d e r s h i p t r a i N i N g
day Four-18
Team
Eve
nts
RepetitionIf there is time remaining in this session, team members can continue practicing using GPS receivers and can continue to hone their skill at measuring by pacing.
SummaryWhen all team members have had a chance to be guided through the process of being teachers, the team guide takes a few moments to coach and encourage them to continue using the Teaching EDGE. Review it once more—Explaining, Demonstrating, Guiding, Enabling. Let them know that being Enabled to teach well requires practice and repetition. The more they use the Teaching EDGE, the more effective they will become.
Also let them know that the measuring and orienteering skills they have been using will be of great value to them during the afternoon’s Geocaching Game.

N a t i o N a l Y o u t h l e a d e r s h i p t r a i N i N g
day Four-19
Content Sessions
day Four: resolving Conflict
time allowed 60 minutes
Format Course presentation with team activity breakouts
responsible Team guides
location Team sites
learning objectives
At the end of this session, each participant should be able to
■ Discuss several ways that good leadership can minimize conflict.
■ Describe how to use EAR (Express, Address, Resolve) as a tool for resolving conflict.
■ List several communication skills important for resolving conflict.
■ Explain when it is appropriate to involve adult leaders in conflict resolution.
Materials Needed
■ Conflict Resolution Checklist (NYLT Participant Notebooks)
■ Communication Skills Checklist (NYLT Participant Notebooks)
■ National Youth Leadership Training DVD, DVD player or computer with DVD capability, projector, and screen
Presentation Procedure
Preparation
Staff members taking part in the conflict resolution role-plays should practice their parts so that they can make realistic presentations.
Opening Discussion
WHAT IS CONFLICT?
Conflicts can occur when people disagreeing with each other seem unable to find a reasonable compromise. The roots of these disagreements can arise from many sources, including differences in personality, values, and perceptions.
As a leader, you occasionally will need to handle the differences that arise between members of your unit. Conflicts may be minor or they may fester into something that can damage unit spirit and the ability of the youth to work together effectively.
Ask the group to share a couple of conflict situations they’ve seen arise in their own units.
Show slide 4-7, Resolving Conflict.

N a t i o N a l Y o u t h l e a d e r s h i p t r a i N i N g
day Four-20
Cont
ent S
essi
ons
Show slide 4-10, Be Aware of Yourself.
Discuss the idea that as a team moves through the stages of Forming, Storming, Norming, and Performing, the Storming stage can include conflict. (A team in the Storming stage has low skills and is experiencing low enthusiasm and low motivation. That can be a recipe for conflict.)
By identifying conflict when it is part of team development, team members and leaders might be able to address that conflict in ways that will help the team move beyond Storming.
Resolving ConflictEven with the best leadership, there are bound to be occasional difficulties between two people, between groups of people, or between one person and a number of others. The signs of trouble brewing may be small—someone becoming withdrawn and quiet, for example. Or the signs may be obvious—shouting, high levels of emotion, etc.
If you are a leader within your own unit, you may be in an official role in which you are expected to step in to resolve a conflict. Or you may simply want to help a couple of your friends work through a disagreement.
Whatever the case, there is a proven set of steps to follow to resolve a conflict:
1. Be aware of yourself.
2. Be aware of others.
3. Listen.
4. Use your EAR.
BE AWARE OF YOURSELF
How do we respond when we are hearing something we don’t want to hear? When a speaker is angry? When we are tired or hungry?
A key to resolving conflict is being aware of ourselves. If we are upset or angry about something, it may affect how we relate to others.
Be aware of your own emotions. Take a deep breath. Count to 10. If you need to, count to 100.
It may require calling a time-out to let emotions cool down.
Stress the point that when helping others resolve a conflict, you must keep yourself out of the debate as much as possible. Rather than choosing sides, you are offering others a sounding board, a fresh way of thinking about the situation, and a chance to figure out answers for themselves.
Show slide 4-8, What Is Conflict.
Show slide 4-9, Resolving Conflict: Steps to
resolve a conflict.

N a t i o N a l Y o u t h l e a d e r s h i p t r a i N i N g
day Four-21
Content Sessions
BE AWARE OF OTHERS
Being aware of yourself will help you remain as calm as you can and stay focused on finding a solution. Being aware of others will help you adjust the situation to increase the possibility of a good outcome.
Be aware of their physical comfort, hunger levels, and other factors that could be affecting their emotions. You might want others to take a break before discussing the problem.
Consider the location of a discussion, too. Ideally, you will want to meet out of the hearing of the rest of your group. That will give everyone a chance to air con-cerns without an audience.
LISTEN
The better the information you have, the greater your chances of finding a work-able solution to a conflict.
Listen carefully to what others are saying, withholding judgment until you’ve gotten everyone’s side of the story. In addition to hearing the words, be aware of tone of voice, body language, and any other clues to what a person really means.
Understand what each person is expressing—what he wants and what he is will-ing to do to get there. Then clarify that the solution lies with both parties.
In a moment we will add step 4—Using your EAR. But first, let’s try an exercise to practice the conflict resolution skills of being aware of yourself, being aware of others, and listening.
GROUP ExERCISE
Let’s continue our exploration of resolving conflict with this exercise: Get with a partner. One of you makes a fist. The other has two minutes to convince the first to open that fist. (Give them a couple of minutes to do this.)
Ask participants: What happened? Did anyone convince the other to open the fist? Whether successful or not, what strategies did you try?
Possible strategies:
■ Bribery—“I’ll give you five dollars if you open your fist.”
■ Concern—“It doesn’t matter to me if you open your fist, but unless you do, you won’t be able to pick anything up.”
■ Persuasion—“I like your hands better open than closed.”
■ Interest—“I’m curious to see what’s inside your fist.”
■ Straightforwardness—“Hey, open your fist!”
If you ask a friend or a coworker or a family member or anyone else to do something and they refuse, you can’t force them to do it.
Show slide 4-11, Be Aware of Others.
Show slide 4-12, Listen.

N a t i o N a l Y o u t h l e a d e r s h i p t r a i N i N g
day Four-22
Cont
ent S
essi
ons
Show slide 4-14, Communication Skills.
You can’t make a person do anything he doesn’t want to do.
How can you persuade someone to change positions? To open the fist? To resolve a conflict? Use your EAR.
Use Your Ear—Express, Address, ResolveA tool for resolving conflict is EAR—Express, Address, Resolve.
As a leader who is trying to manage the conflict, you must use your EAR to help others move through the conflict. Here’s what you do.
EAR represents three steps in resolving conflict:
1. Express. Ask each side in the conflict, “What do you want and what are you doing to get it?” Let them Express their pent-up emotions and concerns. Be sure to listen closely and without judgment.
2. Address. Ask each side, “Why is that working or not working?” You are helping them to Address the issue themselves. You are holding up a mirror for them so they can better address what they see happening.
3. Resolve. Ask each side, “What ways are there to solve the problem?” You are holding them accountable for Resolving the issue. You also are getting informa-tion about the problem and gaining time to think about other solutions you might offer up later.
Write these on the flip chart or reveal a chart with them already printed:
1. What do you want and what are you doing to get it?
2. Why is that working, or why that is not working?
3. What ways are there to solve the problem?
Discuss with the group why these questions, asked in this order, can help resolve conflict. What is the intent of each question? What is the power of each question?
All of the questions are focused on the person/persons experiencing a conflict. You as the person asking the questions are keeping yourself out of the debate as much as possible. You are offering others a sounding board, a fresh way of thinking about the situation, a chance to figure out answers for themselves.
Communication Skills and Conflict Resolution
USING YOUR OWN EARS
Discuss the importance of using good communication skills while resolv - ing conflict.
Refer to the Communication Skills Checklist. Lead the group in discussing how each item on the checklist is important for someone dealing with conflict.
Show slide 4-13, EAR.

N a t i o N a l Y o u t h l e a d e r s h i p t r a i N i N g
day Four-23
Content Sessions
Of all communication skills, the most important for conflict resolution is listening.
Use your ears much more than your mouth. Let each party express its concerns. Encourage others to talk but offer no judgments. “I got it,” is an appropriate response. Make sure you hear the message. Put it in your own words. “This is what I hear you saying….”
Use EAR—Express, Address, Resolve—to find answers to conflict that work for everyone.
Conflict Resolution Role-Play Two staff members play the roles of a couple of participants who are angry with each other about something—a disagreement over who is supposed to wash the dishes, for example. (Staff may devise their own conflict, ideally one that participants will find to be realistic.) The session leader plays the role of a team leader resolving the conflict.
As the participants express their complaints and frustrations, the team leader uses the skills of good listening to acknowledge that the message is being received.
“I got it” is an appropriate response. So is “This is what I hear you saying . . . .”
Encourage the participants to keep talking, but offer no judgment or feedback. It is very likely that the participants will focus on the negative, complaining about what they don’t like. That’s fine. It is often the way people who are upset express themselves.
The team leader says, “I hear what you don’t want. Now tell me what you do what.” Then he or she uses EAR to help the participants resolve the conflict:
Express. What do you want, and what are you doing to get it?
Address. Why is that working or not working?
Resolve. What ways are there to solve the problem?
Encourage the participants in conflict to keep talking, but focus now on positive aspects of the situation rather than negative ones.
Help them move toward a solution that is fair and allows each party to come out ahead.
DEBRIEF THE ROLE-PLAY
Lead the group in a review of the role-play. Begin by reminding them of the four steps of every conflict resolution:
1. Be aware of yourself.
2. Be aware of others.
3. Listen.
4. Use your EAR.
Show slide 4-15, Communication
Skills: Listening . . . .

N a t i o N a l Y o u t h l e a d e r s h i p t r a i N i N g
day Four-24
Cont
ent S
essi
ons
How does the person attempting to resolve the role-play conflict use each of these four steps? What makes each step effective? How might the people involved in the conflict resolution improve their use of the four steps? (Guide the group in using Start, Stop, Continue as the format for evaluating the efforts of the person in the role-play attempting to resolve the conflict.)
Look Out for the Little OnesA healthy unit will have youth members of a variety of ages. The youngest members are essential to bringing new energy into the unit. Older members have experience and skills they can share with younger members, and they can serve in roles of increasing leadership.
Age differences sometimes can be a source of conflict.
As leaders within their own units, NYLT participants need to be aware of the experience of younger members. Encourage them to do their best. Make it your business to help them get the most out of the Scouting program.
Speak up any time you become aware of older members picking on younger boys. The maturity you show as leader can make it clear that yours is a unit where harassment and hazing will not be tolerated.
Team Exercise in Resolving Conflict
For this exercise, participants will watch role-plays of several conflict situations. A role-play will stop at key moments to allow teams to discuss ways to address each conflict. The role-play will then resume, showing one way that a leader can help conflicting parties come to a win-win resolution of the situation.
Before the exercise begins, hand out copies of the Conflict Resolution Checklist so that every participant can refer to it during the exercise.
Present Conflict Resolution Role-PlaysDuring breaks in the conflict resolution role-plays, lead participants in discus-sions of the conflicts being presented and ways those conflicts might be resolved. Guide the discussions with references to the four steps of the Conflict Resolution Checklist. Where appropriate, point out and discuss the Storming stage of team development and the role it plays in a particular conflict scenario.
SCENARIO 1
Here’s a situation many of you have probably experienced firsthand. The parents of a 16-year-old son set his Saturday night curfew at midnight. The first week, he
Show slide 4-16, Look Out for the
Little Ones.
Teaching EDGE reminder: Up to this point, this session has Explained conflict resolution and Demonstrated it. The following exercise will allow staff to Guide participants through the experience of resolving conflict themselves. Enabling participants to use the skills of conflict resolution is a matter of much practice—both during the NYLT course and beyond.

N a t i o N a l Y o u t h l e a d e r s h i p t r a i N i N g
day Four-25
Content Sessions
comes in at 12:05. Is that OK? The parents trust him and they are so glad that he is home safe that they accept the late arrival and say nothing about it.
The next Saturday, he comes in at 12:15. The parents are again relieved that he is home and safe, and so again they say nothing.
The next week, he comes in at 12:30, and the parents freak out. They give him their very best lecture about trust and responsibility. The boy’s eyes glaze over as he listens.
What time will he come in next? Probably about 12:20. He splits the difference between what he understood was OK and what he knows is not. 12:15 was OK, 12:30 was not, so the real curfew time (originally set at midnight) must actually be somewhere around 12:20.
What’s the lesson here? If there are limits that you as a leader expect group mem-bers to respect, you need to be clear about what those boundaries are and then stick to them. One of the best methods of doing that is to involve the group in determining those limits. You can use the four basic questions of conflict resolu-tion to establish standards that may deter conflict from occurring. What do you, as a leader, want? What does your group want? Where is there common ground for agreement? What are the factors that may prove nonnegotiable?
SCENARIO 2
Here’s another scenario. On a hike, three or four of the older members speed ahead of the rest of the group. When they get tired, they stop and wait for the others to catch up, but as soon as the others do, the older members take off again. To make the scenario more interesting, let’s have them hiking in grizzly bear country.
Are there reasons why this should concern you, the leader?
■ There’s a safety issue. If someone becomes injured or lost or happens upon a bear, the group is split up and will be less able to cope with the situation.
■ Dividing the group like this can damage group morale and team building.
■ Dividing the group makes it more difficult for adult leaders to provide appropriate leadership.
You gather the older members to discuss the situation and try to find an accept- able solution. In resolving this conflict, you can begin by encouraging a cooperative approach. If that fails, then you can use another leadership tool— the directive approach.
Bringing Others Into Conflict ResolutionDiscuss strategies of what to do when your best efforts cannot resolve a conflict.
Problems that continue too long or that seem not to respond to your efforts at resolution should also be discussed with the leadership council and with adult leaders in order to draw on their suggestions and involvement.
Show slide 4-17, Bringing Others In.
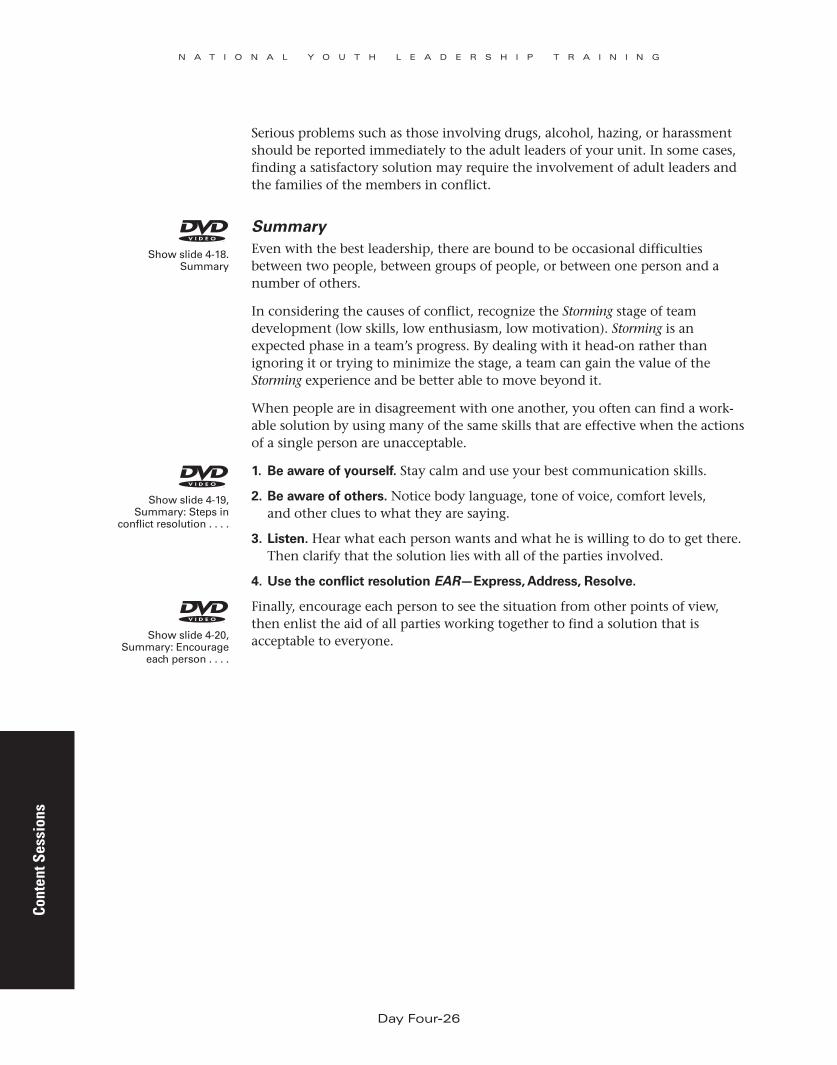
N a t i o N a l Y o u t h l e a d e r s h i p t r a i N i N g
day Four-26
Cont
ent S
essi
ons
Serious problems such as those involving drugs, alcohol, hazing, or harassment should be reported immediately to the adult leaders of your unit. In some cases, finding a satisfactory solution may require the involvement of adult leaders and the families of the members in conflict.
SummaryEven with the best leadership, there are bound to be occasional difficulties between two people, between groups of people, or between one person and a number of others.
In considering the causes of conflict, recognize the Storming stage of team development (low skills, low enthusiasm, low motivation). Storming is an expected phase in a team’s progress. By dealing with it head-on rather than ignoring it or trying to minimize the stage, a team can gain the value of the Storming experience and be better able to move beyond it.
When people are in disagreement with one another, you often can find a work-able solution by using many of the same skills that are effective when the actions of a single person are unacceptable.
1. Be aware of yourself. Stay calm and use your best communication skills.
2. Be aware of others. Notice body language, tone of voice, comfort levels, and other clues to what they are saying.
3. Listen. Hear what each person wants and what he is willing to do to get there. Then clarify that the solution lies with all of the parties involved.
4. Use the conflict resolution EAR—Express, Address, Resolve.
Finally, encourage each person to see the situation from other points of view, then enlist the aid of all parties working together to find a solution that is acceptable to everyone.
Show slide 4-18. Summary
Show slide 4-19, Summary: Steps in
conflict resolution . . . .
Show slide 4-20, Summary: Encourage
each person . . . .
N a t i o N a l Y o u t h l e a d e r s h i p t r a i N i N g
day Four-27
Course Events
day Four: leadership Council Meeting
time allowed 30 minutes
responsible Course leader
location Leadership council site
learning objectives
By the end of this session, participants will
■ Be able to discuss how to run an efficient, well-planned meeting.
■ Be empowered with the resources and guidance to help them lead their teams.
■ Report on team progress on their presentation for the Quest for the Meaning of Leadership.
■ Experience representational leadership as leaders representing their teams.
■ Know what teams are responsible for upcoming assignments.
■ Use Start, Stop, Continue to evaluate team performance.
■ Practice good communication skills.
Materials Needed
■ NYLT Participant Notebooks.
■ Preopening activity guidelines for the program team. (The team should be provided with a printed sheet of instructions for organizing and conducting the preopening activity. If materials are needed, the quartermaster should make those available.)
delivery Method
■ The leadership council meeting is conducted by the course leader, who will model appropriate leadership behavior within the setting of the meeting.
■ As with the Day Three leadership council meeting, the leadership council meeting on Day Four is attended by the course leader, assistant course directors, the team leaders of the day, and the course director.

N a t i o N a l Y o u t h l e a d e r s h i p t r a i N i N g
day Four-28
Cour
se E
vent
s
Leadership Council Meeting AgendaDay Four
1. Welcome and introductions
2. Purpose of the meeting—what we need to accomplish
3. Reports on the progress being made by each team
4. Assignments for the upcoming course meeting (continuing team planning for the Outpost Camp)
5. Announcements (Include a reminder that there will be evening team campfires with follow-up discussions on Making Ethical Decisions.)
6. Program team and service team assignments
7. Closing
8. Course director’s observations
Presentation Procedure
Pre-Meeting Discussion
The course director and course leader often visit for a few minutes before the beginning of a leadership council meeting. They go over the agenda and make sure everything is in order. The course director confirms that the course leader understands the vision of what the meeting will accomplish, and makes sure that he or she is ready to run the meeting.
Once the meeting begins, though, the course leader is in charge and the course director stays on the sidelines. The course director might coach and guide the course leader now and then, but in a youth-led unit, the youth staff are in charge.
At the end of the pre-meeting discussion, the course leader calls the leadership council to order and begins the meeting.
The pre-meeting discussion between the course director and course leader takes place within view and hearing of all the participants of the leadership council meeting. The course director should model good coaching and mentoring. Participants will see that the course leader gains a great deal from the course director’s involvement and is better prepared to lead the leadership council meeting.
Welcome and IntroductionsThe course leader takes charge of the meeting, introduces those persons attending the leadership council meeting, and welcomes everyone.

N a t i o N a l Y o u t h l e a d e r s h i p t r a i N i N g
day Four-29
Course Events
Purpose of the MeetingDirect the attention of the leadership council to the written agenda. Note that the purpose of this meeting will be to
■ Receive reports on the progress being made by each team.
■ Make assignments for the upcoming course meeting (leading team planning for the Outpost Camp).
■ Make program team and service team assignments.
Throughout the meeting, participants will use good communication skills to share ideas.
Reports on the Progress of Each TeamThe course leader asks each team leader to report on his or her team’s progress so far. Encourage team leaders to make their reports as constructive evaluations using SSC:
Start—What can they begin doing to improve their teams?
Stop—What can they stop doing that is not working well?
Continue—What is a strength and is working well that they can continue doing?
Encourage each team leader to use the Leadership Compass to determine the current stage of development of his or her team (Forming, Storming, Norming, Performing).
Remind team leaders that each team should be thinking about its presentation of the Quest for the Meaning of Leadership. Briefly review the challenge (offered by the course director at the campfire on Day One), and stress the importance of continuing to work on the presentation throughout the course.
Assignments for the Upcoming Course MeetingThe team meetings that take place during the Day Four course meeting will focus on planning for the Outpost Camp. The course leader will give each team leader a checklist of things to be done before the teams set out for the Outpost Camp.
The checklist will vary, depending on the nature of the Outpost Camp. (On Day Four, teams will plan the group and personal gear for the Outpost Camp. Teams should have planned the menus on Day Three.)
During the team meetings, each team leader will lead the team in using the What, How, When, Who Planning Tool to determine how the team will reach the goal of being ready for the Outpost Camp.

N a t i o N a l Y o u t h l e a d e r s h i p t r a i N i N g
day Four-30
Cour
se E
vent
s
In general, the checklist can include these items to be planned:
■ Menu planning—Knowing what provisions are available, the team can decide what meals to prepare, how to fix them, and what ingredients are required. Planning should include how ingredients will be repackaged, carried, and stored.
■ Personal equipment—A list of what each person will need.
■ Group equipment—A list of gear the team will carry.
Teams will have Day Four to get everything planned and done before setting out for the Outpost Camp. The process will also reinforce the use of the skills covered in the sessions on planning and problem solving.
Team leaders will receive information about the planning of personal and group equipment during the Day Four leadership council meeting and then will lead their teams in using the checklists to complete the planning during the course meeting.
AnnouncementsThe course leader makes any announcements relevant to the group.
Explain that team leaders have a responsibility to convey to their teams information from the meetings of the leadership council.
Inform team leaders that there will be evening team campfires with follow-up discussions on Making Ethical Decisions.
Note the time and location for the next meeting of the leadership council.
Program Team and Service Team AssignmentsThe course leader asks the assistant course directors for program and service to take the floor.
The assistant course director for program reminds leaders of the service and program teams that they should review what they will be doing and use their planning skills to figure out an effective way to fulfill their responsibilities. Use Start, Stop, Continue for any evaluations.
Program Team (sample assignments)
■ Course assembly—Conduct the flag ceremony for the next day.
■ Course meeting—Prepare the meeting area.
■ Course meeting—Conduct the preopening activity. (The team should be provided with a printed sheet of instructions for organizing and conducting the activity. If materials are needed, the quartermaster should make those available.)
Service Team (sample assignments)
■ Police the course meeting area. (NYLT is a Leave No Trace program.)
■ Maintain participant latrines and showers.

N a t i o N a l Y o u t h l e a d e r s h i p t r a i N i N g
day Four-31
Course Events
STAFF SERVICE TEAM
The assistant course director for service will again make it clear to the leadership council that staff members have the responsibility of cleaning staff latrines/showers, staff campsites, and other areas for staff use. Staff members set a good example by rolling up their sleeves and taking care of their own areas rather than expecting someone else to do it for them.
ClosingThe course leader summarizes the key points covered during the meeting, addresses any questions the team leaders might have, and stresses the importance of performing at the highest levels, using the Scout Oath, the Venturing Oath, and the Scout Law.
Course Director’s ObservationsThe course director thanks all present for their participation and encourages them to continue performing at the highest levels.
The course leader adjourns the meeting, but invites the group to stay a moment to observe the post-meeting debriefing with the course director.
After the MeetingThe course director and course leader meet for a couple of minutes to review the meeting. Using Start, Stop, Continue, they discuss what went well during the meeting and what can be improved the next time the leadership council gathers.

N a t i o N a l Y o u t h l e a d e r s h i p t r a i N i N g
day Four-32
Cour
se E
vent
s
day Four: Course Meeting
time allowed 90 minutes
Format The NYLT syllabus is structured to represent the experience of a unit moving through a month of meetings and activities. The meetings that occur during the first three days of the course are similar to those a typical unit would schedule over a longer time period leading up to their big event. The big event that participants embark upon in their home unit correlates to the final days of the NYLT course—an exciting activity that is an outgrowth of the learning and planning that occurred during the first three meetings.
responsible Staff
location Course assembly area
learning objectives
By the end of this session, participants will
■ Be able to conduct a well-prepared unit meeting built on the seven-step unit meeting plan.
■ Build and/or practice skills needed for the upcoming Outpost Camp.
■ Continue preparations, as a team, for the Outpost Camp.
■ Practice good communication skills.
■ Practice SSC as part of the seven-step unit meeting plan (leadership council only).
■ Have fun.
Presentation Procedure
Preopening
Ask the team leaders, team guides, course director, and assistant course directors to join you for the preopening.

N a t i o N a l Y o u t h l e a d e r s h i p t r a i N i N g
day Four-33
Course Events
Day FourCourse MeeTing Plan
aCTiviTy DesCriPTion run By TiMe ToTal TiMe
Preopening Leadership council 5 min. 5 min.
opening ceremony Scout Oath, Venturing Oath, Program team 5 min. 10 min. and Scout Law
skills instruction Leave No Trace and gear packing Team guides 25 min. 35 min.
Team meetings Equipment planning for Team leaders 20 min. 55 min. Outpost Camp
interteam activity Backpack loading challenge Team guides 25 min. 80 min.
Closing Course Director’s Minute Course director 5 min. 85 min.
after the meeting Debrief; planning ahead Course leader and course director

N a t i o N a l Y o u t h l e a d e r s h i p t r a i N i N g
day Four-34
Cour
se E
vent
s
Check in with the team leaders and team guides to see who has responsibility for the main parts of the upcoming course meeting—the opening, the skills instruc-tion, the team meetings, and the interteam activity.
Ask if everyone has the resources needed to carry out their portion of the meeting.
Ask the course director if there is anything else requiring attention before the opening of the course meeting.
OpeningThe course leader invites course members to make the appropriate sign and recite the Scout Oath, the Scout Law, the Venturing Oath, and the Outdoor Code.
Ask if there are announcements or other contributions from participants and staff.
Skills InstructionThe course leader asks the team guides and/or other skills instructors to conduct the skills instruction portion of the course meeting.
Skills instruction for the Day Four course meeting will involve preparing and packing personal and group gear for the Outpost Camp. This is also an opportunity for team guides to model the Teaching EDGE.
Notes on Skills Instruction
1. These skills will be used during the interteam activity of this course meeting. They also will be needed during the hike to the Outpost Camp on Day Five.
2. The instructors for this portion of the course meeting can be the team guides assigned to each team or can be other youth staff fully versed in the principles of Leave No Trace and able to teach others how to use them.
3. As they prepare to teach this skills session, instructors can refer to the Boy Scout Handbook, Venturer/Ranger Handbook, Fieldbook, and Leave No Trace literature.
4. Instructors should also review the NYLT presentation on the Teaching EDGE and use the methods described in that session as their approach to meeting skills instruction. At the conclusion of this meeting, all NYLT participants will take part in the Teaching EDGE presentation. Instructors of that session will refer to the teaching that occurred during the course meeting as a model of a way that the Teaching EDGE can be used.
5. If instructors discover that some of the NYLT participants are well-informed about the skills being taught, those participants can be encouraged to help less-knowledgeable team members to master the skills. In most cases, though, instructors will probably find that everyone can benefit from a well-presented review of the skills.

N a t i o N a l Y o u t h l e a d e r s h i p t r a i N i N g
day Four-35
Course Events
PREPARATIONS
Each team guide will need the following:
■ A backpack of the sort to be used on the Outpost Camp
■ Personal and group equipment to be carried by one person on the Outpost Camp
■ A nylon sack or other container stuffed to represent one person’s share of team provisions for the Outpost Camp
Team guides should practice together ahead of time to be sure that
■ They can neatly organize everything and correctly load a backpack.■ They can use the Teaching EDGE to share with others the skill of
packing a backpack.■ They understand and can explain the role that choosing gear and food
plays in a Leave No Trace camping trip.
Leave No Trace Outdoor Ethics
■ Plan ahead and prepare.■ Travel and camp on durable surfaces.■ Dispose of waste properly.■ Leave what you find.■ Minimize campfire impacts.■ Respect wildlife.■ Be considerate of other visitors.
PROCEDURE
Using the Teaching EDGE, the team guide Explains how to organize, repackage, and pack one team member’s personal gear, group equipment, and provisions for a campout, then Demonstrates those skills. Next, he or she Guides team members in preparing and packing the gear and provisions themselves. The goal is that each person will be Enabled to pack his or her own backpack correctly for the Outpost Camp.
Areas instructors can cover include:
■ Adjusting shoulder straps and hip straps
■ Lining the sleeping bag stuff sack with a plastic trash bag to protect the sleep-ing bag from rain
■ Stowing clothing in a stuff sack or plastic trash bag
■ Placing water bottles and fuel bottles in outside pockets of the pack to make them accessible and keep them away from foodstuffs
■ If items are tied onto the outside of the bag, making them secure so they won’t swing about or fall off while you are hiking

N a t i o N a l Y o u t h l e a d e r s h i p t r a i N i N g
day Four-36
Cour
se E
vent
s
■ Carrying a large cook pot by slipping it over the end of a sleeping bag before lashing the bag to the pack
■ Striving toward the goal of having a neatly loaded backpack and nothing in your hands
(For more on packing up for a campout, see the Boy Scout Handbook, Venturer/Ranger Handbook, Fieldbook, and Backpacking merit badge pamphlet.)
Team MeetingsThe course leader asks the team leaders to take charge of their teams. The team meeting should cover planning personal and group equipment for the Outpost Camp.
Equipment planning can draw on the skills developed during the Day Two session on Preparing Your Plans.
The course quartermaster can prepare a group equipment planning work sheet that explains what group gear is available for Outpost Camp. With the work sheet for guidance, teams can develop their group equipment list for the Outpost. Using their Outpost Camp menus developed at the Day Three course meeting, members of each team also can make a list of the group cooking gear they will need to prepare their meals. The quartermaster can clarify where and how teams can get the gear they need for the Outpost Camp.
At the Day Three and Day Four meetings of the leadership council, team leaders are given checklists to guide their planning for the Outpost Camp. They are directed to use the checklists and the What, How, When, Who Planning Tool to lead their teams in making their Outpost Camp plans.
Checklists will vary from one NYLT course to another, depending upon the nature of the Outpost Camp. Sample checklists will include:
■ Personal equipment■ Group equipment■ Menu planning■ Food procurement and repackaging
If the checklists are detailed in what must be accomplished, teams will have Day Three to plan menus and Day Four to plan their personal and group equipment and to get everything ready for the Outpost Camp. The exercise also will reinforce the use of the skills covered in the Making Your Plans and Solving Problems sessions.
The team guide stays on the sidelines of the team meeting. He or she is ready to support the team leader and provide coaching if needed, but otherwise is not involved in the meeting.

N a t i o N a l Y o u t h l e a d e r s h i p t r a i N i N g
day Four-37
Course Events
Interteam Activity
MATERIALS NEEDED
For each team:
■ One backpack
■ Gear for one person for a campout
■ Group equipment to be carried by one person on a campout
The challenge for teams will be increased if the packs and gear presented to them are different than those they used during the course meeting skills instruction. A simple way to accomplish this is to shuffle the gear and pack used by one team during the skills instruction to another team for the interteam activity.
The challenge to the teams can be made more difficult by adding an odd-sized item such as an axe (correctly sheathed) or an oversized sleeping bag to the gear pile. If the solution will involve strapping the item to the outside of the pack, there should be lashing straps or cord on hand.
The course leader explains and conducts the interteam activity.
The challenge for each team is to correctly pack a backpack.
1. At the signal to start, each team will come to an empty backpack and a pile of personal and group gear.
2. Before touching the pack or gear, they will have three minutes to use the What, How, When, Who Planning Tool to decide how best to proceed. (A second signal will be given at the end of the three minutes.)
3. At the sound of the second signal, each team will have 10 minutes to follow its plan to pack the personal and group gear into a backpack.
4. A third signal will end the time available for packing. Each team will present its pack to rest of the course and explain their use of the What, How, When, Who Planning Tool.
Teams will be judged both for the way they have packed the gear and for their use of the What, How, When, Who Planning Tool.
As variations on this challenge, teams can make a pack out of a pair of pants or can form an old-style horseshoe pack by rolling their gear inside a blanket and then draping the load over one shoulder. For more informa-tion about pants packs and horseshoe packs, see the Boy Scout Handbook, 10th edition (1990).

N a t i o N a l Y o u t h l e a d e r s h i p t r a i N i N g
day Four-38
Cour
se E
vent
s
Closing—Course Director’s MinuteThe course director offers a Course Director’s Minute.
“There’s a well-known story about a man walking down a beach covered with starfish stranded by the receding tide. It was a hot day and the starfish were dying in the heat of the sun.
“The man came upon a boy who was carrying starfish down to the surf and eas-ing them back into the water.
“‘There are millions of starfish dying on the beach,’ the man told the boy. ‘What makes you think you can make a difference by tossing a few back in the ocean?’
“‘Well,’ said the boy, ‘I’m making a difference for those few, aren’t I?’
“Leave No Trace is like that. The habits we develop to minimize our impact on the land may seem like very small gestures when you consider the size of the planet. But those small efforts add up. They make a real difference to that one trail we hike, that one campsite we use, that next camper who follows us.
“Who we are is measured by what we do. When we use our knowledge—what we know—to care for our part of the world, we are being the best people we can be. The tides will take care of the rest.”
After the MeetingAt the conclusion of the Course Director’s Minute, the course director reminds the participants that the seventh step of a successful unit meeting is after the meeting.
The course director then invites the members of the leadership council to join him for the stand-up leadership council meeting. In this case, the leadership council will comprise the course leader, assistant course directors for program and service, the troop’s team leaders, and the team guides assigned to the teams.
The course leader leads the leadership council in reviewing the just-concluded meeting, using Start, Stop, Continue to evaluate the proceedings.
Thank the group for a job well-done, and adjourn.

N a t i o N a l Y o u t h l e a d e r s h i p t r a i N i N g
day Four-39
Content Sessions
day Four: geocaching game
time allowed 90 minutes
responsible Team leaders
location Selected area
learning objectives
By playing this combination scavenger hunt, orienteering course, and wide game with their teams, participants will
■ Apply many of the skills learned during the NYLT program.
■ Practice finding their way with GPS receivers.
Materials Needed
■ GPS receivers for each team
Presentation Procedure
Geocaching is an activity finding great popularity among Scouting groups and the general public. It combines the delight of orienteering with puzzle solving and outdoor explorations.
Here’s how it works in its non-Scouting form:
1. Players log onto Internet websites featuring geocache locations. They narrow their search to geocache locations in their hometown. For example, there might be a listing that says:
On My Honor
N 32° 53.113, W 096° 58.280
Find the bronze fellow who can show you the way.The date at his feetWill help you completeYour Good Turn quest for today.
They enter those coordinates into their GPS receivers and use the receivers to guide them to the one spot on Earth (the waypoint) indicated by that listing of latitude and longitude. (GPS receivers are accurate enough to pinpoint a location within a radius of about 50 feet or less.)
Once the players reach the waypoint, they refer to the rest of the clues to find the cache. In this case, the waypoint is the statue of a Scout standing outside the entrance to the BSA’s national office in Irving, Texas. The puzzle refers to the date etched near the shoes of the Scout. The geocache instructions then ask that geo-cachers use the final digit of the date to complete the coordinates for a second waypoint—this one, the front door of the National Scouting Museum just next door to the national office.
The final waypoint of a geocache challenge will often have a plastic container hidden nearby. Inside the container will be a notebook where the players can

N a t i o N a l Y o u t h l e a d e r s h i p t r a i N i N g
day Four-40
Cont
ent S
essi
ons
write down their names and the hour and date they found the cache. There might also be a number of trinkets—cheap toys, key chains, small plastic figu-rines. The players take one of them and can leave a trinket of their own so that the number of trinkets in the jar remains the same. (Some trinkets are known as “geotravelers”—items that geocachers move from one geocache to the next.)
Finally, geocachers close up the plastic container and put it back in its hiding place. When they get home, they can log back onto the geocache Web site and, if they wish, report their success in finding the cache and leaving it hidden for other geocache players to discover.
For more information on geocaching, visit http://www.geocaching.com.
NYLT and GeocachingThe NYLT course has adapted geocaching as the heart of the Day Four Geocaching Game. Working together, members of each team use skills they have learned during NYLT to locate hidden caches and then to solve problems posed to them by the contents of the caches.
Incorporating GPS receivers into the NYLT course is a means of introducing this technology to participants and instilling the NYLT course with an added spark.
PREPARATIONS
Setting up an effective course for the Geocaching Game will require careful planning by NYLT staff, ideally completed before the NYLT course begins. The basic tasks to be completed are these:
1. Determine the coordinates for six geocache hiding sites. The geocaches should be located far enough apart so that teams finding them will be out of sight of one another. A cache requiring five minutes to reach and locate is about right. Double-check each waypoint to ensure accuracy and timing.
Allowing 15 minutes per cache will allow each team to seek out six caches during the 90 minutes allotted to this activity. Staff members should test each waypoint to ensure teams will be able to find each cache location, complete what is asked of them, and return to the starting point within the allotted time.
2. Write down the coordinates for each waypoint on a sheet of paper. Include close-in clues teams will need to find each cache.
3. Prepare each cache. (Information on what to include in each cache can be found later in this session description.)

N a t i o N a l Y o u t h l e a d e r s h i p t r a i N i N g
day Four-41
Content Sessions
4. Youth staff should rehearse their roles for the Geocaching Game before the NYLT course begins. That will permit them to operate the game smoothly and will allow them to double-check coordinates, waypoints, and cache contents.
PLAYING THE GEOCACHING GAME
All the teams begin at a central point where the course leader explains the rules of the game. Each team leader is given the GPS coordinates for its first waypoint and close-in clues to find the location of the first geocache. Teams should be informed that they must find a cache, complete the challenge, and return to the starting point within a set amount of time. With the same number of caches as there are teams, every team can set off in search of a different cache.
Each team is accompanied by its team guide. The team guides serve as referees for the game. At some caches, they will have active roles to play in presenting challenges to participants. Otherwise, they should allow the teams to operate on their own, stepping in only if the teams need coaching and support in the use of GPS receivers or if they have become completely stumped and need an additional clue to find a particular cache.
Each team follows its GPS reading. That should get the members of each team close to their first geocache. The close-in clues will take them the rest of the way to the cache. (“Look behind the big oak tree growing beside the fence,” for example.) The combination of GPS readings and close-in clues should make each geocache easy to find if patrol members use their orienteering tools with care and pay attention to their surroundings.
Each team will find one piece of a scavenger hunt—an object, a challenge, a question from their team guide—something that must be done, gathered, answered, or completed—and a means for the team to prove they reached the spot and fulfilled what was asked of them.
When a team has found its first geocache and completed the challenge, they are to leave the geocache as they originally found it and return to the starting point. A staff member at the starting point can acknowledge the success of each team by giving it some token of its progress.
One possibility for token rewards for each successful challenge is that for each geocache it finds, a team will receive one piece of an NYLT emblem:
■ Shield■ Scout emblem outline■ NYLT compass
Completing the full geocache challenge will allow members of a team to assemble the entire emblem and exchange it for a streamer to display on the flagstaff along with their team flag.

N a t i o N a l Y o u t h l e a d e r s h i p t r a i N i N g
day Four-42
Cont
ent S
essi
ons
Each team then receives the coordinates that will lead it to its next geocache. At the start of the second 15-minute segment of the game, all the teams set off to find their second caches. The process repeats until every team has had a chance to find all the geocaches.
In order to manage the flow of people going to each location, teams must return to the starting area and must not proceed to the next waypoint until given permission by the staff managing the starting area. That will ensure sufficient time at each geocache location for teams to complete the challenges in a way that leads to good learning.
The Cache ChallengesUpon locating a cache, team members will discover inside a challenge of some sort, ideally relating to some aspect of the NYLT course. Listed below are poten-tial geocache challenges.
VISION—GOALS—PLANNING: CREATING A POSITIVE FUTURE
In a variation on a Project COPE game, each team must get everyone from point A to point B without touching the ground. The area has been prepared before the Geocaching Game. The destination has signs that read:
“Vision—A picture of what future success looks like.”
“If you can see it, you can be it.”
Team members form behind a starting line a convenient distance from the desti-nation (perhaps 25 feet). They are given four pieces of plywood, each 1 foot square. The word “Goals” is written on each square of plywood. The challenge is for everyone in the team to get from the starting point to the destination, step-ping only on the squares of plywood. Plywood squares may not be thrown. Any movement of the squares must be done by passing them hand-to-hand.
Before they begin, the team should take a few moments to Plan their course of action. Then they can put their Plan in motion, using the Goals to reach their Vision.
The team guide will referee the way the team copes with the challenge.
Upon completing the challenge, the team will put everything back the way they found it. The team guide will give them the token for completing that portion of the Geocaching Game, and everyone will return to the starting point.
ASSESSMENT TOOL: SSC—START, STOP, CONTINUE
The cache will instruct the team to turn to their team guide for challenges on the SSC assessment tool:
1. “What do the letters SSC stand for?” (If team members get stuck on this one, they can refer to the backs of their NYLT Leadership Compasses.)

N a t i o N a l Y o u t h l e a d e r s h i p t r a i N i N g
day Four-43
Content Sessions
2. “Use SSC to evaluate the way your team worked together to locate this geocache.” (The team guide may need to coach the team on being thorough in their use of SSC to conduct their evaluation.)
Upon completing the challenge, the team will put everything back the way they found it. The team guide will give them the token for completing that portion of the Geocaching Game, and everyone will return to the starting point.
TEACHING EDGE—ExPLAIN, DEMONSTRATE, GUIDE, ENABLE
In the cache, the team members will find a two-part challenge:
1. Pair up and use the Teaching EDGE to teach each other how to tie a square knot.
2. As you are doing the teaching, point out to the team guide the steps of Explain, Demonstrate, Guide, Enable as you use them.
When the team is done, the team guide can use SSC to make a brief evaluation how effectively team members applied the Teaching EDGE to teach a skill.
Upon completing the challenge, the team will put everything back the way they found it. The team guide will give them the token for completing that portion of the Geocaching Game, and everyone will return to the starting point.
SMART GOALS—SPECIFIC, MEASURABLE, ATTAINABLE, RELEVANT, TIMELY
In the cache, the team members will find a ring-toss challenge.
The area will be set up with a starting line and five pegs set at varying distances. Each peg has a card nearby indicating one quality of a SMART Goal—Specific, Measurable, Attainable, Relevant, Timely.
1. The team guide will give team members some rings. Standing behind the start-ing line, they are to toss the rings until they get one onto one of the pegs. When they accomplish that task, they are to take a moment to define for the team guide the meaning of that term as it applies to SMART Goals. (That is, “What does it mean for a goal to be Measurable?”)
2. When the team guide is satisfied with the definition, the team can continue tossing rings until they have succeeded in hitting each of the pegs and providing appropriate definitions for the terms.
There may be interesting variations on the ring toss theme—hoops hung from tree branches, for example, set so that team members can toss flying discs or balls or bean bags through them.
Upon completing the challenge, the team will put everything back the way they found it. The team guide will give them the token for completing that portion of the Geocaching Game, and everyone will return to the starting point.
STAGES OF TEAM DEVELOPMENT AND THE LEADING EDGE
In the cache, team members find a challenge to make order out of team develop-ment. They will find a pile of large cards, each with a term written on it. (A piece of poster board for each term would be ideal.) Team members are to unscramble

N a t i o N a l Y o u t h l e a d e r s h i p t r a i N i N g
day Four-44
Cont
ent S
essi
ons
the cards, laying them on the ground in the correct order to show the stages of team development and the Leading EDGE leadership style to use with each stage.
When properly arranged, the cards will be in this pattern:
Forming Storming Norming Performing
Low skill Low skill Rising skill High skill
High Low Growing High enthusiasm enthusiasm enthusiasm enthusiasm
Explaining Demonstrating Guiding Enabling
Upon completing the challenge, the team will put everything back the way they found it. The team guide will give them the token for completing that portion of the Geocaching Game, and everyone will return to the starting point.
CONFLICT RESOLUTION TOOL: EAR—ExPRESS, ADDRESS, RESOLVE
In the cache, team members find a challenge to use the conflict resolution tool to resolve a conflict.
As they complete the reading of the challenge, the team members turn to see the team guide and another youth staff member (or two youth staff members other than the team guide) engaged in an argument. The issue should be realistic—an argument over which one of them is supposed to pick up all the materials from the geocache sites at the end of the game, for example.
Team members can take a moment to plan their approach. Then they are to use EAR—Express, Address, Resolve—as a means of helping the youth staff members resolve their conflict. When they are done, the team guide can use SSC to evalu-ate their conflict resolution efforts.
Upon completing the challenge, the team will put everything back the way they found it. The team guide will give them the token for completing that portion of the Geocaching Game, and everyone will return to the starting point.

N a t i o N a l Y o u t h l e a d e r s h i p t r a i N i N g
day Four-45
Team Events
day Four: team Meetingtime allowed 45 minutes
Format Team presentation
responsible Team leaders
location Team campsite or some other location where the session of one team will not interfere with the activities of other teams.
learning objectives
By the end of this session, participants should be able to
■ Describe the purpose of the team meeting.
■ Describe how a team meeting should be run.
■ Know what the team leader is responsible for doing and what team members are responsible for doing.
■ Use Start, Stop, Continue to evaluate team performance.
As with meetings of the NYLT course and the leadership council, every team meeting during a NYLT course should be organized in a manner that provides an ideal example of such a session. Participants should be able to take the models of the team meetings they see at NYLT and use them to organize effective team meetings in their home units.
Materials Needed
Team meeting agenda. Each team meeting should follow a written agenda. Building on the following model, the agenda for today’s team meeting can be adjusted by the team leader prior to the meeting to fulfill the needs of the team.
delivery Method
The team leaders are the facilitators of the meetings of their teams. The leader-ship style each team leader uses is up to that person; the hands-on experience of leading is every bit as valuable as the progress made by a team during any particular meeting.

N a t i o N a l Y o u t h l e a d e r s h i p t r a i N i N g
day Four-46
Team
Eve
nts
Presentation Procedure
Model Team Meeting AgendaDay Four
■ Welcome—Team leader■ Meeting agenda—Team leader■ Evaluate team progress using Start, Stop, Continue
Start—“What should we be doing that will make things better?”
Stop—“What should we stop doing because it isn’t helping?”
Continue—“What is a strength and is working well that we want to continue doing?”
(Include evaluation of the team’s progress with the Daily Campsite Inspection Checklist and the duty roster.)
■ Using the NYLT Leadership Compass, determine the team’s current stage of development (Forming, Storming, Norming, Performing). Discuss ways the team can move ahead toward the next development stage.
■ Continue work on the team’s Quest for the Meaning of Leadership presentation.
■ Plan the team campfire for the evening of Day Four.■ Adjourn.
Team guides may attend team meetings, but ideally will not take part in any significant way.
N a t i o N a l Y o u t h l e a d e r s h i p t r a i N i N g
day Four-47
Content Sessions
day Four: Making ethical decisionstime allowed 60 minutes
Format Course presentation with team breakout discussions
responsible Course director, assigned staff
location Course assembly site
learning objectives
At the end of this session, each participant should be able to
■ Give a definition for “ethics” and discuss the importance of ethical decision making.
■ Describe three kinds of decisions:
—Right vs. Wrong
—Right vs. Right
—Trivial
■ For each kind of decision, explain one approach to making an ethical choice.
■ Use the Checklist for Ethical Decision Making to test at least one choice involving a right vs. right situation.
Materials Needed
■ Checklist for Ethical Decision Making handout for each participant (appendix, Participant Notebooks)
■ National Youth Leadership Training DVD, DVD player or computer with DVD capability, projector, and screen
■ Flip chart and markers
Presentation Procedure
Opening Discussion
Present participants with one of the following situations, then lead a brief discus-sion about the situation. Encourage them to share the decisions they would make and, more importantly, the means they used to arrive at those decisions.
SCENARIO 1
Your team has gotten permission to build a hiking trail on private property. As you are digging into the soil, you uncover a beautiful piece of Indian pottery that looks very old. You are the only person who sees it.
You know from your work on the Archaeology merit badge that it might be a good idea to leave the piece where it is and report your find when you get home to archaeologists at a nearby college.

N a t i o N a l Y o u t h l e a d e r s h i p t r a i N i N g
day Four-48
Cont
ent S
essi
ons
You know that the owner of the private property collects Indian artifacts and would be delighted to put the piece in his pottery collection.
You know you would like to keep the pottery yourself and start a collection of your own.
Give participants these choices:
1. “If you would leave the piece where it is and report it to archaeologists, please step over to the right side of the meeting area.” (Or to some other convenient spot determined by the session leader.)
2. “If you would give the piece to the owner of the property, please step over to the left side of the meeting area.” (Or to some other convenient spot deter-mined by the session leader.)
3. “If you would keep the pottery yourself, please step to the center of the meeting area.” (Or to some other convenient spot determined by the session leader.)
SCENARIO 2
You are coach of a Little League baseball team about to play in a championship game. Team rules say that anyone who misses a practice without a good excuse can’t play in the next game. Your star pitcher has missed the last two practices and won’t tell you why. The team’s catcher tells you there are rumors that the pitcher is embarrassed because his dad was drinking and couldn’t drive him to practice, but the catcher isn’t sure if the rumors are true.
You know that according to team rules, you should bench the pitcher.
You also know that without your best pitcher in the lineup, the team has no chance of doing well in the championship game.
Give participants these choices:
1. “If you would stick with the team rules and bench the pitcher even though you don’t know the reason for his absences, step to the right of the meeting area.”
2. “If you assume the rumors are true and so you will let the pitcher play, step to the middle of the meeting area.”
3. “If you do what’s best for the greatest number by letting the pitcher play and help the entire team succeed, step to the left of the meeting area.”
SCENARIO DISCUSSION
Ask those in each group to discuss why they made the decision they did. Entertain their answers. If they don’t bring it up, ask them if any of them were influenced to decide as they did because they saw others in their group moving to one part of the meeting area.
N a t i o N a l Y o u t h l e a d e r s h i p t r a i N i N g
day Four-49
Content Sessions
Show slide 4-23, Mission Statement.
Note: The point of this discussion is not to decide the right answer to the situation in question (in fact, each situation may have a variety of “right” answers), but rather to get participants thinking about HOW they arrive at ethical decisions.
Ask participants to return to their seats.
Explaining Ethical Decision MakingAsk participants if any of them can tell you the BSA Mission Statement.
If someone can recite it, write it on the flip chart. If not, write it on the flip chart anyway or show the DVD slide.
The mission of the Boy Scouts of America is to prepare young people to make ethical and moral choices over their lifetimes by instilling in them the values of the Scout Oath and Scout Law.
A mission statement is the primary objective of an organization.
If a key element of the BSA Mission Statement is “make ethical . . . choices,” that must be mighty important—so important that we want to spend plenty of time exploring what it means.
DEFINING THE MISSION STATEMENT
If we are going to be able to make ethical choices, we should at least understand what the words mean.
Choices. What does that mean? (That there are several ways to do something, several answers to a question, and we need to select one of them.)
What about ethical? (From the word “ethics.”)
What are ethics?
Lead the group in coming up with a working definition of the word “ethics.” As they offer ideas, write them on the flip chart.
Two answers to draw out or to present yourself are these:
■ We can think of ethics as an understanding of what is right and wrong for an individual and for groups of people.
■ Ethics are the standards by which we act, both when we are around others and when we are alone.
Where Do Ethics Come From?Ask the group for their ideas about where ethics come from. Write their answers on the flip chart.
Show slide 4-21, Making Ethical Decisions.
Show slide 4-22, Decision Making.
Show slide 4-24, Ethics.

N a t i o N a l Y o u t h l e a d e r s h i p t r a i N i N g
day Four-50
Cont
ent S
essi
ons
An important idea to draw out or present yourself is that ethics develop, in large part, as a result of the values a person gains from family and society.
AN ExAMPLE OF ETHICS
Ask the group if they recognize these words:
“We hold these truths to be self-evident, that all men are created equal, that they are endowed by their Creator with certain unalienable Rights, that among these are Life, Liberty and the pursuit of Happiness . . . .”
Answer: The second paragraph of the Declaration of Independence.
For most people who live in the United States, we accept these ideas as obvious values. As Americans, this is part of our shared ethic.
CODES OF CONDUCT
Ask if any participants attend a school that has a code of conduct. If so, ask them to describe briefly the codes of their schools, the reasons the codes are in place, and what makes those codes effective or ineffective.
Use their comments to explore the general idea of codes of conduct—that they are agreements among people as to generally accepted standards of behavior. Specific items in codes of behavior may be included to make it possible for peo-ple to live and work together effectively.
Some say that ethics are determined largely by what most people believe to be appropriate decision-making behavior. Without generally accepted standards, we would have trouble coming to agreement on much of anything. It would be much more difficult to function as a society.
If no participants offer school codes of conduct, offer the example of mili-tary codes of conduct intended to guide decision-making by everyone in uniform. Invite participants to suggest why the armed services would benefit from having a code of conduct.
The BSA and EthicsOld Boy Scout Handbooks talked about knights and chivalry. The knights swore themselves to live by a code of ethics that pledged them to help others, to do good, to defend those who needed it.
The Handbooks went on to discuss the code of conduct that Boy Scouts pledge themselves to use in guiding the decisions they make—the Scout Oath, Law, slogan, and motto. Similarly, Venturers pledge themselves to use the Venturing Oath, and all of the various Scouting program participants pledge themselves to adhere to the Outdoor Code.
There aren’t any knights in armor around today. Unlike the early days of Scouting, much of our communication occurs over the Internet. But log onto the Web site of the BSA National Council and you can read this:
Show slide 4-26, Codes of Conduct.
Show slide 4-25, Source of Ethics.
Show slide 4-27, The BSA and Ethics.
Show slide 4-28, Scout Code of Conduct.
N a t i o N a l Y o u t h l e a d e r s h i p t r a i N i N g
day Four-51
Content Sessions
The ideals of Boy Scouting are spelled out in the Scout Oath, the Scout Law, the Scout motto, and the Scout slogan. The Boy Scout measures himself against these ideals and continually tries to improve. The goals are high, and as he reaches for them, he has some control over what and who he becomes.
It’s the same message nearly a hundred years after Scouting’s founders first wrote it down.
ASk AND DISCUSS
Why should people be ethical? (A contrasting question would be, “What would happen if people were not?”)
Possible answers include:
■ To develop trust
■ To show mutual respect for others
■ To create a just and fair society
ASk AND DISCUSS
Why would anybody NOT follow a code of ethics?
Possible answers include:
■ I’m just one person, so it doesn’t really matter what I do.
■ If I stand up for a belief, people won’t like me.
■ The chance to do something went by really fast.
■ It would cost too much to do the right thing.
■ Sometimes I don’t know what I should do.
Steps to Ethical Decision MakingLife is about choices. Some are big choices, some are small. Let’s take a look at a few decisions people have faced.
Show video clip 4-29, Making Ethical Decisions (Part One), which begins with “Everyone in this room has choices . . . .” Continue through the interactive exer-cises that begin with slide 4-30, Making Ethical Decisions.
There are some very clear steps we can follow to make choices that are in keeping with our ethical beliefs. Let’s look at them.
STEP ONE: GETTING THE FACTS STRAIGHT
Any attempt to make a good decision has to begin with getting the facts of the situation straight. In some cases that seem at first quite difficult, additional facts are enough to make the correct course of action apparent.
If, for example, we wish to decide how much of our forests should be cut down now, and how much left for future generations, we first need to establish some
Show slide 4-31, Steps to Ethical
Decision Making.

N a t i o N a l Y o u t h l e a d e r s h i p t r a i N i N g
day Four-52
Cont
ent S
essi
ons
facts about the rate at which forests regenerate. These facts might be ascertained through science, or just through the experiences of people who have observed forests over long periods of time.
STEP TWO: FIGURE OUT WHAT kIND OF CHOICE IT IS
The categories of choices are:
■ Those that are Trivial
■ Those that are Right vs. Wrong
■ Those that are Right vs. Right
Trivial Decisions. Why did you choose the seat you took when you came to this session? Is it a decision that really matters? Probably not. What about this choice: You can watch television or you can do your homework. Or this one: You can set your alarm and get up on time or you can sleep in and be late for school. What would you do?
These are decisions that do not require much thought.
If you don’t do your homework because you choose to watch television, you will have to complete your schoolwork later. Your grades might suffer. You won’t feel very good about yourself.
If you sleep in rather than getting to class on time, you might have to stay after school. Your grades might suffer. You’ll miss being with your friends.
Decisions like this are usually very clear. They don’t require deep ethical thinking to figure them out. “If I do this, then this will be the result.”
Right vs. Wrong Decisions. Consider this choice: The clerk at a store has left the building and you are alone. Nobody would ever know if you slipped a candy bar into your pocket and left without paying. Or this one: A friend tells you he has a copy of the answers to a difficult math test you are to take tomorrow and that you can look at it if you want.
What would you do? Would you take the candy bar? Would you borrow the test answers?
These are right vs. wrong choices. There is a clear right course of action and a clear wrong course. These are no-brainers—you don’t need to have serious ethical decision-making debates with yourself to know that you shouldn’t steal the candy or look at the test. Whenever we know that one choice is the right one and another is the wrong one, we all know that the right thing is the thing to do.
If it’s so easy to tell right from wrong, why do we ever choose to do the wrong thing (i.e., steal the candy bar or look at the test answers)?
Right vs. Right Decisions. In the video, a Scout had promised his parents he would be home by a certain time. On his way, he sees a person who has dropped groceries in a parking lot and is having a difficult time. If he helps her, he will get home late. If he ignores her and hurries home, he’ll arrive on time but will not have helped a person in need.

N a t i o N a l Y o u t h l e a d e r s h i p t r a i N i N g
day Four-53
Content Sessions
It’s sometimes hard to know which decision to make when it is a right vs. right decision. If you had been that Scout, what would you have done? Why?
DISCUSS THE CHECkLIST FOR ETHICAL DECISION MAkING
Give each participant a copy of the Checklist for Ethical Decision Making and discuss the checklist with the group. Encourage them to consider how the various Yes or No questions can help them clarify choices and determine appropriate decisions.
Dealing With Peer PressureA Scoutmaster once said, “What you do speaks so loudly I can’t hear what you are saying.” That’s a good way of saying that our actions speak louder than our words.
But what about the words of our friends? What happens to ethical decision making when there is peer pressure?
Let’s take a look:
Show video clip 4-35, Making Ethical Decisions (Part Two), which begins with “Sometimes making an ethical decision and following the Scout Law is the hard choice . . . .”
Remind participants that at one point the narrator said, “Take a minute to write down the values you would like other people to see in you. You don’t have to share the list with anyone but yourself. Behavior is not ‘Do I THINK the right thing?’ but ‘Do I DO the right thing?’”
Encourage participants to think about that assignment during the rest of the course and write some notes to themselves about their own values. Of course, the key then is that WHAT THEY DO is a clear reflection of WHAT THEY THINK.
PRACTICE USING THE CHECkLIST
Return to the scenarios used to open this session and lead the participants through the exercise of testing the choices they made by using the Checklist for Ethical Decision Making.
As with the discussions that opened the session, the point of this exercise is not to judge some choices as being better than others, but rather for participants to gain experience applying the checklist and deciding for themselves if their choices were the best that could have been made.
SummaryEthical decision making is at the heart of the Boy Scouts of America. It is also a true measure of each person’s character.
The first step in ethical decision making is to get the facts of the situation straight.
Show slides 4-32, 4-33, and 4-34, which explain
the Be, Know, and Do checks of the Ethical Decisions Checklist.
Show slide 4-36, Summary.

N a t i o N a l Y o u t h l e a d e r s h i p t r a i N i N g
day Four-54
Cont
ent S
essi
ons
Trivial choices don’t require much consideration. Simply do the right thing.
If there is a right vs. wrong choice, the action is the same. Simply do what you know is right.
When a choice must be made between options that are right vs. right, the Checklist for Ethical Decision Making can help lead you to the correct decision.
Our personal values are reflected in our behaviors. Behavior is not, “Do I think the right thing?” but rather “Do I DO the right thing?”
Team Campfire AssignmentsExplain that the team campfires following this session will continue the exploration of ethical decision making. The team guide of each team will offer some scenarios to spark discussion of choosing the right course of action. Team members also will have opportunities to bring up and discuss ethical situations they have witnessed or experienced.
Adult NYLT staff do not attend the team campfires. The discussions about ethics that take place among team members can take on a different and often more open tone when youth are discussing issues among them-selves without adults listening in. Team guides will represent the NYLT staff at the campfires.

N a t i o N a l Y o u t h l e a d e r s h i p t r a i N i N g
day Four-55
Team Events
day Four: team Campfirestime allowed 60 minutes
Format Campfire at the team campsite
responsible Team leader and team guide
location Team site
learning objectives
This session will
■ Provide an opportunity for teams to enjoy the fellowship and team building of a team campfire.
■ Encourage continued discussion of issues raised during the session on Making Ethical Decisions.
Materials Needed
Discussion scenarios prepared by the NYLT youth staff as discussed below
Presentation Procedure
Team campfires should be relaxed opportunities for team members and their team guides to enjoy an evening of their own making that also includes talking about issues of importance to youth.
As a participant in the campfire, the team guide for each team will lead the conver-sation toward discussions of several situations involving ethical decision making. The scenarios will have been prepared before the course by the NYLT youth staff. The team guide will invite team members to explore the scenarios and apply the tools for making ethical decisions.
The topics laid out by the team guide can be fully formed scenarios that lay out situations where ethical decision making is needed, or they may be presented as direct questions:
■ In my school, here’s a situation that comes up a lot. (Describe the situation.) What’s the ethical thing to do?
■ I knew a guy who was confronted with this ethical decision. (Describe the deci-sion.) What should he have done?
Team guides should also encourage team members to offer situations from their own experience that have demanded ethical decision making. As much as possi-ble, the team guides should be supportive of the comments of team members, and encourage a frank and open discussion of ethical situations.
Adult NYLT staff do not attend the team campfires. The discussions about ethics that take place among team members can take on a different and often more open tone when youth are discussing issues among them-selves without adults listening in. Team guides will represent the NYLT staff at the campfires.


N a t i o N a l Y o u t h l e a d e r s h i p t r a i N i N g
day Five-1
schedule for day Five (thursday)
Time Activity Notes Responsible Location6:30 a.m. Arise, breakfast,
and cleanup.Duty roster Team site
8:00 a.m. Course assembly Course ceremony Staff Course assembly area
9:00 a.m. Leading Yourself Team guides Team site or course site
10:00 a.m. Leadership council meeting
Final plans for Outpost Camp
Course leader Leadership council site
10:45 a.m. Team meeting Outpost Camp preparations
Team leader Team site
11:45 a.m. Lunch and cleanup Duty roster Team site
1:00 p.m. Valuing People Assigned staff Course site
2:15 p.m. Course assembly to begin the Outpost Camp
Meet briefly to launch teams on their way
Course leader and course director
Course assembly area
2:30 p.m. Outpost Camp Schedule of events determined by each team
Team leader Assigned
Content sessions and their connecting activities
Course events and activitiesTeam events and activities

N a t i o N a l Y o u t h l e a d e r s h i p t r a i N i N g
day Five-2
Team
Eve
nts
day Five: Breakfast QuestionsOne or more staff members will join each team for breakfast. This is a good opportunity for participants and staff to get to know each other a little better. In addition, staff members can learn quite a bit about the team and can encourage team members to think about a few key issues as they begin the day.
To make the most of breakfast discussion opportunities, keep the following questions in mind for the Day Five breakfast:
■ How did you sleep?
■ Has anything unexpected happened since yesterday?
■ Tomorrow you’ll make your presentation of your team’s Quest for the Meaning of Leadership. Tell me about the NYLT leadership skills that will be part of your meaning of leadership.
■ When you go back to your home units, how can you use the Teaching EDGE to help others learn skills?
■ What does Enabling mean? (Lead the discussion toward the idea that Enabling means “creating an environment for success and continued growth.”)
The breakfast questions are not meant to be a quiz or a list to be read. Instead, enjoy sharing breakfast with a team and drop the questions into the conversation as a natural part of the morning discussions. Additional questions that relate to the specifics of the course or the team’s learning curve are encouraged.

N a t i o N a l Y o u t h l e a d e r s h i p t r a i N i N g
day Five-3
Course Events
day Five: Course assembly
time allowed 60 minutes
responsible Staff
location Course assembly area
learning objectives
By the end of this session, participants will
■ Have gathered for Day Five of the NYLT course.
■ Feel welcomed and valued (staff too).
■ Reaffirm that the NYLT course operates according to the Scout Oath, the Scout Law, the Venturing Oath, and the Outdoor Code.
■ Have viewed or participated in a flag ceremony presented by the program team.
■ Participate in or view the installation ceremony for new team leaders and assistant team leaders.
■ View youth staff as supporters, guides, and mentors to course participants.
■ Be able to discuss key parts of a good course assembly.
■ Be able to recognize good communication skills.
recommended Facility layout
Before an NYLT course begins, staff members should designate the place that will serve as the course assembly area. In most cases, this will involve an outdoor setting, though indoor areas of sufficient size (a dining hall, for example) can be adapted to accommodate the course assembly. (Indoors, flags can be presented on staffs with floor stands or can be displayed on a wall.)
Presentation Procedure
OpeningThe team leaders lead their teams to the assembly area and arrange them in an appropriate formation.
The course leader takes charge of the meeting, using the Scout sign to bring the assembly to order. He welcomes participants to Day Five of NYLT and expresses pleasure in having everyone there.
Explain that Day Five is the day that we will actually do the activity we have been planning all week. It corresponds to the fourth week in a Boy Scout troop, or the big activity in a Venturing crew, when we get to enjoy the fruits of planning: experiencing the adventure. There will also be a variety of presentations and activities during the day, as well as a course meeting.
N a t i o N a l Y o u t h l e a d e r s h i p t r a i N i N g
day Five-4
Cour
se E
vent
s
Flag CeremonyInstruct NYLT course members to use the appropriate Scout salute while the flag is being raised. Ask the program team of the day to present the colors and raise the American flag, then invite the program team to display the historic flag for the day and explain its significance.
The historic flags to be used for the NYLT course are the same as those presented during Wood Badge courses. Scripts for historic flag presenta-tions, also the same as included in Wood Badge courses, can be found in the appendix for Day Two.
Instruct the program team color guard to raise the historic flag and the NYLT course flag.
Ask the course members to make the Scout sign and recite the Scout Oath and Scout Law.
Dismiss the color guard.
AnnouncementsOffer any announcements important for conducting the day’s sessions and events.
New Team Leader and Assistant Team Leader InstallationThe course leader asks the Day Four team leaders to introduce the Day Five team leaders to the course, then the Day Four assistant team leaders to introduce the Day Five assistant team leaders. Encourage those making the introductions to use effective communication skills.
Note: As introductions are being made, the course leader can provide positive reinforcement by commenting on one or two communication skills being used well—hand gestures, clear voice, eye contact with the group, etc.
Team leader and assistant team leader assignments for each day of the NYLT course can be found in the Sample Team Duty Roster included in each copy of the NYLT Participant Notebook.
The course leader begins the installation. He or she should
■ Invite the new team leaders and assistant team leaders to come forward to be installed.
■ Ask the new team leaders to gather around the course flagpole, placing their left hands on the pole. New assistant team leaders stand behind their team leaders, each placing a left hand on the team leader’s right shoulder.

N a t i o N a l Y o u t h l e a d e r s h i p t r a i N i N g
day Five-5
Course Events
■ Instruct them all to give the Scout sign and repeat, “I promise to do my best to be worthy of this office for the sake of my fellow Scouts in my team and course and in the world brotherhood of Scouting.”
■ Welcome them as the course’s new team leaders and assistant team leaders.
Program and Service Team Emblem ExchangeThe assistant course leaders briefly review the duties of the program team and the service team.
The duties of the teams may differ from other days of the course. Adjust the explanations to reflect the needs of this day of the NYLT program.
Program Team (sample assignments)
■ Set up the course assembly and flag ceremony.
■ Prepare the course meeting area.
■ Perform other duties as assigned at the leadership council meeting.
Service Team (sample assignments)
■ Put the course meeting area in order after meetings. (NYLT is a Leave No Trace program.)
■ Maintain the participant latrines and showers.
■ Perform other duties as assigned at the leadership council meeting.
Ask the leaders of the day’s program team and service team to come forward to receive a symbol of their team responsibilities for the day.
The exchange of symbols for the program team and service team should not overshadow the installation of the day’s team leaders and assistant team leaders. Bestowing the emblems for the program and service teams can be done in good fun, but with the understanding that these team duties are secondary to the roles of team leadership.
STAFF SERVICE TEAM
Explain to participants that staff members have the responsibility of cleaning staff latrines and showers, staff campsites, and other staff-use areas. As fellow members of the course, staff members roll up their sleeves and take care of their own areas rather than expecting someone else to do it for them.

N a t i o N a l Y o u t h l e a d e r s h i p t r a i N i N g
day Five-6
Cour
se E
vent
s
Baden-Powell Team Streamer PresentationsThe course leader presents the Baden-Powell Team streamer awards based on the previous day’s campsite evaluation. Point out that the Boy Scouts of America encourages teams to compete against a standard that all can achieve (in this case, the standard of the Daily Campsite Inspection Checklist) rather than against one another. When it comes to the Baden-Powell Team streamer awards, every team can be a winner.
For guidelines on the daily campsite inspection and for presentations of the Baden-Powell Team streamers, see Day One—Registration, Orientation, and Camp Setup.
Using the Daily Campsite Inspection Checklist as his guide, the assistant course leader in charge of the service teams makes the evaluation of the team campsites. (This may occur while team members are at evening ses-sions of the NYLT course.) Team guides can encourage the teams to use the same form to check their campsites as they complete their cleanup after the evening meal. If a team is having difficulty following through with all the items on the checklist, its team guide can use the Teaching EDGE to help the team learn how to manage campsite cleanup in an efficient and orderly manner.
Each team can tie its Baden-Powell Team streamer for the day onto the pole used to display its team flag. Every team will have the opportunity to add another B-P streamer each day of the NYLT course.
Course Director’s MinuteThe course director presents his Course Director’s Minute for Day Five:
“We’ve talked a lot during this course about astronauts setting off for the moon. We’ve considered mountain climbers trying for the summit of Mount Everest. We’ve looked at the visions of people who set off to go around the world in a balloon or climbed on a bicycle and set out to win the Tour de France.
“Talking is good. Sorting out ideas is fine. But the real test of whether we’ve learned something comes when we set out to do it. Today you are setting off as teams for your Outpost Camp. It’s a chance to use all you’ve learned so far at NYLT to make your team a success. No doubt there will be some challenges along the way that will test you. You have the knowledge to respond well to those challenges, both as individuals and as a team.
“An Outpost Camp isn’t a trip to the moon, or to the summit of Everest, or to the winner’s podium of the Tour de France. But it is a step toward realizing an even greater vision—that of making the most of all the opportunities and chal-lenges that come your way.”
The course leader thanks the course director and brings the course assembly to a close.

N a t i o N a l Y o u t h l e a d e r s h i p t r a i N i N g
day Five-7
Content Sessions
day Five: leading Yourself
time allowed 60 minutes
Format Course presentation
responsible Team guides
location Team sites
learning objectives
By the end of this session, each participant should be able to
■ Discuss the importance of having a personal vision.
■ Recognize at least one new way of thinking about himself.
■ Describe the phases a person experiences while moving toward a goal or learning a new skill.
■ Recognize the phases a person may experience as he or she progresses through learning/achieving experiences.
■ Have fun.
Materials Needed
■ National Youth Leadership Training DVD, DVD player or computer with DVD capability, projector, and screen
■ National Youth Leadership Training Leadership Compass poster (in full view at the front of the meeting area)
Presentation Procedure
Opening Activity
THE IDENTITY GAME—HAWk, SNAkE, COYOTE
Play the Identity Game in an open area, perhaps the course assembly area. Prepare the area by stretching a rope on the ground to separate the area into two equal parts. Mark the back boundaries of the two parts about 50 feet behind, and parallel to, the center rope.
Back line
Center line
Back line
50 fe
et50
feet

N a t i o N a l Y o u t h l e a d e r s h i p t r a i N i N g
day Five-8
Cont
ent S
essi
ons
Limit the time for this game to eight minutes. To make the game go faster, it can be played by individual teams rather than the entire course, or by one team starting against another.
Divide the course into two teams (perhaps Red, Blue, and Green teams as a team, Yellow, Orange, and Maroon teams as the other team). Each team huddles, and members decide whether they will all be hawks, snakes, or coyotes.
The teams face each other across the center line. At the game leader’s signal, members of each team assume the sign of the animal decided upon by their team:
■ Hawks—Arms outstretched as wings
■ Coyotes—Hands cupped against the head as ears
■ Snakes—Palms held together and the hands making a slithering motion
The key to the game is this:
■ Hawks get snakes.
■ Snakes get coyotes.
■ Coyotes get hawks.
Thus, if team A has chosen to be hawks and team B shows the sign for snakes, the snakes must run to the safety of their back line before being tagged by the hawks. Likewise, if team A shows the sign for coyotes and team B shows the sign for snakes, the coyotes must run for safety or be tagged by the snakes.
Each person who is tagged becomes a member of the other team for the next round of the game. The game continues for eight to 10 rounds. The numbers on each team will ebb and flow as participants are tagged and change sides. At the end of the game, participants rejoin their teams and make themselves comfortable in the course presentation area.
IntroductionAsk participants what they liked about the game. (It was fun, active, different . . . .)
Ask what they learned about playing the game successfully. Bring out this idea: You’ve got to know whether you’re a hawk, a snake, or a coyote. Once you know that, then you can use what you know about yourself to decide what you’re going to do—whether you’re going to run for safety or try to tag the other team.
Apply that idea to leading yourself: Being a hawk, a coyote, or a snake is the simplest of qualities to know about yourselves. We all have our own sets of strengths and ways of doing things. We each have experiences that helped make us be who we are today and are influenced by our parents, teachers, religious leaders, friends, and neighbors. We also have the freedom to choose much of who we will be, what guidelines we choose to follow. For example, everyone here pledges themselves to follow the Scout Oath, the Venturing Oath, and the Scout Law.
Show slide 5-1, Leading Yourself.

N a t i o N a l Y o u t h l e a d e r s h i p t r a i N i N g
day Five-9
Content Sessions
Understanding as much as we can about who we are is a basic part of leadership.
Who we are is the BE of Be, Know, Do.
Understanding something about ourselves is the kNOW of Be, Know, Do.
Using our personal strengths to improve our abilities to lead is the DO of Be, Know, Do.
What does it mean to lead yourself?
We often think of a leader as the person out front—the patrol leader; the crew president; the guide showing people the way.
In leading others, we have a greater responsibility than just to ourselves. But before we can lead others well, we need to be able to lead ourselves. For now, let’s boil down leading ourselves to answering three questions:
1. Where am I now?
2. Where do I want to be?
3. How do I close the gap between where I am now and where I want to be?
Give a simple example:
1. I’m a person at the base of a mountain. (Where I am now)
2. I want to be a person standing at the top of the mountain. (Where I want to be)
3. In order to close that gap between the trailhead and the top of the peak, what do I need to do? (How do I close the gap?) Well, I need to organize my group, plan an itinerary, get the food ready, load my pack . . . .
Ask participants for a few more examples. Encourage them to think about situations in school, in sports, or in Scouting where they figure out where they are now, where they want to go, and at least a general idea of how to close the gap between the two.
Transition to Vision: Where I am now is pretty easy to figure out. But how do you figure out where you want to go? Does that sound familiar to anything we’ve discussed so far?
Vision. That’s what future success looks like. That’s where we want to go.
On videos during this course, we’ve seen some examples of personal vision. Can you tell me what Lance Armstrong’s vision was? Steve Fossett’s?
■ Vision is what success looks like. Vision is the elephant.
■ Goals are the steps to fulfilling that vision. Goals are the bites of the elephant.
■ Planning is the way to figure out how to reach your goals. Planning is figuring out where you’ll get the fork, the cook pot, and the elephant recipe book.
Show slide 5-2, Be, Know, Do.
Show slide 5-3, Leading Yourself.
Show slide 5-4, Leading Yourself: I’m at
the base of the mountain.
Show slide 5-5, Vision—Goals—Planning.

N a t i o N a l Y o u t h l e a d e r s h i p t r a i N i N g
day Five-10
Cont
ent S
essi
ons
The Vision ChallengeLater in this NYLT course, we’ll guide each of you through the process of devel-oping a personal vision. For now, start thinking about where you are and where you want to be.
Think big. Where do you want to be in 10 years? In 25 years? Dream a little. What profession most appeals to you? What kind of adult life? Think about that for the next couple of days, and then we’ll start figuring out how you can close the gap between where you are now and where you want to be.
Summarize This SectionWhen it comes to leadership, the person you lead the most and the person over whom you can have the greatest influence is yourself.
To lead ourselves, we need to figure out where we are, where we want to be, and how to close the gap in between. That means having a vision, setting goals to ful-fill that vision, and then planning ways to reach those goals.
Each of us also needs to be responsible for himself—doing what we need to do to close the gap between where we are and where we want to be.
There are lots of people to whom we can turn for support and whom we can draw upon for help.
Knowing Yourself
THE CROSSED-ARMS ExERCISE
Have everyone cross their arms, then recross them the opposite way. Discuss comfort level with difference and the fact that there is no right way. For some people, right over left feels more natural, for others it’s left over right.
Ask all right-handed participants to raise their hands, then ask a show of hands of those who are left-handed.
Ask a show of hands of people with blue eyes, then of those whose eyes are brown.
Some traits (like which way we feel better crossing our arms) may have no clear explanation, but they are still part of who we are.
Emphasize the fact that to lead yourself well, you need to know as much about yourself as you can. Who you are is not just whether you are a coyote, a hawk, or a snake. Who you are is not just how tall you are or the color of your eyes or what kind of music you like, but also how you make decisions when you are with other people and how you make decisions when you are alone.
Show slide 5-8, Leading Yourself:
To lead yourself . . . .
Show slide 5-6, The Vision Challenge.
Show slide 5-7, Leading Yourself: You are . . . .
Show slide 5-9, Leading Yourself:
You need to be . . . .
Show slide 5-10, Knowing Yourself.

N a t i o N a l Y o u t h l e a d e r s h i p t r a i N i N g
day Five-11
Content Sessions
The Self-Leadership CompassWhile we are all unique in many ways, something most of us have in common is the path we take as we are moving toward a goal or learning a new skill. They happen to be the same stages that teams experience as they are working toward a goal or learning new skills:
■ Forming
■ Storming
■ Norming
■ Performing
Whenever we begin to learn a new skill or begin making our way toward a new goal, we have lots of enthusiasm but we probably also have lots to learn before we can get very far. When we begin any new skill or goal, we will always be back at Forming.
The same is true when using a real compass. If you want to head out in a new direction, you need to point your direction-of-travel arrow toward your destina-tion and begin working your way through the phases again.
Self-Leadership Measurement ActivityEncourage participants to use their NYLT compasses to chart their individual progress as they learn new skills and work toward personal goals during the NYLT course. This is a private activity for each of them. Every Scout can consider his level of skill and level of enthusiasm and motivation. By understanding their stages of development, they can move ahead more effectively.
Show video clip 5-12, Leading Yourself (Part One), which begins with “Whether you have a strong personal vision or one that involves others . . . .” Add these thoughts to the video presentation:
■ To move toward more advanced stages of self-leadership, it’s important to reevaluate your goals. Are they getting you closer to realizing your vision of success?
■ You can recast your goals. You can refine them to make them more powerful.
■ You can also seek the help of others. Find people who can help you set your goals, teach you skills, and evaluate your performance.
Continue through the interactive scenarios at slide 5-13, Leading Yourself, and video clip 5-14, Leading Yourself (Part Two), to the Be, Know, Do summary.
Show slide 5-11, The Self-Leadership
Compass
N a t i o N a l Y o u t h l e a d e r s h i p t r a i N i N g
day Five-12
Cont
ent S
essi
ons
SummaryThe foundation of leadership is Be, Know, Do:
■ The BE of leadership—Who you are and how you use your strengths
■ The KNOW of leadership—The skills of teaching and helping others achieve their goals
■ The DO of leadership—Tools for communicating, solving problems, and resolving conflict
We each have responsibility for figuring out where we are, where we want to be, and how to close the gap in between—in other words, to develop a personal vision, determine the goals to fulfill that vision, and make plans for reaching our goals.
Knowing about ourselves will help us understand why we are where we are now, where we want to be, and how to close the gap between our present situation and what success looks like.
Understanding the stages we go through as we learn a new skill or work toward a goal can help us better understand the process and get through difficult times more efficiently.
Show slide 5-15, Summary.
Show slide 5-16, Summary: The stages . . . .

N a t i o N a l Y o u t h l e a d e r s h i p t r a i N i N g
day Five-13
Course Events
day Five: leadership Council Meeting
time allowed 45 minutes
responsible Course leader
location Leadership council site
learning objectives
By the end of this session, team leaders will
■ Be able to discuss how to run an efficient, well-planned meeting.
■ Have the resources and guidance to help them lead their teams.
■ Experience representational leadership as team leaders representing their teams.
■ Report on team’s progress on their presentations for the Quest for the Meaning of Leadership.
■ Know which teams are responsible for upcoming course assignments.
■ Prepare for the Outpost Camp (emergency response plan).
■ Use SSC to evaluate team performance.
■ Practice good communication skills.
Materials Needed
■ Participant Notebooks. Each NYLT participant and staff member will have a notebook containing core information that will be useful throughout the course—blank duty rosters, equipment lists, daily schedules, meeting agendas, etc. Blank pages in the notebooks provide space for team leaders to write down ideas from meetings.
■ Emergency Response Plan work sheets (appendix)
delivery Method
The leadership council meeting is conducted by the course leader, who will model appropriate leadership behavior within the setting of the meeting. As with the Day Four leadership council meeting, the leadership council meeting on Day Five is attended by the course leader, assistant course leader, the team leaders of the day, and the course director.

N a t i o N a l Y o u t h l e a d e r s h i p t r a i N i N g
day Five-14
Cour
se E
vent
s
Leadership Council Meeting AgendaDay Five
1. Welcome and introductions
2. Purpose of the meeting—what we need to accomplish
3. Reports on the progress being made by each team
4. Review plans for the Outpost Camp
5. Review the emergency response plan for the Outpost Camp
6. Announcements, including a reminder that it is time for teams to finalize their Quest presentations
7. Program team and service team assignments
8. Closing
Pre-Meeting DiscussionThe course director and course leader often visit for a few minutes before the beginning of a leadership council meeting. They go over the agenda and make sure everything is in order. The course director confirms that the course leader understands the vision of what the meeting will accomplish, and makes sure the course leader is ready to run the meeting.
Once the meeting begins, though, the course leader is in charge and the course director stays on the sidelines. The course director might coach and guide the course leader now and then, but in a youth-led course, the youth staff are in charge.
At the end of the pre-meeting discussion, the course leader calls the leadership council to order and begins the leadership council meeting.
Welcome and IntroductionsThe course leader takes charge of the meeting, introduces those persons attend-ing the leadership council meeting, and welcomes everyone.
Presentation Procedure

N a t i o N a l Y o u t h l e a d e r s h i p t r a i N i N g
day Five-15
Course Events
Purpose of the MeetingDirect the attention of the leadership council to the written agenda. Note that the purpose of this meeting will be to
■ Make reports on the progress being made by each team.
■ Make final preparations for the Outpost Camp (review plans, go over the emergency response plan).
■ Make program team and service team assignments.
Throughout the meeting, participants will use good communication skills to share ideas.
Reports on the Progress of Each TeamThe course leader asks each team leader to report on his or her team’s progress so far. Encourage team leaders to make their reports as constructive evaluations using SSC:
Start—What can they begin doing to improve their teams?
Stop—What can they stop doing that is not working well?
Continue—What is a strength and is working well that they can continue doing?
Encourage each team leader to use the Leadership Compass to determine the current stage of development of his or her team (Forming, Storming, Norming, Performing).
Remind team leaders that each team should be thinking about its presentation of the Quest for the Meaning of Leadership. Briefly review the challenge (offered by the course director at the campfire on Day One), and stress the importance of continuing to work on the presentation throughout the course.
Review Plans for the Outpost CampGive an overview of the Outpost Camp plan. Discuss the schedule and destina-tion for each team.
Explain that the teams are to be packed up and ready to depart by the end of the Day Five team meeting. (It may even be appropriate for them to bring their packs and form pack lines outside the course assembly area prior to the session on Valuing People. That way they will be ready to depart for their Outpost Camps immediately following that session.)
Review the checklists teams have used on days Three and Four. The checklists might vary, depending on the nature of the Outpost Camp. In general, the checklist can include these items to be planned:
■ Menu planning (covered during the Day Three leadership council meeting and course meeting)
■ Personal equipment (covered during the Day Four leadership council meeting and course meeting)
■ Group equipment (covered during the Day Four leadership council meeting and course meeting)

N a t i o N a l Y o u t h l e a d e r s h i p t r a i N i N g
day Five-16
Cour
se E
vent
s
Review the Emergency Response PlanGuide each team leader in filling out a copy of the plan that can then be shared with the team.
Before the course begins, NYLT adult staff will carefully consider the loca-tions of Outpost Camps and determine the most appropriate emergency response plans to provide teams.
Adult staff should develop team emergency response plans to address worst-case scenarios.
Adult staff should use the emergency response plans to determine the appropriateness of Outpost Camp locations and communications. For example, a team with minimal first-aid skills should not be sent to an Outpost campsite a long distance from persons with the first-aid training and leadership skill to manage medical emergencies. The course director should also consider the locations of coed teams relative to locations of responsible adult staff. See Outpost Camp section on page 30 of Day Five for more detail on this point.
AnnouncementsThe course leader makes any announcements relevant to the group.
Remind team leaders that it is time for teams to finalize their Quest presenta-tions. If they have not done so already, they should spend time during the Outpost Camp completing their presentation plans and rehearsing what they will do to represent their Quest for the Meaning of Leadership.
Explain that team leaders have a responsibility to convey to their teams informa-tion from the meetings of the leadership council.
Note the time and location for the next meeting of the leadership council.
Program Team and Service Team AssignmentsThe course leader asks the assistant course directors to take the floor.
The assistant course directors remind those leaders of the Day Five service and program teams that they should review what they will be doing and use their planning skills to figure out an effective way to fulfill their responsibilities. Use Start, Stop, Continue for any evaluations.
Program Team (sample assignments)
■ Course assembly—Conduct the flag ceremony for the next day.
Service Team (sample assignments)
■ Maintain participant latrines and showers.

N a t i o N a l Y o u t h l e a d e r s h i p t r a i N i N g
day Five-17
Course Events
STAFF SERVICE TEAM
The assistant course leader will again make it clear to the leadership council that staff members have the responsibility of cleaning staff latrines/showers, staff campsites, and other areas for staff use, and will add any other tasks of the day.
ClosingThe course leader summarizes the key points covered during the meeting, addresses any questions the team leaders might have, and stresses the importance of performing at the highest levels, using the Scout Oath and Scout Law as their guides.
Course Director’s ObservationsThe course director thanks all present for their participation and encourages them to continue performing at the highest levels.
The course leader adjourns the meeting, but invites the group to stay a moment to observe the post-meeting debrief with the course director.
After the MeetingThe course director and course leader meet for a couple of minutes to review the meeting. Using Start, Stop, Continue, they discuss what went well during the meeting and what can be improved the next time the leadership council gathers.

N a t i o N a l Y o u t h l e a d e r s h i p t r a i N i N g
day Five-18
Team
Eve
nts
day Five: team Meeting
time allowed 60 minutes
responsible Team leaders
location Team site or some other location where the session of one team will not interfere with the activities of other teams.
learning objectives
By the end of this session, participants should be able to
■ Describe the purpose of the team meeting.
■ Describe how a team meeting should be run.
■ Know what the team leader is responsible for doing, and what team members are responsible for doing.
■ Use Start, Stop, Continue to evaluate team performance.
As with meetings of the NYLT course and the leadership council, every team meeting during an NYLT course should be organized in a manner that provides an ideal example of such a session. Participants should be able to take the models of the team meetings they see at NYLT and use them to organize effective team or crew meetings in their home units.
Materials Needed
Team meeting agenda. Each team meeting should follow a written agenda. Building on the presented model, the agenda for today’s team meeting can be adjusted by the team leader prior to the meeting to fulfill the needs of his team.
recommended Facility layout
The team guide will determine the location of the first team meeting. The team will decide where subsequent team meetings will occur. In most cases, team meetings will take place in or near the team’s campsite.
delivery Method
The team leaders are the facilitators of the meetings of their teams. The leader-ship style each team leader uses is up to that person; the hands-on experience of leading is every bit as valuable as the progress made by a team during any particular meeting.

N a t i o N a l Y o u t h l e a d e r s h i p t r a i N i N g
day Five-19
Team Events
Model Team Meeting AgendaDay Five
1. Welcome—Team leader
2. Meeting Agenda—Team leader
3. Evaluate team progress using Start, Stop, Continue.
Start—“What should we be doing that will make things better?”
Stop—“What should we stop doing because it isn’t helping?”
Continue—“What is a strength and is working well that we want to continue doing?”
(Include evaluation of the team’s progress with the Daily Campsite Inspection Checklist and the duty roster.)
4. Using the NYLT Leadership Compass, determine the team’s current stage of development (Forming, Storming, Norming, Performing). Discuss ways the team can move ahead toward the next development stage.
5. Continue work on the team’s Quest for the Meaning of Leadership presentation.
6. Complete team preparations for the Outpost Camp.
7. Adjourn.
Team guides may attend team meetings, but ideally will not take part in any significant way.
Presentation Procedure

N a t i o N a l Y o u t h l e a d e r s h i p t r a i N i N g
day Five-20
Cont
ent S
essi
ons
day Five: Valuing people
time allowed 50 minutes
Format Course presentation
responsible Assigned staff (preferably the course leader backed up by an adult leader to provide diversity in knowledge, viewpoints, experience, and age)
location Course site
learning objectives
As a result of this session, participants will be able to
■ Understand that the Scout Oath, the Venturing Oath, and the Scout Law guide us in valuing other people.
■ Recognize that both the similarities we share with others and our differences can help groups be stronger.
■ See that we have a responsibility to act in an ethical manner in our dealings with people whose core values differ from our own.
■ Use ROPE principles to strengthen their home unit programs.
Materials Needed
■ 4-foot lengths of rope, one for each participant, presenter, and team guide. They should be of differing colors, diameters, and types. Each rope should be appropriate for learning knot-tying (that is, no bailing twine or string).
■ Posters presenting the Scout Oath, the Venturing Oath, and the Scout Law, and the World Crest emblem (at left). Display the posters at the front of the presentation area in view of all participants.
■ Checklist for Ethical Decision Making (appendix, Participant Notebooks)
■ Flip chart and markers
Presentation Procedure
Opening Exercise
Provide each participant with a 4-foot length of knot-tying rope.
Tell participants that there are lots of great trick knots. A challenging one is the toss knot. It’s tied by spinning a loop into a rope, then tossing through one end as if it were a dart.
Show participants how to tie the toss knot. (These instructions are for a right-handed person. Participants who are left-handed should reverse the hand orientation.)
N a t i o N a l Y o u t h l e a d e r s h i p t r a i N i N g
day Five-21
Content Sessions
Step 1 — While standing, grasp the rope with one end in each hand. Hold the end in your right hand as if it were a dart. There should be about 2 inches of the end of the rope pointing away from you—the point of the dart. The body of the rope should be hanging down in front of you.
Step 2 — With your right hand, flip the body of the rope to the left and over itself to form a loop. The loop will be rotating counterclockwise as you look down at it.
Step 3 — Keeping a tight grip on the rope with your left hand, toss the end in your right hand (the dart) through the loop. Since the loop is in motion, the challenge is to toss the dart at just the right time.
Step 4 — If the dart goes through the loop as it is first forming, it will create an overhand knot. If the loop has spun further before the dart goes through, the knot will be a figure-eight knot.
Team guides can help members of their teams practice the toss knot, explaining that a lot can be done with a single rope. It’s the same with people. One person alone can accomplish a great deal.
Ask participants: Most of you probably know the joining knot. Remember? It’s a square knot.
Have participants tie a square knot with their rope as you describe the architec-ture of the square knot—that is, what makes it a good knot for joining together two rope ends.
The square knot is actually two bends, one in each rope end, that are intertwined.
Each end of the rope brings strength to the knot. When they work together, the contributions of the two ends makes possible a knot that could not exist if there were but one end.
Tell participants: Now I’d like each of you to tie one end of your rope to the end of the rope of another member of your team. Use a square knot. If everyone ties the knot one time, all the ropes should be linked into a circle.
(Team guides can Guide participants if they need help tying the knots or sorting out which ends should be joined to make the circle.)
Look at the strength formed by all these different kinds of rope joined together. When Boy Scouts learn to tie the joining knot, it doesn’t just symbolize them as one person joining a troop. It also symbolizes all the members of a troop joining together to make the strongest possible team.
Just as these ropes are both the same and different from one another, members of teams draw strength from the ways they are similar and ways they are different.
One of the ways all of us here are similar is that we can all tie a square knot. That shared ability allows us to join together in ways that wouldn’t be possible if we shared nothing in common.

N a t i o N a l Y o u t h l e a d e r s h i p t r a i N i N g
day Five-22
Cont
ent S
essi
ons
The Scout Oath, Scout Law, and Venturing OathAsk: Why did you become members of the Boy Scouts of America? Probably for more reasons than just to tie a square knot.
Entertain some answers. Among them might be “Because my friends had joined,” or “My parents wanted me to.”
Lead participants toward this answer: “People in my unit are interested in doing the same kinds of things I like to do.”
All of us here are part of Scouting because we share a common belief in taking part in outdoor adventures. We all share something else, too—a belief in the Scout Oath, Scout Law, and Venturing Oath.
The session leader may ask participants to recite with him the Scout Oath, Scout Law, and Venturing Oath or can simply point out the Oaths and Law on the posters at the front of the presentation area.
Since the beginning of the BSA, the Scout Oath and Scout Law have expressed the values of the Scouting movement.
Being with others who have the same values we do can provide a strong sense of belonging and understanding. We don’t have to explain ourselves to one another. We like to do the same things together. We all have the same founda-tion in our lives.
Being with people who are a lot like us is often easier than getting to know those who aren’t. But, think about what it would be like if everyone around us was just like you.
It’s also clear that there is a strength in having common values and common interests. Values are the glue that holds a group together and helps give the group its identity.
But if everyone in a group were exactly alike, fresh ideas would be rare. Nobody would be asking the sorts of questions that lead to better programs and more interesting adventures. There would be little to learn from one another.
While common values are essential for successful teams, diversity fuels change, growth, and progress. Let’s talk about some of the strengths that come to a team through diversity of its members.
What Is Diversity?
Help participants begin exploring their understanding of diversity and the role it has played in enriching their lives. Encourage them to take part in the discussion but don’t put people on the spot in front of the group. Help them to work their way into the subject at their own pace.

N a t i o N a l Y o u t h l e a d e r s h i p t r a i N i N g
day Five-23
Content Sessions
Ask participants: The first night of NYLT, you all took part in the Who, Me? game. You probably came up with lots of ways that you are similar to others in your team, and some ways that you are unique. I’m sure you found lots of simi-larities with others in your team. What are some of those similarities?
(Invite answers and write them on a flip chart.)
The Who, Me? game probably brought out some differences that team members have, too. What are some of those differences? (Some differences may be simple—“We live in different towns.” “I like to play soccer and everybody else is into football.” Some may be more complicated—“My religious beliefs are different than the rest of the group.” “I was born in a different nation than everybody else.”)
There are lots of differences even in an NYLT course with members who have much in common. Those differences are the diversity we share.
Keep the discussion lively and moving along by asking participants to suggest kinds of diversity they witness in their schools, communities, and nation. Write down their answers on the flip chart.
Encourage participants to think about some of these areas of diversity and to give examples from their own experience of the differences:
■ Gender
■ Race
■ Age
■ Physical appearance
■ Health
■ Education
■ Family structure
■ Friendships
■ Geographic location
■ Occupation
■ Language
■ Heritage
■ Belief systems
■ Religion
■ Traditions
Other questions that can help participants think about the nature of diversity:
■ At some time, each of us has felt different from other people. What are some of your experiences of times when you realized you were different from other people?
■ What were the consequences of being different? What were your feelings about it?
Shared values are the glue that holds a group together. For the Boy Scouts of America, those shared values are found in the Scout Oath, Scout Law, and Venturing Oath.
Each of us also has characteristics that make us unique. We all have knowledge and experiences that set us apart from other people. We can each contribute something special to the teams to which we belong.

N a t i o N a l Y o u t h l e a d e r s h i p t r a i N i N g
day Five-24
Cont
ent S
essi
ons
Throughout life, experiencing different cultures and ways of doing things helps us learn about the world around us. Often the more we explore differences, the more we discover we have in common with other people.
Ask participants:
■ How can diversity strengthen a team? (Among the possible answers: “Each of us has traits that make us unique and each of us has knowledge that we can use to add to our experiences and the experiences of others.”)
■ Can diversity ever be a problem for a team? (Among the possible answers: “We can never agree on what we want to do.” “Some of our guys have religious responsibilities on days we want to go camping.” “We have a guy in our home troop with dietary restrictions, and that makes it hard for us to plan the menus the rest of us want.”)
Diversity brings opportunities and challenges to a team. Differences can be good—bringing fresh ideas to a group, challenging everyone to find new solutions.
Groups work best when everyone in the group shares the same basic values. In Scouting those shared values are best expressed in the Scout Oath, Scout Law, and Venturing Oath. A big challenge for Scouts is knowing how to respond to people who do not share those same basic values.
How Do We Respond to People Whose Values Are Not the Same as Ours?Valuing others and embracing diversity helps us make the most of the talents of everyone in a group.
Everyone is different. All of us share some common values. However, there are many people who do not share all of our values.
There may be many things about each one of them that we can appreciate, value, and respect.
Ask participants: But how should we treat people who do not share all of our core values? What do the Scout Oath, Scout Law, and Venturing Oath tell us about how we should act toward other people? They remind us that we should respect each individual, for each one of us is a special person.
Each of us can enrich the life experience of ourselves and others by helping each other appreciate the fun times and get through the tough times.
The answer can be found in the Scout Law: A Scout is Friendly. A Scout is Courteous. A Scout is Cheerful. A Scout is Kind.
By abiding by the Scout Law, we can value others and, at the same time, con-tinue to serve as examples of the core values we cherish.
You can also use the tools for making ethical decisions. At its heart, the way we respond to people whose values are not the same as ours is an ethical decision. You can use the Checklist for Ethical Decision Making.

N a t i o N a l Y o u t h l e a d e r s h i p t r a i N i N g
day Five-25
Content Sessions
Of all of the checks in the checklist, perhaps the clearest when deciding how to respond to others is the Golden Rule: Treat others as you would have them treat you.
How Can You Use Diversity to Strengthen the Scouting Program?Point out the poster with the World Crest logo.
Tell participants: We’ve talked about diversity and valuing people as an important part of building strong teams. Now let’s talk about ways to put those ideas into action.
A good place to practice these ideas is with our home Scouting units.
An effective approach to increasing the diversity of a team is ROPE:
■ Reach Out
■ Organize
■ Practice
■ Experience
REACH OUT
Many people who aren’t Scouts would like to join if someone would just tell them about all the great activities of a troop or crew. You can be the ones to invite them to join.
Look to those who are not like you in terms of religion, race, ability, culture, and traditions. Keep asking. One by one, one member at a time, you can help build a stronger unit.
ORGANIzE
Once people have joined your troop or crew, do all you can to help deliver the promise of the Scouting program. Help new members feel they are welcome and that they can make real contributions. There is strength in differences. Make diversity work for your unit.
PRACTICE
Practice using the skills of NYLT to build on the diversity in your troop or crew. A shared vision of what you want to achieve is a powerful way to bring people together. The Leading EDGE and the Teaching EDGE go a long way to helping everyone feel involved.
ExPERIENCE
Experience is a terrific teacher. The experiences you have as you include others in your troop or crew can make your Scouting experience richer and can help you learn ways to invite even more people into the BSA.

N a t i o N a l Y o u t h l e a d e r s h i p t r a i N i N g
day Five-26
ROPEReach out, Organize, Practice, Experience . . . . The first letters spell the word ROPE. Valuing others helps us tie together a team, making it strong and lively. Diversity gives energy to our culture and our nation.
Break into teams and brainstorm ideas for using these steps to build stronger, more interesting, and fun programs. After seven minutes, have each team share their results with the rest of the group.
GROUP ACTIVITY
Ask NYLT teams to join with everyone in the course and to tie their ropes together to form a coursewide circle.
Explain that there has been a lot of talk about vision this week. Baden-Powell, the founder of the Scouting movement, had a vision of a world brotherhood of Scouting. He believed that the shared values of Scouting could help young peo-ple around the world see beyond their differences and build upon the strength of their diversity.
Show the poster featuring the World Crest.
We can see lots of diversity within Scouting. In many nations, it is a coed pro-gram—both boys and girls sharing Scouting adventures. The age requirements differ from one nation to another, and so do uniforms, literature, and activities.
Scouting worldwide is for everyone. It has something to offer all people who join, regardless of the diversity they bring with them.
The power of Scouting’s values and our willingness to build on the power of diversity helps make the Scouting movement a success. Our rope circle symbol-izes that. It is a circle that expands worldwide to encompass all who build their lives on the foundation of the Scout Oath, Scout Law, and Venturing Oath.
SummaryThe Scout Oath, Venturing Oath, and Scout Law define our common values.
People are different. Everyone is an individual who brings something special to a team. We value these differences and seek the best from each other.
Diversity is a strength for building a group, holding its interest, getting things done, and having fun and adventure.
Lastly, challenge each participant to use the materials learned in this session to help build stronger troops and make Scouting available to more of the youth in their communities.

N a t i o N a l Y o u t h l e a d e r s h i p t r a i N i N g
day Five-27
Course Events
day Five: outpost Camp departure Course assembly
time allowed 15 minutes
responsible Course leader and course director
location Course assembly area
learning objectives
By the end of this session, participants will
■ Launch their Outpost Camp experience.
■ Reaffirm that during the Outpost Camp, just as during other portions of the NYLT course, the NYLT course operates according to the Scout Oath, Scout Law, and Venturing Oath.
■ Reaffirm the importance of conducting Outpost Camp activities in ways that maintain the safety of team members and that allow each Scout to have a quality experience.
Presentation Procedure
The course leader greets the teams.
Provide the Outpost Camp challenge by reminding Scouts that the Outpost Camp experience is an opportunity for members of each team to put their plans to the test.
The NYLT course has provided participants with all the leadership and team development skills they need to make the Outpost Camp a great success. If teams run into difficulties, they can rely on what they have learned in recent days to find solutions that will see them through.
Throughout the Outpost Camp experience, teams should keep in mind two guid-ing principles:
1. The safety of everyone. Safety can be enhanced by Scouts taking responsibility for their own safety and by watching out for one another.
2. The quality of the experience for each team member. The quality of experience for each person will be greatest when all teams operate according to the guidelines of our founding principles.
Outpost Campsite Orienteering ChallengeAn effective way to incorporate a number of Scouting skills is to provide each team with a list of waypoints they can use with their GPS receivers to find their campsites.
Match the number of waypoints to the number of members of a team. In the instructions to finding their campsites, encourage teams to have each member use the GPS receiver to find the waypoint and to lead the team on that leg of the journey.
N a t i o N a l Y o u t h l e a d e r s h i p t r a i N i N g
day Five-28
Cont
ent S
essi
ons
Staying out of sight, team guides should shadow their teams from a distance as they make their way to their campsites. If a team becomes completely confused and shows no sign of working its way through its geographical difficulties, the team guide can approach and provide enough help that team members can continue on their way.
The team guide should keep in mind the Teaching EDGE (Explain, Demonstrate, Guide, Enable) and remember that any help he provides should be Guiding in nature.
The course director adds support to the words of the course leader and sends the teams off with a sense of anticipation for the great Outpost Camp adventure about to begin.
Emphasize the importance of each patrol using the Scout Oath, the Venturing Oath, and the Scout Law to guide its actions as a group and as the way in which individuals treat one another.
Encourage them all to have a remarkable time.

N a t i o N a l Y o u t h l e a d e r s h i p t r a i N i N g
day Five-29
Content Sessions
day Five: outpost CampThe Outpost Camp is an opportunity for members of each team to organize and carry out their plans for an overnight campout. It is intended as a means for teams to practice the leadership skills they have learned during the NYLT course and to enjoy the spirit of Scouting as members of an NYLT team.
During preparations for the NYLT course, staff should give careful consideration to the locations of the team Outpost Camp campsites and the instructions teams will be given before they set off.
While developing plans for the Outpost Camp experience, staff should keep in mind two guiding principles:
■ The safety of participants
■ The quality of the experience for each Scout
Safety can be enhanced by using the team emergency response plan as guide for thinking through risk management situations and determining the best ways to minimize risk.
The quality of a Scout’s experience will be heightened by providing an effective NYLT course leading up to the Outpost Camp, and then allowing teams to use the team development and leadership skills they have learned.
(For more on the team emergency response plan, see the Day Four leadership council meeting.)
There are several points to keep in mind with respect to coed teams on the outpost hike. First, the course leader and course director must clearly establish the expectation that each team is responsible for the safety and well-being of each of its members. In addition:
■ Team campsites should be separated so each team has the experience of an independent adventure, depending on the resources and layout of the course location.
■ Male and female tenting areas may be separated within the team campsite, or there may be a separate female tenting area for females from all teams. In the second case, all members will hike and eat together, but retire to separate areas to sleep.
■ Adult staff should be out of sight but strategically placed to ensure the health and safety of all participants. Ideally, teams will not need to know the adults are even there.


N a t i o N a l Y o u t h l e a d e r s h i p t r a i N i N g
day six-1
schedule for day six (Friday)
Course events and activitiesTeam events and activities
Time Activity Notes Responsible Location* Arise, breakfast,
and cleanup.*Timing determined by each team
Duty roster Outpost camps
8:15 a.m. Return from Outpost Camp
8:30 a.m. Course Assembly Welcome back. Focus participants on upcom-ing events of the day.
Course leader and course director
Course assembly area
8:45 a.m. Shower and prepare for day.
Participants
9:30 a.m. Finding Your Vision (Part Two)
Expand on ideas of personal vision—make it bigger.
Course director or other assigned staff
Course site
11:00 a.m. Leadership council meeting
Prepare for the remainder of Day Six.
Leadership council site
11:30 p.m. Team meeting Work on presentation, feast plans, camp breakdown.
Team leader Team site
Noon Lunch Duty roster
1:30 p.m. Communicating Well (Part Two)
Build on the week’s communications, adding theory to the practice.
Course site
3:00 p.m. Team presentations: The Quest for the Meaning of Leadership
Course leader Course site
4:00 p.m. Camp breakdown/ feast preparation
Team leader, team members Team site
5:30 p.m. Feast Course dining area
7:00 p.m. Course Closing: Creating a Future
Program team, course leader, course director, assigned youth staff
Campfire site
Content sessions and their connecting activities

N a t i o N a l Y o u t h l e a d e r s h i p t r a i N i N g
day six-2
Team
Eve
nts
day six: outpost Camp Morning and returnThe Outpost Camp is an opportunity for members of each team to organize and carry out their plans for an overnight campout. It is intended as a means for participants to practice the leadership skills they have learned during the National Youth Leadership Training course, and to enjoy the spirit of Scouting as members of an NYLT team.
From the time they leave for the Outpost Camp on the afternoon of Day Five until they return on the morning of Day Six, each team will determine its own activities and schedule.
Teams should conduct their activities on the morning of Day Six so that they arrive back at the main NYLT camp by 8:15 a.m.

N a t i o N a l Y o u t h l e a d e r s h i p t r a i N i N g
day six-3
Course Events
day six: Course assembly
time allowed 15 minutes
responsible Course leader and course director
location Course assembly area
learning objectives
By the end of this session, participants will
■ Have gathered for Day Six of the NYLT course.
■ Feel welcomed and valued (staff too).
■ Reaffirm that the NYLT course operates according to the Scout Oath, the Venturing Oath, and the Scout Law.
■ Have viewed or participated in a flag ceremony presented by the program team.
■ Participate or view the installation ceremony for new team leaders and assistant team leaders.
■ View youth staff as supporters, guides, and mentors to course participants.
■ Be able to discuss key parts of a good unit assembly.
■ Be able to recognize good communication skills.
recommended Facility layout
Before an NYLT course begins, staff members should designate the place that will serve as the course assembly area. In most cases, this will involve an outdoor set-ting, though indoor areas of sufficient size (a dining hall, for example) can be adapted to accommodate the course assembly. (Indoors, flags can be presented on staffs with floor stands or can be displayed on a wall.)
Presentation Procedure
OpeningThe team leaders lead their teams to the assembly area and arrange them in an appropriate formation.
The course leader takes charge of the meeting, using the Scout or Venturing sign to bring the assembly to order. They welcome participants back from their Outpost Camp.
Flag CeremonyInstruct NYLT course members to use the Scout or Venturing salute while the flag is being raised. Ask the program team of the day to present the colors and raise the American flag, then invite the program team to display the historic flag for the day and explain its significance.
N a t i o N a l Y o u t h l e a d e r s h i p t r a i N i N g
day six-4
Cour
se E
vent
s
The historic flags to be used for the NYLT course are the same as those presented during Wood Badge courses. Scripts for historic flag presenta-tions, also the same as included in Wood Badge courses, can be found in the appendix for Day Two.
Instruct the program team color guard to raise the historic flag and the NYLT course flag.
The course leader invites Venturers to stand respectfully while Boy Scouts make the Scout sign and recite the Scout Oath. The course leader invites Boy Scouts to stand respectfully while Venturers make the Venturing sign and recite the Venturing Oath. The course leader invites all participants to make their program’s sign and recite the Scout Law.
Dismiss the color guard.
AnnouncementsOffer any announcements important for conducting the day’s sessions and events.
New Team Leader/Assistant Team Leader InstallationThe course leader asks the Day Five team leaders to introduce the Day Six team leaders to the course participants, then the Day Five assistant team leaders to introduce the Day Six assistant team leaders. Encourage those making the introductions to use effective communication skills.
Note: As introductions are being made, the course leader can provide positive reinforcement by commenting on one or two communica-tions skills being used well—hand gestures, clear voice, eye contact with the group, etc.
Team leader and assistant team leader assignments for each day of the NYLT course can be found in the Sample Team Duty Roster included in each copy of the NYLT Participant Notebook.
The course leader begins the installation. He or she should
■ Invite the new team leaders and assistant team leaders to come forward to be installed.
■ Ask the new team leaders to gather around the course flagpole, placing their left hands on the pole. New assistant team leaders stand behind their team leaders, each placing a left hand on his team leader’s right shoulder.

N a t i o N a l Y o u t h l e a d e r s h i p t r a i N i N g
day six-5
Course Events
■ Instruct them all to give the Scout or Venturing sign and repeat, “I promise to do my best to be worthy of this office for the sake of my fellow Scouts in my team and course and in the world brotherhood of Scouting.”
■ Welcome them as the course’s new team leaders and assistant team leaders.
Program and Service Team Emblem ExchangeThe assistant course directors for program an service briefly review the duties of the program team and the service team.
The duties of the teams may differ from other days of the course. Adjust the explanations to reflect the needs of this day of the NYLT program.
Program Team (sample assignments)
■ Prepare the course assembly and flag ceremony.
■ Prepare the course meeting area.
■ Complete other duties as assigned at the leadership council meeting.
Service Team (sample assignments)
■ Put the course meeting area in order after meetings. (NYLT is a Leave No Trace program.)
■ Maintain the participant latrines and showers.
■ Complete other duties as assigned at the leadership council meeting.
Ask the leaders of the day’s program team and service team to come forward to receive a symbol of their team responsibilities for the day. The emblem for the service team might be a broom or camp shovel, while that for the program team could be a flag.
The exchange of symbols for the program team and service team should not overshadow the installation of the day’s team leaders and assistant team leaders. Bestowing the emblems for the program and service teams can be done in good fun, but with the understanding that these team duties are secondary to the roles of team leadership.
STAFF SERVICE TEAM
Explain to participants the duties of the day.

N a t i o N a l Y o u t h l e a d e r s h i p t r a i N i N g
day six-6
Cour
se E
vent
s
Baden-Powell Team Streamer PresentationsThe course leader presents the Baden-Powell Team streamer awards based on the previous day’s campsite evaluation. Point out that the Boy Scouts of America encourages teams to compete against a standard that all can achieve (in this case, the standard of the Daily Campsite Inspection Checklist) rather than against one another. When it comes to the Baden-Powell Team streamer awards, every team can be a winner.
For guidelines on the daily campsite inspection and for presentations of the Baden-Powell Team streamers, see Day One—Registration, Orientation, and Camp Setup.
Using the Daily Campsite Inspection Checklist as their guide, the assistant course leader in charge of the service teams makes the evaluation of the team campsites. (This may occur while team members are at evening ses-sions of the NYLT course.) Team guides can encourage the teams to use the same form to check their campsites as they complete their cleanup after the evening meal. If a team is having difficulty following through with all the items on the checklist, its team guide can use the Teaching EDGE to help the team learn how to manage campsite cleanup in an efficient and orderly manner.
Each team can tie its Baden-Powell Team streamer for the day onto the pole used to display its team flag.
Personal Vision ChallengeThe course leader explains that later in the morning the Finding Your Vision (Part Two) session will ask each person to write a newspaper story. It’s 25 years in the future and the story is about who you are and what you have done with your life up to that point. There will be a photograph of you along with the story.
Encourage participants to give some thought to what they will write in the story and what they see in the photograph. They can think about it while they are cleaning up and getting ready for the rest of the day. That way they’ll be ready to write the story when the time comes.
Course Director’s MinuteThe course director should personalize this Course Director’s Minute by drawing on conditions or events occurring during the Outpost Camp and using them to illustrate the importance of Be, Know, Do. For example:
“You’ve just returned from your Outpost Camp and we are very pleased to see each one of you. We understand there were some great adventures happening out there.” (Refer to some of the positive events of the Outpost Camp.)

N a t i o N a l Y o u t h l e a d e r s h i p t r a i N i N g
day six-7
Course Events
“There were also some challenges to be overcome (rain, heat, mosquitoes, etc.).
“We all enjoy having a good time, and we’re always pleased when things go well. But how we respond to adversity is even more important. It’s easy to be cheerful on a sunny day, but it can take energy to keep your spirits high when it is raining. When things go wrong, it can take willpower to focus your efforts on making things right rather than simply giving up and feeling sorry for yourself.
“During the Outpost Camp, each of you had moments when the Be, Know, Do of Scouting shone through. For each of you, Outpost Camp challenges brought out the BE (who you are), the KNOW (the skills in your head and hands), and the DO (your willingness to act on behalf of others and yourselves).
“The commitment for you to make now is to apply Be, Know, Do to all the challenges of life, both within Venturing and Scouting and in all the Outposts beyond.”
The course leader thanks the course director and brings the course assembly to a close.

N a t i o N a l Y o u t h l e a d e r s h i p t r a i N i N g
day six-8
Cont
ent S
essi
ons
day six: Finding Your Vision (part two)
time allowed 60 minutes
Format Course presentation with individual activities
responsible Course director or other assigned staff
location Course site
learning objectives
By the end of this session, each participant should be able to
■ Explain that vision is what future success looks like.
■ Discuss how their NYLT team’s team vision for the NYLT course is being realized.
■ Prepare and communicate a personal vision.
■ Identify at least one goal leading toward realization of that personal vision.
Materials Needed
■ National Youth Leadership Training DVD, DVD player or computer with DVD capability, projector, and screen
■ SMART Goals Work Sheet (appendix, Participant Notebooks)
■ Planning Tool Work Sheet (appendix, Participant Notebooks)
■ Developing a Personal Vision Work Sheet (appendix)
■ Pens, colored pencils, crayons, and sheets of flip chart paper for each team
■ Flip chart or other means for presenters to capture ideas generated by participants and staff
Presentation Procedure
PreparationThe NYLT course leader and one team guide should each prepare their own personal vision of success, then identify the goals that will lead to realizing the vision. These visions and the accompanying goals should be written on flip chart pages, posters, or some other form that can be displayed and discussed during the session as examples of fully formed visions and the steps to realize those visions.
Other staff members involved in this session should also prepare and write down their own personal visions of success and identify several goals that lead to realiz-ing that vision.

N a t i o N a l Y o u t h l e a d e r s h i p t r a i N i N g
day six-9
Content Sessions
Opening DiscussionThe presenter reminds participants that early in the NYLT course, the group enjoyed some elephant jokes. Here’s another one:
Q: How can you tell if there’s been an elephant in your refrigerator?
A: Footprints in the butter.
Elephants. They’re big. You can’t ignore them. If you’re in a room with an elephant, you’re going to know. If there’s an elephant in your life, you can’t ignore it.
VisionWe began this week of National Youth Leader Training by exploring having a vision.
Vision is what future success looks like.
Let’s put it another way:
If you can see it, you can be it.
It doesn’t say, “I want to do something,” or “I’d like to do something.” A vision says “In the future, I clearly see myself in this picture of success.”
There is a place for dreaming when you are developing a vision for yourself or your team. You are imagining a future that is brighter and more productive than if you didn’t give thought to what is to come. Nothing happens without a vision, or at least nothing as positive as what can occur when you put your mind to it.
A vision gives you an anchor in the future. It is a magnet that pulls you along. It is a belay point, a touchstone, a clear overview of life beyond the current moment. It’s not a road map showing small steps—that’s the role of goals. Vision is big. It is a clear picture of the future. It’s elephant-sized.
NYLT Team VisionsOn Day One of NYLT, each team developed a team vision for itself. The challenge was to develop a clear picture of your team.
Ask each team to present their team vision from Day One. How did it pull them along through the week? Was the picture of themselves that they imagined five days ago what they look like today?
Show slide 6-2, Vision.
Show slide 6-1, Finding Your Vision
(Part Two).
Show slide 6-3, Vision: Developing . . . .
Show slide 6-4, Team Visions.

N a t i o N a l Y o u t h l e a d e r s h i p t r a i N i N g
day six-10
Cont
ent S
essi
ons
Personal VisionA team vision can help a team (a Scout patrol or Venturing crew, for example) progress toward future success.
A personal vision can show you who you can become. When you see a picture of yourself in the future, you can take steps to make that picture come true.
If you can see it, you can be it.
Show video clip 6-6, Finding Your Vision (Part Two), which begins with “What does your vision look like?”.
Discuss the personal visions illustrated in the video. Highlight the personal vision of each individual and what makes that person’s vision a true vision—that is, a picture of future success.
On the flip chart, write down the personal vision of the people in the video. (Post that vision where the participants can see it as the discussion continues.)
Personal visions shared by the course leader and one of the team guides will help participants see that developing and sharing visions can be done by people their age, not just by the well-known people in the video.
Staff presenting their visions should take this opportunity seriously. The visions should be real, meaningful, and worthwhile.
Participants need to see that having a clear vision is important to staff members and that it has a real impact on the lives of those staff members.
The course leader discusses his or her personal vision.
Explain how you came to have this vision and what makes it a true vision (a picture of future success). Post your written vision where the participants can see it throughout the remainder of the session.
The team guide discusses his or her personal vision.
Explain how you came to have this vision and what makes it a true vision (a picture of future success). Post your written vision where the participants can see it throughout the remainder of the session.
Later in the session, the course leader and the team guide will return to explain some of the goals that will help them realize their visions. Their goals will be written on flip chart pages that can be posted alongside the displays of their personal visions.
Show slide 6-5, Personal Vision.

N a t i o N a l Y o u t h l e a d e r s h i p t r a i N i N g
day six-11
Content Sessions
News Story ChallengeThe presenter explains the News Story Challenge to participants:
1. Write a news story about yourself as you will be when you are 30 years old. Tell who you are and what you have been doing. Describe how your strengths and your interests as a youth have developed as you have become an adult. (For example, how hobbies you had as a Scout helped lead to who you have become as an adult.)
2. The article will have a photograph with it to illustrate who you are at age 30. Write a description or draw a sketch of what you see in the photograph.
Give the participants time to write and draw their responses to the News Story Challenge.
PERSONAL VISION CHALLENGE
Vision is a picture of what future success looks like. Challenge NYLT participants to look into the future and see themselves in a picture of what future success looks like for each of them.
To develop a personal vision, participants can scribble down ideas, make sketches, and do whatever else helps them dream and imagine.
Some questions that can help guide each participant in shaping his or her vision include:
■ What will be a measure of success for me in five years, 10 years, 20 years?
■ What is it that already makes me unique? What do I like to do? What makes me happy? How can I build on that strength? (Think back to the Who Me? game played on the evening of Day One.)
■ What can I take from the News Story Challenge to help shape my vision?
Think of the personal visions of the people in the video. Each of them thought big. They had a big elephant showing them the way into the future. It was a clear target and big enough that it couldn’t be missed.
Encourage each participant to make his or her initial vision bigger. “Grow your elephant. Make it fill the room. Don’t be shy. Don’t hold back because a vision seems unreachable. Dream big.”
A vision should touch your heart, mind, and spirit.
WRITE AND DRAW YOUR VISION
An important step in making a vision real is getting it down on paper. Ask each participant to use words to paint a picture of what his or her future success looks like.
Create an ideal picture of where you want to be in the future.
Your statement of vision should be clear, simple, short, and easy to understand. It should be action-packed (with what you will be doing or have done, just like the news story).

N a t i o N a l Y o u t h l e a d e r s h i p t r a i N i N g
day six-12
Cont
ent S
essi
ons
Draw your picture of future success. Do your best, but make it as detailed as you can.
Your vision should inspire you; you must believe in it. You want this picture of success to become real. If you can see it, you can be it.
It doesn’t have to be perfect, but you must be willing to commit to your vision.
Can you make it bigger?
COMMUNICATE YOUR VISION
Offer NYLT participants the opportunity to share their written and drawn visions with the rest of the participants. Earlier in the session they watched as the course leader and a team guide presented their visions. Now it is the course participants’ turn to share theirs.
The session presenter should make it clear that this is a voluntary exercise. Some participants might feel uneasy about sharing their visions publicly.
Staff members who have not shared their visions previously in this session can add to the presentation by describing their own visions.
GoalsThe presenter asks participants: Remember this elephant joke from Day One?
Q: “How can you eat an elephant?’
A: “One bite at a time!”
Vision. It’s the elephant. It’s big. It’s the picture out there of who we want to be.
How do you achieve a big vision? One bite at a time. That’s how you put yourself into that picture of your future success.
If vision is the elephant, the bite-sized pieces are goals. They are the steps for real-izing a vision.
SMART GoalsYou want to have goals that get you closer to your vision. The test of good goals is the tool we call SMART Goals. Ask participants for the meaning of the letters S.M.A.R.T.
■ Specific
■ Measurable
■ Attainable
■ Relevant
■ Timely
Briefly discuss those terms and their importance to setting and reaching goals.
Show slide 6-7, Goals.
Show slide 6-8, SMART Goals.
N a t i o N a l Y o u t h l e a d e r s h i p t r a i N i N g
day six-13
Content Sessions
SMART GOAL DEMONSTRATION AND CHALLENGE
The course leader and the team guide who had shared their visions earlier in the session to return and describe several of the goals they have determined will help them realize their visions. (Include in the goals at least one relating to school work.)
Have the goals written on flip chart pages or other media that can be posted next to the original visions and viewed by participants for the remainder of the session.
The presenter explains how each of the goals fulfills the requirements of being a SMART Goal.
Ask each participant to think of one goal to be reached as a step toward realizing his or her own personal vision. Have them write down that goal and test it with the SMART Goals tool.
Ask for volunteers to share the goals they have written and to explain how each fulfills the requirements of being a SMART Goal. Use the SMART Goals Work Sheet.
PlanningThe presenter explains that big goals can require that lots of things get done. Planning helps you make sure you haven’t forgotten any tasks and that every-thing is completed in an efficient manner.
PLANNING DEMONSTRATION AND CHALLENGE
The course leader and the team guide shared their visions earlier in the session. They also explained several of the goals they have that will help them realize their visions.
Now they can each revisit one of their goals and, using the What, How, When, Who Planning Tool, demonstrate the planning that goes into achieving goals.
Ask for volunteers to share one of their SMART Goals and to use the planning tool to figure out some of the steps that will help fulfill those goals.
Summing Up Vision, Goals, and PlanningThe presenter summarizes the key points of this session:
■ Personal Vision—The picture of what future success looks like
■ Goals—The steps to fulfill that vision
■ Planning—The tool for efficiently achieving goals
Show slide 6-9, Planning.
Show slide 6-10, Summary.

N a t i o N a l Y o u t h l e a d e r s h i p t r a i N i N g
day six-14
Cont
ent S
essi
ons
Finding the Next ElephantDiscuss what happens when goals have been reached and a vision achieved. What do you do when you’ve reached all your goals? For example, you’ve earned your Eagle Scout award or Silver Award; been to Florida Sea Base, Northern Tier, and Philmont; and now you’re feeling bored.
That’s when it’s time to find a fresh vision, set new goals, and begin pursuing the next, bigger elephant. In Scouting and Venturing, that may be greater leadership positions, bigger adventures, or a stronger role in helping younger members succeed.
A Final Thought: Vision and Scouting and VenturingLeave participants with a final vision challenge:
What is your vision of future success as a leader in your unit?
What goals will it take to realize that vision?
An important part of realizing that vision will be communicating it with your adult leaders.
We’ll talk about effective ways to do that later today in the Communicating Well (Part Two) session.
Show slide 6-11, Your Next Vision.
Show slide 6-12, Vision and Scouting
and Venturing.
Show slide 6-13, Vision and Your Future.
N a t i o N a l Y o u t h l e a d e r s h i p t r a i N i N g
day six-15
Course Events
day six: leadership Council Meeting
time allowed 30 minutes
location Leadership council site
learning objectives
The leadership council meeting on Day Six will
■ Model ways to run an efficient, well-planned meeting.
■ Empower team leaders with the resources and guidance to help them lead their teams.
■ Prepare team leaders for their roles through the rest of Day Six.
■ Remind teams to complete their presentations for the Quest for the Meaning of Leadership.
Materials Needed
Participant Notebooks. Each NYLT participant and staff member will have a notebook containing core information that will be useful throughout the course—blank duty rosters, equipment lists, daily schedules, meeting agendas, etc. Blank pages in the notebooks provide space for team leaders to write down ideas from meetings.
delivery Method
The leadership council meeting is conducted by the course leader, who will model appropriate leadership behavior within the setting of the meeting.
As with the previous leadership council meetings, the leadership council meeting on Day Six is attended by the course leader, one youth assistant course director, the team leaders of the day, and the course director.
Presentation Procedure
Leadership Council Meeting AgendaDay Six
1. Welcome and introductions
2. Purpose of the meeting—what we need to accomplish
3. Reports on the progress being made by each team
4. Assignments for the remainder of Day Six (camp breakdown, feast preparation)
5. Program team and service team assignments
6. Announcements
7. Closing
8. Course director’s observations

N a t i o N a l Y o u t h l e a d e r s h i p t r a i N i N g
day six-16
Cour
se E
vent
s
Welcome and IntroductionsThe course leader takes charge of the meeting, introduces those persons attending the leadership council meeting, and welcomes everyone.
Purpose of the MeetingDirect the attention of the leadership council to the written agenda. Note that the purpose of this meeting will be to
■ Hear reports on the progress being made by each team.
■ Make assignments for the remainder of Day Six.
■ Make program team and service team assignments.
Throughout the meeting, participants will use good communication skills to share ideas.
Reports on the Progress of Each TeamThe course leader asks each team leader to report on his team’s progress so far. Encourage team leaders to make their reports as constructive evaluations using SSC:
Start—What can they begin doing to improve their teams?
Stop—What can they stop doing that is not working well?
Continue—What is a strength and is working well that they can continue doing?
Encourage each team leader to use the Leadership Compass to determine the current stage of development of their team (Forming, Storming, Norming, Performing).
Remind team leaders that each team should be thinking about its presentation of the Quest for the Meaning of Leadership. Briefly review the challenge (offered by the course director at the campfire on Day One), and stress the importance of continuing to work on the presentation throughout the course.
Assignments for the Remainder of Day SixThe team meetings that take place during the Day Six course meeting will focus on preparations for the feast and on breaking down camp. The course leader can give each team leader a checklist of things to be done in order for the teams to break camp and make their feast preparations.
During the team meetings, each team leader will lead his team in using the What, How, When, Who Planning Tool to determine how the team will reach the goals of breaking camp and being ready for the feast.

N a t i o N a l Y o u t h l e a d e r s h i p t r a i N i N g
day six-17
Course Events
The checklist will vary, depending on the nature of the breakdown proce-dures and feast plans.
Sample ChecklistCampsite Breakdown
___ Tents cleaned out and stowed in stuff sacks
___ Dining fly taken down and neatly folded
___ Cooking gear cleaned (except for pots and utensils needed for feast preparations)
___ Personal gear packed
___ Team campsite policed
___ Course guide approves all campsite breakdown and cleanup
___ Tents, dining flies, and group gear returned to the quartermaster hut
Program Team and Service Team AssignmentsThe course leader asks an assistant course director to take the floor.
The assistant course director reminds those leaders of the Day Six service and program teams that they should review what they will be doing and use their planning skills to figure out an effective way to fulfill their responsibilities. Use Start, Stop, Continue for any evaluations.
Program Team (sample assignments)
■ Since there was no flag ceremony for the Day Six program team, that team might be asked to be involved in the closing ceremonies of the course.
■ Prepare the meeting area for the Quest for the Meaning of Leadership presentations.
Service Team (sample assignments)
■ Police the course meeting area. (NYLT is a Leave No Trace program.)
■ Maintain participant latrines/showers.
AnnouncementsThe course leader makes any announcements relevant to the group.
Explain that team leaders have a responsibility to share with their teams informa-tion from the meetings of the leadership council. Inform team leaders of any other matters of Day Six importance to the teams.

N a t i o N a l Y o u t h l e a d e r s h i p t r a i N i N g
day six-18
Cour
se E
vent
s
ClosingThe course leader summarizes the key points covered during the meeting, addresses any questions the team leaders might have, and stresses the importance of performing at the highest levels, using the Scout Oath, the Venturing Oath, and the Scout Law as their guides.
Course Director’s ObservationsThe course director thanks all present for their participation and encourages them to continue performing at the highest levels.
The course leader adjourns the meeting, but invites the group to stay a moment to observe the post-meeting debriefing with the course director.
After the MeetingThe course director and course leader meet for a couple of minutes to review the meeting. Using Start, Stop, Continue, they discuss what went well during the meeting and what can be improved through the remainder of Day Six of the NYLT course.

N a t i o N a l Y o u t h l e a d e r s h i p t r a i N i N g
day six-19
Team Events
day six: team Meeting
time allowed 30 minutes
responsible Team leader
location Team site or some other location where the session of one team will not interfere with the activities of other teams.
learning objectives
By the end of this session, participants should be able to
■ Describe the purpose of the team meeting.
■ Describe how a team meeting should be run.
■ Know what the team leader is responsible for doing, and what team members are responsible for doing.
■ Use Start, Stop, Continue to evaluate team performance.
As with meetings of the NYLT course and the leadership council, every team meeting during an NYLT course should be organized in a manner that provides an ideal example of such a session. Participants should be able to take the models of the team meetings they see at NYLT and use them to organize effective team meetings in their home units.
Materials Needed
Team meeting agenda. Each team meeting should follow a written agenda. Building on the following model, the agenda for today’s team meeting can be adjusted by the team leader prior to the meeting to fulfill the needs of the team.
recommended Facility layout
In most cases, team meetings will take place in or near the team’s campsite.
delivery Method
The team leaders are the facilitators of the meetings of their teams. The leader-ship style each team leader uses is up to that person; the hands-on experience of leading is every bit as valuable as the progress made by a team during any particular meeting.

N a t i o N a l Y o u t h l e a d e r s h i p t r a i N i N g
day six-20
Team
Eve
nts
Model Team Meeting AgendaDay Six
1. Welcome—Team leader
2. Meeting Agenda—Team leader
3. Evaluate team progress using Start, Stop, Continue. (Include evalua-tion of the team’s progress with the Daily Campsite Inspection Checklist and the duty roster.)
4. Complete any remaining work on the team’s Quest for the Meaning of Leadership presentation.
5. Use the What, How, When, Who Planning Tool and any checklists from the leadership council meeting to plan campsite breakdown and feast preparations.
6. Use the remaining team meeting time to put the team plan into action.
7. Adjourn.
Presentation Procedure

N a t i o N a l Y o u t h l e a d e r s h i p t r a i N i N g
day six-21
Content Sessions
day six: Communicating Well (part two)
time allowed 60 minutes
Format Course presentation
location Course site
learning objectives
At the end of this session, each participant should be able to
■ Describe Aristotle’s model for effective communicating.
■ Use tools for effective communication.
■ Use tools for effective listening.
■ Practice communicating a message to use after the NYLT course.
This session is an opportunity to further the discussion of using good communication skills that was begun during the Day One session on Communicating Well. It is also a chance to review the core information from the sessions on the Teaching EDGE, the Leading EDGE, and Resolving Conflicts.
The other content session of Day Six, Finding Your Vision (Part Two), advances the subject of developing a personal vision and also reviews the key points of the sessions Finding Your Vision, Setting Your Goals, and Preparing Your Plans.
Materials Needed
■ National Youth Leadership Training DVD, DVD player or computer with DVD capability, projector, and screen
Presentation Procedure
Attention-Getting Communication DeviceWhen the group has gathered for the session but has not yet come to order, say in a normal speaking voice, “If you can hear my voice, clap once.”
Wait a moment, then say, “If you can hear my voice clap twice.” And then, “If you can hear my voice, clap three times.”
(Typically it takes no more than three claps for all persons in the group to have noticed the clapping and turned their attention to the presenter.)
Explain that you’ve just used a means of communication that is a bit unusual but very effective. Communicating effectively has been of great importance through-out the NYLT course, and it is a subject worthy of revisiting as the course comes to a close.
Now make the Scout or Venturing sign. Explain that in Scouting, the sign is the universal signal for a group to come to order. It is as simple as any message a person can send, and is always understood by those who are ready to receive it.
Show slide 6-14, Communicating Well,
Part Two.

N a t i o N a l Y o u t h l e a d e r s h i p t r a i N i N g
day six-22
Cont
ent S
essi
ons
Opening DiscussionWelcome NYLT participants to the session. Let them know that this is the last teaching session of the NYLT course. Remind the group that the first teaching session of NYLT was also about Communicating Well.
Ask participants: Why would a course on leadership begin and end with sessions on communicating?
Entertain answers. An obvious one is that almost every part of leadership involves sharing ideas with other people—in short, communicating.
ARISTOTLE’S MODEL
The Greek philosopher Aristotle studied communication and devised a model that still stands today. That was more then 3,000 years ago.
Aristotle’s model tells us that all communication has three parts—a message, a sender, and a receiver.
(Draw the Aristotle model on a flip chart or show it on a poster.)
We like to be a bit more up-to-date, so we call this the MaSeR Communication Model. (Write MaSeR on the flip chart.) Ask participants: What do you think the M stands for? (Message) The S? (Sender) And the R? (Receiver) A laser sends light, a maser sends microwaves, and a MaSeR Communication Model sends messages.
Communication always involves a message, a sender, and a receiver.
Examples:
1. Hand-clapping attention-getting device used at the opening of this session:
■ What was the message? (Give me your attention.)
■ Who was the sender? (The person clapping his hands.)
■ Who were the receivers? (The people hearing and seeing the clapping.)
2. This discussion on Aristotle:
■ What is the message? (Communication always involves a message, a sender, and a receiver.)
■ Who was the sender? (“I am,” says the session presenter.)
■ Who were the receivers? (“We are,” say the team members.)
3. What about the comments of you and the team members, as you share your answers to these very questions?
■ What is the message? (We have ideas, too.)
■ Who was the sender? (“We are,” say the team members.)
■ Who is the receiver? (“I am,” says the session presenter.)
Messages flow both ways—from sender to receiver, from receiver to sender.
Receivers and senders both have responsibilities for making good communication possible.
Show slide 6-15, Communicating Well.
Show slide 6-16, Aristotle’s Model.
Show slide 6-17, Artistotle’s Model:
Messages Flow.

N a t i o N a l Y o u t h l e a d e r s h i p t r a i N i N g
day six-23
Content Sessions
Activity—The Message Toss Game
MATERIALS
One tennis ball, orange, or other tossable item (ball) per team member.
PROCEDURE
Each team forms a circle. The team leader tosses (sends) one ball to Participant B, who receives it and then tosses (sends) it to Participant C, etc., until the ball has been touched once by every individual. The last to touch it sends it back to the team leader.
Toss the ball around the circuit several more times until everyone is accustomed to receiving from and sending to the same individuals every time.
The team leader tosses the ball to Participant B again to start it on another trip around the circle. When that ball is midway through the participants, the team guide hands the team leader a second ball which he or she then tosses to Participant B, Participant B to Participant C, and so on. There are now two balls being sent and received around the circle. As long as everyone receives from the same person and sends to the same participant each time, the balls will continue to move smoothly through the system.
The team guide gradually hands the team leader more balls, timing their intro-duction into the circle to keep the balls moving until all the balls are in play.
DEBRIEF THE MESSAGE TOSS GAME
■ What was the message? (The ball.)
■ Who was the sender? (The person tossing the ball.)
■ Who was the receiver? (The person catching it.)
■ What happened when more balls were introduced?
■ When did your team start dropping balls?
■ What does a dropped ball represent in our communication model? (An incomplete message.)
■ What are the causes of dropped balls or missed/distorted communication? Among answers that can be explored:
—Too many balls/too much information.
—Delivery is too fast. Receiver not ready to catch/listen.
—Sender watching incoming balls/messages rather than concentrating on the message he is sending.
—Ball tossed too high or low—in other words, inappropriate communication for the receiver’s level of experience or expertise.

N a t i o N a l Y o u t h l e a d e r s h i p t r a i N i N g
day six-24
Cont
ent S
essi
ons
Effective CommunicationOut of respect for listeners, a speaker will make sure he sends the message as well as he can. Out of respect for the speaker, listeners should make sure they understand.
You can see it as a matter of following the Scout Law. Helpful, Friendly, Courteous, Kind . . . .
Something a speaker can do to help the listener receive a communication is to package the message so it is easy to hear and to remember.
Packaging the MessageThe balls in the Message Toss Game were easy to toss and to catch. Why? (Good size. Not too heavy. Shaped right for catching.)
Instead of balls, what if each team had tossed a 50-pound bag of sand? (Would have had to repackage the contents before tossing. Put the sand into smaller bags, for example, that can be tossed.)
A sender needs to package a message in a way that it can be easily tossed to the receiver, and easily caught.
Newspaper reporters and others in the news field use the five W’s and an H to package a story. (Note: Write these on the flip chart.)
5WH—Who, What, When, Where, Why, How
For example, if we were to write a newspaper story about the Message Toss game that was just played, what would we plug into each W and the H?
■ Who—Each team
■ What—Played the Message Toss Game
■ When—During the NYLT session on Communicating Well
■ Where—The session meeting area
■ Why—To experience Aristotle’s communication model of a message, a sender, and a receiver
■ How—The team passed a ball in a pattern that included each member once. The team guide gradually added more balls until there were as many balls being passed around as there were team members.
Discuss the fact that this NYLT session on communicating is, itself, an example of using 5WH:
■ Who—NYLT participants
■ What—To explore the importance of effective communication and understand some important tools for communicating well
■ When—On the last day of the NYLT course
Show slide 6-18, Effective Listening.
Show slide 6-19, Packaging the Message.
Show slide 6-20, Packaging the Message:
Journalists use 5WH.

N a t i o N a l Y o u t h l e a d e r s h i p t r a i N i N g
day six-25
Content Sessions
■ Where—The session meeting area
■ Why—To provide participants with ways to communicate effectively for the rest of the NYLT course and when they return to their homes
■ How—The staff instructor leads discussions, demonstrations, and activities to highlight information about effective communicating and to help participants master the material
Packaging the NYLT Leadership MessageWe’ve packaged the NYLT leadership message for you and placed the package on the back of the NYLT Leadership Compass card you have been carrying with you. That’s a way to make the message as easy to remember as possible.
For example, we’ve given you a message packaged as the Teaching EDGE. What do the letters in EDGE stand for? (Explain, Demonstrate, Guide, Enable)
We’ve talked about the four stages of team development and the fact that leaders can adjust their leadership styles to match them. What are the stages of team development? (Forming, Storming, Norming, Performing)
What’s a good model to help you in a conflict situation? (EAR: Express, Address, Resolve)
We’ve packaged a message and we’ve sent it. According to the Aristotle model, is communication complete?
So if we’ve packaged the message and sent it, is the communication complete? (No. In addition to a message and a sender, there also needs to be a receiver.)
Let’s talk about the listening part of communication for a few minutes. If you were the NYLT staff, how would you know if you—NYLT participants—were “catching” our messages? (Accept various answers.)
Tools for Effective ListeningEffective listening encourages listeners to repeat the message back to the speaker by either:
■ Rephrasing the message. “Here’s what I hear you saying . . . .”
OR
■ Giving your understanding of the message. “From what I hear, I understand that this is what you want me to do . . . .”
Ask participants for more information: Tell me more about that.
By rephrasing the information and bouncing it back to the speaker, the listeners are making sure they are hearing what the speakers have to say and they are letting the speakers know that their messages are getting through.
Show slide 6-21, Packaging the
Leadership Message.
Show slide 6-22, The Teaching EDGE.
Show slide 6-23, The Leading EDGE.
Show slide 6-24, Effective Listening.

N a t i o N a l Y o u t h l e a d e r s h i p t r a i N i N g
day six-26
Cont
ent S
essi
ons
Ask a volunteer to bounce that last bit of information back to you. You can help them get started by offering the phrase, “What I understand you to be saying is this . . . .” and then encouraging them to put the message into their own words.
The point of this mini-exercise is to get participants to engage their brains in the listening process. What they offer back as their understanding of the message is less important than the fact that they are offering back.
Effective PresentationMuch of communication is conveyed by body language such as nodding your head to show you are receiving the message, smiling and frowning, leaning for-ward to show interest. It’s important that your body language supports the mes-sage you are attempting to communicate.
THE LANGUAGE OF BODY LANGUAGE
In the Message Toss game, what are some of the ways a sender can let the receiver know the ball is on its way? (Discuss verbal cues—“Hey! Here comes the ball!”—and body language—waving arms, eye contact, motioning toward a receiver—a sender might use.)
What are some of the ways a receiver can let the sender know he’s ready to catch the ball? (Discuss verbal cues—“Here! Throw it here!”—and body language—eye contact, holding hands in a catching position—a receiver might use.)
A person who is speaking should also be aware of his own body language.
It also means paying attention to the body language of the people the speaker is addressing. In short, what is the listener (or listeners) doing, and how can you adjust the message to get your meaning across?
Paired Communication Activity
PREPARATION
Each NYLT participant will soon be back in their home unit. Based on what they have learned in NYLT, many of them will want to improve their units, and will have many ideas to share with the adult leaders and other members.
This activity will encourage participants to practice sharing one or more of those ideas using the skills of effective communicating.
PROCEDURE
Ask each participant to take a couple of minutes to write down an improvement they want to make in their home unit based on what they have learned this week. Encourage them to organize their thoughts by using the format Who, What, When, Where, Why, How.
Pair up the participants. One person in each pair plays the role of the home unit member. The other acts as himself or herself discussing his or her ideas for changes in the unit with his or her friend.
Show slide 6-25, The Leading EDGE.
Show slide 6-26, Tools for
Effective Listening.
Show slide 6-27, Body Language.

N a t i o N a l Y o u t h l e a d e r s h i p t r a i N i N g
day six-27
Content Sessions
After the first person has had a chance to present his or her ideas, the pair switches the roles of the friend and participant so that the second participant has a chance to present his or her ideas.
The person who is listening to the presentation can use the Communication Skills Checklist and Start, Stop, Continue to evaluate the speaker’s communication skills—how he or she uses his or her body, his or her tone of voice, whether he or she makes eye contact, etc.
Allow four minutes for rewriting and three minutes for each presentation and feedback, for a total of 10 minutes.
This exercise can have a variety of positive results:
■ Each participant will have the chance to organize and practice delivering a message that has real meaning from the NYLT course.
■ Every participant will practice effective listening.■ Where points are weak, as discovered through effective listening, the
communicator can strengthen the presentation of his or her message before conveying it to his or her home unit.
■ The activity encourages the use of the same skills that participants can use as they get ready for their presentations of the Quest for the Meaning of Leadership.
DEBRIEF THE GROUP ACTIVITY
Ask participants to share some of their experiences from their practice of presenting ideas to their home unit friend. What went well? What was not effective? How can they use the skills of effective communications to better share their ideas?
Explain that you will provide one last set of communication tools, then they can try revise their communication and see if the last tool makes a difference in how well the message is received.
REVIEW THE CHECkLIST
Communication Skills Checklist
___ Neutral Position. The speaker stands comfortably before the patrol, hands at his or her sides.
___ Feet. The speaker positions himself or herself where everyone can see and hear him or her. If possible, the speaker moves around during the presentation.
___ Hands. The speaker uses his or her hands as communication tools.
___ Mouth. The speaker communicates loudly enough for everyone to hear, and clearly enough for everyone to understand. He or she varies the tone of his or her voice as he or she talks.
___ Eyes. The speaker makes eye contact with listeners.
___ Ears. The speaker is aware of his or her audience.

N a t i o N a l Y o u t h l e a d e r s h i p t r a i N i N g
day six-28
Cont
ent S
essi
ons
Ask participants to use the checklist and give you feedback on your body language. Encourage them to frame their evaluation as an SSC—Start, Stop, Continue. What can you start doing to improve your body language? What should you stop doing? What is a strength and is working well that you should continue to do?
As a tool of communication, a presenter should observe the body language of an audience—be it one person or many. Knowing how an audience is responding can allow a presenter to change his means of presentation to get his message across.
Among the most important things to look for in an audience are these:
■ Are people paying attention?
■ Are they making eye contact with you?
■ Are they nodding their heads now and then?
■ Is their body position open or closed? (Arms and legs crossed may indicate an unwillingness to hear what you are saying.)
Effective Communication With AdultsAsk participants to describe some of their experiences in communicating with adults. In what ways is it different than communicating with their peers?
The same tools that work well for communicating with peers are also effective when communicating with adults. Perhaps they are even more important.
Communicating well with adults may mean getting rid of bad-habit words: “Like.” “You know.”
Consider how this sounds: “So I was all, like, you know, on my honor and, like, do your best and, like, do your, like, duty, you know, to God and my, like, country . . . .”
“Like” and “You know.” They are part of a language of many youth, but they get in the way of communicating well with anyone except your close friends.
If local language usage is highlighted by other habits of word choice that are barriers to good communication, make those the focus of this discussion.
GUIDE
Let’s say you go home after this course full of great ideas for making your unit better. You want to talk with your leader about changes you want to help make in the unit.
No matter what message you want to share, and no matter who your audience, a five-step process is almost certain to succeed:
1. Here is the reason I am asking for some of your time.
2. Let me share an idea with you.
Show slide 6-29, Communicating
With Adults.
Show slide 6-28, Audience Body Language.
Show slide 6-30, Communicating With
Adults: Five-step process.

N a t i o N a l Y o u t h l e a d e r s h i p t r a i N i N g
day six-29
Content Sessions
3. Let me summarize the situation for you. (Put your idea in the context of who, what, where, when, why, and how.)
4. Reinforce the benefits.
■ “Here’s why it makes sense.”
■ “Here’s how it helps us reach our goals.”
■ “Here’s how it helps us complete an action plan.”
■ “Here’s what’s in it for you.”
5. Let’s discuss the steps to turn this idea into action.
ExERCISE IN COMMUNICATING WITH ADULTS
Repeat the paired communication activity above, but this time have the partici-pants reorganize their message using the five steps just discussed. The listener will pretend he or she is the leader of the sender’s home unit.
Allow four minutes for rewriting and three minutes for each presentation and feedback, for a total of 10 minutes.
What If Your Leader Isn’t Enthused?Your best efforts to bring a new idea to your home unit may not get very far. But you will make some changes, even if just in the way others think about what’s possible.
You may not be able to achieve everything at first, but you can start achieving something. You can build on what was done by those who came before you, and leave more done for those who come after.
If you can take only one bite of the elephant, take it. That’s the way to achieve a vision—one goal at a time.
Group ActivityRepeat the group activity using the five-step process for communicating with adults.
PROCEDURE
1. Ask each participant to take a couple of minutes to write down an improve-ment each wants to make in his or her home unit. Encourage each to organize his or her thoughts by using the format:
Who, What, When, Where, Why, How
2. Pair up the participants. One participant in each pair plays the role of the home unit leader. The other acts as himself or herself discussing with the leader his or her ideas for changes in the unit.
3. After the first participant has had a chance to present his or her ideas, the pair switches roles so that the second participant has a chance to present his or her ideas.

N a t i o N a l Y o u t h l e a d e r s h i p t r a i N i N g
day six-30
Cont
ent S
essi
ons
4. Participants should use the tools of effective communication and should organize their ideas with these guidelines:
■ Here is the reason I am asking for some of your time.
■ Let me share an idea with you.
■ Let me summarize the situation for you. (Put your idea in the context of who, what, where, when, why, and how.)
■ Reinforce the benefits.
■ Discuss steps to turn the idea into action.
5. The participant who is listening to the presentation can use Start, Stop, Continue to evaluate the speaker’s communication skills—how he or she uses his or her body, his or her tone of voice, whether he or she makes eye contact, etc.
This exercise can have a variety of positive results:
■ Each participant will have the chance to organize and practice delivering a message that has real meaning from the NYLT course.
■ Every participant will practice effective listening.
■ Where points are weak, as discovered through effective listening, the commu-nicator can strengthen his or her presentation and his or her message before conveying it to his or her home unit.
■ The activity encourages the use of the same skills that participants can use as they prepare for their presentations of the Quest for the Meaning of Leadership.
Debrief the Group Activity:
Ask participants to share some of their experiences from their practice of present-ing ideas to the adult leaders of their home units. What went well? What was not effective? How can they use the skills of effective communication to better share their ideas?
ConclusionWithout warning, toss a tennis ball to someone in the group. Then, without saying anything, let someone else know you’re going to toss a ball to them. (Use your eyes, hand gestures, and body language.) Toss the ball.

N a t i o N a l Y o u t h l e a d e r s h i p t r a i N i N g
day six-31
Content Sessions
Remind the group that effective communication has three parts—
■ A message
■ A sender
■ A receiver
Each of the three plays a role in communication. The message needs to be pack-aged well. The sender needs to be effective in presenting the message. The receiver must do his part to gather in the message.
The skills of effective communication we’ve practiced all week—everything from eye contact to hand gestures to skillful listening—can help you improve the qual-ity of all three—your message, the way you send it, and the way in which you receive information from others.
Show the “Communicating Well” video on the NYLT DVD.
This version of the video has discussion breaks for brief discussion to confirm learning.
Show slide 6-31, Summary.

N a t i o N a l Y o u t h l e a d e r s h i p t r a i N i N g
day six-32
Cont
ent S
essi
ons
day six: team presentations—the Quest for the Meaning of leadership
time allowed 60 minutes
Format With the entire course as an audience, each team makes its presentation of The Quest for the Meaning of Leadership.
responsible Course leader
location Course site
learning objectives
By the end of this session, each participant will have
■ Played a role in presenting the team’s Quest for the Meaning of Leadership.
■ Used good communication skills.
■ Experienced the satisfaction of envisioning, planning, and completing a presentation with the team.
■ Given thought to his or her own meaning of leadership.
Presentation Procedure
Serving as master of ceremonies, the course leader can introduce each team and then offer support, encouragement, and a debriefing of the team’s presentation. If necessary, the course leader can manage the behavior of those observing the presentations to create an atmosphere appropriate to this session.
As part of the debriefing, the course leader may wish to ask the team to explain how its presentation illustrates certain key messages of the NYLT course.
The debriefing can also serve as a means of highlighting and reviewing some of the most important elements of leadership.
The team presentations can be a session full of good fun, high spirits, and valu-able learning experiences. Staff involved must remember that this session is for and about the participants, and they should do all they can to encourage and promote the efforts of each team.
While the course leader facilitates this session, the course director should stand by to offer coaching and guidance. Where appropriate during the debriefings, he or she can also help the course leader draw out the important messages of leadership presented by the teams.

N a t i o N a l Y o u t h l e a d e r s h i p t r a i N i N g
day six-33
Team Events
day six: Camp Breakdown/Feast preparation
time allowed 120 minutes
Format During the Day Six leadership council meeting and the Day Six team meetings, the teams were encouraged to use the What, How, When, Who Planning Tool to organize campsite breakdown and feast preparations.
This block of time can be used by teams to continue carrying out the plans they formulated during those meetings. Ideally, they should use the skills of leadership they have learned during the NYLT course and, as a team, should be experiencing the Norming and even Performing stages of team development.

N a t i o N a l Y o u t h l e a d e r s h i p t r a i N i N g
day six-34
Team
Eve
nts
day six: Feast
time allowed 60 minutes
Format The nature of the NYLT feast will vary from one course to the next, depending on local traditions and conditions. In some cases, adult staff will prepare the feast while teams are dismantling their camps. At other courses, youth staff and team members will play a significant role in cooking and presenting the meal.
Whatever the case, the feast should be a time of fellowship and celebration as the NYLT course comes to a close. Everyone has been through a challenging and rewarding time together. The feast is a chance for members of teams to mingle with one another and to join the NYLT youth staff and adult staff as equal veterans of an NYLT course. The course leader and adult staff can help set the tone of the feast through their encouragement and support of everyone in attendance.
location Course dining area
learning objectives
As a result of the NYLT feast, each participant will enjoy good fellowship, a celebration of accomplishment, and a tasty, well-prepared meal.

N a t i o N a l Y o u t h l e a d e r s h i p t r a i N i N g
day six-35
Content Sessions
day six: Closing Campfire—Creating a Future
time allowed 60 minutes
Format Course presentation in a campfire setting. The event is intended to be simple and meaningful as it brings closure to the course.
responsible The closing campfire is conducted by the course leader and three other youth staff members who are especially skilled at delivering a session of this nature. The course director has a concluding message.
learning objectives
At the end of this session, each participant should be able to
■ Feel welcomed, appreciated, and valued.
■ Appreciate a strong sense of closure to the NYLT course.
■ Realize the larger importance of his NYLT experience.
■ Renew his or her commitment to the values of the Scout Oath, the Venturing Oath, and the Scout Law.
recommended Facility layout
The closing campfire can be conducted at the NYLT course campfire area used for the instructional campfire on Day One of the course, or it can utilize a campfire area set aside especially for this event. The fire should be small, and there is no need for seating—facts that should make it possible to have the campfire in a clearing that participants reach after walking for several minutes in silence.
The route should be familiar to the team guides. The pathway can be marked with placards displaying the points of the Scout Law, with candles, or with other lighting and decorations appropriate to the event.
The American flag and NYLT course flag can be displayed on staffs behind and on either side of the campfire. No other presentation materials are required.
delivery Method
Following the feast, participants will gather by teams at an assembly area. After a brief welcome from the course leader, the teams will follow the team guides to the campfire area for the closing presentation.
Presentation Procedure
Assembly
The course leader welcomes everyone to the beginning of the last event of the NYLT course. Put them at ease with a few comments on the feast.
Explain that each team will follow its course guide to the location of the closing campfire. Ask that participants and staff remain silent as they travel and upon reaching the campfire area. Encourage them to use the time they are walking to think about the NYLT course they have just completed and what they will take away with them as they return to their homes.

N a t i o N a l Y o u t h l e a d e r s h i p t r a i N i N g
day six-36
Cont
ent S
essi
ons
The team guides silently lead the teams to the campfire area. There, the teams will find the youth and adult NYLT staff standing behind the campfire ring.
Arrange the teams in a horseshoe facing the staff.
The campfire can already be burning when the participants arrive, or the lighting of the fire can be incorporated into the introduction of the camp-fire program. The fire should be kept small and simple. If it will be lit while the participants watch, the staff members laying the fire should be certain it has enough dry tinder and kindling for the flames to catch with-out difficulty or delay.
The course leader greets the participants. Let them know that the course has gathered for a final time. This will be an opportunity to look back on the NYLT course everyone has shared and to look ahead at the challenges to come.
Briefly talk about the fellowship of the NYLT course.
Participants from many home units have come together to share their skills, their enthusiasm, and their interests. There have been some great adventures—pioneering projects, realistic first aid, the Outpost Camp . . . . And there have been the beginnings of lots of friendships that will last long after the conclusion of the course.
But the most important message of this week needs no memory tip. It is this:
The Scout Oath, Scout Law, and Venturing Oath provide a compass that will always show you the right way.
Like me, each of you has chosen to live your life by the Oath and Law. You can recite the Oath and Law any time, any place. You know these words, and you know what they mean. You can always rely on the guidance of the Oath and Law to see you through.
On Day One we learned that a vision is a picture of what future success looks like. As we leave this camp, I challenge each of you to create one more vision for yourselves. In your mind, create a picture of future success in which you are using the NYLT skills to lead yourself and to lead others. Make it as real as you can—exciting and filled with possibilities.
Finally, make it a picture of a future that you have built on the foundation of the Scout Oath, Scout Law, and the Venturing Oath.
If you can see it, you can be it.
As you return to your homes, keep your NYLT compasses with you. Look at it now and then to remind yourself of the memory tips from our course. Keep making your vision bigger, and work toward the goals that will make that vision a reality.
Most of all, know that you always have the compass of the Scout Oath, Scout Law, and the Venturing Oath to show you the way.

N a t i o N a l Y o u t h l e a d e r s h i p t r a i N i N g
day six-37
Content Sessions
DepartureThe course leader asks the course guides to lead the teams past the campfire and staff and back to the main course area. Staff should arrange themselves in a line so that they can shake hands with participants as they pass by. During the shaking of hands, staff can offer words of congratulation, support, and encouragement.
The traditions of some NYLT courses include inviting each participant to toss an evergreen sprig into the campfire as a sign of rededication to the guidance of the Oath and Law. Where this is the case, the sprigs can be provided by team guides during the initial assembly for the closing camp-fire and can be tossed into the fire as participants move past the fire dur-ing the departure.


N a t i o N a l Y o u t h l e a d e r s h i p t r a i N i N g
appendix–1
Staff GuideNYLT Resources A-2NYLT logos A-3Optional Weekend Schedule A-4Example Quartermaster’s Duties A-11Quartermaster’s Supplies/Materials List A-12*Sample Menus A-13Sample NAYLE Invitation Letter A-14NAYLE flyer A-15
Staff Development GuideEDGE Connections Chart A-16*How to Take Notes A-22*NYLT Memory Tips A-23Course Director’s Pledge A-24
Day One *Campfire Program Planner A-25 Campfire Program Planner for NYLT
Instructional Campfire A-27*Communication Skills Checklist A-28 *Daily Campsite Inspection Checklist A-29*Developing a Team Vision Work Sheet A-30*Developing Your Team Work Sheet A-31*Leadership Compass A-32Who Me? Game Cards A-33*Overview of the Week A-39*Team Duty Roster A-43 *Sample Team Duty Roster A-44*Schedule of Events for Day One (Sunday) A-46
Day Two*Checklist for Ethical Decision Making A-47*Conflict Resolution Checklist A-48*Day Two Course Meeting Plan A-49*Day Two Team Meeting Agenda A-50*Emergency Response Plan A-51*Figure-of-Eight Lashing Instructions A-52Historic American Flag Presentation:
British Union Flag A-53Historic American Flag Presentation:
46-Star Flag A-54
Historic American Flag Presentation: Continental Flag A-55
Historic American Flag Presentation: Flag of 1777 (Betsy Ross Flag) A-56
Historic American Flag Presentation: Serapis Flag A-57
Historic American Flag Presentation: Star-Spangled Banner A-58
*Day Two Leadership Council Meeting Agenda A-59
*Planning a Scouts’ Worship Service A-60*Planning Tool Work Sheet A-61*Preparing Your Plans Work Sheet A-62*Sample Course Meeting Plan Work Sheet A-63*Schedule of Events for Day Two (Monday) A-64*Service and Program Team Assignments A-65*Setting Your Goals Work Sheet A-66*SMART Goals Work Sheet A-67
Day Three*Duties of a Patrol Leader A-69*The Teaching EDGE A-70*Troop and Crew Leadership Hints A-71*Schedule of Events for Day Three (Tuesday) A-72
Day Four*Conflict Resolution Checklist A-73*Decision-Making Tools A-74*Making Ethical Decisions A-75*Schedule of Events for Day Four (Wednesday) A-76
Day Five*Leading Yourself Work Sheet A-77
*Schedule of Events for Day Five (Thursday) A-78
Day Six*Communicating Well Work Sheet A-79*Developing a Personal Vision Work Sheet A-80*Schedule of Events for Day Six (Friday) A-82*NYLT Recognition Request A-83*Valuing Others Work Sheet A-85
appendixThe appendix is designed to provide the NYLT course tools referenced in the syllabus and sample pages for use in the participant* and/or staff notebooks. Application forms and other council-specific administrative elements are left to the individual councils to design based on their local needs.

N a t i o N a l Y o u t h l e a d e r s h i p t r a i N i N g
appendix-2
NYlt resources
■ Communicating Well DVD, No. AV-02DVD20
■ National Youth Leadership Training with DVD, No. 34490A
■ NYLT ribbons (pack of 10), No. 17150
■ NYLT participant belt buckle (black and silver), No. 14203
■ NYLT staff belt buckle, No. 64039
■ NYLT patch, No. 10003
■ NYLT memory cards (pack of 100), No. 32254
■ NYLT certificate, No. 32255
■ NYLT Stages of Growth chart, No. 32256
■ World Crest poster, No. 34337
■ Historic flag set, No. 02185

N a t i o N a l Y o u t h l e a d e r s h i p t r a i N i N g
appendix-3
NYlt logos
Leadership Compass
NYLT Participant’s Patch
N a t i o N a l Y o u t h l e a d e r s h i p t r a i N i N g
appendix-4
optional Weekend schedule
Weekend OneFriday
Time Activity Notes Responsible Location
6:30 a.m. Staff arise
7:00 a.m. Staff breakfast
Staff meeting
8:00 a.m. Flag ceremony
11:00 a.m. RegistrationStaff To be determined
by course leadership
Noon Fellowship lunch Welcome Staff Staff site or
course site
1:00 p.m. Orientation TrailCamp health and safety, model campsite
To be determined by course leadership
2:00 p.m. Campsite setupTeams, course guides
Team sites
3:00 p.m. Opening assemblyCourse director/course leader
Course assembly area
3:30 p.m.Communicating Well (Part One)
Course leader/team guides
Course site with team breakouts
4:15 p.m. Finding Your vision (Part One)
Assigned staff Course site
5:15 p.m. Team meal preparation Duty roster
6:00 p.m.No-cook meal and cleanup
7:15 p.m. Flag lowering(Course does not gather.) Staff Course assembly
area
7:30 p.m.Development of Guidelines for Course Conduct
StaffTeam activity in course setting
8:15 p.m. Who, Me? Game Team guides Course site
9:00 p.m. Opening night campfireDemonstration of campfire as a program and communication element
Staff Campfire ring
10:00 p.m. Course cracker barrel
10:30 p.m. Lights out
N a t i o N a l Y o u t h l e a d e r s h i p t r a i N i N g
appendix-5
saturday
Time Activity Purpose Responsible Location
6:30 a.m.Arise, team breakfast, cleanup
Duty roster Team site
8:00 a.m. Course AssemblyFlag ceremony Staff Course assembly
area
8:45 a.m. Setting Your Goals Assigned staff Course site
9:45 a.m. Team meetingTeam leader Team breakouts
at course site
10:15 a.m. Preparing Your PlansPlanning for lunch and pioneering projects
Team guides Team breakouts at course site
11:30 a.m.Model leadership council meeting
Course leader Course site
12:15 p.m.Team Lunch Planning Challenge
Built on the menu from the morning’s planning session
Team leader Team site
1:30 p.m. Model course meeting
Leave No Trace instructional skill relates to the Outpost Camp and pioneering projects.
Course leader, course director, and other assigned staff
Course site
3:00 p.m.Building Pioneering Projects
Progression of the morning’s planning session
Large outdoor site
5:00 p.m. Meal preparation Duty roster Team site
5:30 p.m. Dinner and cleanup Team leader Team site
7:15 p.m. Flag ceremonyProgram team Course assembly
area
7:30 p.m.Lego® Challenge/Realistic First Aid
9:00 p.m. Cracker barrel
10:00 p.m. Lights out

N a t i o N a l Y o u t h l e a d e r s h i p t r a i N i N g
appendix-6
sunday
Time Activity Purpose Responsible Location
6:30 a.m. Arise, breakfast and cleanup
Duty roster Duty roster Team site
7:45 a.m. Course Assembly Flag ceremony Course leader and staff
Course assembly area
8:00 a.m. Scouts’ Worship Service
Conducted with explanation; ties into Leading Yourself
Staff Chapel or campfire ring
8:30 a.m. Developing Your Team Experienced youth staff presenter
Course site
10:00 a.m. Solving Problems Presentation on methods for problem solving
Team guides Large outdoor area
10:45 a.m. Problem Solving Round-Robin
Perhaps outdoor skills–oriented challenges
Team guides
11:45 a.m. Leadership council meeting
Course leader LC site
Noon Lunch and cleanup Duty roster Team site
1:00 p.m. Course meeting Backpacking stoves/Leave No Trace Assigned staff Course site
2:30 p.m. The Leading EDGE Staff Course site
3:00 p.m. Team Games Active event. Builds on team development, problem solving
Assigned staff Large outdoor area
3:30 p.m. Team Meeting
4:00 p.m. Camp cleanup and return equipment
4:45 p.m. Course assembly Retire flags Staff Course assembly area
5:00 p.m. Leave for home

N a t i o N a l Y o u t h l e a d e r s h i p t r a i N i N g
appendix-7
Weekend TwoFriday
Time Activity Purpose Responsible Location
Staff arrives early
1:00 p.m. Course Assembly
1:30 p.m. The Teaching EDGE Use GPS skills as examples Team guide Course site
2:15 p.m. Team activity Ties to Teaching EDGE, team building, problem solving, etc.
Team guide Team site and/or activity area
3:00 p.m. Resolving Conflict Team guide Course site
3:45 p.m. Geocaching Game Reinforces main points of the NYLT course days One through Four
Team leaders Selected area
5:15 p.m. Meal prep
6:00 p.m. Dinner (Program team takes down flags)
7:00 p.m. Team Games
7:45 p.m. Making Ethical Decisions
Course director, assigned staff
Course site
8:30 p.m. Movie Night Ties back to earlier sessions
10:30 p.m. Lights out
10:00 p.m. Troop cracker barrel
10:30 p.m. Lights out

N a t i o N a l Y o u t h l e a d e r s h i p t r a i N i N g
appendix-8
saturday
Time Activity Purpose Responsible Location
6:30 a.m. Arise; breakfast and cleanup
Duty roster Team site
8:00 a.m. Course Assembly Flag ceremony Staff Course assembly area
9:00 a.m. Leading Yourself Team guides Team site or course site
10:00 a.m. Leadership council meeting
Final plans for Outpost Camp Course leader LC site
10:45 a.m. Team meeting Outpost Camp preparations Team leader Team site
Noon Lunch and cleanup Duty roster Team site
1:00 p.m. Valuing People Assigned staff Course site
2:15 p.m. Course assembly to begin hike to Outpost Camp
Meet briefly to launch teams on their way
Course leader and course director
Course assembly area
2:30 p.m. Outpost Camp Schedule of events determined by each team
Team leader Assigned
10:00 p.m. Lights out

N a t i o N a l Y o u t h l e a d e r s h i p t r a i N i N g
appendix–9
sunday
Time Activity Purpose Responsible Location
6:30 a.m. Breakfast and cleanup *Timing determined by each team Duty roster Outpost camps
8:00 a.m. Return to camp
8:15 a.m. Course Assembly Welcome back. Focus participants on upcoming events of the day.
Course leader and course director
Course assembly area
8:30 a.m. Shower and prepare for the day
9:30 a.m. Finding Your Vision (Part 2)
Expand on ideas of personal vision—make it bigger.
Staff Course site
10:45 a.m. Leadership council meeting
Prepare for the remainder of Day Six.
LC site
11:30 a.m. Team meeting Work on presentation, feast plans, camp breakdown.
Team leader Team site
Noon Lunch and cleanup Duty roster
1:00 p.m. Communicating Well (Part 2)
Build on the week’s communications, adding theory to the practice.
Course site
2:00 p.m. Team Presentations Quest for the Meaning of Leadership
Course leader Course site
3:00 p.m. Camp breakdown Team leader, team members
Team site
4:00 p.m. Closing celebration
5:00 p.m. Course Closing: Creating a Future
Program team, course leader, course director, assigned youth staff
Campfire ring

N a t i o N a l Y o u t h l e a d e r s h i p t r a i N i N g
appendix-10
example Quartermaster’s duties
daily
❑ Pick up food at kitchen at 10:30 a.m.
❑ Pick up ice blocks (two per team, four for staff).
❑ Inspect campsites after lunch.
❑ Pick up cooler/dry box after dinner.
❑ Pick up trash at 7:00 p.m.
❑ Choose winners of cooking and campsite awards.
In addition to daily duties, the following days have special duties related to the program:
day one
❑ Make first food run.
❑ Set up for staff lunch.
❑ Distribute team staples.
❑ Provide materials for Orientation Trail.
❑ Ensure TV/DVD system is working.
❑ Set up for check-in.
(Dinner is on your own.)
day two
❑ Set up for staff breakfast.
❑ Set up for staff lunch in staff area.
❑ Set up for cracker barrel (before campfire).
❑ Set up course campfire.
day three
❑ Ensure that DVD player is set up and working.
day Four
❑ Ensure that the Lego™ game is set up.
day Five
❑ Ensure that the geocaching games are set up.
day six
❑ Prepare for Outpost Hike:
—Ensure that team campsites are marked.
—Ensure that water and meals are provided.
❑ Help monitor candidates’ arrival to campsites.
day seven
❑ Set up staff breakfast.
❑ Set up course lunch.
❑ Prepare lunch, including dessert.
❑ Monitor cleanup.
day eight
❑ Set up staff breakfast.
❑ Monitor campsite cleanup.

N a t i o N a l Y o u t h l e a d e r s h i p t r a i N i N g
appendix–11
Quartermaster’s supplies/Materials list
Bsa literature
■ Boy Scout Handbook, No. 34554
■ Fieldbook, No. 33104
■ Venturer/Ranger Handbook, No. 33494
■ Backpacking merit badge pamphlet, No. 33232A
■ First Aid merit badge pamphlet, No. 33301B
■ Troop Program Resources, No. 33588
■ Troop Program Features, Volume I, No. 33110
■ Troop Program Features, Volume II, No. 33111
■ Troop Program Features, Volume IIII, No. 33112
general
■ Flip chart and markers
■ American flag
■ Course flag
■ Historic American flags
■ Baden-Powell Team award streamers
■ Stages of Team Development compass boards
day one
■ Team flag decorating material
■ Who, Me? game board, No. 34887 (Wood Badge Who Me game board)
■ Materials teams can use in the Quest for the Meaning of Leadership challenge
day two
■ Anticipated supplies for the Team Lunch Planning Challenge
■ Photographs of possible pioneering projects (one set for each team)
■ Spars and ropes for lashing
■ Figure-of-eight lashing instructions
day three
■ Posters of the NYLT Leadership Compass for each team
■ Blindfolds and a tent for each team
■ Printouts of the Solving Problems DVD slides for each team
■ Various materials to be used for challenges in the Problem-Solving Round-Robin
■ Menu-planning work sheet for Outpost Camp
■ Materials for Day Three course meeting’s interteam activity
day Four
■ Preopening activity sheets and materials for course meeting
■ Group equipment planning work sheet for Outpost Camp
■ Materials to prepare caches for the Geocaching Game
day Five
■ 4-foot lengths of rope of varying colors, diame-ters, and types, appropriate for knot-tying
■ Posters presenting the Scout Oath, Scout Law, Venturing Oath, and the World Crest emblem

N a t i o N a l Y o u t h l e a d e r s h i p t r a i N i N g
appendix-12
sample Menus
Day Breakfast Lunch Dinner Cracker Barrel Snack
Day One Cereal, sweet rolls, milk, juice
Cheese and meat sandwiches, PBJ, fruit cocktail, punch, cookies
Beef stew, apple sauce, bread, butter, punch, cookies
Cut fruit, cheese, crackers, punch, coffee, summer sausage
Day Two Donuts, sweet rolls, beef sticks, milk, juice
Ham and cheese hoagies, PBJ, fruit, punch, cookies
Chicken and dumplings, salad, pudding, punch
Cut fruit, cheese, crackers, punch, coffee, mixed nuts
Day Three Oatmeal, jerky, hot chocolate, milk, fruit juice, bread, butter, jelly
Tuna salad sandwiches, PBJ, corn chips, punch, fruit
Goulash, bread, butter, jelly, salad, fruit pies, punch
Cut fruit, cheese, crackers, punch, coffee, chips and salsa
Day Four Hot/cold granola, beef sticks, bread, butter, jelly, juice, milk, hot chocolate
Cheese and meat sandwiches, PBJ, fruit cocktail, punch, cookies
Hamburger helper, salad, crackers, punch, brownies
Ice cream or popsicles
Day Five Cinnamon toast, Vienna sausages, fruit, milk, hot chocolate
Turkey hoagies, apple slices, PBJ, crackers, punch, cookies
Noncook meal (TBD)
Day Six Oatmeal, beef sticks, bread, butter, jelly, fruit juice, milk, hot chocolate
Hot dogs, chips, fruit, cupcakes, punch
Taco casserole, salad, cobbler, punch
Alternates Granola bars, jerky, fruit leather, orange juice
Cheese and meat sandwiches, PBJ, carrot and celery sticks, fruit cocktail, punch, cookies

N a t i o N a l Y o u t h l e a d e r s h i p t r a i N i N g
appendix-13
sample NaYle invitation letterTo All NYLT Graduates:
Congratulations on completing ____________Council’s National Youth Leadership Training (NYLT) course. Because of your success at NYLT, you are eligible and are invited to apply to attend the National Advanced Youth Leader Experience (NAYLE) this summer.
So what is NAYLE? It’s an opportunity to use and further develop the skills you have learned in Introduction to Leadership Skills for Troops (or Crews) and in NYLT. NAYLE is a weeklong experience in the out-of-doors—camping and experiencing leadership with similarly qualified Scouts.
At NAYLE, you will experience a wide range of daily activities such as Project COPE, wilderness first aid, search and rescue, geocaching, Leave No Trace, and conservation. As the name says, NAYLE is an experi-ence—it is action, it’s about doing . . . applying what you have learned and taught. Throughout all these activities, the opportunity is there to live Scouting at its best and to continue your development as a servant leader.
The course dates for NAYLE are _________________________. More detailed information is available at www.nayle.org, including age, physical, leadership, and recommendation requirements. You can download the application form from this site. Once you have been accepted, you will receive a packet with even more detailed information, including suggestions for travel arrangements.
If you have difficulty accessing the NAYLE website or have questions about NAYLE, you may contact: ____________________________________________________________________________________________________
The courses are expected to fill up quickly, so I encourage you to apply early to ensure your place and selection of course week.
Yours in Scouting,
National Youth Leadership Training ChairmanYour Council, BSA

N a t i o N a l Y o u t h l e a d e r s h i p t r a i N i N g
appendix-14
National Advanced Youth Leadership Experience What is NAYLE? National Advanced Youth Leadership Experience (NAYLE) is an exciting program where young men and women enhance their leadership skills. Courses are held at Philmont Scout Ranch and, beginning in 2011, at Scout camps in other regions of the country. Youth will expand upon the team building and ethical decision making skills learned in National Youth Leadership Training (NYLT). NAYLE emphasizes leadership, teamwork, and selfless service using the core elements of NYLT to make these skills intuitive. What Can I Expect? NAYLE is a very special experience. You will camp and live in a team setting that enable participants to use their leadership skills to resolve challenging situations. The week concludes with a closing challenge for each Scout to use what they’ve learned in service to others. What Will I Take Home from NAYLE? • The skill, ability, and motivation to be a dynamic and effective leader taught through
advanced, practical applications of NYLT skills. • Innovative techniques to deliver NYLT skills to units and councils. • Nationwide resources including new ideas and contacts that can only be gained through a
program of this type. • Personal written commitment to apply NAYLE skills back home. How Has the NAYLE Changed? • NAYLE is now open to young men and women who are registered in a troop, team, crew, or
ship and hold a unit leadership position. • NAYLE will be offered at locations other than Philmont. Who Can Come? Scouts must be at least of 14 years old, and not yet 21, hold a unit leadership position, and have completed NYLT. A NYLT to NAYLE bridge course is available for Venturers who have not been able to take NYLT. Councils may send a council contingent, units may send their leadership teams, or Scouts can come alone. Where and When Is It? Four courses will be held at Philmont’s Rocky Mountain Scout Camp. The 2011 dates are June 12-18, June 19-25, July 17-23, and July 24-30. The cost for the Philmont program is $355. If needed, there are a small number of $200 scholarships available. Contact your local council for more information. The locations and dates for other NAYLE courses will be announced later. How Do I Register? To register go to www.myscouting.org, Events Registration, NAYLE Registration.

N a t i o N a l Y o u t h l e a d e r s h i p t r a i N i N g
appendix-15
ed
ge C
onnecti
ons C
hart d
ay o
ne s
chedule
Act
ivit
yN
ote
sR
esp
on
sib
leLo
cati
on
Be
kn
owD
oC
on
nec
tio
ns
Reg
istr
atio
n b
egin
sS
taff
Ori
enta
tio
n T
rail
Cam
p h
ealth
an
d s
afet
y,
mo
del
cam
psi
te,
Get
ting
to
Kn
ow
Me
gam
e
AC
O p
rog
ram
/ser
vice
Mo
del
Cam
psi
teX
Cam
psi
te s
etu
pTe
ams,
tea
m g
uid
esTe
am s
ites
X
Op
enin
g a
ssem
bly
Wel
com
eC
ours
e di
rect
or/te
am le
ader
Co
urs
e as
sem
bly
are
a
Co
mm
un
icat
ing
Wel
l (P
art
On
e)B
uild
s o
n t
he
com
mu
nic
a-tio
n m
od
eled
du
rin
g t
he
o
pen
ing
ass
emb
ly.
Co
urs
e le
ader
/team
gu
ide
Co
urs
e si
te w
ith
te
am b
reak
ou
tsX
All
sess
ion
s
Fin
din
g Y
ou
r Vis
ion
Co
urs
e si
teX
X
Cam
pfir
eD
emo
nst
ratio
n o
f ca
mp
fire
as
a p
rog
ram
an
d
com
mu
nic
atio
n e
lem
ent
Sta
ffX
Lig
hts
ou
t
Co
urs
e ev
ents
an
d a
ctiv
itie
s
Te
am e
ven
ts a
nd
act
iviti
es
Co
nte
nt
sess
ion
s an
d t
hei
r co
nn
ecti
ng
act
ivit
ies

N a t i o N a l Y o u t h l e a d e r s h i p t r a i N i N g
appendix-16
ed
ge C
onnecti
ons C
hart d
ay t
wo s
chedule
Act
ivit
yN
ote
sR
esp
on
sib
leLo
cati
on
Be
kn
owD
oC
on
nec
tio
ns
Ari
se, t
eam
b
reak
fast
an
d c
lean
up
Du
ty r
ost
erTe
am s
ite
Co
urs
e as
sem
bly
Flag
cer
emo
nyC
ou
rse
lead
er, s
taff
Co
urs
e as
sem
bly
are
a
Set
tin
g Y
ou
r G
oal
sA
ssig
ned
sta
ffC
ou
rse
site
XFi
nd
ing
Yo
ur V
isio
n,
Prep
arin
g Y
ou
r P
lan
s
Team
mee
ting
Team
lead
erTe
am b
reak
ou
ts a
t
cou
rse
site
Pre
par
ing
Yo
ur
Pla
ns
Pla
nn
ing
fo
r lu
nch
an
d
pio
nee
rin
g p
roje
cts
Team
gu
ide
Team
bre
ako
uts
at
co
urs
e si
teX
Fin
din
g Y
ou
r Vis
ion
, S
etti
ng
Yo
ur
Go
als,
C
amp
fire
Mo
del
Lea
der
ship
C
ou
nci
l Mee
tin
gC
ou
rse
lead
erC
ou
rse
site
Team
Lu
nch
P
lan
nin
g C
hal
len
ge
Bu
ilt o
n t
he
men
u f
rom
th
e m
orn
ing
’s p
lan
nin
g s
essi
on
Team
lead
erTe
am s
ite
X
Mo
del
co
urs
e m
eeti
ng
, te
am c
orn
ers
Inst
ruct
ion
al s
kill
rela
tes
to
sto
ves.
Cou
rse
lead
er, c
ours
e di
rect
or,
othe
r as
sign
ed s
taff
Co
urs
e si
teX
Bu
ildin
g p
ion
eer
pro
ject
sPr
og
ress
ion
fro
m t
he
m
orn
ing
’s p
lan
nin
g s
essi
on
Larg
e o
utd
oo
r si
teX
Mea
l pre
par
atio
nD
uty
ro
ster
Team
sit
e
Din
ner
an
d c
lean
up
Team
lead
erTe
am s
ite
Flag
cer
emo
nyPr
og
ram
tea
mC
ou
rse
asse
mb
ly a
rea
Lead
ing
Yo
urs
elf
Exp
erie
nce
d s
taff
Co
urs
e si
teX
Fin
din
g Y
ou
r Vis
ion
, S
etti
ng
Yo
ur
Go
als,
C
om
mu
nic
atin
g W
ell,
Team
Dev
elo
pm
ent
Mov
ie N
igh
t
(with
cra
cker
bar
rel)
Fello
wsh
ip a
nd
rel
axat
ion
Sta
ffC
ou
rse
site
Lig
hts
ou
t
Co
urs
e ev
ents
an
d a
ctiv
itie
s
Te
am e
ven
ts a
nd
act
iviti
es
Co
nte
nt
sess
ion
s an
d t
hei
r co
nn
ecti
ng
act
ivit
ies

N a t i o N a l Y o u t h l e a d e r s h i p t r a i N i N g
appendix-17
ed
ge C
onnecti
ons C
hart d
ay t
hre
e s
chedule
Act
ivit
yN
ote
sR
esp
on
sib
leLo
cati
on
Be
kn
owD
oC
on
nec
tio
ns
Ari
se, b
reak
fast
an
d c
lean
up
Du
ty r
ost
erTe
am s
ite
Co
urs
e as
sem
bly
Flag
cer
emo
nyC
ou
rse
lead
er, s
taff
Co
urs
e as
sem
bly
are
a
Sco
uts
’ wo
rsh
ip s
ervi
ceT
ied
into
Lea
din
g Y
ou
rsel
f.
Co
nd
uct
ed w
ith e
xpla
nat
ion
.Yo
uth
sta
ffC
hap
el, o
r a
mo
re
conv
enie
nt
site
XLe
adin
g Y
ou
rsel
f
Team
Dev
elo
pm
ent
Exp
erie
nce
d y
ou
th s
taff
Co
urs
e si
teX
Lead
ing
Yo
urs
elf,
Co
mm
un
icat
ing
Wel
l, Le
adin
g E
DG
E™
, Te
ach
ing
ED
GE
™,
Res
olv
ing
Co
nfli
ct
So
lvin
g P
rob
lem
sPr
esen
tatio
n o
n
pro
ble
m-s
olv
ing
met
ho
ds
Team
gu
ides
Larg
e o
utd
oo
r ar
eaX
Res
olv
ing
Co
nfli
ct,
Prep
arin
g Y
ou
r P
lan
s,
cam
pfir
e
Lead
ersh
ip
cou
nci
l mee
tin
gC
ou
rse
lead
erLe
ader
ship
co
un
cil
mee
tin
g s
ite
Lun
ch a
nd
cle
anu
pD
uty
ro
ster
Team
sit
e
Pro
ble
m-S
olv
ing
R
ou
nd
-Ro
bin
Perh
aps
ou
tdo
or
sk
ills–
ori
ente
d c
hal
len
ges
Team
gu
ides
XS
olv
ing
pro
ble
ms
Co
urs
e m
eeti
ng
, te
am c
orn
ers
Inst
ruct
ion
al s
kill
rela
tes
to
the
pio
nee
rin
g p
roje
cts.
Ass
ign
ed s
taff
Team
sit
eX
Team
gam
esA
ctiv
e ev
ent.
Bu
ilds
on
tea
m
dev
elo
pm
ent,
pro
ble
m s
olv
ing
.X
Dev
elo
pin
g Y
ou
r Tea
m,
So
lvin
g P
rob
lem
s
Cle
an u
p f
or
d
epar
ture
Team
sit
e
Flag
cer
emo
nyD
epar
ture
of
par
ticip
ants
Co
urs
e ev
ents
an
d a
ctiv
itie
s
Te
am e
ven
ts a
nd
act
iviti
es
Co
nte
nt
sess
ion
s an
d t
hei
r co
nn
ecti
ng
act
ivit
ies

N a t i o N a l Y o u t h l e a d e r s h i p t r a i N i N g
appendix-18
ed
ge C
onnecti
ons C
hart d
ay F
our
schedule
Act
ivit
yN
ote
sR
esp
on
sib
leLo
cati
on
Be
kn
owD
oC
on
nec
tio
ns
Arr
ive,
set
up
te
am s
ites
Du
ty r
ost
erTe
am s
ite
Team
mee
ting
Qu
est
for
the
Mea
nin
g
of
Lead
ersh
ipTe
am le
ader
Team
sit
e
Res
olv
ing
Co
nfli
ctTe
am g
uid
esTe
am s
ites
XPr
ob
lem
So
lvin
g,
Co
mm
un
icat
ing
W
ell (
Part
s O
ne
and
Tw
o),
Valu
ing
Peo
ple
Mak
ing
Eth
ical
Dec
isio
ns
Sen
ior
you
th s
taff
Co
urs
e si
teX
Lead
ing
Yo
urs
elf
Cam
pfir
e an
d
crac
ker
bar
rel
Co
ntin
ue
dis
cuss
ion
of
et
hic
al d
ecis
ion
mak
ing
.Te
am le
ader
, tea
m
gu
ide
to f
acili
tate
Team
site
XM
akin
g E
thic
al
Dec
isio
n
Lig
hts
ou
t
Co
urs
e ev
ents
an
d a
ctiv
itie
s
Te
am e
ven
ts a
nd
act
iviti
es
Co
nte
nt
sess
ion
s an
d t
hei
r co
nn
ecti
ng
act
ivit
ies

N a t i o N a l Y o u t h l e a d e r s h i p t r a i N i N g
appendix-19
ed
ge C
onnecti
ons C
hart
day F
ive s
chedule
Act
ivit
yN
ote
sR
esp
on
sib
leLo
cati
on
Be
kn
owD
oC
on
nec
tio
ns
Ari
se, b
reak
fast
an
d c
lean
up
Du
ty r
ost
erTe
am s
ite
Co
urs
e as
sem
bly
Sta
ffC
ou
rse
asse
mb
ly a
rea
Th
e Te
ach
ing
ED
GE
Use
GP
S s
kills
as
exam
ple
s.C
ou
rse
site
sX
Teac
hin
g m
od
el
thro
ug
ho
ut
cou
rse,
o
pen
ing
cam
pfir
e
Inte
rtea
m a
ctiv
ity,
sn
ack
afte
r ev
ent
Ori
ente
erin
g c
hal
len
ge
Co
urs
e le
ader
Co
urs
e si
teX
Th
e Te
ach
ing
ED
GE
, D
evel
op
ing
Yo
ur T
eam
, S
olv
ing
Pro
ble
ms
Th
e Le
adin
g E
DG
ETe
am g
uid
esTe
am s
iteX
Lead
ing
Yo
urs
elf,
Co
mm
un
icat
ing
Wel
l,
Teac
hin
g E
DG
E,
Res
olv
ing
Co
nfli
ct,
Mak
ing
Eth
ical
D
ecis
ion
s
Lead
ersh
ip c
ou
nci
l mee
tin
gC
ou
rse
lead
erLe
ader
ship
co
un
cil
mee
tin
g s
ite
Lun
ch a
nd
cle
anu
p
Val
uin
g P
eop
leC
ou
rse
site
XX
Co
urs
e m
eeti
ng
, te
am c
orn
ers
Prep
are
for
cam
pfir
e.A
ssig
ned
sta
ffC
ou
rse
site
Fin
din
g Y
ou
r Vis
ion
(P
art T
wo
)M
ake
it b
igg
er. E
xpan
d o
n id
eas
of
per
son
al v
isio
n.
Sen
ior
you
th s
taff
Co
urs
e si
teX
XD
evel
op
ing
Yo
ur T
eam
, Le
adin
g Y
ou
rsel
f, S
ettin
g Y
ou
r G
oal
s,
Prep
arin
g Y
ou
r P
lan
s,
Co
mm
un
icat
ing
Wel
l
Din
ner
Team
sit
e
Co
mm
un
icat
ing
Wel
l (P
art T
wo
)B
uild
on
th
e w
eek’
s
com
mu
nic
atio
n.
Co
urs
e si
teX
Cam
pfir
e an
d
crac
ker
bar
rel
Cam
pfi
re s
ite
Lig
hts
ou
t
Co
urs
e ev
ents
an
d a
ctiv
itie
s
Te
am e
ven
ts a
nd
act
iviti
es
Co
nte
nt
sess
ion
s an
d t
hei
r co
nn
ecti
ng
act
ivit
ies
N a t i o N a l Y o u t h l e a d e r s h i p t r a i N i N g
appendix-20
ed
ge C
onnecti
ons C
hart
day s
ix s
chedule
Act
ivit
yN
ote
sR
esp
on
sib
leLo
cati
on
Be
kn
owD
oC
on
nec
tio
ns
Ari
se, b
reak
fast
an
d c
lean
up
Du
ty r
ost
er
Co
urs
e as
sem
bly
Co
urs
e le
ader
, co
urs
e d
irec
tor
Co
urs
e as
sem
bly
are
a
Sco
uts
’ wo
rsh
ip s
ervi
ceS
cou
ts, p
artic
ipan
tsC
hap
el o
r o
ther
co
nven
ien
t si
teX
Lead
ing
Yo
urs
elf
Bre
ak c
amp
an
d
team
mee
ting
Fin
aliz
e te
am p
rese
nta
tion
s.Te
am le
ader
Team
sit
es
Qu
est
for
the
Mea
nin
g
of
Lead
ersh
ipC
ou
rse
lead
erC
ou
rse
site
XX
X
Team
pre
sen
tatio
ns
Co
urs
e si
teX
Lun
chQ
uar
term
aste
r st
aff
Clo
sin
g, C
reat
ing
a F
utu
reC
ou
rse
lead
erC
ou
rse
site
XX
X
Clo
sin
g c
ou
rse
asse
mb
lyA
war
ds
cere
mo
nyPa
rad
e g
rou
nd
s
Co
urs
e ev
ents
an
d a
ctiv
itie
s
Te
am e
ven
ts a
nd
act
iviti
es
Co
nte
nt
sess
ion
s an
d t
hei
r co
nn
ecti
ng
act
ivit
ies

N a t i o N a l Y o u t h l e a d e r s h i p t r a i N i N g
appendix-21
how to take Notes
Notes are important
They are the only dependable way to be sure that you will remember the valuable ideas you hear and see.
get the Main ideas
Write down only as much detail as you can without losing what the speaker is saying. The speaker usually will tip you off by announcing the main points: “There are three major reasons why . . .” or “The first reason is . . . .”
use outline style
Outlines show the relationship of ideas.
I. Roman numerals represent main ideas.
A. Capital letters are subheads under Roman numerals.
1. Arabic numerals are subheads under capital letters.
a. Small letters are subheads under Arabic numerals.
abbreviate
Use key words and partial sentences. On the other hand, don’t be so sketchy that it doesn’t mean any-thing. Brief, accurate notes are better than lengthy, confused ones.
use a Notebook
Random notes scribbled on loose scraps of paper are seldom satisfactory.
this is important
Before those notes get cold (probably within 24 hours), take time to make sure you understand them. Then you won’t be wondering several months from now what you meant by some of the abbreviations.
remember
Faded ink is better than best memory.
—Baden-Powell
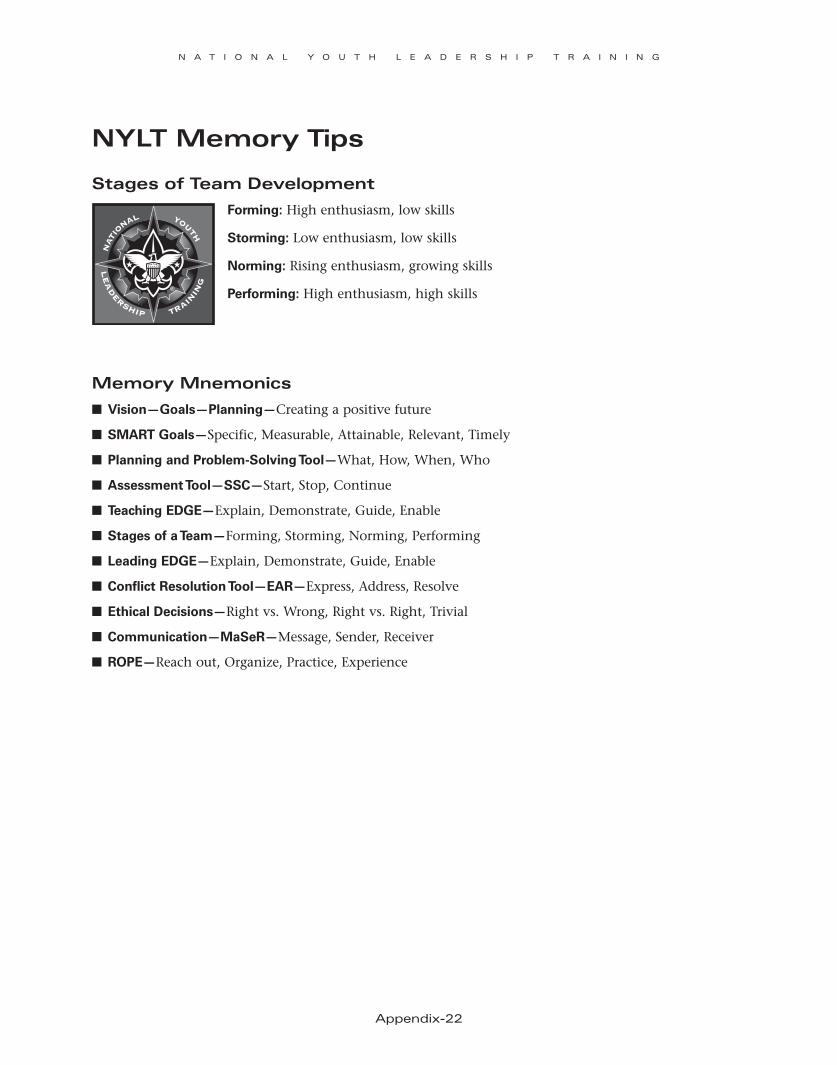
N a t i o N a l Y o u t h l e a d e r s h i p t r a i N i N g
appendix-22
NYlt Memory tips
stages of team development
Forming: High enthusiasm, low skills
Storming: Low enthusiasm, low skills
Norming: Rising enthusiasm, growing skills
Performing: High enthusiasm, high skills
Memory Mnemonics
■ Vision—Goals—Planning—Creating a positive future
■ SMART Goals—Specific, Measurable, Attainable, Relevant, Timely
■ Planning and Problem-Solving Tool—What, How, When, Who
■ Assessment Tool—SSC—Start, Stop, Continue
■ Teaching EDGE—Explain, Demonstrate, Guide, Enable
■ Stages of a Team—Forming, Storming, Norming, Performing
■ Leading EDGE—Explain, Demonstrate, Guide, Enable
■ Conflict Resolution Tool—EAR—Express, Address, Resolve
■ Ethical Decisions—Right vs. Wrong, Right vs. Right, Trivial
■ Communication—MaSeR—Message, Sender, Receiver
■ ROPE—Reach out, Organize, Practice, Experience

N a t i o N a l Y o u t h l e a d e r s h i p t r a i N i N g
appendix-23
NYlt Course director’s pledgeRecognizing that NYLT training is a national program and that in accepting this nomination as course director of course No. __________________ I will be representing the National Council, Boy Scouts of America, I enter into the following covenant:
1. I will present the content and activities in the current NYLT syllabus, No. 34490, 2011 printing, without additions, deletions, or shortcuts.
2. I am responsible for the development of my entire training team.
3. The NYLT camping program is based on modeling a weekend camping experience using the principles of Leave No Trace. Extensive campsite improvements are thus not part of NYLT training, nor are extensive aquatic activities.
4. As set out in the regional Course Director’s Conference, I will file closeout reports to BSA regional and national offices within the specified time frames.
5. My course will be conducted in accordance with the aims and methods of the Boy Scouts of America. All staff members and participants will be informed that
a. NYLT is a positive learning experience, and its guiding principles are the Scout Oath, Scout Law, and Venturing Oath.
b. We will create a positive learning environment at NYLT and provide a setting where everyone should feel physically and emotionally secure. We will accomplish this in several ways:
■ We will set the example for others and ourselves by always behaving as Scouts should. To the best of our abilities, we will live the Scout Oath, Venturing Oath, and Scout Law each moment of each day.
■ We will refuse to tolerate any kind of put-down, name-calling, or physical aggression.
■ We will communicate our acceptance of each participant and each other whenever possible through expressions of concern and by showing our appreciation.
■ We will create an environment based on learning and fun. We will seek the best from each participant and do our best to help each person achieve it.
6. I will maintain the integrity of the course content, including the staff guide, syllabus, DVD, and all supporting materials.
Accepted by:
_____________________________________________________ Date: ________________________________________ Course Director Nominee
_____________________________________________________ Date: ________________________________________ Host Council Executive
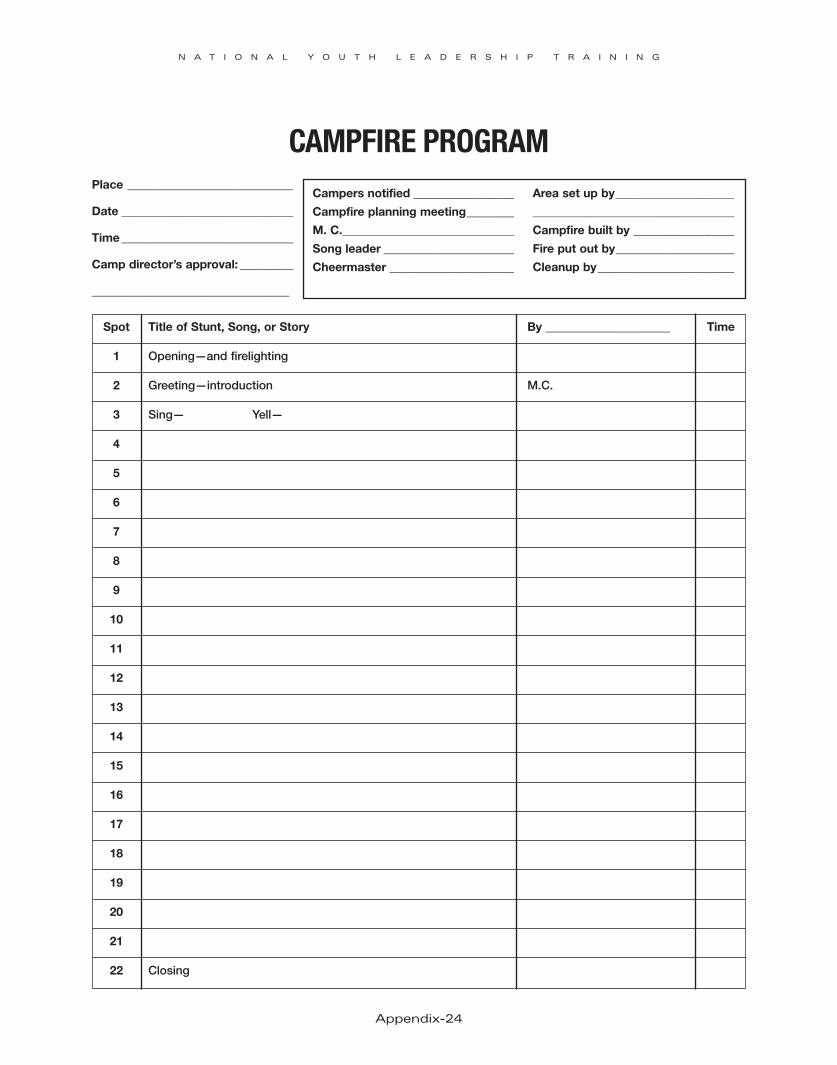
N a t i o N a l Y o u t h l e a d e r s h i p t r a i N i N g
appendix-24
Campfire program Place ____________________________
Date _____________________________
Time _____________________________
Camp director’s approval: _________
__________________________________
Campers notified _________________
Campfire planning meeting ________
M. C._____________________________
Song leader ______________________
Cheermaster _____________________
Area set up by ____________________
__________________________________
Campfire built by _________________
Fire put out by ____________________
Cleanup by _______________________
Spot Title of Stunt, Song, or Story By _____________________ Time
1 Opening—and firelighting
2 Greeting—introduction M.C.
3 Sing— Yell—
4
5
6
7
8
9
10
11
12
13
14
15
16
17
18
19
20
21
22 Closing
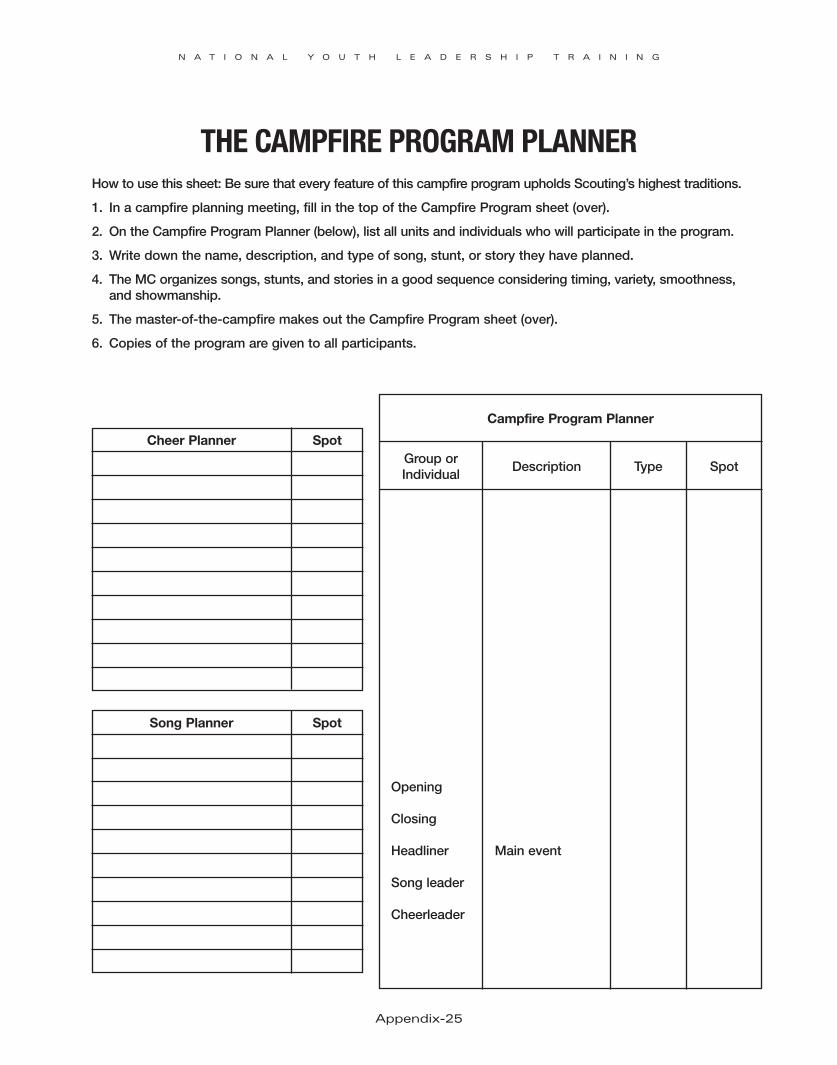
N a t i o N a l Y o u t h l e a d e r s h i p t r a i N i N g
appendix-25
The Campfire program plannerHow to use this sheet: Be sure that every feature of this campfire program upholds Scouting’s highest traditions.
1. In a campfire planning meeting, fill in the top of the Campfire Program sheet (over).
2. On the Campfire Program Planner (below), list all units and individuals who will participate in the program.
3. Write down the name, description, and type of song, stunt, or story they have planned.
4. The MC organizes songs, stunts, and stories in a good sequence considering timing, variety, smoothness, and showmanship.
5. The master-of-the-campfire makes out the Campfire Program sheet (over).
6. Copies of the program are given to all participants.
Campfire Program Planner
Group or Individual
Description Type Spot
Opening
Closing
Headliner Main event
Song leader
Cheerleader
Cheer Planner Spot
Song Planner Spot
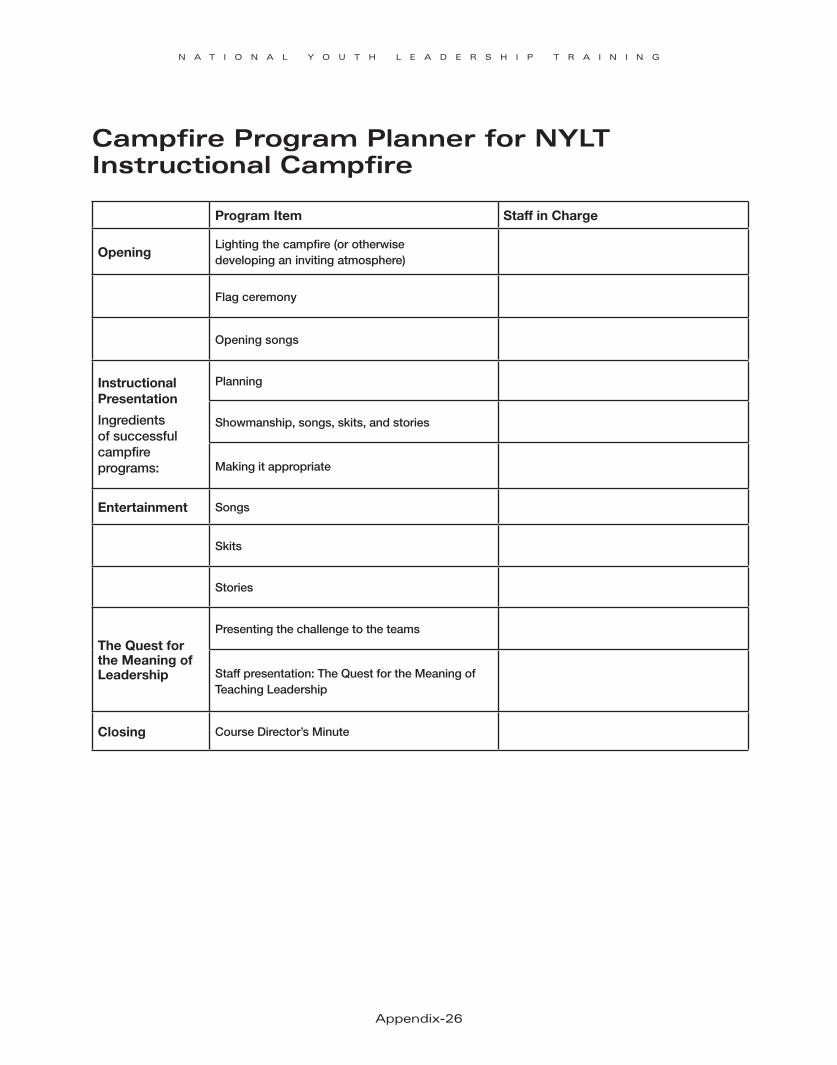
N a t i o N a l Y o u t h l e a d e r s h i p t r a i N i N g
appendix-26
Campfire program planner for NYlt instructional Campfire
Program Item Staff in Charge
OpeningLighting the campfire (or otherwise developing an inviting atmosphere)
Flag ceremony
Opening songs
Instructional Presentation
Ingredients of successful campfire programs:
Planning
Showmanship, songs, skits, and stories
Making it appropriate
Entertainment Songs
Skits
Stories
The Quest for the Meaning of Leadership
Presenting the challenge to the teams
Staff presentation: The Quest for the Meaning of Teaching Leadership
Closing Course Director’s Minute

N a t i o N a l Y o u t h l e a d e r s h i p t r a i N i N g
appendix-27
Communication skills Checklist
_____ Neutral position. The leader stands comfortably before the audience, hands at his or her sides. Their posture is good.
_____ Feet. The leader positions himself or herself where everyone can see and hear them without distraction. If possible, the leader moves around during the presentation.
_____ Hands. The leader uses their hands and arms as communicating tools, inviting the audience’s participation while not distracting them with constant motion.
_____ Mouth. The leader communicates loudly enough for everyone to hear, and clearly enough for everyone to understand. He or she varies the tone of their voice as they talk.
_____ Eyes. The leader makes eye contact with listeners.
_____ Ears. The leader is aware of how listeners respond to what he or she says, and he or she adjusts his or her communicating to fit their needs.

N a t i o N a l Y o u t h l e a d e r s h i p t r a i N i N g
appendix-28
daily Campsite inspection ChecklistTeams must receive a score of 90 or above to receive a daily Baden-Powell Team streamer.
Team Name ____________________________________________________________________ Date _____________
Tents Possible Points Total
Tents neat and properly pitched 5 _______
Dining fly neat and properly pitched 5 _______
Tents Total 10 _______
Fire Protection
Campfire area properly cleared and secured 5 _______
Fire tools present and readily available 5 _______
Fire buckets filled and ready 5 _______
Stove fuel and firewood properly stored 5 _______
Fire Protection Total 20 _______
Team and Personal Equipment
Equipment clean and properly stored 10 _______
Duty roster filled out and posted 5 _______
Personal equipment neat and properly stored 5 _______
Team and Personal Equipment Total 20 _______
Health and Safety
Campsite free of litter and debris 5 _______
First-aid kit in camp and visible 5 _______
Handwashing station operational 10 _______
Dishwashing practices resulting in clean cooking gear and personal eating utensils 10 _______
Cooking equipment neatly stored off the ground 10 _______
All food items protected from spoilage, contamination, and animals 10 _______
Health and Safety Total 50 _______
Grand Total 100 _______
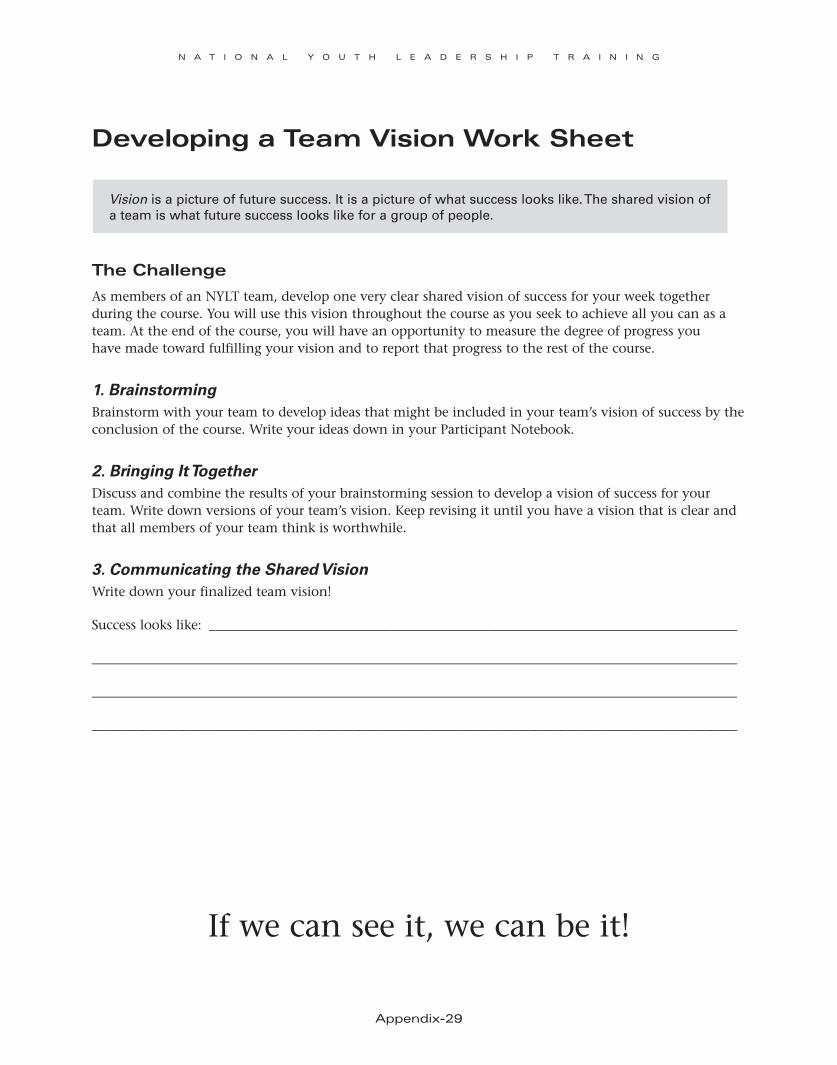
N a t i o N a l Y o u t h l e a d e r s h i p t r a i N i N g
appendix-29
developing a team Vision Work sheet
Vision is a picture of future success. It is a picture of what success looks like. The shared vision of a team is what future success looks like for a group of people.
the Challenge
As members of an NYLT team, develop one very clear shared vision of success for your week together during the course. You will use this vision throughout the course as you seek to achieve all you can as a team. At the end of the course, you will have an opportunity to measure the degree of progress you have made toward fulfilling your vision and to report that progress to the rest of the course.
1. BrainstormingBrainstorm with your team to develop ideas that might be included in your team’s vision of success by the conclusion of the course. Write your ideas down in your Participant Notebook.
2. Bringing It TogetherDiscuss and combine the results of your brainstorming session to develop a vision of success for your team. Write down versions of your team’s vision. Keep revising it until you have a vision that is clear and that all members of your team think is worthwhile.
3. Communicating the Shared VisionWrite down your finalized team vision!
Success looks like: _________________________________________________________________________________
___________________________________________________________________________________________________
___________________________________________________________________________________________________
___________________________________________________________________________________________________
If we can see it, we can be it!

N a t i o N a l Y o u t h l e a d e r s h i p t r a i N i N g
appendix-30
developing Your team Work sheetA team is a group of people who share a common vision. They work together to complete goals that will help them realize their shared vision. They support and depend on one another.
stages of team development
Forming—Low skills, high enthusiasm
__________________________________________________________________________________________________
__________________________________________________________________________________________________
__________________________________________________________________________________________________
__________________________________________________________________________________________________
Storming—Low skills, low enthusiasm
__________________________________________________________________________________________________
__________________________________________________________________________________________________
__________________________________________________________________________________________________
__________________________________________________________________________________________________
Norming—Growing skills, rising enthusiasm
__________________________________________________________________________________________________
__________________________________________________________________________________________________
__________________________________________________________________________________________________
__________________________________________________________________________________________________
Performing—High skills, high enthusiasm
__________________________________________________________________________________________________
__________________________________________________________________________________________________
__________________________________________________________________________________________________
__________________________________________________________________________________________________

N a t i o N a l Y o u t h l e a d e r s h i p t r a i N i N g
appendix-31
leadership Compass

N a t i o N a l Y o u t h l e a d e r s h i p t r a i N i N g
appendix-32
Who, Me? game Cards Easier Category
Make these game cards by copying this page on blue paper and cutting along the dotted lines.
1. What is your given name, and why did your parents name you that?
2. What is your favorite food, and why?
3. What is your favorite thing to do when you have free time?
4. Ask each member of the group to name the best movie he or she has ever seen.
5. What is your favorite color, and why?
6. Ask each member of the group to guess your posi-tion in the family (oldest, youngest, one of five, etc.), then tell them the answer.
7. What is your favorite holiday or celebration? Why?
8. If you were to describe yourself as a cartoon char-acter or superhero, which one would it be? Why?
9. Describe something that you like about where you live.
10. What do you listen to on the radio?

N a t i o N a l Y o u t h l e a d e r s h i p t r a i N i N g
appendix-33
Who, Me? game Cards (cont.) Easier Category
Make these game cards by copying this page on blue paper and cutting along the dotted lines.
11. Do you have any pets? Why or why not?
12. Who is your favorite actor or actress? What do you like about him or her?
13. If you were the president of the United States for a day, what would you do? Why?
14. What are your favorite television programs? Why?
15. Name a song that makes you happy when you sing it. Why did you choose that song?
16. Tell a story about something that happened to you on a camping trip with your Scout troop or Venturing crew.
17. What is your favorite subject in school? Why?

N a t i o N a l Y o u t h l e a d e r s h i p t r a i N i N g
appendix-34
1. Describe the first place you remember living in.
2. Why did you get involved with Scouting? What reasons do you have for staying in today?
3. Ask each member of the group: If you could be an expert in any field, what would it be?
4. Ask one member of the group to describe the best Scouting ceremony he or she has ever seen.
5. Who is the person you most respect in Scouting? Why?
6. Ask each member of the group to name the best sports event he or she has ever seen.
7. Tell us about your best friend. Why did you pick this person?
8. If you could live somewhere else, where would it be and why?
9. Of the things that you own, which ones best represent who you are? Why?
10. Name a great leader in world history. Why did you choose that person?
Who, Me? game Cards More Thoughtful CategoryMake these game cards by copying this page on gold paper and cutting along the dotted lines.

N a t i o N a l Y o u t h l e a d e r s h i p t r a i N i N g
appendix-35
Who, Me? game Cards (cont.) More Thoughtful CategoryMake these game cards by copying this page on gold paper and cutting along the dotted lines.
11. If you could live anywhere, where would you live and why?
12. What have you done in your life that makes you proud? Why did you choose that answer?
13. Who is one of your heroes? How did that person influence your life?
14. What person do you admire the most today? Why?
15. Why is Scouting important to you?
16. What do people like best about you?
17. If you could choose only one nonliving object to take from your burning house, what would this thing be?
18. Tell about one of your favorite childhood memories.
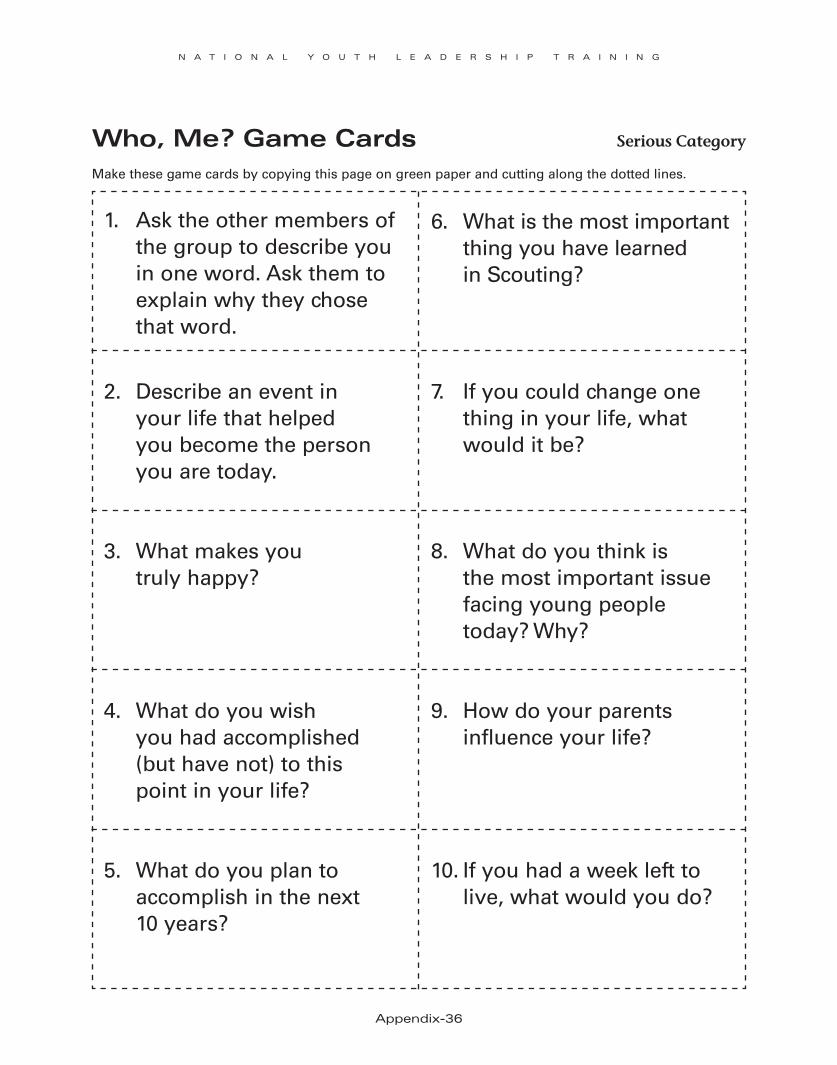
N a t i o N a l Y o u t h l e a d e r s h i p t r a i N i N g
appendix-36
1. Ask the other members of the group to describe you in one word. Ask them to explain why they chose that word.
2. Describe an event in your life that helped you become the person you are today.
3. What makes you truly happy?
4. What do you wish you had accomplished (but have not) to this point in your life?
5. What do you plan to accomplish in the next 10 years?
6. What is the most important thing you have learned in Scouting?
7. If you could change one thing in your life, what would it be?
8. What do you think is the most important issue facing young people today? Why?
9. How do your parents influence your life?
10. If you had a week left to live, what would you do?
Who, Me? game Cards Serious Category
Make these game cards by copying this page on green paper and cutting along the dotted lines.

N a t i o N a l Y o u t h l e a d e r s h i p t r a i N i N g
appendix-37
Who, Me? game Cards (cont.) Serious Category
Make these game cards by copying this page on green paper and cutting along the dotted lines.
11. If you died tomorrow, how would you be remembered?
12. What is the worst moment you have ever had?
13. Talk about one of your worst habits.
14. What is a foolish thing you have done in your life?
15. Name two very important events in your life. What made them important?

N a t i o N a l Y o u t h l e a d e r s h i p t r a i N i N g
appendix-38
overview of the Week
day one (sunday)
12:00 p.m. Registration begins
1:00 p.m. Orientation Trail
2:00 p.m. Campsite setup
3:00 p.m. Opening assembly
3:30 p.m. Communicating Well (Part One)
4:00 p.m. Finding Your Vision (Part One)
5:00 p.m. Team meal preparation, dinner, and cleanup; finish campsite setup
7:15 p.m. Flag ceremony
7:30 p.m. Who, Me? game and cracker barrel
8:30 p.m. Opening night campfire
9:30 p.m. Silent return to campsites
10:00 p.m. Lights out
day two (Monday)
6:30 a.m. Arise; team breakfast and cleanup
8:00 a.m. Course assembly
8:45 a.m. Setting Your Goals
9:45 a.m. Team meeting
10:15 a.m. Preparing Your Plans
11:30 a.m. Model leadership council meeting
12:15 p.m. Team Lunch Planning Challenge
1:30 p.m. Model course meeting
Course events and activitiesTeam events and activities
Content sessions and their connecting activities

N a t i o N a l Y o u t h l e a d e r s h i p t r a i N i N g
appendix-39
3:00 p.m.
5:00 p.m. Meal preparation
5:30 p.m. Dinner and cleanup
7:15 p.m. Flag ceremony
7:30 p.m. Scouts’ worship service
8:00 p.m. Movie night with cracker barrel
10:00 p.m. Lights out
day three (tuesday)
6:30 a.m. Arise; breakfast and cleanup
7:45 a.m. Course assembly
8:00 a.m.
9:30 a.m. Solving Problems
10:15 a.m. Problem-Solving Round-Robin
11:30 a.m. Leadership council meeting
12:15 a.m. Lunch and cleanup
1:00 p.m. Course meeting
2:30 p.m. The Leading EDGE
3:30 p.m. Team Games
4:00 p.m. Team meeting
4:45 p.m. Meal preparation
6:00 p.m. Dinner and cleanup
7:15 p.m. Flag ceremony
7:30 p.m. Lego® Challenge/Realistic First Aid*
10:00 p.m. Lights out
Course events and activitiesTeam events and activities
*Consider omitting “Realistic First Aid” from participants’ schedules.
Building pioneering projects
Developing Your Team
Content sessions and their connecting activities

N a t i o N a l Y o u t h l e a d e r s h i p t r a i N i N g
appendix-40
day Four (Wednesday)
6:30 a.m. Arise; breakfast and cleanup
8:00 a.m. Course assembly
8:45 a.m. The Teaching EDGE
9:45 a.m. Team activity
10:30 a.m. Resolving Conflicts
11:30 a.m. Leadership council meeting
12:00 p.m. Lunch and cleanup
1:00 p.m. Course meeting
2:30 p.m. Geocaching Game
4:00 p.m. Team meeting
4:45 p.m. Meal preparation
6:00 p.m. Dinner and cleanup
7:15 p.m. Flag ceremony
7:30 p.m. Making Ethical Decisions
8:30 p.m. Team campfires (with cracker barrel snacks)
10:00 p.m. Lights out
day Five (thursday)
6:30 a.m. Arise; breakfast and cleanup
8:00 a.m. Course assembly
9:00 a.m. Leading Yourself
10:00 a.m. Leadership council meeting
10:45 a.m. Team meeting
11:45 a.m. Lunch and cleanup
1:00 p.m. Valuing People
2:15 p.m. Course assembly to begin the Outpost Camp
2:30 p.m. Outpost Camp
Course events and activitiesTeam events and activities
Content sessions and their connecting activities
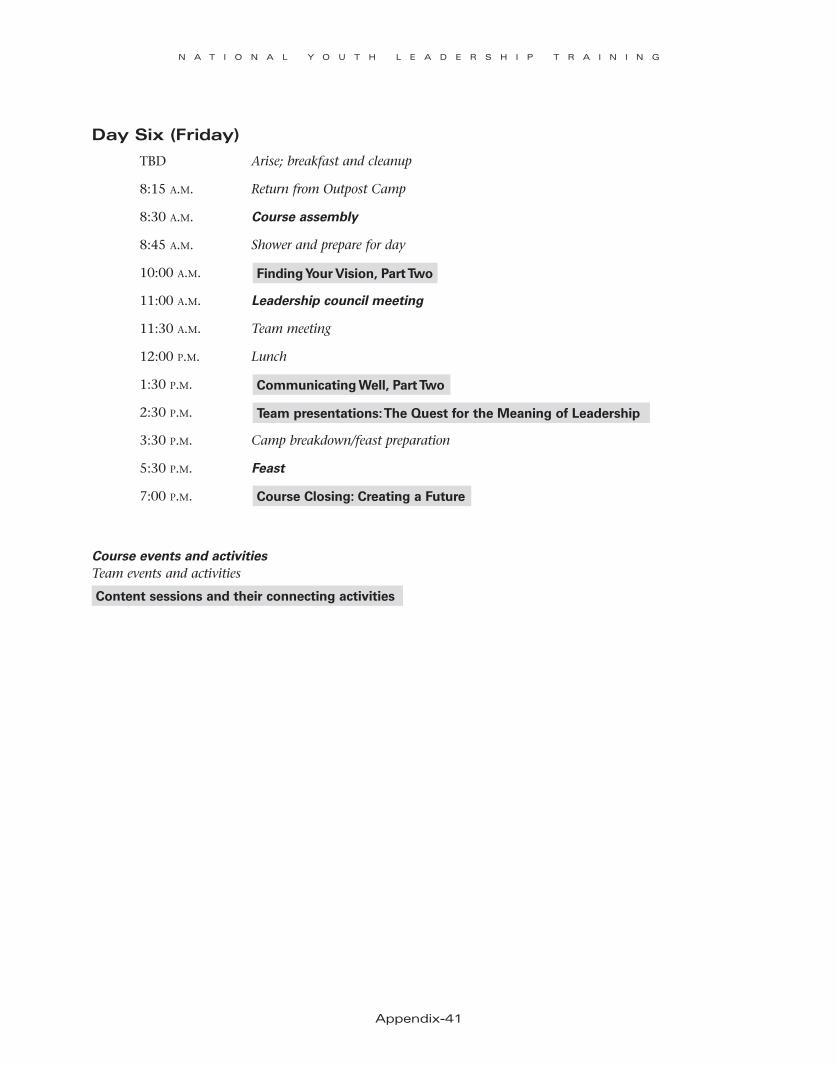
N a t i o N a l Y o u t h l e a d e r s h i p t r a i N i N g
appendix-41
day six (Friday)
TBD Arise; breakfast and cleanup
8:15 a.m. Return from Outpost Camp
8:30 a.m. Course assembly
8:45 a.m. Shower and prepare for day
10:00 a.m. Finding Your Vision, Part Two
11:00 a.m. Leadership council meeting
11:30 a.m. Team meeting
12:00 p.m. Lunch
1:30 p.m. Communicating Well, Part Two
2:30 p.m. Team presentations: The Quest for the Meaning of Leadership
3:30 p.m. Camp breakdown/feast preparation
5:30 p.m. Feast
7:00 p.m. Course Closing: Creating a Future
Course events and activitiesTeam events and activities
Content sessions and their connecting activities

N a t i o N a l Y o u t h l e a d e r s h i p t r a i N i N g
appendix-42
team duty roster Roster may be adjusted to meet particular team needs.
Team Members
A. _______________________________________________
B. ________________________________________________
C. ________________________________________________
D. ________________________________________________
E. ________________________________________________
F. ________________________________________________
Day 1 A B C D E F
Day 2 F A B C D E
Day 3 E F A B C D
Day 4 D E F A B C
Day 5 C D E F A B
Day 6 B C D E F A
Team Leader(water)
Assistant Team Leader
(stoves)Cook 1 Cook 2 Cleanup 1 Cleanup 2

N a t i o N a l Y o u t h l e a d e r s h i p t r a i N i N g
appendix-43
sample team duty rosterRotation of duties takes place daily at the morning course assembly.
Team _____________________________________________
Day One Day Two Day Three Day Four Day Five Day Six Day SevenNames/days
Team leaderCleanup buddies
Team leader
Assistant team leader
Team leader
Assistant team leader
Cooking buddies
Fire and water buddies
Fire and water buddies
Cleanup buddies
Cooking buddies
Cooking buddies
Fire and water buddies
Cleanup buddies
Assistant team leader
The team leader leads the team; attends leadership council meetings; holds team meetings to keep mem-bers informed of course plans and activities; leads the team in games, practices, and competitions; sets an example by initiative and Scouting spirit; and is responsible for keeping team activities on the camp’s time/event schedule.
The assistant team leader leads the team in the absence of the team leader and assists the team leader as requested in the operation of the team and participation in activities.
Note: The team leader and assistant team leader are not scheduled for camp duties. They should be free to assist wherever and whenever needed.
Cooking buddies secure food supplies from the quartermaster at 4:30 p.m. and at such other times as directed; follow menus and recipes exactly after reading directions twice; serve meals on time; put away food; put cooking pots to soak; place cleanup water supply over fire before serving the meal.
Fire and water buddies maintain water supply; maintain supplies of tinder, kindling, and firewood pro-tected from weather; and start fires in time for cooks to have meals ready on time.
Cleanup buddies set up wash and rinse water for dishwashing; clean cooking pots, utensils, and team’s personal eating gear; clean up the kitchen and dining areas; store all team equipment; dispose of trash; and put out all fires after use.

N a t i o N a l Y o u t h l e a d e r s h i p t r a i N i N g
appendix-44
sample team duty roster (cont.)
Latrine Cleaning Rotation ScheduleIn the U.S. Navy, it’s called a head; in the U.S. Army, a latrine. Rural residents might call it an outhouse or a privy. To the Japanese, it’s the benjo. In Europe, it’s the WC, and the British sometimes call it the necessary. To a Scout camper, it’s the latrine.
Whatever it’s called, when you’re sharing it with another team, somebody has to keep it clean and in good order. That’s not the best job in camp, so it is important that everybody takes turns. The teams that are sharing the latrine should get together and work out a schedule.
The latrine should be checked and cleaned twice a day. See that extra toilet paper is available, that the lantern is lit (or the lights are on) at dusk and extinguished in the morning, that hand-washing water is available, and that any other chores are accomplished.
SUN MON TUE WED THU FRI SAT
AM
PM

N a t i o N a l Y o u t h l e a d e r s h i p t r a i N i N g
appendix-45
schedule of events for day one (sunday)
12:00 p.m. Registration begins
1:00 p.m. Orientation Trail
2:00 p.m. Campsite setup
3:00 p.m. Opening assembly
3:30 p.m. Communicating Well (Part One)
4:00 p.m. Finding Your Version (Part One)
5:00 p.m. Team meal preparation, dinner, and cleanup; finish campsite setup
7:15 p.m. Flag ceremony
7:30 p.m. Getting to know Me game and cracker barrel
8:30 p.m. Opening night campfire
9:30 p.m. Silent return to campsites
10:00 p.m. Lights out
Course events and activitiesTeam events and activities
Content sessions and their connecting activities

N a t i o N a l Y o u t h l e a d e r s h i p t r a i N i N g
appendix-46
Checklist for ethical decision Making
This checklist can be used to test choices when you are considering whether a decision is ethical. If you answer NO to any of the items, you may be heading in the wrong direction.
Be Checks:
_____ Yes _____ No Does it allow me to remain loyal to my values?
_____ Yes _____ No Does it allow me to lead myself and others correctly?
_____ Yes _____ No Am I being Obedient?
_____ Yes _____ No Am I being Brave?
_____ Yes _____ No Am I following all the points of the Scout Law?
know Checks:
_____ Yes _____ No Is it legal?
_____ Yes _____ No Does it conform with the Golden Rule?
_____ Yes _____ No Will this choice help me build trust with others?
_____ Yes _____ No Does it conform with my religious beliefs?
_____ Yes _____ No Does it allow me to use skills from the NYLT toolbox, such as ROPE?
Do Checks:
_____ Yes _____ No Does it conform to the Scout Oath, the Scout Law, and the Venturing Oath?
_____ Yes _____ No Am I fulfilling my duty to God and my country?
_____ Yes _____ No Does this choice help me stay physically strong, mentally awake, and morally straight?
_____ Yes _____ No Does it conform to the principles of the Outdoor Code?

N a t i o N a l Y o u t h l e a d e r s h i p t r a i N i N g
appendix-47
Conflict resolution Checklist
What strategies can we use to manage conflict?
1. Be aware of yourself.
2. Be aware of others.
3. Listen
■ Bribery
■ Concern
■ Persuasion
■ Interest
■ Straightforwardness
■ ______________________
■ ______________________
4. Use your EAR
Express—What do you want, and what are you doing to get it?
___________________________________________________________________________________________________
___________________________________________________________________________________________________
___________________________________________________________________________________________________
Address—Why is that working, or why is that not working?
___________________________________________________________________________________________________
___________________________________________________________________________________________________
___________________________________________________________________________________________________
Resolve—What ways are there to solve the problem?
___________________________________________________________________________________________________
___________________________________________________________________________________________________
___________________________________________________________________________________________________

N a t i o N a l Y o u t h l e a d e r s h i p t r a i N i N g
appendix-48
DAY tWOcOurse Meeting PlAn
ActivitY DescriPtiOn run BY tiMe
Preopening
______ minutes
Opening Ceremony
______ minutes
Skills Instruction
______ minutes
Team Meetings
______ minutes
Interteam Activity
______ minutes
Closing
______ minutes
Total 90 minutes of meeting
After the Meeting
CD• CourseDirector’sMinute.

N a t i o N a l Y o u t h l e a d e r s h i p t r a i N i N g
appendix-49
day two team Meeting agenda1. Welcome—Team guide
2. Meeting agenda—Team guide
3. Team leader responsibilities—Team guide
4. Team duty roster—Team leader
5. Evaluation using Start, Stop, Continue (SSC)—Explained by the team guide; evaluation led by the team leader, with team guide’s support
6. Closing—Team leader
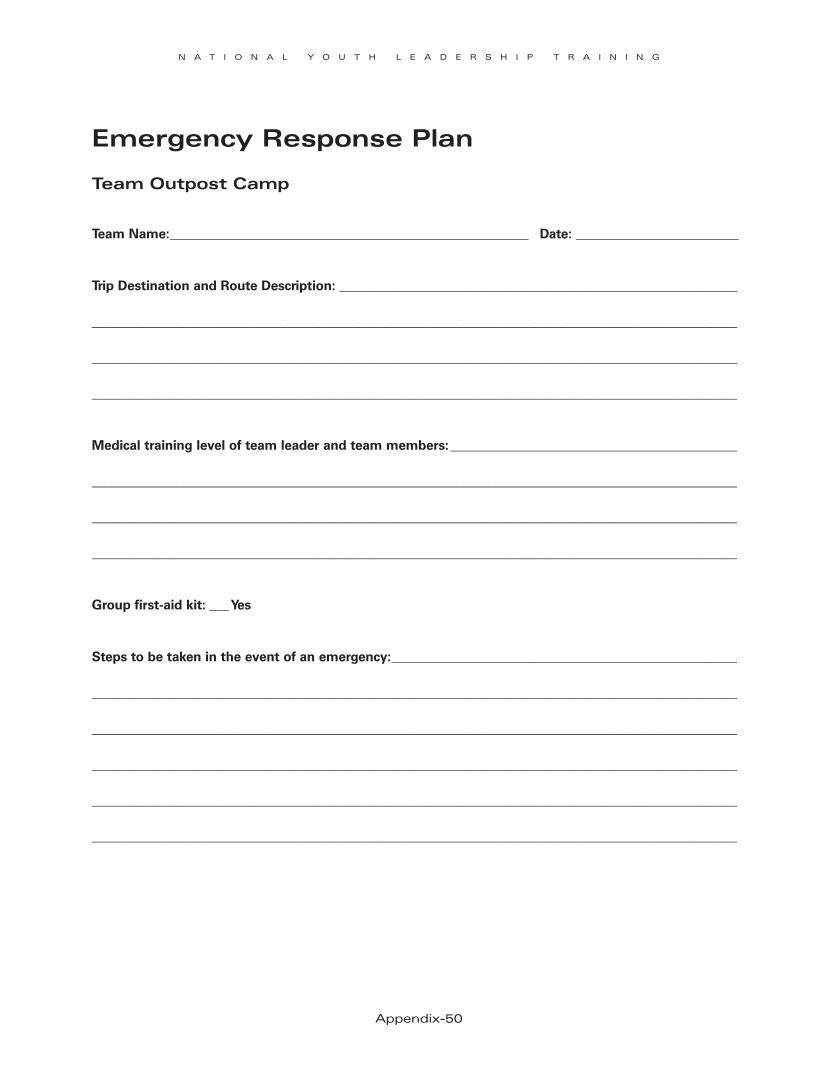
N a t i o N a l Y o u t h l e a d e r s h i p t r a i N i N g
appendix-50
emergency response plan
team outpost Camp
Team Name: _______________________________________________________ Date: _________________________
Trip Destination and Route Description: _____________________________________________________________
___________________________________________________________________________________________________
___________________________________________________________________________________________________
___________________________________________________________________________________________________
Medical training level of team leader and team members: ____________________________________________
___________________________________________________________________________________________________
___________________________________________________________________________________________________
___________________________________________________________________________________________________
Group first-aid kit: ___ Yes
Steps to be taken in the event of an emergency: _____________________________________________________
___________________________________________________________________________________________________
___________________________________________________________________________________________________
___________________________________________________________________________________________________
___________________________________________________________________________________________________
___________________________________________________________________________________________________

N a t i o N a l Y o u t h l e a d e r s h i p t r a i N i N g
appendix-51
Figure-of-eight lashing instructionsLay three spars alongside each other, butt to butt and tip to tip. Starting at the middle of the rope, weave around the spars a few times with each rope end. Tighten with two frapping turns in the spaces between the spars. Finish with a square knot and open the tripod.
To stabilize the tripod, three more spars should be lashed across the butts a foot or so from the base.

N a t i o N a l Y o u t h l e a d e r s h i p t r a i N i N g
appendix-52
historic american Flag presentation: British union Flag
British Union Flag
The British Union flag, sometimes called the Union Jack, was carried by the Jamestown settlers in 1607 and by the pilgrims who arrived on the Mayflower in 1620. Today, it is the official flag of the United Kingdom. Its design can be found in the Hawaii flag and several flags of other nations, including New Zealand and Australia.
Of special note is the fact that the British Union flag was flown upside down—usually a sign of distress—many times when forces were under siege during the Boer War. Scouts will remember one hero of the Boer War: Robert S. S. Baden-Powell, the founder of the worldwide Scouting movement.

N a t i o N a l Y o u t h l e a d e r s h i p t r a i N i N g
appendix-53
historic american Flag presentation: 46-star Flag
46-Star Flag
By 1908, the United States of America had grown to encompass states from the Atlantic to the Pacific. Nearly all of the territory in between had also been recognized with statehood. When Oklahoma joined the Union, the U.S. flag changed to include 46 stars, a design that would last for only four years and the administrations of two presidents, Theodore Roosevelt and William Taft.
For us, there is further significance. This is the flag that was flying over America in 1910 when the Boy Scouts of America had its beginnings.
Let us honor this flag with a song that also honors our nation; let us honor our nation with a song that also honors the land.
“God Bless America”
God bless America, land that I love.Stand beside her, and guide her,Through the night with a light from above.From the mountains, to the prairies,To the oceans, white with foam—God bless America! My home, sweet home.God bless America! My home, sweet home.

N a t i o N a l Y o u t h l e a d e r s h i p t r a i N i N g
appendix-54
historic american Flag presentation: Continental Flag
The Continental FlagA nation’s flag is a stirring sight as it flies in the wind, representing a country’s land, its people, its government, and its ideals. The Egyptians flew the first flaglike symbols thousands of years ago, and people have been flying them ever since.
While many flags have flown over what is now the United States of America, the first flag to represent all the colonies was the Continental Colors, also called the Cambridge Flag or the Grand Union Flag. This flag, on which the British flag appeared at the upper left, was the unofficial American flag in 1775 and 1776. On New Year’s Day 1776, in Cambridge, Massachusetts, George Washington chose it to be flown to celebrate the formation of the Continental Army. Later that year, it became the first American flag to be saluted by another country—the Netherlands.
Let us honor this flag with a song that also honors America:
“America the Beautiful”O beautiful for spacious skies, For amber waves of grain, For purple mountain majesties Above the fruited plain! America! America! God shed his grace on thee And crown thy good with brotherhood From sea to shining sea!

N a t i o N a l Y o u t h l e a d e r s h i p t r a i N i N g
appendix-55
historic american Flag presentation: Flag of 1777 (Betsy ross Flag)
The Flag of 1777 (Betsy Ross Flag)With the signing of the Declaration of Independence, the new American nation needed a flag of its own. On June 14, 1777, Congress passed this resolution:
“Resolved: That the flag of the thirteen United States be thirteen stripes alternate red and white; that the union be thirteen stars, white in a blue field, representing a new constellation.”
Each star and each stripe represented one of the colonies that would become the United States. The Flag of 1777 flew over the young nation for 18 years. George Washington was the only president to serve under this banner. To this day, June 14, the birthday of our flag, is celebrated each year as Flag Day.
Let us honor this flag with a song that also honors America:
“America the Beautiful”O beautiful for spacious skies, For amber waves of grain, For purple mountain majesties Above the fruited plain! America! America! God shed his grace on thee And crown thy good with brotherhood From sea to shining sea!

N a t i o N a l Y o u t h l e a d e r s h i p t r a i N i N g
appendix-56
historic american Flag presentation: serapis Flag
The Serapis Flag
Designed with 13 stripes alternating red, white, and blue, this flag was raised by Capt. John Paul Jones on the British frigate Serapis during the most famous naval battle of the Revolutionary War.
In 1779, after conducting sea raids on the coast of Britain, Jones took command of a rebuilt French
merchant ship that had been renamed the U.S.S. Bonhomme Richard in honor of Benjamin Franklin. In September of that same year, Jones engaged the British frigate Serapis in the North Sea, sailing in close, lashing his vessel to the British ship, and fighting the battle at point-blank range. During the fight, two cannon burst on the Bonhomme Richard. The British captain asked Jones if he was ready to surrender. Jones replied, “Sir, I have not yet begun to fight!” Eventually it was the crew of the Serapis that surrendered, though the Bonhomme Richard was severely damaged. The American sailors board-ed the Serapis and watched from the deck as the Bonhomme Richard sank beneath the waves.
Let us honor this flag with a song that also honors America.
“Columbia, the Gem of the Ocean”O Columbia, the gem of the ocean,The home of the brave and the free,The shrine of each patriot’s devotion,A world offers homage to thee.
Thy mandates make heroes assemble,When Liberty’s form stands in view;Thy banners make tyranny tremble,When borne by the red, white, and blue!
When borne by the red, white, and blue!When borne by the red, white, and blue!Thy banners make tyranny tremble,When borne by the red, white, and blue!

N a t i o N a l Y o u t h l e a d e r s h i p t r a i N i N g
appendix-57
historic american Flag presentation: star-spangled Banner
The Star-Spangled Banner
By 1795, Vermont and Kentucky had joined the Union, bringing the number of states to 15. The new flag, featuring 15 stars and 15 stripes, flew over the nation for the next 23 years and the administrations of five presidents. It was this flag that flew over Fort McHenry the memorable night of its bombardment by the British in 1814, inspiring Francis Scott Key to write the verses of our national anthem.
The actual flag that flew over Fort McHenry that night is now preserved in the Smithsonian National Museum of American History.
Let us honor the flag by singing the first verse of the song it inspired.
“The Star-Spangled Banner”O say, can you see, by the dawn’s early light,What so proudly we hail’d at the twilight’s last gleaming?Whose broad stripes and bright stars, thro’ the perilous fight,O’er the ramparts we watched, were so gallantly streaming?And the rockets’ red glare, the bombs bursting in air,Gave proof thro’ the night that our flag was still there!O say, does that star-spangled banner yet waveO’er the land of the free and the home of the brave?

N a t i o N a l Y o u t h l e a d e r s h i p t r a i N i N g
appendix-58
day two leadership Council Meeting agenda1. Welcome and introductions
2. Purpose of the meeting—what we need to accomplish
3. Reports on the progress being made by each team
4. Announcements
5. Program team and service team assignments
6. Closing
7. Course director’s observations

N a t i o N a l Y o u t h l e a d e r s h i p t r a i N i N g
appendix-59
planning a scouts’ Worship service
The Boy Scouts of America maintains that no member can grow into the best kind of citizen without recognizing an obligation to God.
—From BSA’s Charter and Bylaws
location
■ Lends itself to the occasion and promotes reverence
■ Comfortable for participants
■ Has a focal point (view)
Content
■ In line with Courtesy, Kind, and Reverent
■ Participants are active (responsive readings, singing, etc.)
sample outline
Scouts’ Worship Service
1. Call to worship
2. Hymns or songs
3. Scriptures or reading from a variety of inspirational sources
4. Responsive reading
5. Personal prayer
6. Group prayer
7. Inspirational reading or message
8. Offering (World Friendship Fund)
9. An act of friendship
10. Benediction or closing
a suggested opening
“Prepare yourself for prayer in your usual custom.”

N a t i o N a l Y o u t h l e a d e r s h i p t r a i N i N g
appendix-60
planning tool Work sheet
Date _______________________________________ Name _______________________________________
Goal or Activity _____________________________________________________________________________
Priority (A, B, C)
What (Activity) How
When (Start/Stop; How Long?)
Who

N a t i o N a l Y o u t h l e a d e r s h i p t r a i N i N g
appendix-61
preparing Your plans Work sheet
1. Start, Stop, ContinueStart, Stop, Continue is a tool for testing the effectiveness of your plans. It can be used whenever evaluation is appropriate.
Start—What should we start doing that will make things better?
Stop—What should we stop doing because it is not helping?
Continue—What is a strength and is working well that we want to continue doing?
2. Action Plans
__________________________________________________________________________________
__________________________________________________________________________________
__________________________________________________________________________________
__________________________________________________________________________________
__________________________________________________________________________________
__________________________________________________________________________________
__________________________________________________________________________________
__________________________________________________________________________________
__________________________________________________________________________________
__________________________________________________________________________________
__________________________________________________________________________________
__________________________________________________________________________________
__________________________________________________________________________________
__________________________________________________________________________________
__________________________________________________________________________________
__________________________________________________________________________________
__________________________________________________________________________________

N a t i o N a l Y o u t h l e a d e r s h i p t r a i N i N g
appendix-62
sample Course Meeting plan Work sheet
cOurse Meeting PlAn
Date ______________________________
ActivitY DescriPtiOn run BY tiMe
Preopening
______ minutes
Opening Ceremony
______ minutes
Skills Instruction
______ minutes
Team Meetings
______ minutes
Interteam Activity
______ minutes
Closing
______ minutes
Total 90 minutes of meeting
After the Meeting
CD• CourseDirector’sMinute.

N a t i o N a l Y o u t h l e a d e r s h i p t r a i N i N g
appendix-63
schedule of events for day two (Monday)6:30 a.m. Arise; team breakfast and cleanup
8:00 a.m. Course assembly
8:45 a.m. Setting Your Goals
9:45 a.m. Team meeting
10:15 a.m. Preparing Your Plans
11:30 a.m. Model leadership council meeting
12:15 p.m. Team Lunch Planning Challenge
1:30 p.m. Model course meeting
3:00 p.m. Building pioneering projects
5:00 p.m. Meal preparation
5:30 p.m. Dinner and cleanup
7:15 p.m. Flag ceremony
7:30 p.m. Scouts’ worship service
8:00 p.m. Movie night with cracker barrel
10:00 p.m. Lights out
Course events and activitiesTeam events and activities
Content sessions and their connecting activities

N a t i o N a l Y o u t h l e a d e r s h i p t r a i N i N g
appendix-64
service and program team assignments
service team
The service team period of service is from morning course assembly until the duties are turned over to the new service team at the next ceremony.
Service team duties include:
■ Being responsible for the general cleanliness of the camp, especially for the meeting areas and campfire circle.
■ Assisting the quartermaster with course cracker barrels.
■ Laying campfires when requested and extinguishing the fires when done.
■ Placing lighted latrine lanterns in appropriate places every evening and returning them to the quarter-master each morning, cleaned and filled.
program team
The program team period of service is from the morning course assembly until the duties are turned over to the new program team at the next ceremony.
Program team duties include:
■ Hoisting the flags in the morning at course assembly and lowering the flags in the evening as directed by the course leader through the leadership council.
■ Making sure that the presentation area is set up and the necessary equipment is on hand before the start of each session, as requested by the assistant course director for program.
■ Giving leadership to campfire programs, as requested, and being ready at all times to introduce and lead songs when called upon.
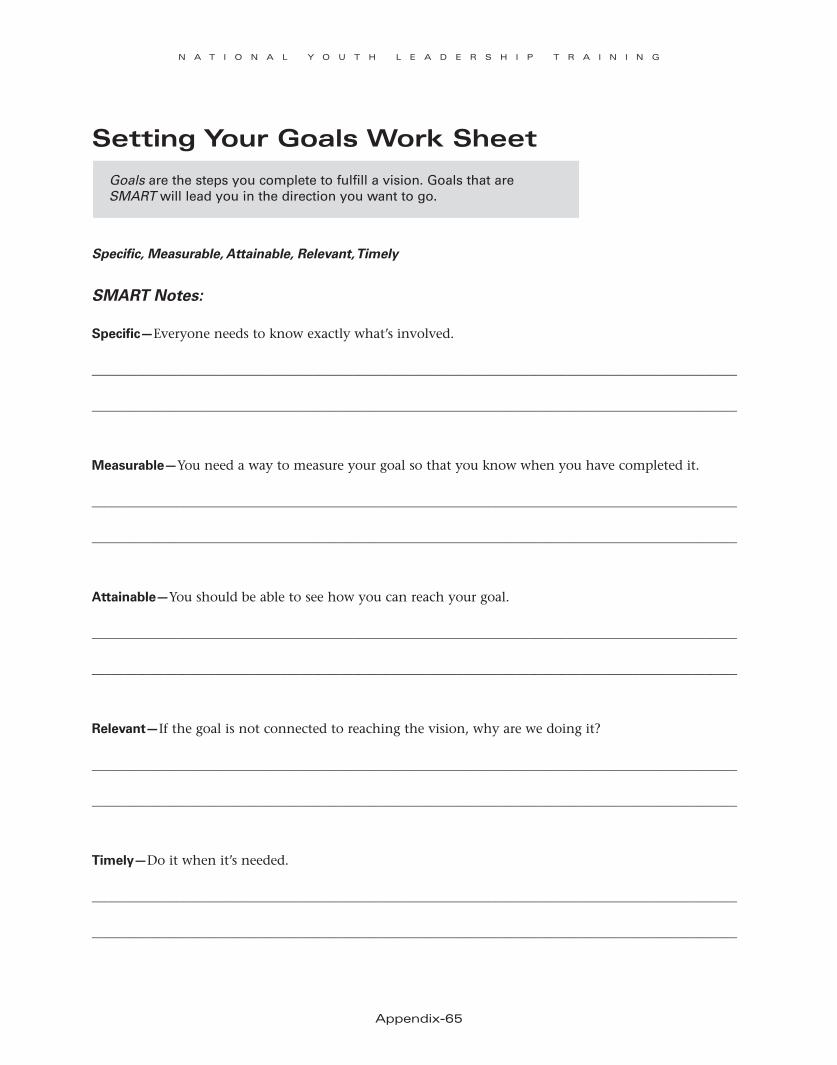
N a t i o N a l Y o u t h l e a d e r s h i p t r a i N i N g
appendix-65
setting Your goals Work sheet
Goals are the steps you complete to fulfill a vision. Goals that are SMART will lead you in the direction you want to go.
Specific, Measurable, Attainable, Relevant, Timely
SMART Notes:
Specific—Everyone needs to know exactly what’s involved.
___________________________________________________________________________________________________
___________________________________________________________________________________________________
Measurable—You need a way to measure your goal so that you know when you have completed it.
___________________________________________________________________________________________________
___________________________________________________________________________________________________
Attainable—You should be able to see how you can reach your goal.
___________________________________________________________________________________________________
___________________________________________________________________________________________________
Relevant—If the goal is not connected to reaching the vision, why are we doing it?
___________________________________________________________________________________________________
___________________________________________________________________________________________________
Timely—Do it when it’s needed.
___________________________________________________________________________________________________
___________________________________________________________________________________________________
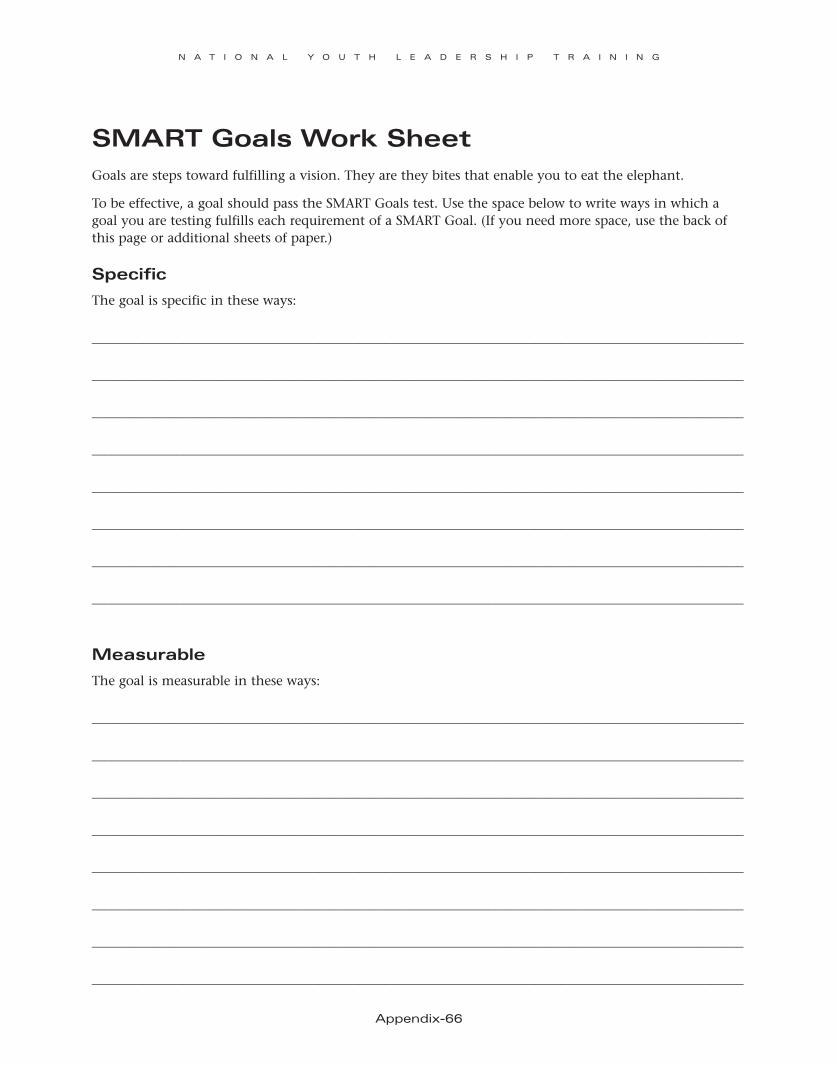
N a t i o N a l Y o u t h l e a d e r s h i p t r a i N i N g
appendix-66
sMart goals Work sheetGoals are steps toward fulfilling a vision. They are they bites that enable you to eat the elephant.
To be effective, a goal should pass the SMART Goals test. Use the space below to write ways in which a goal you are testing fulfills each requirement of a SMART Goal. (If you need more space, use the back of this page or additional sheets of paper.)
specific
The goal is specific in these ways:
____________________________________________________________________________________________________
____________________________________________________________________________________________________
____________________________________________________________________________________________________
____________________________________________________________________________________________________
____________________________________________________________________________________________________
____________________________________________________________________________________________________
____________________________________________________________________________________________________
____________________________________________________________________________________________________
Measurable
The goal is measurable in these ways:
____________________________________________________________________________________________________
____________________________________________________________________________________________________
____________________________________________________________________________________________________
____________________________________________________________________________________________________
____________________________________________________________________________________________________
____________________________________________________________________________________________________
____________________________________________________________________________________________________
____________________________________________________________________________________________________

N a t i o N a l Y o u t h l e a d e r s h i p t r a i N i N g
appendix-67
attainable
The goal is attainable in these ways:
____________________________________________________________________________________________________
____________________________________________________________________________________________________
____________________________________________________________________________________________________
____________________________________________________________________________________________________
____________________________________________________________________________________________________
relevant
The goal is relevant to the vision in these ways:
____________________________________________________________________________________________________
____________________________________________________________________________________________________
____________________________________________________________________________________________________
____________________________________________________________________________________________________
____________________________________________________________________________________________________
timely
The goal is timely in these ways:
____________________________________________________________________________________________________
____________________________________________________________________________________________________
____________________________________________________________________________________________________
____________________________________________________________________________________________________
____________________________________________________________________________________________________

N a t i o N a l Y o u t h l e a d e r s h i p t r a i N i N g
appendix-68
duties of a patrol leader—From the Patrol Leader Handbook
■ Represent your patrol at all patrol leaders’ council meetings and the annual program planning conference.
■ Keep patrol members informed of decisions made by the patrol leaders’ council.
■ Take a key role in planning, leading, and encouraging patrol meetings and activities.
■ Help the patrol prepare to participate in all troop activities.
■ Learn about the abilities of other patrol members. Fully involve them in patrol and troop activities by assigning them specific tasks and responsibilities.
■ Attend youth leader training and continue to work on advancement.
■ Encourage patrol members to complete their own advancement requirements.
■ Set a good example to your patrol by having a positive attitude, wearing the Scout uniform, showing patrol spirit, and expecting the best from yourself and others.
■ Devote the time necessary to be an effective leader.
■ Work with others in the troop to make the troop go.
■ Live by the Scout Oath and Scout Law.

N a t i o N a l Y o u t h l e a d e r s h i p t r a i N i N g
appendix-69
the teaching edgeExplain—Explain what you are going to teach and why.
Demonstrate—Demonstrate the skill. Ensure that your audience can see and hear clearly. Go at a slow pace so that each step in the process is clearly demonstrated.
Guide—Provide the materials and tools needed for learners to complete the exercise. Coach/guide the learners as they go through the exercise the first time. A learner must do a new activity at least twice. That’s how real learning takes place. Repetition is essential. Doing something once is not enough.
Enable—Evaluate the effort. Encourage the learners to keep trying until they master the skill. Only then have you enabled them to go off on their own and use that skill whenever they feel it is appropriate.
Remember, teaching is not effective unless learning takes place!
What would a person in each phase of learning need from a teacher?
Forming: __________________________________________________________________________________________
Storming: _________________________________________________________________________________________
Norming: __________________________________________________________________________________________
Performing: _______________________________________________________________________________________

N a t i o N a l Y o u t h l e a d e r s h i p t r a i N i N g
appendix-70
troop and Crew leadership hints
the leading edge
■ Shared values are a foundation of any team. The Scout Oath, Scout Law, and Venturing Oath are expressions of the BSA’s values. Rely on them as you are making ethical choices in unit leadership.
■ Offer a vision of success. The unit’s annual program plan is a blueprint for exciting activities and outdoor adventures. Use it to focus Scouts’ energies and enthusiasm.
■ Recognize achievement differences. Some Scouts learn and advance faster than others. Give additional assistance to Scouts taking more time to learn skills and to gain Scouting experience. Offer advanced Scouts added responsibility and leadership positions.
■ Model ideal behavior. Demonstrate yourself the kind of behavior and achievement you expect from everyone in the troop. Be what you want them to be. Have high expectations for yourself, and expect the best in others.
■ Acknowledge differences. Look for ways to draw on individual strengths to the advantage of the entire unit. Develop trust by keeping the interests of the unit members in mind.
■ Make meetings count. Get outdoors and have adventures. Working through the leadership council, develop an exciting program, then carry it out.
■ Respect and value others. Help each unit member feel that he has something important to contribute to the success of his patrol and troop or crew.

N a t i o N a l Y o u t h l e a d e r s h i p t r a i N i N g
appendix-71
schedule of events for day three (tuesday)6:30 a.m. Arise; breakfast and cleanup
7:45 a.m. Course assembly
8:00 a.m. Developing Your Team
9:30 a.m. Solving Problems
10:15 a.m. Problem-Solving Round-Robin
11:30 a.m. Leadership council meeting
12:15 p.m. Lunch and cleanup
1:00 p.m. Course meeting
2:30 p.m. The Leading EDGE
3:30 p.m. Team games
4:00 p.m. Team meeting
4:45 p.m. Meal preparation
6:00 p.m. Dinner and cleanup
7:15 p.m. Flag ceremony
7:30 p.m. Lego™ Challenge/Realistic First Aid*
10:00 p.m. Lights out
Course events and activitiesTeam events and activities
*Consider omitting “Realistic First Aid” from participants’ schedules.
Content sessions and their connecting activities

N a t i o N a l Y o u t h l e a d e r s h i p t r a i N i N g
appendix-72
Conflict resolution Checklist1. Be aware of yourself.
2. Be aware of others.
3. Listen.
4. Use EAR to:
Express—What do you want and what are you doing to get it?
Address—Why is that working or not working?
Resolve—What ways are available to solve the problem?

N a t i o N a l Y o u t h l e a d e r s h i p t r a i N i N g
appendix-73
decision-Making toolsBrainstorming—Allows for the free flow of ideas.
___________________________________________________________________________________________________
___________________________________________________________________________________________________
___________________________________________________________________________________________________
___________________________________________________________________________________________________
Consensus—Occurs when a discussion leads to agreement without resorting to a vote.
___________________________________________________________________________________________________
___________________________________________________________________________________________________
___________________________________________________________________________________________________
___________________________________________________________________________________________________
Multivoting—Allows team members to trim a list to a manageable size.
___________________________________________________________________________________________________
___________________________________________________________________________________________________
___________________________________________________________________________________________________
___________________________________________________________________________________________________
Parking Lot—Helps a team hold onto fresh ideas whose time has not yet arrived.
___________________________________________________________________________________________________
___________________________________________________________________________________________________
___________________________________________________________________________________________________
___________________________________________________________________________________________________

N a t i o N a l Y o u t h l e a d e r s h i p t r a i N i N g
appendix-74
Making ethical decisions
Steps to Ethical Decision MakingLife is about choices. Some are big choices, some are small. Whatever the case, there are some very clear steps we can follow to make choices that are in keeping with our ethical beliefs.
step one: getting the Facts straight
Any attempt to make a good decision has to begin with getting the facts of the situation straight. In some cases that seem difficult at first, additional facts are enough to make the correct course of action apparent.
step two: Figure out What Kind of Choice it is
The categories of choices are:
■ Those that are Trivial
■ Those that are Right vs. Wrong
■ Those that are Right vs. Right
Our personal values are reflected in our behaviors. Behavior is not “Do I think the right thing?” but rather “Do I DO the right thing?”

N a t i o N a l Y o u t h l e a d e r s h i p t r a i N i N g
appendix-75
schedule of events for day Four (Wednesday)6:30 a.m. Arise; breakfast and cleanup
8:00 a.m. Course assembly
8:45 a.m. The Teaching EDGE
9:45 a.m. Team activity
10:30 a.m. Resolving Conflict
11:30 a.m. Leadership council meeting
12:00 p.m. Lunch and cleanup
1:00 p.m. Course meeting
2:30 p.m. Geocaching Game
4:00 p.m. Team meeting
4:45 p.m. Meal preparation
6:00 p.m. Dinner and cleanup
7:15 p.m. Flag ceremony
7:30 p.m. Making Ethical Decisions
8:30 p.m. Team campfires (with cracker barrel snacks)
10:00 p.m. Lights out
Course events and activitiesTeam events and activities
Content sessions and their connecting activities

N a t i o N a l Y o u t h l e a d e r s h i p t r a i N i N g
appendix-76
leading Yourself Work sheetThree questions:
1. Where am I now?
____________________________________________________________________________________________________
____________________________________________________________________________________________________
____________________________________________________________________________________________________
____________________________________________________________________________________________________
2. Where do I want to be?
____________________________________________________________________________________________________
____________________________________________________________________________________________________
____________________________________________________________________________________________________
____________________________________________________________________________________________________
3. How do I close the gap between where I am now and where I want to be?
____________________________________________________________________________________________________
____________________________________________________________________________________________________
____________________________________________________________________________________________________
____________________________________________________________________________________________________
The Foundation of LeadershipBE—Who you are and how you use your strengths
kNOW—The skills of teaching and helping others achieve their goals
DO—Tools for communicating, solving problems, and resolving conflicts

N a t i o N a l Y o u t h l e a d e r s h i p t r a i N i N g
appendix-77
schedule of events for day Five (thursday)6:30 a.m. Arise; breakfast and cleanup
8:00 a.m. Course assembly
9:00 a.m. Leading Yourself
10:00 a.m. Leadership council meeting
10:45 a.m. Team meeting
11:45 a.m. Lunch and cleanup
1:00 p.m. Valuing People
2:15 p.m. Course assembly to begin the Outpost Camp
2:30 p.m. Outpost Camp
Course events and activitiesTeam events and activities
Content sessions and their connecting activities

N a t i o N a l Y o u t h l e a d e r s h i p t r a i N i N g
appendix-78
Communicating Well Work sheet
Aristotle’s Model for Effective CommunicationMessage Sender Receiver
Effective Communication Work Sheet
Checklist for organizing the Message
Use 5WH to organize a message you want to communicate.
■ Who?
■ What?
■ When?
■ Where?
■ Why?
■ How?
Checklist for Being an effective sender
1. Here is the reason I’m asking for some of your time.
2. Here is my idea.
3. Let me summarize the situation for you. (Use 5WH.)
4. Reinforce the benefits.
■ Here’s why it makes sense.
■ Here’s how it helps us reach our goals.
■ Here’s how it helps us complete an action plan.
■ Here’s what’s in it for you.
5. Let’s discuss the steps to turn this idea into action.
Checklist for Being an effective listener
1. Repeat the message back to the speaker.
■ Rephrase the message. “Here’s what I hear you saying.”
OR
■ Give your understanding of the message. “From what you are saying, I understand this is what you want me to do.”
2. Ask for more information. “Tell me more about that.”

N a t i o N a l Y o u t h l e a d e r s h i p t r a i N i N g
appendix-79
developing a personal Vision Work sheetPersonal and Confidential
Name ___________________________________________________ Unit ____________________________________
Instructions: This personal conference goals sheet is a contract that you are being asked to make with yourself. You will share it with your unit leader, and together you will develop some goals to make your unit better.
During the week, you are going to learn about leadership. Using what you have learned in NYLT, you can make a real difference in your success as a youth leader. Use this space to record your feelings about leader-ship, especially your personal vision and goals, and how to accomplish them. Your vision and goals may concern your troop or crew (making it better) or yourself (becoming a better leader).
Record your personal vision.
___________________________________________________________________________________________________
___________________________________________________________________________________________________
___________________________________________________________________________________________________
___________________________________________________________________________________________________
___________________________________________________________________________________________________
List three personal goals to ensure that your personal vision is successful.
1. ________________________________________________________________________________________________
___________________________________________________________________________________________________
___________________________________________________________________________________________________
___________________________________________________________________________________________________
2. ________________________________________________________________________________________________
___________________________________________________________________________________________________
___________________________________________________________________________________________________
___________________________________________________________________________________________________
3. ________________________________________________________________________________________________
___________________________________________________________________________________________________
___________________________________________________________________________________________________
___________________________________________________________________________________________________

N a t i o N a l Y o u t h l e a d e r s h i p t r a i N i N g
appendix-80
List five personal plans to ensure your personal goals are met.
1. ________________________________________________________________________________________________
___________________________________________________________________________________________________
___________________________________________________________________________________________________
___________________________________________________________________________________________________
___________________________________________________________________________________________________
2. ________________________________________________________________________________________________
___________________________________________________________________________________________________
___________________________________________________________________________________________________
___________________________________________________________________________________________________
___________________________________________________________________________________________________
3. ________________________________________________________________________________________________
___________________________________________________________________________________________________
___________________________________________________________________________________________________
___________________________________________________________________________________________________
___________________________________________________________________________________________________
4. ________________________________________________________________________________________________
___________________________________________________________________________________________________
___________________________________________________________________________________________________
___________________________________________________________________________________________________
___________________________________________________________________________________________________
5. ________________________________________________________________________________________________
___________________________________________________________________________________________________
___________________________________________________________________________________________________
___________________________________________________________________________________________________
___________________________________________________________________________________________________

N a t i o N a l Y o u t h l e a d e r s h i p t r a i N i N g
appendix-81
schedule of events for day six (Friday)TBD Arise; breakfast and cleanup
8:15 a.m. Return from Outpost Camp
8:30 a.m. Course Assembly
8:45 a.m. Shower and prepare for day
10:00 a.m. Finding Your Vision, Part Two
11:00 a.m. Leadership council meeting
11:30 a.m. Team meeting
12:00 p.m. Lunch
1:30 p.m. Communicating Well, Part Two
2:30 p.m. Team presentations: The Quest for the Meaning of Leadership
3:30 p.m. Camp breakdown/feast preparation
5:30 p.m. Feast
7:00 p.m. Course Closing: Creating a Future
Course events and activitiesTeam events and activities
Content sessions and their connecting activities

N a t i o N a l Y o u t h l e a d e r s h i p t r a i N i N g
appendix-82
National Youth leadership training
recognition requestFrom (Council): __________________________________________________ Council Number: ________________
Headquarters (City): ______________________________________________ Area: ___________________________
To (Regional Director): ______________________________________________________________________________
Person to Be RecognizedName: _______________________________________ Address: ____________________________________________
City: _____________________________________________ State: _______________ Zip Code: ________________
Home Telephone: ____________________________ E-mail: _____________________________________________
Recognition Type(Select one of the following and complete all related sections in the table.)
3 beads for NYLT assistant course director Completed Wood Badge for the 21st Century and earned beads. Attended Trainer’s EDGE two years or less before staffing NYLT. Staffed a NYLT or NAYLE course as an assistant course director who provided training and oversight
of youth staff. No other adult positions qualify. (Note: The quartermaster position may be classified as an assistant course director if providing content instruction and/or oversight for the youth staff.)
4 beads for NYLT course director Staffed Wood Badge for the 21st Century as a troop guide. Completed NYLT area/regional course director conference within one year prior to NYLT or NAYLE
service as a course director, and signed course director’s pledge. Attended Trainer’s EDGE two years or less before staffing NYLT. Served as a course director for NYLT or NAYLE.
Please fill in the details for the recognition being requested. A copy of the application form for the council NYLT program must be attached to this submission. Recognitions are presented on behalf of the National Council, region, and local council, and cannot be made without the written approval of the region.
Item Date (Month/Year)
Earned Wood Badge for the 21st Century beads
Served as Wood Badge for the 21st Century troop guide
Last attended Trainer’s EDGE
Last attended area/regional NYLT conference
Last served as NYLT assistant course director
Last served as NYLT course director
N a t i o N a l Y o u t h l e a d e r s h i p t r a i N i N g
appendix-83
Host Council Approval
Signed: __________________________________________________ Date: ___________________________________ Host Council Training Chair
Signed: __________________________________________________ Date: ___________________________________ Host Council Scout Executive
Area Approval
We have reviewed this request and recommend the requested recognition. (If not approved, the area director should contact the local council.)
Signed: __________________________________________________ Date: ___________________________________ NYLT Area or Regional Coordinator
Action by Regional Service Center
This recognition ______ (is) _____ (is not) approved.
(If approved, recognition items may now be ordered.)
Signed: __________________________________________________ Date: ___________________________________ For the Region
After the request is signed and approved by the training chair and Scout executive, mail the original request to:

N a t i o N a l Y o u t h l e a d e r s h i p t r a i N i N g
appendix-84
Valuing others Work sheet
GOALS are the steps you complete to fulfill a vision. Goals that are SMART will lead you in the direction you want to go.
Specific, Measurable, Attainable, Relevant, Timely
ROPE—An effective approach to increasing a team’s diversity
Reach—Look to those who are not like you in terms of religion, race, ability, culture, and traditions.
___________________________________________________________________________________________________
___________________________________________________________________________________________________
Organize—Do all you can to help deliver the promise of the Scouting program.
___________________________________________________________________________________________________
___________________________________________________________________________________________________
Practice—Practice using the skills of NYLT to build on the diversity in your patrol, troop, or crew.
___________________________________________________________________________________________________
___________________________________________________________________________________________________
Experience—The experiences you have as you include others in your unit can make your Scouting experience richer.
___________________________________________________________________________________________________
___________________________________________________________________________________________________

N a t i o N a l Y o u t h l e a d e r s h i p t r a i N i N g
appendix-85
Credits
AcknowledgmentsThe Boy Scouts of America would like to sincerely thank all members of the production teams. The publication of this new youth leadership syllabus was, in part, made possible by the Hillcourt Trust, which is dedicated to furthering the ideals of Scouting so valued by its namesake, Bill Hillcourt. Special thanks to volunteers Dan Zaccara, Rich Owens, Lisa Owens, Mike Dunne, and Tom Krouskop for their unending dedication, creativity, and energy.
Publishing Team
National Youth leadership training task Force
*Florida Sea Base design team member
National pilot Course Councils
■ Circle Ten Council, Dallas, Texas
■ Detroit Area Council, Detroit, Michigan
■ Lincoln Heritage Council, Louisville, Kentucky
■ Sam Houston Area Council, Houston, Texas
*John Alline
Tim Andrechek
Steve Ardoneli
*Tony Aretz
*Scott Beckett
*Bob Birkby
*Roy Blackwood
Larry Carter
Jack Chandler
Ron Coleman
Maria Dahl
*Mike Dunne
*John Glockner
Jim Grossman
Mike Hoffman
*Linda Hughes
Bobby Kennedy
*Tom Krouskop
Bobby Lyle
*Lisa Owens
*Rich Owens
Guru Raj
*Gary Schroeder
Suzanne Showstack
Doyle Strong
Mark Stolowitz
*Dan Zaccara
Jennifer Zingg

N a t i o N a l Y o u t h l e a d e r s h i p t r a i N i N g
appendix-86
Notes

N a t i o N a l Y o u t h l e a d e r s h i p t r a i N i N g
appendix-87
Notes

N a t i o N a l Y o u t h l e a d e r s h i p t r a i N i N g
appendix-88
Notes

Enclosed is the National Youth Leadership Training DVD, which contains educational slides, videos, and interactive activities for use during NYLT courses. Its use requires a
DVD player or a computer with DVD capabilities.

Boy ScoutS of AmericA1325 West Walnut Hill LaneP.o. Box 152079irving, tX 75015-2079http://www.scouting.org
SKu 34490
34490 2011 Printing