Non-residential Science Workshop - Azim Premji …azimpremjifoundation.org/sites/default/files/Non...
36
Non-residential Science Workshop Gurumitkal (December 19-20, 2013) Yadgir (December 20-21, 2013) Report by Akkamahadevi Patil, Science team Yadgir District Institute
Transcript of Non-residential Science Workshop - Azim Premji …azimpremjifoundation.org/sites/default/files/Non...
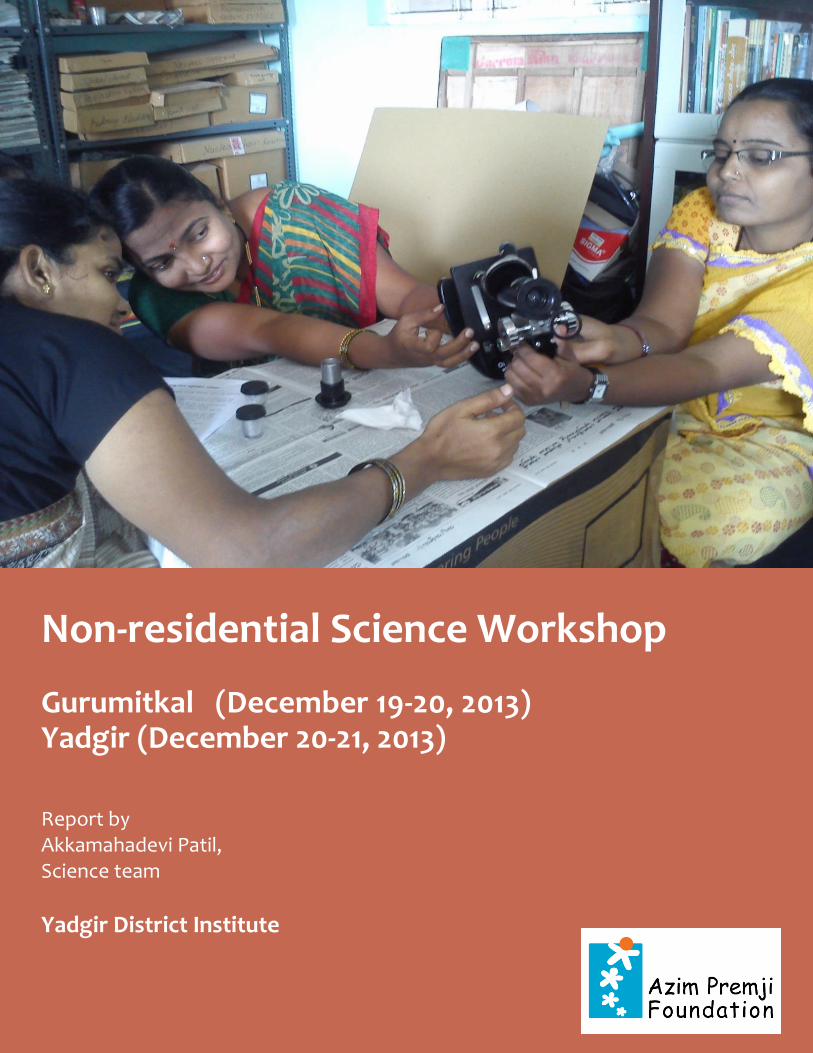
Non-residential Science Workshop Gurumitkal (December 19-20, 2013) Yadgir (December 20-21, 2013)
Report by Akkamahadevi Patil, Science team
Yadgir District Institute
Preface
The education policy documents such as NCF 2005 and NCFTE h a v e
emphasized the need for localized, contextual curriculum- based textbooks and
pedagogy. In order to align school curriculum with these policies, the teacher must
go beyond prescribed textbooks.
Both Gandhi, who professed education from work and Tagore who professed
education from nature, proposed that the teacher must go beyond the prescribed
text. According to Gandhi (Navajivan, 16 June 1928 (CW 36, pp. 352–3) (Translated
from Gujarati), “A good teacher would never content himself with summarizing or explaining the
meaning of difficult passages. Time and again, he would go beyond the text-books
and present his subject to the pupil in a vivid manner in the same way as an artist
does. The best text-book may be compared to the best photograph. However, just
as a painting by an artist although second rate is invariably superior to a
photograph, similar is the case with a real teacher. A true teacher introduces the
pupil to his subject, creates in him interest for the subject and enables him to
understand it independently”.
In alignment with the above, District institute Yadgir is striving to support teachers through various activities such as forums, melas, workshops and conferences to enable them to become more effective. The science team in Yadgir planned two-day non-residential workshops as a part of these efforts.
Objectives
To create a space for teachers to go beyond textbooks and practice science
concepts
To provide opportunities for peer group learning
To provide opportunities for self-learning for the team in facilitating and
organizing workshops.

Preparations
Our science team in Yadgir is in itself an experiment. All activities are based on the
the theme “let us experiment”. The composition of the team is such that each one
of us has to learn first and then do the work. Hence while planning for 2013-14,
we deliberately placed the workshop activity in the third quarter of the year.
From the formation of the team every resource person set ‘facilitating a workshop’
(planning, designing and executing independently) as a primary goal and started
their journey towards that. Readings/literature survey, content mapping and lab
onsite support during lab manual preparation for high school labs, helped us in
enriching our content knowledge. This enabled us in forming and conducting
voluntary teacher forums on Saturday/Sundays regularly with the help of three
TLCs (Shahapur, Yadgir and Gurmitkal). These forum activities provided us several
opportunities to interact with teachers closely to understand them and their needs.
Our team also participated in codev activities to acquire requisite capacity in
module preparation for workshops and enrichment of content knowledge. All
these activities/processes instilled confidence in us to conduct two non-
residential workshops at Yadgir and Gurmitkal TLCs.
In consultation with TLC coordinators,
teachers and education functionaries,
we decided to organize the two day
non-residential workshops on 19th
and 20th Dec, 2013 at Gurumitkal and
on 20th
and 21st Dec 2013 at Yadgir.
The TLC coordinators, Chetan, Roopa,
Chandrakant and Hanumanthappa
were actively involved in the process
of need analysis of teachers, material
procurement and other arrangements from November onwards.

Science team members focused on preparation
of modules and materials required for the
workshop. Among the team members several
meetings and discussions took place for
finalizing the module and content. The prepared
modules were presented to the team on 6th
Dec, 2013. Anil Angadki added value to the
prepared modules by way of his
suggestions/comments. Then the final list of
requirements was prepared and shared
with TLC coordinators for procurement. With this preparation we arrived at the
implementation stage.
Schedule of Nonresidential two days science teachers’ workshop
Place: Gurumitkal Date: 19/12/2013 to 20/12/2013
Place: Yadgir Date: 20/12/2013 to 21/12/2013
Day One
Time Name of the
content
Objective Mode of
transaction
Facilitator
9:30 to
10 am
introduction To understand
Participants
Activity of
identifying scientist and their inventions
10:00
am to 1:00 pm
Laws of
reflection and Multiple reflection using plane mirrors
To provide
experiential learning opportunities to the participants through different experiments
Group activity Shankar

Tea break : 11:00 am to 11:15 Lunch break : 1:00 pm to 2.00pm
Session – 2
2:00 pm
to 4: 30 pm
Image
formation by spherical mirrors
To analyze
the formation of image by concave and convex mirrors
Group activity Naseema
Tea break: 3.00 pm to 3:15 pm
Day -2
Session – 1
9:30 am to 1:00 pm
Exploration of Microscope and
Microorganisms
To enable the participants to handle the Microscope and to develop observation skills.
Group activity Akkamahadevi
Tea break : 11:00 am to 11:15 am Lunch Break : 1:00 pm to 2:00 pm
Session – 2
2:00 pm to 4:30 pm
Introduction of Acids , Base and
Salts
To give hands on experience of the acids, base and salts.
Group activity Anand and Pralhad
4:30 pm to 5:00
pm
Feedback
Tea Break : 3:00 pm to 3:15 pm

19th Dec, 2013
Gurumitkal
As per the schedule the workshop at Gurumitkal began at 9.30 am. Chandrakant
Reddy, TLC coordinator, Gurumitkal greeted the gathering in his welcome address.
Akkamahadevi, Coordinator, Science team briefed the team about the workshop
in her introductory speech.
Mr. Venkat Reddy, BRP, Gurumitkal block and Mr. Narayan reddy, CRP,
Gurumitkal cluster were present on the occasion. They encouraged the
participants to reap maximum benefit from the workshop.
20th Dec, 2013
Yadgir
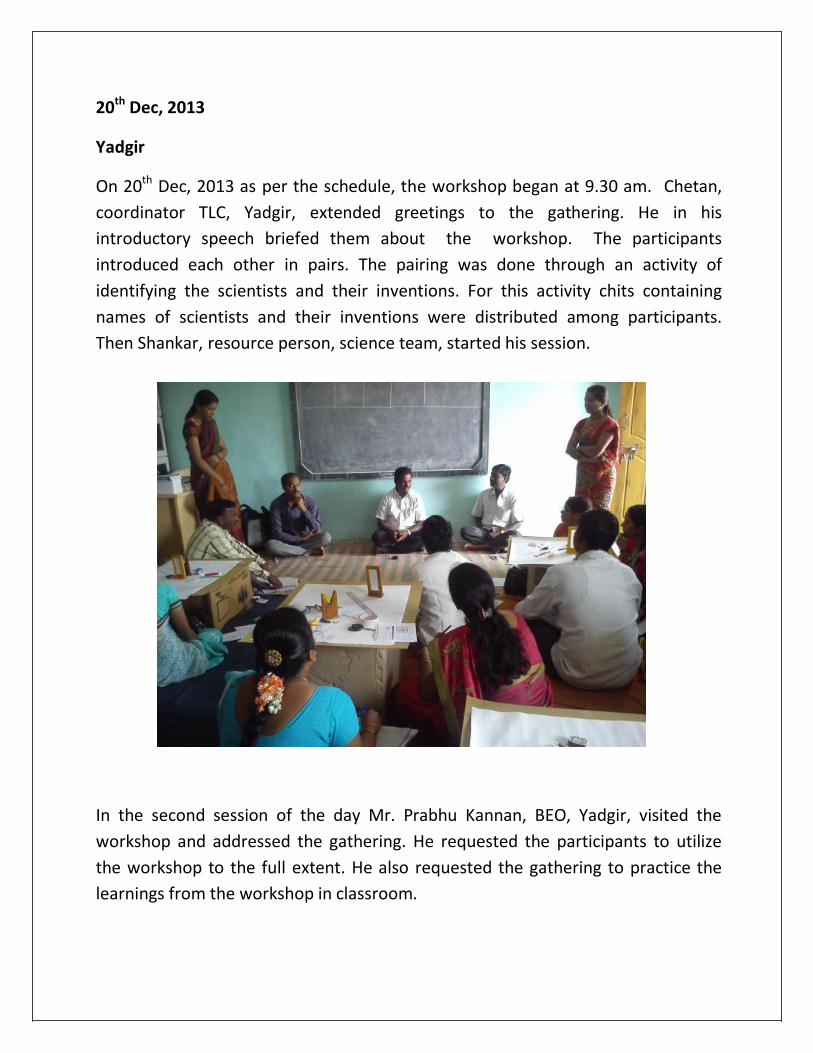
On 20th Dec, 2013 as per the schedule, the workshop began at 9.30 am. Chetan,
coordinator TLC, Yadgir, extended greetings to the gathering. He in his
introductory speech briefed them about the workshop. The participants
introduced each other in pairs. The pairing was done through an activity of
identifying the scientists and their inventions. For this activity chits containing
names of scientists and their inventions were distributed among participants.
Then Shankar, resource person, science team, started his session.
In the second session of the day Mr. Prabhu Kannan, BEO, Yadgir, visited the
workshop and addressed the gathering. He requested the participants to utilize
the workshop to the full extent. He also requested the gathering to practice the
learnings from the workshop in classroom.
Since the same modules were transacted in both the workshops a common session
flow was maintained. The highlights from the sessions are as follows.
Highlights of the module:
The modules consisted of the topic/concepts that emerged out of the need analysis.
Biology included exploration of microscope, microbes, and microscopic objects
In physics, reflection of light by plane mirror and image formation by
spherical mirrors was dealt with.
In chemistry introduction to acids and bases were dealt with. Each subject was allotted a session of 3 hours duration.
Each module consisted of hands-on activities with detailed instructions,
points for group discussions , facilitator’s instructions, instructions for the
group and list of materials.
The session flow for both the workshops was as follows.
Day one:
Session 1: 10 am to 1 pm Facilitator: Shankar
Topic: Reflection of Light in Plane Mirror
Shankar started with the introduction activity. The name of scientists and their
inventions were used to pair up participants and introduce the other person in the
pair. Then participants are divided into five groups consists of 3 or 4 members.
The discussion about Importance of light in our daily life was done in groups. After
the discussion groups presented their points to the gathering.

Activity 1: Light Travels in a Straight Line
In a group all the participants verified the above
statement using candle and a pipe made of
chart paper. They rolled the chart paper into
a straight pipe and observed the candle
through it.
Then they bent the pipe in ‘L’ shape and observed the candle. After the activity they discussed their observations and concluded that light travels in a straight line.
Activity 2: Formation of Image in Plane Mirror
All the participants in groups with the help of a
plane mirror studied the formation of images.
They observed object and image distance,
upright or left-right images, size of the images,
etc
Then they wrote their names on a paper
(semitransparent) and observed it in the mirror.
They compared the same with the back side view
looking through paper. After the activity they
discussed the findings. They came to the following conclusions:
1. Image is upright. 2. It is the same size as of the object. 3. The image is as far behind the mirror as the object in front of it. 4. It is reversed, left > right

Activity 3: Multiple Reflections
All the participants in groups, with the help of
two plane mirrors observed the number of
images formed by mirrors when held at
different angles.
During the observation they noticed that as
the angle between the two mirrors
increased the number of images formed went
on decreasing and they verified the image
formation rule: (No. of images) N=(360/A)-1.
Then they plotted a graph with the collected data (N vs A). Then they tried to find
the value of N for unknown angles. During the activity a lot of discussion took
place. What happens when A=0, and how to observe the same practically was
discussed at length. Then Shankar provided a solution to the practical problem by
suggesting that they make a hole in the center of the mirror and try to observe the
number of images through the hole.
Activity 4: Laws of Reflection
All the participants in groups, with the help of a plane mirror, A4 size paper and a
toy laser beamer verified the laws of reflection. They folded the paper at 90, 45,
30, and 60 degrees and marked them accordingly. Then they placed a plane mirror
so that it is perpendicular to the 90 degree line (fold).
Then they pointed the toy laser beamer at
the mirror along different angles on one side of
the 90 degree line so that the beam glazes the
surface of the paper along the folded line. Then
the reflected beam on the other side of the 90
degree line was observed. Each time they found
that the angle of incidence is equal to the
angle of reflection. And the reflected ray grazes
the surface of the paper. By this activity they validated the laws of reflection.
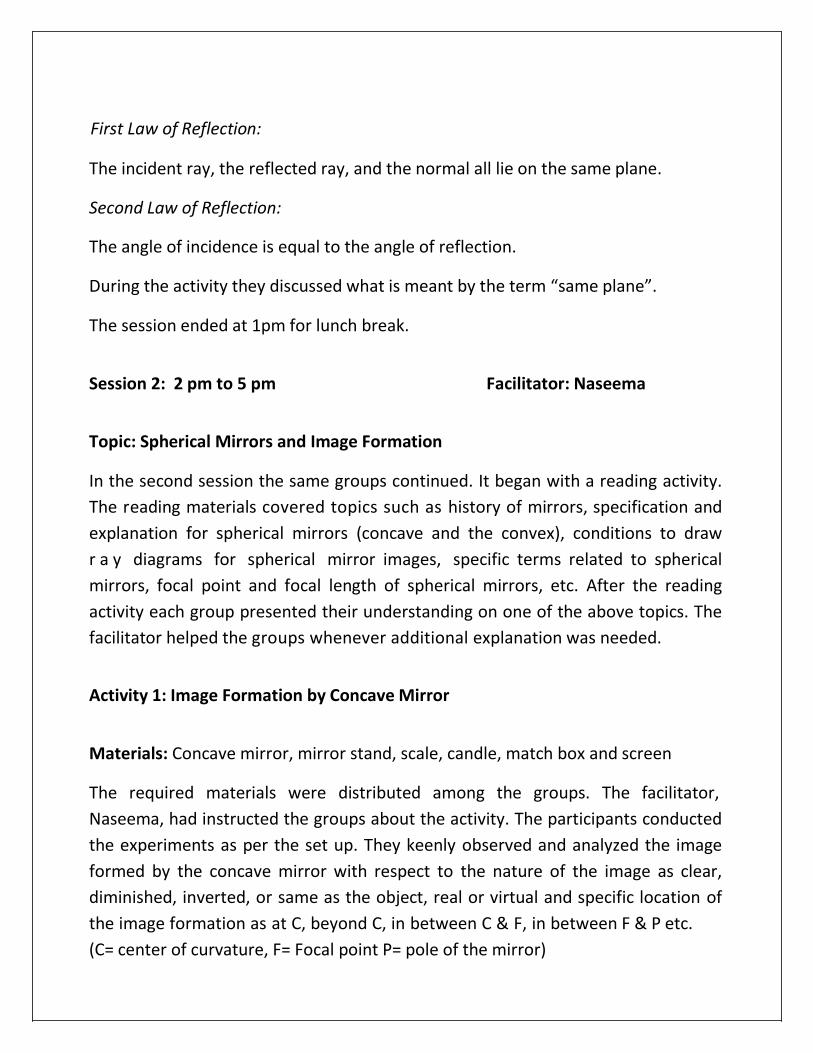
First Law of Reflection:
The incident ray, the reflected ray, and the normal all lie on the same plane.
Second Law of Reflection:
The angle of incidence is equal to the angle of reflection.
During the activity they discussed what is meant by the term “same plane”.
The session ended at 1pm for lunch break.
Session 2: 2 pm to 5 pm Facilitator: Naseema
Topic: Spherical Mirrors and Image Formation
In the second session the same groups continued. It began with a reading activity.
The reading materials covered topics such as history of mirrors, specification and
explanation for spherical mirrors (concave and the convex), conditions to draw
r a y diagrams for spherical mirror images, specific terms related to spherical
mirrors, focal point and focal length of spherical mirrors, etc. After the reading
activity each group presented their understanding on one of the above topics. The
facilitator helped the groups whenever additional explanation was needed.
Activity 1: Image Formation by Concave Mirror
Materials: Concave mirror, mirror stand, scale, candle, match box and screen
The required materials were distributed among the groups. The facilitator,
Naseema, had instructed the groups about the activity. The participants conducted
the experiments as per the set up. They keenly observed and analyzed the image
formed by the concave mirror with respect to the nature of the image as clear,
diminished, inverted, or same as the object, real or virtual and specific location of
the image formation as at C, beyond C, in between C & F, in between F & P etc.
(C= center of curvature, F= Focal point P= pole of the mirror)

(P F= focal length (f)), CP= radius of curvature=2f)
The participants marked the positions C, F and P using the value of ‘f’ given
on the lens cover on a paper.
Experimental set up:
Case 1: When object is placed far from the C, (CP= 2f i.e. 2 times the distance of
the focal length)
Case 2: When the object is placed at C.
Case 3: When the object is placed between C and F.
Case 4: When the object is placed at F.
Case 5: When the object is placed between F and P.
Each group presented their findings and explanation about the experimental facts
they performed in the group. The facilitator summarized the findings of the
activity in a table to help participants understand better.

Table of Findings
Conclusion The nature, position and size of the image formed by a concave mirror depend on
the position of the object in relation to points P, F and C. The image formed is real
for some positions of the object. It is found to be a virtual image for a certain other
position. The image is either magnified, reduced or has the same size, depending
on the position of the object. Concave mirrors can produce real and virtual
images.
The uses of concave mirrors were also discussed by the participants.
Observations When the
object is placed far from C.
When
the object is placed at C.
When the
object is placed between C and F.
When the
object is placed at F.
When the
object is placed in between P and F.
Image formation point
Between
C and F.
AT C. (beside
C)
Beyond the C
At infinity Behind
the mirror
Nature of the
Image
Real
Image
Real
image
Real
image
Real image Virtual
image
Size of the image as compared to the object
Image size is reduced
Size of the
image is same as the
object
Image size is larger than the object
Image size is larger than the object (highly enlarged)
Enlarged
Pattern of image formed as compared to the object
Inverted Inverted Inverted Inverted Erect

Activity 2: Image Formation by Convex Mirror
Case 1: Object is placed far from C.
Case 2: Object is placed between P and F
Findings
Conclusion A convex mirror is sometimes referred to as a diverging mirror due to the
fact that incident light originating from the same point will reflect off the
mirror surface and diverge. After reflection, the light rays diverge; subsequently
they will never intersect on the object side of the mirror. For this reason, convex
mirrors produce virtual images that are located somewhere behind the mirror
for all position of the object.
Observations When the object is placed far from C. (at infinity)
When the object is placed in between P and F.
(BP< f)
Image formation
Point
At the focus F, behind the
mirror
Between P and F, behind the
mirror
Nature of the
image
Virtual image Virtual image

Day Two
Session 1: 10am to 1pm Facilitator: Akkamahadevi
Topic: Exploring Microscope, Microbes and Microscopic Objects
Session Objectives
To enable participants to know about the microscope and its parts.
To enable participants to repair the minor defects in the parts of a
microscope.
To know the functions of the different parts of microscope.
To develop the skill of observation and identification of different
microbes and microscopic objects.
Materials
Microscopes, stains (safranin, methylene blue) glycerin, glass slides, coverslips,
number 0 paint brush, needles, watch glass, forceps, yeast, spoiled bread, and
lemon (fungal growth), use and throw tea cups (transparent),transparent nail
polish, soaked seeds (3-4 variety), curd, milk, muslin cloth, different varieties of
leaves, capsicum, tomato, onion and ear buds, flowers (hibiscus, cassia, lilly), ink
pillar, and tissue paper/ filter paper.
The session started at 10 am. All the participants joined their respective groups
formed on the first day. Akkamahadevi started the session by asking a question
“How many of you have handled the microscope prior to this workshop?” Only
four raised their hands in response. Then she said, “Don’t worry. Today we will
play with the microscope as a child plays with a toy.” Then she tossed another
question. “When does a child enjoy most while paying with the toy? Some of the
teachers answered, “When he breaks the toy.” Then she replied, “Let us play the
same way, but with some caution.” She then gave detailed instructions for
dismantling and reconstructing microscope.
Each group was supplied with handouts regarding t h e history of microscope,
how to handle it, types of microscopes and their images.

Activity: Dismantling and Reconstructing Parts of a Microscope
Materials required: Microscope
Compound light microscopes were distributed to the groups, asking them to
dismantle it.
In a group, half the members dismantled the microscope while the other half
reconstructed the same. Discussions took place to identify the parts of
microscope. Then each part was named. After this activity each participant had was
with a worksheet containing the picture of the microscope without labeling the
parts. Participants were asked to label the parts with names. Once they finished
this, a sheet containing the correctly labelled picture of the microscope was
supplied for reference and cross check. The following points were discussed.
What are the parts of a microscope? Which lenses are used in the eye
piece and objectives?
What does “10x, 15x, 40x, 100x” written on objectives and eye pieces
indicate?
Can we observe the magnification?
Are there glasses on both the sides in the eye piece?
How do they work? Do you think they work like lenses?
On the lower side, there is a mirror and can you say which type of mirror it
is? (connected to the first day mirror activity).

Activity: Exploration of Microbes and Microscopic Objects
1: Observation of Lactobacillus Bacteria in Curd
Materials required: curd, slide, coverslips, and methylene blue stain
Instructions given to participants:
Take a drop of sour curd on a glass slide and spread it as a thin layer. Allow it to
dry for 5 to 10 minutes and add a drop of methylene blue stain with the help of ink
pillar and put a coverslip on it slowly. Then using tissue paper remove excess
stain.
Once you have your slide in place
on the stage, make sure the low
power objective (the shortest
objective lens) is in position and
turn the coarse focus until the lens
is at a position closest to the stage.
Set the diaphragm to its largest
opening (where it allows the most
light through). Then, while looking
through the ocular, begin to slowly
turn the coarse focus. Turn slowly
and watch carefully. When the specimen is focused under low power, move
the slide so that what you want to see is dead-center in your field of view, and then
switch to a higher power objective. Do not touch the coarse focus again --- you will
break something! Once you are using a high power objective, focus using the fine
focus knob only. Be sure to center your specimen before switching to a higher
power objective or it may disappear. Try to observe in the field of microscopic view
the rod shaped lactobacillus bacteria with the stained color.
The participants were asked to follow the instructions and make the following
observations.

Observations:
Are these organisms are unicellular/multicellular?
Can you observe the nucleus in the cell?
Repeat the process for milk using both packet milk and direct milk.
After the observations, the following points were discussed.
Why do we need to use methylene blue stain?
Do you find any difference in the prepared slide with regard to curd and
milk?
Do you find any bacteria in packet milk?
2: Observation of Protozoa (Paramecium and Diatom) from given sample of water
Materials required: Sample water (logged water or 2 to 3 day old seed-
soaked water)
Instructions:
Take a drop of water from the sample through ink pillar and place it on a glass
slide and observe under the microscope.

Observations
Try to observe the moving bodies. If you want you can also use a drop of stain for
it. Observe whether these organisms are unicellular or multicellular and note
the presence of nucleus inside the cell.
The following points were discussed by the participants.
Discussion point:
Are there any moving bodies?
Can you observe the nucleus in them?
3: Observation of Fungi (yeast, aspergillums, ryzopus)
Materials required: yeast solution, spoiled lemon, bread, vegetables and roti.
(Keep all these 3 to 5 days in an air tight container to allow the fungi grow)
Instructions
Take a drop of yeast solution from the given sample through ink pillar and place
it on a glass slide and observe under microscope.
Observations:
Try to observe the small circular or oval
bodies and some beaded structures. If
you want you can also put a drop of
stain to get a clear image. Observe
whether these organisms are unicellular
or multicellular and mark the presence
of nucleus inside the cell and the color
of the cells.
Similarly you can take some fungus from spoiled roti, bread, vegetable and
place it on the slide and wet it with a drop of water and observe under microscope.
After observation the following points were discussed
Discussion points:
Do you observed any nucleus in yeast? Is there any chain of cells?
Are they unicellular or multicellular?
What are these organisms that grow on lemon?
Is there any difference in structure of cells in the sample taken from lemon,
roti and bread?
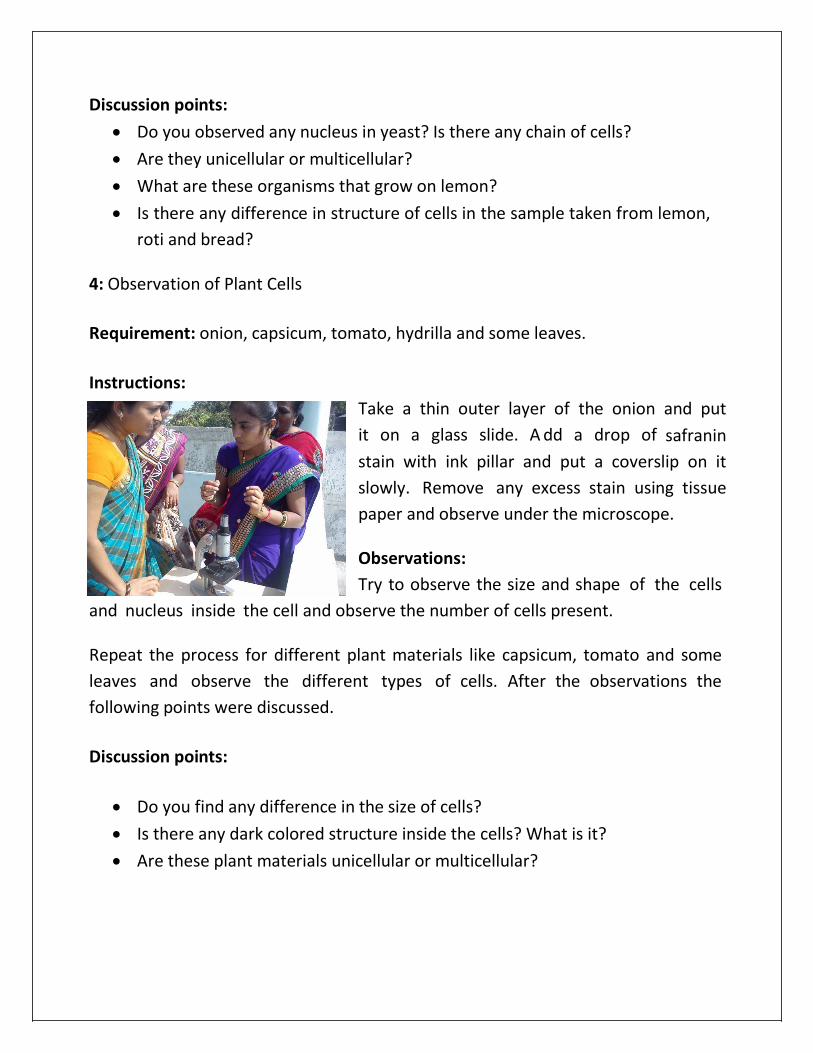
4: Observation of Plant Cells
Requirement: onion, capsicum, tomato, hydrilla and some leaves.
Instructions:
Take a thin outer layer of the onion and put
it on a glass slide. A dd a drop of safranin
stain with ink pillar and put a coverslip on it
slowly. Remove any excess stain using tissue
paper and observe under the microscope.
Observations:
Try to observe the size and shape of the cells
and nucleus inside the cell and observe the number of cells present.
Repeat the process for different plant materials like capsicum, tomato and some
leaves and observe the different types of cells. After the observations the
following points were discussed.
Discussion points:
Do you find any difference in the size of cells?
Is there any dark colored structure inside the cells? What is it?
Are these plant materials unicellular or multicellular?

Do you find any green colored structures inside the cells? What are they?
What are the small openings you observed in the thin layer of leaf?
5: Observation of Animal Cells
Materials required: ear buds, slide, coverslip and stain
The participants were given the
following instructions and observation
points.
Instructions:
Take a little scrape from the cheeks with
the help of buds and put on slid and add
a drop of water and stain and observe
under microscope. The participants
followed the instructions and observed
the cheek cells under microscope.
No discussions took place about this activity.
Plan B Activity: Classification of specimen pictures into 5 kingdoms (Only carried
out in the Yadgir workshop)
Objective: To create awareness about 5 animal kingdoms.
Materials: Pictures of specimens belong to 5 animal kingdoms, list of kingdom
names.
Instructions
In a group discuss and write the names of the kingdoms given in the sheet against
the pictures of the specimen. Present your classification to the whole group with
reasons why you classified so.
After the activity the participants entered into a discussion.
Discussion points:
Do you know how the 5 kingdom system came into existence?
Name any creature not falling into 5 kingdoms.

The session ended at 1 pm for lunch break.
Session 2: 2 pm to 5 pm Facilitators: Anand and Prahlad
Topic: Introduction to Acids, Bases and Salts
Objectives:
To enable participants to identify the given materials (from real life
experience) as acids and bases
To develop conceptual understanding of acids and bases
Anand started the session with an introduction to acid and bases. He briefly
dealt with the meaning of acid and base. And he talked about organic acids and
inorganic acids. After the discussion, the participants were involved in activities.
Activity 1: Sort the given liquids into acids and bases using litmus paper
Materials:
curd, orange juice, NaOH solution, NaCl solution, grape juice, lemon juice, soap
water, NaHCO3 solution, tamarind juice, Na2CO3 , vinegar, blue litmus, red litmus
and yellow litmus.
The facilitator clearly instructed the
participants about the activity and gave
observation sheets to the participants to
record their observations. They did litmus
paper test for the given liquids and filled
the observation sheets.
in the sheet

Observation Sheet
The participants then asked to sort the given materials into acids, bases and salts
using litmus paper.
Activity 2: Sort the given solid materials using litmus paper.
Materials required: tamarind, lemon, NaOH pallets, NaCl, Mg, and sulphur
All the participants were supplied with the required materials. The facilitator
gave the following instructions:
Take both types of litmus paper and use it to touch the solid materials given to you.
Observe any changes in the color of litmus paper and note down your observations in a given sheet.
Based on color changes, sort them into acids and bases.
After the activity, the facilitator discussed with the participants their observations.
He concluded that the acids show their acidic nature in aqueous solutions and not
in the solid phase with litmus paper. H e a l s o m e n t i o n e d the pH
definition and why pH ranges from 0 to 14. And he compared both activities. Then
he mentioned the Arrhenius theory.
“Arrhenius theory states that an acid is any substance which dissociates into
hydrogen ion (H+) while a base is any substance which dissociates into hydroxide
ions (OH¯).”
Sl no/Material Blue litmus Red litmus Yellow litmus
1. Curd Red No change No change
2. Orange juice Red No change No change
3. NaOH No change Blue Red
4. NaCl No change No change No change
5. Grape juice Red No change No change
6. Soap water No change Blue Red
7. Lemon juice Red No change No change
8. NaHCO3 No change Blue Red
9. Tamarind juice Red No change No change
10.Na2CO3 No change Blue Red
11.Vinegar red No change No change

Activity 3: Formation of Acid by Acidic Oxides.
Materials required: sulphur powder, long handle spoon, gas jar, lamp, match box, water, litmus paper, glass rod.
Each group was supplied with the above set of materials. The facilitator gave the following instructions to the participants.
Take 5gm of sulphur powder in the given spoon; burn the powder with the help of lamp. Keep the burning powder into the gas jar and collect the gas of the sulphur.
Add 100 ml of water into the gas jar and mix with the help of a glass rod.
Now test the solution with the help of both wet litmus paper and note down the
observations. After the activity, facilitator asked the following questions to the
participants:
What happens when sulphur burns in the presence of air?
Can you write the chemical reaction for above process?
What is the difference between sulphuric and sulphurus acids?
Then the facilitator noted the chemical reaction:
S + O2 SO2.
SO2 + H2O H2SO3.
Then he discussed the formation of acids through above reactions. He also dealt
with the difference between sulphuric and sulphurus acids.
The remaining part of the session was facilitated by Pralhad.

Activity: Formation of Bases by Basic Oxides
Materials Required: magnesium file, sodium metal, water, test tubes (3), a pair of
tongs, blue and red litmus paper, lamp, match stick, glass rod.
All the groups were given the above materials. For two groups, magnesium foil
and for other groups sodium metal was given. The facilitator gave the following
instructions.
Instructions for magnesium test group:
Take 5cm of magnesium file, with a pair
of tongs, and burn it in presence of air.
Wait till magnesium burns
completely then collect the white ash in
the test tube.
Add 10 ml of water to the ash; mix well
with the help of a glass rod.
Now take both wet litmus paper and
dip it in the solution one by one and note
down the observations.
Instruction for sodium test group:
Take a test tube and add 5ml of water
Take a pinch of sodium metal piece and slowly put it into water and allow the sodium metal to react with water completely.
After some time sodium metal completely disappears. Then test with both wet litmus paper and note down observations.
After the activity each group shared their observations before the gathering. Then
the facilitator discussed the chemical reactions involved in the activity.
2Mg + O2 2MgO
2Na +2H2O 2NaOH + H2
Then he explained how some metals react with air and some metals react with
water and give basic oxides. Then these basic oxides react with water to form

bases. He also discussed some general properties of bases like taste, reaction with
acids, color changes with litmus paper test, etc. He also covered chemical reactions
and electronic configurations. Some of the participants wanted to know the
difference between valence electron and other electrons.
Activity: Test of Acids Using Metals
Materials: 10ml dilute HCL solution, magnesium foil, test tube,
The groups were supplied with the above materials. The facilitator instructed
them about the process.
Participants tested how magnesium reacts
with HCl and gives rise to magnesium chloride
and liberates hydrogen gas. The liberated gas
was tested with a burning match stick. And
participants confirmed that the gas was
hydrogen by hearing puff sound when
hydrogen burns. Participants enjoyed this
activity. Then facilitator explained the
chemical reactions involved in the activity.
Mg +2Hcl MgCl2 + H2
Activity: Neutralization Reaction
Materials: 10ml 1% NaOH solution, 10ml 1% HCL solution, litmus paper, beaker
The participants tested the definite proportion
of acid or base reacting with each other and
giving rise to salt and water. The formed
product is neutral in nature and was tested with
litmus paper. Then facilitator discussed the
chemical reactions involved. NaOH + HCl ---------- NaCl + H2O

Interaction between Teachers and DIET Personnel During the Workshop:
DIET personnel from various NEK districts attended a
three day workshop on orientation to 12th five year
plan at Yadgir District Institute from 17th Dec, 2013 to
19th Dec, 2013. On 19th they visited TLC Gurumitkal to understand the TLC activities. They observed the science workshop and interacted with the participants. Excerpts from a report on the workshop
for DIET personnel in NEK on the 12th Five Year Plan which contains interaction details are given below.
In TLC - Gurumitkal:
1. What kind of change did you bring in your teaching learning process from TLC?
We can utilize the teacher learning materials to conduct experiments in the schools which help making teaching learning processes effective.
2. Did you share this experience with your colleagues?
We informed all our colleagues and friends about TLC and motivated them to visit.
3. So far how many teachers have visited the TLC?
Around 30-40 teachers visit the TLC. 4. Why are teachers not showing interest in visiting the BRCs and other sources where the Department is providing all resources?
One of the reasons why we visit TLCs is that it is very close to our homes. And we find more resources and they are open on Sundays. Regular forum activities also take place here.
On 21st Dec, 2013, Mr. Rudresh, Leader, Yadgir District Institute visited the Yadgir
TLC and he addressed the participants. He referred to NCF 2005 and requested
the participants to read NCF position paper on science education prepared by the
focus group on science.
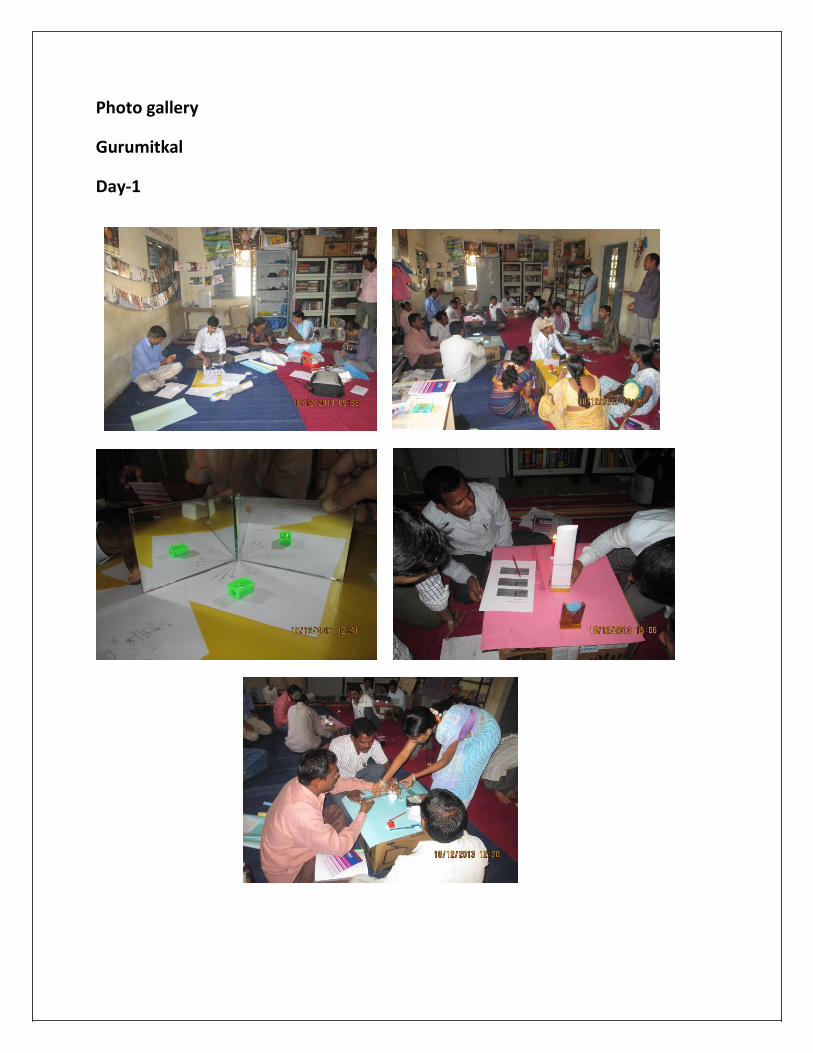
Photo gallery
Gurumitkal
Day-1

Day-2

Yadgir
Day-1

Day 2

Feedback by Participants: 1. The sessions were good.
2. It would be useful to have the explanations in the form of reading materials.
3. Avoid using English words during the session.
4. The session did not have very new and useful content for the TGT
teachers. (TGT teacher expressed)
5. Light experiments gave practical experience. The same can be done with
children. The chapter on light is difficult to teach. This workshop has given
experimental learning about light.
6. Acid/base activity provided the experience on how to teach with daily
life experience, and think about chemical equations that are difficult
to deal with children.
7. The activity on microscopes helped to understand its parts and their
functions. It also enabled us to repair minor problems of the microscope.
8. We learnt how to mount the specimen and observe the same
through microscope.
9. Some extra details about microbes were needed.
10. The selected topics should be dealt with in depth. We expected more.
11. One of the participants expressed interest to serve as a resource person.
Insights:
1. The regular engagement with teachers through forums and workshops
will help in building relationship with them.
2. The activities providing hands-on experience to the teachers are crucial to
the science workshops.
3. Teachers are willing to learn and are always looking for better opportunities.
4. Our support to the teachers will persuade them to reform their
classroom practices.
5. These engagements will ensure the creation of resource persons within
the government system.

Learnings:
1. All of us learnt how to plan, prepare and facilitate a workshop.
2. To facilitate a workshop, clarity in concepts and understanding o f the
subject is absolute necessary.
3. All the facilitators should hone their communication skills and session
moderation skills.
4. During the preparation for the workshop we learnt lot of concepts in our areas
of expertise and in other areas too.
5. We learnt how to coordinate between different people like, TLC coordinators,
teachers, education functionaries, etc.
6. We learnt that workshops are different from forums. Workshops demand less
content, deeper discussions.
7. Along with practical experiences theoretical aspects are also necessary.
8. We should give sufficient time to design a workshop.
9. Prior understanding of the target group is essential for the workshop. 10. Coordination between co facilitators is crucial.
Our “let’s experiment” activities finally culminated in this workshop for this
academic year. The team’s dream to conduct two days’ workshop came true with
the support of all colleagues in the district institute, TLC coordinators, leaders,
teachers and education functionaries. The science team extends its sincere thanks
to all of them. Mr. Anil in spite of his busy schedule at the school participated in
the workshop. He added his valuable comments during the internal feedback
sessions. For his cooperation, science team extends special thanks to him.
Akkamahadevi Patil
Annexure 1: List of Participants in Science Workshop at Gurumitkal
Sl No
Name of the Teachers
Designation Current working school
Contact Number
01 Sri Venkatesh Science Teacher
GHPS Kakalwar Base GKL
9845524259
02 Sri Hanumantha Science Teacher
GHPS Himalpur 9591515243
03 Sri Girish Science Teacher
GHPS Rampur 9972272047
04 Sri Shivaraj Saka TGT GHPS Keswar 9008265001 05 Sri Kista Reddy Science
Teacher GHPS Chappetla 9901261539
06 Sri Gopal Krishna Science Teacher
CPS Gurmitkal 9845150427
07 Buggappa.T.sindhe Science Teacher
Gyanodaya Patasala Gkl
9611652929
08 Smt Veena Science Teacher
HPS Vidya Jhothi Gkl
8147350989
09 Smt Parvathidevi Science Teacher
Shanthveer High school Gkl
10 Sri Balappa Science Teacher
GHPS Putpak 9845974613
11 Sri Srinivash TGT GHPS Budur 9731045523
12 Sri Ravi Kumar Science Teacher
GHPS M.T.Palli 9611715393
13 Sri Suresh Kumar Science Teachers
GHPS Hossalli 9902876862
14 Sri B.N Venkatesh Science Teacher
GHPS Mallayyakatta 9845992478
15 Subhash Chawan Science teacher, High school
Govt Jr College Gkl 9901136031
16 Khaja Hussein Science Govt Jr College Gkl 8123356884

teacher, high school
17 Sri Jeevan Reddy Science Teacher
GHPS Gajarakot 9916345859
18 Sri Narayan Reddy CRP Gurmitkal Cluster 9945207618 19 Sri Venkat Reddy BRP Gurmitkal Block 9482149427
Annexure 2: List of participants -Science workshop at Yadgir
SI NO Name of the teacher School Cluster Contact no
1 Usha ritti GHPS Koiloor Rural 8970573259 2 Rameshkumar GHPS Sawoor Malhar 9482055506
3 Shahista banu GHPS Kawloor Malhar 8497876412 4 Bangarappa GHPS Bachwar Hattikuni 9739512175
5 Jyotilakshmi GHPS Ambedkar nagar Yadgir
Urban 9916051690
6 Subhash GHPS Mundaragi Ramsamudra 9663878692 7 Suma GHPS Kyasapnalli Alipur 9686565162 8 Gangamma GHPS Horuncha Alipur 9880999134
9 Savitramma GHPS Kanchagarhalli
Alipur
10 Ambika GHPS Venkateshwar nagar Alipur
Alipur 9008996367
11 Shaila jyoti GHPS Koliwada Rural 9742831983
12 Sarvamangala GHPS Ramsamudra Ramsamudra
TGT Teachers list
1 Rajshree GHPS Aashnal Ramsamudra 9731772987 2 Sharanappa GHPS Thangundi 9945305401
3 Prameela M S GHPS Abbetumkur Station Bazar 9731882002 4 Shilpa GHPS Koiloor Rural 8095423880
5 Maheshkumar GHPS Belgeri Ramsamudra 9900845572 6 Renuka GHPS Yeddalli Hongera 9448386577 7 Jayshree GHPS Arkera k